-
Tired of adverts on RWI? - Subscribe by clicking HERE and PMing Trailboss for instructions and they will magically go away!
You are using an out of date browser. It may not display this or other websites correctly.
You should upgrade or use an alternative browser.
You should upgrade or use an alternative browser.
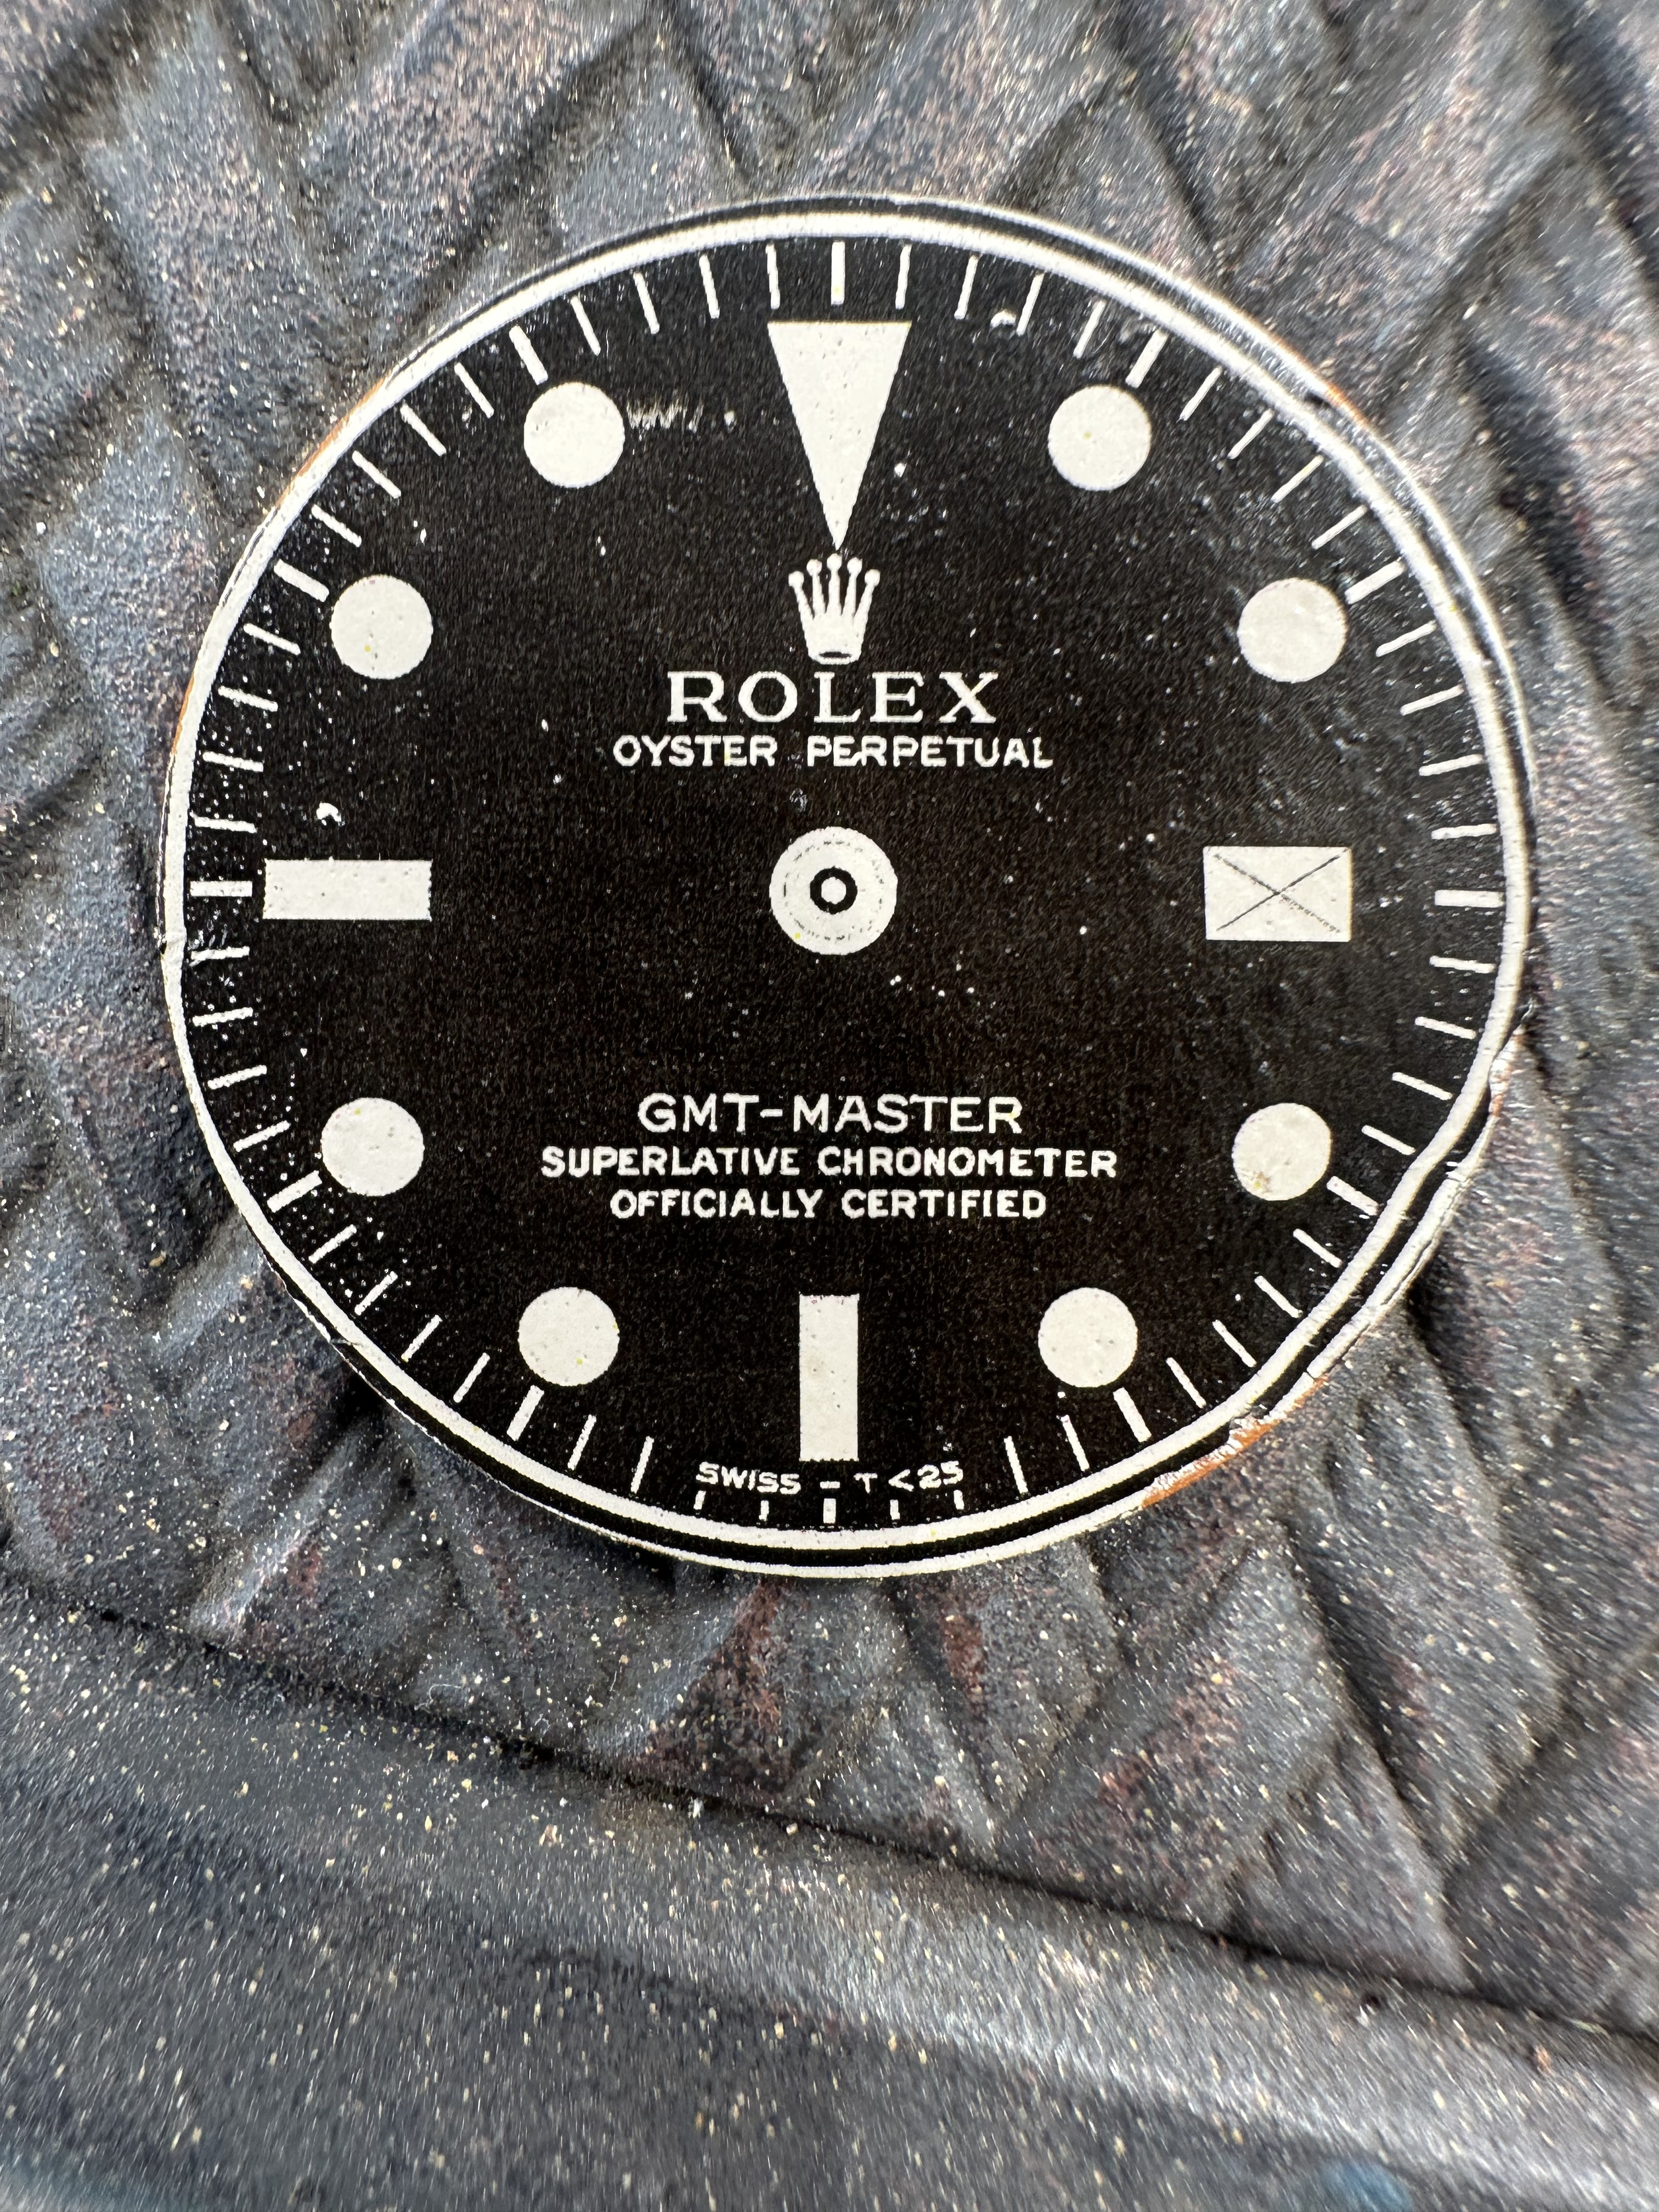
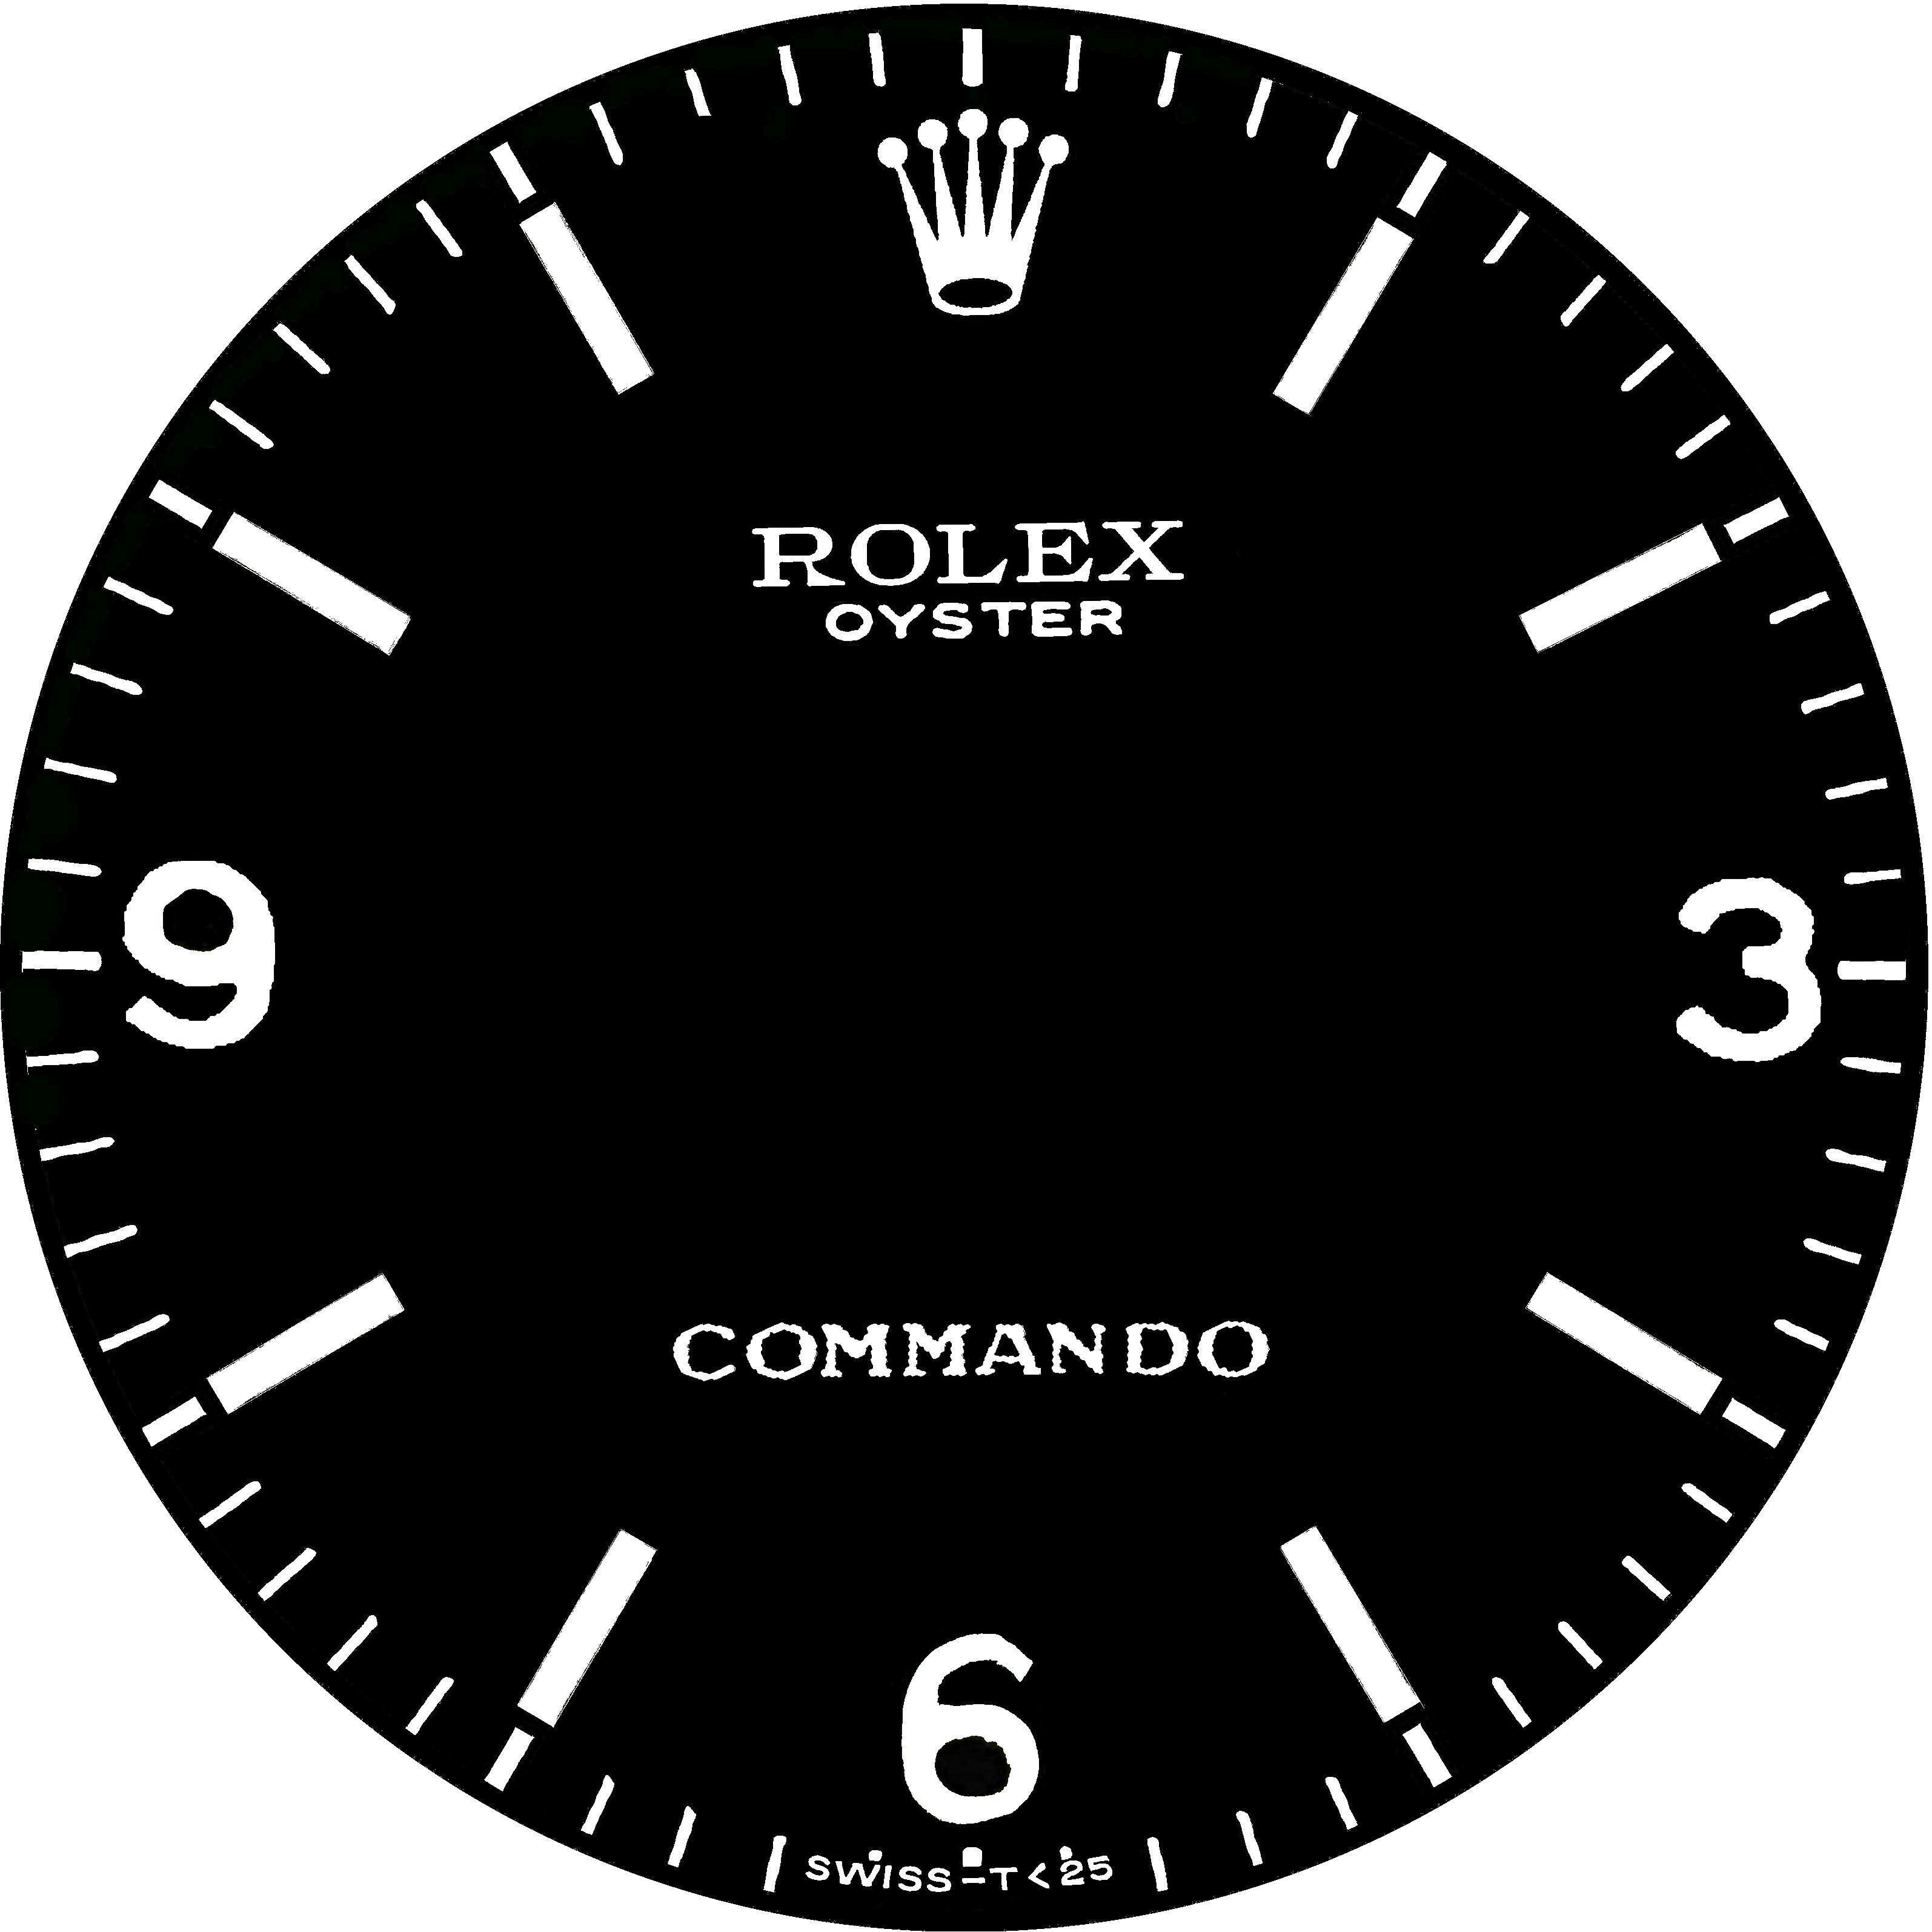
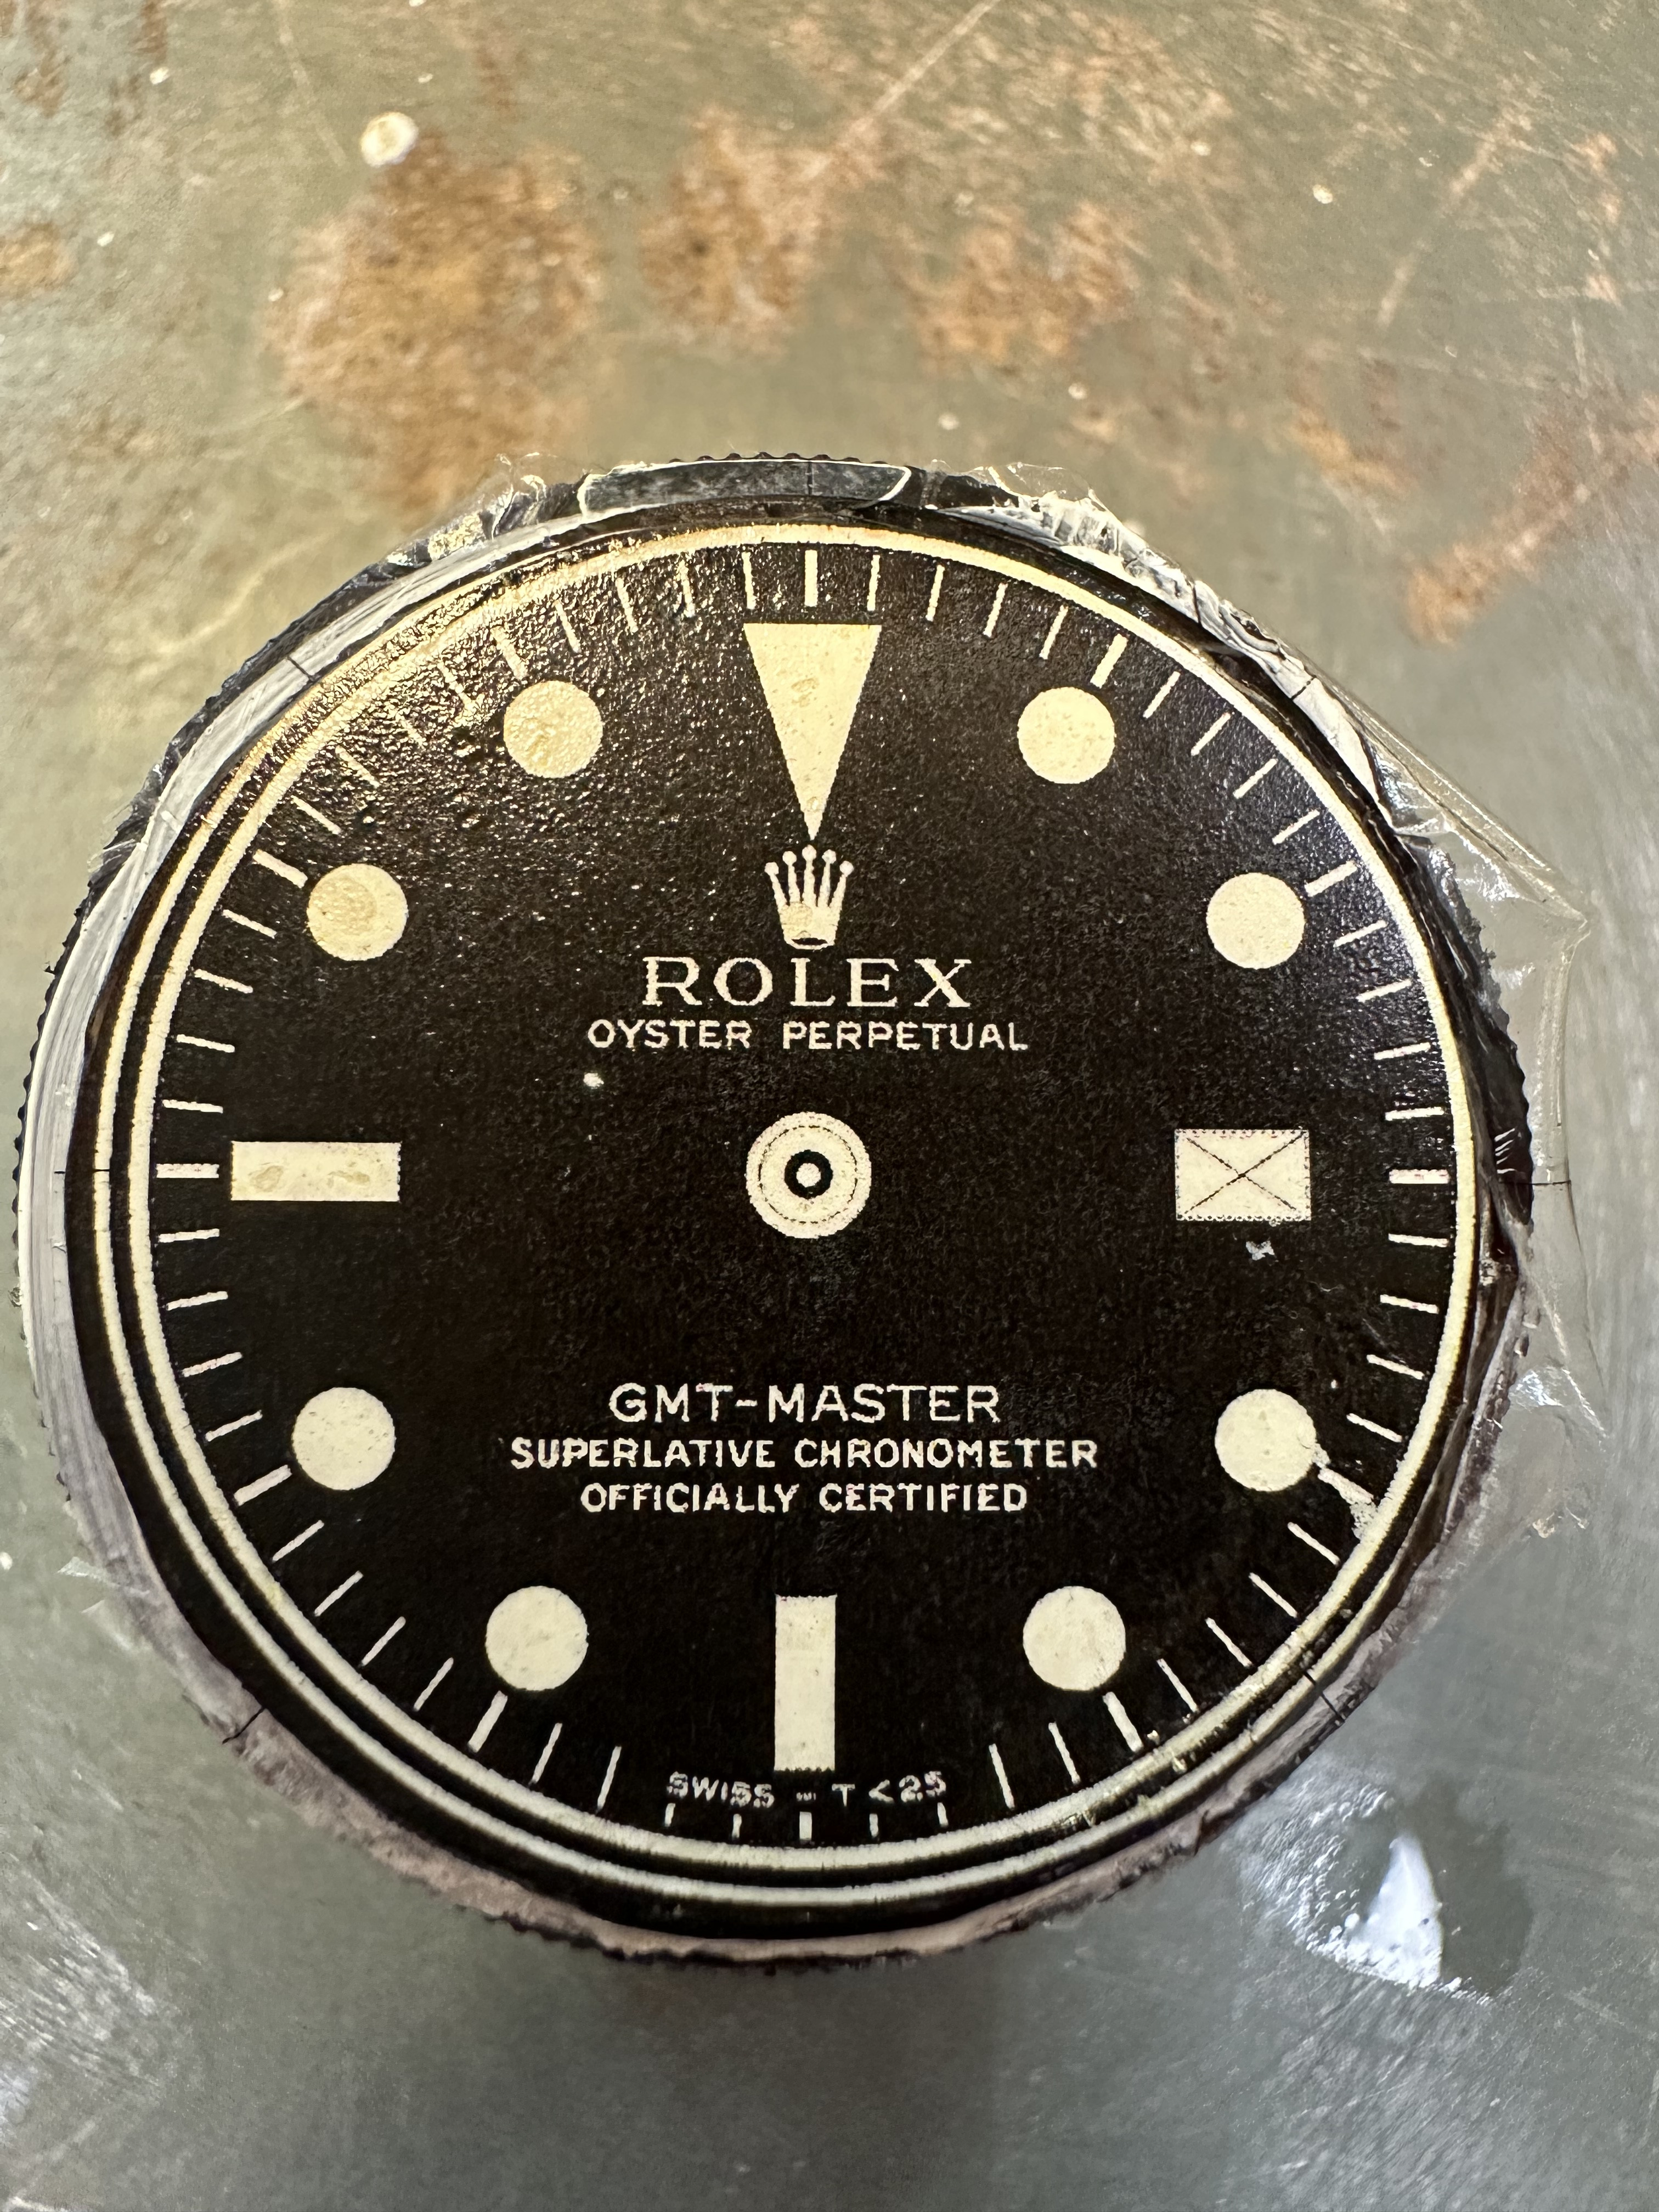
Decal printed dial
- Thread starter Bart Cordell
- Start date
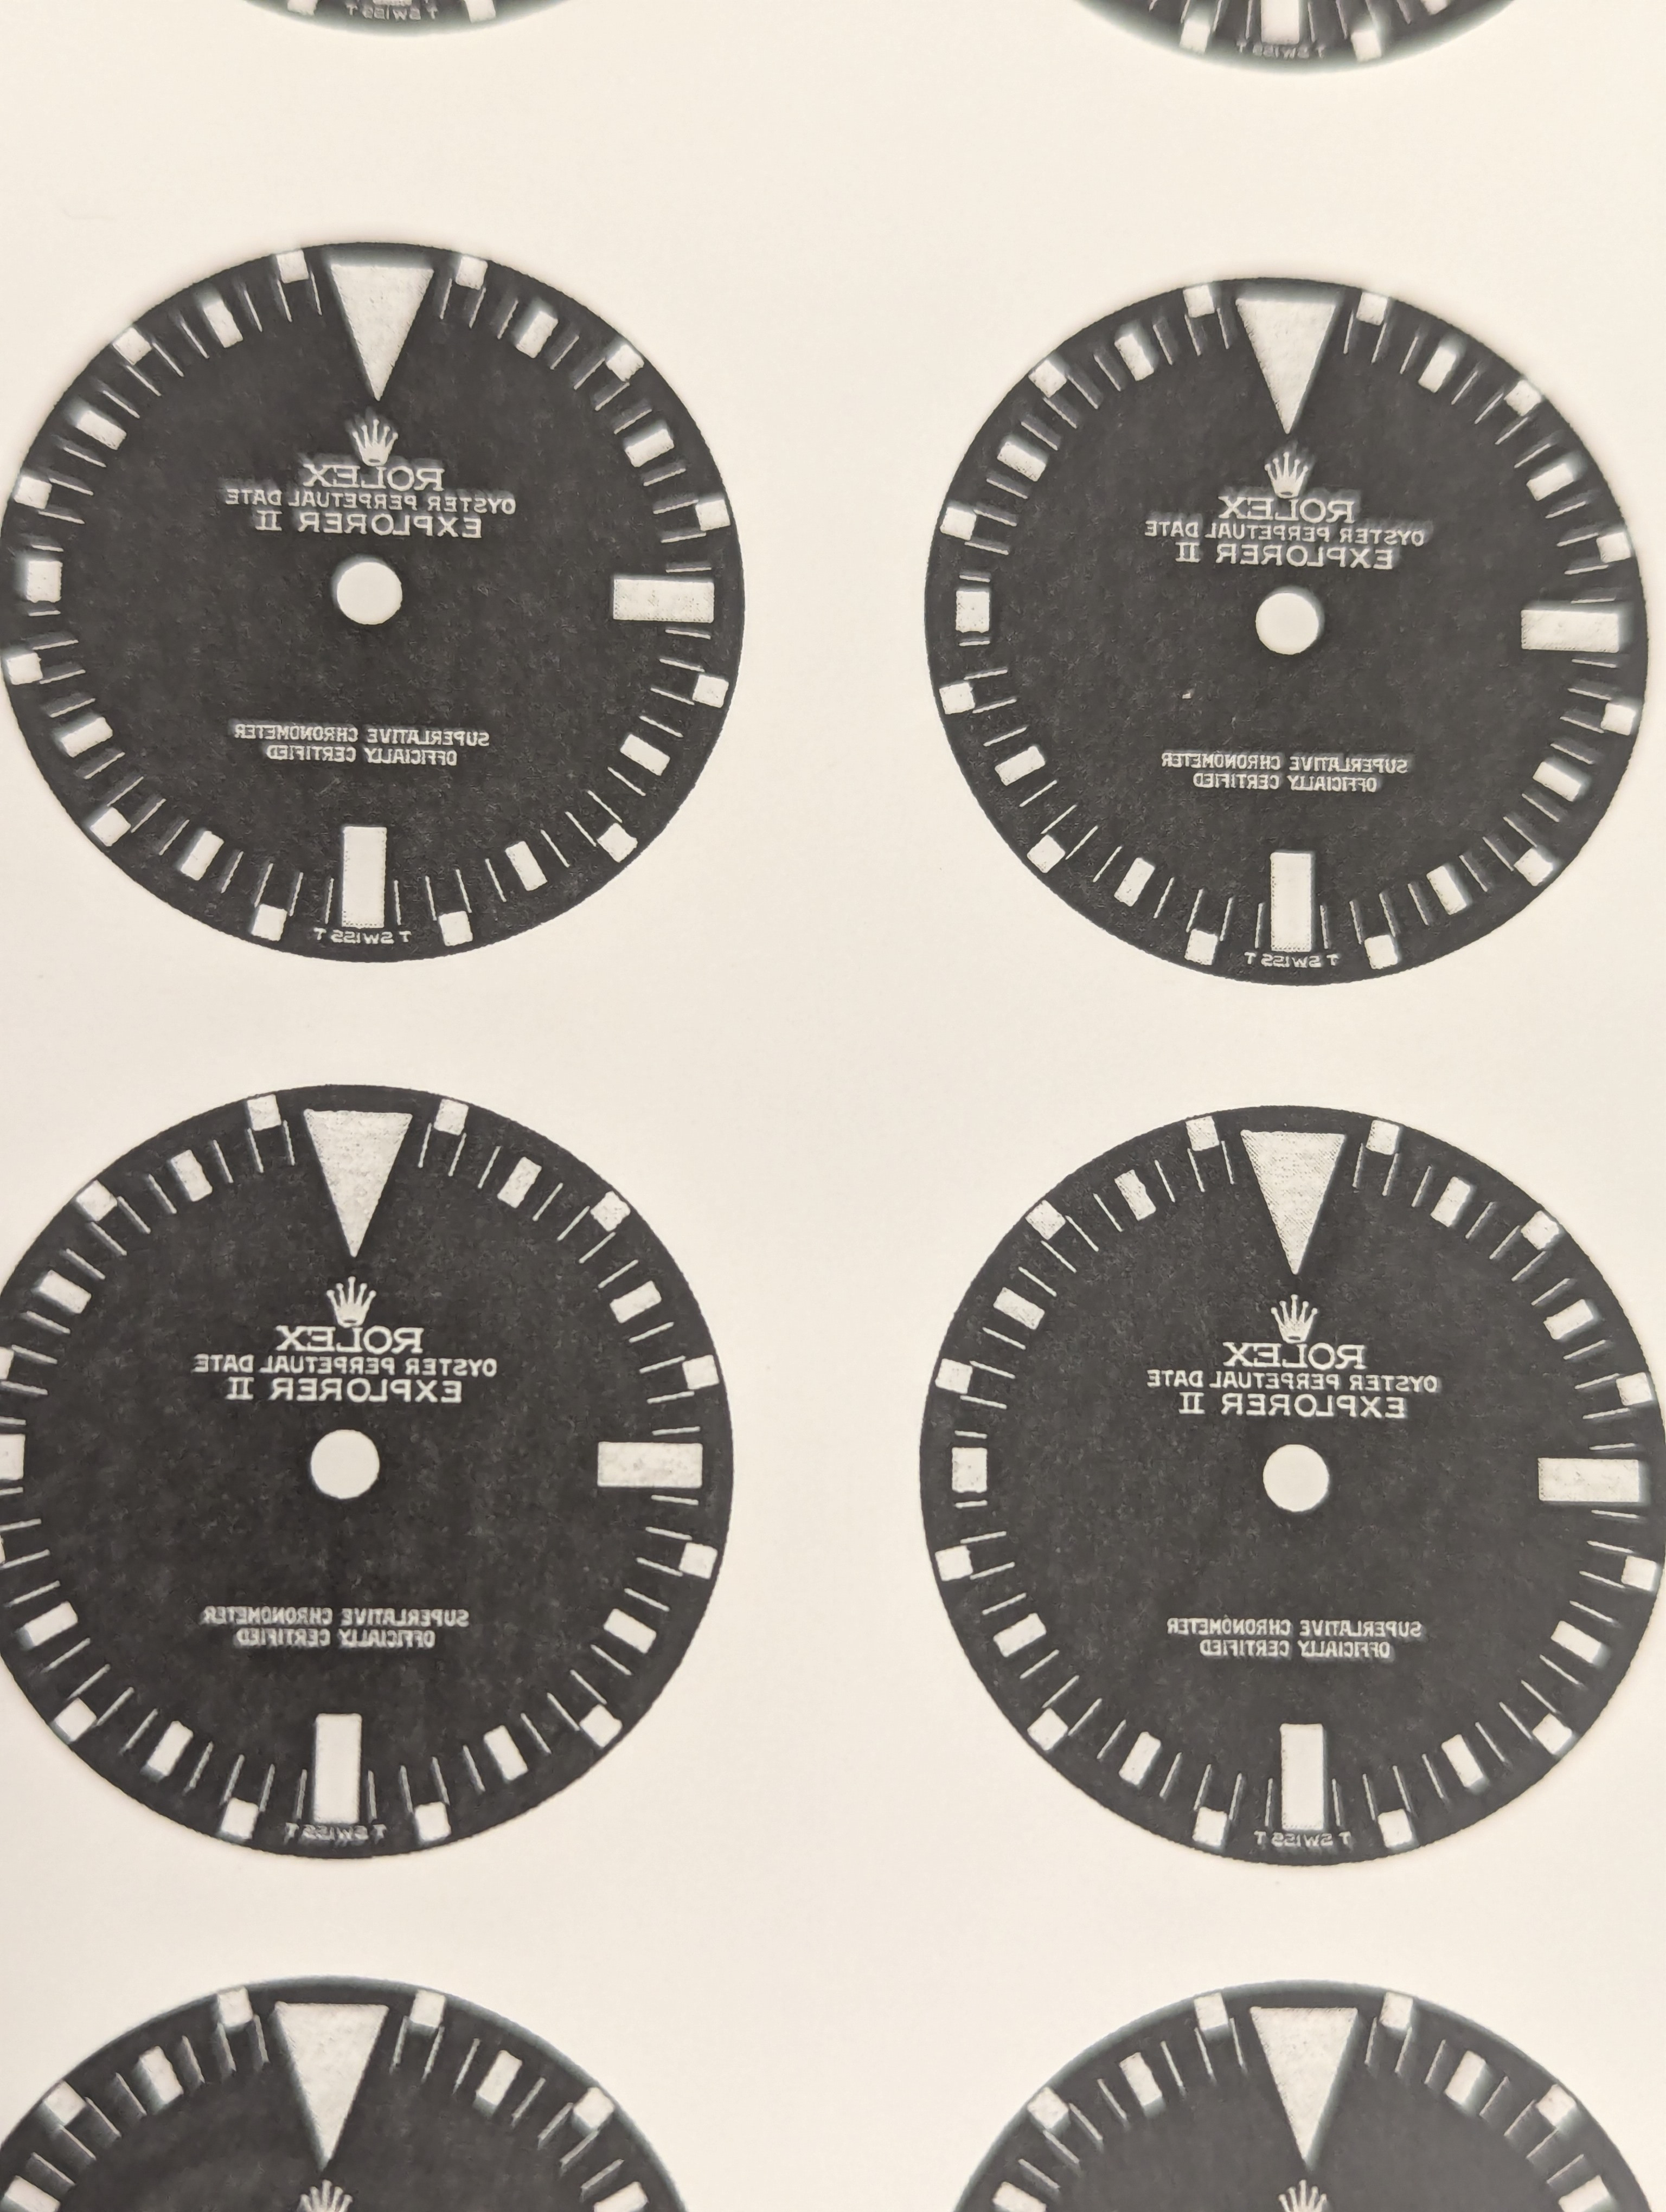
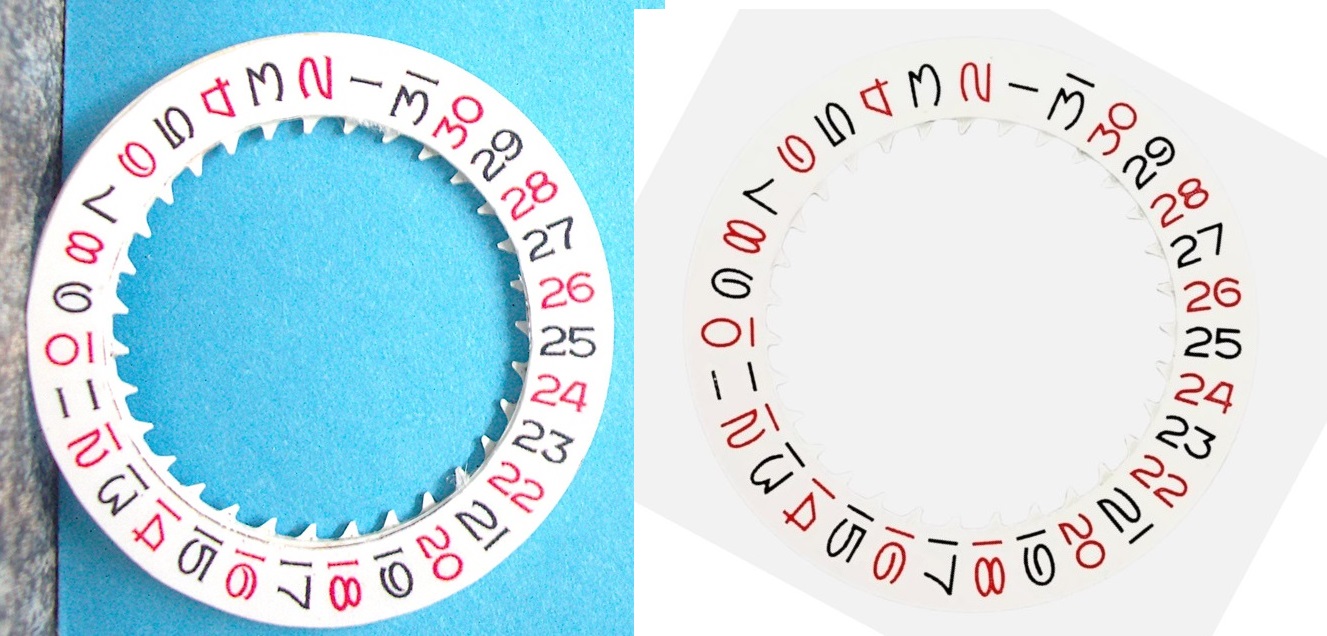
Been trying to perfect the roulette datewheel for the NH34/5 dial.
I did buy NH roulette datewheel to see what it was like (on the right), but the 3s, 1s were wrong and there was a lack of serifs.
I've tried a new semi-gloss vinyl thin sticker paper as an overlay.
I'm getting there, but not wuite satisfied on the 1s and 7s. Still better than the aftermarket one.
I did buy NH roulette datewheel to see what it was like (on the right), but the 3s, 1s were wrong and there was a lack of serifs.
I've tried a new semi-gloss vinyl thin sticker paper as an overlay.
I'm getting there, but not wuite satisfied on the 1s and 7s. Still better than the aftermarket one.
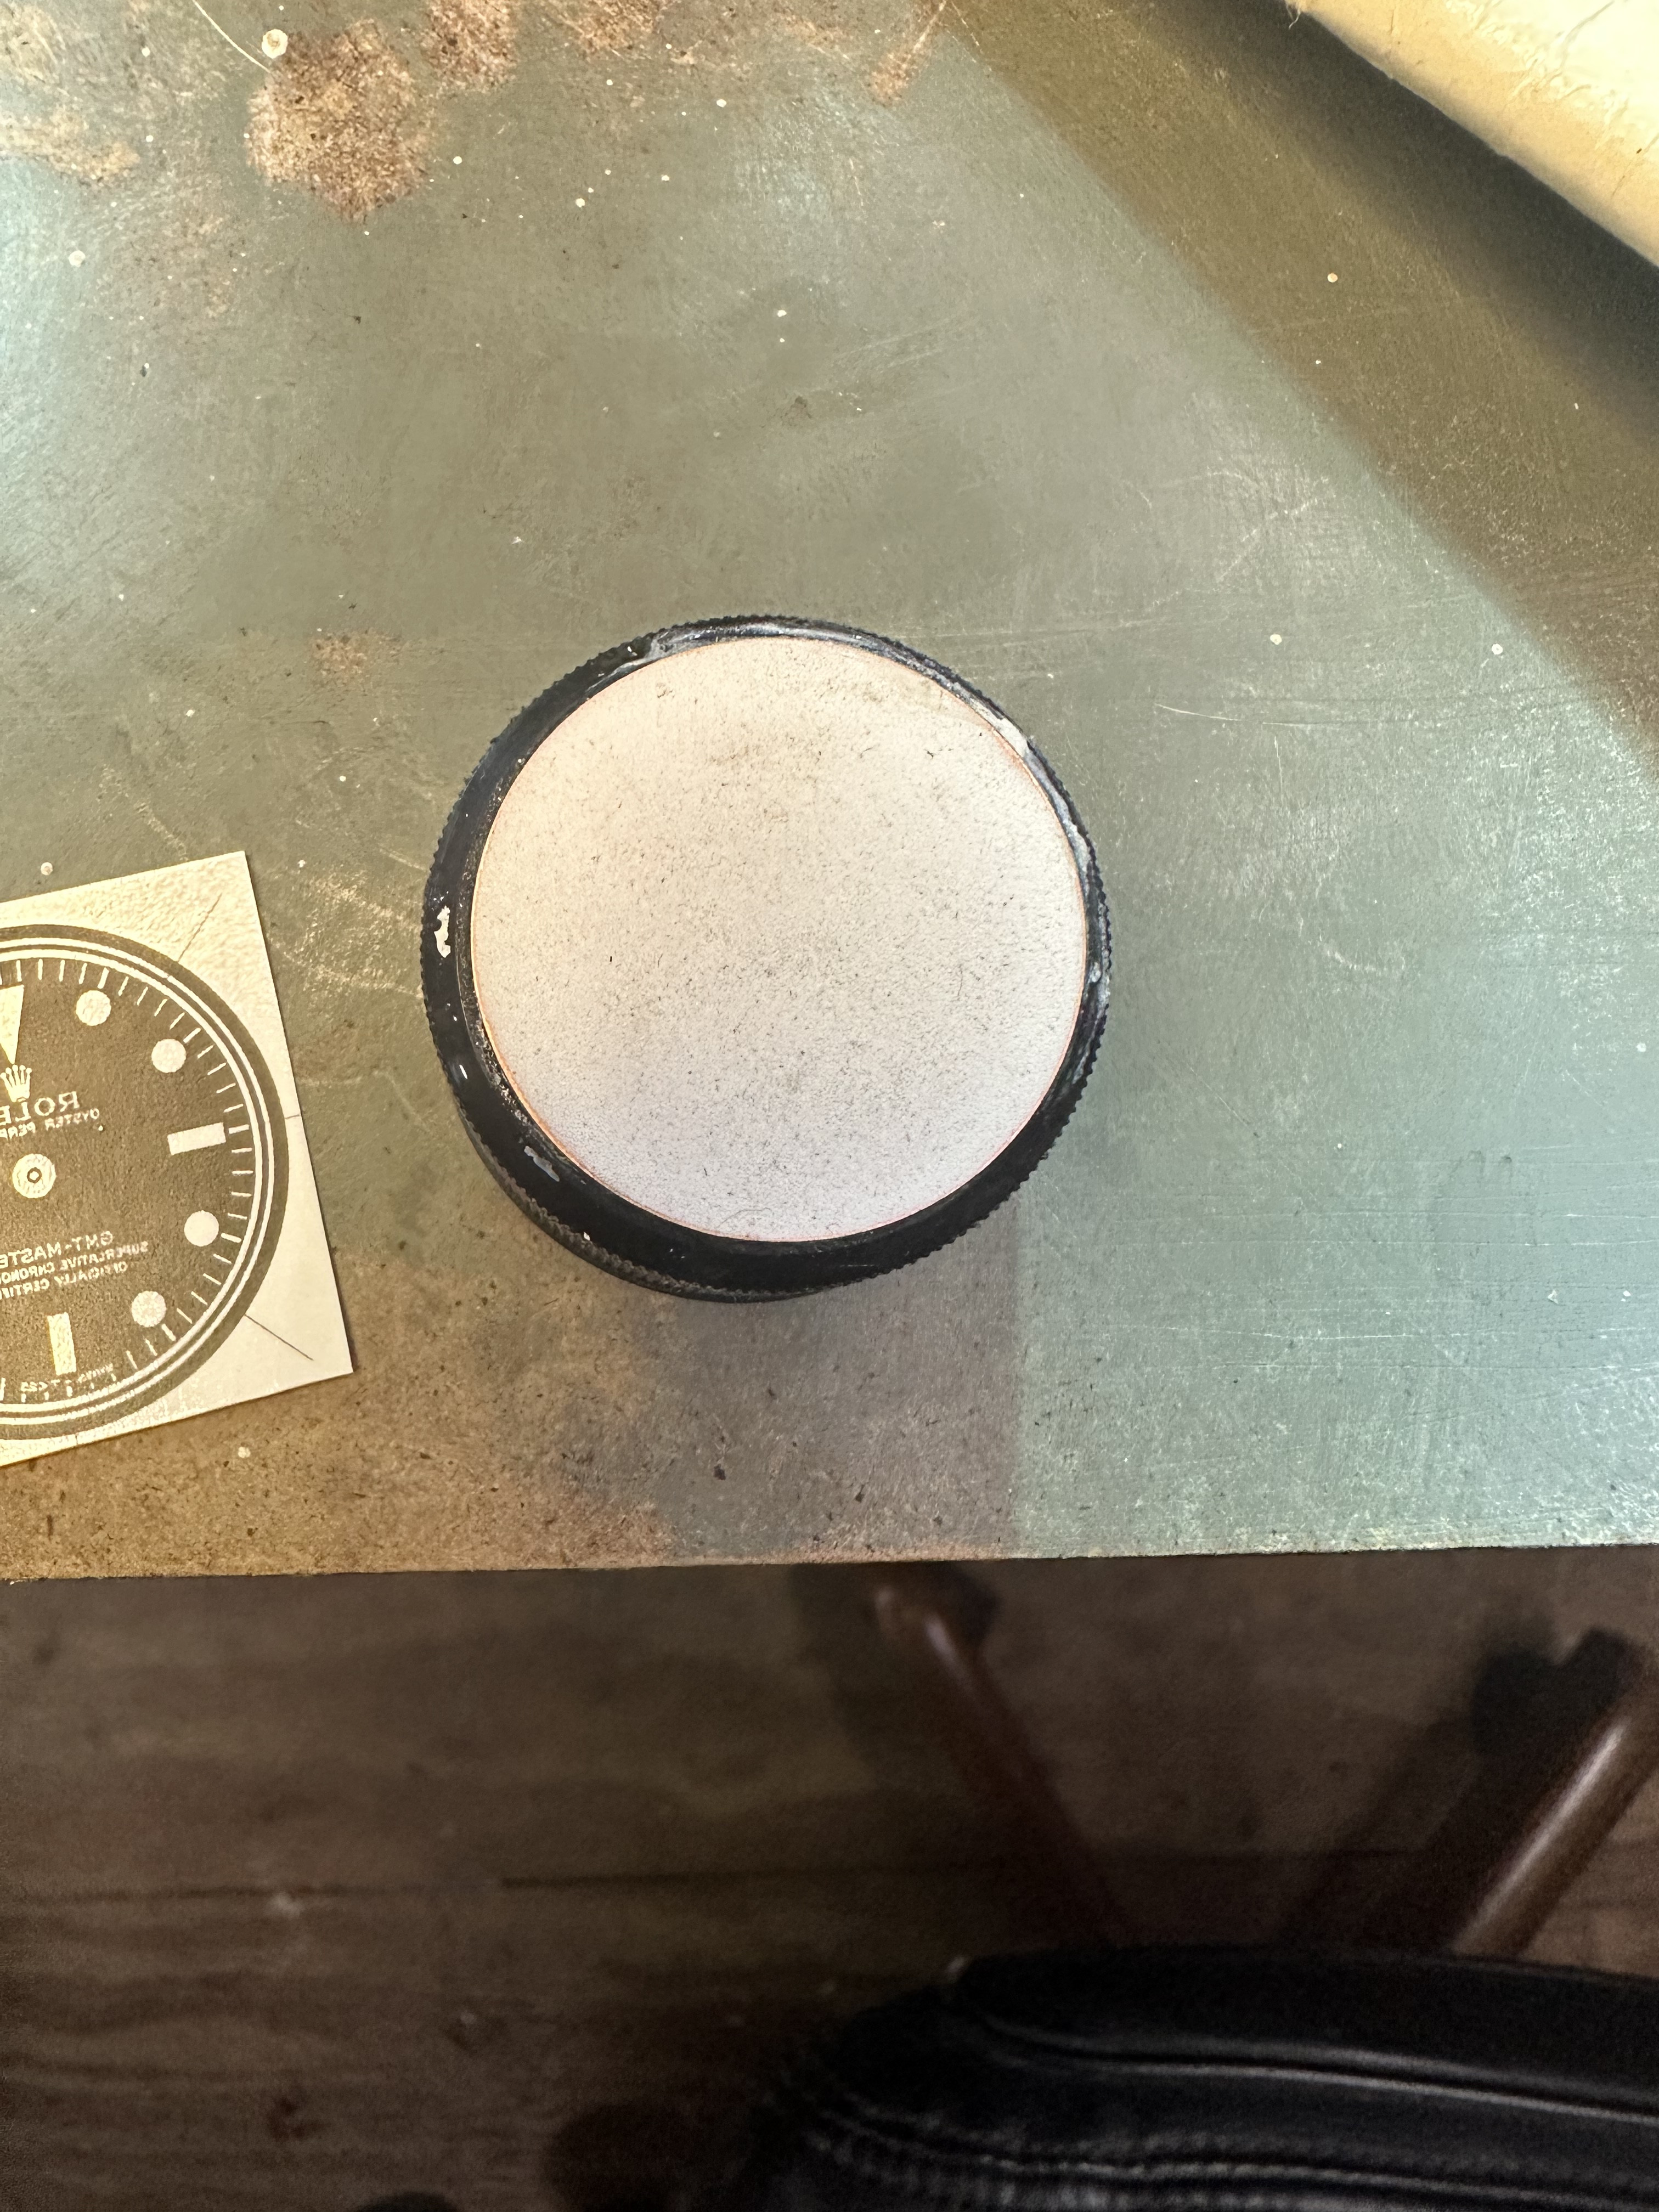
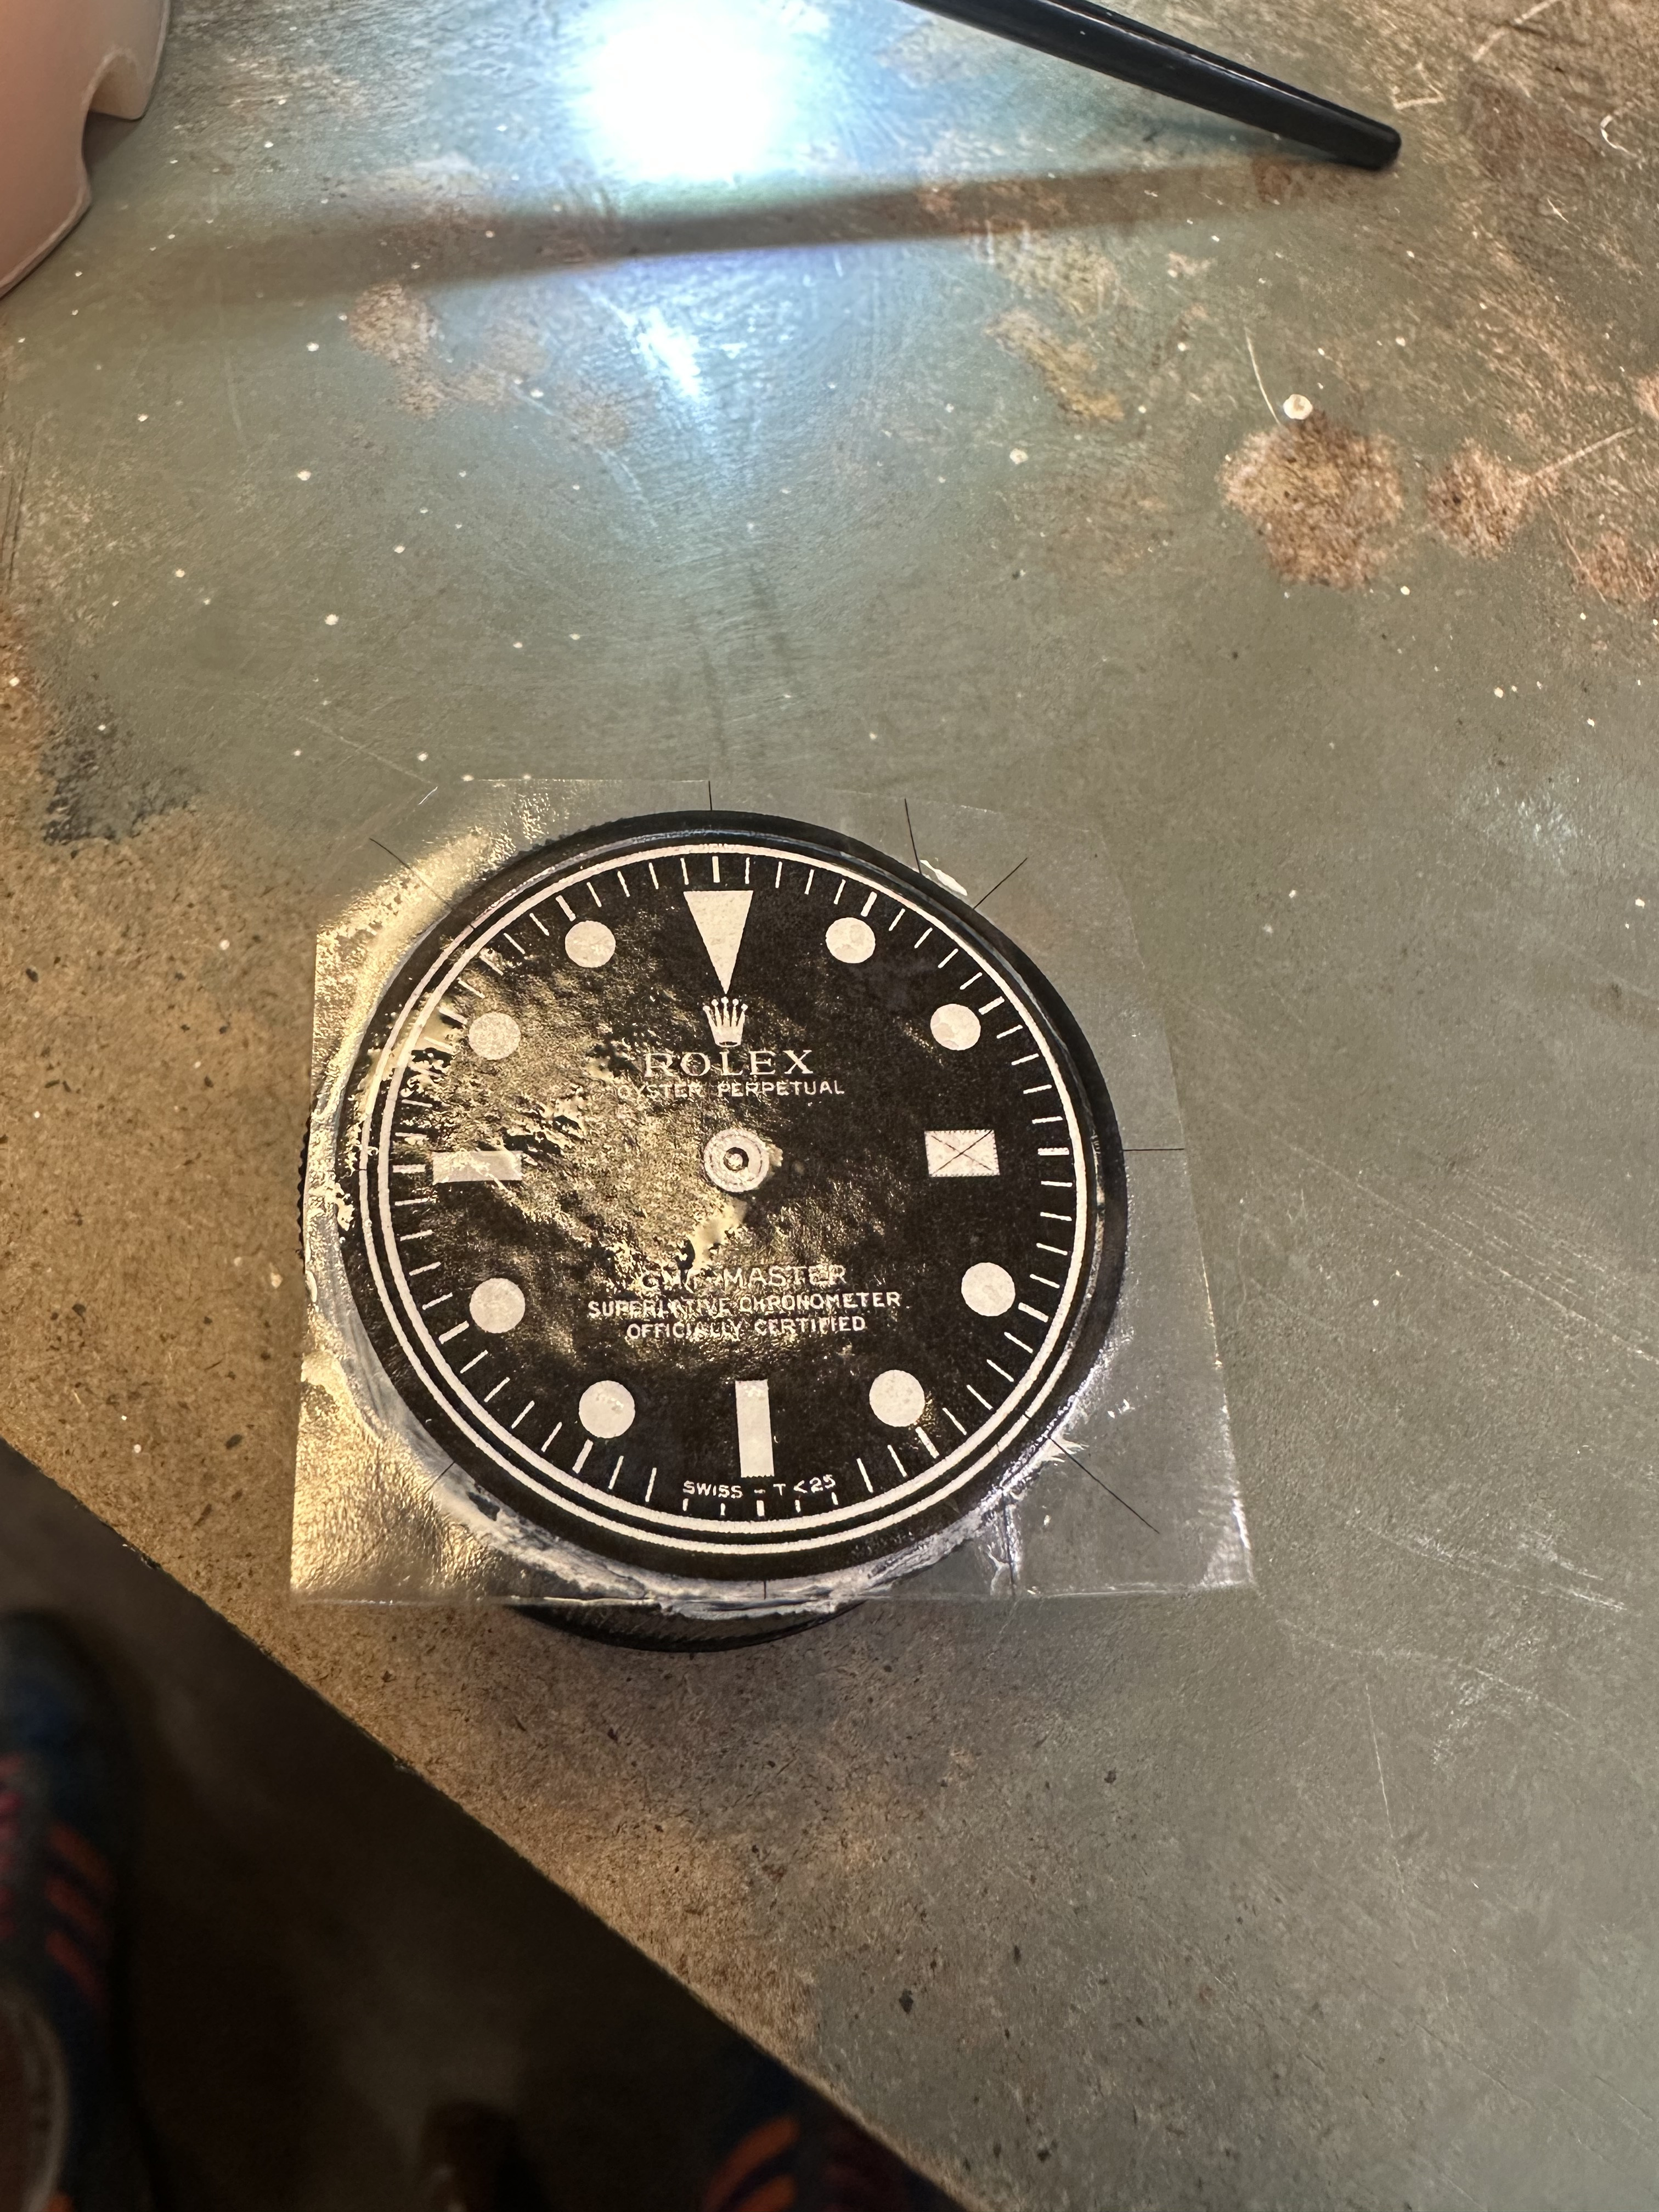
Since I have my leftover Sunnyscopa prints, I wanted to test the adhesion of my Liquitex medium formula instead of Sunnyscopa glue under immense pressure. With a blank dial disc painted in white enamel, I applied the medium, placed the transfer, and heated it up with a hairdryer. Then, using a flat, stiff foam and/or silicone sheet to sandwich the dial, I placed it in a cold war era vice and cranked it down with enough pressure to turn bone into powder.
What I learned:
1) It smeared the transfer. Immense pressure is unnecessary, but a little pressure is good for squeezing out excess transfer medium.
2) Doing it on a large flat disc is so damn easy. With an oversized blank disc for a no-date dial vs. an exactly sized dial with a date window is a pleasure. For those only looking to do no-date dials, consider finishing the dial on a disc first. Then, drill the center hole, insert the disc in a dremel, and spin that sucker against sandpaper until you have the exact diameter you need. So many potential adhesive problems can be avoided.
Last edited:
I found these little tricks of a familiar name
 www.watchrepairtalk.com
CUSTOM DECAL DIAL TUTORIAL
Hi guys … I had promised that I would make a « custom decal dial tutorial » on another thread there So here we are … There are many variations of decal dials, the best IMHO being the « negative gilt » dials which gives the best results. The process I’m showing today is aabout how to make a dial w...
www.watchrepairtalk.com
i wanted to give the decal method a try. i read the thread but unfortunately all links of the files from Bart (thank you for sharing with the community!!!) seem to be down.
could someone be so nice to send my the files? Thank you!!
could someone be so nice to send my the files? Thank you!!
There are many here: you can scroll down for some, and also go a few pages back. I think page 11 has numerous dials. There are probably more throughout the entire thread, but you'll have to page by page to see what's there.i wanted to give the decal method a try. i read the thread but unfortunately all links of the files from Bart (thank you for sharing with the community!!!) seem to be down.
could someone be so nice to send my the files? Thank you!!
Decals print dials
rwg.cc
I'm beginning to realise that the problem isn't the printer but the quality of the image...To be reviewed after the holidays. And my number 1 problem is finding dials in gen spec.... 26 mm and 27.3 with date window....I've been looking for weeks.
1) What printer are you using?I'm beginning to realise that the problem isn't the printer but the quality of the image...To be reviewed after the holidays. And my number 1 problem is finding dials in gen spec.... 26 mm and 27.3 with date window....I've been looking for weeks.
2) Do you have access to Photoshop or similar?
3) I believe there's an old post about the "best method" for maximizing your printer and the proper settings way, way earlier in this thread. I'll let you know if I can find it. (EDIT: Found the organized version with pictures on RWG.) It's kind of confusing, but very helpful if you don't try to memorize it all at once. I definitely need to reread it!
Decal Dials Tutorial
Hello all, I am reposting this tutorial that I wrote on RWI (when my account there existed) as I think many of you here will find it useful. All credit for this idea, as far as Im aware, belongs to Bart Cordell for his pioneering of the decal technique. The intent of this tutorial will be to help...
www.rwg.bz
Project "RWI Raffle Win"... a 1675 Build
Thanks itgoes - some interesting ideas there. I think your comment, “can’t say yet if it’s the techniques or the different inserts that drives the different results” is of real note though - and is what makes the process so interesting but frustratingly inconsistent! I’m very consistent with my...
Last edited:
For the record, I specifically meant that doing a blank, oversized disc is much easier than doing a dial that already has holes for the center pinions, date window, or is already the desired diameter. Simply my opinion because I always lose the transfer around the date window! And the the edge of the dial!!! Grrrr!Since I have my leftover Sunnyscopa prints, I wanted to test the adhesion of my Liquitex medium formula instead of Sunnyscopa glue under immense pressure. With a blank dial disc painted in white enamel, I applied the medium, placed the transfer, and heated it up with a hairdryer. Then, using a flat, stiff foam and/or silicone sheet to sandwich the dial, I placed it in a cold war era vice and cranked it down with enough pressure to turn bone into powder.
What I learned:
1) It smeared the transfer. Immense pressure is unnecessary, but a little pressure is good for squeezing out excess transfer medium.
2) Doing it on a large flat disc is so damn easy. With an oversized blank disc for a no-date dial vs. an exactly sized dial with a date window is a pleasure. For those only looking to do no-date dials, consider finishing the dial on a disc first. Then, drill the center hole, insert the disc in a dremel, and spin that sucker against sandpaper until you have the exact diameter you need. So many potential adhesive problems can be avoided.
I'm going to test it right now to see if my assessment is partially accurate or completely wrong.
1) a blank disc, painted in flat white enamel.
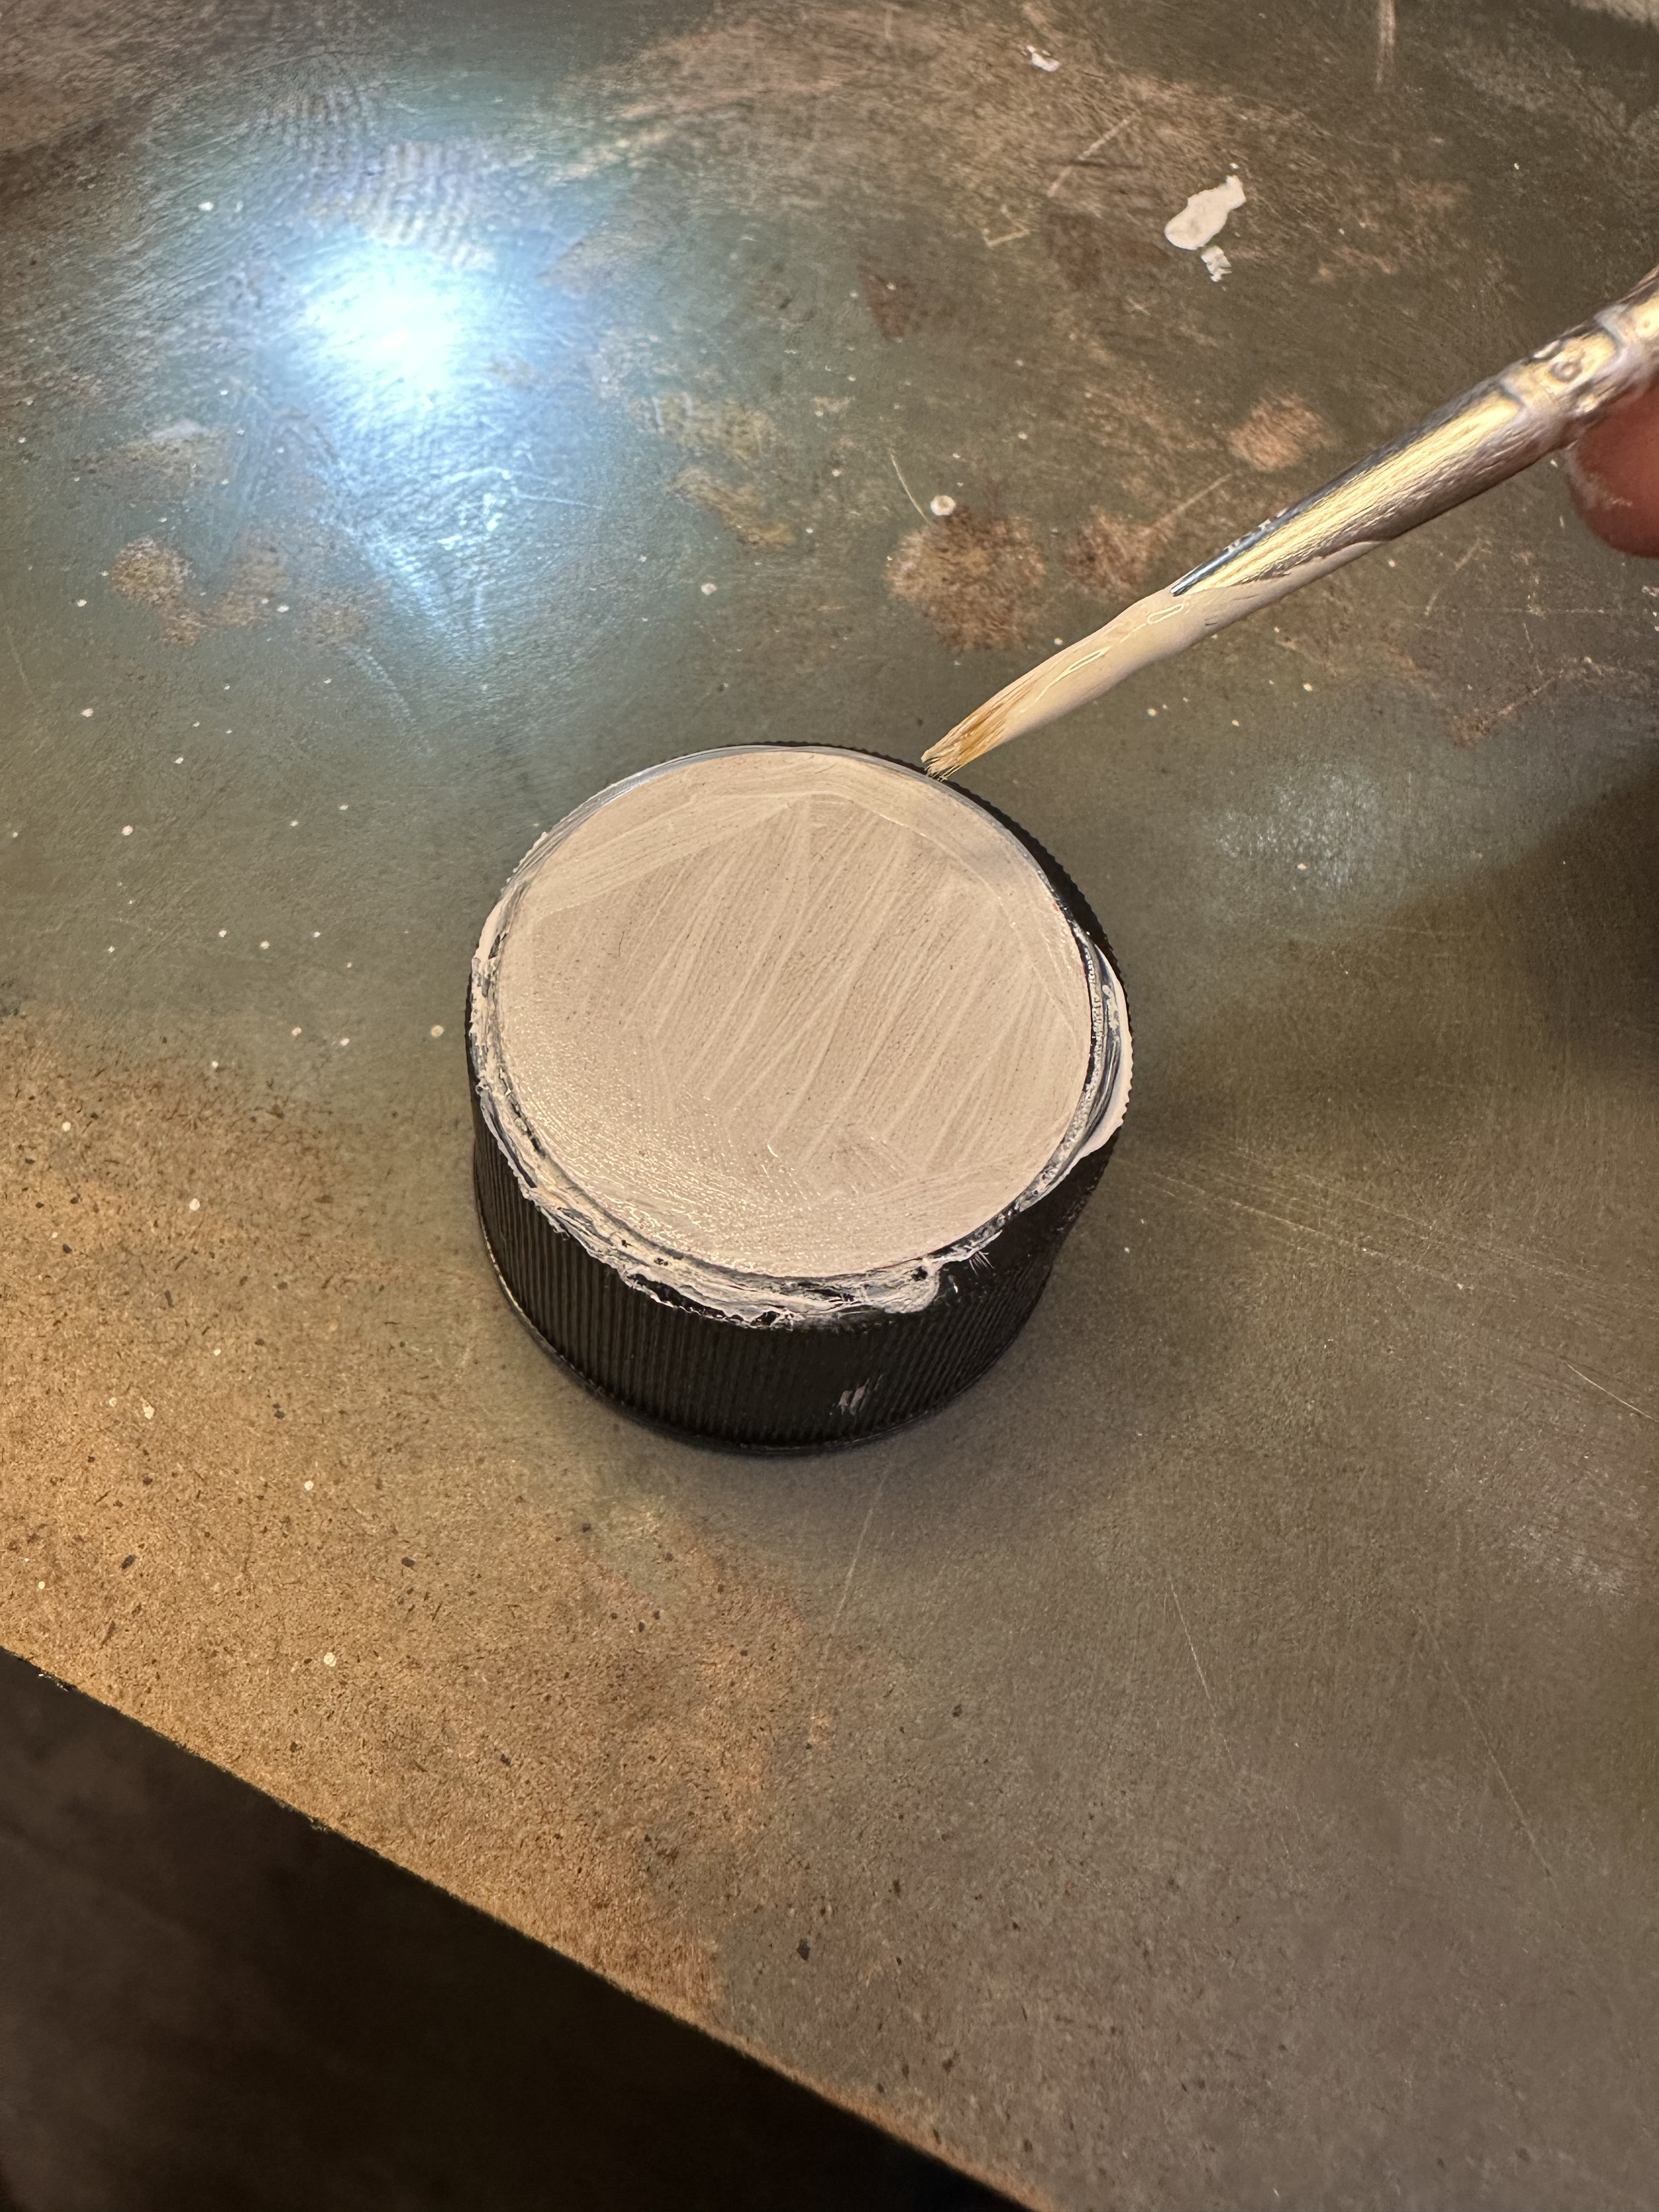
2) painting more white with a mixture of Liquitex "gloss medium & varnish" and titanium white.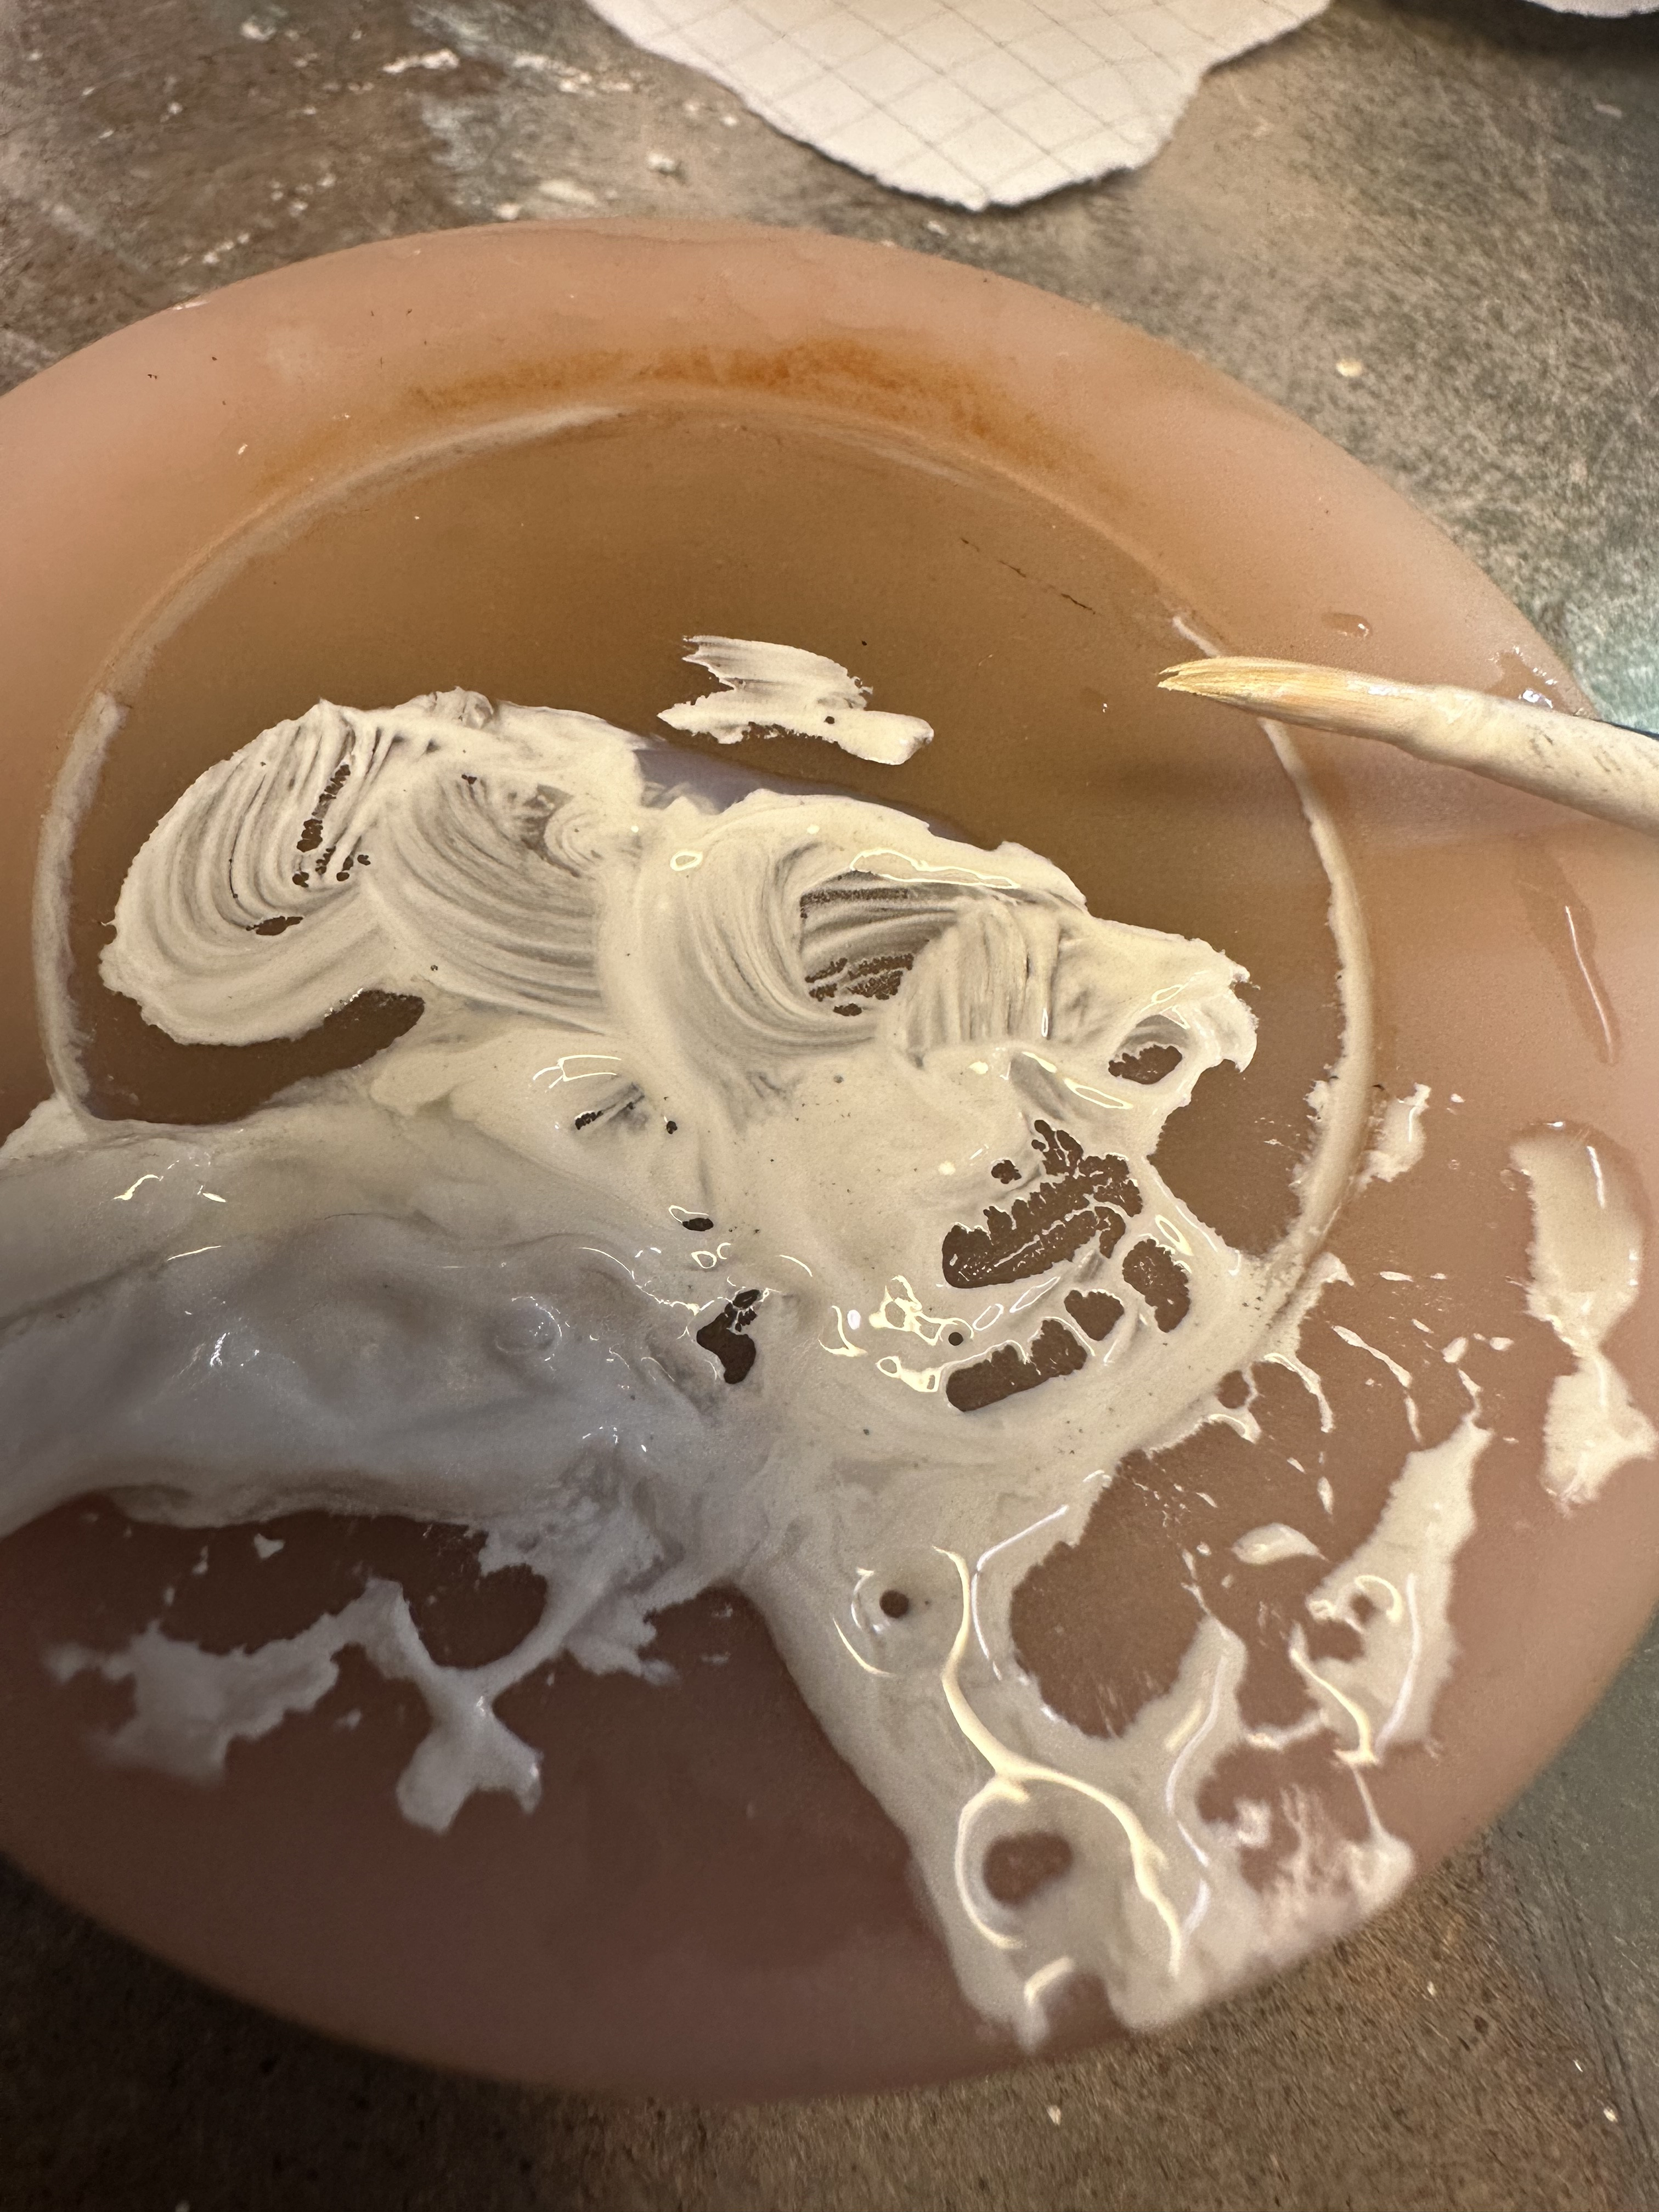
3) applying transfer film and heating with a hair dryer
4) using ice to smooth the film and prevent overheating during the hair drying process (when it gets really hot).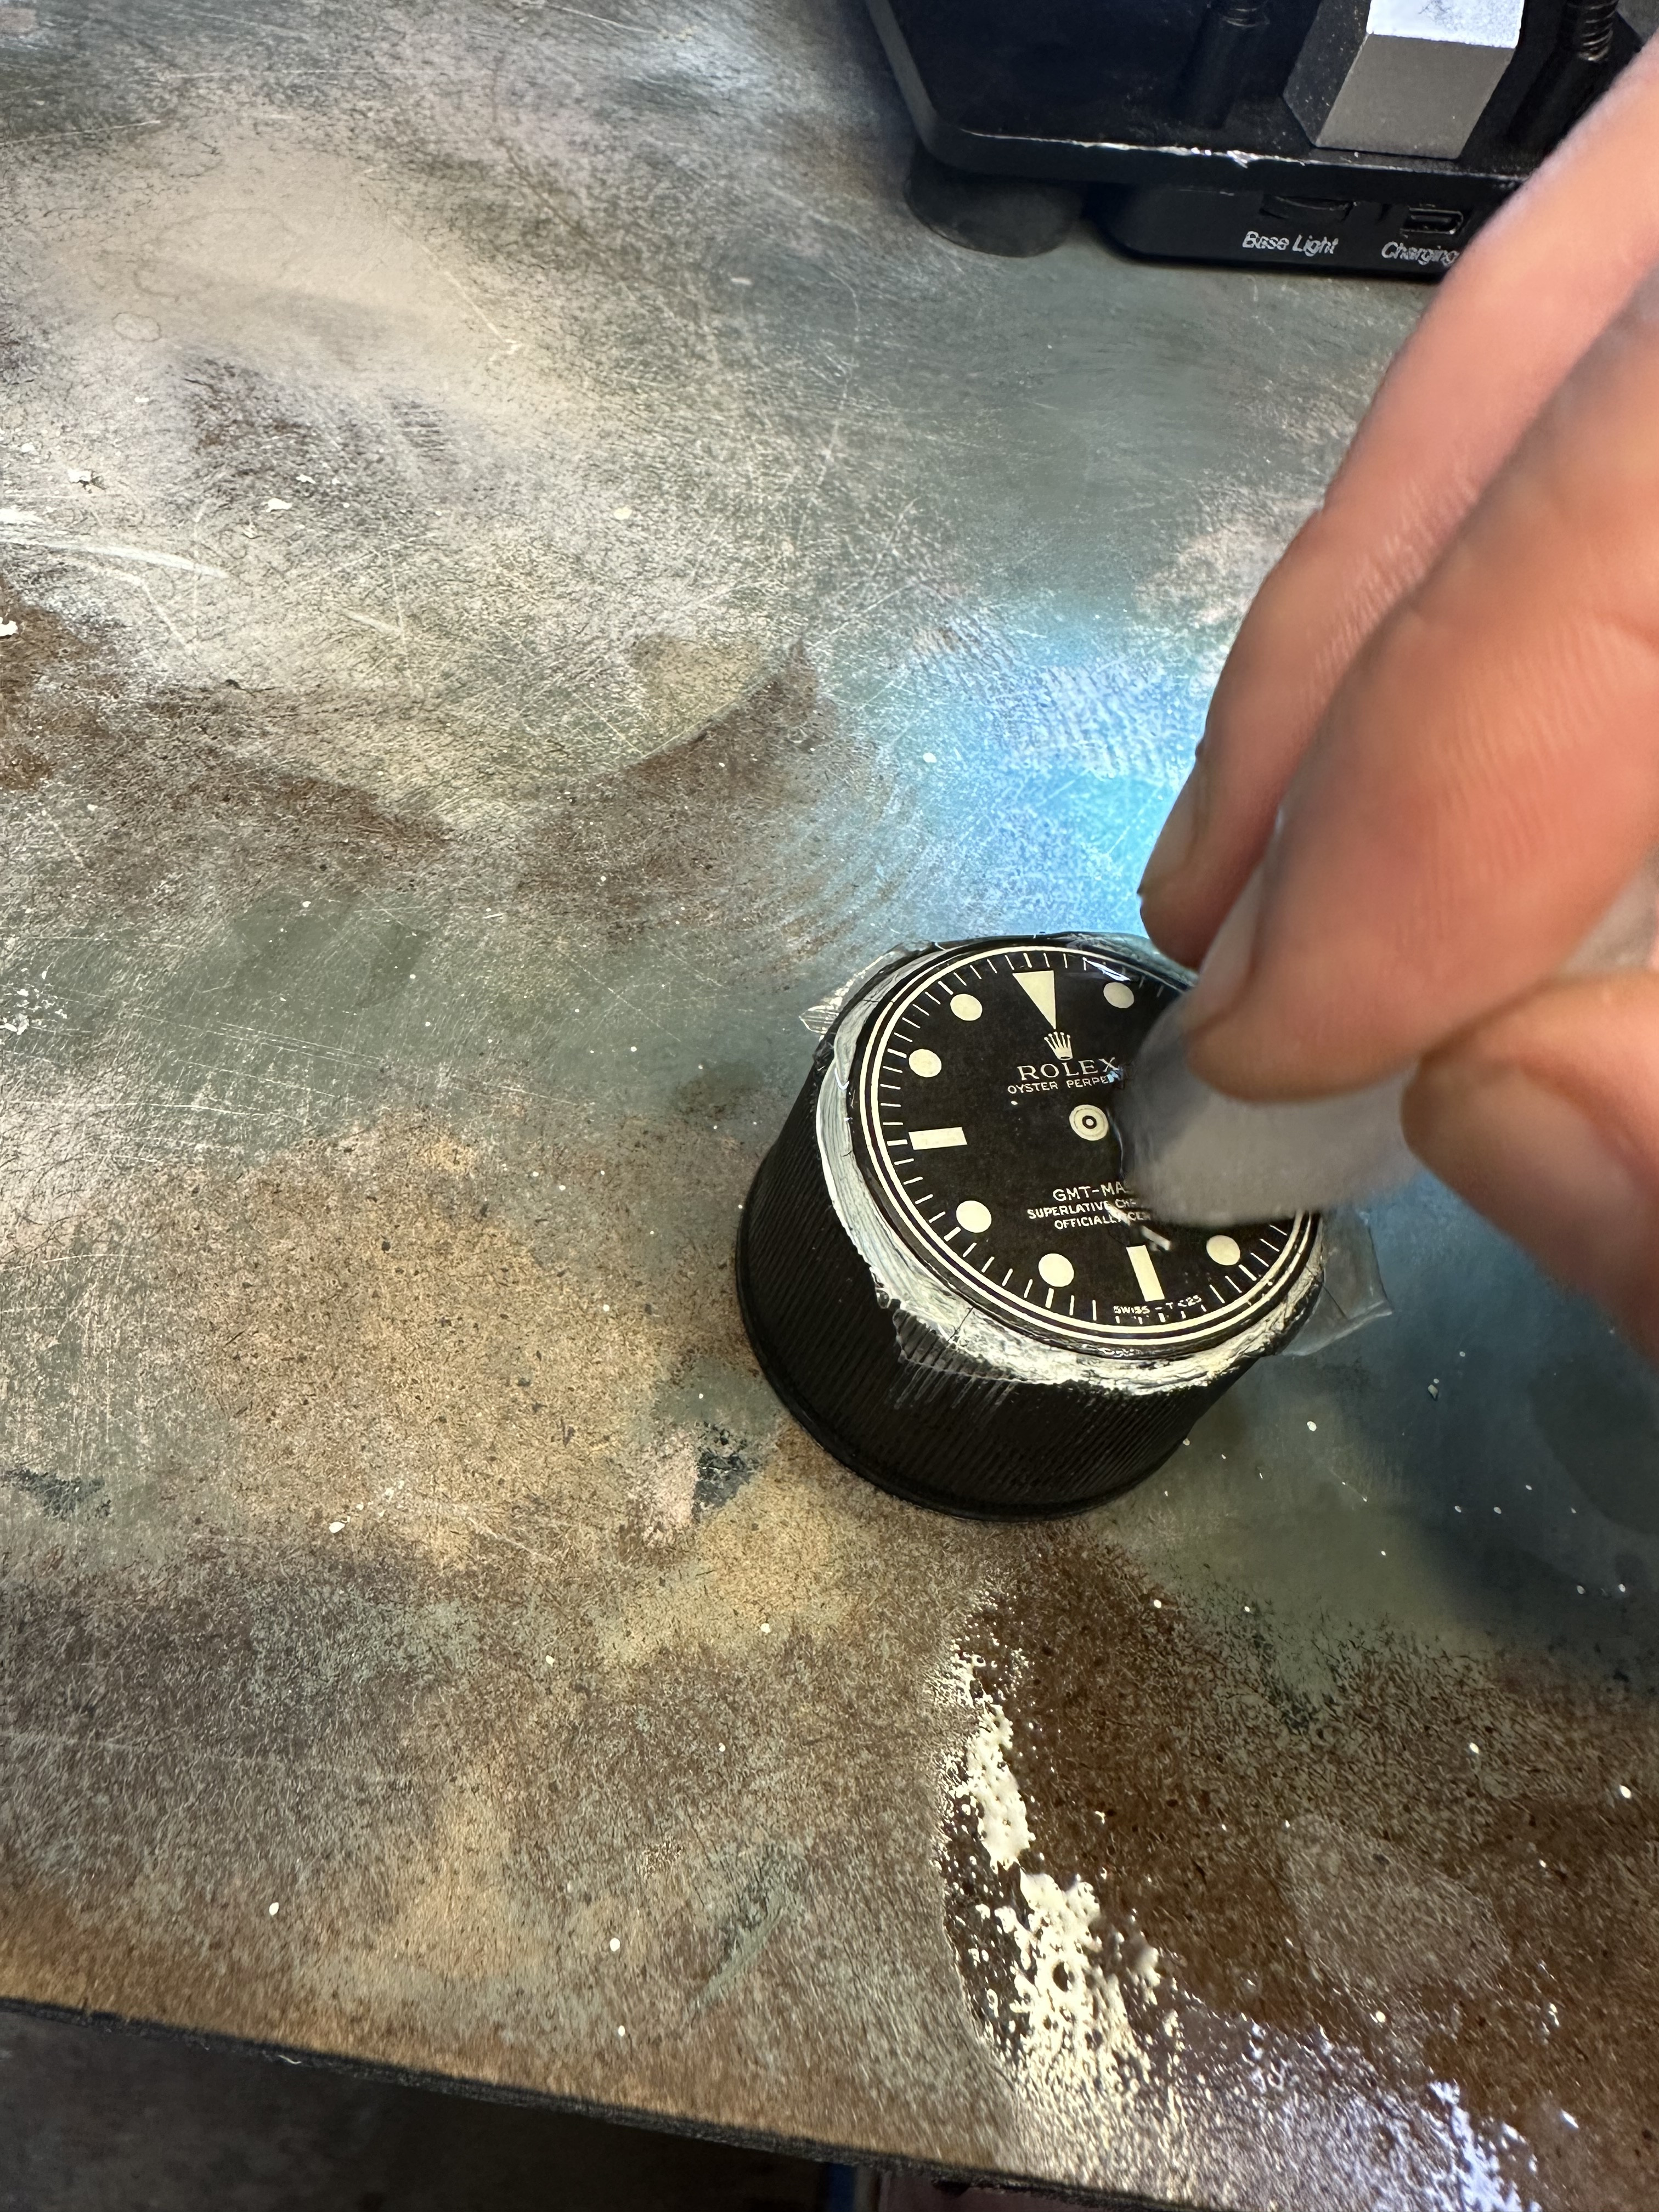
5) when it looks good, 3-5 minutes in the toaster oven to make sure it's all melted.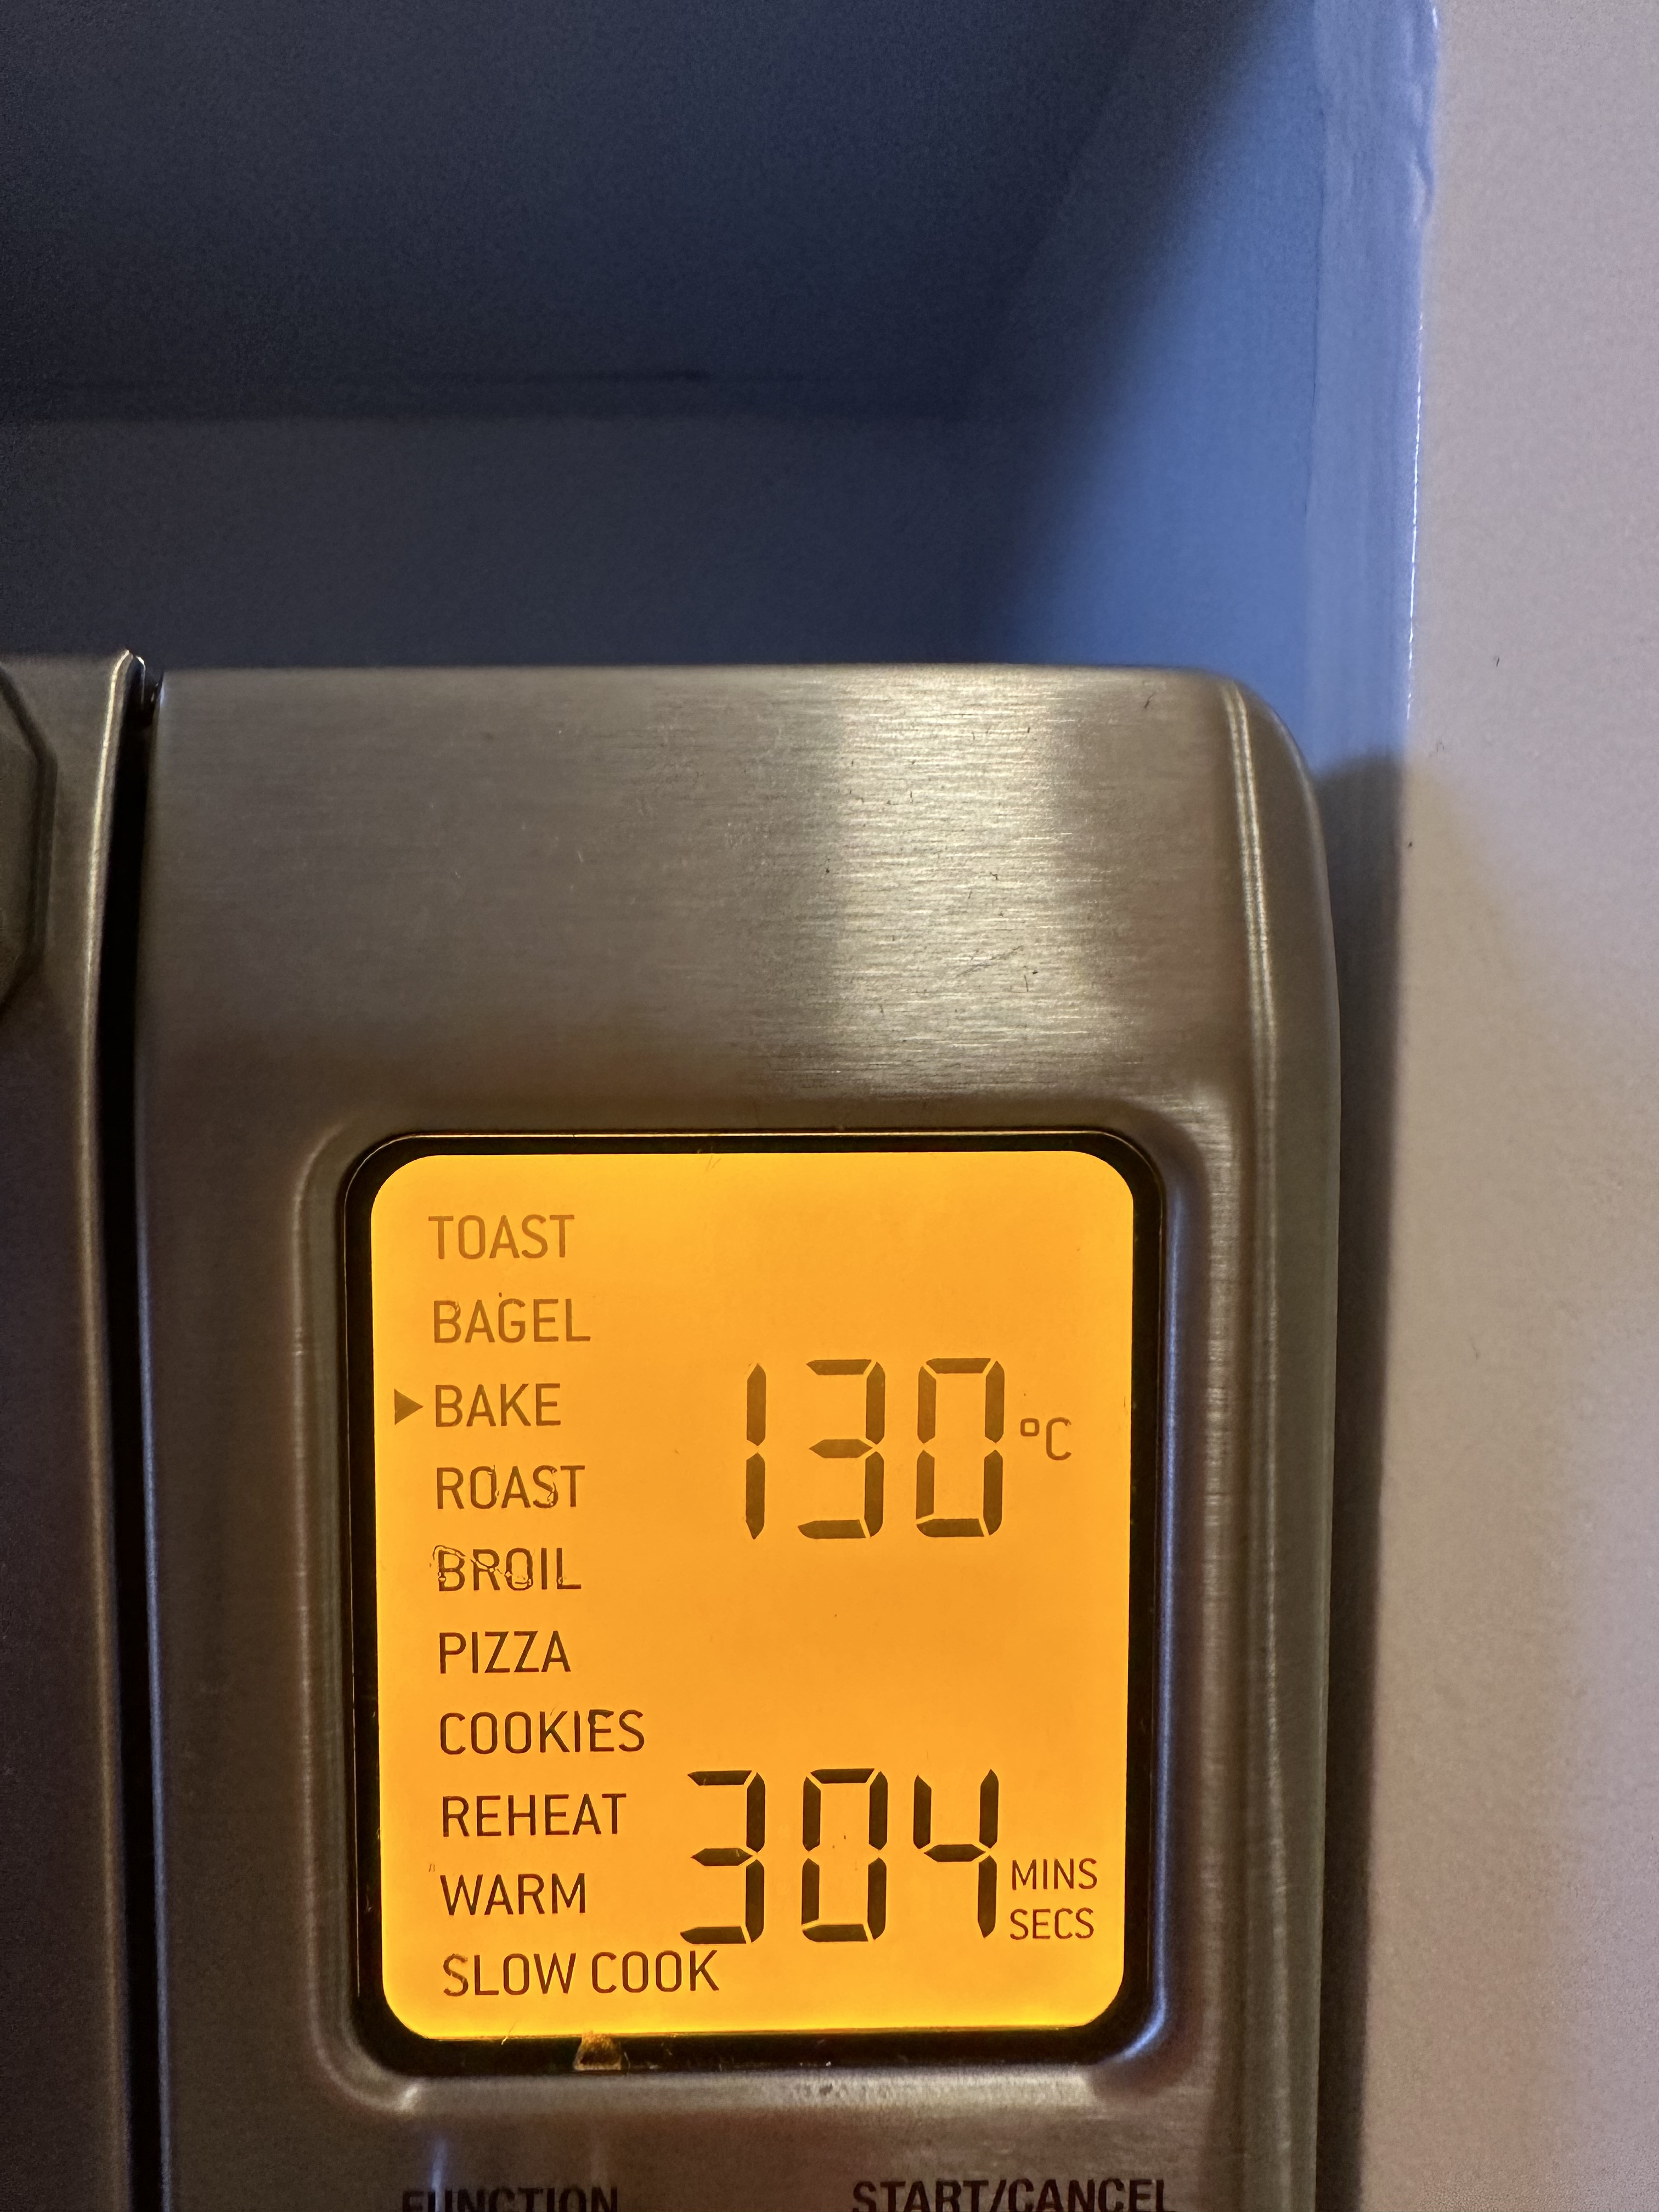
6) gently smooth again with ice and/or stiff neoprene foam after the toaster oven
6b) A picture of the ice and foam, aka convenient tools that work great and are very affordable to boot.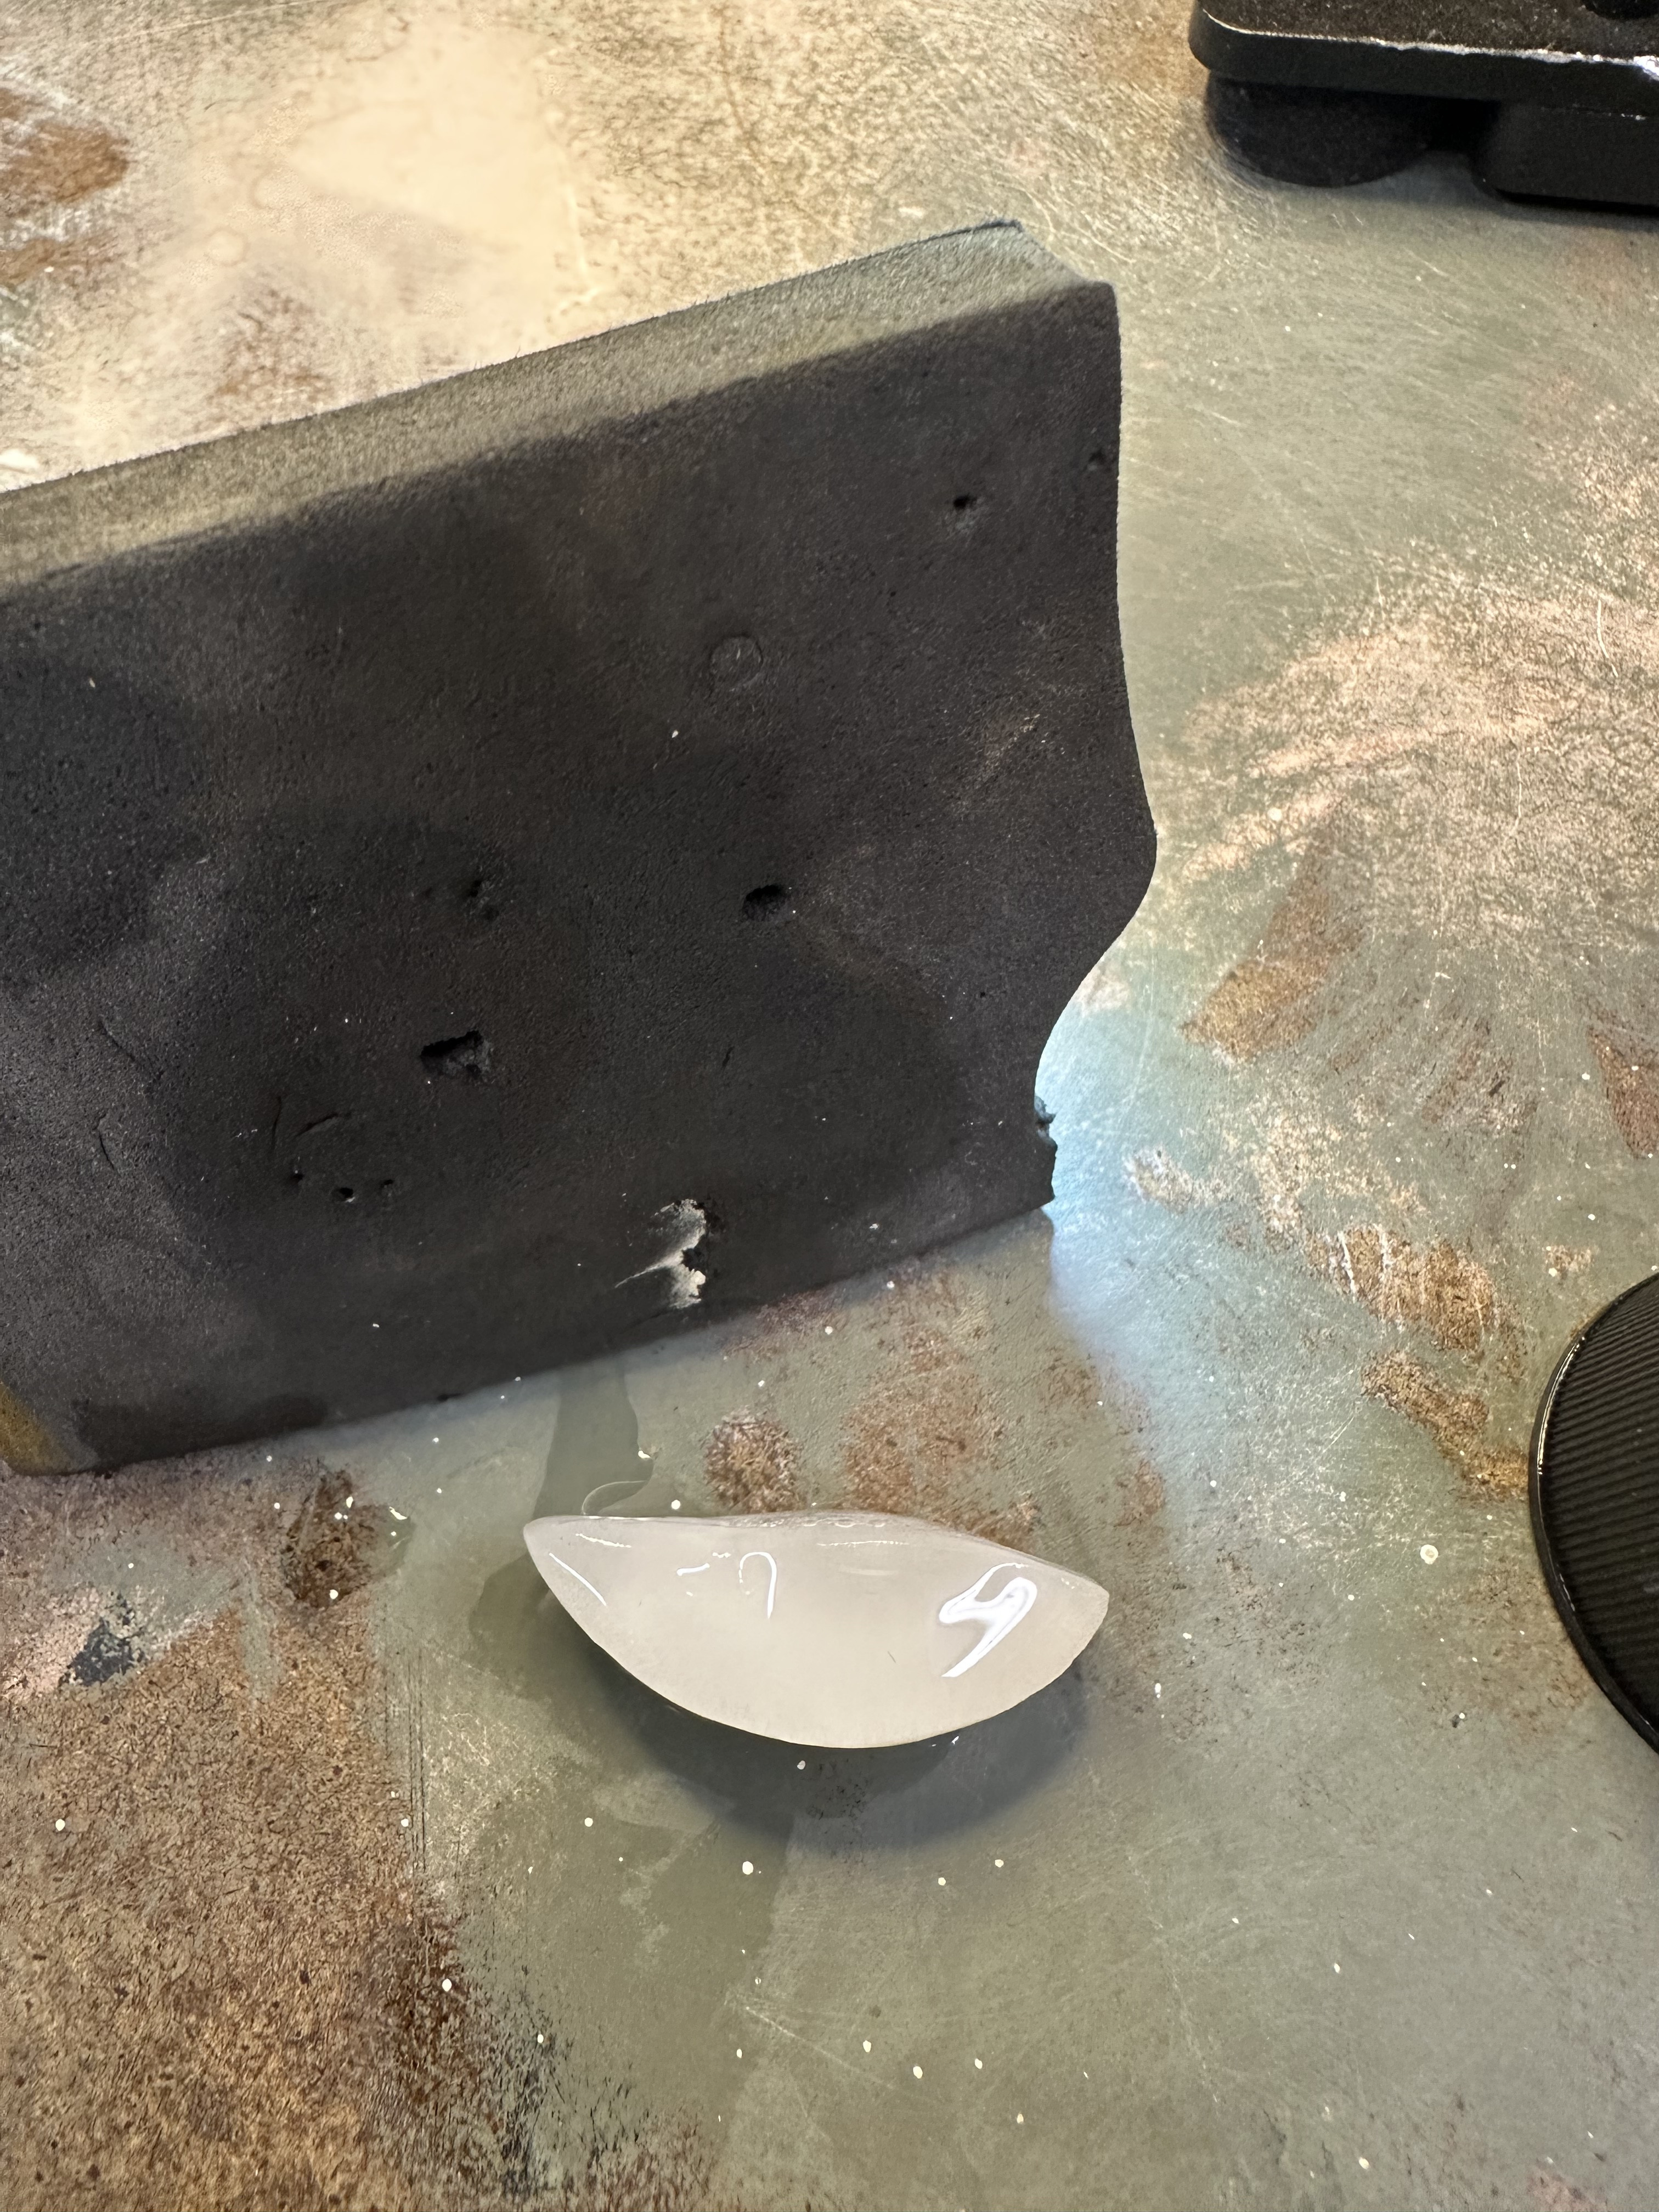
7) The final result of a transfer that looks pretty good.
8) If you are religious, say multiple prayers because it's time to take off the film and see what sticks. If you aren't religious, cross your fingers and bite down really hard on a piece of wood or rolled up towel.
Last edited:
Thank you very much for your help, I really appreciate it. use a printer and a computer with photoshop installed which is at my wife's agency. The problem is that it's a mac and I'm not really comfortable. So I need help, which annoys her quite a bit1) What printer are you using?
2) Do you have access to Photoshop or similar?
3) I believe there's an old post about the "best method" for maximizing your printer and the proper settings way, way earlier in this thread. I'll let you know if I can find it. (EDIT: Found the organized version with pictures on RWG.) It's kind of confusing, but very helpful if you don't try to memorize it all at once. I definitely need to reread it!
4) As for finding dials that are the right size, you can either purchase some from Raffles, or buy something cheaper and shave it down to the right size. Finding 3135 placed date windows are not that easy, but it's very easy to find dials if you don't need a date window. See here around the bottom of page 9. Have you considered this route for reducing to your dial sizes?Decal Dials Tutorial
Hello all, I am reposting this tutorial that I wrote on RWI (when my account there existed) as I think many of you here will find it useful. All credit for this idea, as far as Im aware, belongs to Bart Cordell for his pioneering of the decal technique. The intent of this tutorial will be to help...www.rwg.bz
Project "RWI Raffle Win"... a 1675 Build
Thanks itgoes - some interesting ideas there. I think your comment, “can’t say yet if it’s the techniques or the different inserts that drives the different results” is of real note though - and is what makes the process so interesting but frustratingly inconsistent! I’m very consistent with my...forum.replica-watch.info
 . I thought I'd done my homework on the forums but I see there's a ton of information I haven't read yet. I've found a solution for the 26mm dials. And I'm going to try to reduce the dials with the dremel method for the 27.3.
This is the printer model I use
Ricoh IM C3000
Finally $35 for a dial with placed feet, it's true that it can save quite a bit of work1) What printer are you using?
2) Do you have access to Photoshop or similar?
3) I believe there's an old post about the "best method" for maximizing your printer and the proper settings way, way earlier in this thread. I'll let you know if I can find it. (EDIT: Found the organized version with pictures on RWG.) It's kind of confusing, but very helpful if you don't try to memorize it all at once. I definitely need to reread it!
4) As for finding dials that are the right size, you can either purchase some from Raffles, or buy something cheaper and shave it down to the right size. Finding 3135 placed date windows are not that easy, but it's very easy to find dials if you don't need a date window. See here around the bottom of page 9. Have you considered this route for reducing to your dial sizes?Decal Dials Tutorial
Hello all, I am reposting this tutorial that I wrote on RWI (when my account there existed) as I think many of you here will find it useful. All credit for this idea, as far as Im aware, belongs to Bart Cordell for his pioneering of the decal technique. The intent of this tutorial will be to help...www.rwg.bz
Project "RWI Raffle Win"... a 1675 Build
Thanks itgoes - some interesting ideas there. I think your comment, “can’t say yet if it’s the techniques or the different inserts that drives the different results” is of real note though - and is what makes the process so interesting but frustratingly inconsistent! I’m very consistent with my...
 . The refines option isn't too bad.
- 9/8/10
- 977
- 865
- 93
Does anyone have one of those dial feet welding/soldering machines?
Something like: https://www.ebay.co.uk/itm/251911240473
Something like: https://www.ebay.co.uk/itm/251911240473
I built one, it's not very hard to do and there are a few places with instructions online.Does anyone have one of those dial feet welding/soldering machines?
Something like: https://www.ebay.co.uk/itm/251911240473
- 9/8/10
- 977
- 865
- 93
I just have one dial to do (for now) - I looked up the box construction method and thought... easier just to find someoneI built one, it's not very hard to do and there are a few places with instructions online.

Is there an extreme improvement vs a quality soldering iron with sufficient heat? I assumed they were way better, but I've seen some people go back to regular irons. I'm guessing it was only done because it's simpler to plug in a pencil than set up a box, but a specific machine seems like it would be far superior with accuracy too.I built one, it's not very hard to do and there are a few places with instructions online.
I think the advantages are precision, since you can place the foot with perfect accuracy before soldering; and that it doesn't heat up the dial like a soldering iron would. It's a few seconds of electricity and it's done, rather than trying to heat up the foot and dial and solder with an iron, WITHOUT causing heat damage to the face of the dial.Is there an extreme improvement vs a quality soldering iron with sufficient heat? I assumed they were way better, but I've seen some people go back to regular irons. I'm guessing it was only done because it's simpler to plug in a pencil than set up a box, but a specific machine seems like it would be far superior with accuracy too.
In my opinion, it's a lot easier to use for someone who doesn't have a lot of experience soldering, and you can literally make it with an old AC adapter (from a cell phone or electronic device you no longer use...everyone has a dozen of them scattered around the house or garage) and some metal scraps. The guides online have specific items listed, but as long as there's a way to hold the dial, place the foot, and apply electricity, you've got everything you need.
I think I posted a thread with how I did mine, with links to the Amazon items I bought, but it's very open to interpretation.
1) That printer is a real workhorse for the office, but I'm still unsure how good 600x600dpi can be.Thank you very much for your help, I really appreciate it. use a printer and a computer with photoshop installed which is at my wife's agency. The problem is that it's a mac and I'm not really comfortable. So I need help, which annoys her quite a bit
This is the printer model I use
Ricoh IM C3000
2) Since you have Photoshop, let me know if need help finding high resolution photos of genuine dials. I've actually become pretty damn good at finding many with incredible resolution.
3) What's your solution for the 26mm dials?
4) Remember that dremels turn really fast, and 27.3mm is super precise. Better to use a finer sandpaper or file than a heavy grit. I've sanded them too much on many occasions!
Do you have a link to yours (or similar one) that details the parts that hold the dial and feet/wire/rod? I'm interested in getting the precision parts first before buying the electronic internals. I have a few soldering irons that "might" be safe enough for quick soldering without frying the dial, but I have nothing reliable to hold the dial and feet precisely in place.I think the advantages are precision, since you can place the foot with perfect accuracy before soldering; and that it doesn't heat up the dial like a soldering iron would. It's a few seconds of electricity and it's done, rather than trying to heat up the foot and dial and solder with an iron, WITHOUT causing heat damage to the face of the dial.
In my opinion, it's a lot easier to use for someone who doesn't have a lot of experience soldering, and you can literally make it with an old AC adapter (from a cell phone or electronic device you no longer use...everyone has a dozen of them scattered around the house or garage) and some metal scraps. The guides online have specific items listed, but as long as there's a way to hold the dial, place the foot, and apply electricity, you've got everything you need.
I think I posted a thread with how I did mine, with links to the Amazon items I bought, but it's very open to interpretation.
It's basically a box, an on/off switch, some wire, and one of those cheap, hobby "third hands" that don't really work great for the intended purpose, but very well for this.Do you have a link to yours (or similar one) that details the parts that hold the dial and feet/wire/rod? I'm interested in getting the precision parts first before buying the electronic internals. I have a few soldering irons that "might" be safe enough for quick soldering without frying the dial, but I have nothing reliable to hold the dial and feet precisely in place.
I checked my Amazon cart, this is everything I bought to make mine, but you'll see plenty of places you can improvise...wire, crimps, the AC to DC adapter, etc. This is worst case scenario, everything bought new:
This is the finished product:

Last edited: