• Tired of adverts on RWI? - Subscribe by clicking HERE and PMing Trailboss for instructions and they will magically go away!

Decal printed dial

WatchN3RD

I supported. Doesn't make me an expert!
Gold Patron
24/7/18
469
500
63
Very well said. I totally agree. I'm not concerned with micro-scratches, as that is unfortunately the least of our worries. I don't think micro-scratches take away from the "pop" either. Solvents or paints have given me that problem.
 
Last edited:

chrome72

Renowned Member
7/12/17
608
511
93
Houston TX Baby
I suppose the level of polish on a bare brass dial depends on what you are trying to achieve. I can't comment on whether it makes a big difference, or how it compares to a gen 50s/60s gilt dial (haven't seen on in person), but I haven't bothered trying to polish the blanks I am working with. Why?
  1. They already look very shiny to me
  2. Magnification to the level of observing scratches will expose all the printing flaws and inaccuracies, never mind completely different technique than pad printing and galvanic printing, which is a bigger tell
  3. I don't want to have issues with decals (or any method) not adhering properly to a dial because it is microscopically smooth
  4. The aging and cracks in lacquer (see the example you linked) creates more imperfections than scratches would, and would likely impact the shininess as much or more than scratches in the brass
  5. Gen gilt dials also have corrosion on the brass, which likely reduces shininess, yet they are still shiny
So I think you are over thinking it some, which is a problem all of us here have. :)
Ha I figured it was probably nothing to worry about as I won’t be using a magnifying glass probably ever in real life.
 
  • Like
Reactions: GenuineFool

WatchN3RD

I supported. Doesn't make me an expert!
Gold Patron
24/7/18
469
500
63
I'd like to ask a general question towards those that are still using Sunnyscopa. I've had plenty of great results, but I still never know with 100% certainty how it will turn out until the bandage is ripped off.
I always seem to keep trying it when I'm waiting on something, so I might as well ask...


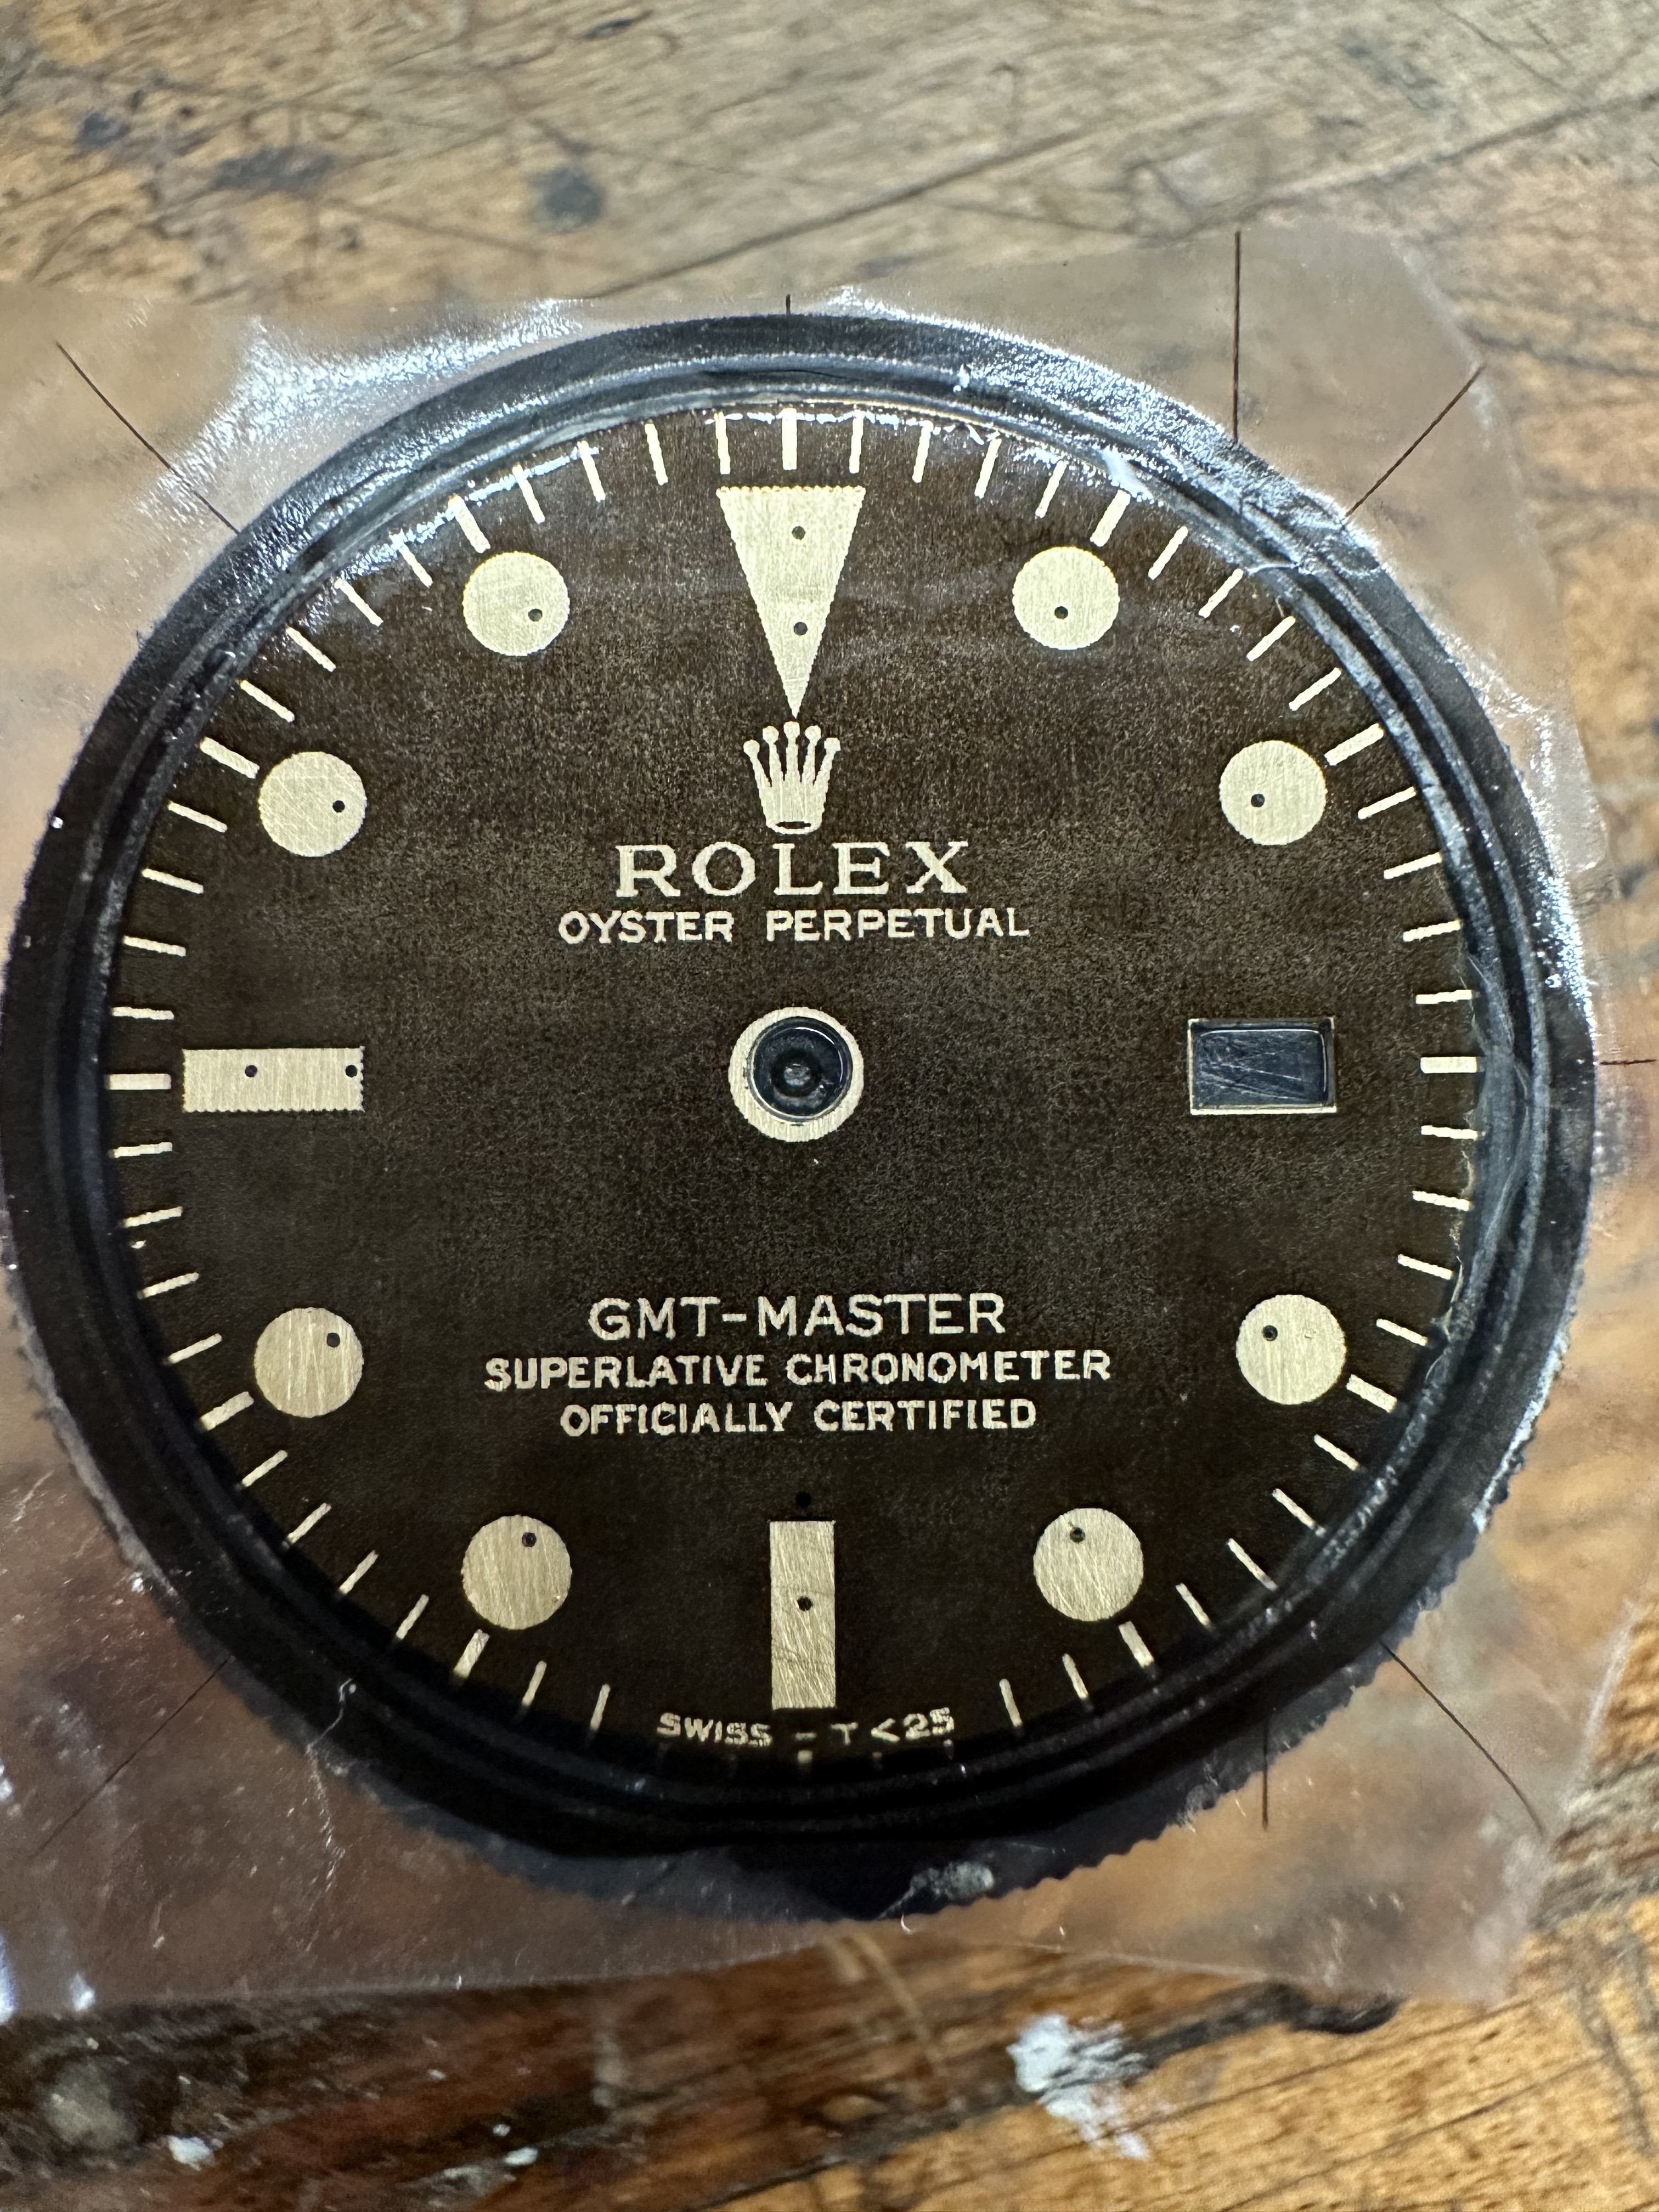
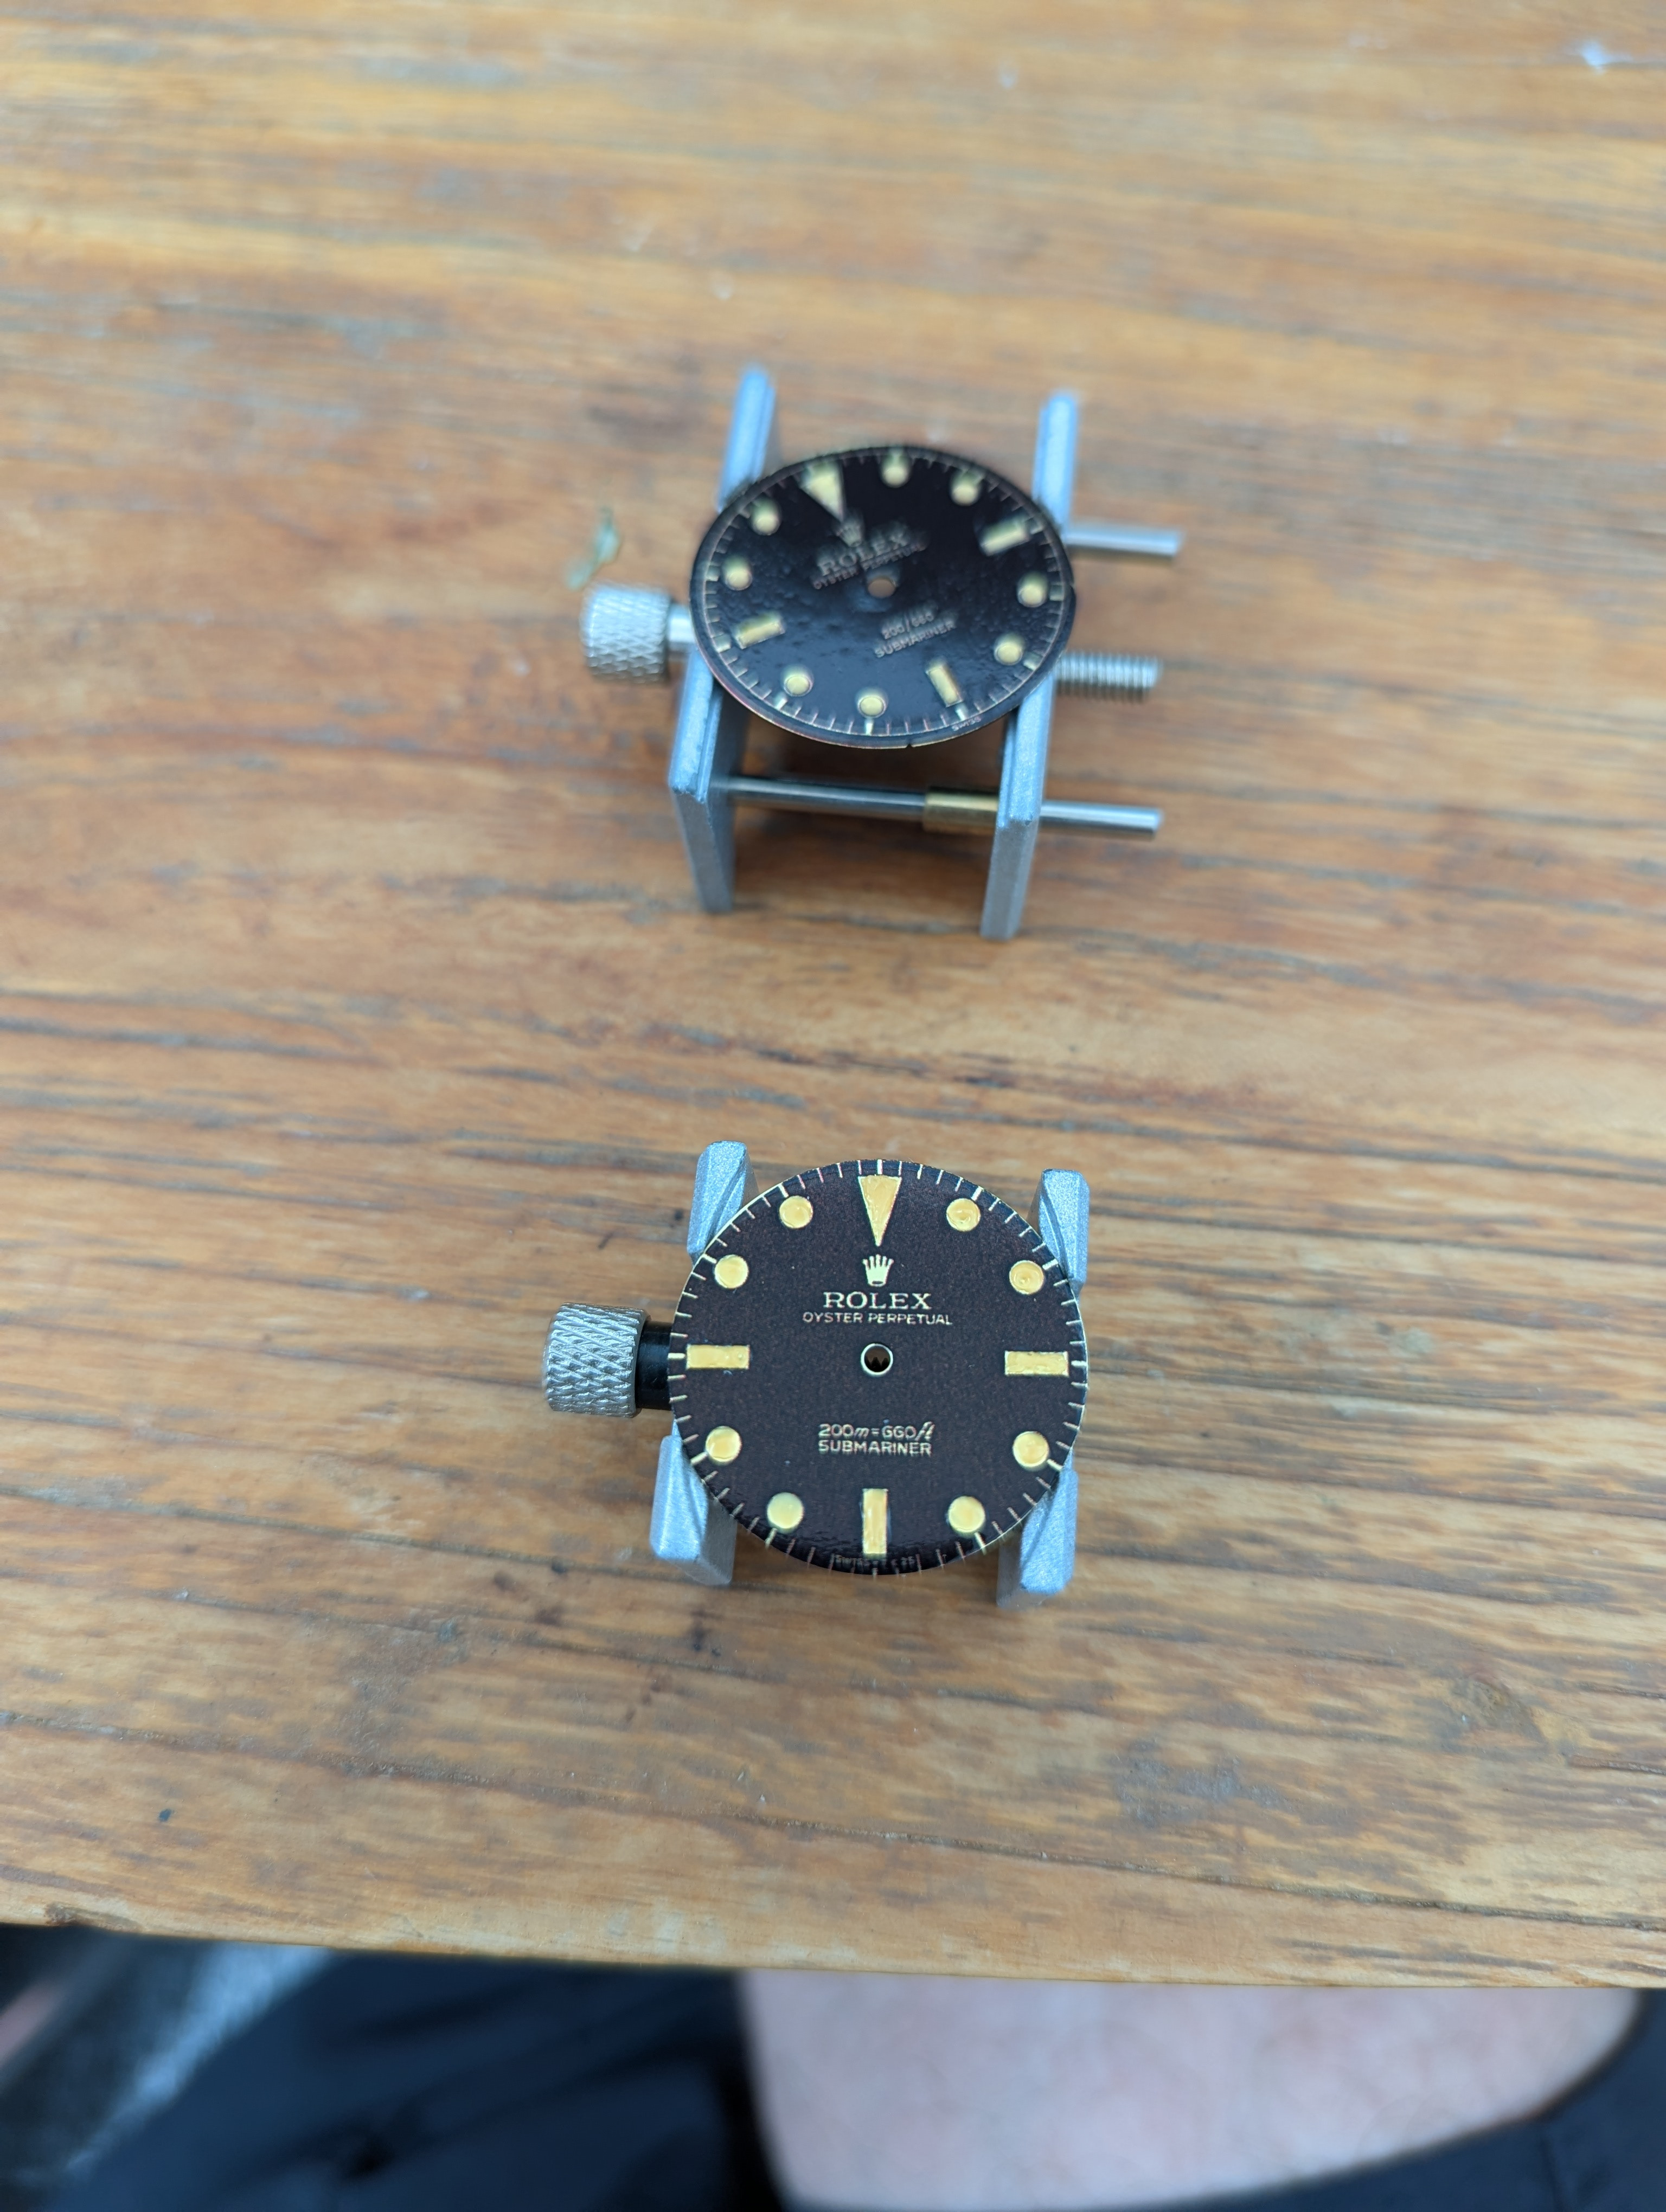
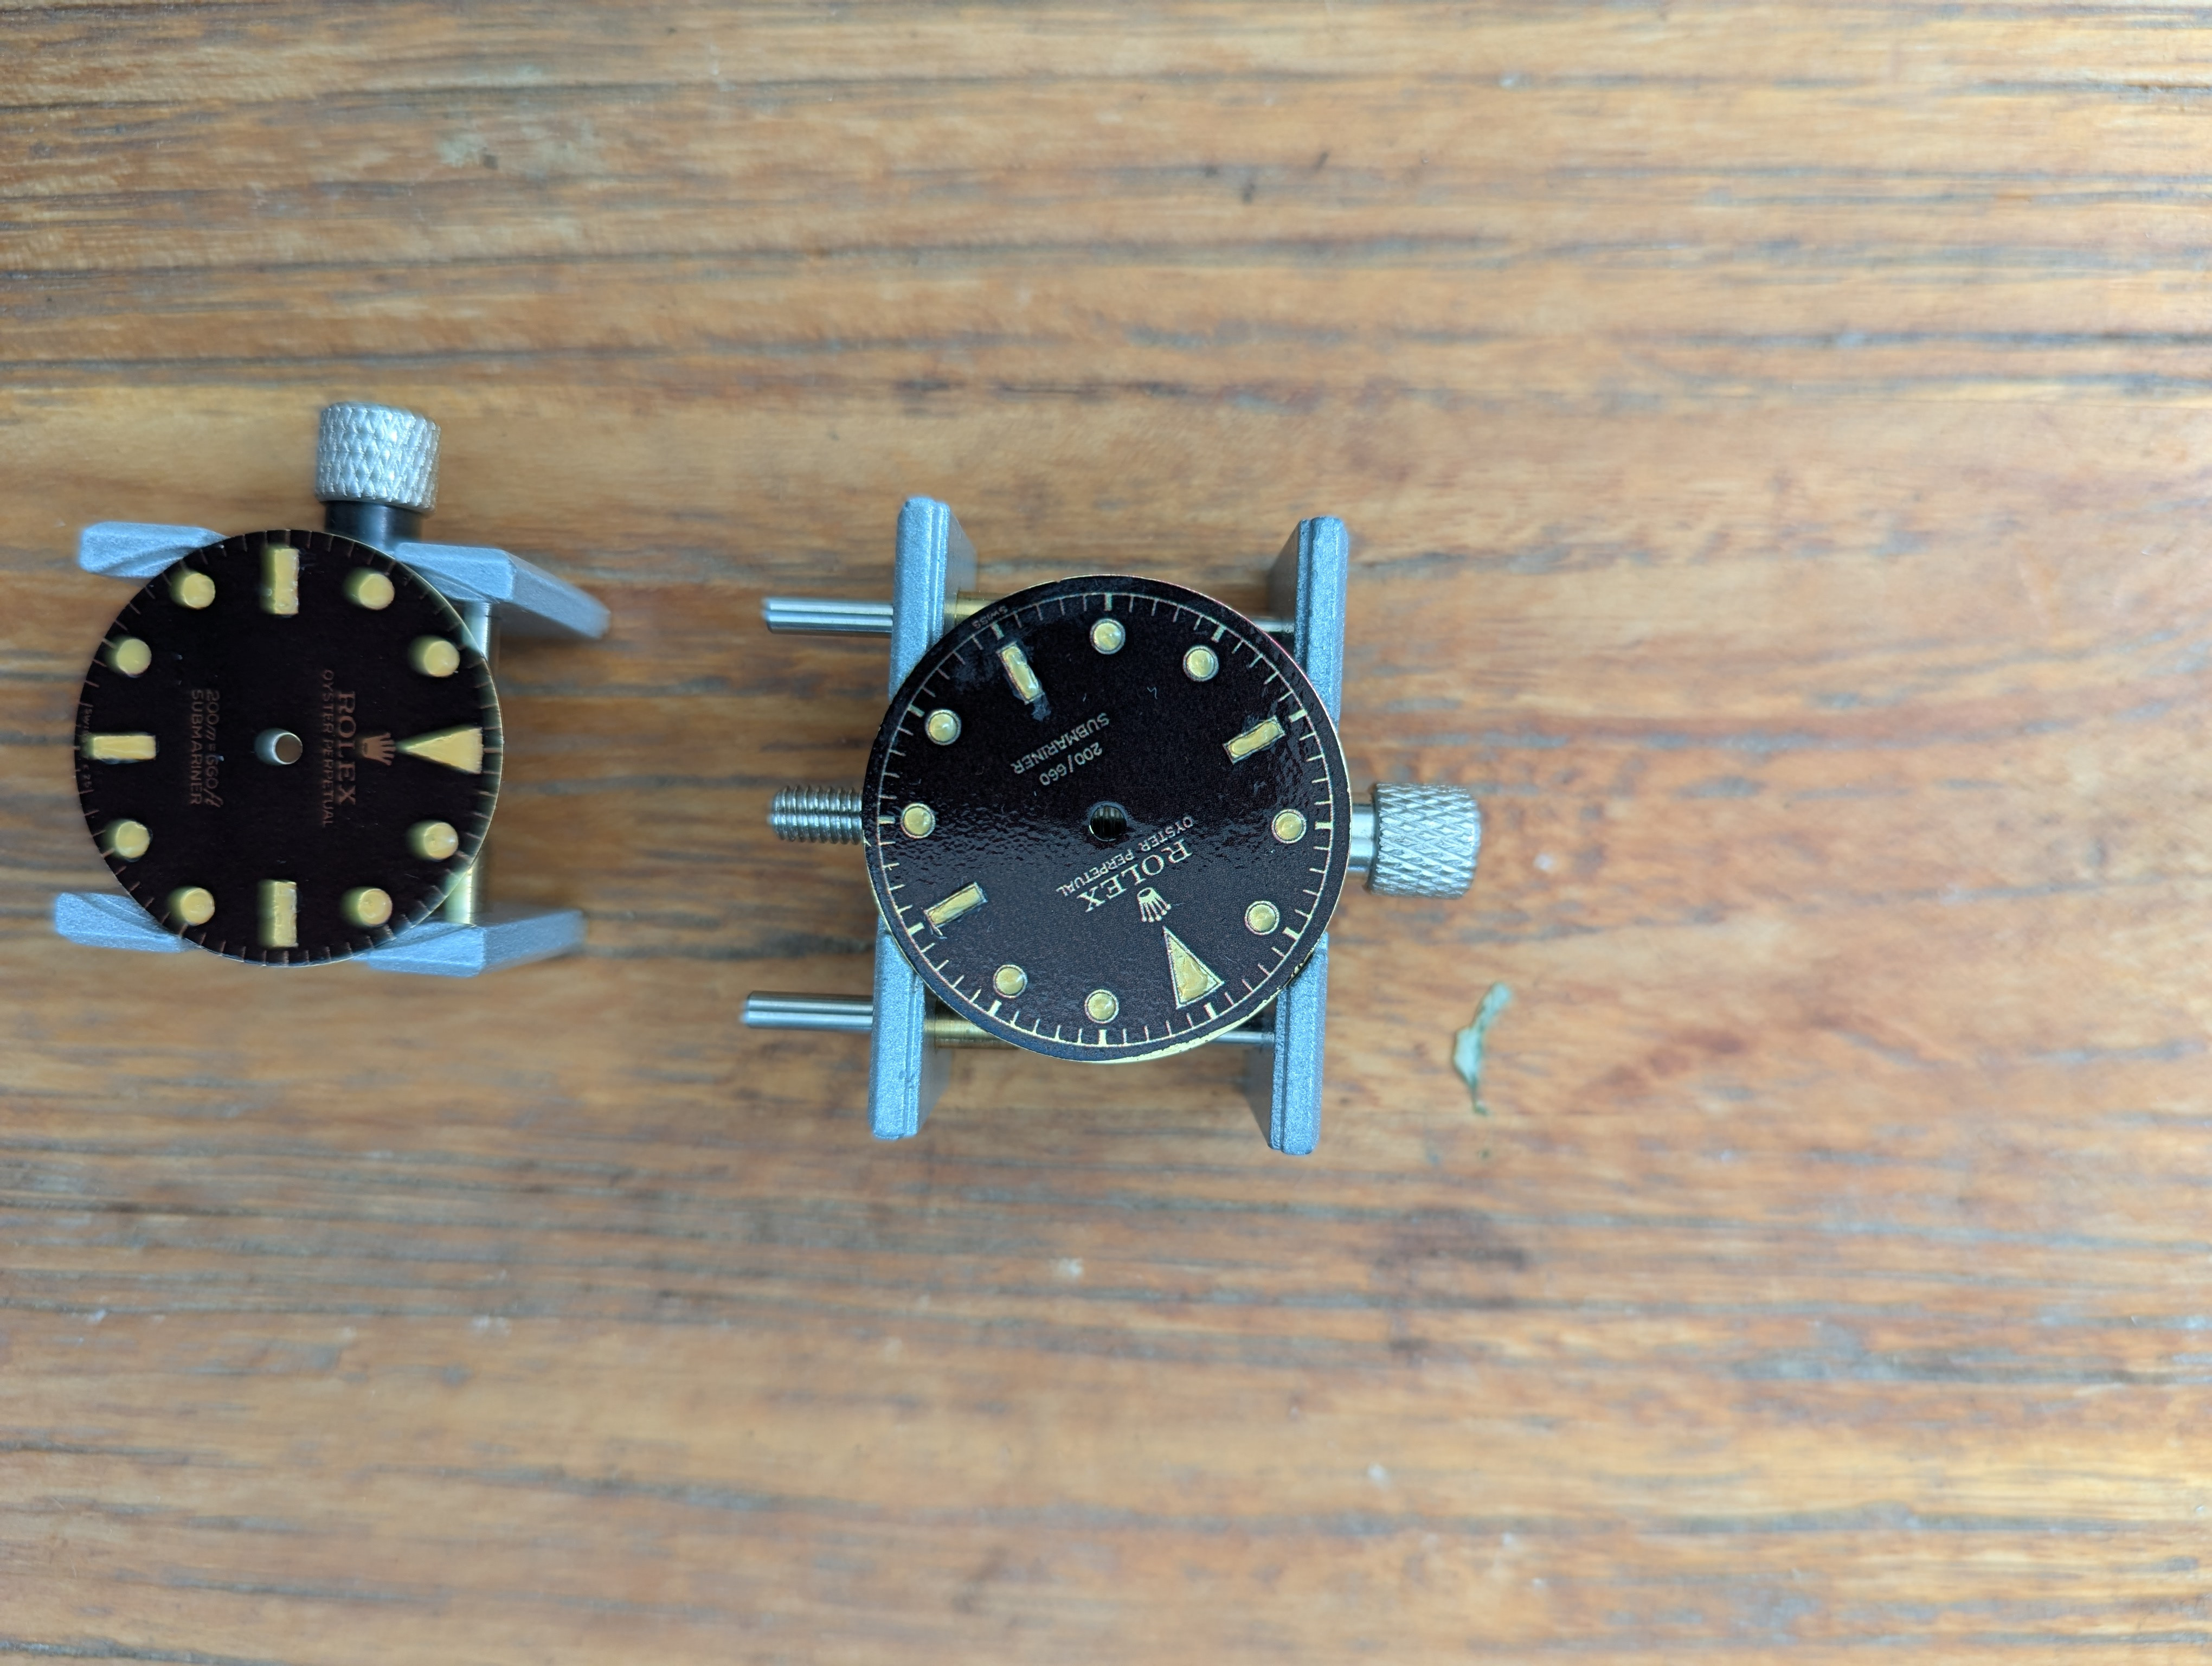
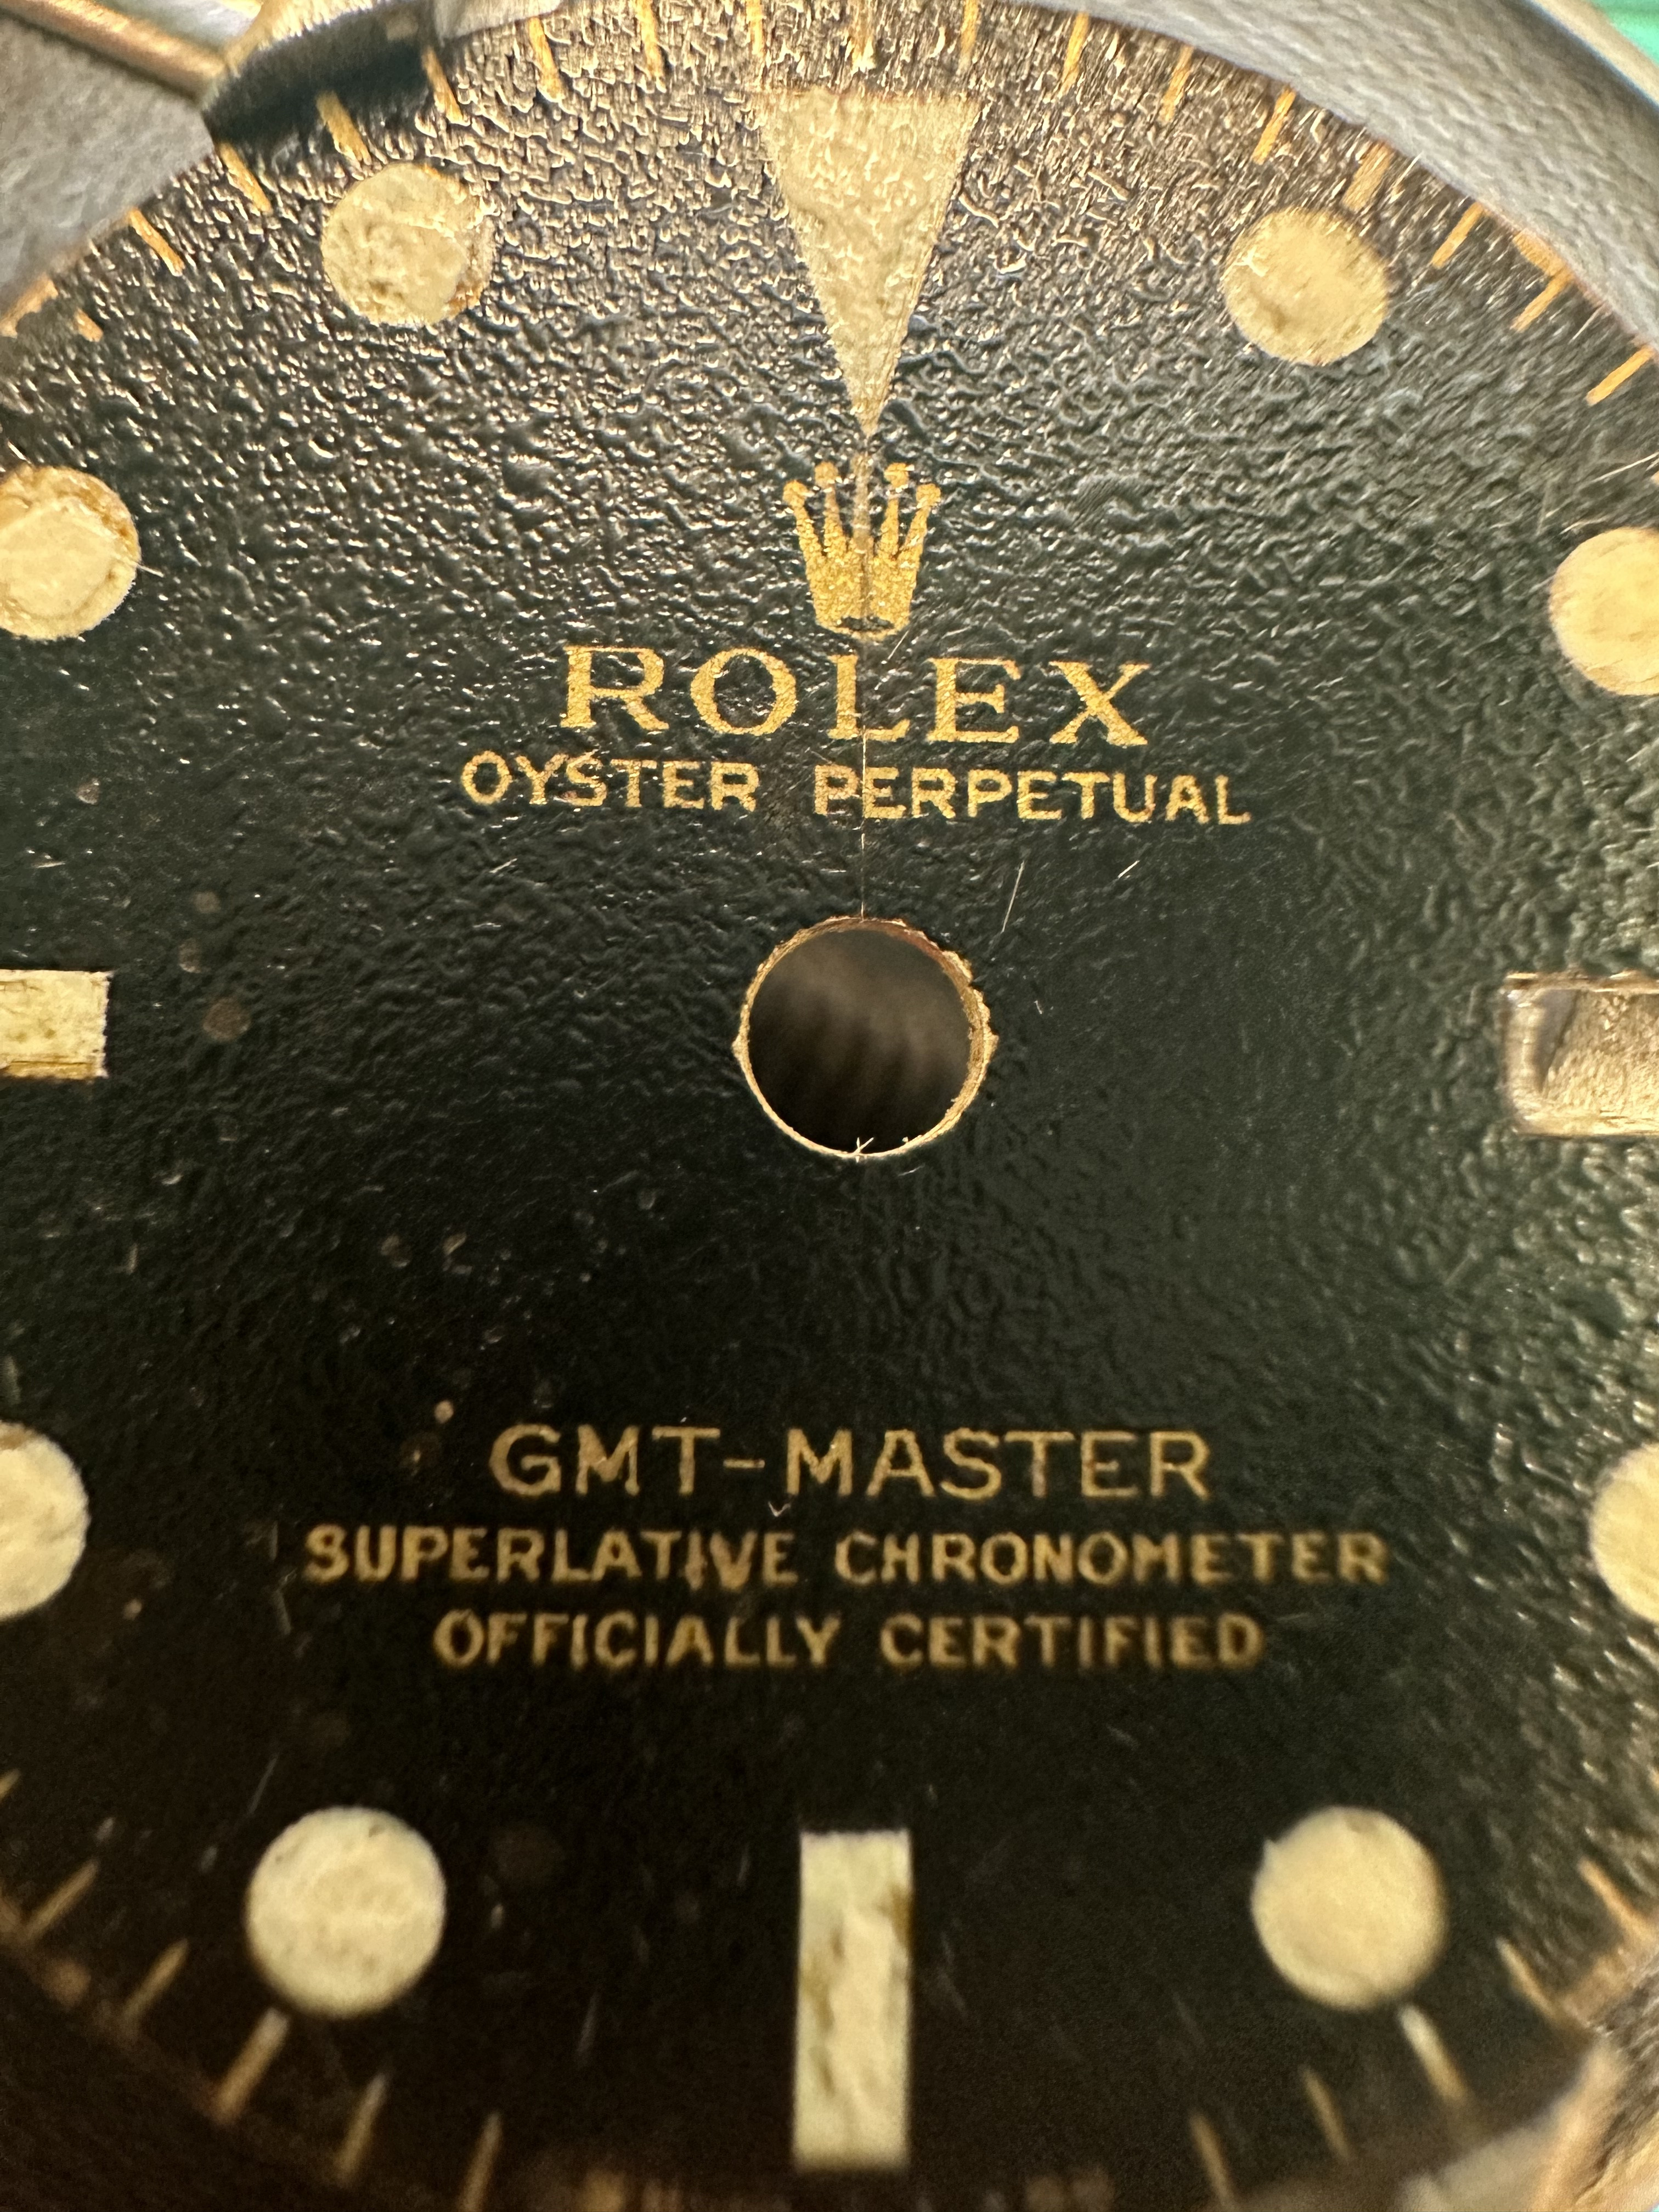
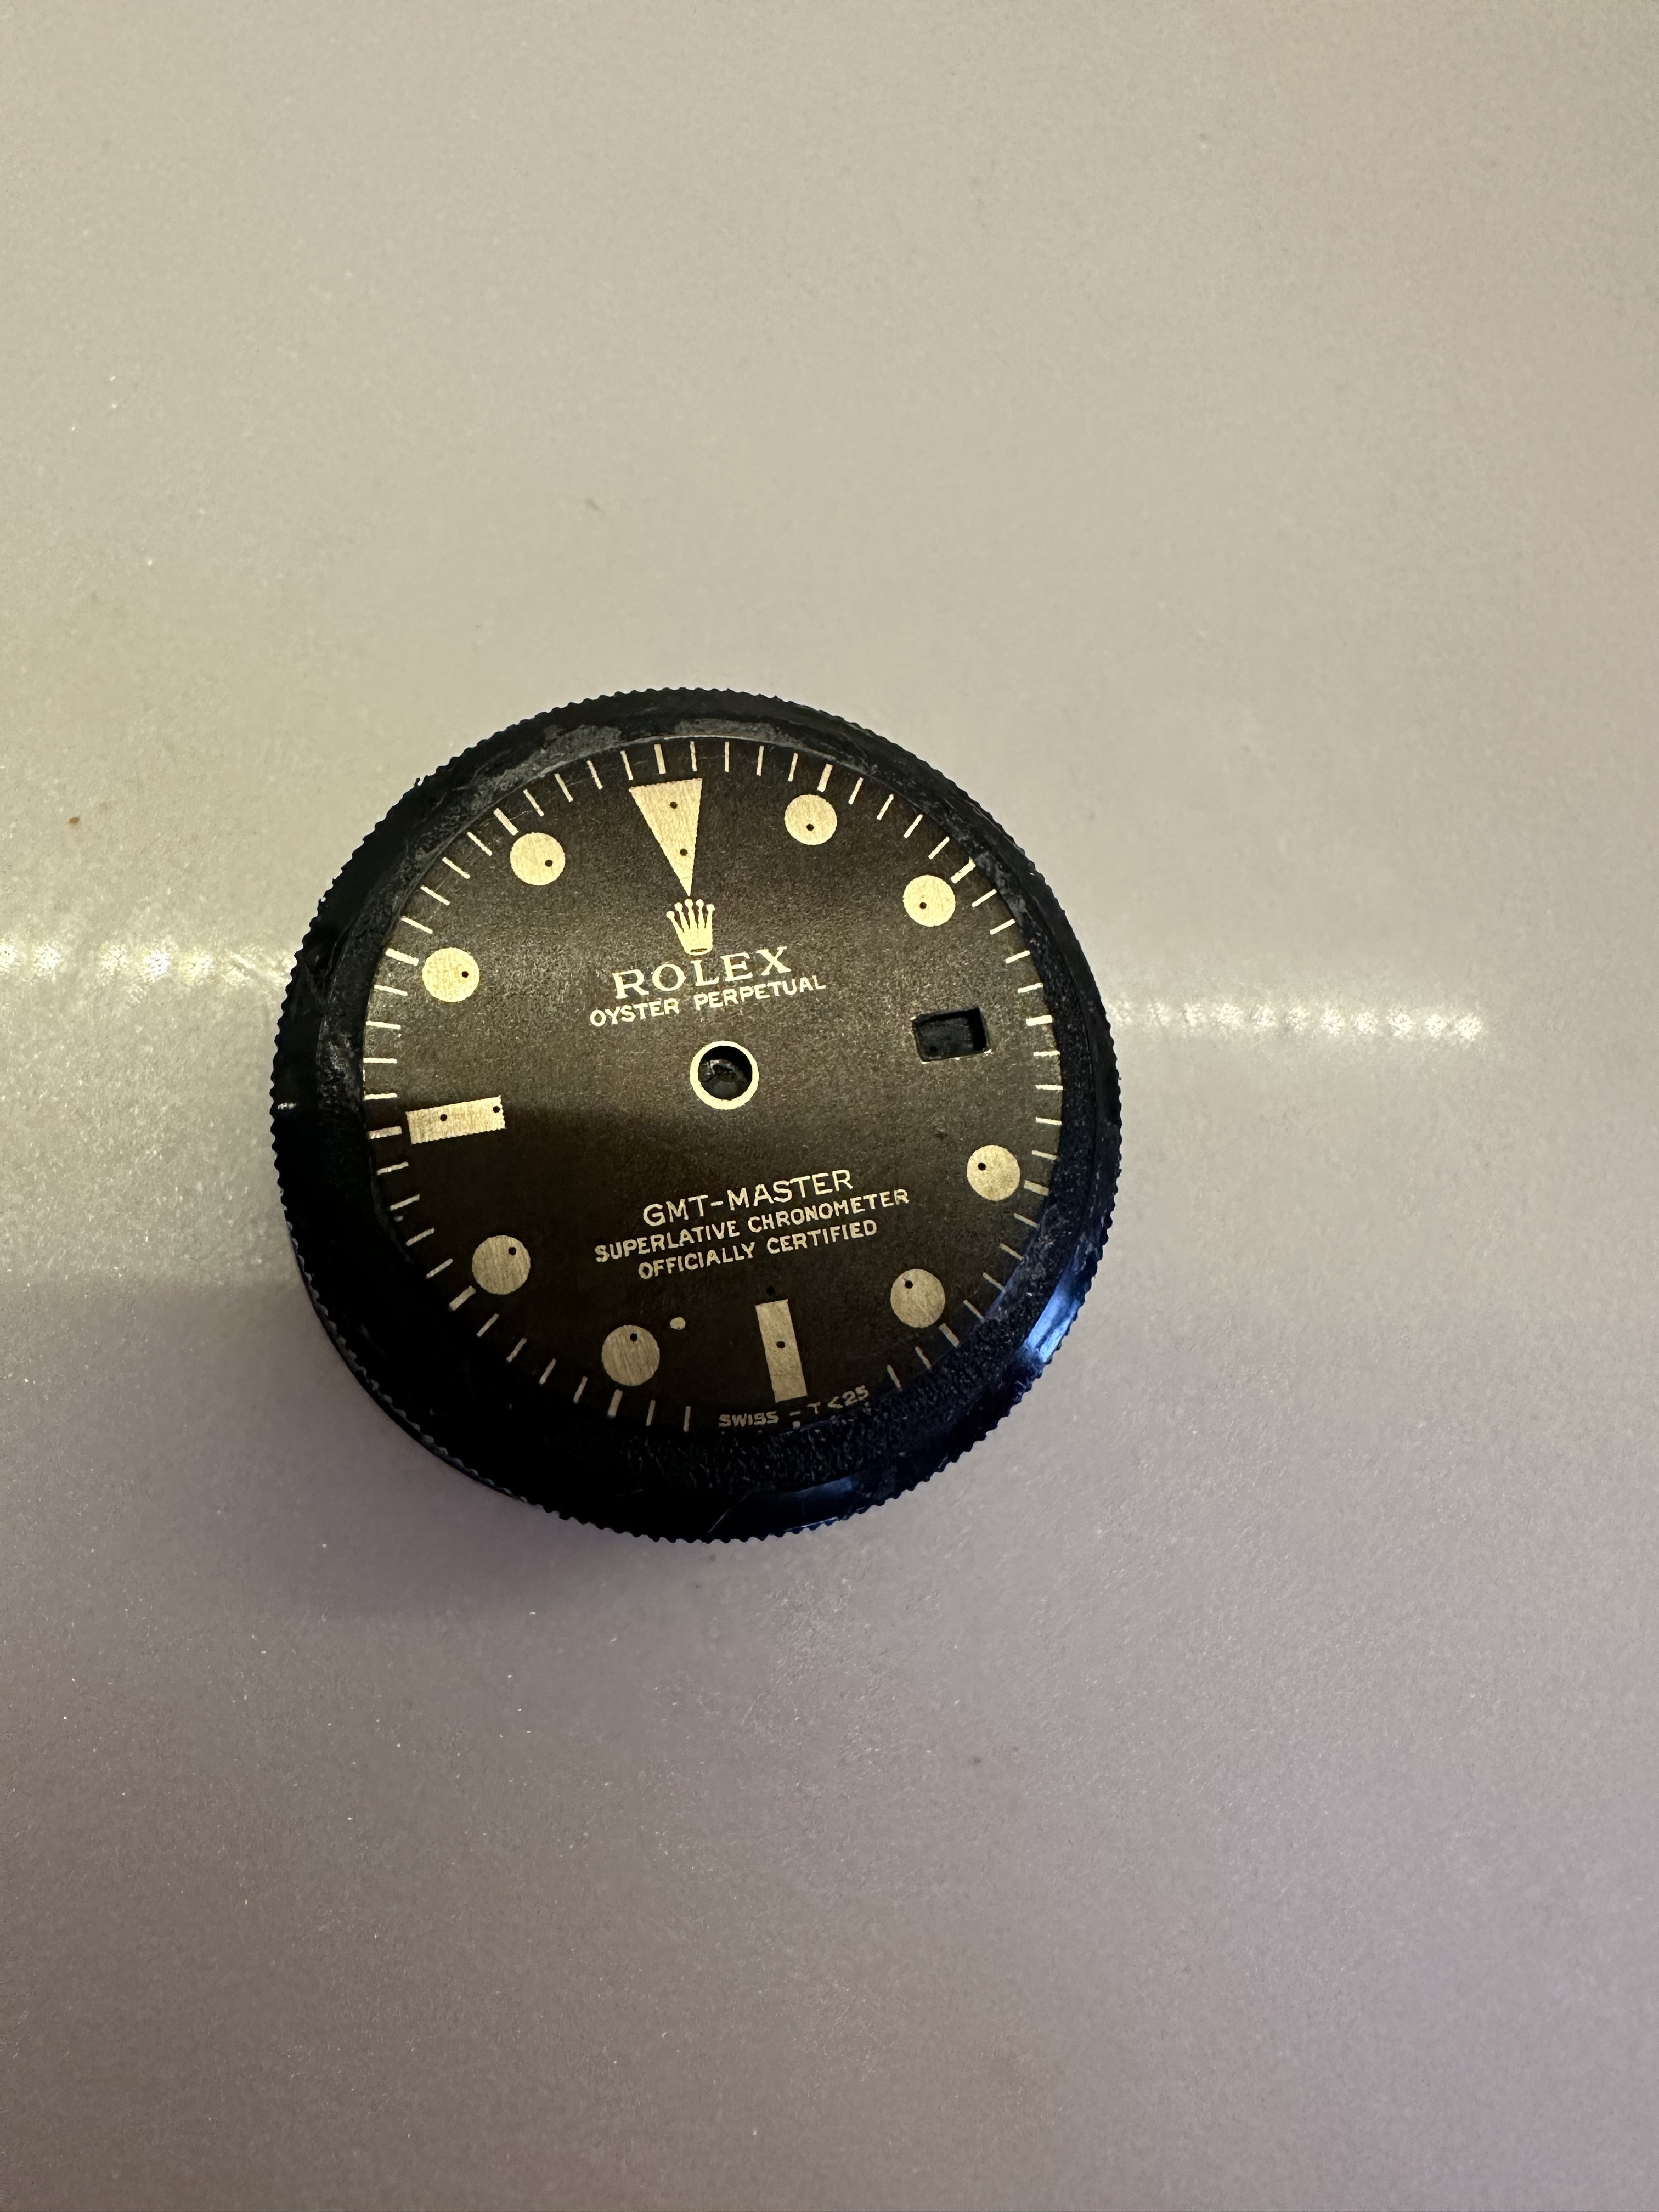
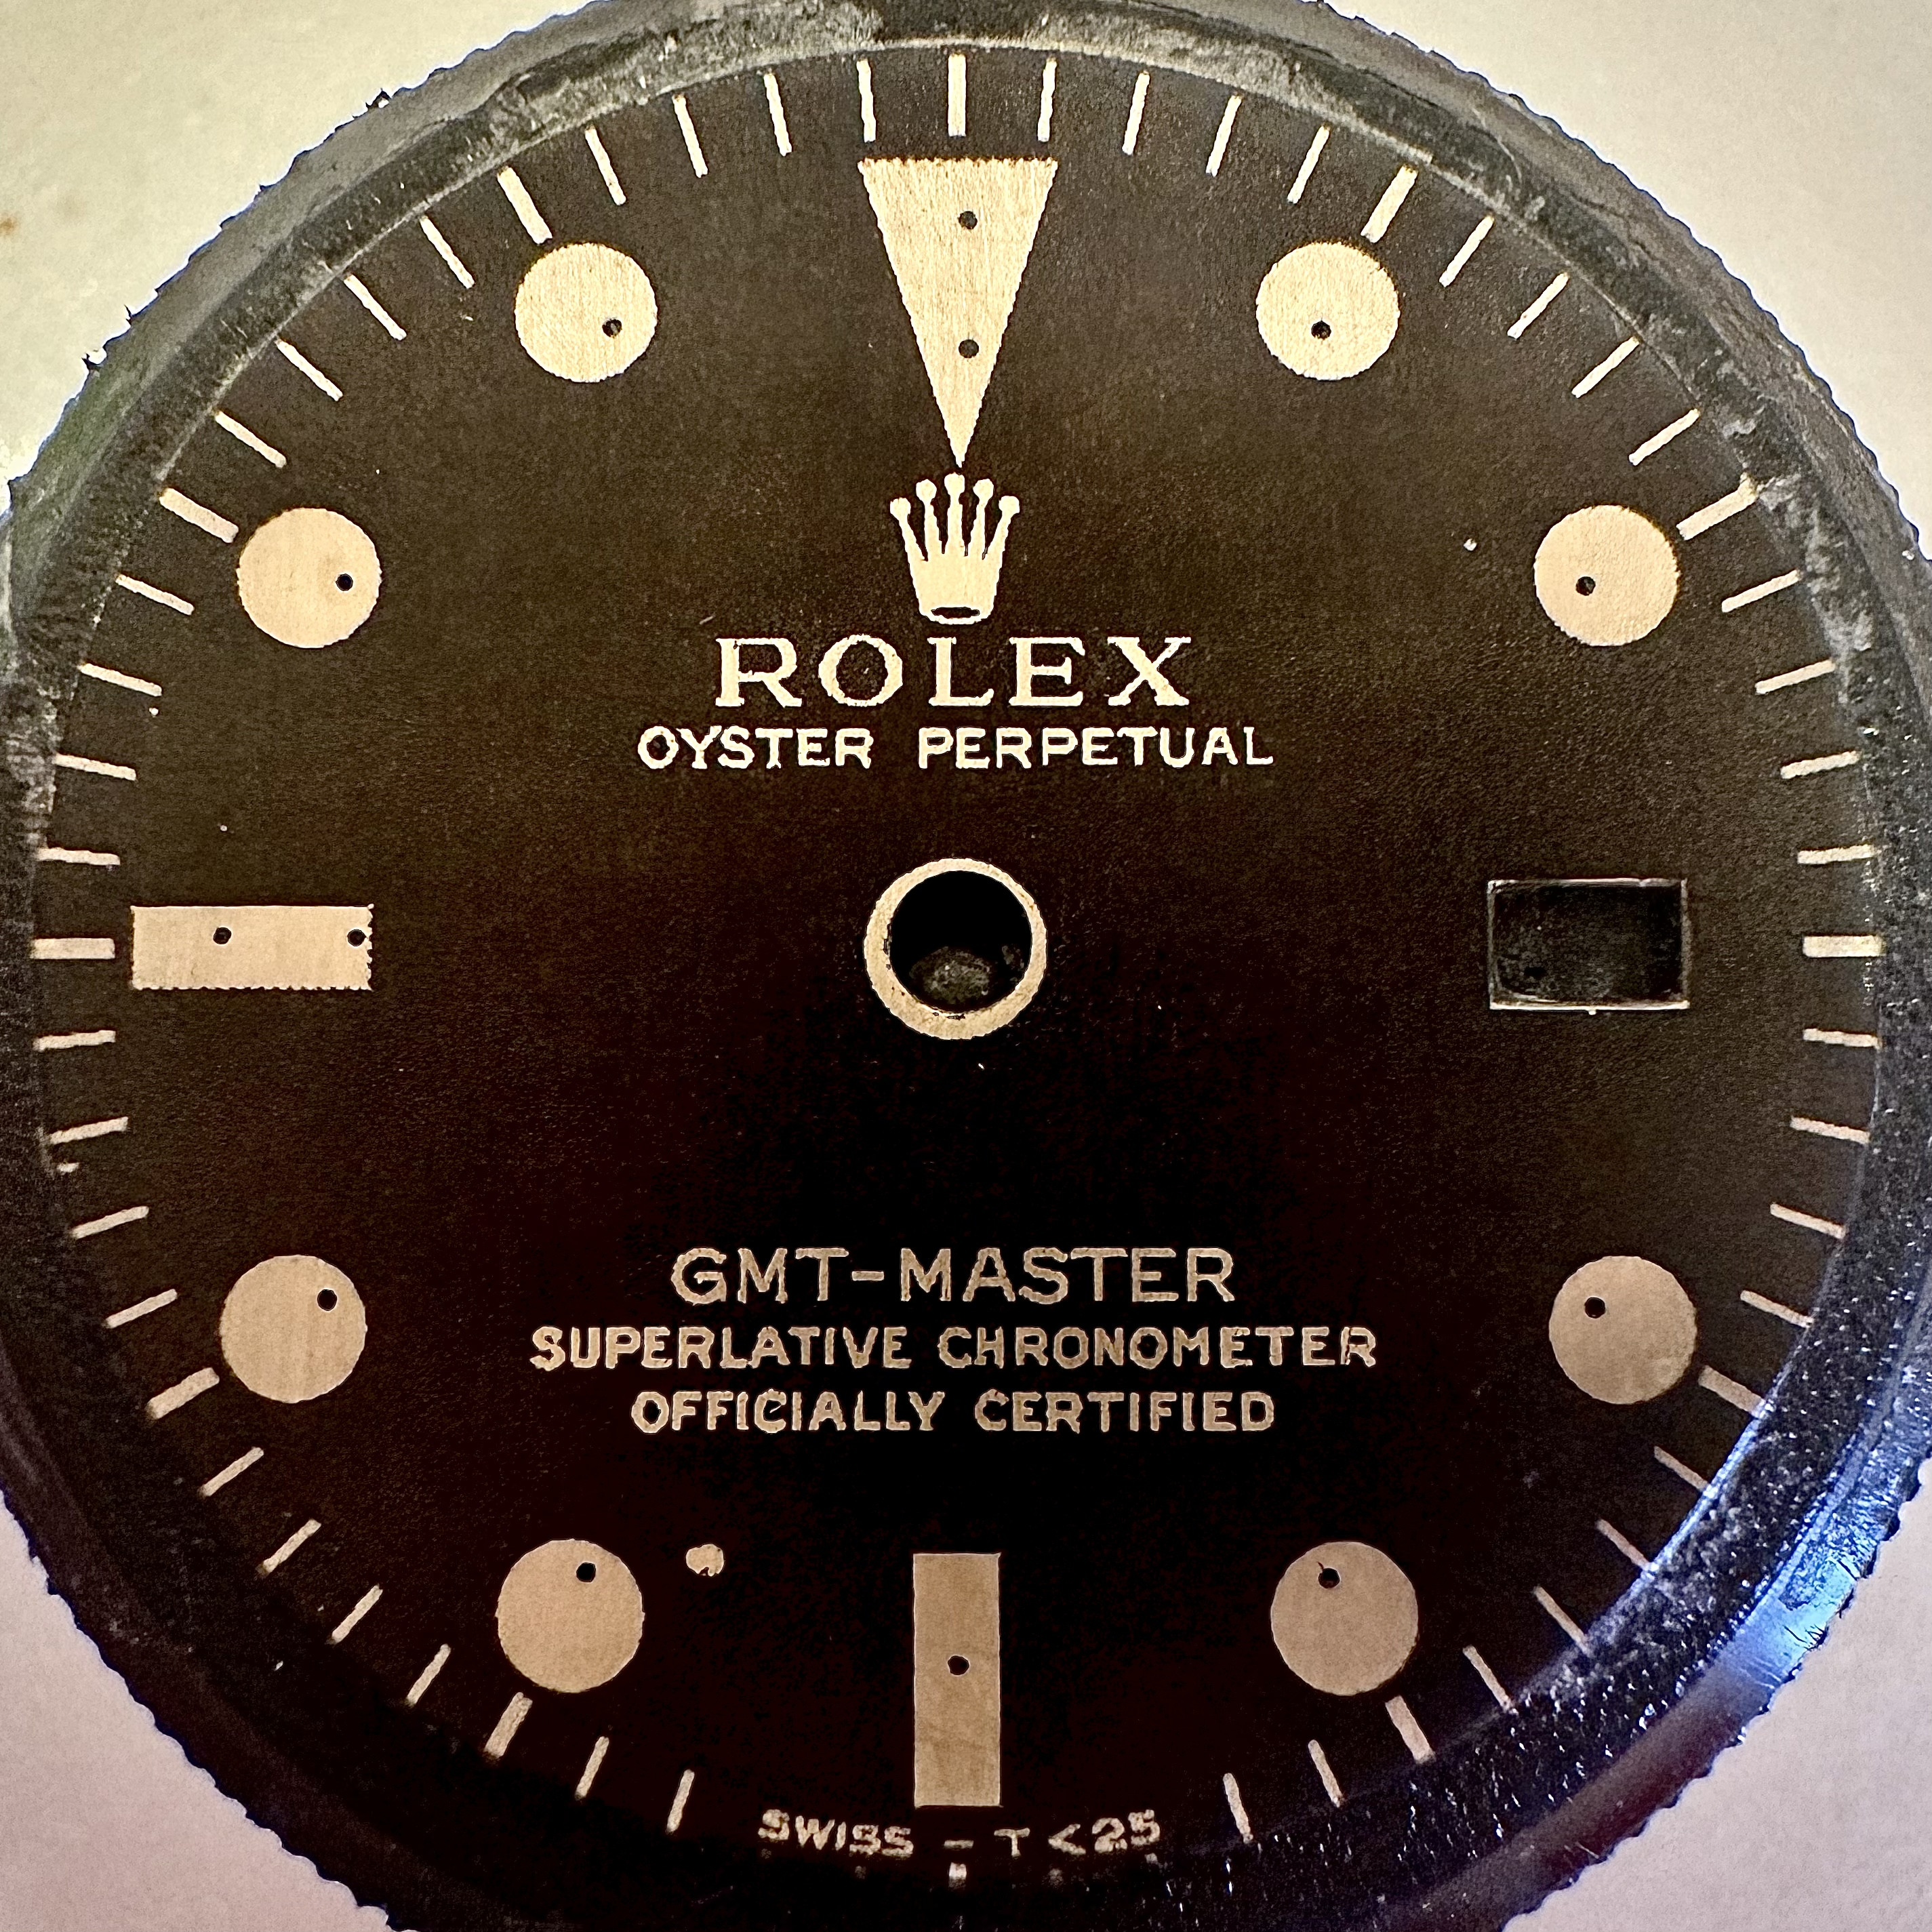
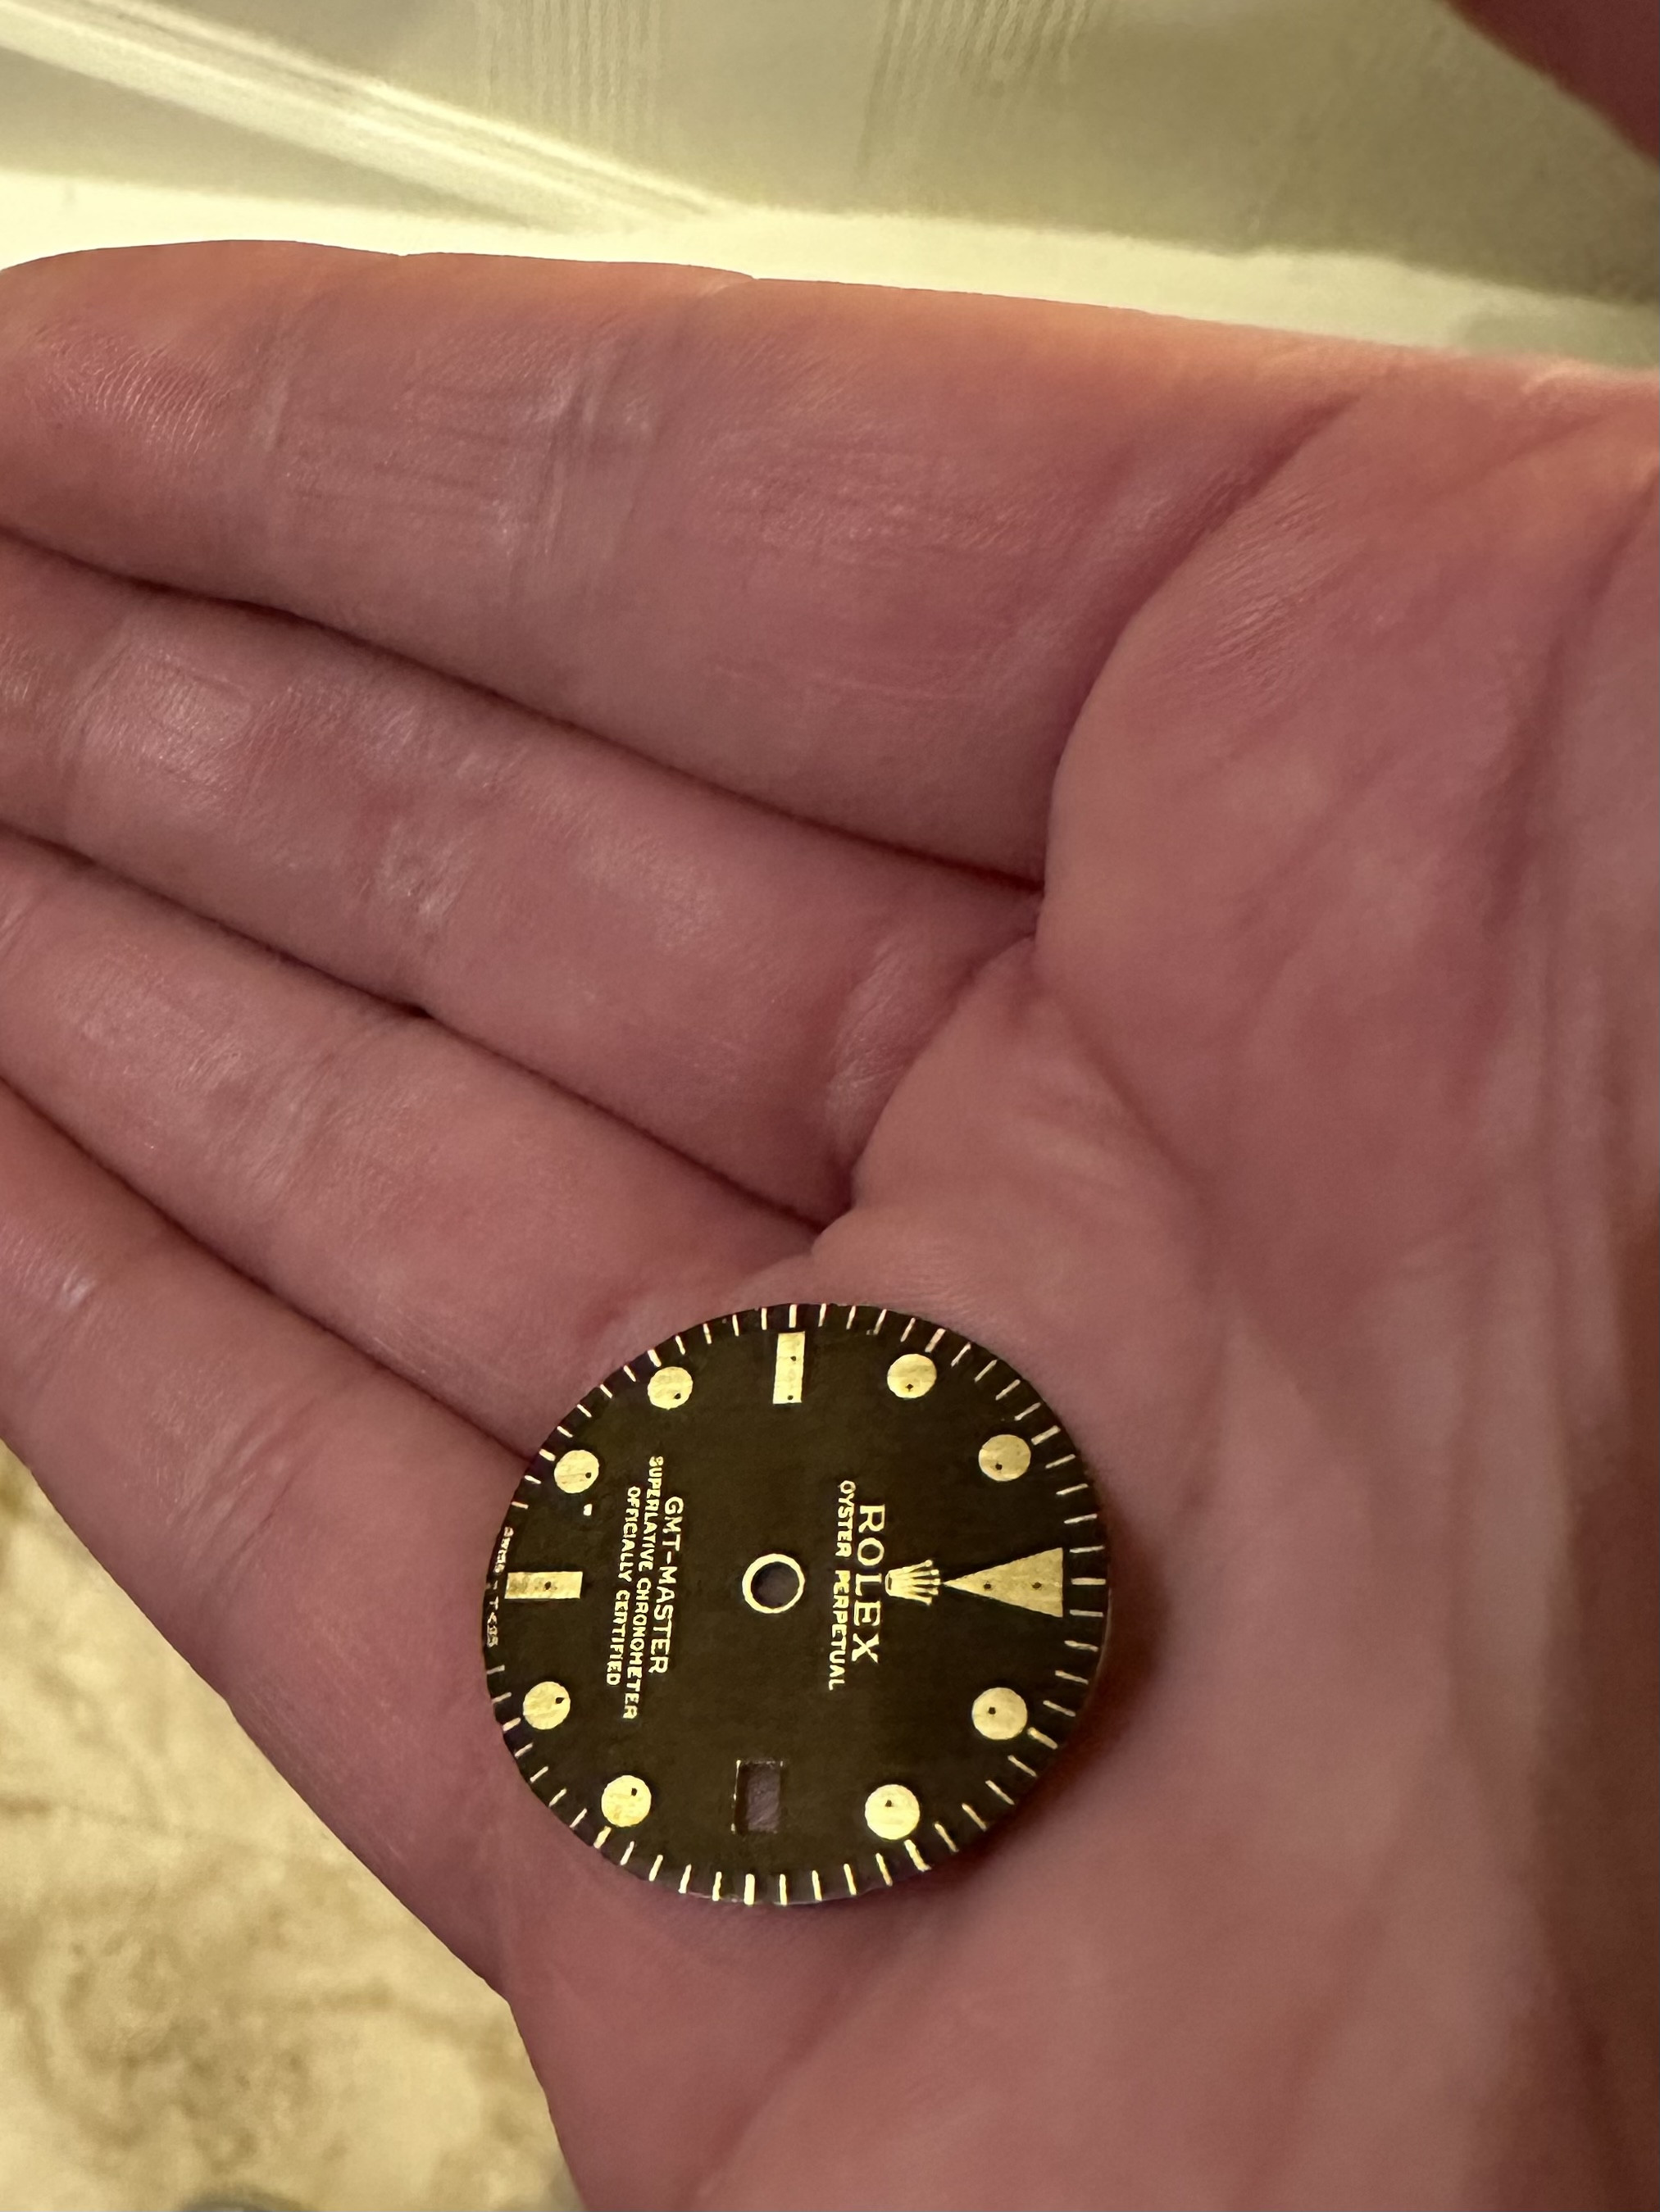
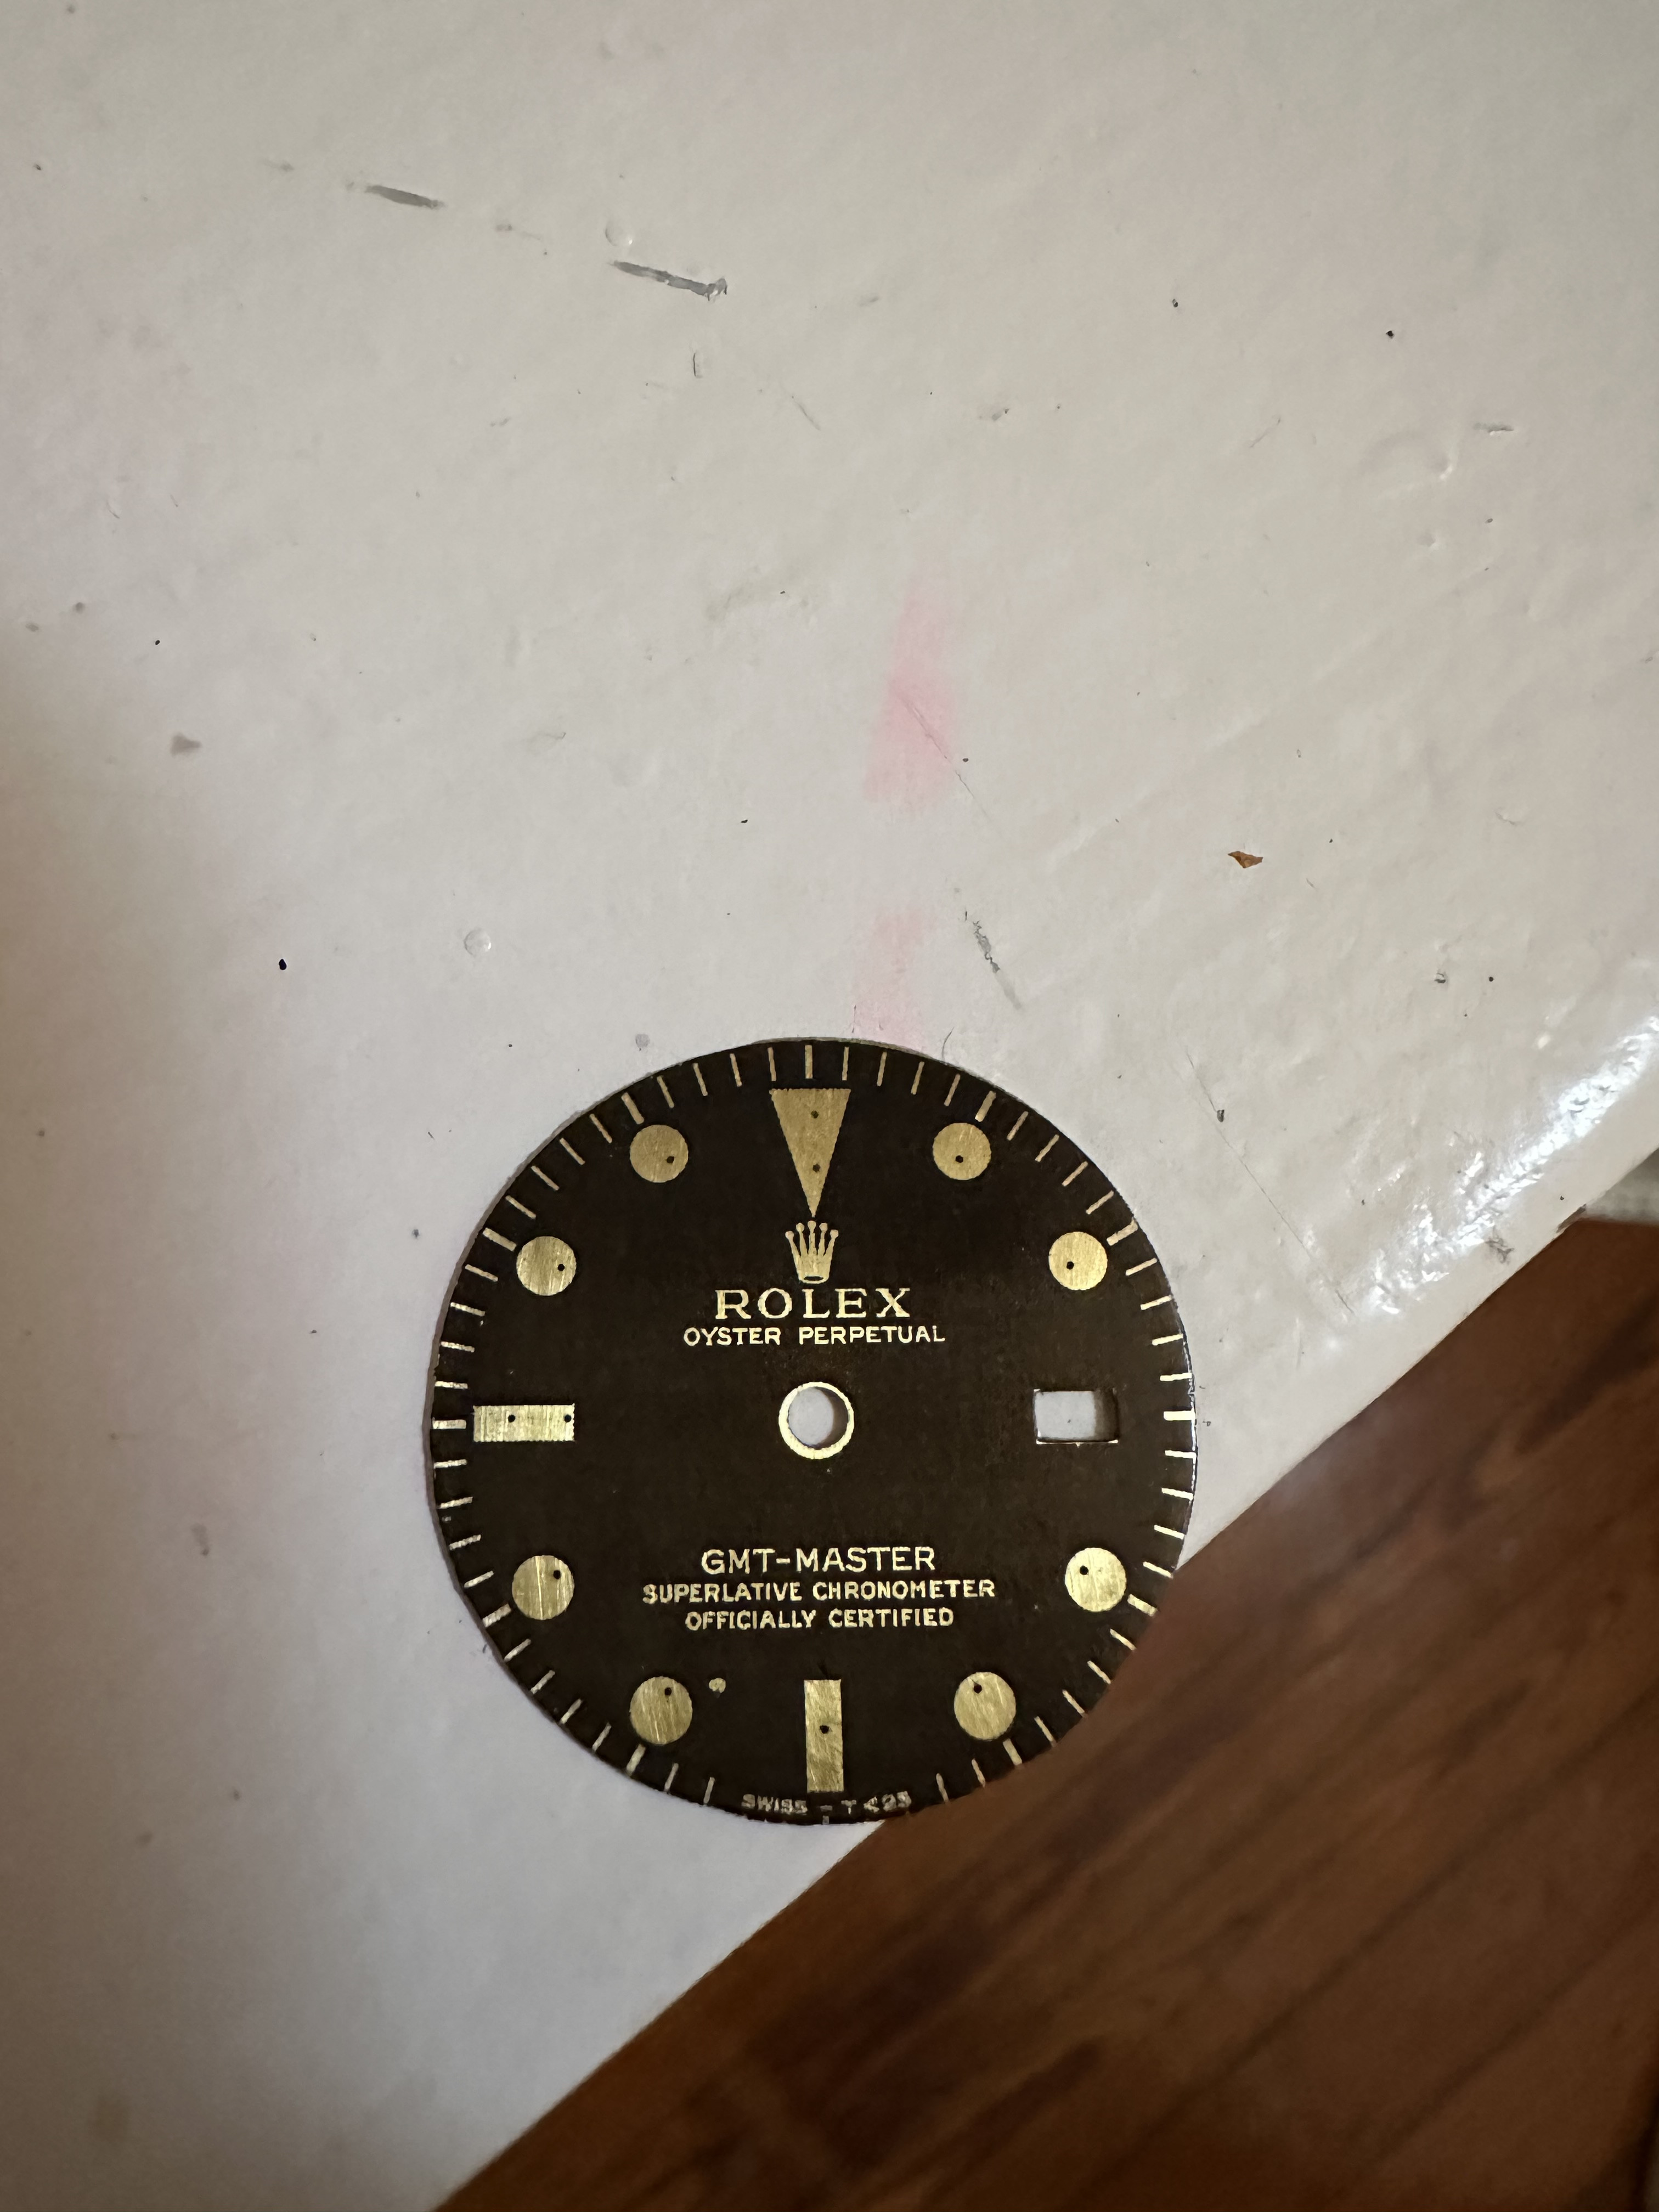
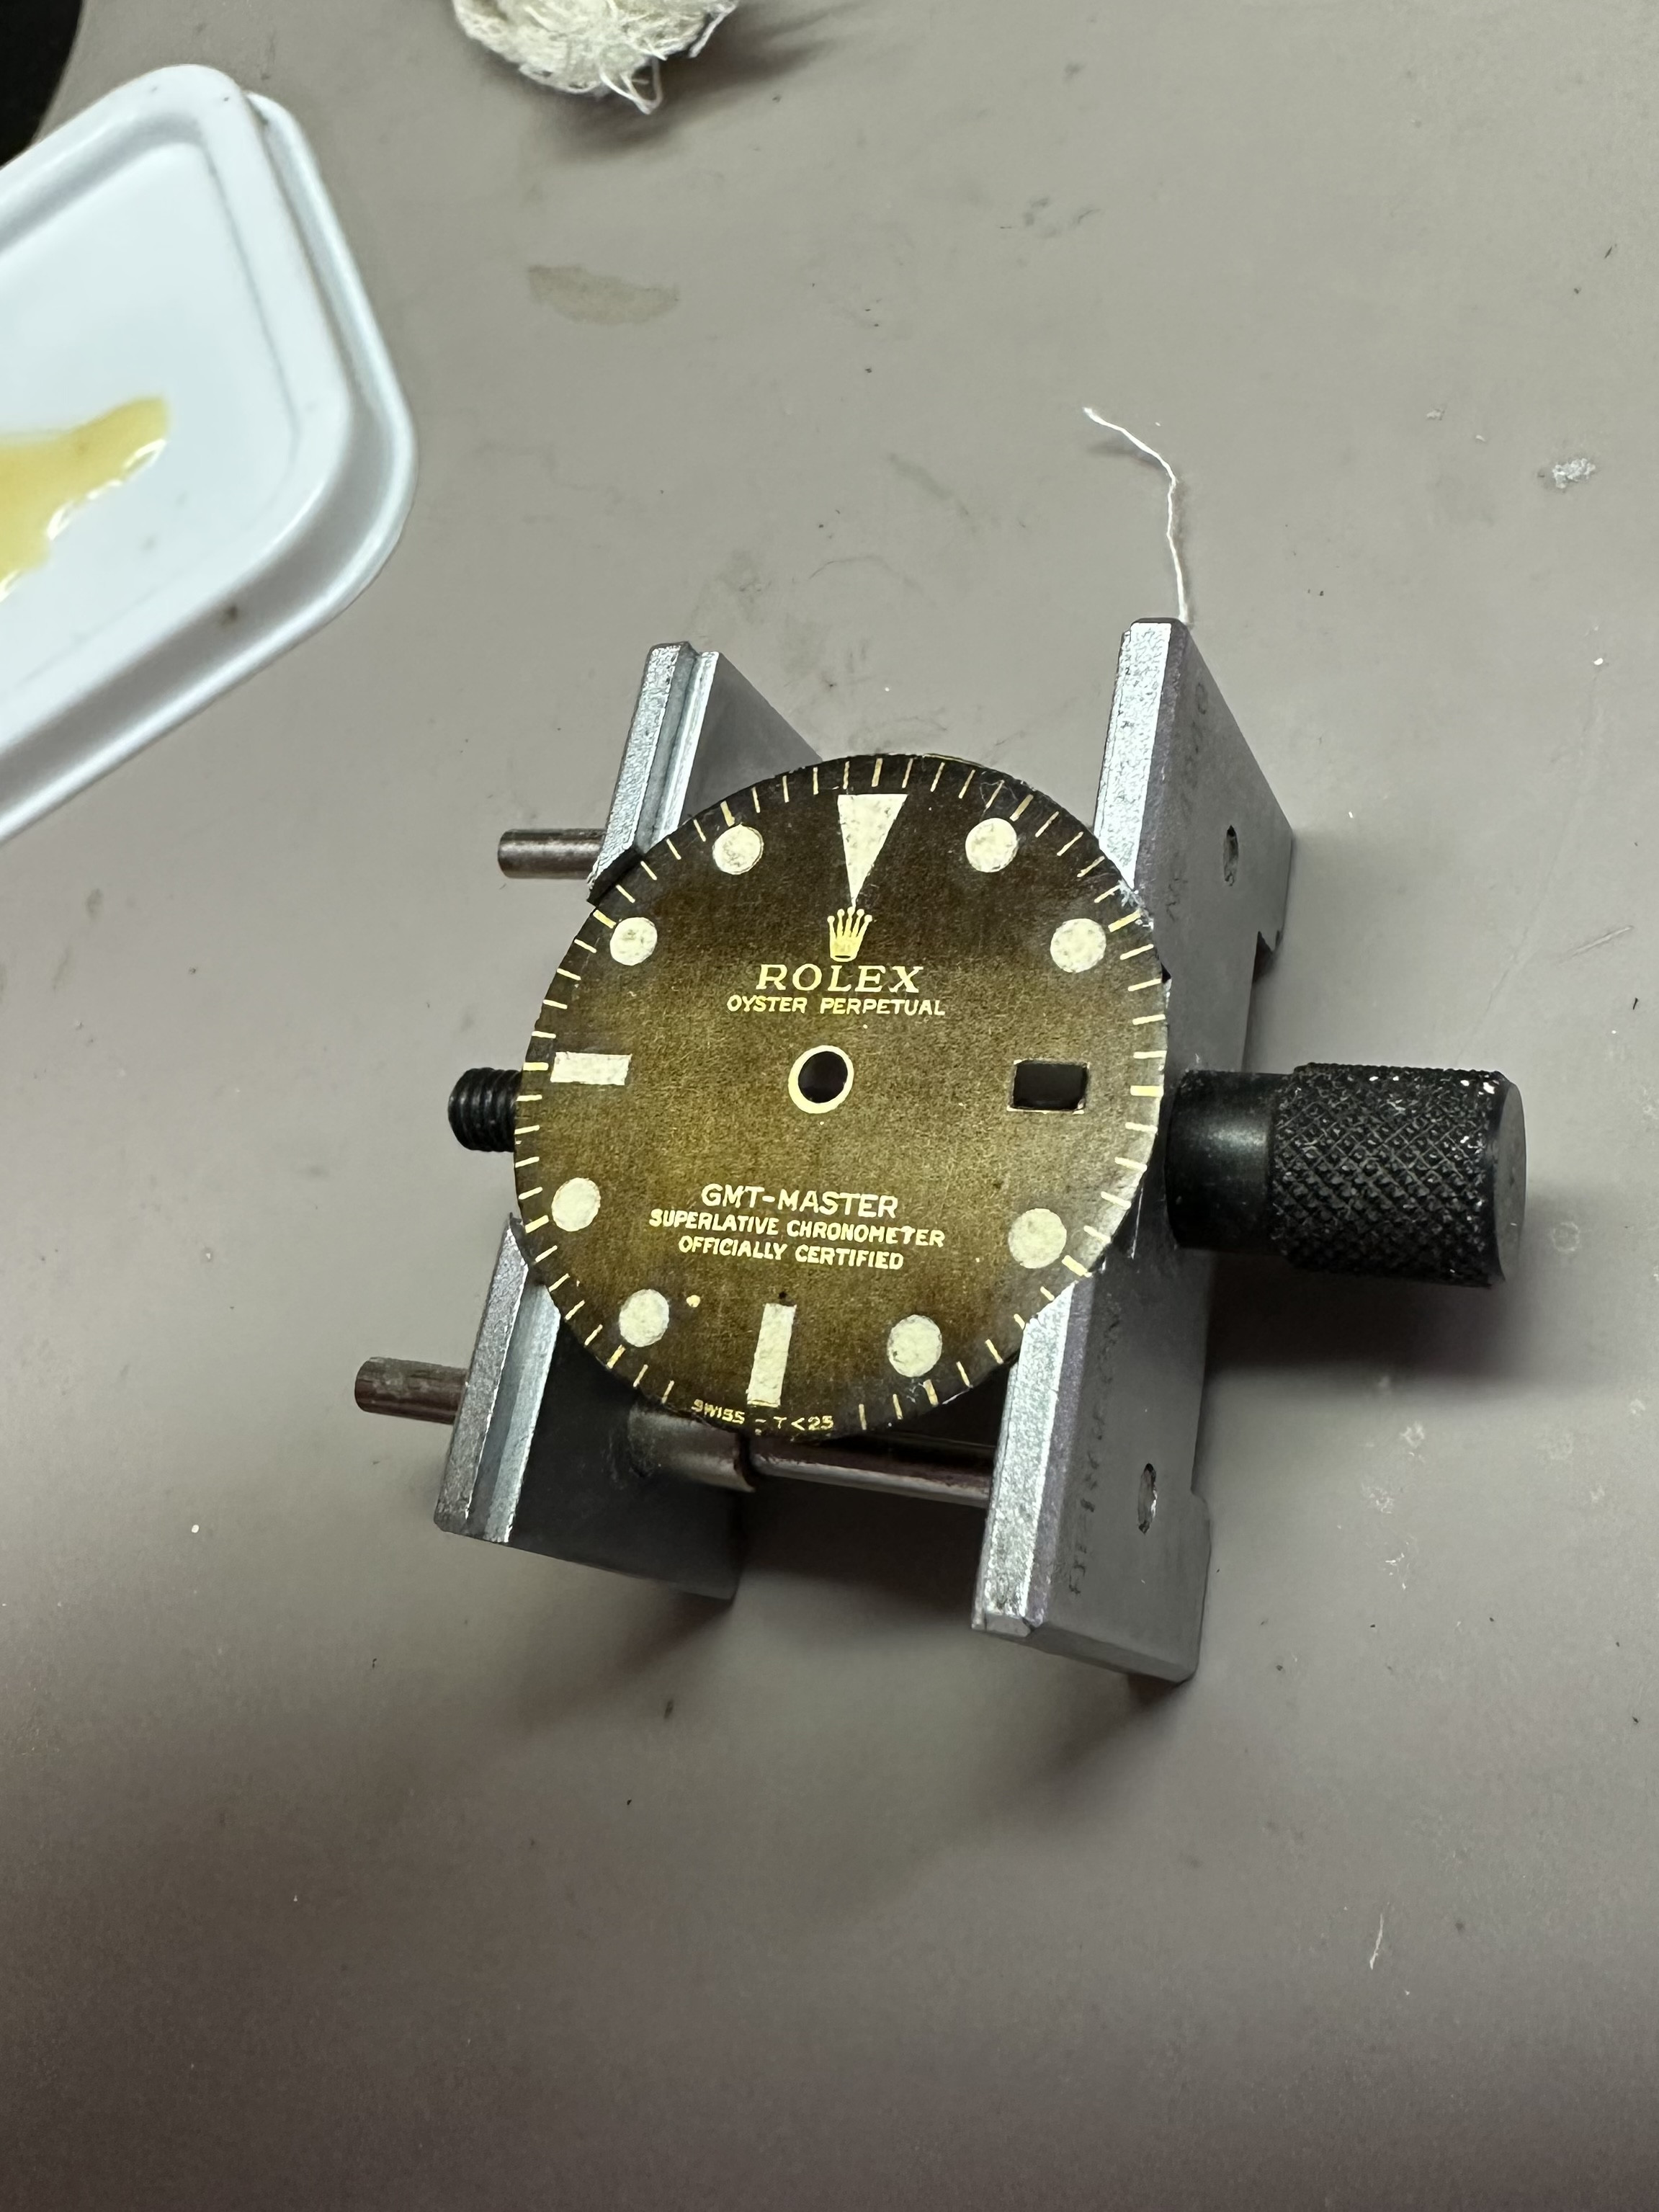
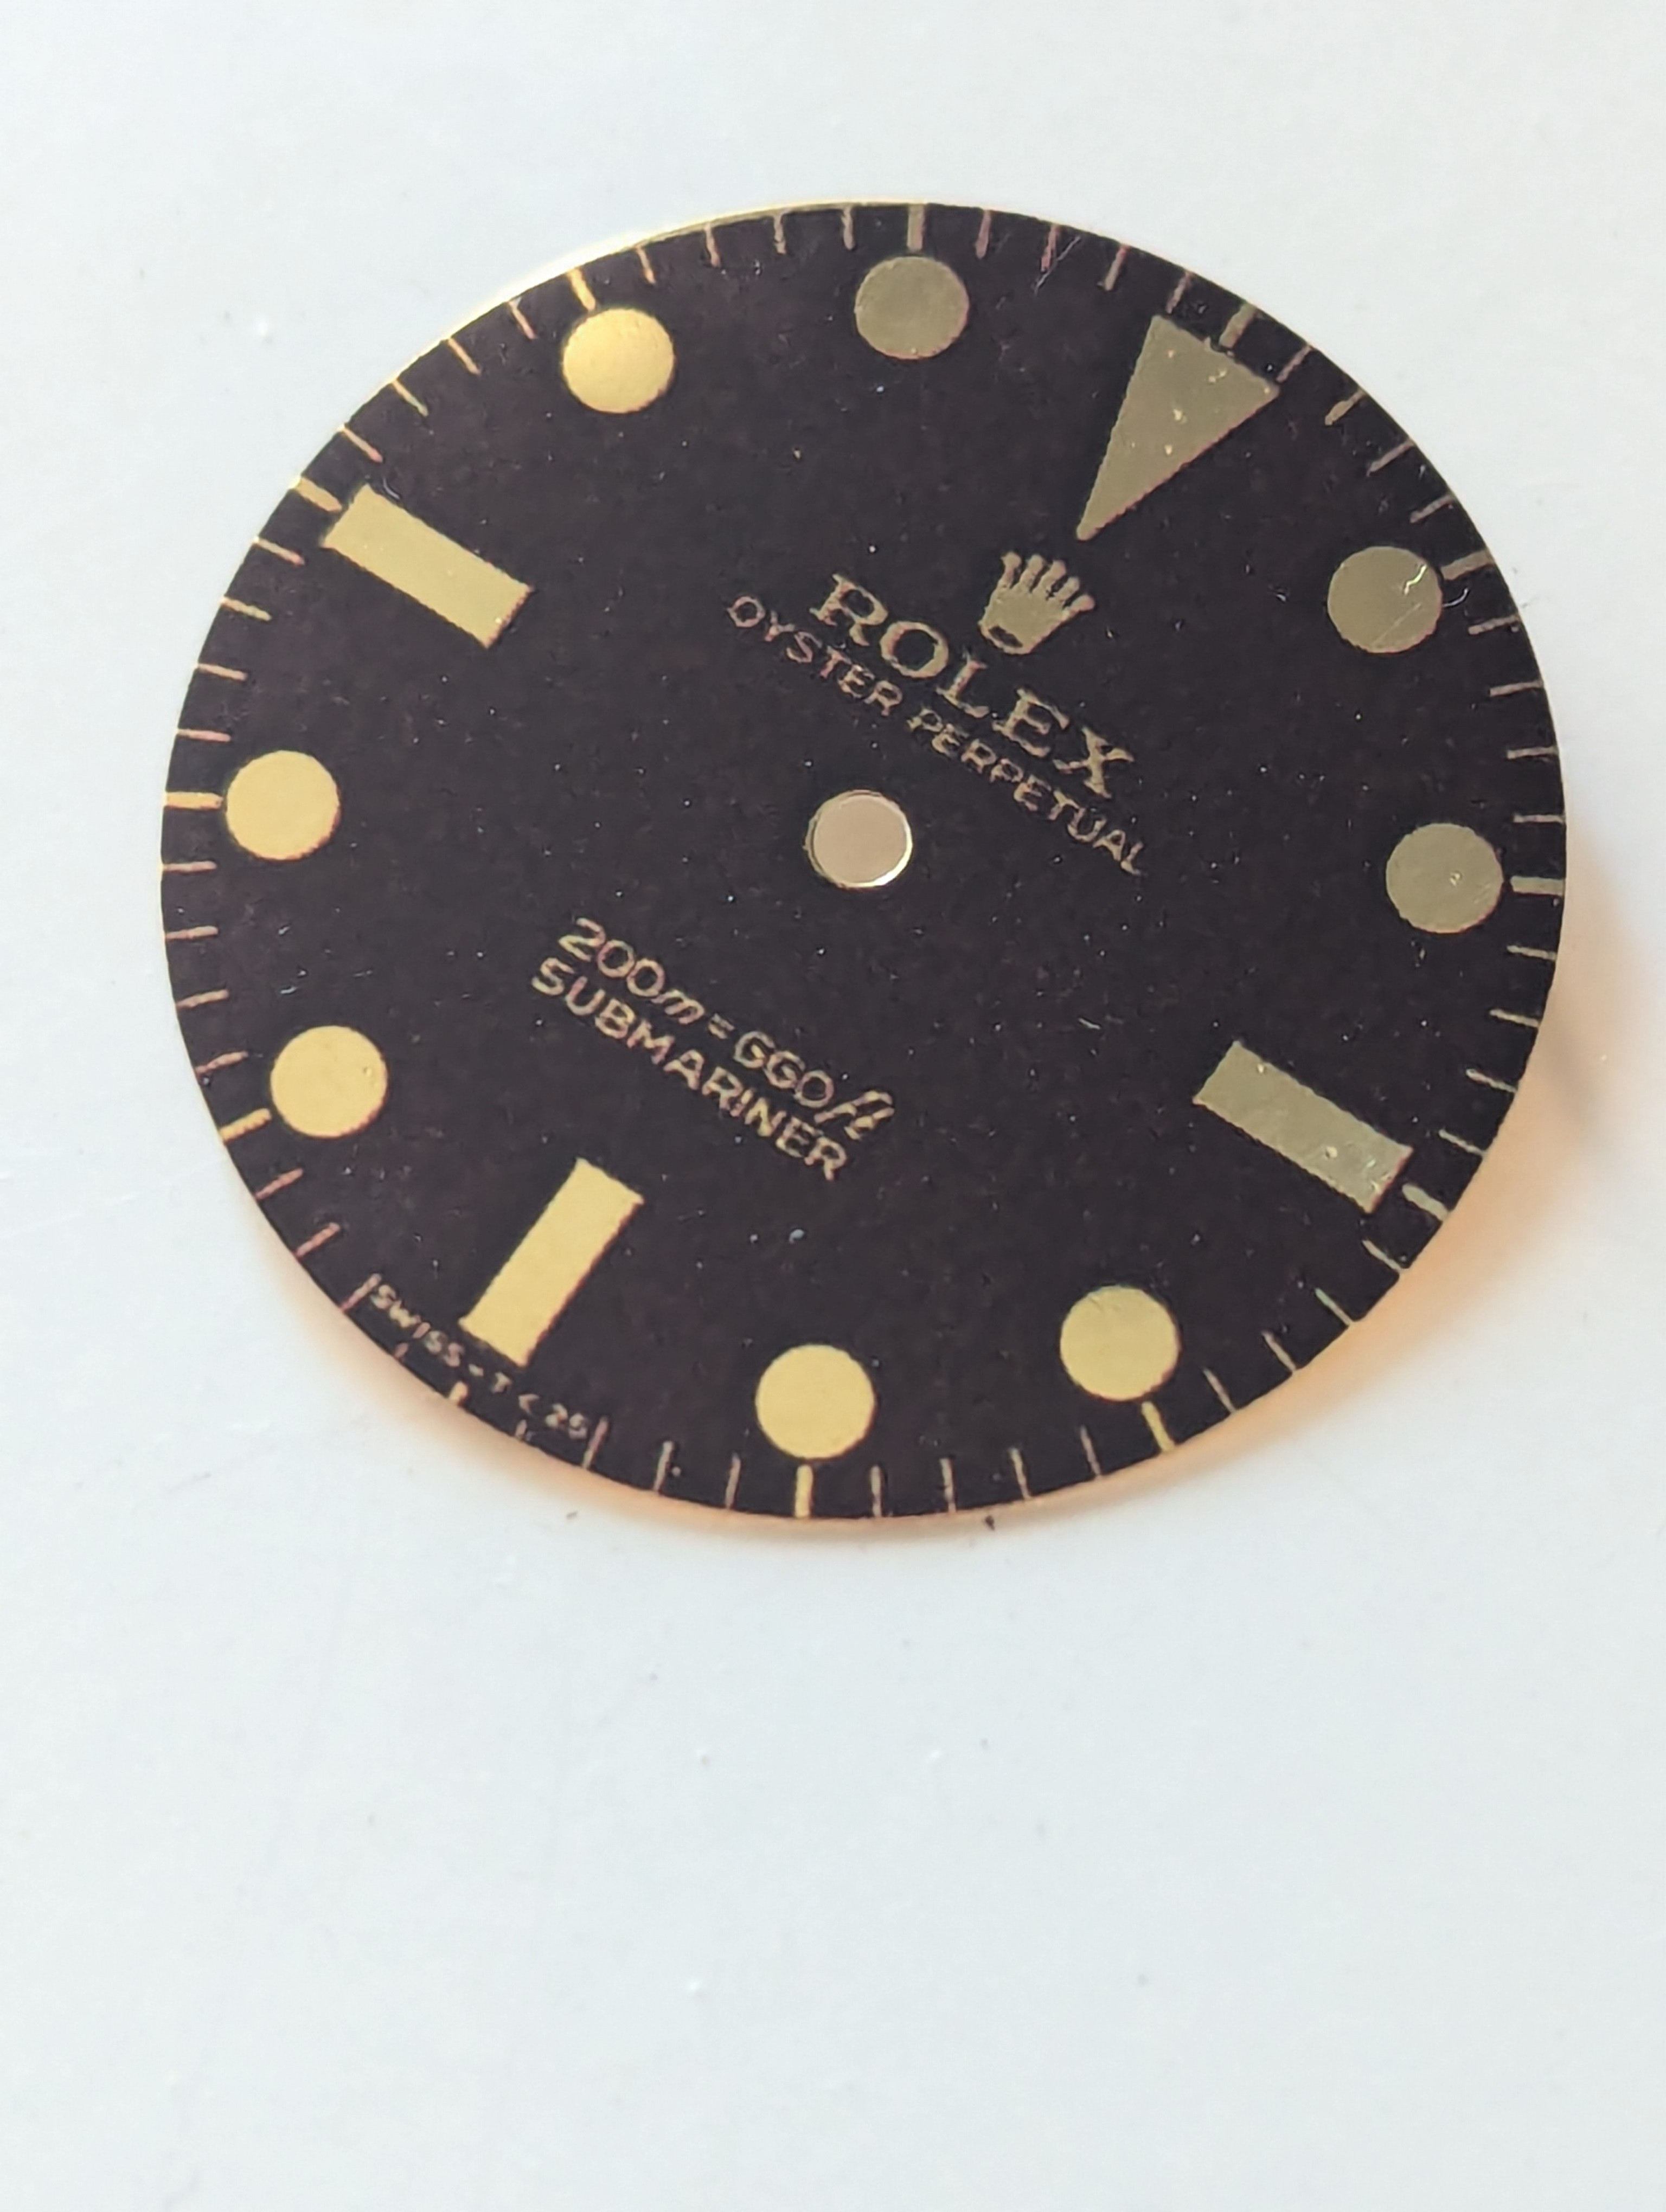
Here's a good print. Dial is clean as a whistle. I heated it up with a hair dryer and avoided a heat sink to avoid under heating. Used a glass vial and a paint brush to continually apply pressure while heating. It's applied well, and there are no smears or smudges.

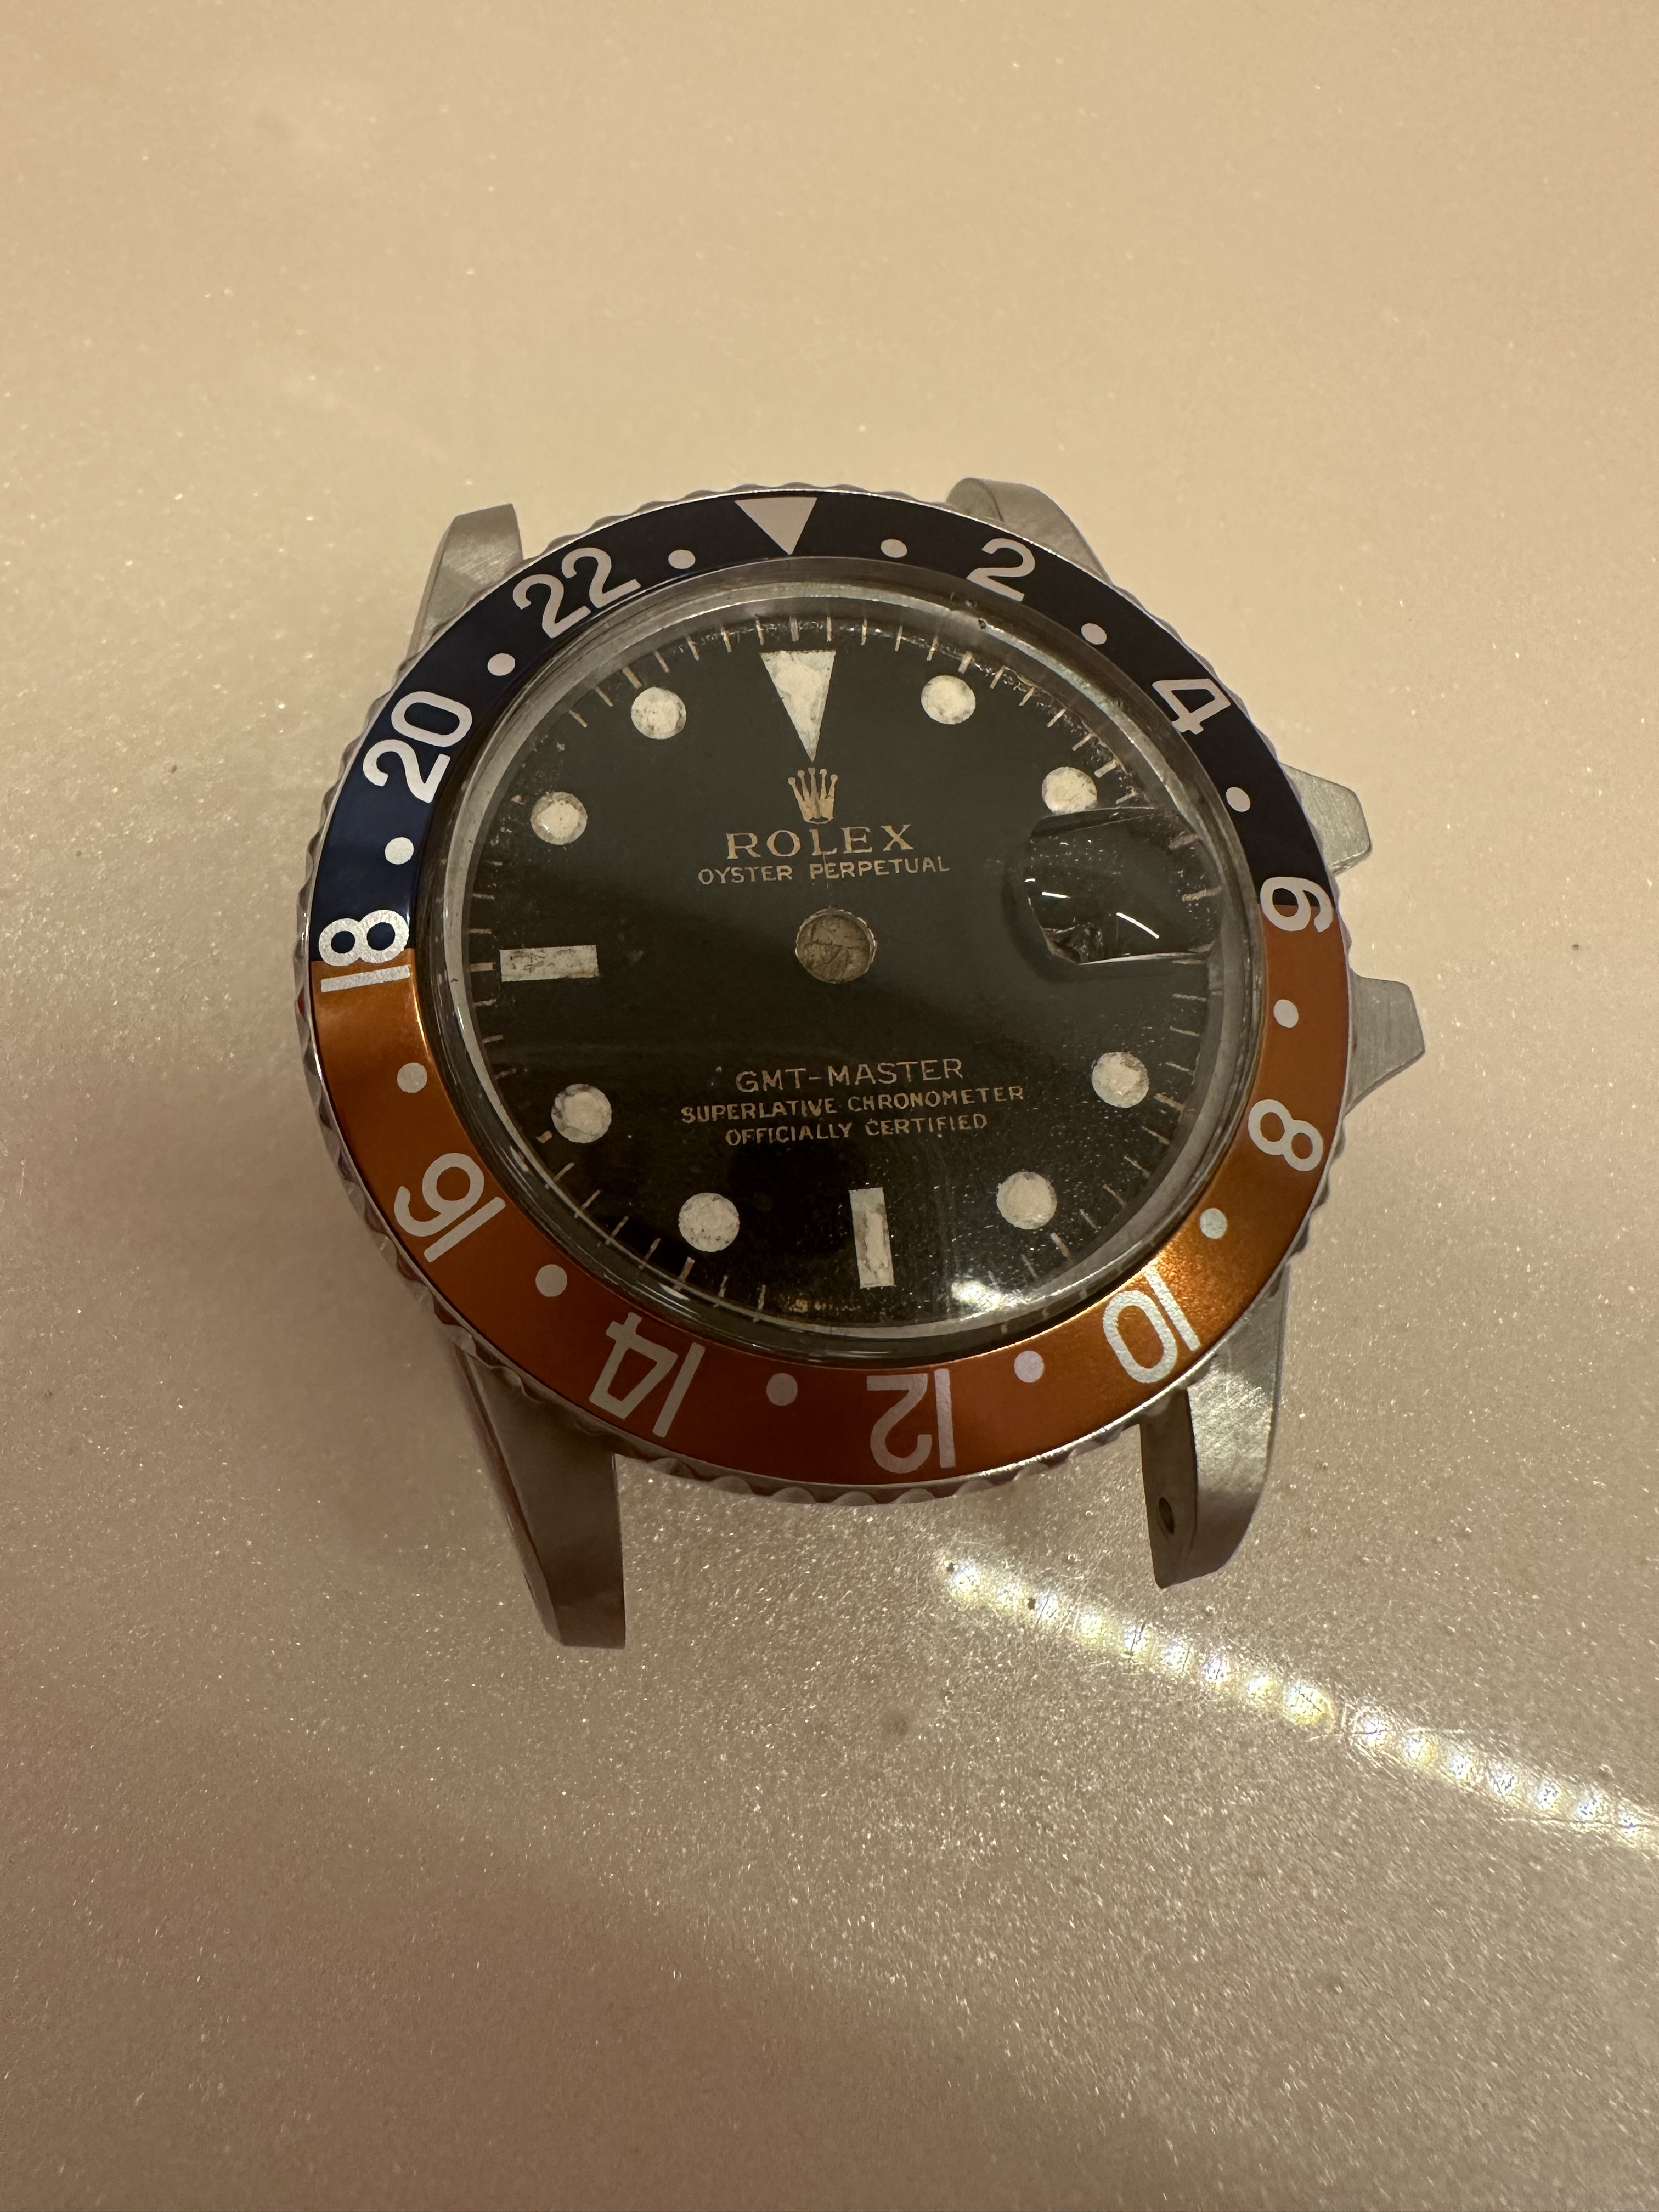
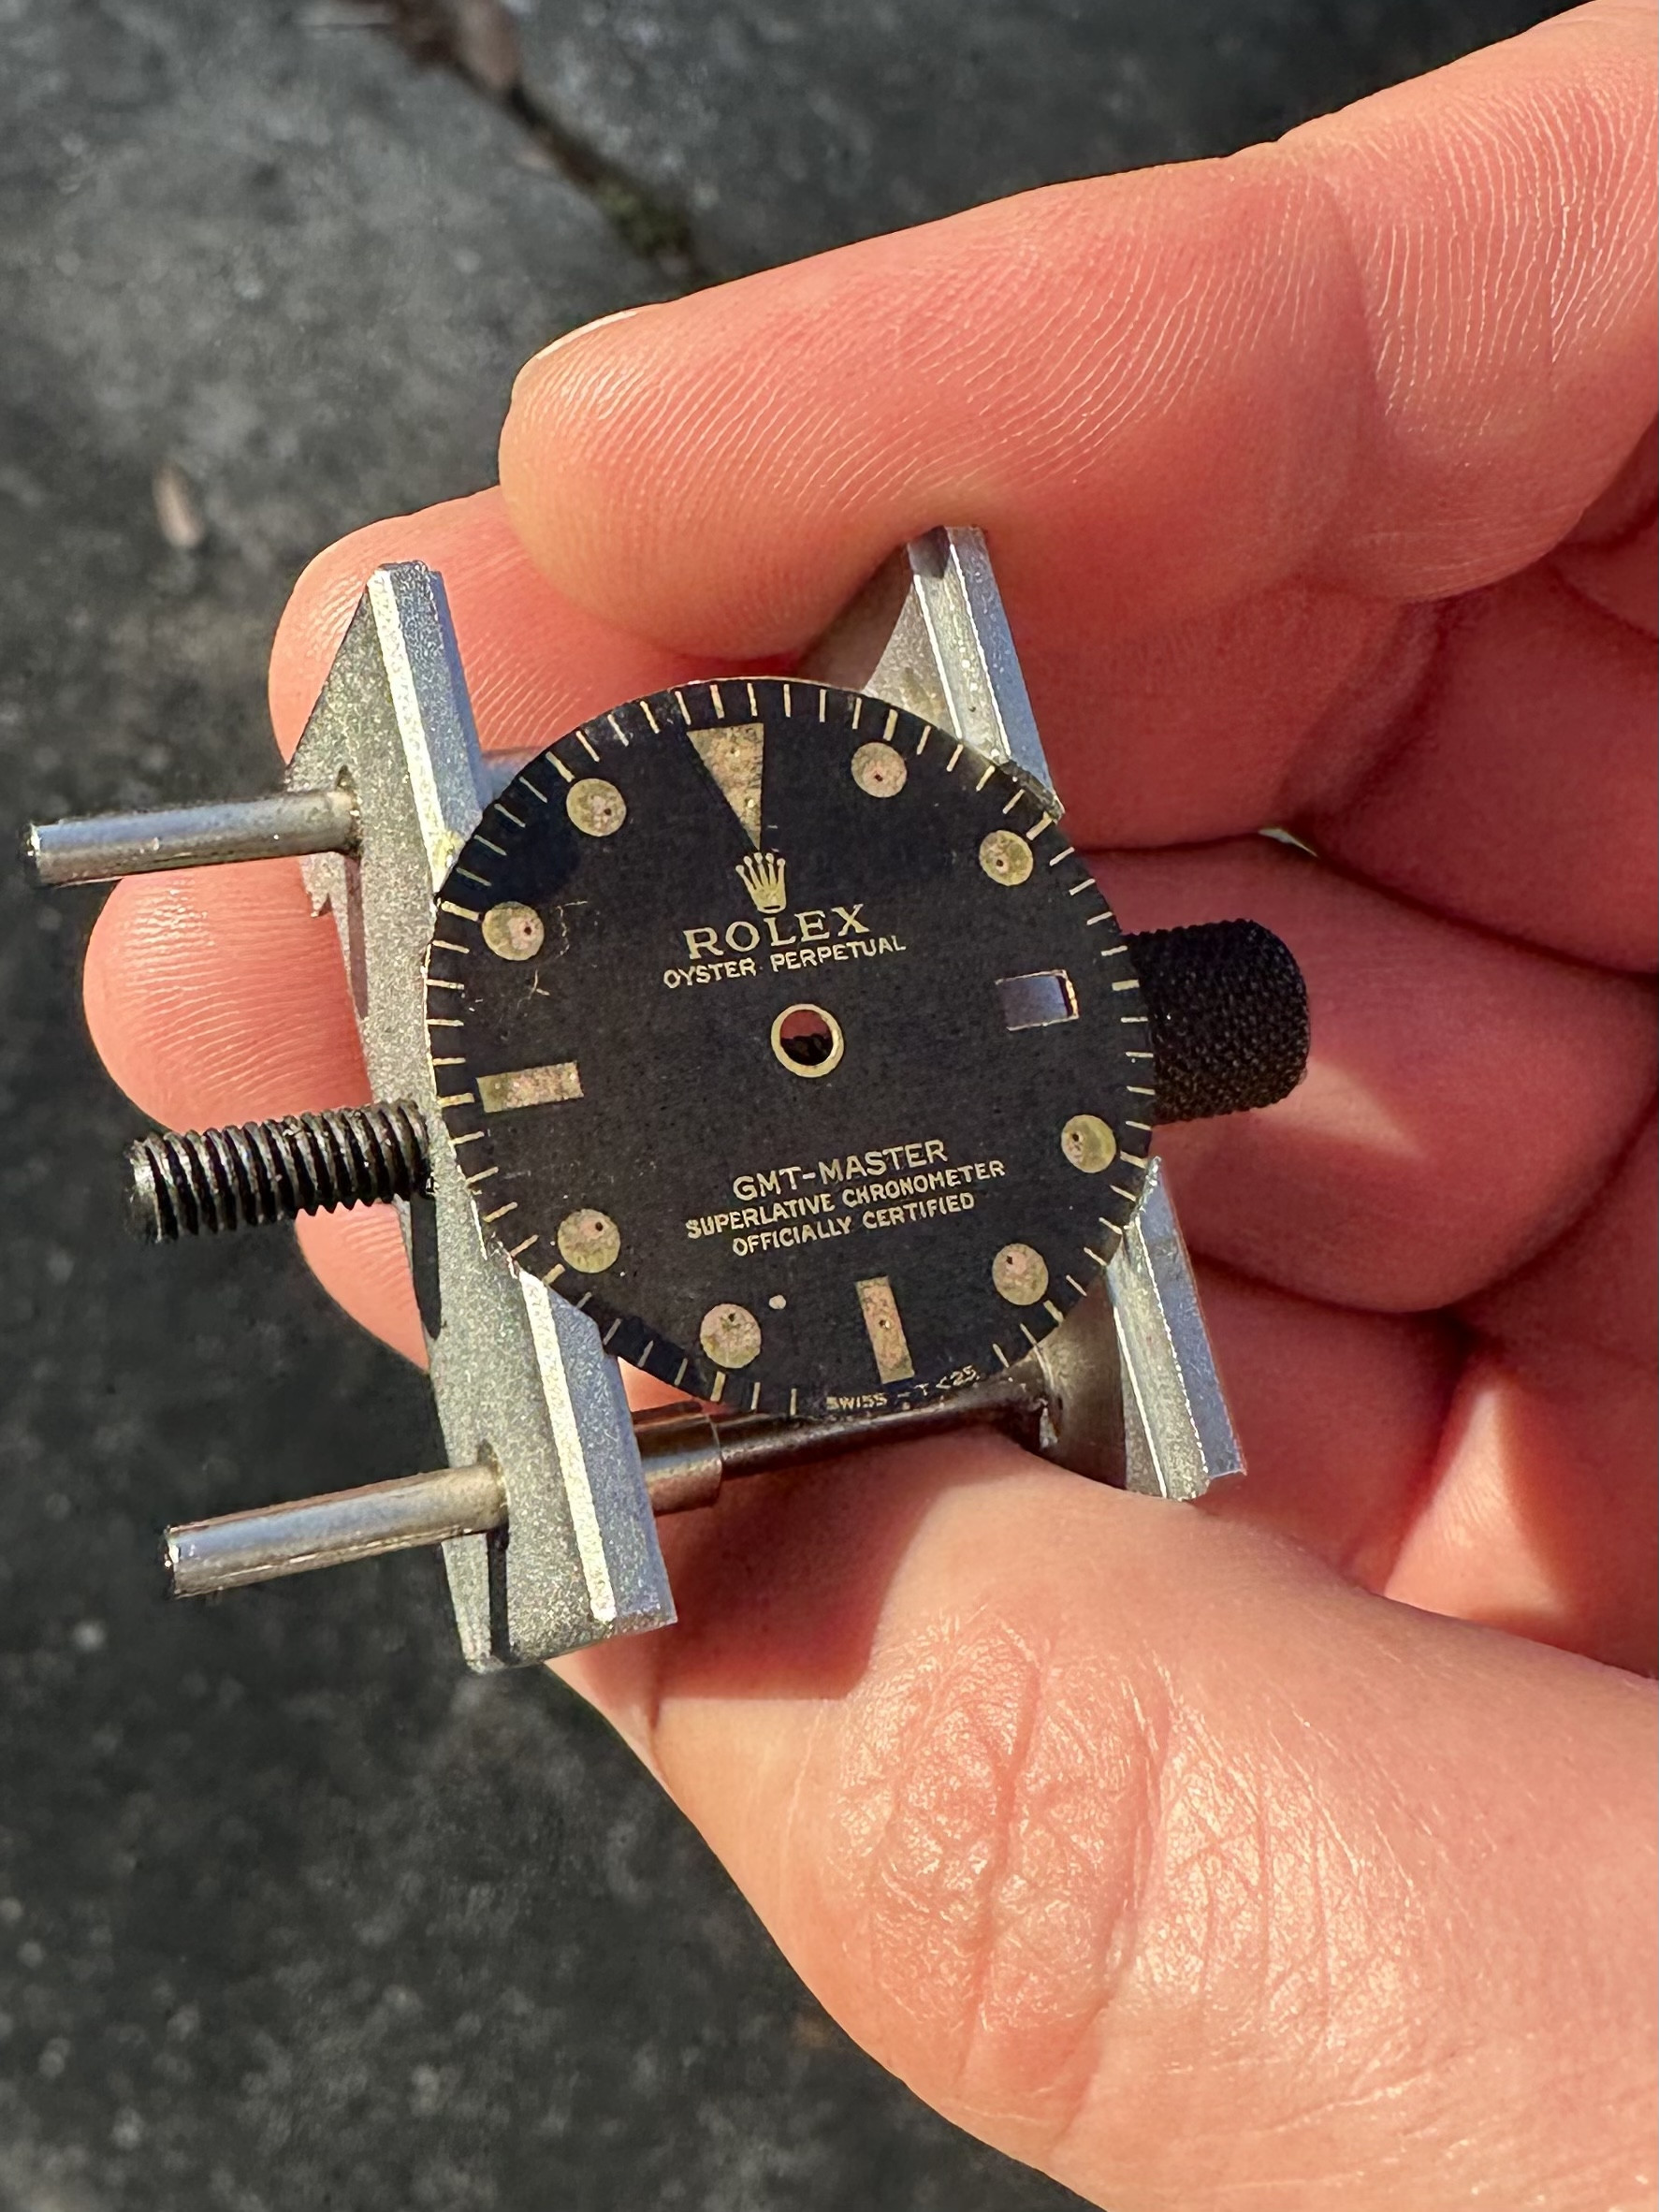
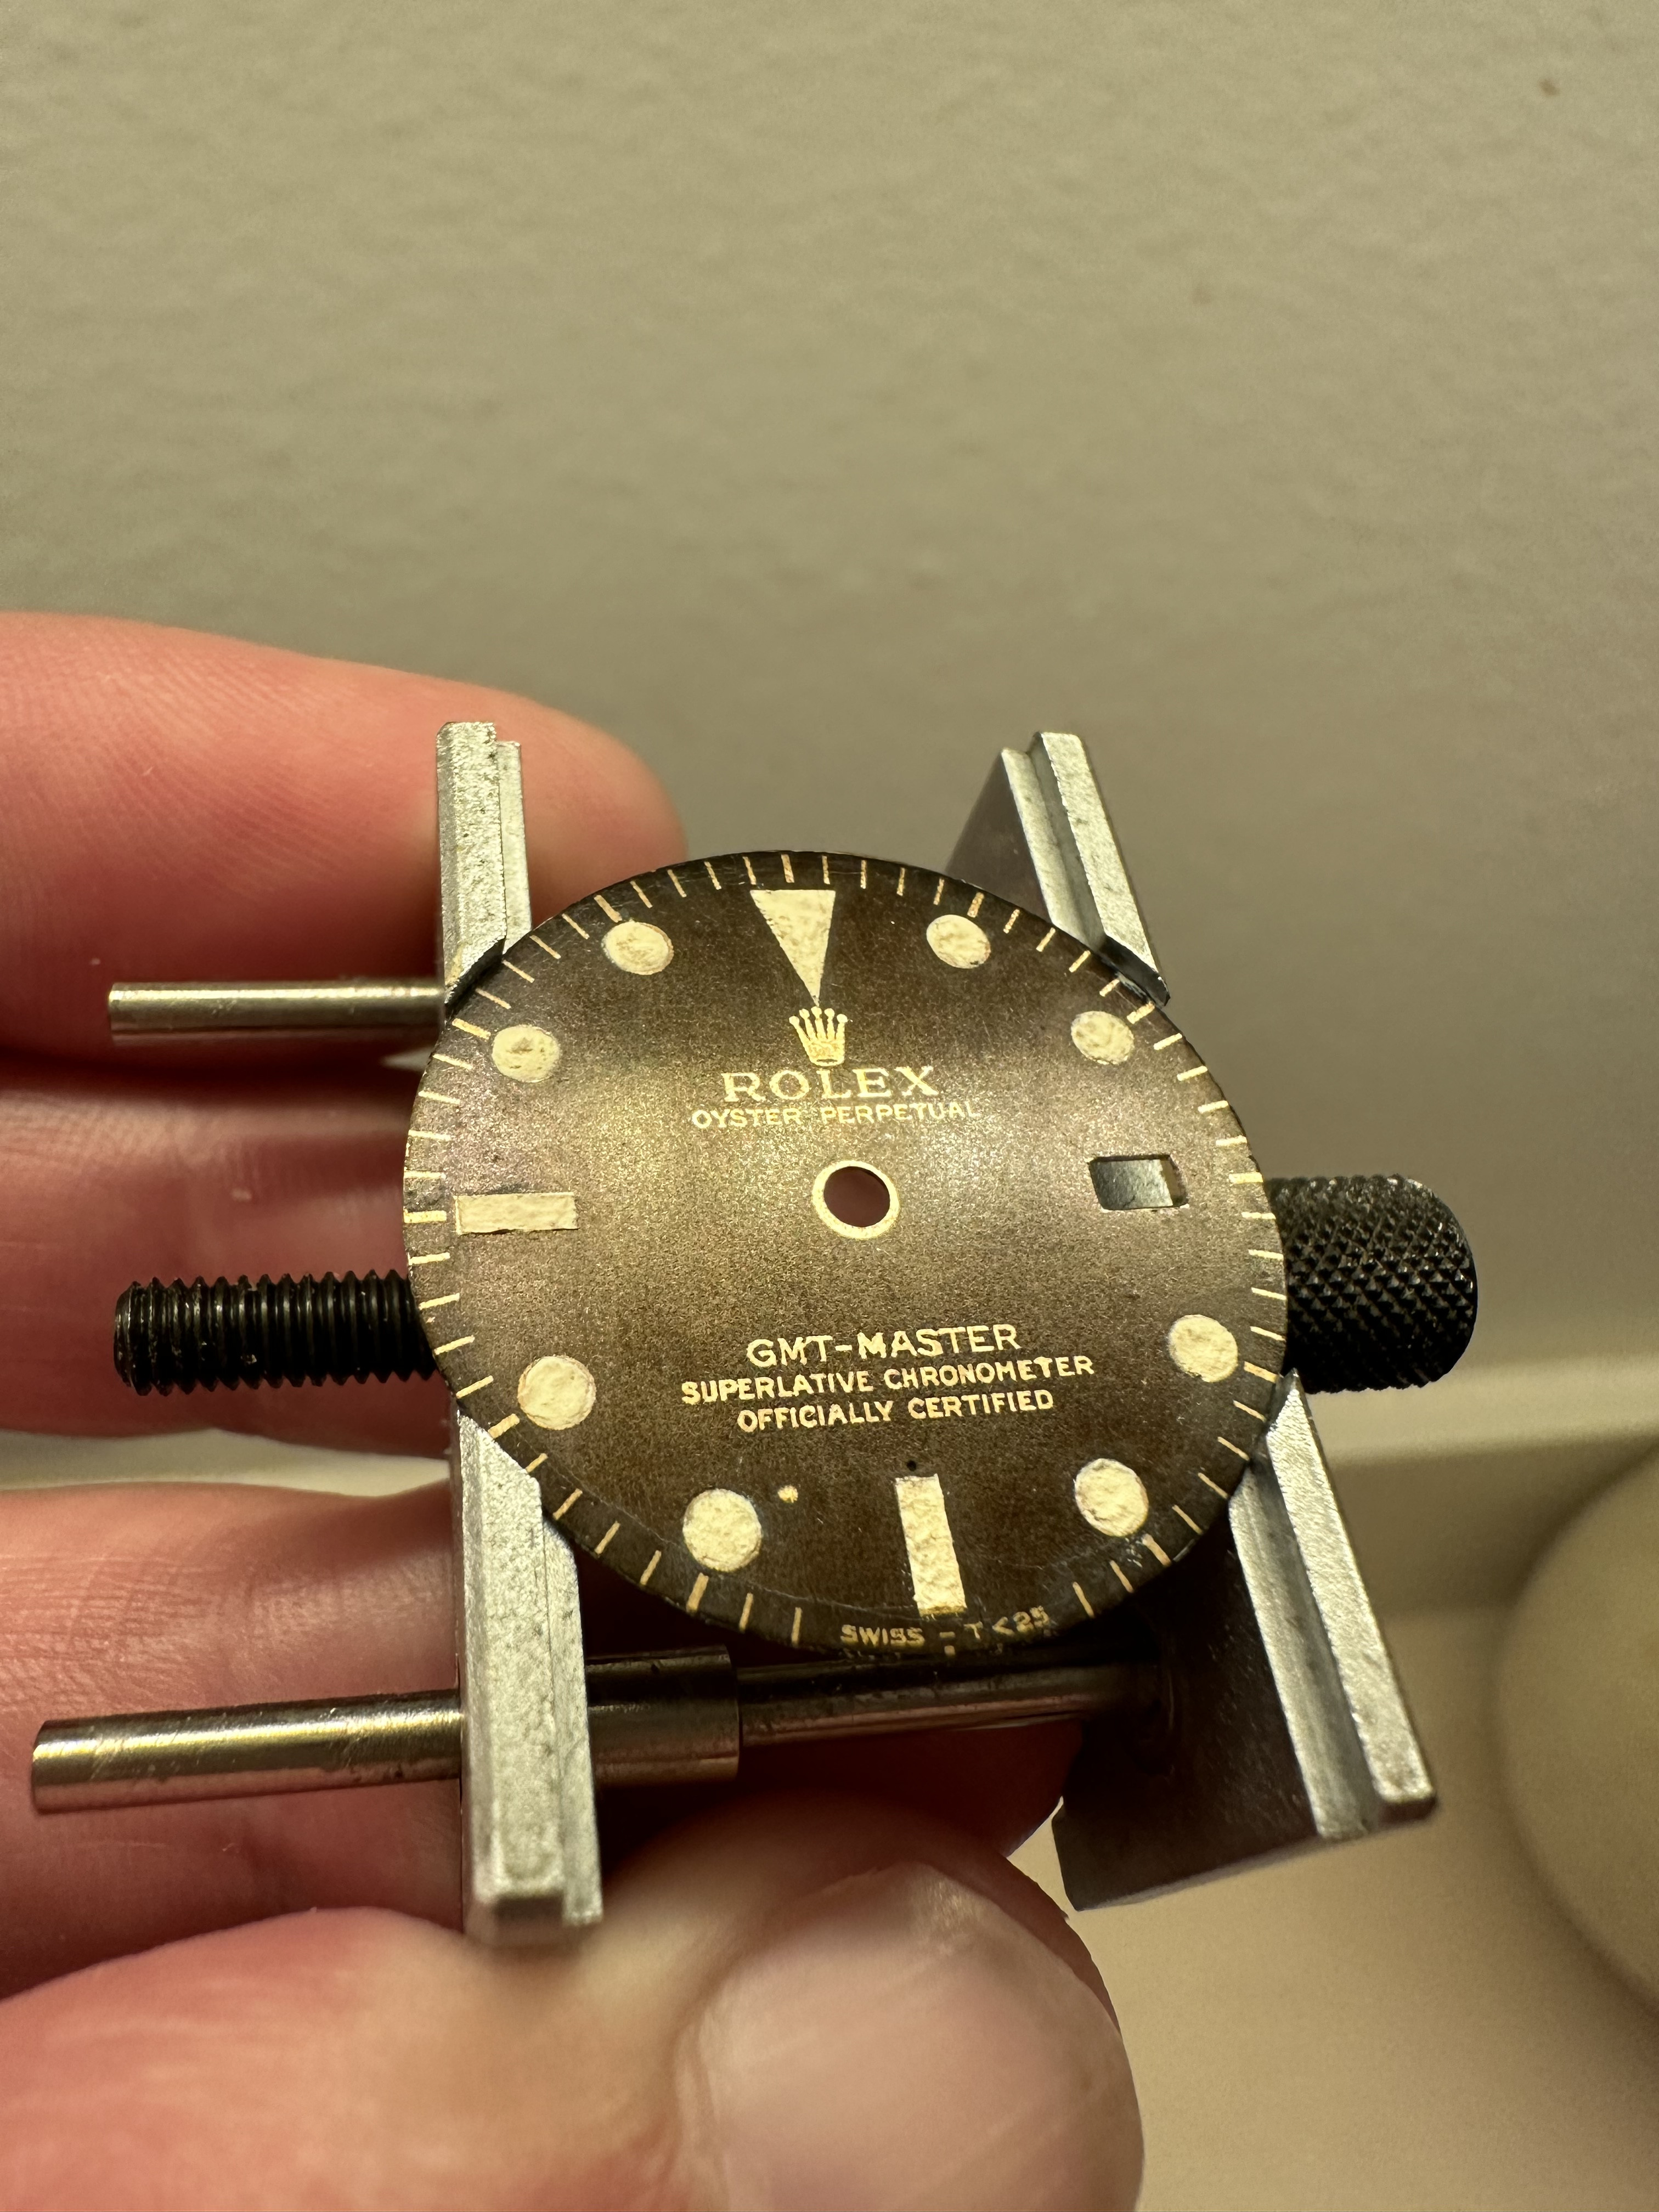
So, at this point, do you toss it in the oven? If so, what temperature (please specify F or C). I'm certain it will come off clean, but every time I'm sure, I lose something... might be around an edge, date window, who knows?

Again, I know the directions, and I have had great results. I'm asking for others' input. If I knew how to post a survey, that's what I would've done. Again, no wrong answers here. Just asking because I hate the guessing game. Not even sure it's avoidable.
 

bigtiddygothgf

Active Member
7/10/18
319
143
43
Can't help you as I also have adhesion issues upon peeling that I have yet to resolve, but damn that print looks sharp. Was that on a home office printer or a larger more commercial printer?
 

WatchN3RD

I supported. Doesn't make me an expert!
Gold Patron
24/7/18
469
500
63
Can't help you as I also have adhesion issues upon peeling that I have yet to resolve, but damn that print looks sharp. Was that on a home office printer or a larger more commercial printer?
Thank you for the kind words! I am using an OKI331 (discontinued) home office printer, but I am sure back when I purchased it it had a reputation for cleaner than average prints vs. others in the same class. It's actually 600 x 1200dpi, so I'm guessing the 600dpi part is why I get jagged lines on some prints. It seems to depend on where the print starts, so I could probably get a few dial prints without the jagged edges if I printed an entire 8.5x11" sheet and cherry picked from there.
I'm printing from an ancient version Photoshop with a 2400dpi file and then printing it at the 1200dpi setting.
One last note, if I print using a thick paper setting, I get a thick waffle texture that looks awful. I noticed printing around the second to lightest setting gives a nice clean black without unwanted texture.
By the way I got impatient and pulled off the bandaid. It's not perfect, but it's good enough. I'm sure I'll accidentally drop it or screw it up anyway when I go to clear it or lume it!
 

GenuineFool

Known Member
Supporter
Certified
I have been using Sunnyscopa decals, not decal free, as I can't get satisfactory prints from a laser printer. However, I recall that Manodeoro was applying more than one decal in some instances. Yes, for honeycomb Explorer 6350 dials, but also for flat dials to get depth or negative relief. It might be very hard to line up the second (and third?) decal free prints (he uses a microscope), but doing that, and melting the toner in the oven to even it out, might be the way to go.

You could even try printing dials at different orientations (90 degrees?) to reduce jagged edges by averaging them out.
 

WatchN3RD

I supported. Doesn't make me an expert!
Gold Patron
24/7/18
469
500
63
I like your ideas/suggestions and planned on doing my dial file with rows of dials where each dial was rotated at a different 45 degree angle to see if that cured the jagged edges. And then I completely forgot to do it when I got towards the end. I also forgot about Manodeoro's amazing results with multiple decals, but I'm not as confident with so many failed attempts under my belt. I did try it quickly once, but it came out like a 3D movie without having the glasses. I may revisit it if I my success rate continues an upward trajectory. I'm glad you mentioned that!

I'm not overly concerned about the jagged edges for a few reasons though.
1) The worst spots are usually on the lume plots.
2) The second baking to "seal" transfer reduces many jagged spots.
3) If I clearcoat the dial, the majority of solvents will also reduce jagged edges.

Just sharing my thought process, but your ideas are good ones. I definitely appreciate the input. Let's see if my dial survives 200C for 10 minutes without melting. 🤞
 
  • Like
Reactions: GenuineFool

WatchN3RD

I supported. Doesn't make me an expert!
Gold Patron
24/7/18
469
500
63

So, the dial actually survived the 200C. It actually turned the yellow of the brass into a slightly more red or golden tone. Also, the shinier the object, the worse my phone takes photos, but many of the jagged edges did become (much?) more subtle. Damn thing looks amazing in the sunlight. It goes from a brownish black to a glow depending on the light. Pictures above are taken in indoor lighting and direct sunlight. No filters or adjustments were used on the photos. If I could only get this every time! I'll try and lume it, so enjoy the pictures before I destroy it via lume or a botched rattle can clear.
 

aphmars13

Renowned Member
Supporter
Certified
4/10/22
767
1,168
93
South of France
I'll get back to it 😍..I'm so lame 😂
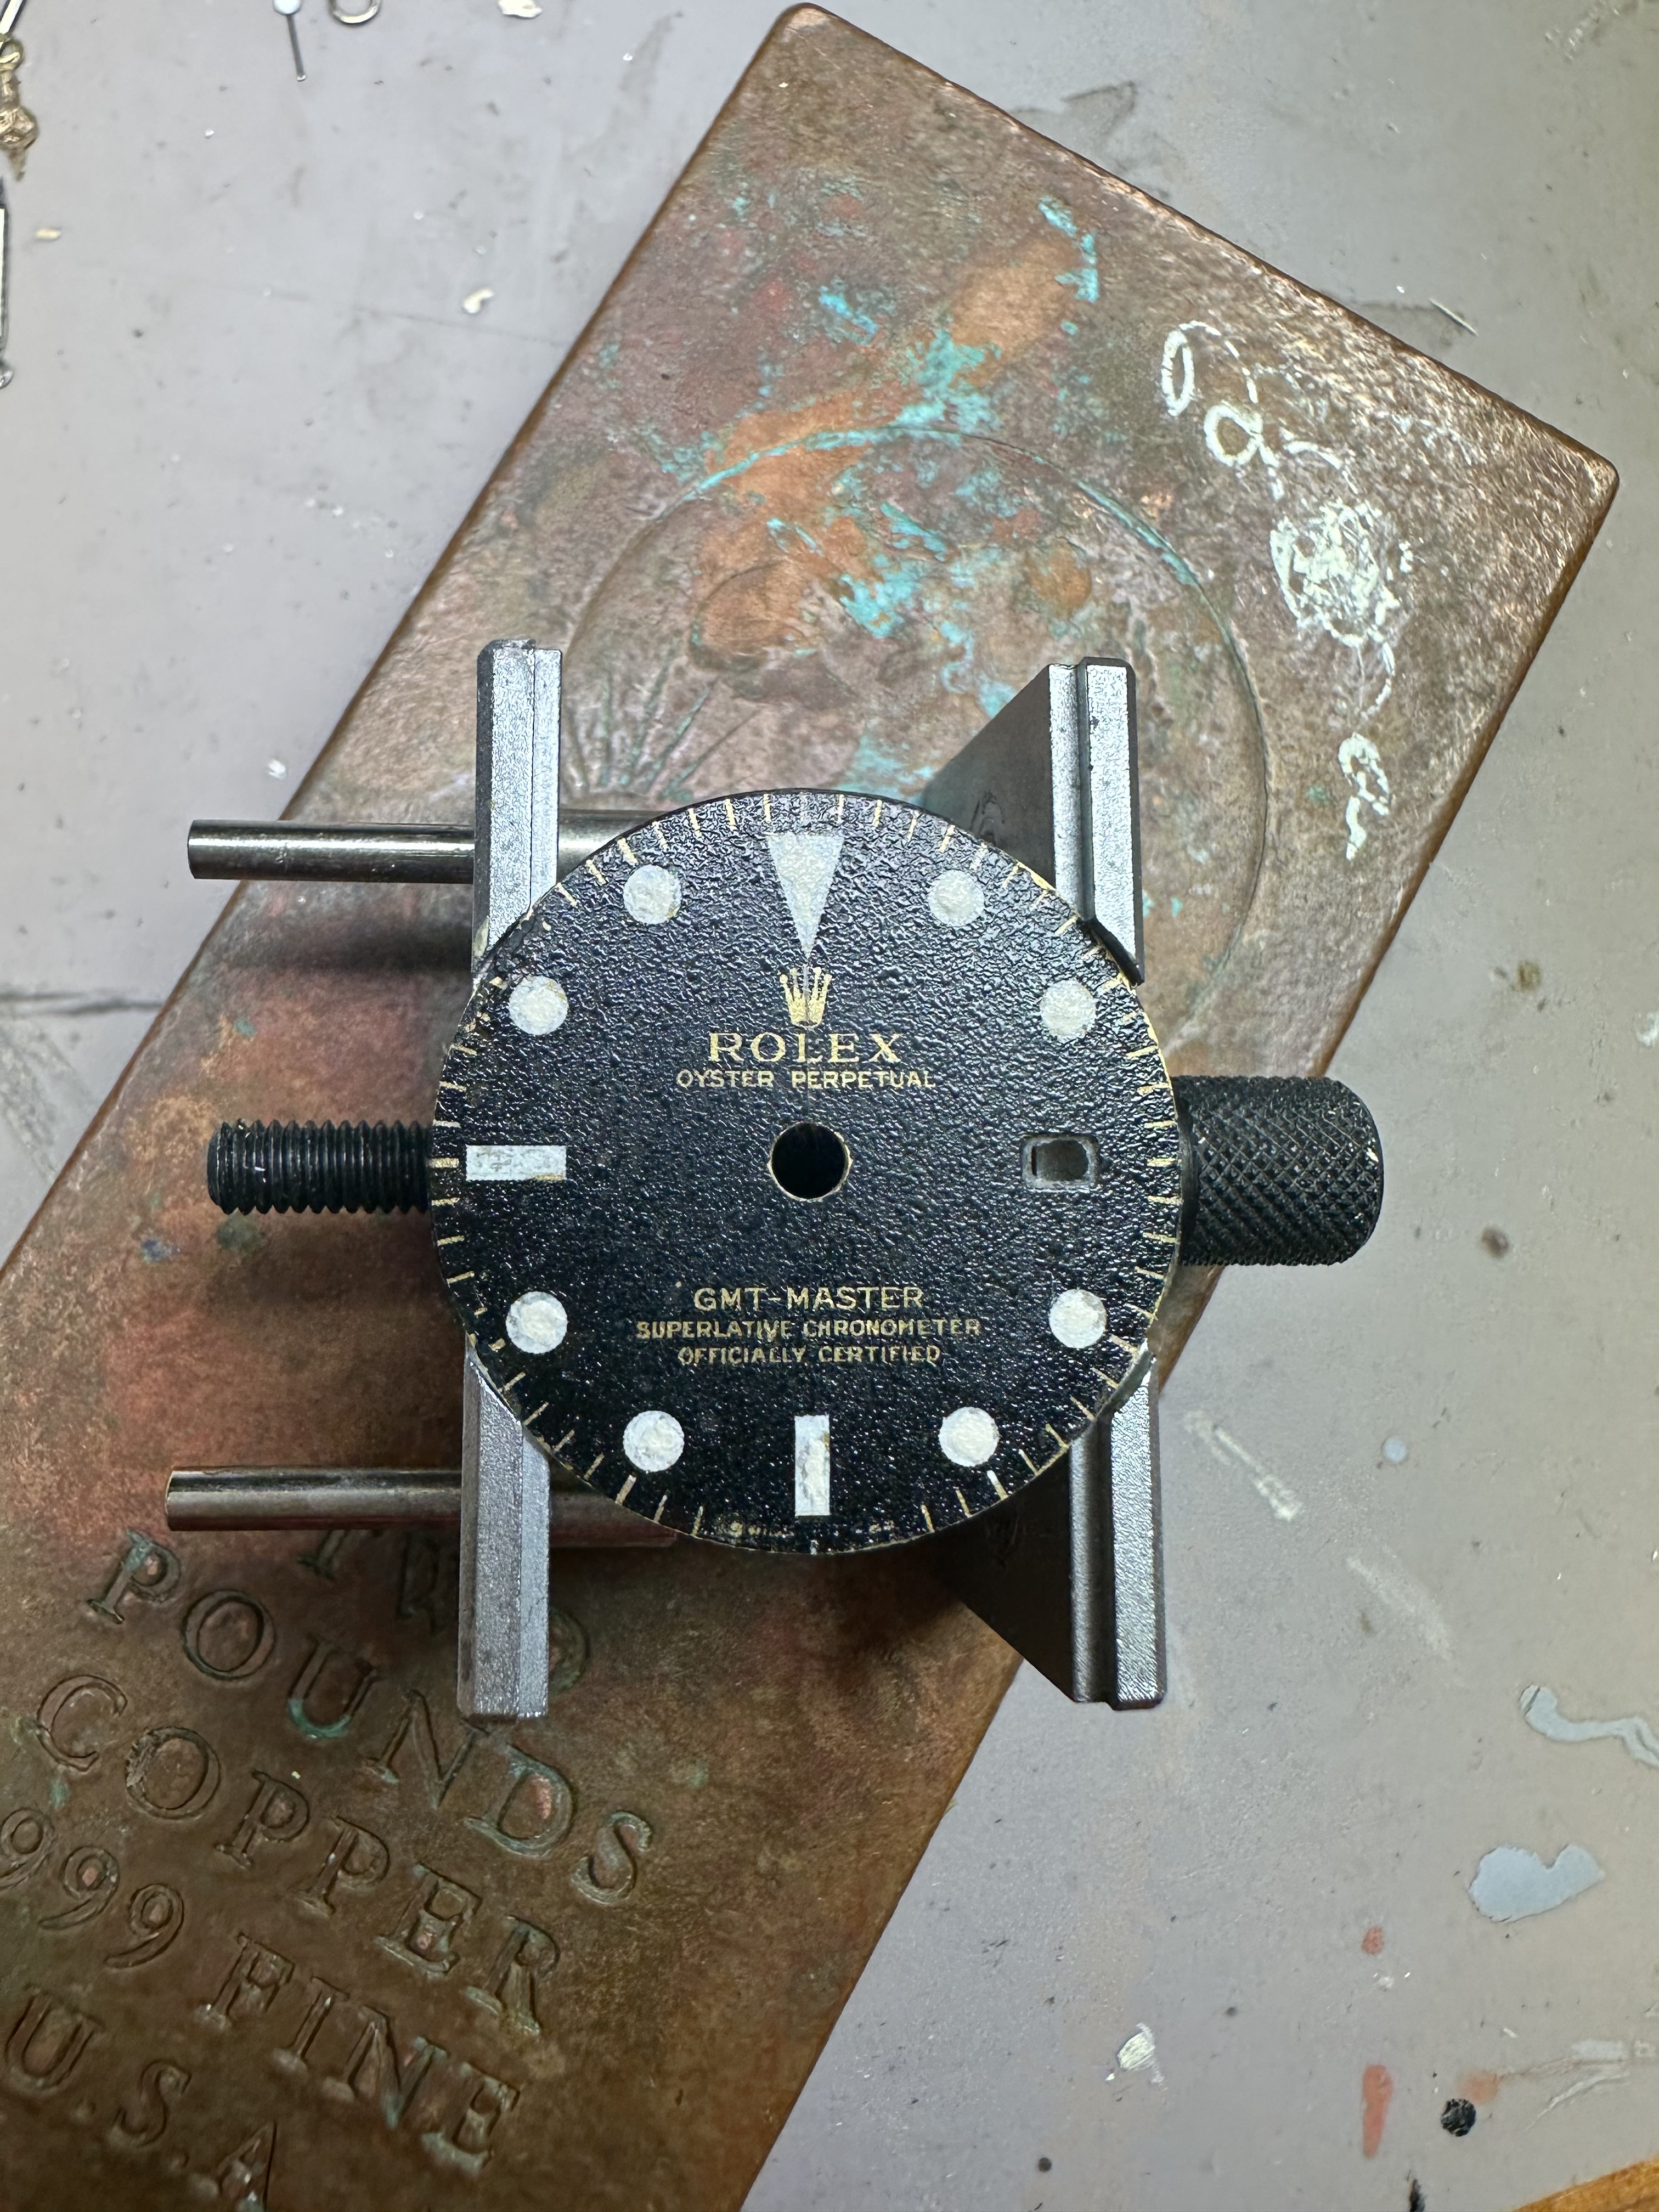
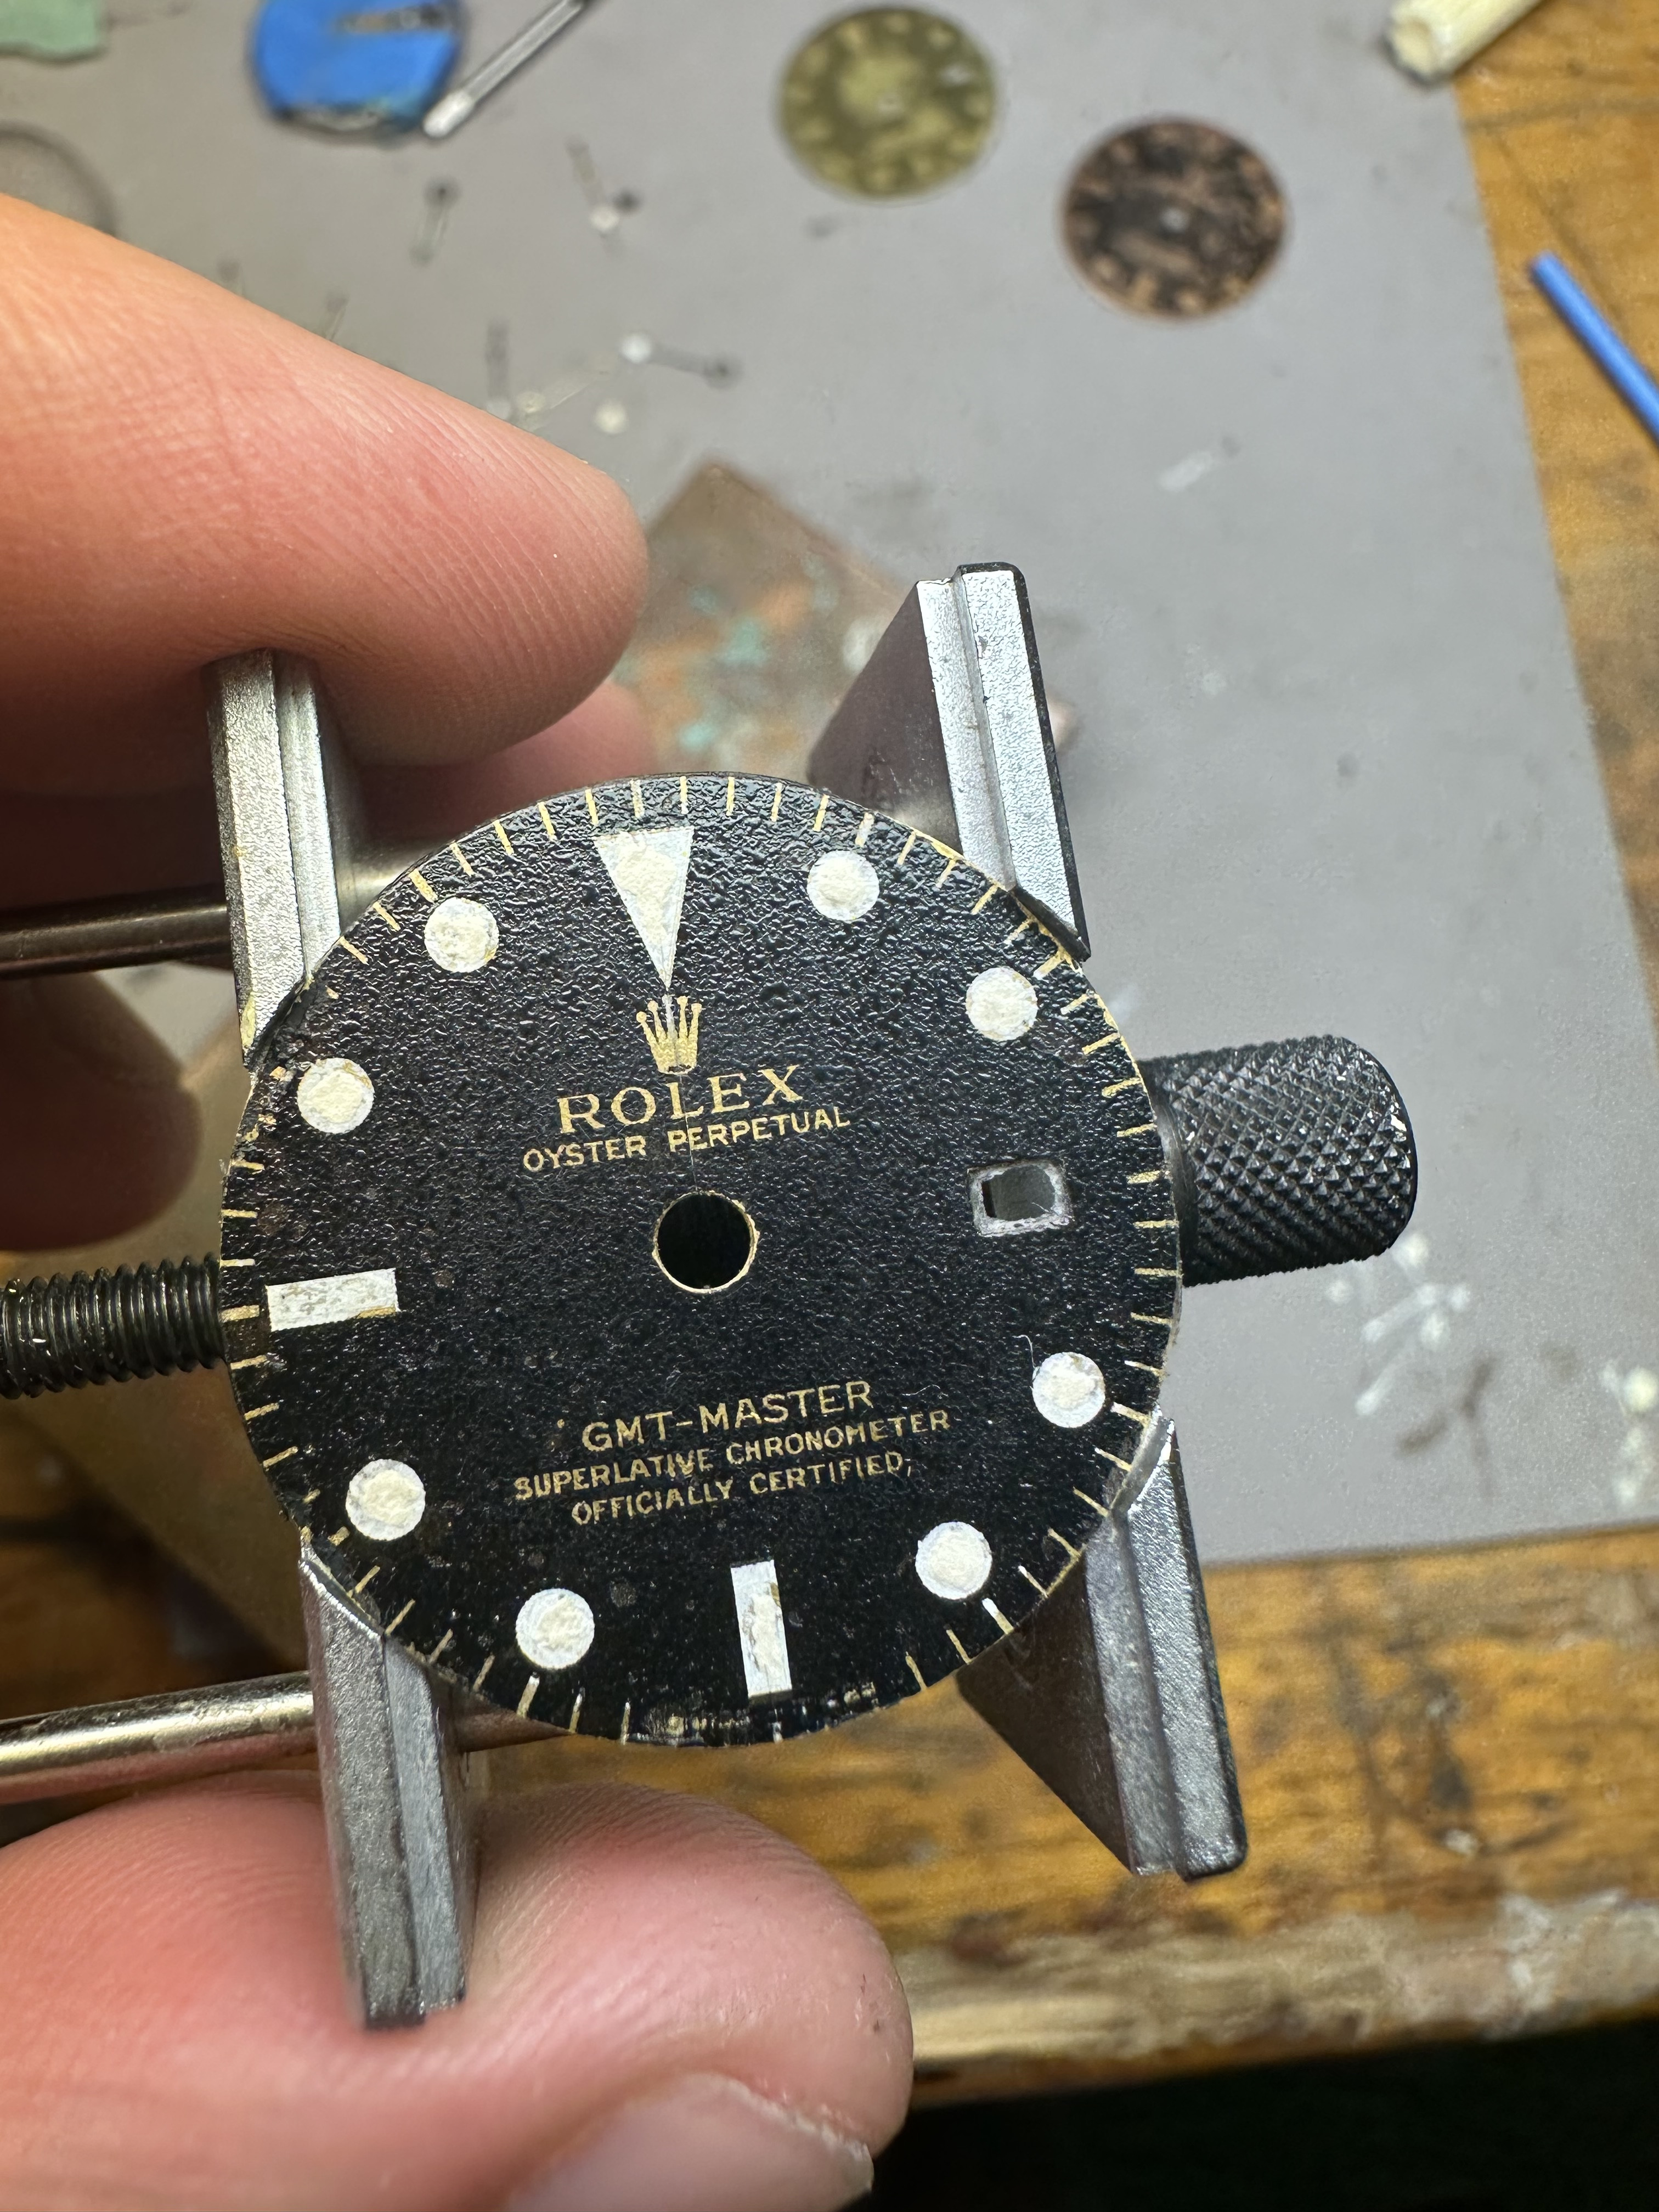
is there any 5513 Bart gilt dial like this one? It's a friend's watch that makes me drool.
The print file ?

 
Last edited:
  • Love
Reactions: 369mafia

WatchN3RD

I supported. Doesn't make me an expert!
Gold Patron
24/7/18
469
500
63
That's looking very nice. Is the slight red tint around the text from printing in color on a laser printer, or is that an inkjet print? (I noticed it on the chapter ring dial at "200x magnification)."
Seems way more common for inkjets, but I've had it happen to me on laser printers too.
I think you'd be a pig in shit if you could put some white behind the indices before applying the print. That's my next goal, but I don't have a fool proof method yet.
 

aphmars13

Renowned Member
Supporter
Certified
4/10/22
767
1,168
93
South of France
That's looking very nice. Is the slight red tint around the text from printing in color on a laser printer, or is that an inkjet print? (I noticed it on the chapter ring dial at "200x magnification)."
Seems way more common for inkjets, but I've had it happen to me on laser printers too.
I think you'd be a pig in shit if you could put some white behind the indices before applying the print. That's my next goal, but I don't have a fool proof method yet.
Thank you😀 
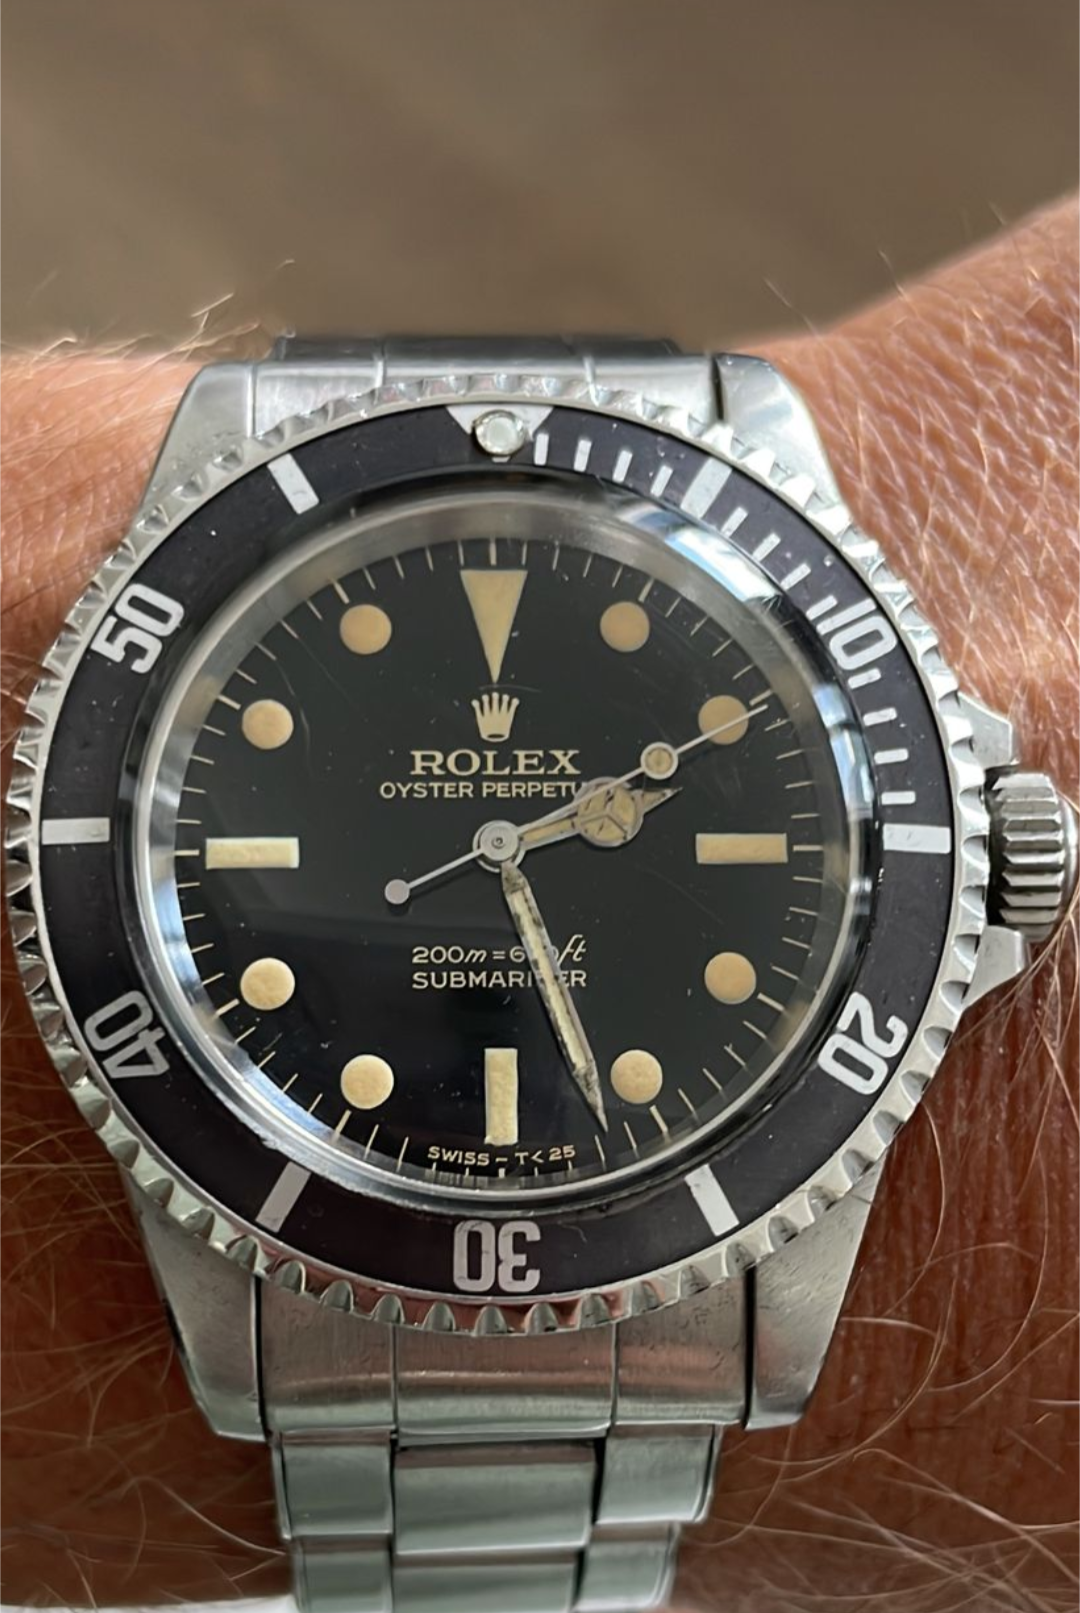
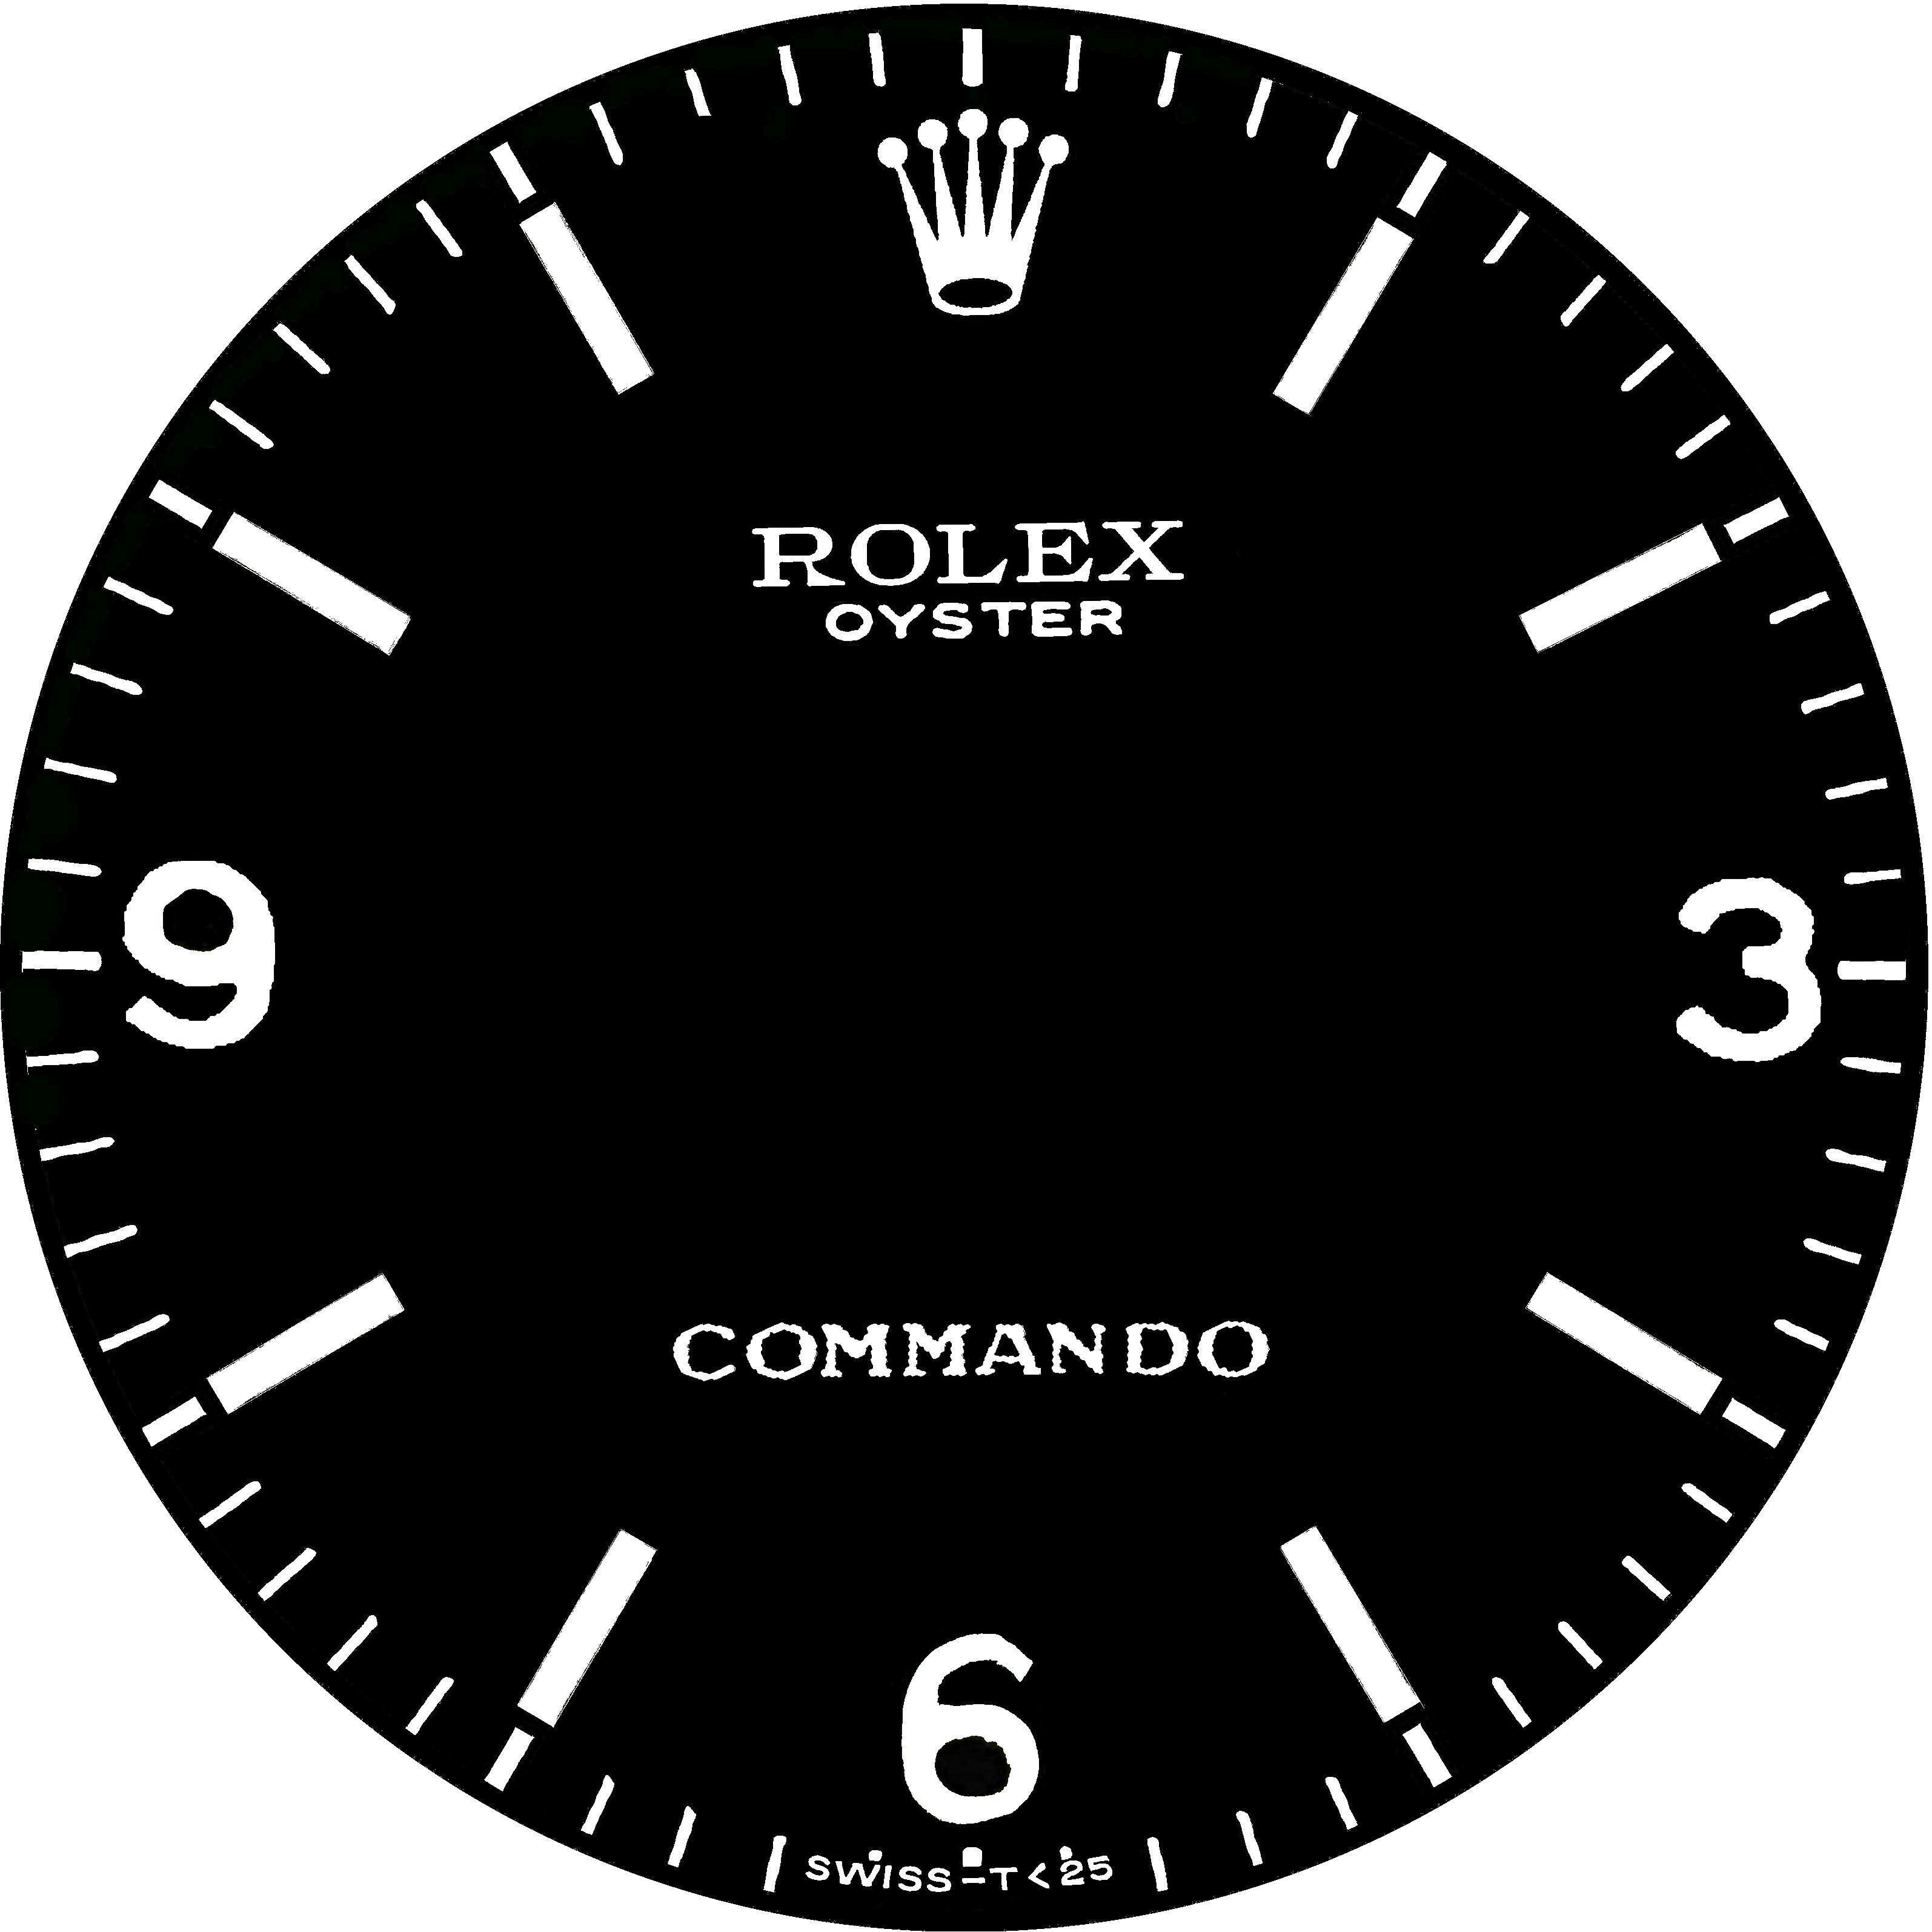
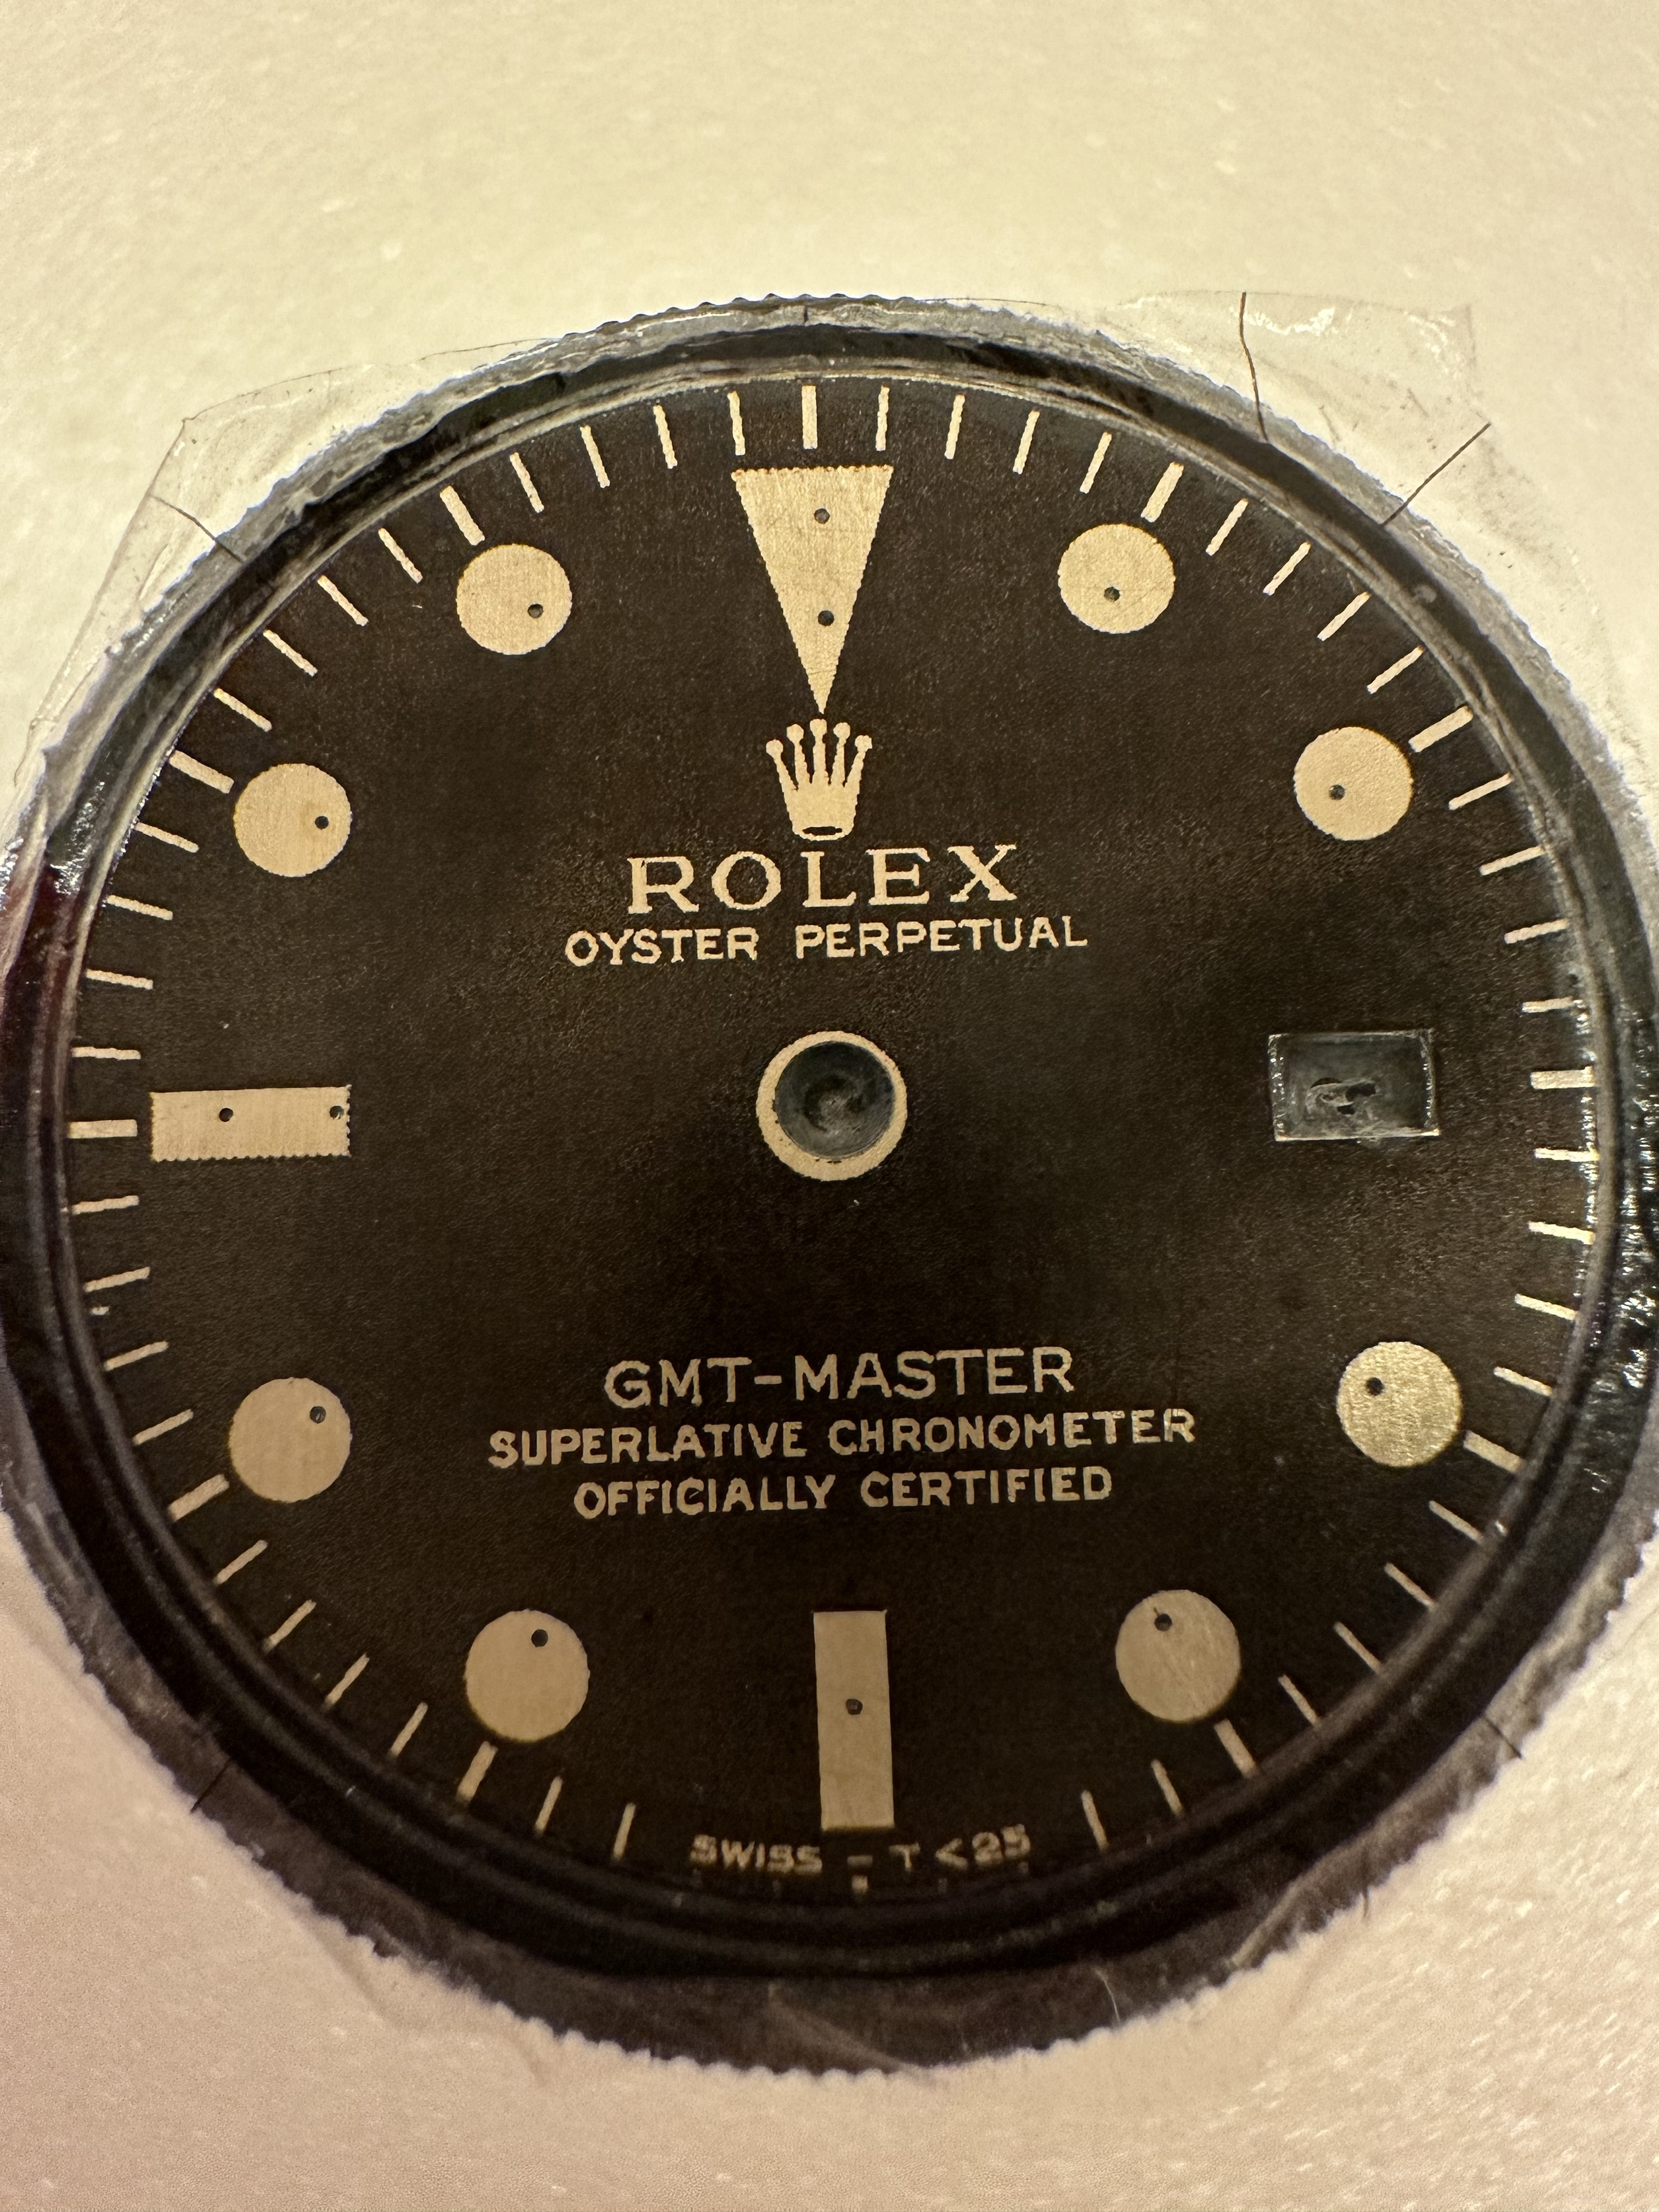
I'm not ready to put white on the indexes, I'm going to do a camouflage test with two layers of lume one white then one aged. It's a professional laser printer but limited to 1200 dpi. You can clearly see the pixelation when zooming in. I'd have to go to 2400 to get a sharper print. When I see @manodeoro's dials... I wonder what this "magic"😉 
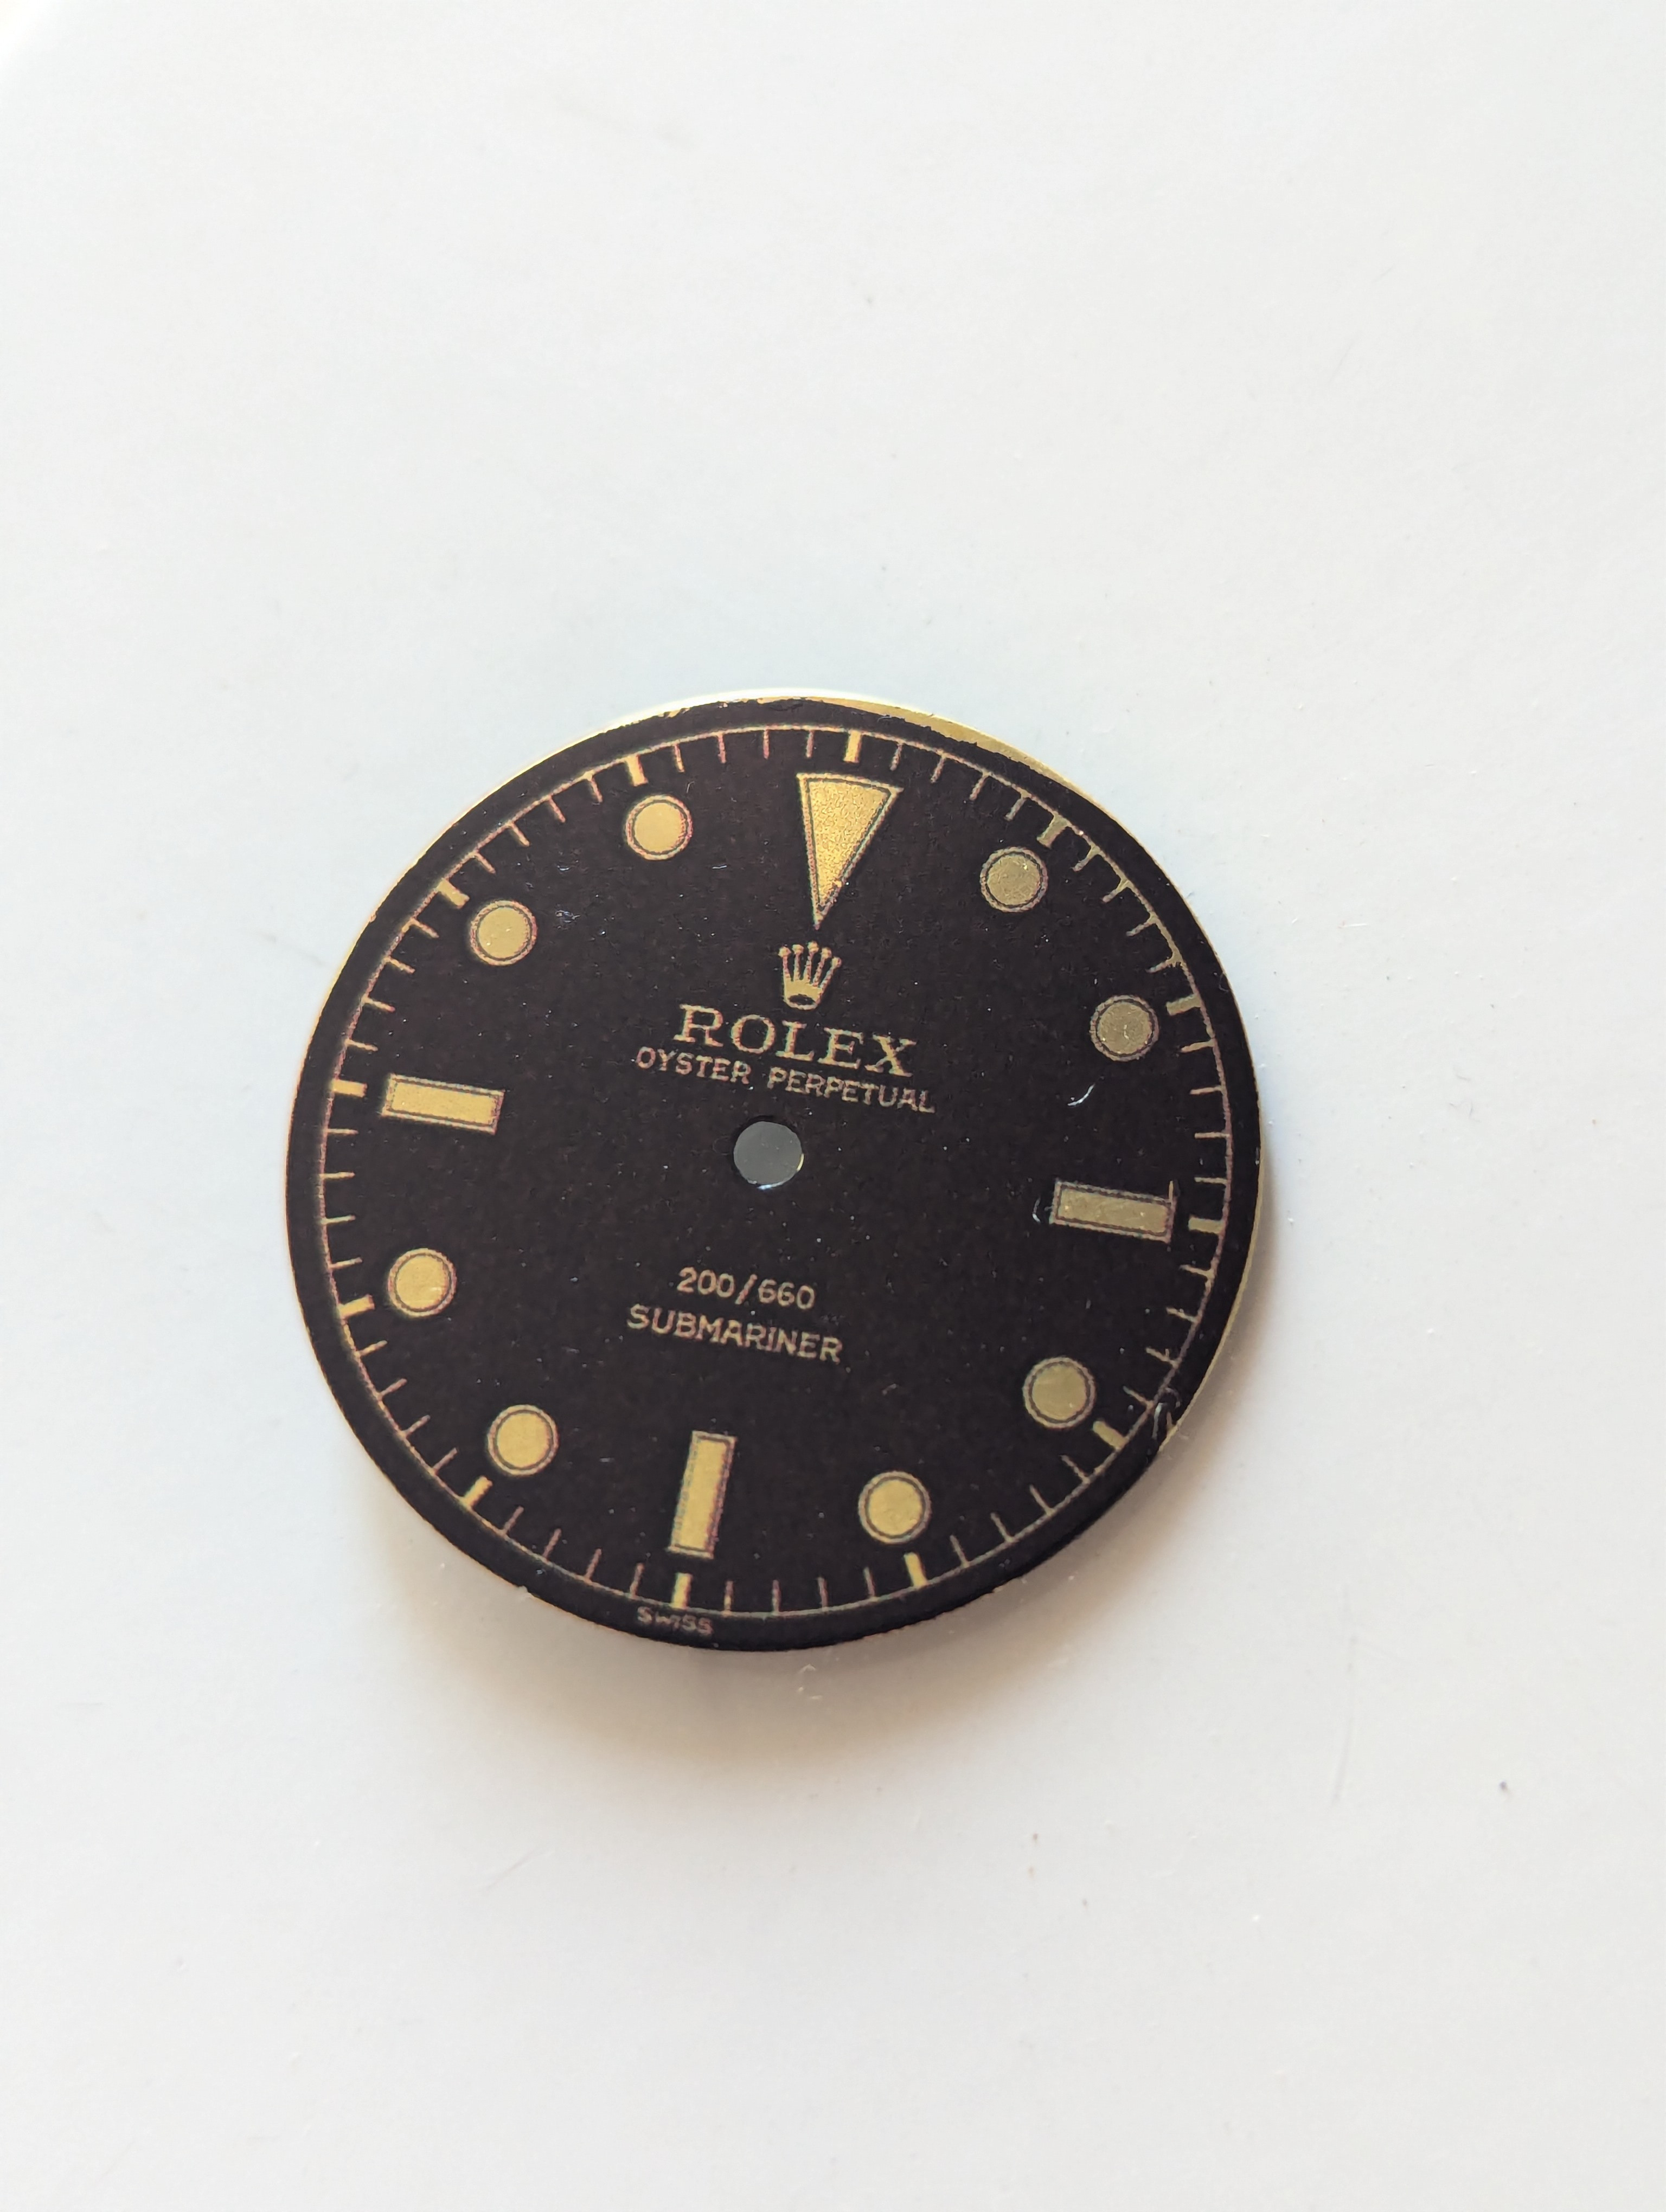
is all about. I've just bought a glossy acrylic varnish and I'm going to apply it and continue when I get back from my weekend.
 

aphmars13

Renowned Member
Supporter
Certified
4/10/22
767
1,168
93
South of France
I think I'd prefer it without varnish. I haven't thought about it, but watchlume goes on a white index. The original glue is white but translucent when it dries..... So I did a thin unnecessary first coat and a thick clear coat. Plus I drank too much coffee this morning 😅 It's a workout....

 
Last edited:

WatchN3RD

I supported. Doesn't make me an expert!
Gold Patron
24/7/18
469
500
63
I hate to admit it, but couldn't give up on the Sunnyscopa sheets I still had left. I inadvertently spilled the glue various times when the bag hadn't properly sealed, so I still have a few sheets with no binder to use. Decided to try some Liquitex gloss medium, which is "almost" the same as clear acrylic waterbased paint.
It came out okay, but it's much thicker and doesn't have any noticeable benefits from the glue Sunnyscopa comes with. I decided to apply white acrylic before to have a sharp white base for the lume, and the final result was great for having a white base, but it really lost the beauty of a mirror polished gilt dial. With that, I misted the final result with a strong clear. It's much more textured than I want, but a clean white base for lume was the goal here.
 

WatchN3RD

I supported. Doesn't make me an expert!
Gold Patron
24/7/18
469
500
63
I also screwed up the T-Swiss and the center of the crown!
Lots more to improve, but I need a dial to use for now. I think the decal transfer can succeed with matte dials, but for a gilt, a brass base for the indices never looks right unless it's a 6542 or similar dial. I'm really more concerned with an early 1675 gilt that had screen printed indices, so avoiding a manually applied white base was the goal here. I went cheap and lazy here. Cheated the finish to keep the clean indices.
Just sharing the unnecessary details on my thought process.
 

aphmars13

Renowned Member
Supporter
Certified
4/10/22
767
1,168
93
South of France
As far as I can see, your print is of better quality than mine, your drawing is much less pixelated and your writing is beautiful. Indeed, finding dials that are the right size is mission impossible. I've found white dials measuring 26.3 mm with feet of unknown origin. I've also found 27.4 black dials with a place for the date, but not in the same place as the Rolex dials, closer to the end of the dial.....