-
Tired of adverts on RWI? - Subscribe by clicking HERE and PMing Trailboss for instructions and they will magically go away!
You are using an out of date browser. It may not display this or other websites correctly.
You should upgrade or use an alternative browser.
You should upgrade or use an alternative browser.
How to make a true gilt dial on the cheap - Tropical or Black
- Thread starter chrome72
- Start date
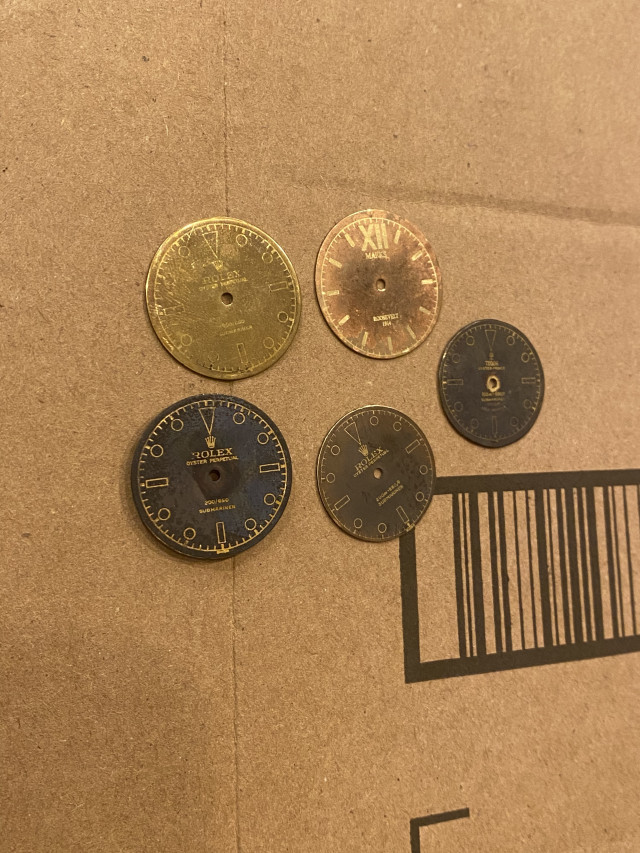
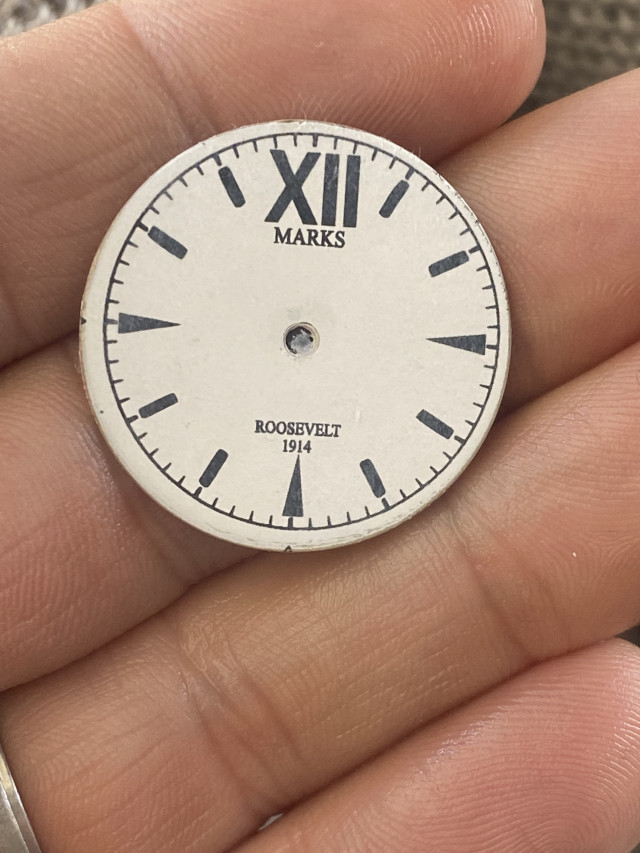
Throwing this out there too. First try at this and it came out great transfer wise. It’s not a gilt dial but same idea of transferring the toner. However instead of wiping it away when I’m done I’m keeping it on the dial. I’m going for a white explorer style dial. Used white lacquer and let it dry. Laid my design down on the dial and ran it through a laminator 6 times. Very promising

That was for sure the most difficult process I have done for watch parts.
After reading and asking several people here, I decided to give it a try. It was December when I start ordering parts like dials, liquid,... . I even convinced my family that we needed a laser printer.
My first attempts were disappointing. Especially the toner transfer get me the most problem. It doesn't stick correctly at the brass. Thanks to @chrome72 who always motivated me and gave me tips. I tried different liquids, used my iron and ended up by using film free decals to get the best result for the toner transfer. Because I did a lot of my work in the kitchen, my daughter asked if we eat dials today ;-)
And don't forget the work at the computer. I worked several hours to create a vector based file and still correct it by changing the line thickness ...
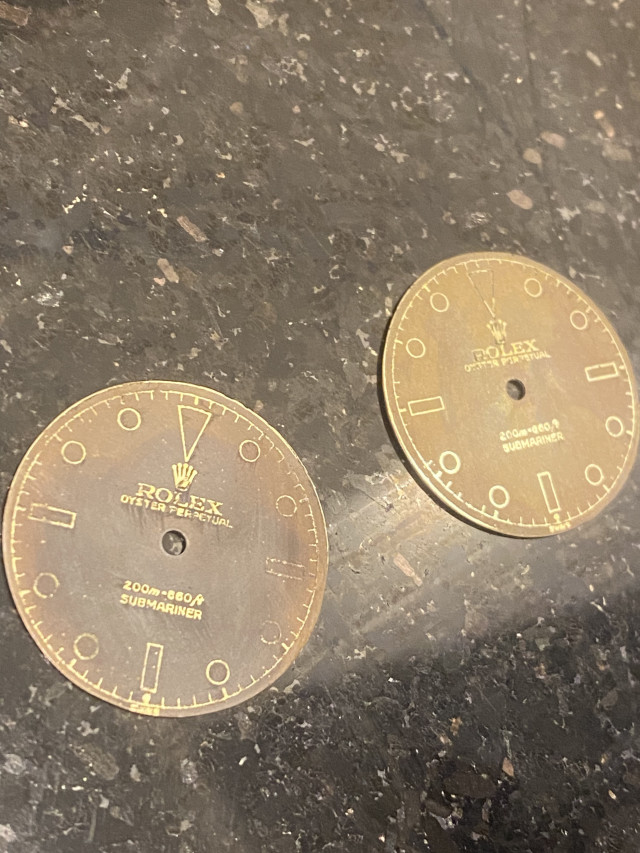
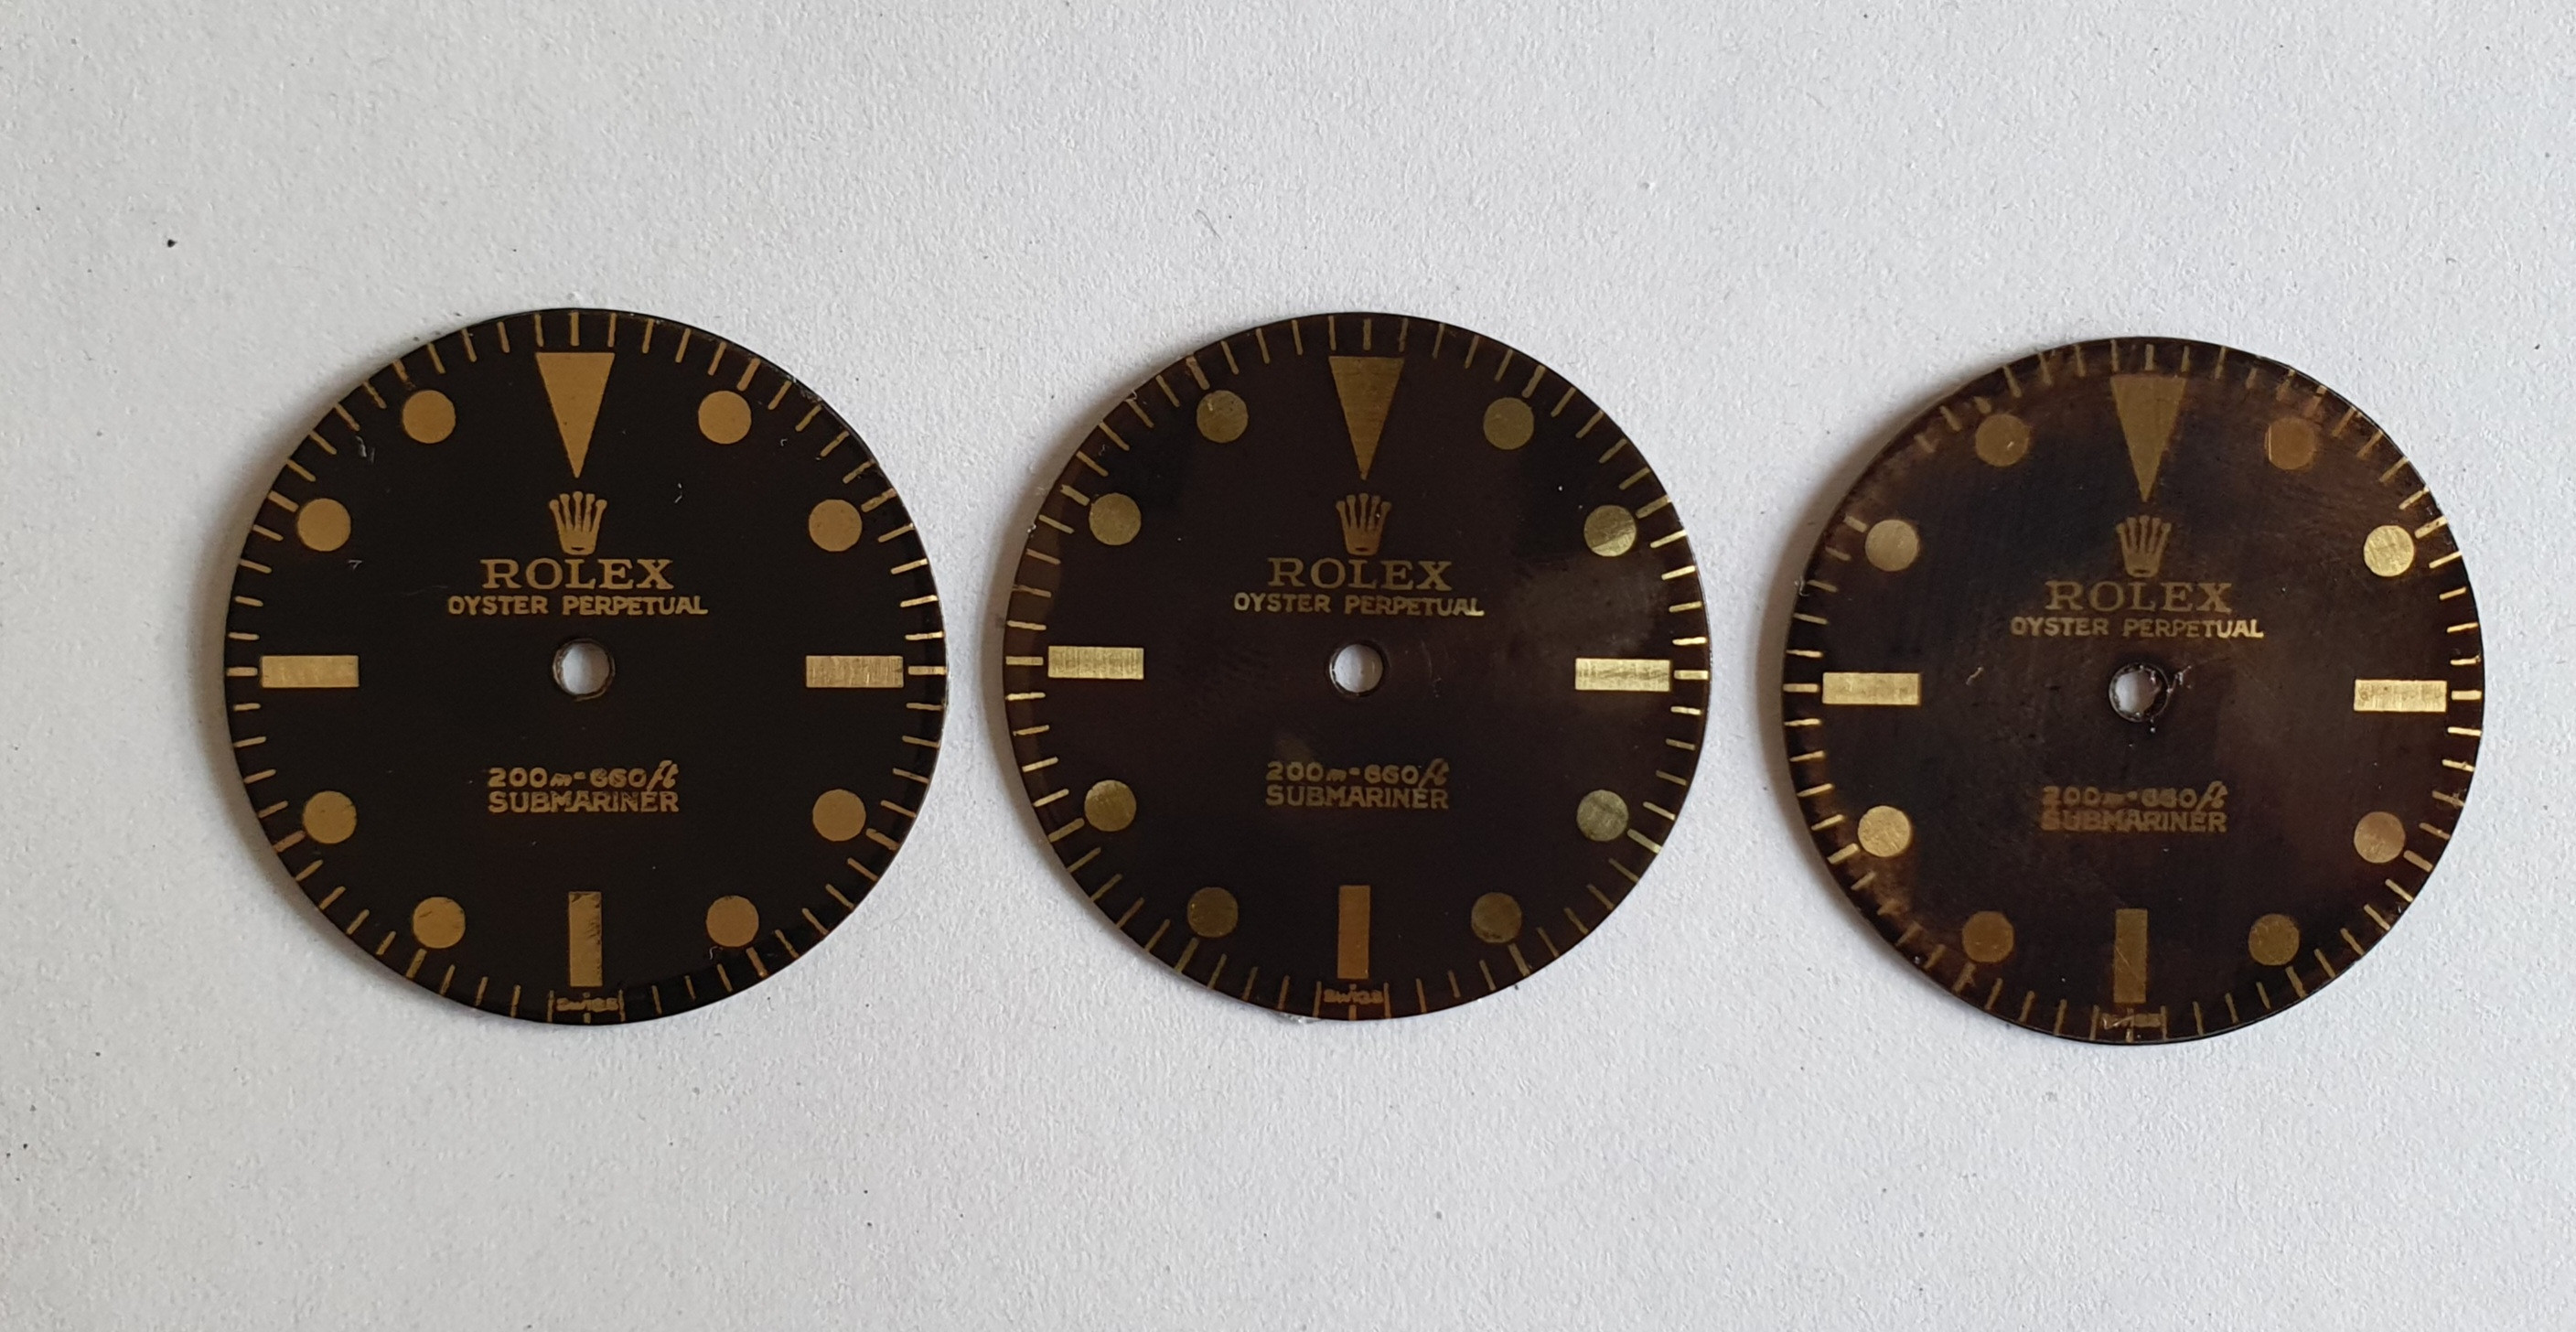
But the result is phenomenal. Here some picture of the process:
Toner transfered dial:
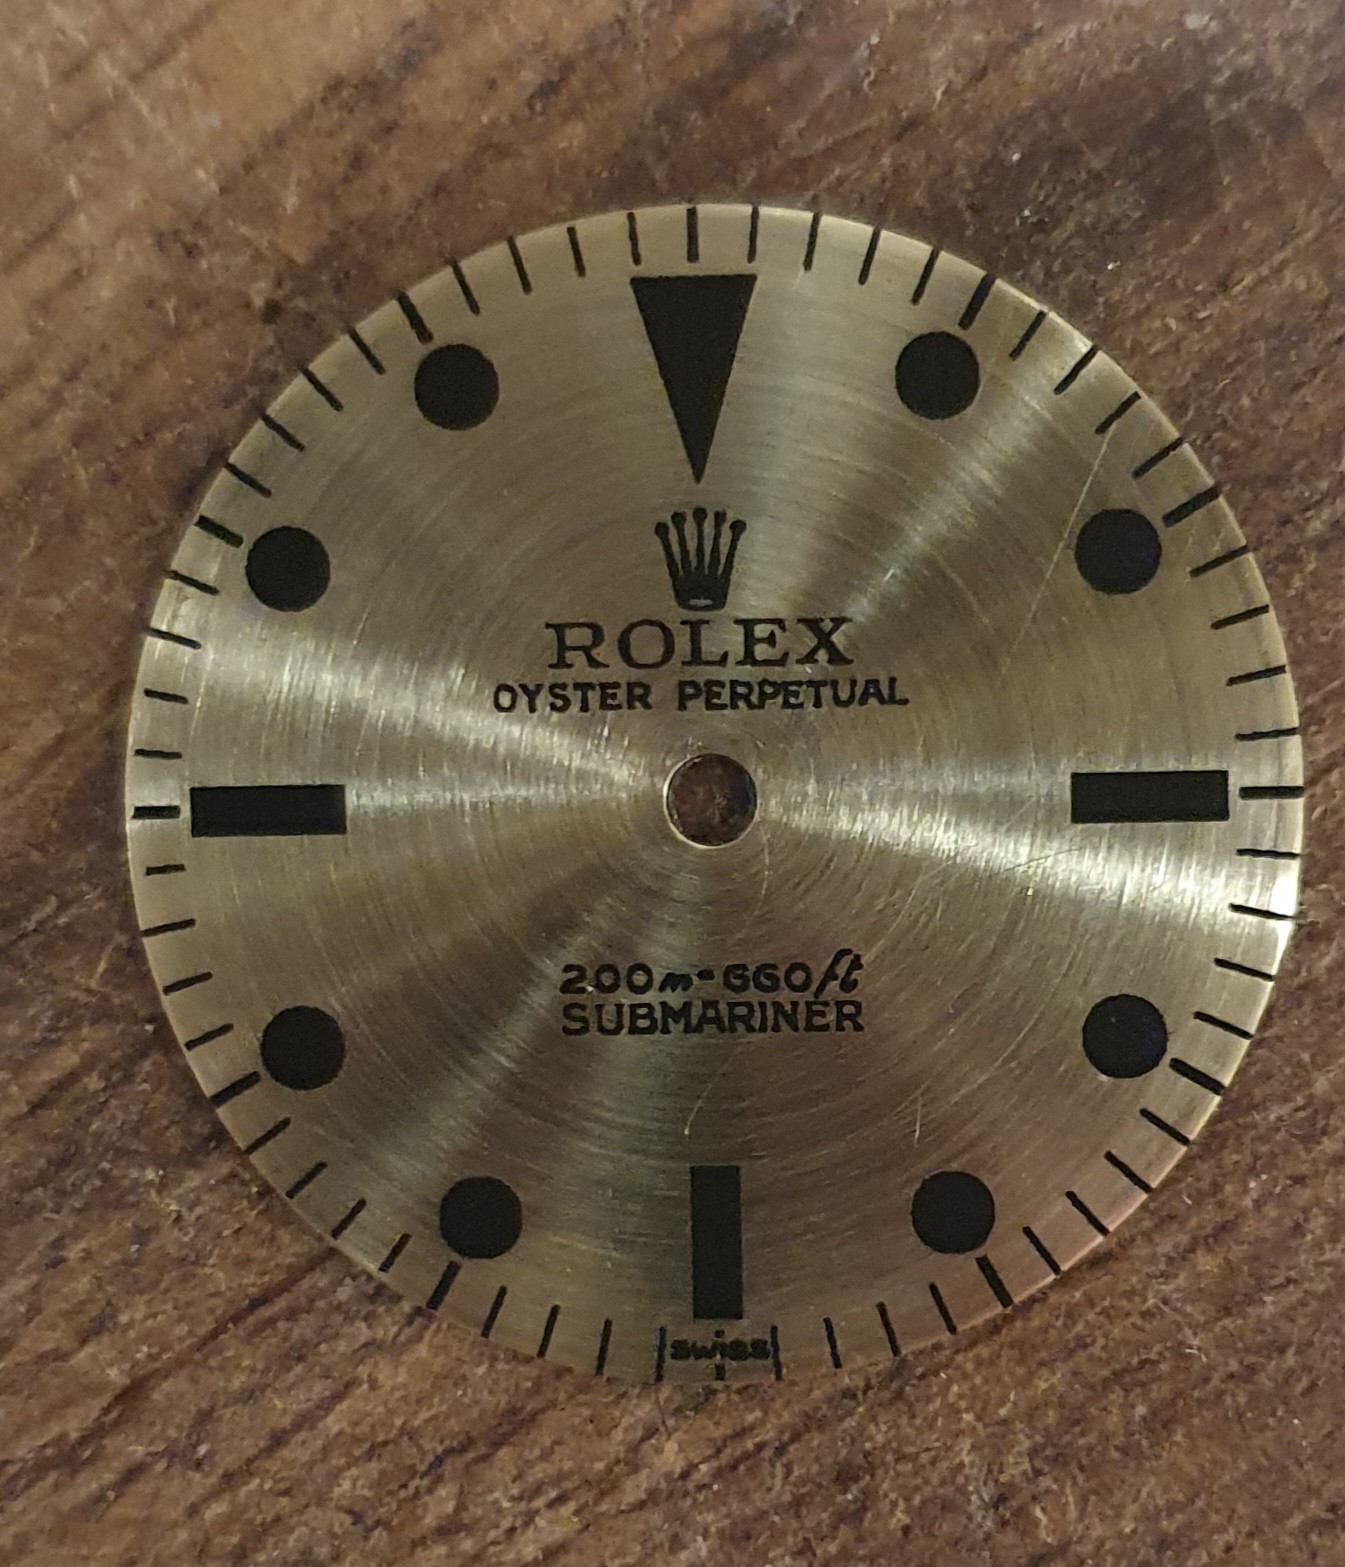
blacked the brass with liquid:
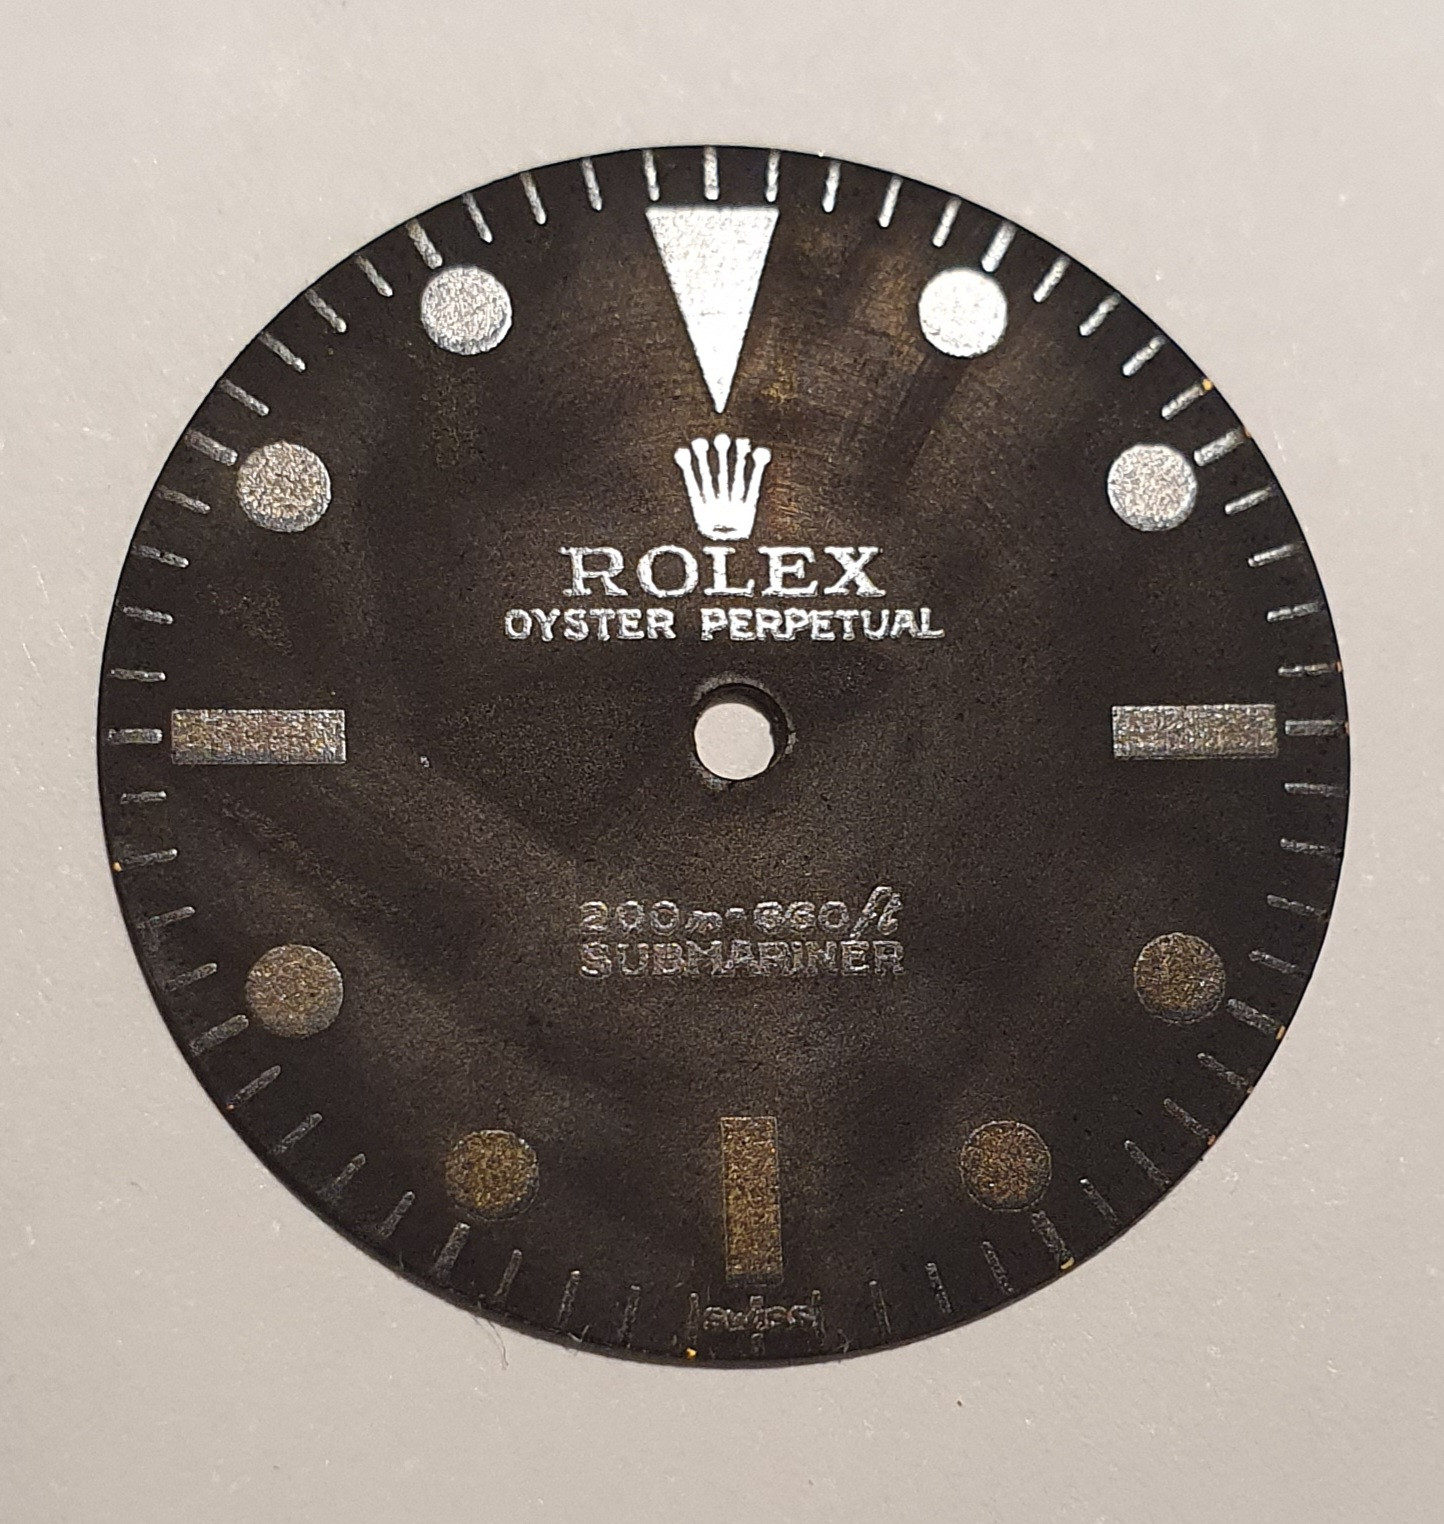
remove the toner with aceton:
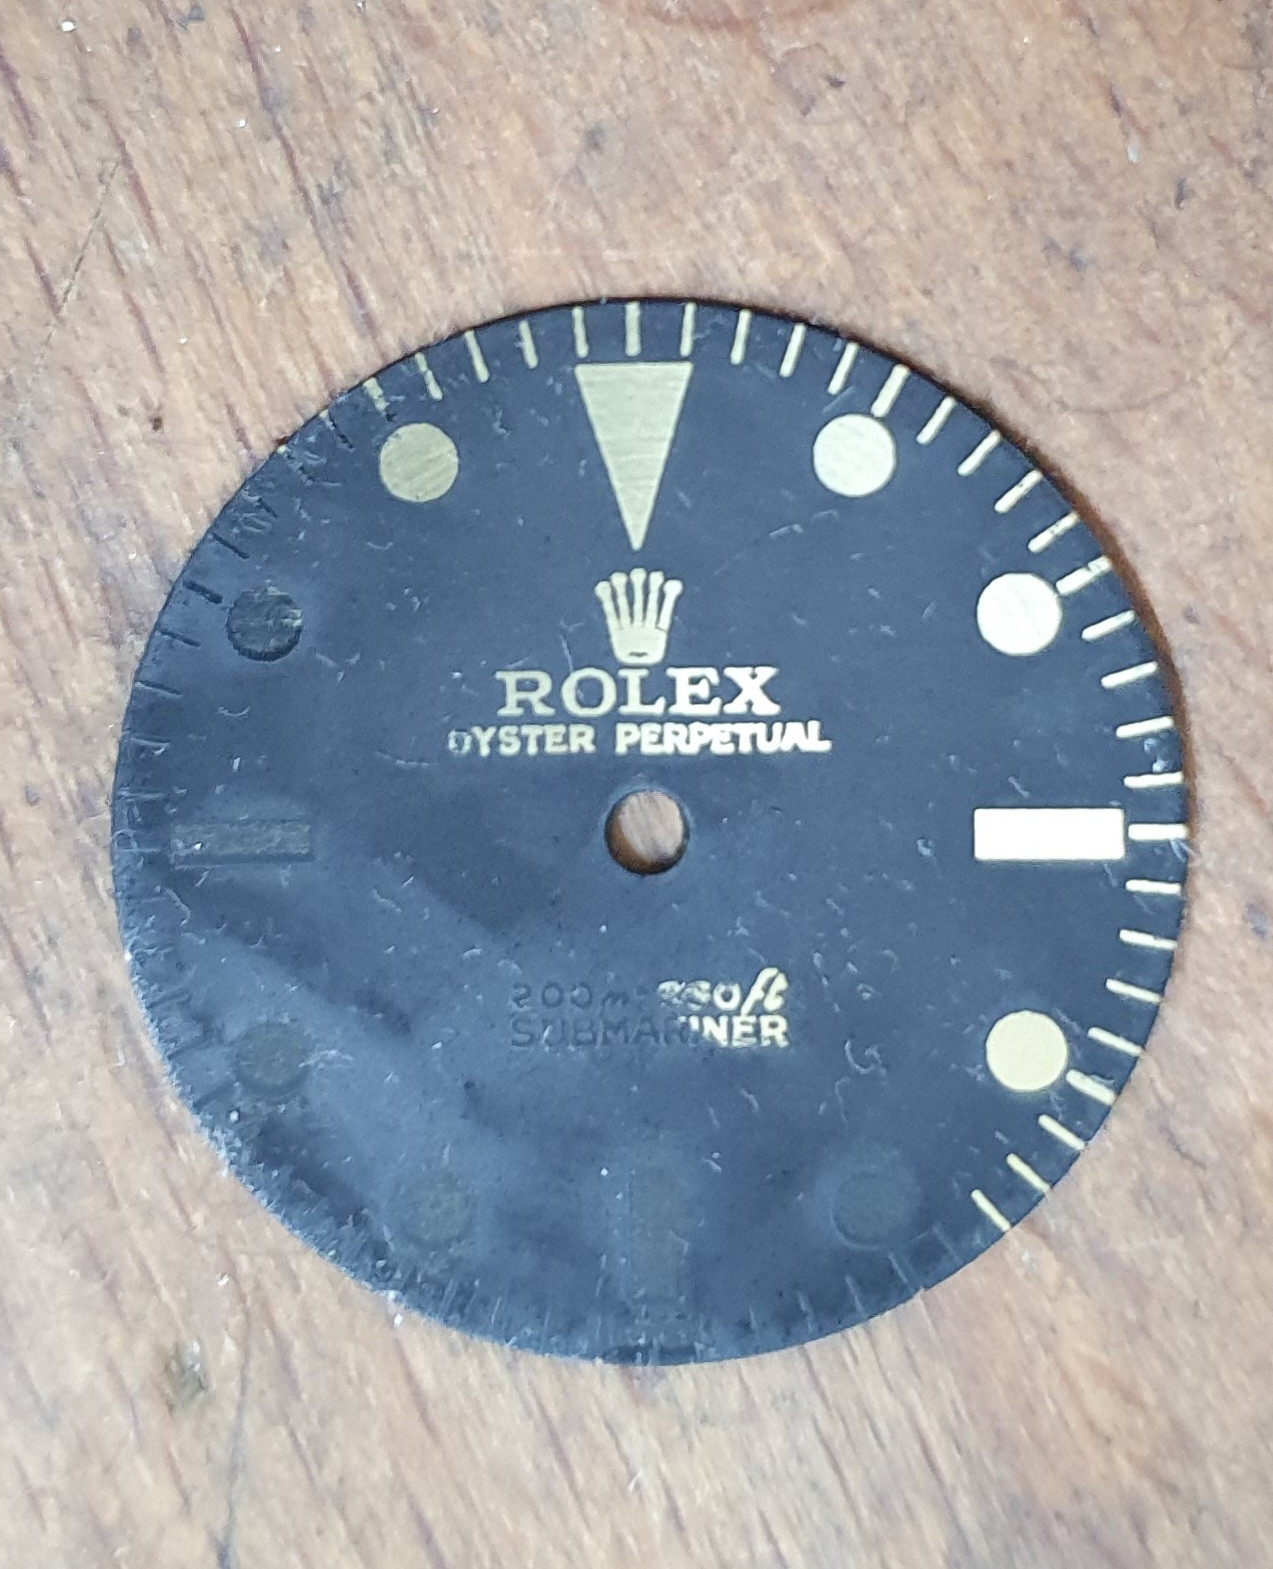
finished dial (without lacquer):
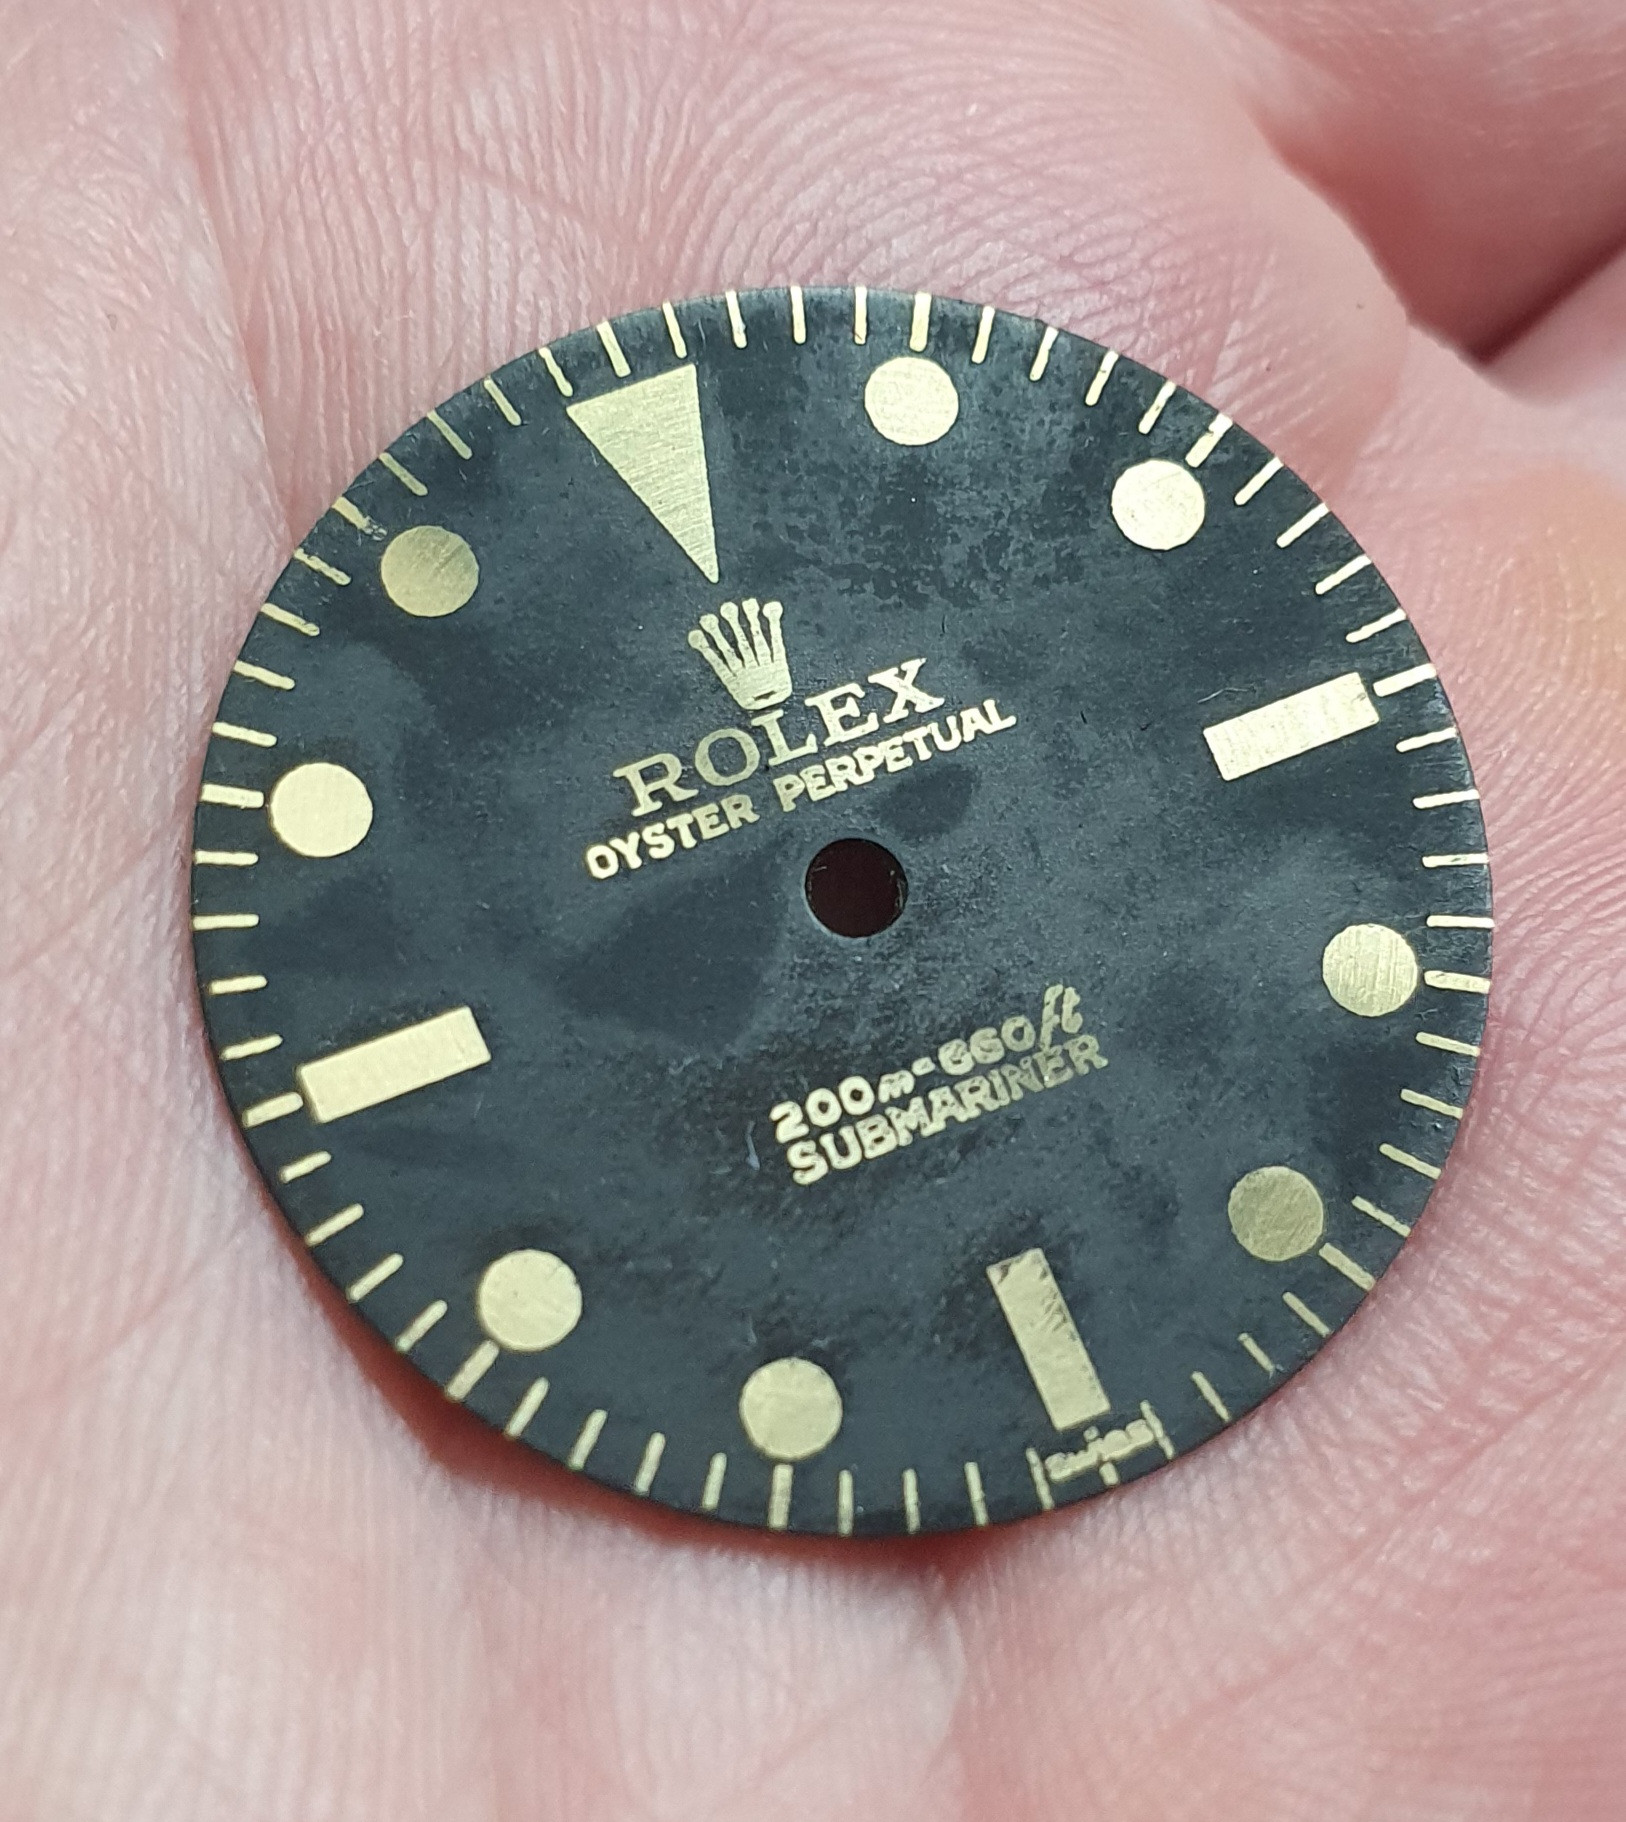
dial with lacquer:
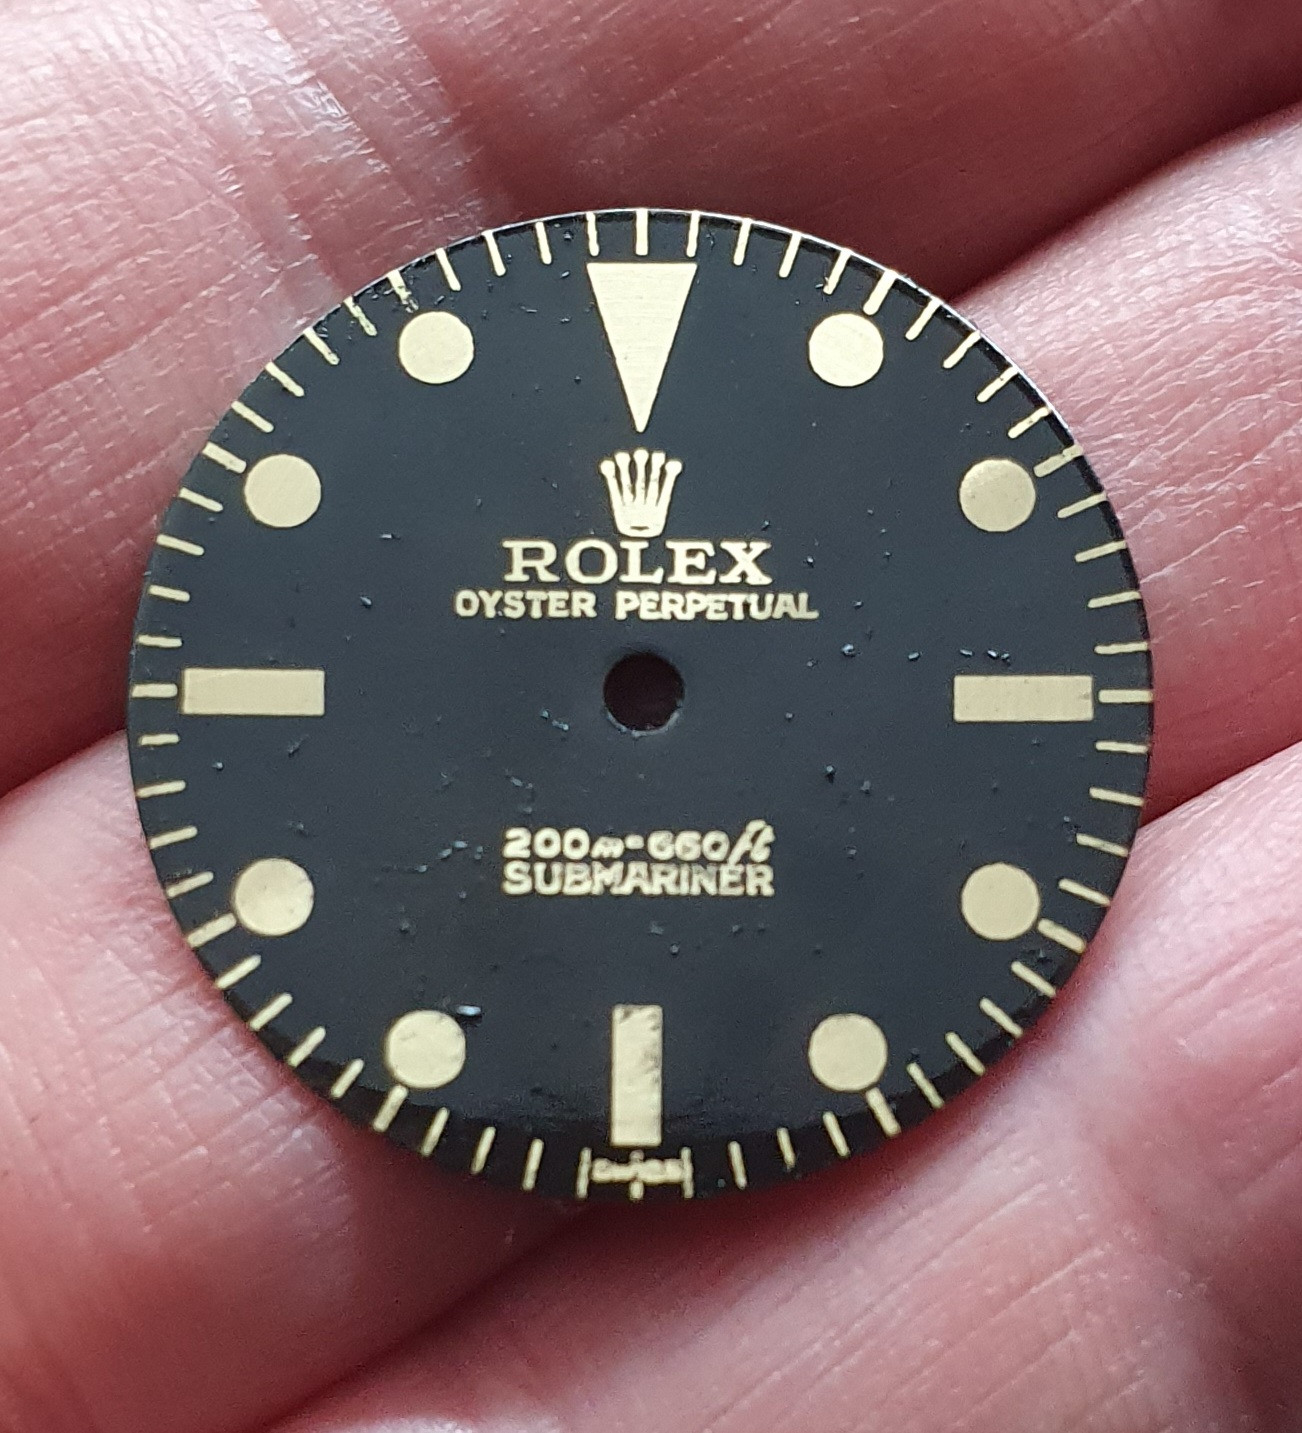
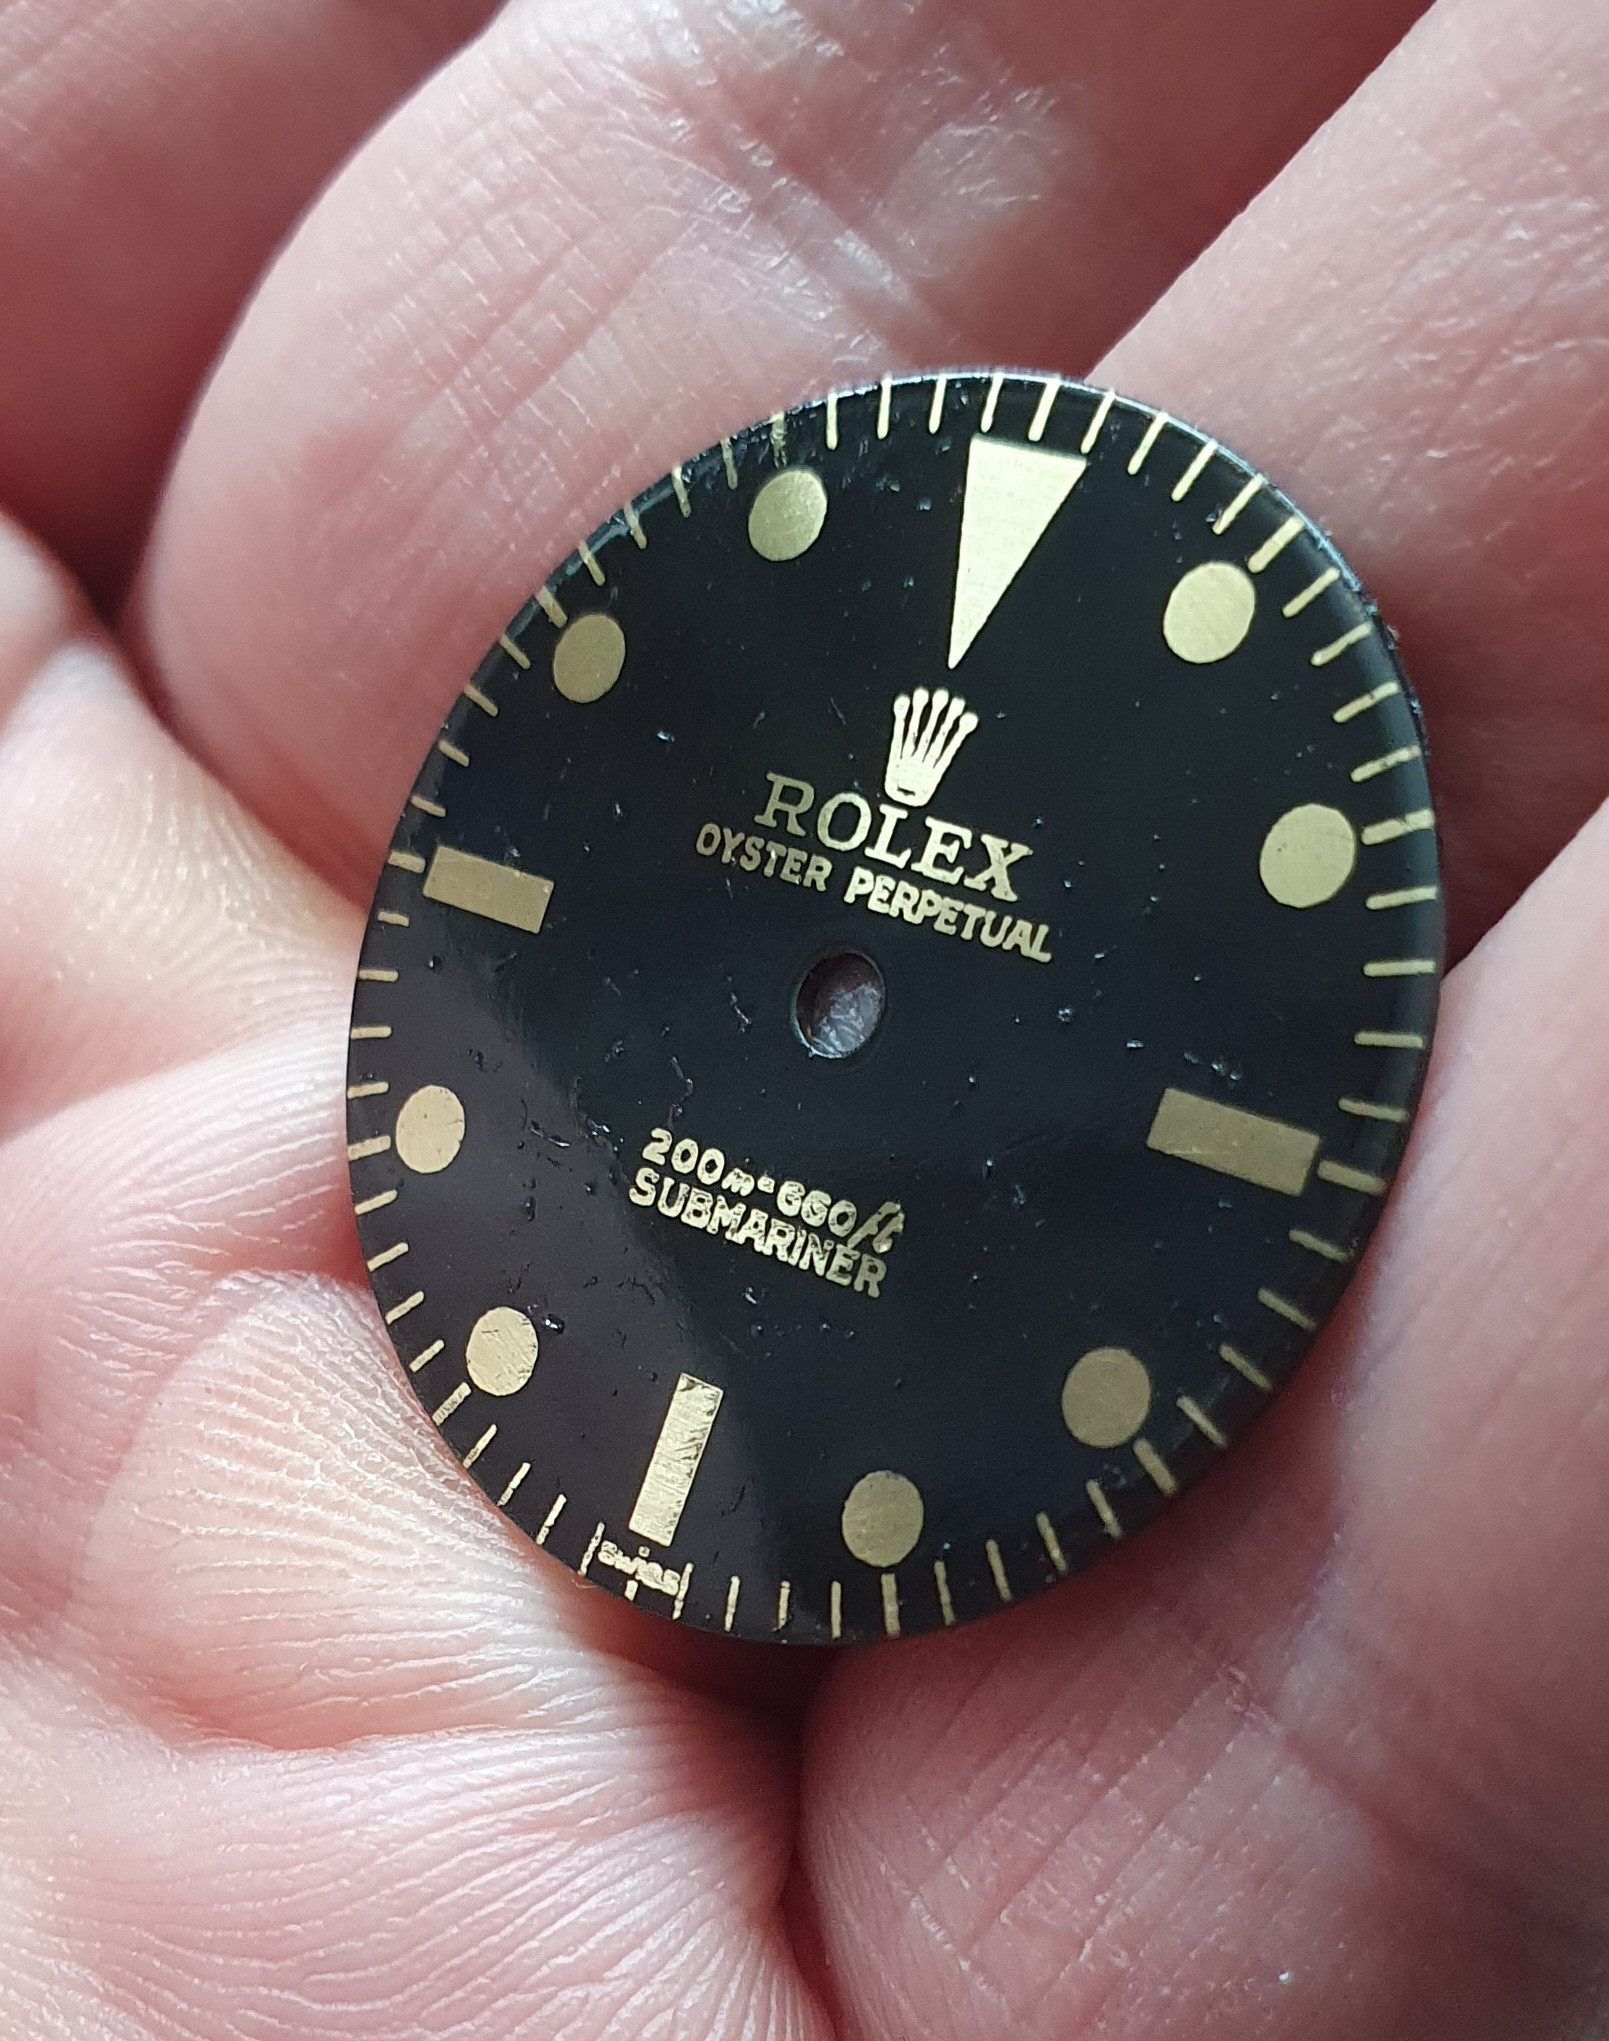
Keep your fingers crossed that I get the lume applied well. That's not one of my strengths ;-)
After reading and asking several people here, I decided to give it a try. It was December when I start ordering parts like dials, liquid,... . I even convinced my family that we needed a laser printer.
My first attempts were disappointing. Especially the toner transfer get me the most problem. It doesn't stick correctly at the brass. Thanks to @chrome72 who always motivated me and gave me tips. I tried different liquids, used my iron and ended up by using film free decals to get the best result for the toner transfer. Because I did a lot of my work in the kitchen, my daughter asked if we eat dials today ;-)
And don't forget the work at the computer. I worked several hours to create a vector based file and still correct it by changing the line thickness ...
But the result is phenomenal. Here some picture of the process:
Toner transfered dial:

blacked the brass with liquid:

remove the toner with aceton:

finished dial (without lacquer):

dial with lacquer:


Keep your fingers crossed that I get the lume applied well. That's not one of my strengths ;-)
Thats awesome! Your transfer was spot on! Now I will pepper you with questions ha.That was for sure the most difficult process I have done for watch parts.
After reading and asking several people here, I decided to give it a try. It was December when I start ordering parts like dials, liquid,... . I even convinced my family that we needed a laser printer.
My first attempts were disappointing. Especially the toner transfer get me the most problem. It doesn't stick correctly at the brass. Thanks to @chrome72 who always motivated me and gave me tips. I tried different liquids, used my iron and ended up by using film free decals to get the best result for the toner transfer. Because I did a lot of my work in the kitchen, my daughter asked if we eat dials today ;-)
And don't forget the work at the computer. I worked several hours to create a vector based file and still correct it by changing the line thickness ...
But the result is phenomenal. Here some picture of the process:
Toner transfered dial:

blacked the brass with liquid:

remove the toner with aceton:

finished dial (without lacquer):

dial with lacquer:


Keep your fingers crossed that I get the lume applied well. That's not one of my strengths ;-)
What did you end up using for making the brass black?
On the last photo is that just water on the dial?
Isn't it crazy how lacquer evens out the splotchyness?
It is a pleasure!Thats awesome! Your transfer was spot on! Now I will pepper you with questions ha.
What did you end up using for making the brass black?
>I used a bath of Ballistol Nerofor for 3-5 minutes. I didn't clean it with water. Than i bake the wet dial in the oven at 180 degrees for 10 minutes.
On the last photo is that just water on the dial?
>No it is lacquer from a can. As you can see there is a bit dust at the dial. Or the lacquer is not suitable for the substrate. I think I have to sanding it again and put a extra layer of lacquer at it.
Isn't it crazy how lacquer evens out the splotchyness?
>Oh yes. And it gets a lot darker.
Gtocha. I think the Ballistol Nerofor is essentially the same as Brass Black available in the USA. I haven't touched my brass black since I started this years ago but your blackening gave it a rich black color so Ill have to try it again. I also have my electroplating kit de-rusting in vinegar so I can electroplate some dials with black nickel. I also have a few dials drying with various coats of nitrocellulose lacquer and will post those once they look finished.It is a pleasure!
What did you end up using for making the brass black?
>I used a bath of Ballistol Nerofor for 3-5 minutes. I didn't clean it with water. Than i bake the wet dial in the oven at 180 degrees for 10 minutes.
On the last photo is that just water on the dial?
>No it is lacquer from a can. As you can see there is a bit dust at the dial. Or the lacquer is not suitable for the substrate. I think I have to sanding it again and put a extra layer of lacquer at it.
Isn't it crazy how lacquer evens out the splotchyness?
>Oh yes. And it gets a lot darker.
Lastly, I also figured out laser jet transparency film works great too for a toner transfer medium! The added bonus is you can actually see where your artwork actually is on the dial so its awesome for simple artwork alignment. I was also hesitant to do a Rolex 6542 gmt dial because I didn't want to be slightly off but now it won't be a problem.
Nicely done. that looks great. just need to find a dust free area for spraying clear and your good!!That was for sure the most difficult process I have done for watch parts.
After reading and asking several people here, I decided to give it a try. It was December when I start ordering parts like dials, liquid,... . I even convinced my family that we needed a laser printer.
My first attempts were disappointing. Especially the toner transfer get me the most problem. It doesn't stick correctly at the brass. Thanks to @chrome72 who always motivated me and gave me tips. I tried different liquids, used my iron and ended up by using film free decals to get the best result for the toner transfer. Because I did a lot of my work in the kitchen, my daughter asked if we eat dials today ;-)
And don't forget the work at the computer. I worked several hours to create a vector based file and still correct it by changing the line thickness ...
But the result is phenomenal. Here some picture of the process:
Toner transfered dial:

blacked the brass with liquid:

remove the toner with aceton:

finished dial (without lacquer):

dial with lacquer:


Keep your fingers crossed that I get the lume applied well. That's not one of my strengths ;-)
I want to get into this and try my hand at tropical dials.
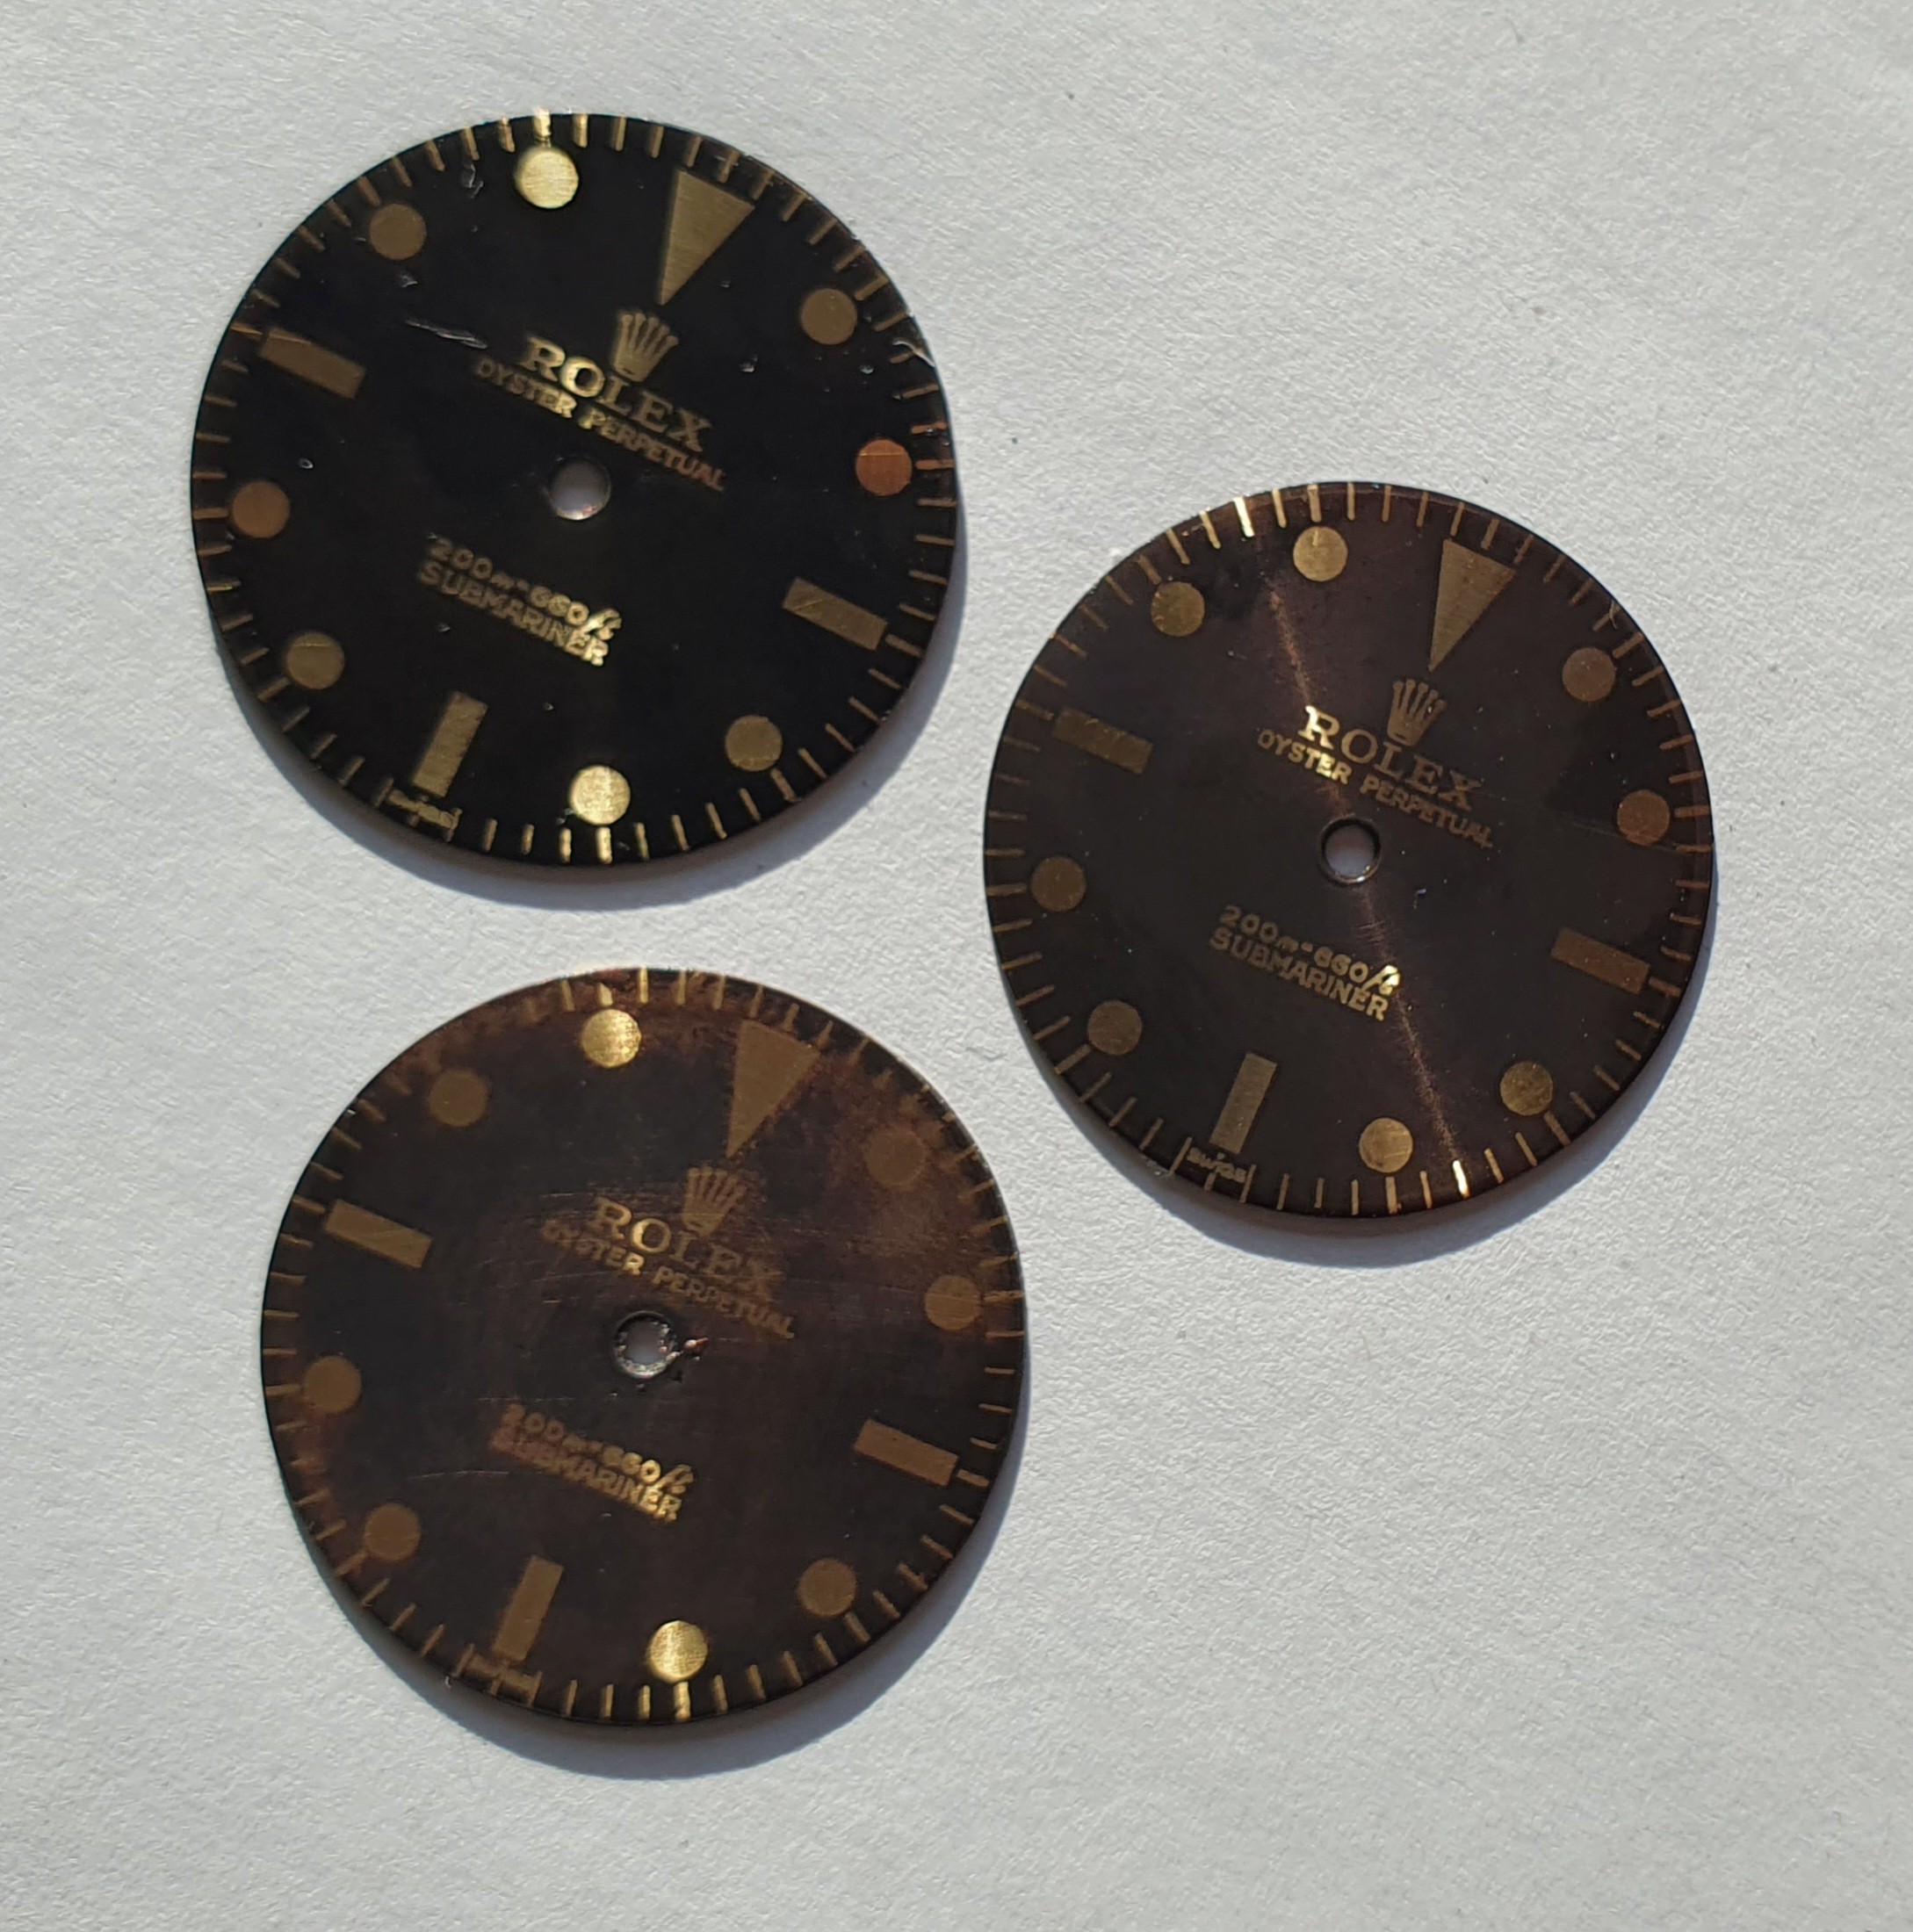
I used again Nerofor. Unfortunately, the result of the colour always varies and is not yet comprehensible to me. But I have found out the following:
- Rinsing the surface with water removes a lot of the black colour.
- Rubbing the surface by hand also removes the dark tones.
- Baking at 180 degrees
- Removing the toner transfer with acetone. Only wipe over the surface very briefly.
bigtiddygothgf
Active Member
- 7/10/18
- 323
- 149
- 43
the gradients on the rightmost/bottom dial look sooooo good, do you plan on hitting these with gloss lacquer? would love to see the result.
curious if you've tried this method with polished blanks as opposed to brushed? i'm wondering if it would effect the evenness of the color in one direction or the other
Amazing! Are you using the glue with that comes with the film free decals, or only the film and heat?That was for sure the most difficult process I have done for watch parts.
After reading and asking several people here, I decided to give it a try. It was December when I start ordering parts like dials, liquid,... . I even convinced my family that we needed a laser printer.
My first attempts were disappointing. Especially the toner transfer get me the most problem. It doesn't stick correctly at the brass. Thanks to @chrome72 who always motivated me and gave me tips. I tried different liquids, used my iron and ended up by using film free decals to get the best result for the toner transfer. Because I did a lot of my work in the kitchen, my daughter asked if we eat dials today ;-)
And don't forget the work at the computer. I worked several hours to create a vector based file and still correct it by changing the line thickness ...
But the result is phenomenal. Here some picture of the process:
Toner transfered dial:

blacked the brass with liquid:

remove the toner with aceton:

finished dial (without lacquer):

dial with lacquer:


Keep your fingers crossed that I get the lume applied well. That's not one of my strengths ;-)
Thank you very much for the positive feedback. Nice to hear that you share the joy.
There is already a gloss lacquer on it.do you plan on hitting these with gloss lacquer? would love to see the result.
I have not yet had the idea of testing the difference. @chrome72 also asked me about it. Maybe I'll give it a try over the next few days.curious if you've tried this method with polished blanks as opposed to brushed? i'm wondering if it would effect the evenness of the color in one direction or the other
No. I am not using the glue. I suspect that this also has disadvantages when dyeing black. If there is glue on the metal, the Nerofor cannot work on the spot.Amazing! Are you using the glue with that comes with the film free decals, or only the film and heat?
I don't think it matters if the surface is polished or not. The acids interact with the metal itself, not the design of the metal. The differences in color are due to time and temp and how clean your surface is. If you put the dial in at an angle, part of the dial has more time in acid. Warmer conditions also make things react faster. I cleaned dial post image transfer and sprayed a cleaner on it and scrubbed it off. After oxidizing it you could see some pattern of the cleaner in the form of a lighter brown.I have not yet had the idea of testing the difference. @chrome72 also asked me about it. Maybe I'll give it a try over the next few days.
Rambling here, but i think your best bet is to adopt the methodology of electroplaters...clean, dip in your degreaser and let it rest, pull it out, dip in distilled water and let it rest, dip in your acid, dip in clean distilled water.
Glue will 100% mess with the blackening. You can't oxidize glueNo. I am not using the glue. I suspect that this also has disadvantages when dyeing black. If there is glue on the metal, the Nerofor cannot work on the spot.
Can you give more details on how you transferred the toner to the dial?Thank you very much for the positive feedback. Nice to hear that you share the joy.
There is already a gloss lacquer on it.
I have not yet had the idea of testing the difference. @chrome72 also asked me about it. Maybe I'll give it a try over the next few days.
No. I am not using the glue. I suspect that this also has disadvantages when dyeing black. If there is glue on the metal, the Nerofor cannot work on the spot.
-what did you use as a heat source?
-what setting or temperature did you use?
-did you sandwich the dial in between two pieces of metal or simply burnish the transfer before removing the film?
I'm ready to try this ASAP, so any tips or suggestions are greatly appreciated!!!
Well, I just follow the instruction of the film free decals paper I've ordered. In my case, there was a Video instruction that was great. For the heat, I have to put it into the heater at 120 degree. I think each film free decals are different, so it may not help you to explain my option.Can you give more details on how you transferred the toner to the dial?
-what did you use as a heat source?
-what setting or temperature did you use?
-did you sandwich the dial in between two pieces of metal or simply burnish the transfer before removing the film?
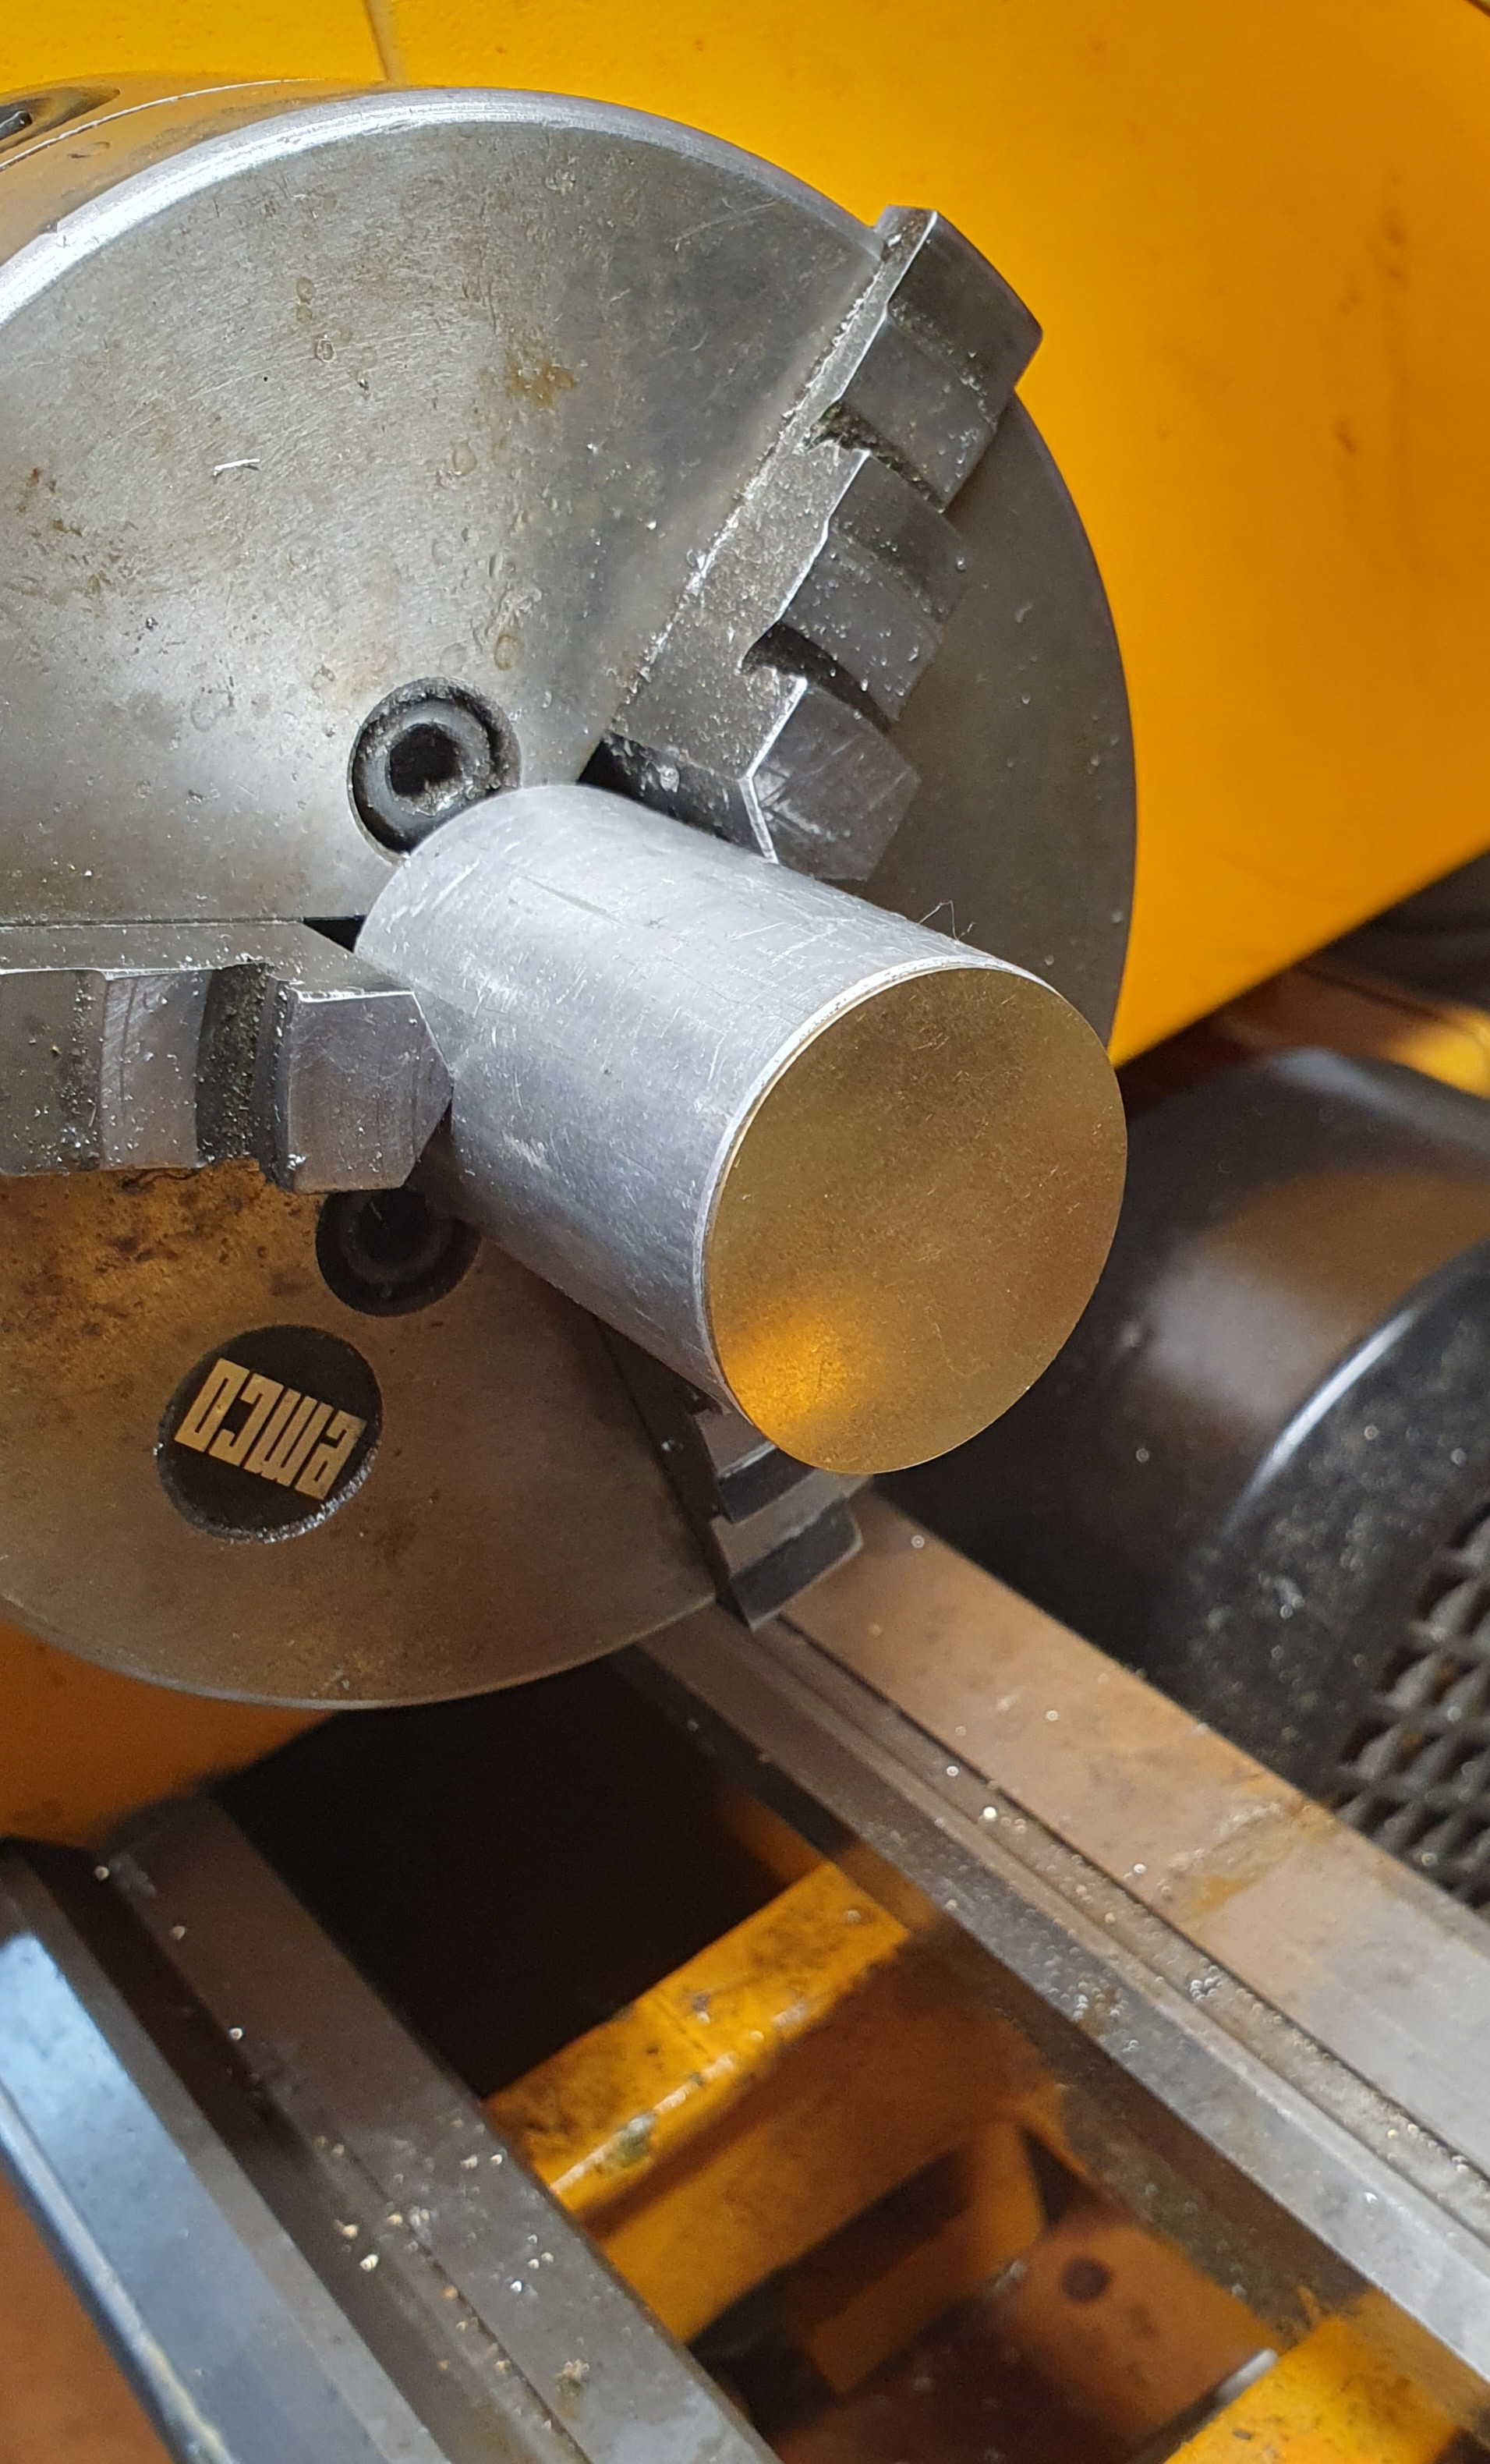
I polished the dial before at my lathe. I put double site tape at the back and stick it to a metal and rotate it. Then I used sandpaper from 280 ... 5000.
When you do the film free are you just heating it and then done? Other times I see people do a few other little things but not sure if you needed to do that if you were just eventually wiping it away post blackeningWell, I just follow the instruction of the film free decals paper I've ordered. In my case, there was a Video instruction that was great. For the heat, I have to put it into the heater at 120 degree. I think each film free decals are different, so it may not help you to explain my option.
I polished the dial before at my lathe. I put double site tape at the back and stick it to a metal and rotate it. Then I used sandpaper from 280 ... 5000.


