• Tired of adverts on RWI? - Subscribe by clicking HERE and PMing Trailboss for instructions and they will magically go away!

How to make a true gilt dial on the cheap - Tropical or Black

WatchN3RD

I supported. Doesn't make me an expert!
Gold Patron
24/7/18
562
649
93
I have been tinkering for a few years aiming to perfect the vintage Tudor rose logo. Its small, its intricate. I figured if I can perfect that, anything else would be peanuts next to it. Confirmed my settings today with my resin printer as the UV light source. Check out this mask! The text even has the serifs. Will do this on an actual dial, zinc plate, and apply acids and have a quality dial.

https://clickpix.org/image/hCFBqo] [/url]
That's very promising! Is that after removing the unexposed portion with soda ash?

BTW, I've read that some films work better after letting the film develop another 10-30 minutes after exposure, but prior to removing the unexposed portion. I've noticed it goes from a softer film to a darker, harder plastic the longer it sits. I haven't calculated the exposure times I'll need or the best ratio of soda ash yet. Only mentioning in case you come across any issues where that information might help.
 
  • Like
Reactions: onsight

chrome72

Renowned Member
7/12/17
639
562
93
Houston TX Baby
@WatchN3RD yes this is after "developing" it which is really washing away the unexposed part. I just use 3% washing soda to water by weight aka 15 grams washing soda per 500 grams water.

I haven't come across the mention of letting it develop further post exposure for 10-30 minutes, do you have any sources? Some people do reexpose the developed film to additional UV post developing which is what hardens even more. The general idea is that you use the least amount of UV to develop so that parts wont wash away and then harden whats left. I have found that its not really necessary when electroplating and using acids. It might matter if say you need to do light sanding or withstand acetone slightly longer.
 
  • Love
Reactions: WatchN3RD

WatchN3RD

I supported. Doesn't make me an expert!
Gold Patron
24/7/18
562
649
93
@WatchN3RD yes this is after "developing" it which is really washing away the unexposed part. I just use 3% washing soda to water by weight aka 15 grams washing soda per 500 grams water.

I haven't come across the mention of letting it develop further post exposure for 10-30 minutes, do you have any sources? Some people do reexpose the developed film to additional UV post developing which is what hardens even more. The general idea is that you use the least amount of UV to develop so that parts wont wash away and then harden whats left. I have found that its not really necessary when electroplating and using acids. It might matter if say you need to do light sanding or withstand acetone slightly longer.
Man, that looks great if you've already developed it. I wouldn't change a thing, but I will have to ask you multiple more questions when I'm closer to dialing in my UV exposure and figuring out the development.
Quick question for now though. Did you submerge the film in 3% Soda Ash/sodium carbonate/washing soda the entire time, or did you use any agitation methods like a soft brush, or air bubbles, or anything else?
 

chrome72

Renowned Member
7/12/17
639
562
93
Houston TX Baby
Man, that looks great if you've already developed it. I wouldn't change a thing, but I will have to ask you multiple more questions when I'm closer to dialing in my UV exposure and figuring out the development.
Quick question for now though. Did you submerge the film in 3% Soda Ash/sodium carbonate/washing soda the entire time, or did you use any agitation methods like a soft brush, or air bubbles, or anything else?
After I exposed my coated dial to uv light (30 secs for my set up) I simply just dunked it into my washing soda/water mixture. I let it sit for about a minute and brushed off the undeveloped portion by rubbing it with my thumb. I should use a small brush next time to get rid of some microscopic parts that might need help.
 

chrome72

Renowned Member
7/12/17
639
562
93
Houston TX Baby
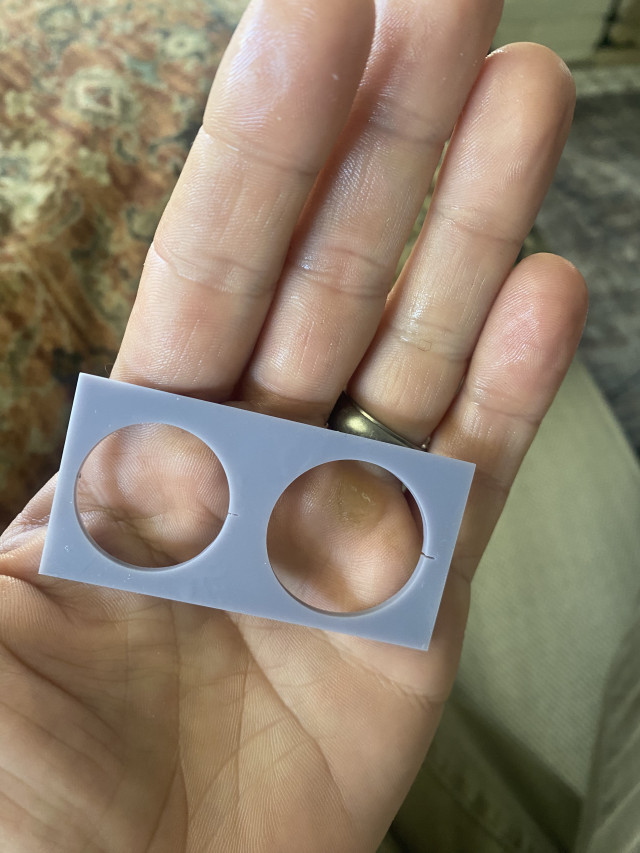
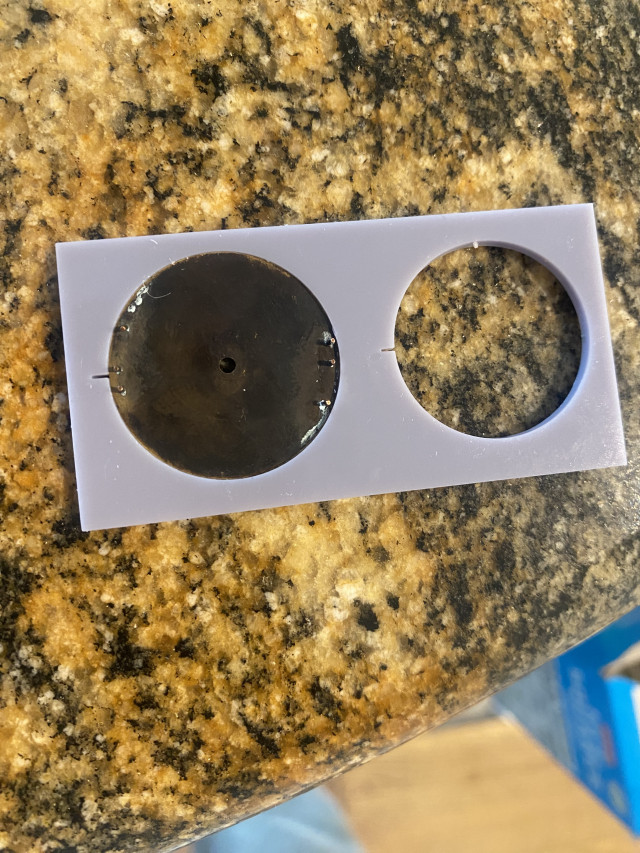
Made a 3D printed jig/alignment tool for my uv exposure. Super excited that it was my first ever design and print. It will allow me to both center the dial with the mask and allow me to rotate the dial to get it in the appropriate orientation I.e. 3 o’clock on the dial will align to 3oclock on the uv mask