-
Tired of adverts on RWI? - Subscribe by clicking HERE and PMing Trailboss for instructions and they will magically go away!
You are using an out of date browser. It may not display this or other websites correctly.
You should upgrade or use an alternative browser.
You should upgrade or use an alternative browser.
How to make a true gilt dial on the cheap - Tropical or Black
- Thread starter chrome72
- Start date
bigtiddygothgf
Active Member
- 7/10/18
- 322
- 146
- 43
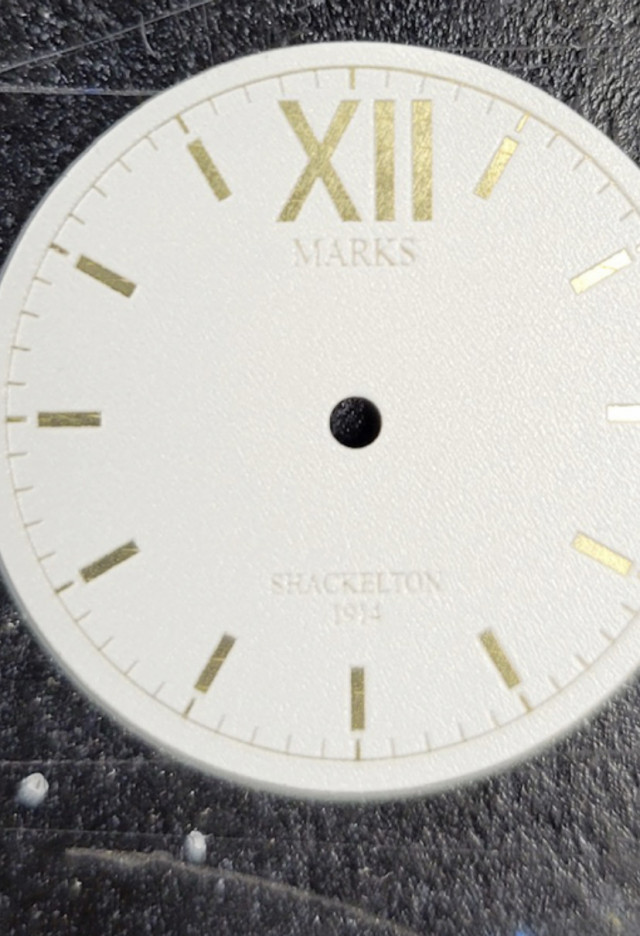
Woah, that looks really good, most traditional (non-negative relief) digital printing I've seen on dials looks terribly flat.
Apologies in advance for the barrage of questions.
That looks to have some good depth to it but is that due to something you've done, ie: multiple passes, a different printer, settings, etc, or is that just how negative relief looks with most digital printing? Have you tried it in black?
Can you share some more details about it? Did you just give it to a print shop and let them do their thing?
I gave it to a print shop here in Houston that happens to print watch dials for a company that licenses to the nfl, mlb, nhl etc. I liked what I saw and this was a test dial. I wasn’t really expecting depth and I’d actually will ask for less depth as I feel like it closed in the text a bit. It’s a decent first attempt. They can do whatever colors I want.Woah, that looks really good, most traditional (non-negative relief) digital printing I've seen on dials looks terribly flat.
Apologies in advance for the barrage of questions.
That looks to have some good depth to it but is that due to something you've done, ie: multiple passes, a different printer, settings, etc, or is that just how negative relief looks with most digital printing? Have you tried it in black?
Can you share some more details about it? Did you just give it to a print shop and let them do their thing?
I can ask them whatever specifics you want to know.
First attempt with my uv resin 3D printer using the uv light and screen projection for masking on photosensitive film. Very happy with how the .45mm SWISS came out at the bottom! The Tudor rose came out perfect.
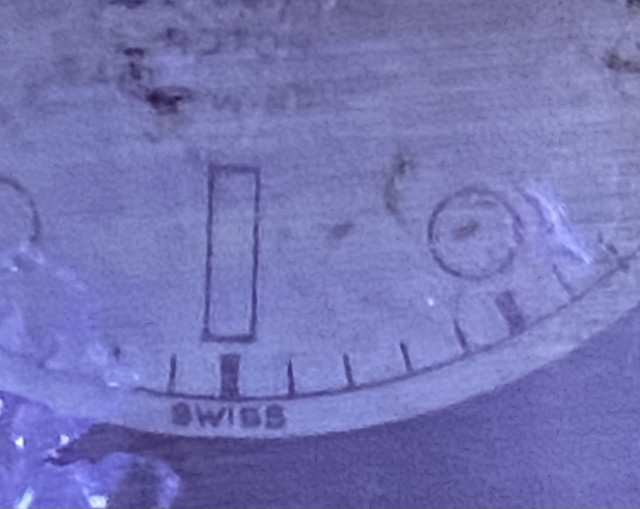
with this method you should get true representation of the art if you figure out your light source, distance and time. The photosensitive film hardens upon uv exposure and acids won’t touch it.
I need to build a jig for alignment of the dial and I should be good to go.

with this method you should get true representation of the art if you figure out your light source, distance and time. The photosensitive film hardens upon uv exposure and acids won’t touch it.
I need to build a jig for alignment of the dial and I should be good to go.
With the photoresist method I found out you can put the film over a painted surface or even a lacquered surface. You can essentially make a super detailed stencil.
Lets say I have a white painted dial like above. I could put the inverted image over the entire dial revealing the white paint where I would want the shiny brass to be. I could then just wipe the white paint away with acetone to reveal the base brass then dissolve the photoresist in a washing soda/water mixture that wouldn't touch the paint. You would then have a gilt dial with a painted surface, kind of acting like a laser engraver in removing paint.
For a lacquer surface, you could put the inverted image on the lacquered gilt dial you made and then paint in the exposed space (lets say you want it to say "220/660" and be the color red) and then dissolve the photoresist film. You would then be left with a gilt dial with "220/660" in red color....a red depth dial. You could do purple for the 6542 gilt dial as well.
Heck you could even make your own custom dial with as many colors as you want as long as you are good at alignment.
Hopefully have time to tinker soon now that I know my settings are correct.
are you using laser jet transparent sheets or ink jet ? Ive been trying this method on etching casebacks and its just not transferring for me. with the uv exposureWith the photoresist method I found out you can put the film over a painted surface or even a lacquered surface. You can essentially make a super detailed stencil.
Lets say I have a white painted dial like above. I could put the inverted image over the entire dial revealing the white paint where I would want the shiny brass to be. I could then just wipe the white paint away with acetone to reveal the base brass then dissolve the photoresist in a washing soda/water mixture that wouldn't touch the paint. You would then have a gilt dial with a painted surface, kind of acting like a laser engraver in removing paint.
For a lacquer surface, you could put the inverted image on the lacquered gilt dial you made and then paint in the exposed space (lets say you want it to say "220/660" and be the color red) and then dissolve the photoresist film. You would then be left with a gilt dial with "220/660" in red color....a red depth dial. You could do purple for the 6542 gilt dial as well.
Heck you could even make your own custom dial with as many colors as you want as long as you are good at alignment.
Hopefully have time to tinker soon now that I know my settings are correct.
@369mafia I am using the Elegoo Mars 4 MSLA 3D printer. It essentially has a LCD screen that makes the mask and a UV light beneath the screen that projects through the mask. The screen itself has a resolution of like .01mm which is pretty detailed. All I have to do is make my .svg a .stl file with a height of .05mm and then slice it to 1 layer. A 1 minute exposure works great.
Here is general idea of the UV light projecting through the screen.
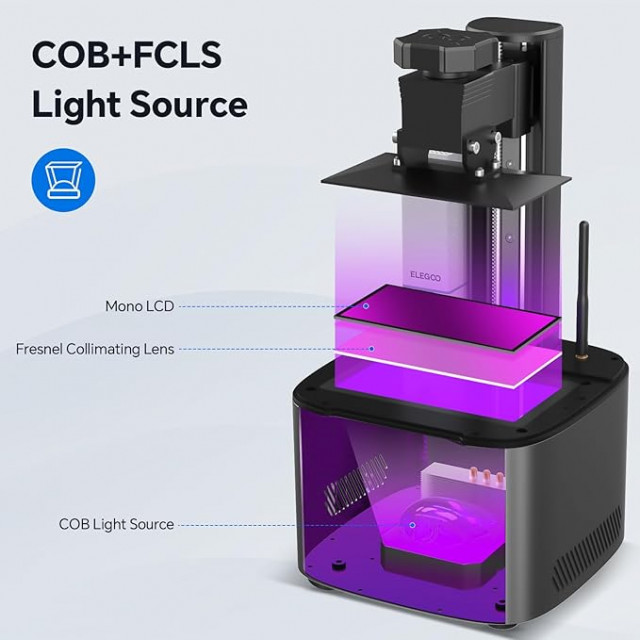
Any UV light source will do just gotta get right the distance of the light to the substrate and the time of exposure.
Here is general idea of the UV light projecting through the screen.

Any UV light source will do just gotta get right the distance of the light to the substrate and the time of exposure.
I am using ink jet transparent sheets. that I am printing the tudor sub case back script on to do a salt water etch .@369mafia perhaps I can help troubleshoot for you. When you say its not transferring can you explain more.
I apply the photo paper, then tape the printed transparent and tape ti to the case back as its a bit stiff to fit to the curve of a caseback. then exposed it to uv on a nail machine... but nothing is burnt into the photo paper . It was suggested that the ink jet print is not dark enough and is letting the light get past the ink and why its not leaving its mark on the photo paper. .
I was going to try a laser jet next with the correct paper.
your machine looks wild. This would do case backs quite easily it seems, especially since you are getting such nice detail on dials.
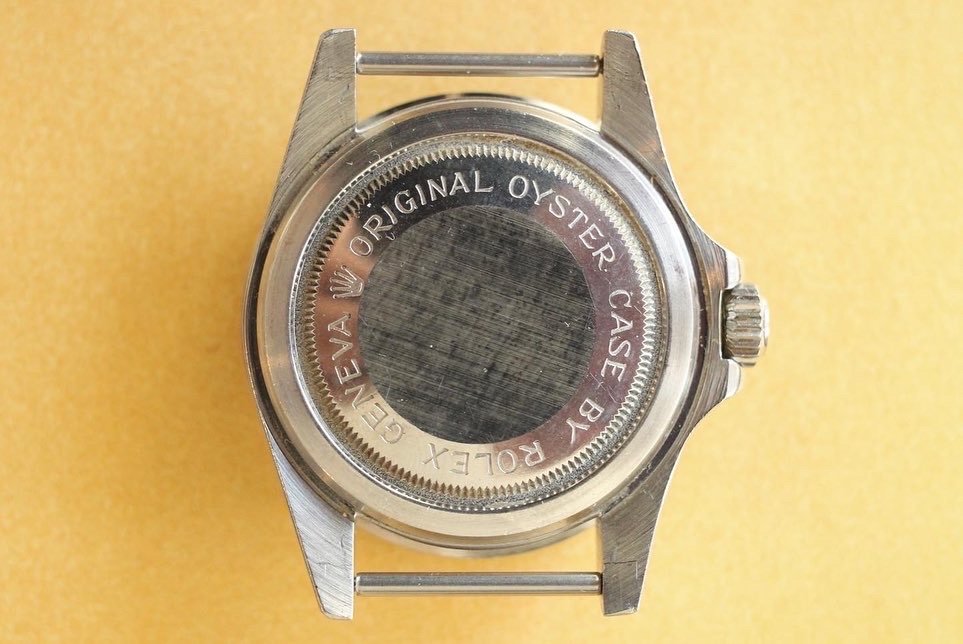
I know it can be done.
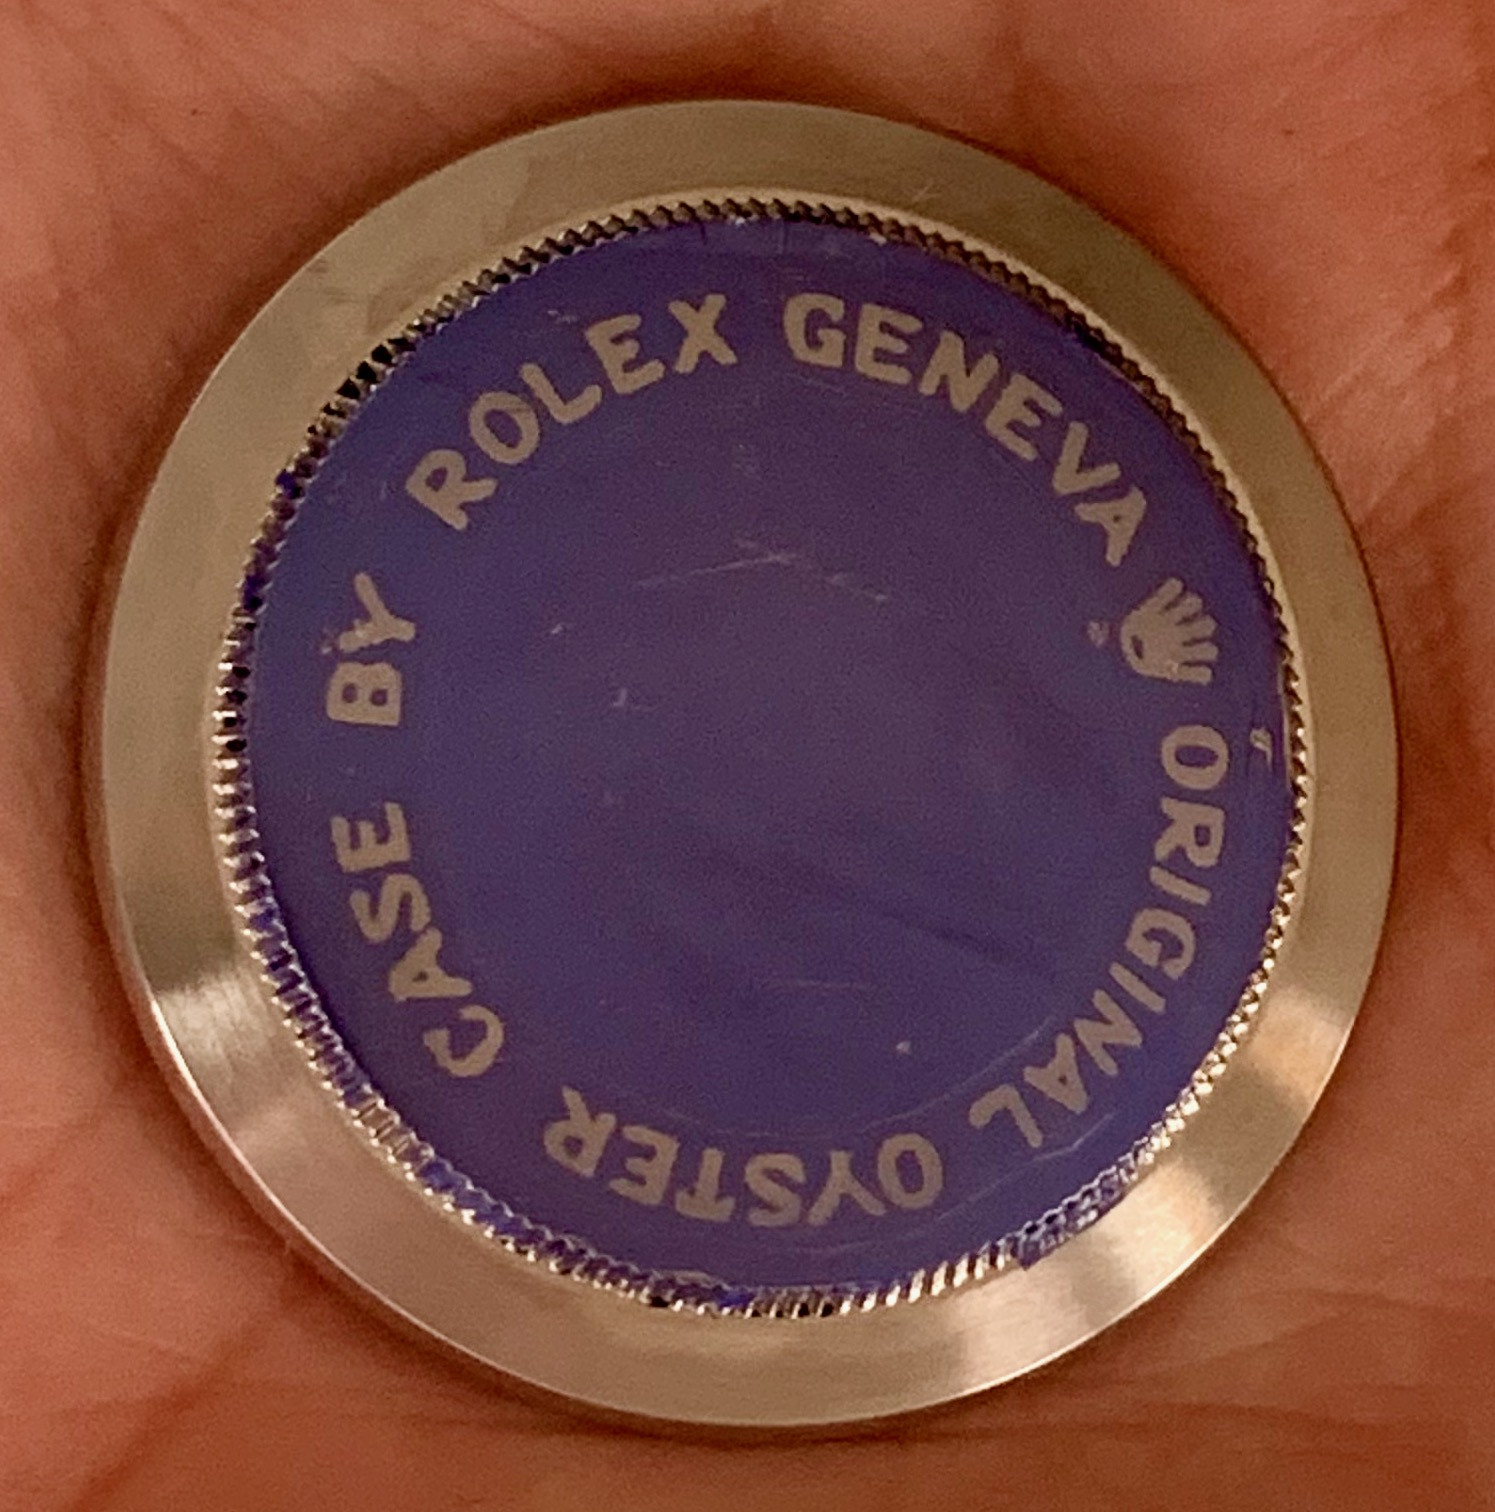
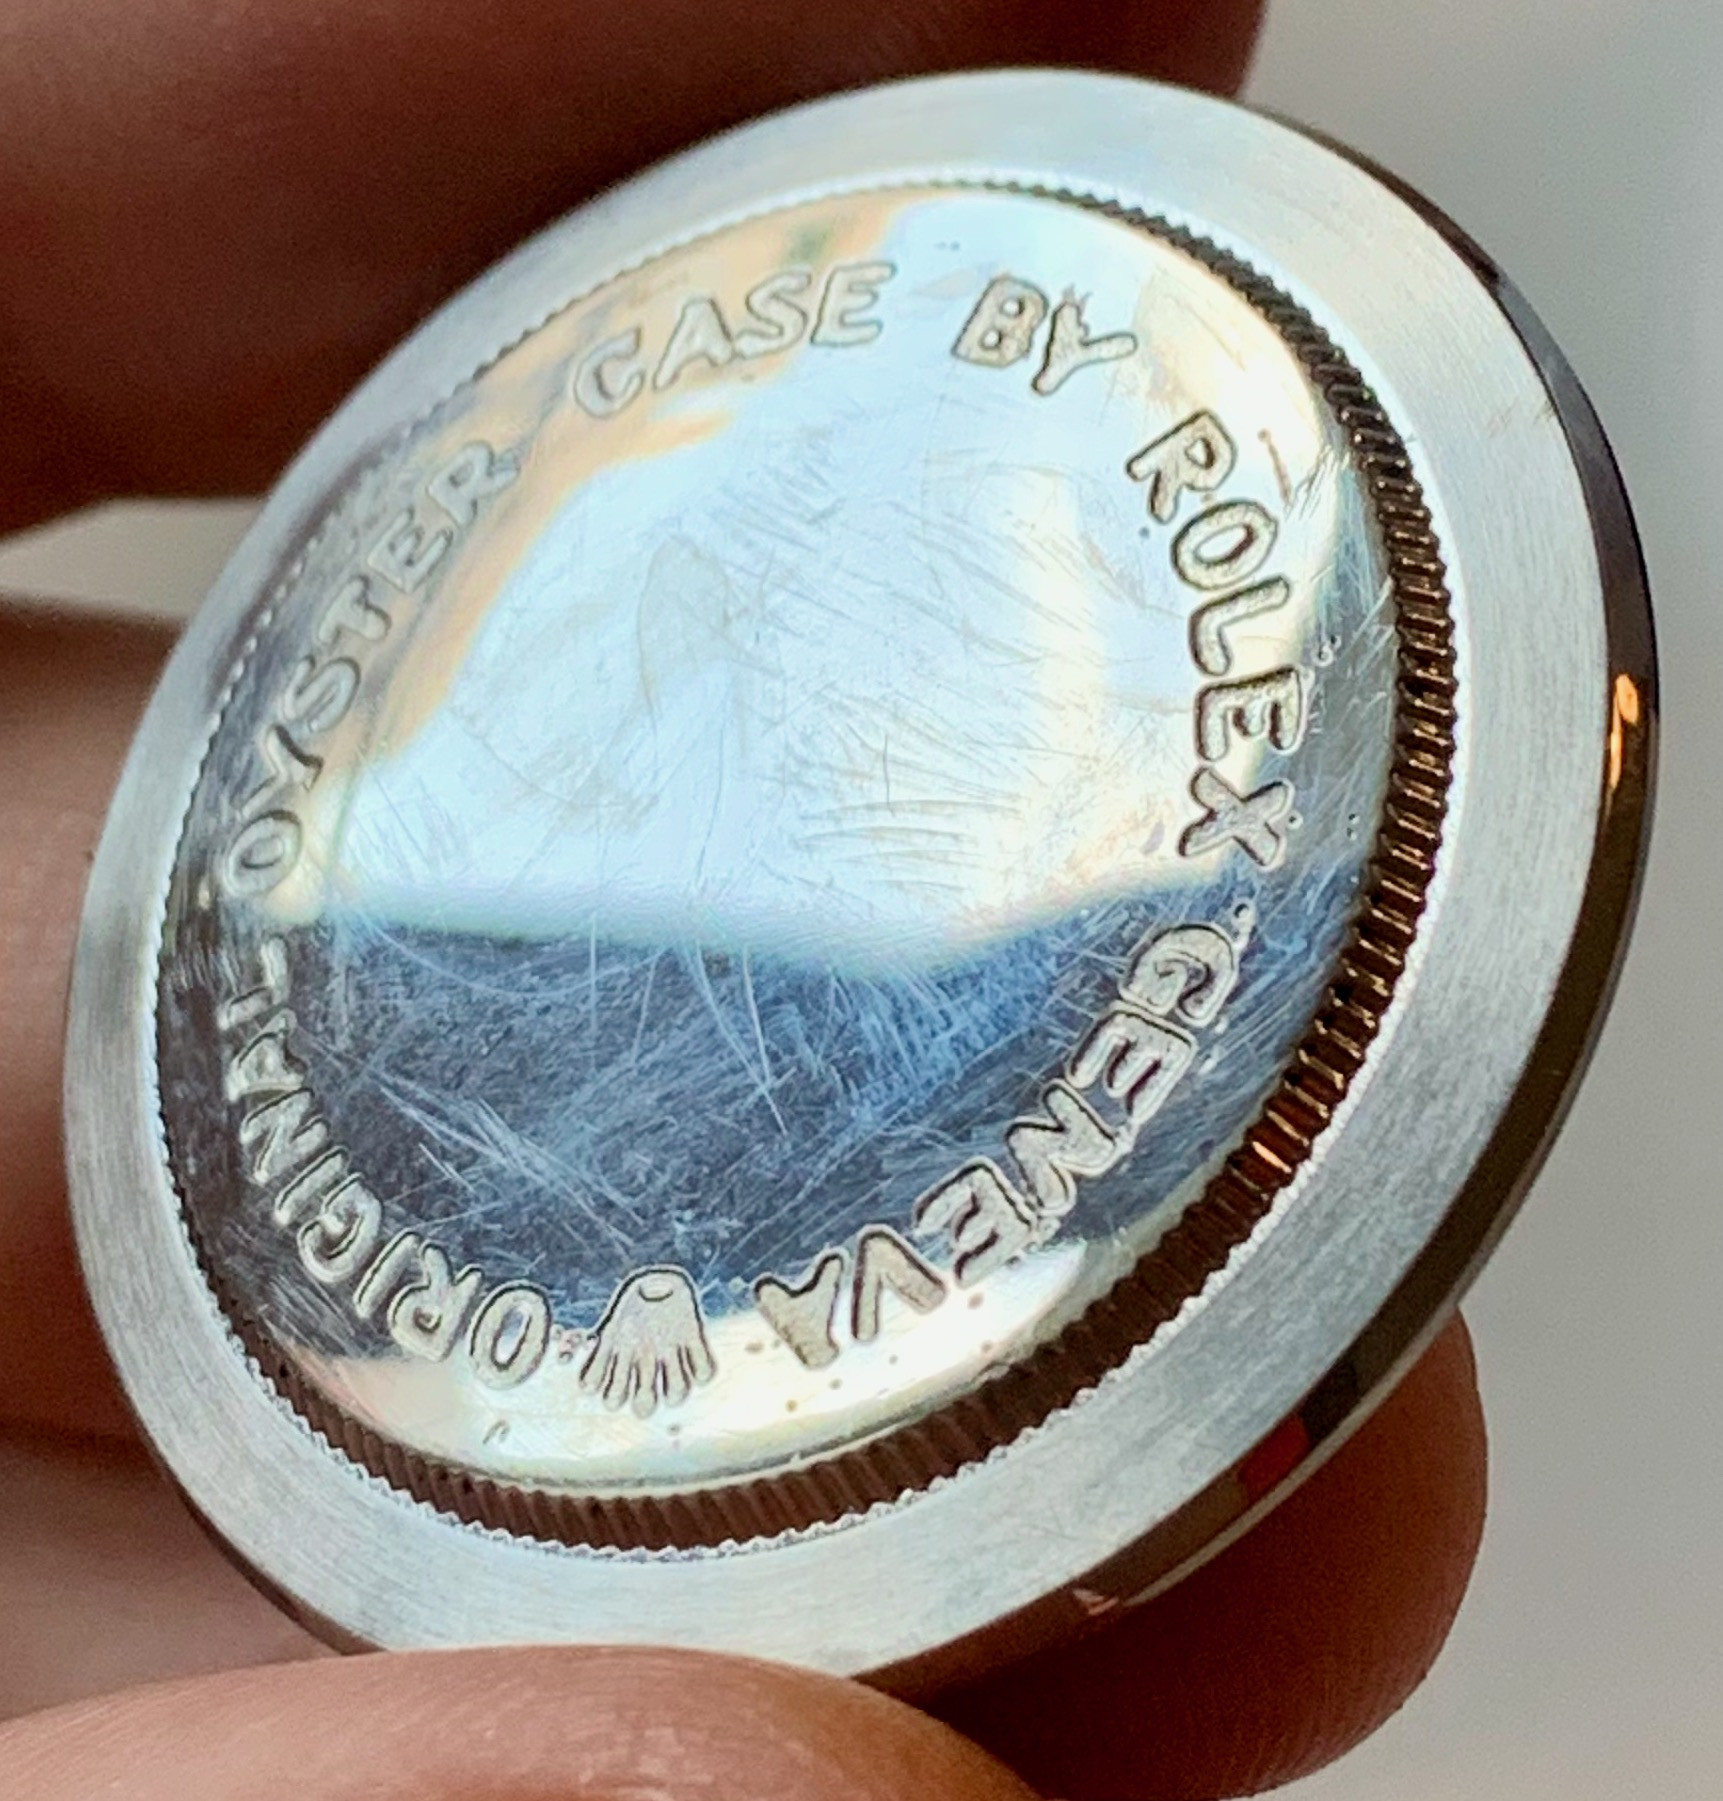
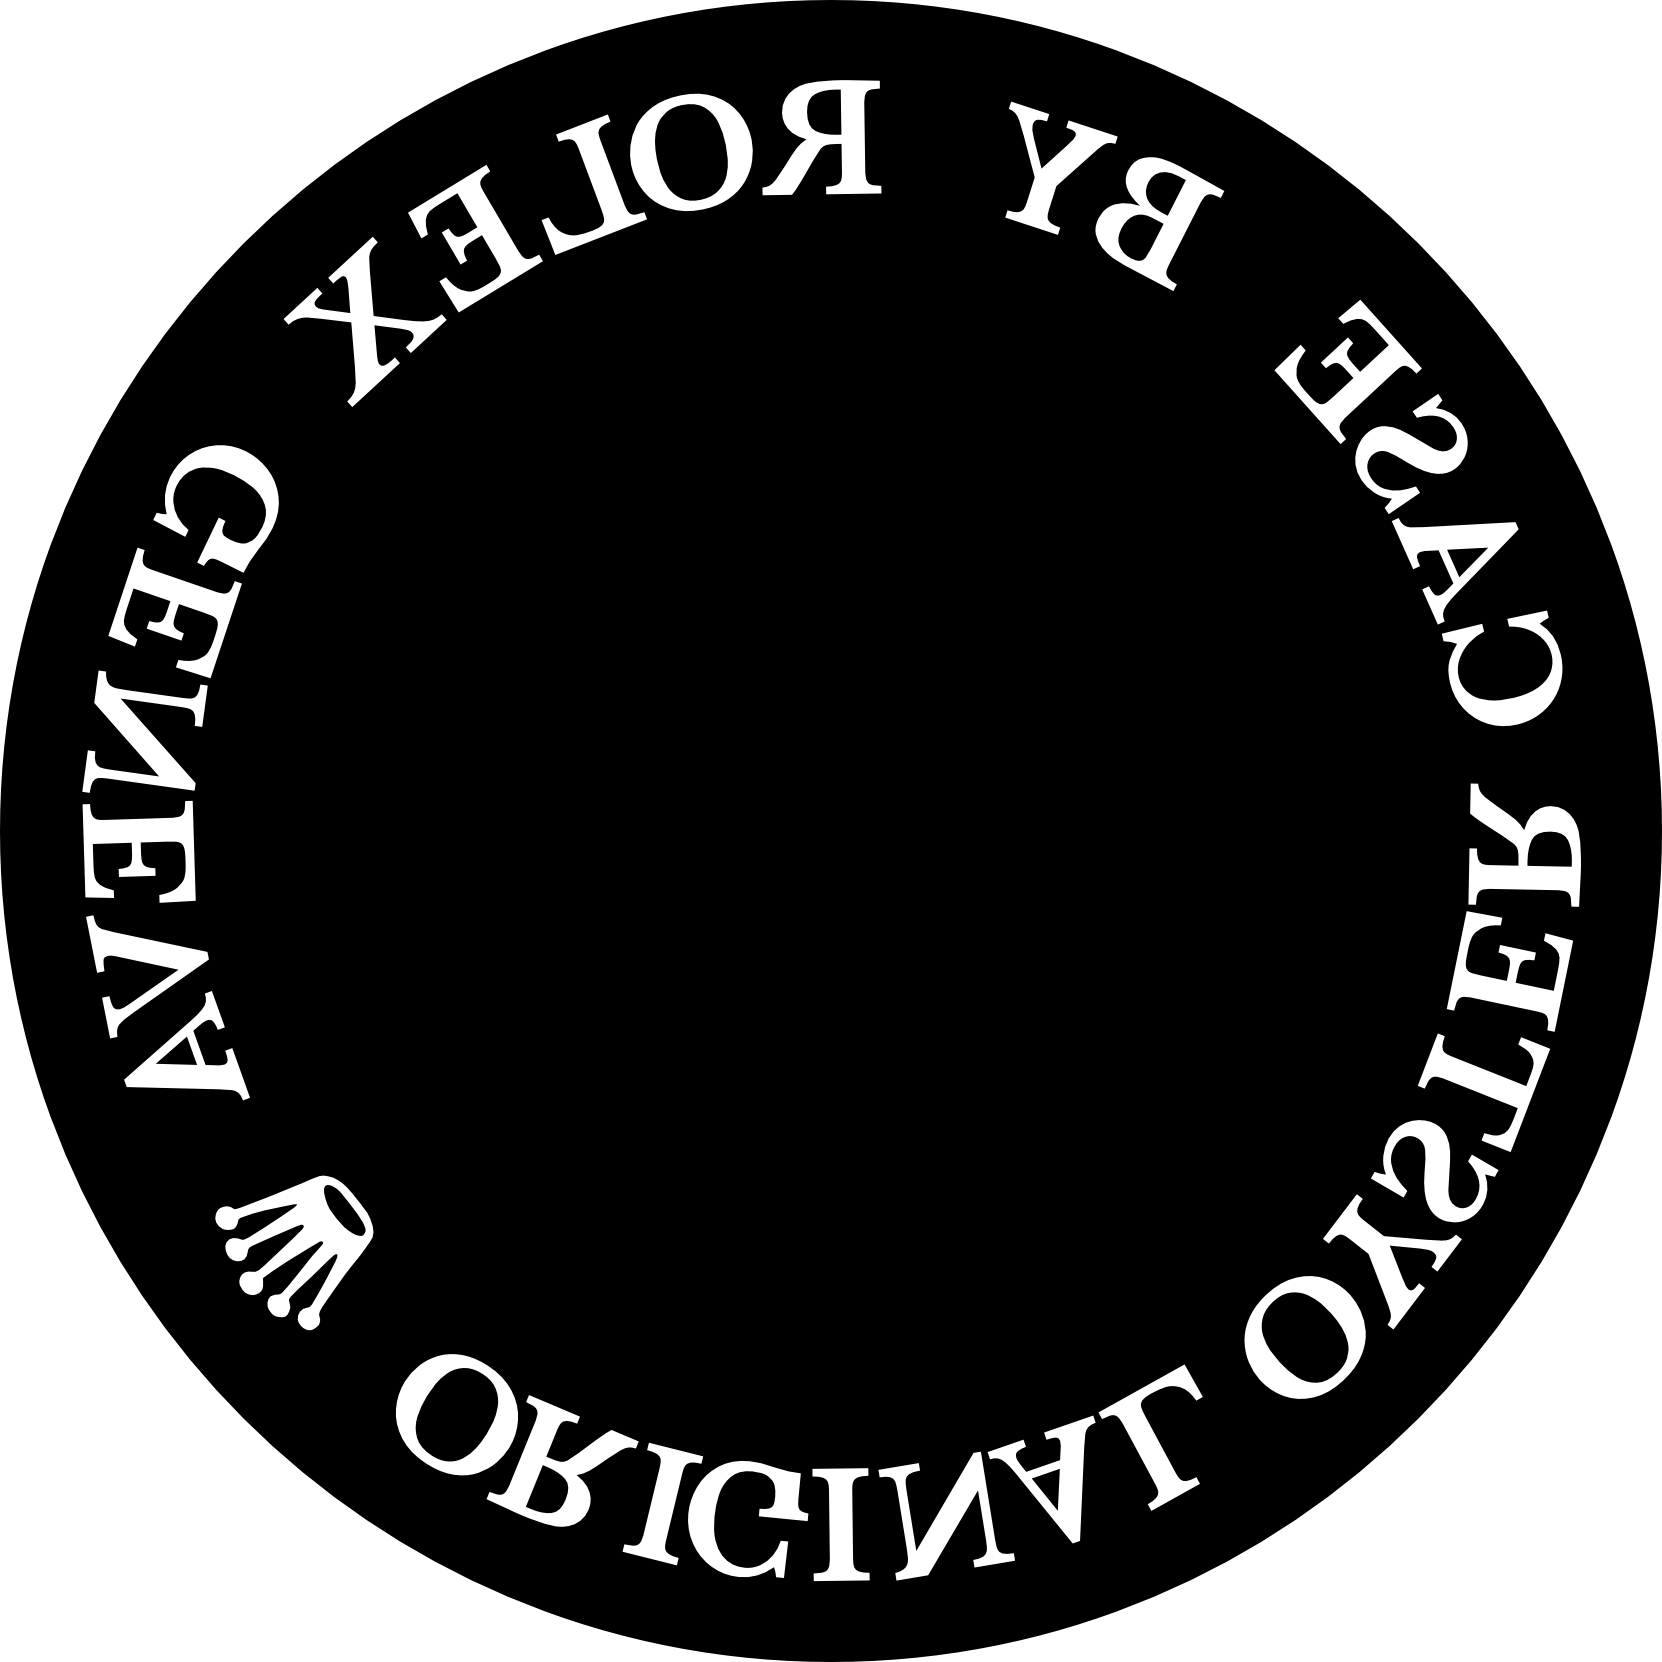
The dumb stuff first....I am using ink jet transparent sheets. that I am printing the tudor sub case back script on to do a salt water etch .
I apply the photo paper, then tape the printed transparent and tape ti to the case back as its a bit stiff to fit to the curve of a caseback. then exposed it to uv on a nail machine... but nothing is burnt into the photo paper . It was suggested that the ink jet print is not dark enough and is letting the light get past the ink and why its not leaving its mark on the photo paper. .
I was going to try a laser jet next with the correct paper.
your machine looks wild. This would do case backs quite easily it seems, especially since you are getting such nice detail on dials.
1) did you peel off the protective layer (its clear) before the now exposed film is put down on the caseback? The film prevents UV exposure which would prevent the transferring.
2) did you use heat to affix the photoresistant film to the caseback? If its not on it well, the image wont transfer well.
3) Generally, the acetate mask needs essentially maximum contact with the film, does tapping it down do that for you?
If so, try it your way again but do it on a flat piece of metal and with some glass ontop to ensure the acetate film is fully connecting to the film. If it doesn't one of two things might be happening: You aren't exposing it long enough or your film is a dud.
The dumb stuff first....
1) did you peel off the protective layer (its clear) before the now exposed film is put down on the caseback? The film prevents UV exposure which would prevent the transferring.
2) did you use heat to affix the photoresistant film to the caseback? If its not on it well, the image wont transfer well.
3) Generally, the acetate mask needs essentially maximum contact with the film, does tapping it down do that for you?
If so, try it your way again but do it on a flat piece of metal and with some glass ontop to ensure the acetate film is fully connecting to the film. If it doesn't one of two things might be happening: You aren't exposing it long enough or your film is a dud.
Yes to the plastic on the side that goes to the metal. left the top layer on as the diy vids I watched left the top layer on
YEs I used a bit of moisture and applied some heat with a hair drier
No I do not think it is making suitable contact with the caseback / photo paper because it is rather stiff and does not bend well I figured the packing tape was blocking uv. but I thought about spray glue
the transparent sheet does not fit or form well to the case back...I may try trimming it closer to see if I can get a better fit.
I thought that perhaps the film is a dud, but I think I want to try a lazer printed transparent to see if this cures the light leak theory on the ink jet print.
Make a sandwich....clamp together glass, acetate mask, film, caseback, something rigid. You will have to make sure the caseback is level. This should give you plenty of pressure to make the acetate mask flush against the casebackYes to the plastic on the side that goes to the metal. left the top layer on as the diy vids I watched left the top layer on
YEs I used a bit of moisture and applied some heat with a hair drier
No I do not think it is making suitable contact with the caseback / photo paper because it is rather stiff and does not bend well I figured the packing tape was blocking uv. but I thought about spray glue
the transparent sheet does not fit or form well to the case back...I may try trimming it closer to see if I can get a better fit.
I thought that perhaps the film is a dud, but I think I want to try a lazer printed transparent to see if this cures the light leak theory on the ink jet print.
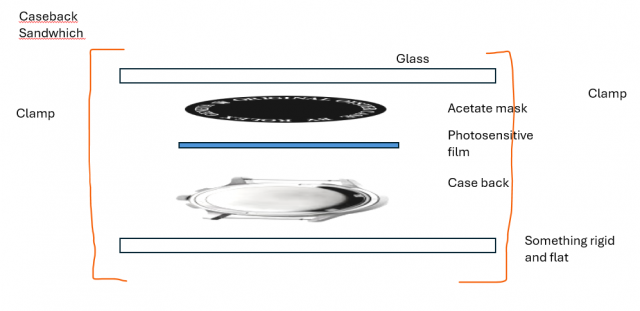
Ill give it a go, but the text is more so on the sloped area of the case back so the class will not press on those areas but only on the center section of the case back which I am not etching .
How big is your text. I have other means to tell you if it’s bigger than 2mmIll give it a go, but the text is more so on the sloped area of the case back so the class will not press on those areas but only on the center section of the case back which I am not etching .
it is approx 2mm tall text used on the case backHow big is your text. I have other means to tell you if it’s bigger than 2mm
We can take this to DM , I didnt mean to kidnap this thread with my problems lol
Nah man its knowledge.it is approx 2mm tall text used on the case back
We can take this to DM , I didnt mean to kidnap this thread with my problems lol
There is something called UV dtf stickers. They are self weeding meanings the sticker can have no ink and no sticker at all.
Here is a generic Etsy link. They are super cheap and 2mm should be super doable. I tried this as masking for the .45mm and it sucked. I reached its limitation.
You would just get the Sticker in a that what you want to etch is the exposed space. Given they are stickers you can bend them over curves.
Ah okay so instead of the ink jet transparent sheet , use transparent stickers , Yes I think this will work alot better and get me closer to the the desired results . Thanks for the info, I appreciate ya!!Nah man its knowledge.
There is something called UV dtf stickers. They are self weeding meanings the sticker can have no ink and no sticker at all.
Here is a generic Etsy link. They are super cheap and 2mm should be super doable. I tried this as masking for the .45mm and it sucked. I reached its limitation.
You would just get the Sticker in a that what you want to etch is the exposed space. Given they are stickers you can bend them over curves.
I am going to order a pack of uv printable stickers from amazon and give it a shot!!
Last edited:
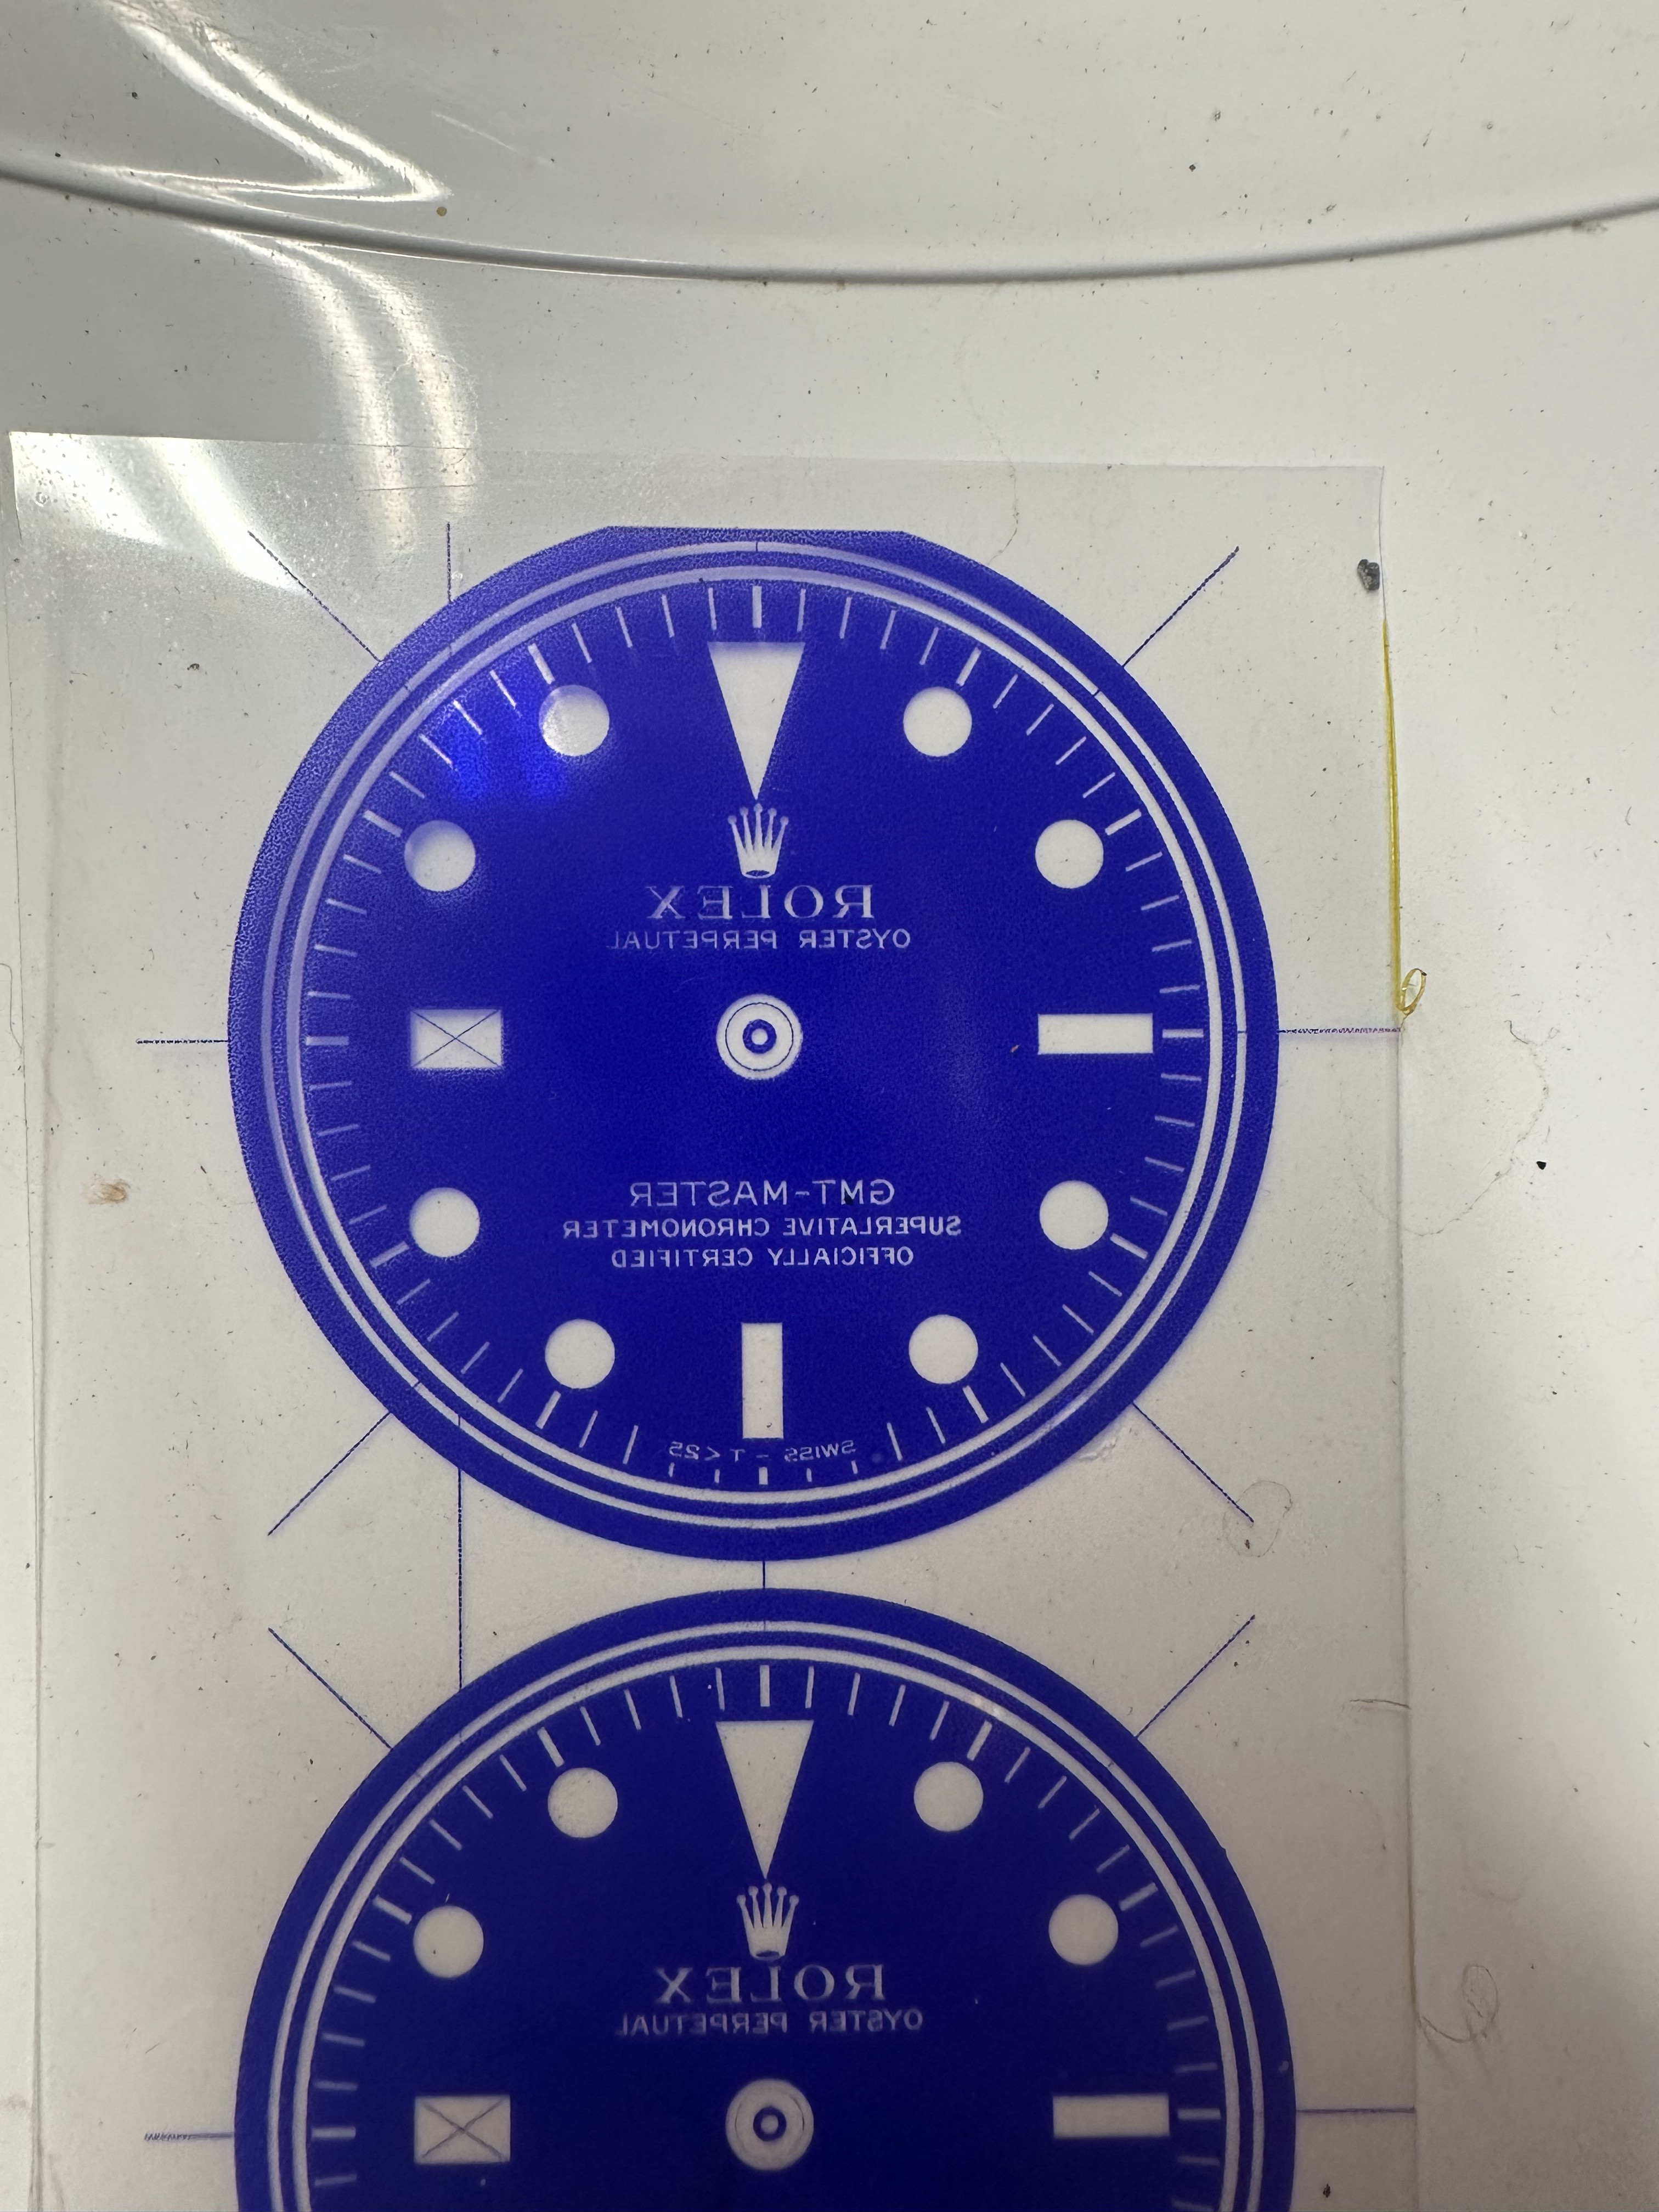
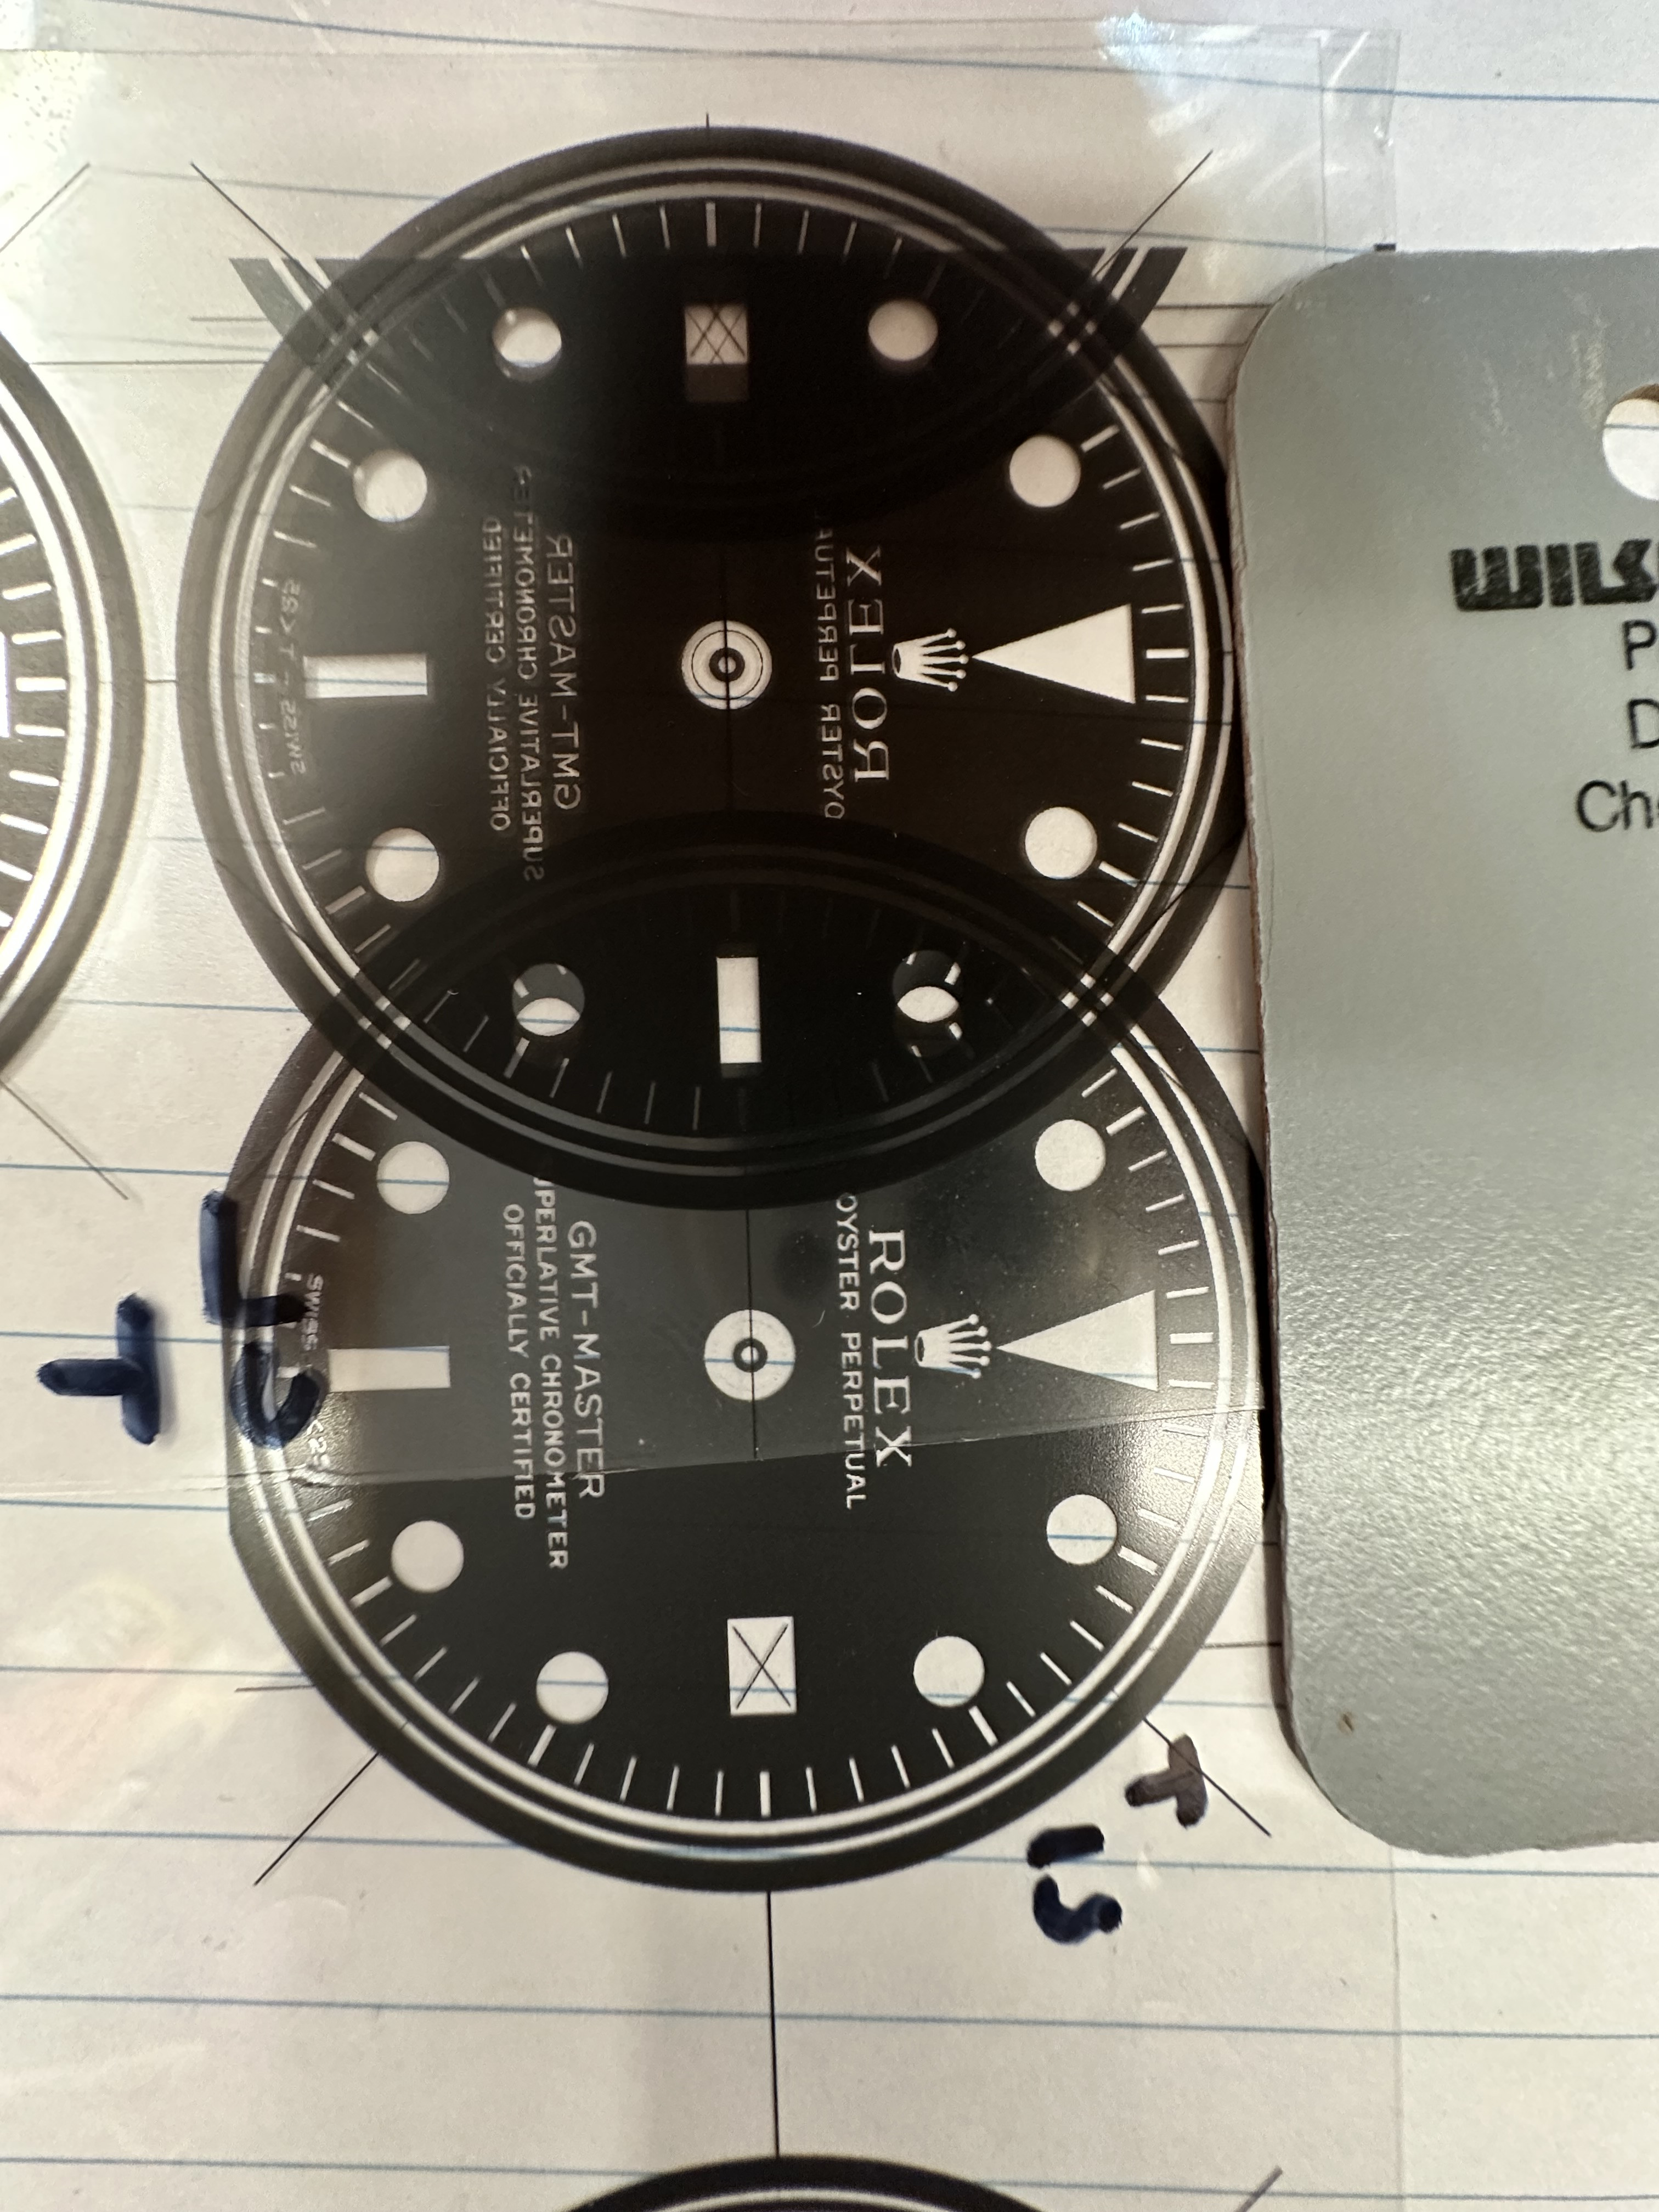
I'm partially working on this as well. Don't try and use a black transparency that printed blue!
I would cut your transparency so it can fit over the case back as tight as possible.
Also, the UV light should be pointing straight at the surface. Something that (projects) straight like a laser is going to give sharper results than a light that diffuses or spreads the light in multiple directions. You don't want the light to creep in at all, if possible.
Last edited:
l
They are the mask! You need a special printer so go for something of the Etsy. You just send them your file. You put them on and salt water etch then remove the sticker. It’s taking the place of the photosensitive film.Ah okay so instead of the ink jet transparent sheet , use transparent stickers , Yes I think this will work alot better and get me closer to the the desired results . Thanks for the info, I appreciate ya!!
I am going to order a pack of uv printable stickers from amazon and give it a shot!!
oh okay gotcha.. That reduces a few steps , that would be ideal. I will reach out to a maker and see if they are willing to do a run for me. will report backl
They are the mask! You need a special printer so go for something of the Etsy. You just send them your file. You put them on and salt water etch then remove the sticker. It’s taking the place of the photosensitive film.

