Oh yes! I'm looking forward to your further progress. Do I understand correctly that you "only" want to transfer the toner and not chemically blacken the brass? Your last picture lookes wet. Did you already lacquered the dial?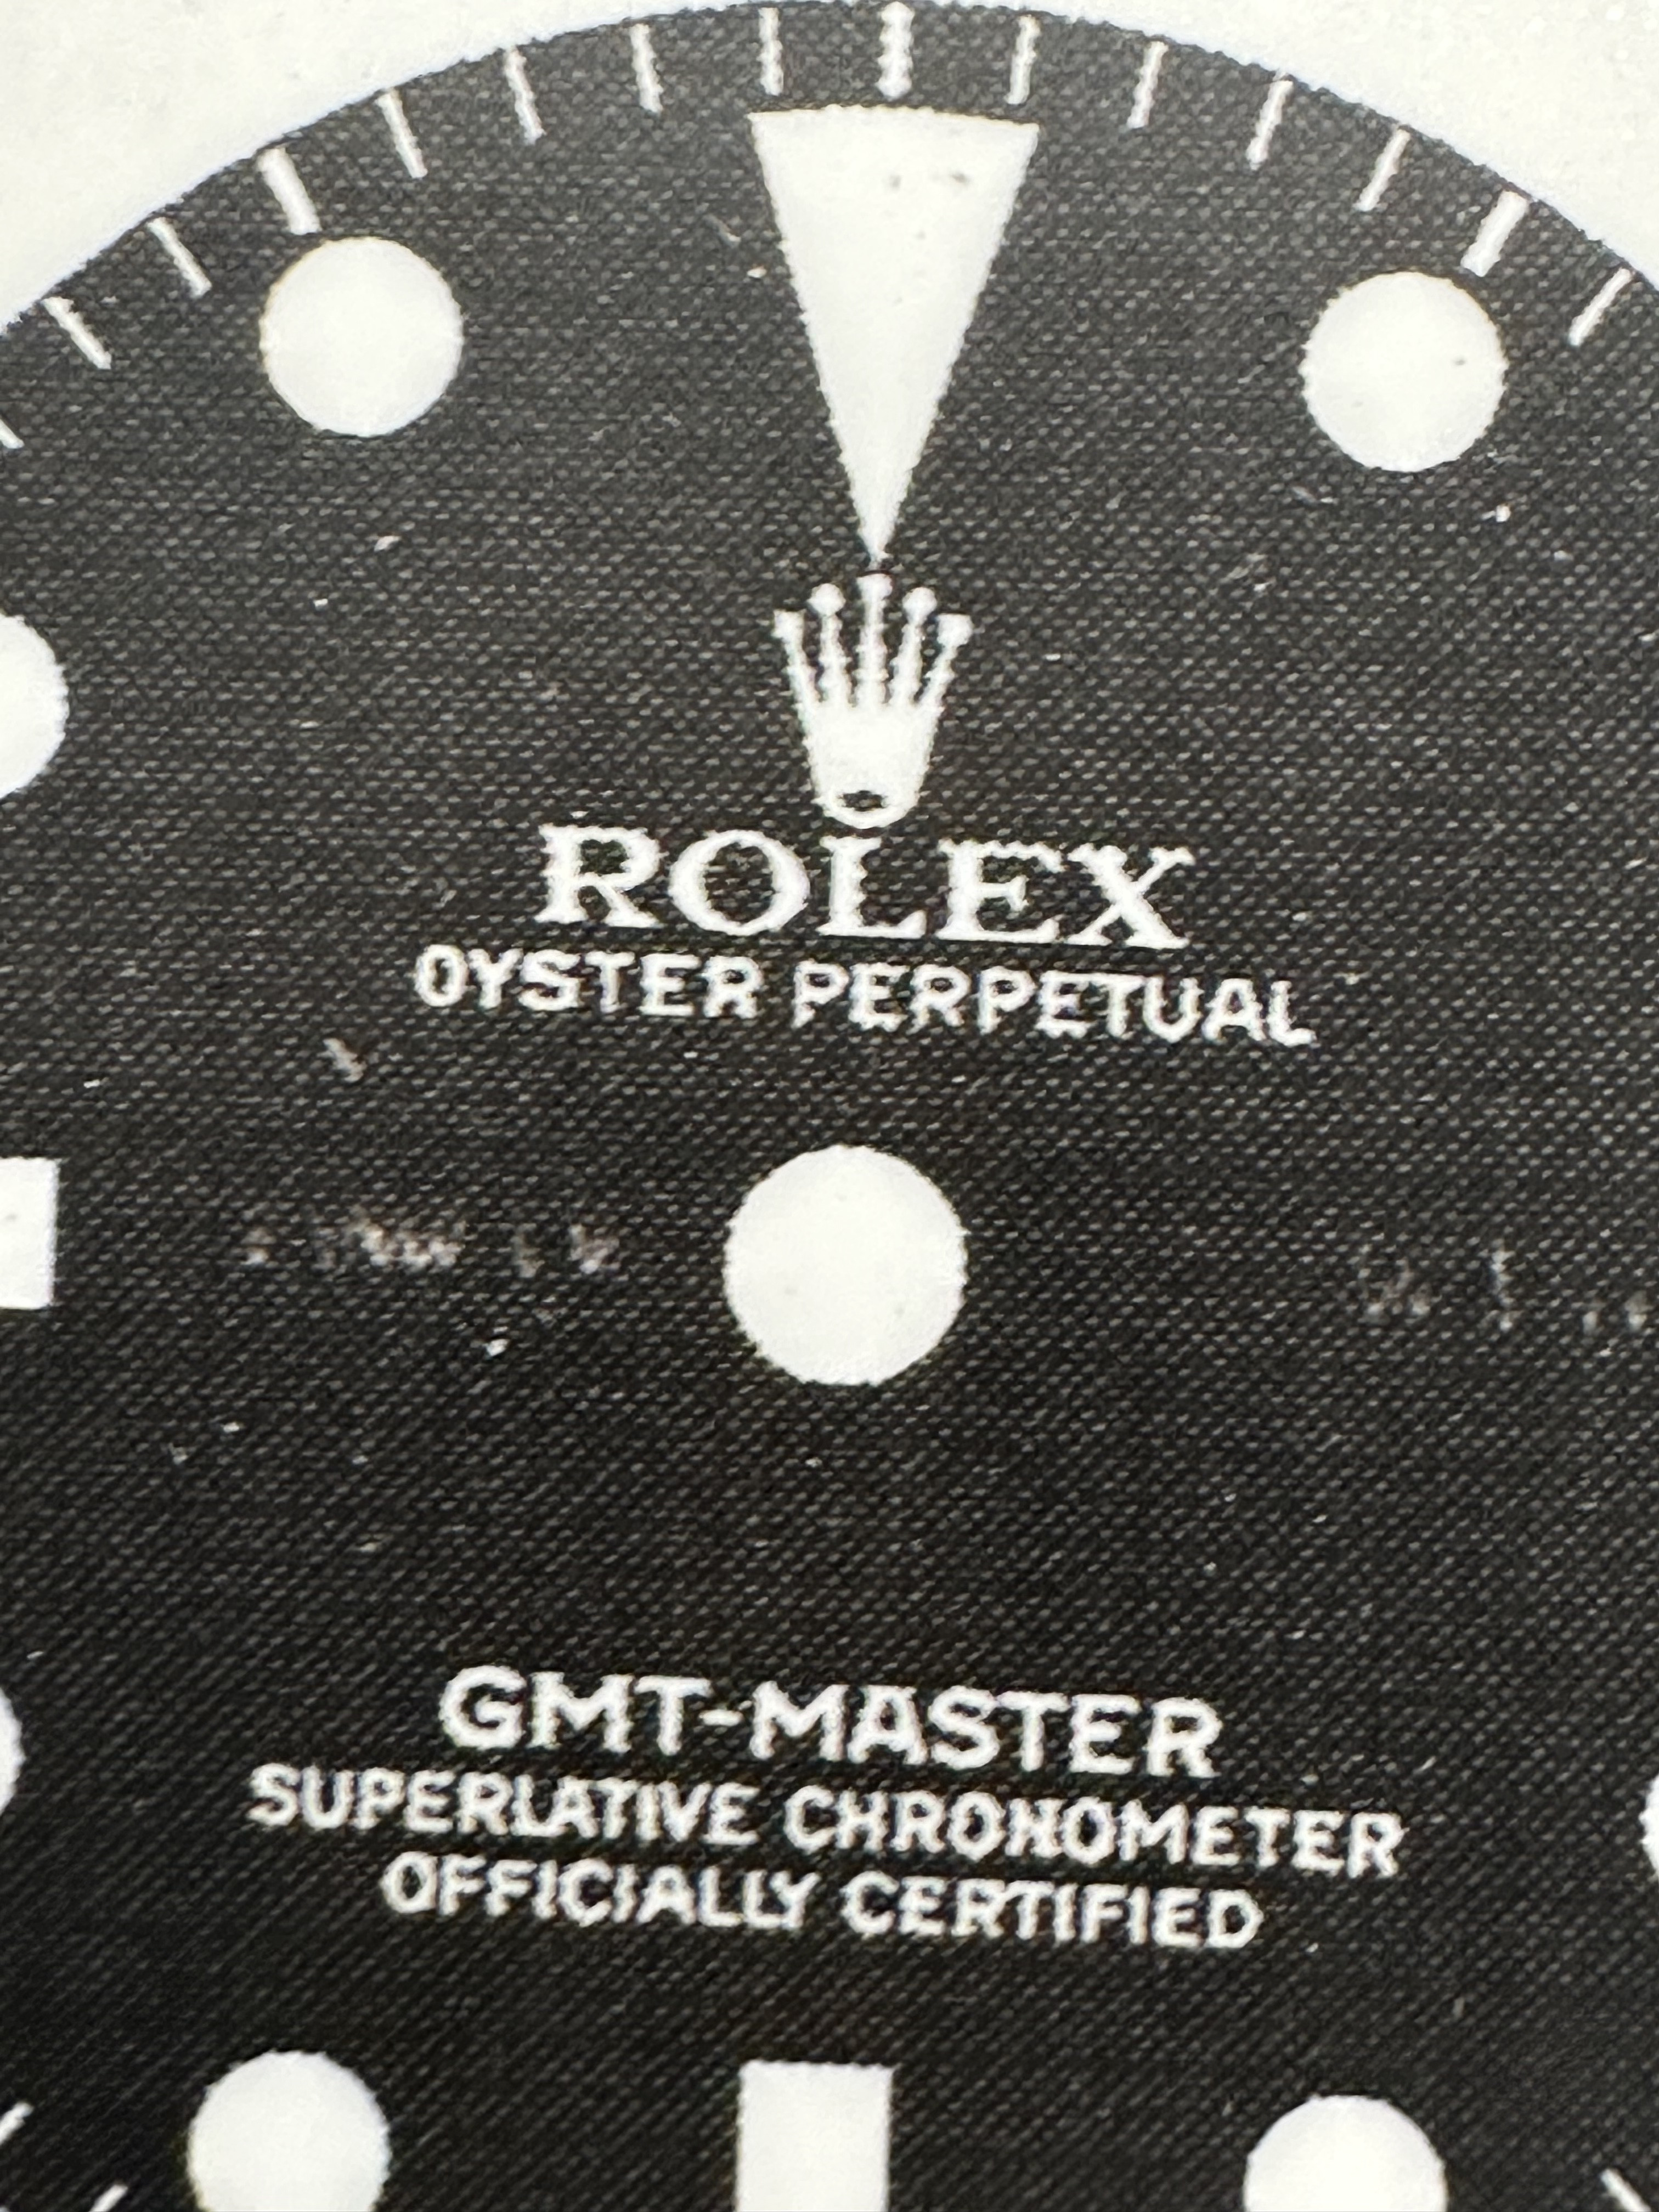
I'm still only using the toner transfer for now, but I've adjusted my print settings from pure black to rich black. I also reduced the cyan amount for a more brown black when printing black with CMYK instead of just K. Only tried it one dial but the results are much better. The print file could use some cleaning up too. Just happy to be moving in the right direction again.
-
Tired of adverts on RWI? - Subscribe by clicking HERE and PMing Trailboss for instructions and they will magically go away!
You are using an out of date browser. It may not display this or other websites correctly.
You should upgrade or use an alternative browser.
You should upgrade or use an alternative browser.
How to make a true gilt dial on the cheap - Tropical or Black
- Thread starter chrome72
- Start date
By the way I also improve my process. This should get the dial for my next project with the Raffel 1675 case.
As you can see I followed your hints for the lacquer process and put a last thin (wet) layer after the sanding process.

As you can see I followed your hints for the lacquer process and put a last thin (wet) layer after the sanding process.

Pardon my French but holy fuk.By the way I also improve my process. This should get the dial for my next project with the Raffel 1675 case.
As you can see I followed your hints for the lacquer process and put a last thin (wet) layer after the sanding process.

Correct. I am only transferring the toner right now. Will try to chemically blacken once I get good/better at the toner transfer process.Oh yes! I'm looking forward to your further progress. Do I understand correctly that you "only" want to transfer the toner and not chemically blacken the brass? Your last picture lookes wet. Did you already lacquered the dial?
The last picture is right after one coat of lacquer. It needs many more coats and then sanding before a final coat. I hope to avoid sanding after the final coat, but may try wetsanding with 2000-2500 grit and then polish as a last resort -- depends on how smooth I can spray that last coat.
Are you serious? That looks amazing!!! Is it still wet in the picture? If that lacquer is dry, you have achieved the ideal finish! Even the texture of the brass is visible and reflecting light waves like a disco ball. It must pop even more in person. I'm just shocked at how good that looks! Very impressive work, my friend.By the way I also improve my process. This should get the dial for my next project with the Raffel 1675 case.
As you can see I followed your hints for the lacquer process and put a last thin (wet) layer after the sanding process.
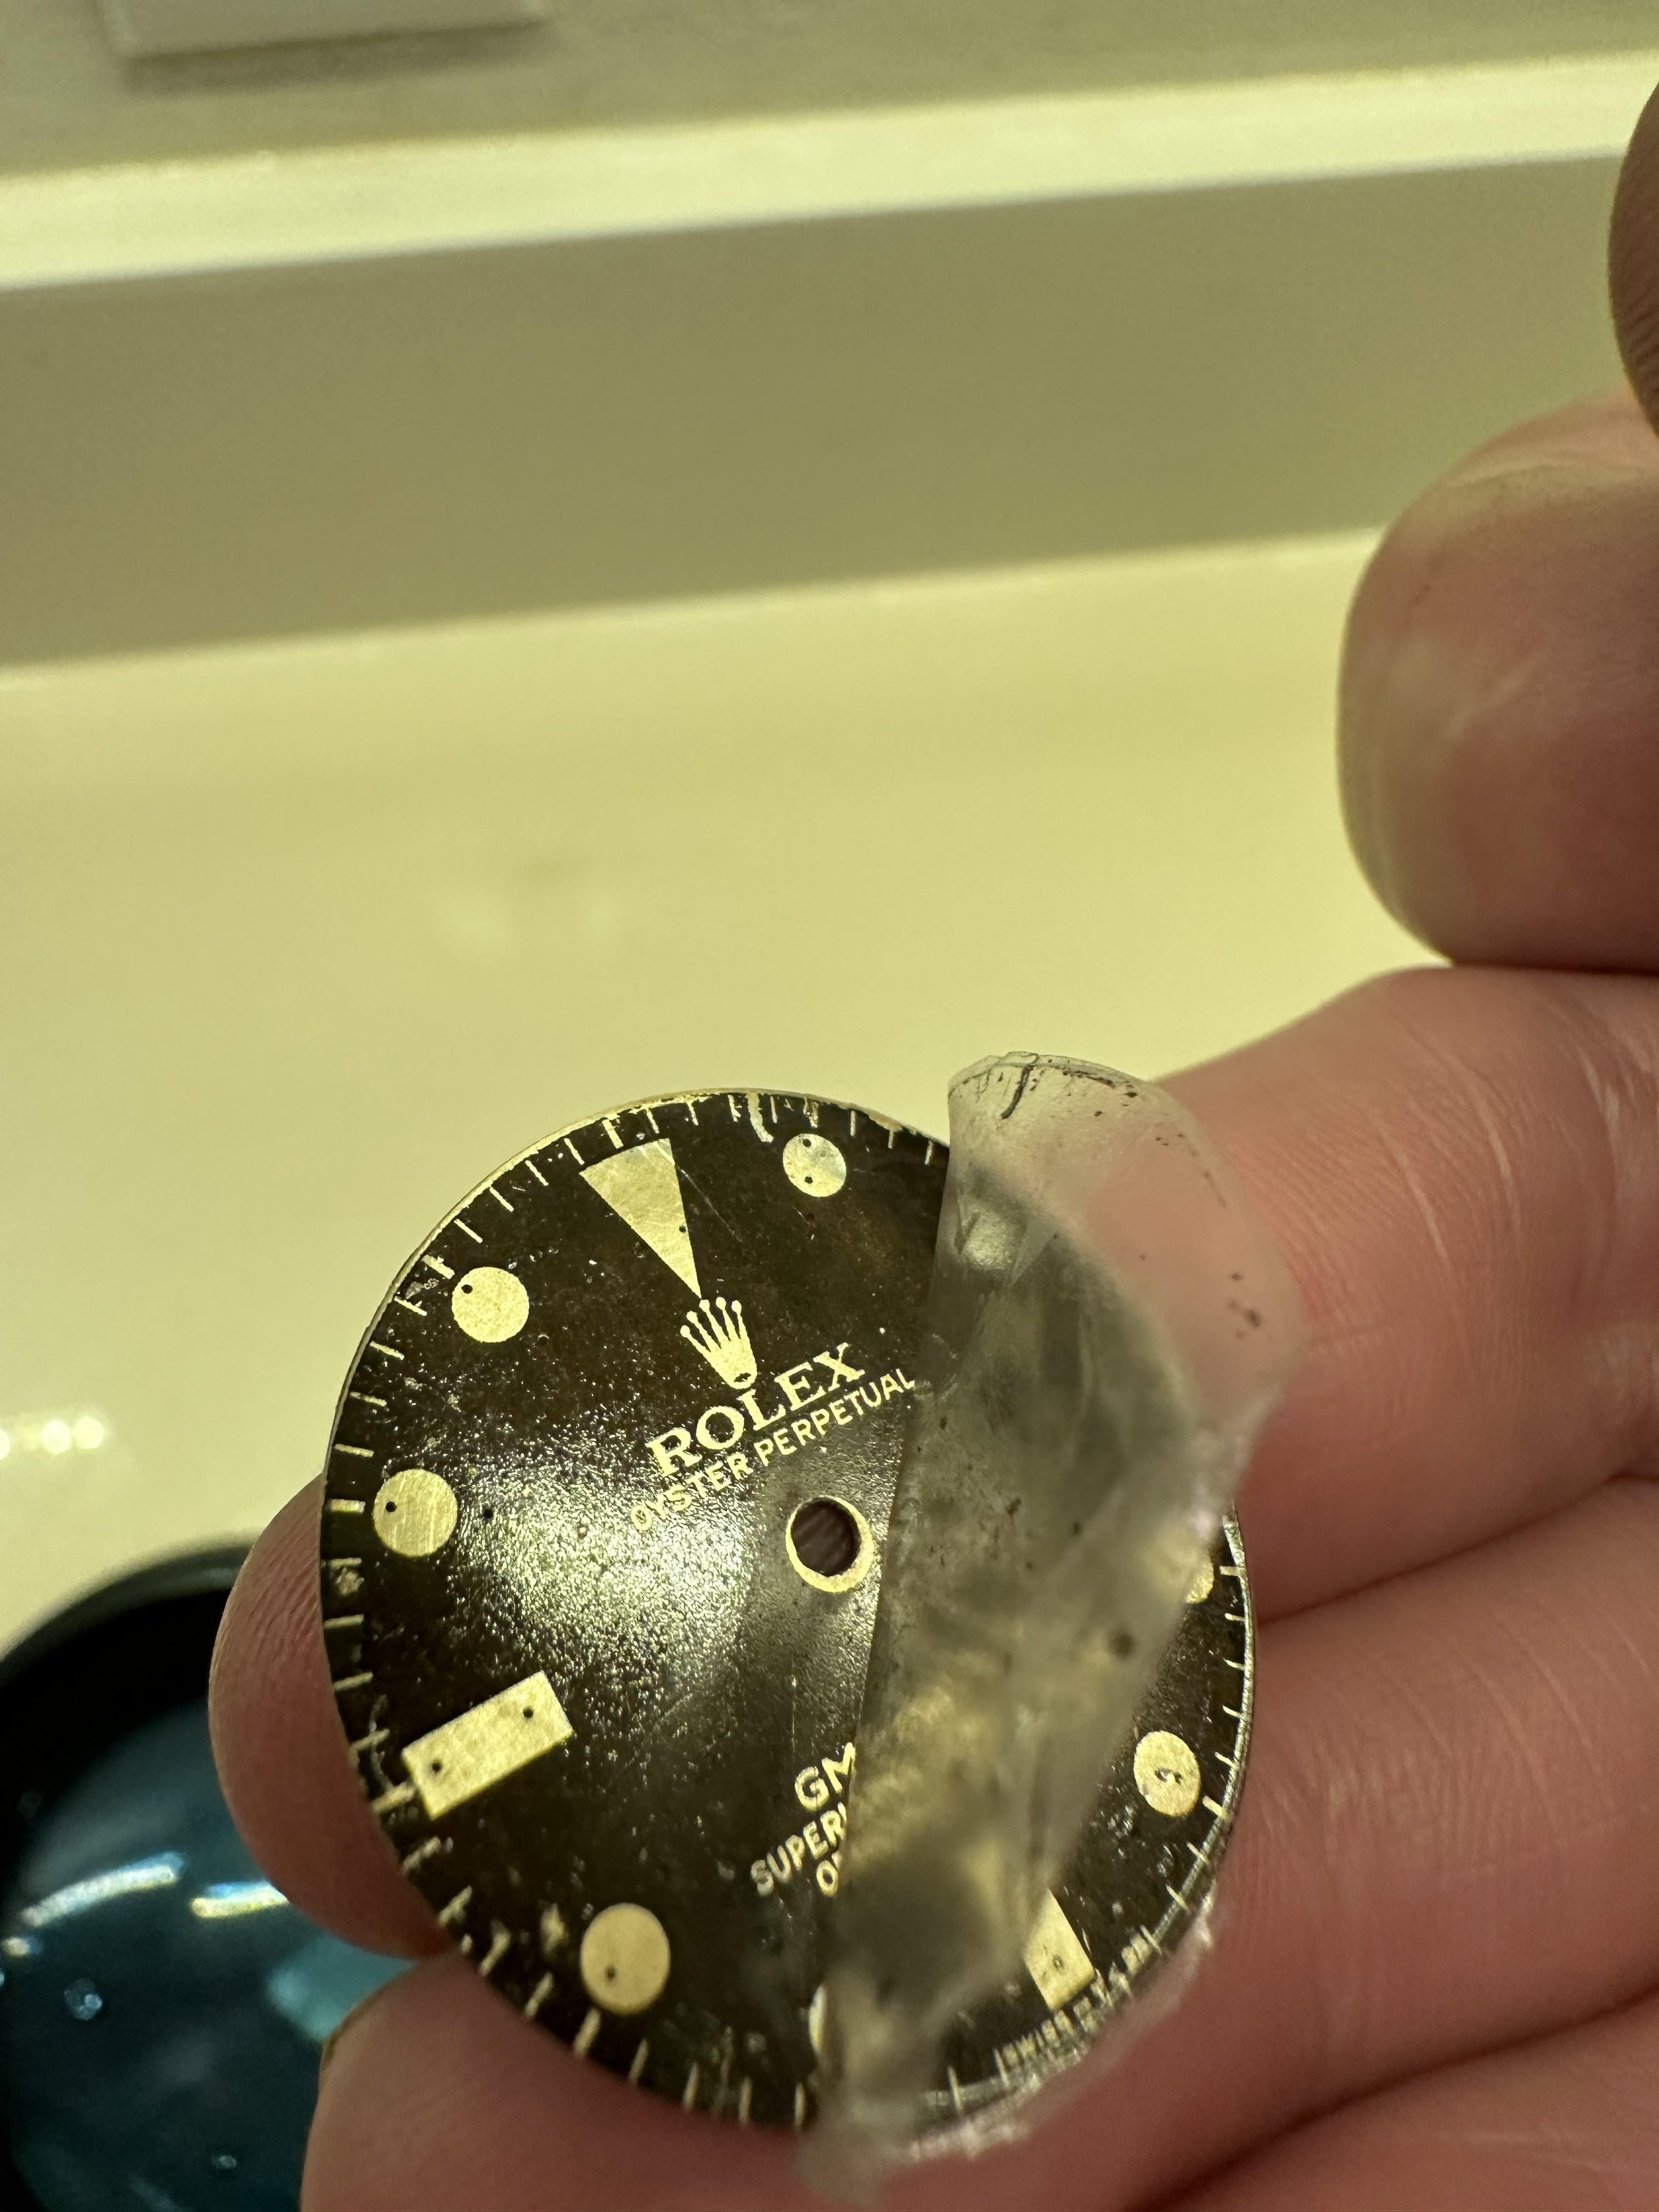
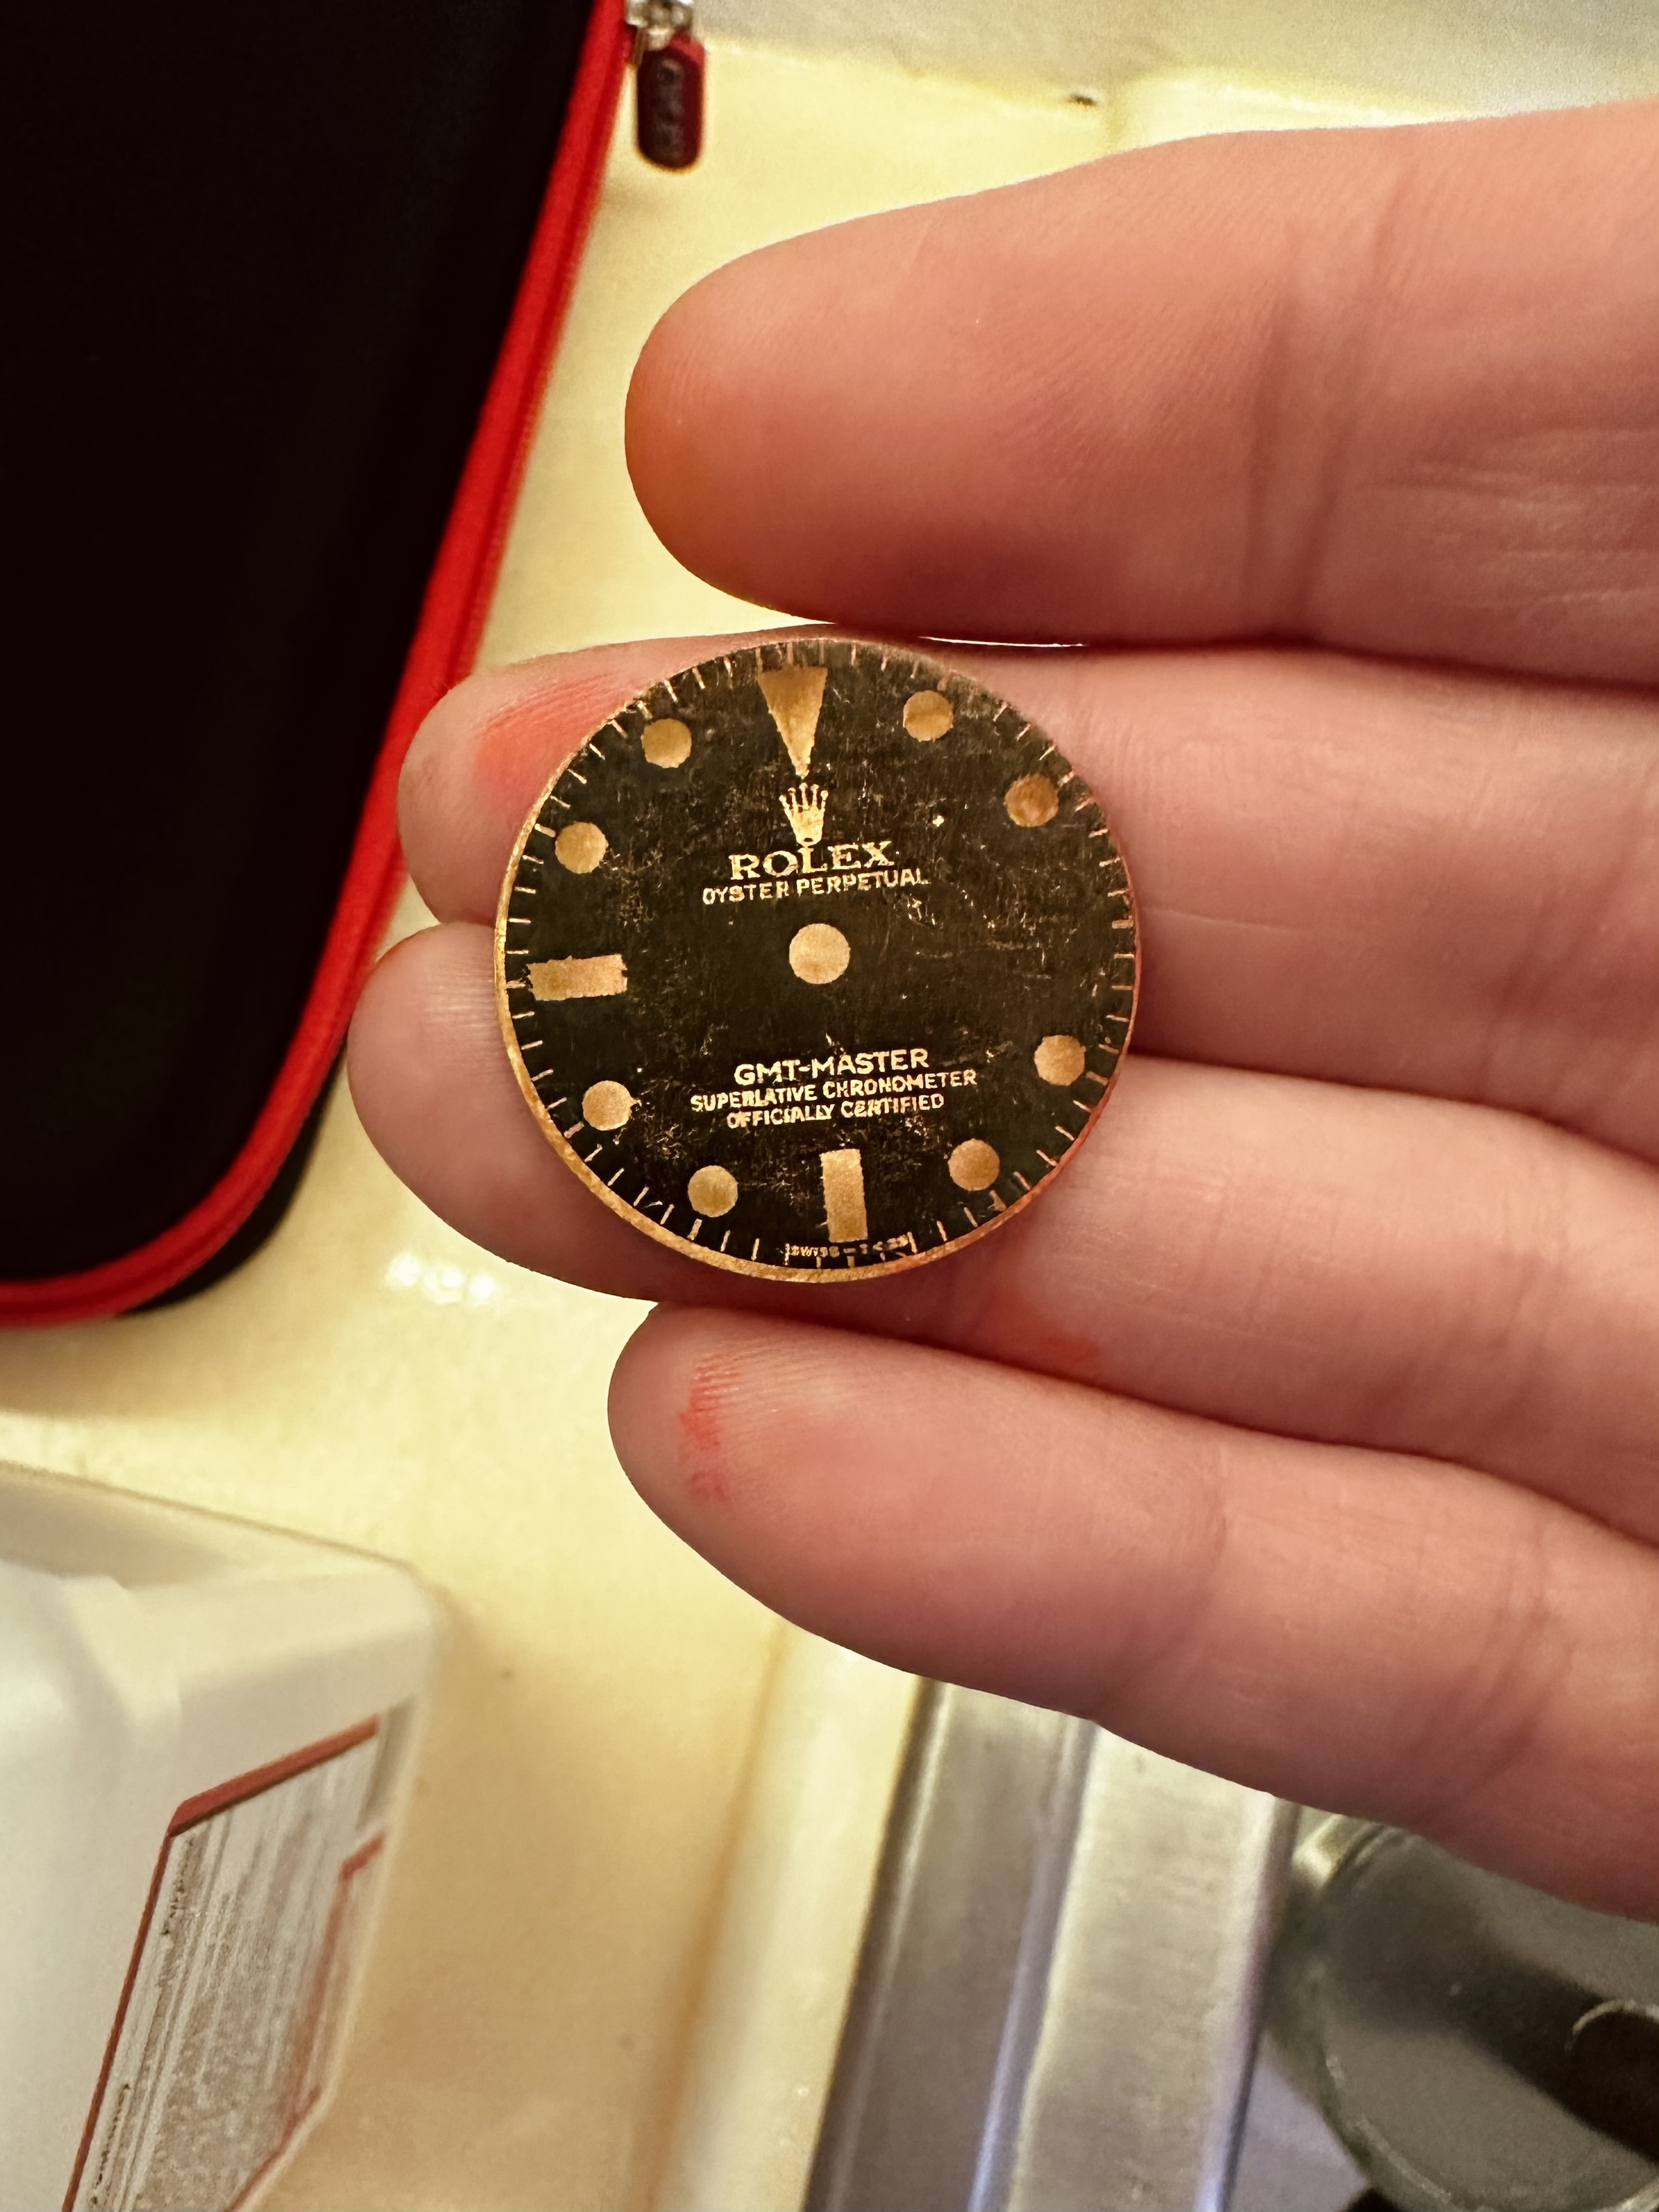
Unfortunately, I dropped this dial and botched everything regarding a finish. Since I couldn't make it worse, I sanded what I could and tried to cover the "wounds" with red Sharpie and Sunburst Yellow Prismacolor. After coating that with lacquer, I did get some nice golden brown shades. Just sharing in case anyone needed a quick cheat on an otherwise perfect dial.
I'll be redoing this dial from scratch, but it has a nice color.
Well, because I don't have a proper print file finished, I figured I would just experiment with the damaged dial even more and see how it looked. (I also needed to dust off my luming skills, and re-introduce myself to the hand-eye coordination required.) Certainly not there yet, but I was able to manage a crappy, yet workable basecoat/ undercoat for the lume.bummer that it messed up but the tropical effect is sweetass!!!
best of luck on the next attempt
Best part? I got really crazy shades of golden brown and brown with crazy 3D effects. It's like a hologram at certain angles. If I don't ruin it before then, I'll update after a mirror finish and vintage matte lume. Love the holographic effect though!
Well, I can't get the finish I want with over-the-counter clear coats. Putting that dial in a jar of MEK or acetone tomorrow with happiness. It's a genuine dial, but thankfully, it's only a datejust!
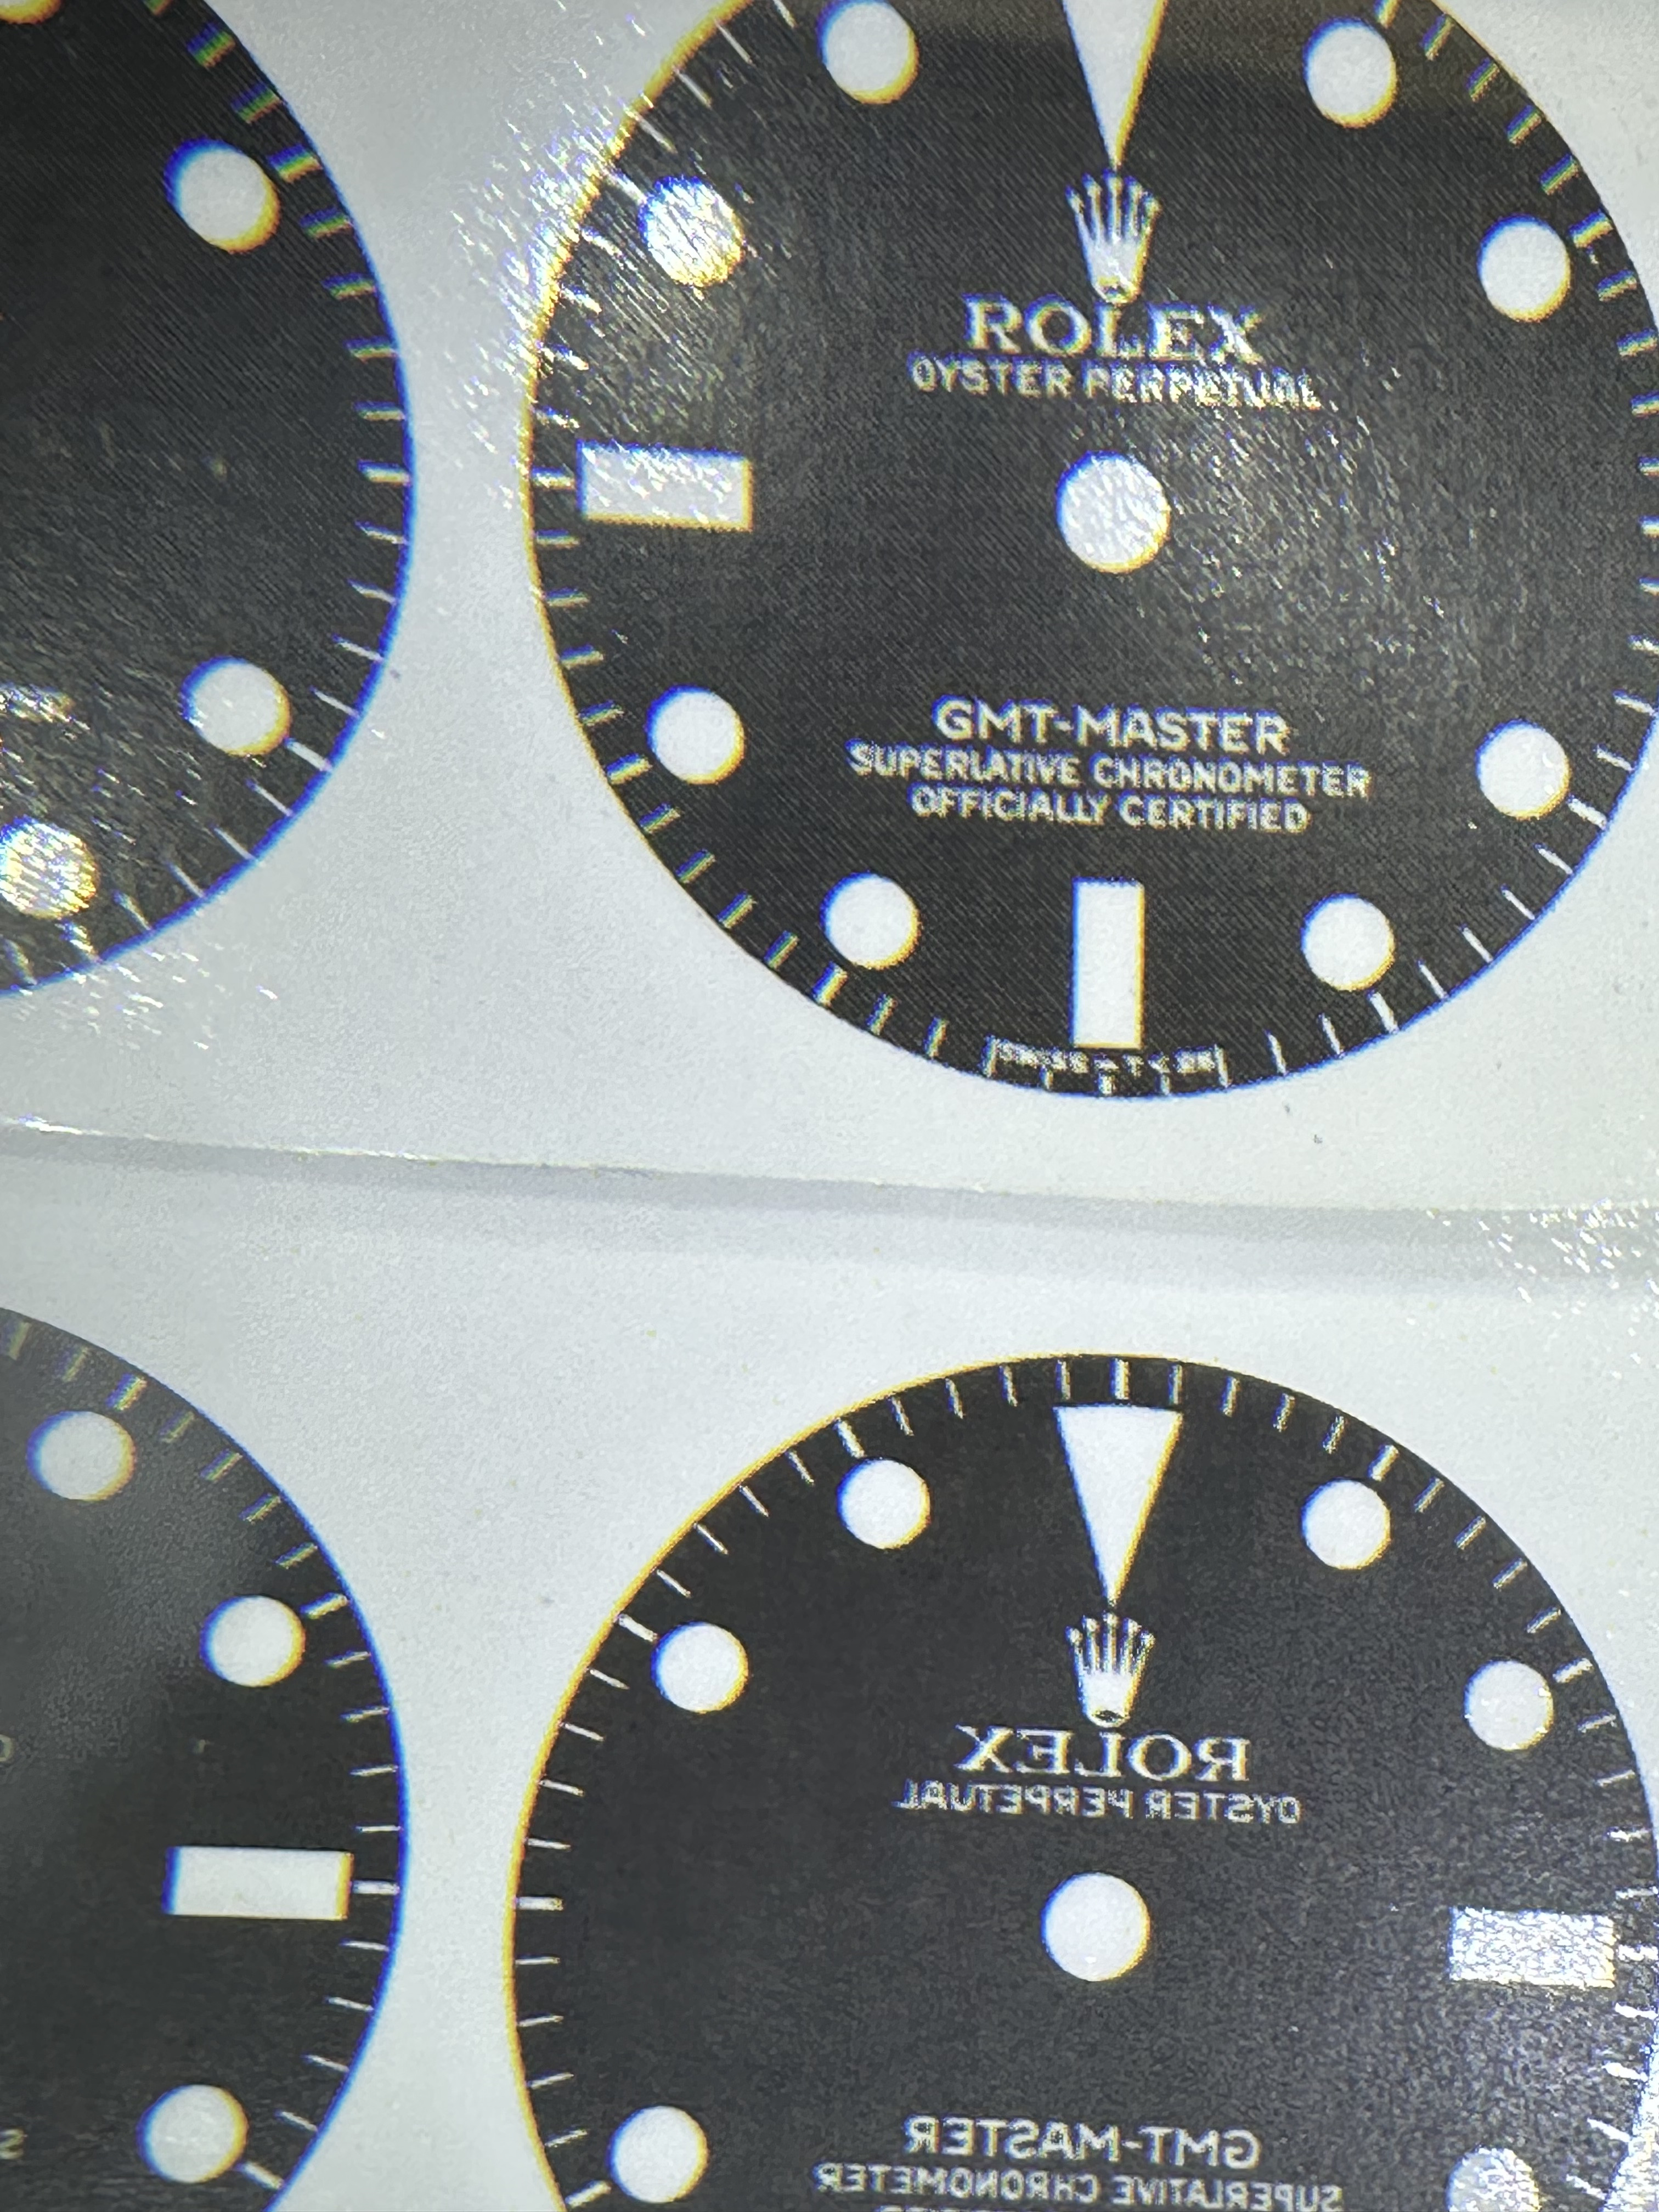
Working on a new template and was curious if anyone has a proper link or file for this SCOC. Top logo and GMT are covered.
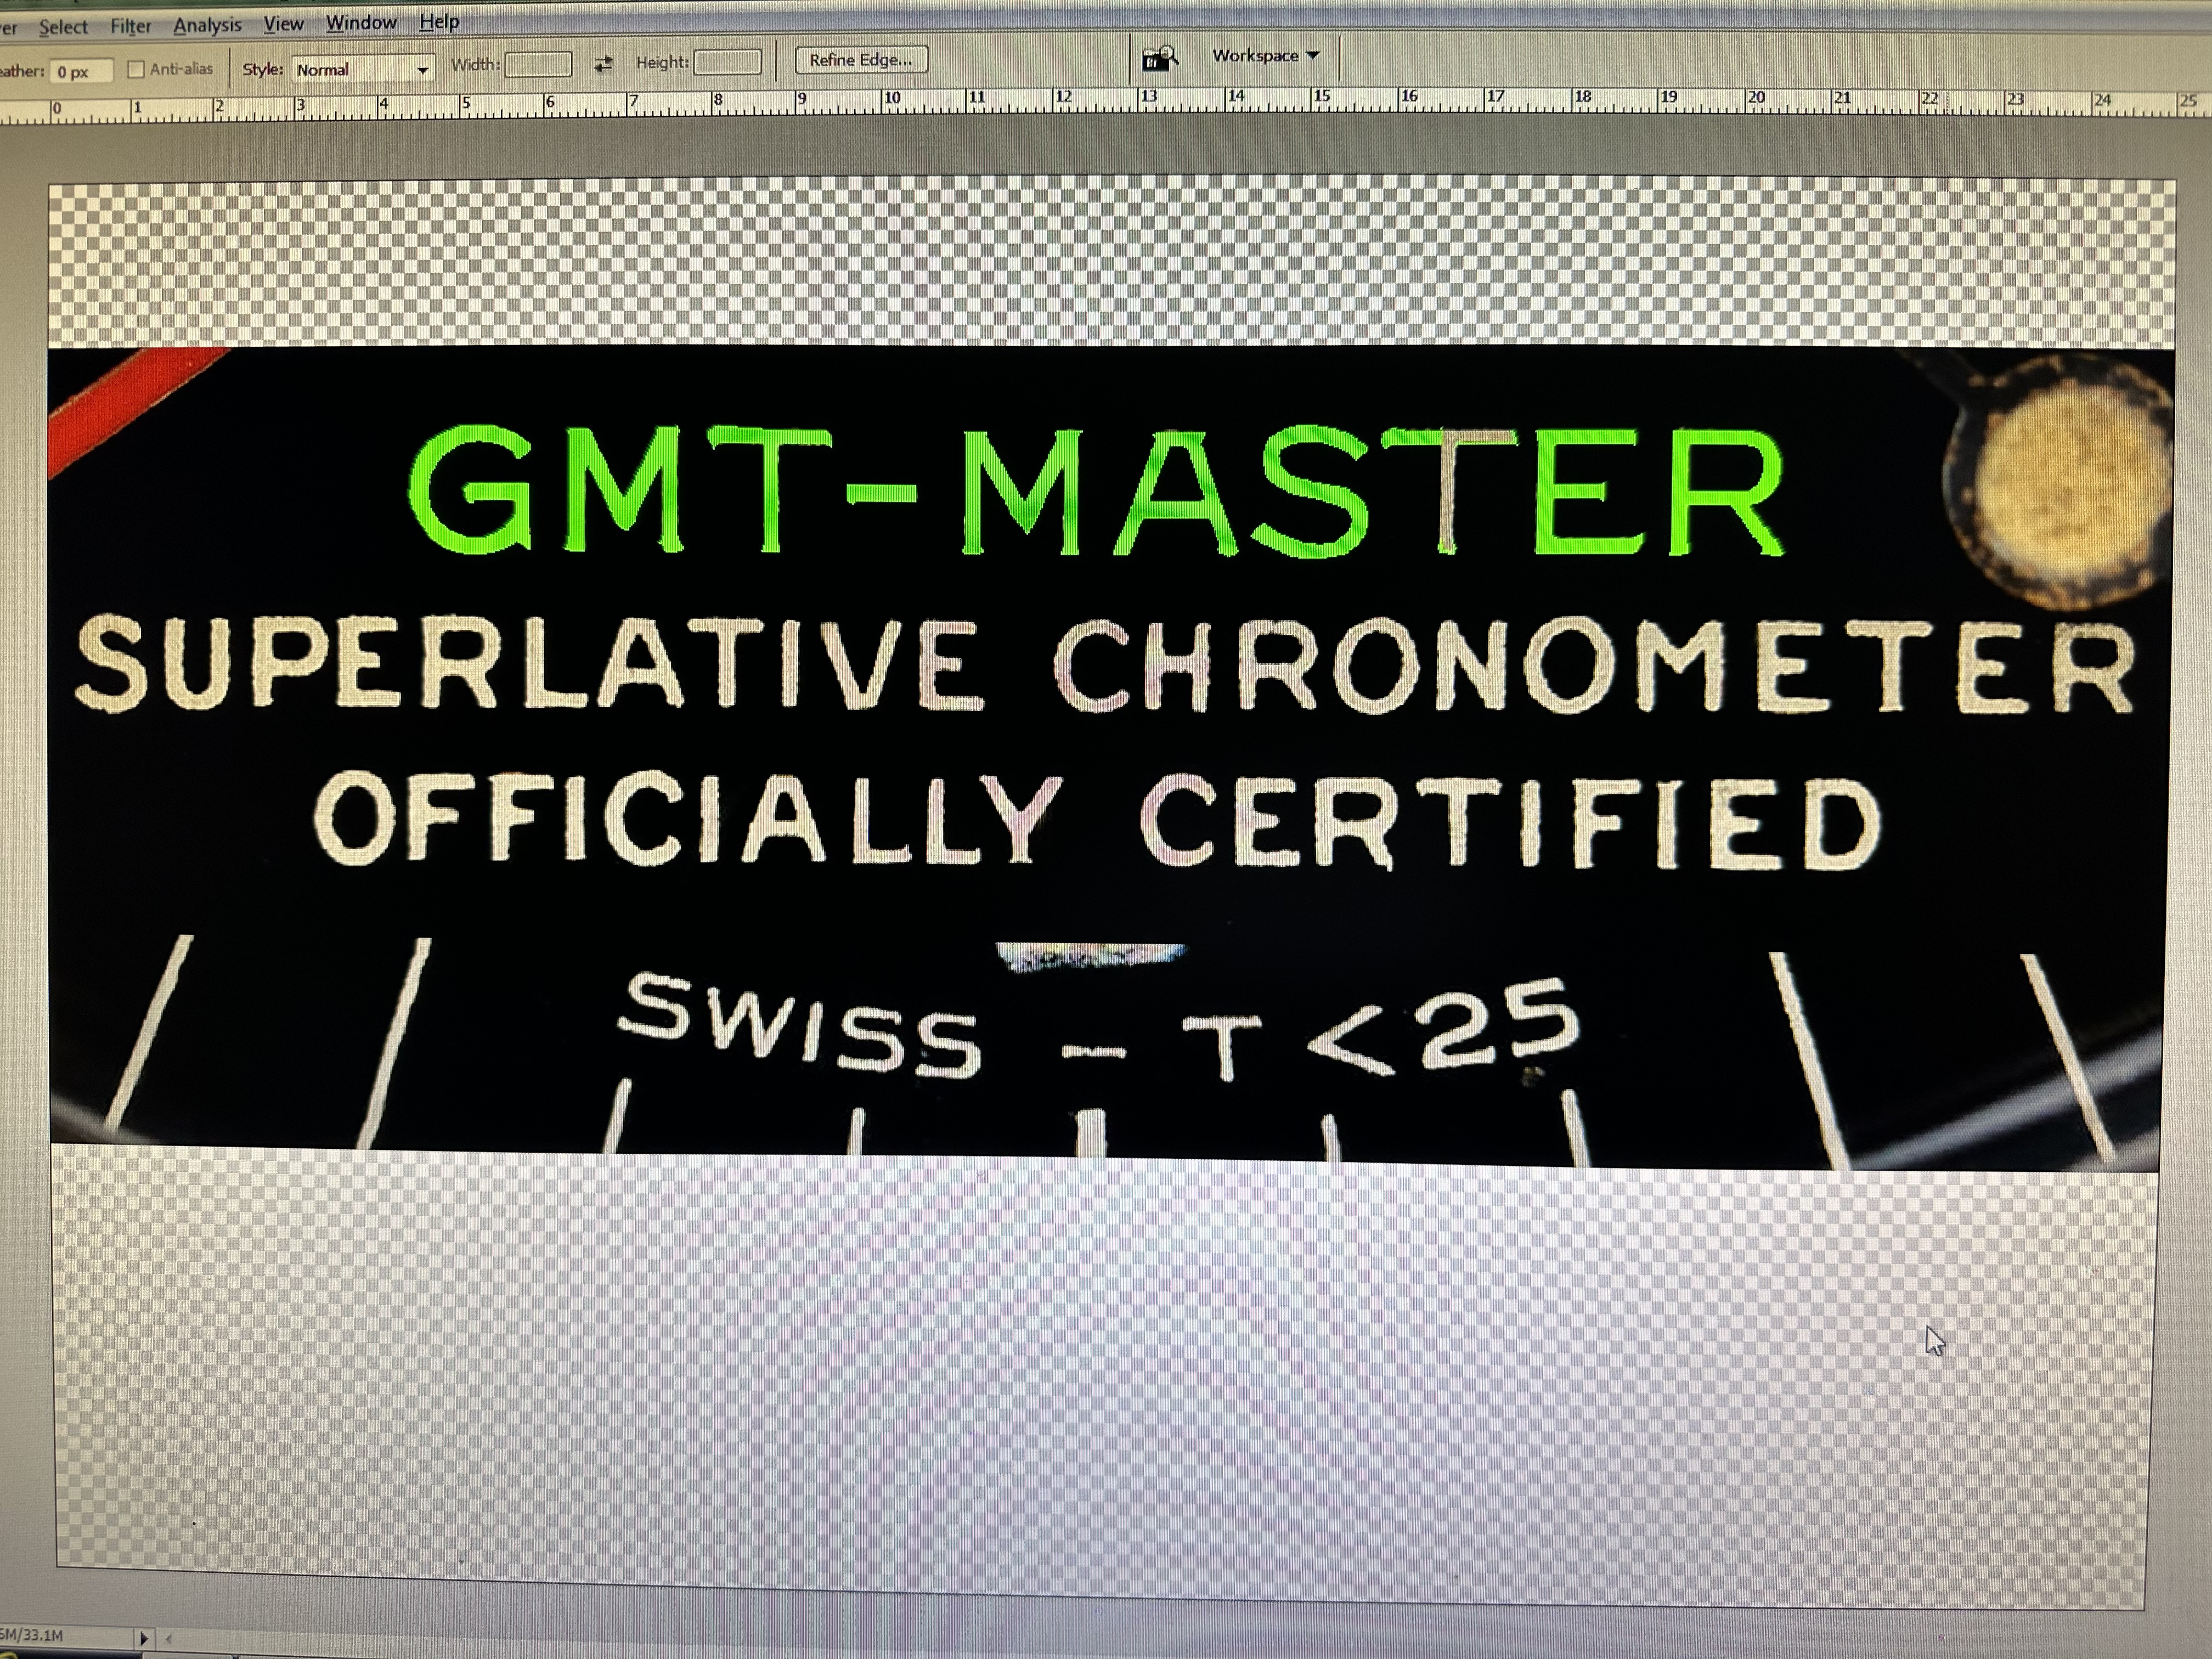
Working on a new template and was curious if anyone has a proper link or file for this SCOC. Top logo and GMT are covered.
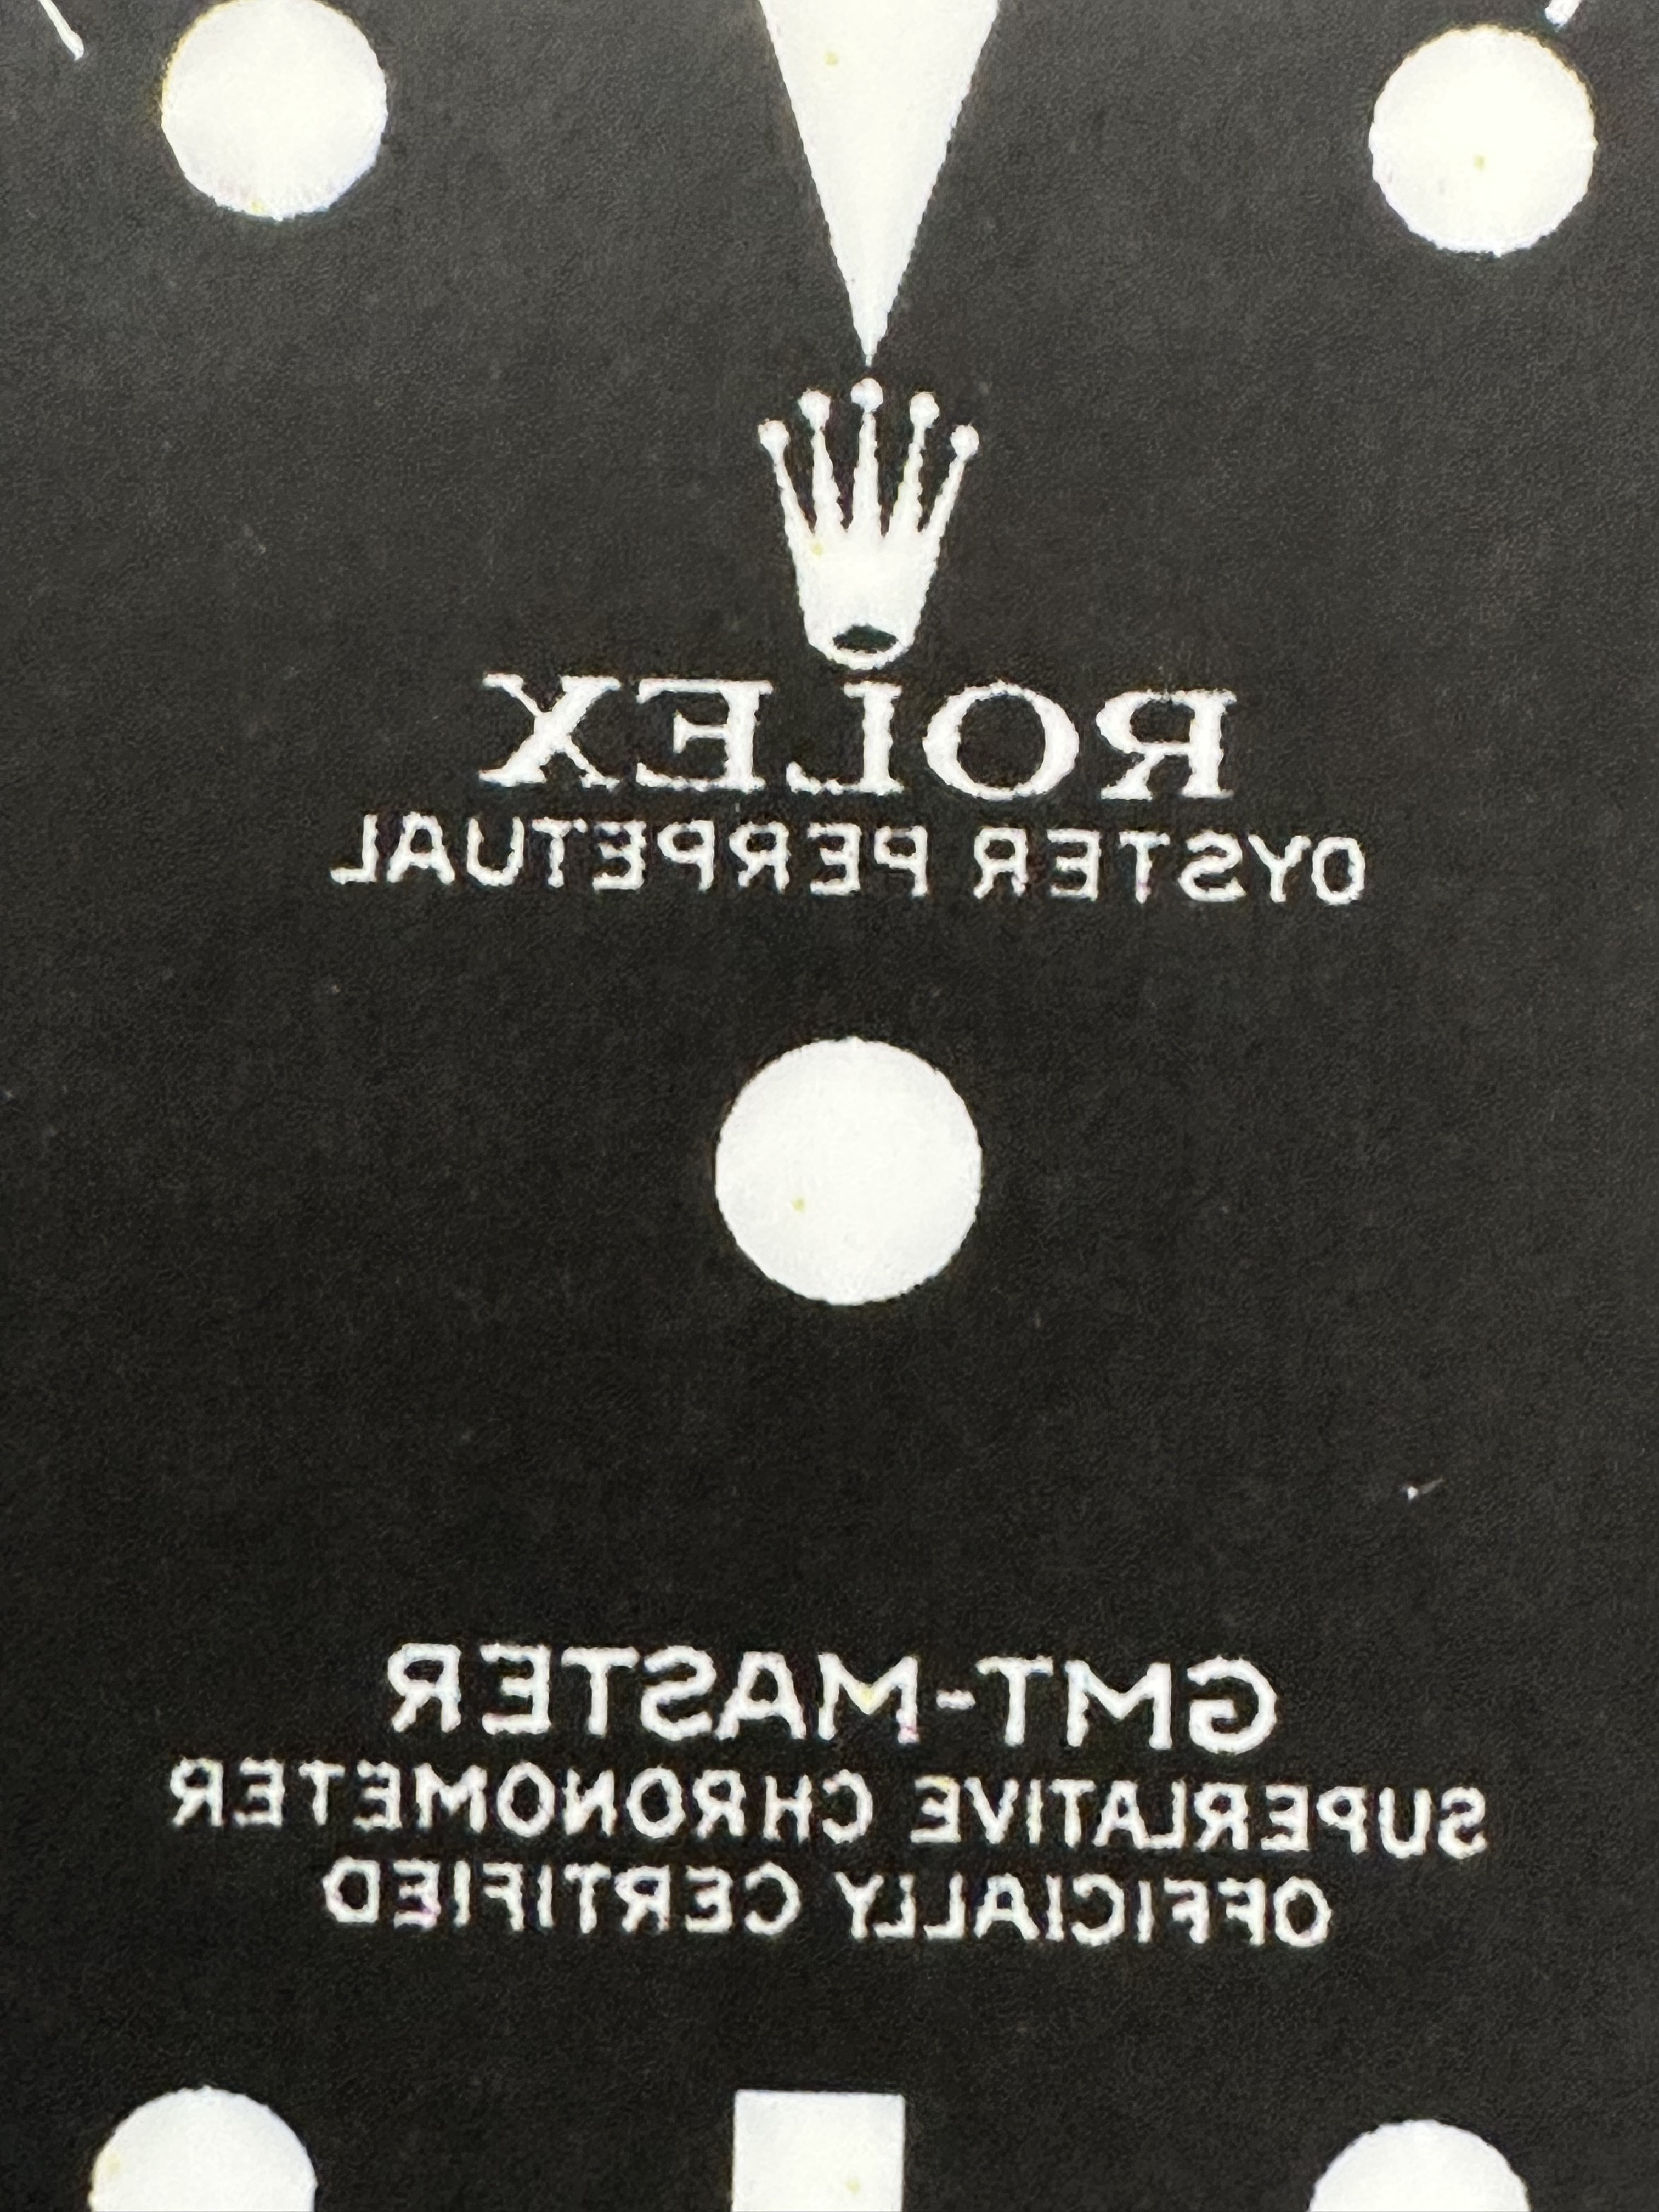
No matter what I do, I'm still not getting a full transfer of the toner to the dials.. especially around the edges. Any ideas?
Should I get better results only heating the dial from below?
Maybe try acetone instead of using only Sunnyscopa glue?
Does the dial have to be a mirror shine for everything to properly stick?
I'm so close, but the edge of the dials are driving me crazy.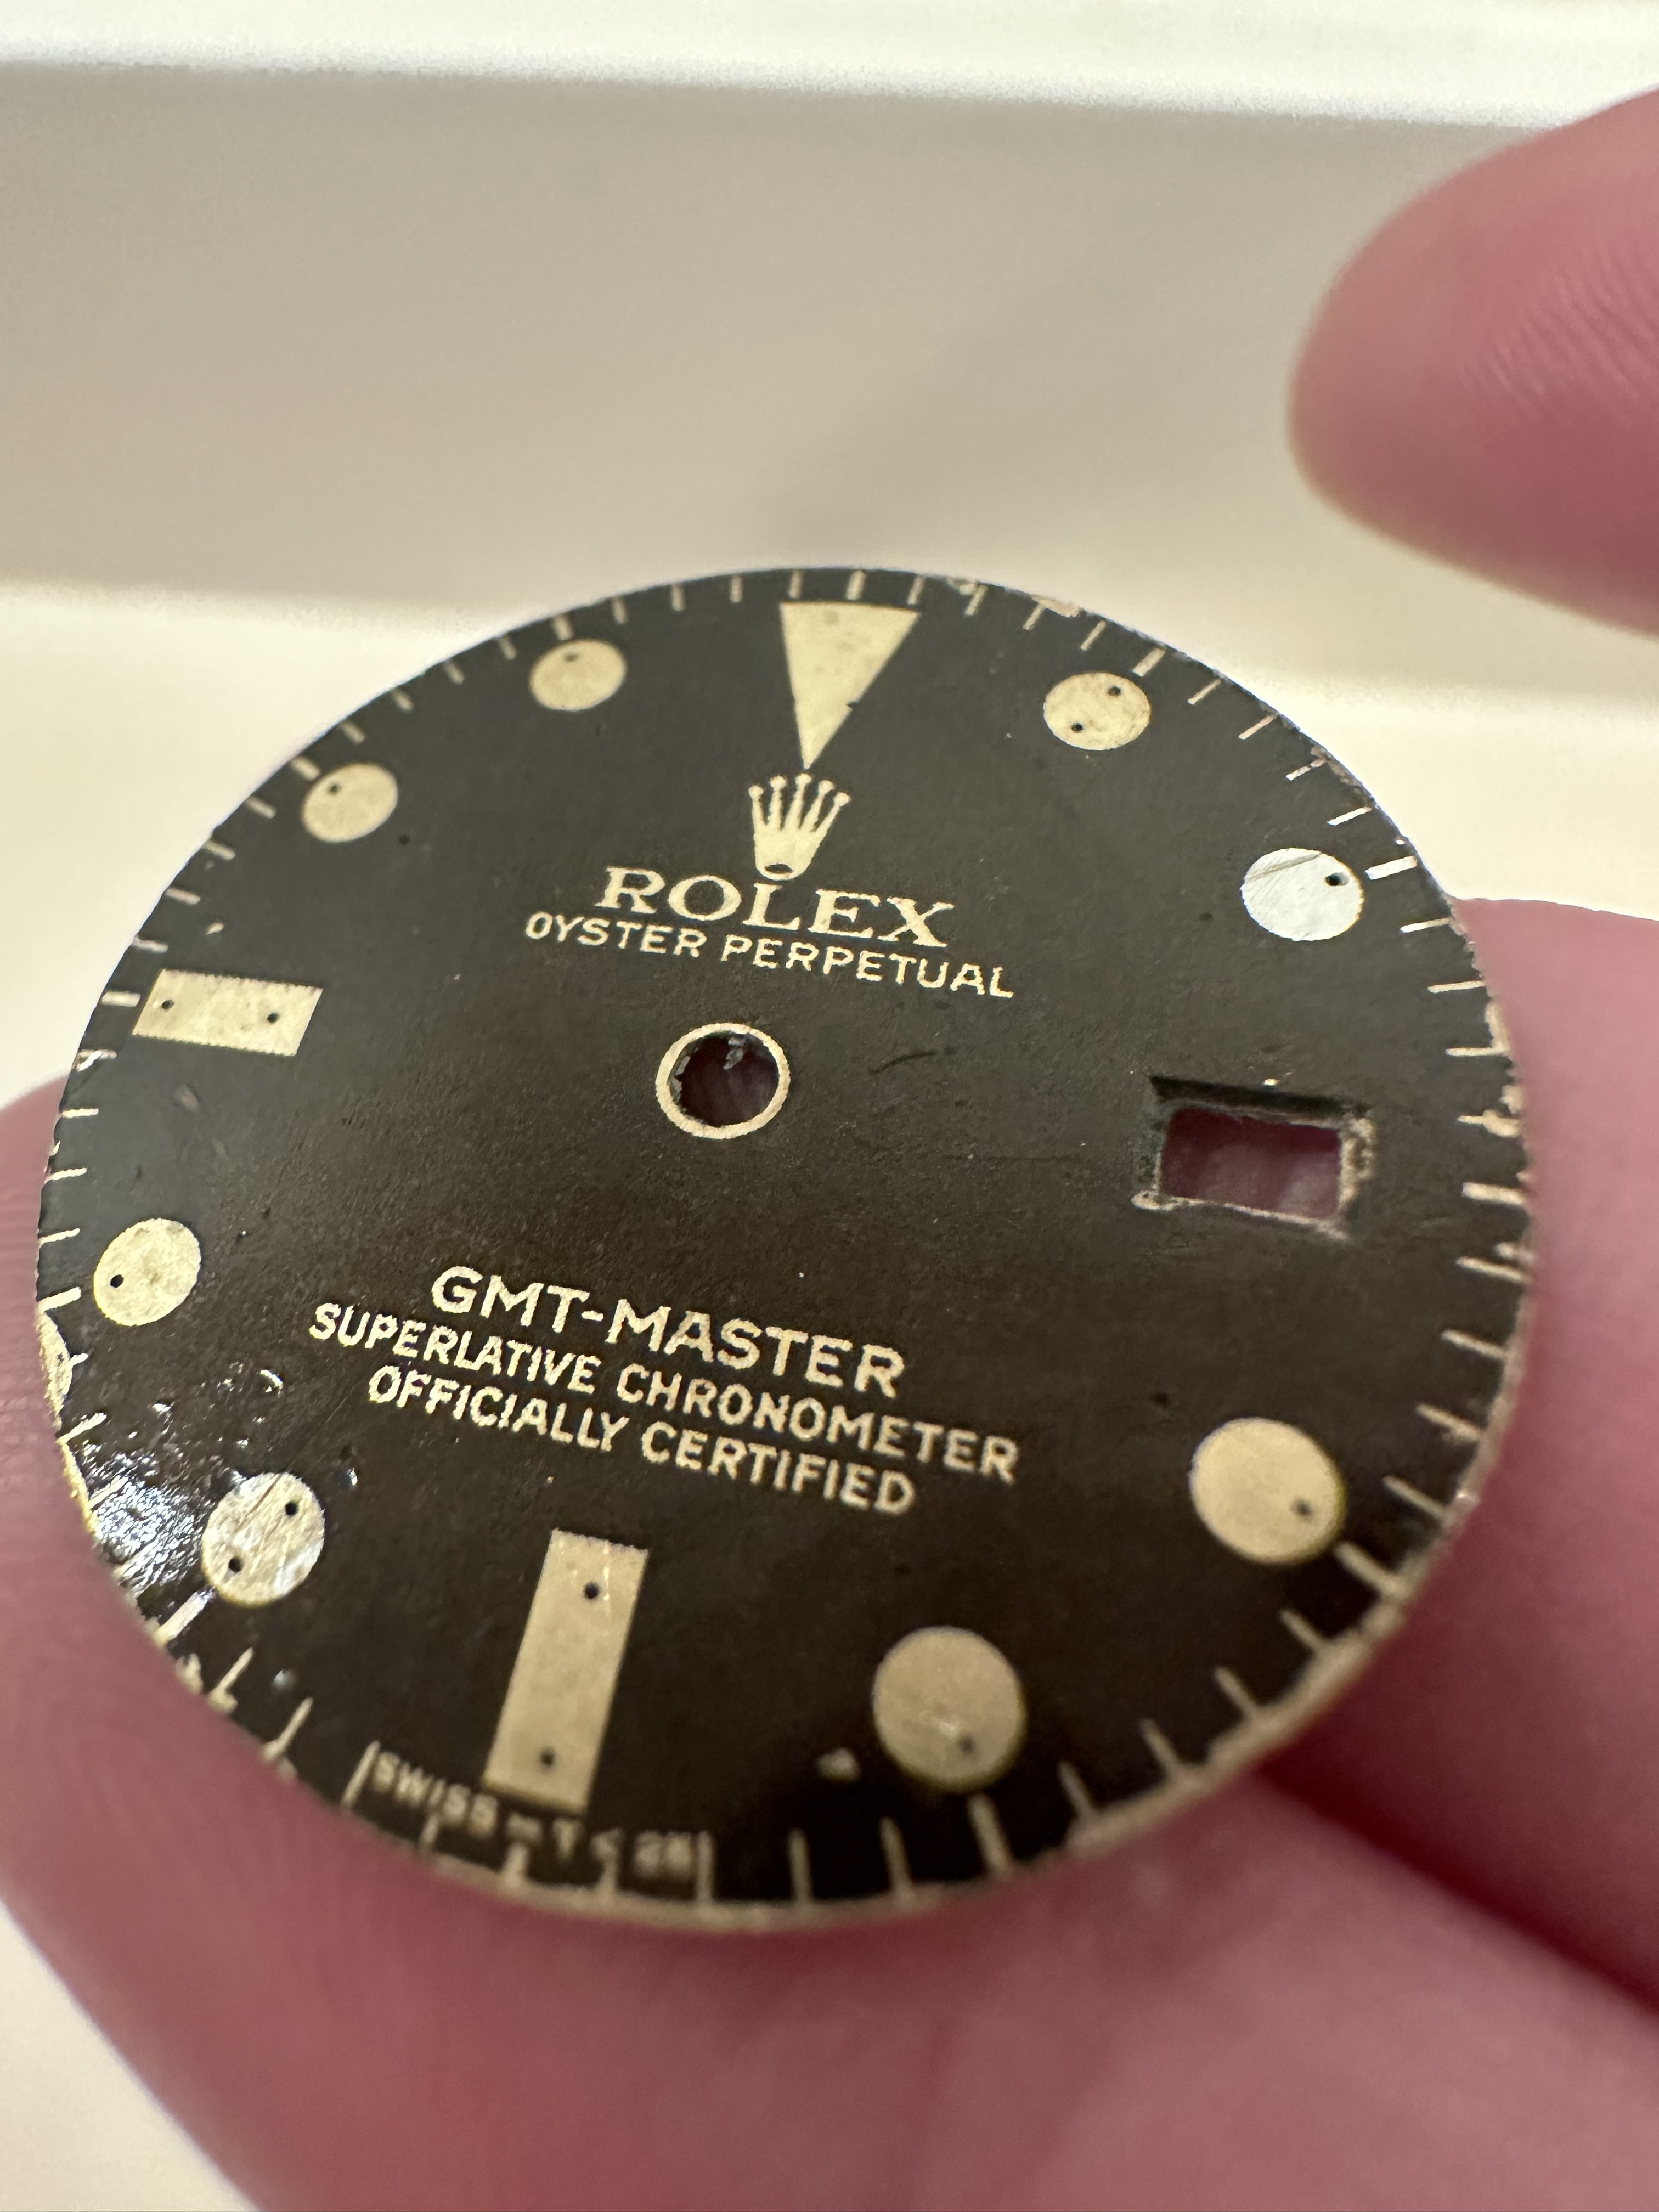
Should I get better results only heating the dial from below?
Maybe try acetone instead of using only Sunnyscopa glue?
Does the dial have to be a mirror shine for everything to properly stick?
I'm so close, but the edge of the dials are driving me crazy.
Well, at least I'm beginning to remember why to practice luming on junk dials. Takes a lot of breath-holding and practice to recoup not doing it for a couple years.
It'll by me some time until I figure mt problem with the edges.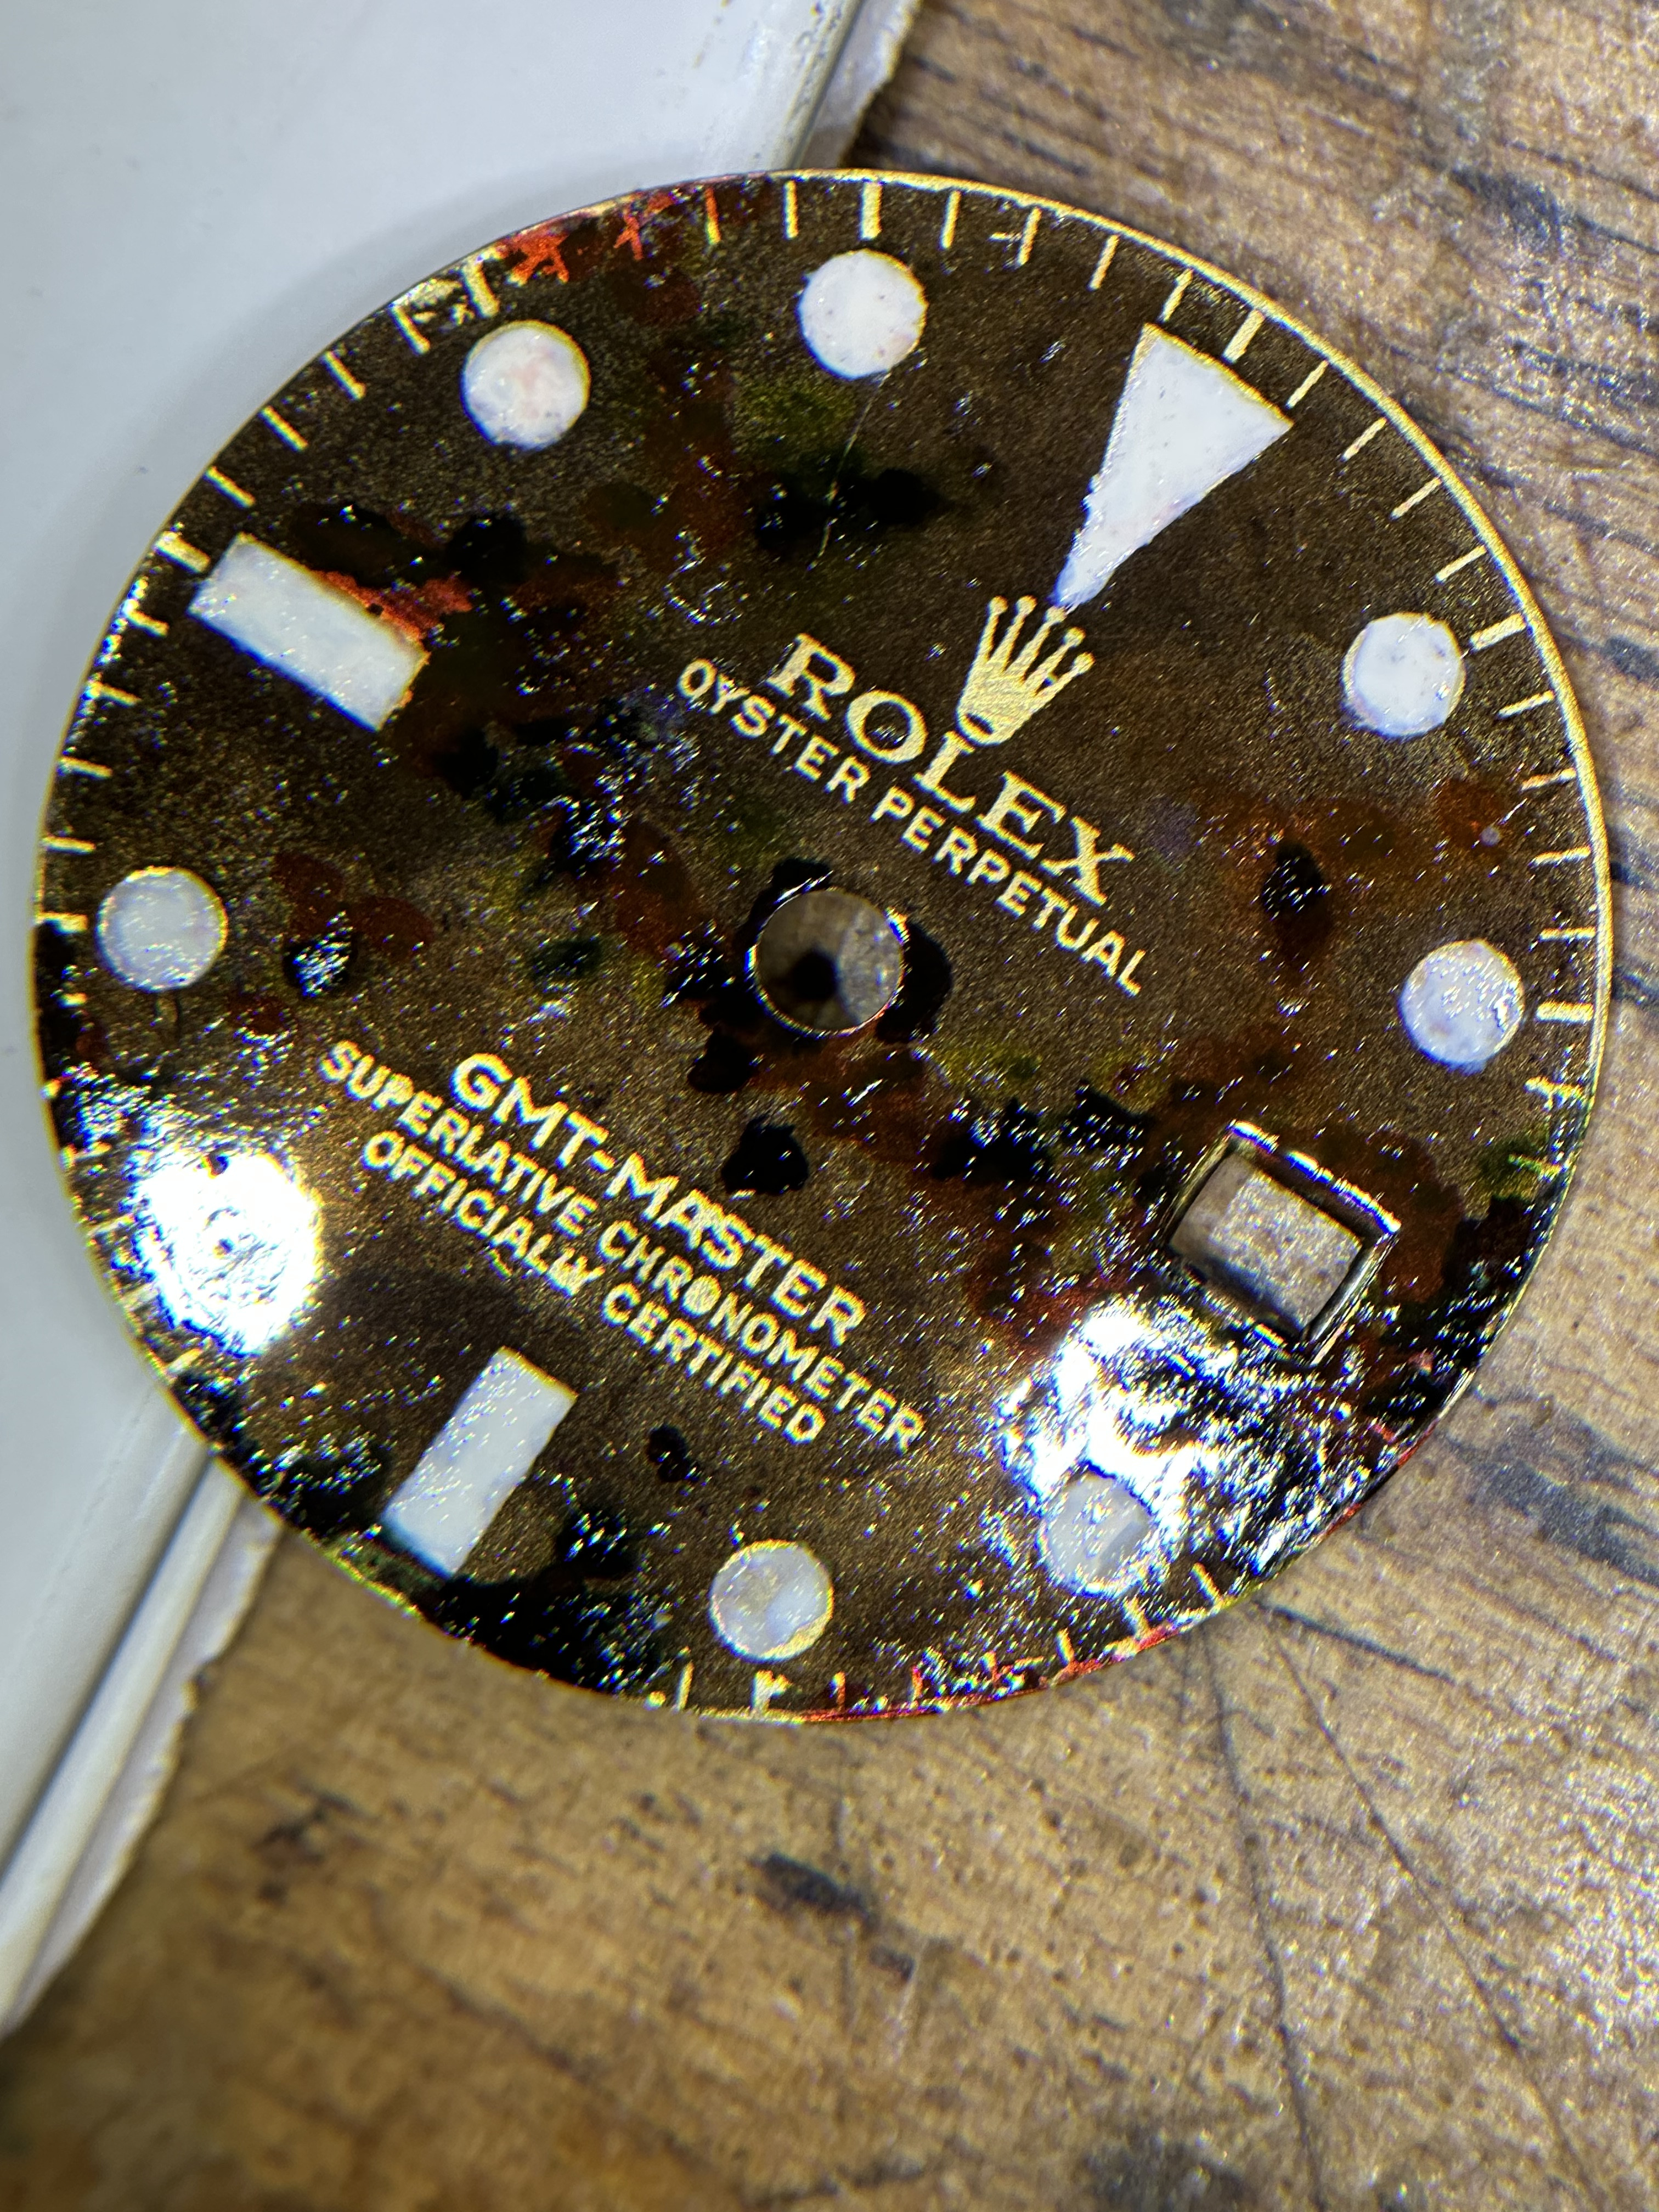
It'll by me some time until I figure mt problem with the edges.
The yellow transfer paper definitely seems to transfer easier than the Sunnyscopa after my first test. Decided to write a novel about it, so TL/DRs need not apply! I might have gone overboard cleaning the dial but wanted to rule out any other issues and give the yellow transfer paper a fair assessment.
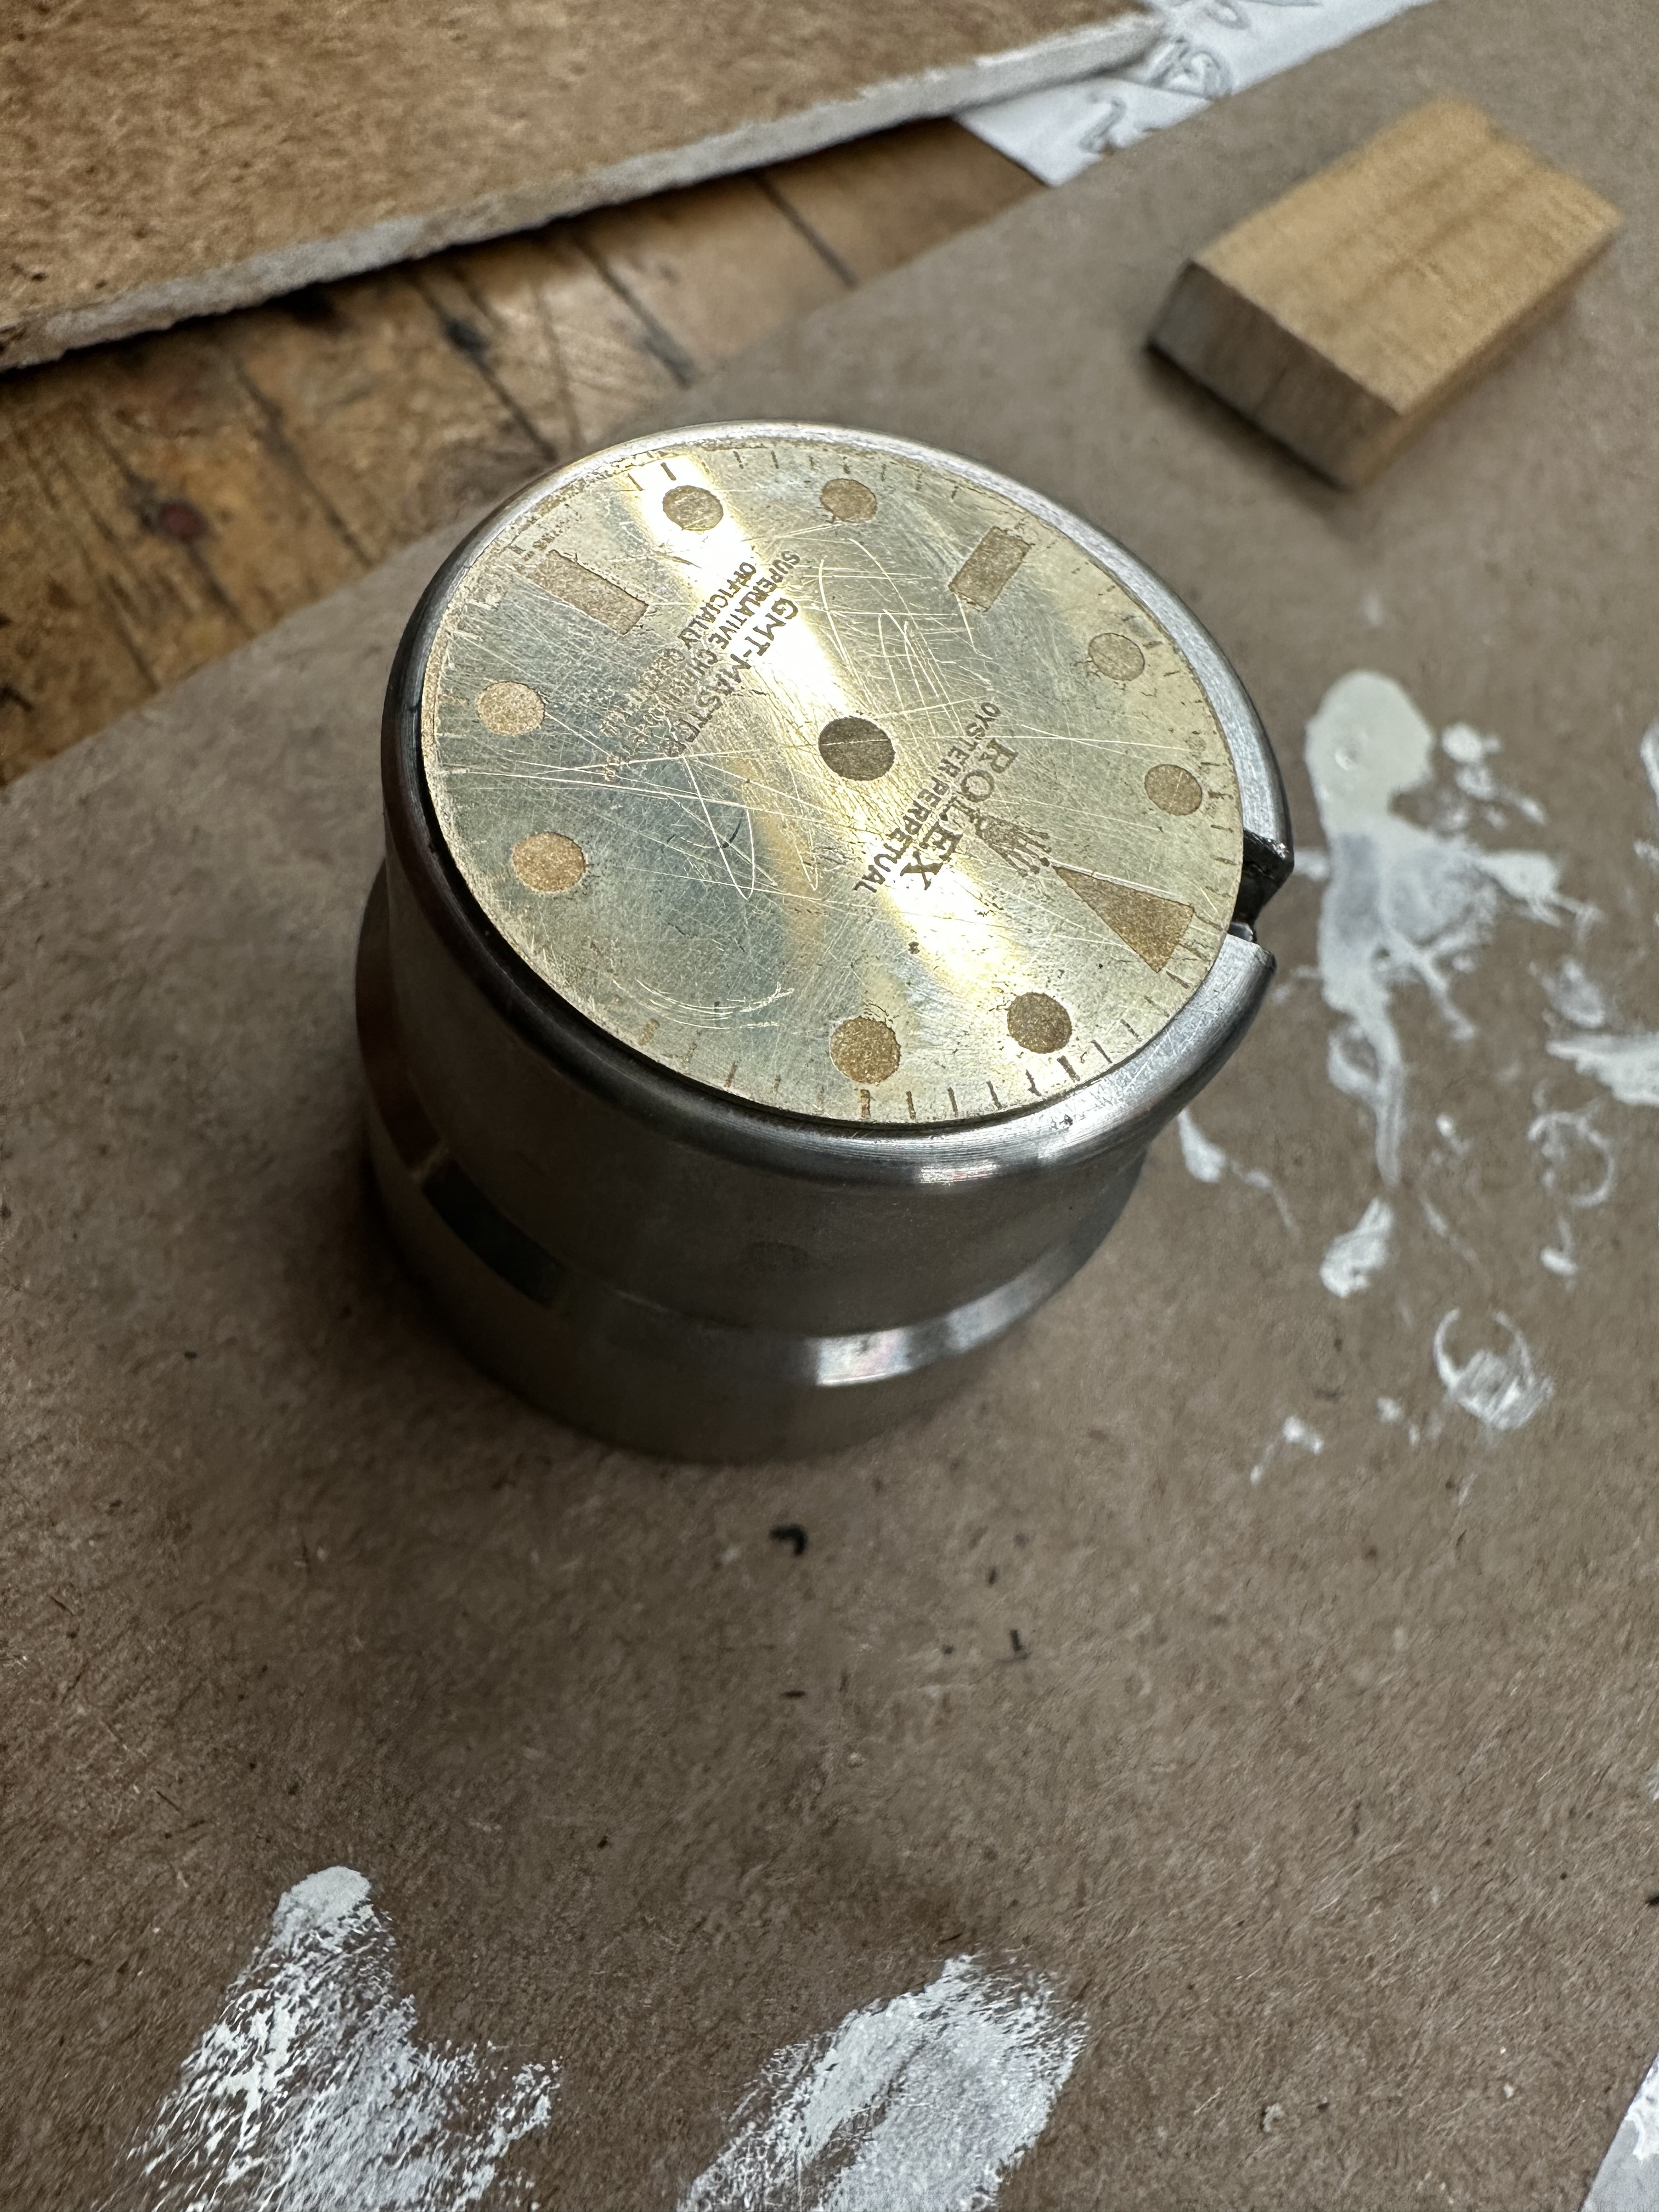
I wet sanded a blank brass disc flat with 1000, then 1500, laid flat on a piece of glass. Next, I did a quick and final wetsand with 3000 just to be sure there were no excessively sharp edges or "giant" scratches that could affect adhesion. I then dropped the disc in a glass filled about 50/50 of alcohol and water (and a few drops of dawn dish soap) and put the glass in the ultrasonic cleaner for about 5 minutes.
Next up, I put on some rubber gloves and rubbed/cleaned/polished the dial with glass cooktop/stovetop cleaner. It's my new favorite for cleaning brass, as you can tell if the brass is clean enough by the way water sheets or puddles on it. I made sure there were no puddles -- just a thin sheet of water.
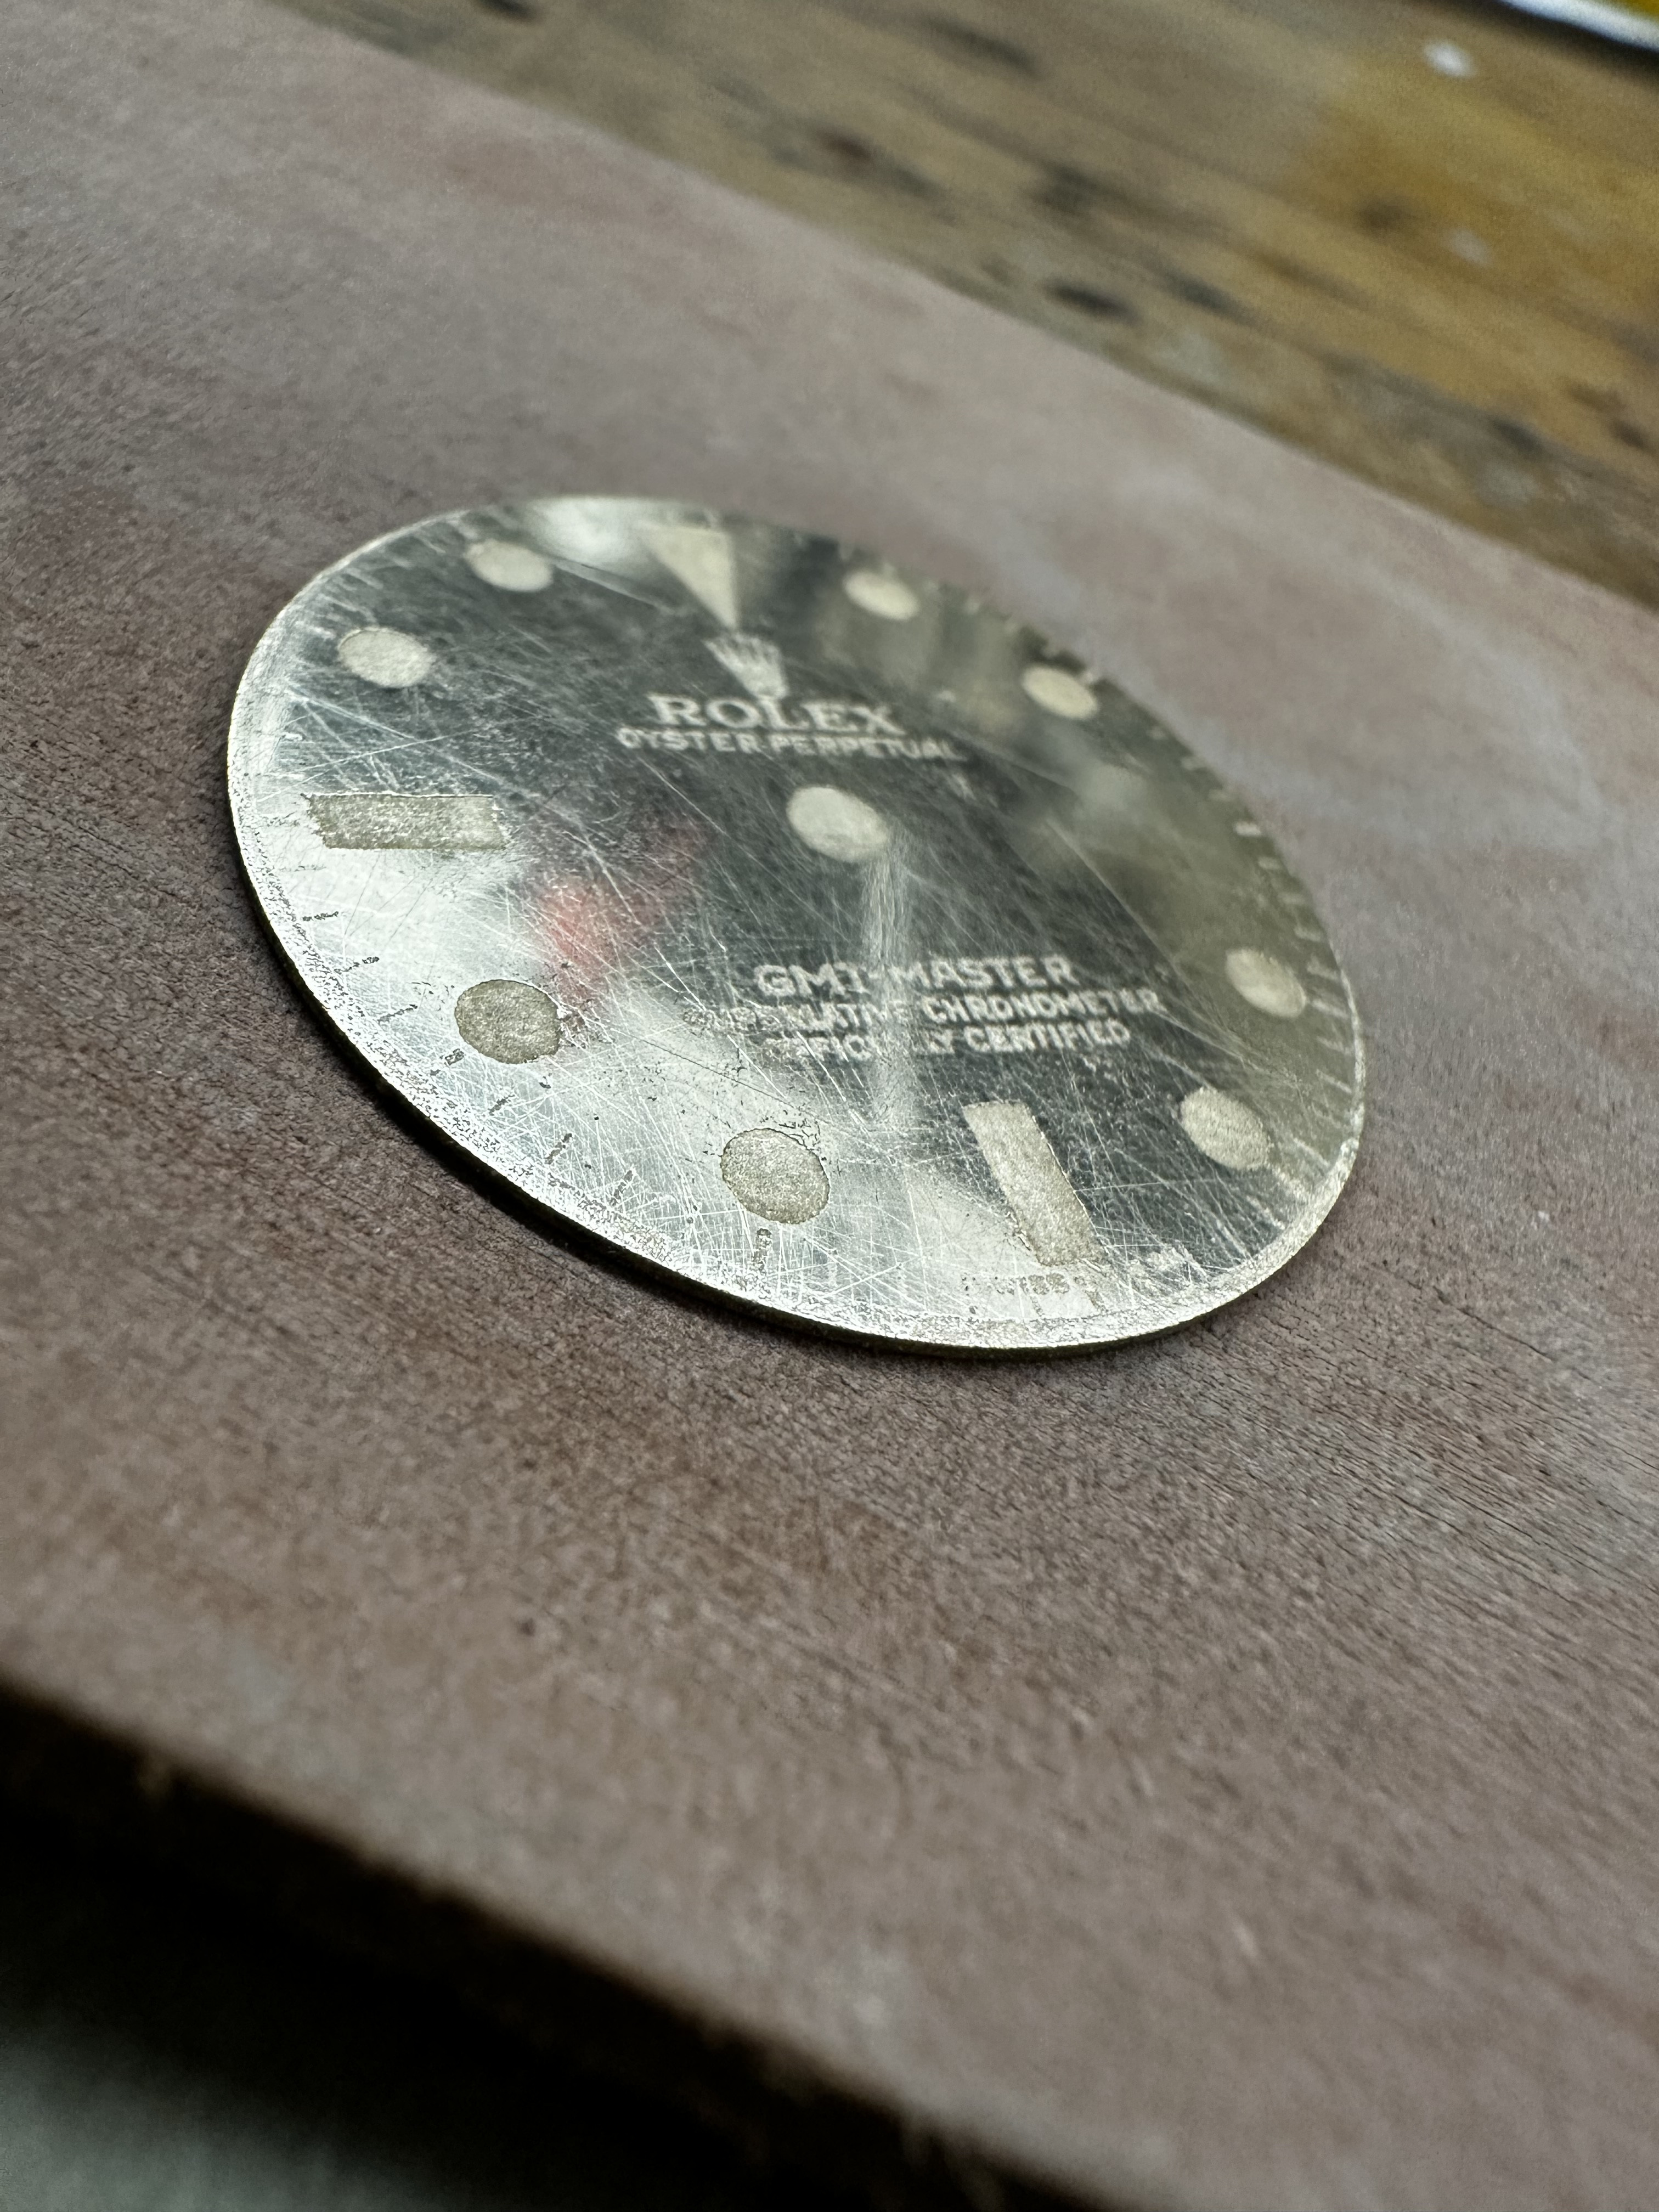
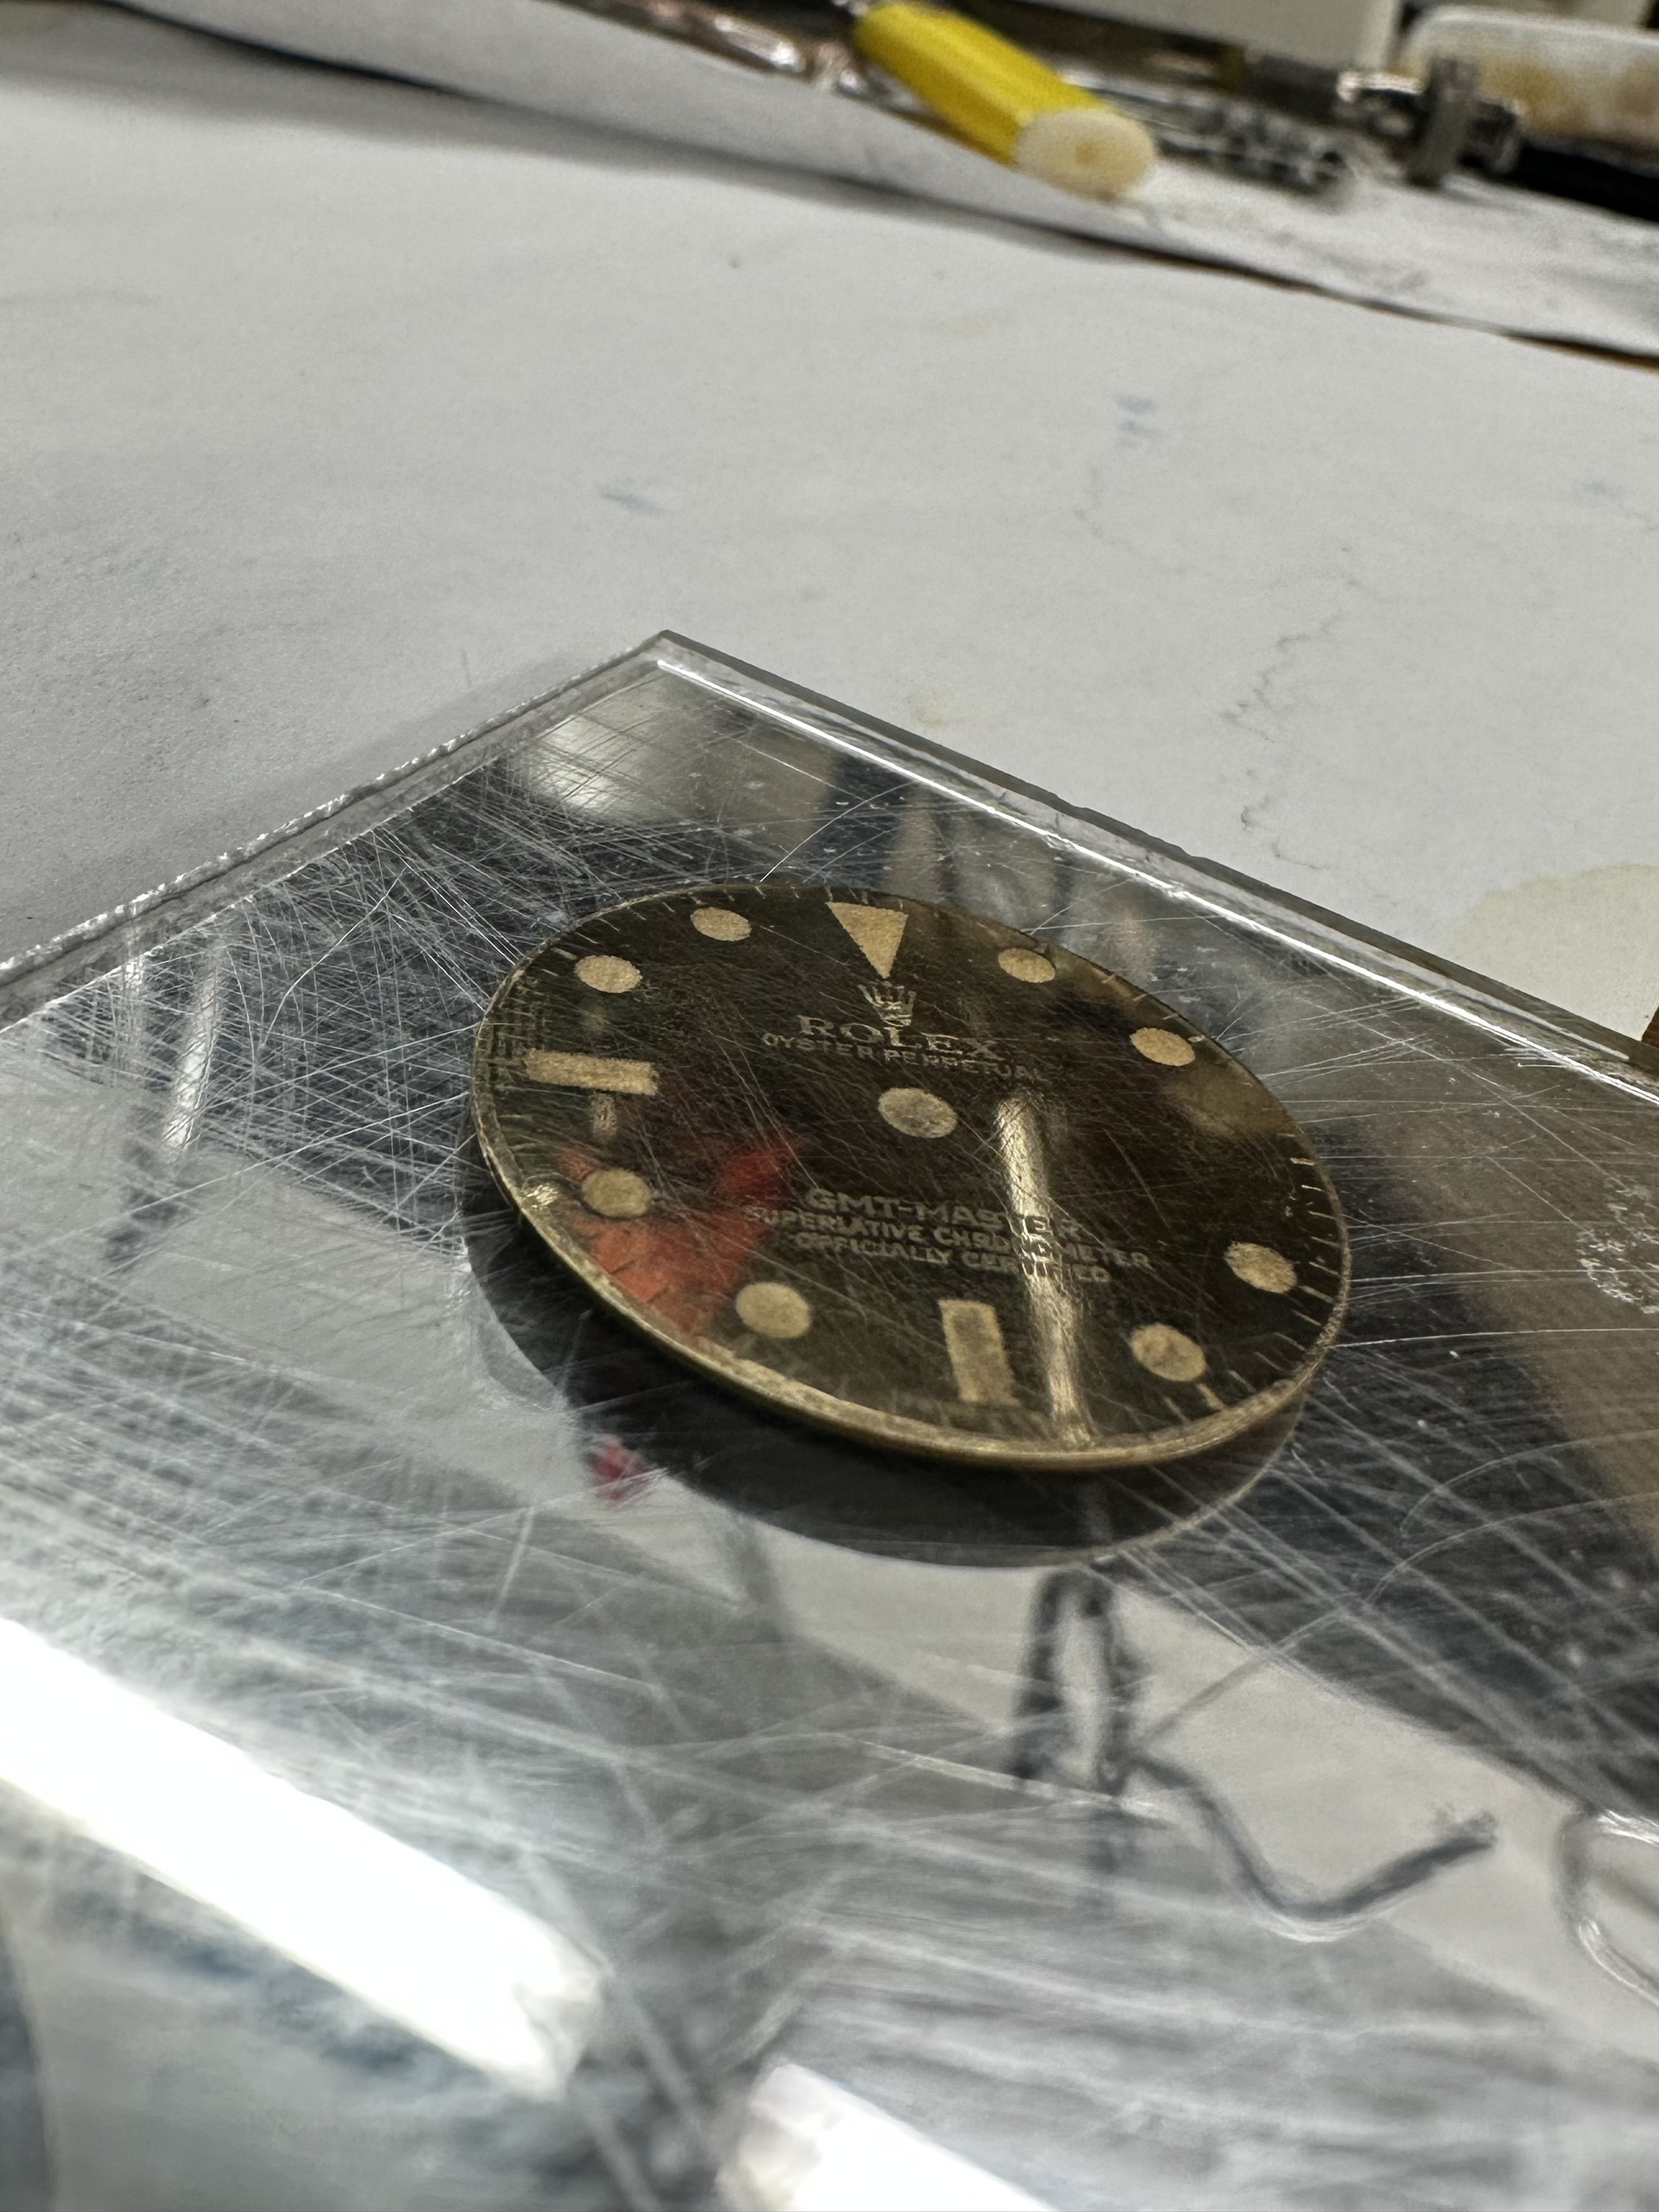
On to the really easy part... I put the yellow transfer paper on top of the dial (with tape around the edges to prevent it from moving) and just burnished the paper with a broad tip on my soldering iron. That's it.
The results were not necessarily amazing, but judging from my very first attempt:
1) It was really easy
2) I finally had success getting the edge of the dial to transfer!
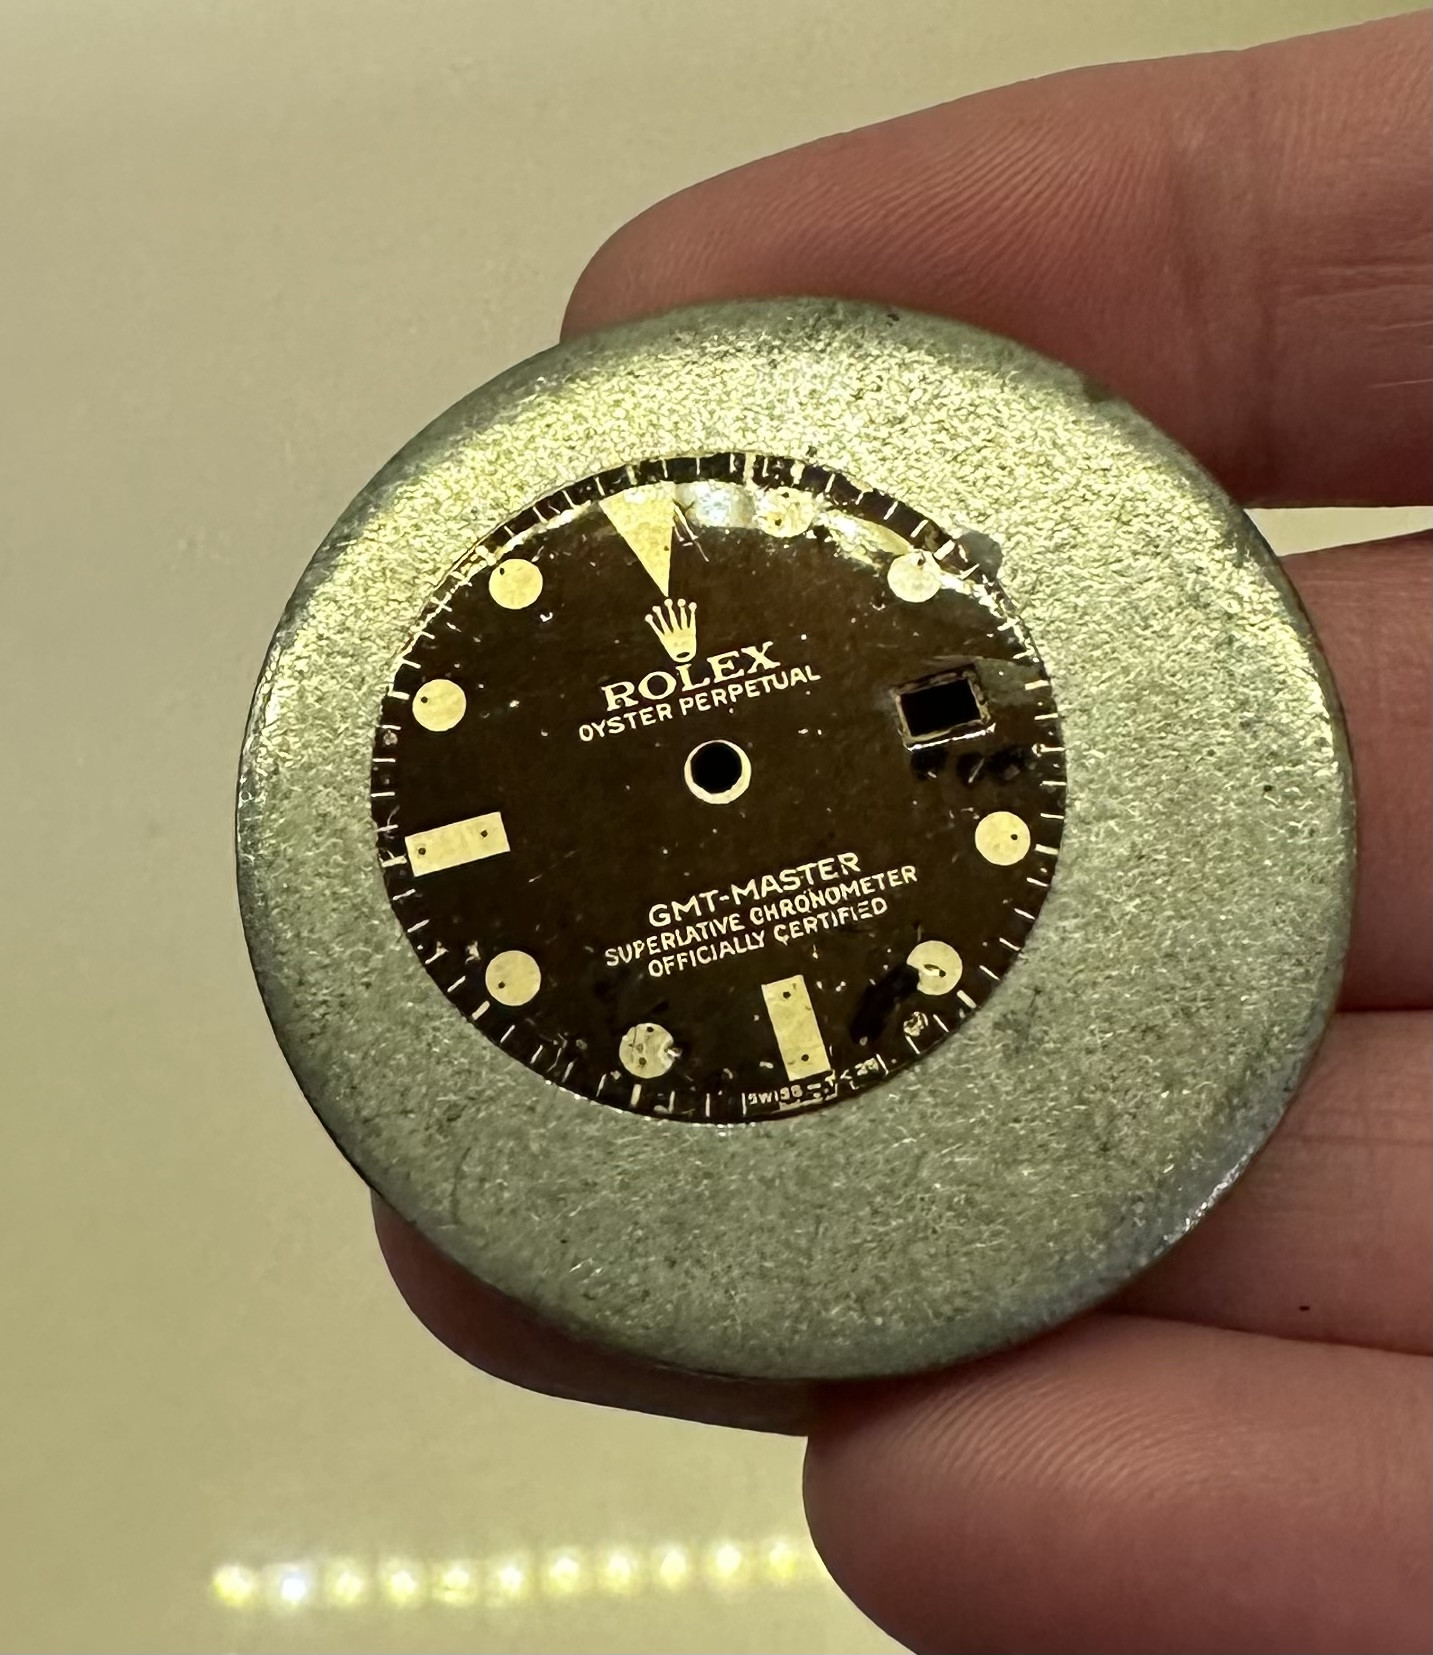
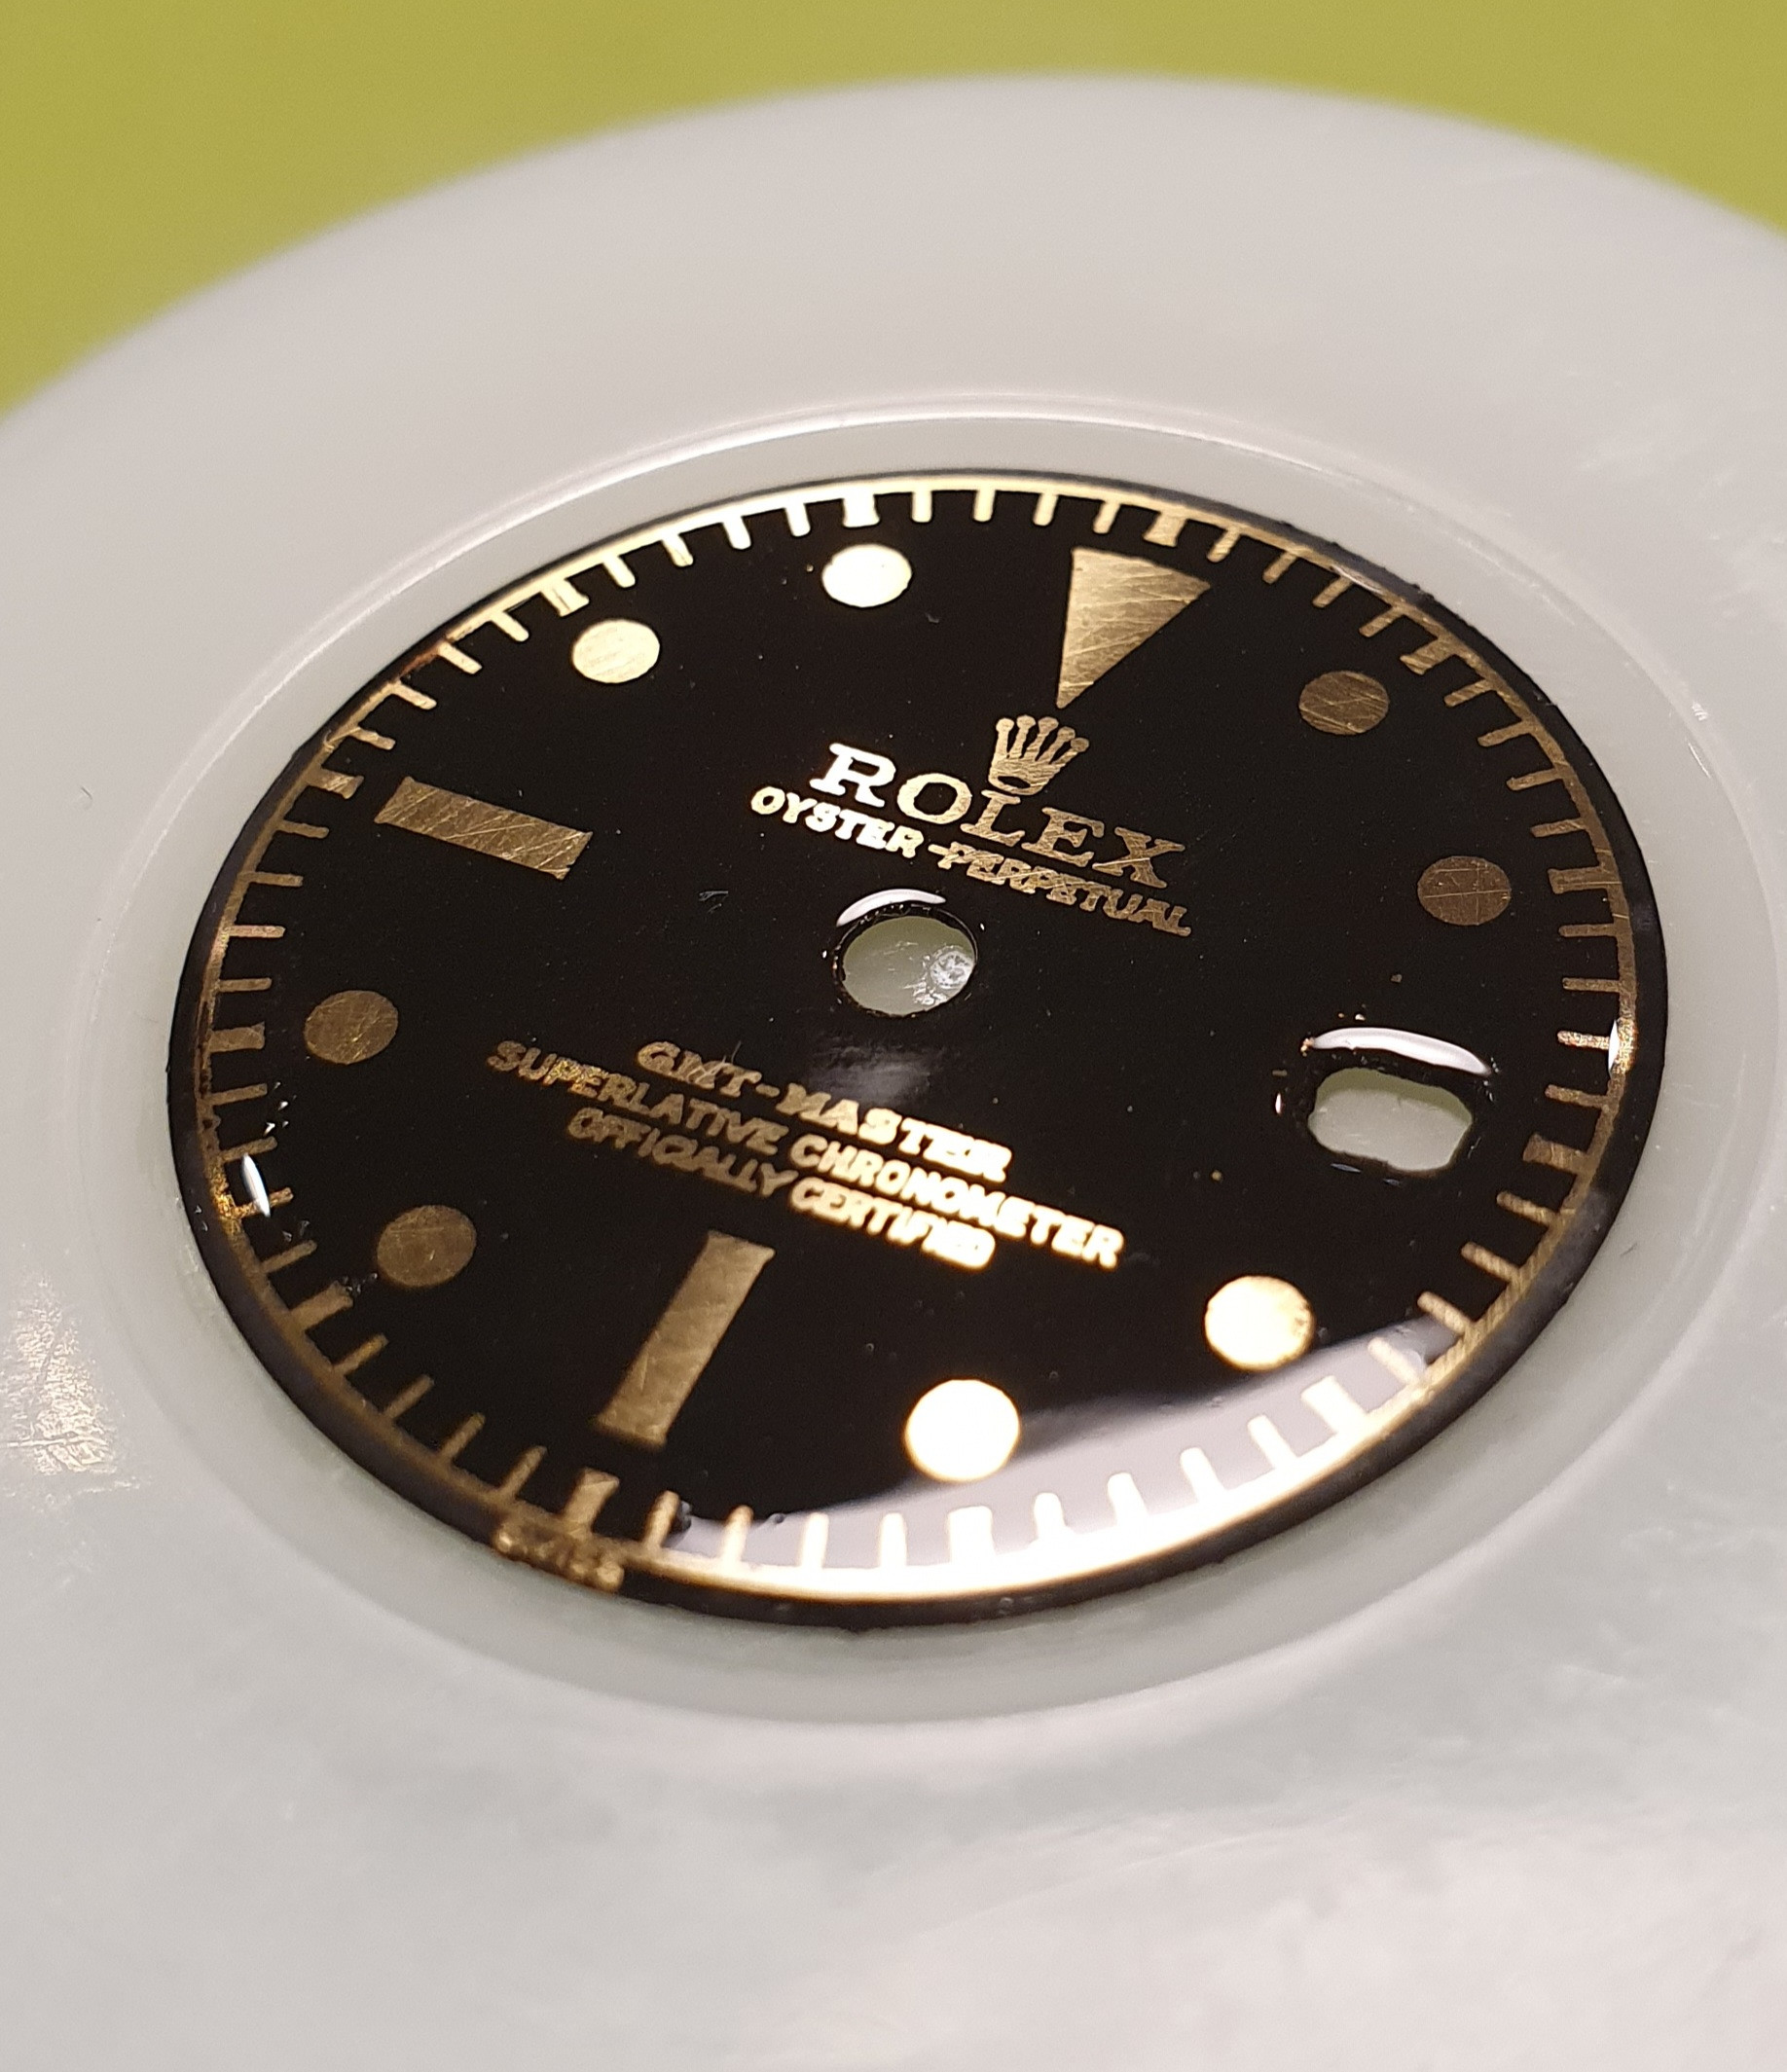
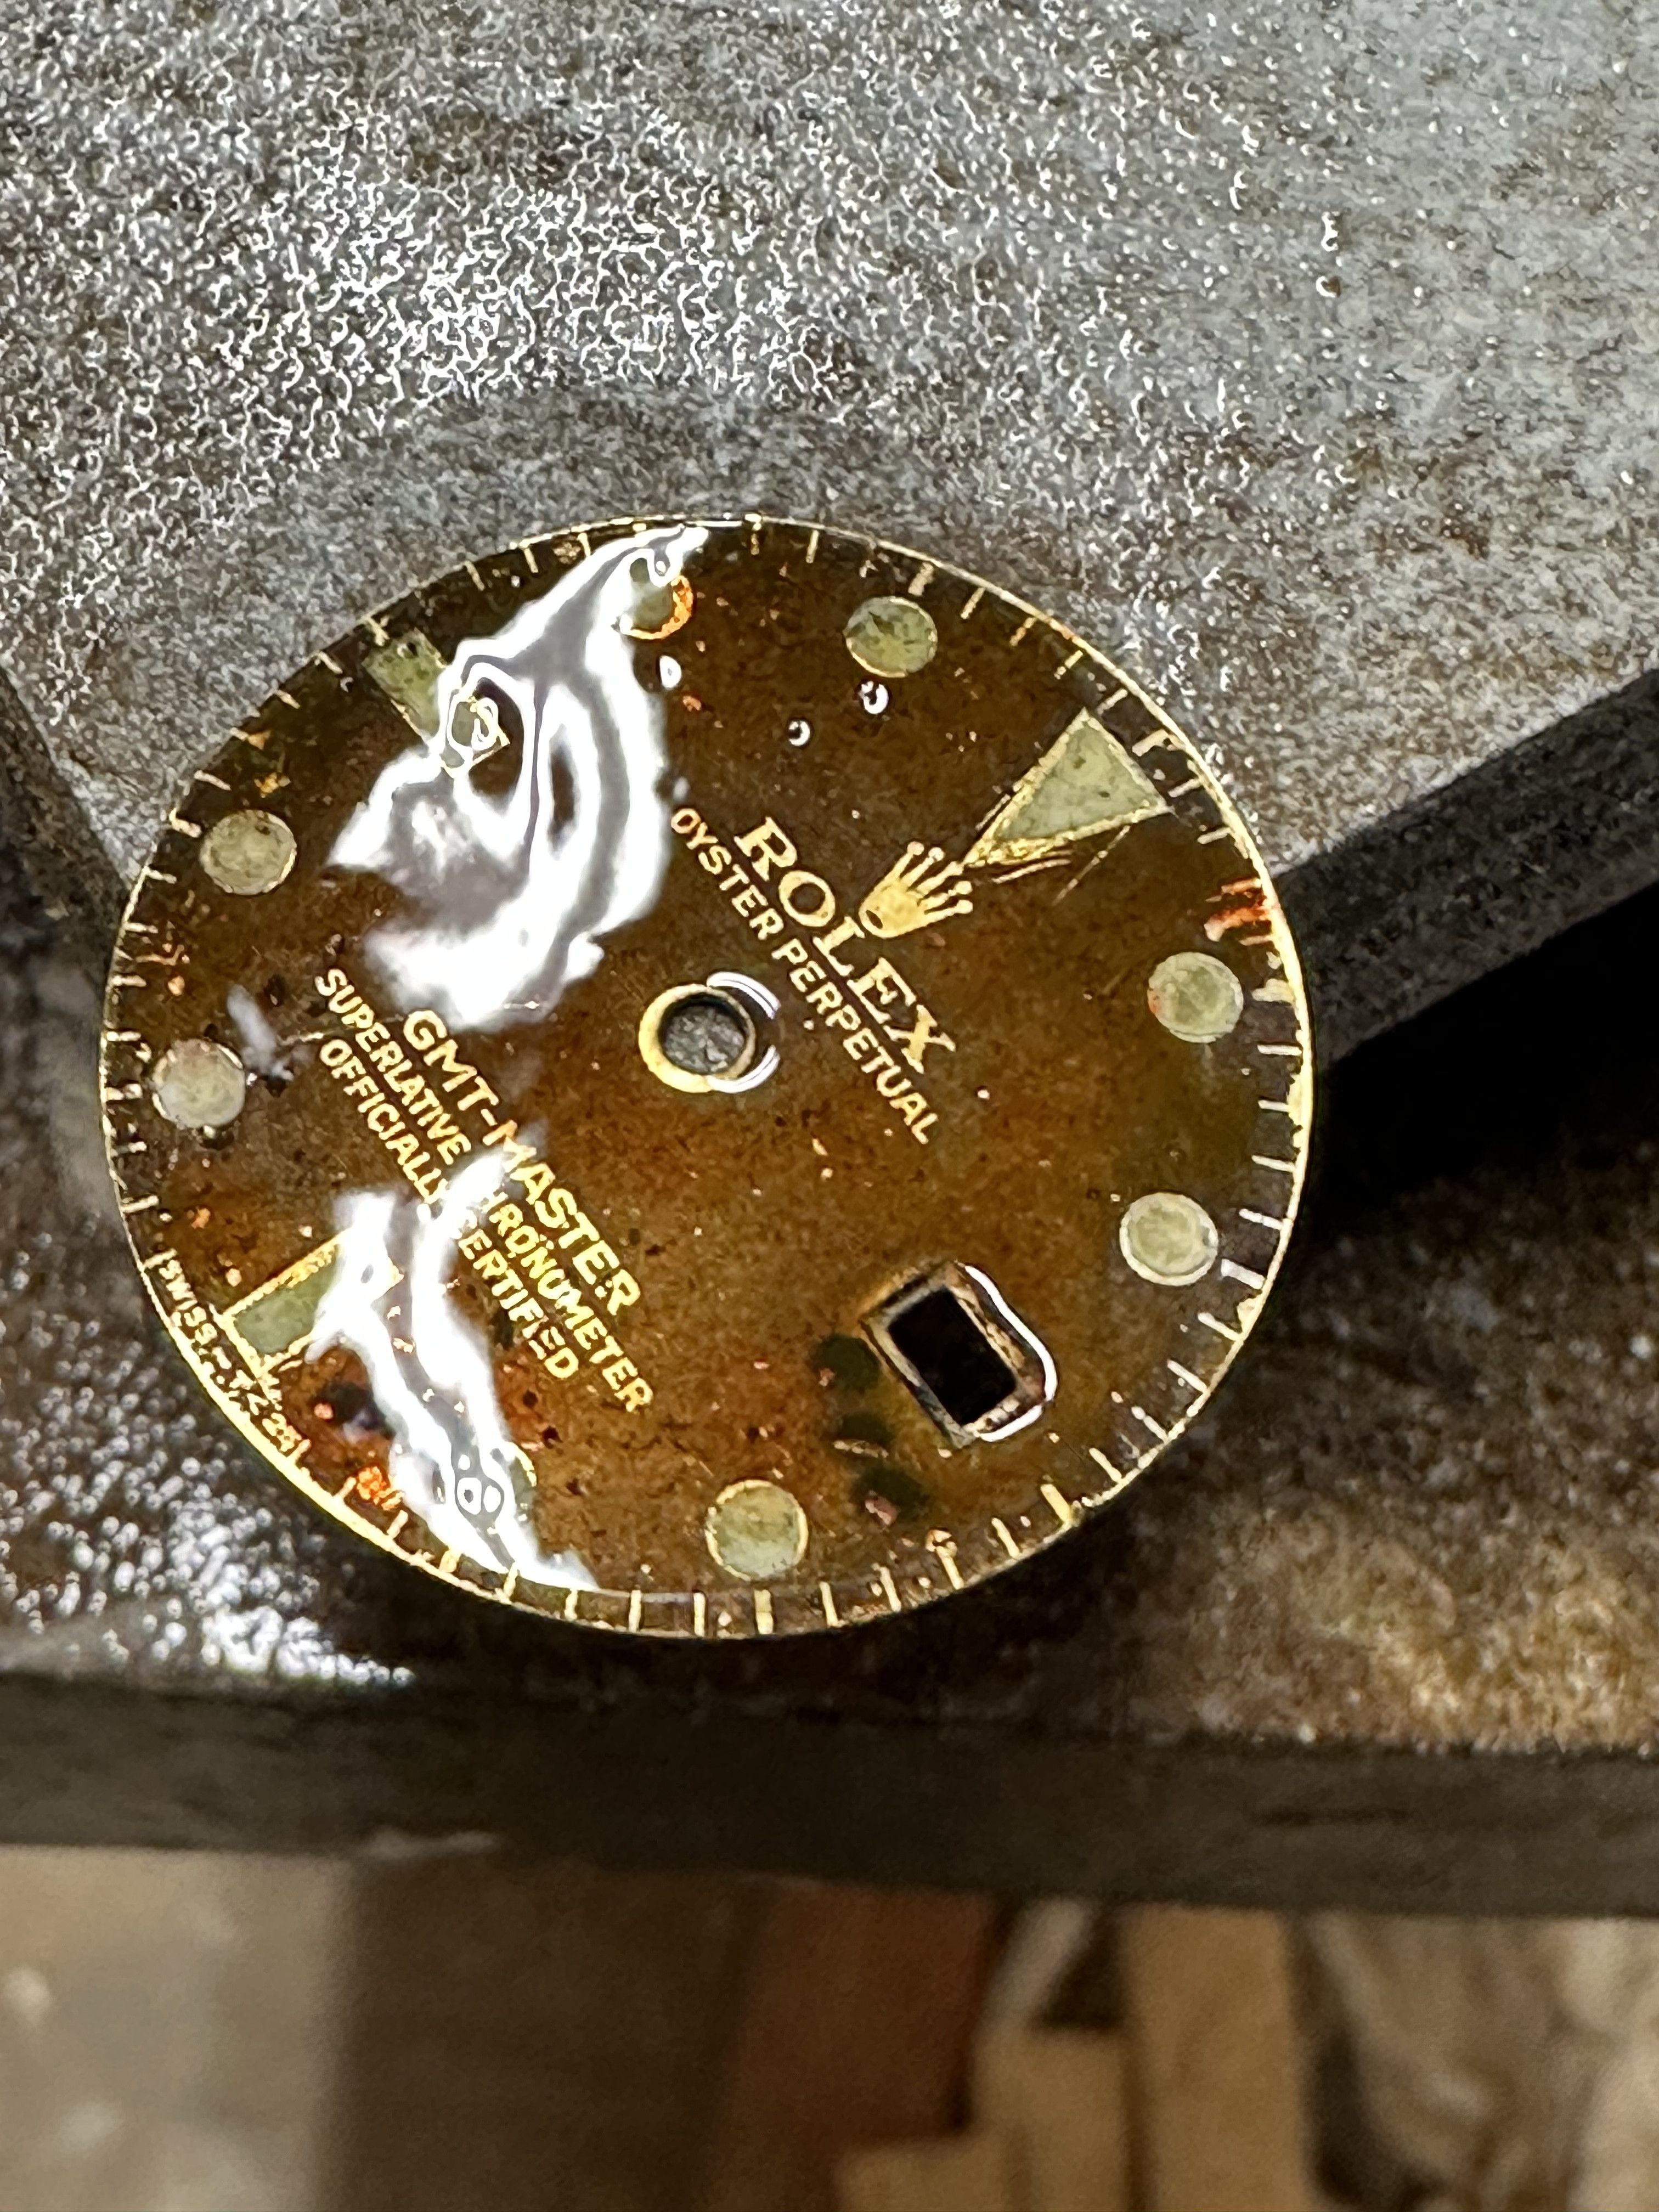
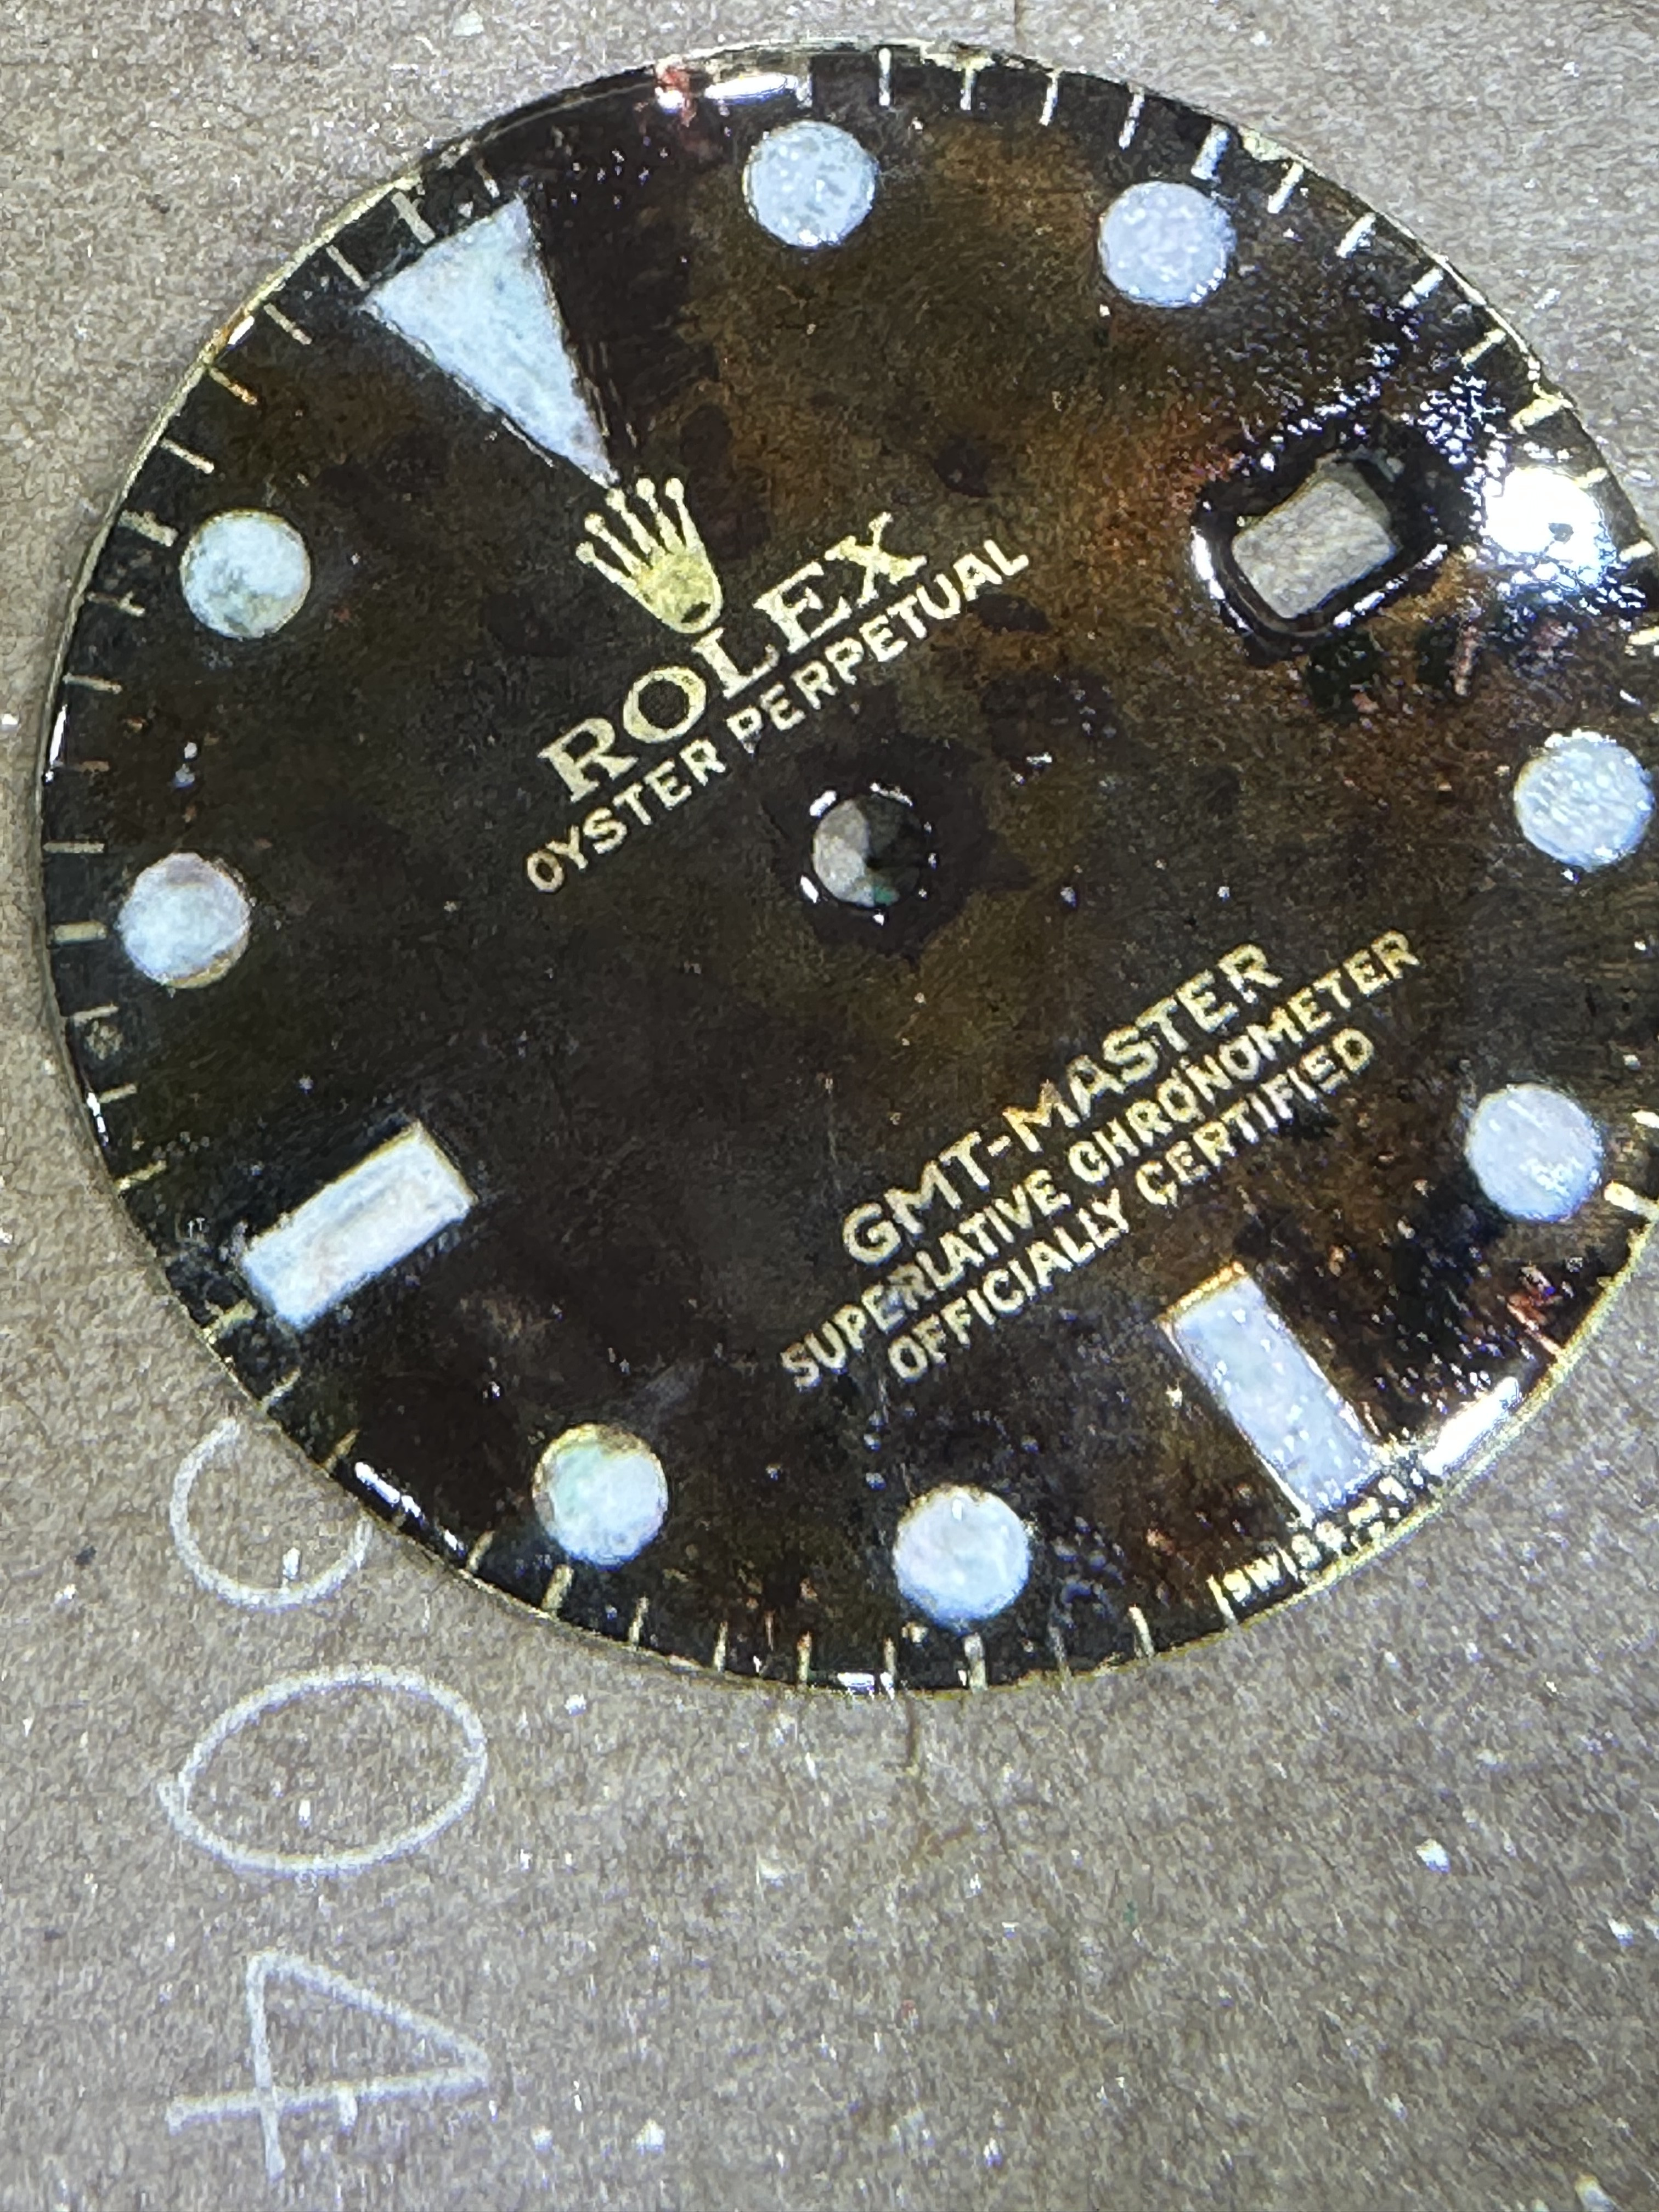
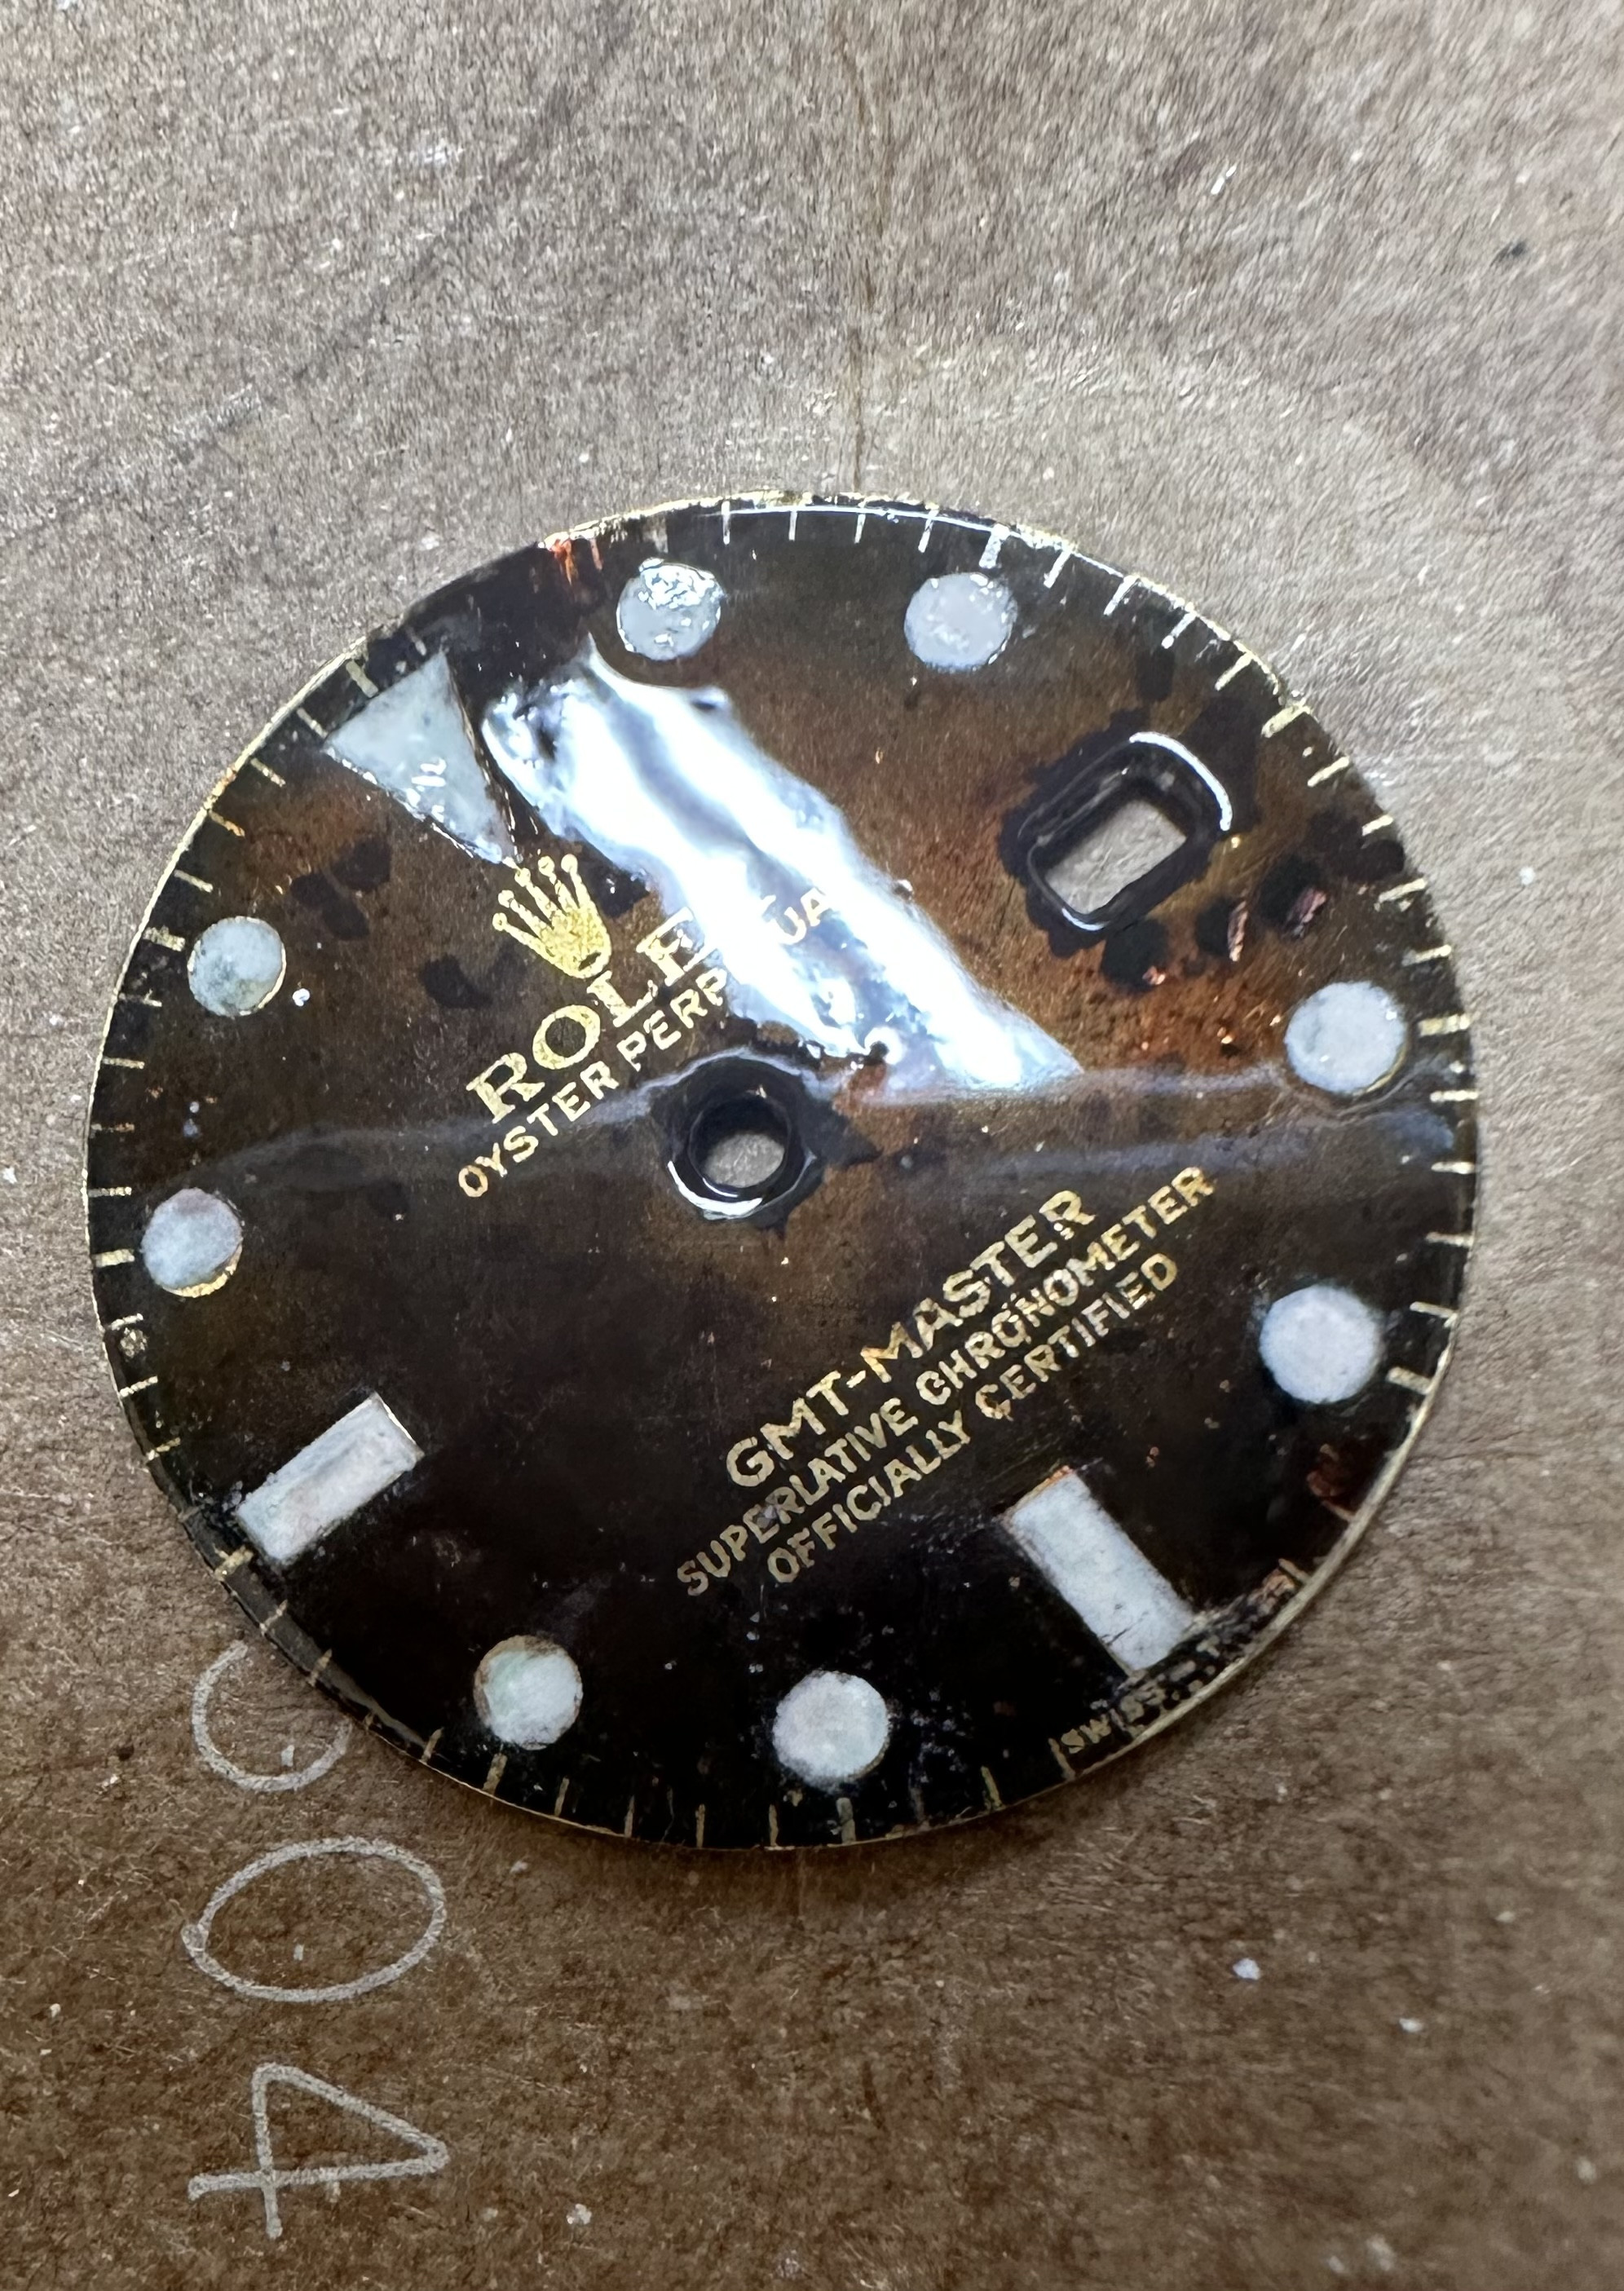
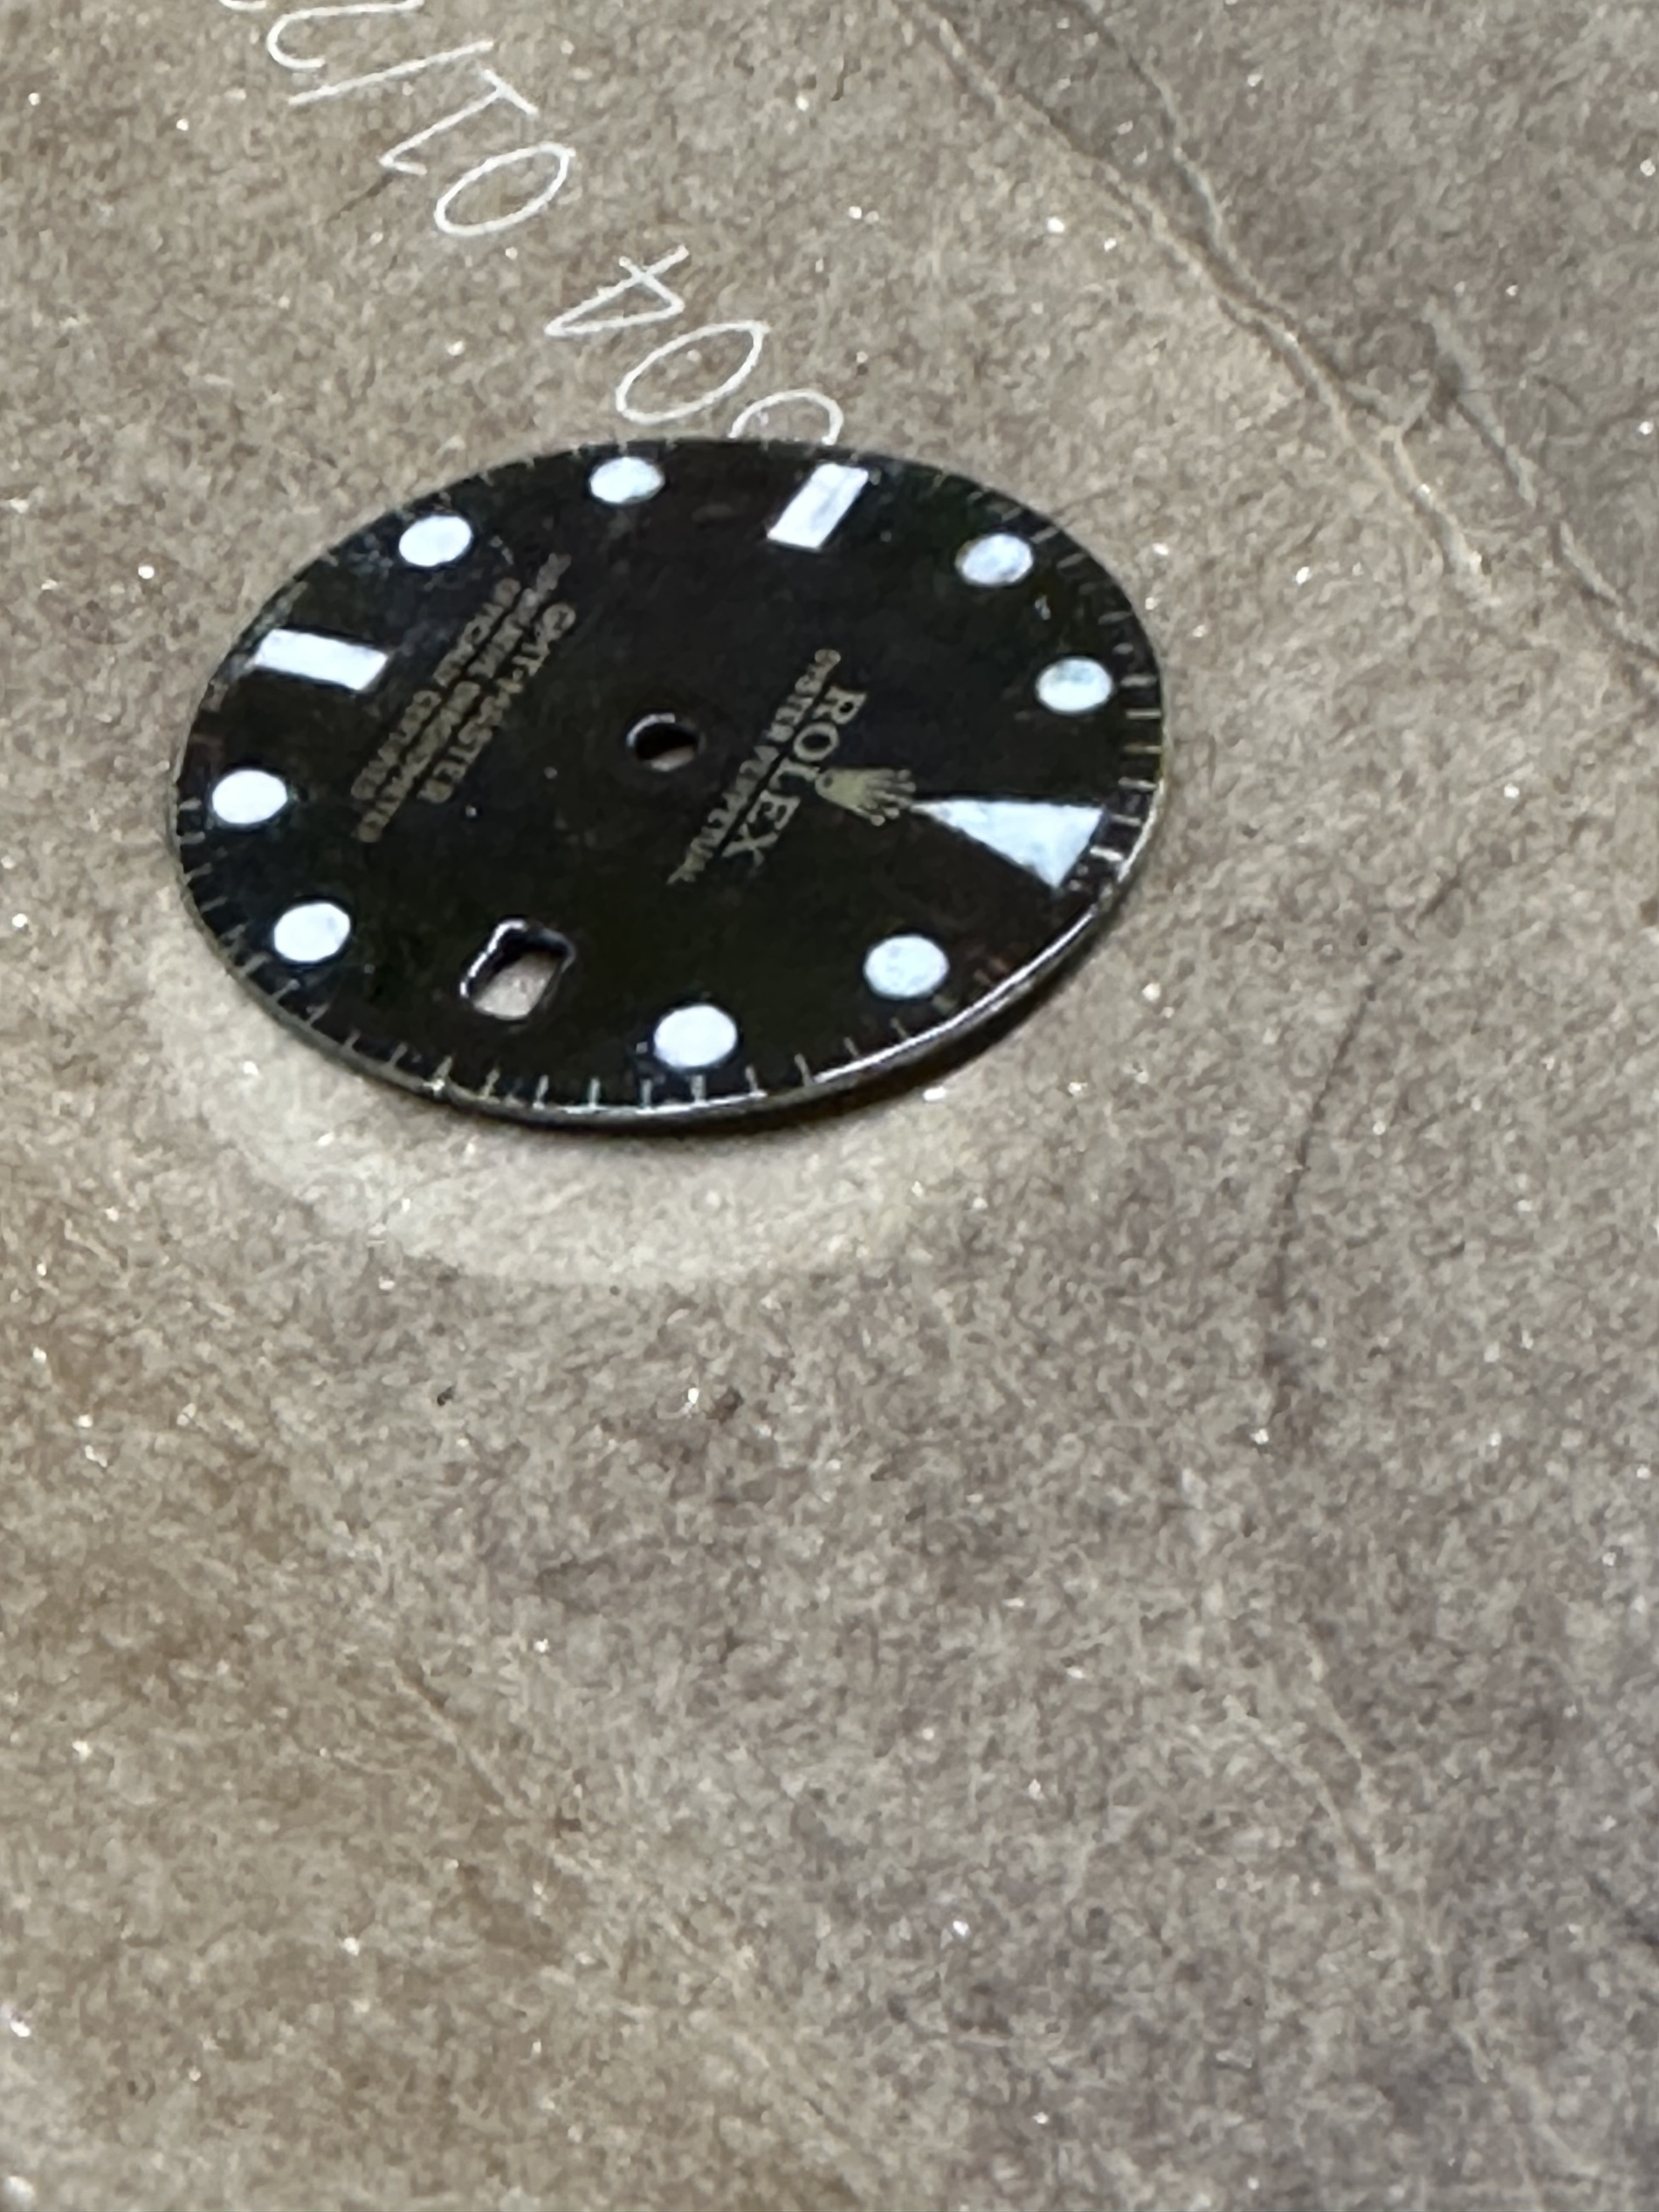
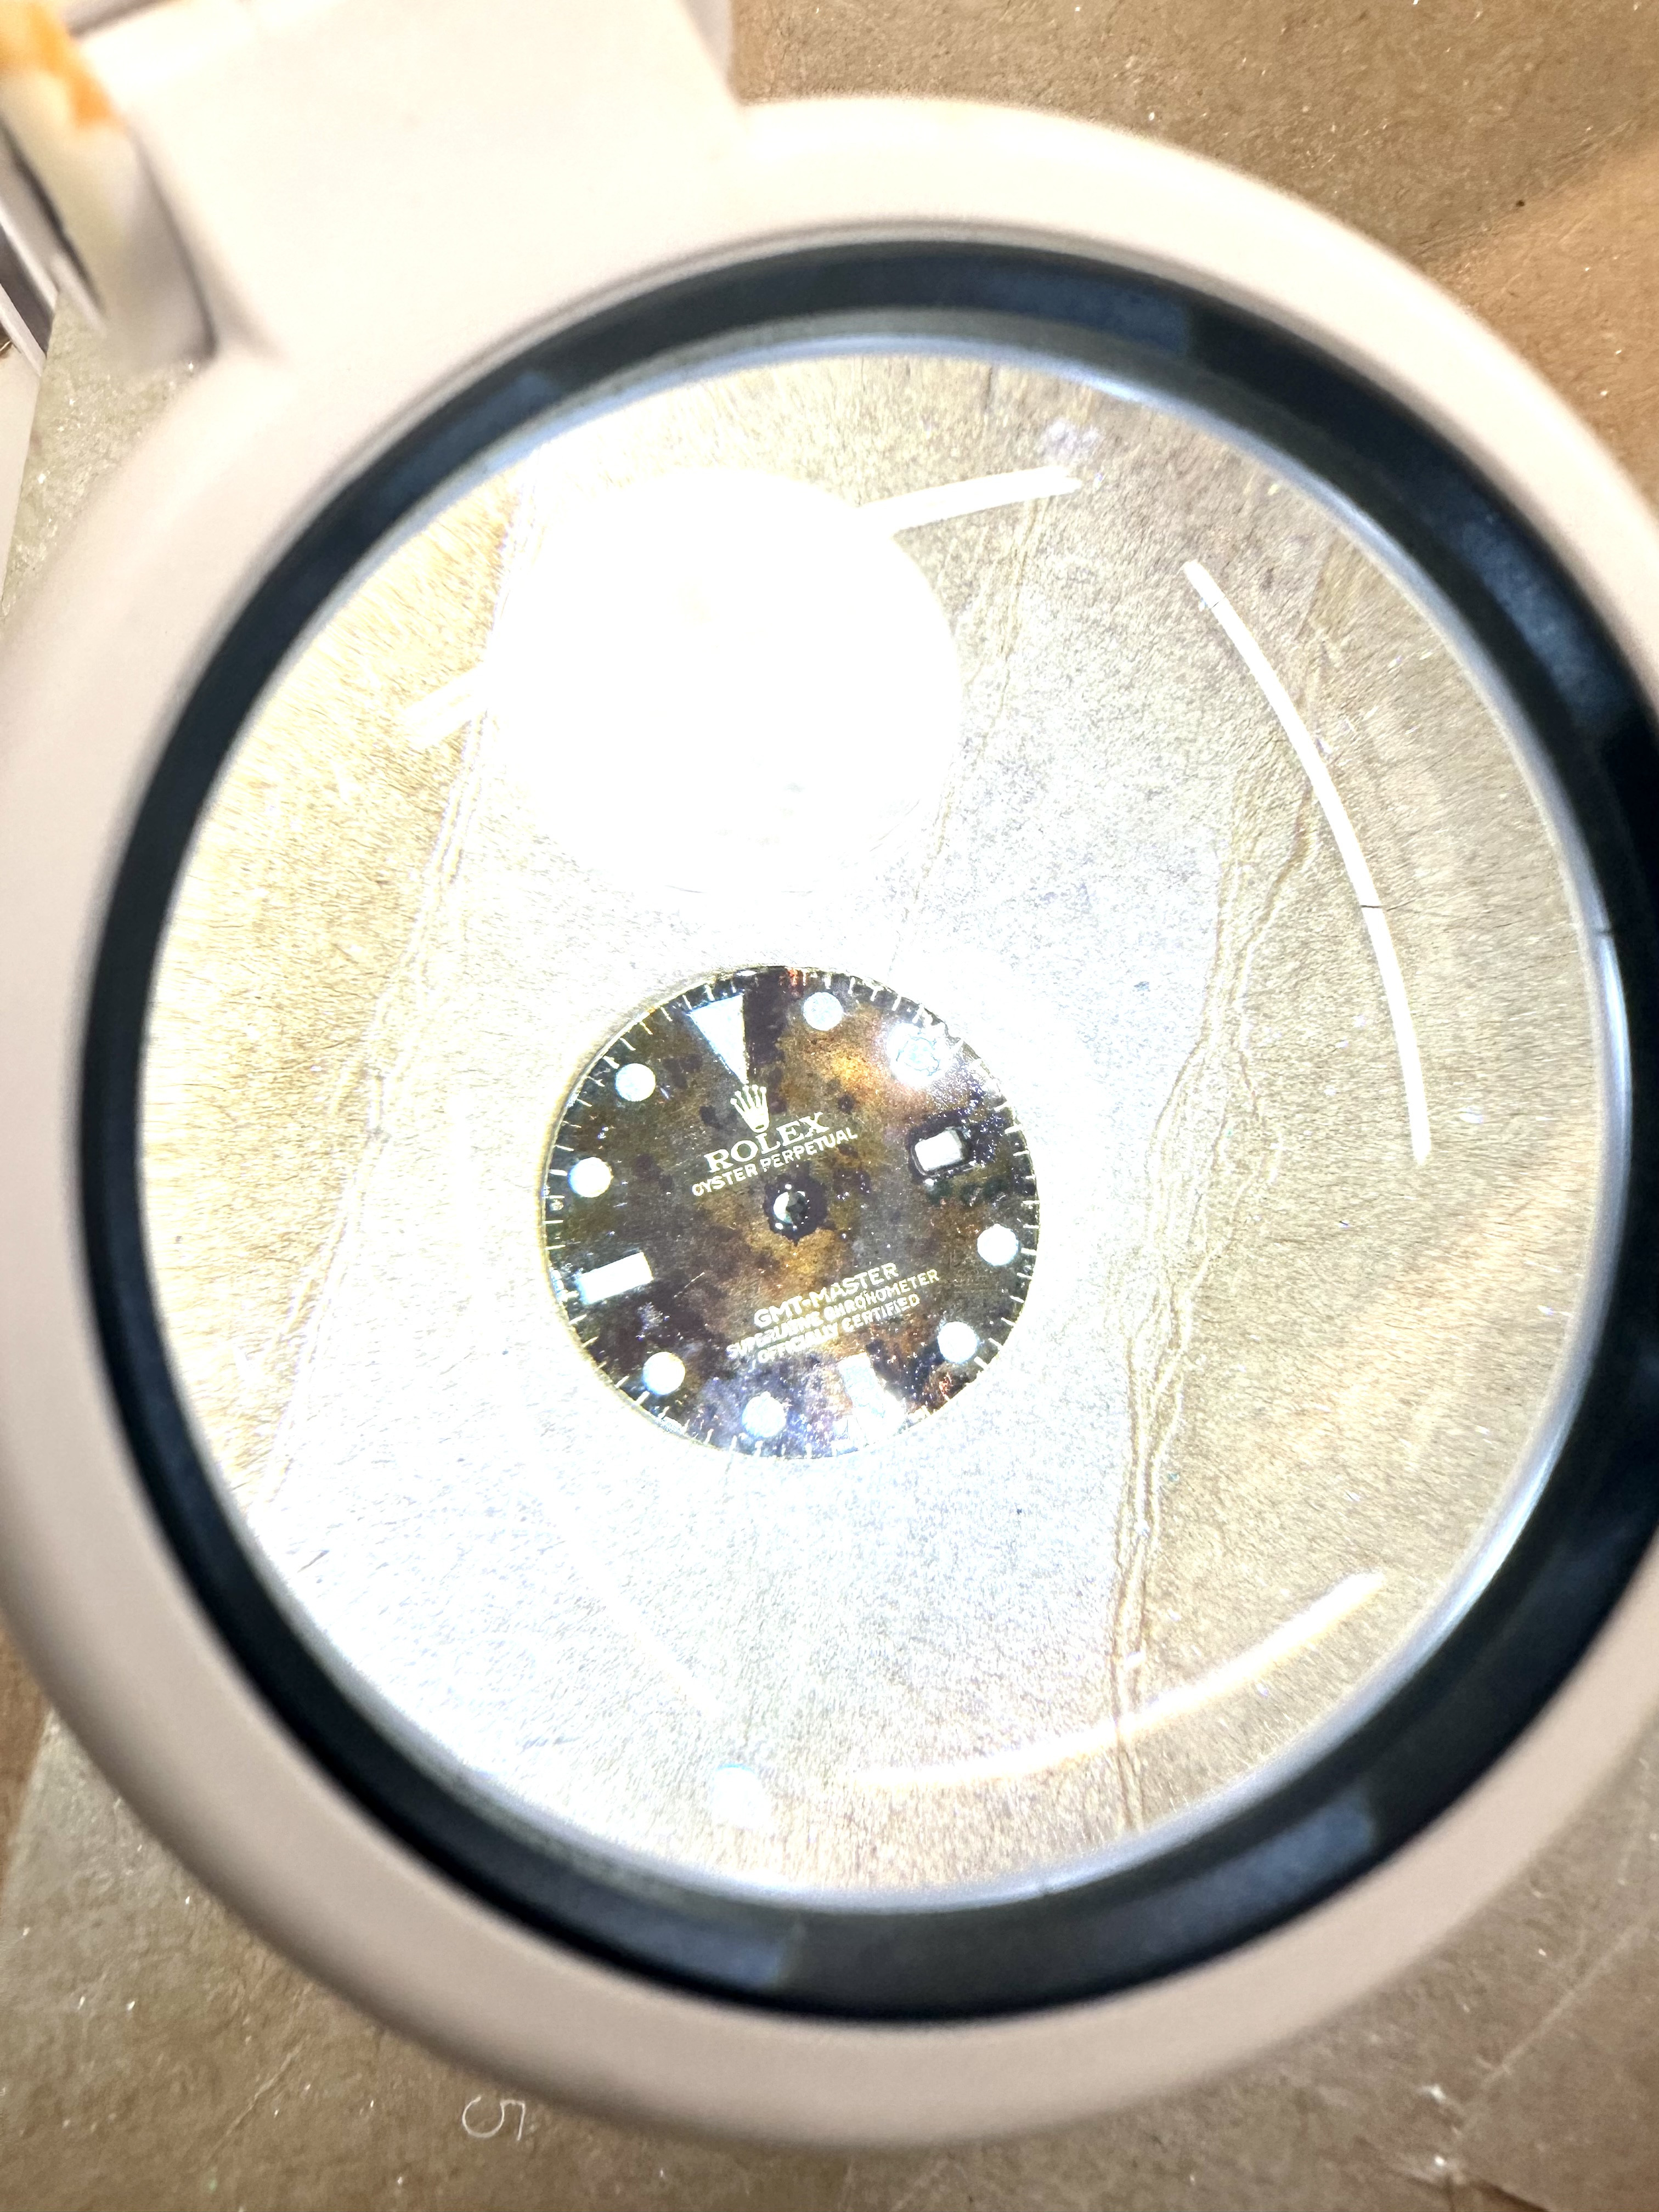
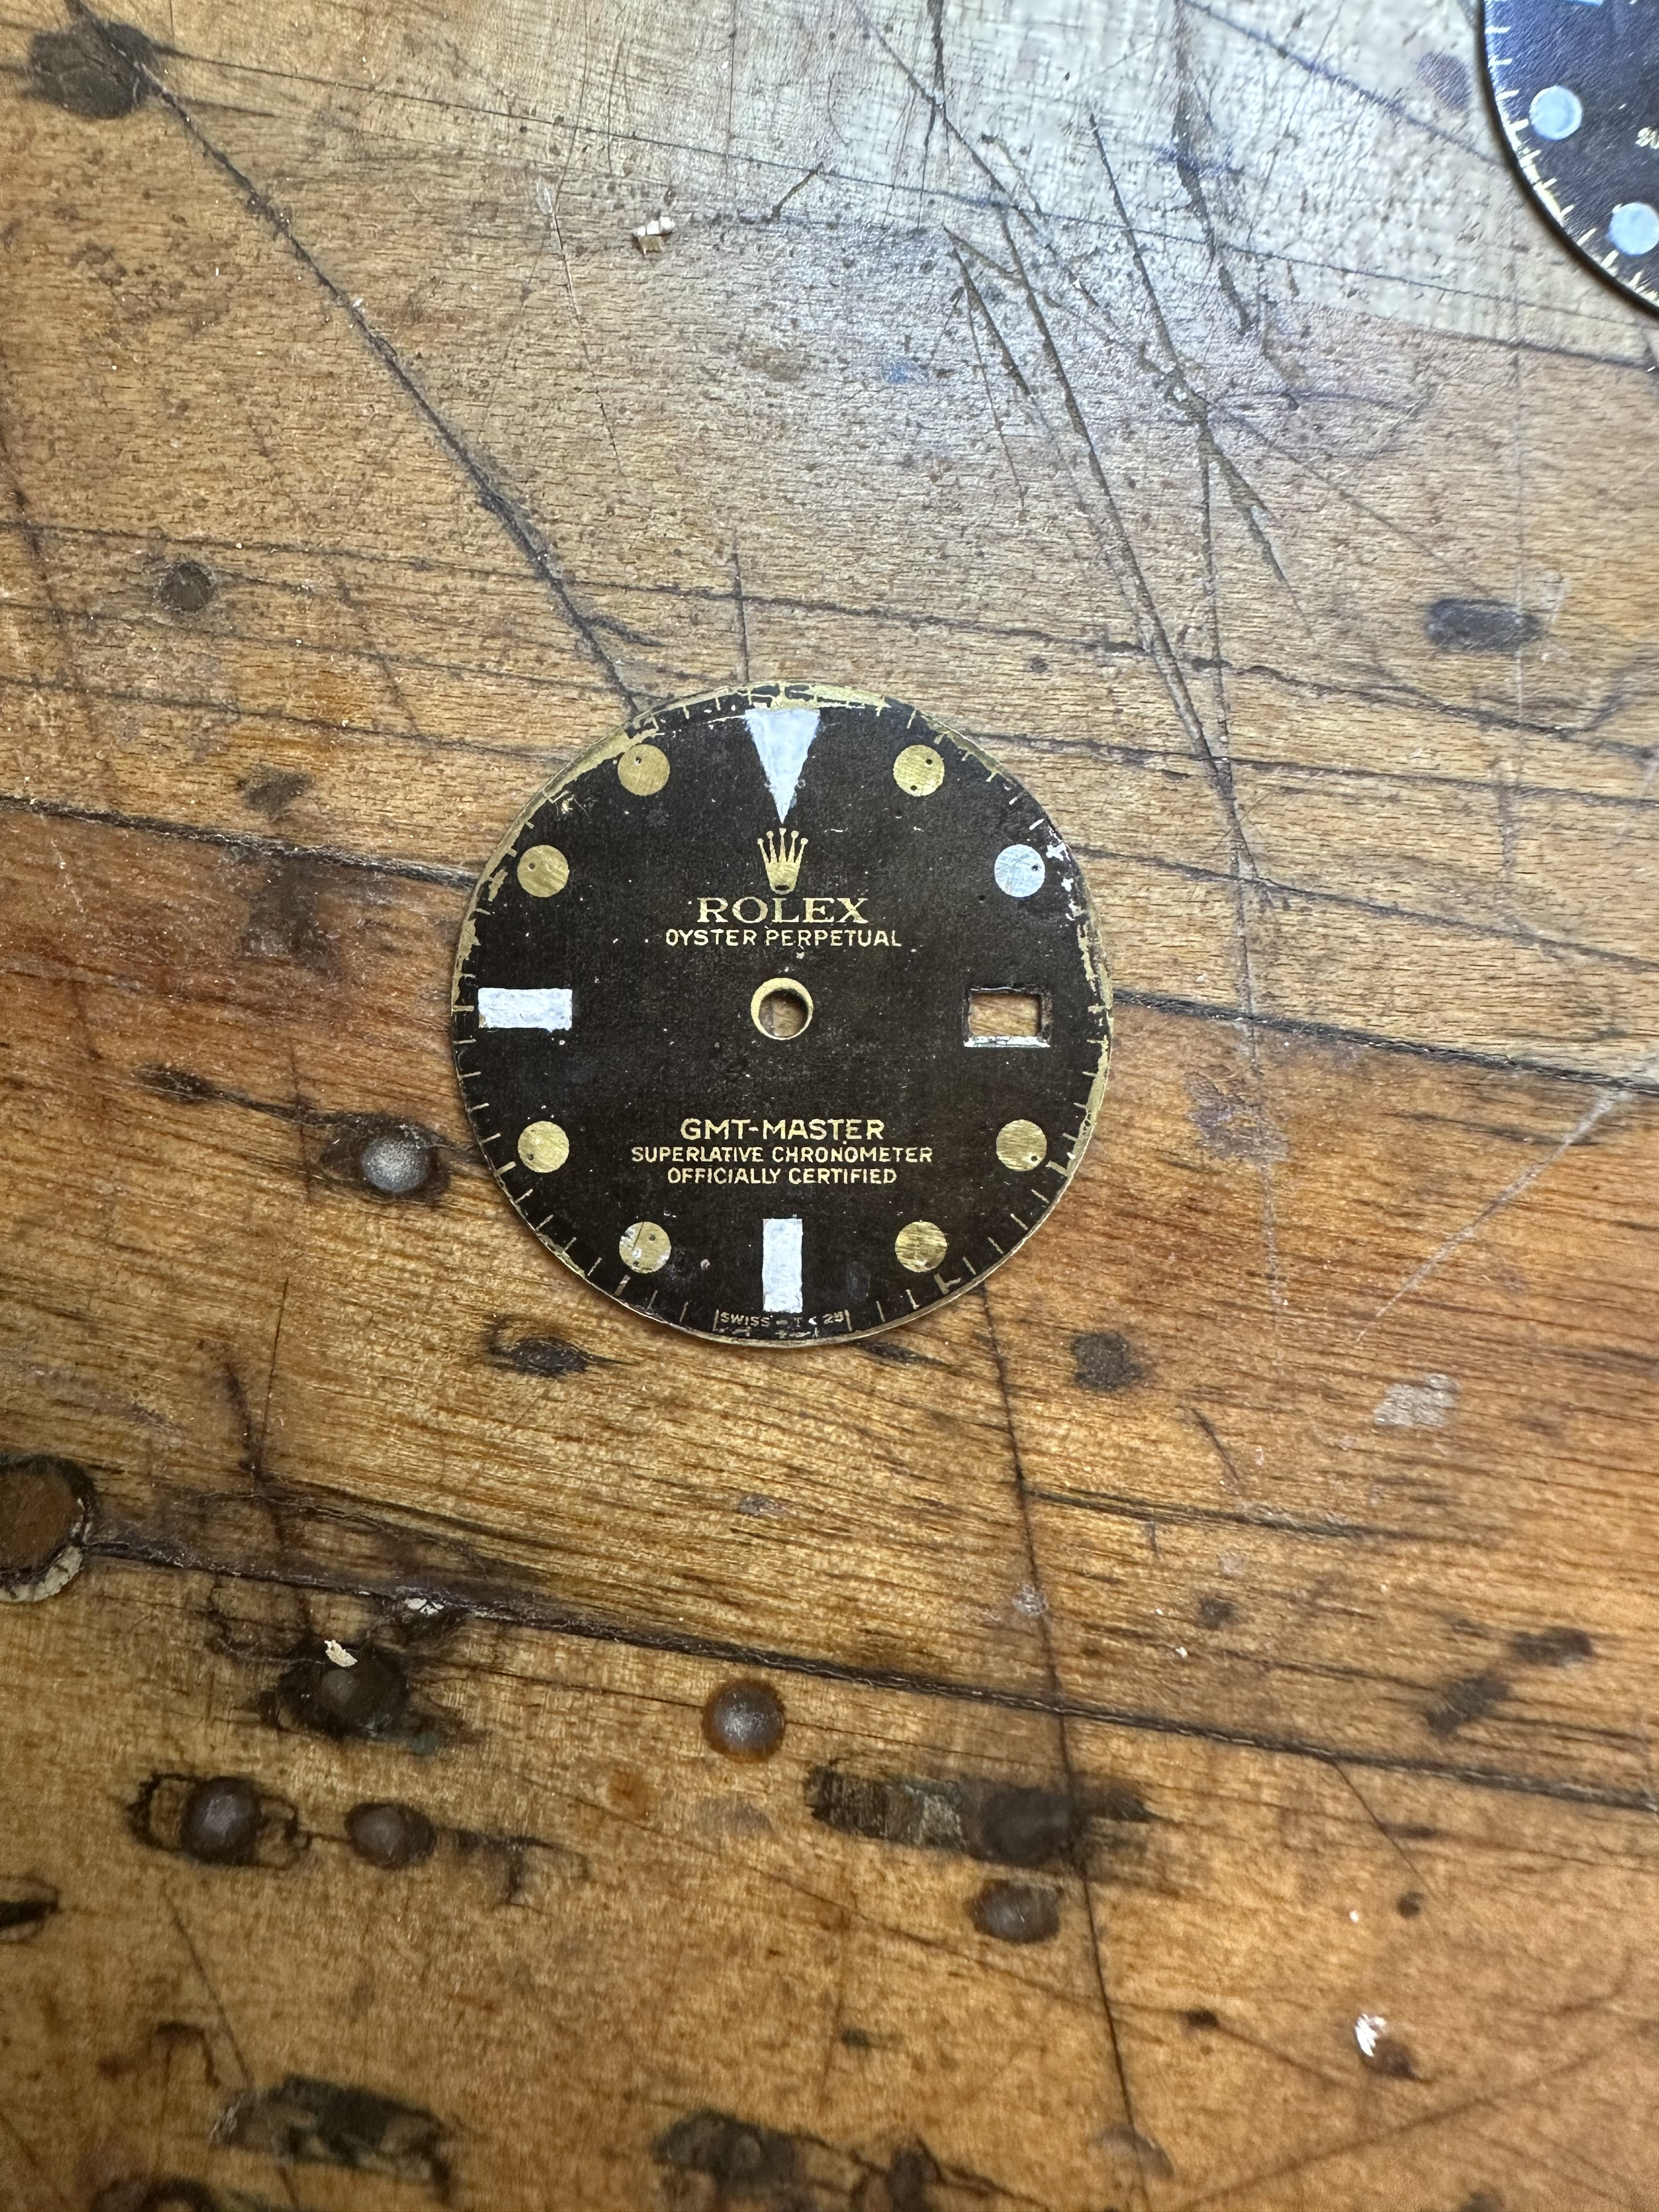
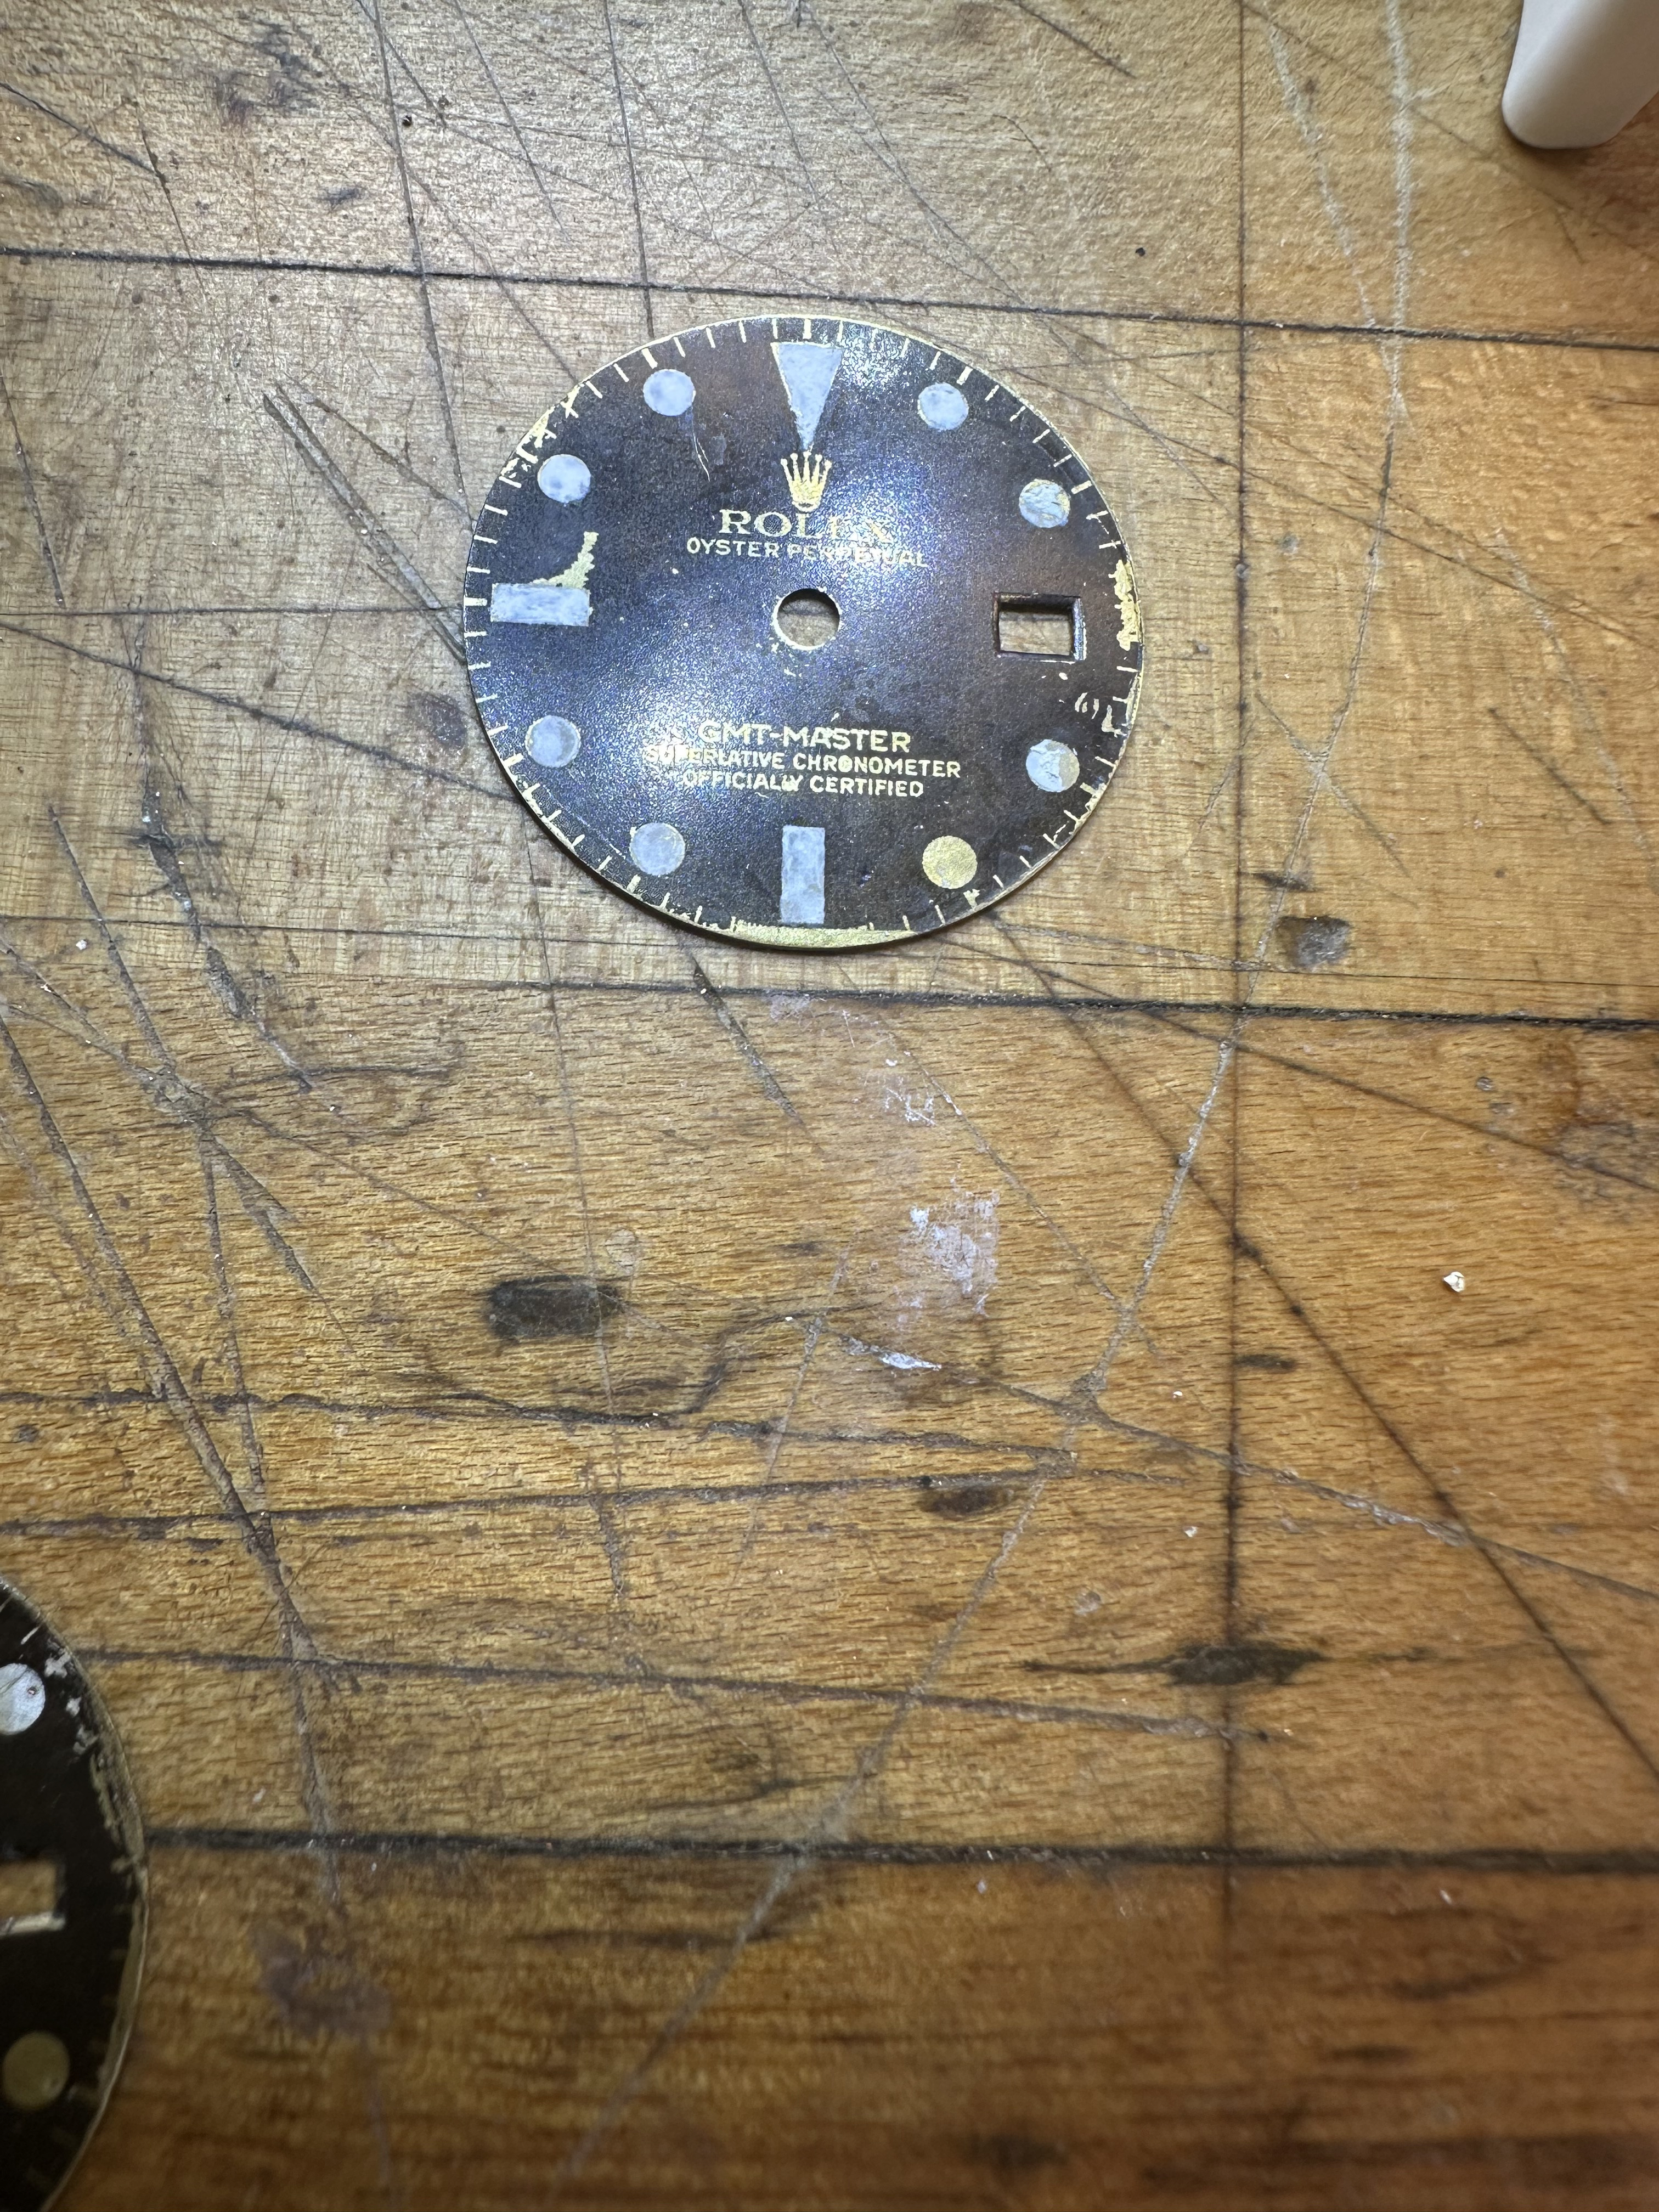
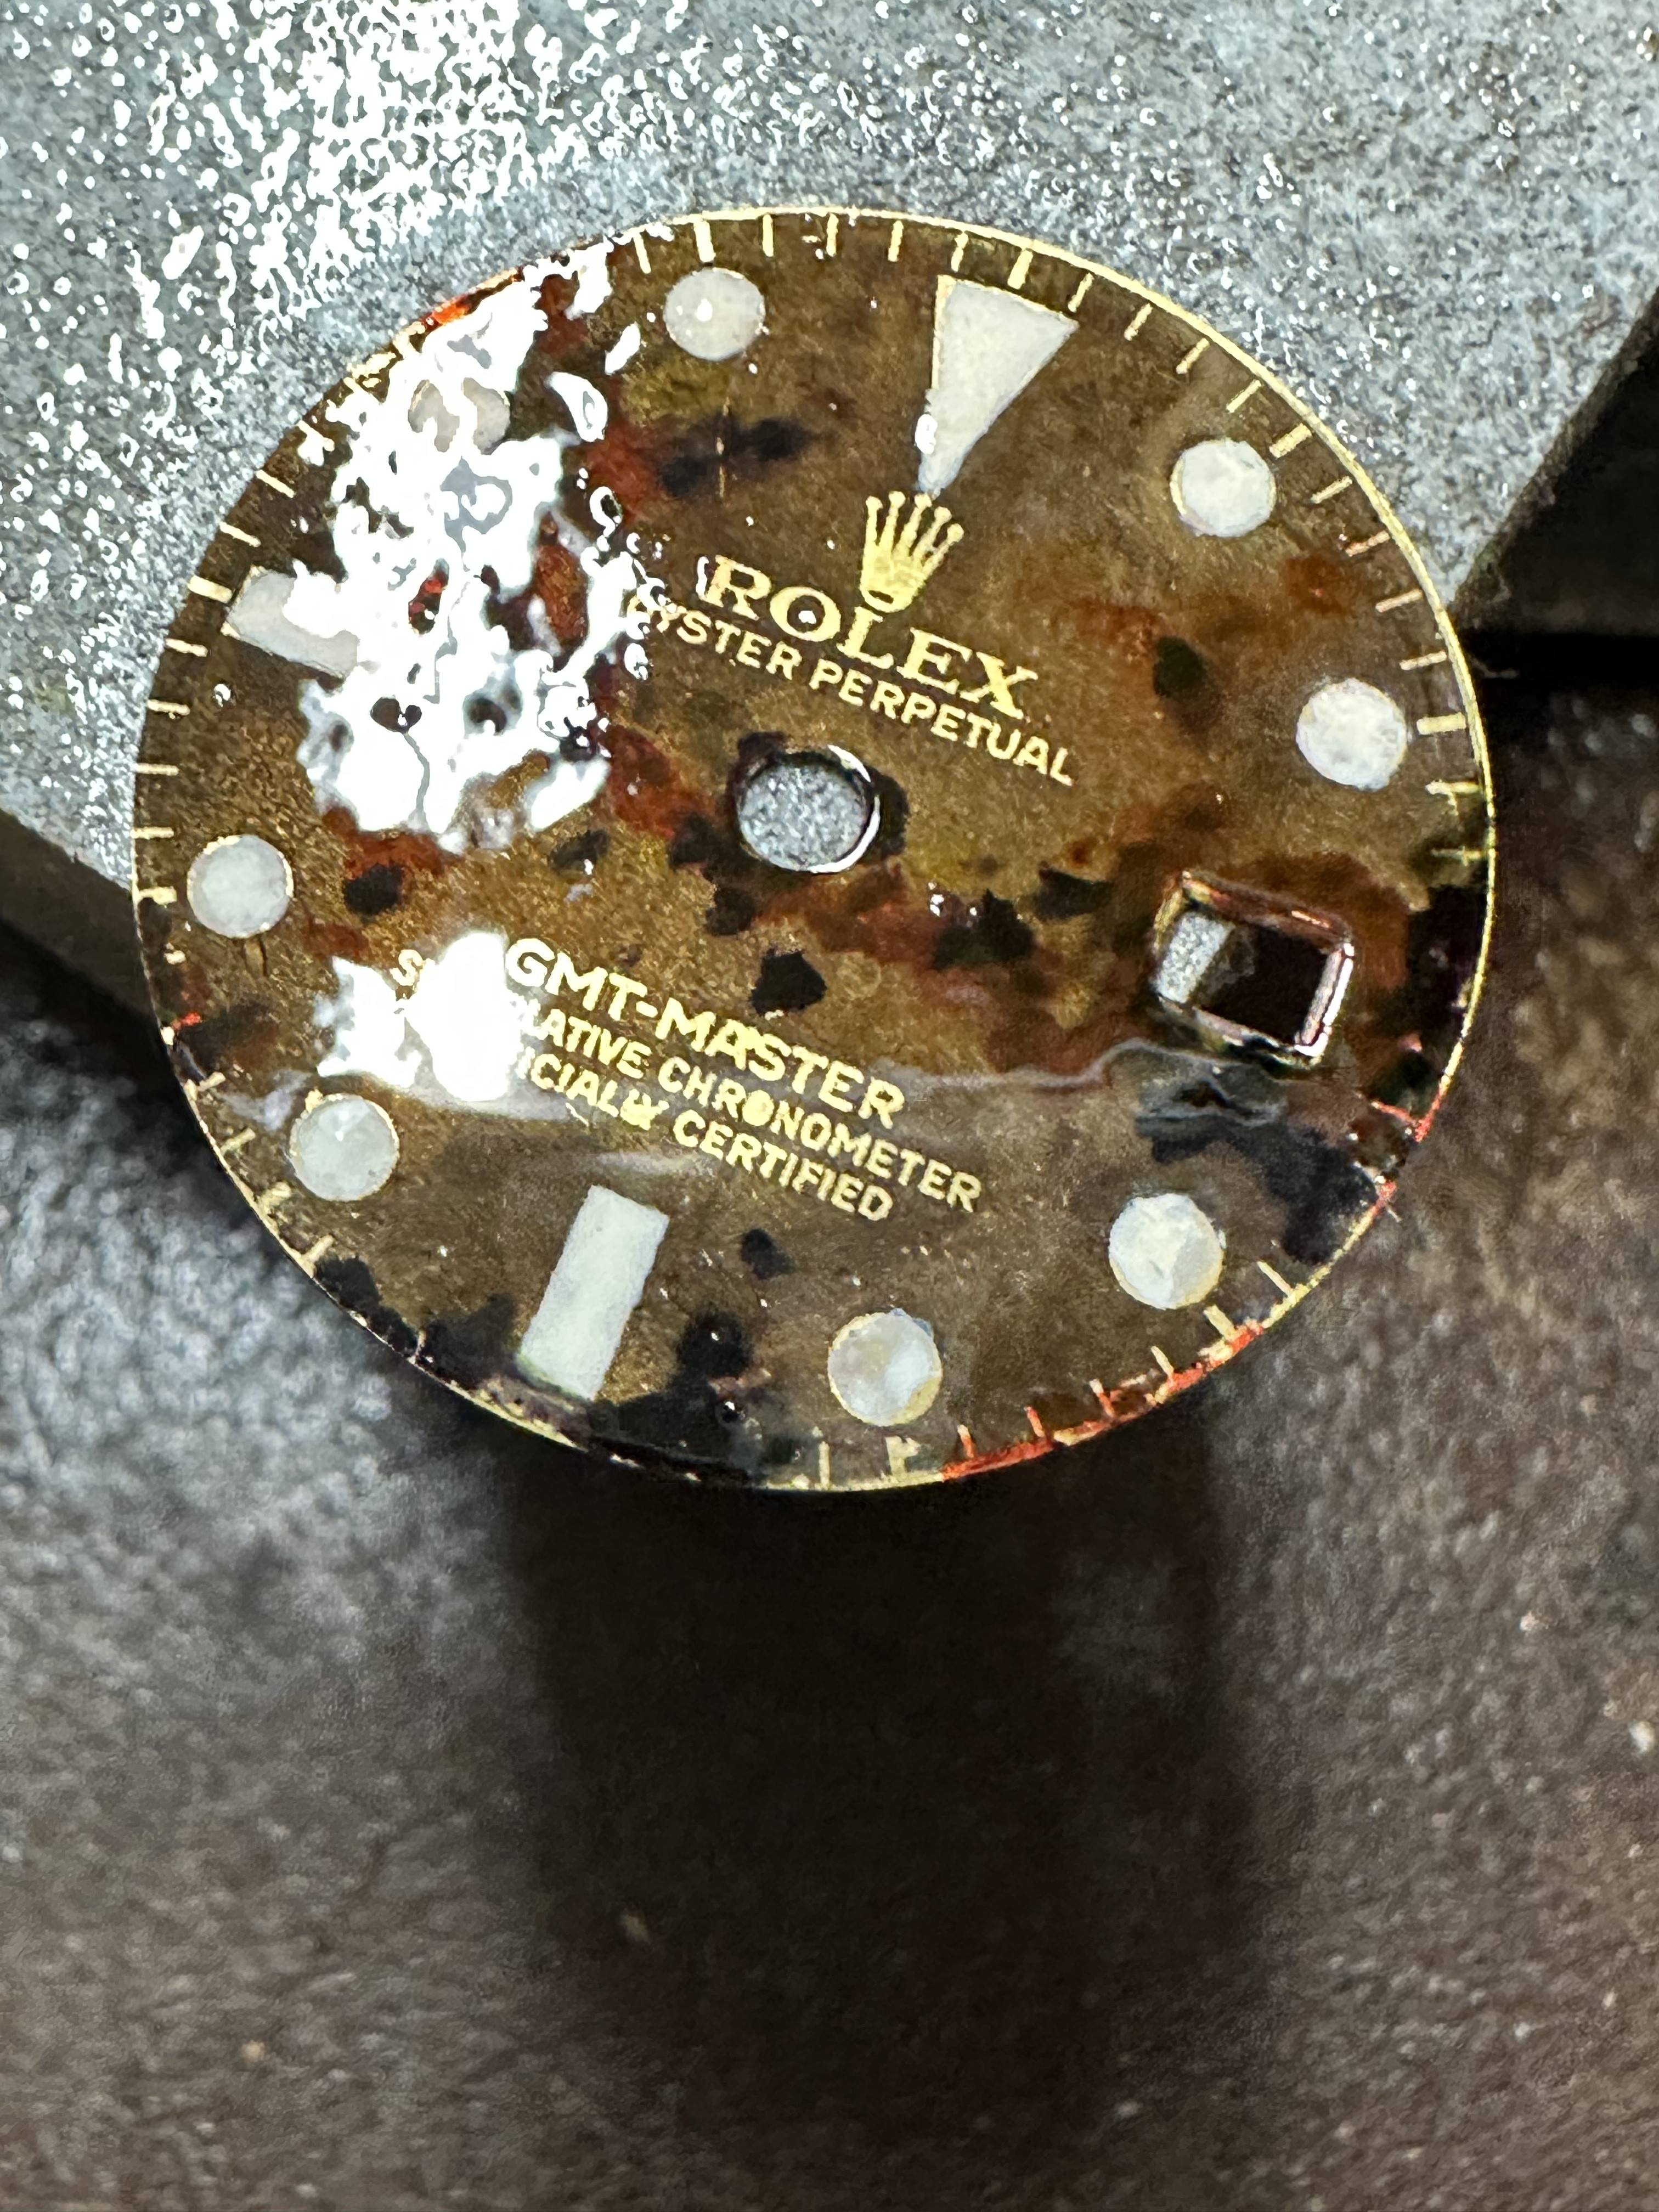
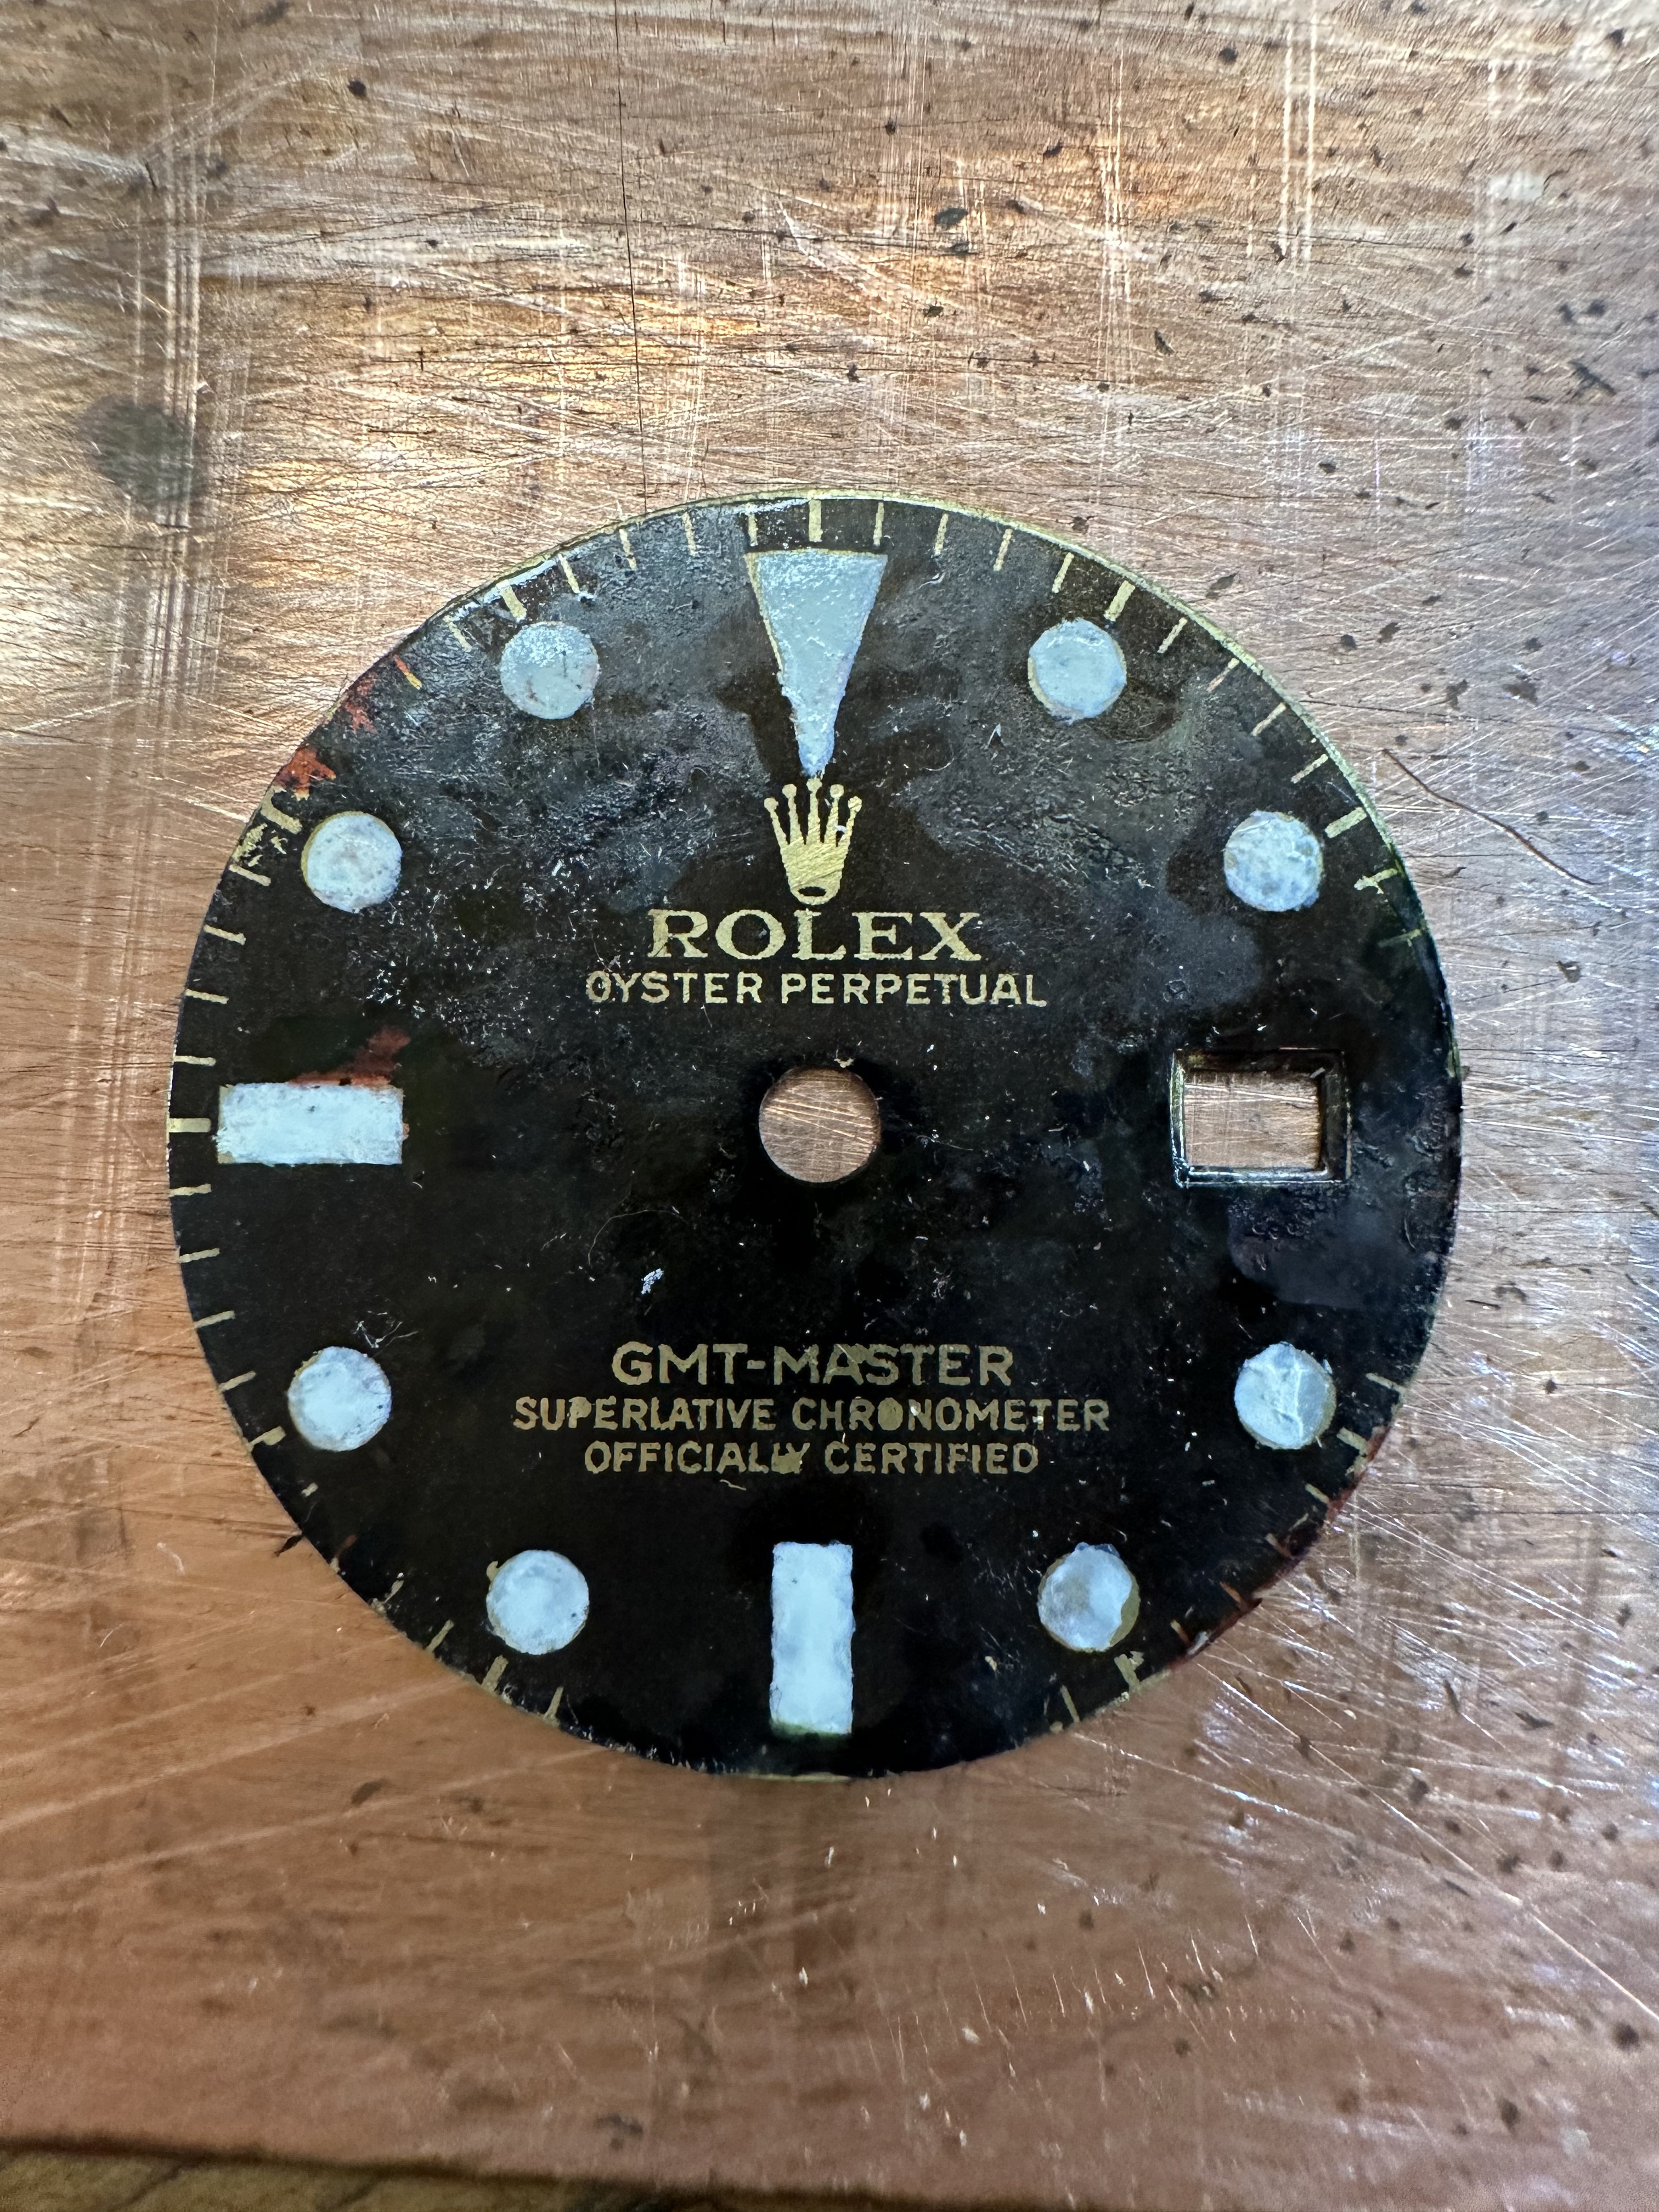
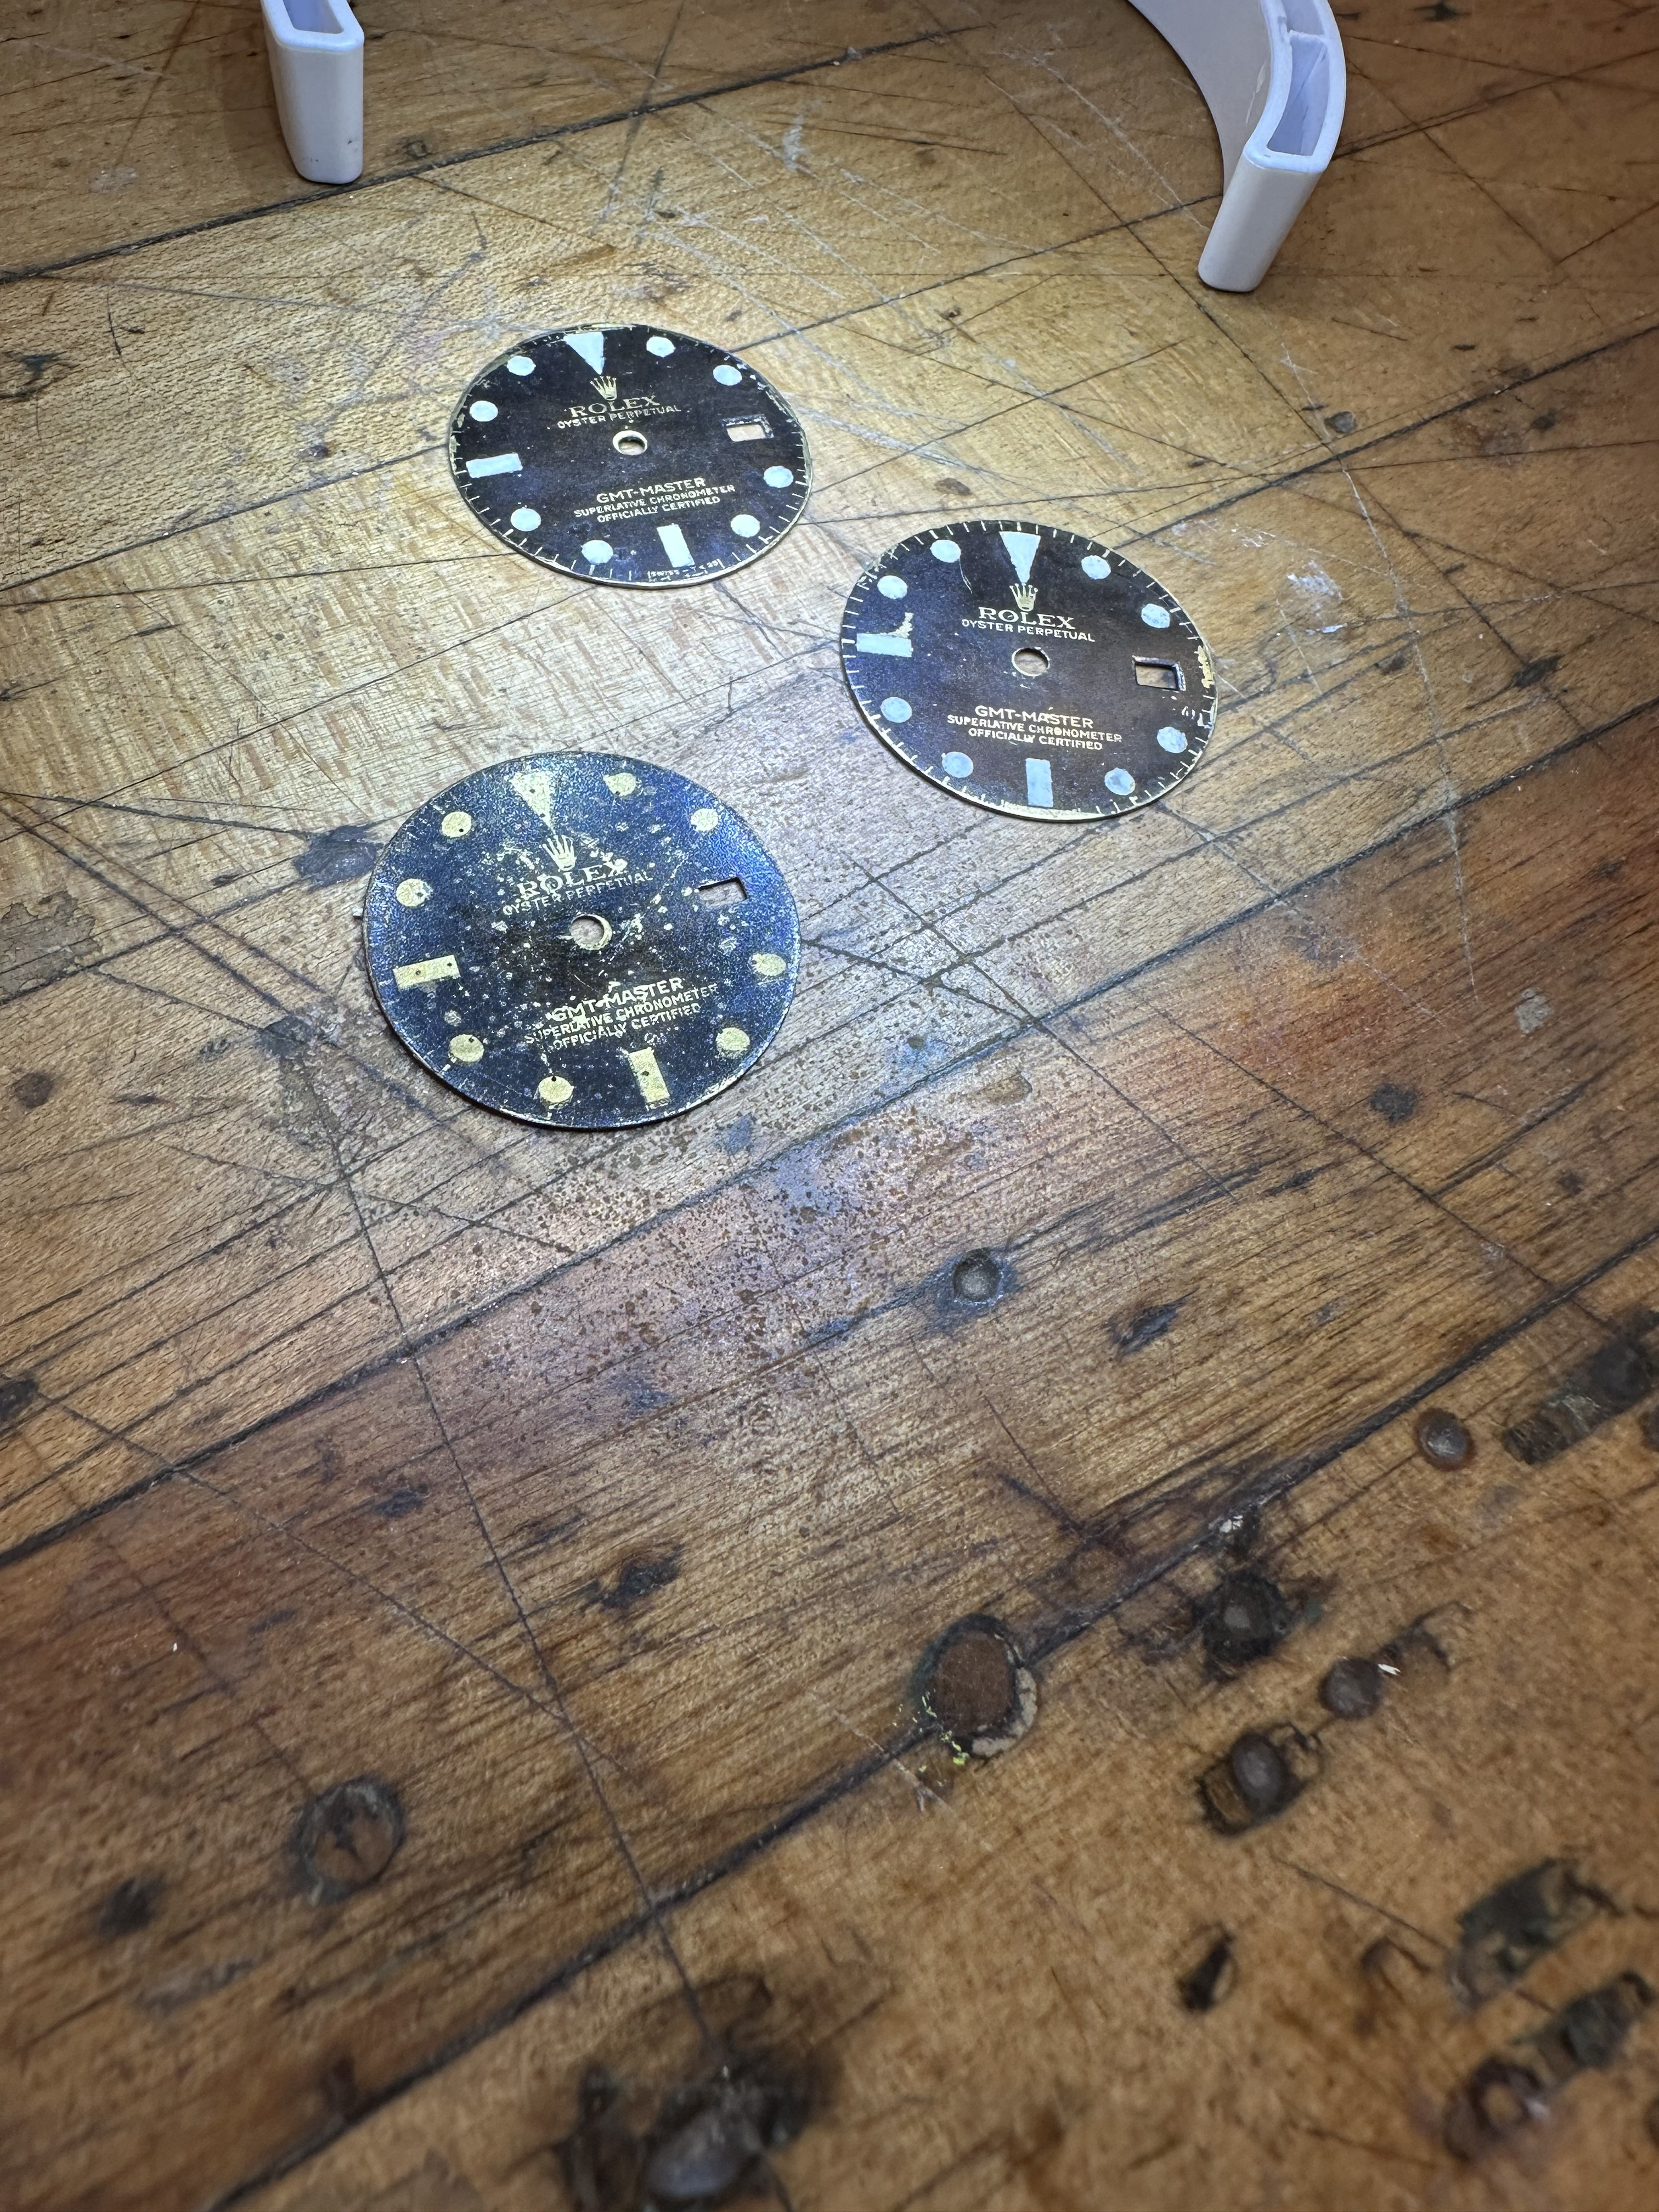
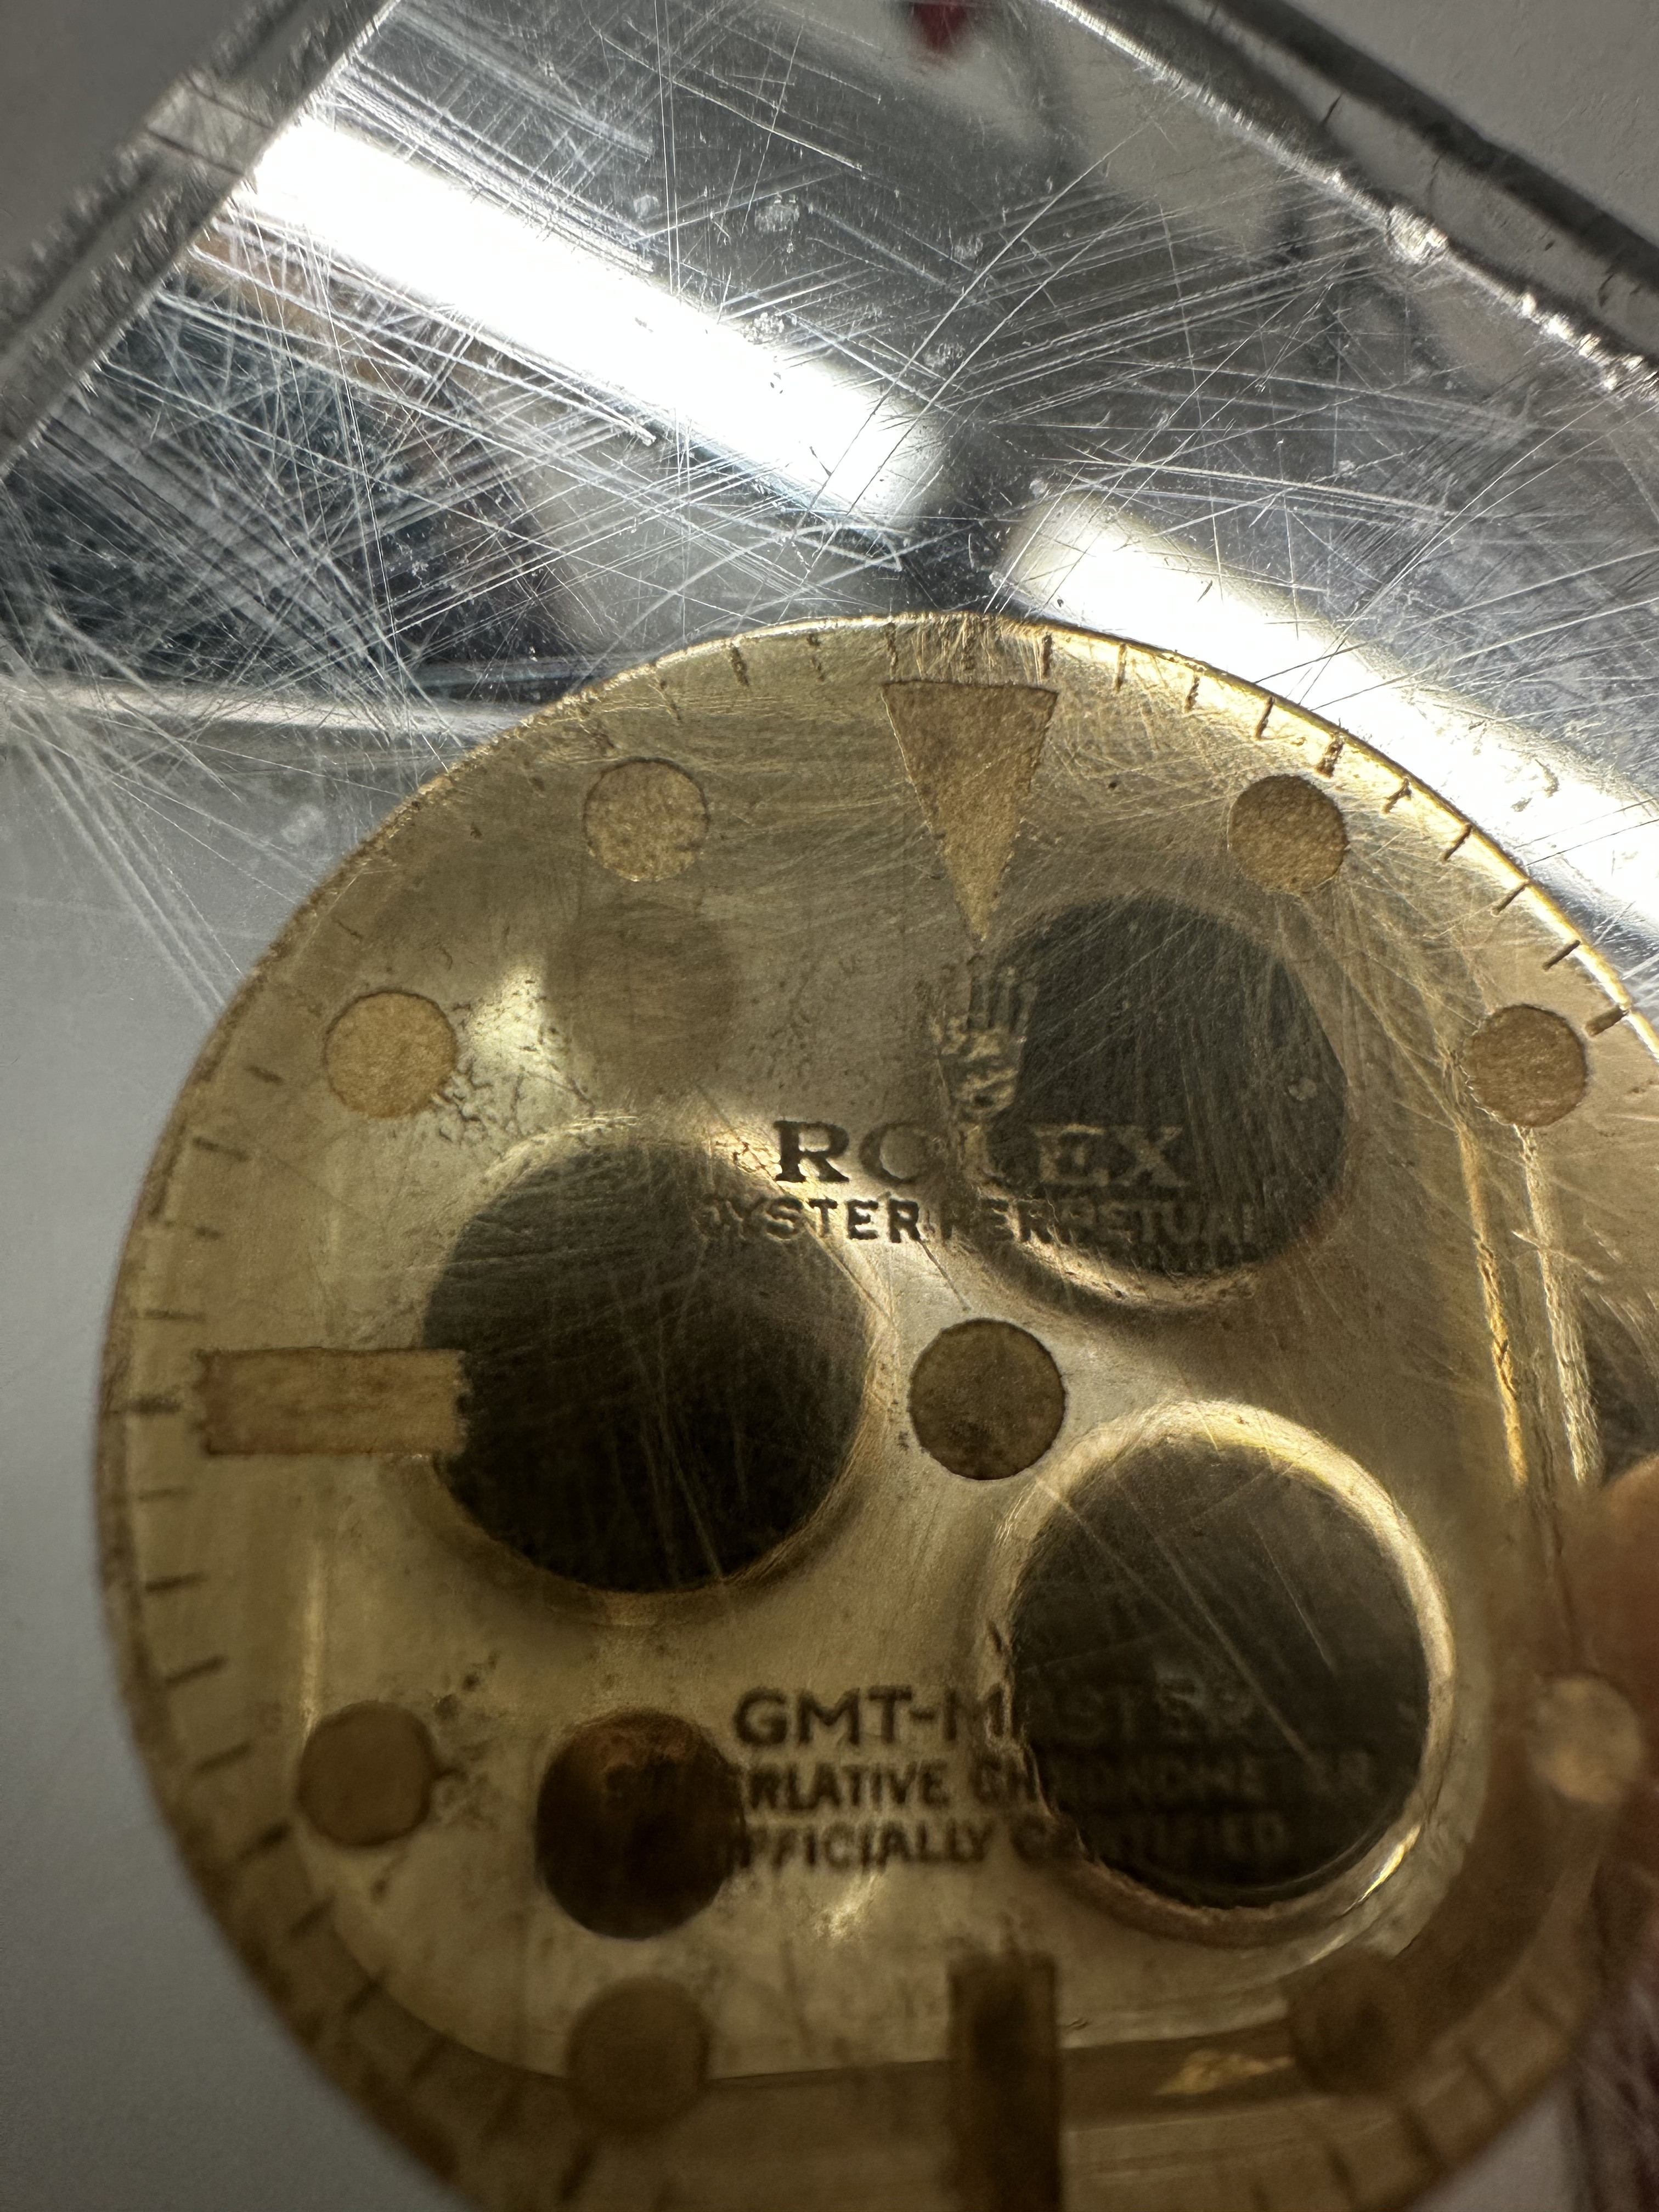
On to the pictures... first is directly after the transfer. Second is after 10 minutes in the oven on 110C (might need more time). Third picture is just a test after mild acids to see any cool patina patterns jumped out. When I say mild, I mean Vinegar, lemon juice, etc.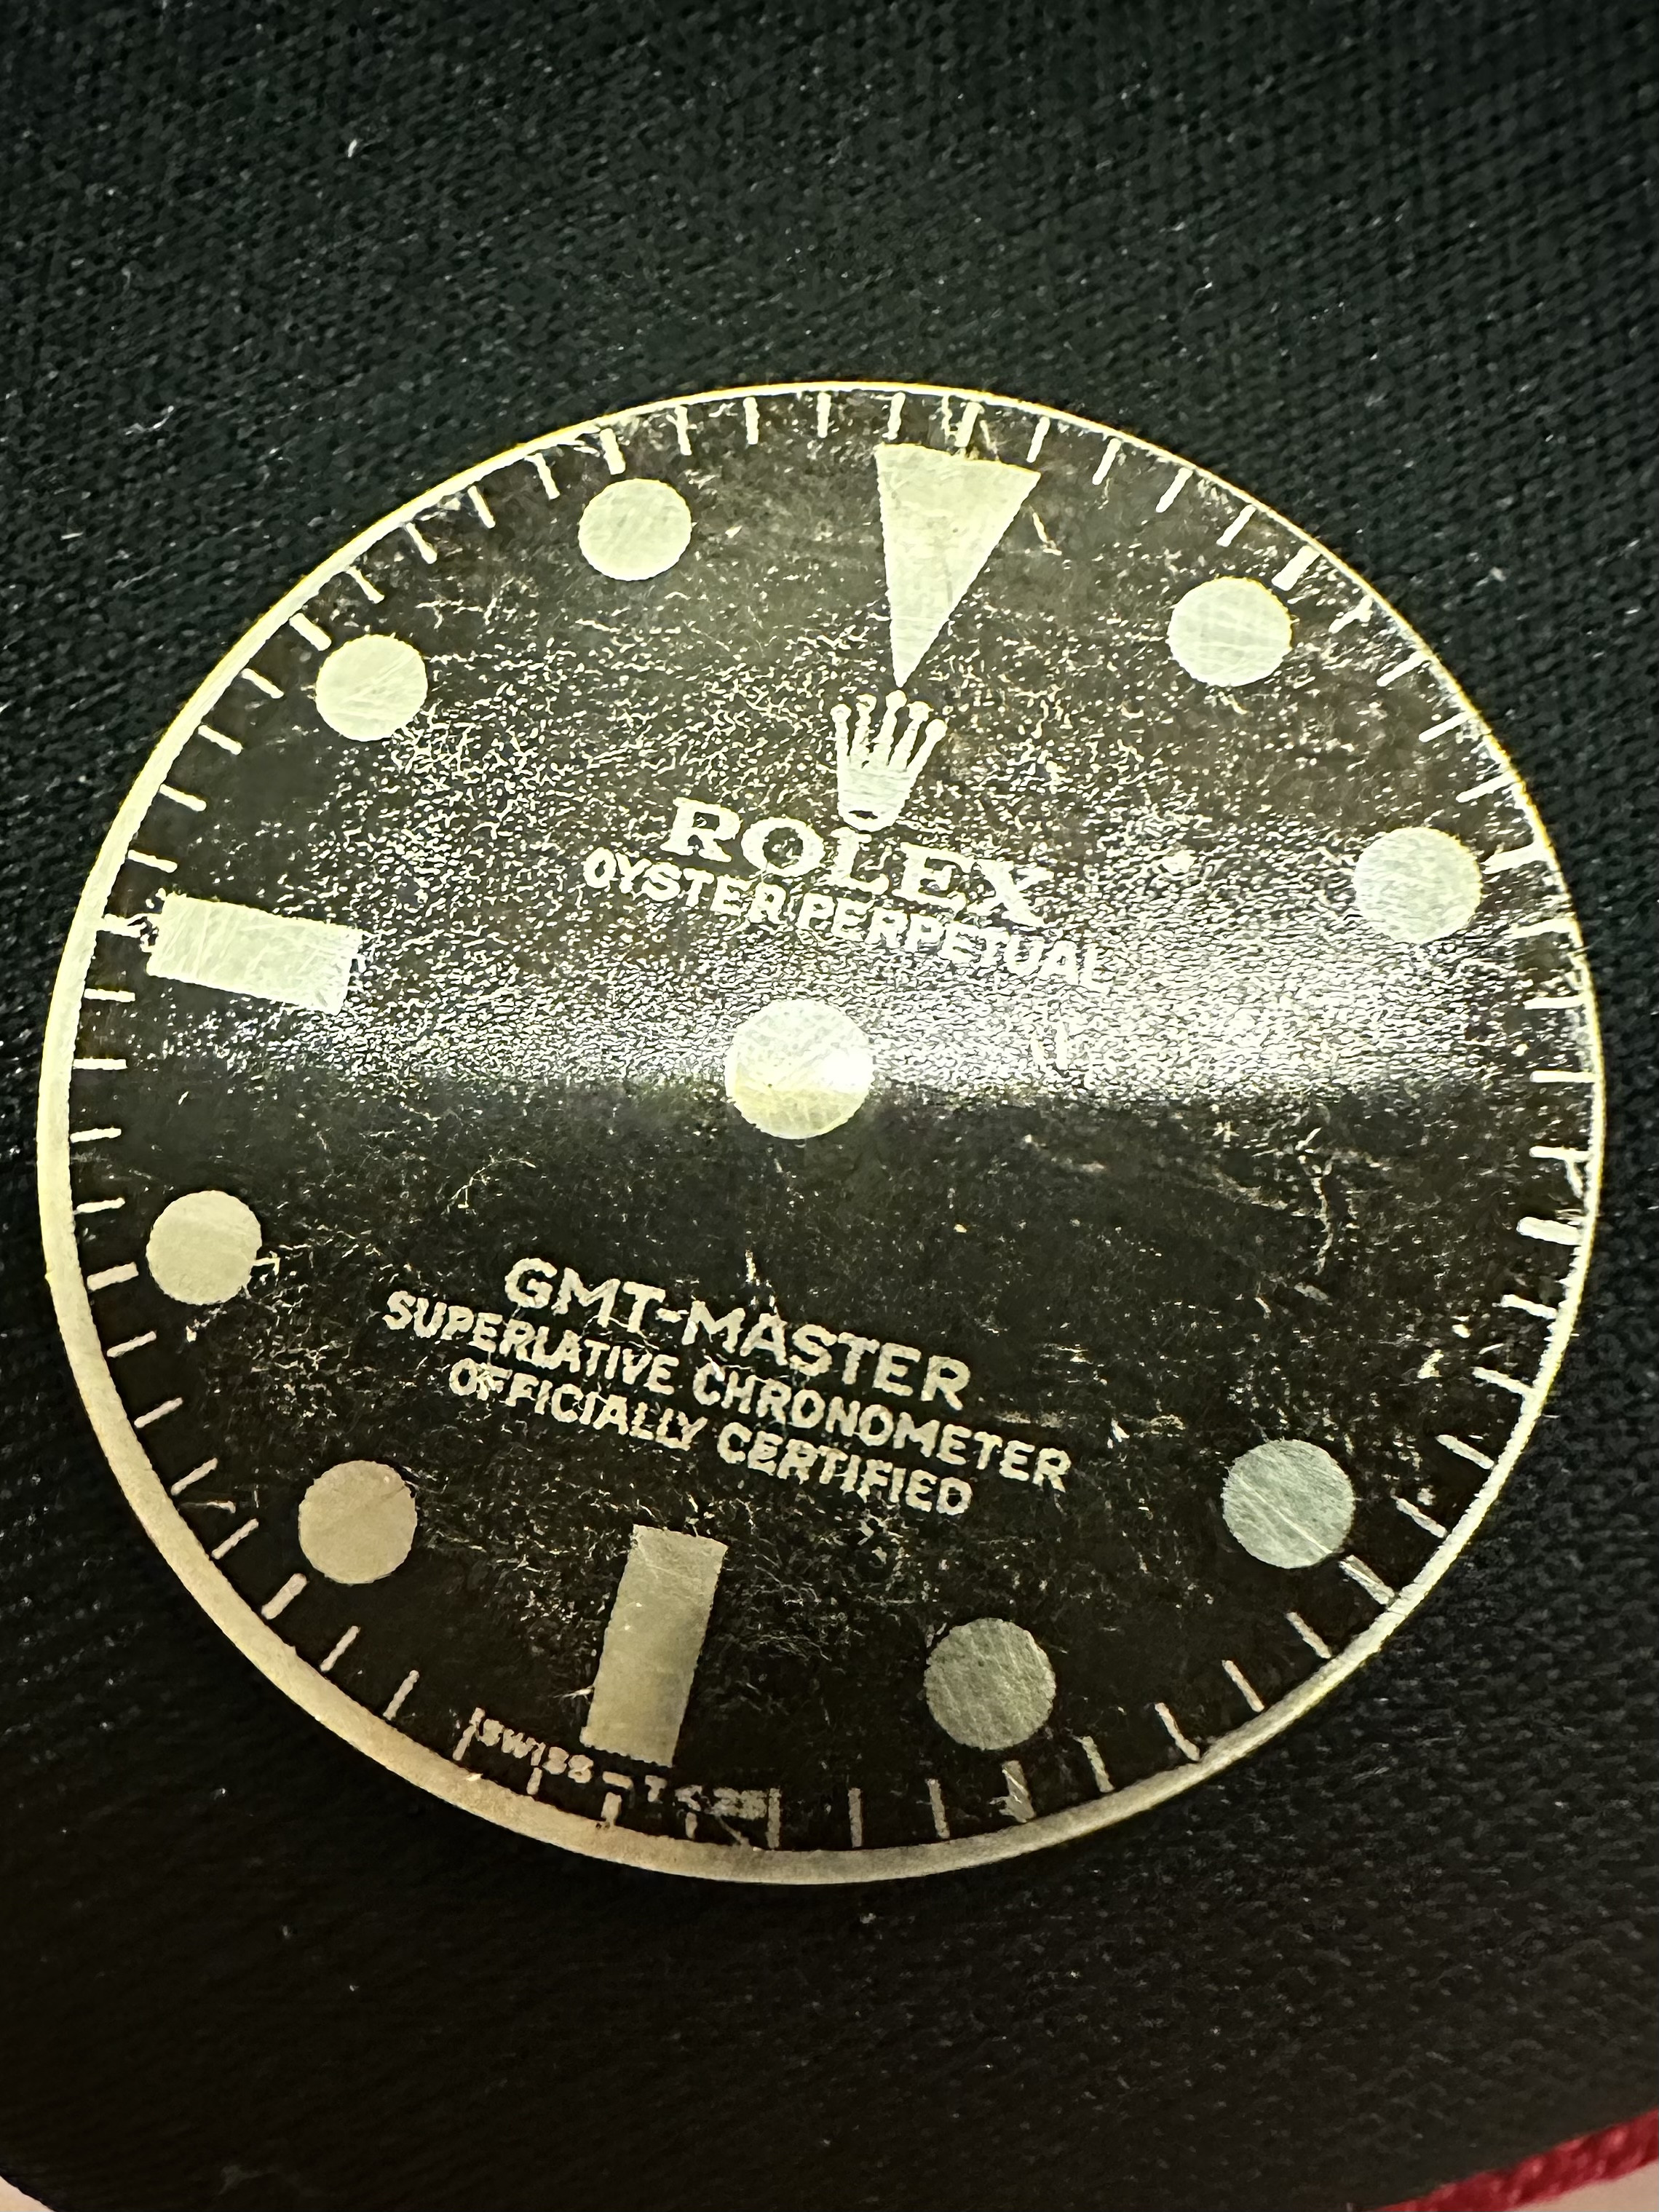
I wet sanded a blank brass disc flat with 1000, then 1500, laid flat on a piece of glass. Next, I did a quick and final wetsand with 3000 just to be sure there were no excessively sharp edges or "giant" scratches that could affect adhesion. I then dropped the disc in a glass filled about 50/50 of alcohol and water (and a few drops of dawn dish soap) and put the glass in the ultrasonic cleaner for about 5 minutes.
Next up, I put on some rubber gloves and rubbed/cleaned/polished the dial with glass cooktop/stovetop cleaner. It's my new favorite for cleaning brass, as you can tell if the brass is clean enough by the way water sheets or puddles on it. I made sure there were no puddles -- just a thin sheet of water.
On to the really easy part... I put the yellow transfer paper on top of the dial (with tape around the edges to prevent it from moving) and just burnished the paper with a broad tip on my soldering iron. That's it.
The results were not necessarily amazing, but judging from my very first attempt:
1) It was really easy
2) I finally had success getting the edge of the dial to transfer!
On to the pictures... first is directly after the transfer. Second is after 10 minutes in the oven on 110C (might need more time). Third picture is just a test after mild acids to see any cool patina patterns jumped out. When I say mild, I mean Vinegar, lemon juice, etc.
Buy a cheap laminator from Amazon. Like the Amazon basic $20 laminator. I found best results when I have a carrier sheet of metal that is 8mm thick to run through the laminator a few times at 3mil setting to get nice and hot. Run your dial and yellow paper on top of the carrier metal a few times. Put the dial/paper into some water and let it float away. 100% transfer every time for me. Not distortion of the toner at all since is a lower temp but higher pressure. Always go for the lowest temp you can.The yellow transfer paper definitely seems to transfer easier than the Sunnyscopa after my first test. Decided to write a novel about it, so TL/DRs need not apply! I might have gone overboard cleaning the dial but wanted to rule out any other issues and give the yellow transfer paper a fair assessment.
I wet sanded a blank brass disc flat with 1000, then 1500, laid flat on a piece of glass. Next, I did a quick and final wetsand with 3000 just to be sure there were no excessively sharp edges or "giant" scratches that could affect adhesion. I then dropped the disc in a glass filled about 50/50 of alcohol and water (and a few drops of dawn dish soap) and put the glass in the ultrasonic cleaner for about 5 minutes.
Next up, I put on some rubber gloves and rubbed/cleaned/polished the dial with glass cooktop/stovetop cleaner. It's my new favorite for cleaning brass, as you can tell if the brass is clean enough by the way water sheets or puddles on it. I made sure there were no puddles -- just a thin sheet of water.
On to the really easy part... I put the yellow transfer paper on top of the dial (with tape around the edges to prevent it from moving) and just burnished the paper with a broad tip on my soldering iron. That's it.
The results were not necessarily amazing, but judging from my very first attempt:
1) It was really easy
2) I finally had success getting the edge of the dial to transfer!
On to the pictures... first is directly after the transfer. Second is after 10 minutes in the oven on 110C (might need more time). Third picture is just a test after mild acids to see any cool patina patterns jumped out. When I say mild, I mean Vinegar, lemon juice, etc.
I am using transparency film now as I get actually see where the alignment is top view instead of the bottom side down. Get some kapton tape too as it doesn’t deform from the heat and pull the paper slightly and mess up the alignment of the art.
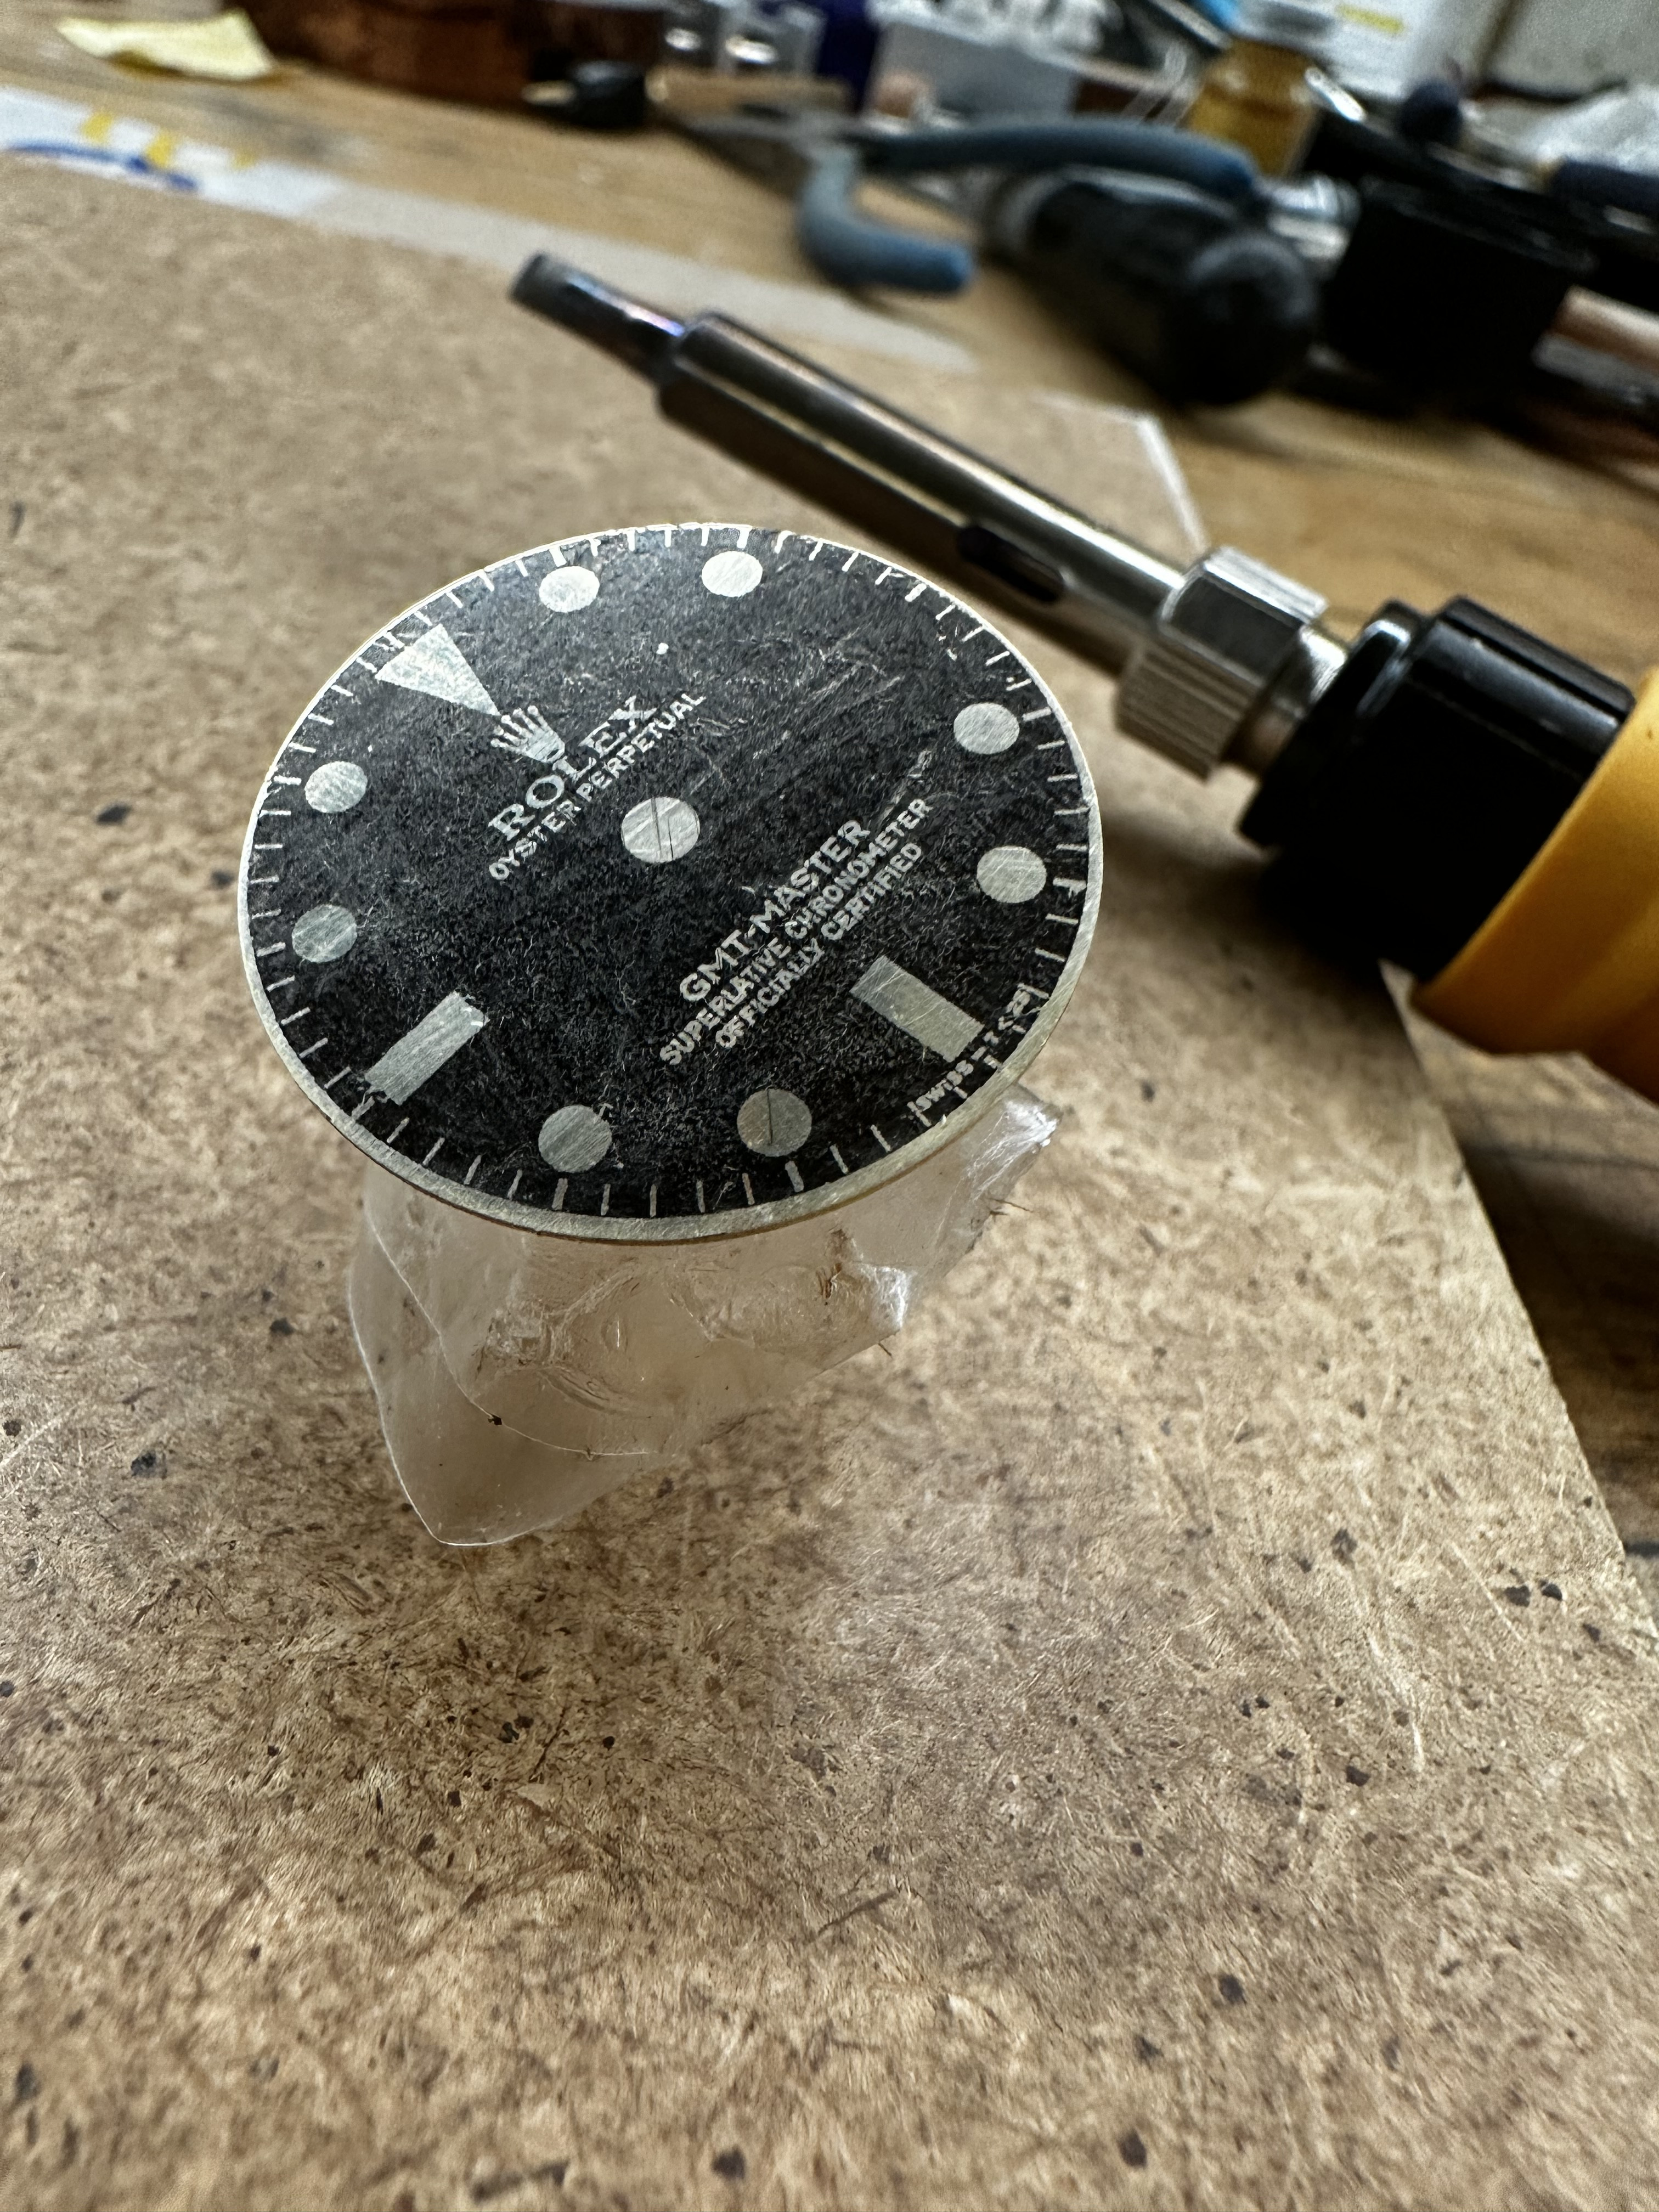
As for polishing the dial I am using a dremel and the polishing pad with mothers mag polish. I put the dial on a block of aluminum to absorb the heat and so the heat doesn’t make weird distortions In the brass. That way I get a super mirror polish shine. I just use soap and water and have never had an issue with washing it off and degreasing it.
Sorry just saw this. Yes that’s what I have. Any laminator that gets to at or above 220f should work.TL901x?