• Tired of adverts on RWI? - Subscribe by clicking HERE and PMing Trailboss for instructions and they will magically go away!

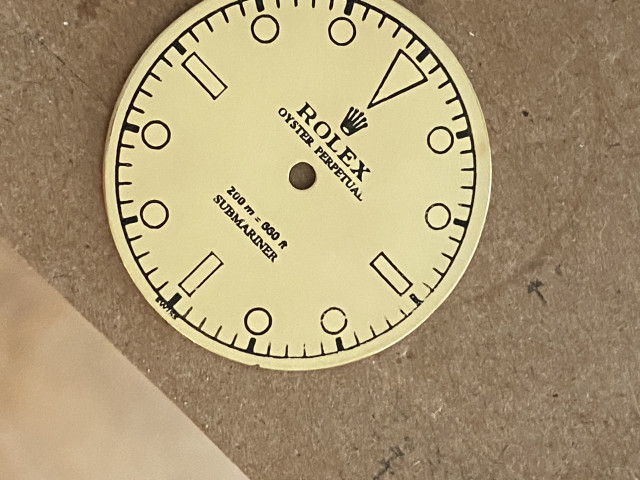
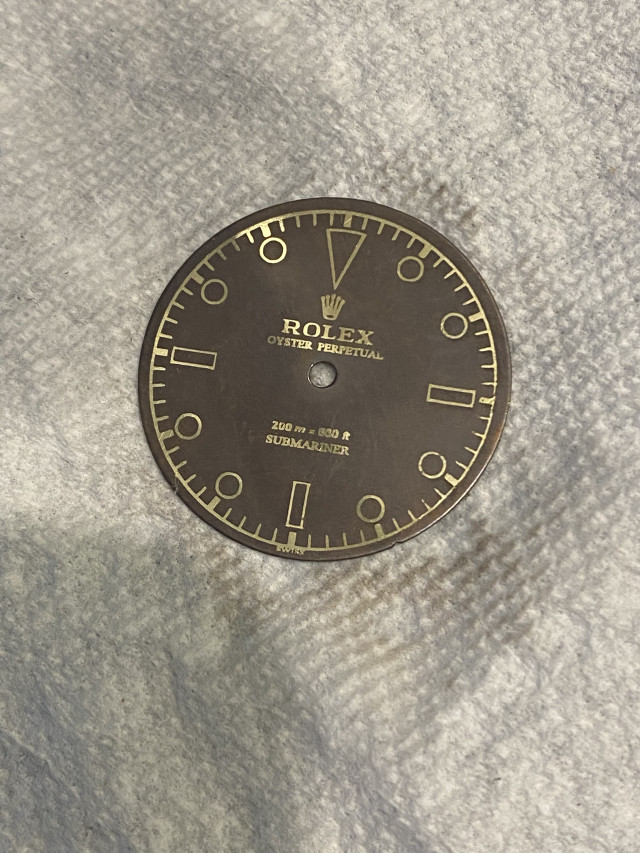
How to make a true gilt dial on the cheap - Tropical or Black

WatchN3RD

I supported. Doesn't make me an expert!
Gold Patron
24/7/18
523
591
93
Laminator is en route. Quick question for those that have had experience with this process and similar:

From my understanding, a patina is generally from a corrosive process similar to etching. One is removing material and oxidizing it for a desired texture, color, or general finish. I might be wrong!

Plating is removing deposits from one object, and plating those to another object.

If the above is true, what product or type of nickel plating process should I be using? True gilt dials have some negative relief, so a simple patina would not be additive, correct?

My thoughts are that an etch would provide a negative relief, but the deeper it goes, more definition will be lost by the corrosion one is forcing. If using a positive method that is depositing, no details would be corroded away.

I might be wrong, but please explain where I need to be to create a 3-dimensional coating without losing detail?

Can I just toss the dial in a container with electrodes using zinc coated screws on the positive and the dial connected to ground while the toner or etch resist is there?
 
  • Like
Reactions: dpd3672

chrome72

Renowned Member
7/12/17
639
561
93
Houston TX Baby
The patina is not an etch. It forms a layer on top of the brass. It’s microscopic in terms of depth. You can use brass black or look at sculpt neavou or surfin chemica and pick out a brown to black acid. I really like sculp neavous m38 patina. You can get cool tropicL colors and can get a deep brown/black.

For plating you can diy a plating kit (it’s super simple) and make your own black zinc plating solution OR for like $50 you can buy the black nickel plating kit (plug n play) from caswell. That’s what I use and it’s pretty simple and great results.
 

369mafia

Resident Explorer Expert
Patron
Certified
7/7/15
3,478
6,109
113
Canada
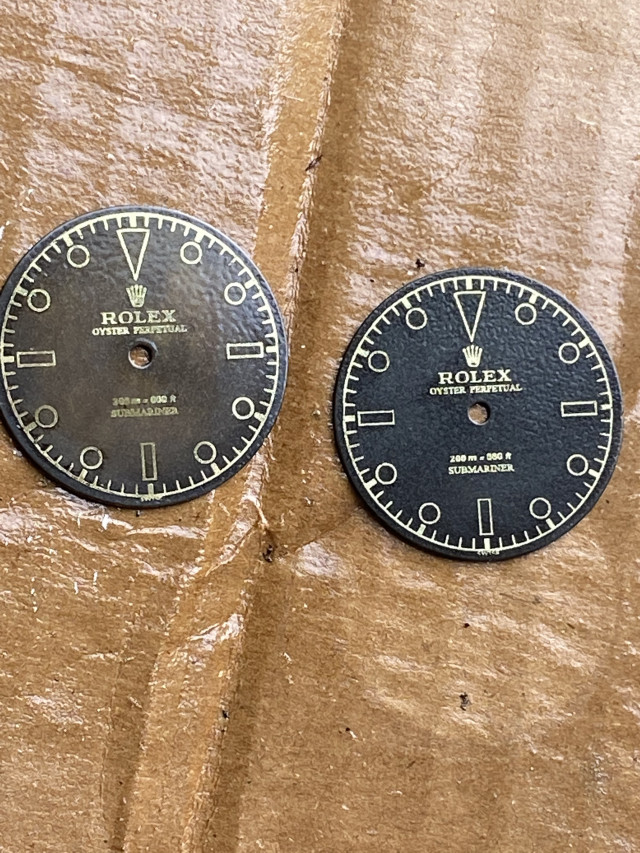
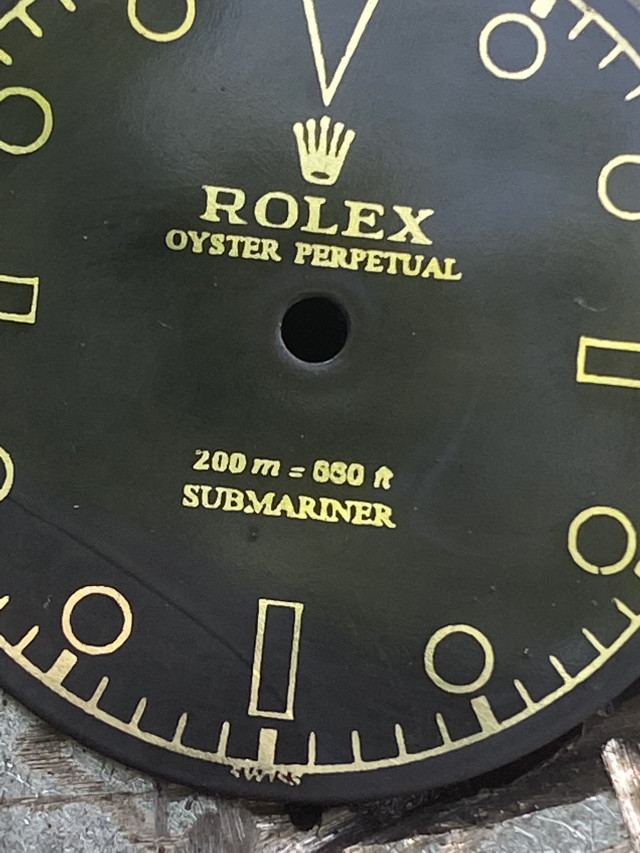
Done using a laminator and Staples transparency film printed at Staples

2 different acids. 1 to get black. 1 to get the tropical which is hard to capture fully. 3 thin layers of nitrocellulose on. I need to learn to take better pics.

dibs!
 
  • Like
Reactions: onsight

GenuineFool

Known Member
Supporter
Certified
Done using a laminator and Staples transparency film printed at Staples

2 different acids. 1 to get black. 1 to get the tropical which is hard to capture fully. 3 thin layers of nitrocellulose on. I need to learn to take better pics

That tropical looks nice. They both do, but I like how there is variation in the density of the effect, almost cloud like.
 

WatchN3RD

I supported. Doesn't make me an expert!
Gold Patron
24/7/18
523
591
93
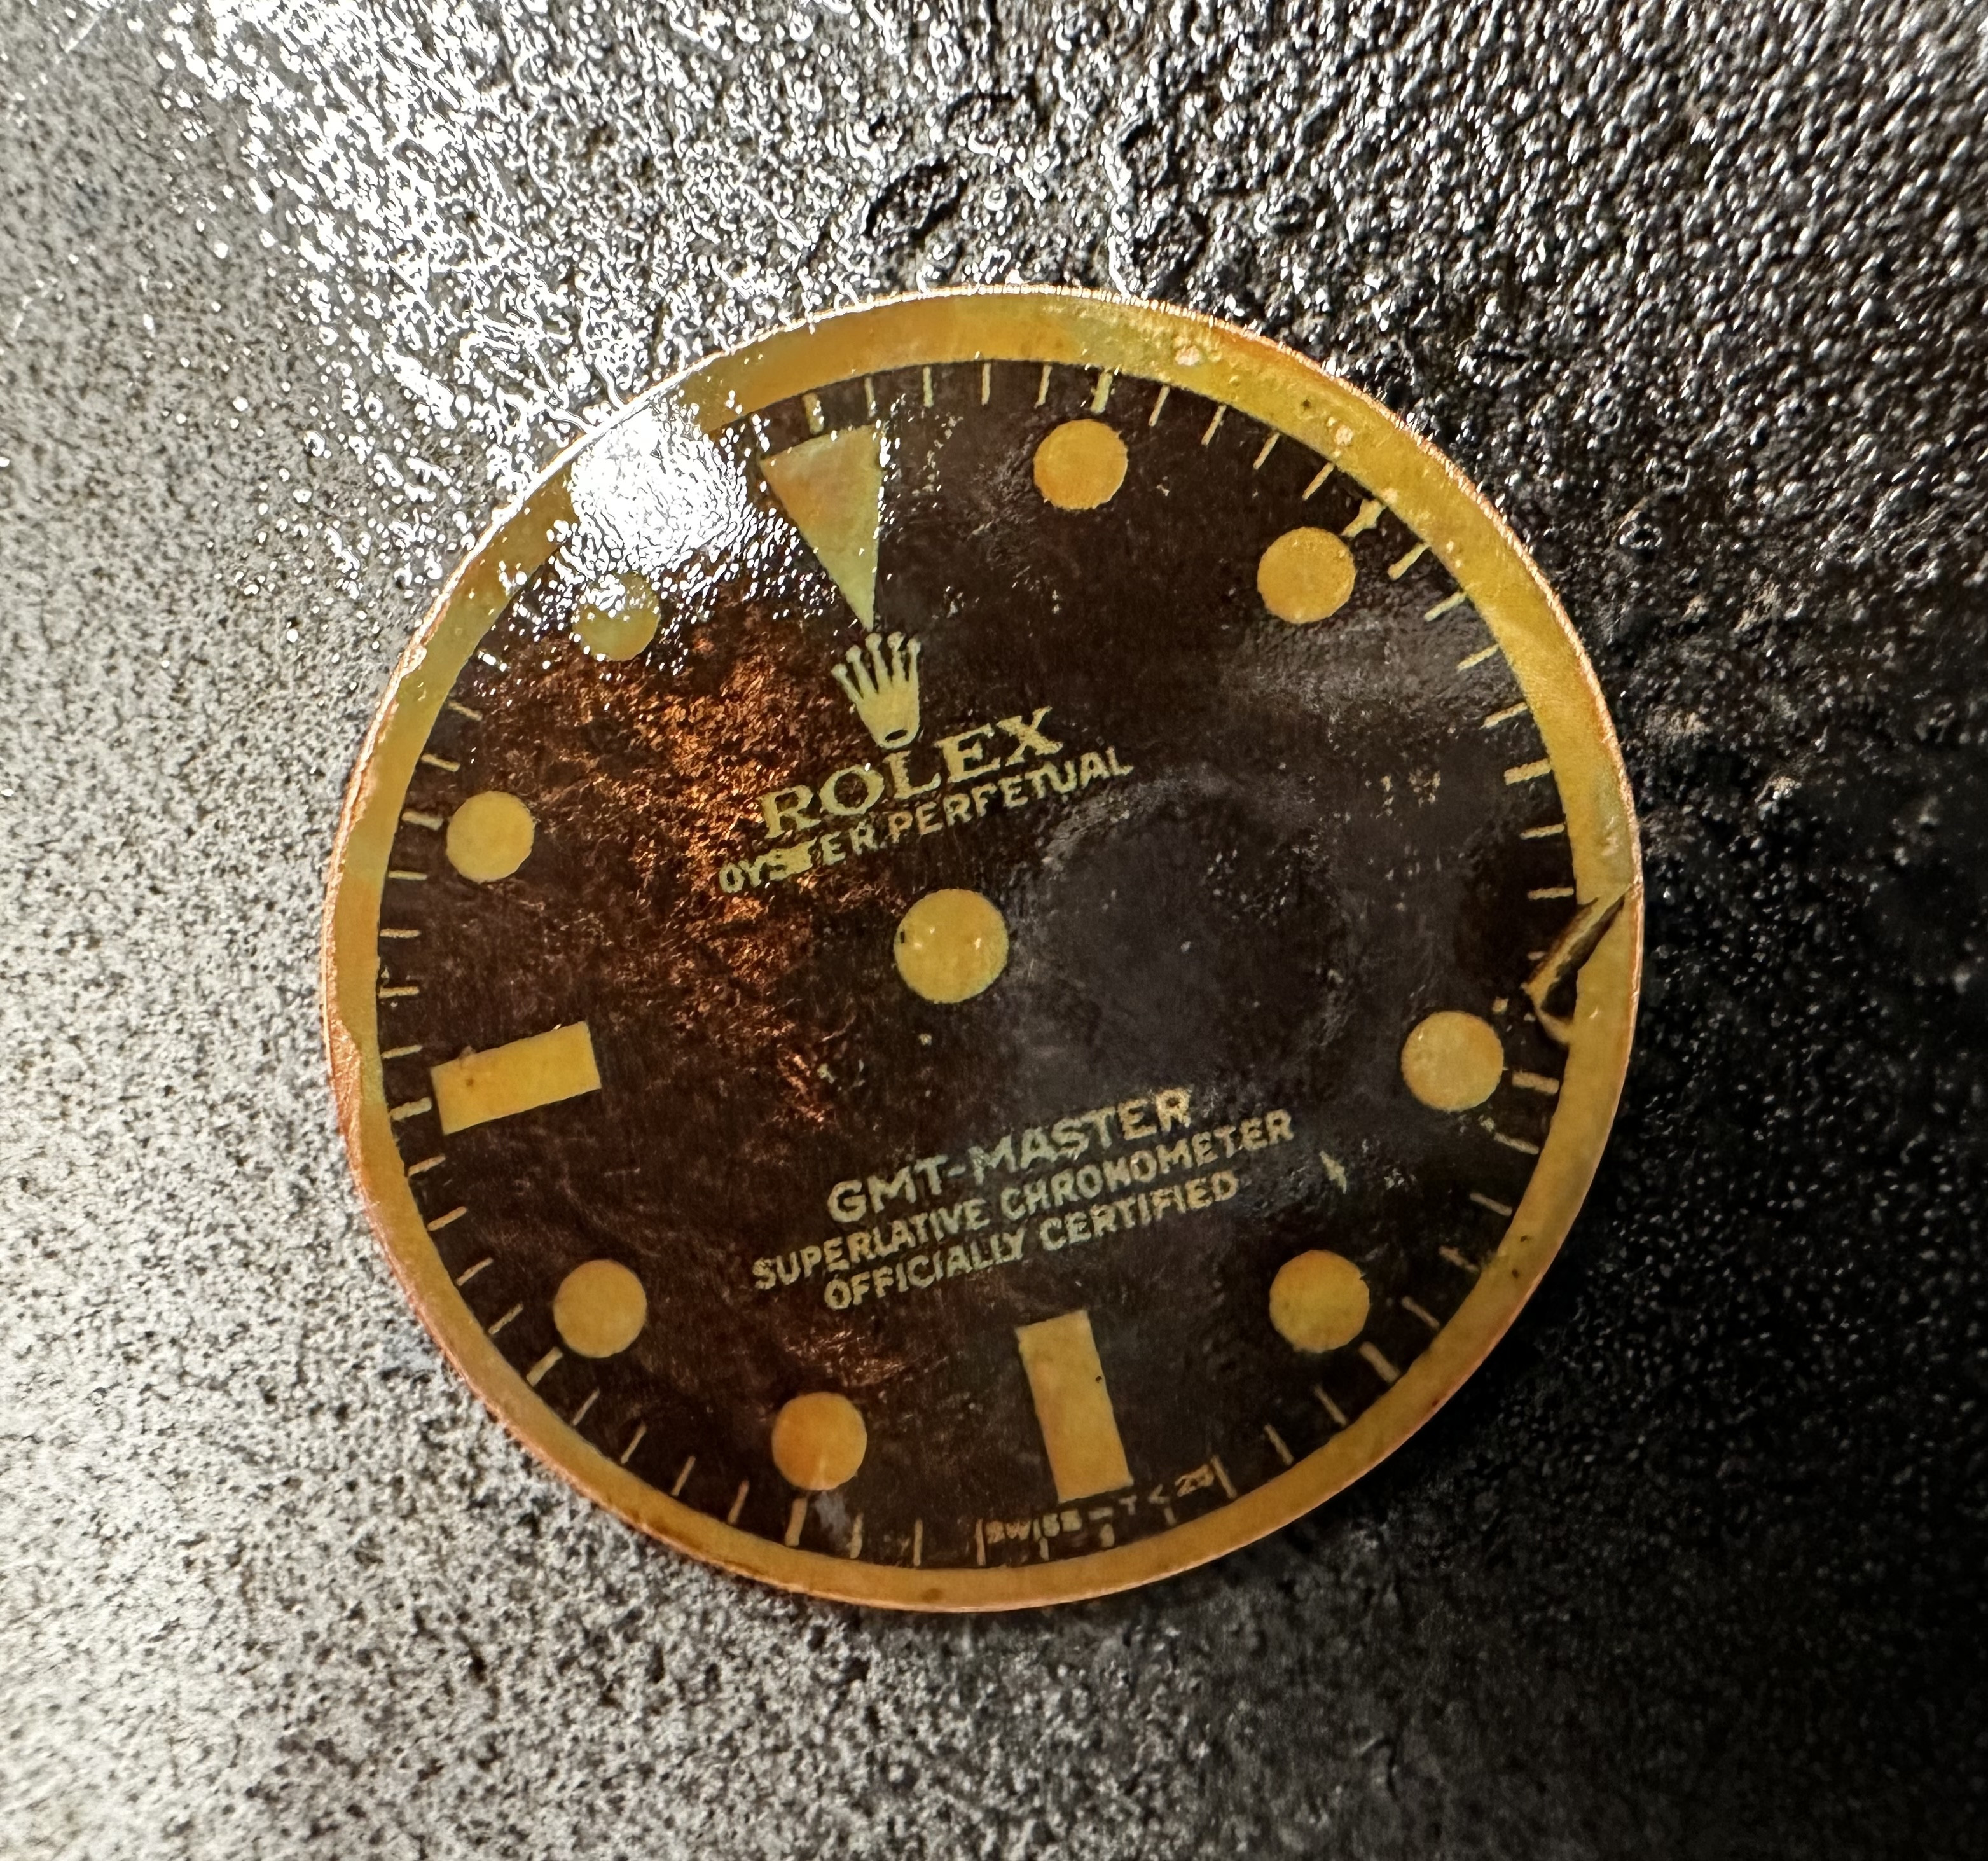
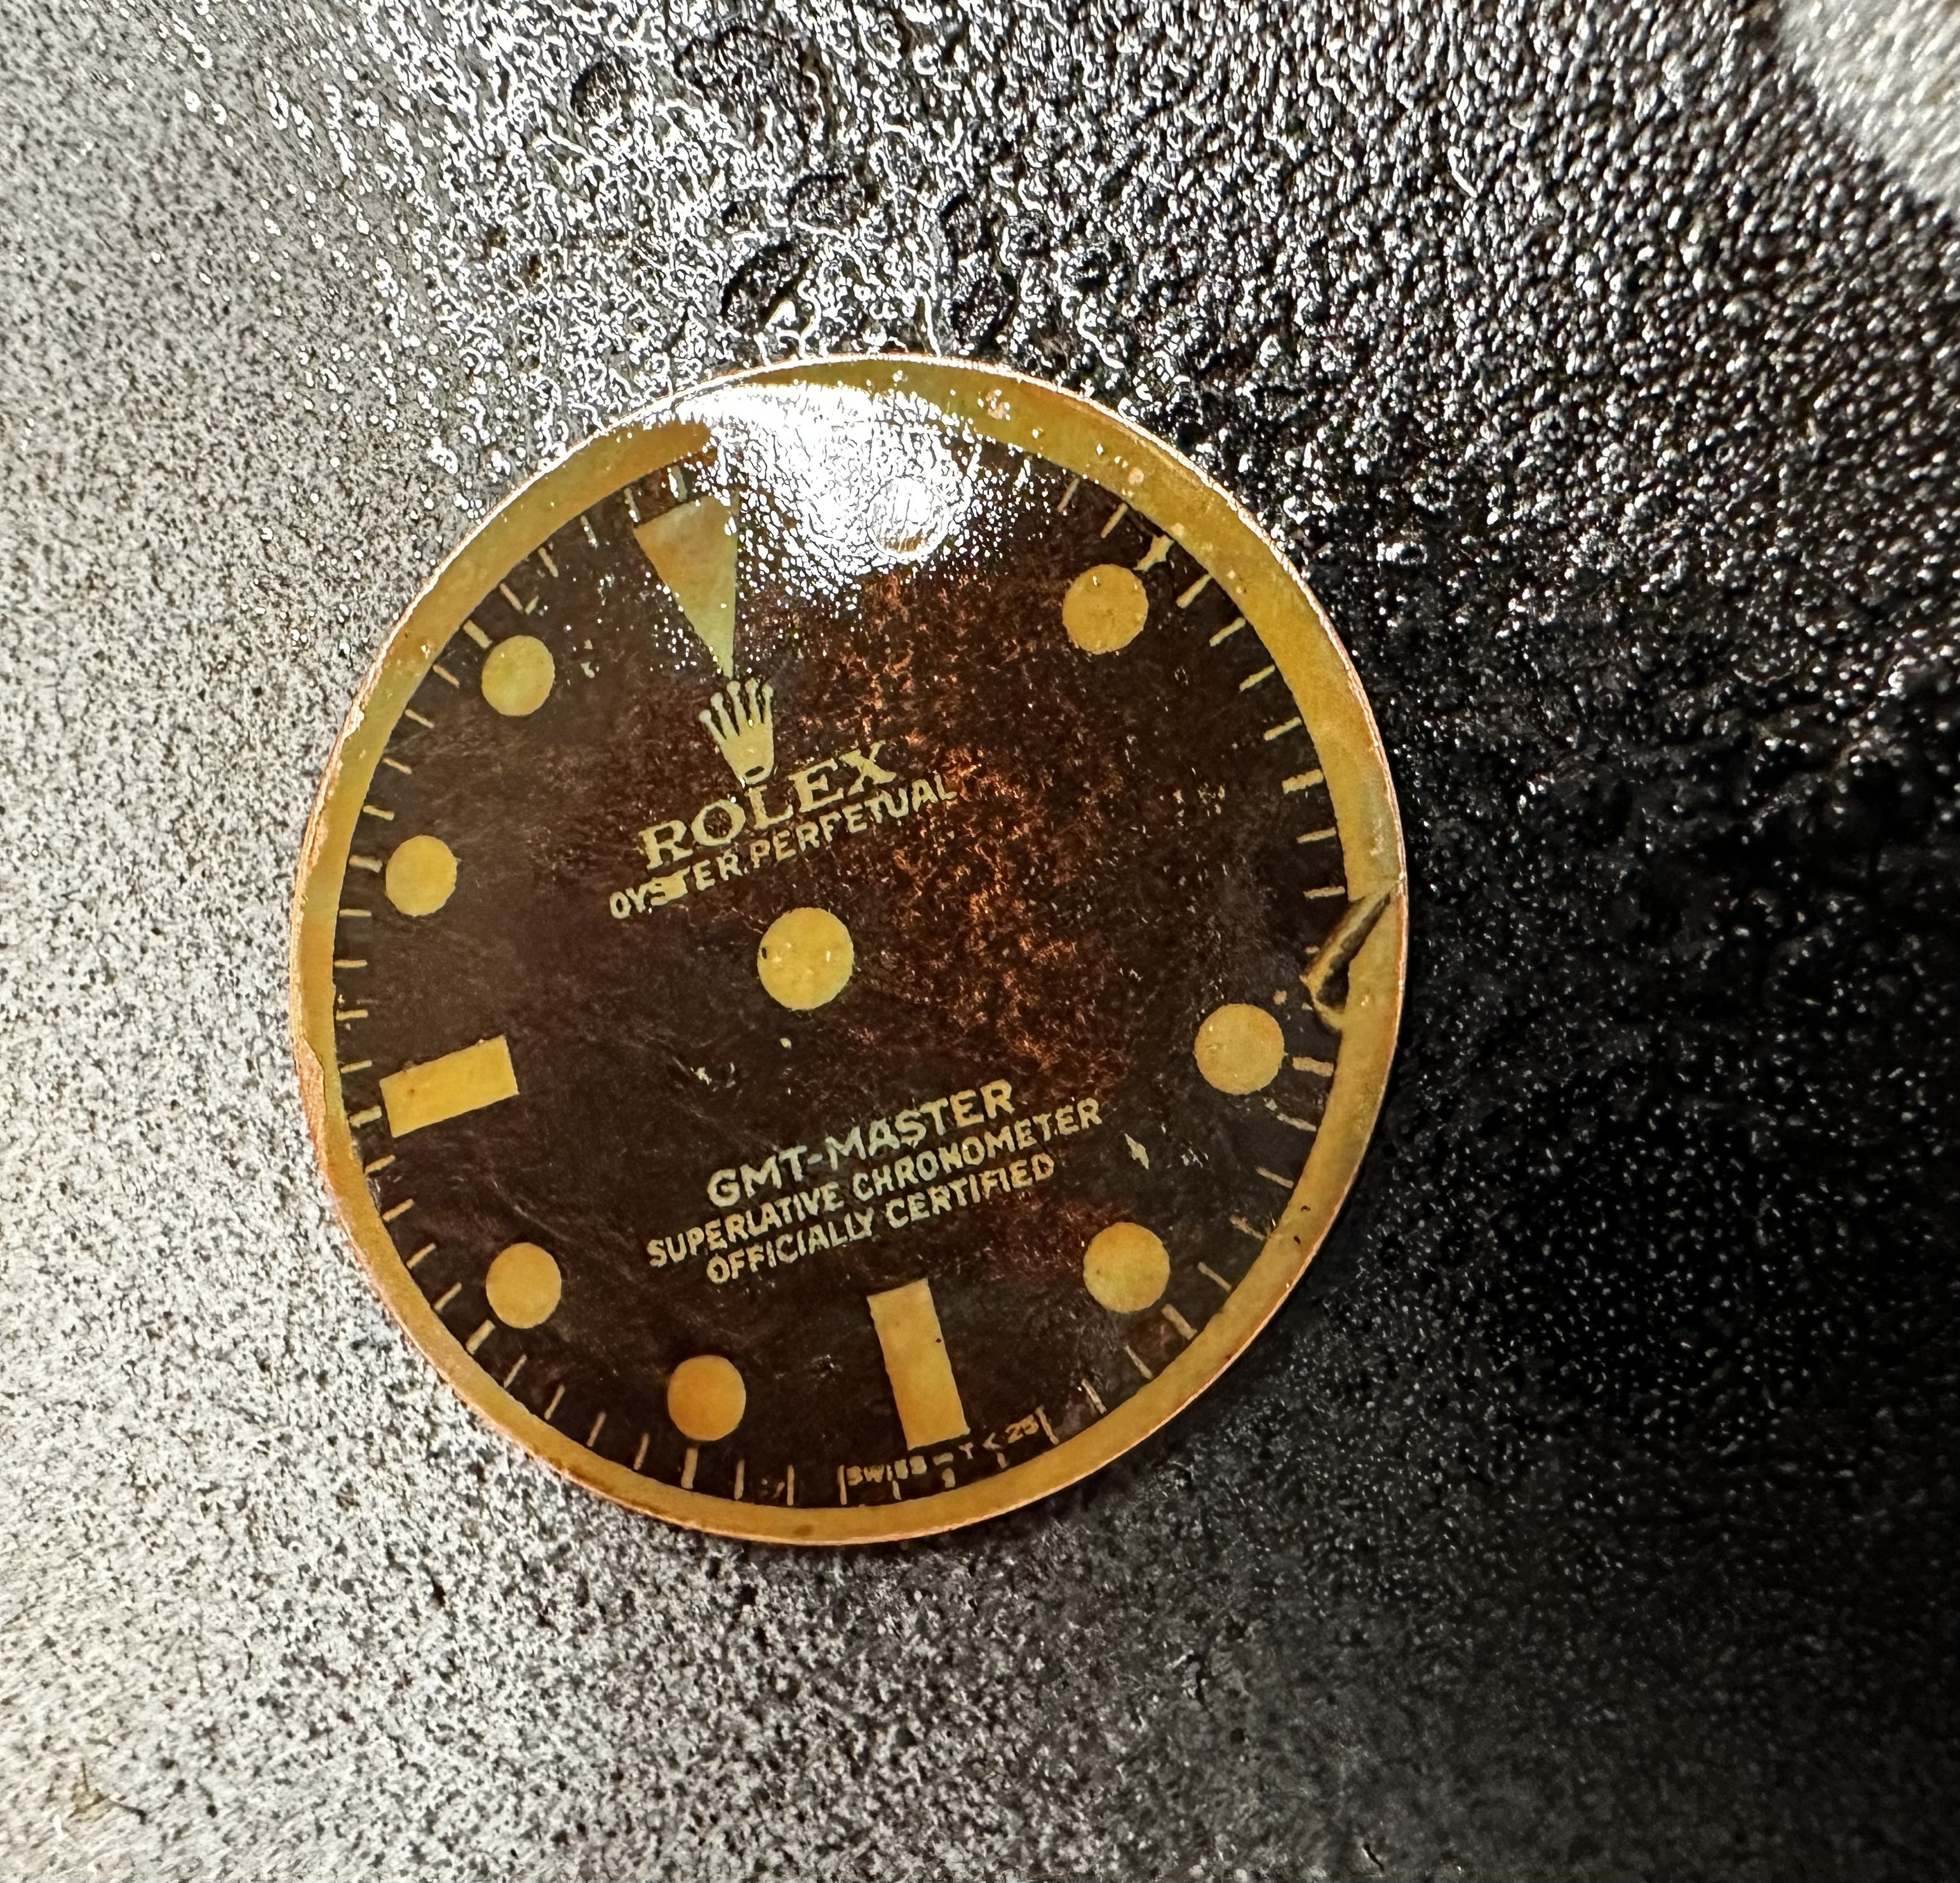
I decided to try some Minwax clear gloss lacquer I had in an aerosol can. To me, it's not a true lacquer, as it is easily thinned with rubbing alcohol. I sprayed it on a heavily patinad, transfer toner copper test dial.
I found the lacquer to be extremely thin; however, I doubt I shook the can enough. But, thin might be what's desired too. Especially if one wants a negative relief to show through when the coating fully settles.
Wanted to share my observations in case it helps anyone.
Whether a true lacquer or a blend, it evaporates very quickly. Lacquer thinner and denatured alcohol evaporate very fast, so don't expect any lacquer or shellac act be a slow curing, self leveling enamel. On a positive note, each layer should melt the previous one, so there's less of a chance for orange peel to continually build up. Plus, it's possible with an airbrush to mist a thinner on top of the dried finish to melt it just enough to where it can level itself without additional coats or excessive sanding and polishing. I'd be surprised if exposing it to vapors in a closed container wouldn't work similarly.

Most importantly, it is very sensitive to humidity so be sure to avoid spraying in a humid environment. If you do, you are likely to achieve a "fog" in the coat which really diminishes the holographic affect of many tropical dials.

Again, this dial is copper which cheats having to force the dezincification of brass, and it's melted toner which cheats a real galvanizing process. With that said, I saw some cool shades when I sprayed it, but I still think it'll require at least a soft polish. In my view, one needs a perfectly flat and highly polished, optically clear finish to make the 3D of a tropical dial really pop.
 
  • Like
Reactions: GenuineFool

chrome72

Renowned Member
7/12/17
639
561
93
Houston TX Baby
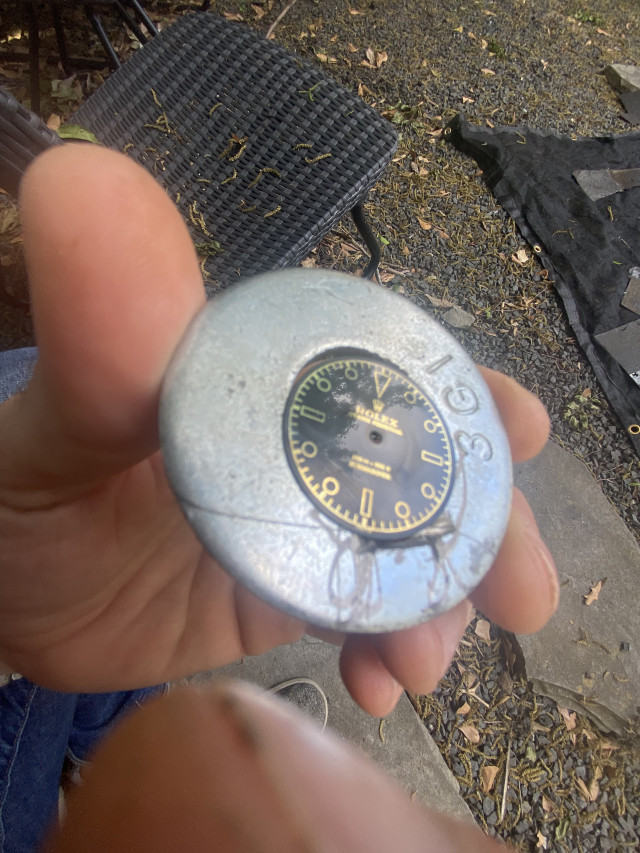
@WatchN3RD you made me remember a 3D printing trick! So a lot of prints are done with abs. Abs is soluble with acetone. Using acetone vapors smooths out the print. Your post above made me remember that. Nitrocellulose is soluble as well so I tried an acetone vapor chamber. Really just a paper towel with acetone inside a cup. The dial raised off the ground. 15 minutes later all orange peel is gone and I was left with a smooth glossy surface. I need to tinker with timing as I think I overdid it and it got slightly milky in spots. But it’s a great start to smooth glossy finish.

If you look close enough you can see the reflection of the tree leaves. Kind of crazy.

I should note to that this has the potential to melt toner as well if you eat through the lacquer. So you will need to test times and quantities or acetone.


matzemedia

Active Member
Certified
22/4/21
348
683
93
Germany
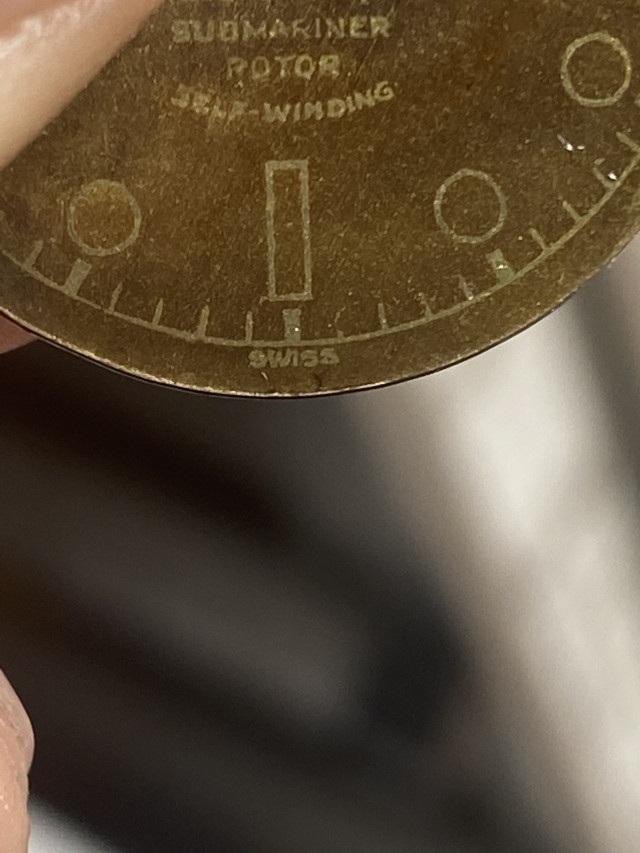
That lookes very nice at your picture. I really would like to see a close up picture with the details? Could you read the letters? Especialy the small "SWISS" at the bottom? That is still a challenge on my gilt dials.

You wrote:
2 different acids. 1 to get black.

What exact do you use as acids to get different black colors?
 

chrome72

Renowned Member
7/12/17
639
561
93
Houston TX Baby
That lookes very nice at your picture. I really would like to see a close up picture with the details? Could you read the letters? Especialy the small "SWISS" at the bottom? That is still a challenge on my gilt dials.

You wrote:


What exact do you use as acids to get different black colors?
On the black one you can read swiss. on the tropical one not as much but i know where i went wrong. I had a small portion of the toner not stick as i started to peel off the transparency so i put it through a few more times that i should have. that smushed the toner a bit. here is a pic of a Tudor 7928 dial i made where you can see the SWISS.
https://clickpix.org/image/KB0Dxo] [/url]

If doing the way i am making these dials (a toner resist mask), you need to have the lower heat (like 220F-ish). The yellow transfer paper that is on amazon for like $10 is really good for lower temps, just the downside is you have to have a really good method for aligning the art essentially upside down. I use arrows that sit just outside of say 28.5mm for my dials that have the tip of the arrow at 12,3,6,9 touch at 28.55mm or something like that. That way I can get just about perfect alignment when using paper as my medium. I am a fan of the transparency film as you can do that plus actually see where your art is.

For the black, i used Surfin Chemical CB 2. I dip it for probably 30 secs, then rub off the film that develops, then redip for another 30 secs, rub off the film, then dip again and rub off for the last time. You should get a deep, black, uniform patina.
 
  • Like
Reactions: matzemedia

matzemedia

Active Member
Certified
22/4/21
348
683
93
Germany
Thanks for your answer and the pictures. As far as I can see, the method does not sharpen our results. So the finer the font, the less accurate it becomes.
By the way: I tried to create steel dial and blackening it with the same method. So it silver instead of gold. But it is not dark (black) enough.
 

chrome72

Renowned Member
7/12/17
639
561
93
Houston TX Baby
Thanks for your answer and the pictures. As far as I can see, the method does not sharpen our results. So the finer the font, the less accurate it becomes.
By the way: I tried to create steel dial and blackening it with the same method. So it silver instead of gold. But it is not dark (black) enough.
You can get the finer results. Just neee the magic temp and pressure. I’ve done it before where I capture the super small serifs in the font itself. My advice is stick with one printer. Stick with one paper type (glossy magazine, yellow transfer, transparencies etc) so you have everything the same except for the temp/pressure.

There is a badge laminator out there that I’m considering for this. Google laminator model 5000. It’s consistent pressure and you can adjust the temp. With consistent paper type and printer and consistent pressure you just got to find the right temp by adjusting the laminator control.

I’m trying to do all the work for you guys
 

chrome72

Renowned Member
7/12/17
639
561
93
Houston TX Baby
That laminator the 5000 you can find them used on Facebook market place for $50 usually.

There is also a t shirt heat press which is what they use to put images onto t shirt. It has a digital heater and you can control the pressure. I am trying to stick with transparency’s and have t found the magic combo of that yet. I have with yellow paper. It’s just like the laminator. 220f and 57 psi which is like fully tightened on a t shirt heat press minus 1 full turn to loosen pressure. With the t shirt heat press you can do dials with feet on if you make a little jig to hold the dial
 
  • Like
Reactions: 369mafia

chrome72

Renowned Member
7/12/17
639
561
93
Houston TX Baby
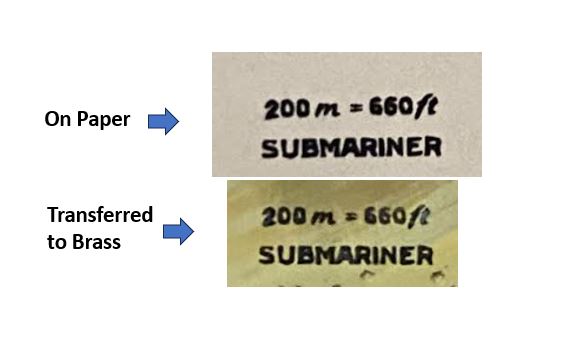
@matzemedia let me know if you think this is better. This used a Staples print on their thin glossy paper. I am comparing what was actually printed vs what was transferred. I would say its pretty spot on. Used my basic laminator and it went through maybe 5 times.

KQ5ytE.jpeg
 
  • Like
Reactions: GenuineFool

chrome72

Renowned Member
7/12/17
639
561
93
Houston TX Baby
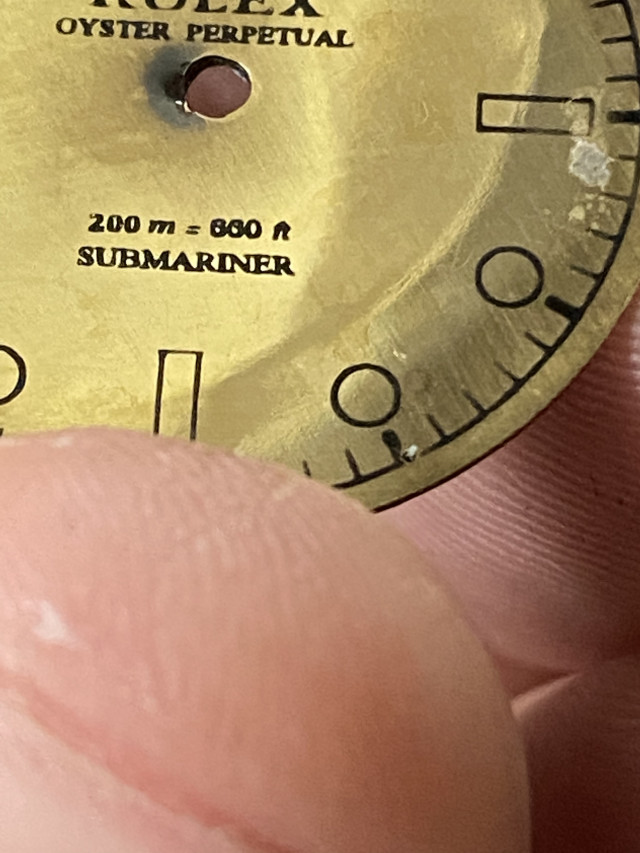
Here is one I just did with transparency paper. I changed a variable. Heat is the same. 3 mil on the laminator (220f). Kept 5 passes. Reduced pressure. I reduced pressure by putting less thick stuff in. I was using a .4mm thick piece of brass sheet. That with the dial itself was .8mm thick of stuff. I is read used a super thin piece of cardboard from a box of one of my kids snacks. Just used that and the dial.

Let know your thoughts as I would much rather use transparency film because again you can see where the artwork actually falls.


chrome72

Renowned Member
7/12/17
639
561
93
Houston TX Baby
Ok made a real one. I really like how it turned out. This one is for me! Will lacquer it up tomorrow

Just after transfer:


Post tropicalization:
 

GenuineFool

Known Member
Supporter
Certified
Nitrocellulose is soluble as well so I tried an acetone vapor chamber. Really just a paper towel with acetone inside a cup. The dial raised off the ground. 15 minutes later all orange peel is gone and I was left with a smooth glossy surface. I need to tinker with timing as I think I overdid it and it got slightly milky in spots. But it’s a great start to smooth glossy finish.

If you look close enough you can see the reflection of the tree leaves. Kind of crazy.

How long after lacquering with nitrocellulose did you try this? Was it shortly after a fresh coat, or had the nitrocellulose (mostly) cured/hardened? I ask because I just sanded a dial with 5000 then 7000 to remove almost all the "orange peel" texture. I then tried the acetone vapor chamber and yes, it was glossy shiny, but I could still see a little of the orange peel texture, although less than just after sanding. My dial was lacquered at the beginning of the week, so it was well along to being completely cured.
 

chrome72

Renowned Member
7/12/17
639
561
93
Houston TX Baby
How long after lacquering with nitrocellulose did you try this? Was it shortly after a fresh coat, or had the nitrocellulose (mostly) cured/hardened? I ask because I just sanded a dial with 5000 then 7000 to remove almost all the "orange peel" texture. I then tried the acetone vapor chamber and yes, it was glossy shiny, but I could still see a little of the orange peel texture, although less than just after sanding. My dial was lacquered at the beginning of the week, so it was well along to being completely cured.
Probably 24 hours. I technically over did it as it liquified which turned out to be good. My surface wasn’t fully level so when it recured there was a noticable wave in it where the max level of lacquer was on the top of the dial of that makes sense. Lessons learned.

Each time you apply nitrocellulose lacquer it should be dissolving the previous layer. I would assume that time wouldn’t matter as you can still strip a 60 year old lacquered dial.
 
  • Like
Reactions: GenuineFool

GenuineFool

Known Member
Supporter
Certified
OK, so it might be a matter of time then. My dial quickly took on a nice sheen, but I didn't see much difference between 3 minutes and 7 minutes, so I stopped it because I didn't think much else was happening and to avoid the milkiness that you saw at the 15 minute mark.

Thanks for posting this technique. The experimentation will continue!
 

chrome72

Renowned Member
7/12/17
639
561
93
Houston TX Baby
OK, so it might be a matter of time then. My dial quickly took on a nice sheen, but I didn't see much difference between 3 minutes and 7 minutes, so I stopped it because I didn't think much else was happening and to avoid the milkiness that you saw at the 15 minute mark.

Thanks for posting this technique. The experimentation will continue!
For reference I put a paper towel on the opening of the acetone container. Gave it a tilt to saturate one spot then moved it around 5 times or so. It wasn’t like a soaking mess. I want to try doing a cotton ball that is soaked. There is clearly room for improvement but very surprised it worked as well as it did right off the bat
 
  • Like
Reactions: GenuineFool