I’m doing zinc because it doesn’t mess with the toner. It keeps it as is. It also adds depth. Less options for coloring though if aiming for tropical colors.Glad to see this thread is back in business. Chrome, is the zinc plating more for a rich black, adding depth, or neither?
-
Tired of adverts on RWI? - Subscribe by clicking HERE and PMing Trailboss for instructions and they will magically go away!
You are using an out of date browser. It may not display this or other websites correctly.
You should upgrade or use an alternative browser.
You should upgrade or use an alternative browser.
How to make a true gilt dial on the cheap - Tropical or Black
- Thread starter chrome72
- Start date

I have seen some people do some cool pcbs with this, making detailed things the size of a penny so we will see!
The photoresist method is really down to just a few variables you need to control for. Light intensity, light distance, and time.
Good thing is the printer's LCD screen is a fixed distance light source, fixed light intensity, and people have already figured out the time.
The photoresist method is really down to just a few variables you need to control for. Light intensity, light distance, and time.
Good thing is the printer's LCD screen is a fixed distance light source, fixed light intensity, and people have already figured out the time.
I will certainly be revisiting photoresist. Toner transfer is just so easy WHEN IT WORKS. I tried photoresist (maybe twice) about 6 months ago, and it was really just to understand it better and see how resistant it was to the etching chemicals. I didn't have a clean dial file I was planning to use, so I didn't pursue it.I have seen some people do some cool pcbs with this, making detailed things the size of a penny so we will see!
The photoresist method is really down to just a few variables you need to control for. Light intensity, light distance, and time.
Good thing is the printer's LCD screen is a fixed distance light source, fixed light intensity, and people have already figured out the time.
Finally, I was really hoping to find some kind of (condensing?) lens or reverse magnification setup that would allow me to use a bigger transparency than the ~27.5mm dial image. I need one!!!!
Either way, I'll be attempting an honest effort with the photoresist method very soon.
*If anyone has knowledge in darkroom film printing, lenses, or optics to help me find an affordable option for such a lens, please let me know. I'm worried those cheap artist projectors won't have the fine tuning focus option, and buying a darkroom setup to hack up or modify is not a realistic option.
oh man! I went down that rabbit hole and talked to some researchers. There was a set up I was considering building using a DLP projector and a microscope so I could project an image into a microscope and have it reduced to the correct size of a dial and do the photoresist that way. It is kind of how they make microchips. It sounded like a bit of pain to make and a bit overkill but a fun idea.I will certainly be revisiting photoresist. Toner transfer is just so easy WHEN IT WORKS. I tried photoresist (maybe twice) about 6 months ago, and it was really just to understand it better and see how resistant it was to the etching chemicals. I didn't have a clean dial file I was planning to use, so I didn't pursue it.
Finally, I was really hoping to find some kind of (condensing?) lens or reverse magnification setup that would allow me to use a bigger transparency than the ~27.5mm dial image. I need one!!!!
Either way, I'll be attempting an honest effort with the photoresist method very soon.
*If anyone has knowledge in darkroom film printing, lenses, or optics to help me find an affordable option for such a lens, please let me know. I'm worried those cheap artist projectors won't have the fine tuning focus option, and buying a darkroom setup to hack up or modify is not a realistic option.
There was also a guy who was using a DLP projector and fixed onto it a camera lens that reduced the image, i think he had to reverse the lens so instead of small to big, it went big to small. He then just projected the reduced image onto the film to expose.
Crazy thought, but how secure is your printer sitting? I ask because it looks like horizontal waviness of the print increases as you go down the dial, 12 o'clock to 6 o'clock. I'm wondering what could cause this, and my first (and only) thought is that your printer is moving quite a bit side to side during the print process.
Besides that slight waviness, this is a fantastic result. Would love to see photos of this mounted in a completed watch!
I will certainly be revisiting photoresist. Toner transfer is just so easy WHEN IT WORKS. I tried photoresist (maybe twice) about 6 months ago, and it was really just to understand it better and see how resistant it was to the etching chemicals. I didn't have a clean dial file I was planning to use, so I didn't pursue it.
Finally, I was really hoping to find some kind of (condensing?) lens or reverse magnification setup that would allow me to use a bigger transparency than the ~27.5mm dial image. I need one!!!!
Either way, I'll be attempting an honest effort with the photoresist method very soon.
*If anyone has knowledge in darkroom film printing, lenses, or optics to help me find an affordable option for such a lens, please let me know. I'm worried those cheap artist projectors won't have the fine tuning focus option, and buying a darkroom setup to hack up or modify is not a realistic option.
The cheapest route is to probably find a film club that has a darkroom and join. The least hassle, too. Otherwise, you could use a cheap 6x6 medium format enlarger from a local listing or eBay. I know darkroom photography had a bit of a comeback but I think gear still can be found inexpensively. Of course, you would need somewhere to set it up. You could probably use almost any inexpensive enlarger lens. A lens/enlarger/substrate system that yields only 30 line pairs per mm (lpmm), which is the equivalent of any mid-tier film camera, effectively gives 60 lines or "pixels" per mm, which is approximately equivalent to about 1500 dpi. I suppose you could build a crude enlarger, but I recommend a film grain focuser whatever you do to make sure it is sharply in focus.
I'm planning on trying something like this, and picked up a medium format enlarger for peanuts. I have some medium and large format camera lenses and a few projector lenses already. My plan is to print a poster-sized dial, photograph it with a 6x9 camera, then use that negative on the enlarger to actually make what is called a microprint (a reduction from the negative, rather than an enlargement). With my setup, I am confident that I will get about 50 lpmm resolution on the final dial.
But unfortunately, I cannot test this out for a while. Feel free to message me if you have any questions.
I had similar results in print quality on some of the big professional printers used by Staples here in the US. I think it’s a limitation of the file type and printer.Crazy thought, but how secure is your printer sitting? I ask because it looks like horizontal waviness of the print increases as you go down the dial, 12 o'clock to 6 o'clock. I'm wondering what could cause this, and my first (and only) thought is that your printer is moving quite a bit side to side during the print process.
Besides that slight waviness, this is a fantastic result. Would love to see photos of this mounted in a completed watch!
Yes!!! I started looking into many of things a while back, but I quickly realized I didn't know enough to move forward with the various options.The cheapest route is to probably find a film club that has a darkroom and join. The least hassle, too. Otherwise, you could use a cheap 6x6 medium format enlarger from a local listing or eBay. I know darkroom photography had a bit of a comeback but I think gear still can be found inexpensively. Of course, you would need somewhere to set it up. You could probably use almost any inexpensive enlarger lens. A lens/enlarger/substrate system that yields only 30 line pairs per mm (lpmm), which is the equivalent of any mid-tier film camera, effectively gives 60 lines or "pixels" per mm, which is approximately equivalent to about 1500 dpi. I suppose you could build a crude enlarger, but I recommend a film grain focuser whatever you do to make sure it is sharply in focus.
I'm planning on trying something like this, and picked up a medium format enlarger for peanuts. I have some medium and large format camera lenses and a few projector lenses already. My plan is to print a poster-sized dial, photograph it with a 6x9 camera, then use that negative on the enlarger to actually make what is called a microprint (a reduction from the negative, rather than an enlargement). With my setup, I am confident that I will get about 50 lpmm resolution on the final dial.
But unfortunately, I cannot test this out for a while. Feel free to message me if you have any questions.
I considered printing an enlarged dial and photographing it to use the negative as well, but needing a larger film than standard, having it developed properly, etc required a lot more knowledge about film than I had.
My father was into photography years ago, so I'm betting I already have an enlarger stored somewhere.
I'm not sure how yet, but my plan is to do a crude microprint. I'd like to do an enlarged dial print on the transparency and then project a reduced image to burn a photoresist.
It sounds like the same idea as yours but I would avoid the camera and film (and sacrifice some resolution) by using a printer transparency instead of a "picture perfect" film negative.
Does this sound realistic/reasonable? I'm thinking like the opposite of a school projector but using am enlarger as the base (and reversing the lens if needed).
Yes it sounds feasible. Look at “maskless lithography” Be careful you might find yourself making microchips in your basement…..Yes!!! I started looking into many of things a while back, but I quickly realized I didn't know enough to move forward with the various options.
I considered printing an enlarged dial and photographing it to use the negative as well, but needing a larger film than standard, having it developed properly, etc required a lot more knowledge about film than I had.
My father was into photography years ago, so I'm betting I already have an enlarger stored somewhere.
I'm not sure how yet, but my plan is to do a crude microprint. I'd like to do an enlarged dial print on the transparency and then project a reduced image to burn a photoresist.
It sounds like the same idea as yours but I would avoid the camera and film (and sacrifice some resolution) by using a printer transparency instead of a "picture perfect" film negative.
Does this sound realistic/reasonable? I'm thinking like the opposite of a school projector but using am enlarger as the base (and reversing the lens if needed).
One cool thing about the msla printer I got is I don’t need a transparency. The mask is on the screen and light projects through it. So I won’t need a transparency.
I'd like to do an enlarged dial print on the transparency and then project a reduced image to burn a photoresist.
Does this sound realistic/reasonable? I'm thinking like the opposite of a school projector but using am enlarger as the base (and reversing the lens if needed).
Yes, this sounds realistic. I'm looking forward to your results!
I know what you mean. Especally the 6 hour marker. I double checked my layout and realized the was a small angel. The both maker hat a angel of 90.1° and 180.1°.Crazy thought, but how secure is your printer sitting? I ask because it looks like horizontal waviness of the print increases as you go down the dial, 12 o'clock to 6 o'clock. I'm wondering what could cause this, and my first (and only) thought is that your printer is moving quite a bit side to side during the print process.
Me too. Currently I don't have a case, movement and all the parts. And to be honest, I already have too many watches. I'm still thinking about whether I'm going to butcher another of my 1675s for it.Besides that slight waviness, this is a fantastic result. Would love to see photos of this mounted in a completed watch!
@matzemedia I love that you are just making dials, even if there is no watch waiting for them. I had to put my 1016 type 2 dial on hold, but I have everything else just waiting for it.
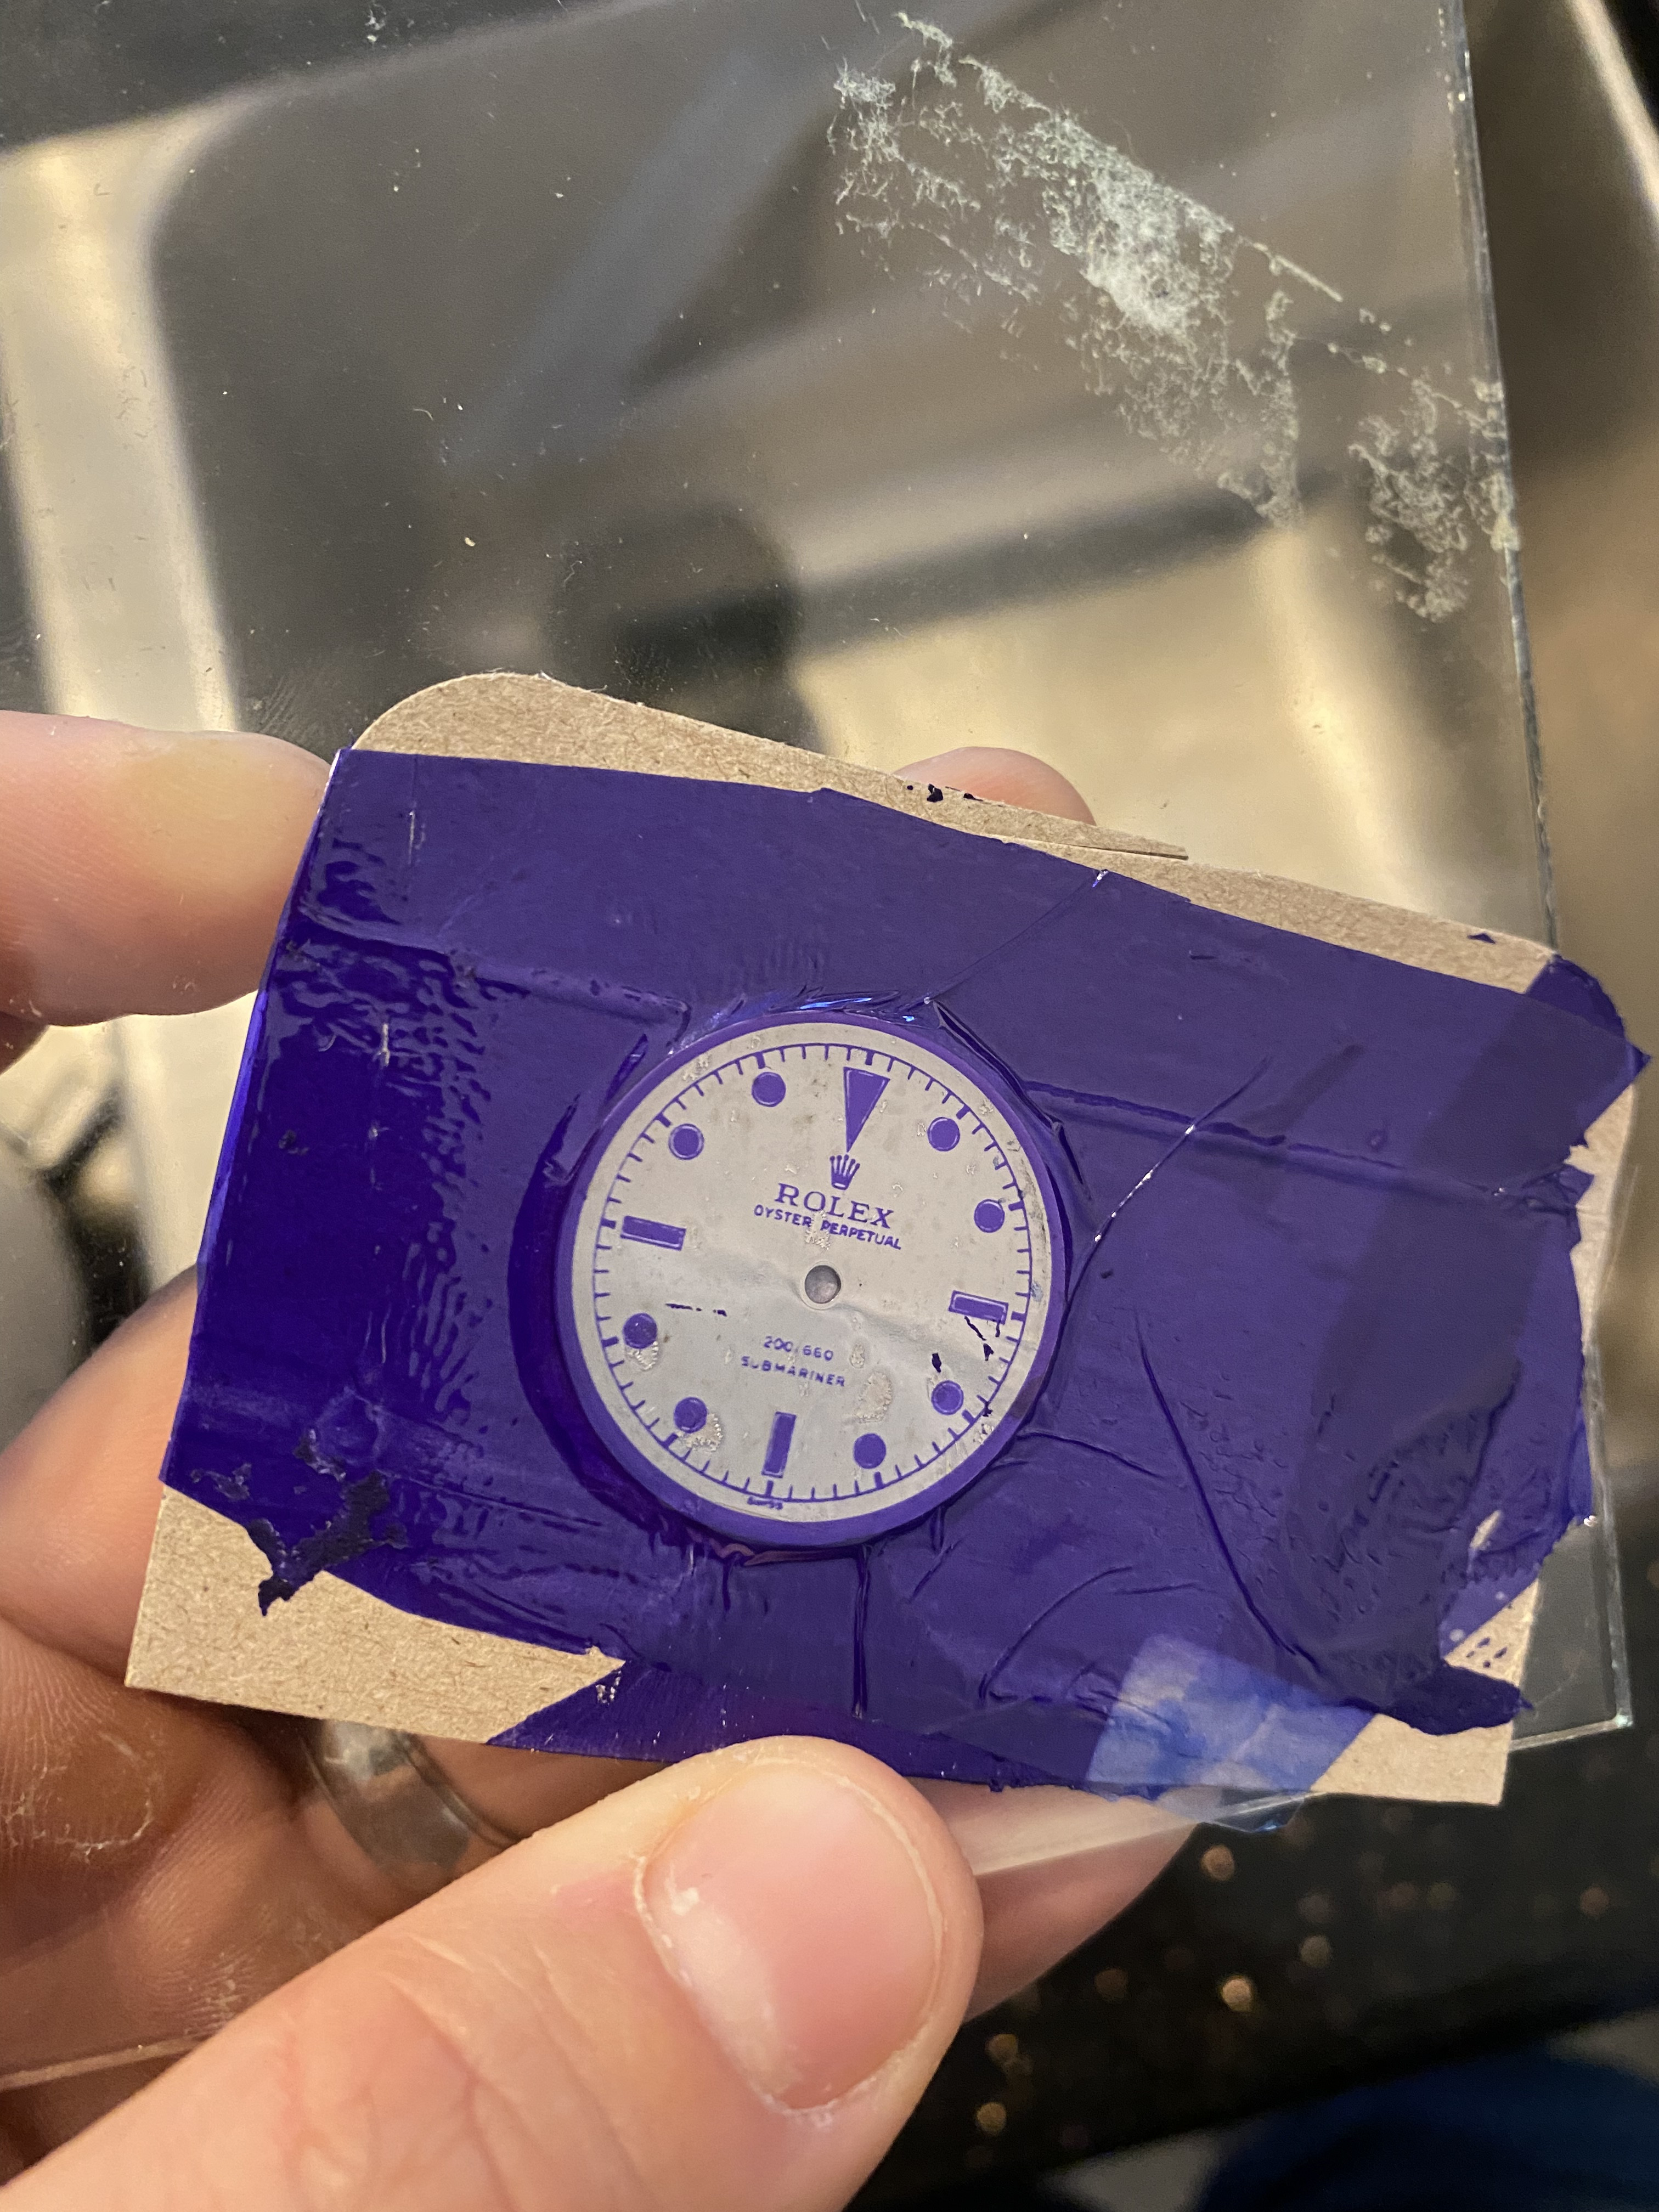
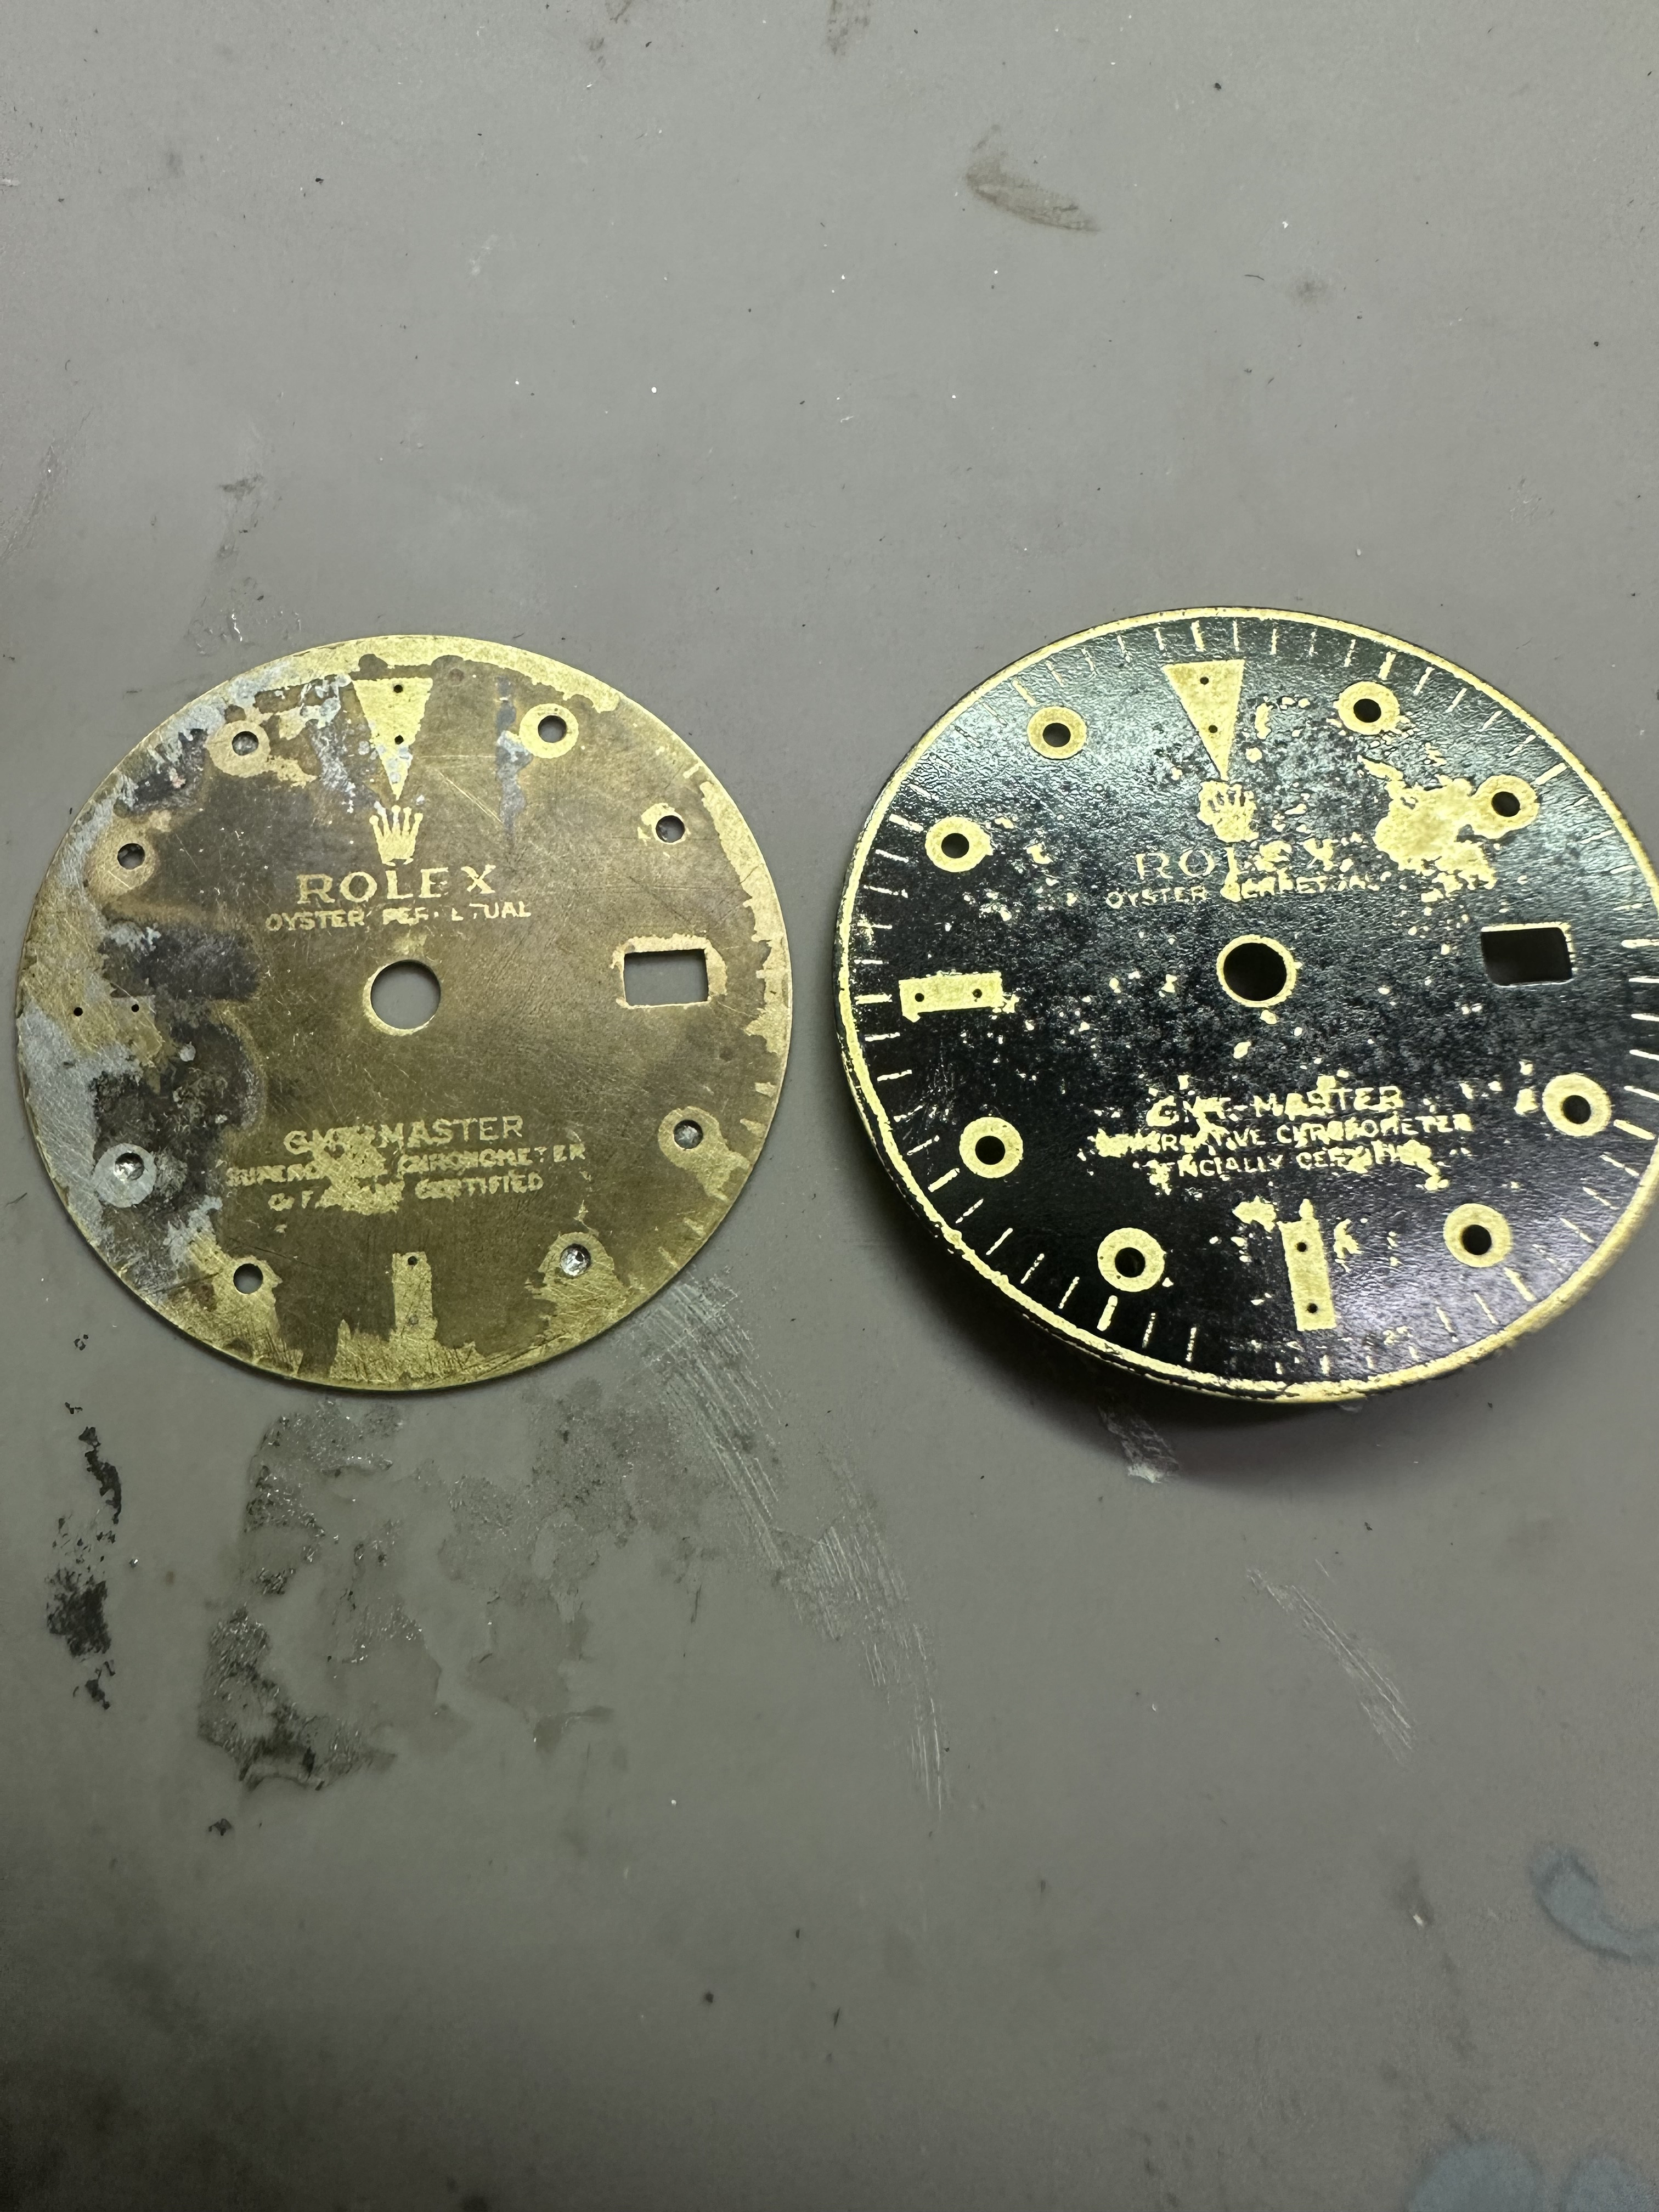
I like to do the same since so many are not successful. Even if they are, I have ruined many good ones testing various techniques that often backfire. Speaking of failures, my attempt at another brass black dial didn't work at all.
But I did find an enlarger. And it has a bellow on it, which I read may be key! I'm referring to the accordion thing that blocks light when the lens is moved. I didn't see it, but when I started moving parts, it appeared. Do you think will work for my plan to shrink transparencies?
Also, how can I find out the maximum image size I can use in place of film? The current film holder is standard sized, so the opening is currently way too small.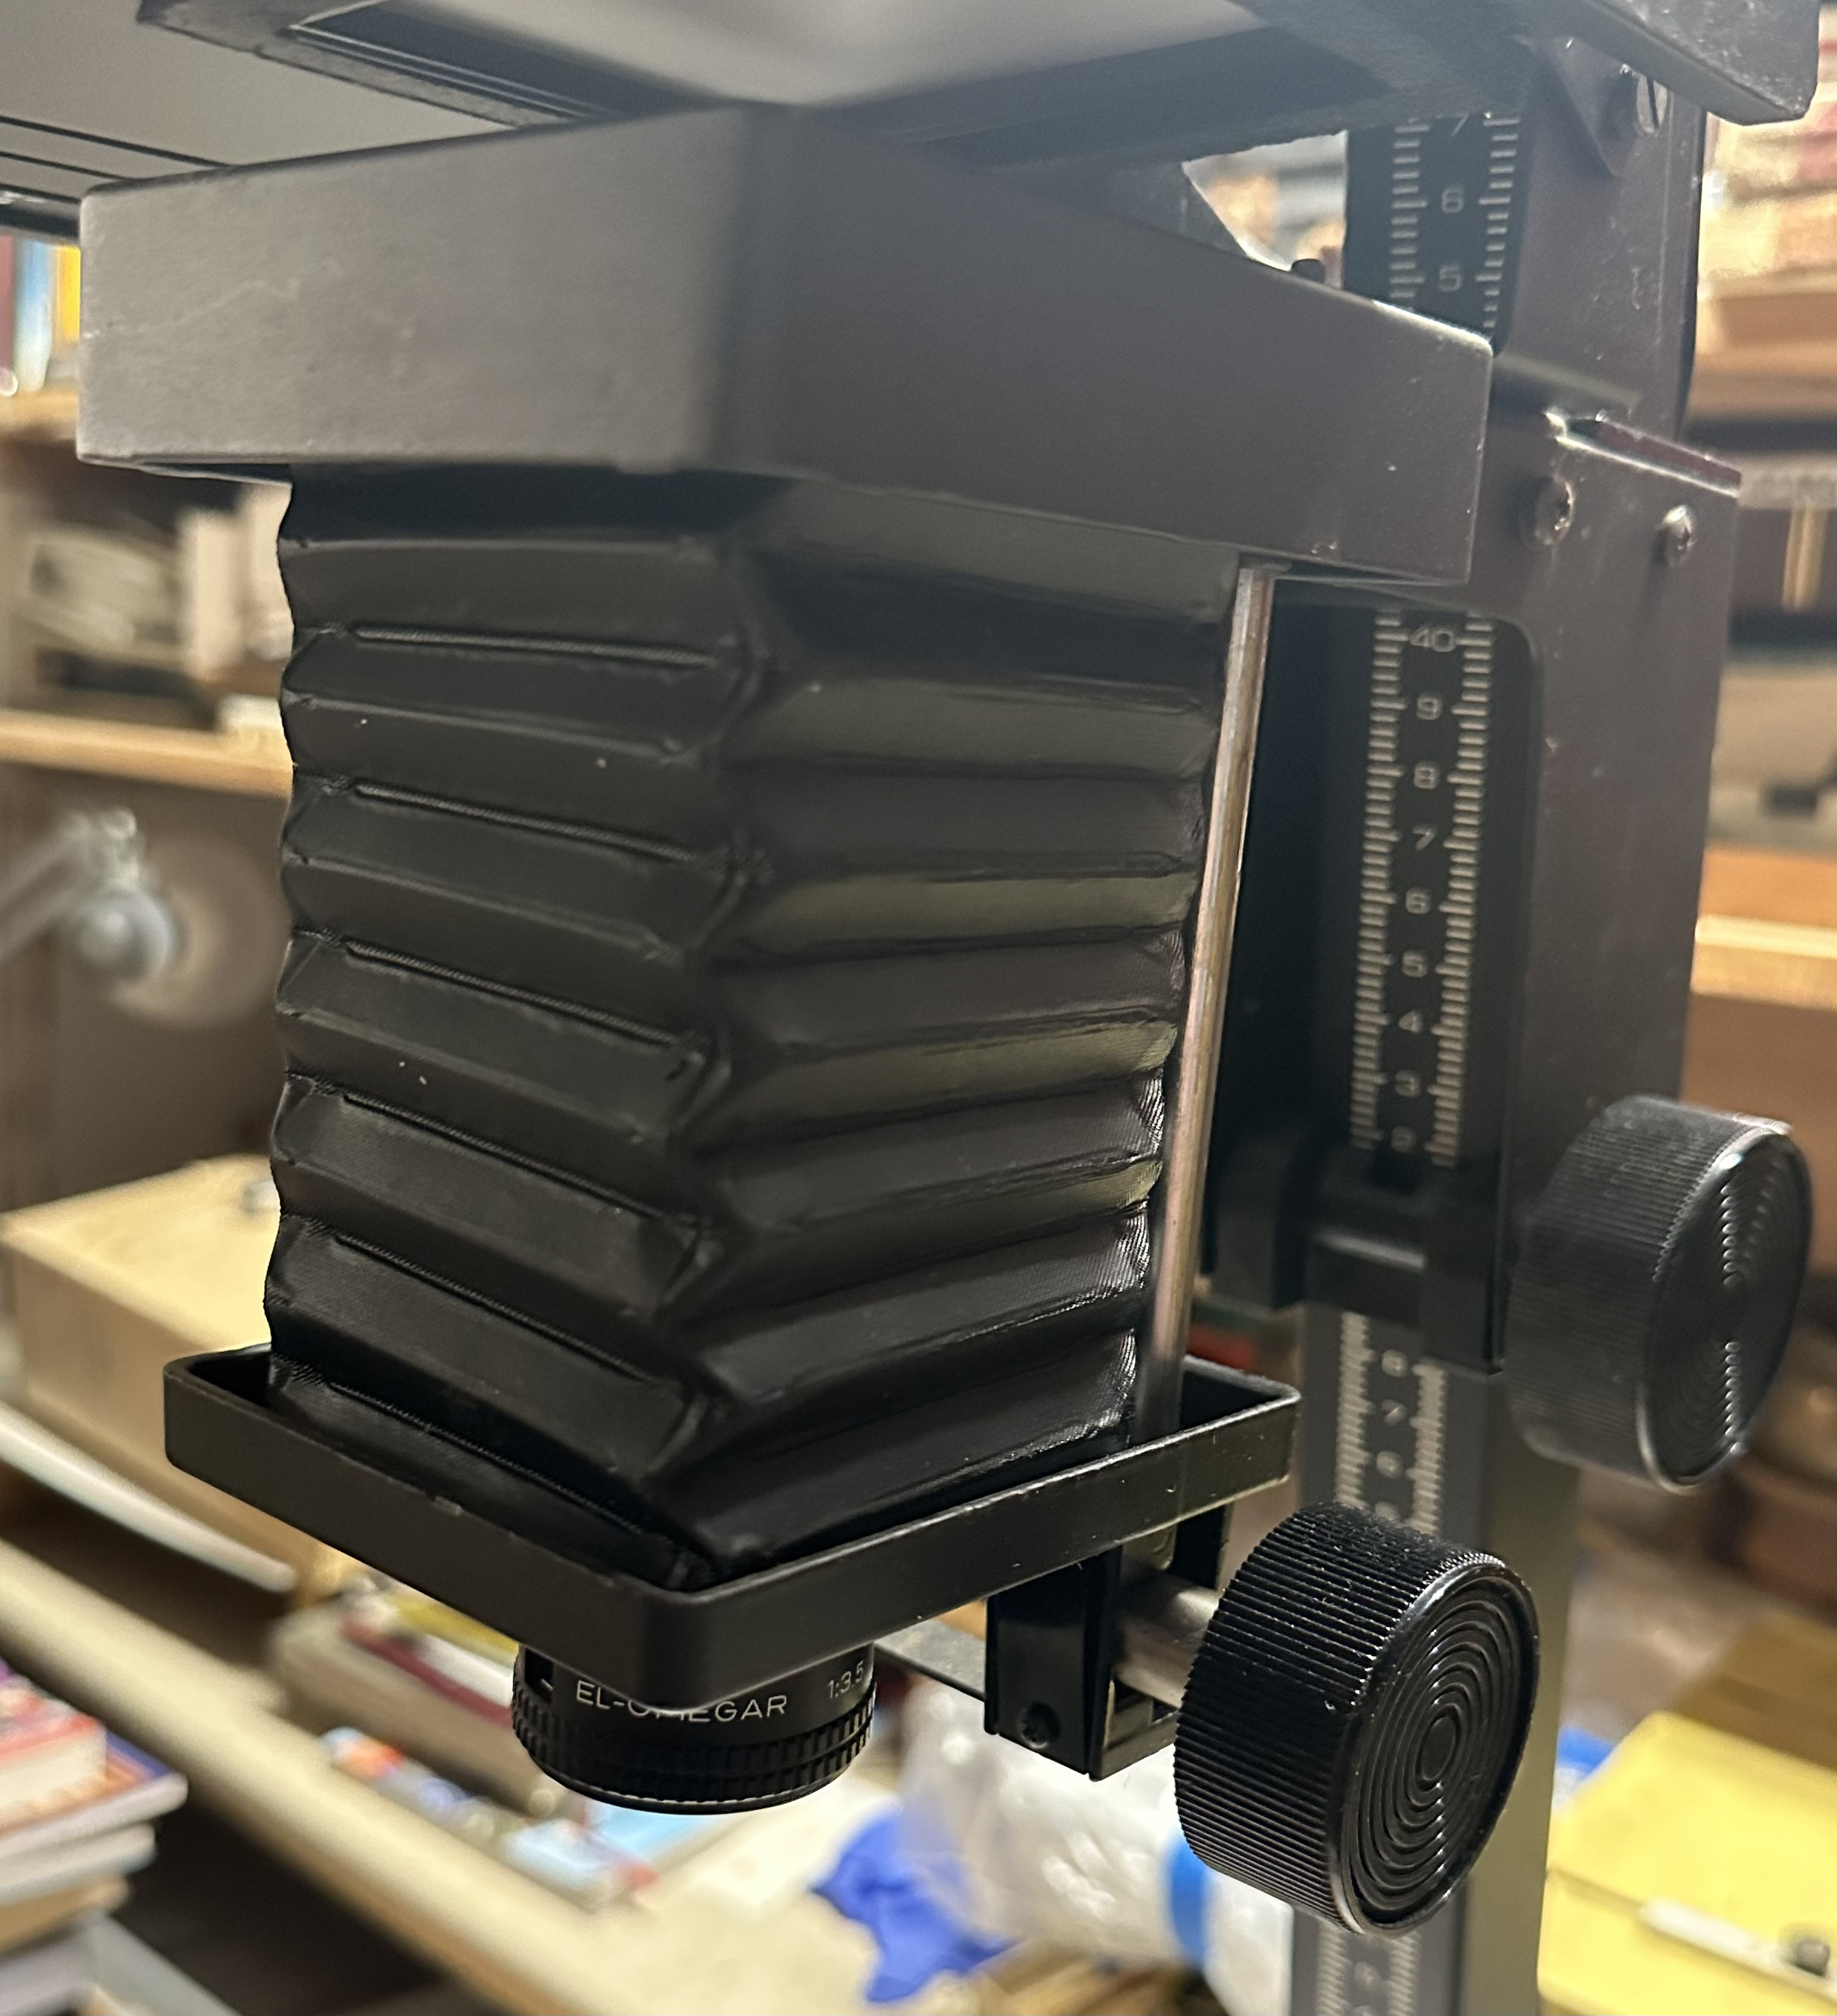
That looks like a 35 mm enlarger, meaning it is only meant for 35 mm film. (50 mm lenses are standard enlarging lenses for 35 mm.) You won't be able to take a larger image and reduce it. The next size up from 35 mm is 6x6 cm. The negative holder would have a square opening about 56 x 56 mm. I can't say for sure, but you might be able to get a 6x6 negative holder that fits. What is the make and model of the enlarger?
By the way, to reduce an image from the negative to your printing surface, you need to reverse the lens. Think of it this way: a camera lens takes in a very large view and reduces it to fit on film. When using an enlarger, you are projecting light from the negative out the front of the lens. But to reduce, you want to do the same operation as taking a photo, so you want the front of the lens to face the negative. The 50 mm enlarging lens that you have might work; depends on how far the bellows extends. I would try it.
By the way, to reduce an image from the negative to your printing surface, you need to reverse the lens. Think of it this way: a camera lens takes in a very large view and reduces it to fit on film. When using an enlarger, you are projecting light from the negative out the front of the lens. But to reduce, you want to do the same operation as taking a photo, so you want the front of the lens to face the negative. The 50 mm enlarging lens that you have might work; depends on how far the bellows extends. I would try it.
Not what I was hoping to hear about the enlarger! Was hoping it would almost do everything for me. To be continued...
As for the brass black, I had two consecutive failures. I assumed it was from a dirty dial from me gaining unnecessary confidence after great results lately. I couldn't get it work, so I thought I would get everything amazingly clean and blacken it first. Then, I tried the film on top and tried to get a negative etch on the blackened dial.
I must've mixed in more brown or other patina the first time, because using just the black isn't working at all. It creates a fragile layer that can almost chip away. I'm not sure why, but using only Jax Black is useless with my attempts. I need a black I can electroplate.
On a positive note, concentrated lime juice works well for getting the brass a bright, bright yellow. It's pretty simple since you can just add hydrogen peroxide to strengthen or water to weaken. Very hard to mess something up.
Last edited:
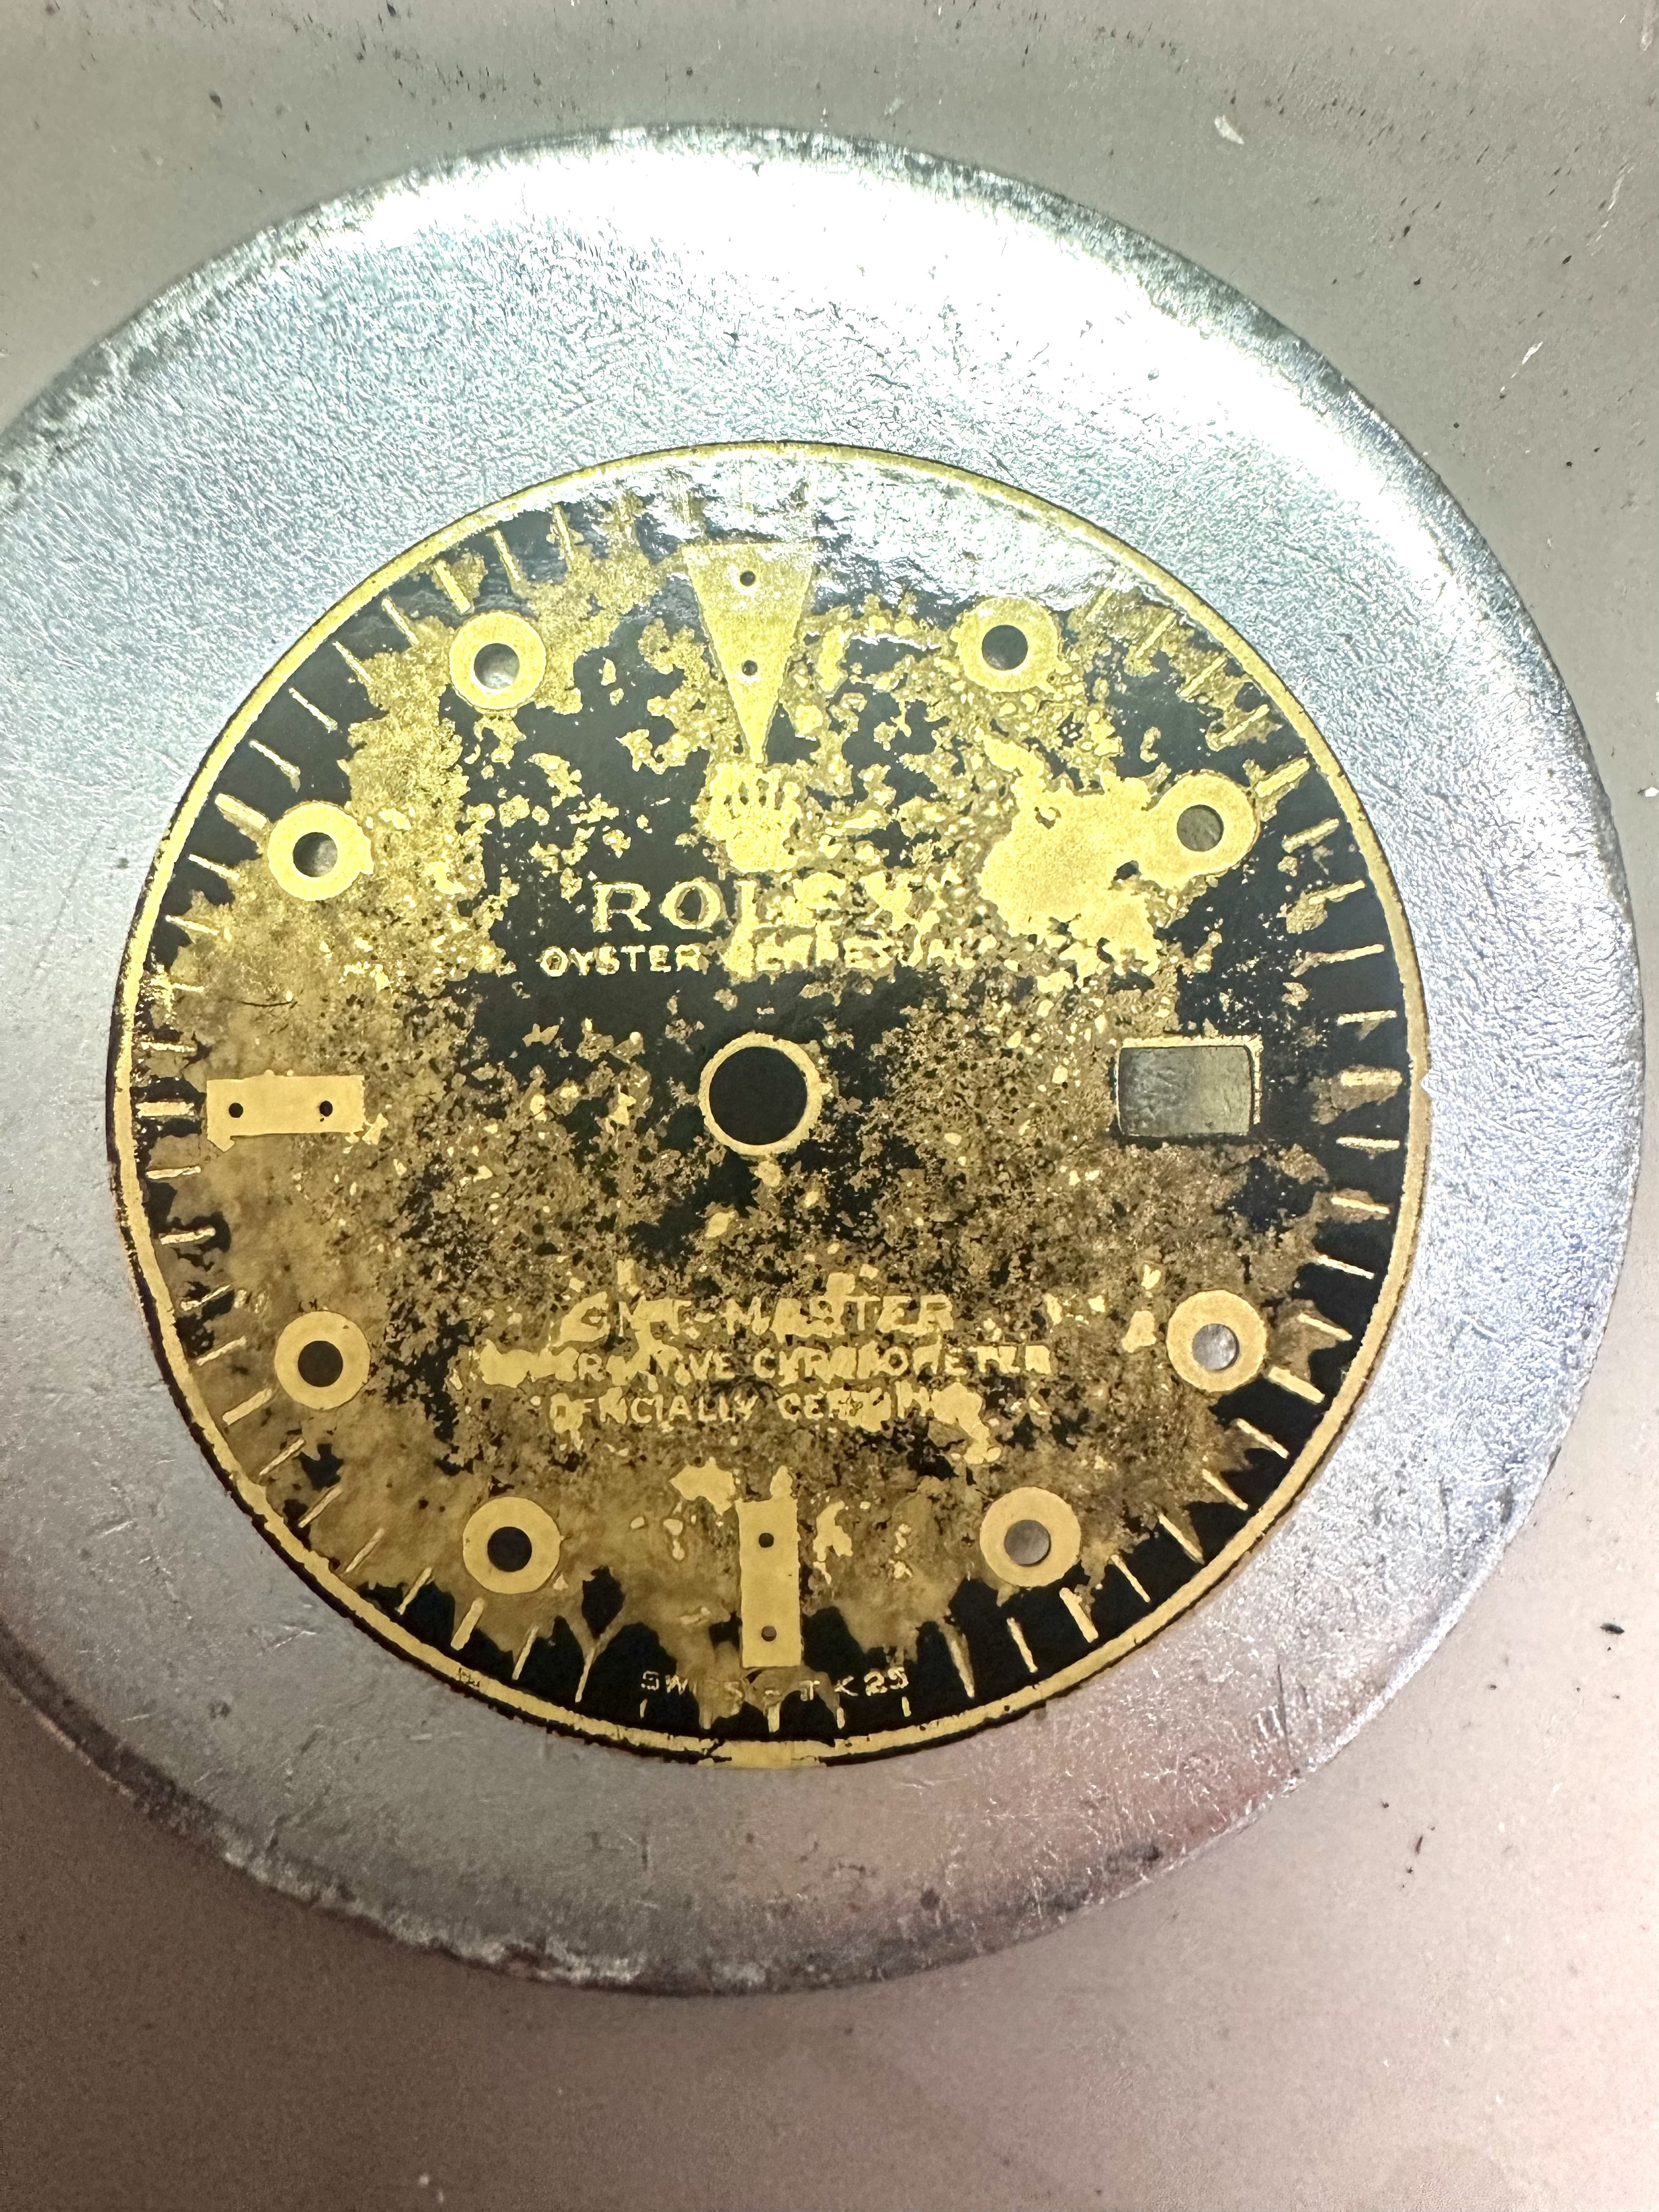
I am now a bit frustrated. Ok, my lume doesen't look perfect - but that is not the point. After two thin layer of lacquer (Nitrocellulose) the dial is getting darker. Especially the shiny gold from the brass gets into brown. I haven't had that by using acryl lacquer. It is something that comes with the Nitrocellulose.I tried it again!
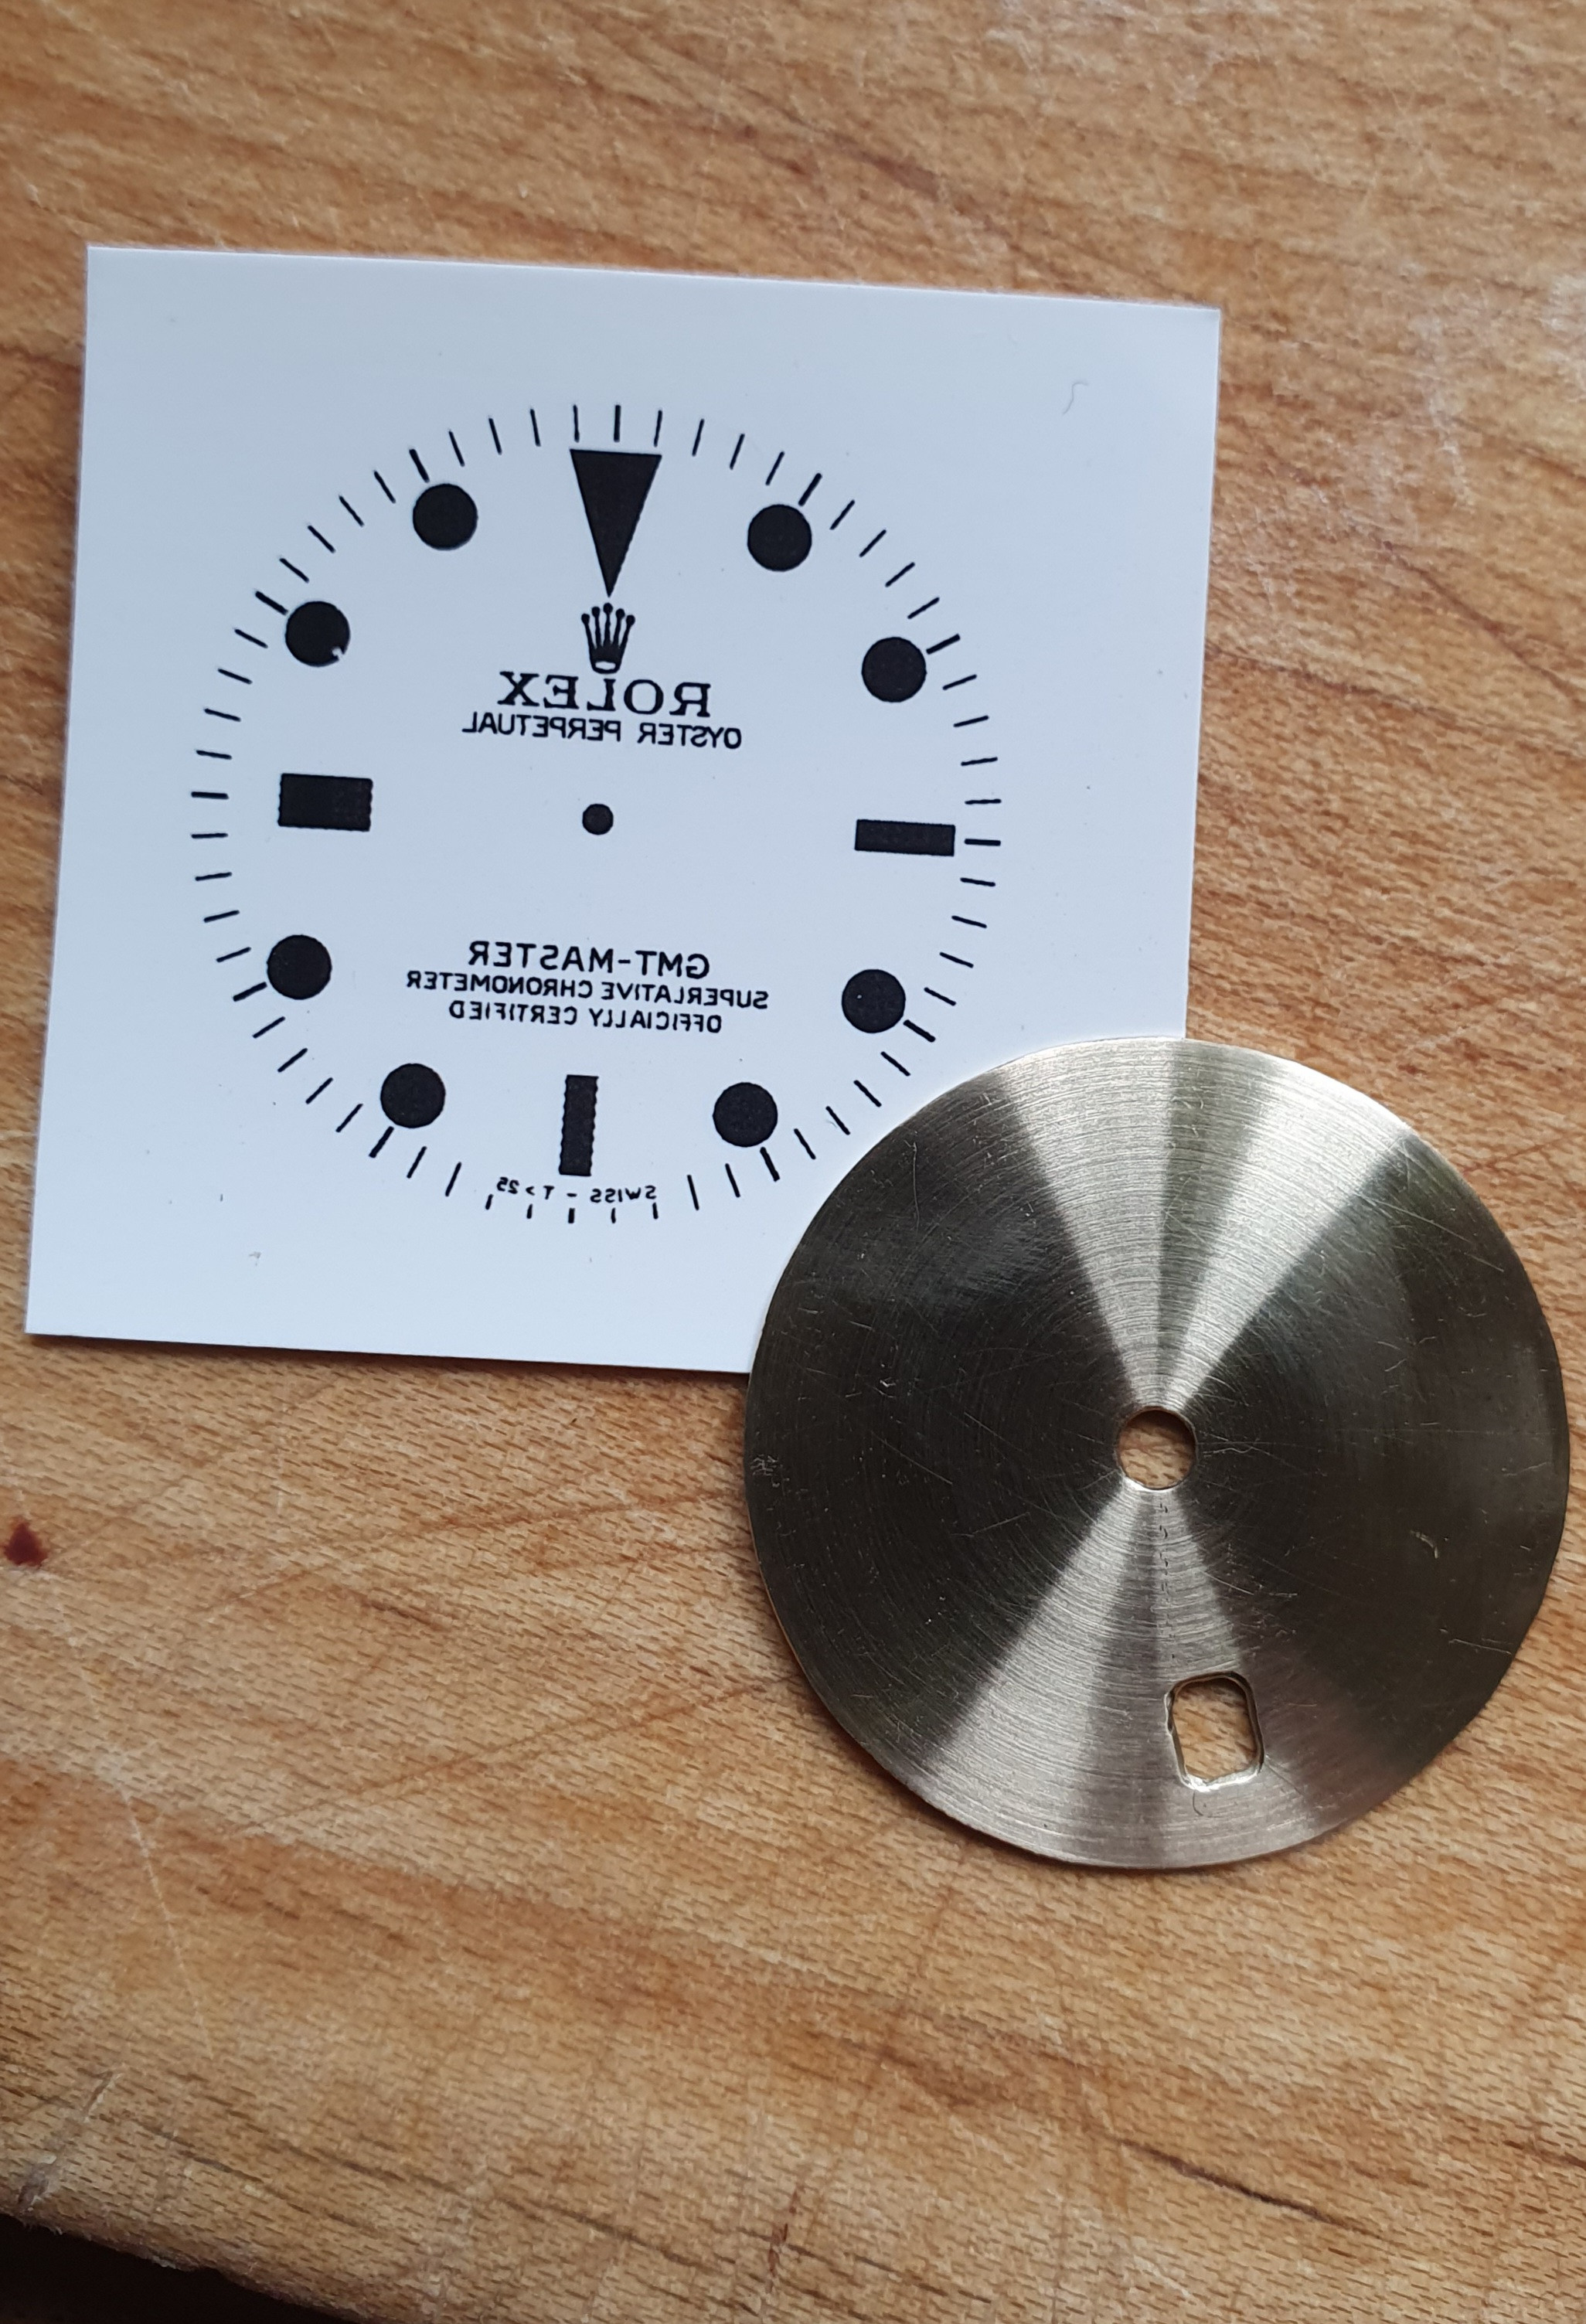
The last attempt from @WatchN3RD at the decal thread give me the motivation to try again a dial based on the toner transfer - blacked method. I will write all my learning to this thread. Maybe it helps someone.
Printer driver
In the past month, I learned a lot about my printer. Especially that I have to use a different driver to optimize the result. So if you have a Mac and like to print decals or to the toner transfer, don't use the default Air Printer from Apple. Search for the factory driver and use it. You will get a lot more options to get a better result.
Correct DPI settings
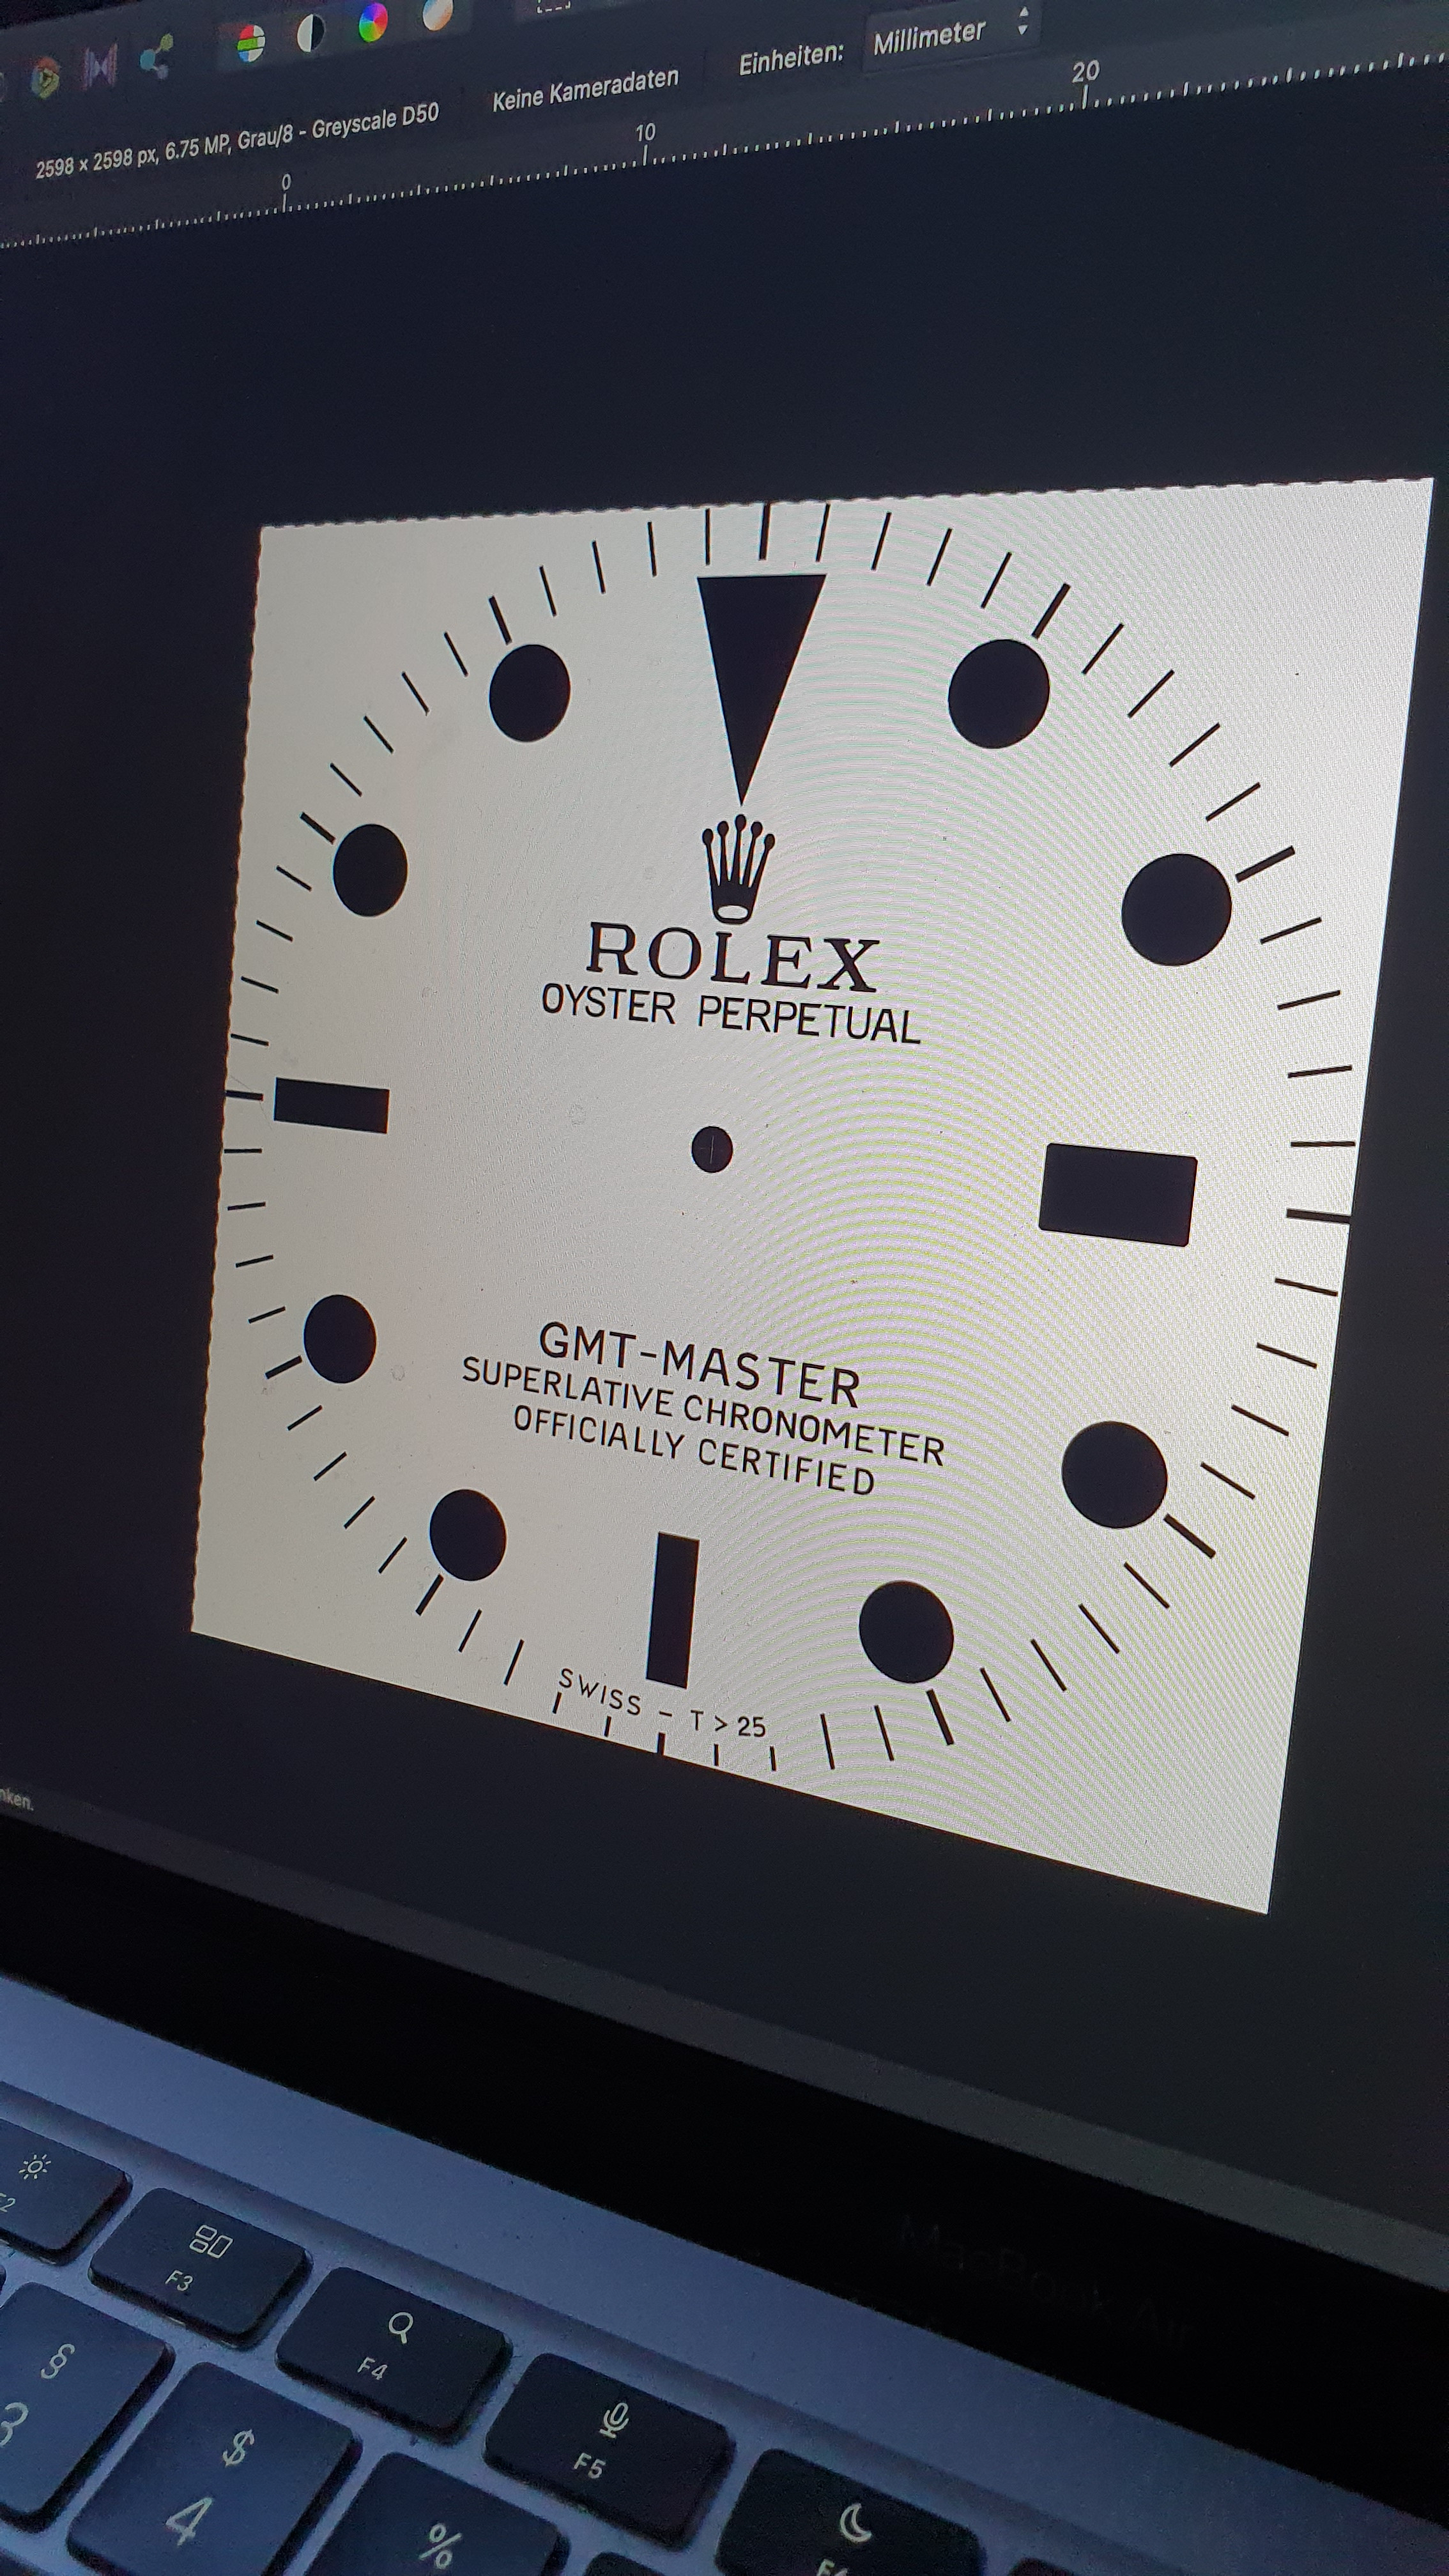
DPI is a number that shows the grade of your printer. The common DPI of a laser printer is 300 x 300 dpi. This is not enough for our dials. You better use a printer with 1200 x 1200 dpi. Mine has, 2400 x 600 dpi. That is for sure not the best. To get the best out of your printer, you need an image with the same resolution. In the past, I thought I can use a vector image for the best result, but I learned that my software is not printing as it should. So I created I TIFF file with the same resolution (dpi) as my printer (in my case 2400 x 2400) and use the common image program to print. A lot of people write they have problems to print with illustrator and use Photoshop. I am using Affinity Designer to create the image and Affinity Photo to create a Tiff out of my vector file.
Use Font instead of Vector files
In the past, I used photos from the original watches and rebuild the dial in Affinity Designer. One Problem was that the small fonts doesn't look sharp. This time I started us a font and redesign the dial. Finding the correct font is nearly impossible. You can find similar fonts and reshape single letters. Well this is very time consuming, and maybe the learning with the less optimization. So better you skip this ;-)
Toner Transfer
I use this Sunnyscopa Decal Transfer stuff and clearly use the description to get a good result. The most important part is to get rid of bubbles. I always use gloves.
Blacken
I used a bath of Ballistol Nerofor 3 times for 1-3 minutes each step. After step 1 and 2 I rub gently the dial under fresh water with my hand (wearing gloves). Just to get rid of the top layer of slag. At the last step, I just let the water run over the dial without wiping the surface by hand. Then I put die dial into the heater (180°C) for 10 minutes.
Using Nitrocellulose as clear coat
After removing the toner transfer with Acton and try the dial, I use Nitrocellulose. I just tried it once but with a good result. It is sufficient to apply a thin layer.
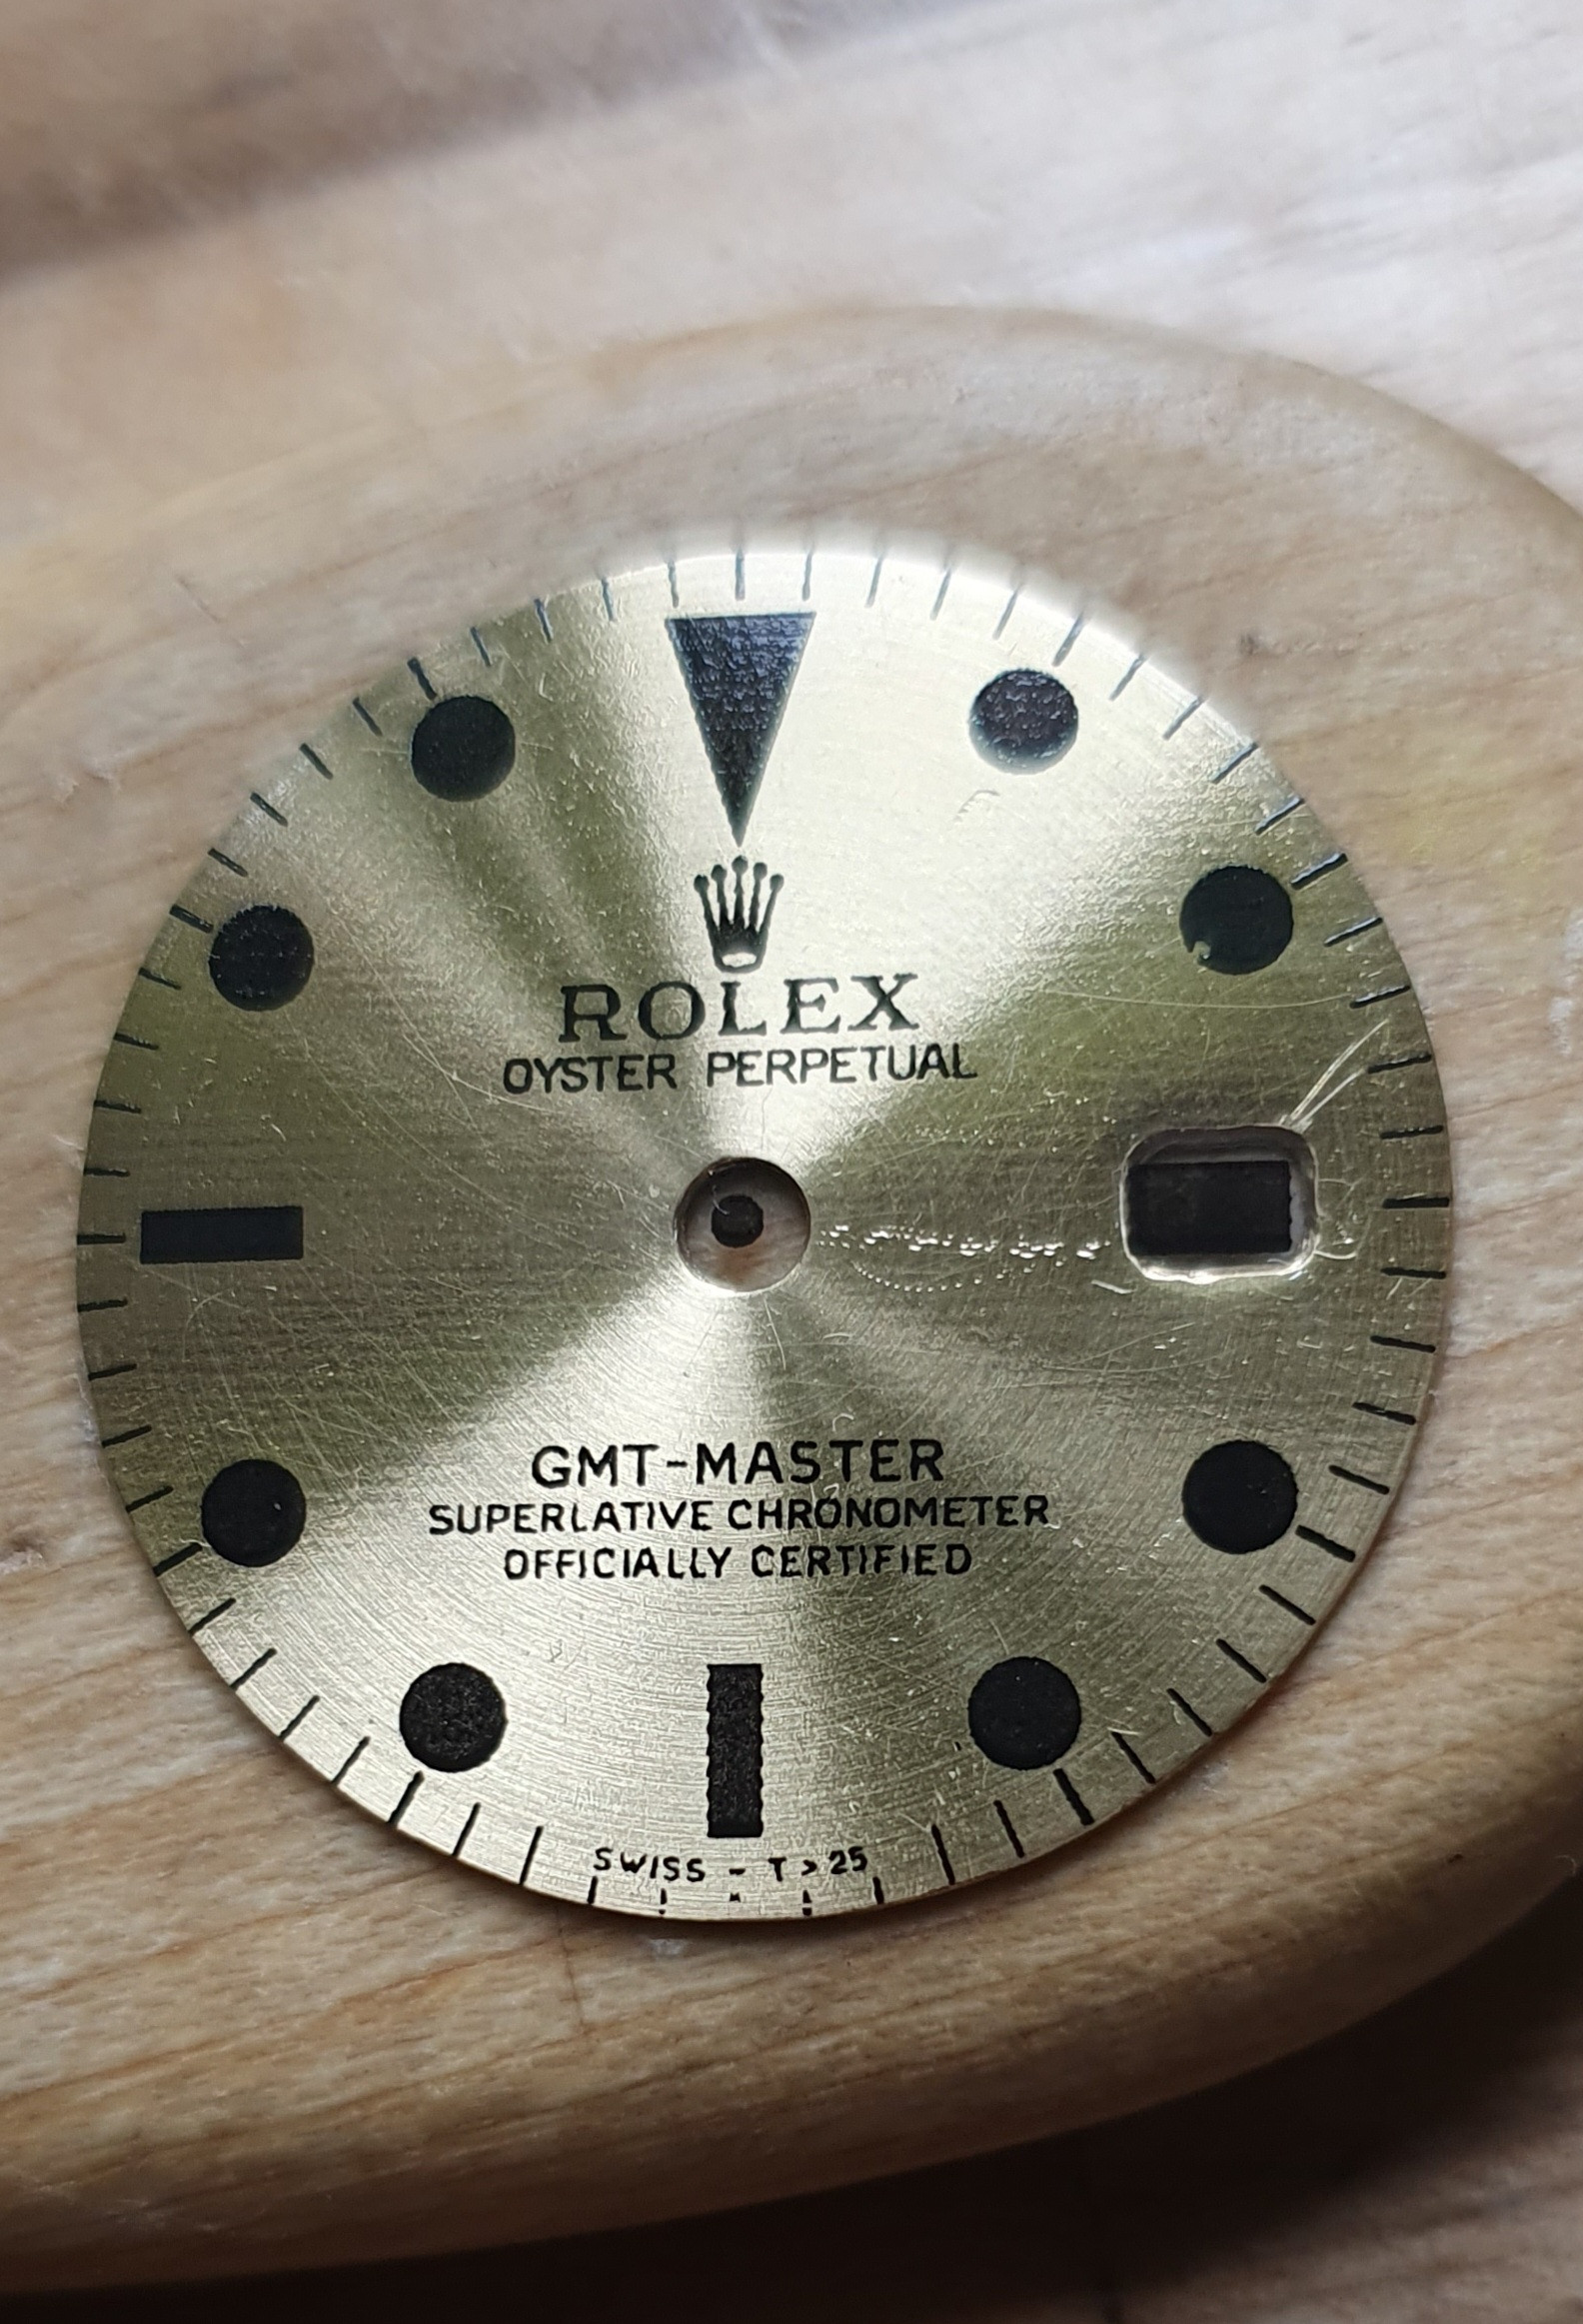

Also if you take a close look to the crown there are some dark points. Looks like a oxidisation or the laquer loses from the base.

If you look to the pictures of gilt dials at the internet. The typo looks more white instead of gold. Do you know the reason why or how we can copy this?
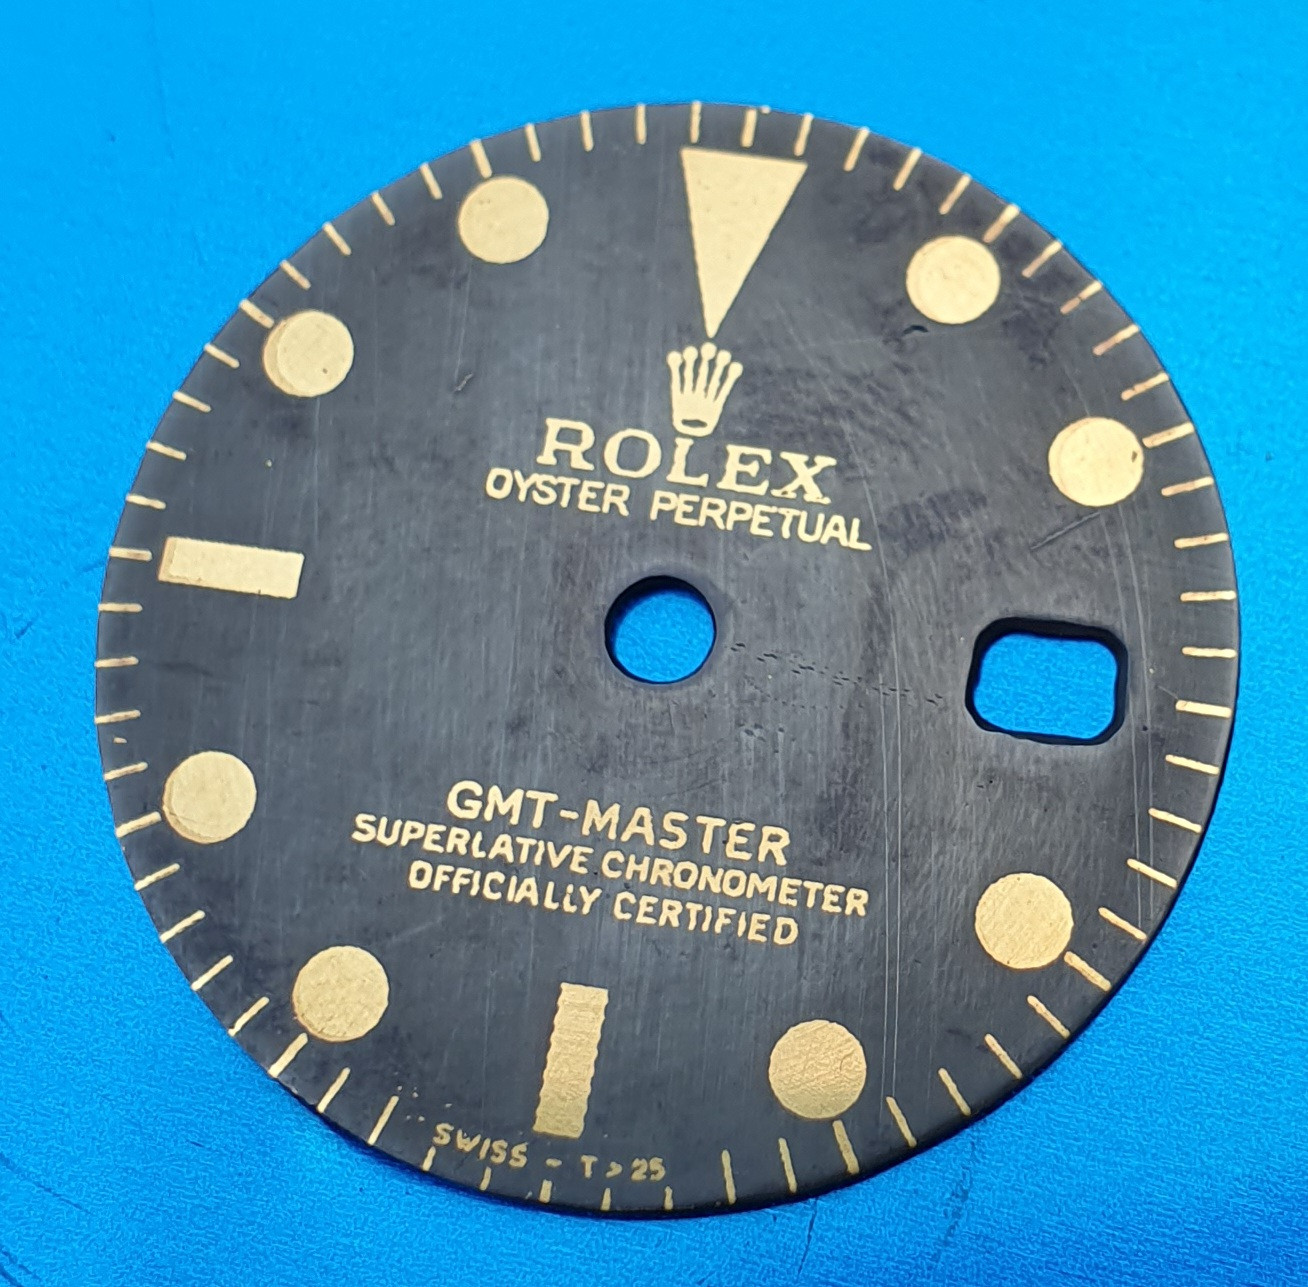
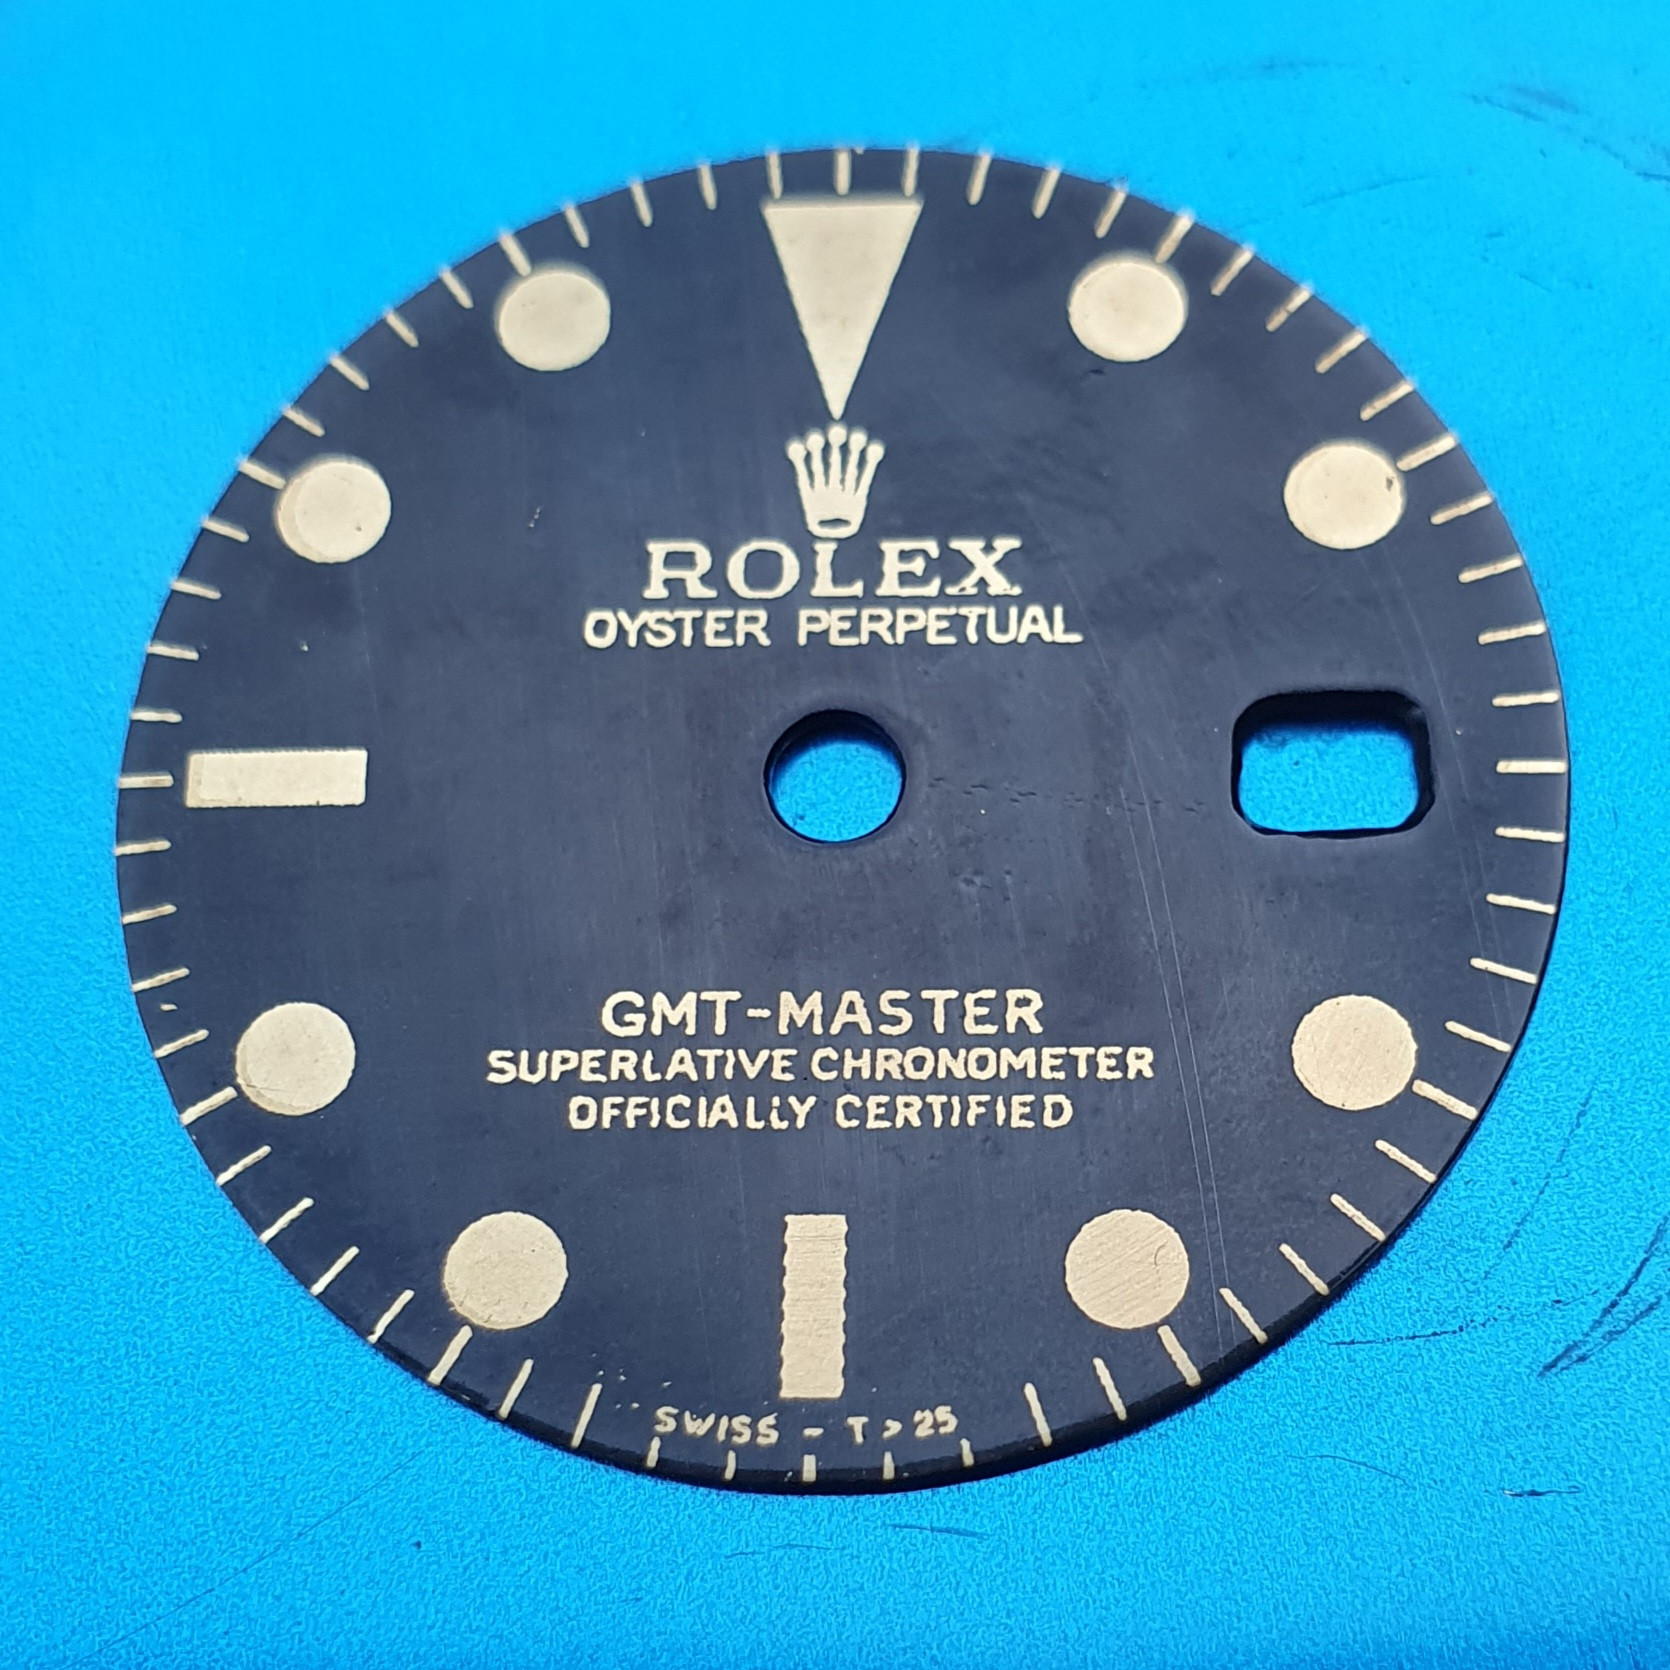
Gen dial 1675 Type C (Source: https://gmtmaster1675.com/)
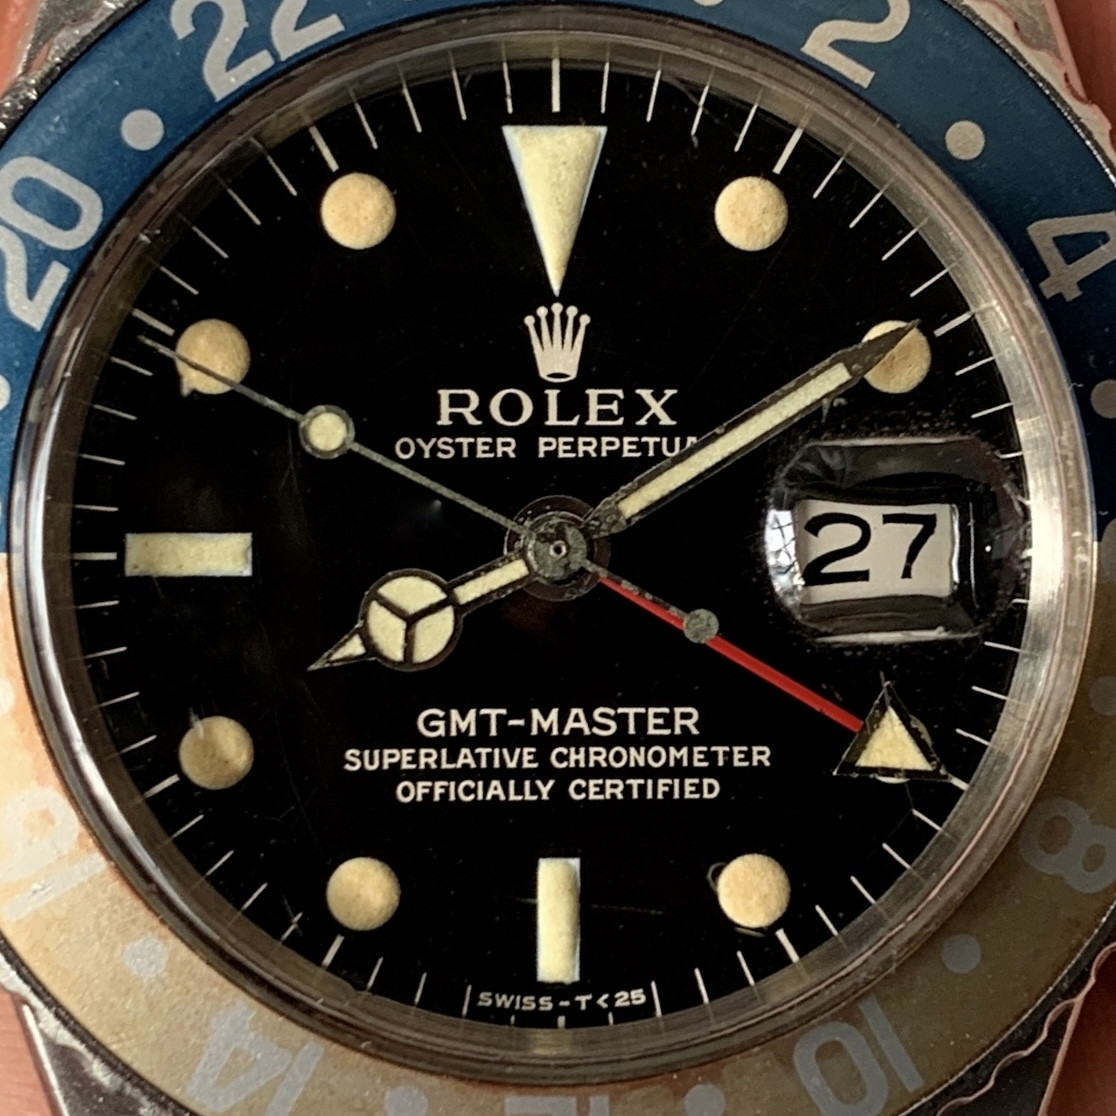
If you look to the pictures of gilt dials at the internet. The typo looks more white instead of gold. Do you know the reason why or how we can copy this?
At what step did you tried the lighten the dial with hydrogen peroxide? After or bevor the blacken?On a positive note, concentrated lime juice works well for getting the brass a bright, bright yellow. It's pretty simple since you can just add hydrogen peroxide to strengthen or water to weaken. Very hard to mess something up.
@matzemedia i haven’t found nitro to change the color of the brass at all. I’m using 3M.
For the one I used lime juice on, I started with a dial that was completely black. I then used toner so only the text was exposed and used concentrated lime juice turn the black text yellow. Unfortunately, the black coating was very thin and began to flake off.At what step did you tried the lighten the dial with hydrogen peroxide? After or bevor the blacken?
Doing it with your method, you would have to use the lime juice concentrate before you black. Not sure it would help if your clear is etching the surface though. You probably need a new lacquer or new thinner or both. Some clears cause that to happen so you may need a different brand.
I'm pretty sure that's why they sell lacquers that are made specifically for guilding and metal coating. It takes the guesswork out of buying one that might cause a stronger chemical reaction and change the color.
Last edited: