• Tired of adverts on RWI? - Subscribe by clicking HERE and PMing Trailboss for instructions and they will magically go away!

Decal printed dial

OverFukos

Looking Around
8/2/22
2
1
3
Hello,

First of all, thank you for this incredible tread! I learned a lot from it, this hobby is great haha


I have a problem with the tread: I bought this Seiko Aftermarket dial, and I'd like to remove the Comex logo without removing the black paint layer underneath, do you have any ideas on how to do this?

3SvLDD.jpeg


Thanks to all 1
 

rangan

Renowned Member
8/4/12
724
146
43
Hello,

First of all, thank you for this incredible tread! I learned a lot from it, this hobby is great haha


I have a problem with the tread: I bought this Seiko Aftermarket dial, and I'd like to remove the Comex logo without removing the black paint layer underneath, do you have any ideas on how to do this?

3SvLDD.jpeg


Thanks to all 1
Ruin the dial for sure , very difficult operation , easier to reprint it
 

WatchN3RD

Active Member
24/7/18
219
216
43
Such an amazing thread. It's too bad so many photos are no longer there. Is there a general consensus on:
1) what decal paper is best?
2) what lacquer/varnish is best?
3) extra tips or tricks for the best results?

I'm having decent results with a thin decal paper and Micro Set. I tried using Koala decal paper and it's like using parchment paper or aluminum foil for me. Stay away from Koala!!!
 

jamiex

Active Member
25/7/09
216
96
28
Yorkshire
Such an amazing thread. It's too bad so many photos are no longer there. Is there a general consensus on:
1) what decal paper is best?
2) what lacquer/varnish is best?
3) extra tips or tricks for the best results?

I'm having decent results with a thin decal paper and Micro Set. I tried using Koala decal paper and it's like using parchment paper or aluminum foil for me. Stay away from Koala!!!
For decal paper I think the general cosensus is this stuff.


For laquer I think any will do, I've used car laquer before and as far as tips are concerned you want to have a chat with @manodeoro .

Hope this helps.
 
  • Like
Reactions: WatchN3RD

bigtiddygothgf

Active Member
7/10/18
303
137
43
Such an amazing thread. It's too bad so many photos are no longer there. Is there a general consensus on:
1) what decal paper is best?
2) what lacquer/varnish is best?
3) extra tips or tricks for the best results?

I'm having decent results with a thin decal paper and Micro Set. I tried using Koala decal paper and it's like using parchment paper or aluminum foil for me. Stay away from Koala!!!
From what i understand nitrocellulose lacquer will age/discolor/break down over the years similar to the real thing. Some people suggest that it might be what they used back in the day.
 

jamiex

Active Member
25/7/09
216
96
28
Yorkshire
From what i understand nitrocellulose lacquer will age/discolor/break down over the years similar to the real thing. Some people suggest that it might be what they used back in the day.
The early versions used nitrocellulose but by the time they were making the final four line version with the red triangle and hashed insert they were using acrylic laquer which is why those versions have aged much better.
 

Fpicabia

You're Saying I Can Sell?
21/1/17
41
35
18
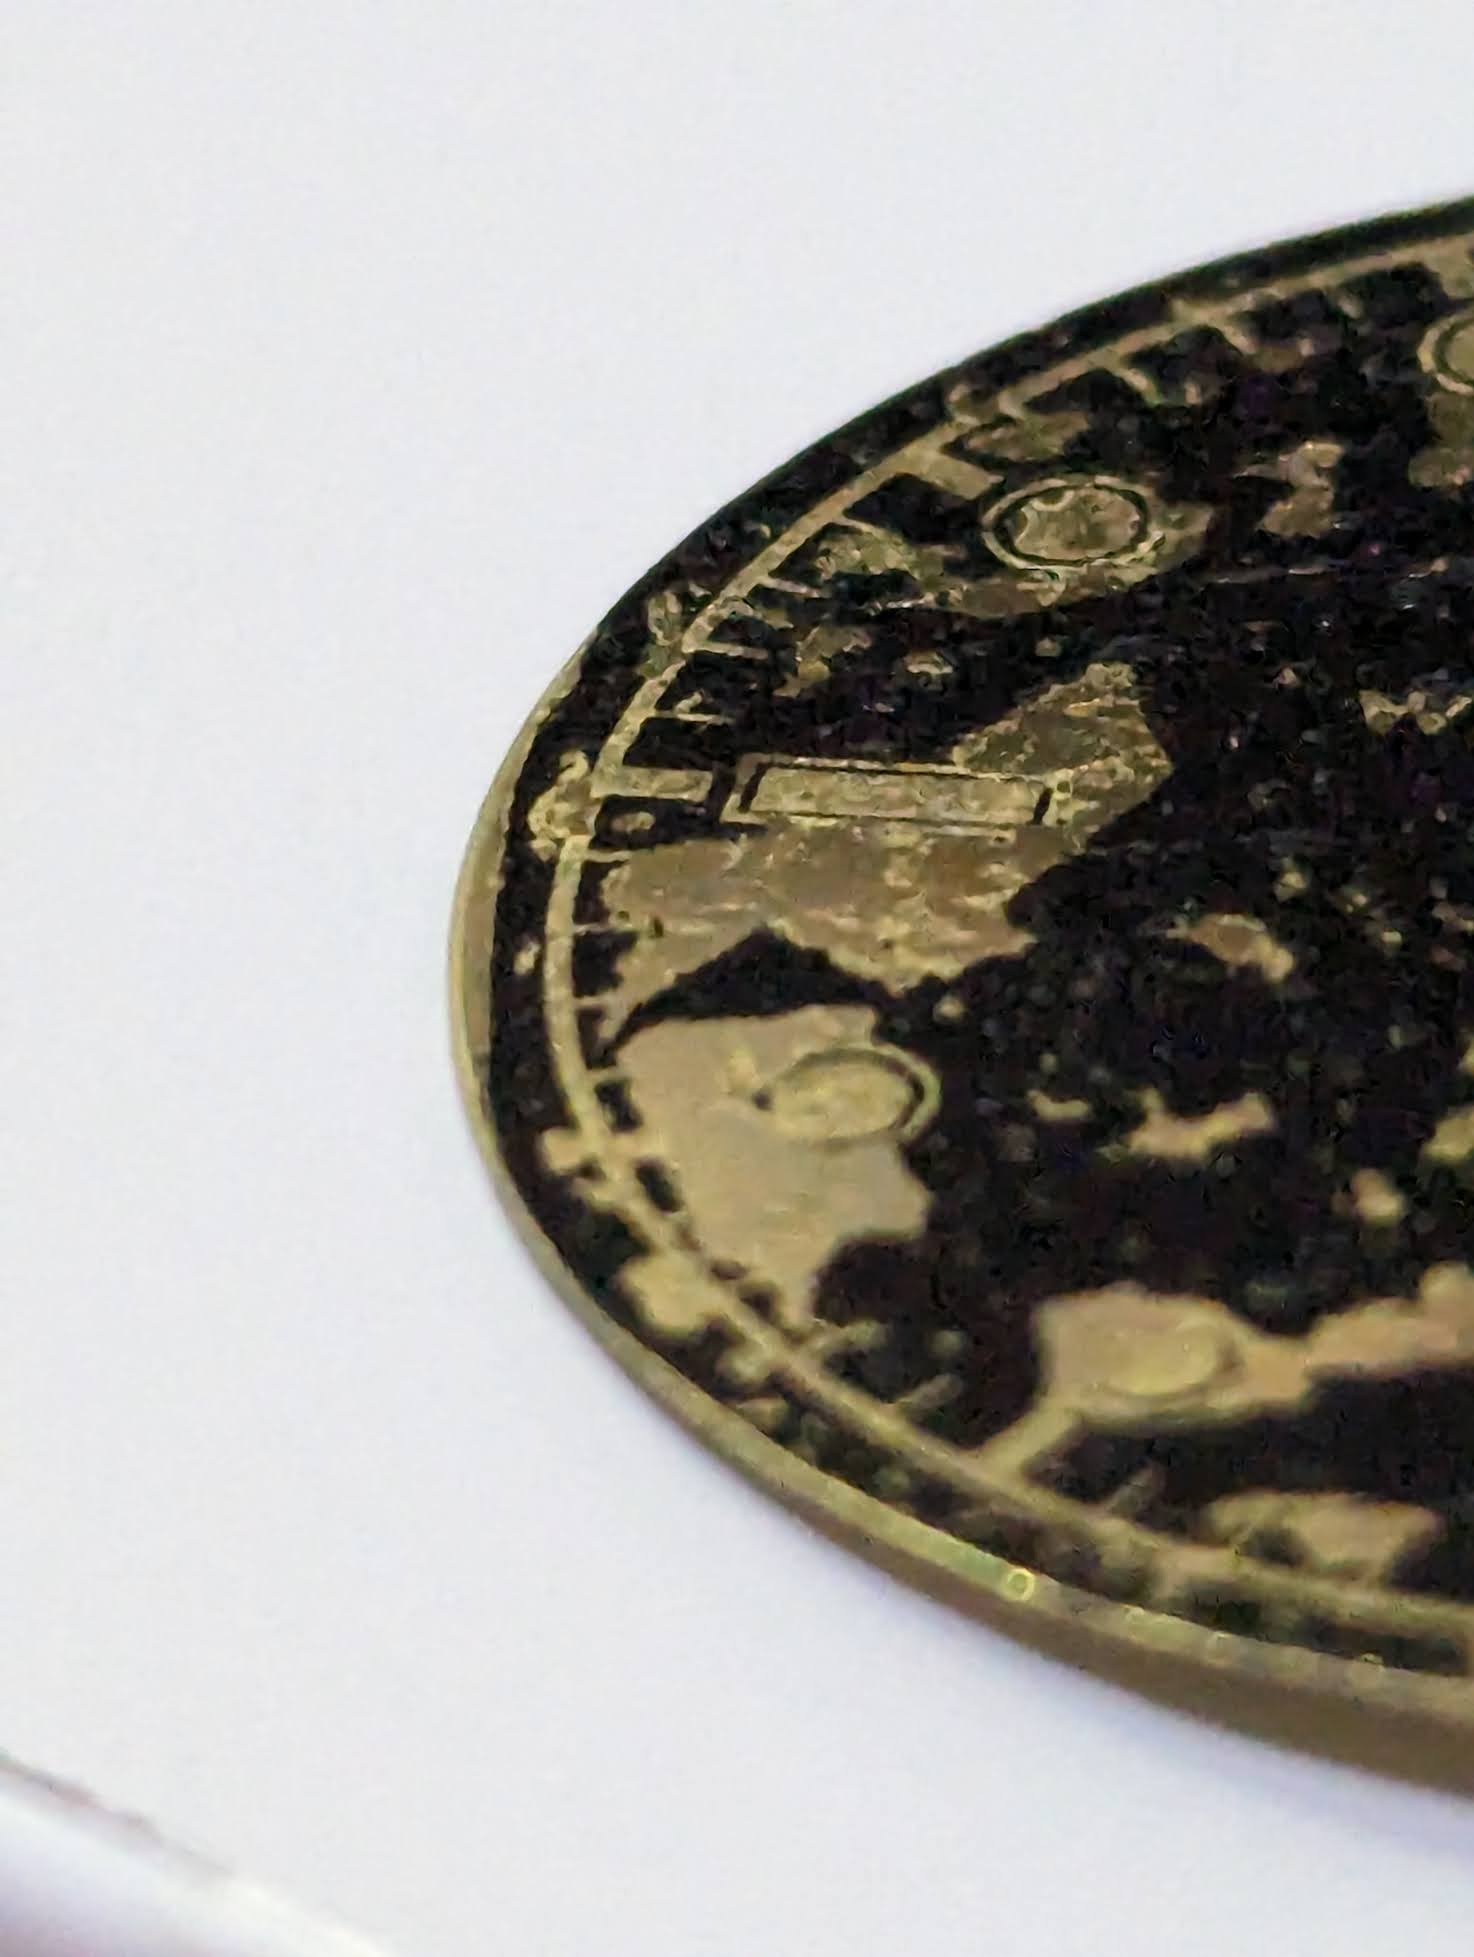
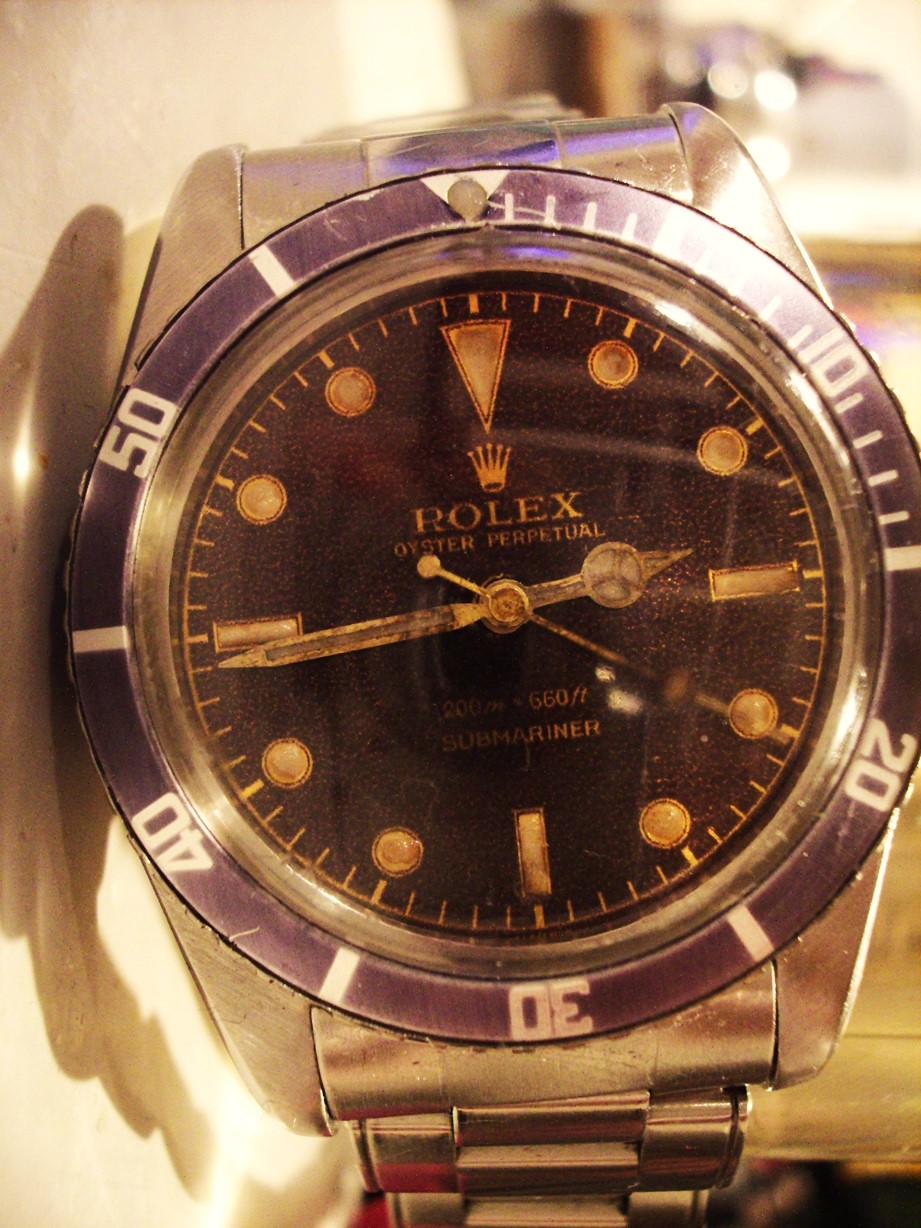
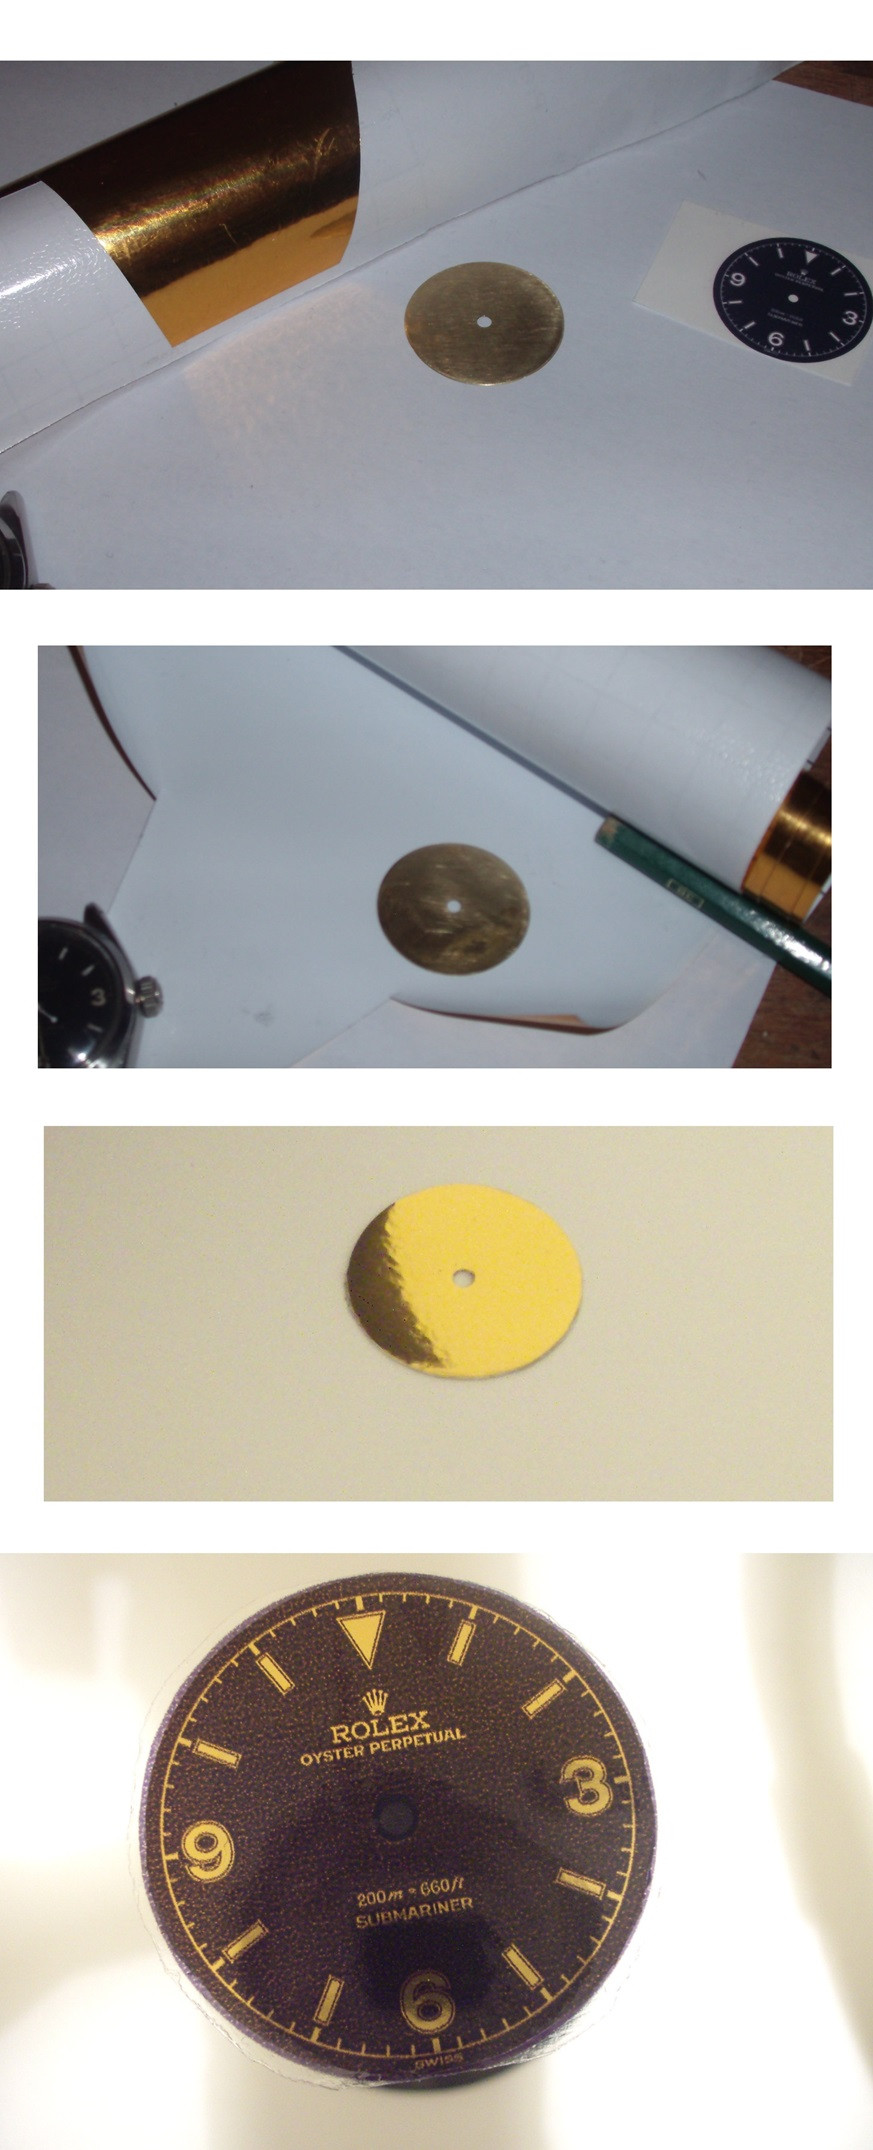
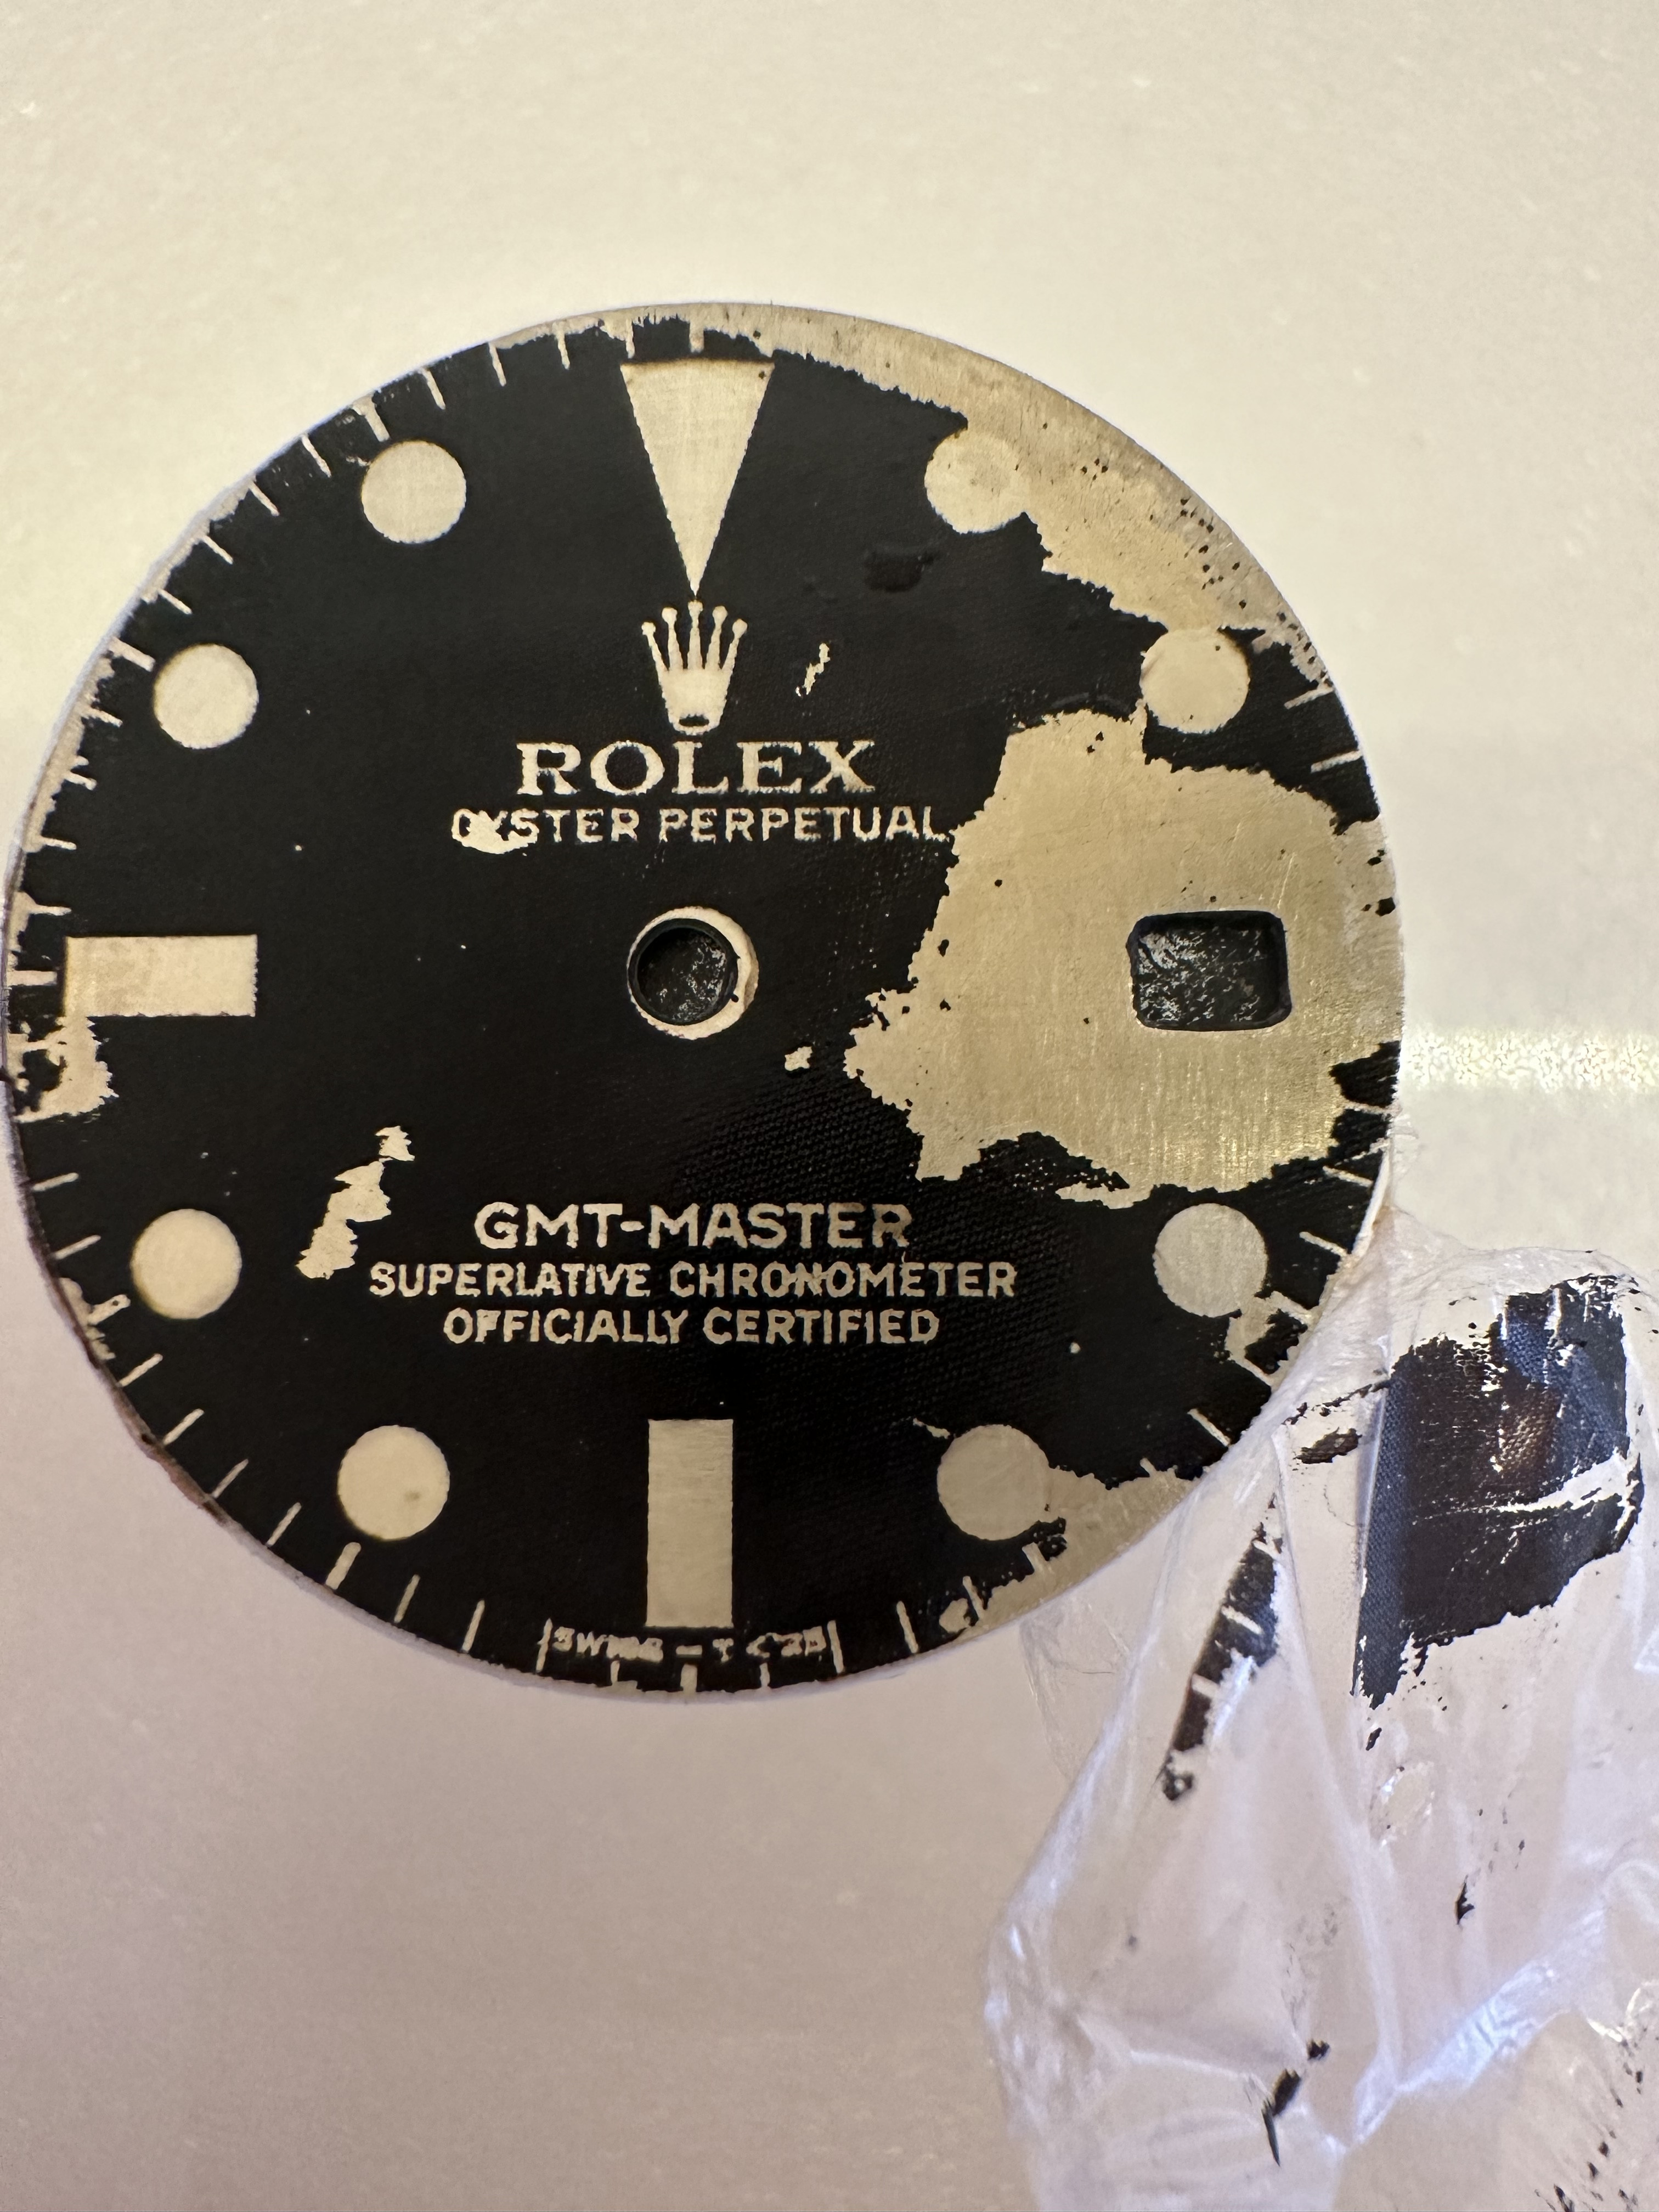
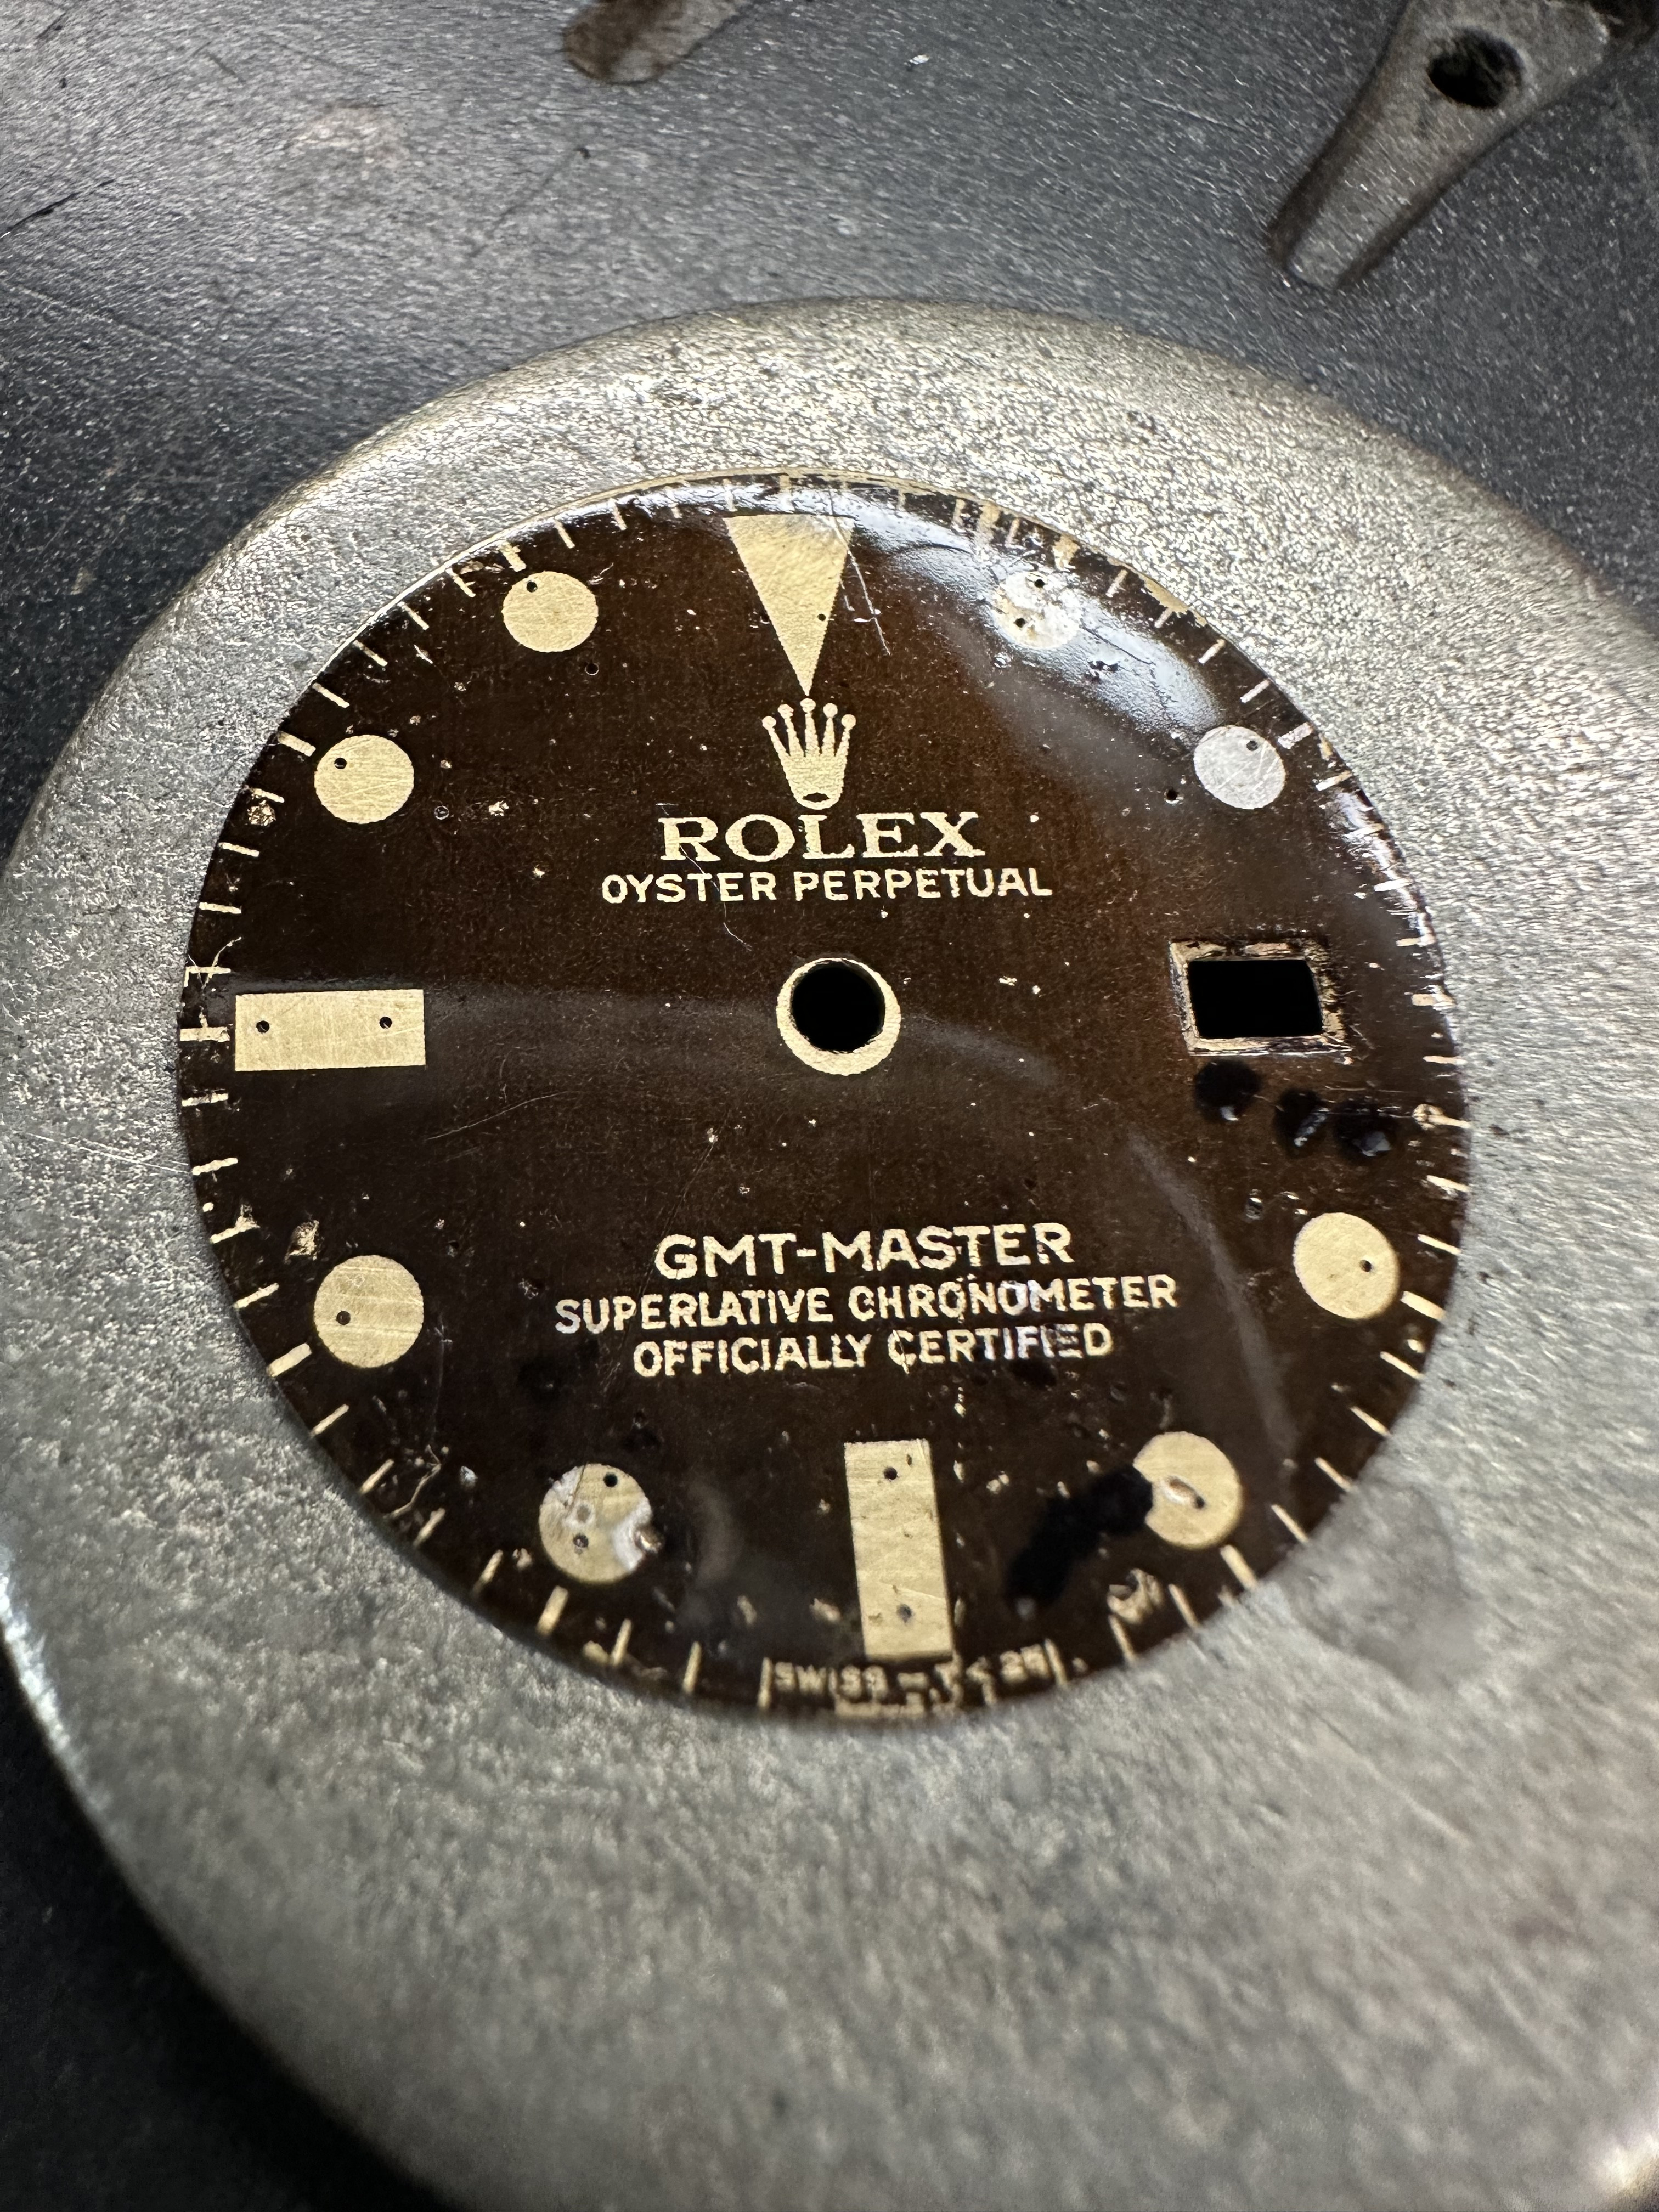
Re- Spider dials. I think I saw someone on this thread wanting to figure this out and I'm not sure if someone has posted either this basic idea or a better one.

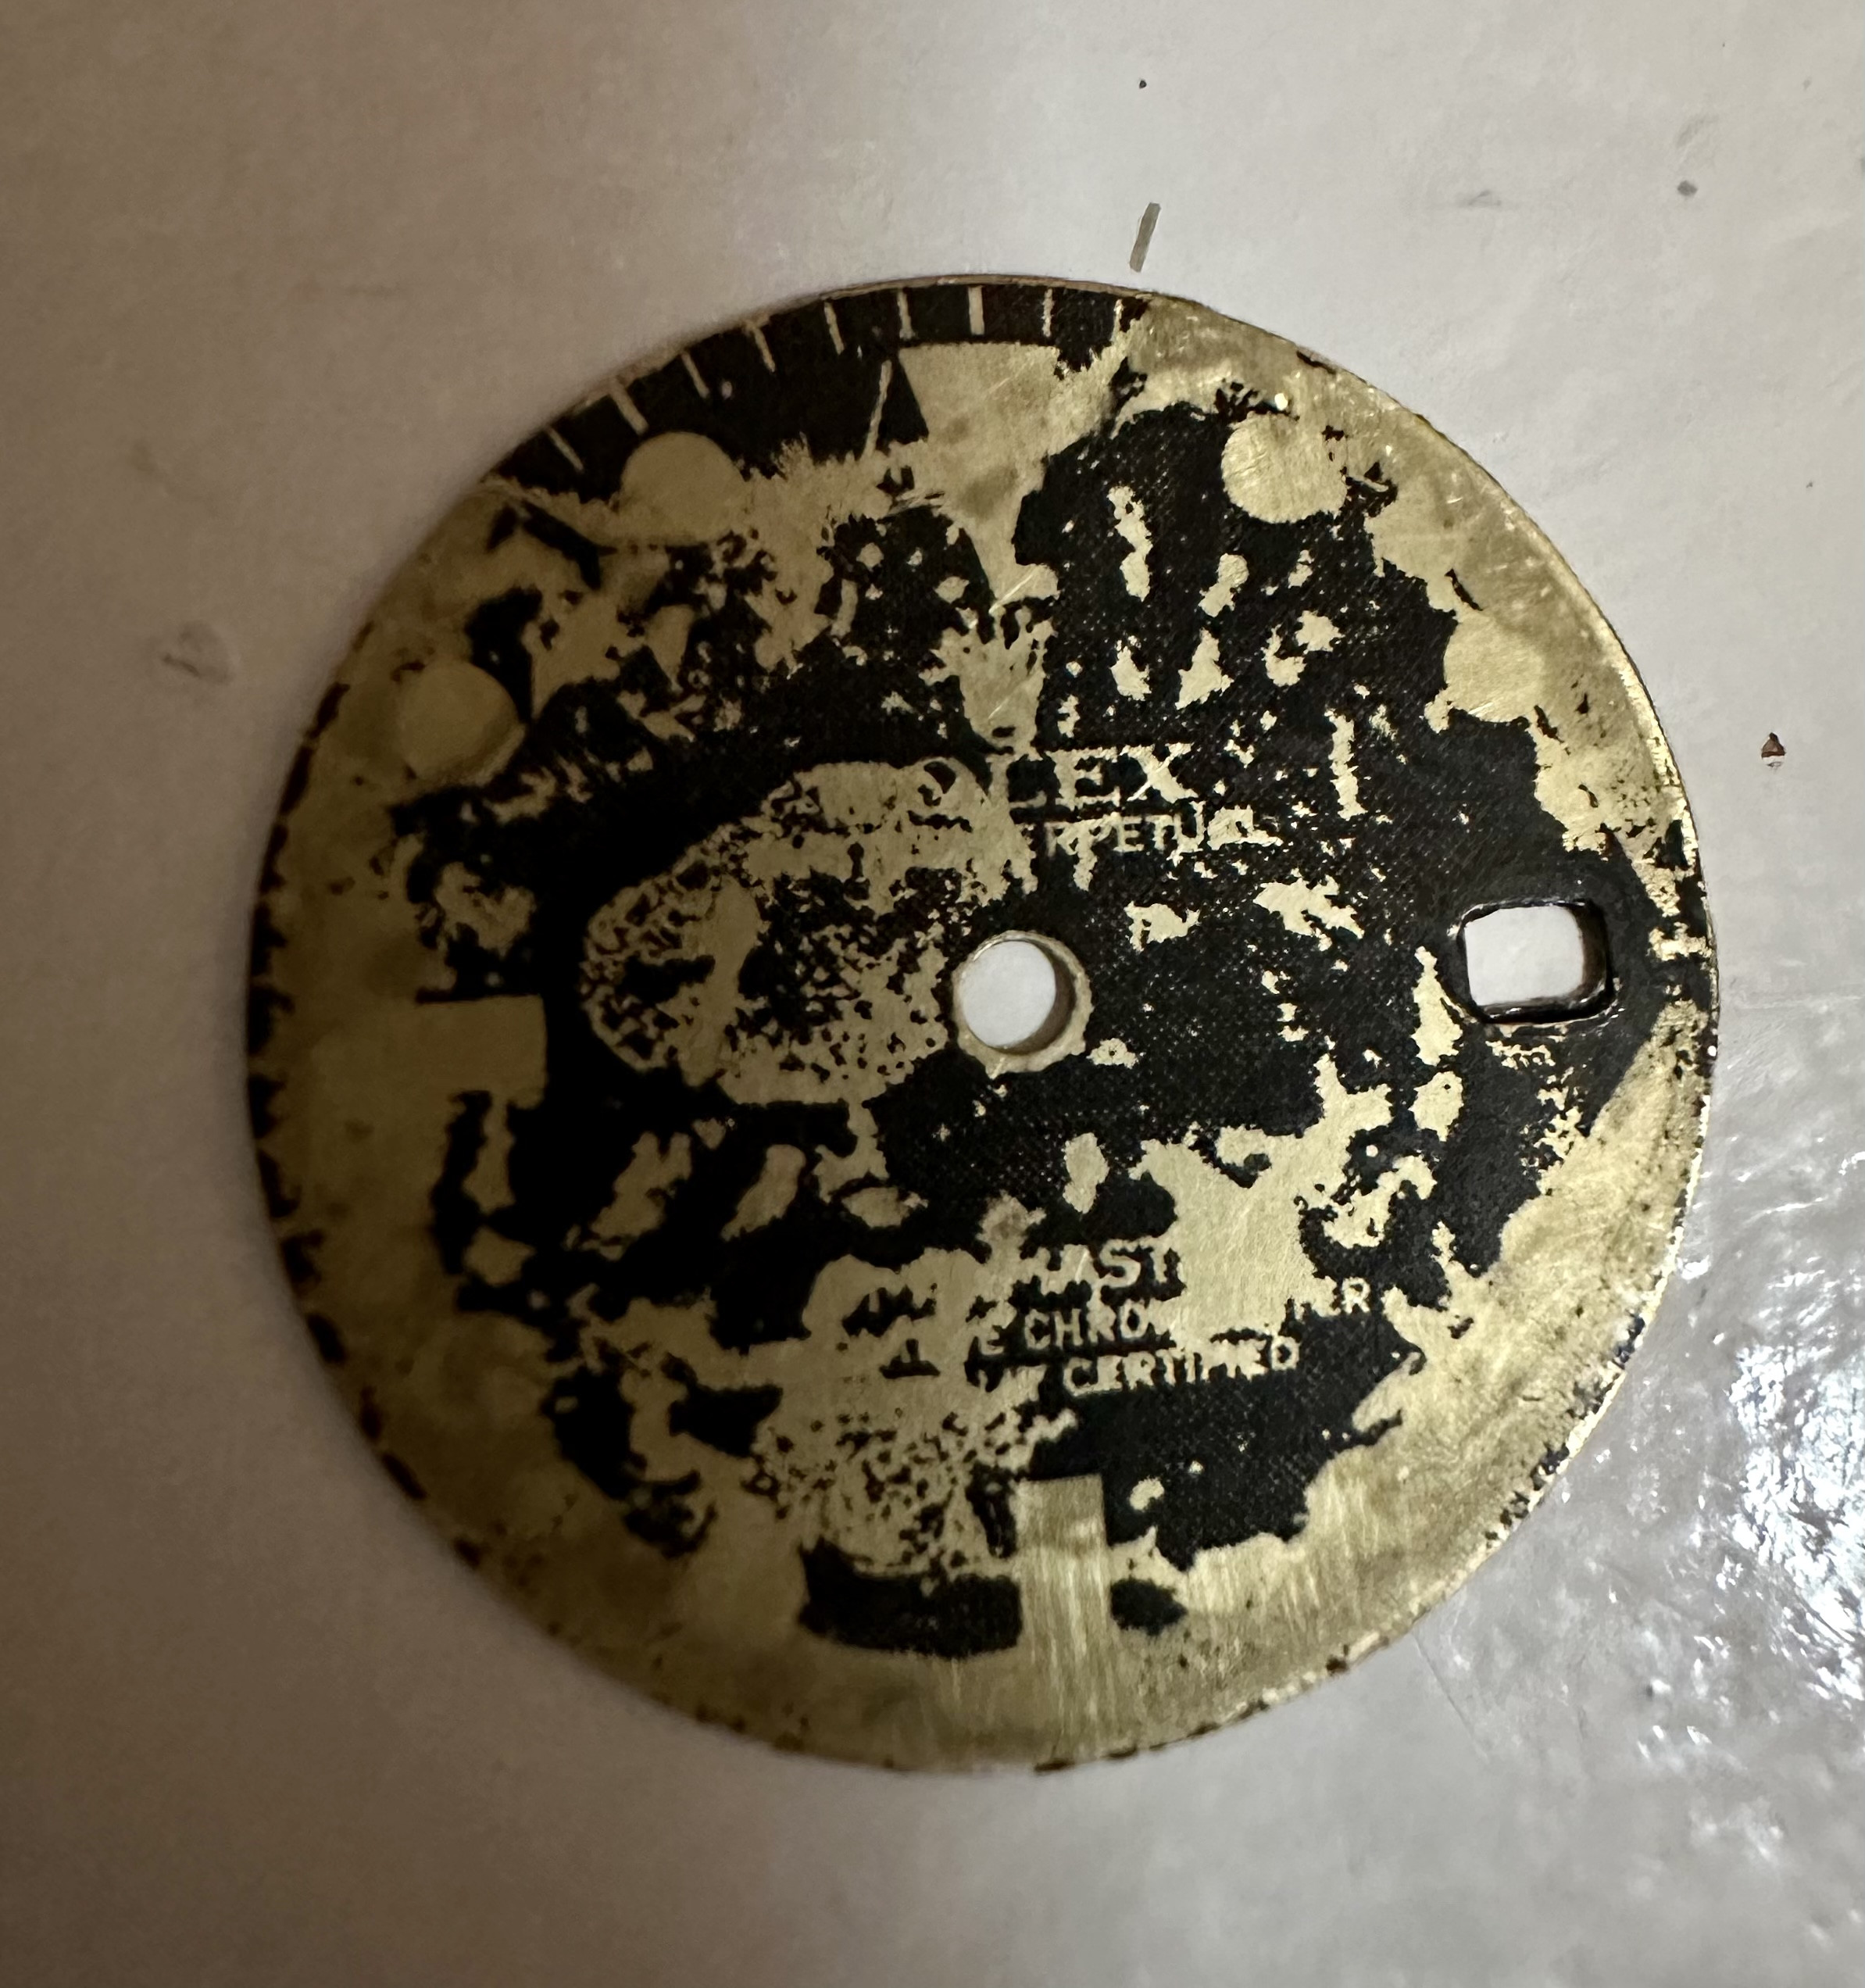
After going through 20, 30 pages in this thread, I though I should share a trick I learned years ago to make paint crack upon curing. I haven't seen this mentioned yet so here goes.
I learned this while working in the film/theater business with scenic painters.

When I say paint, I mean both color and clear finishes. All paints and finishes shrink as the thinner of the paint evaporates.
While I've never tried this on watch dials, the technique "should" work.

-Source 2 types of paint. One that dries faster than the other.
-Apply the slower drying paint first and let it cure a bit.
-Apply the faster curing paint on top and let both cure.
-As the 2 differing paints cure at different rates, the top coat shrinks first and causes random cracking.

Disclaimer and further clarification-
I would use this technique building and painting film sets that were supposed to look old, battered and worn, such as moldings and doors, etc. Apply an oil based paint as a base coat and top a coat of acrylic. As they both dry at there respective cure rates, the acrylic shrinks and cracks, sometimes exposing the base layer.

With all this said, any base paint layer that dries slower than lacquer should cause the lacquer to crack. "Should" being the operative word here. Hopefully this info might inspire some experimentation.
Thank you all the great research and development.
 

bigtiddygothgf

Active Member
7/10/18
303
137
43
Recently got a laser printer so decided to give decal dials another shot. Pretty happy with the resolution/sharpness of the print but my first attempt ended up looking like this:
HFaZ4D.png


I'm using the Sunnyscopa film free paper with their W1 glue as recommended. This happened after pulling the dial out of the oven and carefully peeling back the film. Is this a result of too quick of a drying time/temperature? Not enough glue? In the meantime I'll keep experimenting but if anyone has encountered this and figured out how to avoid it please let me know! For reference my drying time was in 325F oven for 5min.

There also appears to be adhesive or something of that nature left over on the bare negative exposed brass parts too. Is this unavoidable? Does it even matter after a glossy clearcoat is applied?


Thanks in advance!
 

manodeoro

Section Moderator
Supporter
Section Moderator
Certified
13/10/16
3,830
2,148
113
Recently got a laser printer so decided to give decal dials another shot. Pretty happy with the resolution/sharpness of the print but my first attempt ended up looking like this:
HFaZ4D.png


I'm using the Sunnyscopa film free paper with their W1 glue as recommended. This happened after pulling the dial out of the oven and carefully peeling back the film. Is this a result of too quick of a drying time/temperature? Not enough glue? In the meantime I'll keep experimenting but if anyone has encountered this and figured out how to avoid it please let me know! For reference my drying time was in 325F oven for 5min.

There also appears to be adhesive or something of that nature left over on the bare negative exposed brass parts too. Is this unavoidable? Does it even matter after a glossy clearcoat is applied?


Thanks in advance!

Maybe a problem while preparing the bare dials ... you can try sanding the dial plate abit more, polish it with copper polish compound then rub it with acetone to remove any adhesive or grease on it, wash it with demineralized water and dry them thorougly
 
  • Like
Reactions: bigtiddygothgf

bigtiddygothgf

Active Member
7/10/18
303
137
43
Maybe a problem while preparing the bare dials ... you can try sanding the dial plate abit more, polish it with copper polish compound then rub it with acetone to remove any adhesive or grease on it, wash it with demineralized water and dry them thorougly
The plate was already polished to a mirror shine, but Ill need to try acetone degreasing next try, thanks for the tip. I dont think I did any sort of proper cleaning on the first attempt, just a wipe down with a microfiber cloth.

I'm guessing acetone will also strip off the toner and bring the plate back to bare metal right?
 

manodeoro

Section Moderator
Supporter
Section Moderator
Certified
13/10/16
3,830
2,148
113
The plate was already polished to a mirror shine, but Ill need to try acetone degreasing next try, thanks for the tip. I dont think I did any sort of proper cleaning on the first attempt, just a wipe down with a microfiber cloth.

I'm guessing acetone will also strip off the toner and bring the plate back to bare metal right?

YES it will do ;) I often use it ...print/erase/reprint/etc until I get the result I want.
When you polish the dial the compound leaves some "grease" on it so acetone + demineralized water is helpfull to get it really clean and degreased.
 
  • Like
Reactions: bigtiddygothgf

janneau

You're Saying I Can Sell?
18/1/22
61
111
33
I decided to try overlaying the bare dial with gold vinyl wrap to see if that would work as a base.
The gold vinyl has more of a red tint to it than the bare polished brass (not that you can see it in the photo from my lousy camera)
The finish was better than the gold leaf and the rattle can gold I've tried as a base before and the decal paper adhered to the vinyl better than the bare brass.

 
  • Like
Reactions: Hec and 369mafia

chrome72

Renowned Member
7/12/17
515
422
63
Houston TX Baby
I decided to try overlaying the bare dial with gold vinyl wrap to see if that would work as a base.
The gold vinyl has more of a red tint to it than the bare polished brass (not that you can see it in the photo from my lousy camera)
The finish was better than the gold leaf and the rattle can gold I've tried as a base before and the decal paper adhered to the vinyl better than the bare brass.

I applaud your continued tinkering.
 
  • Like
Reactions: janneau

WatchN3RD

Active Member
24/7/18
219
216
43
Recently got a laser printer so decided to give decal dials another shot. Pretty happy with the resolution/sharpness of the print but my first attempt ended up looking like this:
HFaZ4D.png


I'm using the Sunnyscopa film free paper with their W1 glue as recommended. This happened after pulling the dial out of the oven and carefully peeling back the film. Is this a result of too quick of a drying time/temperature? Not enough glue? In the meantime I'll keep experimenting but if anyone has encountered this and figured out how to avoid it please let me know! For reference my drying time was in 325F oven for 5min.

There also appears to be adhesive or something of that nature left over on the bare negative exposed brass parts too. Is this unavoidable? Does it even matter after a glossy clearcoat is applied?


Thanks in advance!
This is what I'm good at. Making it not work!

I've had the best results from gradually heating the dial from below and pressing out any potential air bubbles. Then, gradually increase the heat to hot as fuck. As hot as you can get it without the toner starting to boil and bubble.
 

dpd3672

Putting the "whore" in "horology" since 2023
Supporter
Certified
29/5/23
1,351
2,184
113
USA
I've been printing a LOT of decal dials the last few weeks. The best advice I can offer is that the prep and process are equally important.

The dial must be PERFECTLY clean and free of grease, dust, and contaminants.

And the process requires a lot of experimentation. I find that applying the decal and letting it dry for 30 minutes, then 30 minutes in the oven at 250F to set the decal. Remove the film when it's still hot and let cool.

Then rinse the glue with denatured alcohol gently, and bake at 350F for another 10-20 minutes.

After that, seal with matte or gloss enamel and let dry for at least a day.

After that, it's pretty tough and can tolerate some handling for lume.