• Tired of adverts on RWI? - Subscribe by clicking HERE and PMing Trailboss for instructions and they will magically go away!

The 1016: The Under Appreciated Thread

Action_Jensen

Known Member
20/4/21
161
252
63
sorry to come back on topic 😅
I have a question.

I think I read that some of you buy the sapphire crystal version of the Raffles case, as it's easier to take off ? Is that a thing?
When I removed the acrylic crystal on mine, it had been glued solid.
Yes, in the saphire version the crystal is not glued in, you can just pop it off, as it is held in place by just a gasket. I have a saphire and an acrylic case here and the tollerances seem to be much tighter on the saphire for a tighter fit of a t21 or t22. Bezzel work still has to be done as per usua though ;-)
 

Karbon74

Pika Factory
Patron
Certified
5/5/23
10,261
20,007
113
EU - Kalos Region
Yes, in the saphire version the crystal is not glued in, you can just pop it off, as it is held in place by just a gasket. I have a saphire and an acrylic case here and the tollerances seem to be much tighter on the saphire for a tighter fit of a t21 or t22. Bezzel work still has to be done as per usua though ;-)
thanks. on the acrylic version the T22 fit well, and I used a bezel from @1016 lover
It was a tight fit and a bit of stress while using the press, but no need for any bezel rework
 
  • Like
Reactions: Iksander

dpd3672

Putting the "whore" in "horology" since 2023
Patron
Certified
29/5/23
1,742
2,851
113
USA
wow! what an achievement :) Im sure you had a lot of other things on your mond as wel but i find the shots of the night sky particularly imperessive... gives me some perspective.
Yes, extreme altitude, thin air, and zero light or other pollution for hundreds of miles in each direction made for some breathtaking night skies. It was beautiful there, but the skies at night were an amazing surprise.
 

369mafia

Resident Explorer Expert
Patron
Certified
7/7/15
3,561
6,382
113
Canada


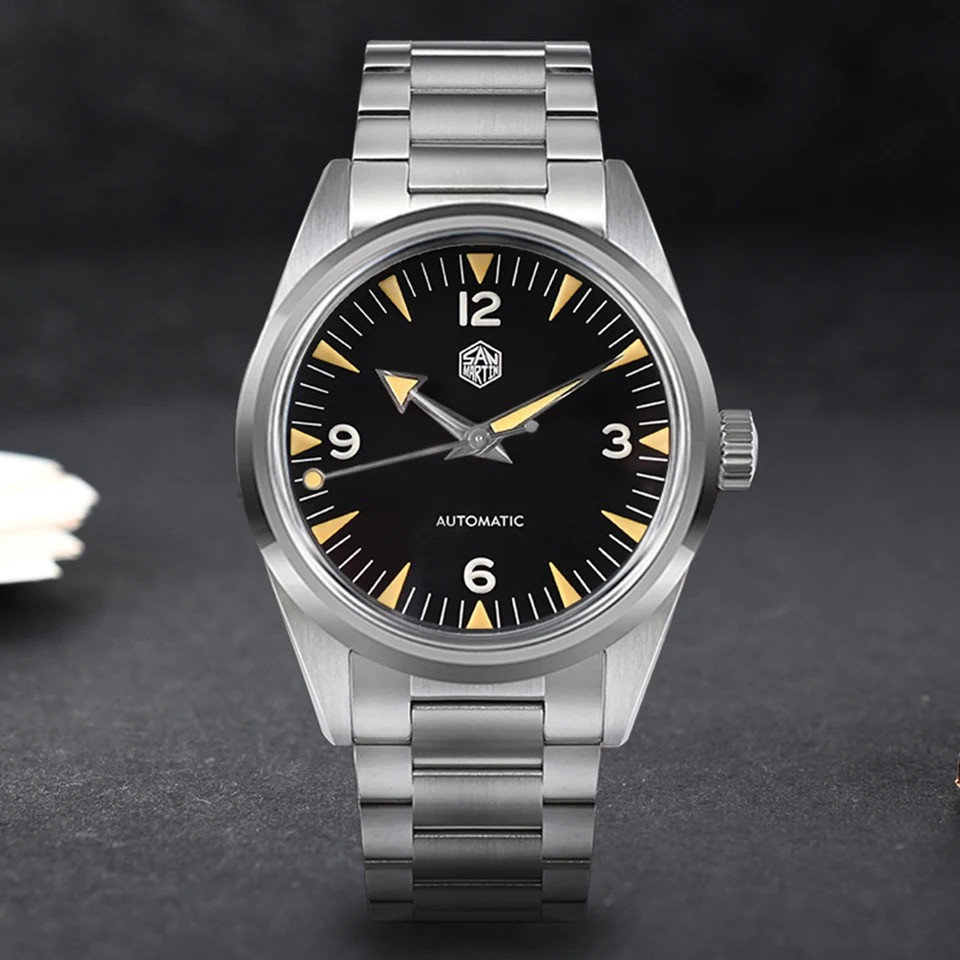
San Martin SN0113

not a 36 but a 38
modern...but I think there is potential here

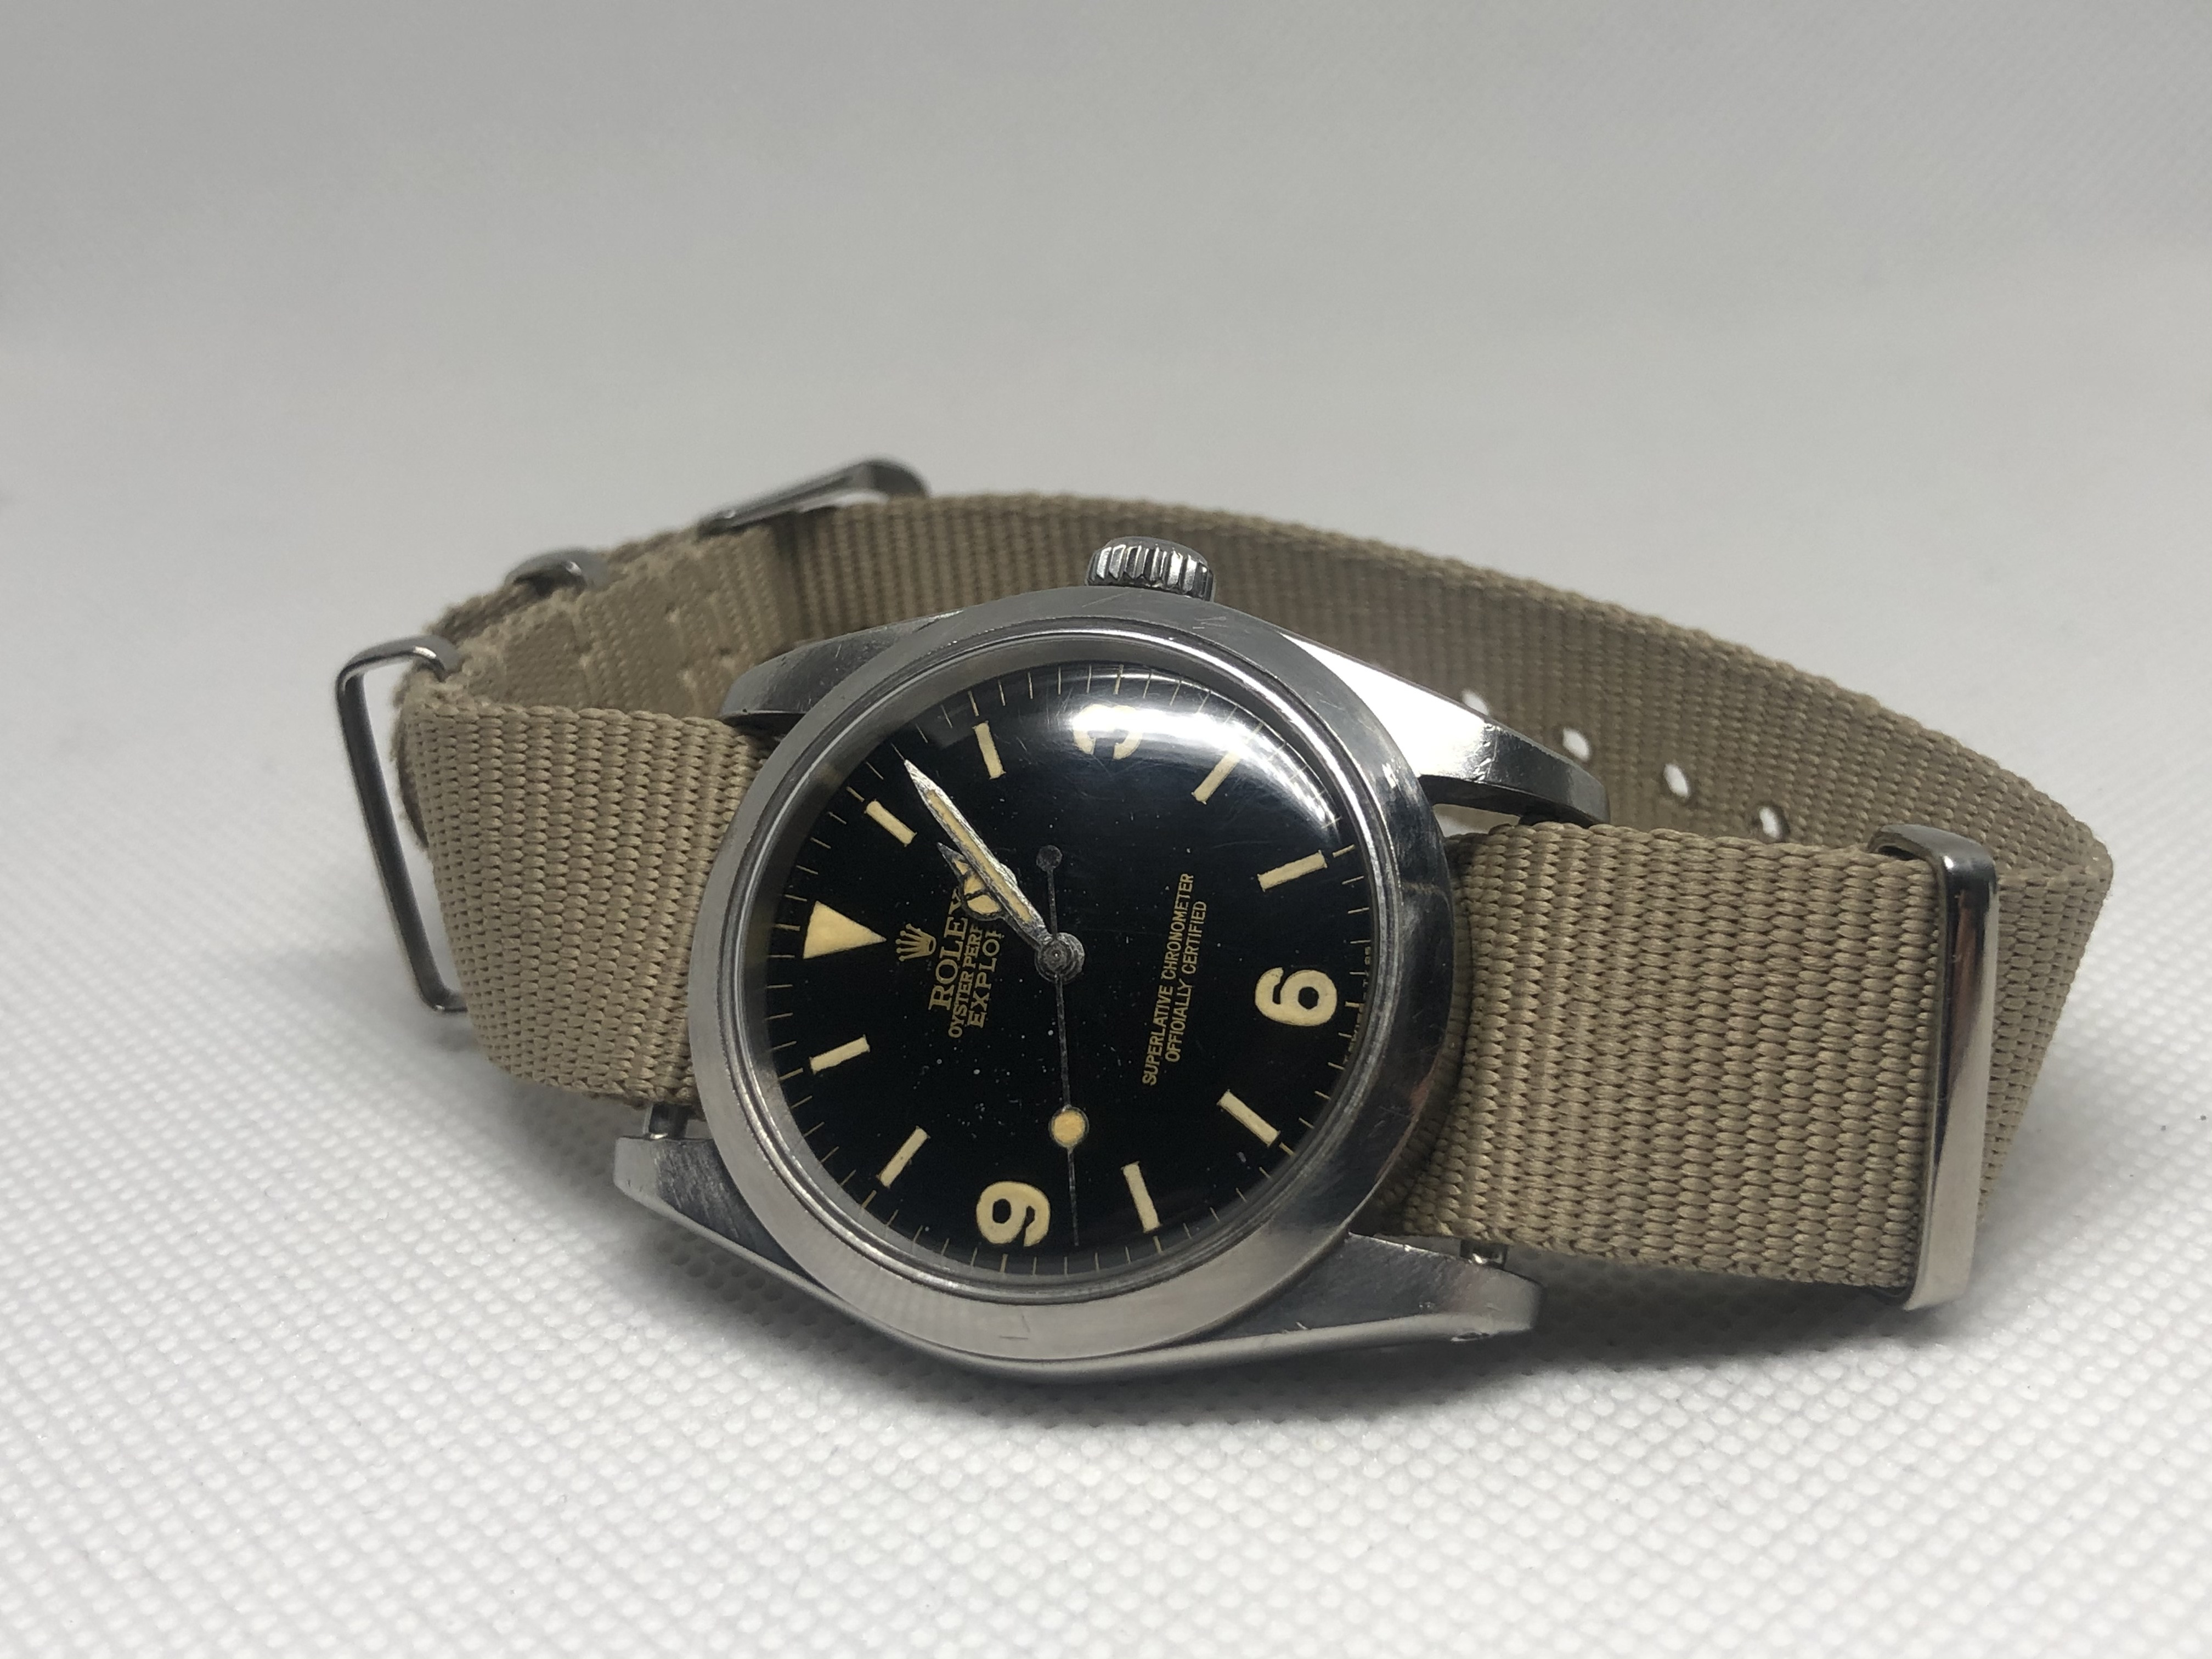
The railmaster dial would be pretty easy to make I think using a fimless decal . relatively speaking , the lume work will be the trick . once someone traces the dial out into a file. this is a viable project and I myself would sign up for one.


my estimate on the price of the case was just a guess. The milgauss case was 1400 and its similar in build, with faraday cage and all. so the omega case may be less. but who knows. mq does not give anything away, its all top dollar parts
 

1016 lover

Active Member
4/10/22
490
823
93
if the SN was 36mm I would have already bought it. Ever since I wore that 1016, after getting used to it, I find it's the perfect size for me.
I think the original watch IS 38mm, but work with saphire case is spécial, rehaut and dial position in case not match plexy thing
 

HSV726

Known Member
Supporter
1/8/10
132
165
43
I tried the hand ageing this evening using the suggested mix,
The effect was quite violent with the hand moving quickly around the container,
I let it sit for around ten minutes when I removed the hand and gave it a rinse and wipe the finish was as new other than a small amount of corrosion on the back side

Would I be right in thinking that the hands could be stainless or perhaps plated in a semi precious metal? (The hands were sourced from Ken at Raffles Time)
 

dpd3672

Putting the "whore" in "horology" since 2023
Patron
Certified
29/5/23
1,742
2,851
113
USA
I tried the hand ageing this evening using the suggested mix,
The effect was quite violent with the hand moving quickly around the container,
I let it sit for around ten minutes when I removed the hand and gave it a rinse and wipe the finish was as new other than a small amount of corrosion on the back side

Would I be right in thinking that the hands could be stainless or perhaps plated in a semi precious metal? (The hands were sourced from Ken at Raffles Time)
Just a guess, but maybe the hands are painted with a clear coat. If they corroded on the back side, but the front wasn't touched, I'd guess the finish would need to be stripped before anything would happen.
 
  • Like
Reactions: HSV726

Karbon74

Pika Factory
Patron
Certified
5/5/23
10,261
20,007
113
EU - Kalos Region
I tried the hand ageing this evening using the suggested mix,
The effect was quite violent with the hand moving quickly around the container,
I let it sit for around ten minutes when I removed the hand and gave it a rinse and wipe the finish was as new other than a small amount of corrosion on the back side

Would I be right in thinking that the hands could be stainless or perhaps plated in a semi precious metal? (The hands were sourced from Ken at Raffles Time)
You can sand the hands very carefully before

For some reason, parts (dials hands inserts) from Ken seem to be very resilient 😅

almost as if he knows that his customers will do damaging things to his stuff 😅


I also added one step before the hydrogen peroxide mix... I put the hands front side down in a small pool of leftover coffee and left it in the oven until it dried up 😅

the following mix cleans them up but it leaves uneven texture on the silver surface AND dirties up the lume where it meets the metal.

Disclaimer: do this at your risks and perils 😁
 

369mafia

Resident Explorer Expert
Patron
Certified
7/7/15
3,561
6,382
113
Canada
agreed sanding the hands could be an option. however use a very high grit paper 2000 or a well used dish pad. one that has softened up from some use and give it one or two light strokes. otherwise you will leave scratches . which may or may not be appealing .

however the solution should do the rest.
I aged these hands in that solution however they did not need to be sanded first. I did add a sprinkle of salt into my mix , to taste

HS0m3c.jpeg
 
Last edited:

Karbon74

Pika Factory
Patron
Certified
5/5/23
10,261
20,007
113
EU - Kalos Region
I did not sand mine. but i did do a spray of white vinegar plus salt before the mix dunk, and left an hour or so.

I read somewhere that highly polished stainless steel makes a natural coating that "protects" the metal from further corrosion...hence the name "stainless"

the vinegar and salt remove that coating, and the mix does the rest
 

dpd3672

Putting the "whore" in "horology" since 2023
Patron
Certified
29/5/23
1,742
2,851
113
USA
I'm sharing this because you guys are my tribe, like it or not, and I assume that anything I'm excited about will have some impact here, lol.

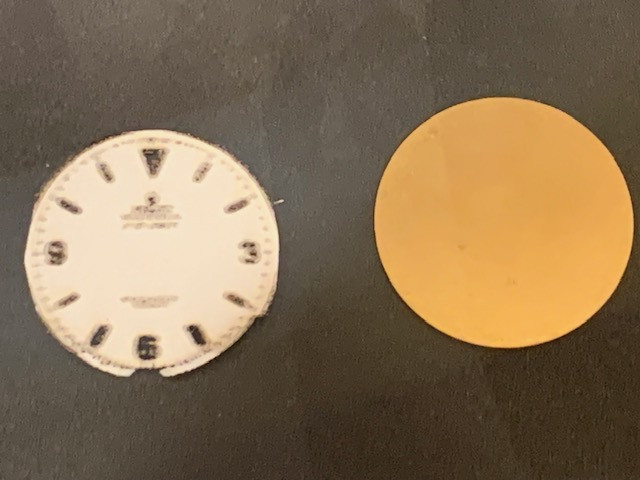
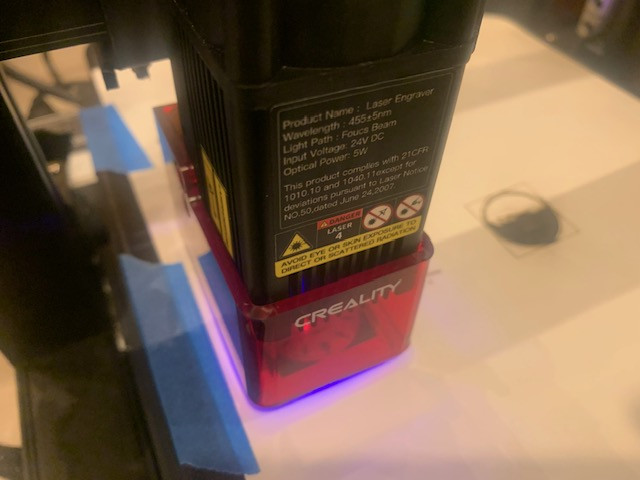
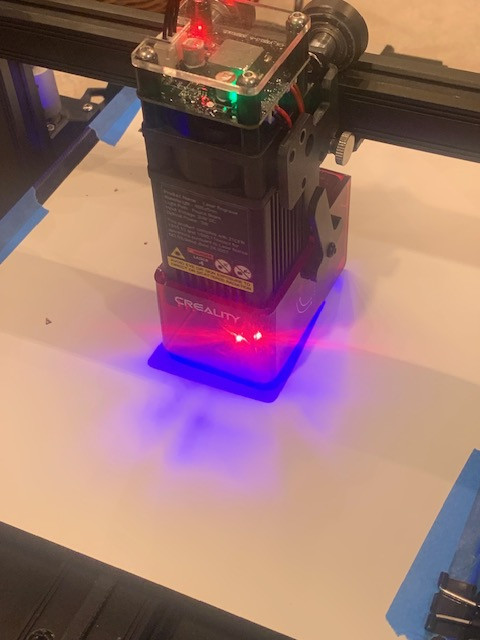
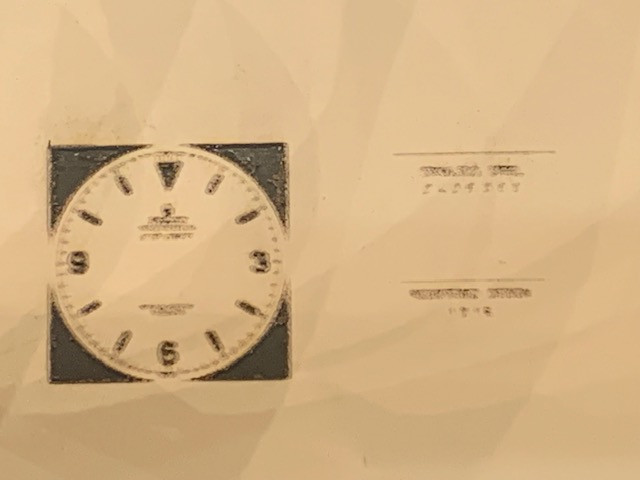
This is VERY EARLY in the process, and requires a LOT of fine tuning, but a pretty nice breakthrough was made in the projects I've been working on. You can see the aborted first attempt (laser set WAY too high, lol) in the first photo. There will be a lot more failures before success, but as a proof of concept, I think I'm almost there.

FIRST...TO create a stencil, preferably reusable, for saltwater etching serial number and model numbers between lugs. If it works, it would open up some very reasonable quality lug engraving to anyone with the desire to do it (ie, it won't be OEM, factory new quality, but it will look very much like what a real vintage watch looks like in the wild).

The process should be simple, and very user friendly with a low barrier to entry.

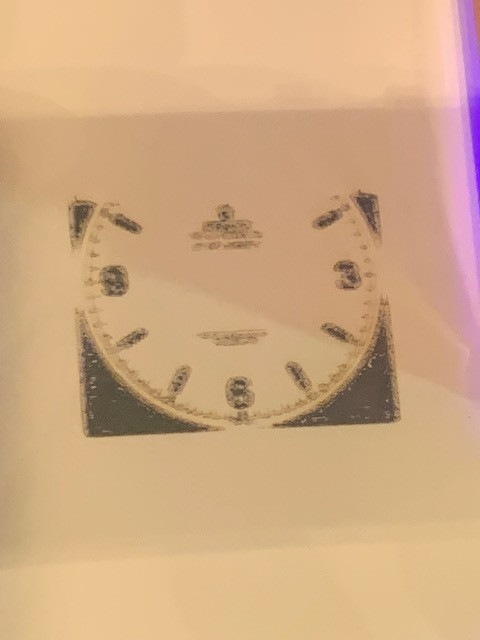
This is a laser cut of very cheap sticker paper. The laser settings (focus, speed, etc) need to be fine tuned quite a bit, and I need to find better paper that doesn't burn as easily, but assuming I can do that, I should be able to cut a vinyl sheet with just about every model and serial number (range) that a novice modder could ever want. The "master sheet" is shared publicly, and anyone could download and use it and change the model and serial numbers to their own preference. I posted the proof sheet a few pages back, but this is the first time I've ever been able to print it into something usable. Basically, cut the sticker out with a laser engraver (it might even work with a precision cutter, like a Cricut or Silhouette, I will know in a couple days, I ordered one as a "gift" to the lady friend, lol):


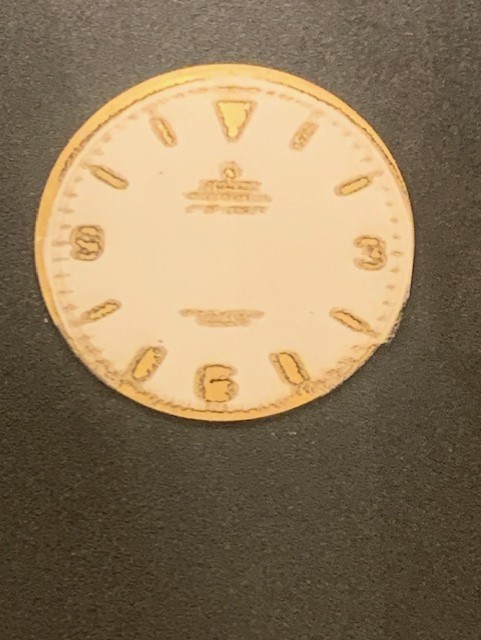
SECOND...to create a "stencil" of sorts to help us who don't have the eyes of a fighter pilot and the hands of a neurosurgeon to lume our dials. Basically, it will be another vinyl sticker that would go over a finished, but unlumed dial, masking off anything that we don't want lume on. So we will be able to lume the indices without "coloring outside the lines." Instead of painstakingly doing it with an oiler or pin, we could actually use a small paintbrush...even spray paint, assuming the mask adheres well. Once the lume is on, the stencil/mask could be peeled off without harming the dial. The sizes of the "masks" could even be tweaked slightly to give the concentric lines in the "nicer" vintage dials.


As said, I have to experiment and tweak the laser settings and the paper/vinyl for the right settings and qualities, but this is a big step towards that.
 
Last edited:

Caboose

I'm Pretty Popular
Patron
Certified
27/2/15
1,522
2,162
113
CONUS
I'm sharing this because you guys are my tribe, like it or not, and I assume that anything I'm excited about will have some impact here, lol.

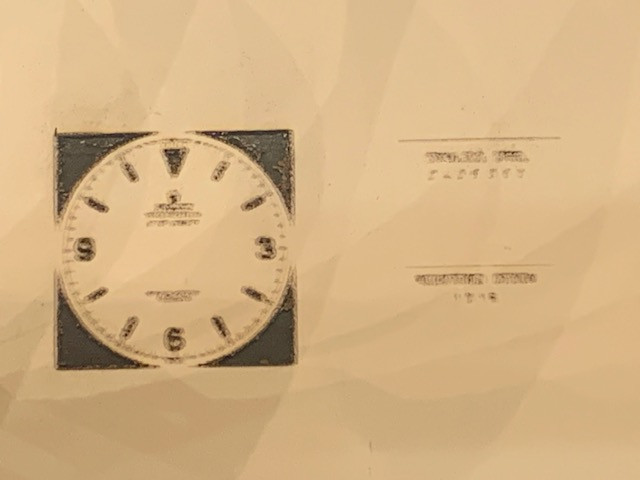
This is VERY EARLY in the process, and requires a LOT of fine tuning, but a pretty nice breakthrough was made in the projects I've been working on. You can see the aborted first attempt (laser set WAY too high, lol) in one of the photos. There will be a lot more failures before success, but as a proof of concept, I think I'm almost there.

FIRST...TO create a stencil, preferably reusable, for saltwater etching serial number and model numbers between lugs. If it works, it would open up some very reasonable quality lug engraving to anyone with the desire to do it (ie, it won't be OEM, factory new quality, but it will look very much like what a real vintage watch looks like in the wild).

The process should be simple, and very user friendly with a low barrier to entry.

This is a laser cut of vwery cheap sticker paper. The laser settings (focus, speed, etc) need to be fine tuned quite a bit, and I need to find better paper that doesn't burn as easily, but assuming I can do that, I should be able to cut a vinyl sheet with just about every model and serial number (range) that a novice modder could ever want. The "master sheet" is shared publicly, and anyone could download and use it and change the model and serial numbers to their own preference. I posted the proof sheet a few pages back, but this is the first time I've ever been able to print it into something usable. Basically, cut the sticker out with a laser engraver (it might even work with a precision cutter, like a Cricut or Silhouette, I will know in a couple days, I ordered one as a "gift" to the lady friend, lol):


SECOND...to create a "stencil" of sorts to help us who don't have the eyes of a fighter pilot and the hands of a neurosurgeon to lume our dials. Basically, it will be another vinyl sticker that would go over a finished, but unlumed dial, masking off anything that we don't want lume on. So we will be able to lume the indices without "coloring outside the lines." Instead of painstakingly doing it with an oiler or pin, we could actually use a small paintbrush...even spray paint, assuming the mask adheres well. Once the lume is on, the stencil/mask could be peeled off without harming the dial. The sizes of the "masks" could even be tweaked slightly to give the concentric lines in the "nicer" vintage dials.


As said, I have to experiment and tweak the laser settings and the paper/vinyl for the right settings and qualities, but this is a big step towards that.
REALLY wanting to see the mid case engravings. If the fidelity is good enough, it could be easy to make a 3d printed jig to hold in place the case vertically so the machine can laser engrave between the lugs.
 
  • Like
Reactions: 316lad and Karbon74

dpd3672

Putting the "whore" in "horology" since 2023
Patron
Certified
29/5/23
1,742
2,851
113
USA
REALLY wanting to see the mid case engravings. If the fidelity is good enough, it could be easy to make a 3d printed jig to hold in place the case vertically so the machine can laser engrave between the lugs.
Way ahead of you, my friend. ;)


But this type of engraving really wouldn't need a jig. You would just stick the sticker on the case, between the lugs, and saltwater etch the numbers and letters into the metal. Remove the sticker and you're done.

There's a thread on it here, but You Tube has hundreds of variations on the idea, some better than others.

Actual laser engraving of the case would require a pretty potent laser, not something as user friendly and affordable as a hobby laser. I believe to engrave stainless steel, you'd need between 20 and 40 watts, minimum, and those start getting into real money, maybe a grand or more when it's all said and done.

With a sticker or decal, you can use a hobbyist laser, in the 1-10 watt range...they cost under $100 to a couple hundred.
 
Last edited:

Caboose

I'm Pretty Popular
Patron
Certified
27/2/15
1,522
2,162
113
CONUS
Way ahead of you, my friend. ;)


But this type of engraving really wouldn't need a jig. You would just stick the sticker on the case, between the lugs, and saltwater etch the numbers and letters into the metal. Remove the sticker and you're done.

There's a thread on it here, but You Tube has hundreds of variations on the idea, some better than others.

Actual laser engraving of the case would require a pretty potent laser, not something as user friendly and affordable as a hobby laser. I believe to engrave stainless steel, you'd need between 20 and 40 watts, minimum, and those start getting into real money, maybe a grand or more when it's all said and done.

With a sticker or decal, you can use a hobbyist laser, in the 1-10 watt range...they cost under $100 to a couple hundred.
I was thinking you were engraving directly from the machine to the steel, but I suspect this sort of engraver can't really handle steel all too well.
 

dpd3672

Putting the "whore" in "horology" since 2023
Patron
Certified
29/5/23
1,742
2,851
113
USA
I was thinking you were engraving directly from the machine to the steel, but I suspect this sort of engraver can't really handle steel all too well.
No, sadly, that would make things way too simple, lol.

I actually bought an engraver, the same kind Rolex allegedly used, but it was after I had already started trying to figure out the saltwater etching thing, and I'm determined to take that as far as I can, since it's a lot more user friendly of a process.

For my own cases, I'll probably use the proper engraver, but for anyone that doesn't want to raid antique shops for old watchmaker tools, the saltwater process is really surprisingly good, with little technical expertise or investment required, and there's plenty of things that the engraver might not be able to do, that saltwater etching might...like the decoration on movement parts, or various hallmarks and manufacturer's stampings.
 
Last edited:

369mafia

Resident Explorer Expert
Patron
Certified
7/7/15
3,561
6,382
113
Canada
I'm sharing this because you guys are my tribe, like it or not, and I assume that anything I'm excited about will have some impact here, lol.

This is VERY EARLY in the process, and requires a LOT of fine tuning, but a pretty nice breakthrough was made in the projects I've been working on. You can see the aborted first attempt (laser set WAY too high, lol) in the first photo. There will be a lot more failures before success, but as a proof of concept, I think I'm almost there.

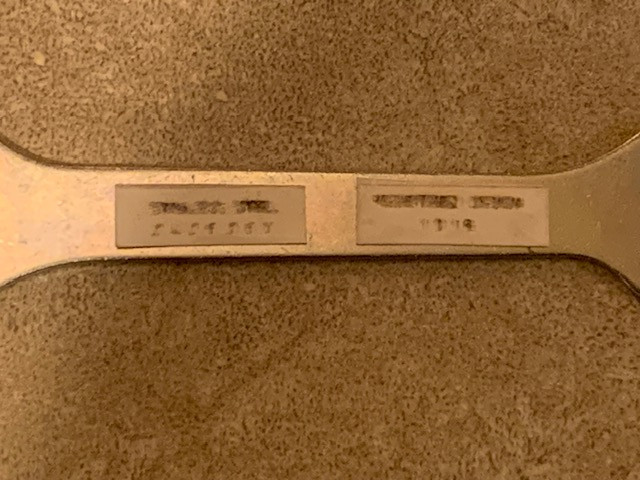
FIRST...TO create a stencil, preferably reusable, for saltwater etching serial number and model numbers between lugs. If it works, it would open up some very reasonable quality lug engraving to anyone with the desire to do it (ie, it won't be OEM, factory new quality, but it will look very much like what a real vintage watch looks like in the wild).

The process should be simple, and very user friendly with a low barrier to entry.

This is a laser cut of very cheap sticker paper. The laser settings (focus, speed, etc) need to be fine tuned quite a bit, and I need to find better paper that doesn't burn as easily, but assuming I can do that, I should be able to cut a vinyl sheet with just about every model and serial number (range) that a novice modder could ever want. The "master sheet" is shared publicly, and anyone could download and use it and change the model and serial numbers to their own preference. I posted the proof sheet a few pages back, but this is the first time I've ever been able to print it into something usable. Basically, cut the sticker out with a laser engraver (it might even work with a precision cutter, like a Cricut or Silhouette, I will know in a couple days, I ordered one as a "gift" to the lady friend, lol):


SECOND...to create a "stencil" of sorts to help us who don't have the eyes of a fighter pilot and the hands of a neurosurgeon to lume our dials. Basically, it will be another vinyl sticker that would go over a finished, but unlumed dial, masking off anything that we don't want lume on. So we will be able to lume the indices without "coloring outside the lines." Instead of painstakingly doing it with an oiler or pin, we could actually use a small paintbrush...even spray paint, assuming the mask adheres well. Once the lume is on, the stencil/mask could be peeled off without harming the dial. The sizes of the "masks" could even be tweaked slightly to give the concentric lines in the "nicer" vintage dials.


As said, I have to experiment and tweak the laser settings and the paper/vinyl for the right settings and qualities, but this is a big step towards that.
Awesome work D. This has big potential and would be a huge help to us that like to DIY!! Nice work bro.
 

Karbon74

Pika Factory
Patron
Certified
5/5/23
10,261
20,007
113
EU - Kalos Region
I was thinking you were engraving directly from the machine to the steel, but I suspect this sort of engraver can't really handle steel all too well.

I also asked Wainlux on AliX. They sell compact laser engravers. They told me that their 10W version can directly engrave SS.

Just found this amazing item on AliExpress. WAINLUX K8 Mini Blue Laser Engraving Machine Ultimate Desktop Laser Engraver 2.5W 5W 10W for Productivity DIY Small Businesses
 
  • Like
Reactions: Caboose