-
Tired of adverts on RWI? - Subscribe by clicking HERE and PMing Trailboss for instructions and they will magically go away!
You are using an out of date browser. It may not display this or other websites correctly.
You should upgrade or use an alternative browser.
You should upgrade or use an alternative browser.
If you want someone done right... (Engraving content)
- Thread starter newest dude on the forum
- Start date
There's an attachment for the New Hermes machines for engraving in a circle. I have one, and did some case back engraving with it, but never tried to replicate the Tudor engravings.
The accessory looks like this, and they pop up on Ebay from time to time. I think there's actually a knock off on AliX that I seem to remember seeing as well:

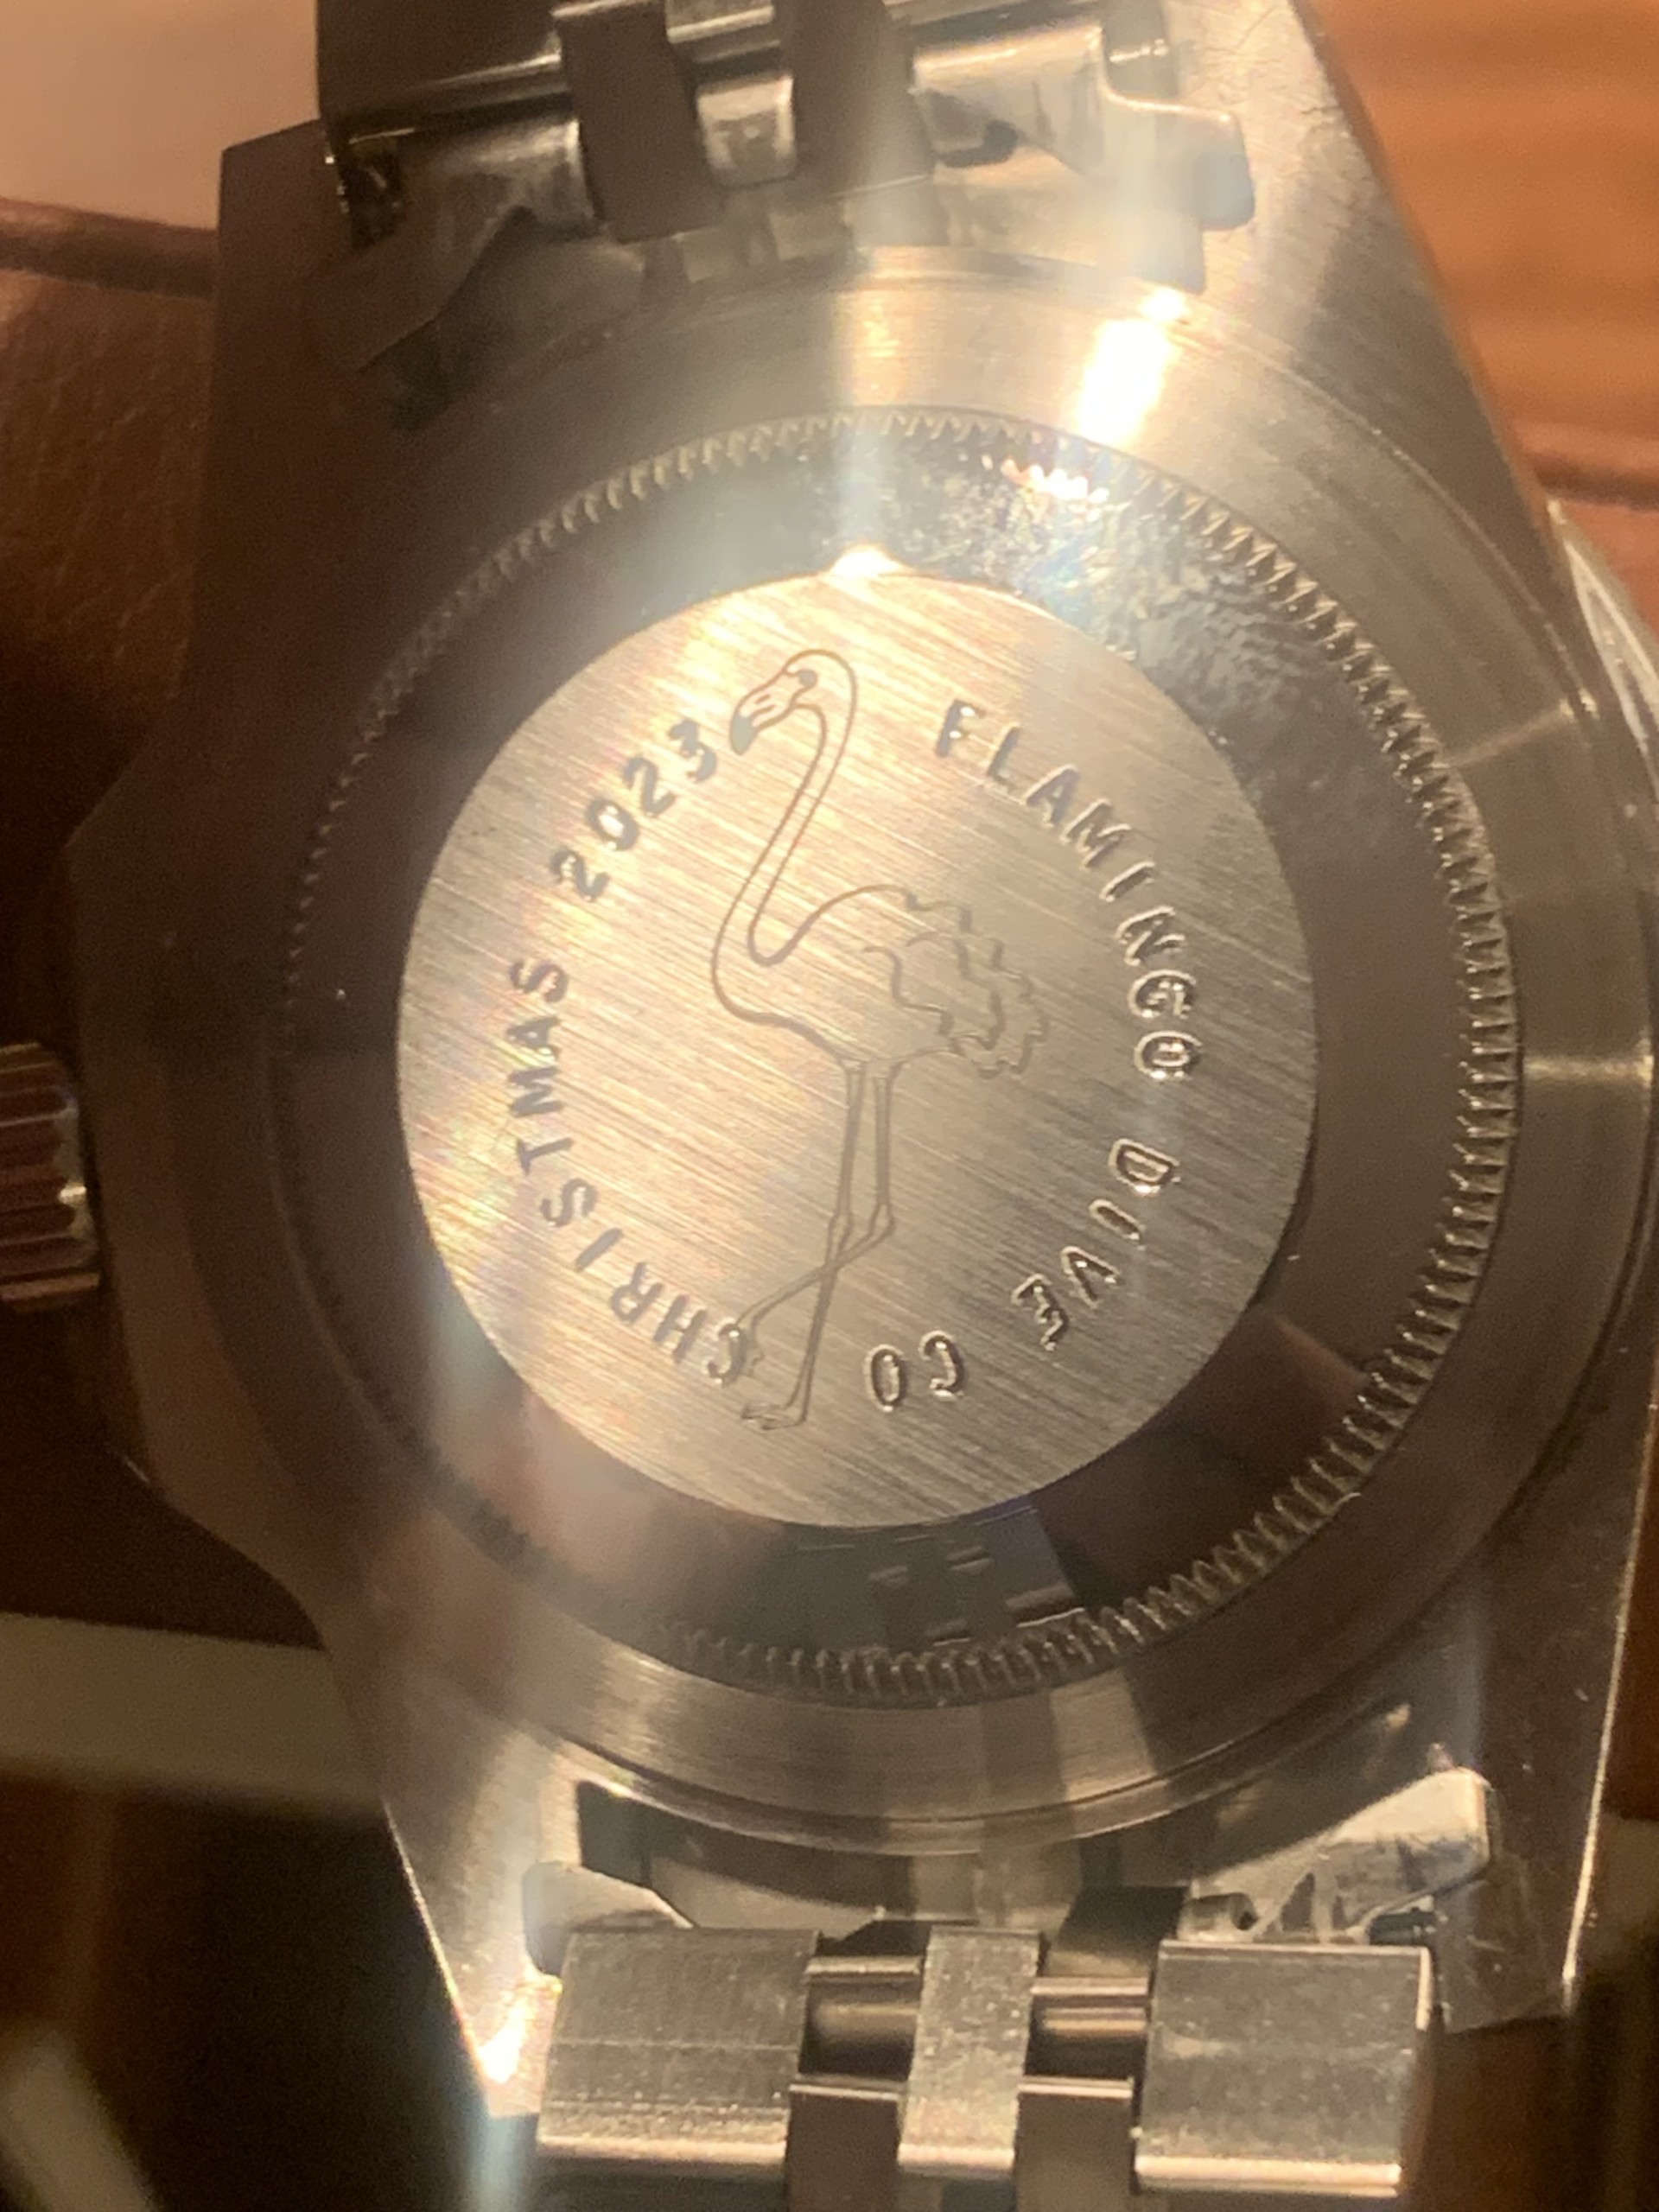
This is a couple watch backs I did for a couple builds for the girlfriend (the infamous "Flamingo watches," lol), just to give an idea how it engraves. I hadn't really practiced with it much, other than on a beater Raffles case back to get everything centered.
You'd probably need to work out the font and spacing, but a Tudor case back is certainly doable.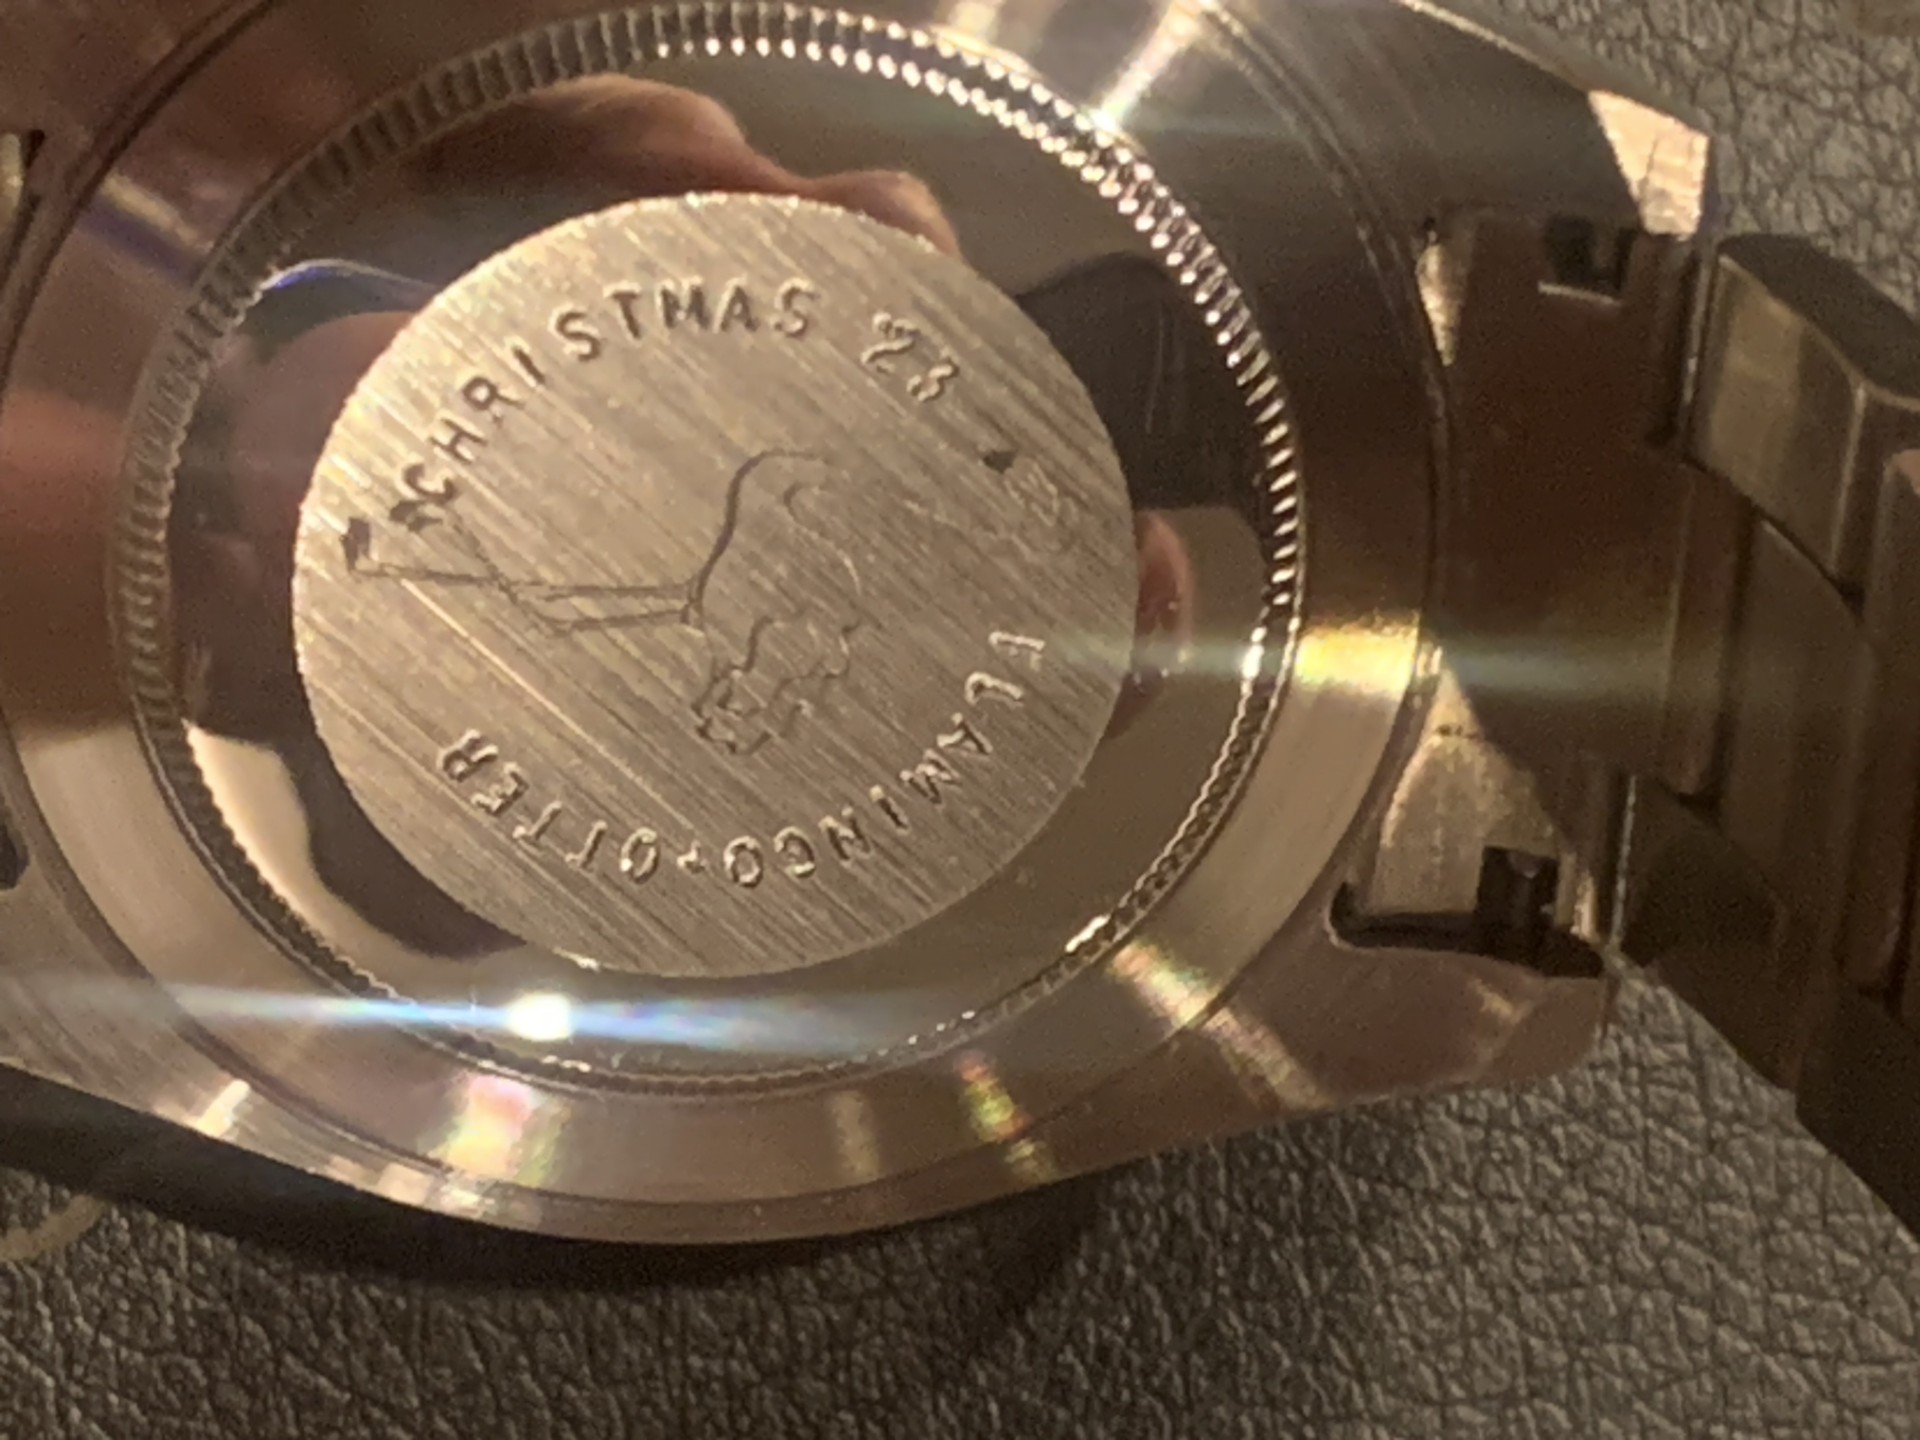
The accessory looks like this, and they pop up on Ebay from time to time. I think there's actually a knock off on AliX that I seem to remember seeing as well:

This is a couple watch backs I did for a couple builds for the girlfriend (the infamous "Flamingo watches," lol), just to give an idea how it engraves. I hadn't really practiced with it much, other than on a beater Raffles case back to get everything centered.
You'd probably need to work out the font and spacing, but a Tudor case back is certainly doable.


It also looks like there's a store on Ebay that's making aftermarket circle engraving jigs, with options for different fonts. No idea if they're good or trash, but worth looking into if you're hoping to do circular engraving.


BRAND NEW MICRO-CURV CURVED CIRCULAR FONT FIXTURE FOR NEW HERMES WITH 2 DISKS ! | eBay
This fixture will also fit other engraving machines as long as you have a way to attach it to your font tray. This unit is used to engrave characters along a curve or a complete circle around an object.
www.ebay.com
The main issue are the proper fonts, not he jig! Unfortunately my CAD-skills are quite on a low level! Maybe one of you could help us out, to construct the right jig in an OpeSCAD-file. We could convert it into an STL-file & print it out in 3D-Resin. The requirements are:
- a circle plate ( diameter 110mm/height 5 to 10mm) with a center hole of 8mm ;
- 60 notches on the outside of the plate (low point starting at 360 deg)
- text (8mm , font: RoundSlabSerif) in a circle with a distance from the circumference of 5mm;
- text size, font and length up to 60 single letters freely selectable;
- text engraved about 1mm into the plate;
This would do the job on any caseback, because we could print out the jig with the complete text necessary & would not have to bring each single letter into position right before the cut;
Suggestions welcome...
Could probably use a scanner, even a photocopier, to capture the letters from a watch or photograph, then transfer that to CAD software. It would take some basic photo editing skills but it's fairly doable....mostly increasing the contrast and erasing the clutter and artifacts.The main issue are the proper fonts, not he jig! Unfortunately my CAD-skills are quite on a low level! Maybe one of you could help us out, to construct the right jig in an OpeSCAD-file. We could convert it into an STL-file & print it out in 3D-Resin. The requirements are:
- a circle plate ( diameter 110mm/height 5 to 10mm) with a center hole of 8mm ;
- 60 notches on the outside of the plate (low point starting at 360 deg)
- text (8mm , font: RoundSlabSerif) in a circle with a distance from the circumference of 5mm;
- text size, font and length up to 60 single letters freely selectable;
- text engraved about 1mm into the plate;
This would do the job on any caseback, because we could print out the jig with the complete text necessary & would not have to bring each single letter into position right before the cut;
Suggestions welcome...
...to my knowledge: that's not the way CAD is working. But maybe I'm wrong...Could probably use a scanner, even a photocopier, to capture the letters from a watch or photograph, then transfer that to CAD software. It would take some basic photo editing skills but it's fairly doable....mostly increasing the contrast and erasing the clutter and artifacts.
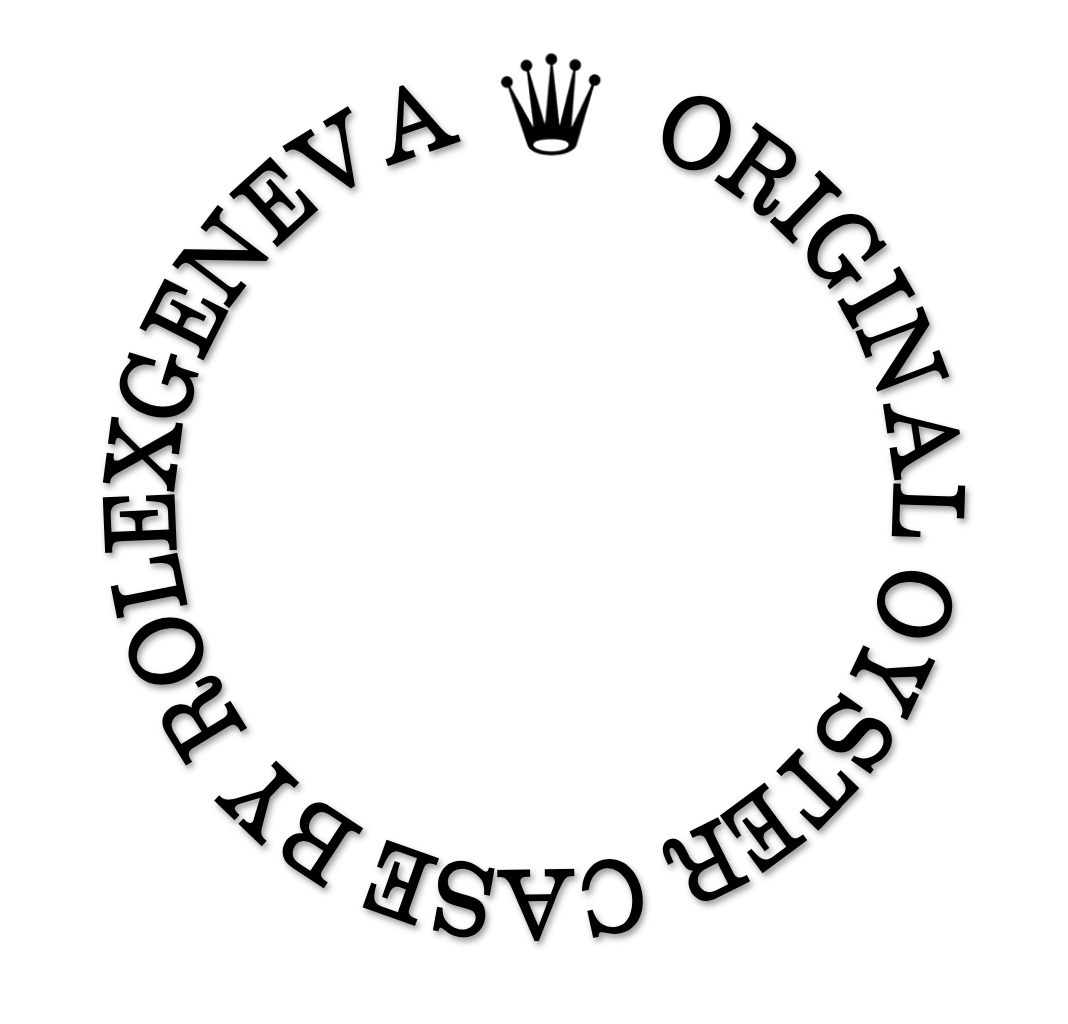
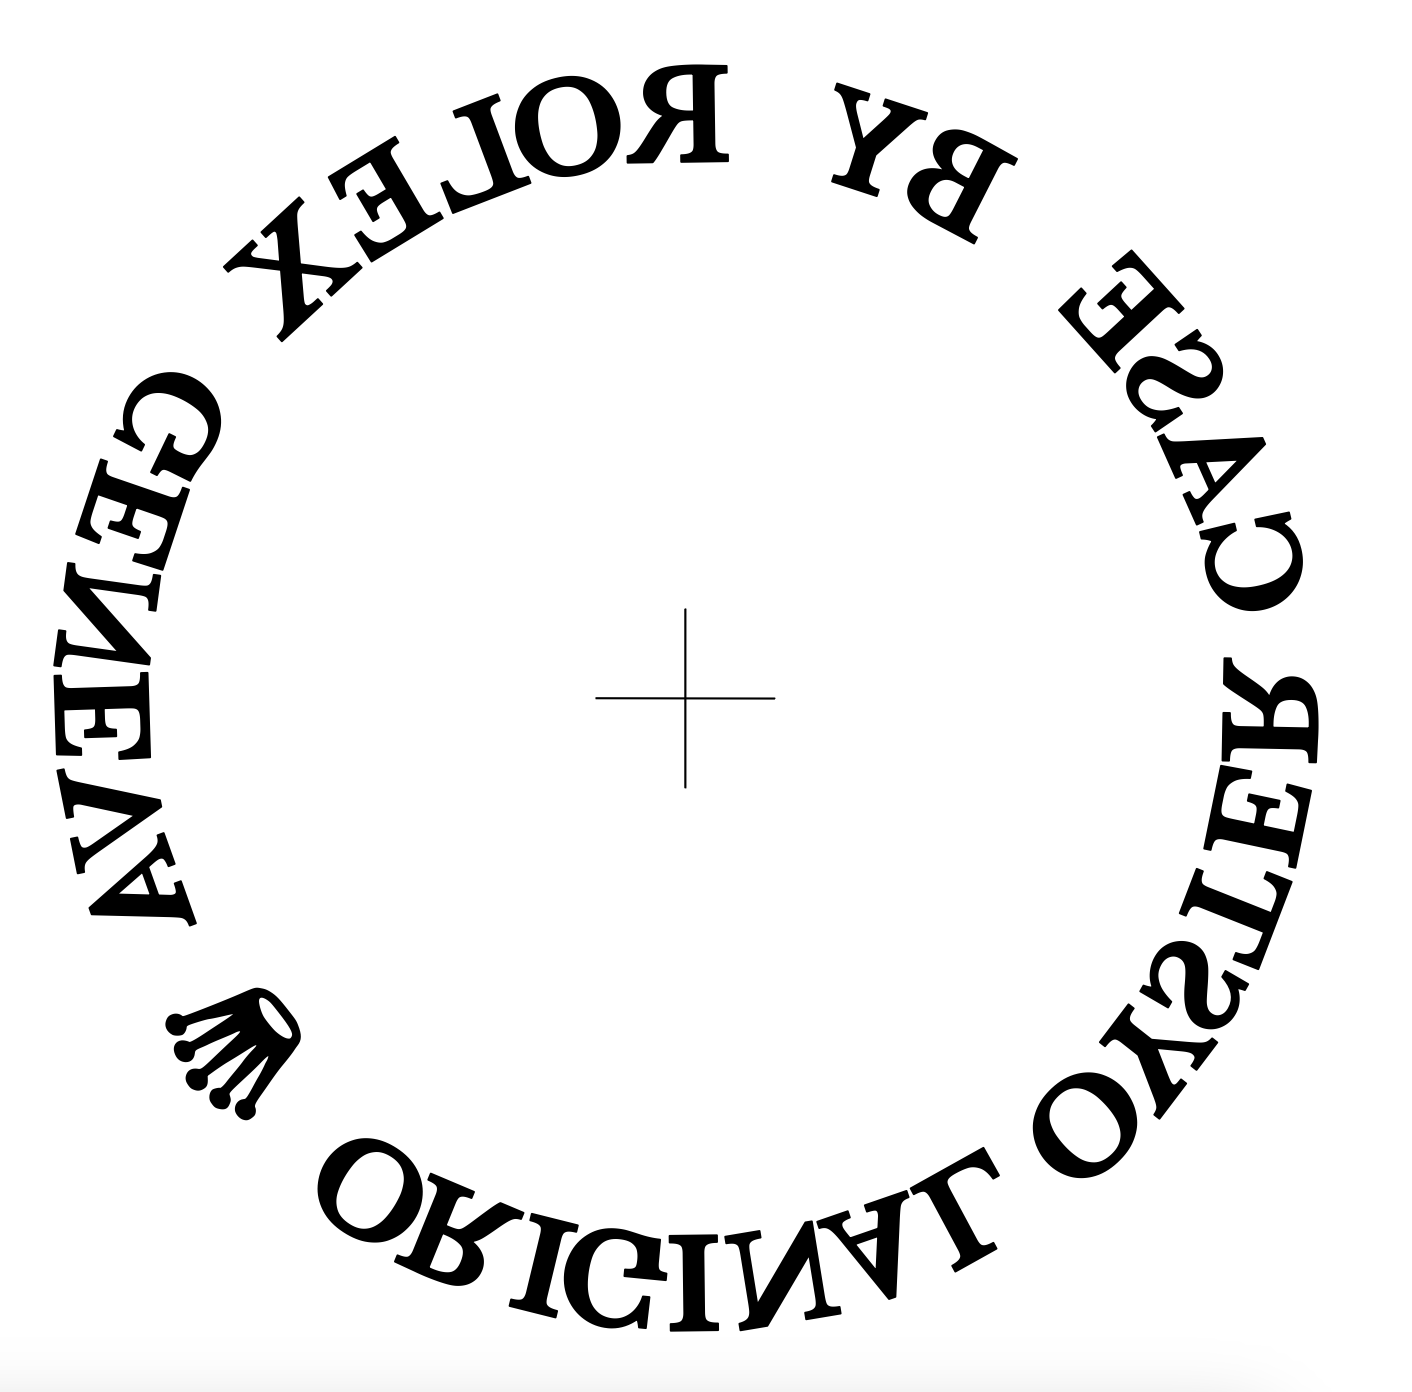
the attached image is a simple word-file in RoundSlabSerif... Try your best, @dpd3672 !
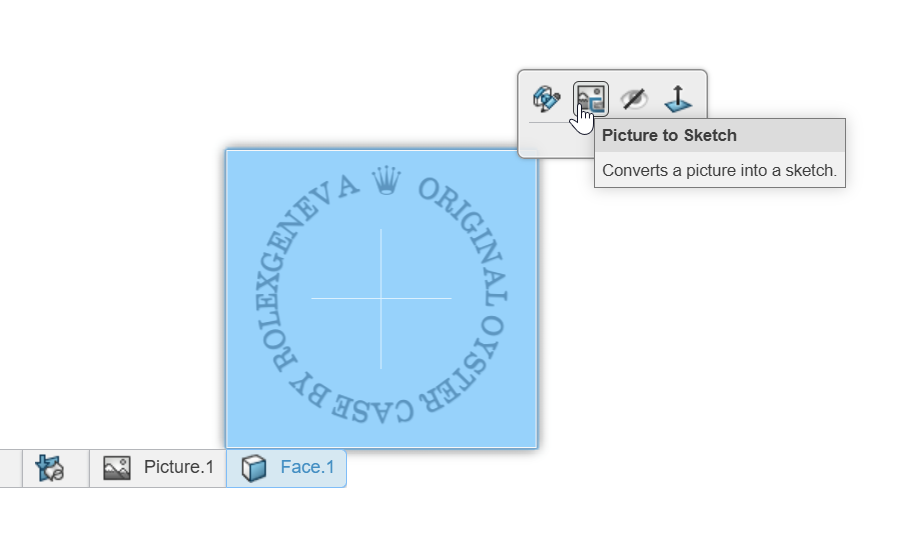
I converted it to a vector file, which is imperfect, but not a bad starting point. If you have the ability to save the original in SVG format, it'll be cleaner. This is a quick and dirty template I came up with to engrave a Tudor case back, just tweak the size and 3D print and use with a drag engraver.
It's 100mmx100mm and the engraving is an 80mm diameter circle based on the art posted above, but it can be reduced as needed to do a case back.
It needs a lot of tweaking before it'll pass for gen (which, I believe, was probably stamped in the past, and is laser etched now), but it should give passable results.

 www.tinkercad.com
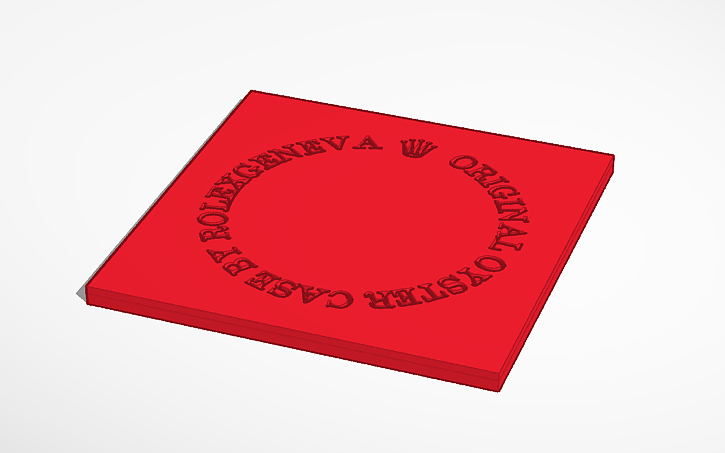
It's 100mmx100mm and the engraving is an 80mm diameter circle based on the art posted above, but it can be reduced as needed to do a case back.
It needs a lot of tweaking before it'll pass for gen (which, I believe, was probably stamped in the past, and is laser etched now), but it should give passable results.

3D design Tudor Case Back - Tinkercad
3D design Tudor Case Back created by David Patterson with Tinkercad

Tried it already out... doesn't work properly.... results are not crisp enough...You could simply get it made in .svg format, svg2stl and set extrusion height. Open in 3D printer software to check and print.
You could simply get it made in .svg format, svg2stl and set extrusion height. Open in 3D printer software to check and print.
YOU ARE MY MAN, DPD!!!!I converted it to a vector file, which is imperfect, but not a bad starting point. If you have the ability to save the original in SVG format, it'll be cleaner. This is a quick and dirty template I came up with to engrave a Tudor case back, just tweak the size and 3D print and use with a drag engraver.
It's 100mmx100mm and the engraving is an 80mm diameter circle based on the art posted above, but it can be reduced as needed to do a case back.
It needs a lot of tweaking before it'll pass for gen (which, I believe, was probably stamped in the past, and is laser etched now), but it should give passable results.

3D design Tudor Case Back - Tinkercad
3D design Tudor Case Back created by David Patterson with Tinkercadwww.tinkercad.com

FWIW, the vintage Tudor case backs would probably look better using the saltwater etching tecnique than with drag engraving. I think the engraved lines are too thin to follow the shape of letters in the example above. But would love to see what can be done if others add their twist on things.
Vector file = .svg (or .AI, .EPS...), he did what I proposed, lol.YOU ARE MY MAN, DPD!!!!
If you start with a proper .svg then it should be crisp enough.
I'll try my best...FWIW, the vintage Tudor case backs would probably look better using the saltwater etching tecnique than with drag engraving. I think the engraved lines are too thin to follow the shape of letters in the example above. But would love to see what can be done if others add their twist on things.
- 5/9/24
- 77
- 149
- 33
Honestly, the easiest way to manage this from a CAD perspective is to not rely on an image, but get the Font and create a text feature. Arrange in the correct layout on the solid model. This way you can parameterize the design and not have to worry about scale issues or image resolution. I haven't read the entire thread, but I could help mock this up and send you the file if you give me the right information. Just DM me if you need any help.Hero!
- 5/9/24
- 77
- 149
- 33
Also, any success you might have with CAD files, feel free to share in this thread here. Trying to consolidate any engineering info for everyone. I will also add to the Google Doc too with your permission.
CAD Model Docs
CAD Model Docs
Updated Tudor case back with better art as source. Spacing is improved over the previous one.

 www.tinkercad.com
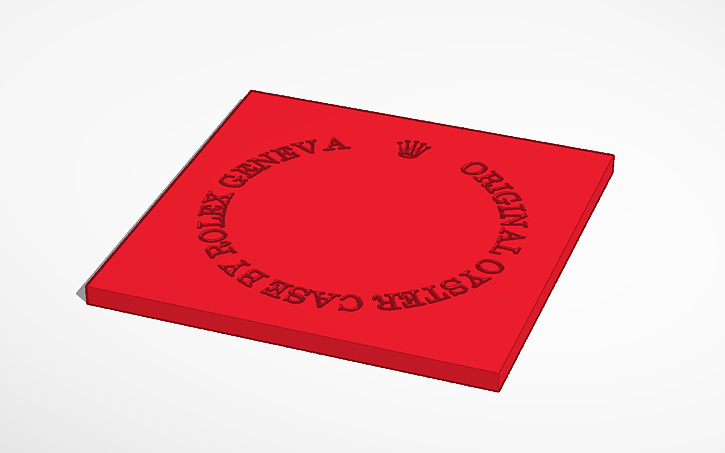

3D design Tudor Case Back - Tinkercad
3D design Tudor Case Back created by David Patterson with Tinkercad


