-
It's our birthday and YOU get the gifts! Eight giveaways including six watches that you can enter for free! RWI Birthday Free Gifts Link
-
Tired of adverts on RWI? - Subscribe by clicking HERE and PMing Trailboss for instructions and they will magically go away!
Dogwood's Watchmaking Journey
- Thread starter dogwood
- Start date
In theory converting a vs3235 to a vs3230 would be easy. I’d just remove the date works (if VSF even included these parts in the movement), and then I’d need to replace the 3235-231 setting lever jumper with a 3230-231 setting lever jumper.Insane work again P. I always admire your intricate work!
Do you know if you are able to remove the ghost date from the vsf op 36, in a similar fashion? Been wanting a tiffany op 36 for a while now, but the ghost date is really a deal breaker for me.
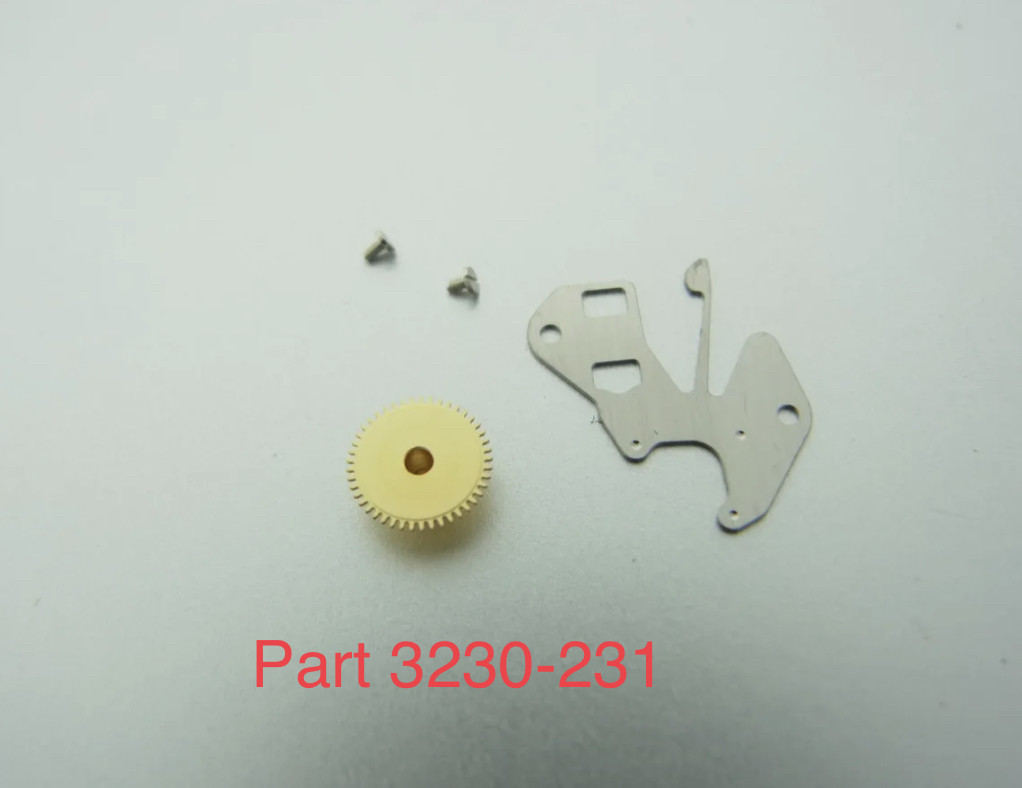
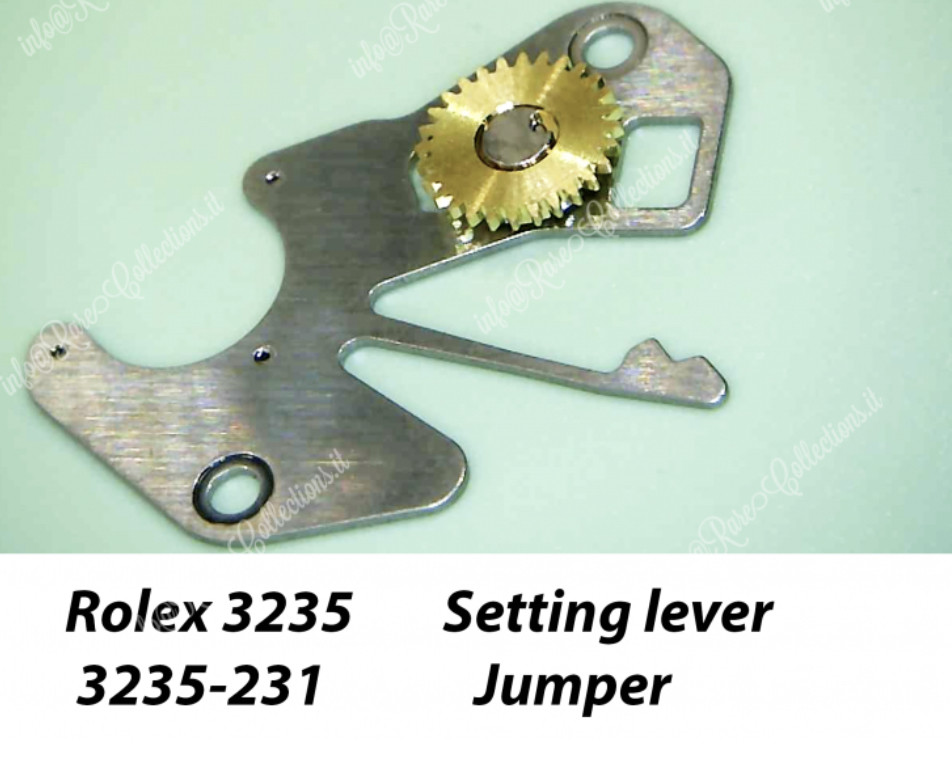
When I was thinking about doing this before I thought it would be hard because the 3235 version of the part has a riveted intermediate wheel. But of course the 3230 version of the part doesn’t need the intermediate wheel since that’s the wheel used to drive the date corrector. This means that the 3230 version of the part is just a flat piece of metal of a specific thickness that’s cut in a very specific shape. Exactly the kind of thing that someone with a fancy cnc laser cutter (cough @Oascom cough) would be able to make if he had a CAD file for said part.
I think I might need to fire up Fusion360 tonight and make a drawing.
I hope so too… a polar explorer 2 with a dd3285 would be a great watch. But for now, the sh3285 certainly isn’t a bad movement so the GMF v5 explorer 2 is a great rep. Wear it in good health!Wow. Really impressive work. My hat is off to you. I hope a DD 3285 Explorer II with proper sized date wheel does become a reality, though. Just ordered a GMF Explorer II and will be interested to see how it looks and works.
JTime and Trusty Time both sell them. Not sure who else. I ordered from JTime. Great folks.Sorry for the newbie question, but where can I order a GMF v5 Explorer 2,
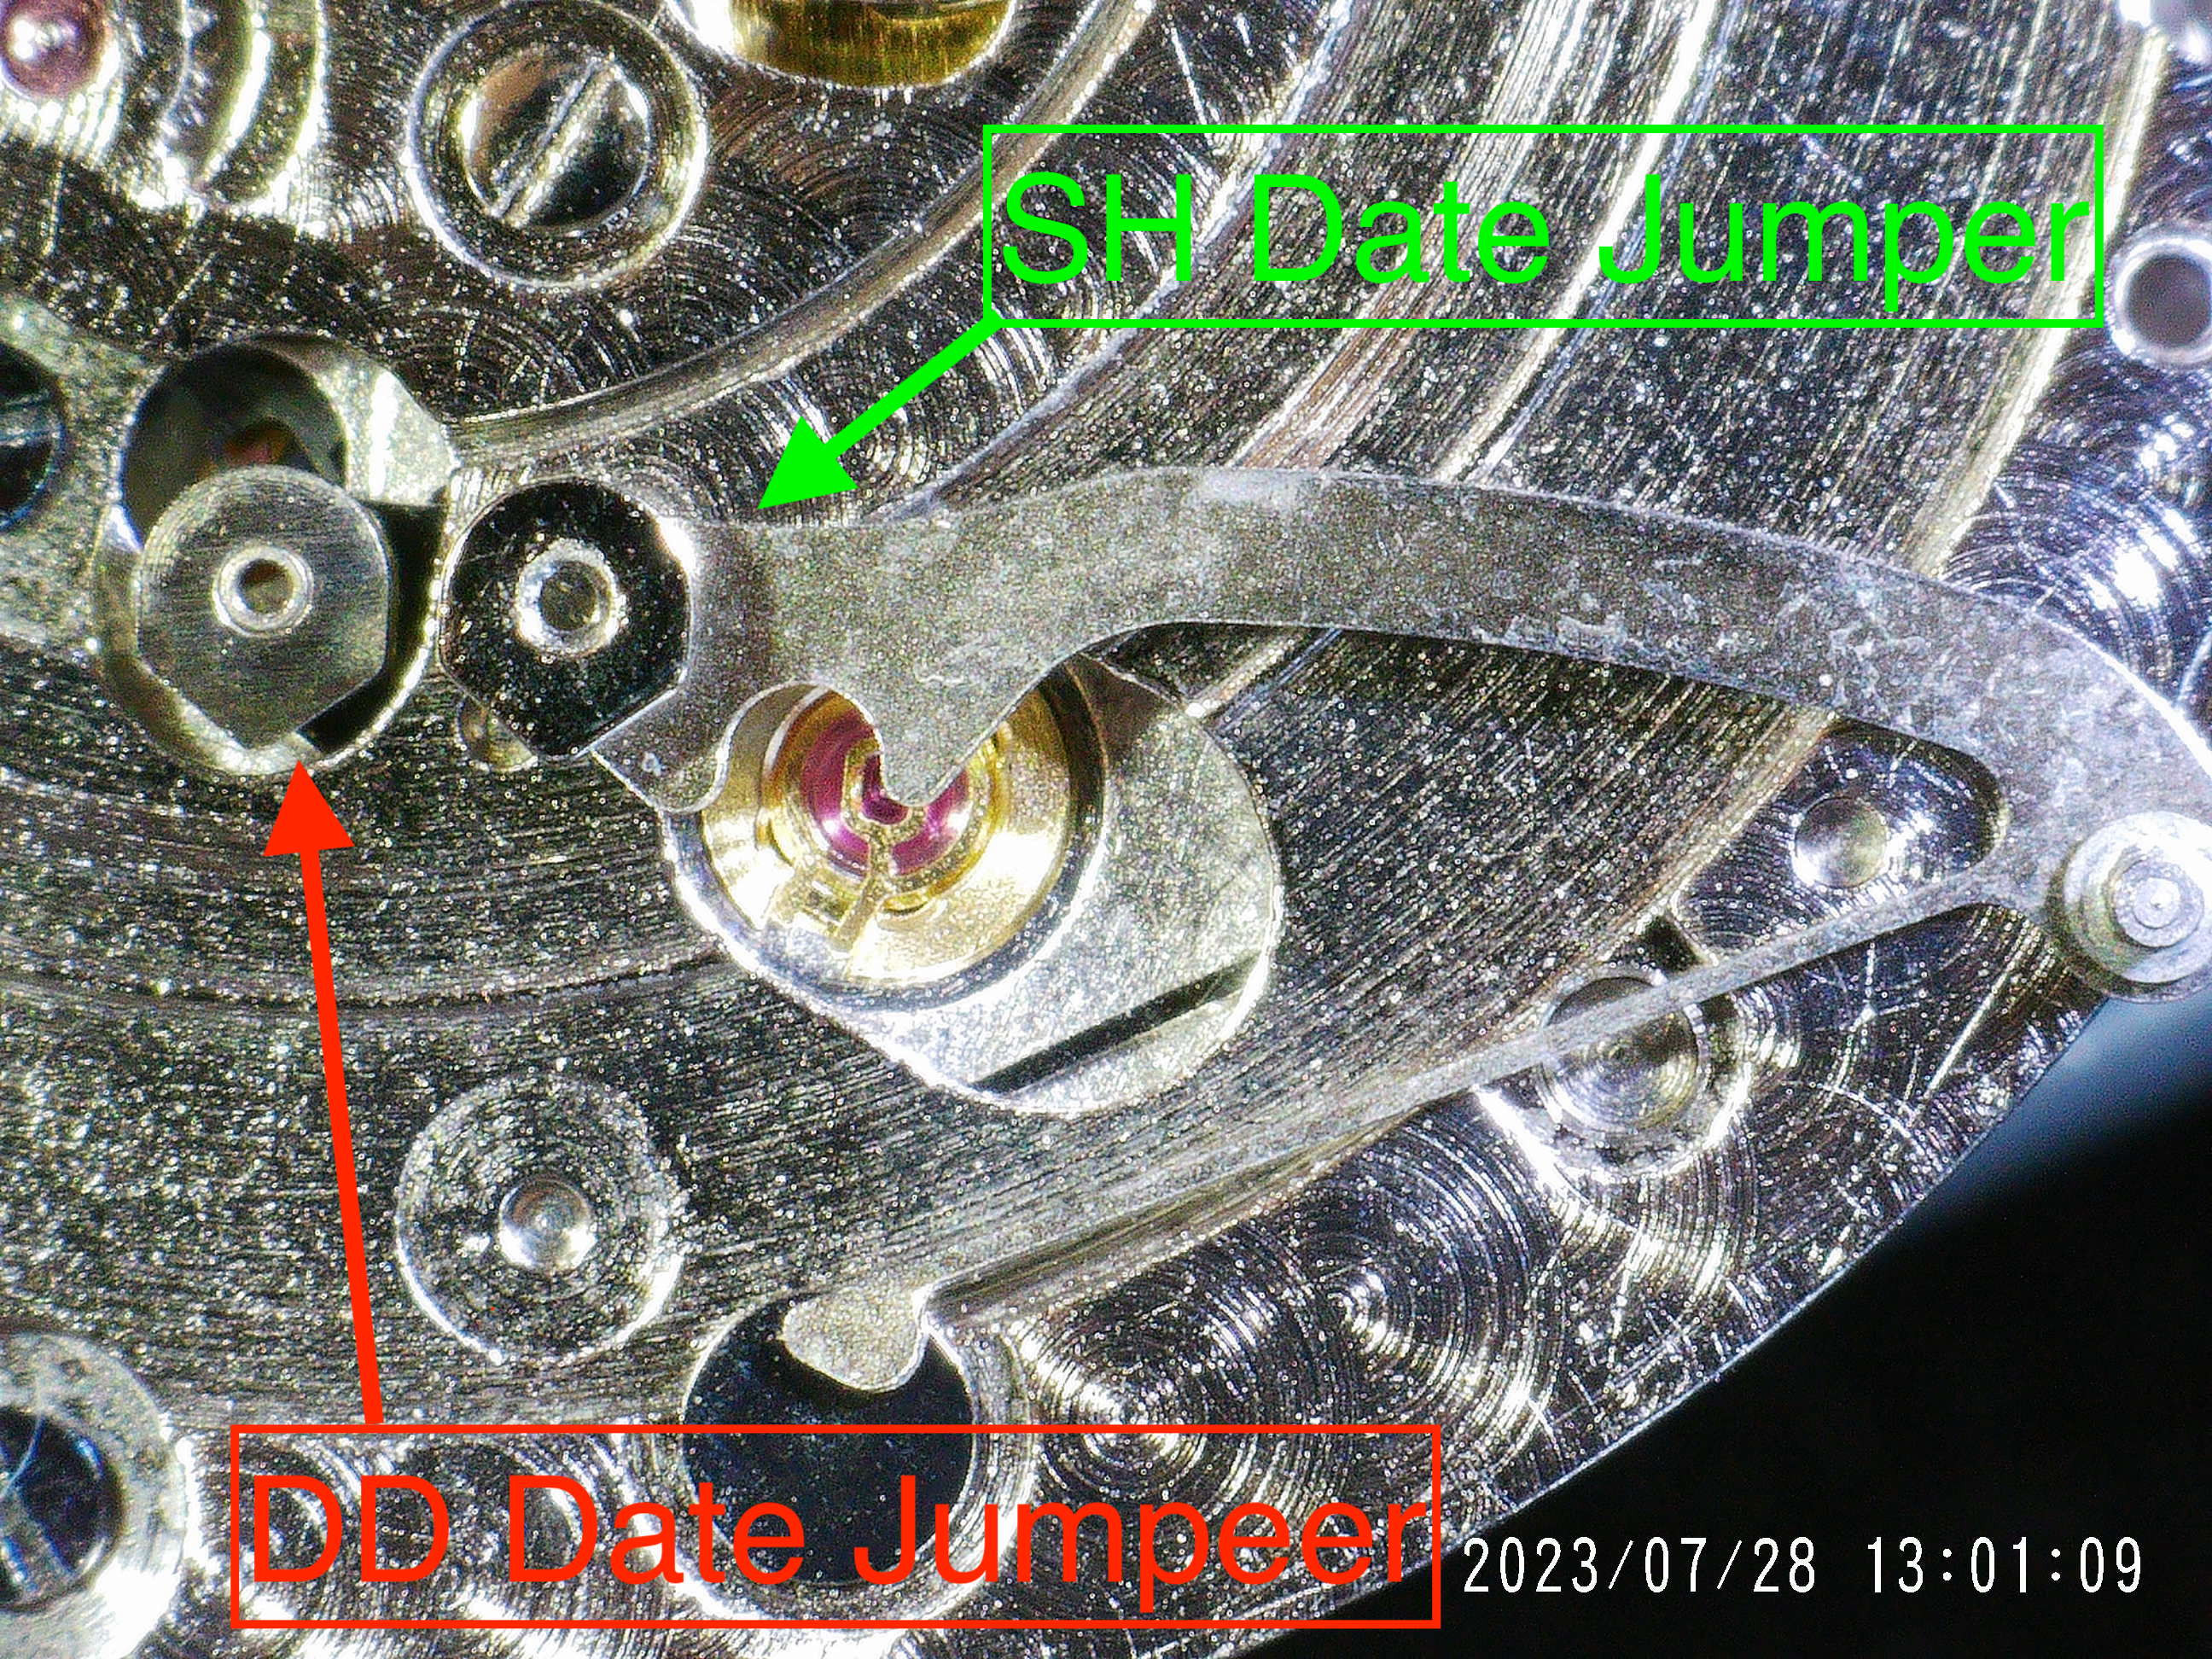
Update on the SH3285-DD3285 hybrid for the Explorer 2. I discovered two problems with the hybrid:
To solve problem 2, I needed to push out the jewel with the large hole from the SH date plate bridge, and find a suitable 1.1mm jewel with a ~0.3mm hole from my assorted set of jewels.
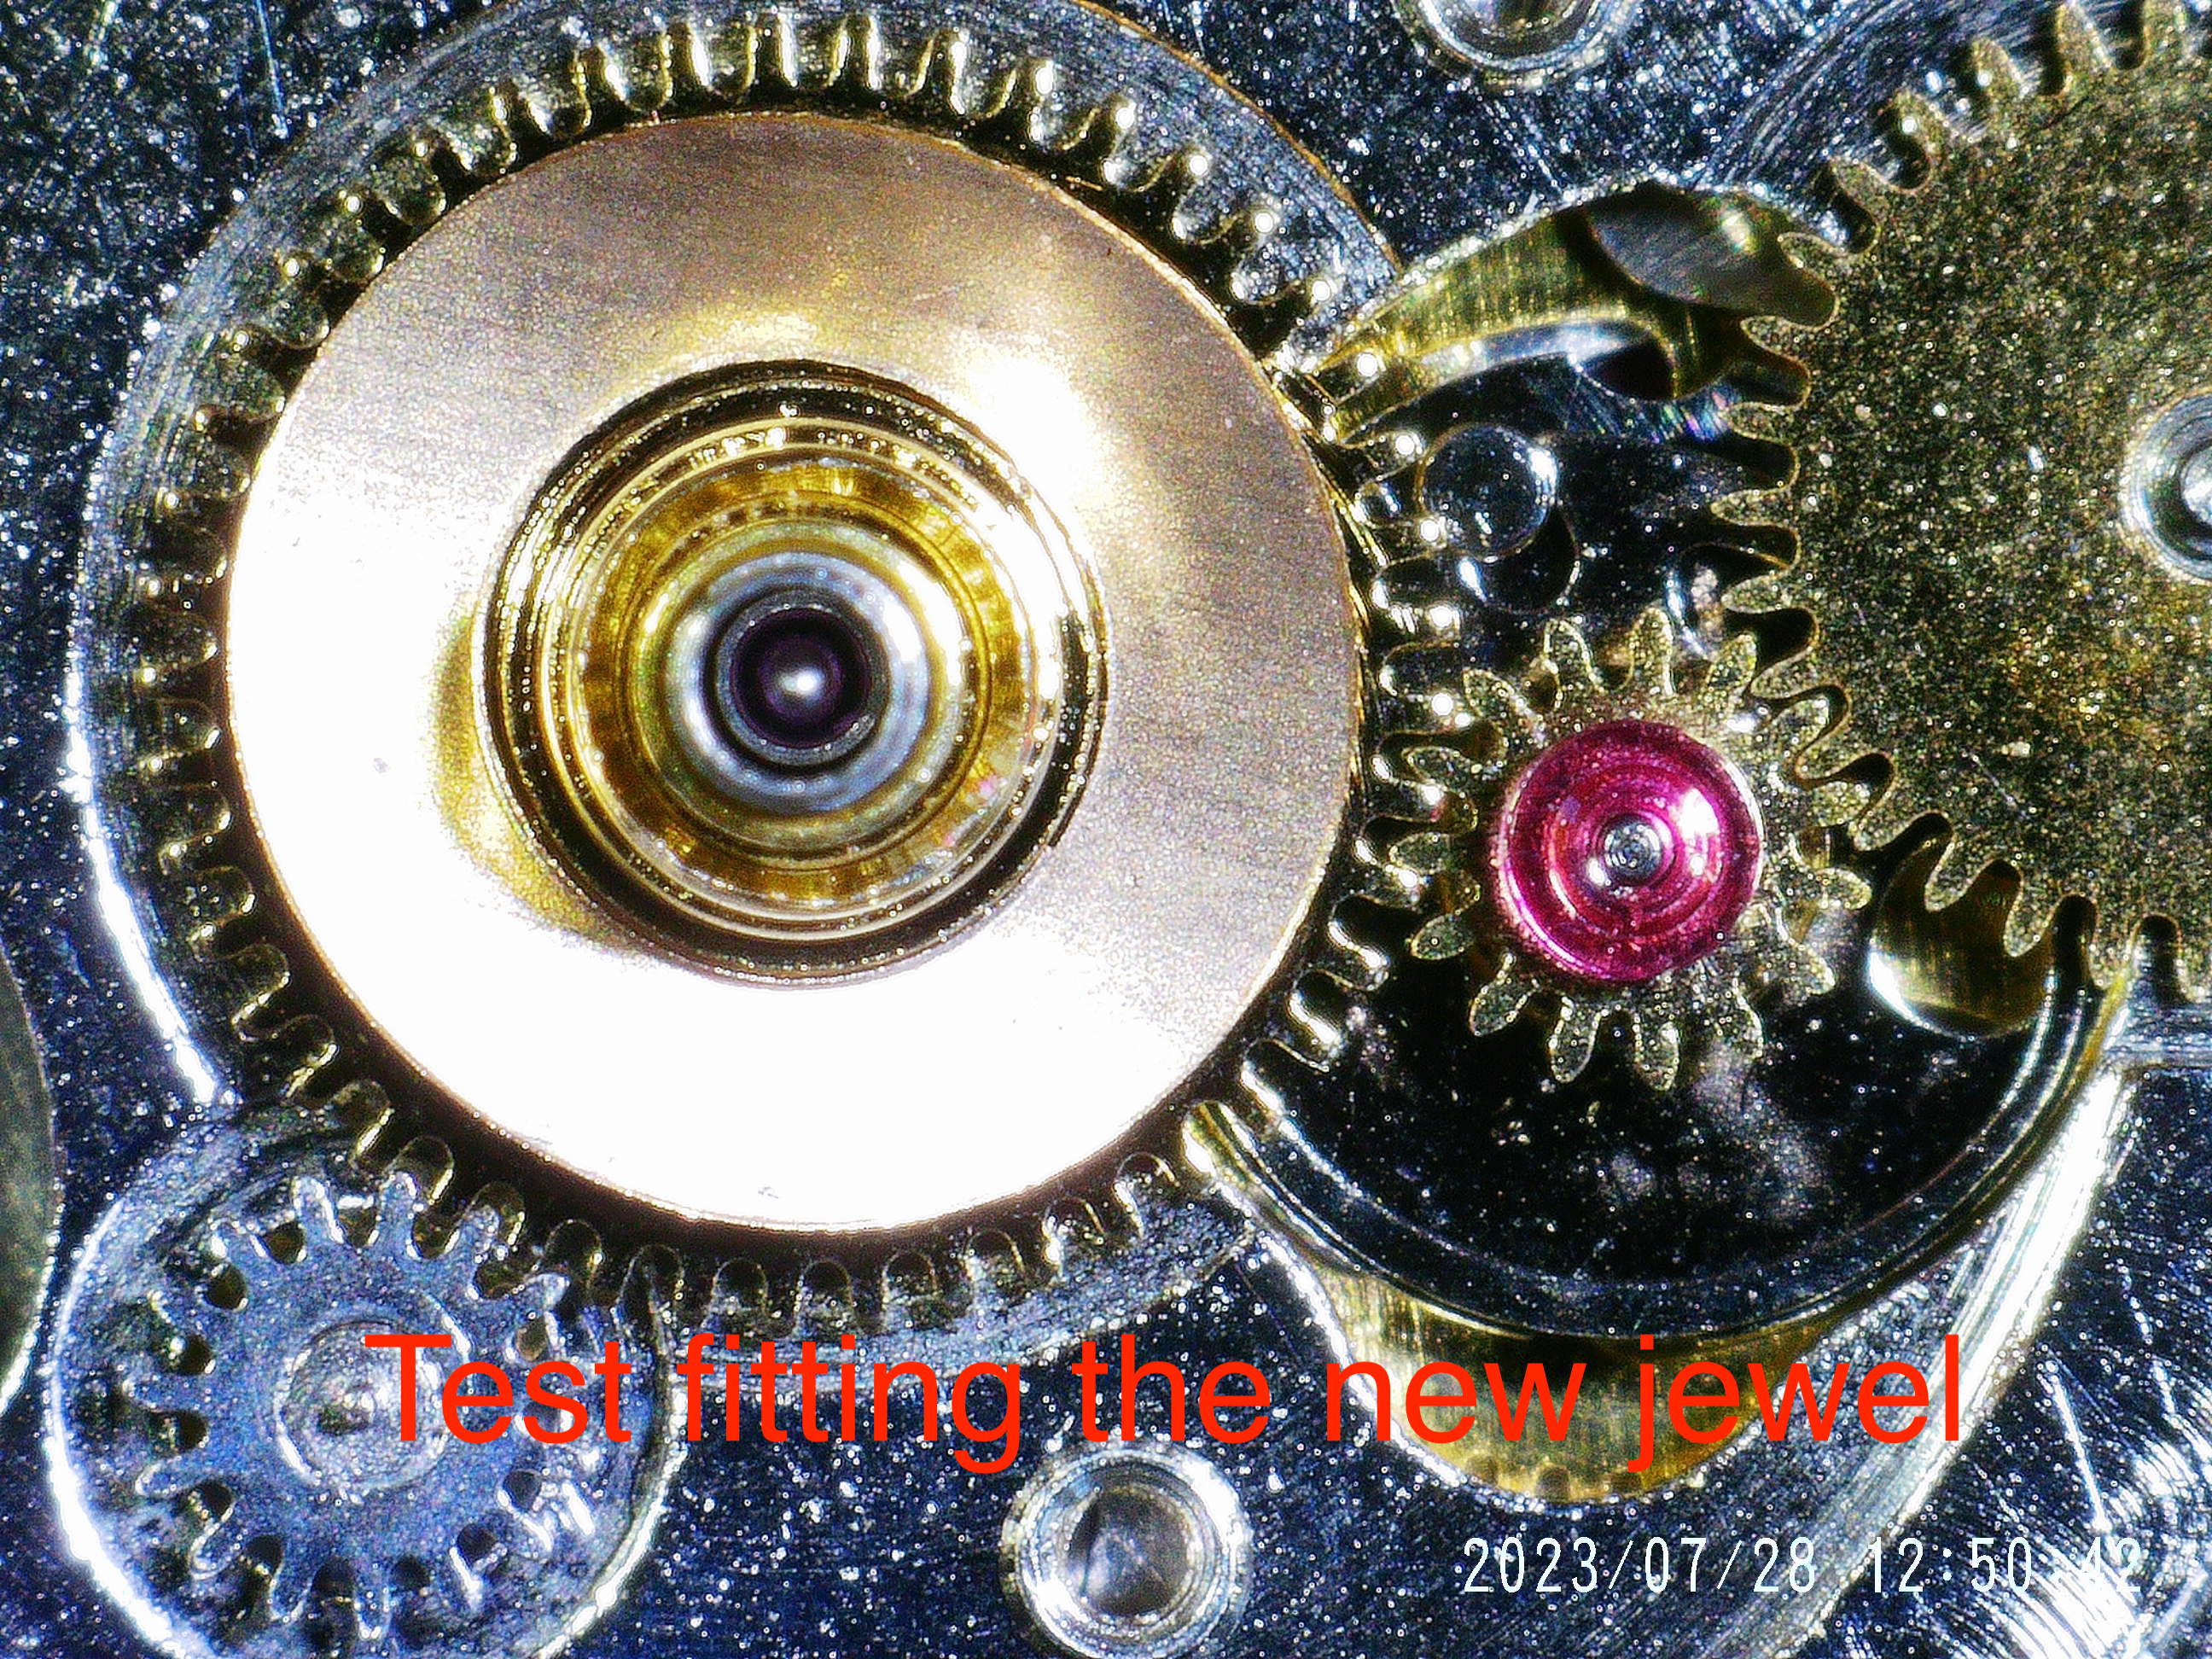
I pressed the new jewel into place:
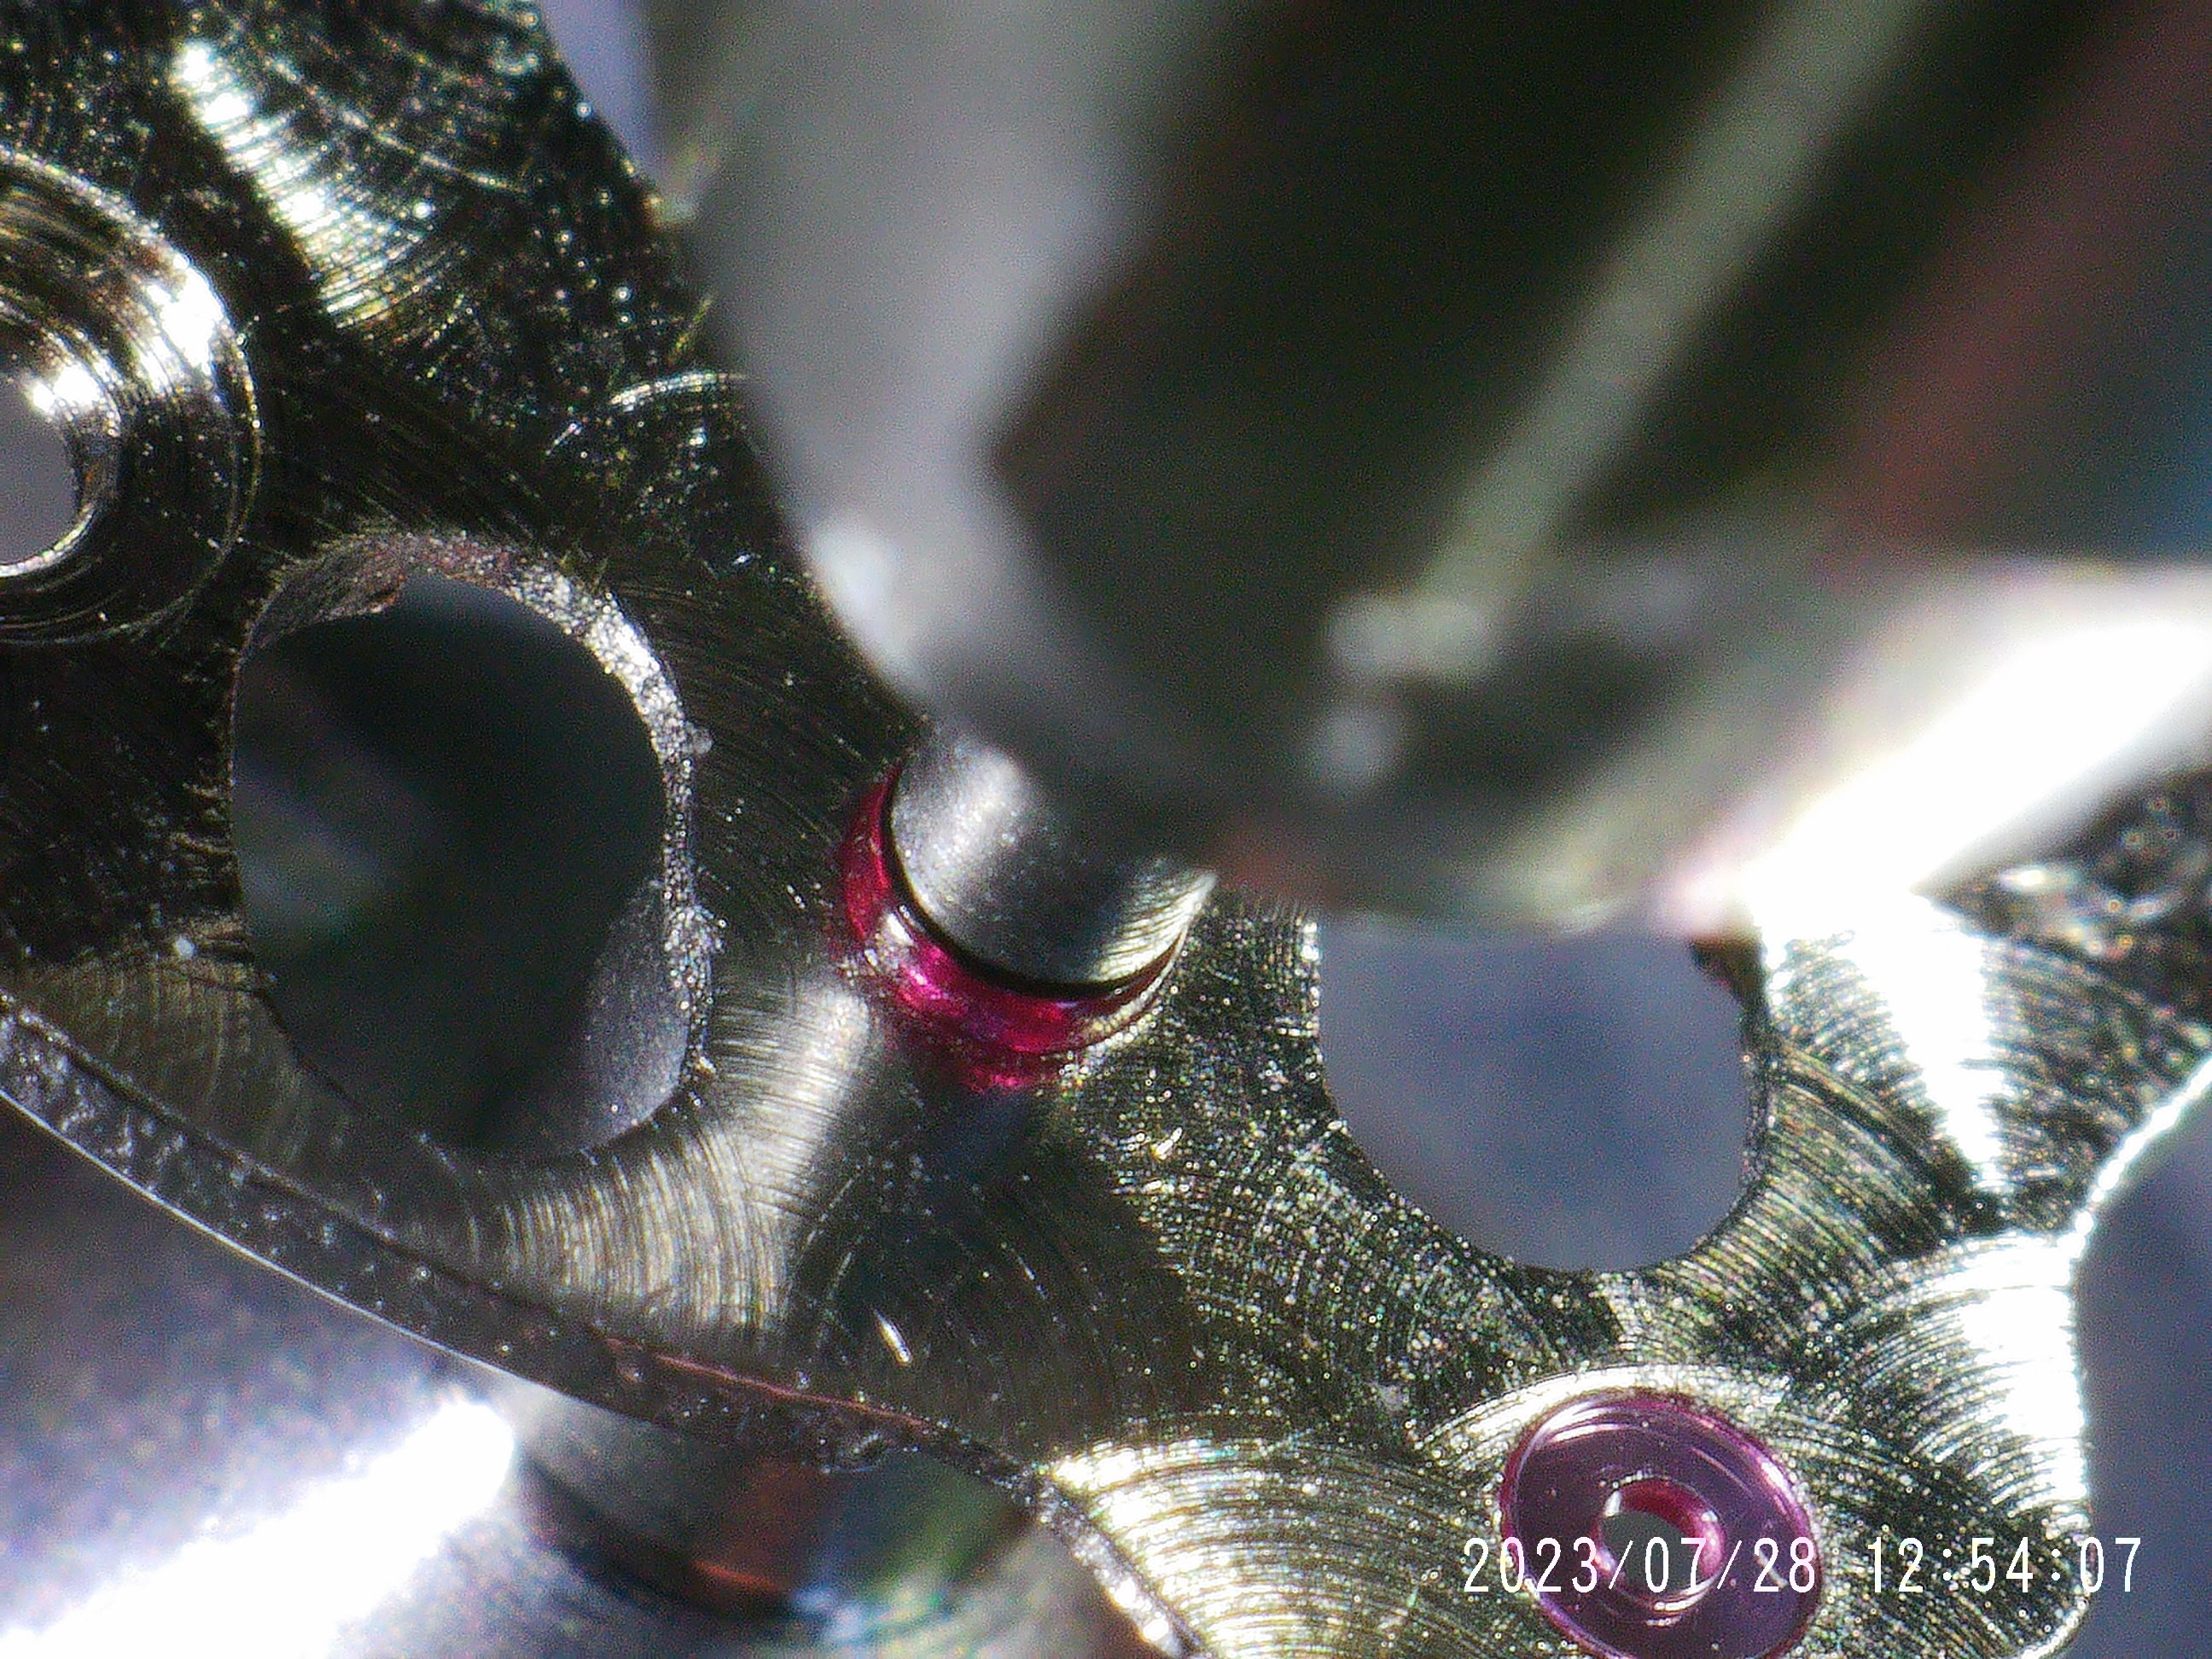
When I dropped the date plate bridge onto the date plate, the hour jumping mechanism pivot fit nice and snugly in its new jewel hole.
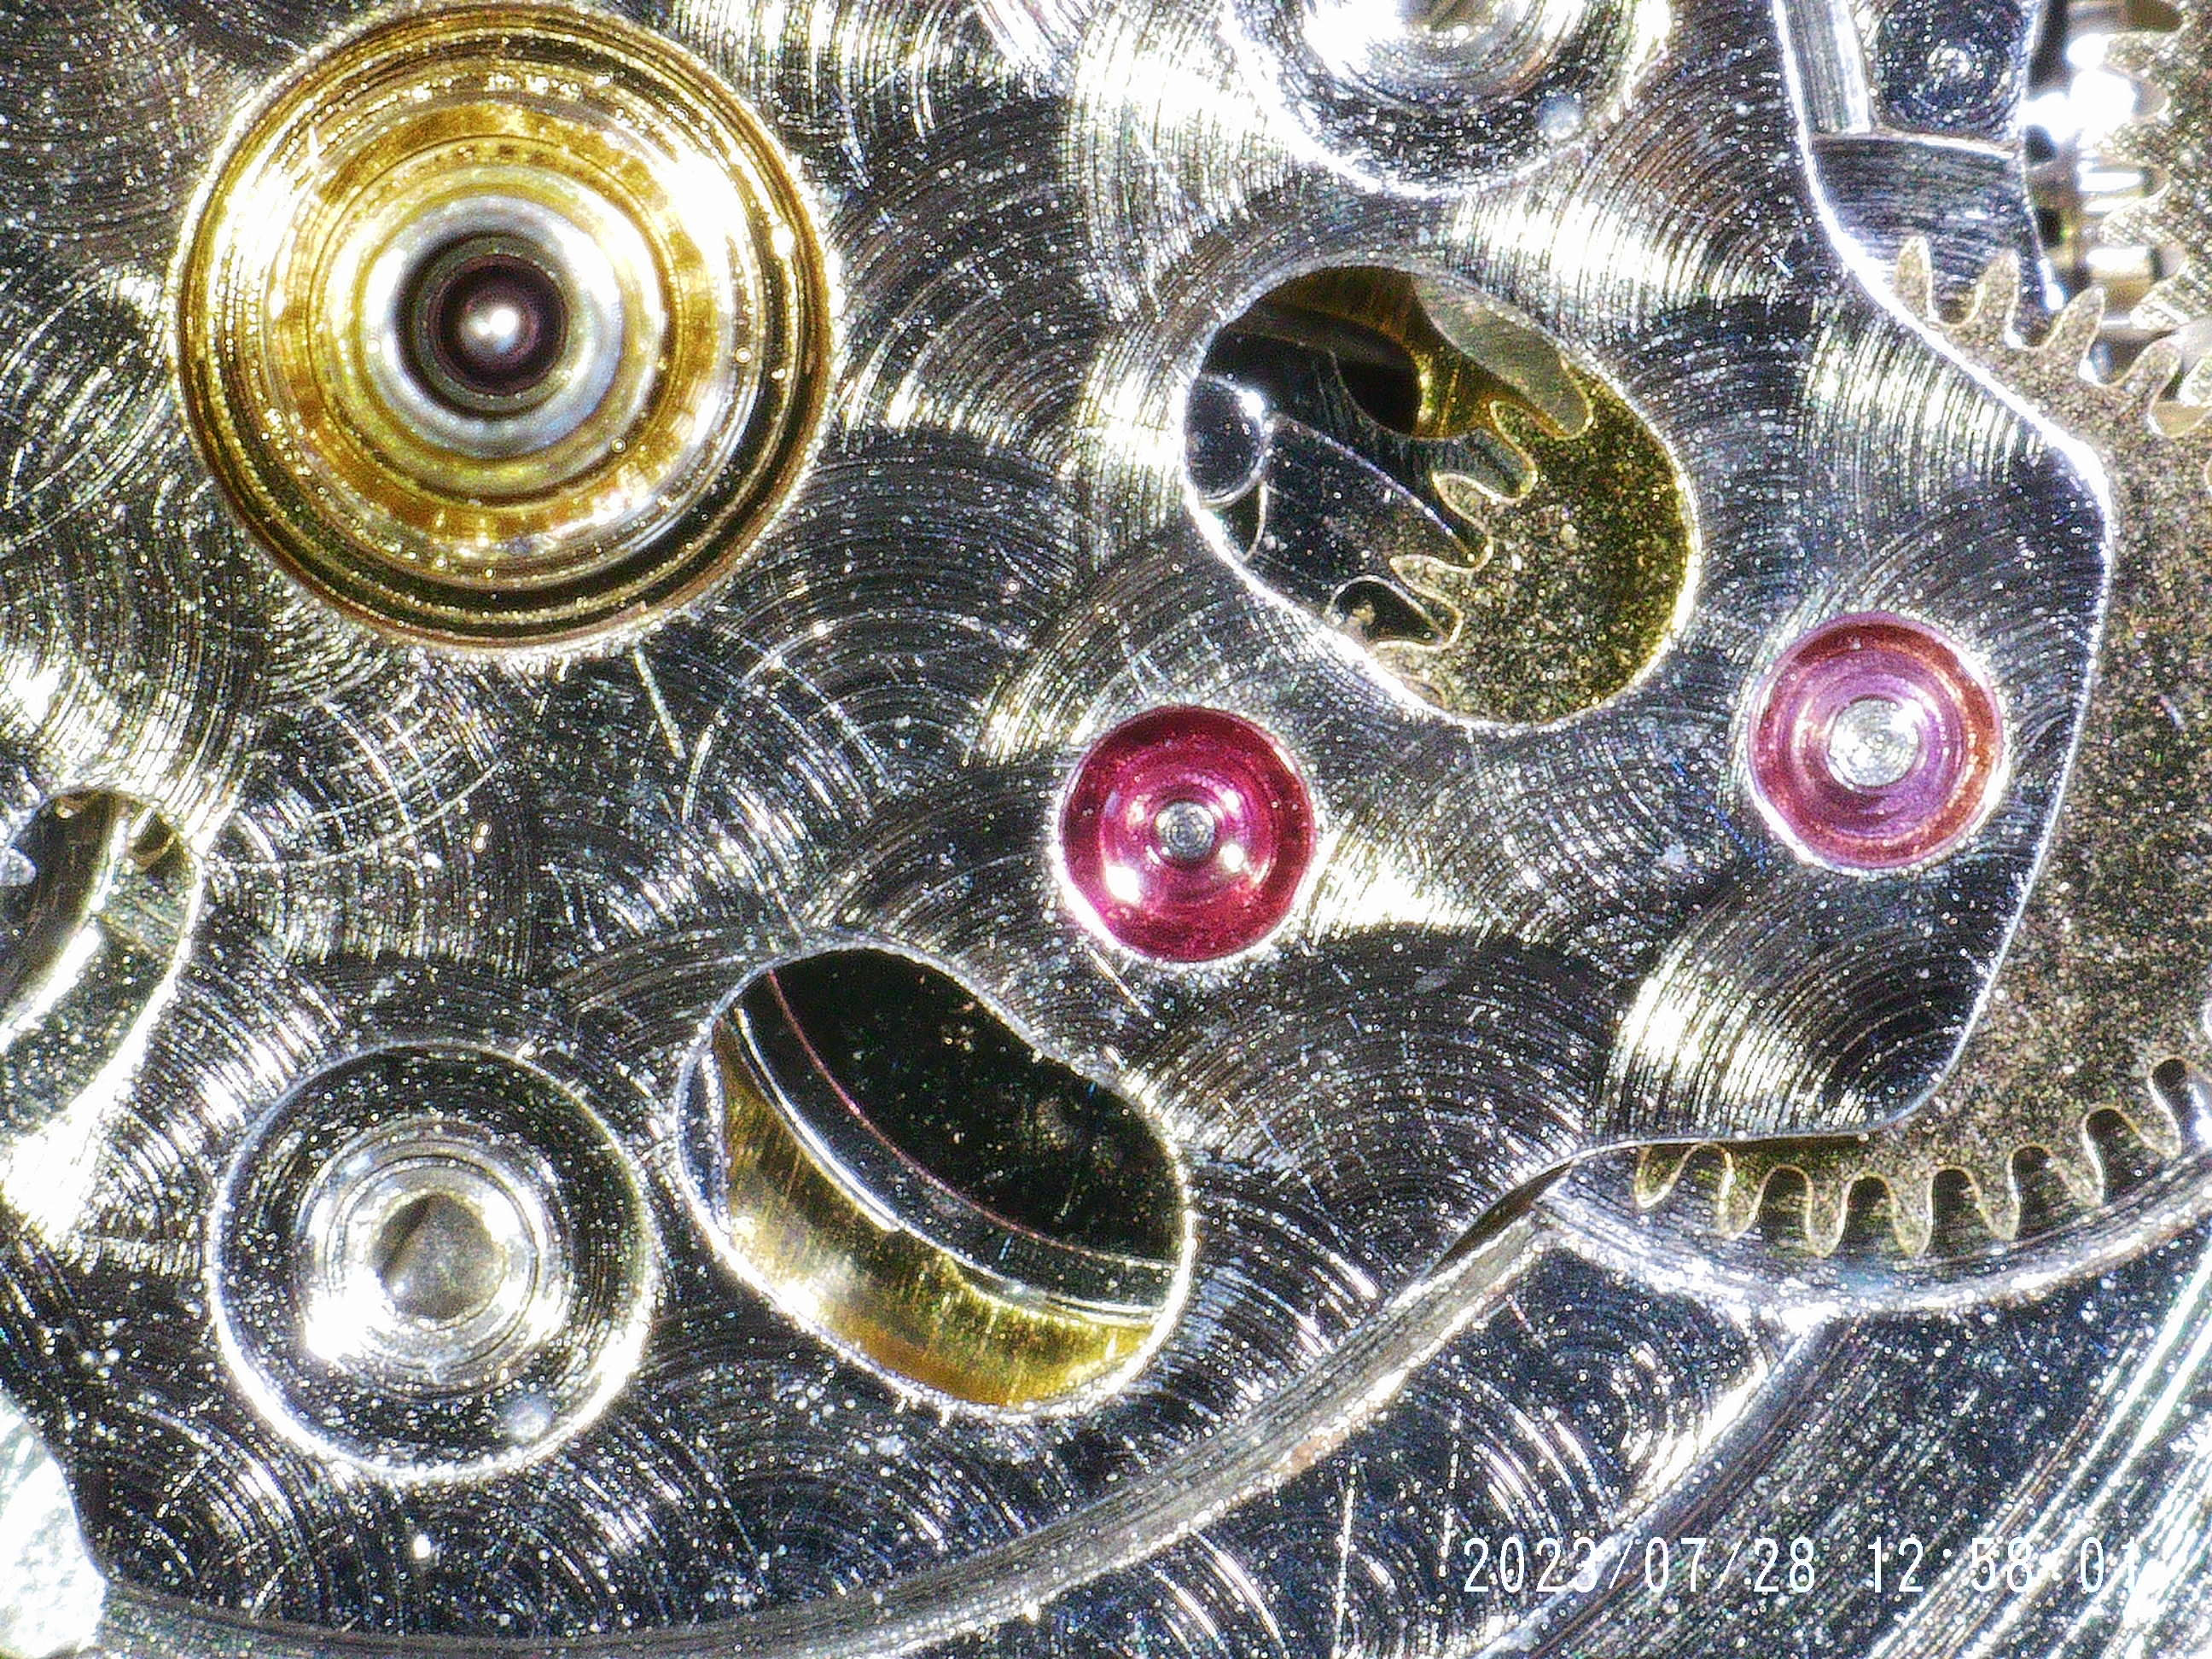
After extensive testing and as many hand positions s I could think of, I haven't had the hour jumping mechanism have any issue. If others attempt this mod, I think swapping out this jewel should not be considered optional.
- The date jumper spring on the SH3285 appears to either have slightly different geometry or is slightly weaker than the dd3285 version. This meant that the datewheel wasn't being held firmly in place after it clicked through at midnight.
- The oversized jewel hole in the SH date plate bridge for the hour hand jumping mechanism pivot lead to the jumping mechanism to pop off its spring under certain conditions.

To solve problem 2, I needed to push out the jewel with the large hole from the SH date plate bridge, and find a suitable 1.1mm jewel with a ~0.3mm hole from my assorted set of jewels.

I pressed the new jewel into place:

When I dropped the date plate bridge onto the date plate, the hour jumping mechanism pivot fit nice and snugly in its new jewel hole.

After extensive testing and as many hand positions s I could think of, I haven't had the hour jumping mechanism have any issue. If others attempt this mod, I think swapping out this jewel should not be considered optional.
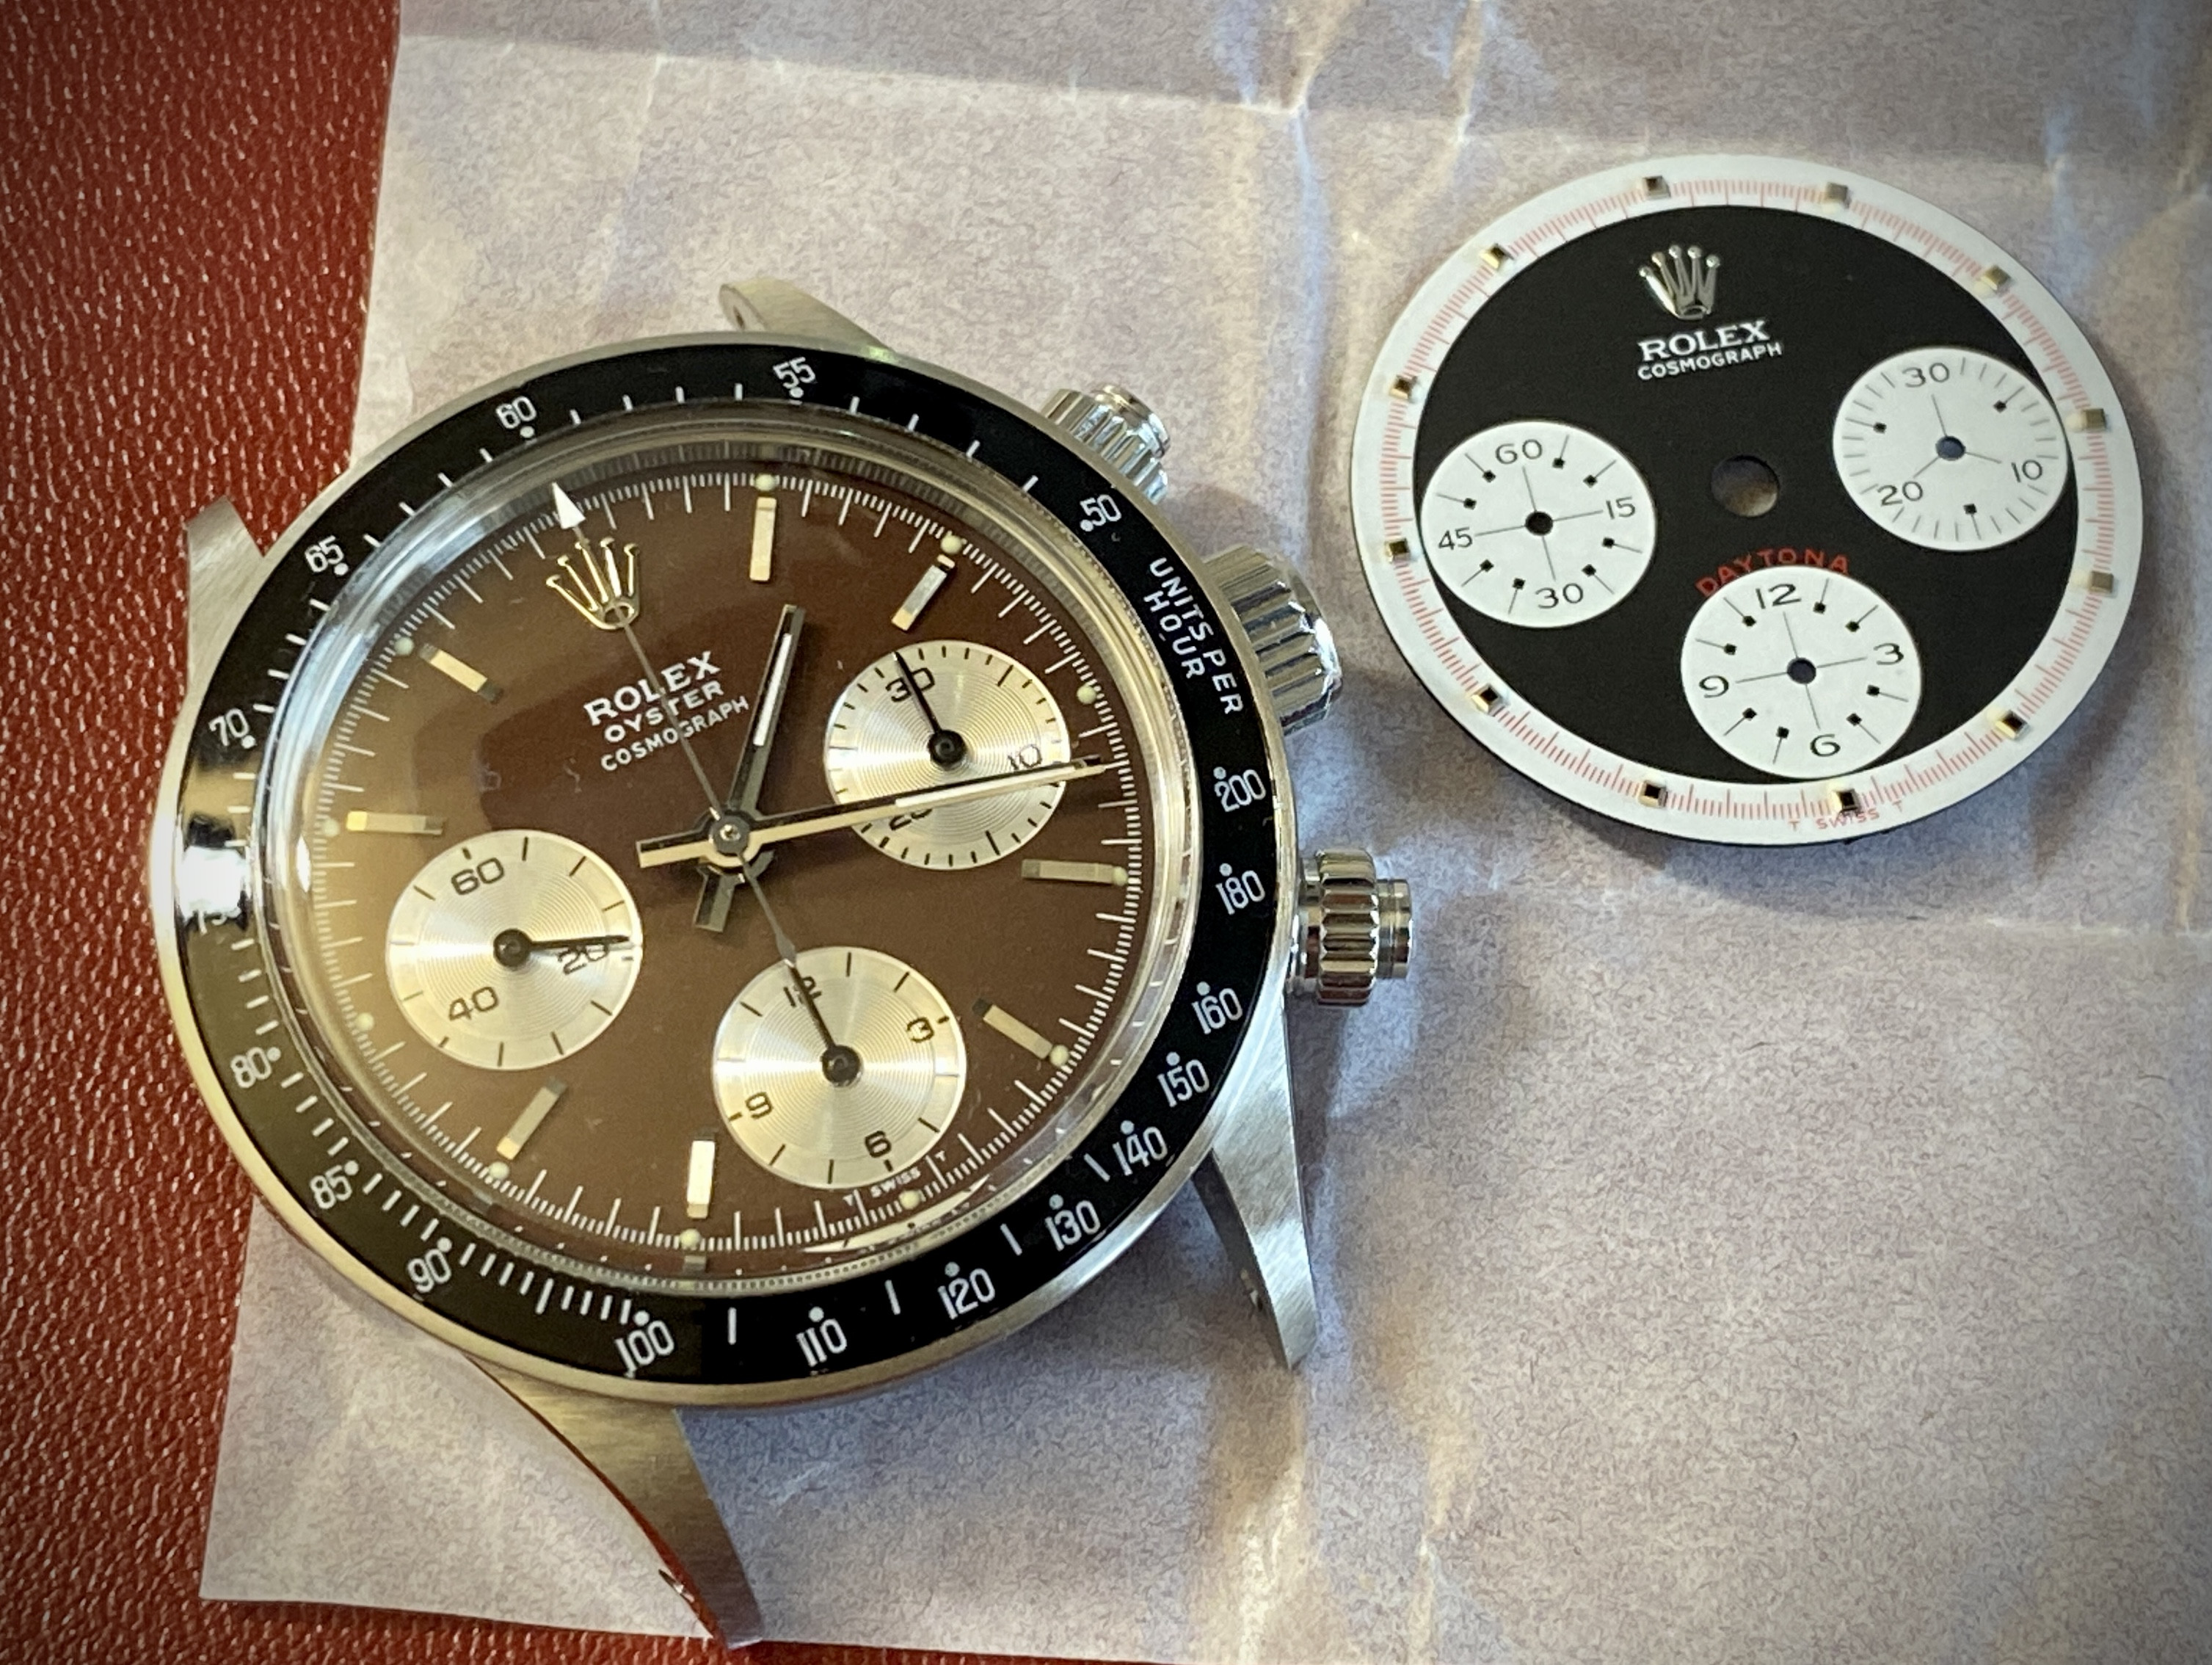
I've had a fun project on my bench this week: a Daytona 6263... The reps of these Daytonas are powered by the ST1903 movement. But the problem is that the ST1903 movement has the 6 o'clock subdial pinion in the wrong place so a true replica dial won't fit. Fortunately the 6 o'clock sub-dial on the rep is non functional, and somebody over on RWG has described a mod to move the pinion upwards towards the center of the watch to allow for a more gen like sub-dial position. This was my first time working on this watch and on the ST1903 movement, so I figured I'd document how it went and add some colour to the original mod procedure from RWG.
Here's what @scott223905 sent me: the watch and the new dial:
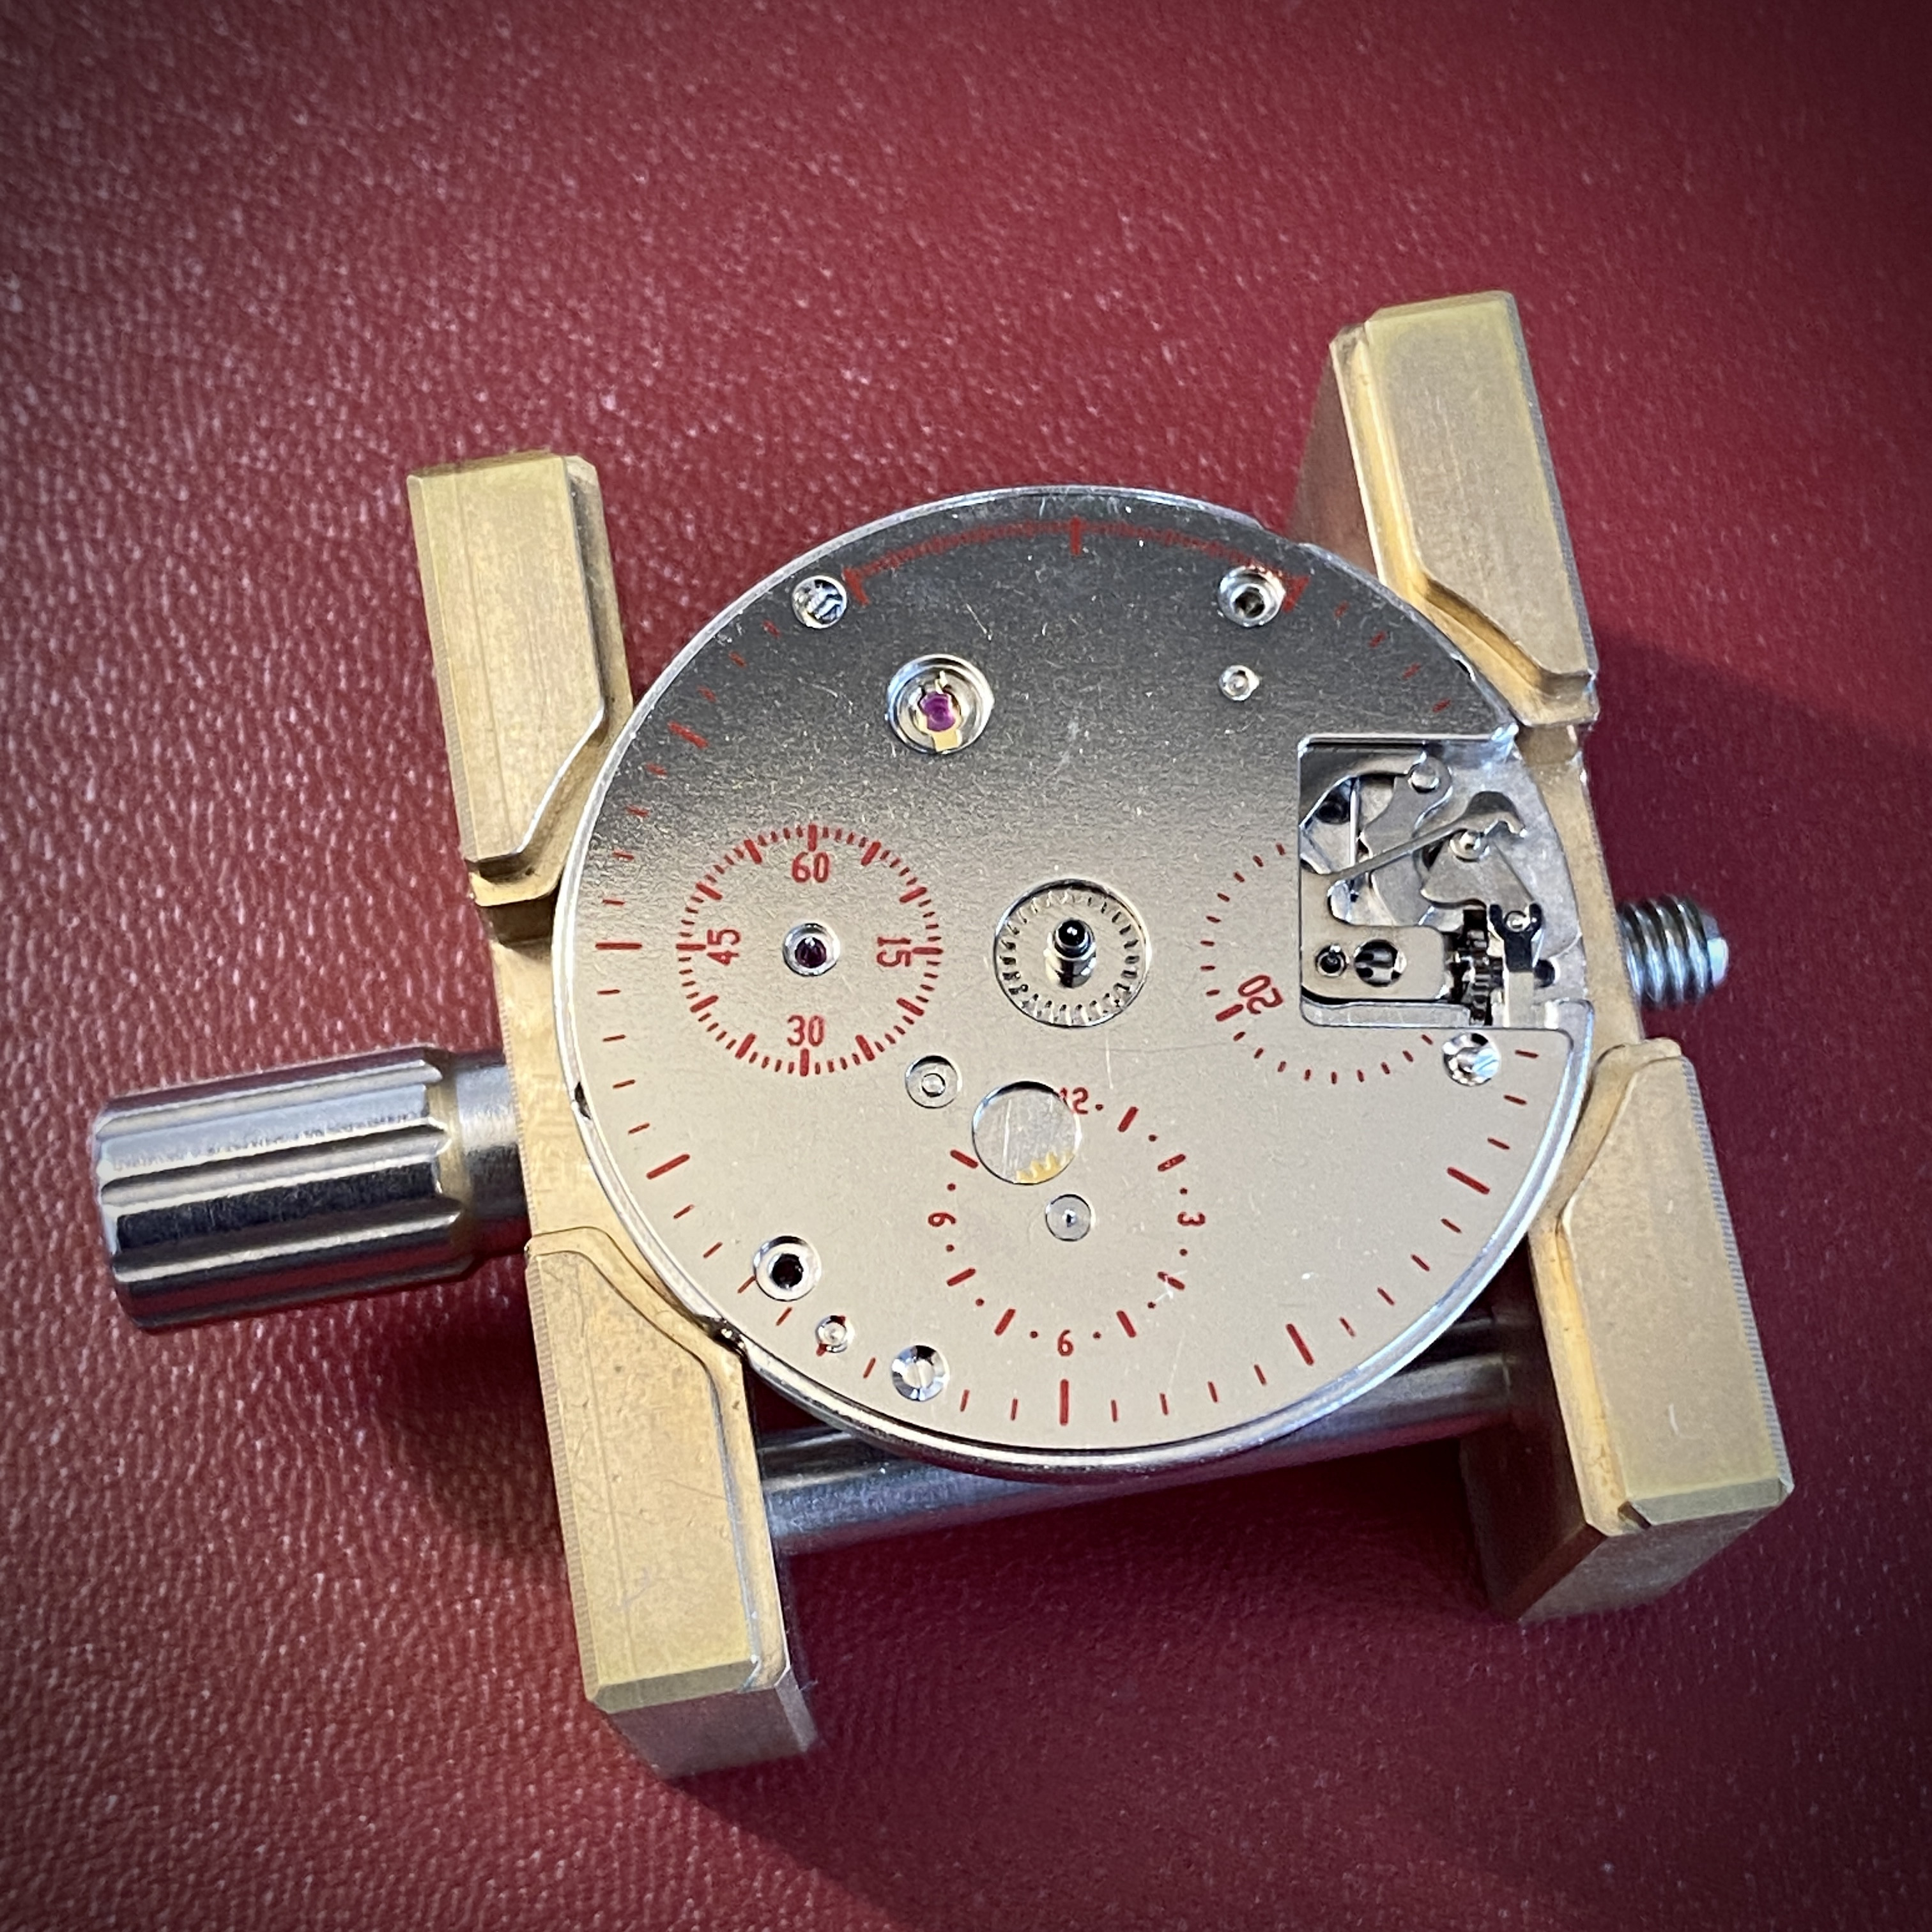
After removing the movement from the case, and removing the old dial, this is what the dial side of the movement looks like:
After removing the dial side top plate, the false 6 o'clock sub-dial pinion can be seen. I was under the impression from the description on RWG that this pinion would simply come free, but it is in fact very well wedged / stuck into its pivot hole. In hind sight, this makes sense -- if it were loose at all, there would be a risk of the sub dial hand moving when the watch took a knock.
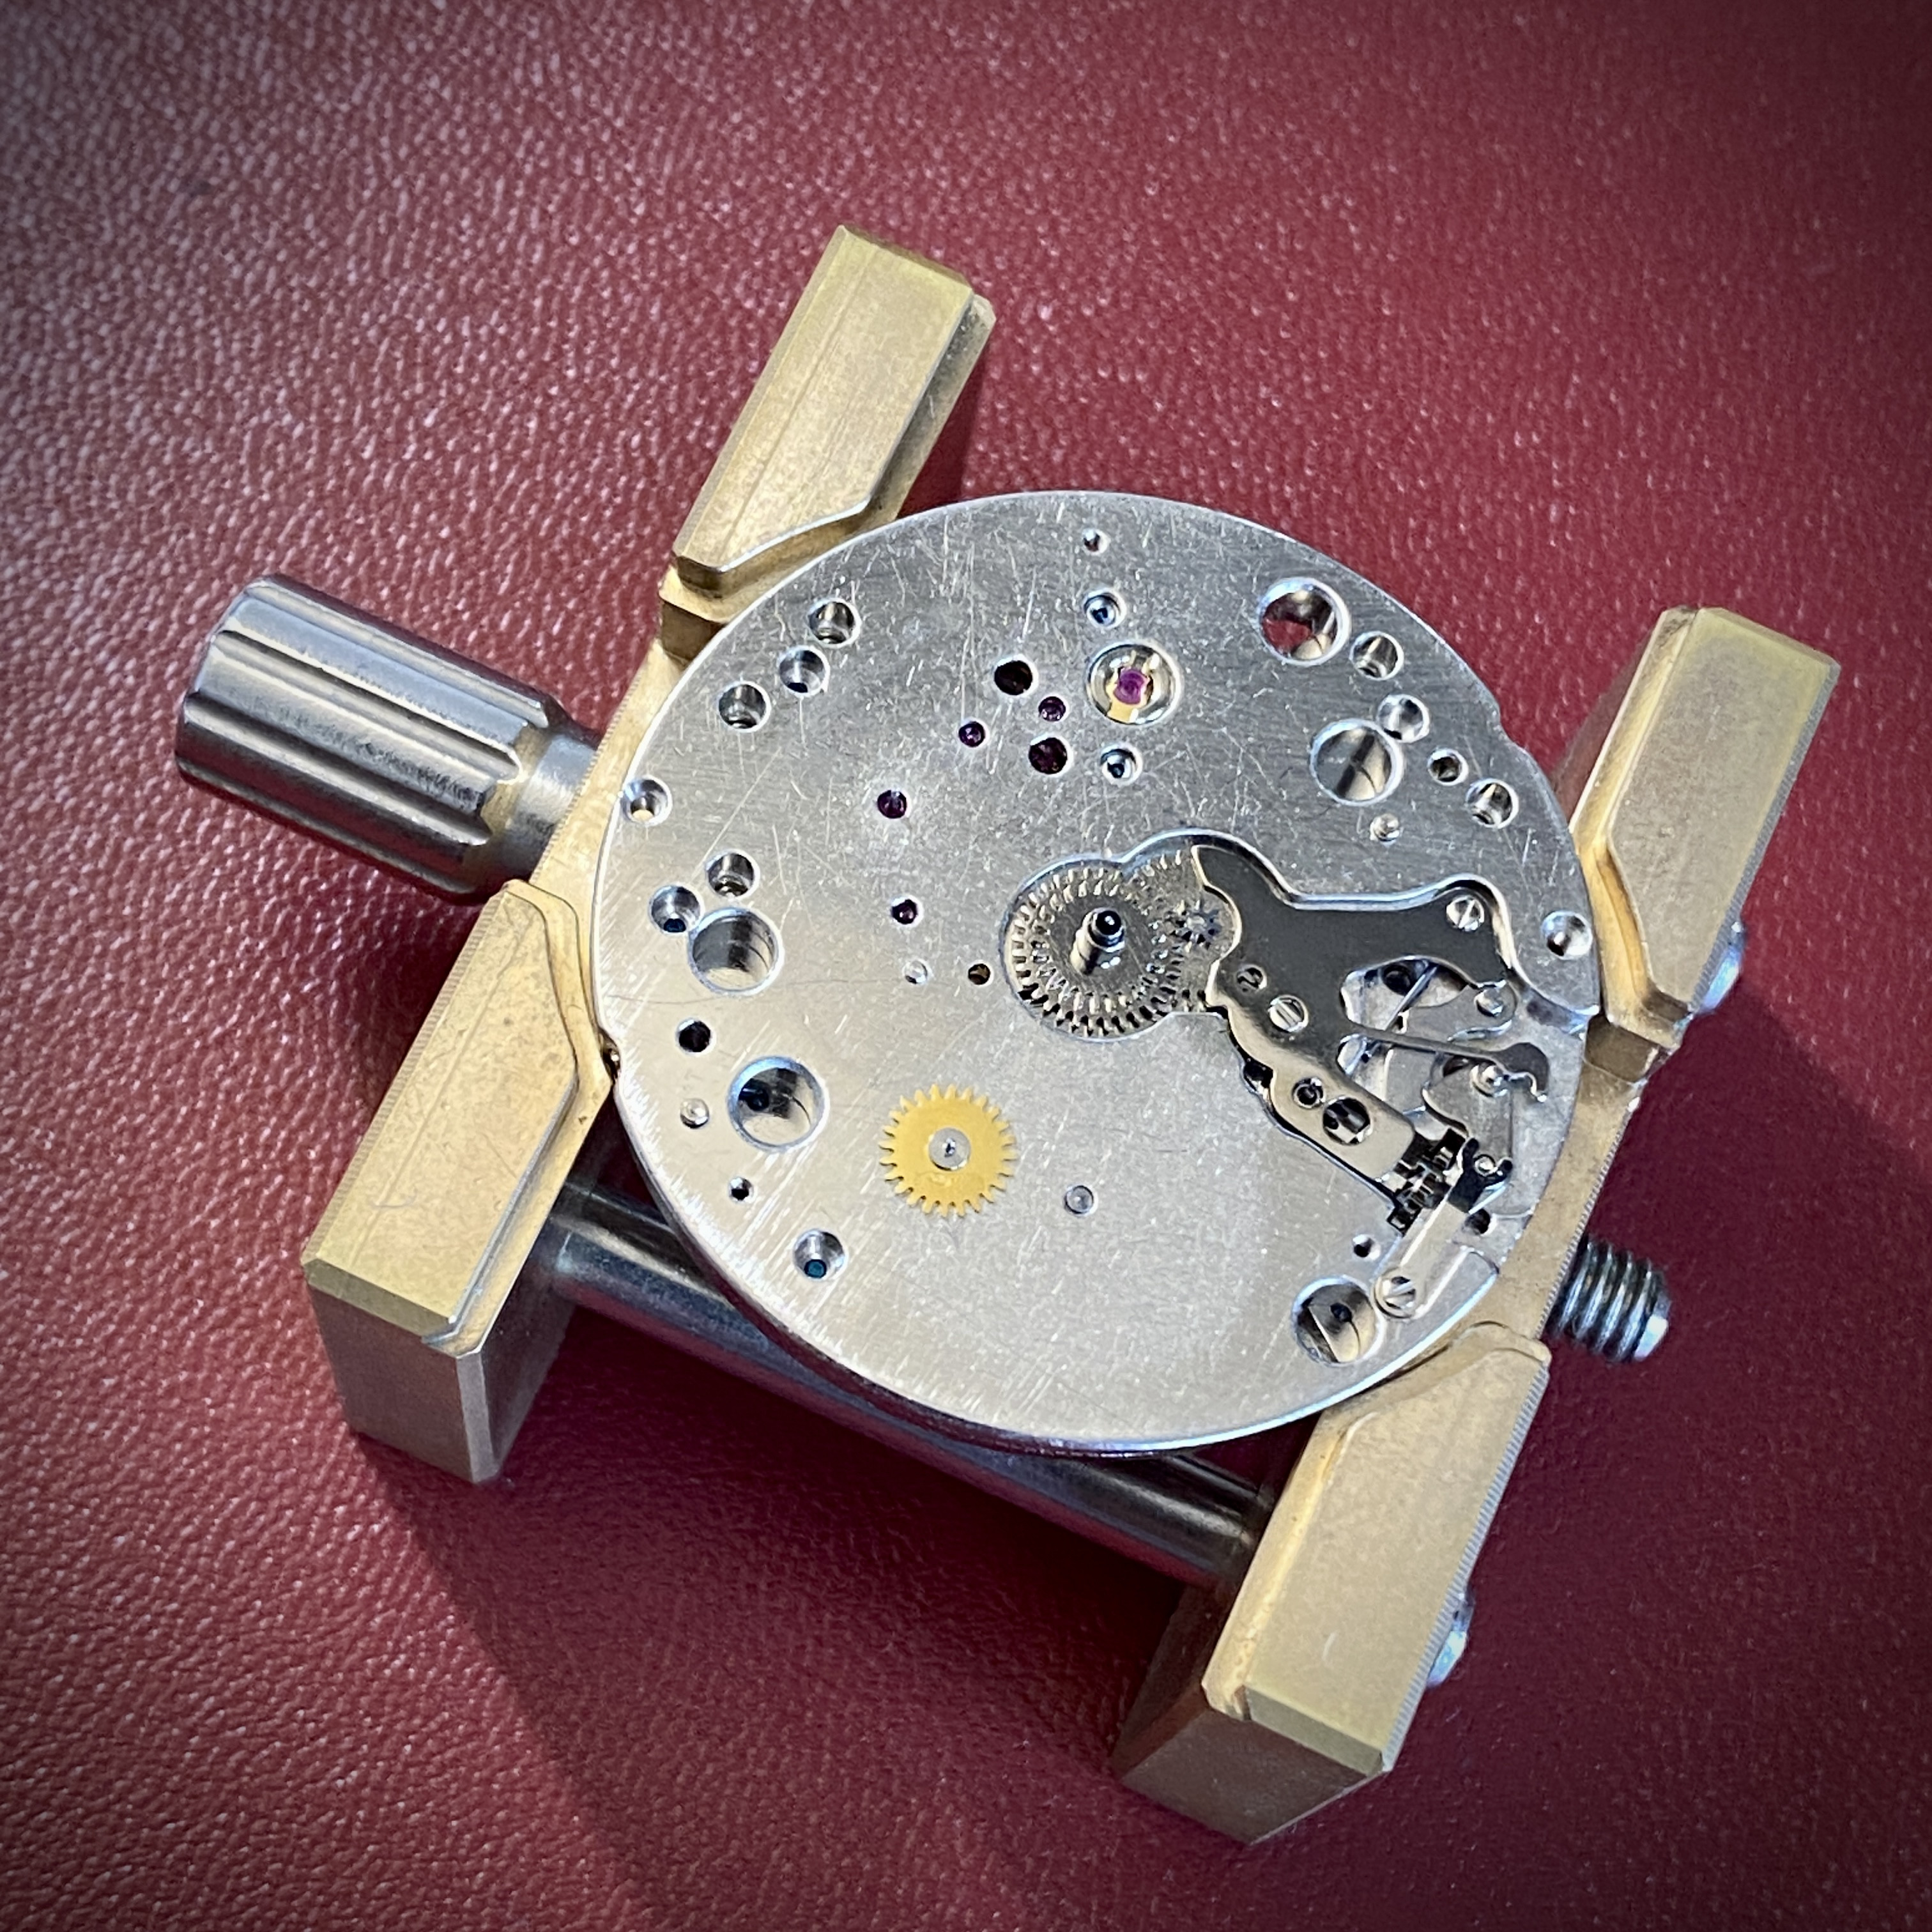
I tried pulling the pinion free with a pin vise, but didn't want to risk breaking the pinion by applying excessive force. And this left me in the uncomfortable position of having to knock the pinion out from the other side of the main plate.
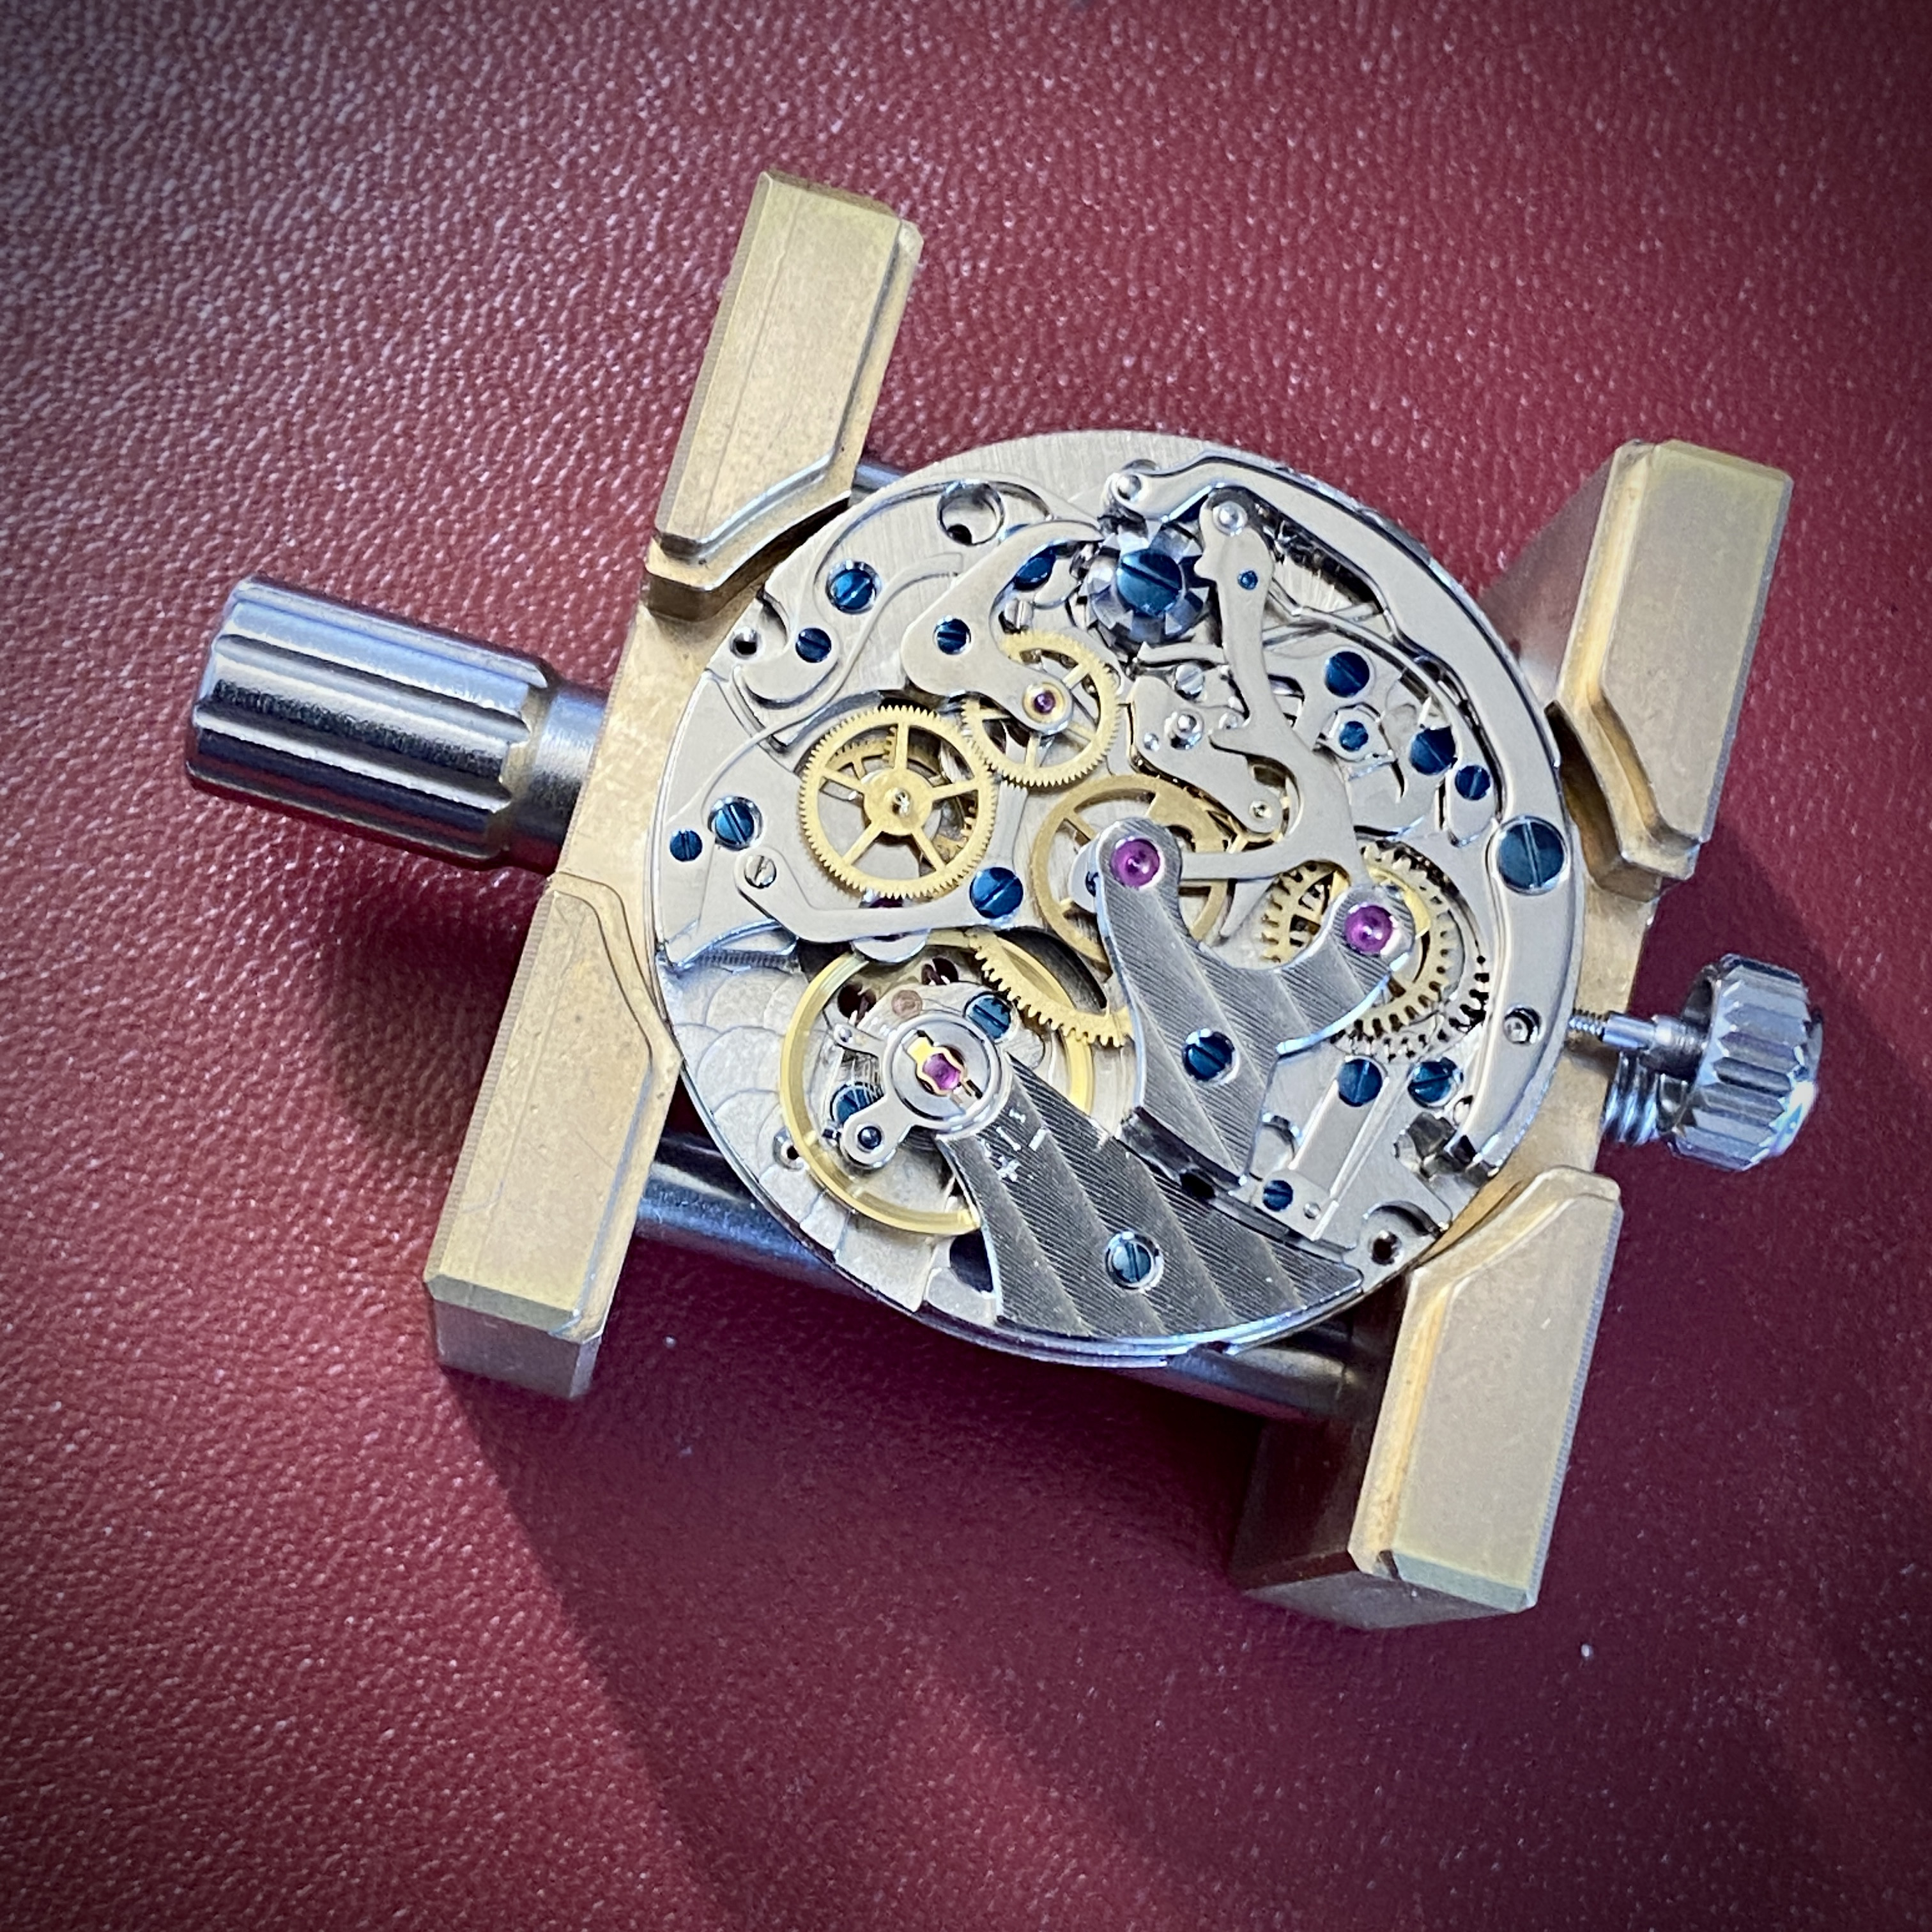
Unfortunately, getting at the other side of the pinion through the mainplate looked like it would involve basically disassembling the entire movement... a (chronograph!!!) movement that I'd never worked on before.
I ended up doing a bit of research and found a good tear down video by Mark Lovick of the ST1903... after studying the video, I was able to come up with a plan where I'd be able to remove most of the movement intact. The trick is to remove the chronograph start / stop lever, the spring for the start / stop lever, the moving clutch wheel, the spring for the moving clutch wheel, the press fit chronograph connection wheel, the balance, the cannon pinion, the escape wheel bridge, and the escape wheel. It's then possible to remove the entire chonograph module / train bridge assembly intact.
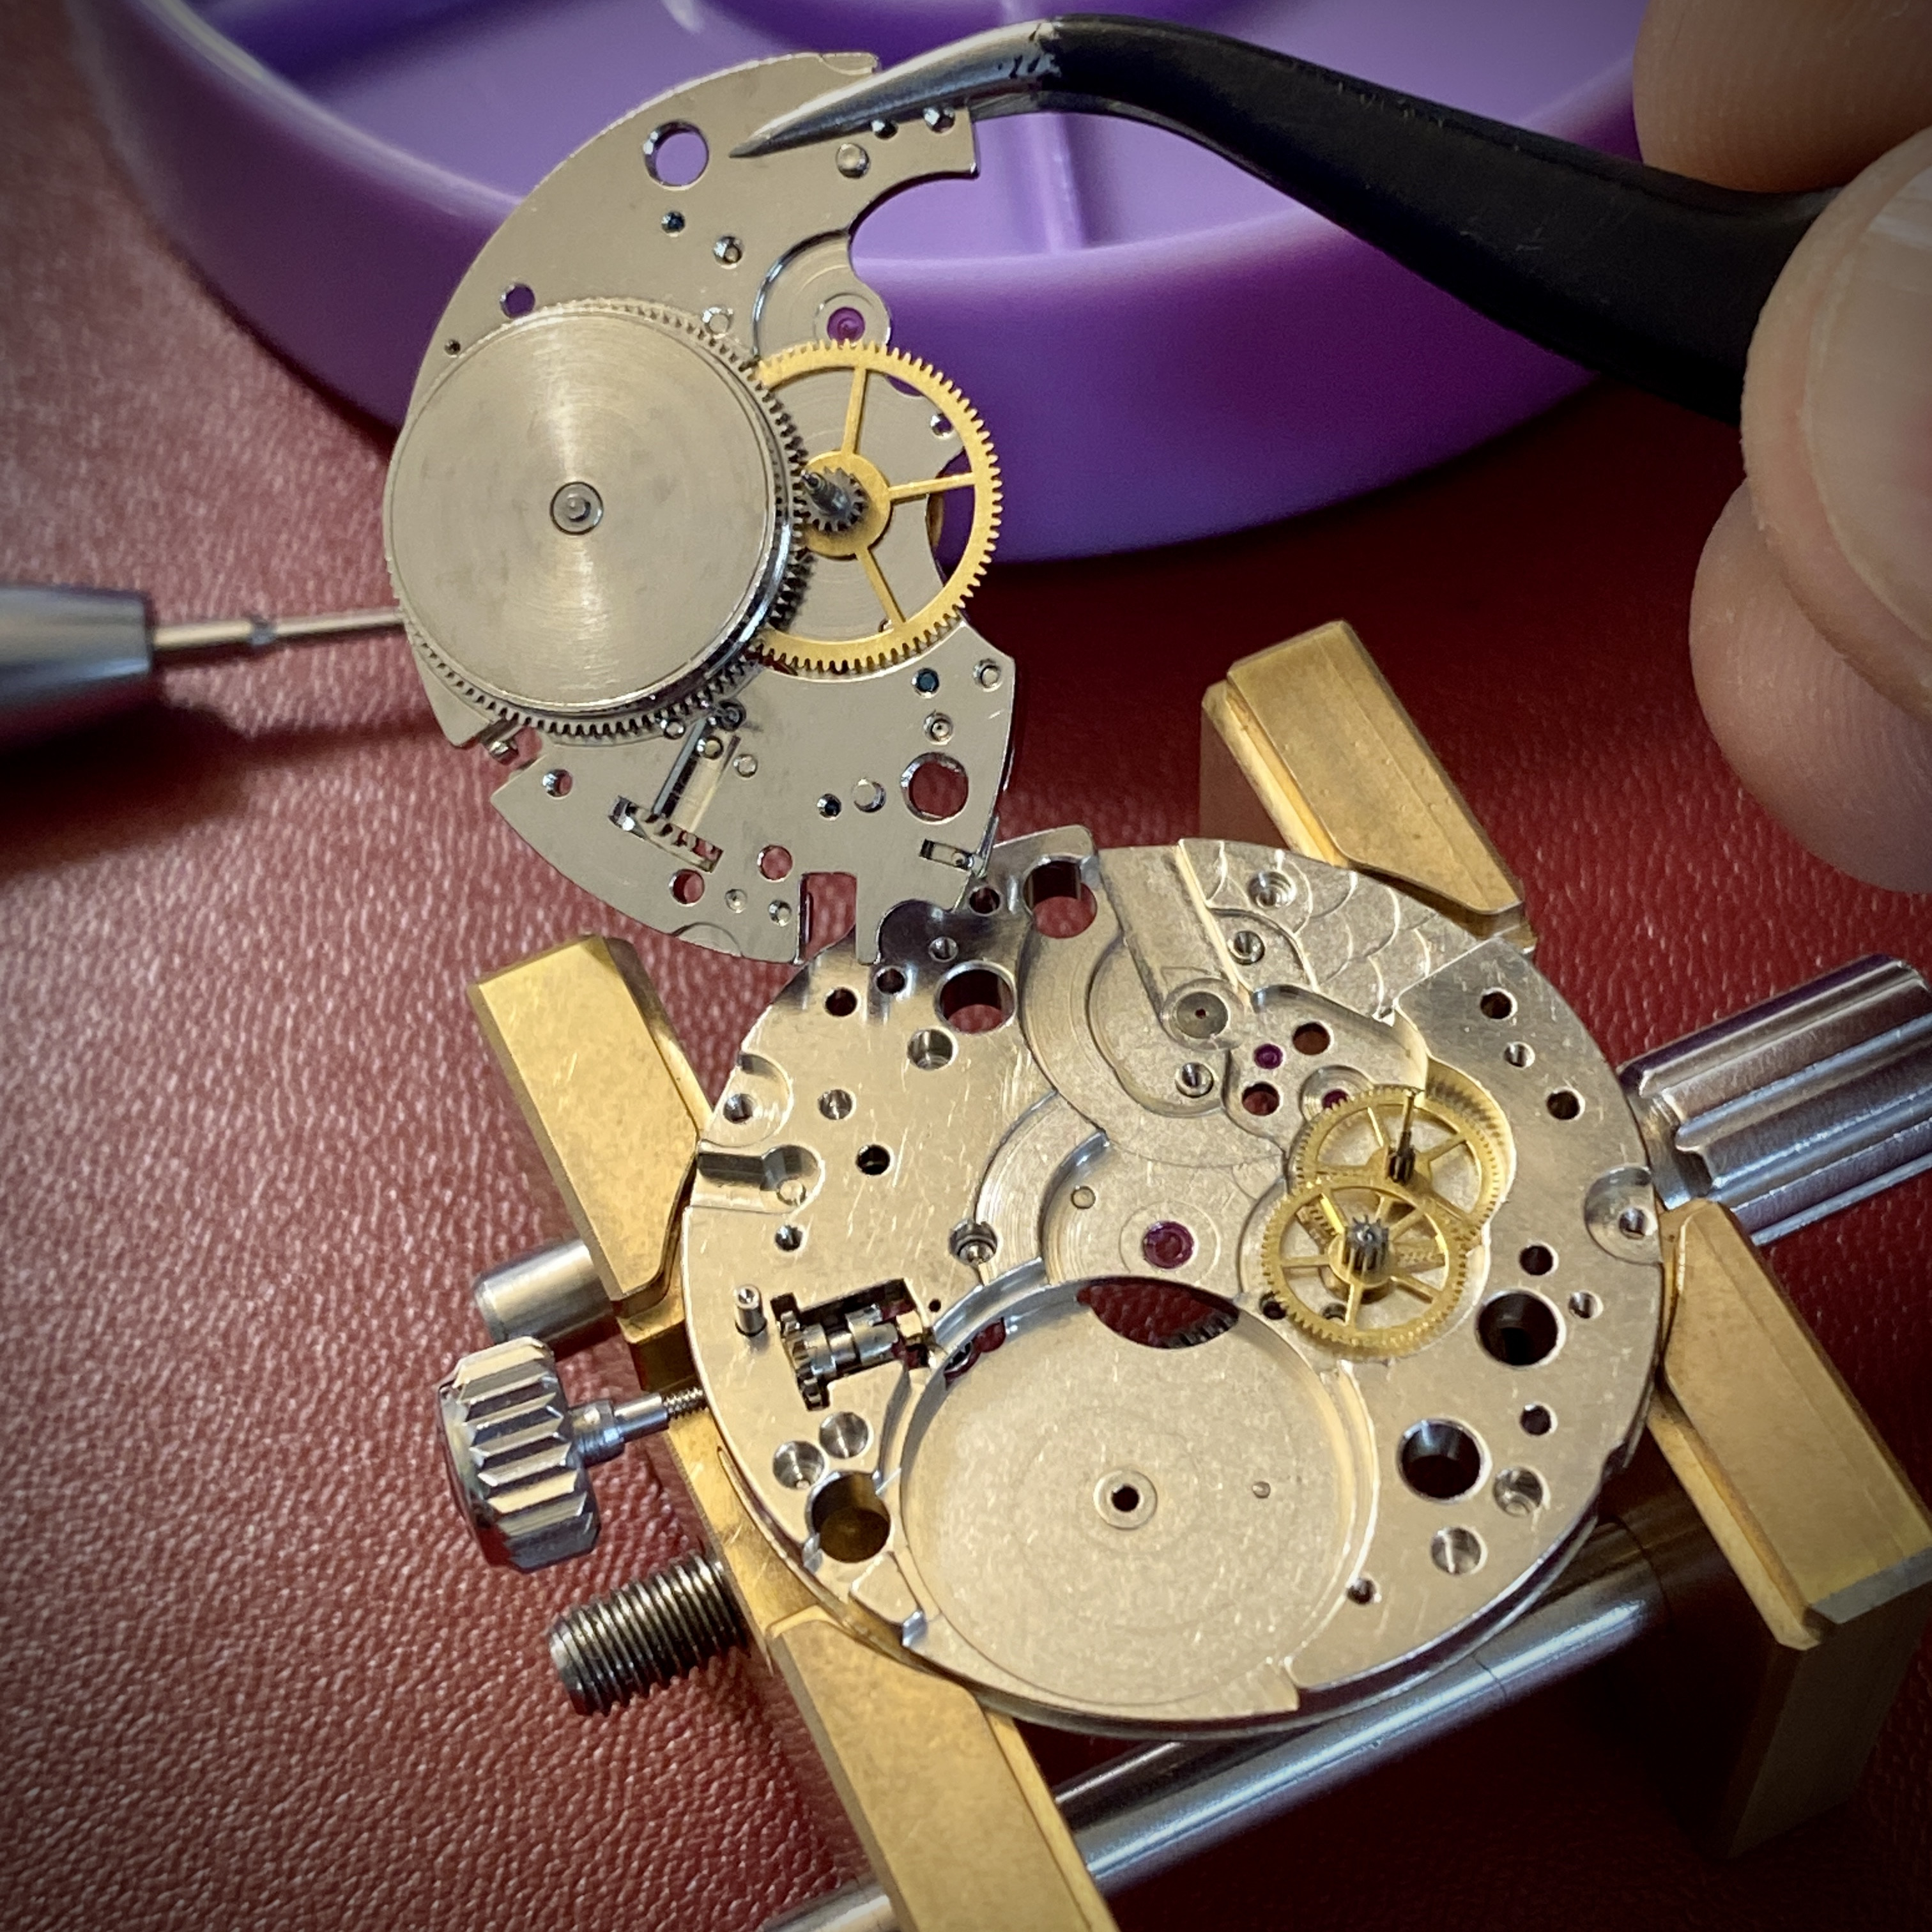
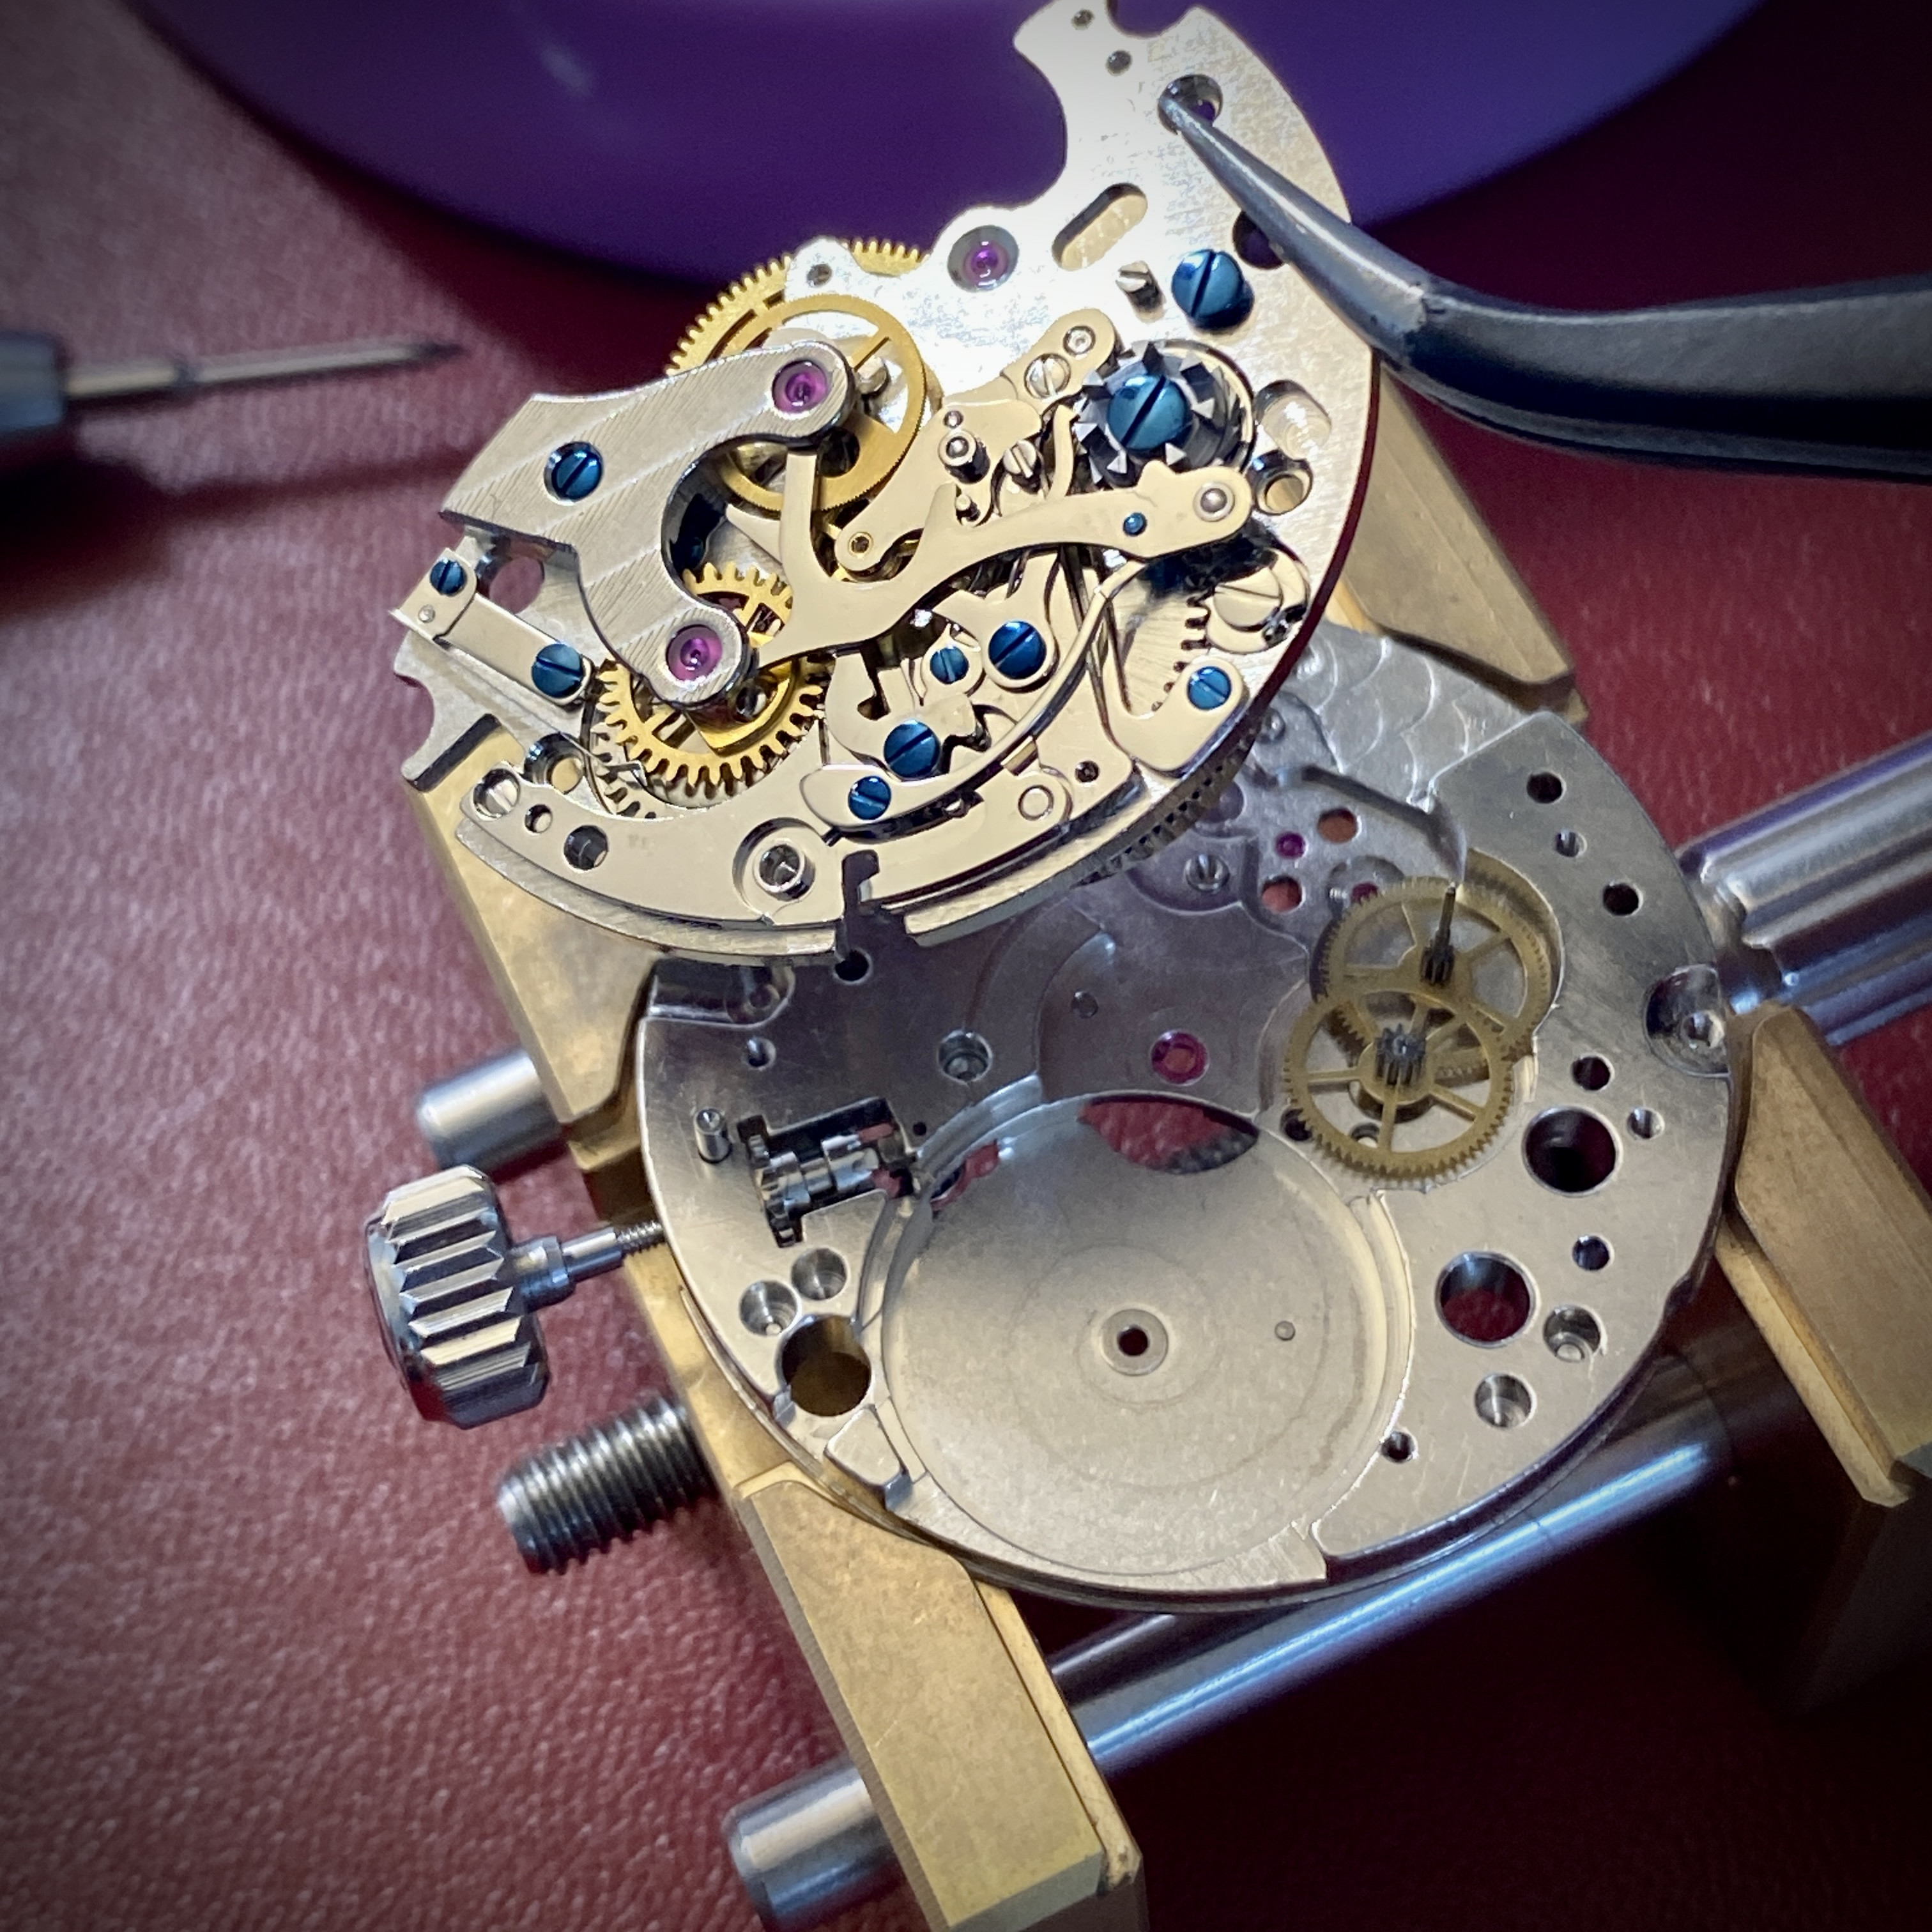
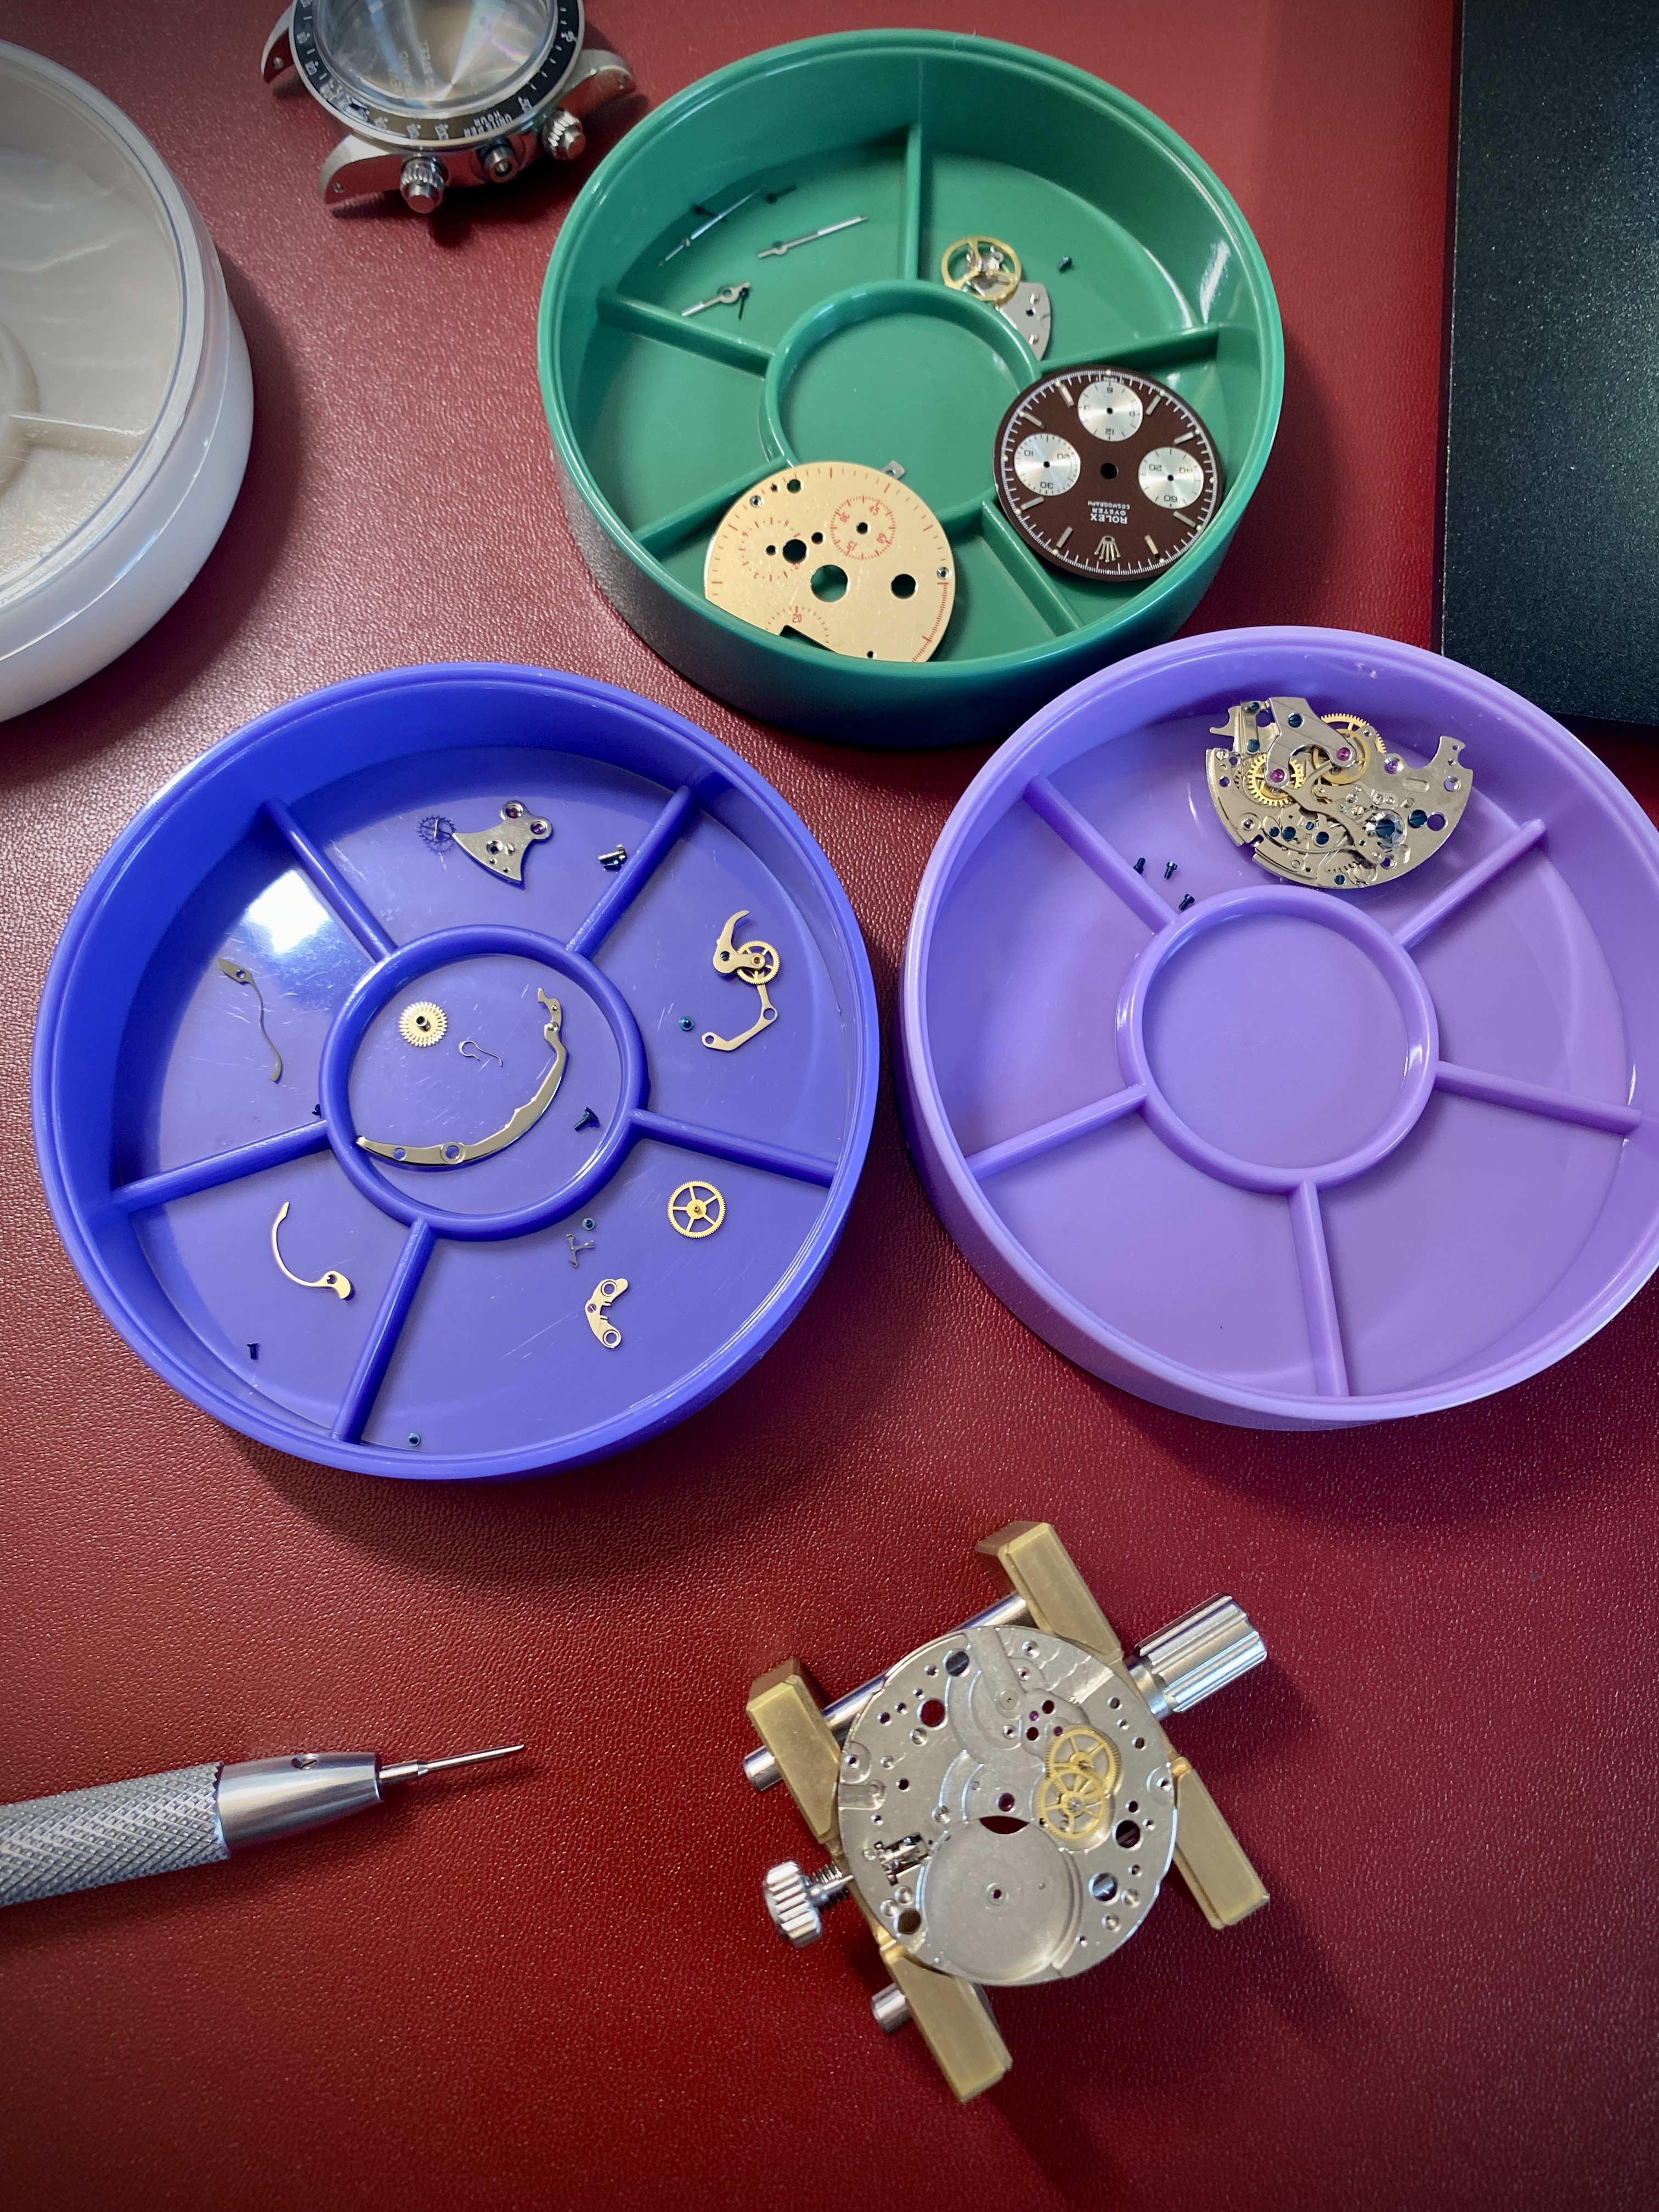
With all those parts removed, it's possible to use a stake to punch out the 6 o'clock pinion form the bottom of the mainspring well in the main plate.
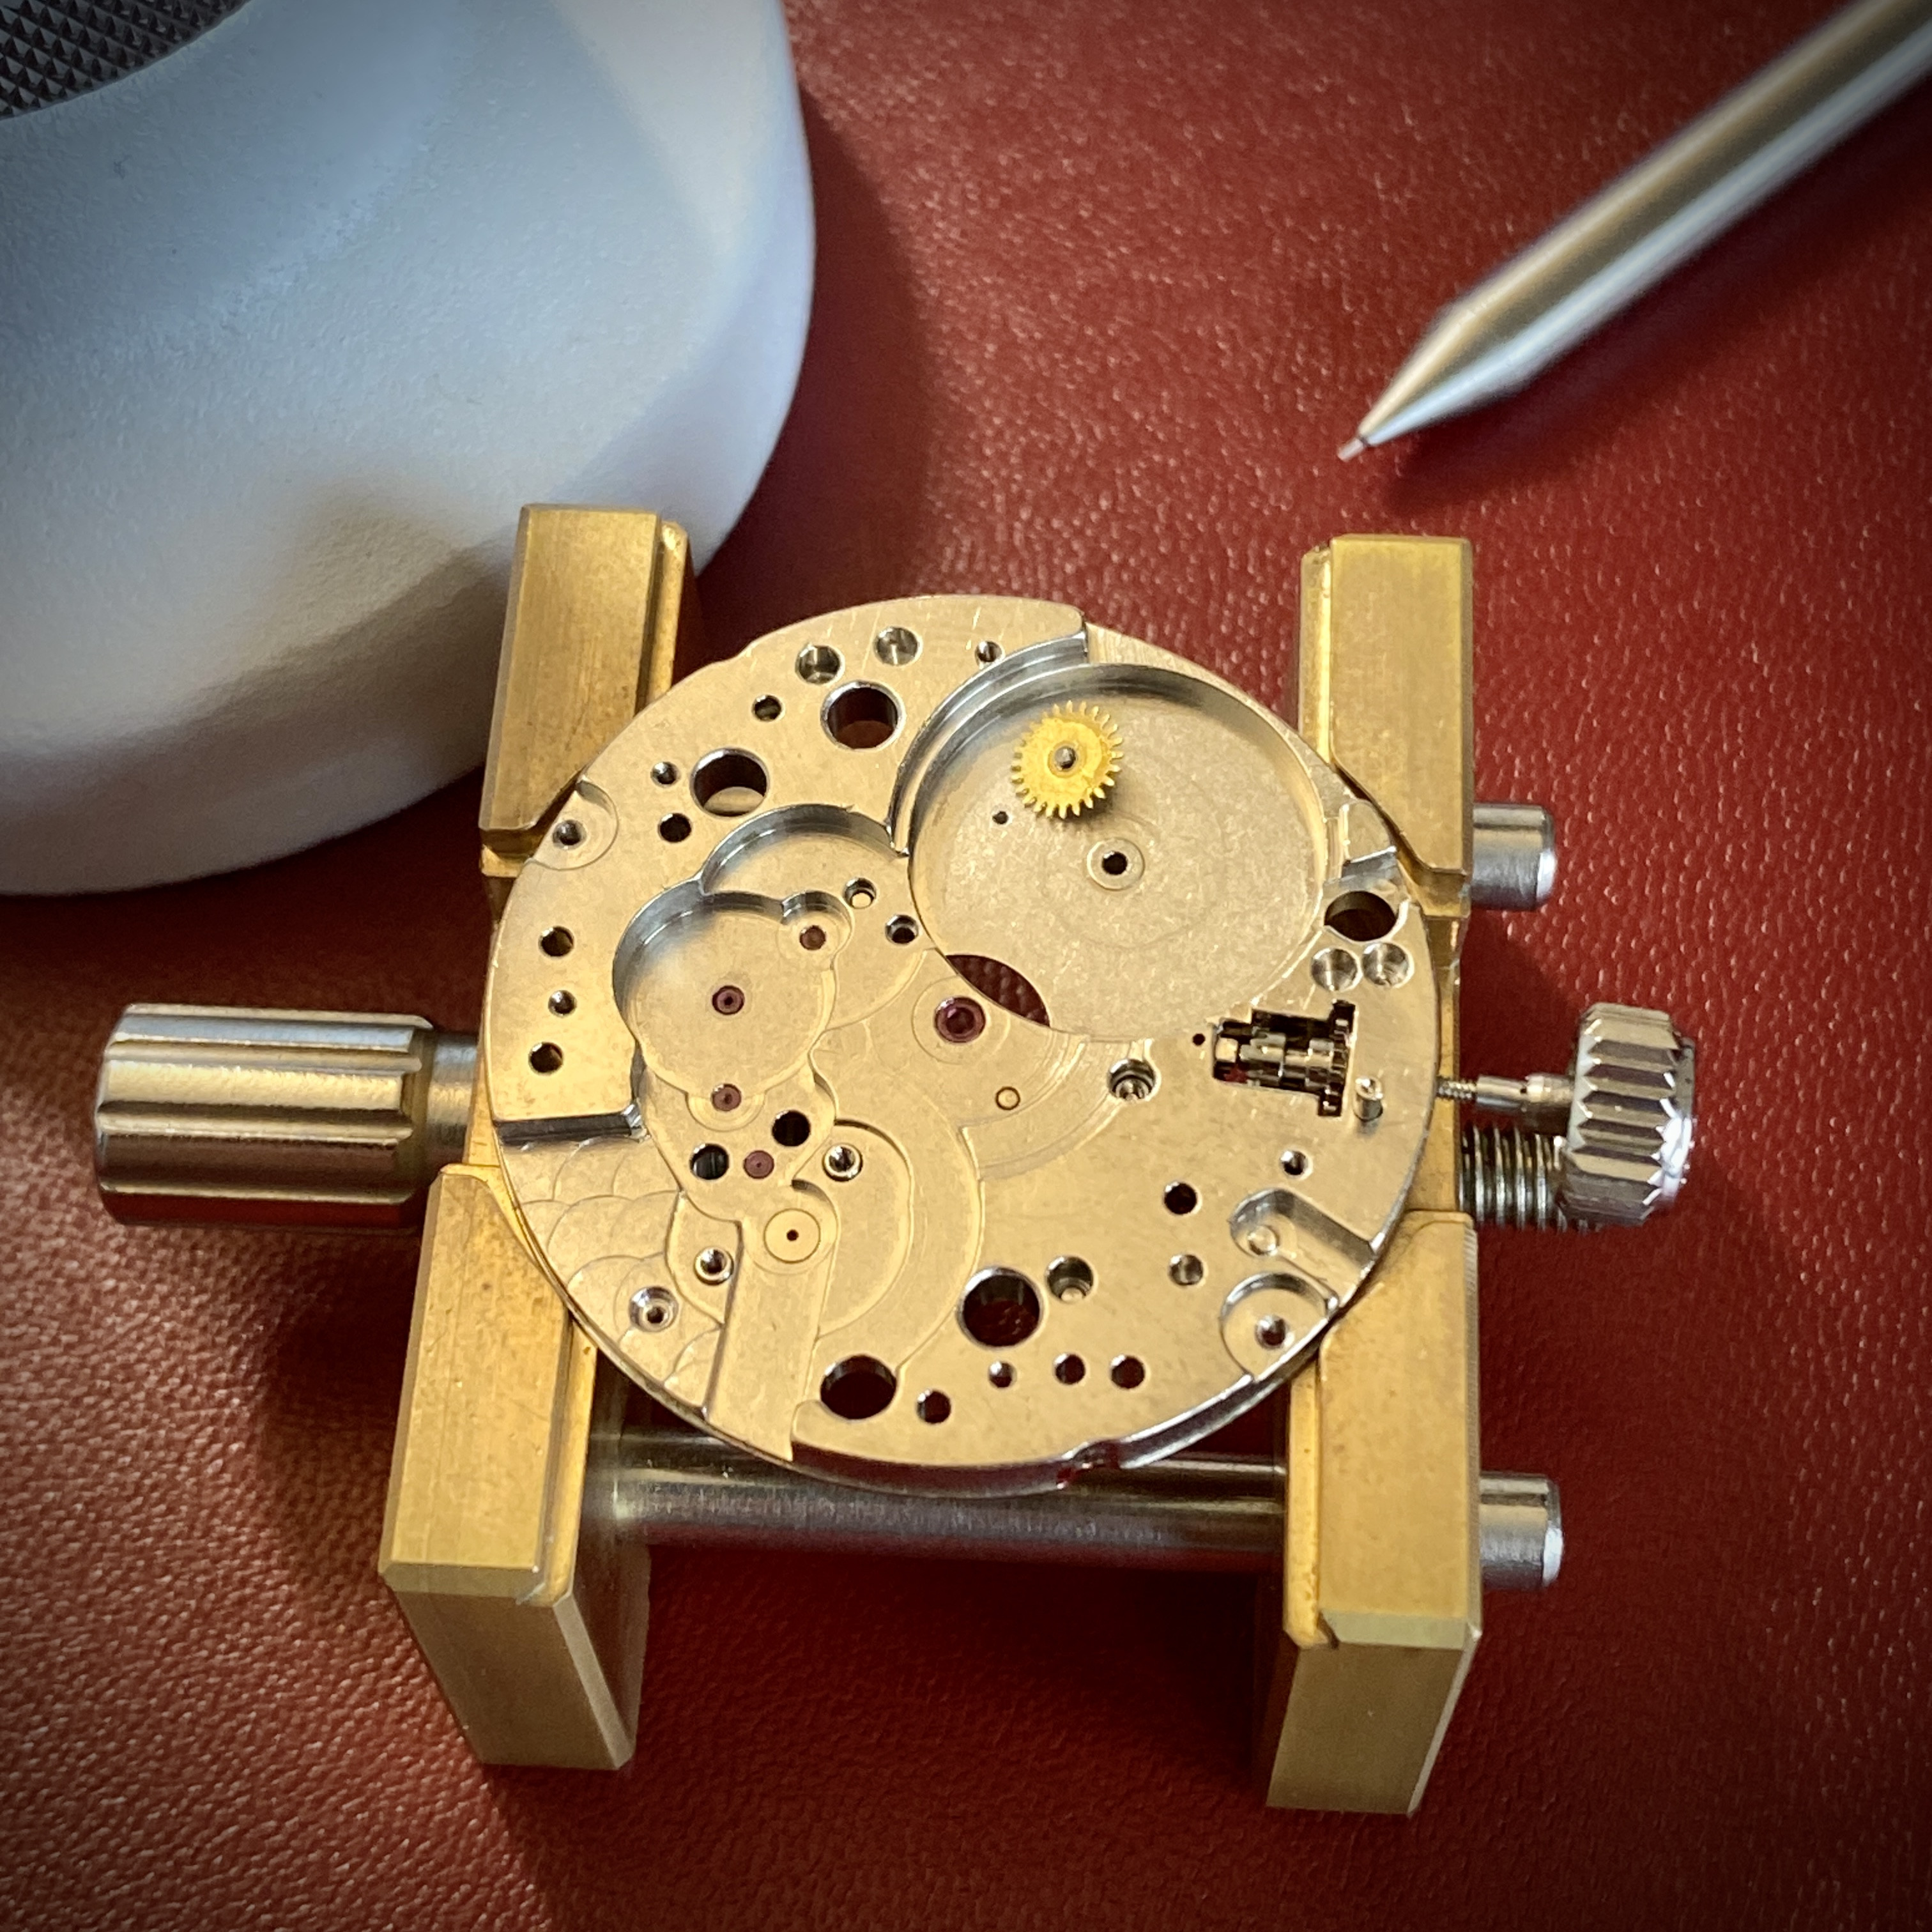
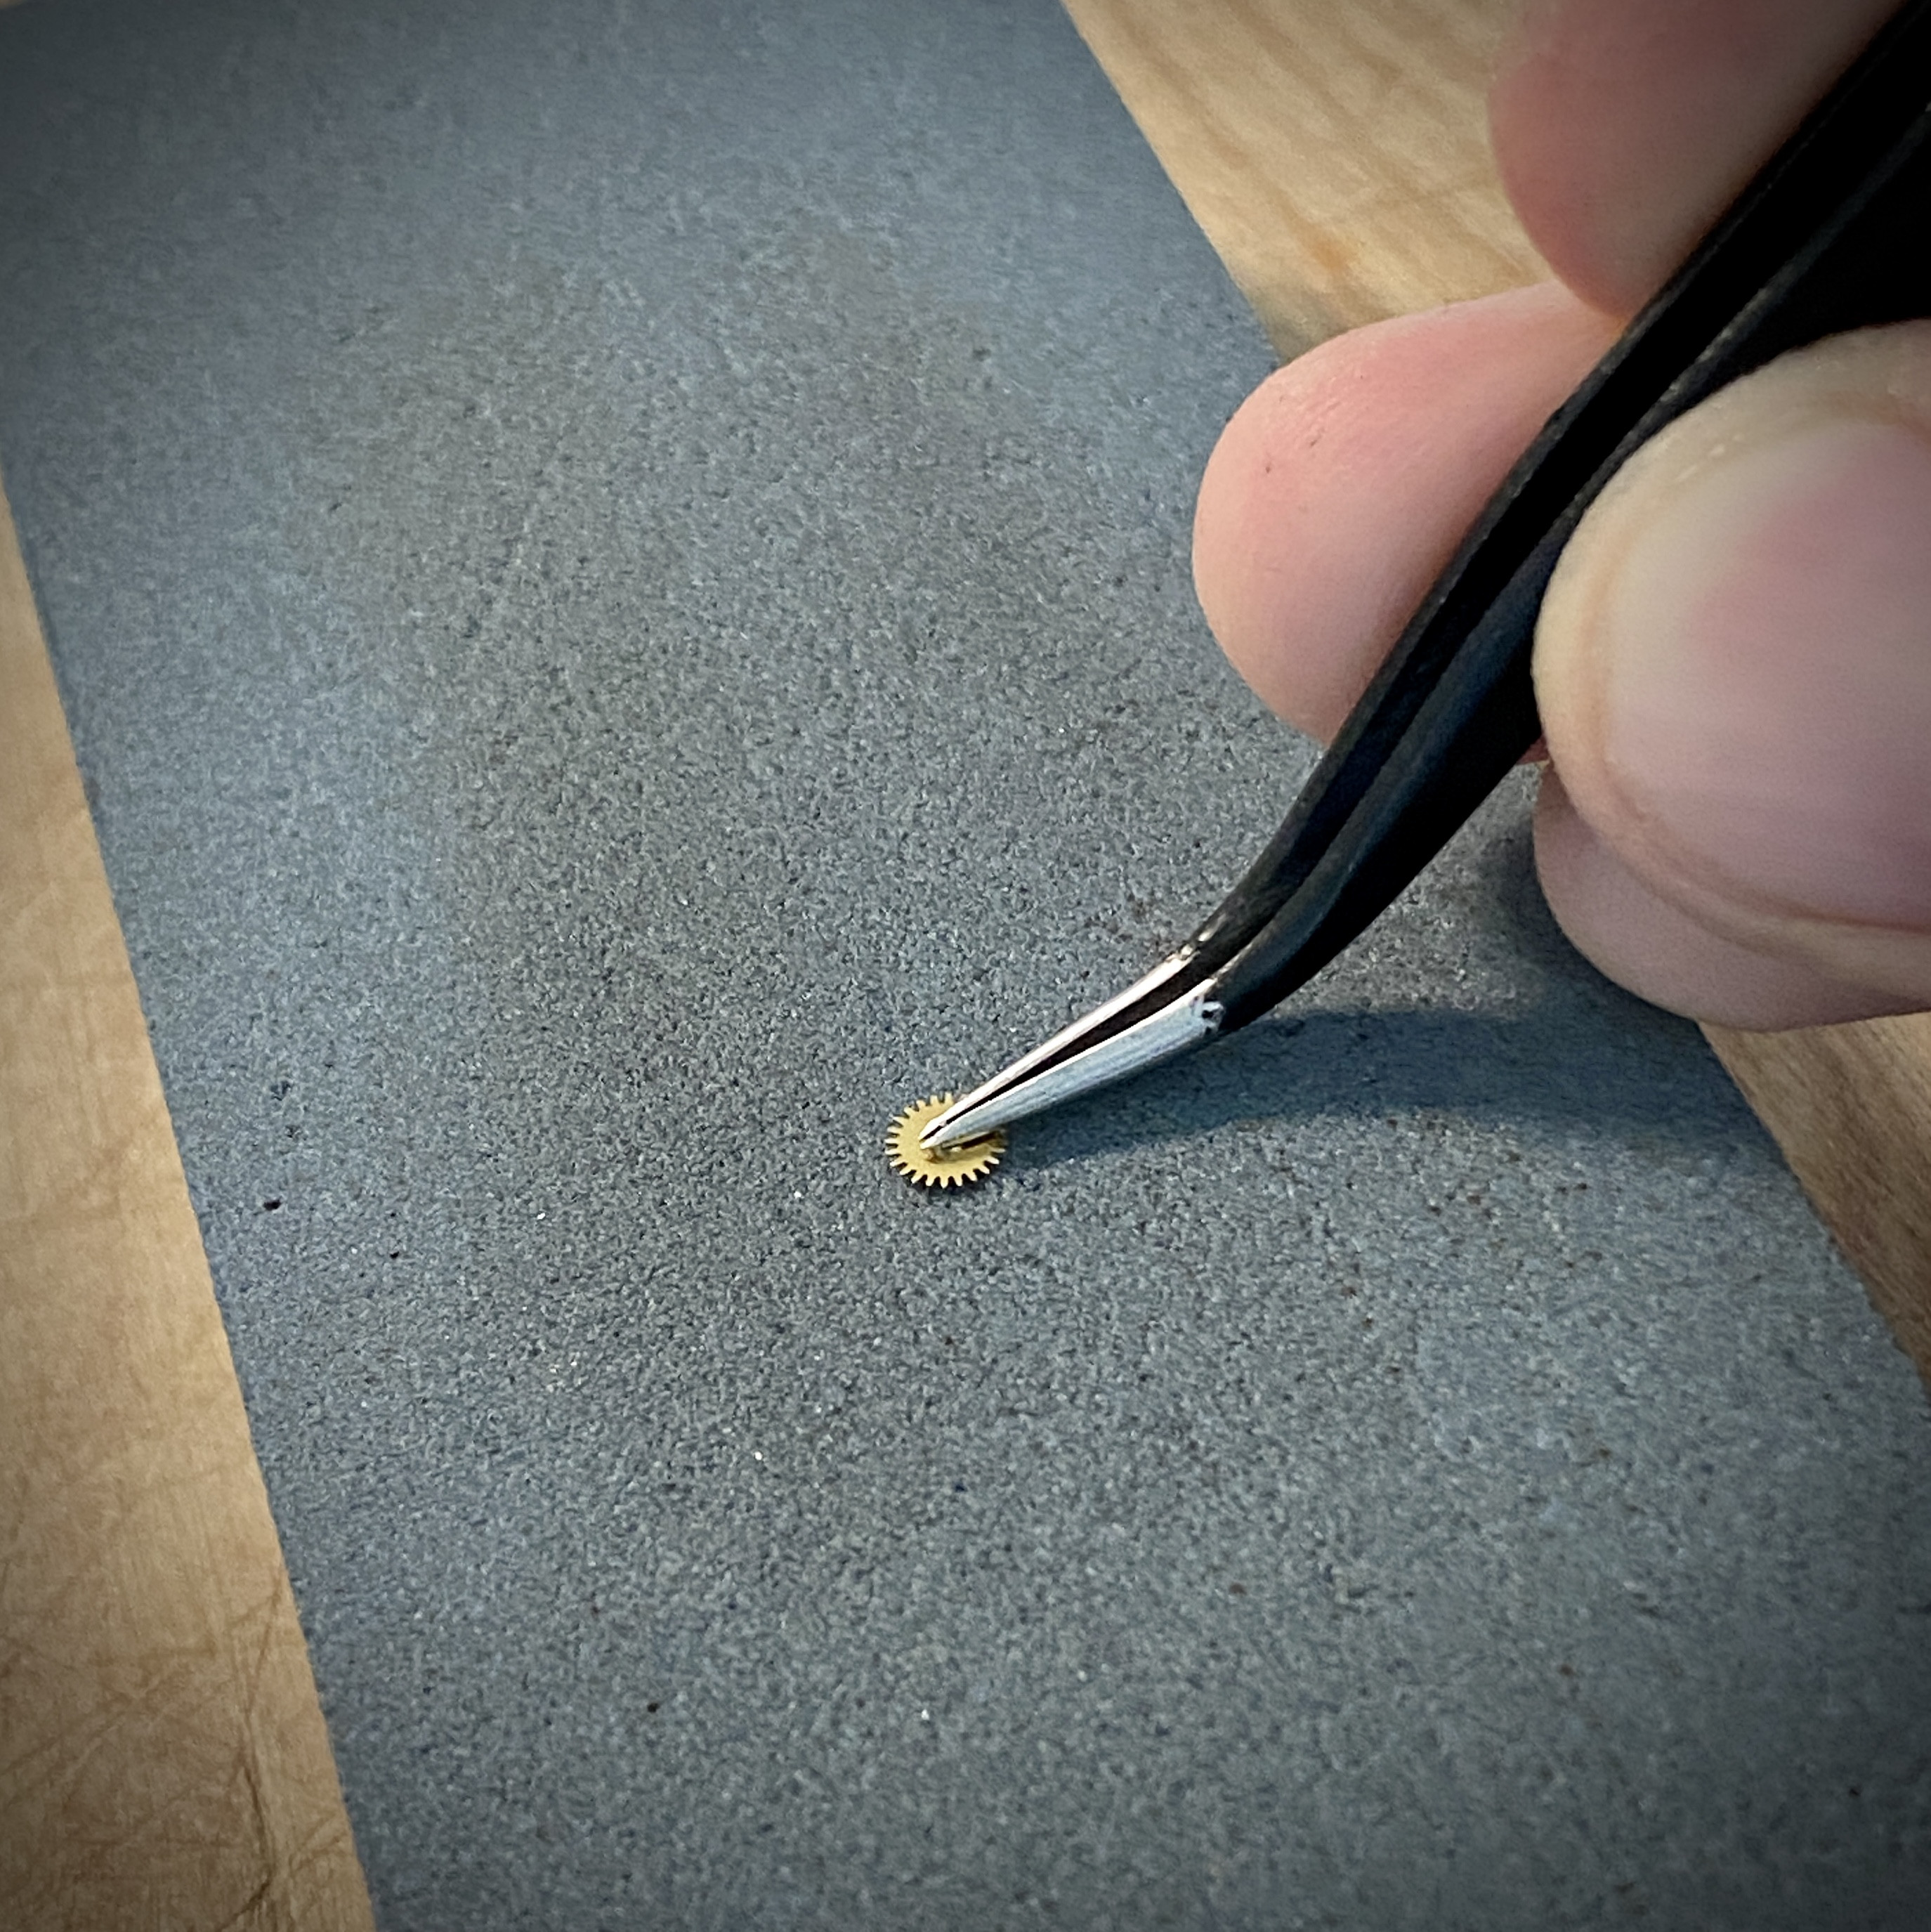
Since the 6 o'clock sub-dial pinion has a pivot on the back side that used to fit into the hole in the main plate, I used a stone to grind it flat so that I could position it flush with the mainplate in a new position.
Next I needed to open up the hole in the dial side top plate. For this I used my trusty set of broaches. It's easier to simply open the hole in all directions than to try to move the hole... so I just kept broaching until I was sure there would be enough clearance for the pinion to sit in the new position.
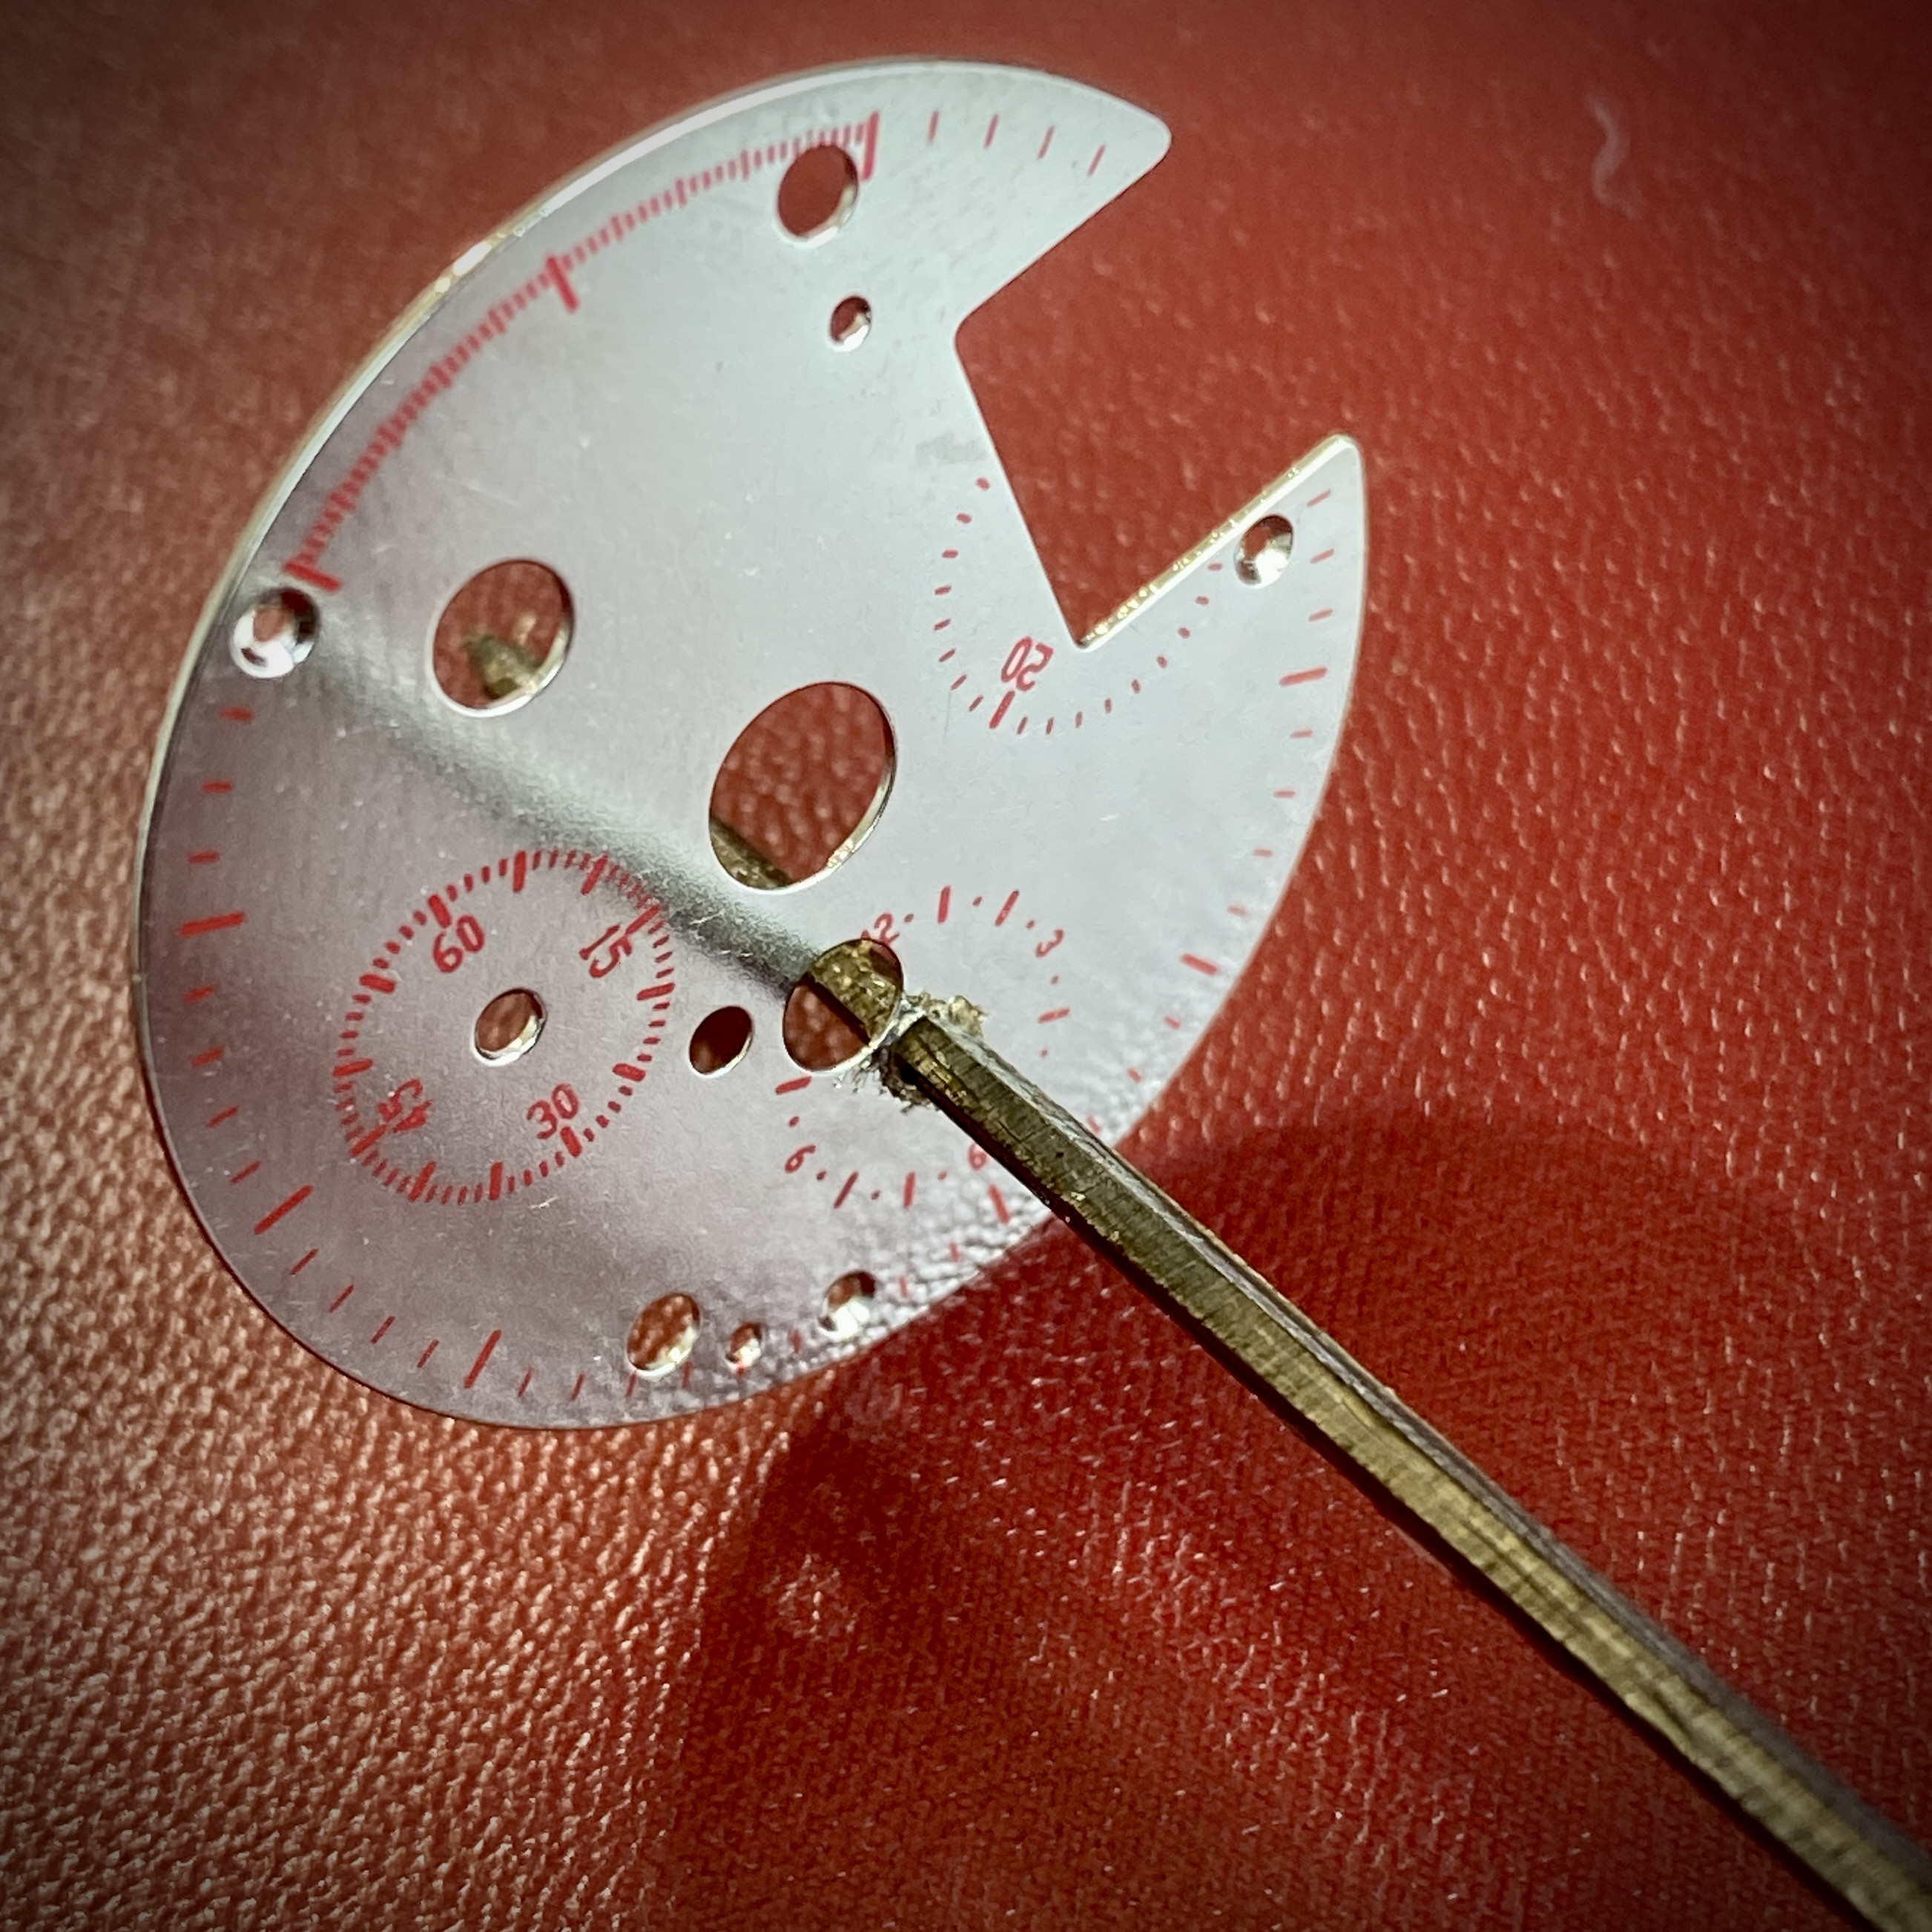
It turned out that I actually cut it pretty close, but there was just enough room (see blue arrow).
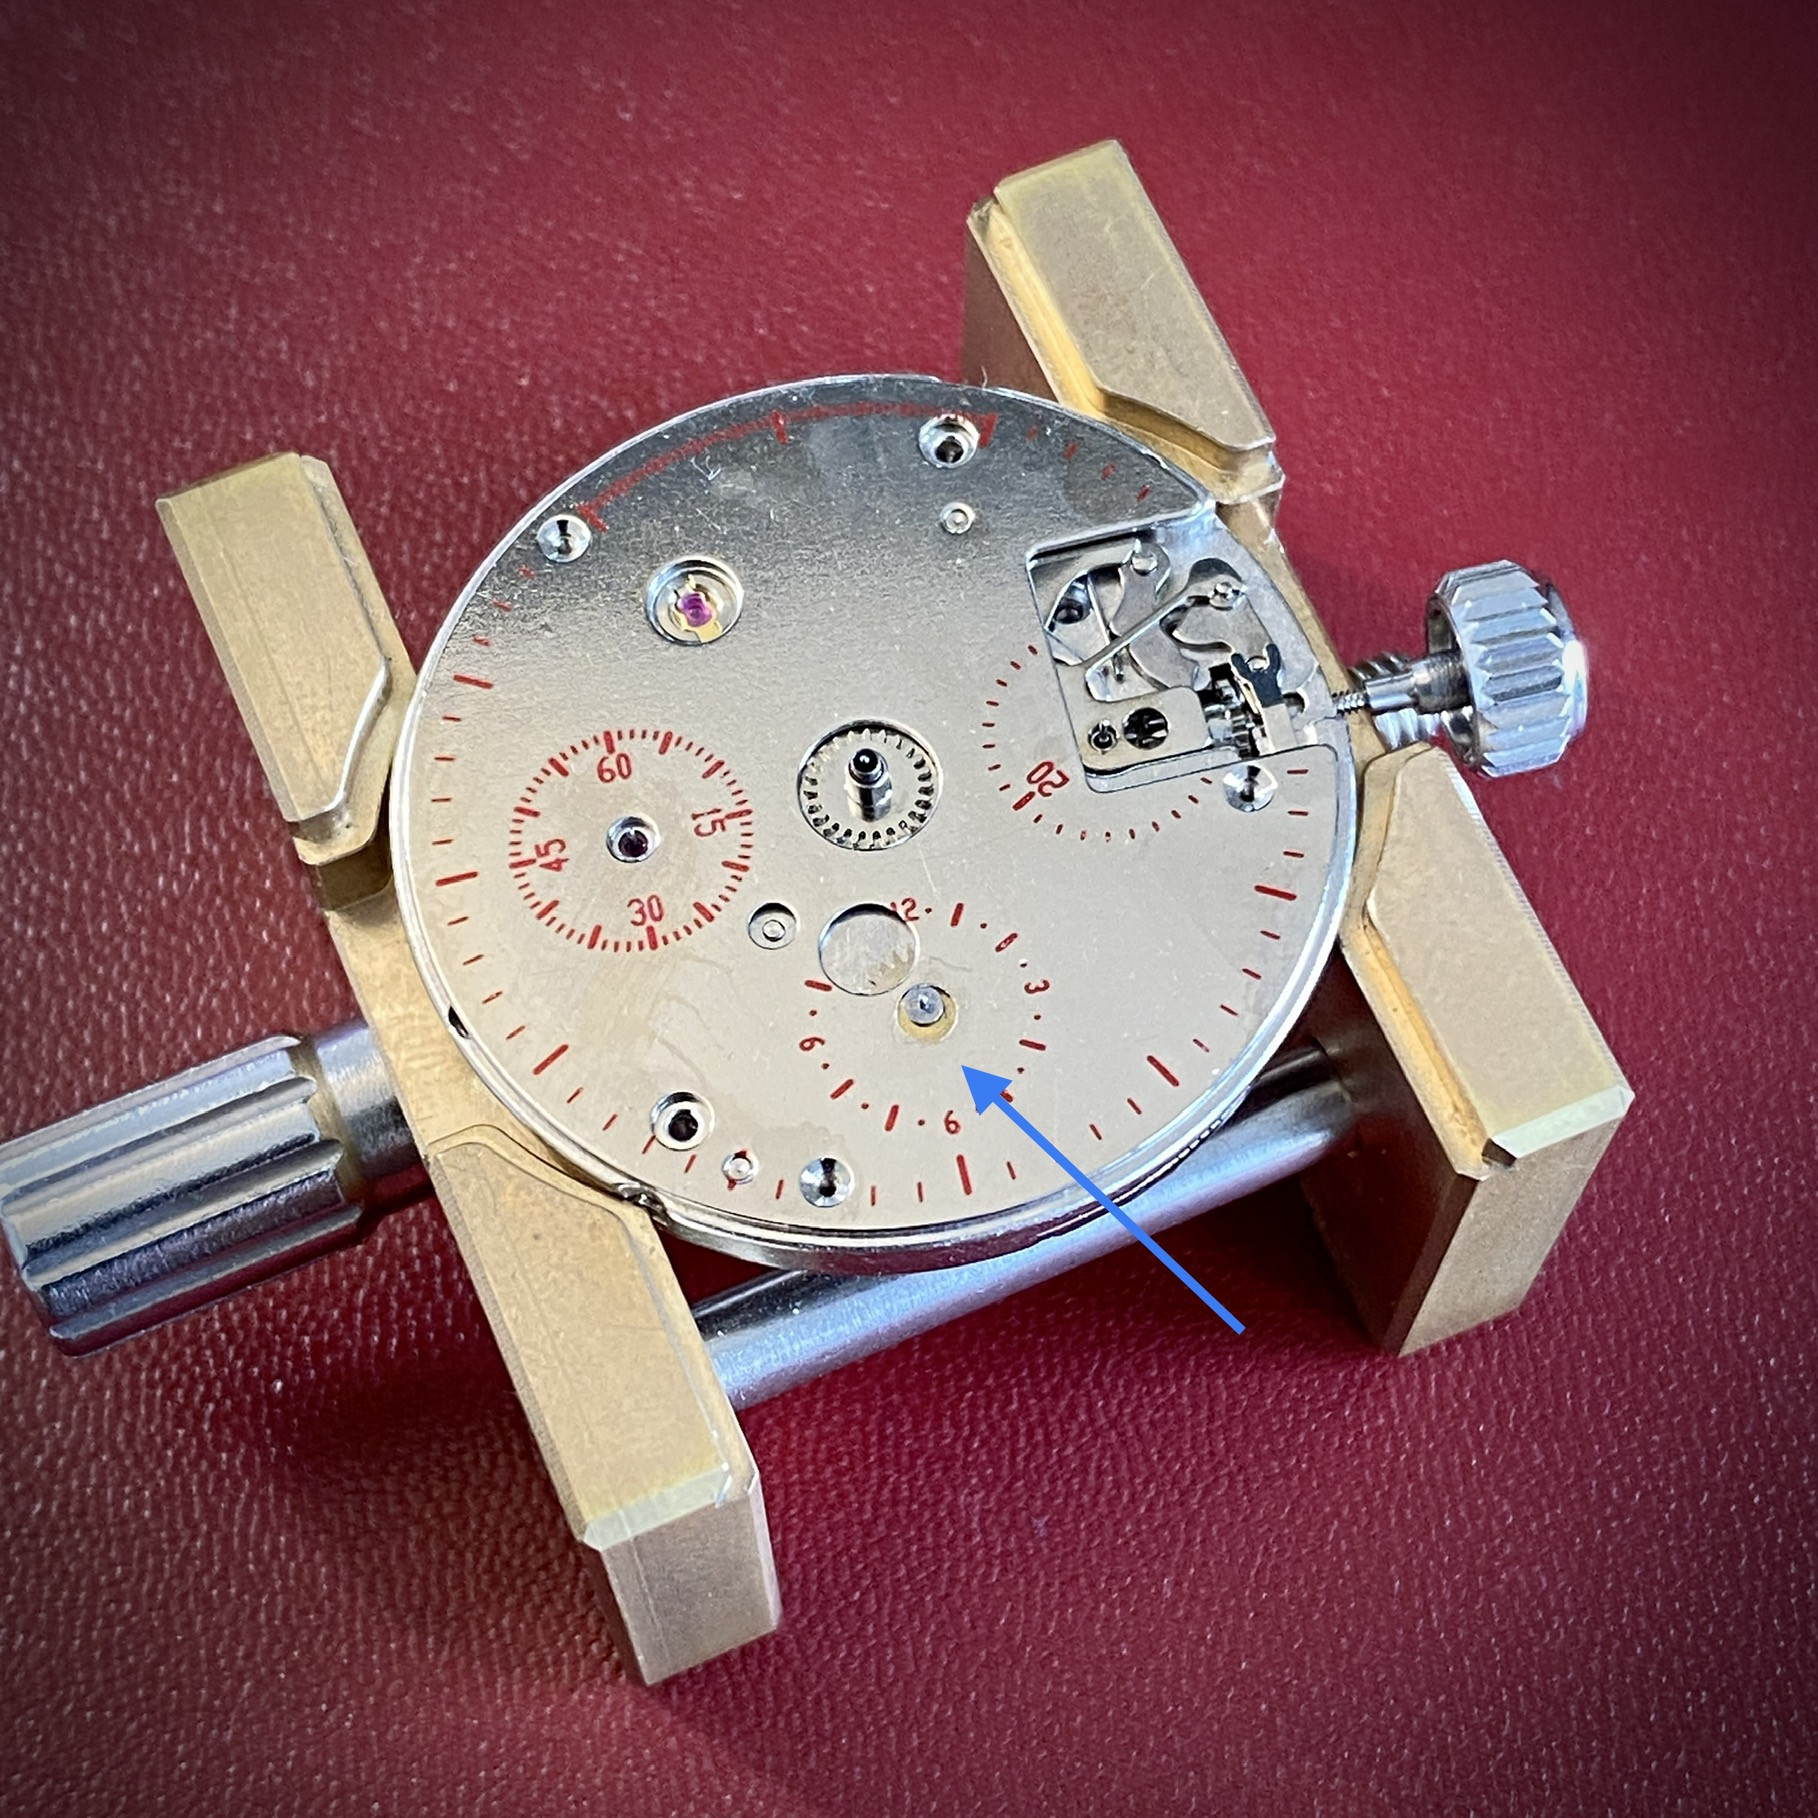
To secure the pinion in place I used a bit of 5-minute epoxy. I made sure to keep the epoxy away from the hole in the main plate that the pinion used to sit in since I didn't want it locking the mainspring barrel in place on the other side. There's quire a large flat surface under the pinion, so there's no need to get glue near the old hole.
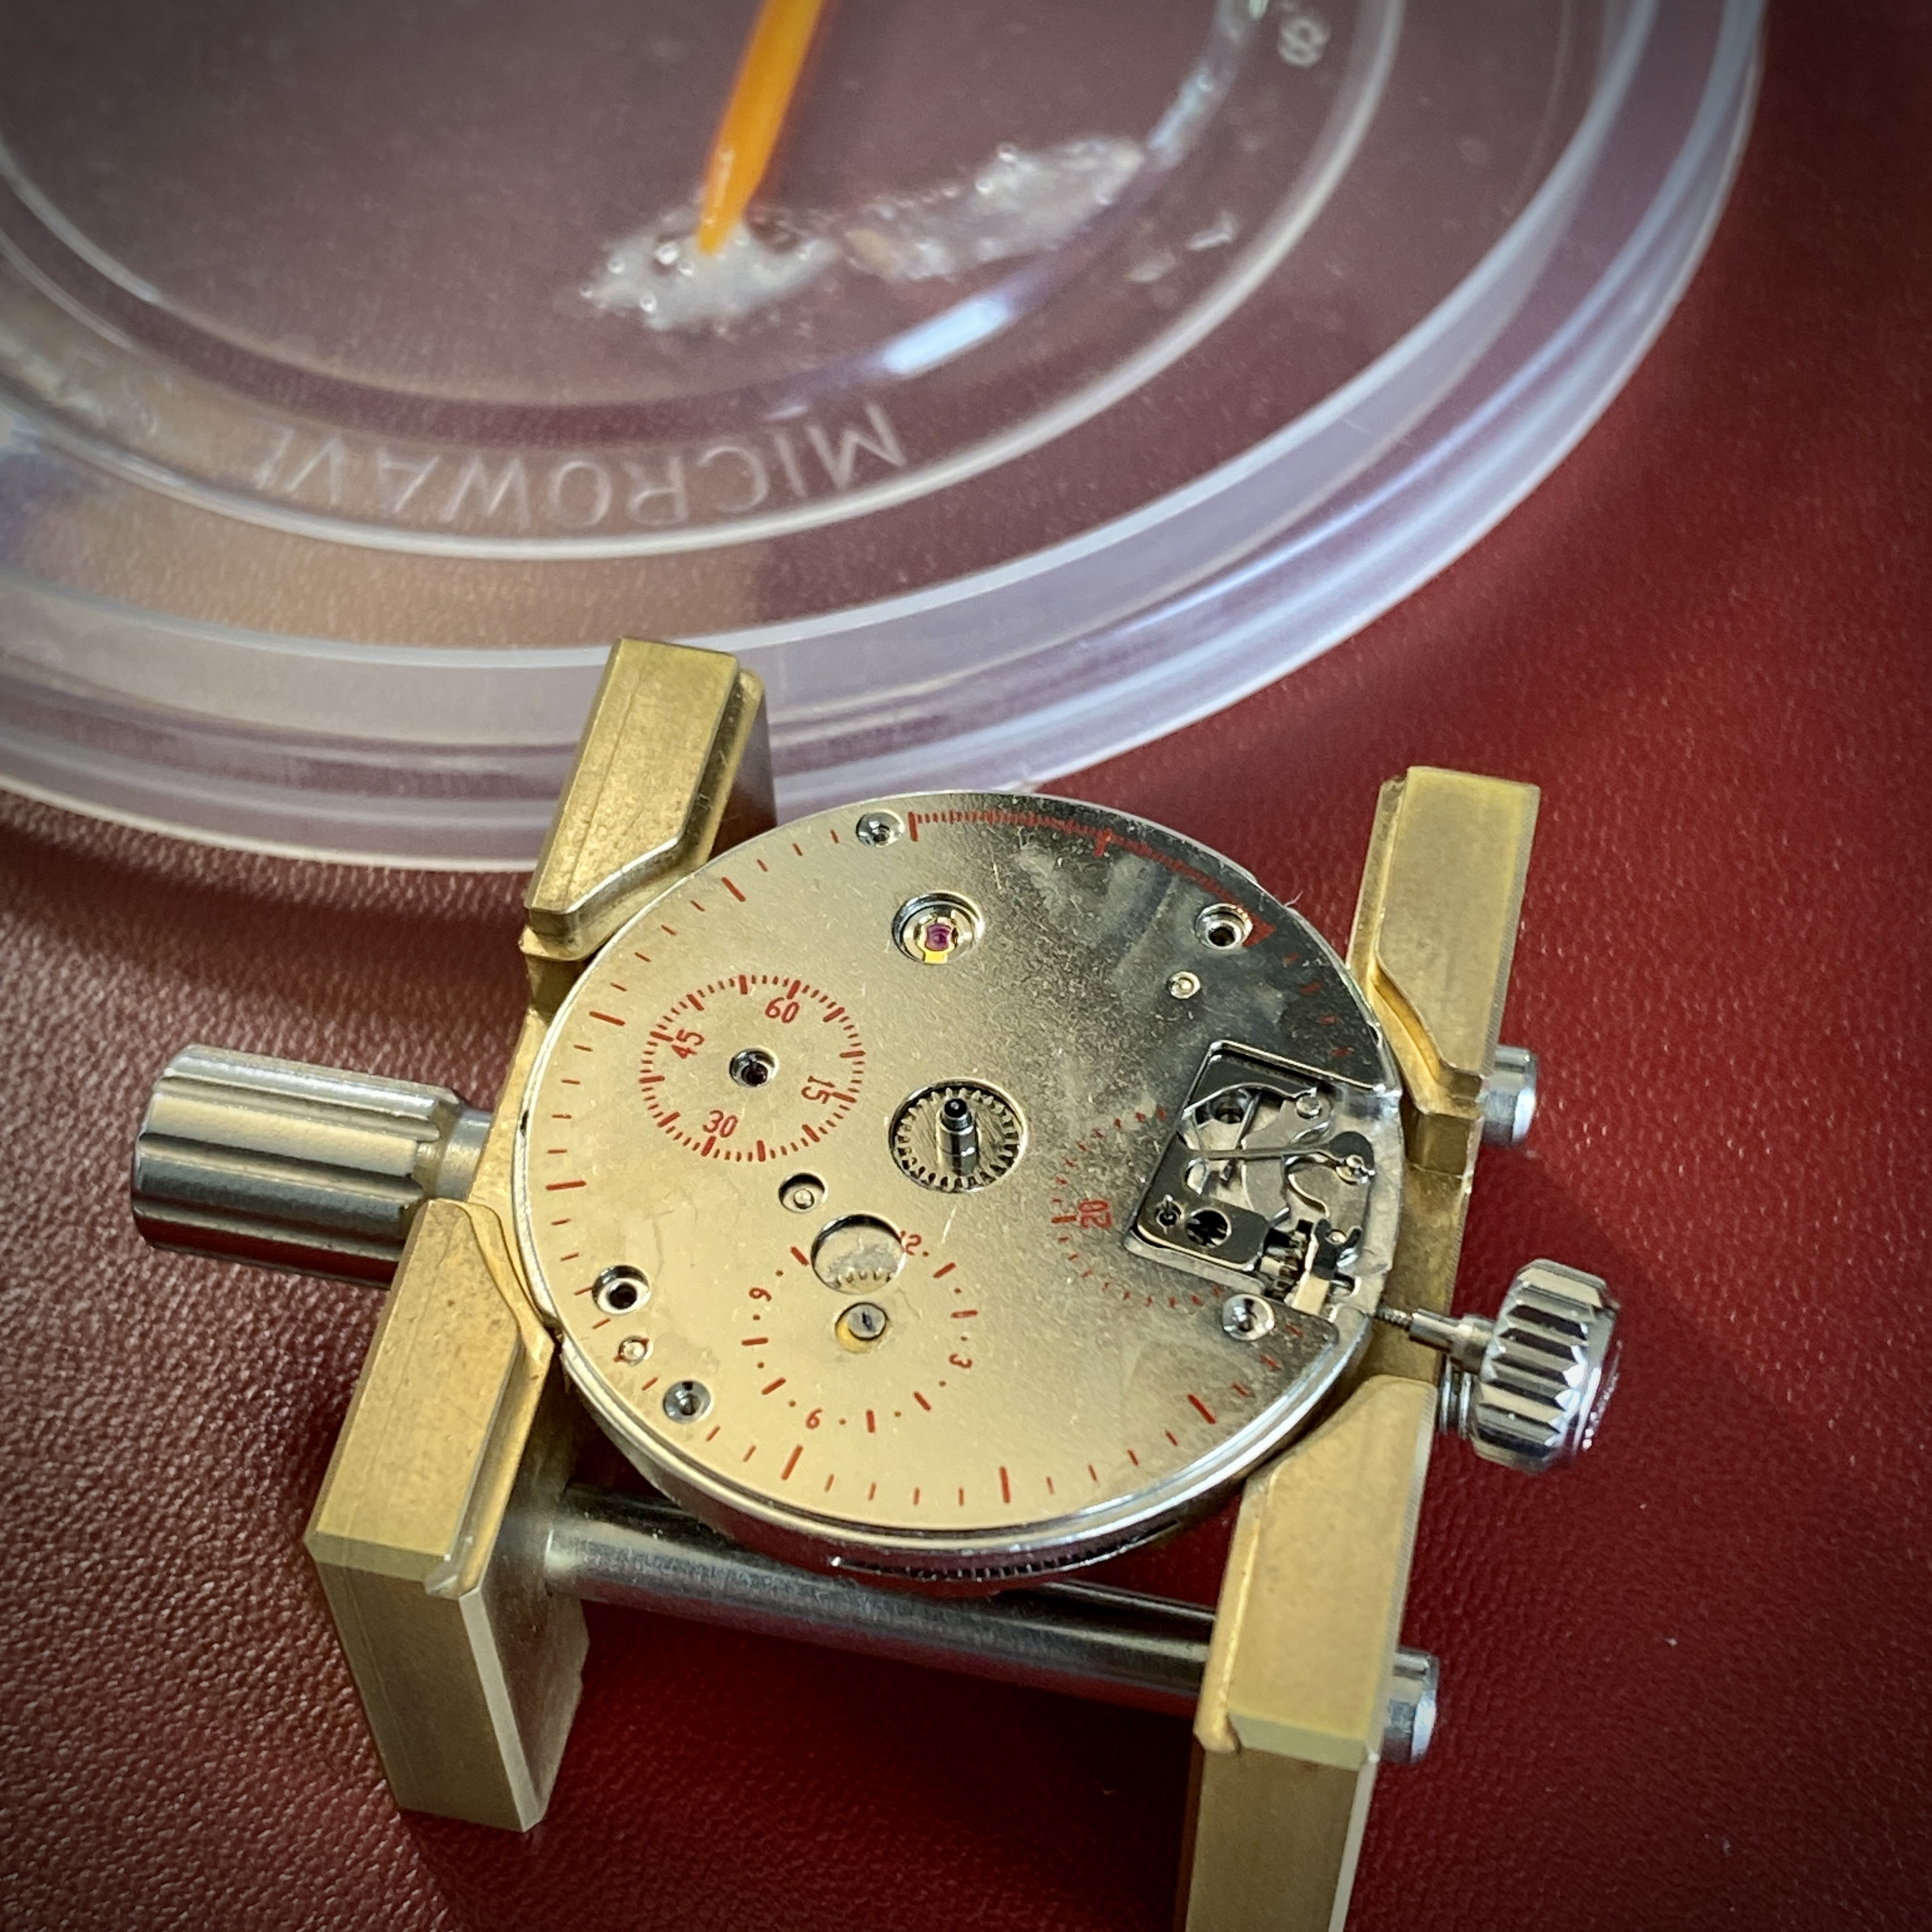
With the epoxy not yet cured, I was able to place the dial onto the movement top plate to make sure the alignment was correct. NB: I needed to clip the feet from the new dial since the dial feet on the new dial aren't in the right positions for the ST1903 movement.
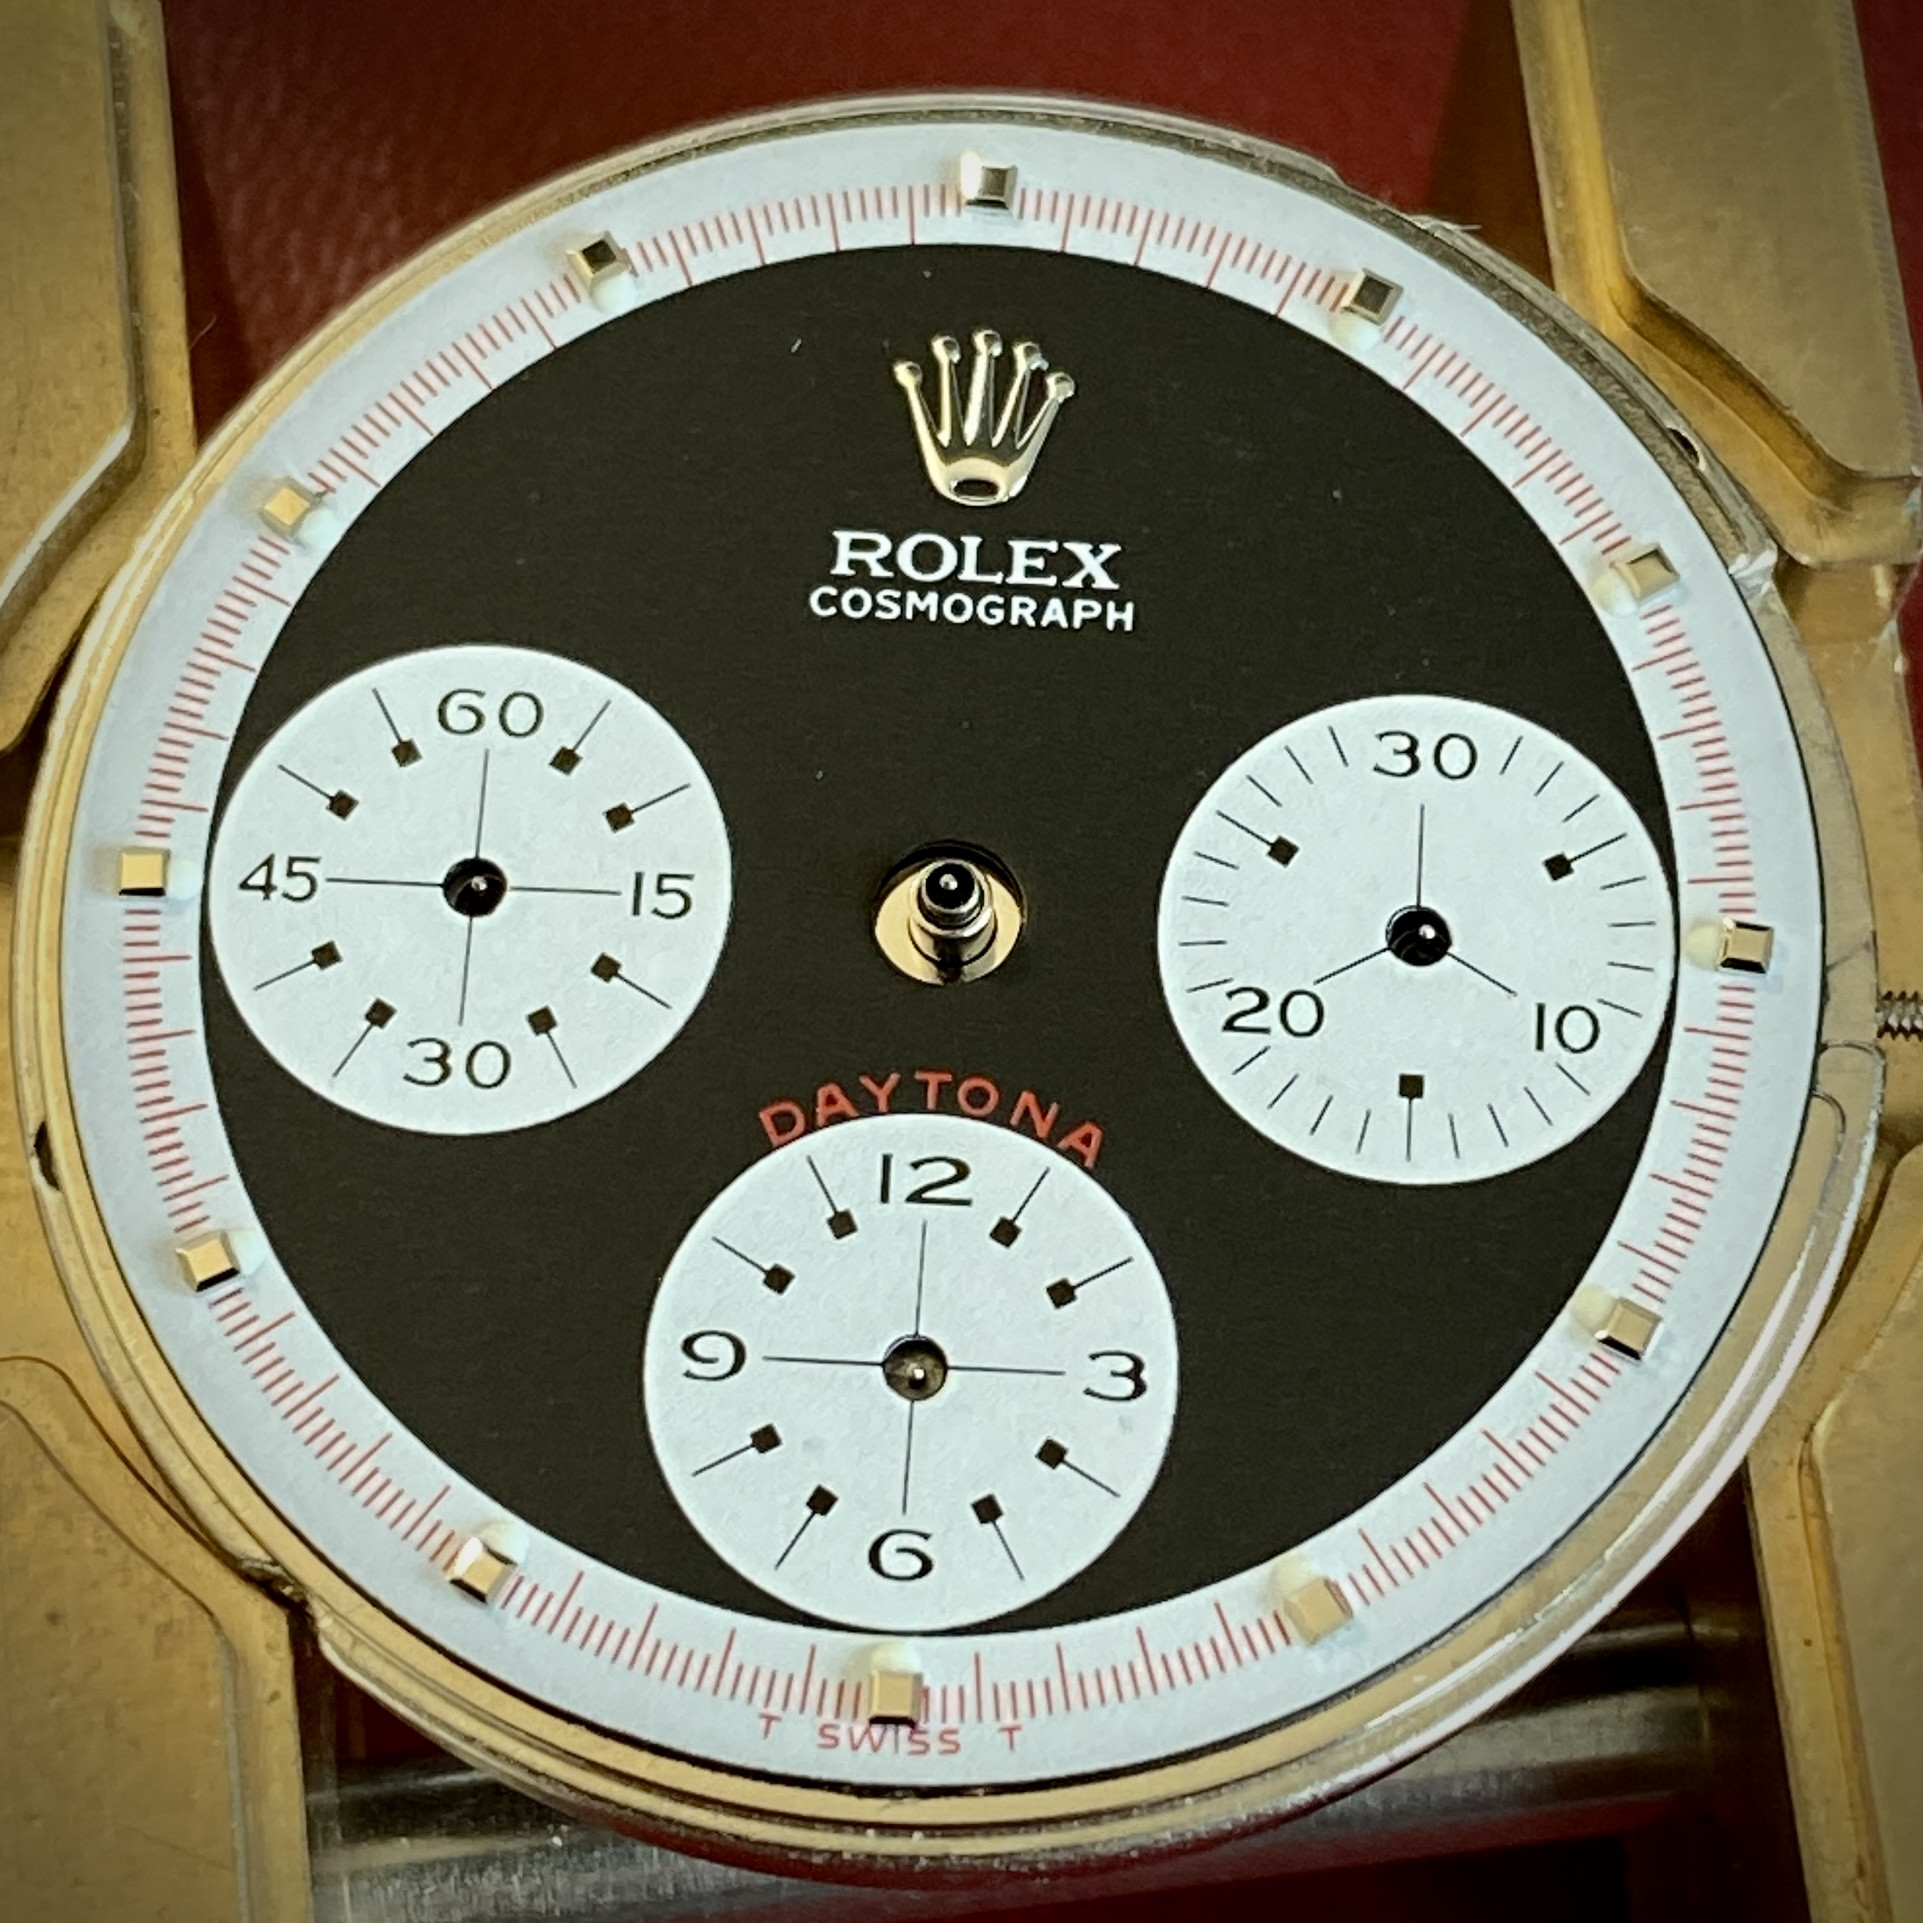
After I'd left the epoxy on the pinion to cure for a few hours (I know it's 5 minute epoxy, but it takes a while to gain full strength), I mixed another batch of epoxy and used it to secure the dial to the movement using a few dots around the movement top plate. I left this to cure overnight. The next morning I pressed the hands back on and cased the movement back up.
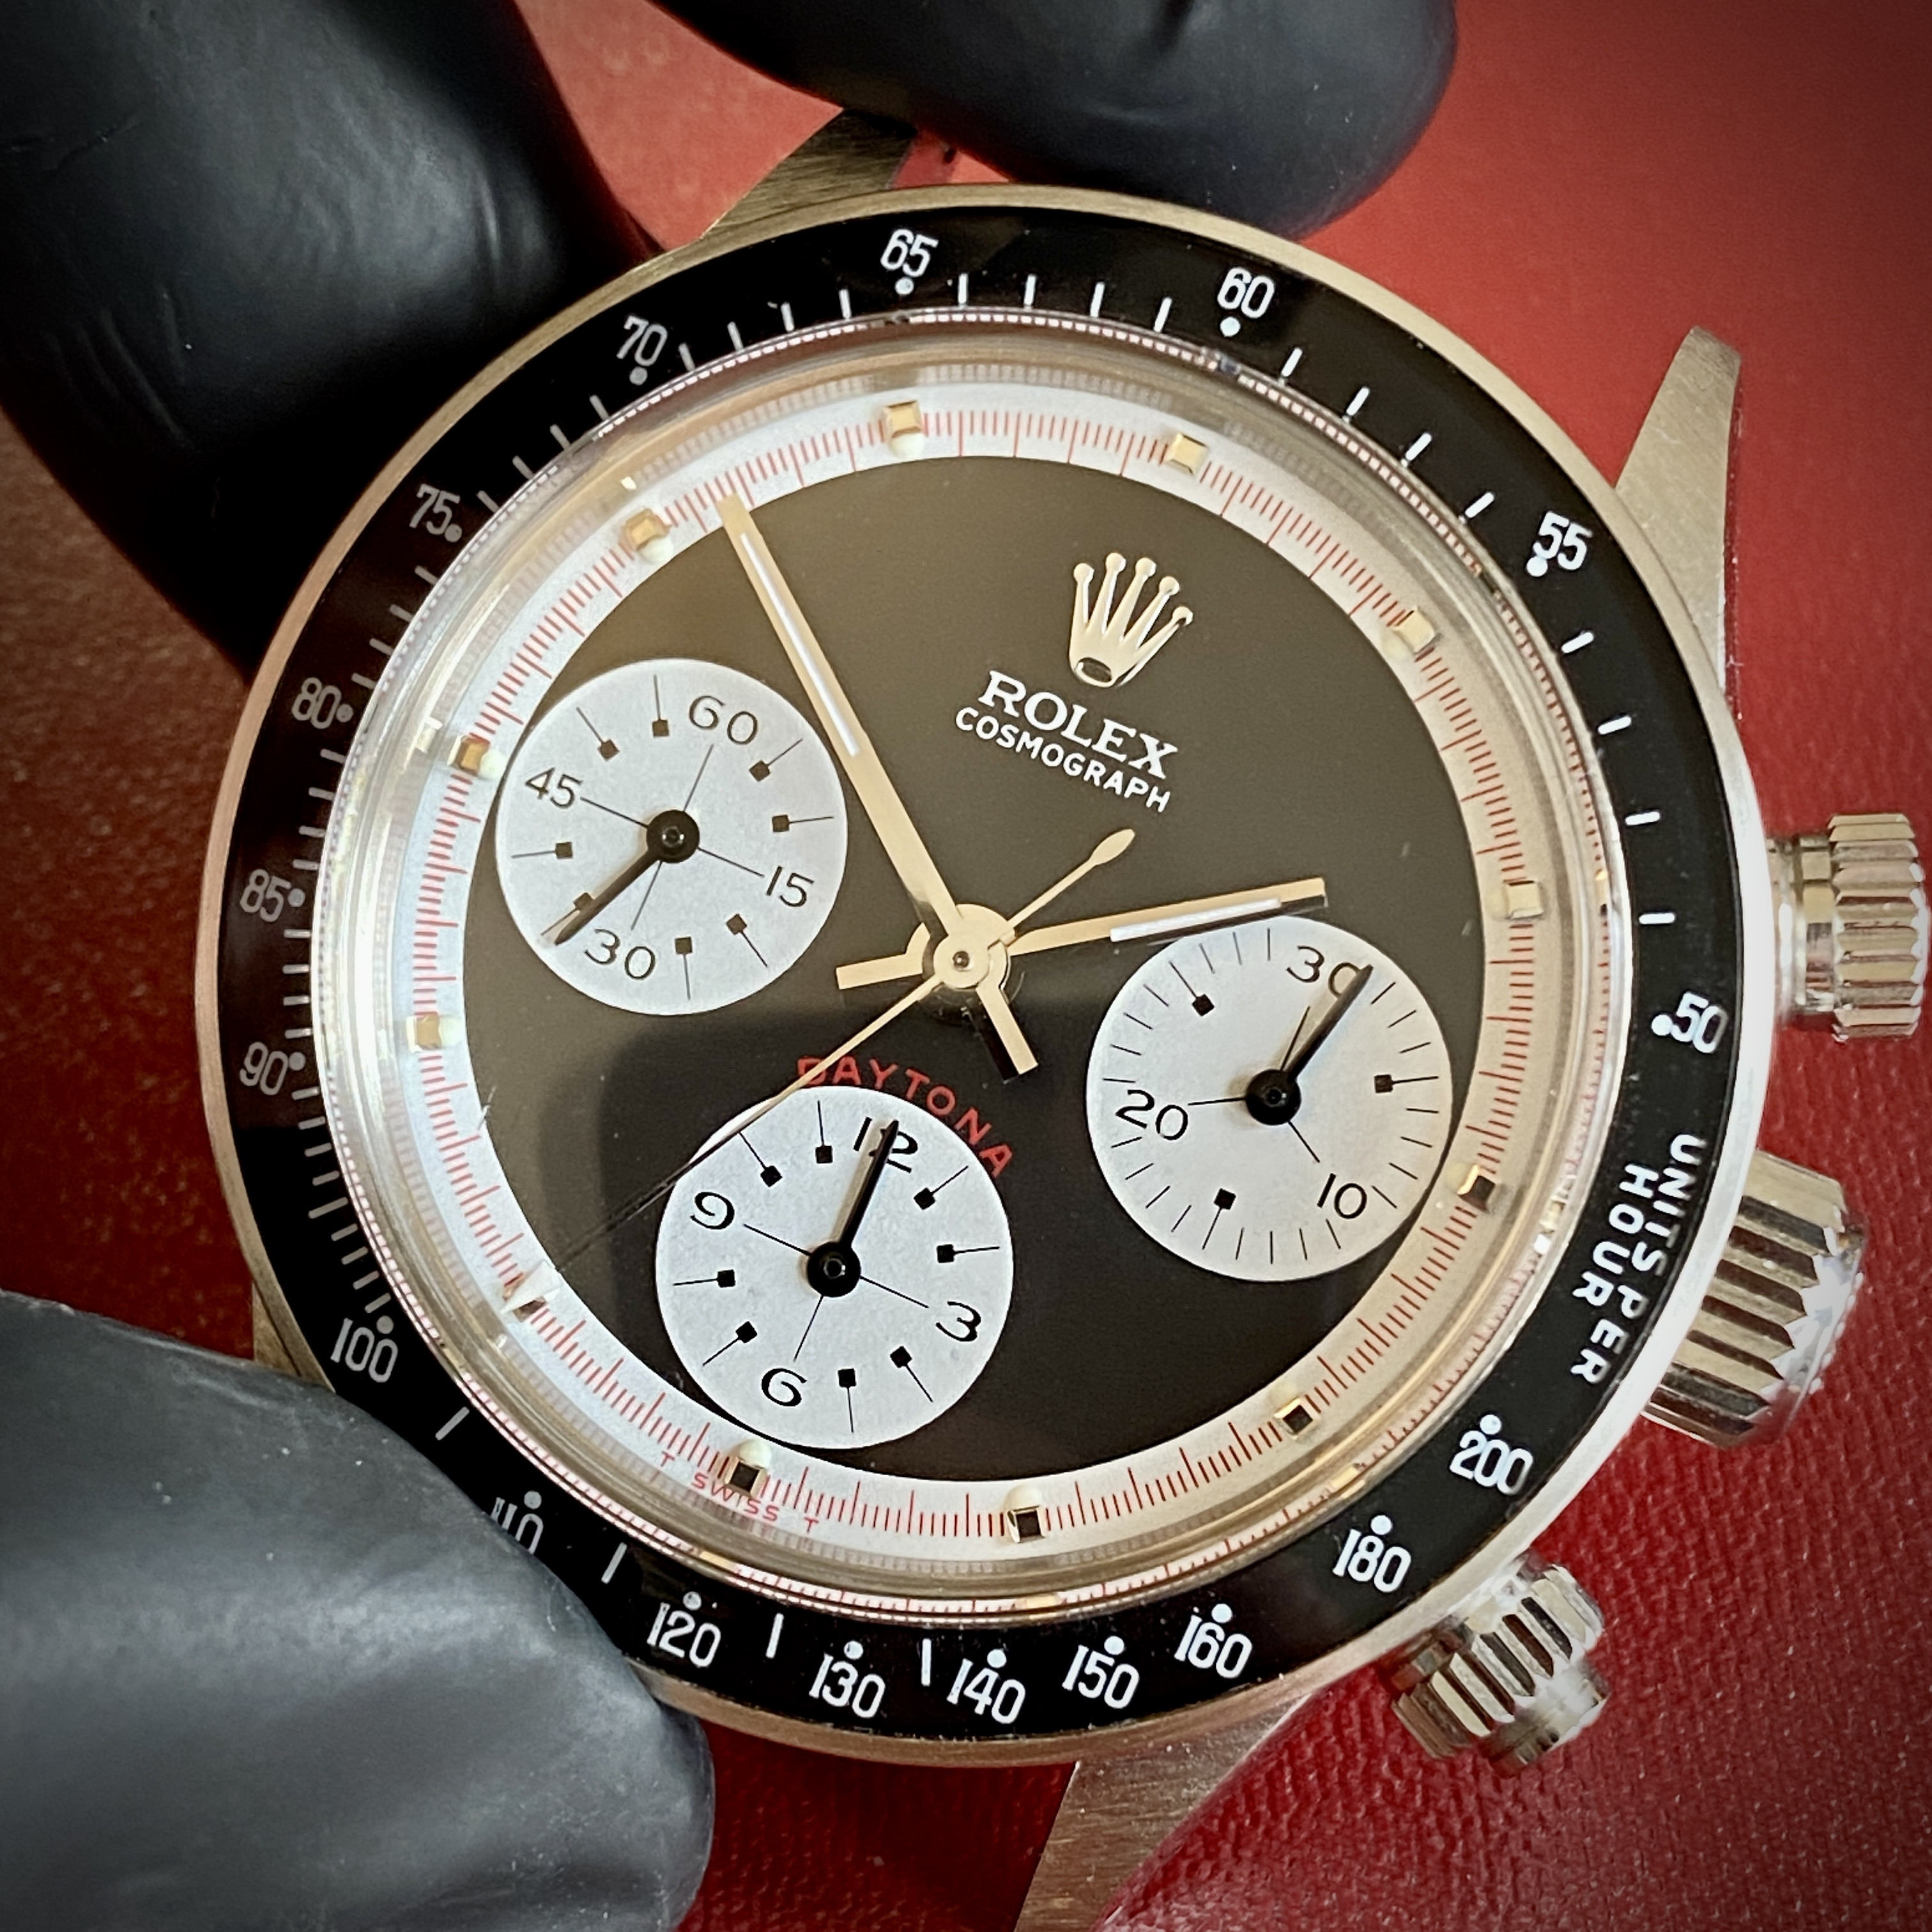
I noticed a small scratch on the hesalite crystal so I used a bit of polywatch and a microfiber chamoix to try to buff it out. I wasn't able to completly remove the scratch (small spot between 7 and 8 o'clock), but the polwatch polishing paste did remove all the other micro scratches in the crystal which makes the new dial underneath really pop.
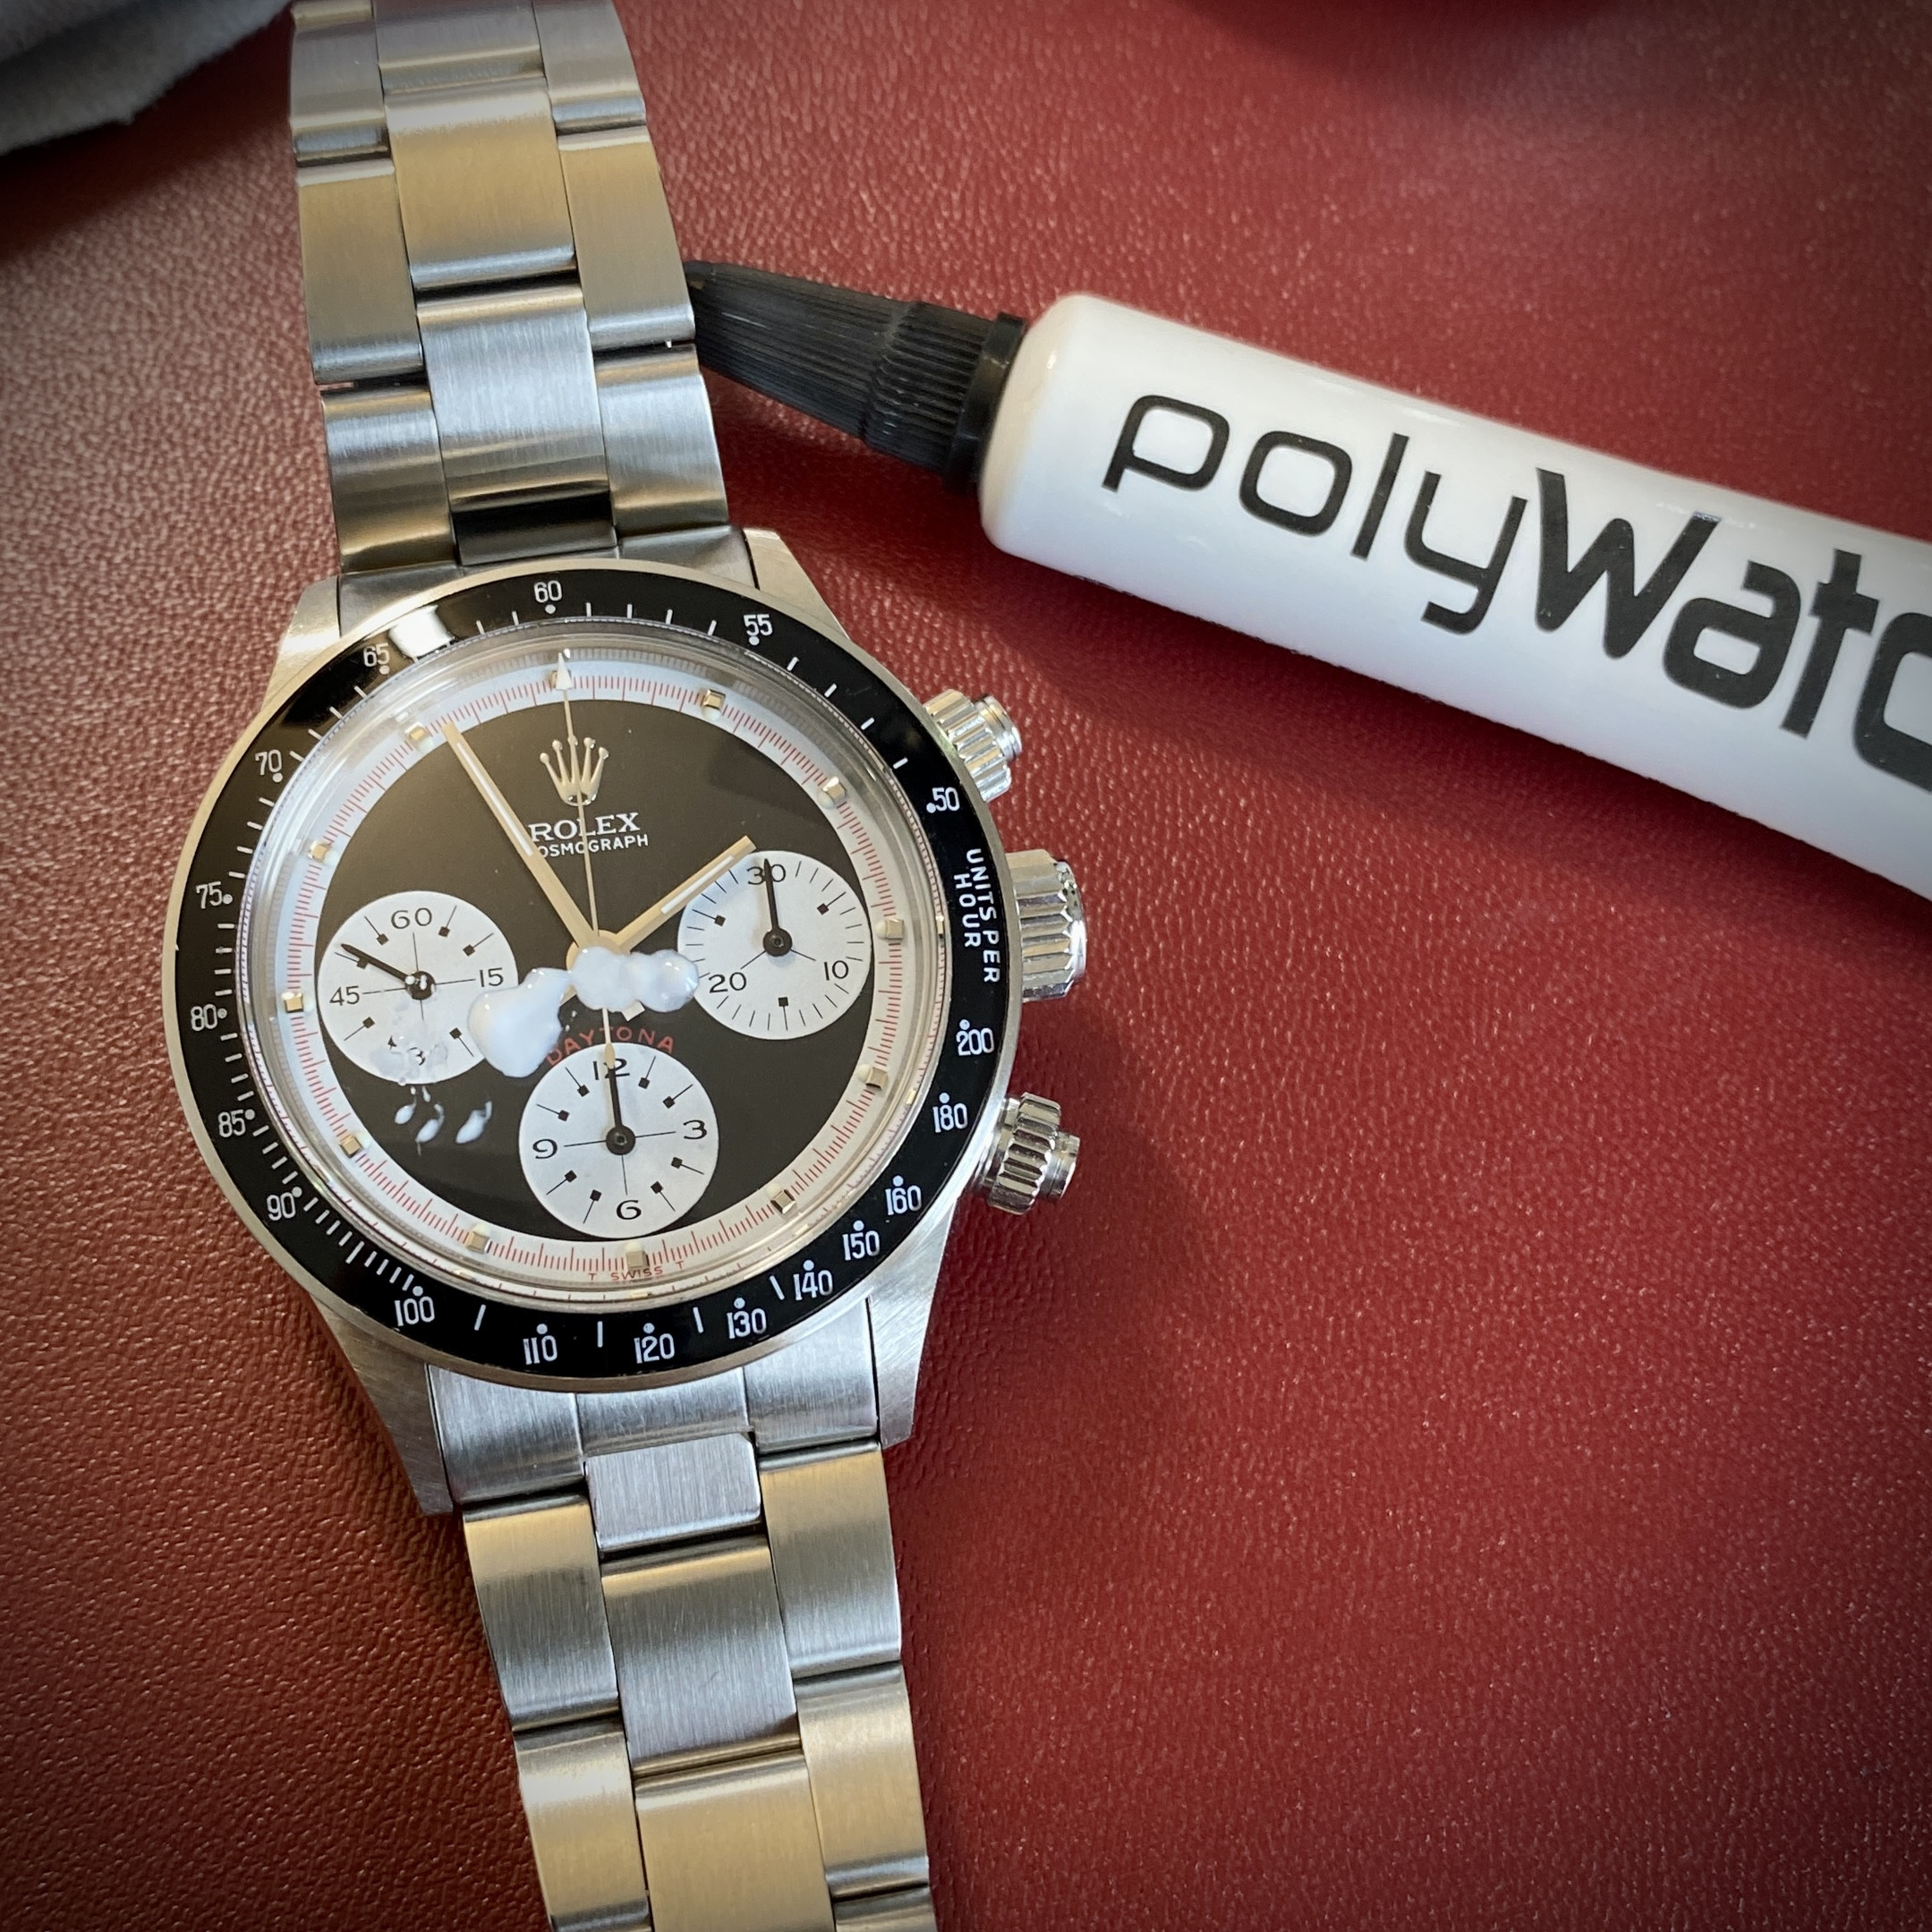
I'm really happy with how this project turned out. I've never been a huge fan of vintage reps, but this project might have changed my opinion.
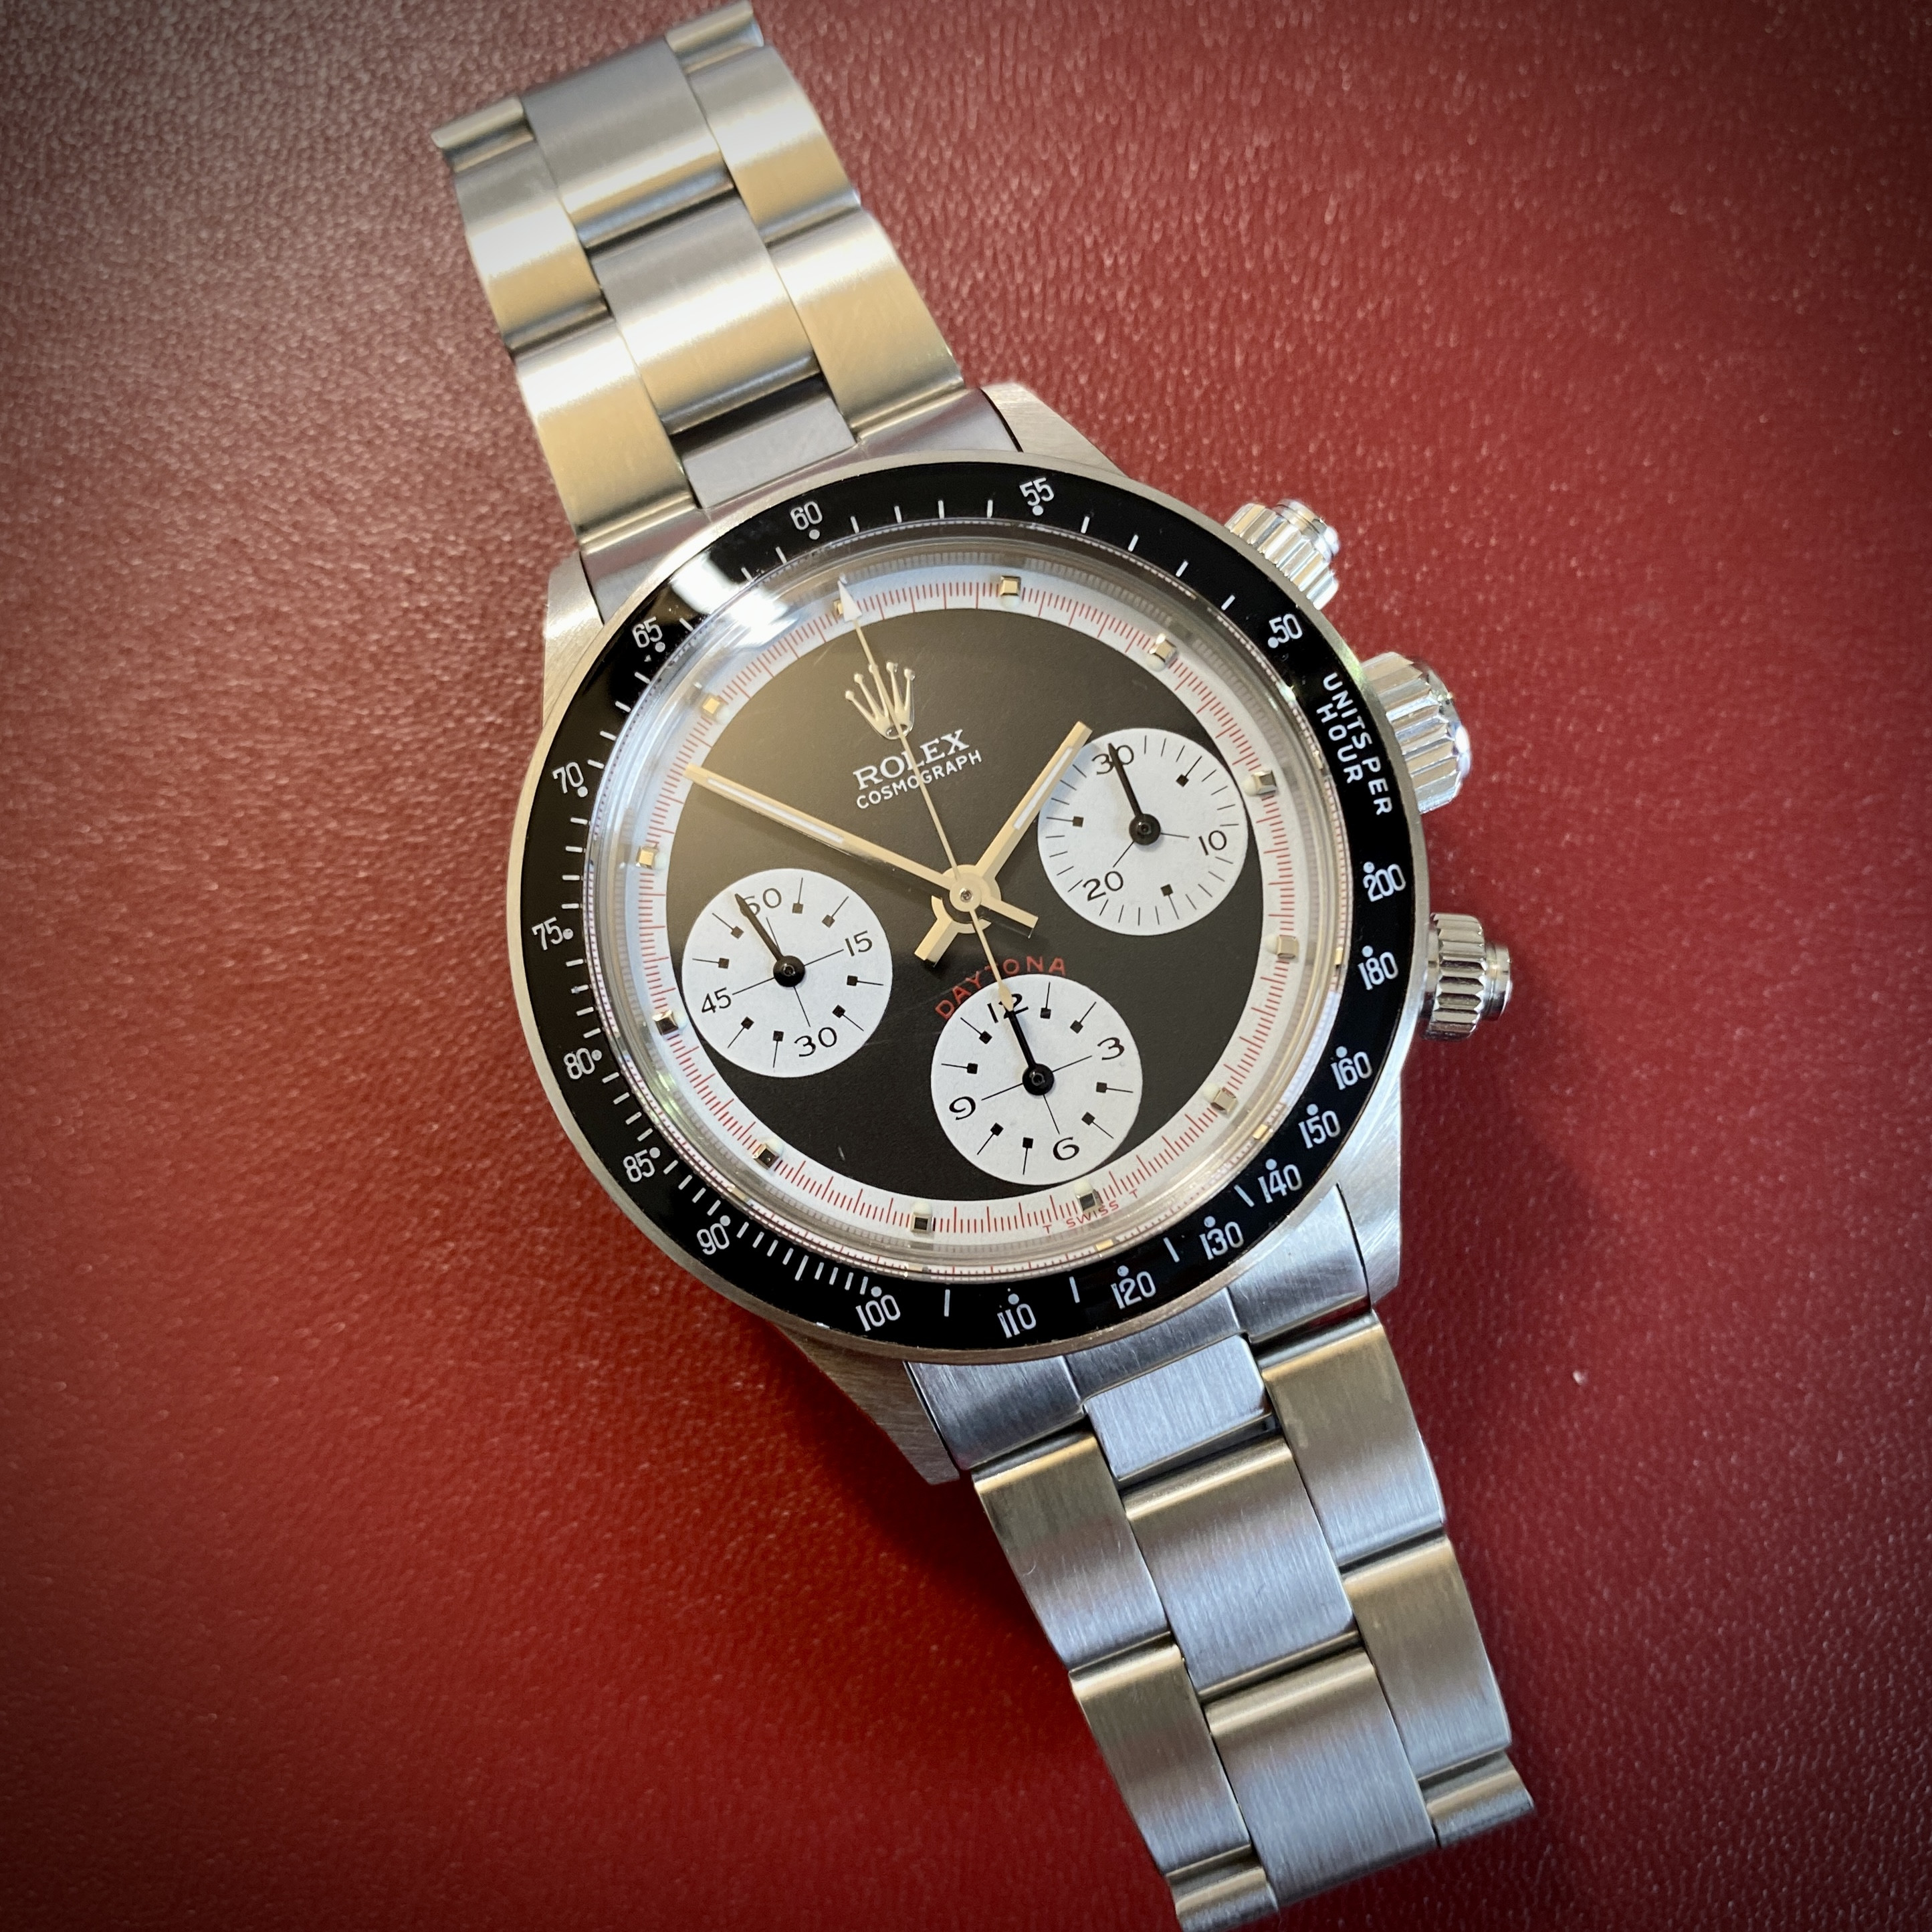
Here's what @scott223905 sent me: the watch and the new dial:

After removing the movement from the case, and removing the old dial, this is what the dial side of the movement looks like:

After removing the dial side top plate, the false 6 o'clock sub-dial pinion can be seen. I was under the impression from the description on RWG that this pinion would simply come free, but it is in fact very well wedged / stuck into its pivot hole. In hind sight, this makes sense -- if it were loose at all, there would be a risk of the sub dial hand moving when the watch took a knock.

I tried pulling the pinion free with a pin vise, but didn't want to risk breaking the pinion by applying excessive force. And this left me in the uncomfortable position of having to knock the pinion out from the other side of the main plate.

Unfortunately, getting at the other side of the pinion through the mainplate looked like it would involve basically disassembling the entire movement... a (chronograph!!!) movement that I'd never worked on before.
I ended up doing a bit of research and found a good tear down video by Mark Lovick of the ST1903... after studying the video, I was able to come up with a plan where I'd be able to remove most of the movement intact. The trick is to remove the chronograph start / stop lever, the spring for the start / stop lever, the moving clutch wheel, the spring for the moving clutch wheel, the press fit chronograph connection wheel, the balance, the cannon pinion, the escape wheel bridge, and the escape wheel. It's then possible to remove the entire chonograph module / train bridge assembly intact.


With all those parts removed, it's possible to use a stake to punch out the 6 o'clock pinion form the bottom of the mainspring well in the main plate.

Since the 6 o'clock sub-dial pinion has a pivot on the back side that used to fit into the hole in the main plate, I used a stone to grind it flat so that I could position it flush with the mainplate in a new position.

Next I needed to open up the hole in the dial side top plate. For this I used my trusty set of broaches. It's easier to simply open the hole in all directions than to try to move the hole... so I just kept broaching until I was sure there would be enough clearance for the pinion to sit in the new position.

It turned out that I actually cut it pretty close, but there was just enough room (see blue arrow).

To secure the pinion in place I used a bit of 5-minute epoxy. I made sure to keep the epoxy away from the hole in the main plate that the pinion used to sit in since I didn't want it locking the mainspring barrel in place on the other side. There's quire a large flat surface under the pinion, so there's no need to get glue near the old hole.

With the epoxy not yet cured, I was able to place the dial onto the movement top plate to make sure the alignment was correct. NB: I needed to clip the feet from the new dial since the dial feet on the new dial aren't in the right positions for the ST1903 movement.

After I'd left the epoxy on the pinion to cure for a few hours (I know it's 5 minute epoxy, but it takes a while to gain full strength), I mixed another batch of epoxy and used it to secure the dial to the movement using a few dots around the movement top plate. I left this to cure overnight. The next morning I pressed the hands back on and cased the movement back up.

I noticed a small scratch on the hesalite crystal so I used a bit of polywatch and a microfiber chamoix to try to buff it out. I wasn't able to completly remove the scratch (small spot between 7 and 8 o'clock), but the polwatch polishing paste did remove all the other micro scratches in the crystal which makes the new dial underneath really pop.

I'm really happy with how this project turned out. I've never been a huge fan of vintage reps, but this project might have changed my opinion.

@dogwood - since you have worked on a DD3285 and SH3285 movements - are they interchangeable? Meaning, could I swap a GMF Explorer II complete SH3285 movement with DD3285? I'm looking into this mainly for power reserve and easyer servicing as most of the parts are interchangeable with GEN movement parts.
No, you’d have to build a hybrid movement like I did several posts back. Use the date plate from the SH and the bulk of the movement from the DD.@dogwood - since you have worked on a DD3285 and SH3285 movements - are they interchangeable? Meaning, could I swap a GMF Explorer II complete SH3285 movement with DD3285? I'm looking into this mainly for power reserve and easyer servicing as most of the parts are interchangeable with GEN movement parts.
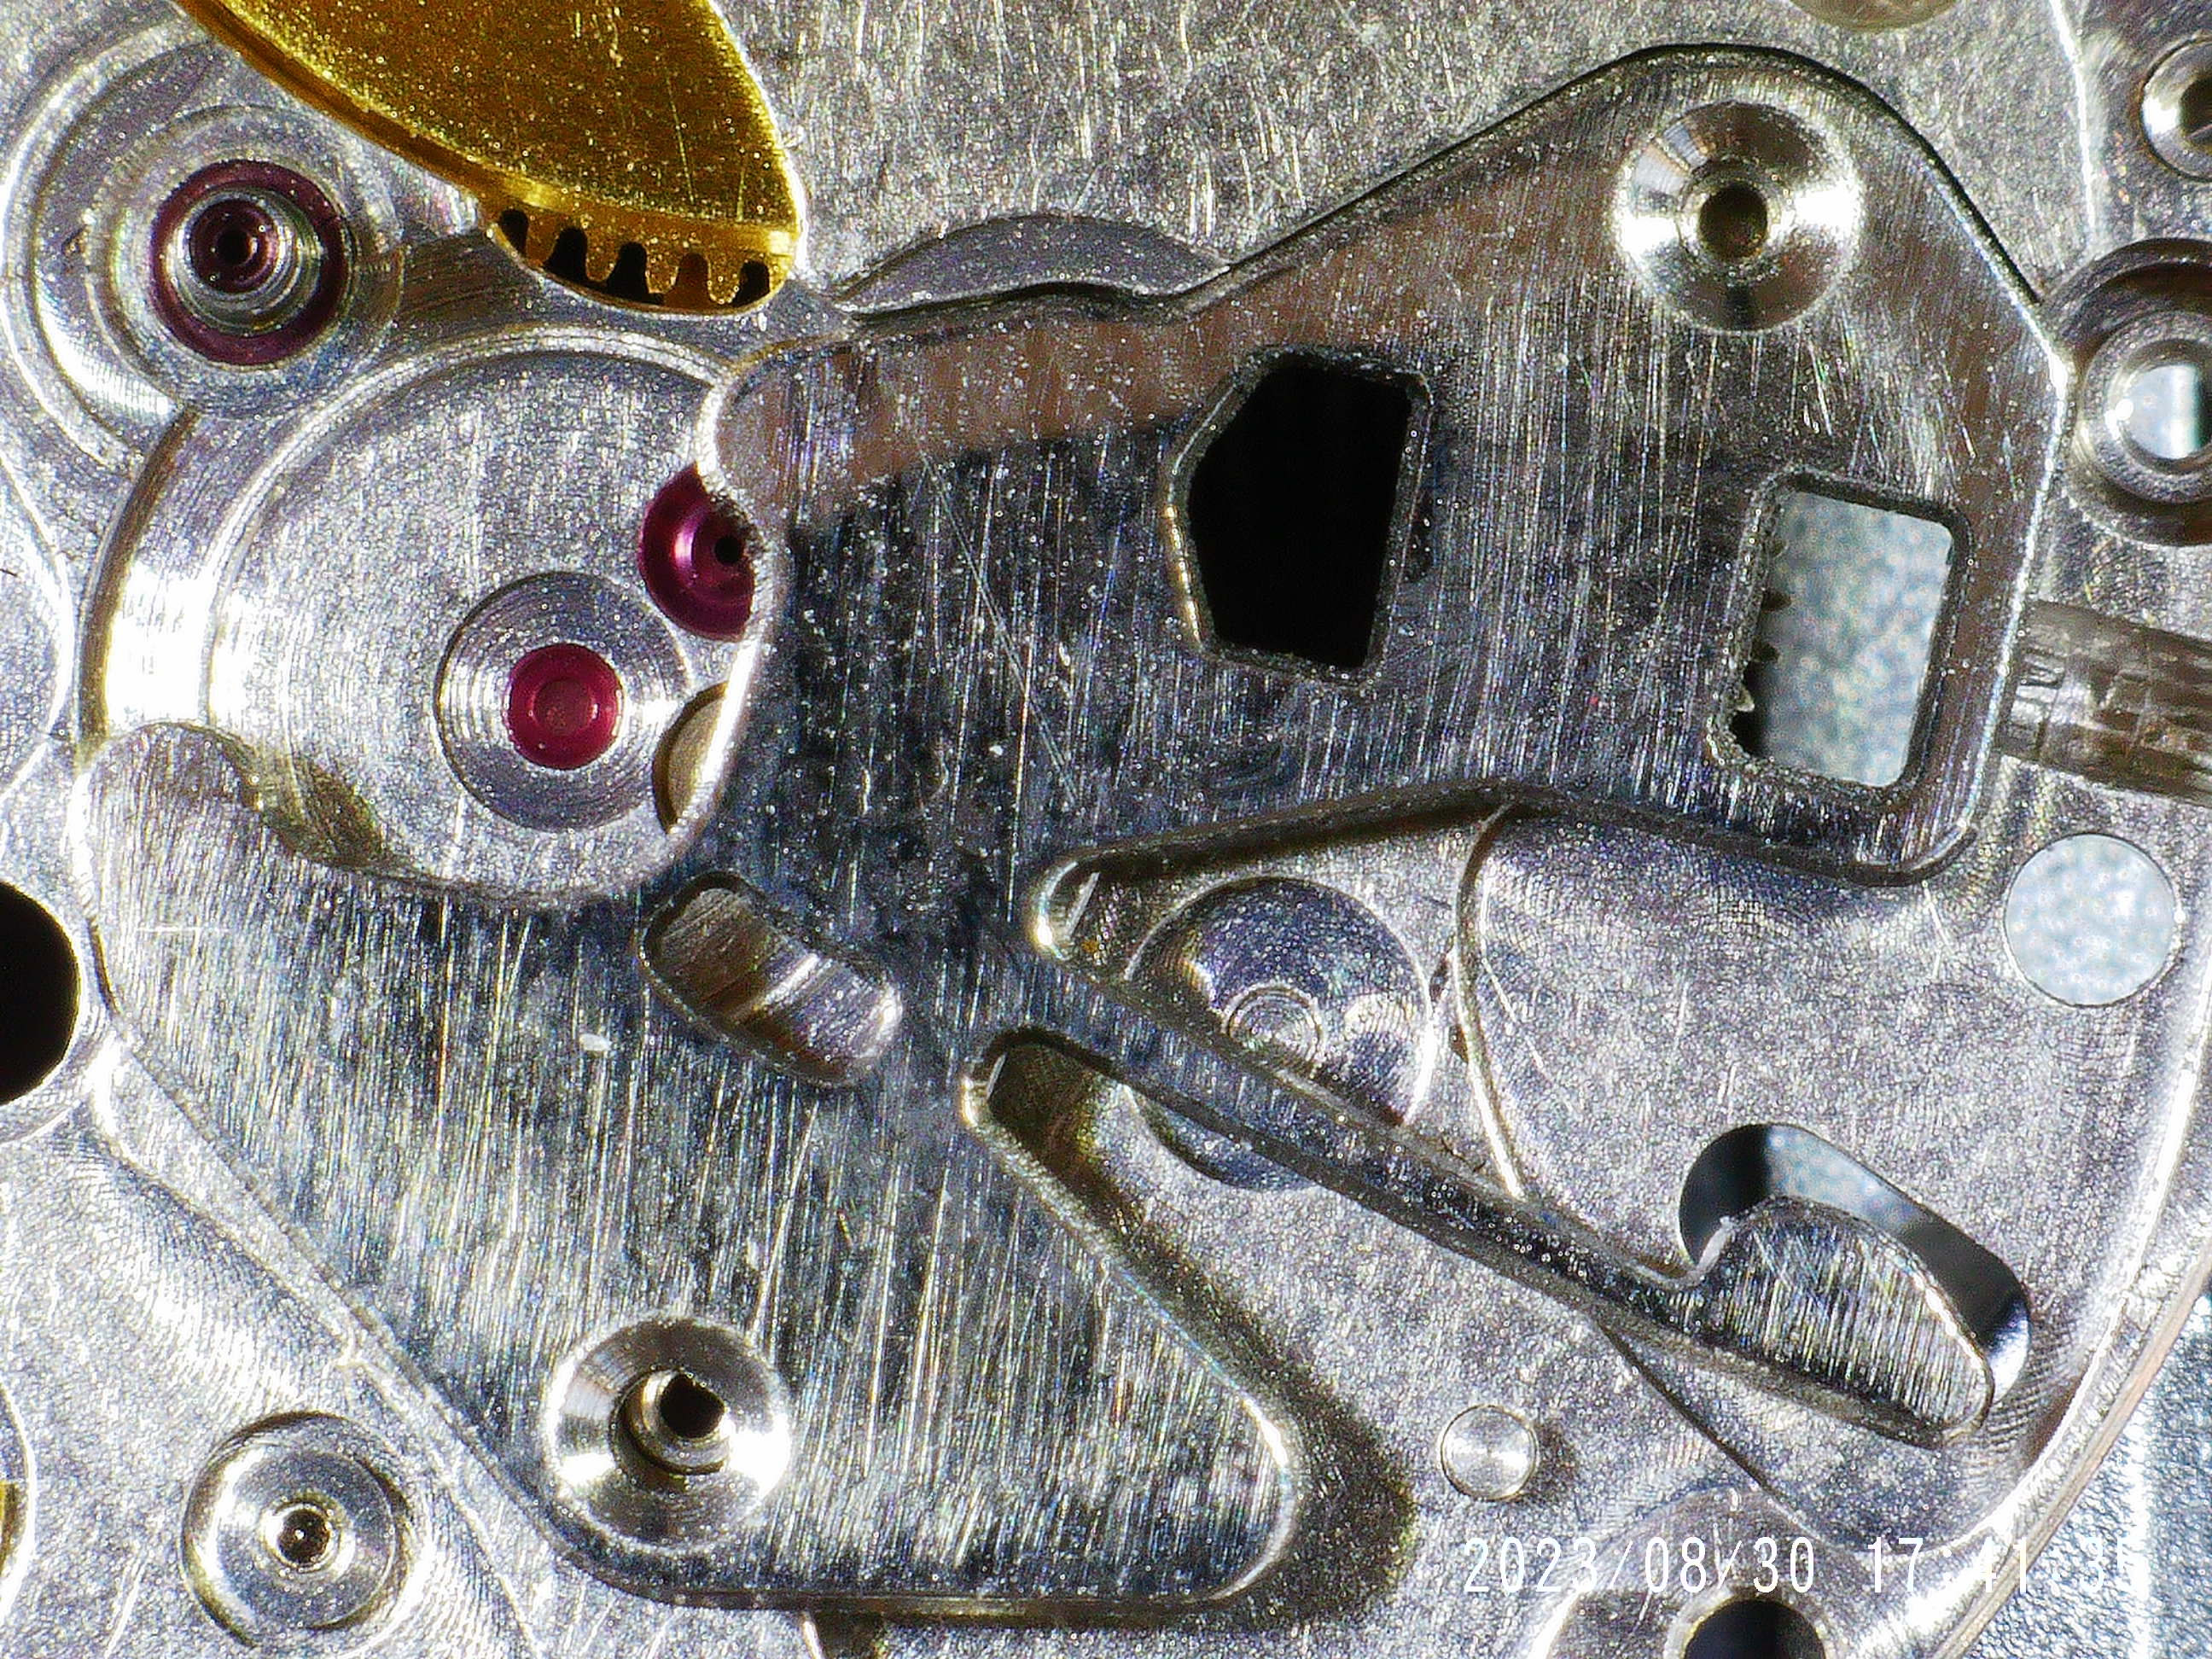
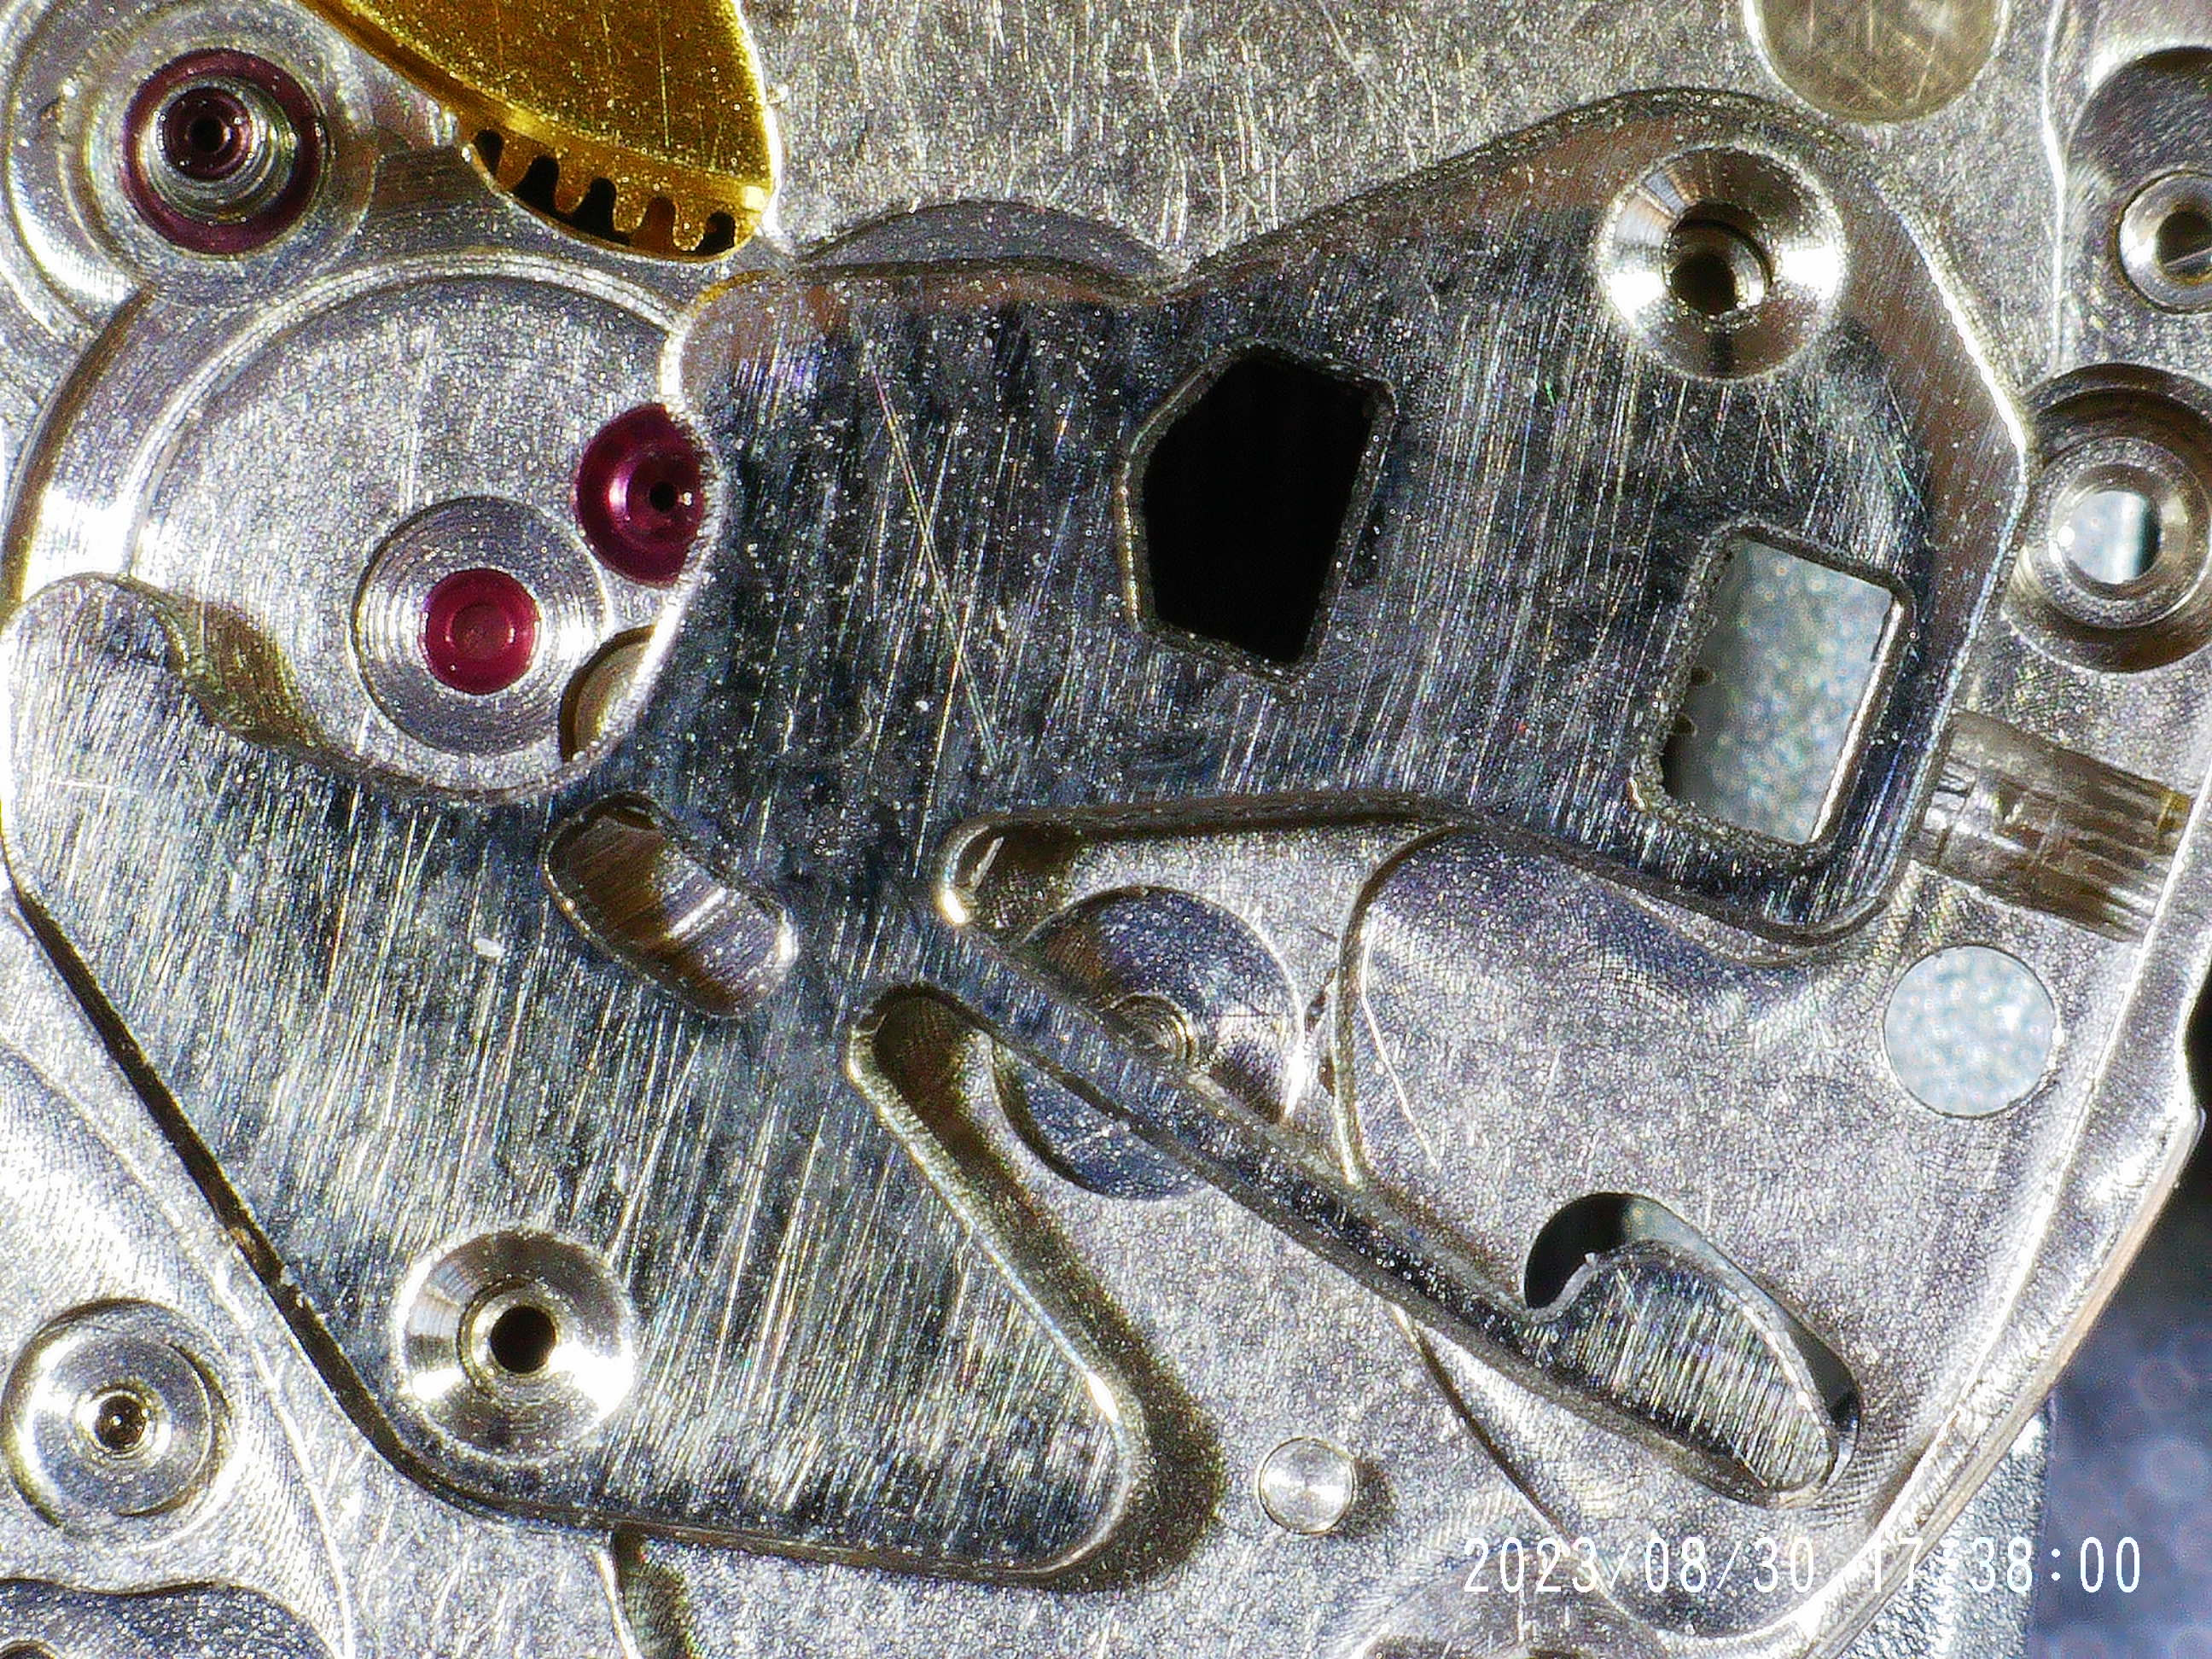
I was feeling creative this morning and I've had an idea in the back of my head for a little while... we've recently seen the release of VSF Oyster Perpetuals powered by the excellent VS3235 movement. The problem with these OPs from VSF is that VSF (or more specifically Dandong movement factory) didn't change the Setting Lever Jumper (part number 3235-231) to remove the phantom date correction "middle" position. Removing this middle stop on the crown's journey from winding to time setting would be a simple matter of changing the lobe on the end of the setting lever jumper spring to remove the middle detent. This morning I happened to have a VS3235 in parts on my bench, so I decided to fire up Fusion360 and see if I could make a version of this part that doesn't have that middle detent.
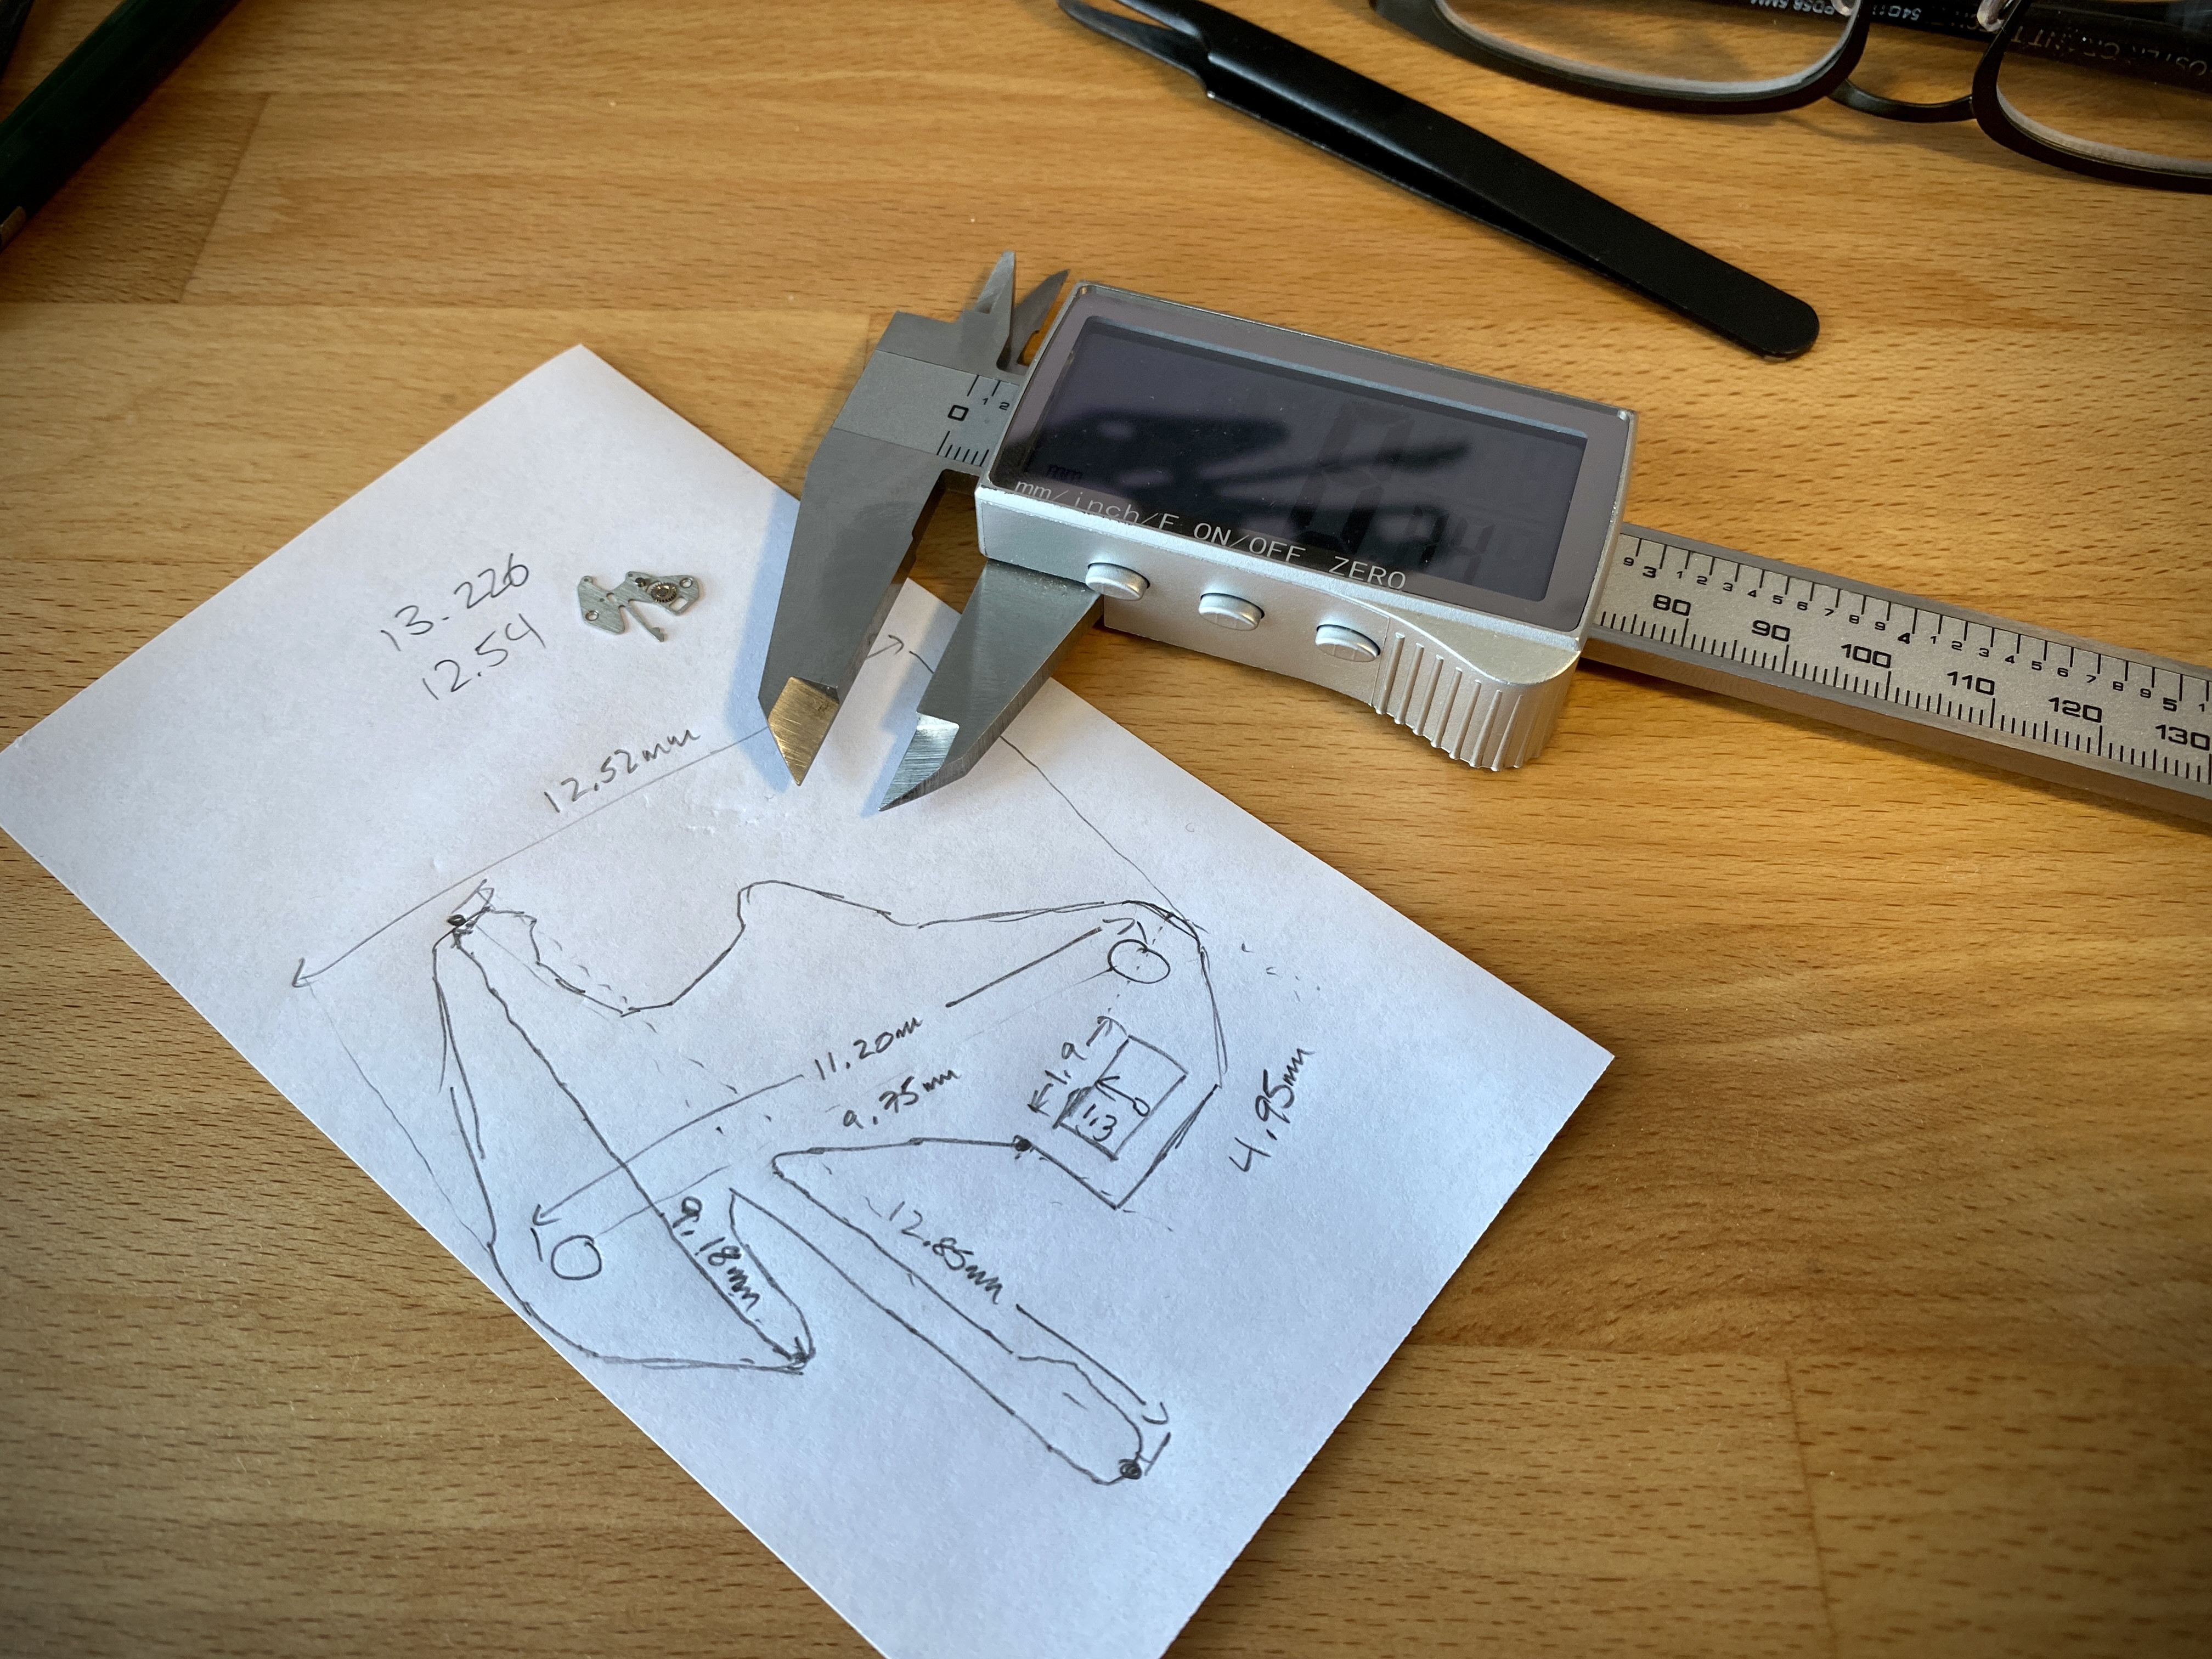
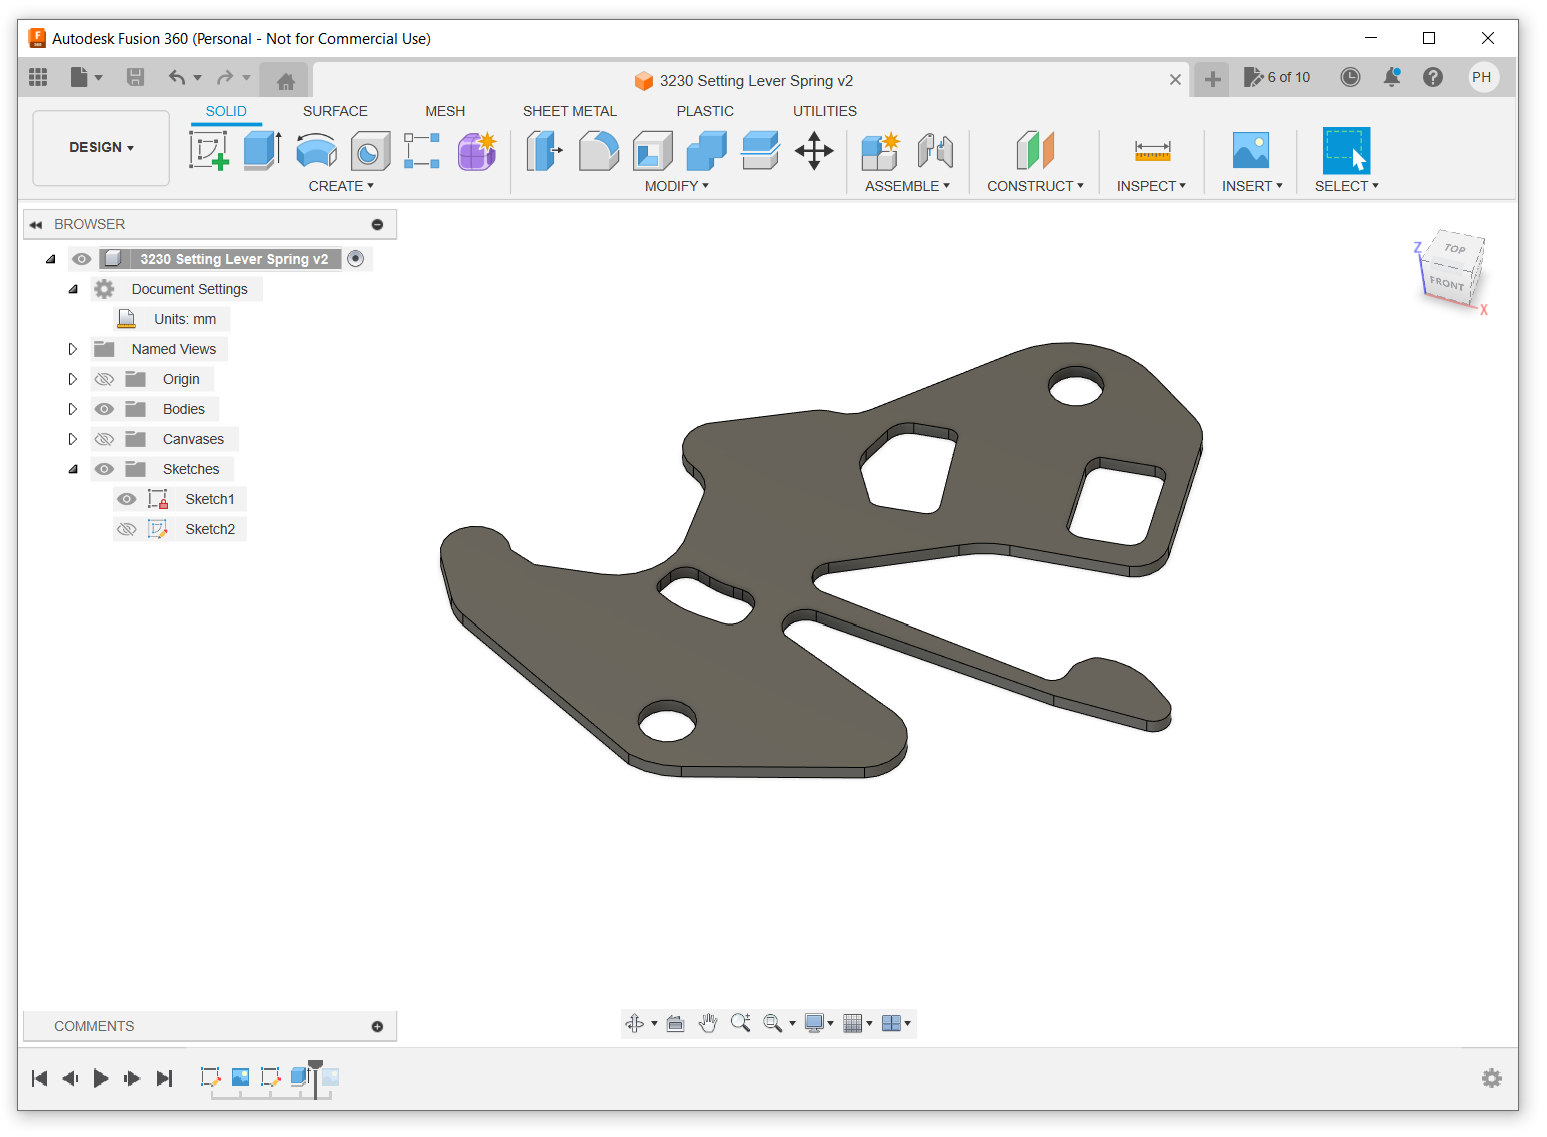
The process is pretty simple... take a good top down picture of the part using my microscope, then import that picture into Fusion360 and trace the outline (making the change on the end of the spring lobe to remove the middle stop). Then scale the sketch to the correct size based on a few measurements of the actual part, and then simply extrude the sketch into an object in CAD. Fortunately, the 3230 version of the part doesn't need the rivetted wheel since that wheel is only used for the date quick correction function (which isn't present on the 3230 because it doesn't have a date function at all).
Now all I need to do is find somewhere to have this part manufactured from 0.25mm steel sheet. If only there was someone on RWI with a fancy fiber laser CNC ...
...


The process is pretty simple... take a good top down picture of the part using my microscope, then import that picture into Fusion360 and trace the outline (making the change on the end of the spring lobe to remove the middle stop). Then scale the sketch to the correct size based on a few measurements of the actual part, and then simply extrude the sketch into an object in CAD. Fortunately, the 3230 version of the part doesn't need the rivetted wheel since that wheel is only used for the date quick correction function (which isn't present on the 3230 because it doesn't have a date function at all).
Now all I need to do is find somewhere to have this part manufactured from 0.25mm steel sheet. If only there was someone on RWI with a fancy fiber laser CNC
I was feeling creative this morning and I've had an idea in the back of my head for a little while... we've recently seen the release of VSF Oyster Perpetuals powered by the excellent VS3235 movement. The problem with these OPs from VSF is that VSF (or more specifically Dandong movement factory) didn't change the Setting Lever Jumper (part number 3235-231) to remove the phantom date correction "middle" position. Removing this middle stop on the crown's journey from winding to time setting would be a simple matter of changing the lobe on the end of the setting lever jumper spring to remove the middle detent. This morning I happened to have a VS3235 in parts on my bench, so I decided to fire up Fusion360 and see if I could make a version of this part that doesn't have that middle detent.


The process is pretty simple... take a good top down picture of the part using my microscope, then import that picture into Fusion360 and trace the outline (making the change on the end of the spring lobe to remove the middle stop). Then scale the sketch to the correct size based on a few measurements of the actual part, and then simply extrude the sketch into an object in CAD. Fortunately, the 3230 version of the part doesn't need the rivetted wheel since that wheel is only used for the date quick correction function (which isn't present on the 3230 because it doesn't have a date function at all).
Now all I need to do is find somewhere to have this part manufactured from 0.25mm steel sheet. If only there was someone on RWI with a fancy fiber laser CNC...
Better get a Copyright for that part!
Looks great by the way.
Lol... if it works, I'll open source the design. These parts should be pretty easy to manufacture, and if it works as a mod, then that would be pretty cool.Better get a Copyright for that part!
Looks great by the way.
A couple of folks who own fiber laser CNCs stepped forward and offered to cut a few prototypes of my 3230 setting lever spring design. I haven't tested these yet, but I'm looking forward to giving them a try soon. I suspect I'll have to tweak the CAD a few times to get the fit right and to get the right profile on the lobe at the end of the spring.


@dogwood Hey fellow Canuck. I'm glad I found your journey throigh watchmaker and another local in Vancouver. So you take jobs still and if so, what's the waitlist? I'm looking to service, waterproof, and align the index of a new ZF BB58, and would love to do it locally. Your mods are really interesting! Thanks
Thanks for reaching out. I’m not an official vendor here on RWI. But I’m happy to meet up and see if I can help you out if you’re local. DM me and let’s connect.@dogwood Hey fellow Canuck. I'm glad I found your journey throigh watchmaker and another local in Vancouver. So you take jobs still and if so, what's the waitlist? I'm looking to service, waterproof, and align the index of a new ZF BB58, and would love to do it locally. Your mods are really interesting! Thanks
Following up on the 3230-231 part project, aka converting a vs3235 into a vs3230…
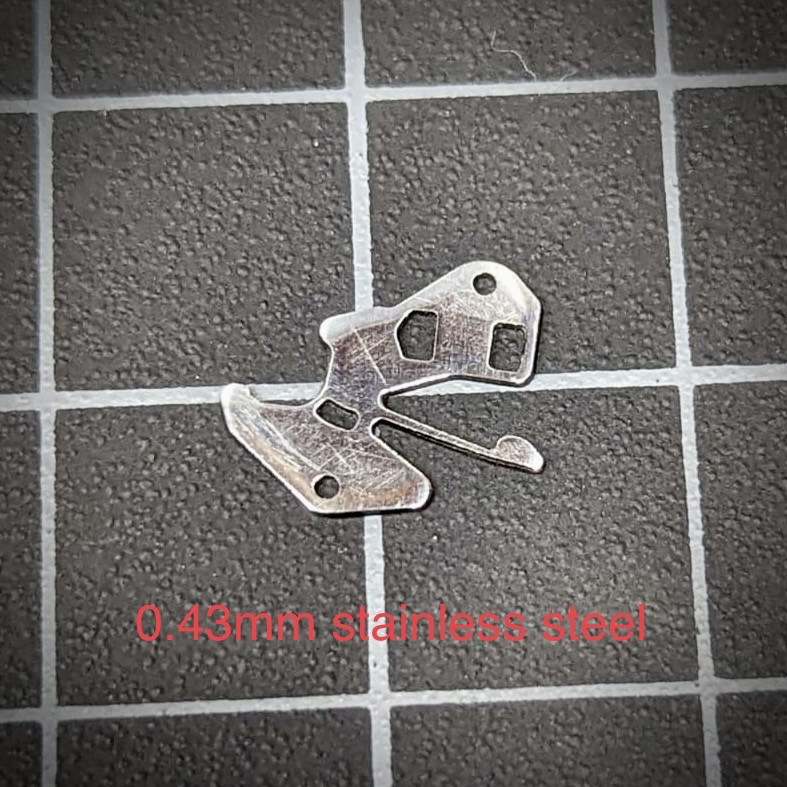
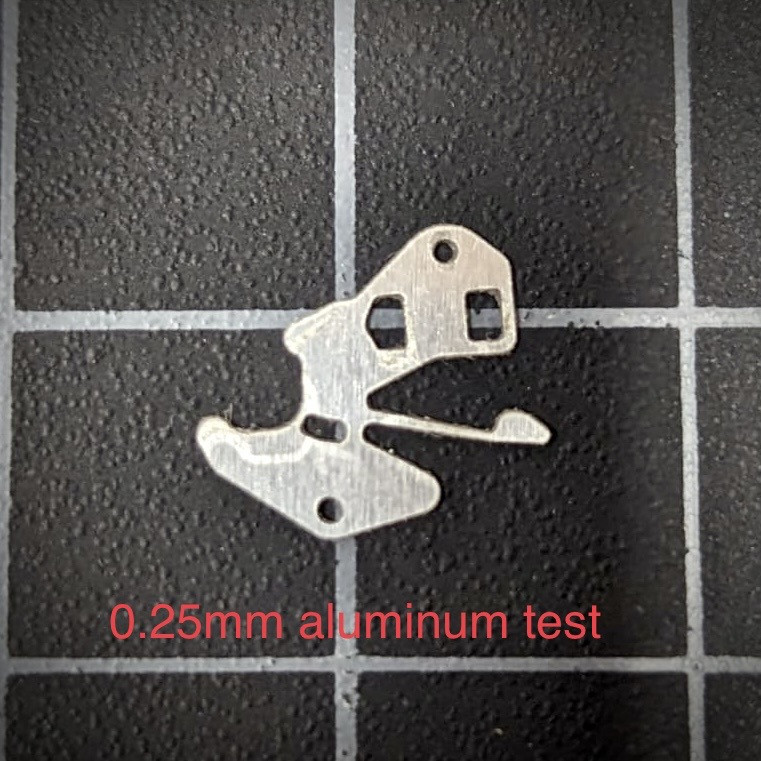
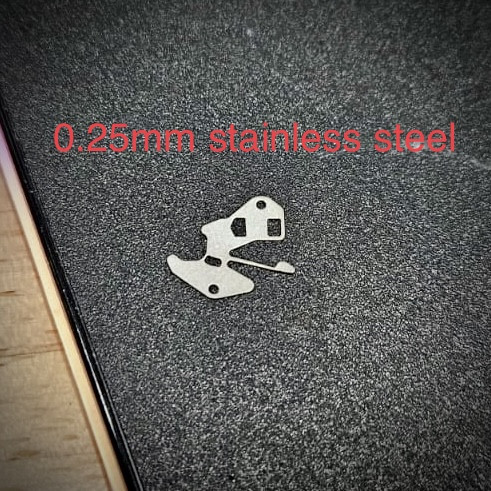
My first batch of prototype setting lever springs arrived courtesy of @xZeroCoolx … unfortunately it looks like I got my scaling constant ever so slightly off. I’ll need to rescale my design in CAD, and also open up the screw holes slightly more so that they fit over the posts in the main plate. These prototype parts were also cut from thicker 0.45mm stainless steel to test 2D fit. I’ve ordered some 0.25mm stainless steel sheet, so the next batch should be closer to spec.
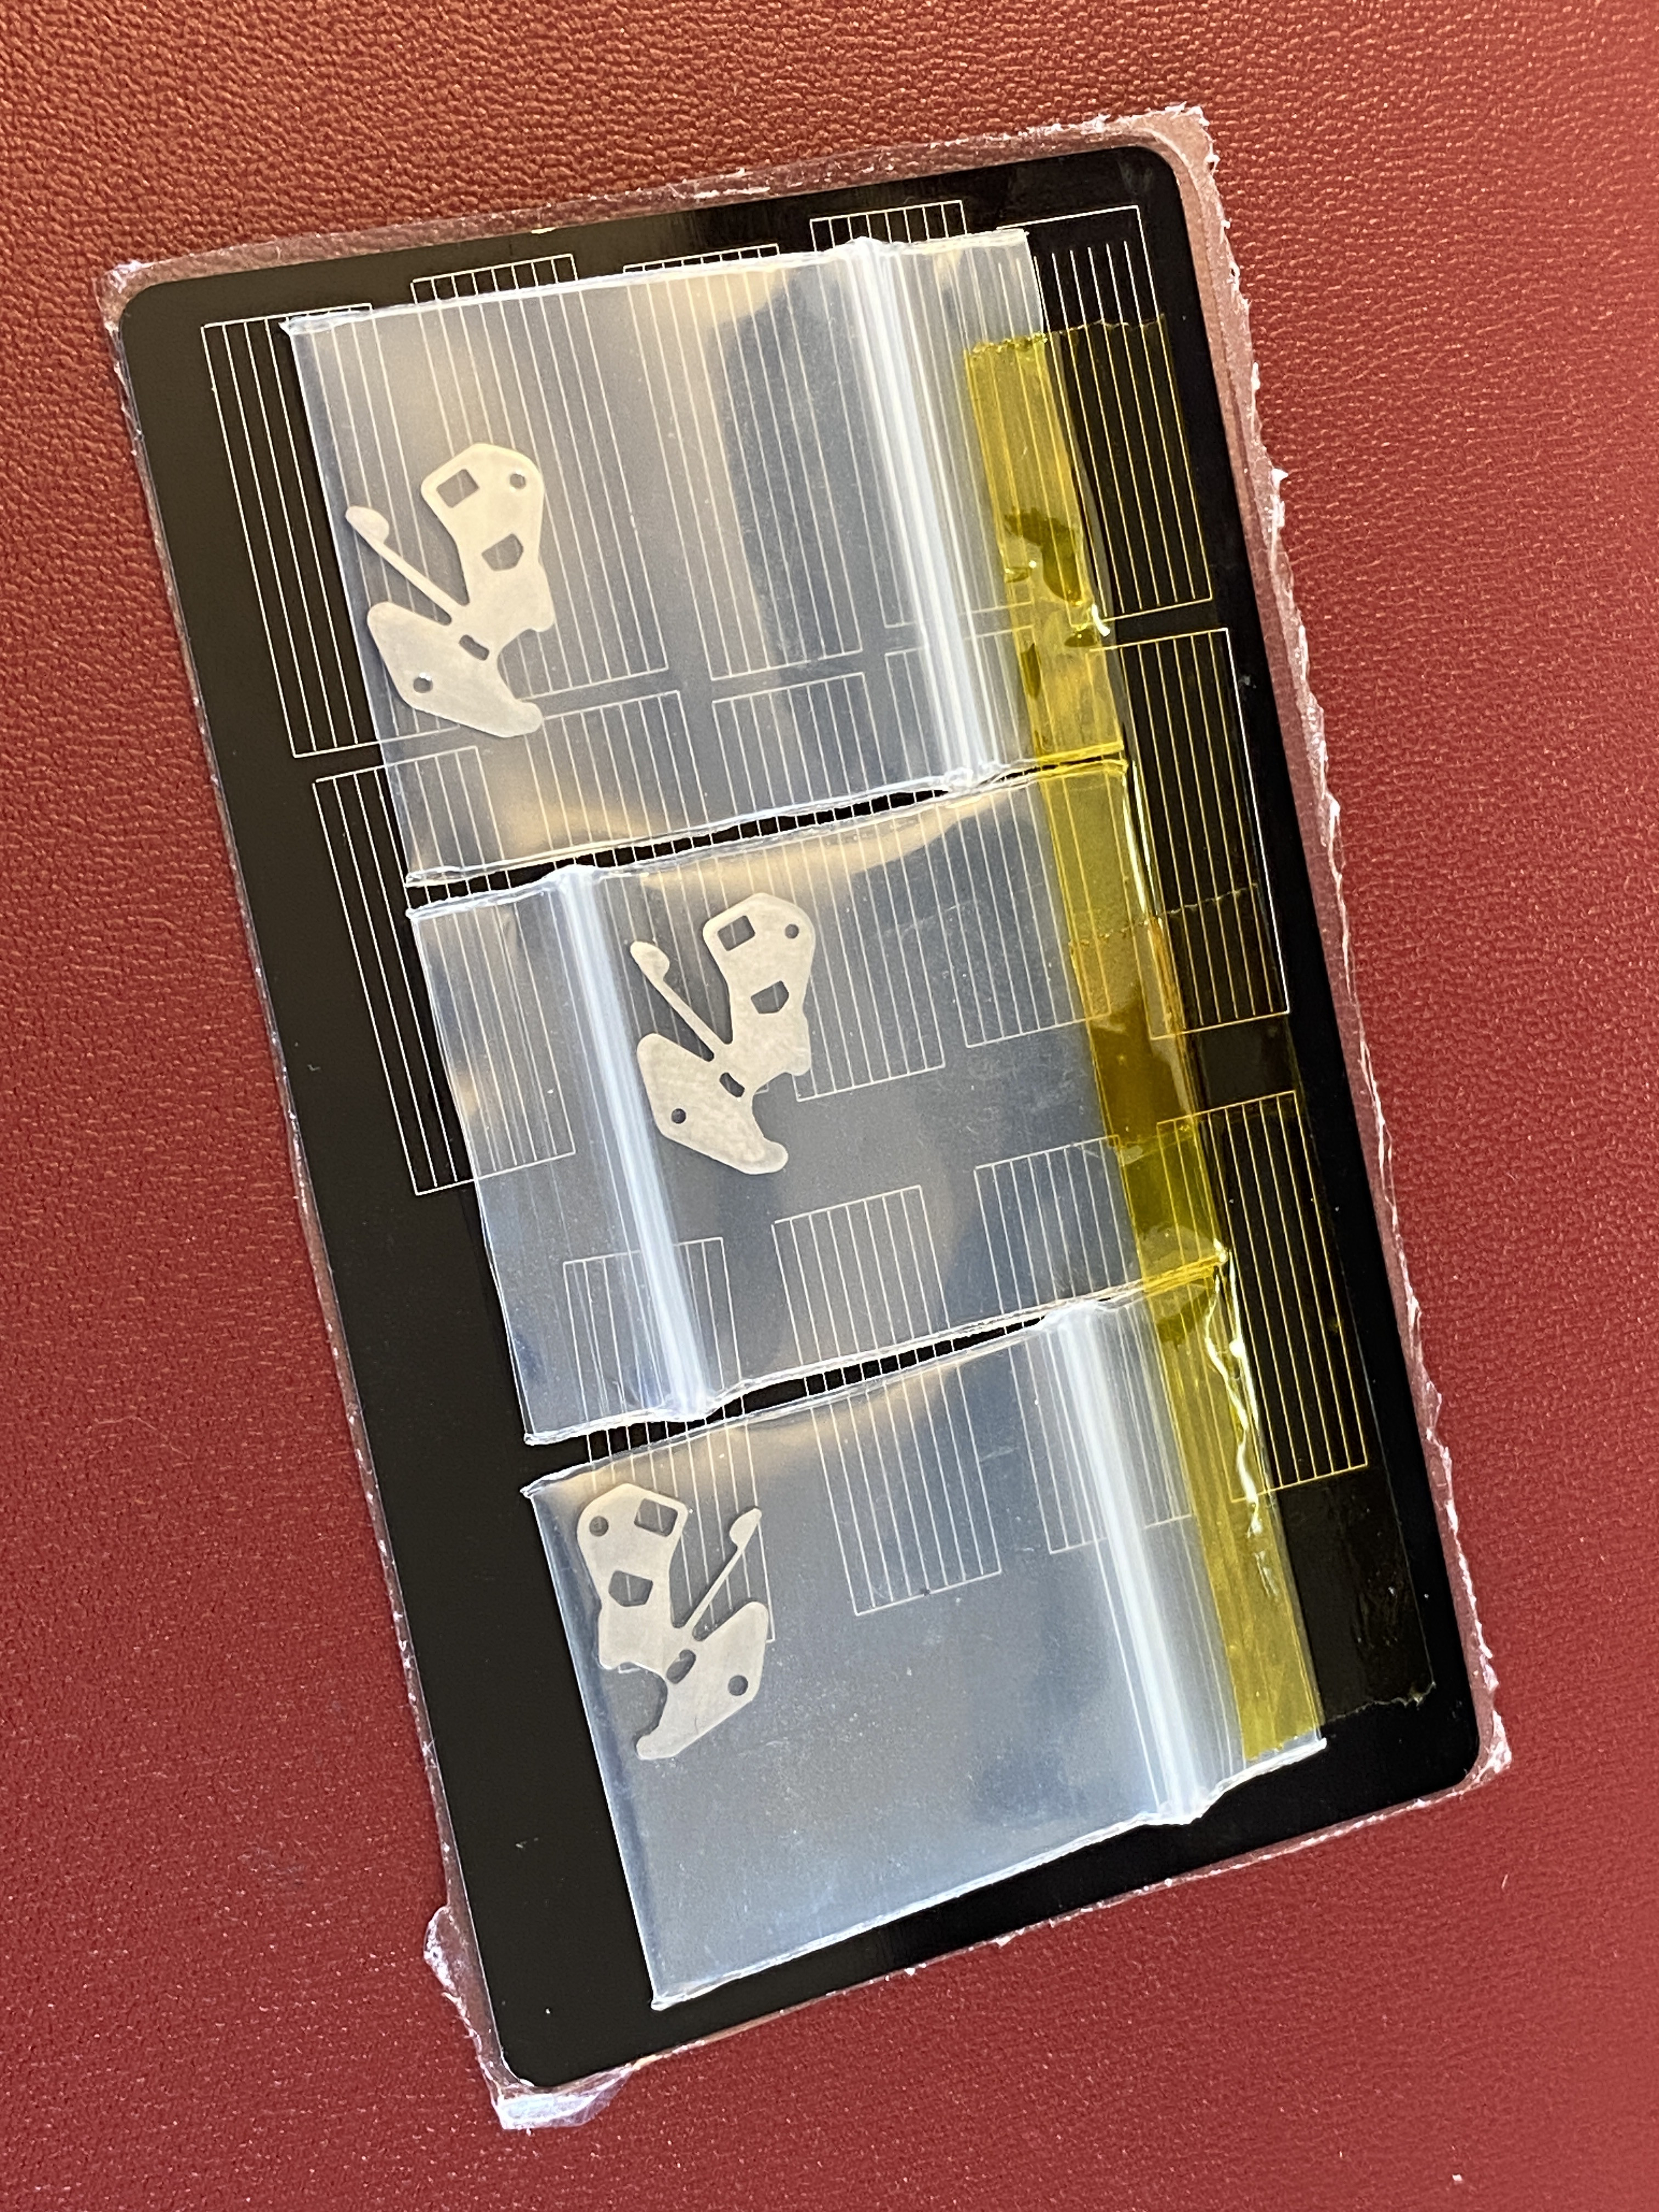
My first batch of prototype setting lever springs arrived courtesy of @xZeroCoolx … unfortunately it looks like I got my scaling constant ever so slightly off. I’ll need to rescale my design in CAD, and also open up the screw holes slightly more so that they fit over the posts in the main plate. These prototype parts were also cut from thicker 0.45mm stainless steel to test 2D fit. I’ve ordered some 0.25mm stainless steel sheet, so the next batch should be closer to spec.


- 25/9/22
- 7,598
- 21,320
- 113
ThisI've had a fun project on my bench this week: a Daytona 6263... The reps of these Daytonas are powered by the ST1903 movement. But the problem is that the ST1903 movement has the 6 o'clock subdial pinion in the wrong place so a true replica dial won't fit. Fortunately the 6 o'clock sub-dial on the rep is non functional, and somebody over on RWG has described a mod to move the pinion upwards towards the center of the watch to allow for a more gen like sub-dial position. This was my first time working on this watch and on the ST1903 movement, so I figured I'd document how it went and add some colour to the original mod procedure from RWG.
Here's what @scott223905 sent me: the watch and the new dial:

After removing the movement from the case, and removing the old dial, this is what the dial side of the movement looks like:

After removing the dial side top plate, the false 6 o'clock sub-dial pinion can be seen. I was under the impression from the description on RWG that this pinion would simply come free, but it is in fact very well wedged / stuck into its pivot hole. In hind sight, this makes sense -- if it were loose at all, there would be a risk of the sub dial hand moving when the watch took a knock.

I tried pulling the pinion free with a pin vise, but didn't want to risk breaking the pinion by applying excessive force. And this left me in the uncomfortable position of having to knock the pinion out from the other side of the main plate.

Unfortunately, getting at the other side of the pinion through the mainplate looked like it would involve basically disassembling the entire movement... a (chronograph!!!) movement that I'd never worked on before.
I ended up doing a bit of research and found a good tear down video by Mark Lovick of the ST1903... after studying the video, I was able to come up with a plan where I'd be able to remove most of the movement intact. The trick is to remove the chronograph start / stop lever, the spring for the start / stop lever, the moving clutch wheel, the spring for the moving clutch wheel, the press fit chronograph connection wheel, the balance, the cannon pinion, the escape wheel bridge, and the escape wheel. It's then possible to remove the entire chonograph module / train bridge assembly intact.


With all those parts removed, it's possible to use a stake to punch out the 6 o'clock pinion form the bottom of the mainspring well in the main plate.

Since the 6 o'clock sub-dial pinion has a pivot on the back side that used to fit into the hole in the main plate, I used a stone to grind it flat so that I could position it flush with the mainplate in a new position.

Next I needed to open up the hole in the dial side top plate. For this I used my trusty set of broaches. It's easier to simply open the hole in all directions than to try to move the hole... so I just kept broaching until I was sure there would be enough clearance for the pinion to sit in the new position.

It turned out that I actually cut it pretty close, but there was just enough room (see blue arrow).

To secure the pinion in place I used a bit of 5-minute epoxy. I made sure to keep the epoxy away from the hole in the main plate that the pinion used to sit in since I didn't want it locking the mainspring barrel in place on the other side. There's quire a large flat surface under the pinion, so there's no need to get glue near the old hole.

With the epoxy not yet cured, I was able to place the dial onto the movement top plate to make sure the alignment was correct. NB: I needed to clip the feet from the new dial since the dial feet on the new dial aren't in the right positions for the ST1903 movement.

After I'd left the epoxy on the pinion to cure for a few hours (I know it's 5 minute epoxy, but it takes a while to gain full strength), I mixed another batch of epoxy and used it to secure the dial to the movement using a few dots around the movement top plate. I left this to cure overnight. The next morning I pressed the hands back on and cased the movement back up.

I noticed a small scratch on the hesalite crystal so I used a bit of polywatch and a microfiber chamoix to try to buff it out. I wasn't able to completly remove the scratch (small spot between 7 and 8 o'clock), but the polwatch polishing paste did remove all the other micro scratches in the crystal which makes the new dial underneath really pop.

I'm really happy with how this project turned out. I've never been a huge fan of vintage reps, but this project might have changed my opinion.

Great, great write up that I can show to my watchmaker. Thank you.I've had a fun project on my bench this week: a Daytona 6263... The reps of these Daytonas are powered by the ST1903 movement. But the problem is that the ST1903 movement has the 6 o'clock subdial pinion in the wrong place so a true replica dial won't fit. Fortunately the 6 o'clock sub-dial on the rep is non functional, and somebody over on RWG has described a mod to move the pinion upwards towards the center of the watch to allow for a more gen like sub-dial position. This was my first time working on this watch and on the ST1903 movement, so I figured I'd document how it went and add some colour to the original mod procedure from RWG.
Here's what @scott223905 sent me: the watch and the new dial:

After removing the movement from the case, and removing the old dial, this is what the dial side of the movement looks like:

After removing the dial side top plate, the false 6 o'clock sub-dial pinion can be seen. I was under the impression from the description on RWG that this pinion would simply come free, but it is in fact very well wedged / stuck into its pivot hole. In hind sight, this makes sense -- if it were loose at all, there would be a risk of the sub dial hand moving when the watch took a knock.

I tried pulling the pinion free with a pin vise, but didn't want to risk breaking the pinion by applying excessive force. And this left me in the uncomfortable position of having to knock the pinion out from the other side of the main plate.

Unfortunately, getting at the other side of the pinion through the mainplate looked like it would involve basically disassembling the entire movement... a (chronograph!!!) movement that I'd never worked on before.
I ended up doing a bit of research and found a good tear down video by Mark Lovick of the ST1903... after studying the video, I was able to come up with a plan where I'd be able to remove most of the movement intact. The trick is to remove the chronograph start / stop lever, the spring for the start / stop lever, the moving clutch wheel, the spring for the moving clutch wheel, the press fit chronograph connection wheel, the balance, the cannon pinion, the escape wheel bridge, and the escape wheel. It's then possible to remove the entire chonograph module / train bridge assembly intact.


With all those parts removed, it's possible to use a stake to punch out the 6 o'clock pinion form the bottom of the mainspring well in the main plate.

Since the 6 o'clock sub-dial pinion has a pivot on the back side that used to fit into the hole in the main plate, I used a stone to grind it flat so that I could position it flush with the mainplate in a new position.

Next I needed to open up the hole in the dial side top plate. For this I used my trusty set of broaches. It's easier to simply open the hole in all directions than to try to move the hole... so I just kept broaching until I was sure there would be enough clearance for the pinion to sit in the new position.

It turned out that I actually cut it pretty close, but there was just enough room (see blue arrow).

To secure the pinion in place I used a bit of 5-minute epoxy. I made sure to keep the epoxy away from the hole in the main plate that the pinion used to sit in since I didn't want it locking the mainspring barrel in place on the other side. There's quire a large flat surface under the pinion, so there's no need to get glue near the old hole.

With the epoxy not yet cured, I was able to place the dial onto the movement top plate to make sure the alignment was correct. NB: I needed to clip the feet from the new dial since the dial feet on the new dial aren't in the right positions for the ST1903 movement.

After I'd left the epoxy on the pinion to cure for a few hours (I know it's 5 minute epoxy, but it takes a while to gain full strength), I mixed another batch of epoxy and used it to secure the dial to the movement using a few dots around the movement top plate. I left this to cure overnight. The next morning I pressed the hands back on and cased the movement back up.

I noticed a small scratch on the hesalite crystal so I used a bit of polywatch and a microfiber chamoix to try to buff it out. I wasn't able to completly remove the scratch (small spot between 7 and 8 o'clock), but the polwatch polishing paste did remove all the other micro scratches in the crystal which makes the new dial underneath really pop.

I'm really happy with how this project turned out. I've never been a huge fan of vintage reps, but this project might have changed my opinion.

