-
Tired of adverts on RWI? - Subscribe by clicking HERE and PMing Trailboss for instructions and they will magically go away!
You are using an out of date browser. It may not display this or other websites correctly.
You should upgrade or use an alternative browser.
You should upgrade or use an alternative browser.
[BUILD LOG] Rolex 6610 big white lollipop - 1957
- Thread starter Erect
- Start date
Project Overview
I'm embarking on a watch-building project that involves sourcing components from various parts of the world. Some items are readily available, while others are more challenging to obtain. I'm leveraging the expertise of multiple RWI members, along with my global network of connections and friends, to bring this project to fruition. I extend my gratitude to all those who will assist in this endeavor. Thank you in advance for your support and assistance.
Dial
In my opinion, the dial is the most crucial component of this project. I refrained from purchasing any other parts until I was confident that the dial would work out. I spent countless hours researching dial production options, both on this forum and across the internet. Ruby's dials were too expensive and didn't meet my exacting standards. The impressive work by @manodeoro and other members inspired me, but with Mano currently unavailable, I had to explore other avenues, leading me to "reinvent the wheel," as someone mentioned in private messages.
I turned to Chinese secondhand markets, which are abundant with various items, although the watch hobby community is much smaller in China compared to Europe or the USA. I found a like-minded individual, who is now a friend, sharing the same passion. It was quite a challenge to connect with him since foreigners can't communicate with sellers on these platforms without a Chinese ID. After verifying my ID with Taobao and Alipay without success, I cleverly found his censored username, searched for it on WeChat, and fortunately, he used the same name there.
We engaged in extensive discussions, and he showcased some of his builds using Vietnam dials and other parts, as well as his self-made dials. This collaboration led us to work on creating a 6610 dial, a design we both admire.
Dial Design Process
After numerous attempts to create a vector myself—which were satisfactory but not exceptional—I decided to hire a professional illustrator to assist with the design. Both of us aren't expert graphic illustrators. Moderators, am I allowed to share the illustrator's contact information here for others who might be interested?
Here’s the progress we made:
- My First Attempt:
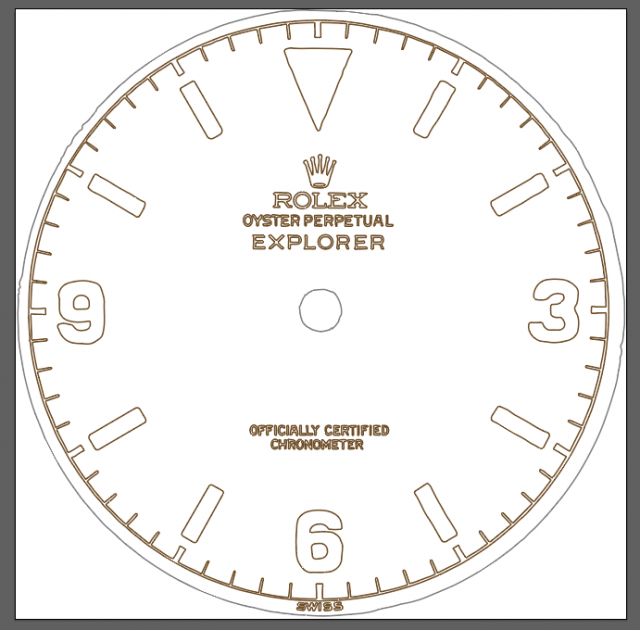
- Second Adjustment After @369mafia's Feedback:
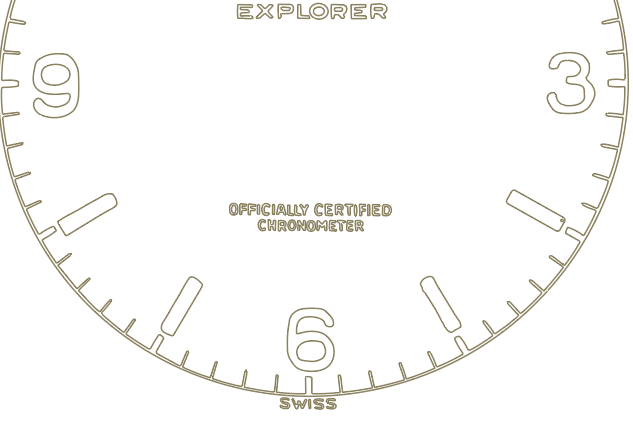
- First Version with the Professional Illustrator:
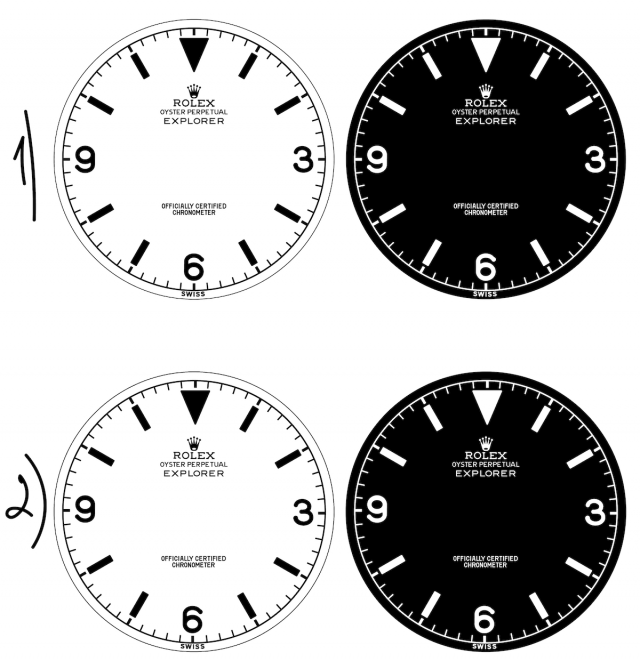
Although it looked good to the untrained eye, I had several remarks:
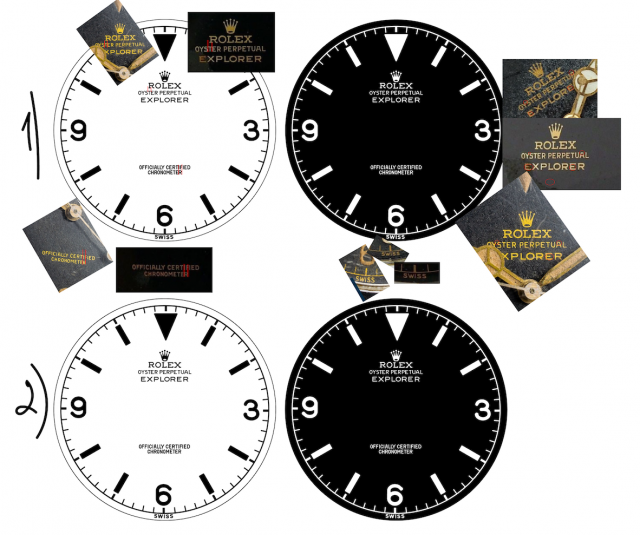
After extensive back-and-forth communication:
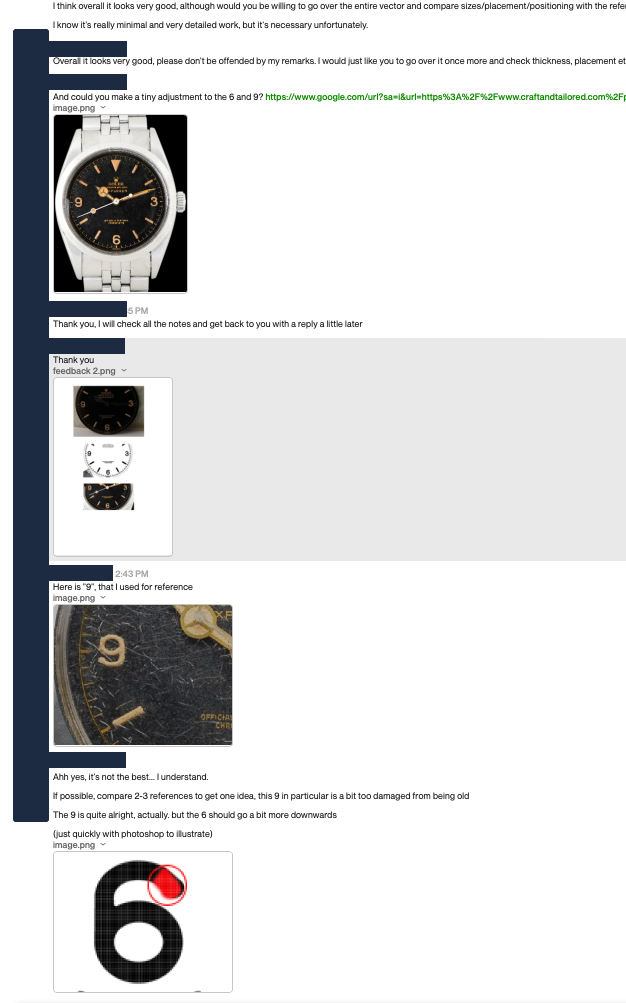
We made numerous adjustments and eventually reached this result:
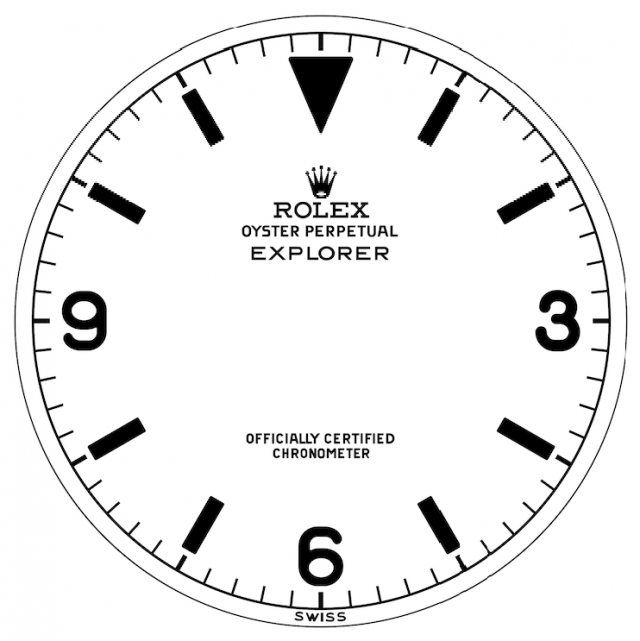
At first glance, it seemed perfect. To ensure accuracy, I overlaid the vector in purple transparency over an actual genuine NOS naked dial I found online:
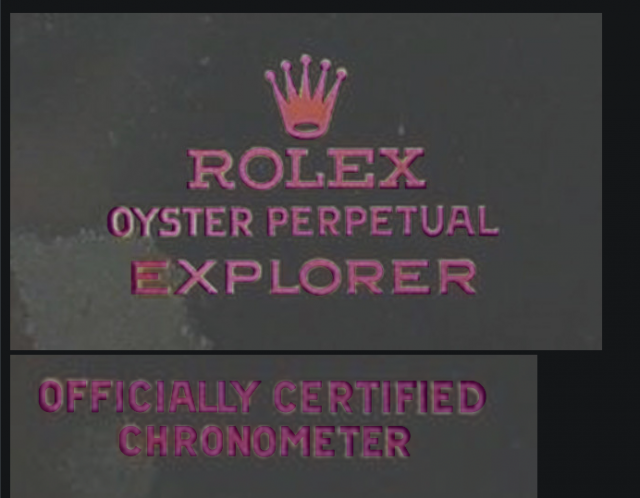
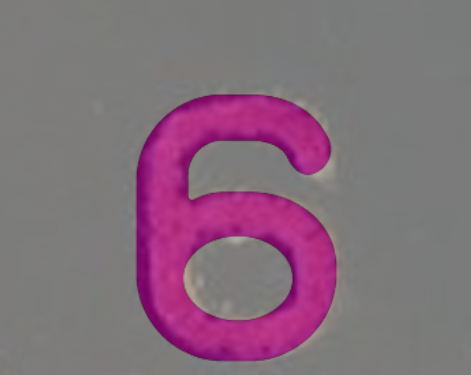
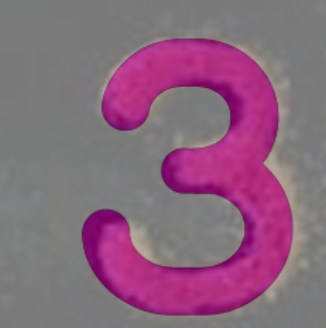
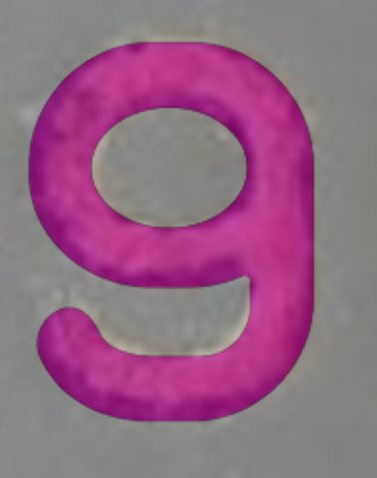
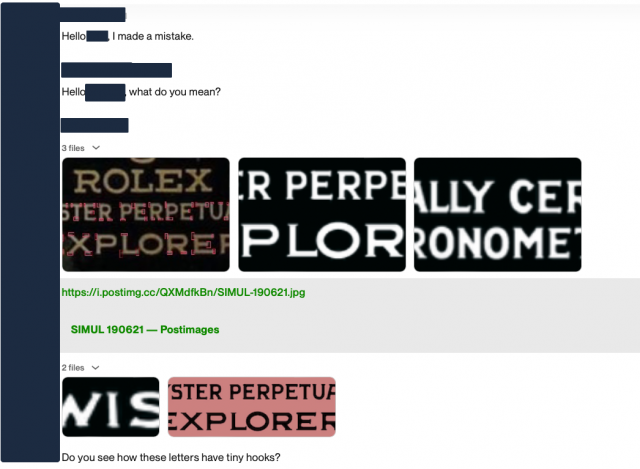
However, I realized that the letters needed their characteristic "hooks":
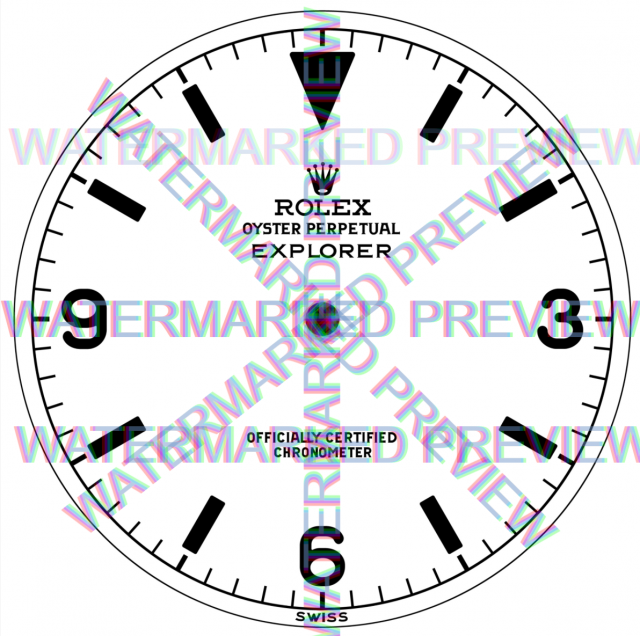
So, we made further adjustments. I essentially gave the illustrator, who initially knew nothing about watches, a crash course on Rolex 6610s—he's now quite knowledgeable! Here's the final result (watermarked to prevent unauthorized use):
- Initial Attempt Without the Vector for Engraving:
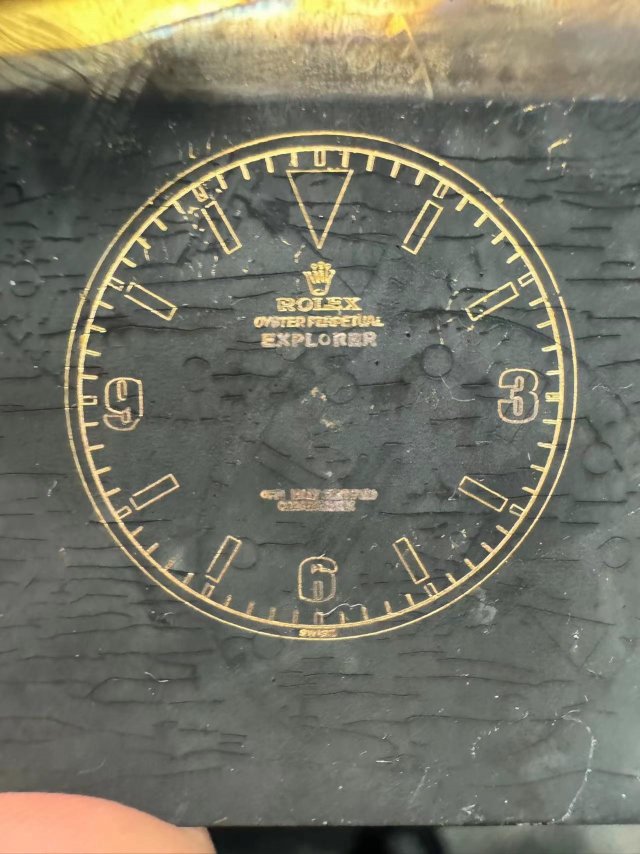
- With the Professional Vector:
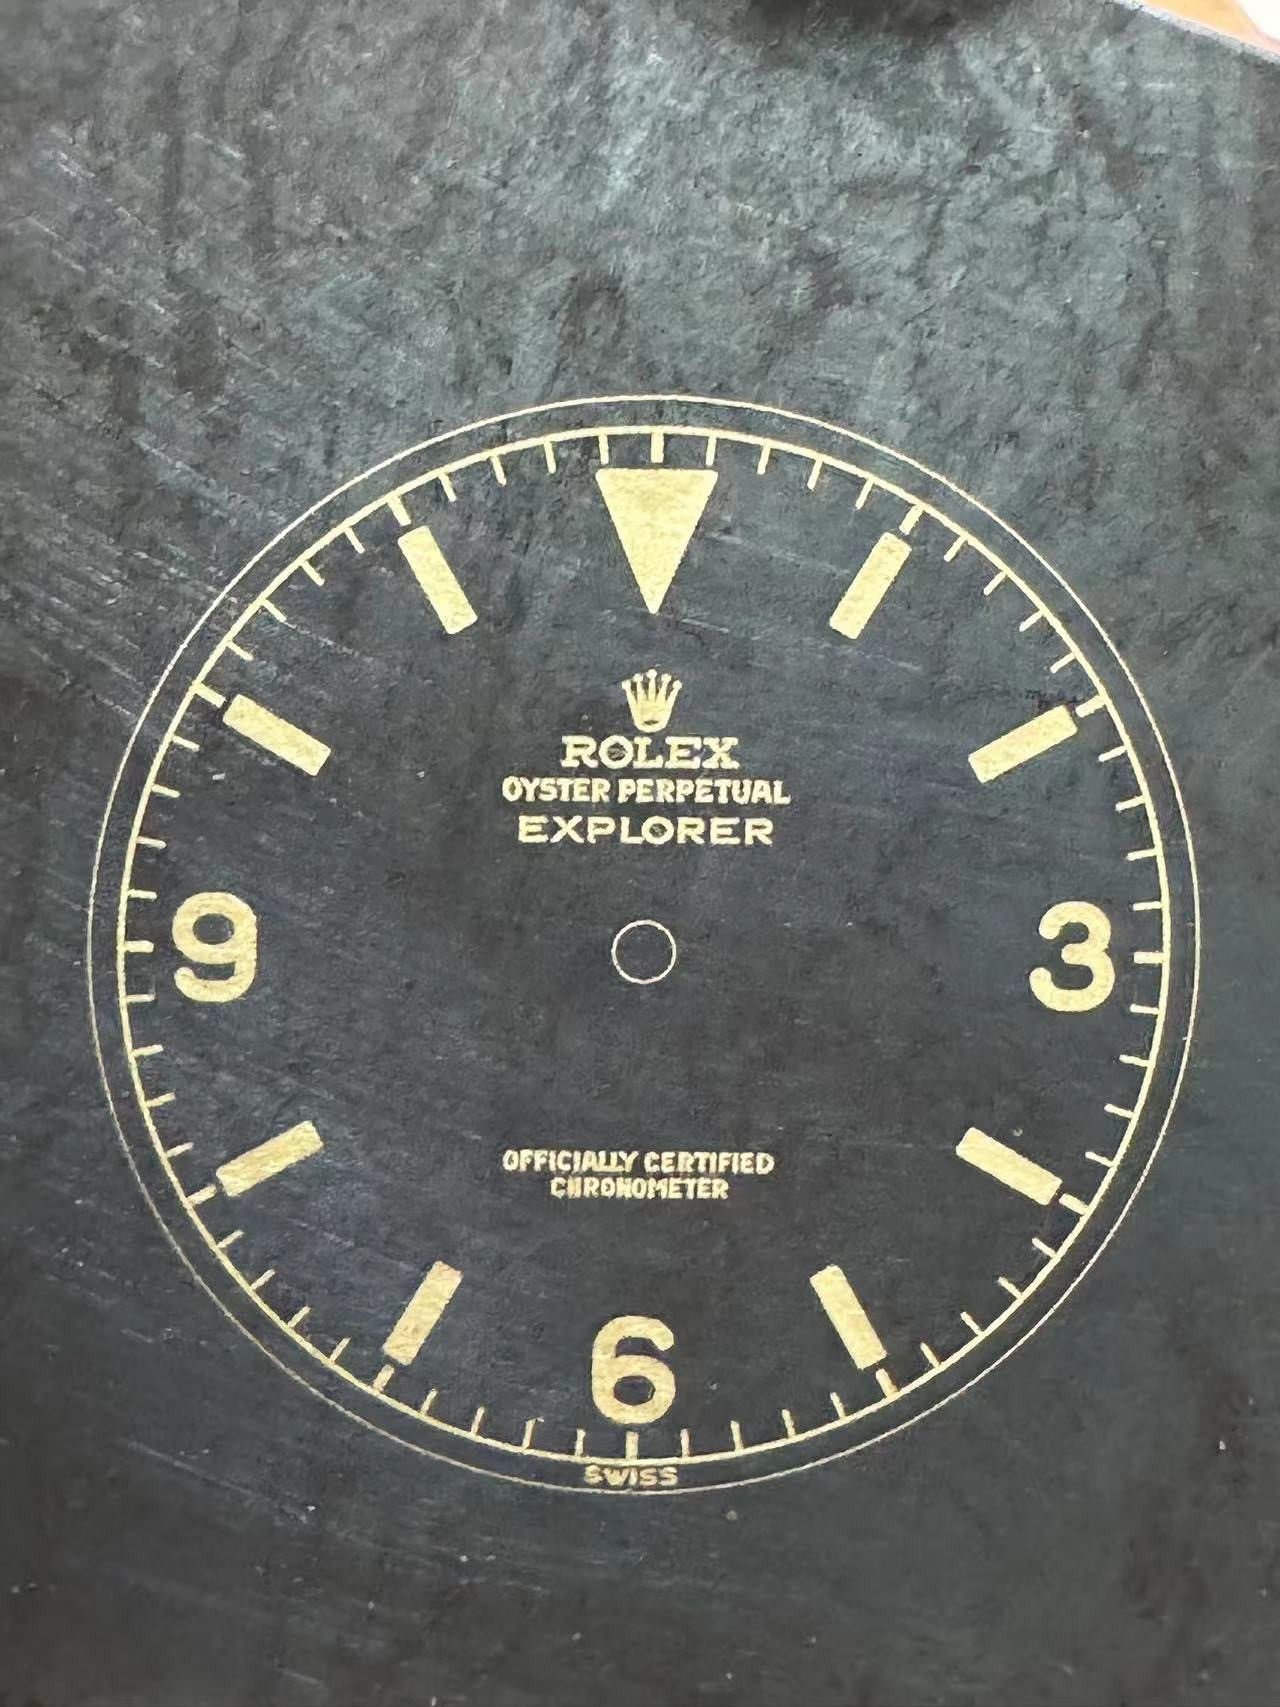
We still need to refine the details and achieve sharper lines. Currently, we're experimenting with line thickness. Here's a closer look:
https://imgur.com/a/E1F2wAD
Note: The dial section will be updated in the future once it's finalized.
Crystal
Content to be added.
Case Sourced by @1016lover
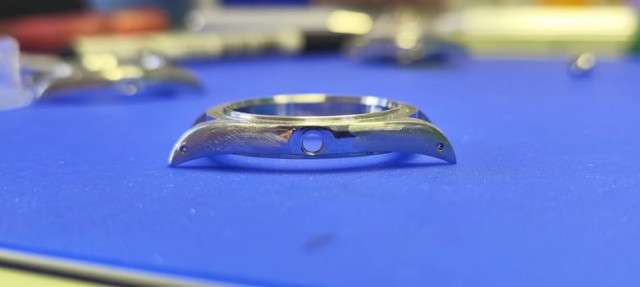
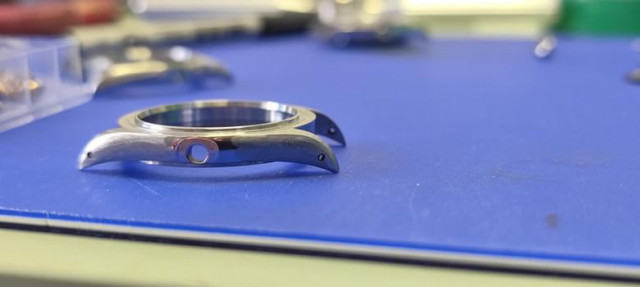
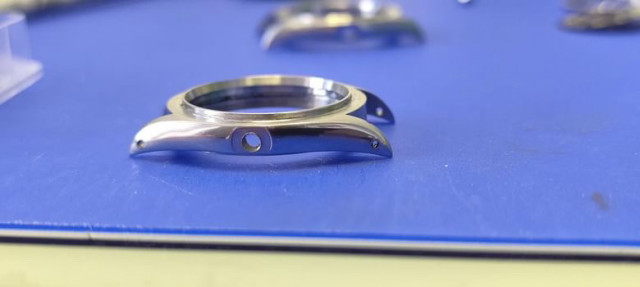
I'm facing some challenges with the case, which was sourced by @1016lover. The case features more aggressive lug curving, closely resembling the 6610 shape, at least in my opinion.
Comparison with Raffles Case
Here's a comparison between the larger hole case and the Raffles case:
Issue with Crown Tube Fitting
The primary issue with this case is that the Athaya Vintage crown tube doesn't fit properly—the hole is slightly too large. To address this, the hole needs to be filled, drilled, and tapped to the appropriate size. After discussing potential solutions with @1016lover and considering my metalworking and welding experience, we came up with three possible approaches:
1. Poly Metal Bonding to Fill the Hole
2. Welding with a Chalmo Torch Using a Copper/Aluminum and Flux Blended Rod
3. TIG Welding
I was cautious about using torch and TIG welding due to the heat involved, so I conducted tests on a stainless steel dummy block.
1. Poly Metal Bonding
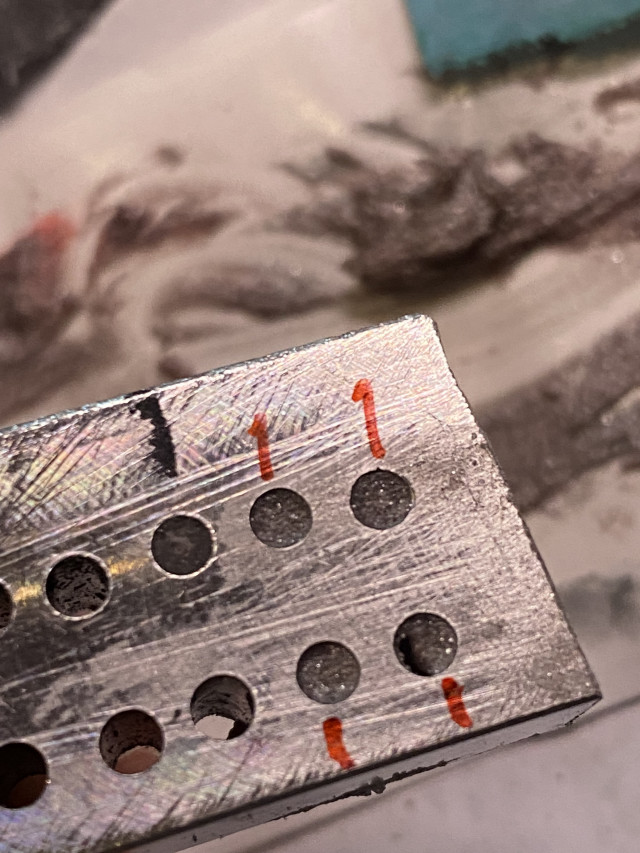
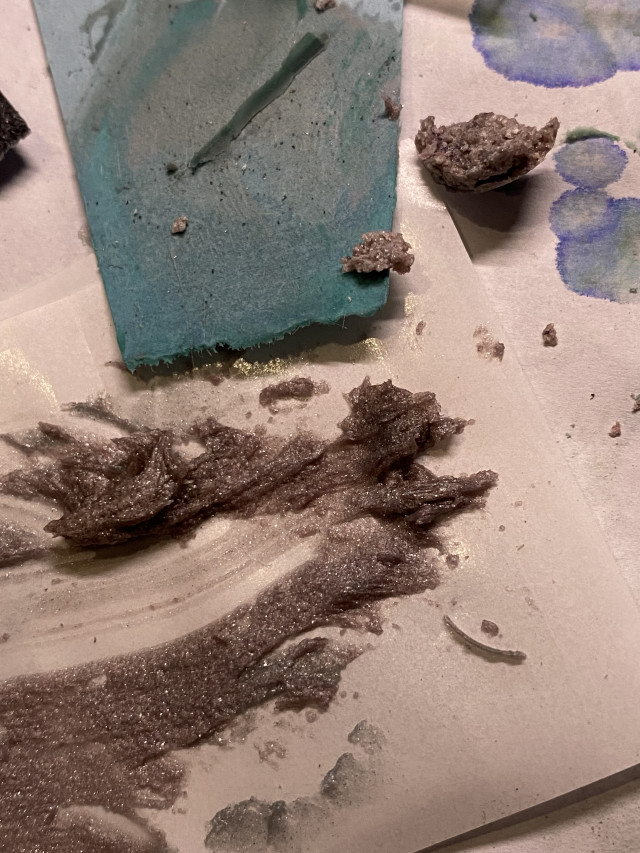
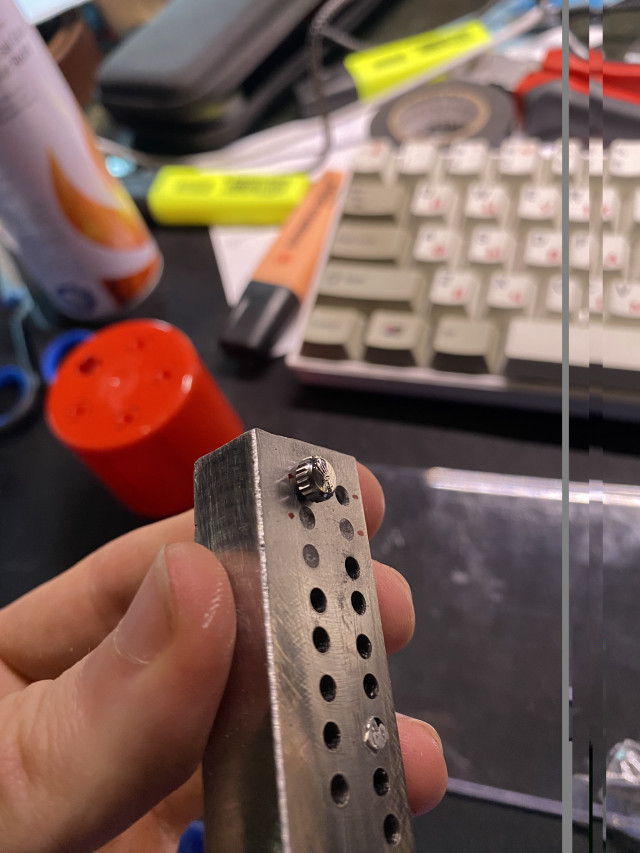
While this method worked, the thread strength wasn't optimal.
2. Chalmo Torch Welding
Using a copper/aluminum/flux blended rod:
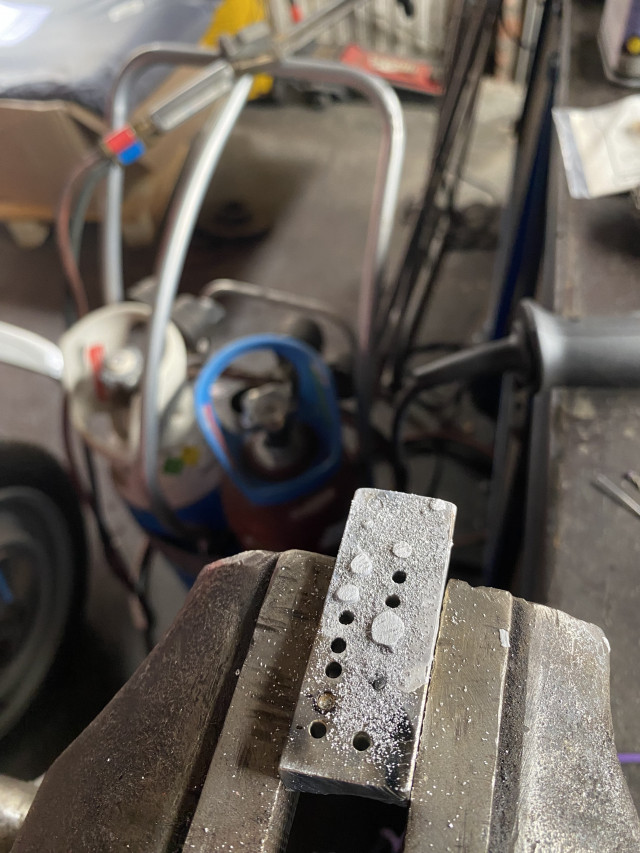
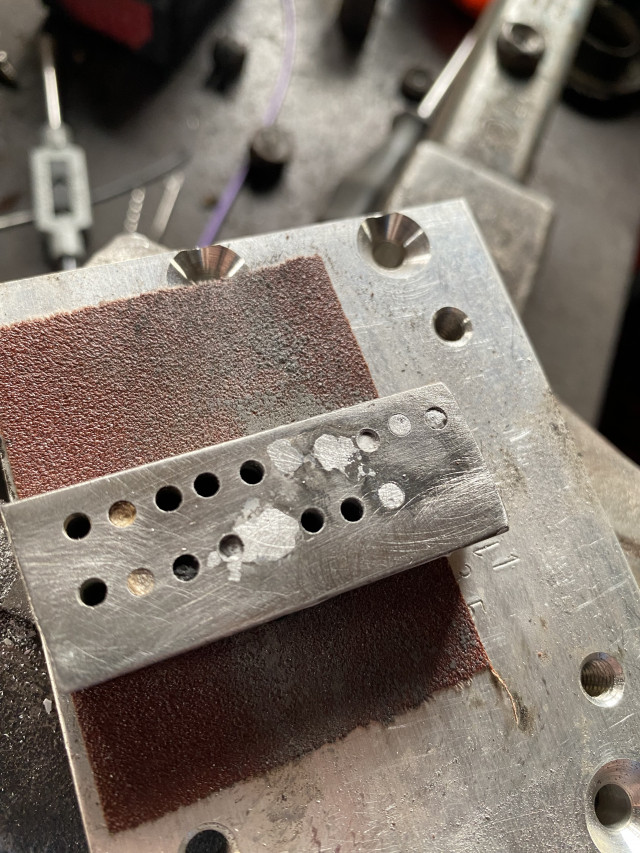
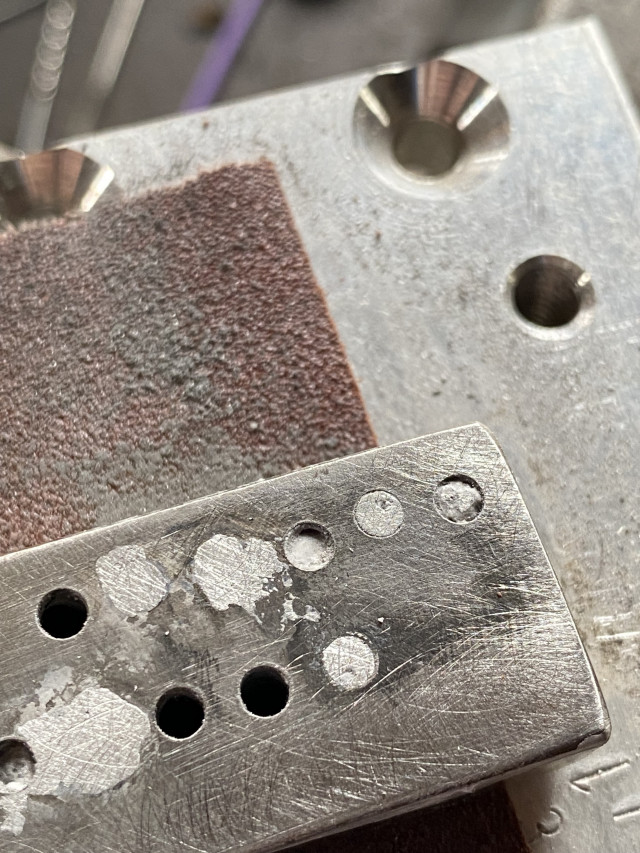
The initial attempts were messy, but I eventually mastered the technique:
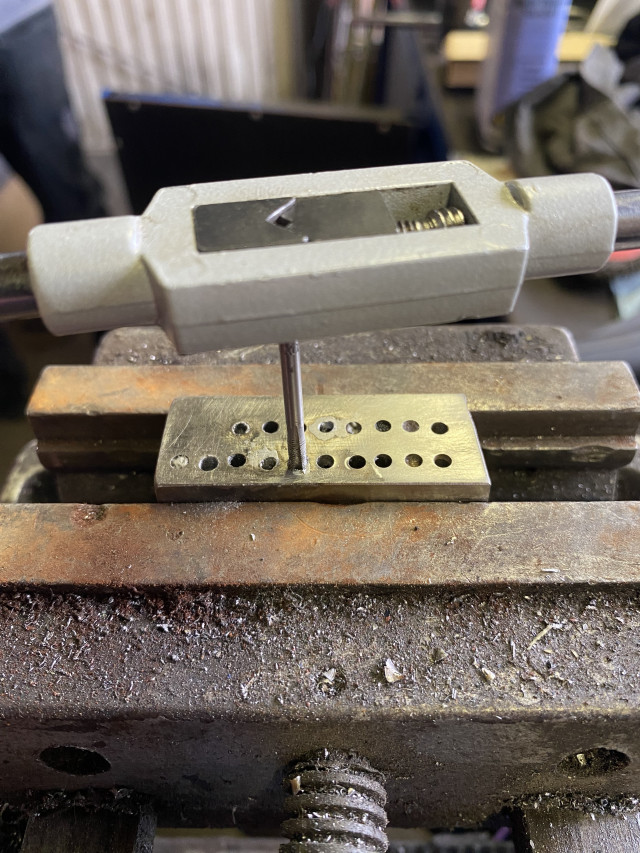
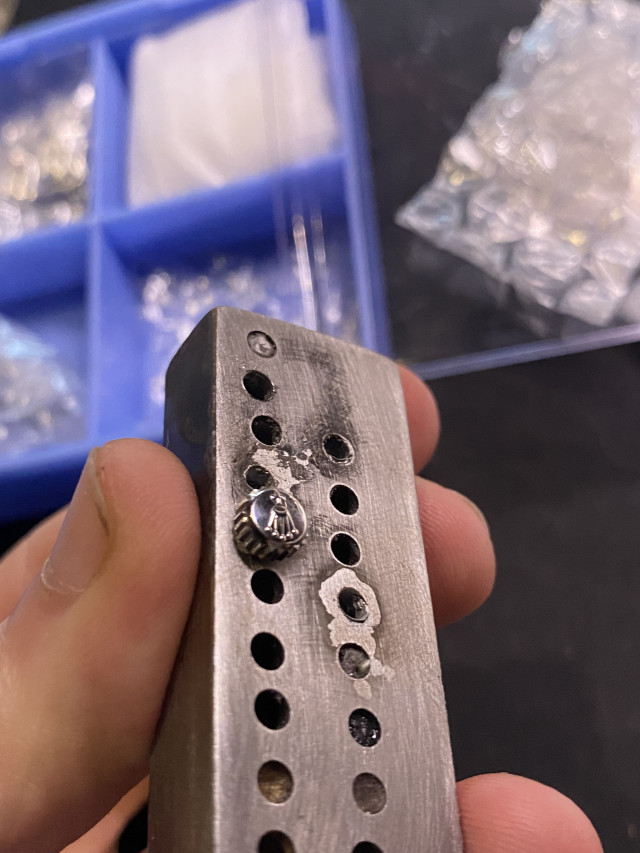
This method produced stronger threads but was challenging due to the heat. Precision is key to avoid damaging the case. I'm considering investing in a precision torch device for jewelry welding to improve this process.
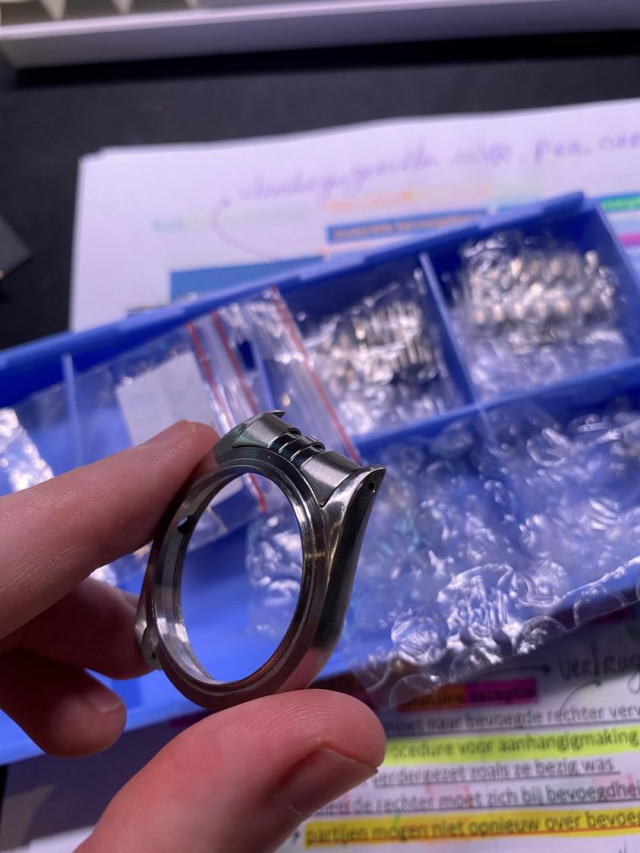
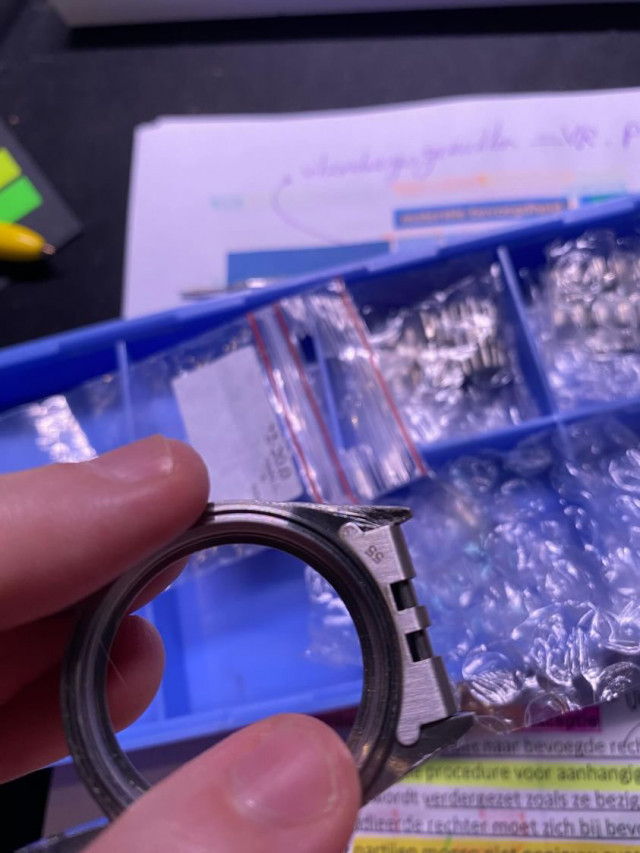
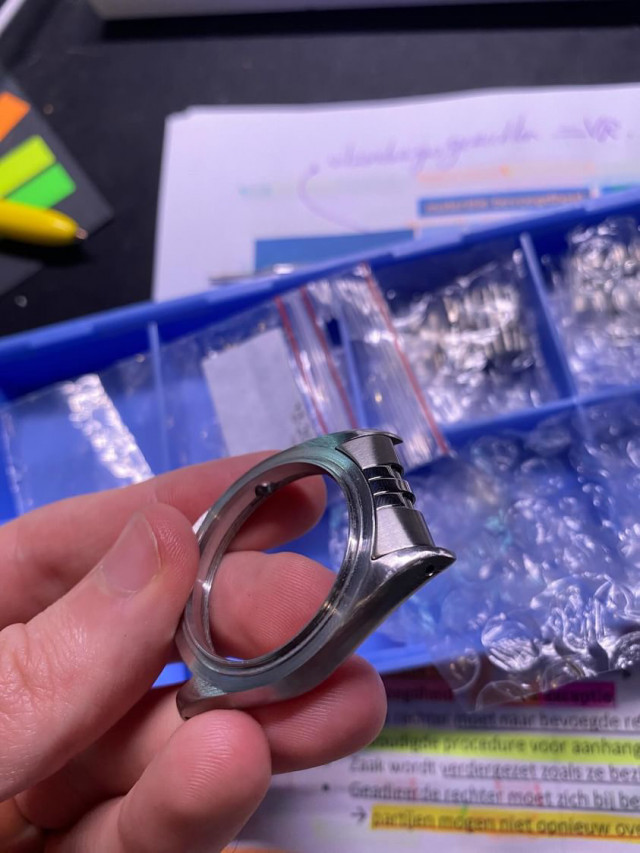
@1016lover provided a test case for practicing the hole-filling technique. I also tested the 55 end links on this case, and they fit perfectly:
3. TIG Welding
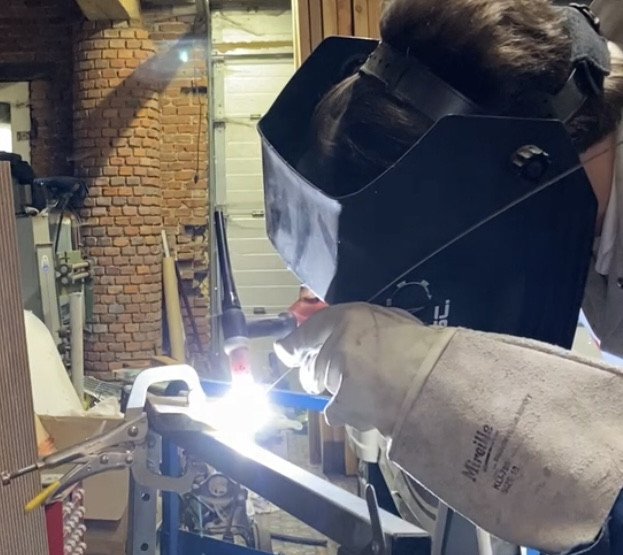
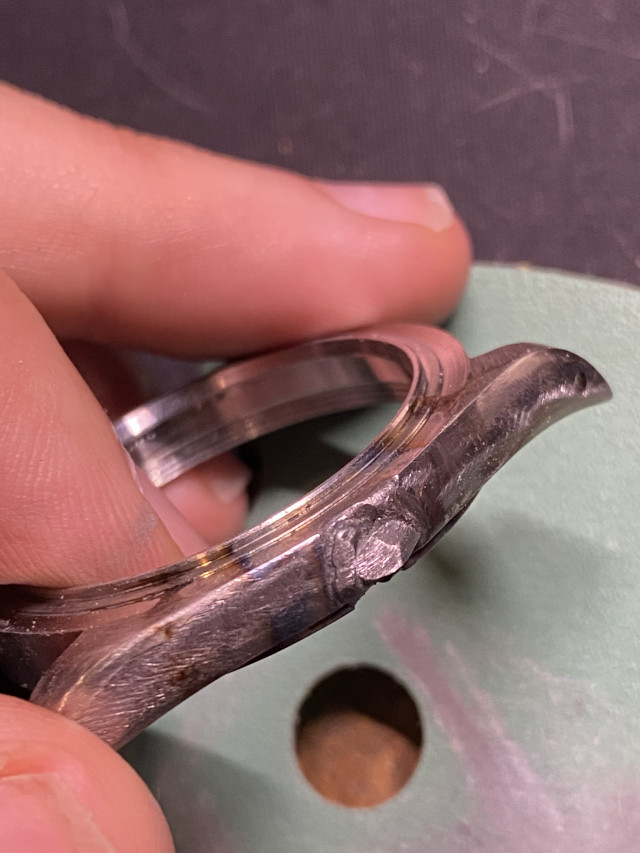
I tested TIG welding on the dummy block with success. However, when applied to the stainless steel test case, I noticed the case material differed slightly from the block and didn't withstand the heat as well:
Alternative Solution
Due to the challenges, I explored alternative methods, such as using a crown tube with unique specifications (4.35 x 3.35 x 3.60 mm):
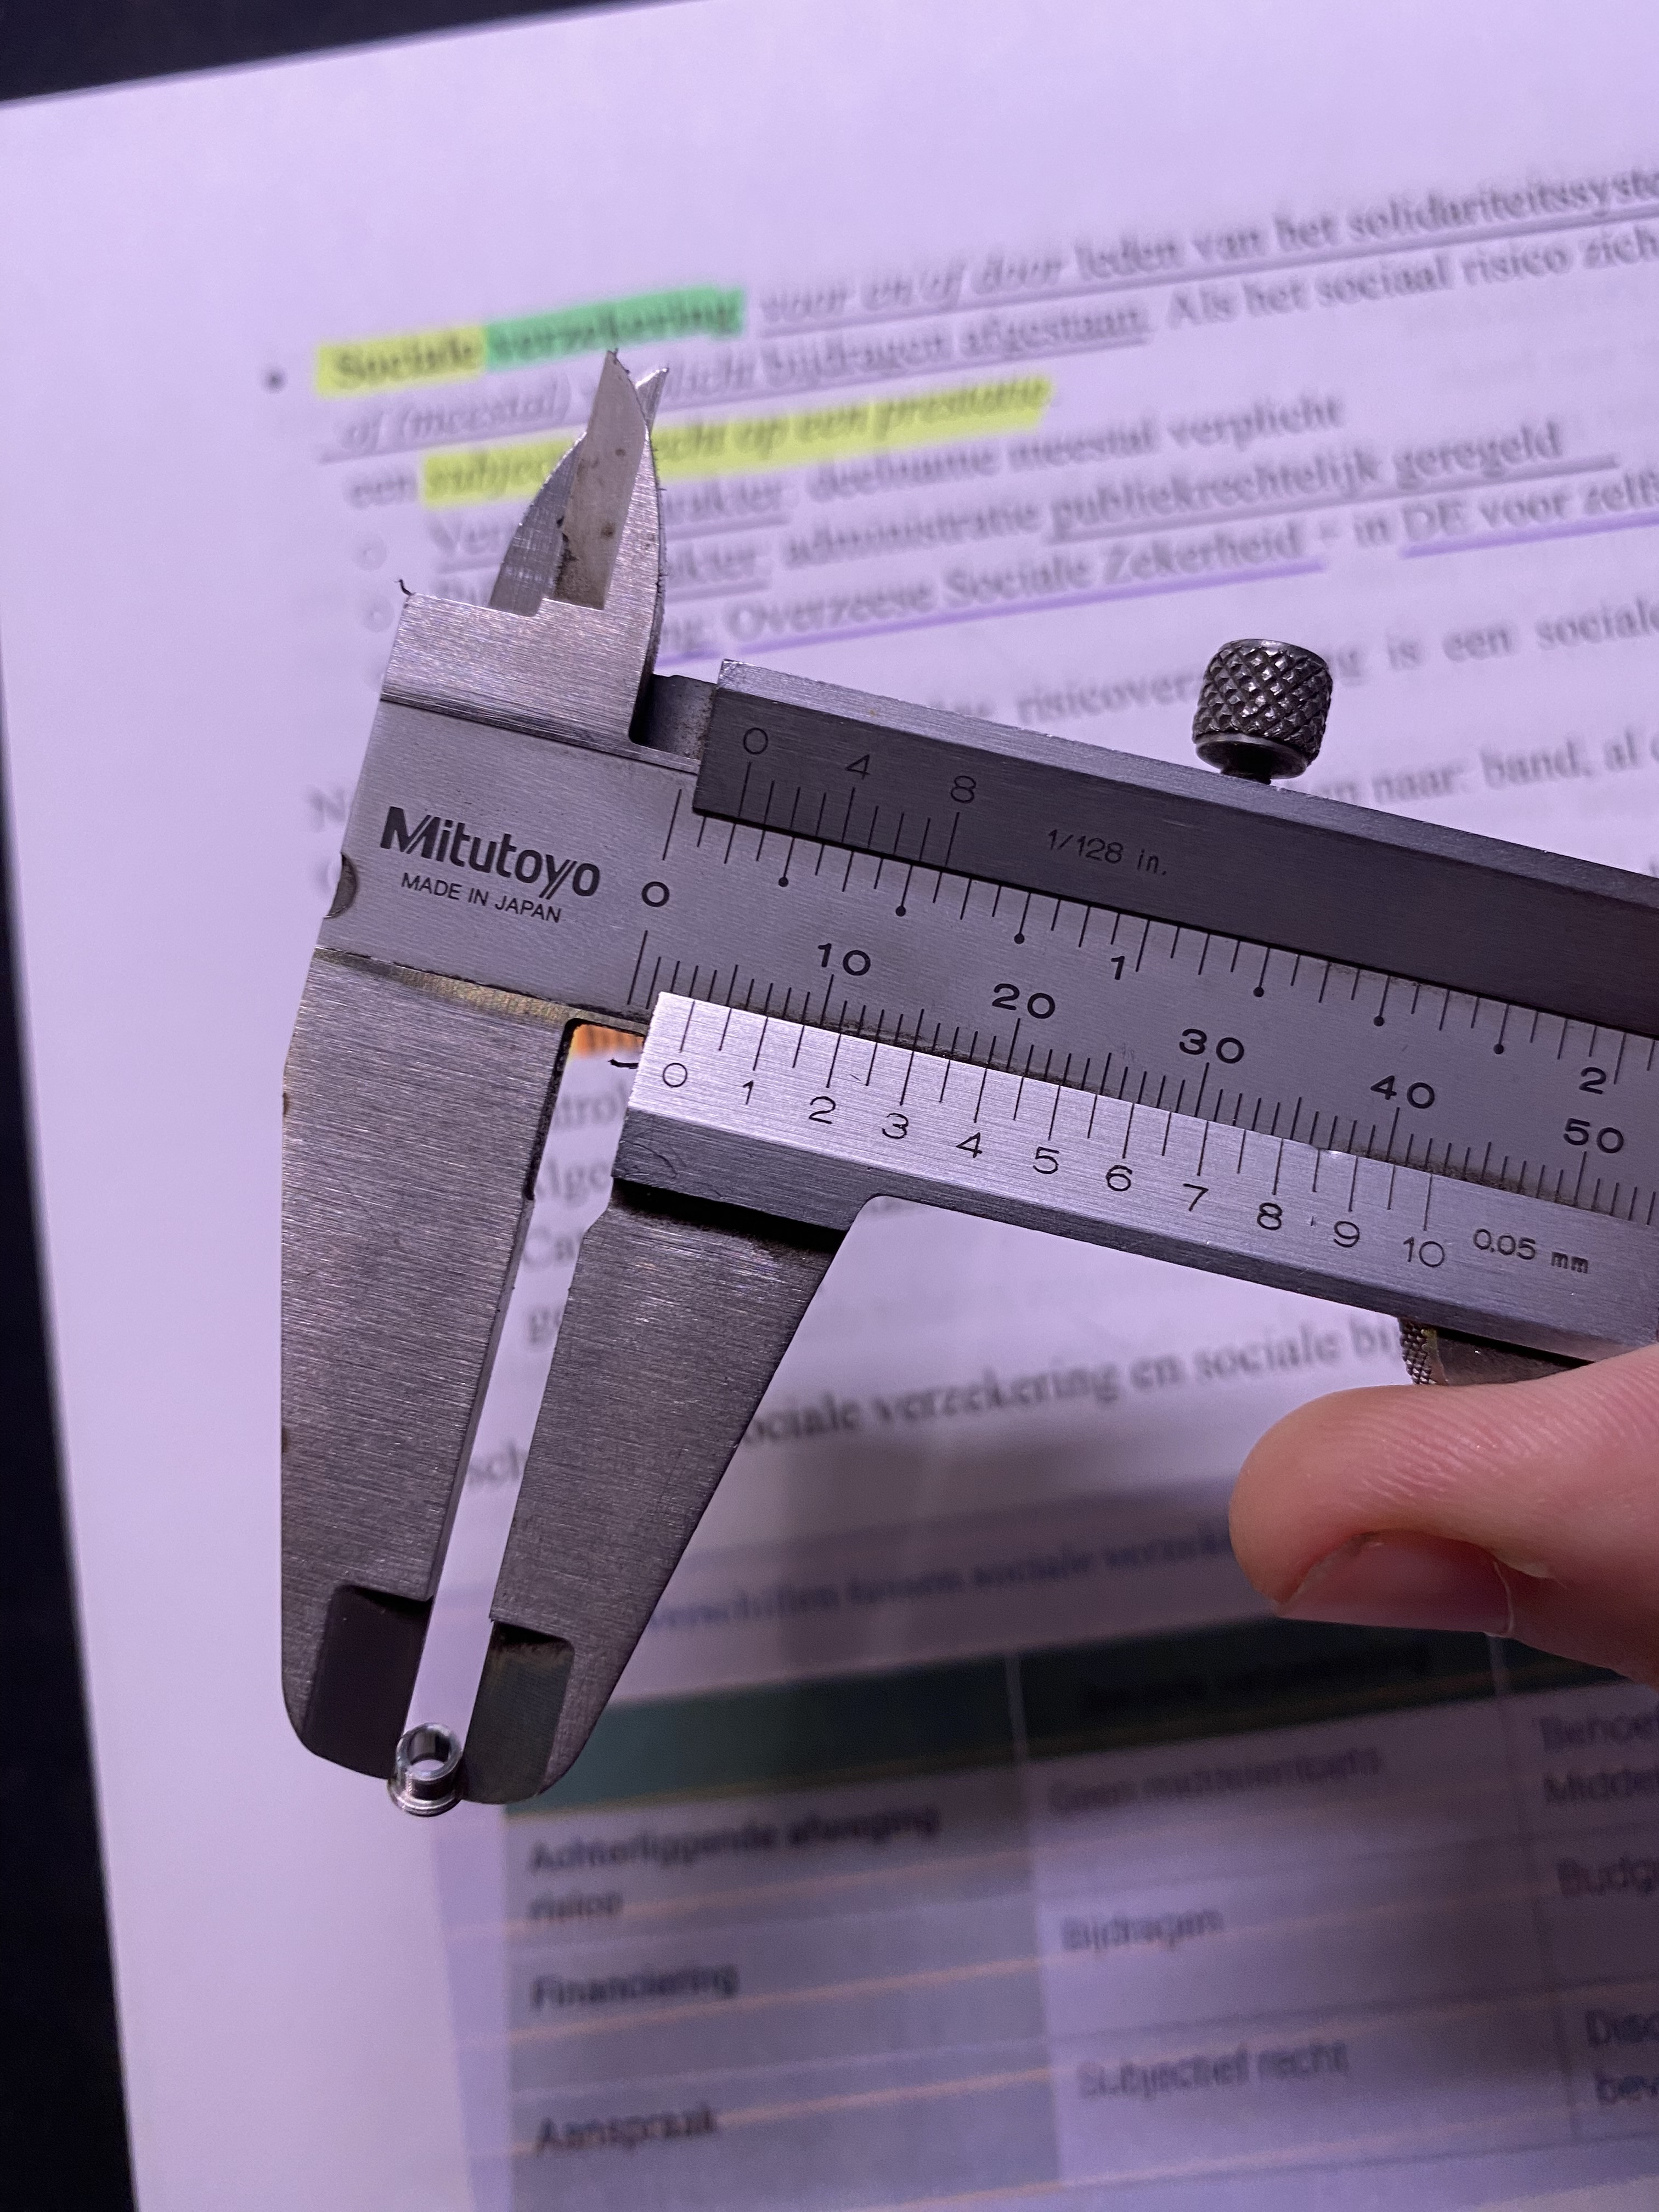
This approach allows @1016lover to tap a larger thread size in the case and fit the crown tube neatly, eliminating the need for welding or redrilling. The Athaya Vintage Brevet crown fits perfectly on the crown tube end, which is a significant advantage.
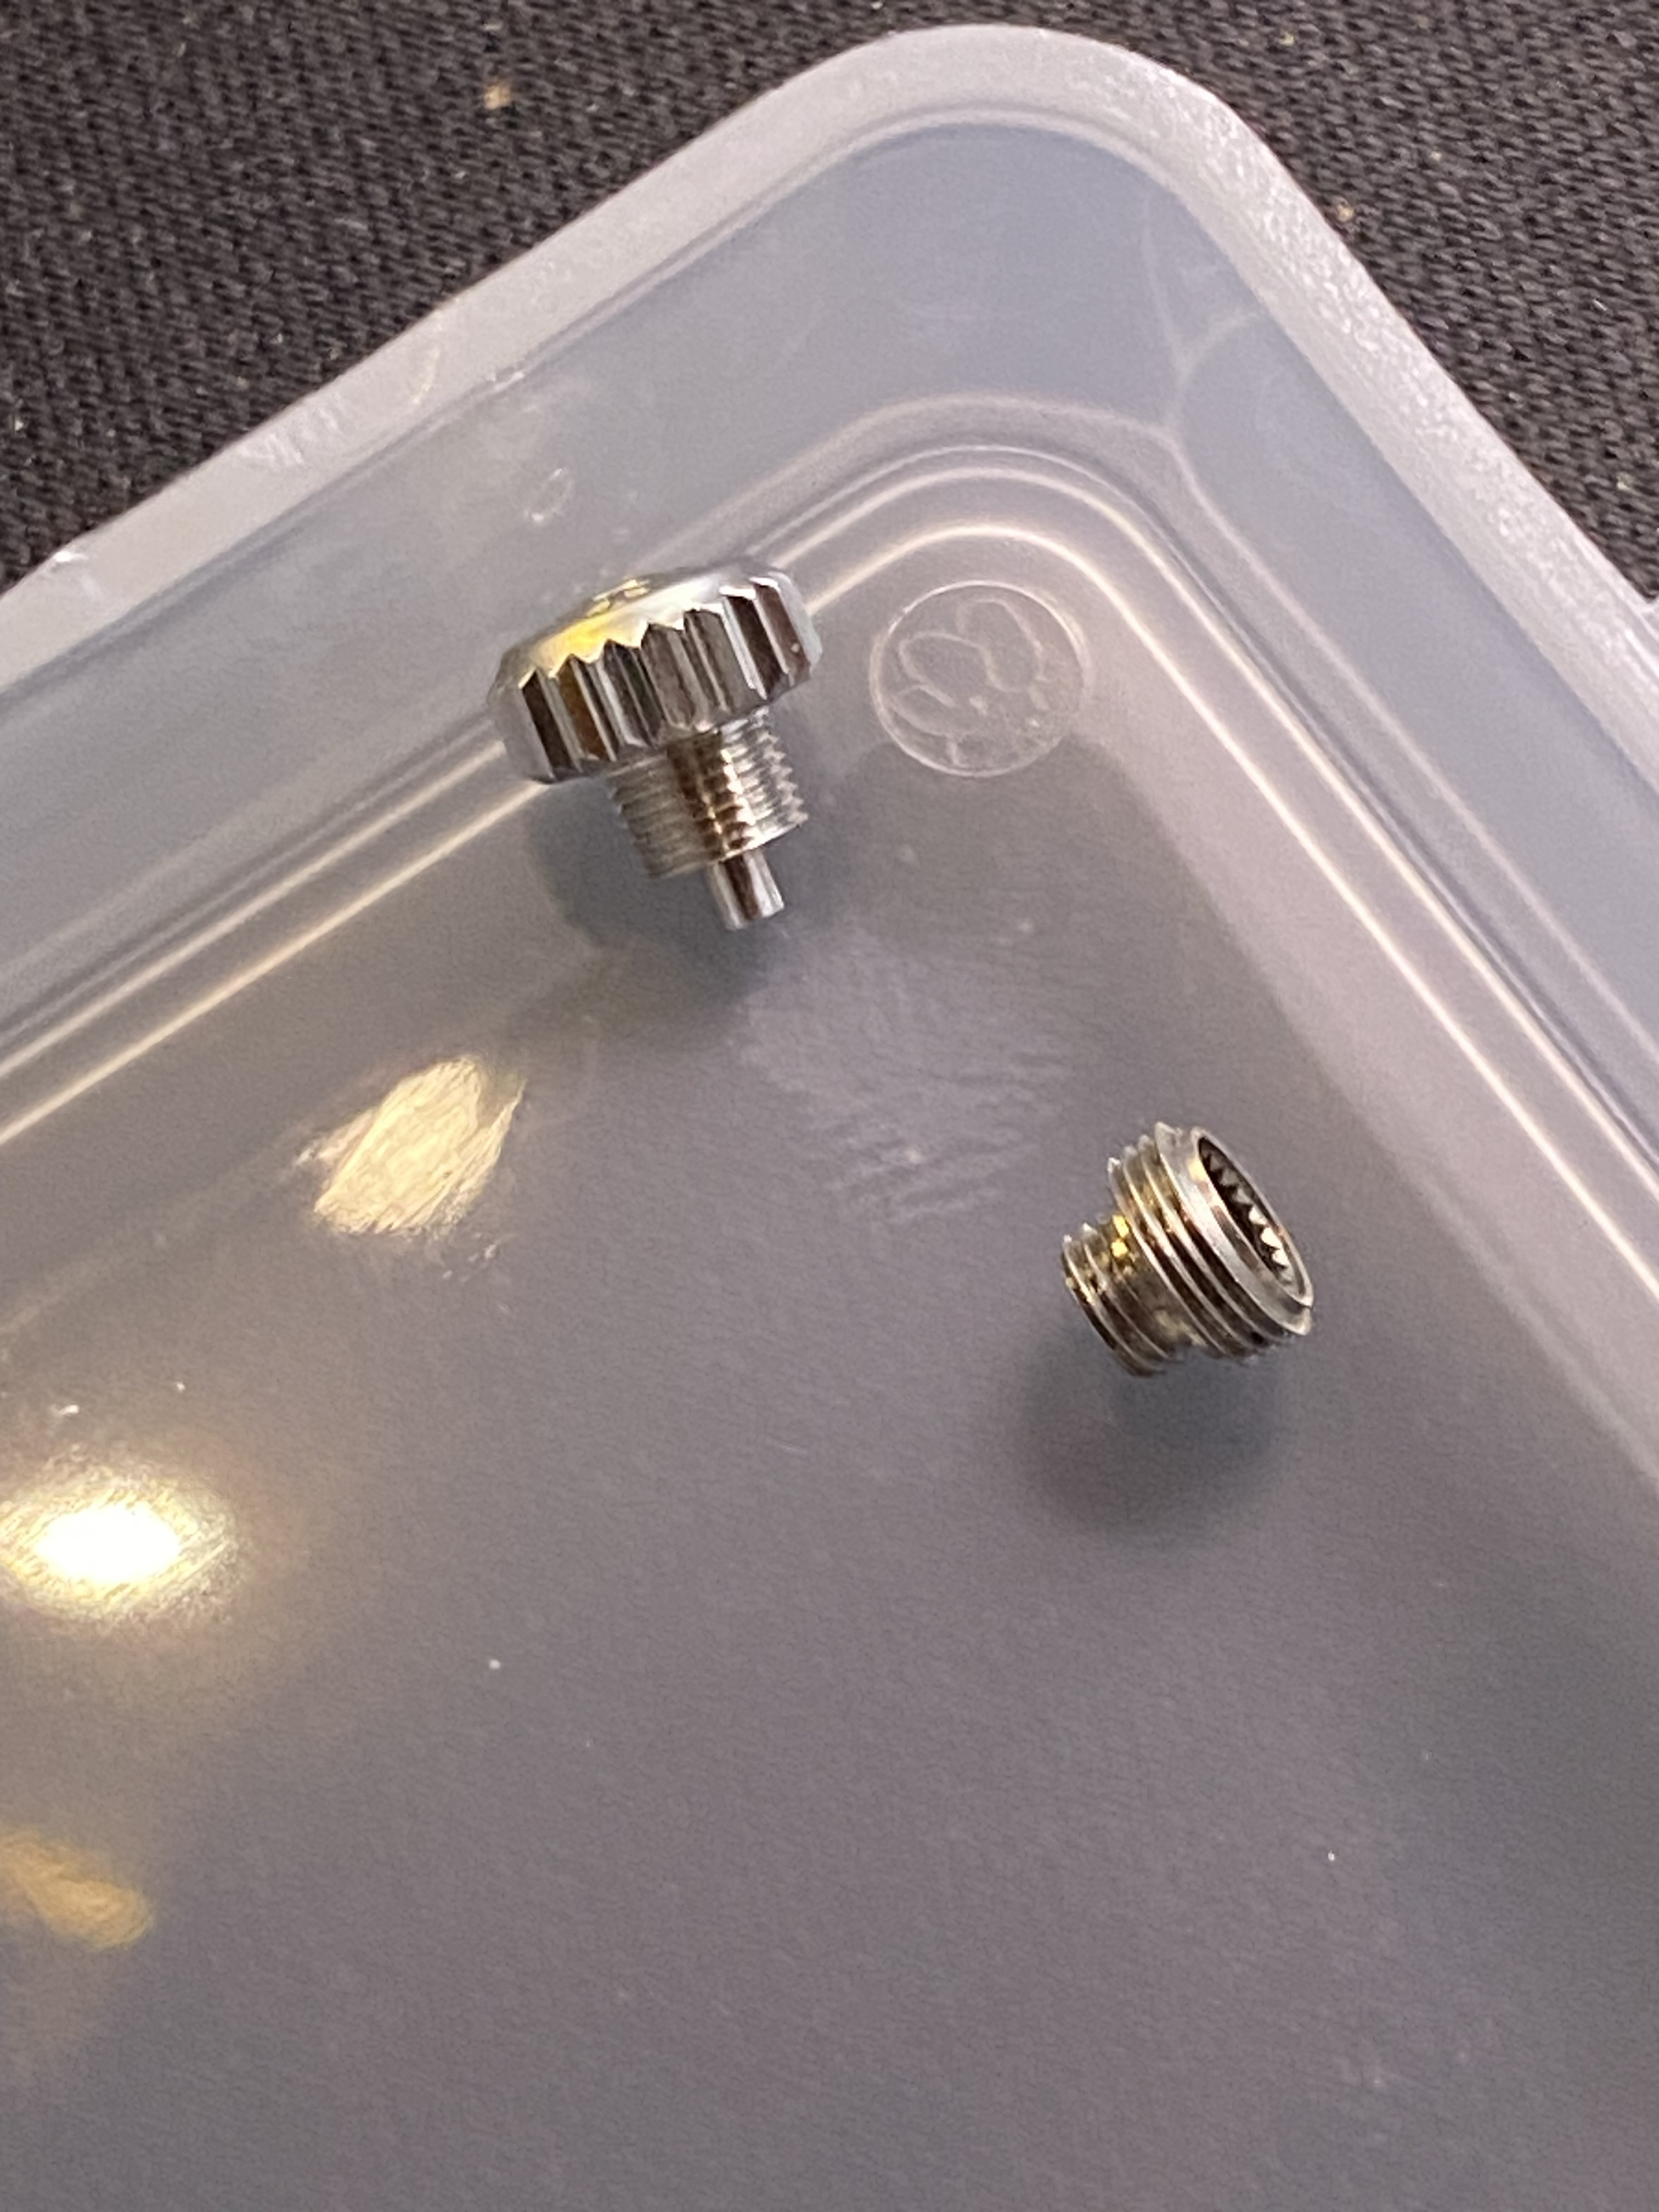
*Stock Athaya crown tube on the right.*
Bezel by @1016lover
Content to be added.
Caseback by @1016lover
The case, bezel, and caseback have been completed and shipped off to @newest dude on the forum for pantograph engravings.
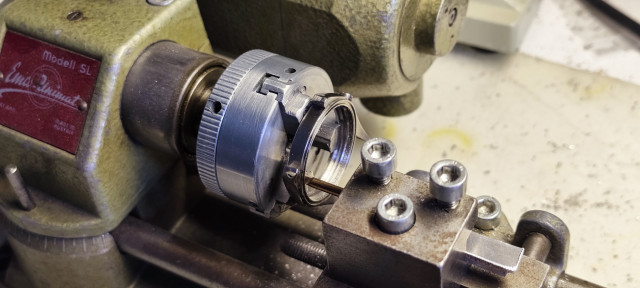
The case, made by @1016lover, originates from a NH Aliexpress case with more aggressive curvature than the Raffles case:
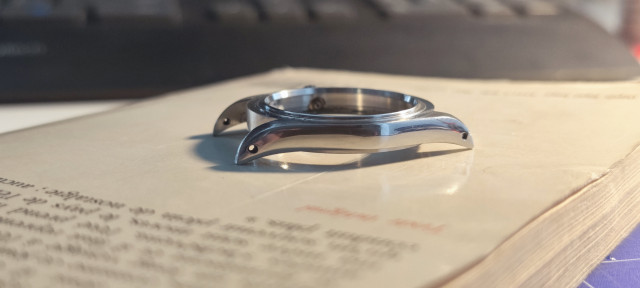
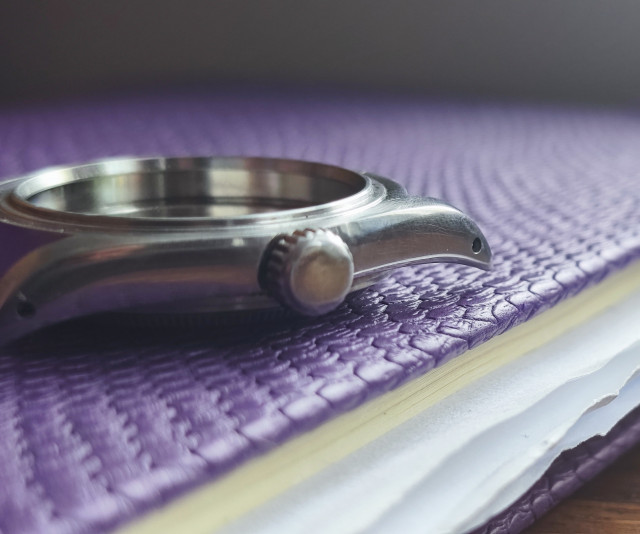
To accommodate ETA movements, a cut was made on the inside:
Last edited:
Alright people, I managed to get hold of the raw BBCODE of my initial post (through another bug), and have now split the post in two parts... If all is well, you should be able to simply expand the quote of part 2 in my initial post - so not much changes and you can still read the whole thing on the initial thread.
That being said, I have a small update for you:
That being said, I have a small update for you:
Movement
I decided to use a genuine Swiss ETA 2451 movement, which has 18,000 bph, matching the specifications of the genuine 6610. This movement is sourced from a vintage 1960s Hebli watch.
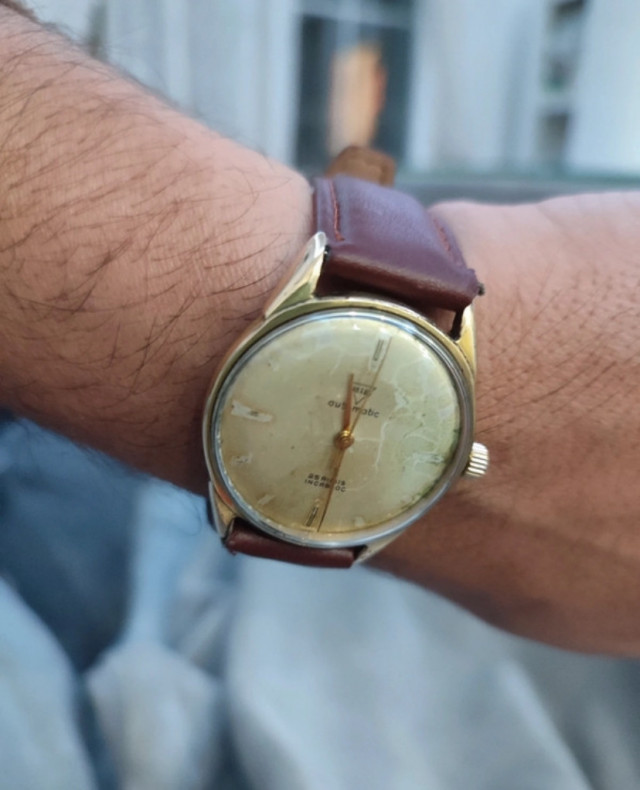
Here are the timegrapher specifications as it currently stands:
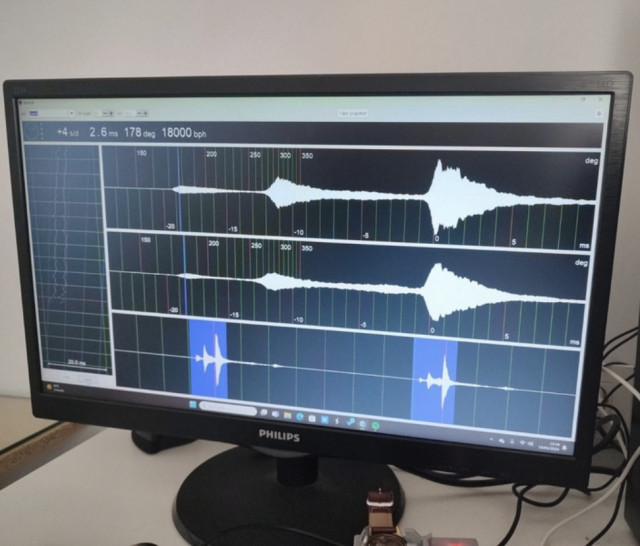
I will most likely have it serviced before using it in the 6610 build. The movement has a mounting diameter (Dm) of 25.6mm, the same as the ETA-2824, and a stem height (T) of 1.85mm, which is only 0.05mm taller and should not be an issue.
The dial feet positions are different for this movement, but this should not pose an issue either, as the dial is custom-made and the feet will be placed as necessary.
I already know which big lollipop seconds hand I'll be using, and it should fit this movement without any issues. The hand can be pinched to fit tightly. The ETA-2451 uses 1.50mm and 0.90mm hour and minute hands, identical to the ETA-2824.
I will update the movement section once it has been serviced, along with its timegrapher results after the service.
Last edited:
Galvanic black zinc and nitrocellulose lacquer like genuine rolex factory.What is your plan for the black on the dial? Like what material will you be coating the brass with
I never saw in my research black zinc that it might be the coating. Black zinc didn’t have the properties of tropicalization. It could turn brown. But not reddish or yellowish. Black zinc would more typically turn when oxidized a particular brown-green which I have never seen in a tropicalized watch. I figured it would be black nickel at that can turn those shades when oxidized. Happy to be wrong thoughGalvanic black zinc and nitrocellulose lacquer like genuine rolex factory.
I can’t find the source I found after countless days searching the internet like a maniac. But I did read it was zinc. Theres a lot of (mis)information on the internet. So its hard to know what is true.I never saw in my research black zinc that it might be the coating. Black zinc didn’t have the properties of tropicalization. It could turn brown. But not reddish or yellowish. Black zinc would more typically turn when oxidized a particular brown-green which I have never seen in a tropicalized watch. I figured it would be black nickel at that can turn those shades when oxidized. Happy to be wrong though
I wish I could back it up with a source but I read so much… almost everything on internet regarding that topic. Including old patents from the 50’s and 60’s. I can’t find where I read zinc right now.
Anyway, this is a first attempt at tropical dial reproduction - sped up, using black zinc galvanic process. Its not great but hey it’s something. Credit goes to my Chinese friend.
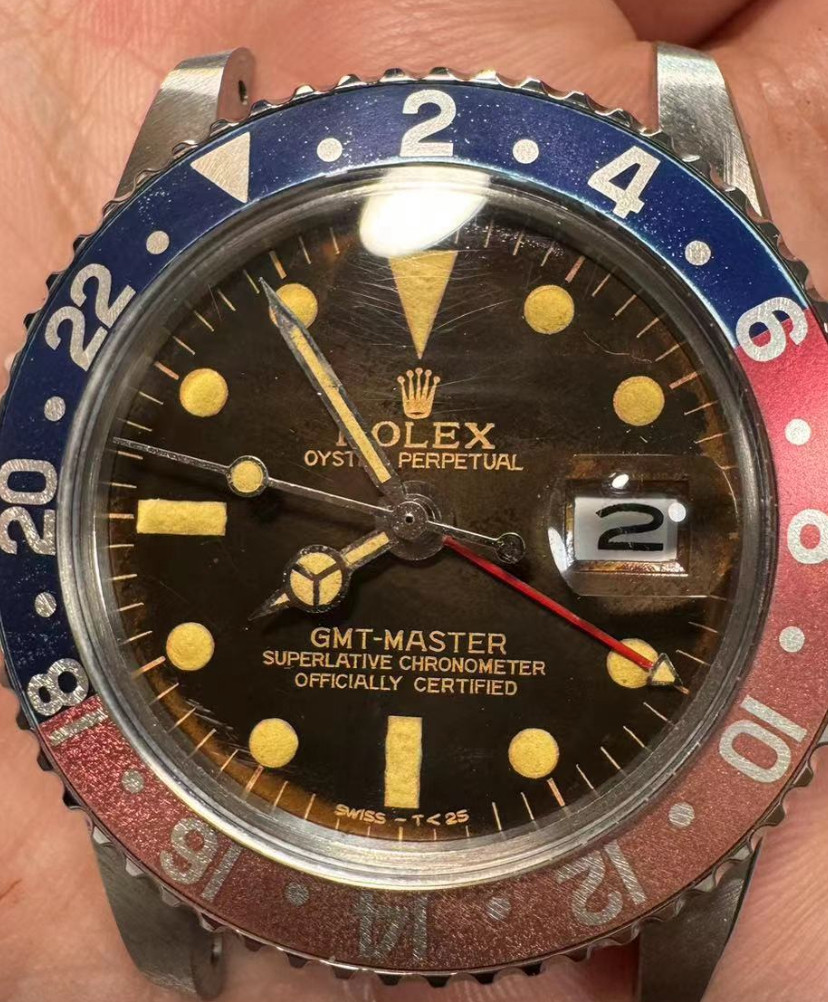
EDIT: also, you mention yellow and red. There’s a distinction between tropical and damaged. The term tropical is (mis)used for both cases.
Yellow is damaged, usually by waterdamage, chlorine…the red spics are often radium dust burning into the dial/lacquer. But those are not tropical, in the strict meaning of the term.
See: https://rolexpassionmarket.com/commercial-abuse-vintage-rolex-term-tropical/
Last edited:
That’s awesome. Tropicalization is really huis tv oxidation. Wether it’s the galvanic black turning brown or black ink fading. It’s a fascinating process. It’s just oxygen,heat, time. You could throw in “pollutants” and acids too which cause chemical reactions.I can’t find the source I found after countless days searching the internet like a maniac. But I did read it was zinc. Theres a lot of (mis)information on the internet. So its hard to know what is true.
I wish I could back it up with a source but I read so much… almost everything on internet regarding that topic. Including old patents from the 50’s and 60’s. I can’t find where I read zinc right now.
Anyway, this is a first attempt at tropical dial reproduction - sped up, using black zinc galvanic process. Its not great but hey it’s something. Credit goes to my Chinese friend.

EDIT: also, you mention yellow and red. There’s a distinction between tropical and damaged. The term tropical is (mis)used for both cases.
Yellow is damaged, usually by waterdamage, chlorine…the red spics are often radium dust burning into the dial/lacquer. But those are not tropical, in the strict meaning of the term.
See: https://rolexpassionmarket.com/commercial-abuse-vintage-rolex-term-tropical/
Please, please share more information on this 1675 dial. Was that zinc coated then laser etched? Any more pictures? I'm obsessed with 1675 gilts, but I'm not happy with my results thus far. That one looks damn good though.I can’t find the source I found after countless days searching the internet like a maniac. But I did read it was zinc. Theres a lot of (mis)information on the internet. So its hard to know what is true.
I wish I could back it up with a source but I read so much… almost everything on internet regarding that topic. Including old patents from the 50’s and 60’s. I can’t find where I read zinc right now.
Anyway, this is a first attempt at tropical dial reproduction - sped up, using black zinc galvanic process. Its not great but hey it’s something. Credit goes to my Chinese friend.

EDIT: also, you mention yellow and red. There’s a distinction between tropical and damaged. The term tropical is (mis)used for both cases.
Yellow is damaged, usually by waterdamage, chlorine…the red spics are often radium dust burning into the dial/lacquer. But those are not tropical, in the strict meaning of the term.
See: https://rolexpassionmarket.com/commercial-abuse-vintage-rolex-term-tropical/
I think for the real deal (original) tropical its the effect UV and UV-A in particular has on zinc. You could compare it with a bleaching effect. I think its not so much to do with heat. (?)
Yes. Galvanic zinc the brass plate, then laser.
Its just electroplated black zinc.
If you mean a chromium ion electron configuration like CR/CR3+ then yes.
Its usually just referred to as black zinc as far as I know.
Not at hand, ill check later for more pics.do you have any pics of the dial not under the crystal? Is your mfg applying zinc then lasering? I’m super interested in this and glad you are trying this route. Also interested in the cost of this when all is said and done
Yes. Galvanic zinc the brass plate, then laser.
Do you refer to zinc plating and then applying a black chromate conversion layer? If so, no.Also is this a black chromate zinc?
Its just electroplated black zinc.
If you mean a chromium ion electron configuration like CR/CR3+ then yes.
Its usually just referred to as black zinc as far as I know.
Yes same procedure as what we’re doing with the 6610. 1675 is more easy, because the text is not so small. Unlike the 6610 text…I don’t have the dial in hand.Please, please share more information on this 1675 dial. Was that zinc coated then laser etched? Any more pictures? I'm obsessed with 1675 gilts, but I'm not happy with my results thus far. That one looks damn good though.
Anyway, its many hours past my bedtime but cant sleep… going to try once more.
Also, im considering the pad printing route…
EDIT: This is another gmt dial (not tropical), same procedure. But this is the 6610 thread
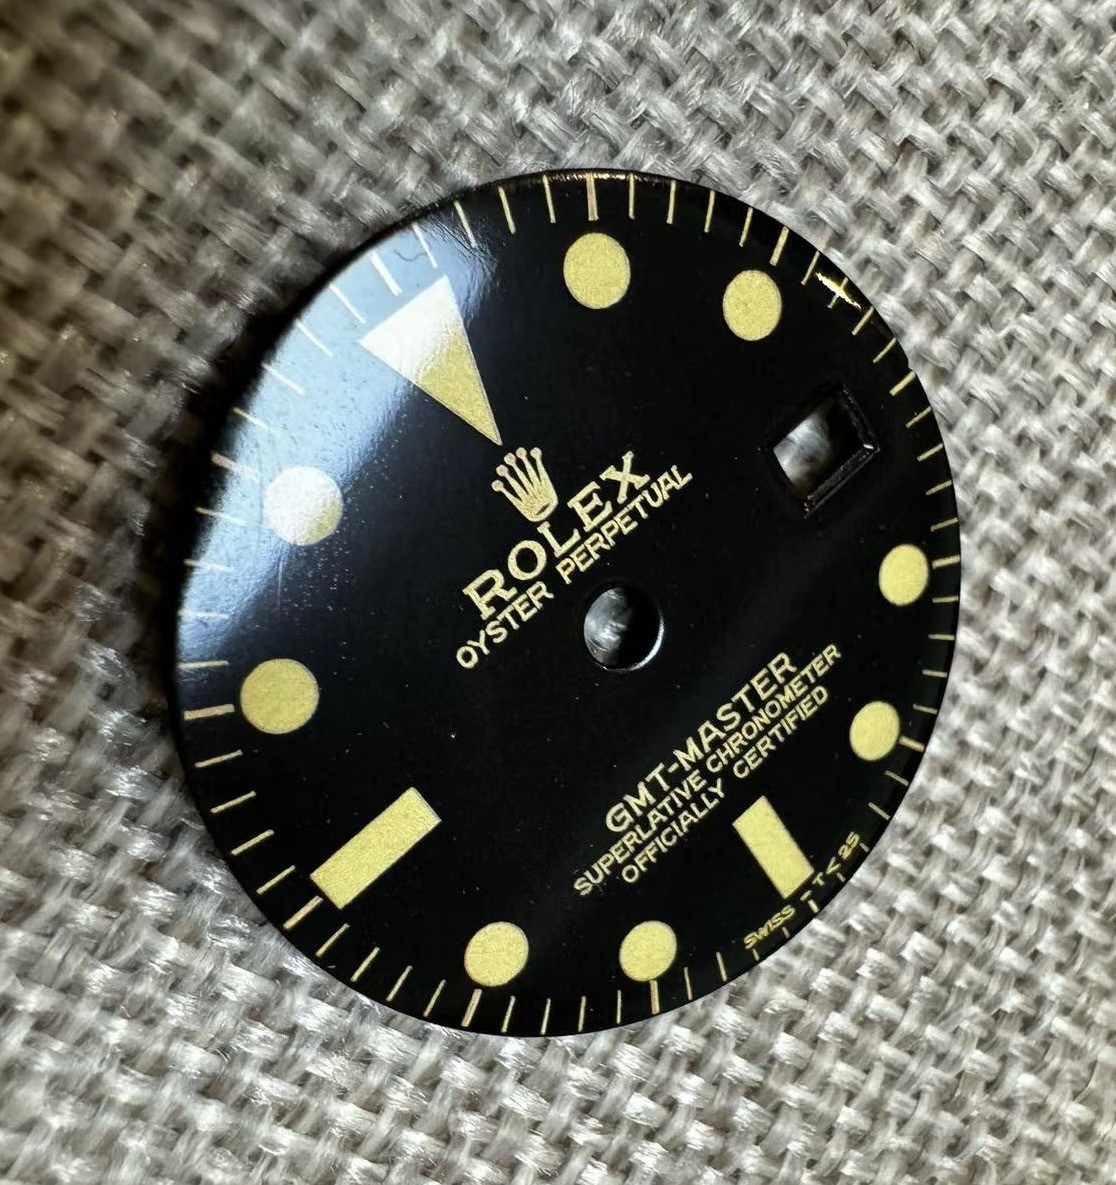
e3ae3f75b4183805432d014afd1c6a5a
Image e3ae3f75b4183805432d014afd1c6a5a hosted in ClickPix.org
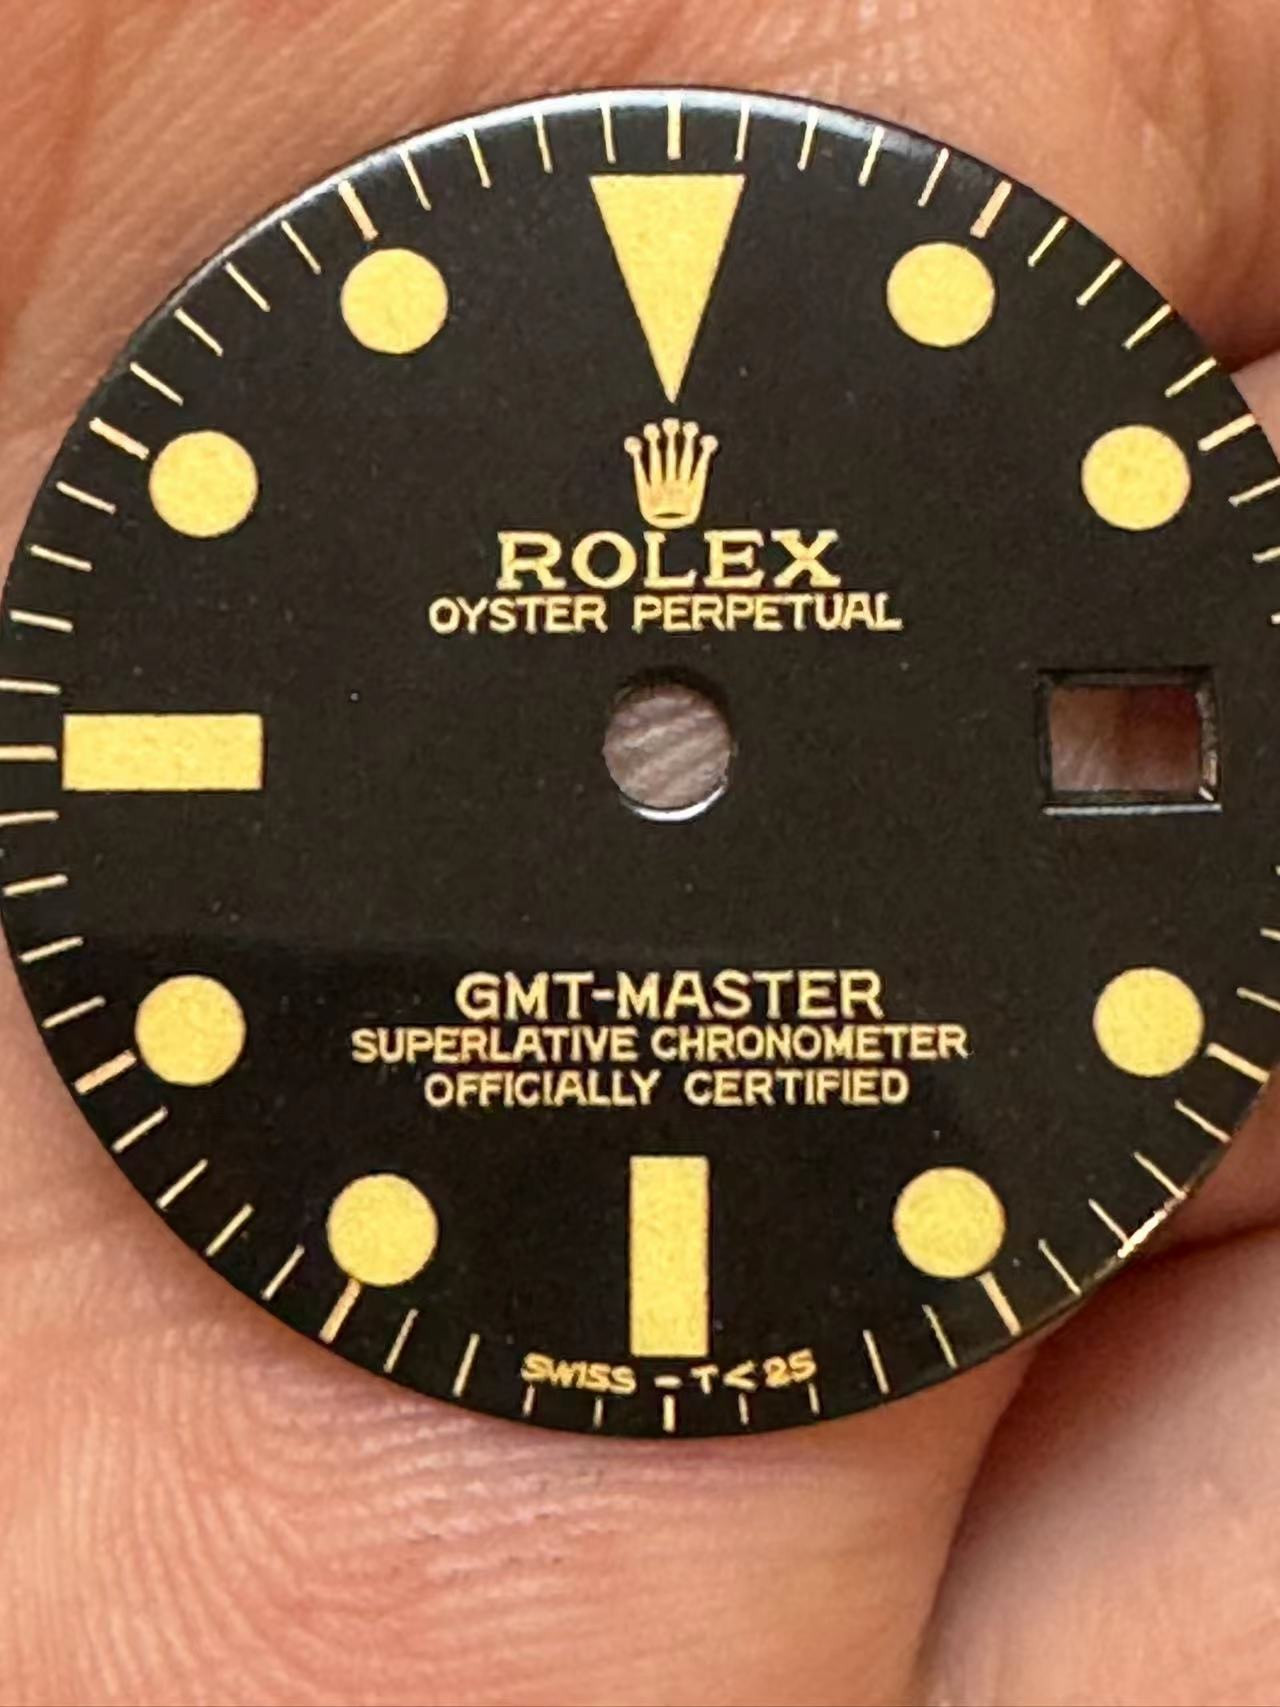
cd76f0cd21a793e444dc8bd089011e0b
Image cd76f0cd21a793e444dc8bd089011e0b hosted in ClickPix.org
Last edited:
How was your mfg forcing the tropicalization? Your dial is very promisingI can’t find the source I found after countless days searching the internet like a maniac. But I did read it was zinc. Theres a lot of (mis)information on the internet. So its hard to know what is true.
I wish I could back it up with a source but I read so much… almost everything on internet regarding that topic. Including old patents from the 50’s and 60’s. I can’t find where I read zinc right now.
Anyway, this is a first attempt at tropical dial reproduction - sped up, using black zinc galvanic process. Its not great but hey it’s something. Credit goes to my Chinese friend.

EDIT: also, you mention yellow and red. There’s a distinction between tropical and damaged. The term tropical is (mis)used for both cases.
Yellow is damaged, usually by waterdamage, chlorine…the red spics are often radium dust burning into the dial/lacquer. But those are not tropical, in the strict meaning of the term.
See: https://rolexpassionmarket.com/commercial-abuse-vintage-rolex-term-tropical/
Ha I remember reading that article like 2 years ago. Funny how it comes back.I think for the real deal (original) tropical its the effect UV and UV-A in particular has on zinc. You could compare it with a bleaching effect. I think its not so much to do with heat. (?)
Not at hand, ill check later for more pics.
Yes. Galvanic zinc the brass plate, then laser.
Do you refer to zinc plating and then applying a black chromate conversion layer? If so, no.
Its just electroplated black zinc.
If you mean a chromium ion electron configuration like CR/CR3+ then yes.
It’s usually just referred to as black zinc as far as I know.
I’m curious how the plating works. I was always under the assumption that black zinc is a 2 step process. Zinc plating then black chromate immersion. I’d love to know more
By using different concentrations during the galvanic process. Fractional plating. And then polishing the end result.How was your mfg forcing the tropicalization? Your dial is very promising
Its still a long way before it looks like an actual decent tropical. Not sure if we’ll achieve it with the method above. But need to keep experimenting.
I was thinking it could be much easier by just airbrushing a patina on a dial and lasering the vector. But havent tried this. I think the heat may do weird things to the dye.
Last edited:
Hi, just to get back to you. I used a translator just now and I get "black passivator". I wasn't sure what you meant with chromate zinc precisely. I'm not an English native. Is black passivator what you referred to earlier?Also is this a black chromate zinc?
Yep that’s itHi, just to get back to you. I used a translator just now and I get "black passivator". I wasn't sure what you meant with chromate zinc precisely. I'm not an English native. Is black passivator what you referred to earlier?
Last edited:
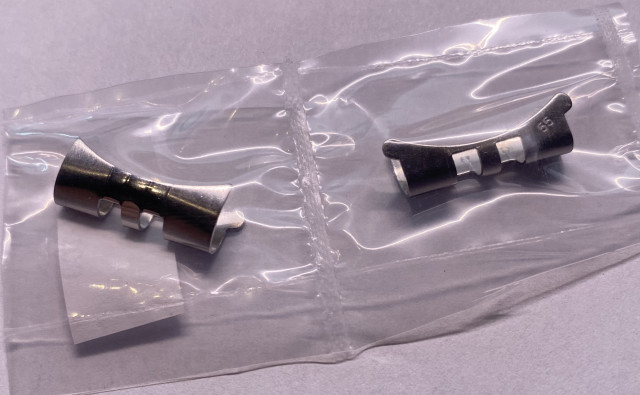
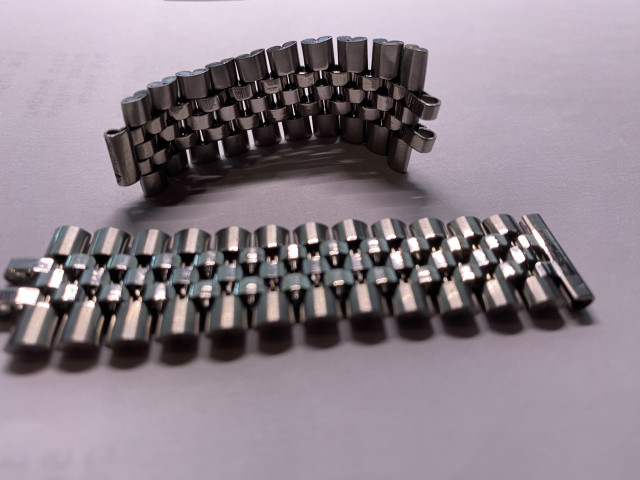
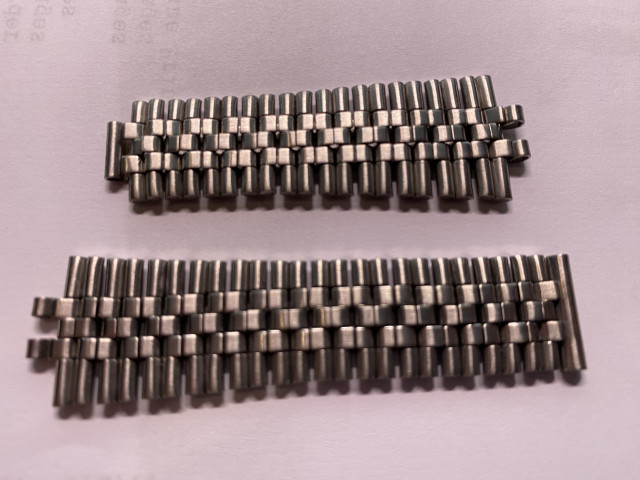
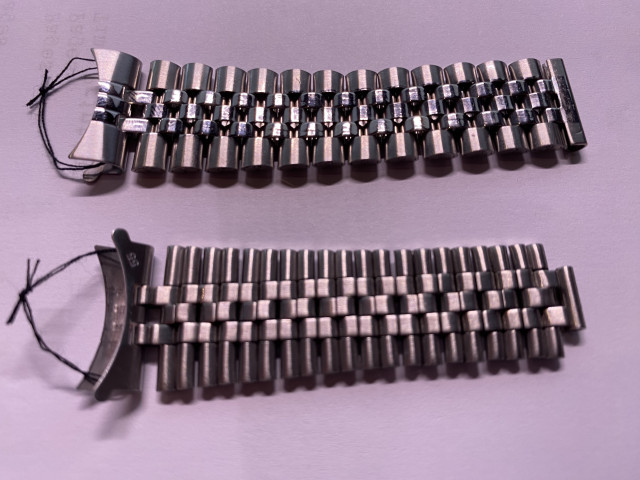
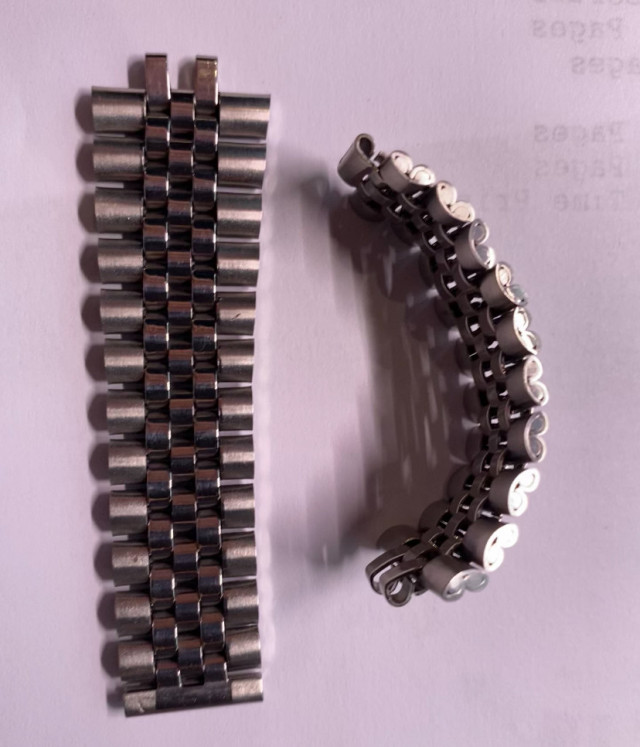
Slowly but surely, things are coming along. The bracelet has been delivered today. All bracelet components have been acquired. Just the big crown clasp is in China still, waiting to be shipped internationally along with other parts being sourced there.


Last edited:

