Thank you very much for your kind words.
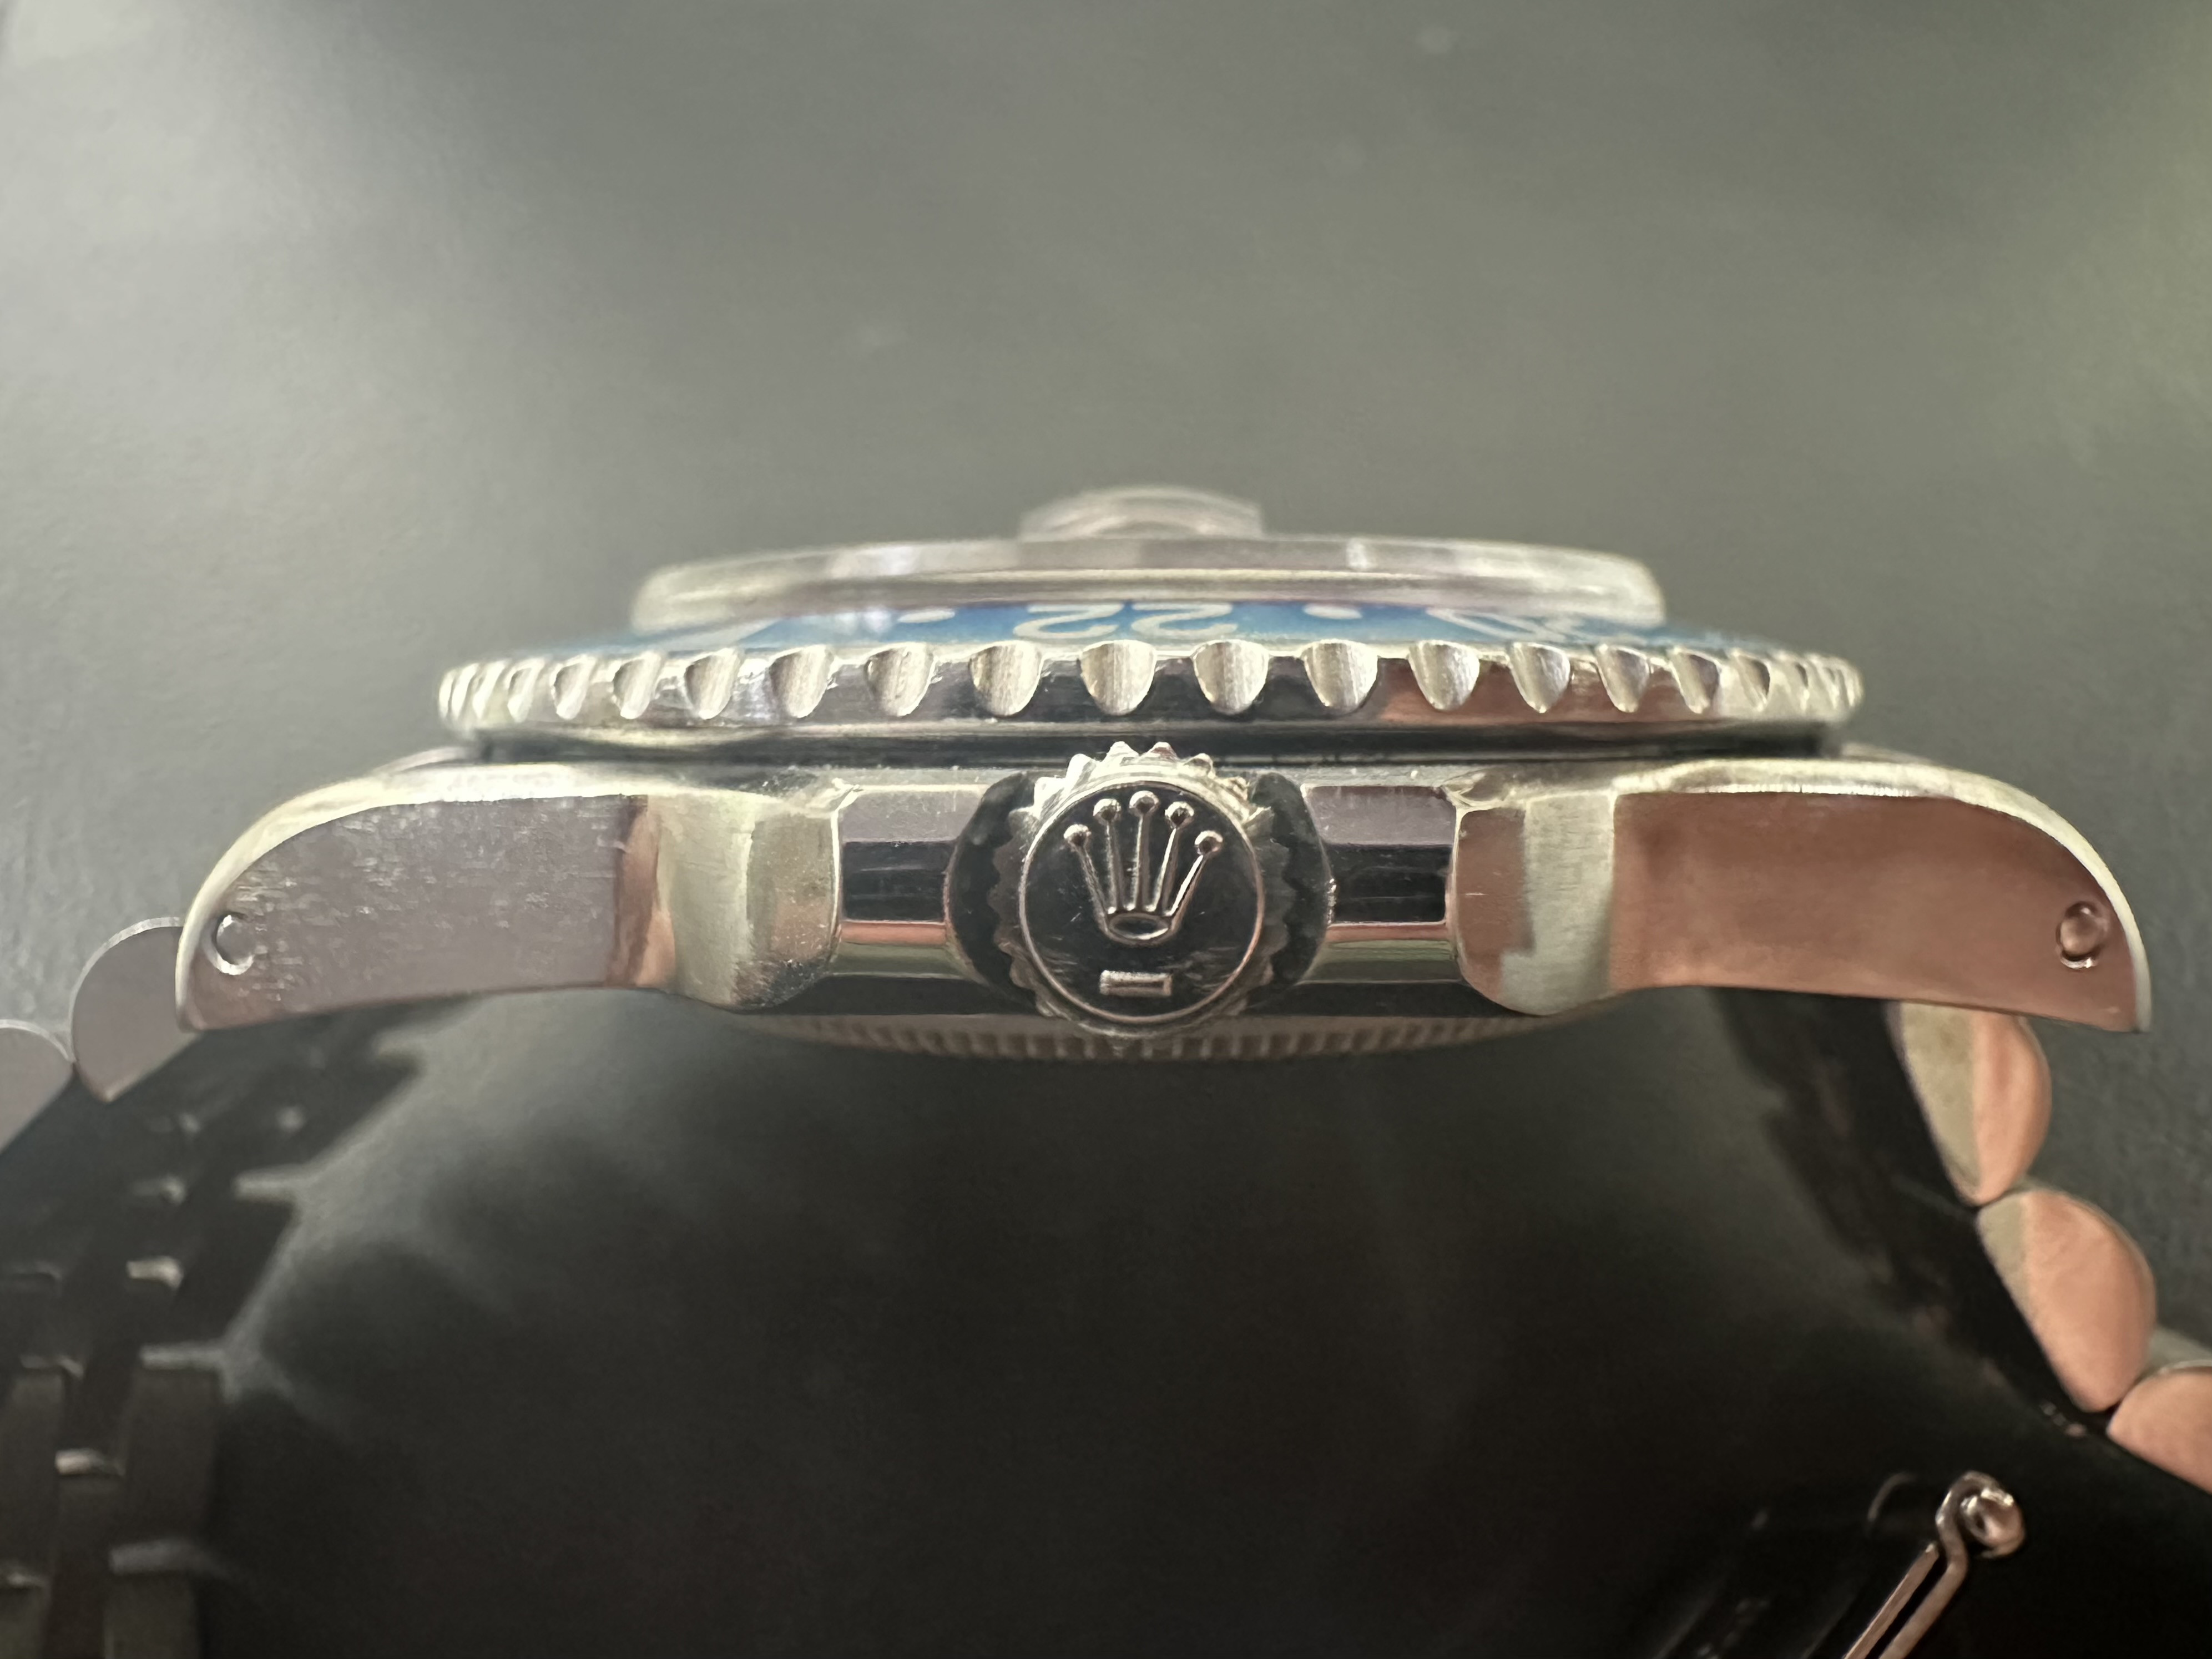
I am quite satisfied myself, still needs a tiny bit of refinement but is almost there.
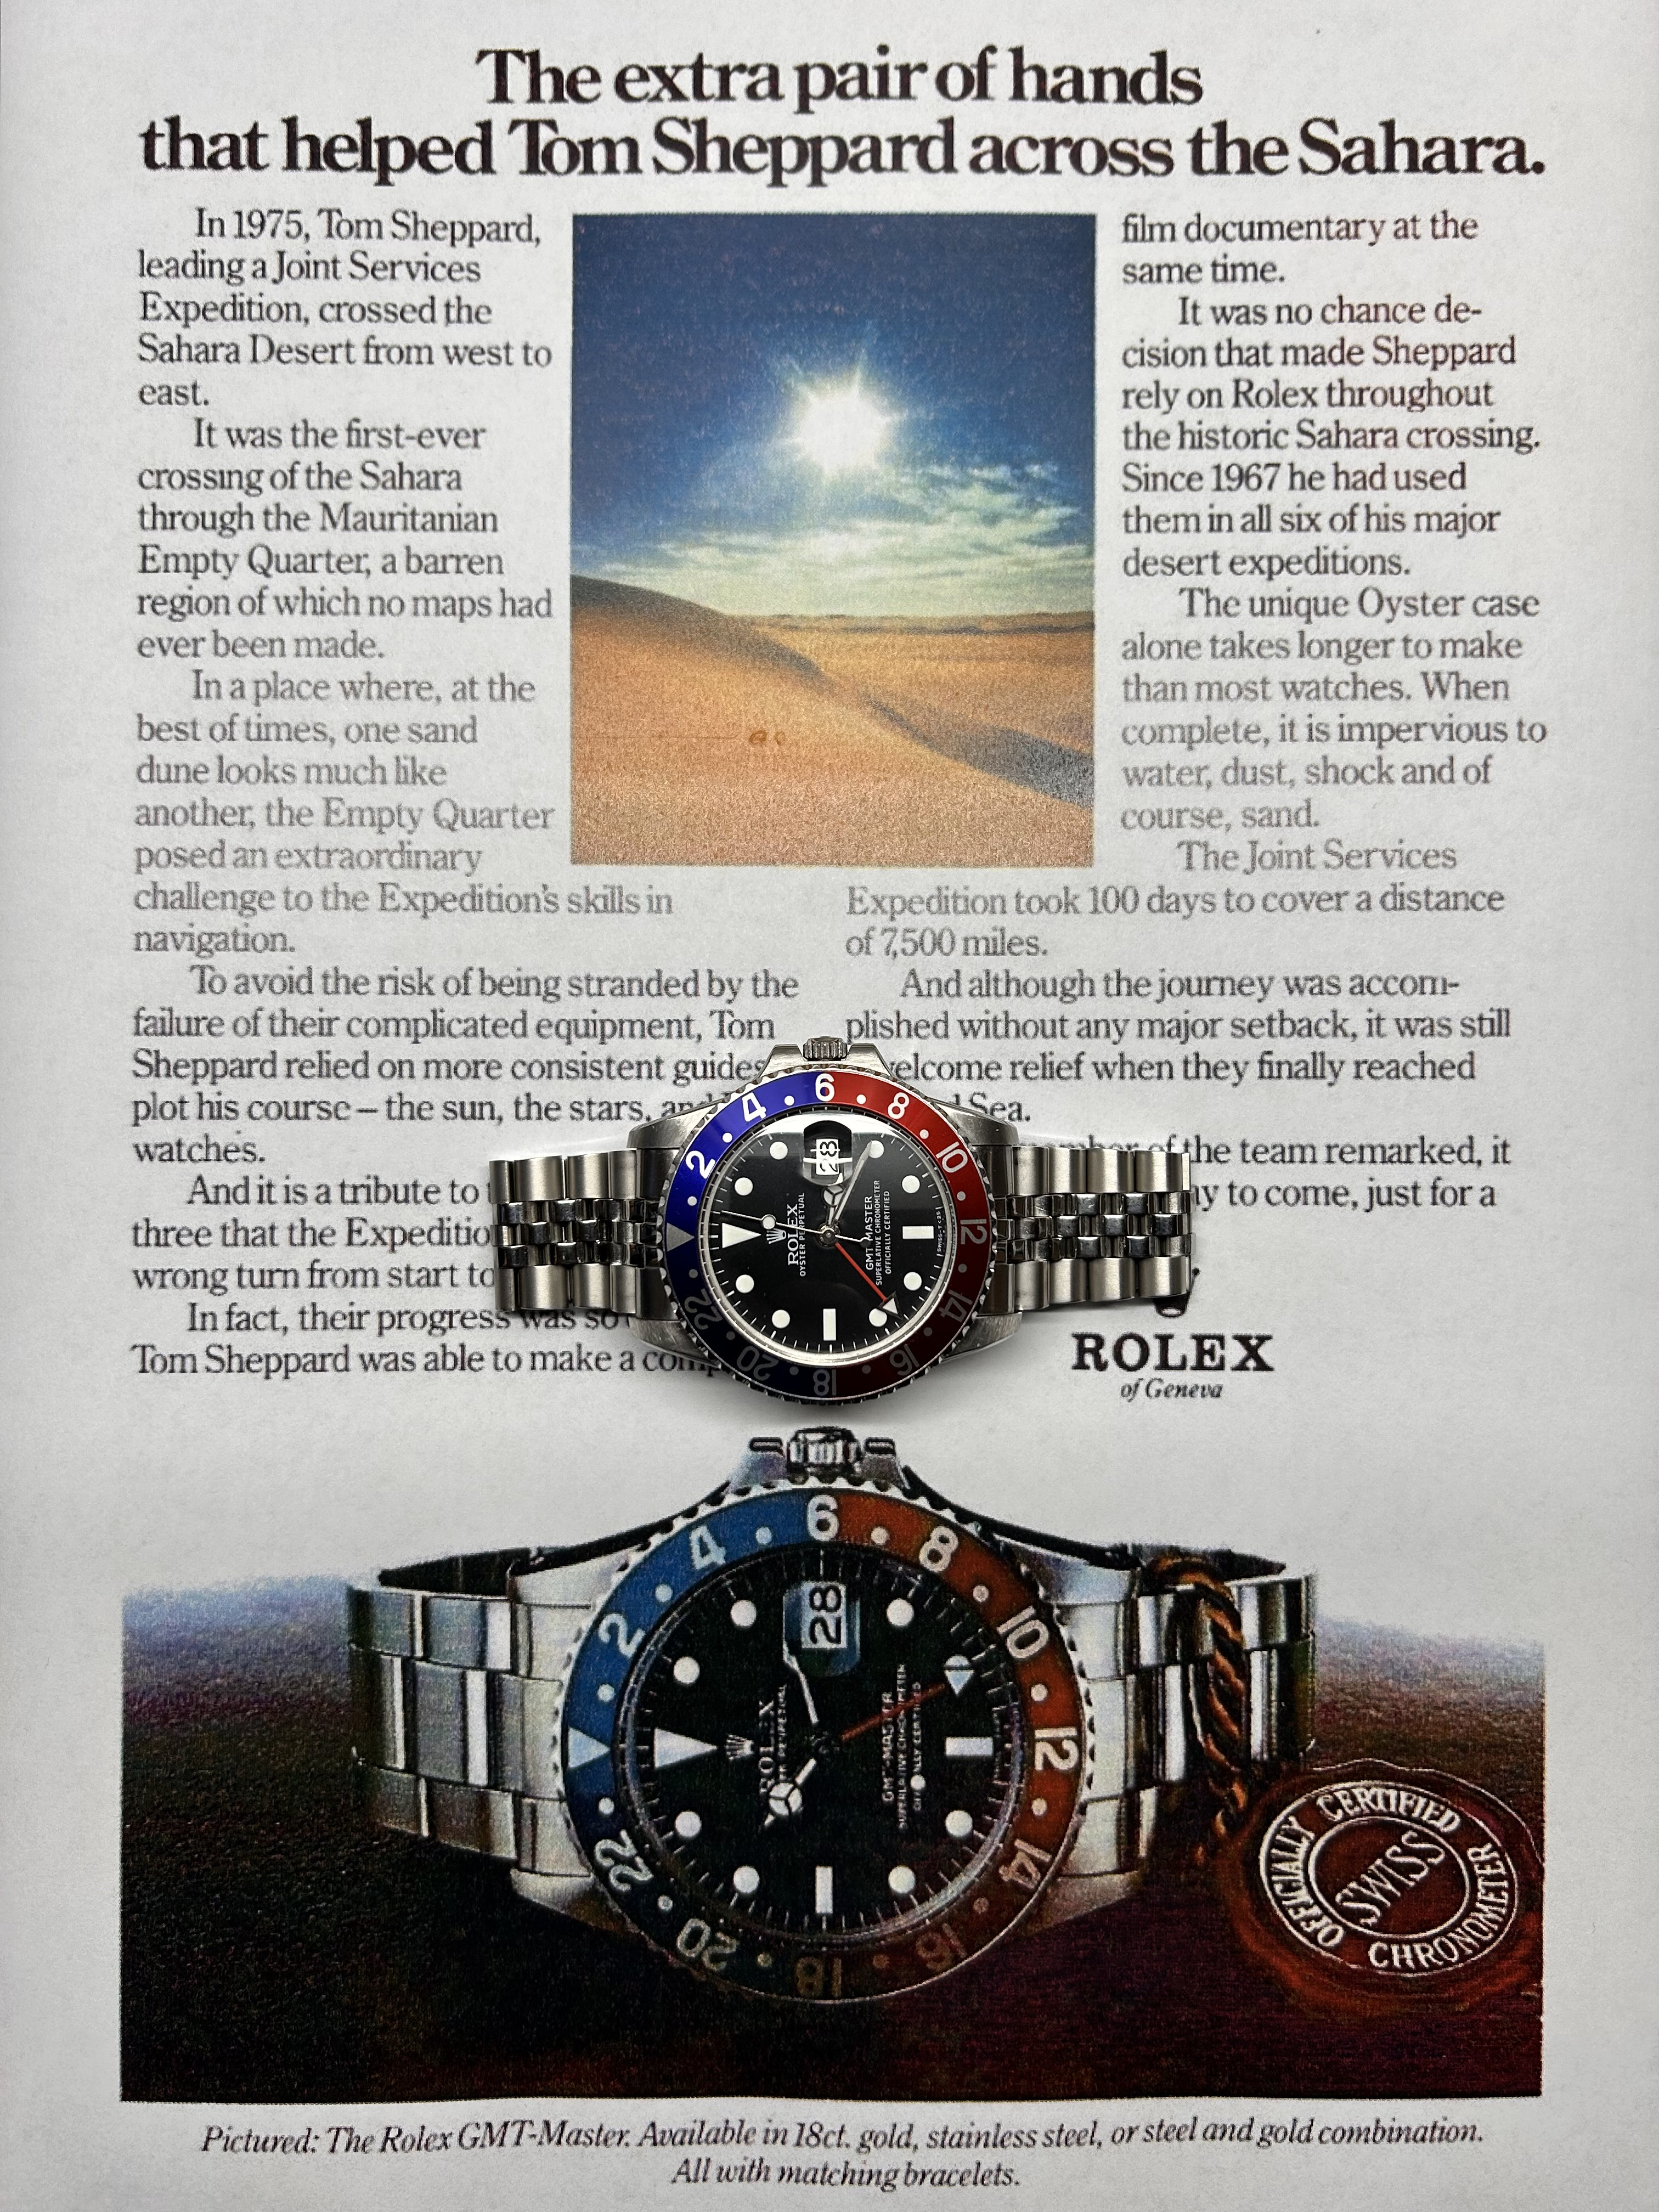
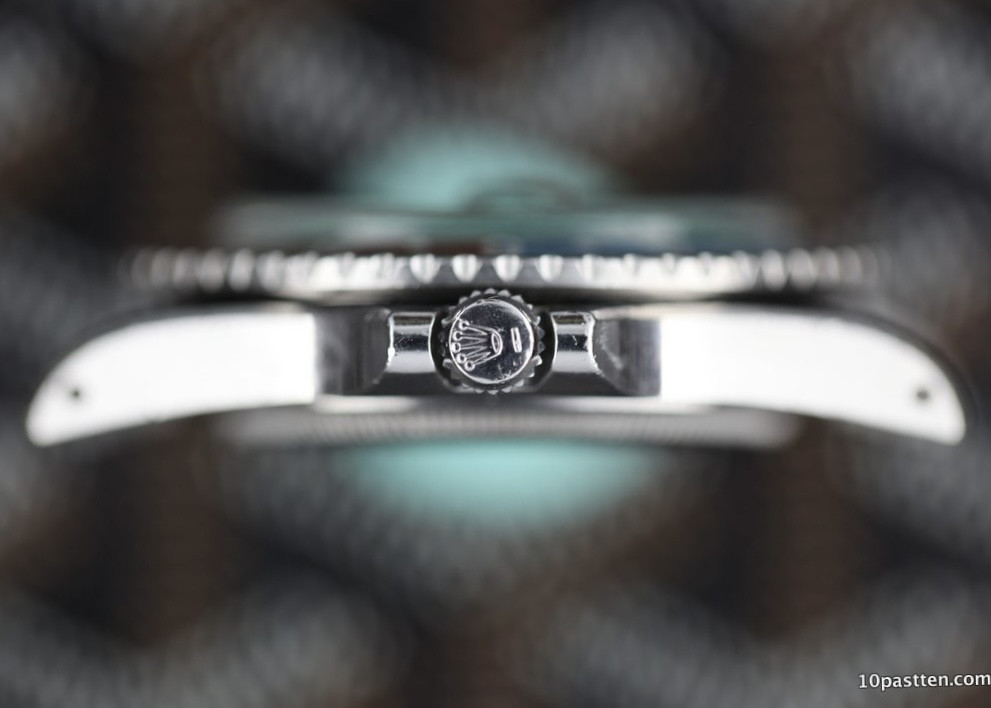
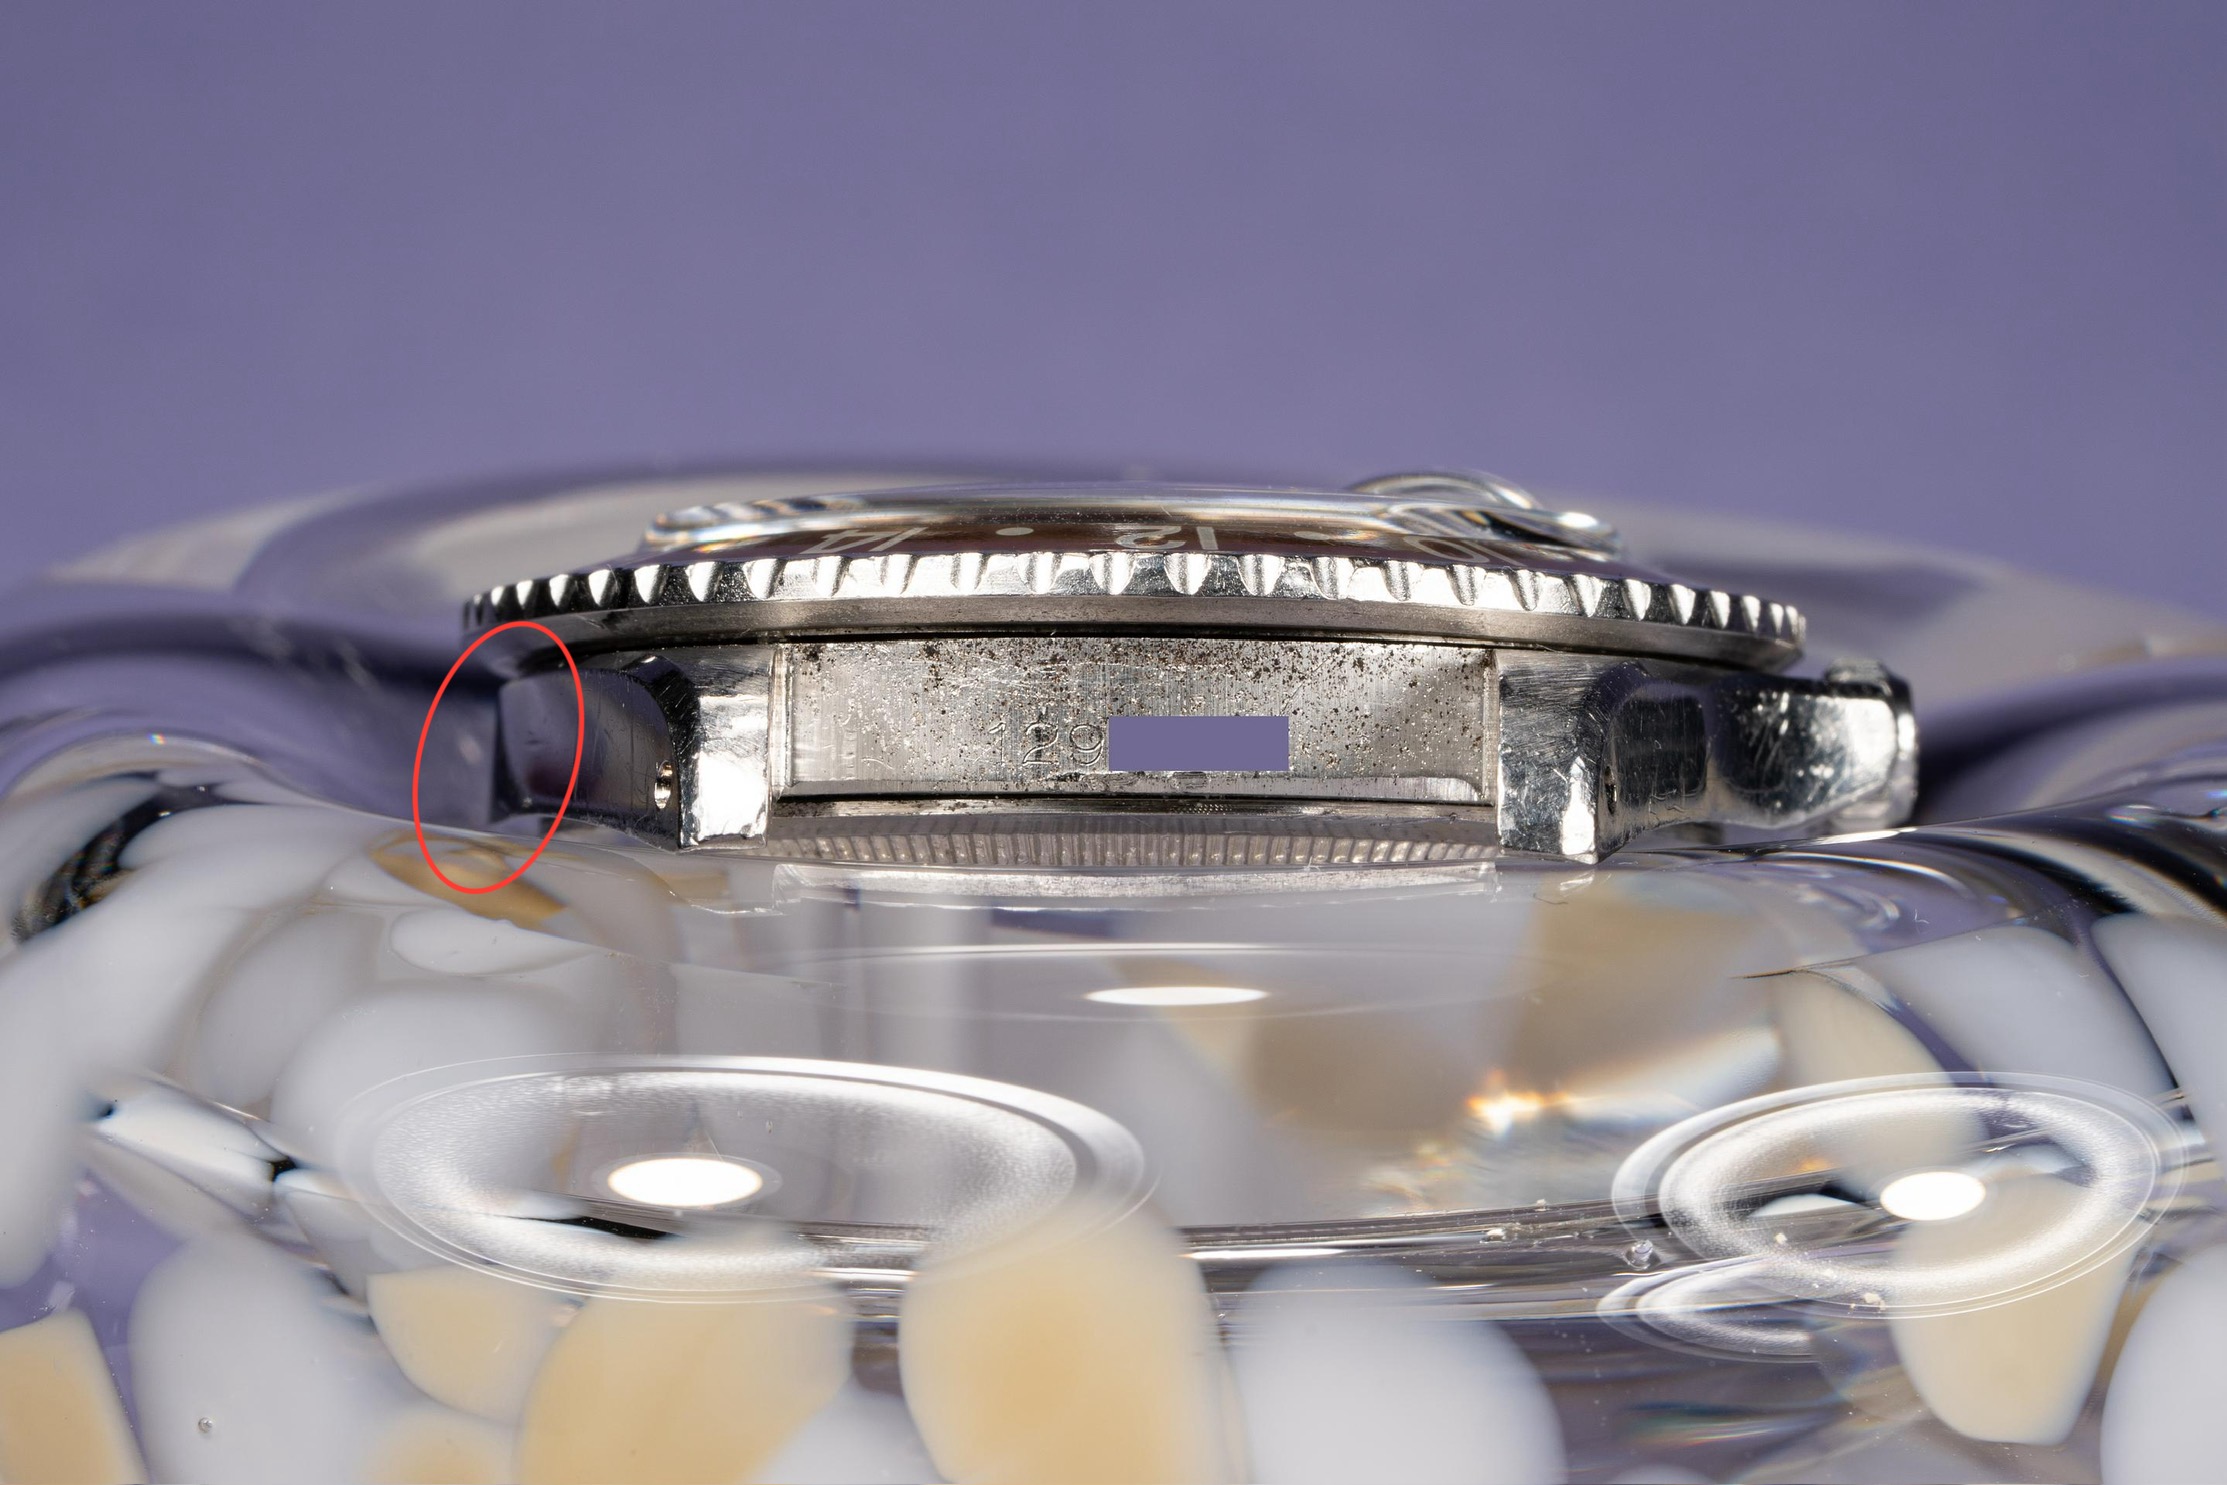
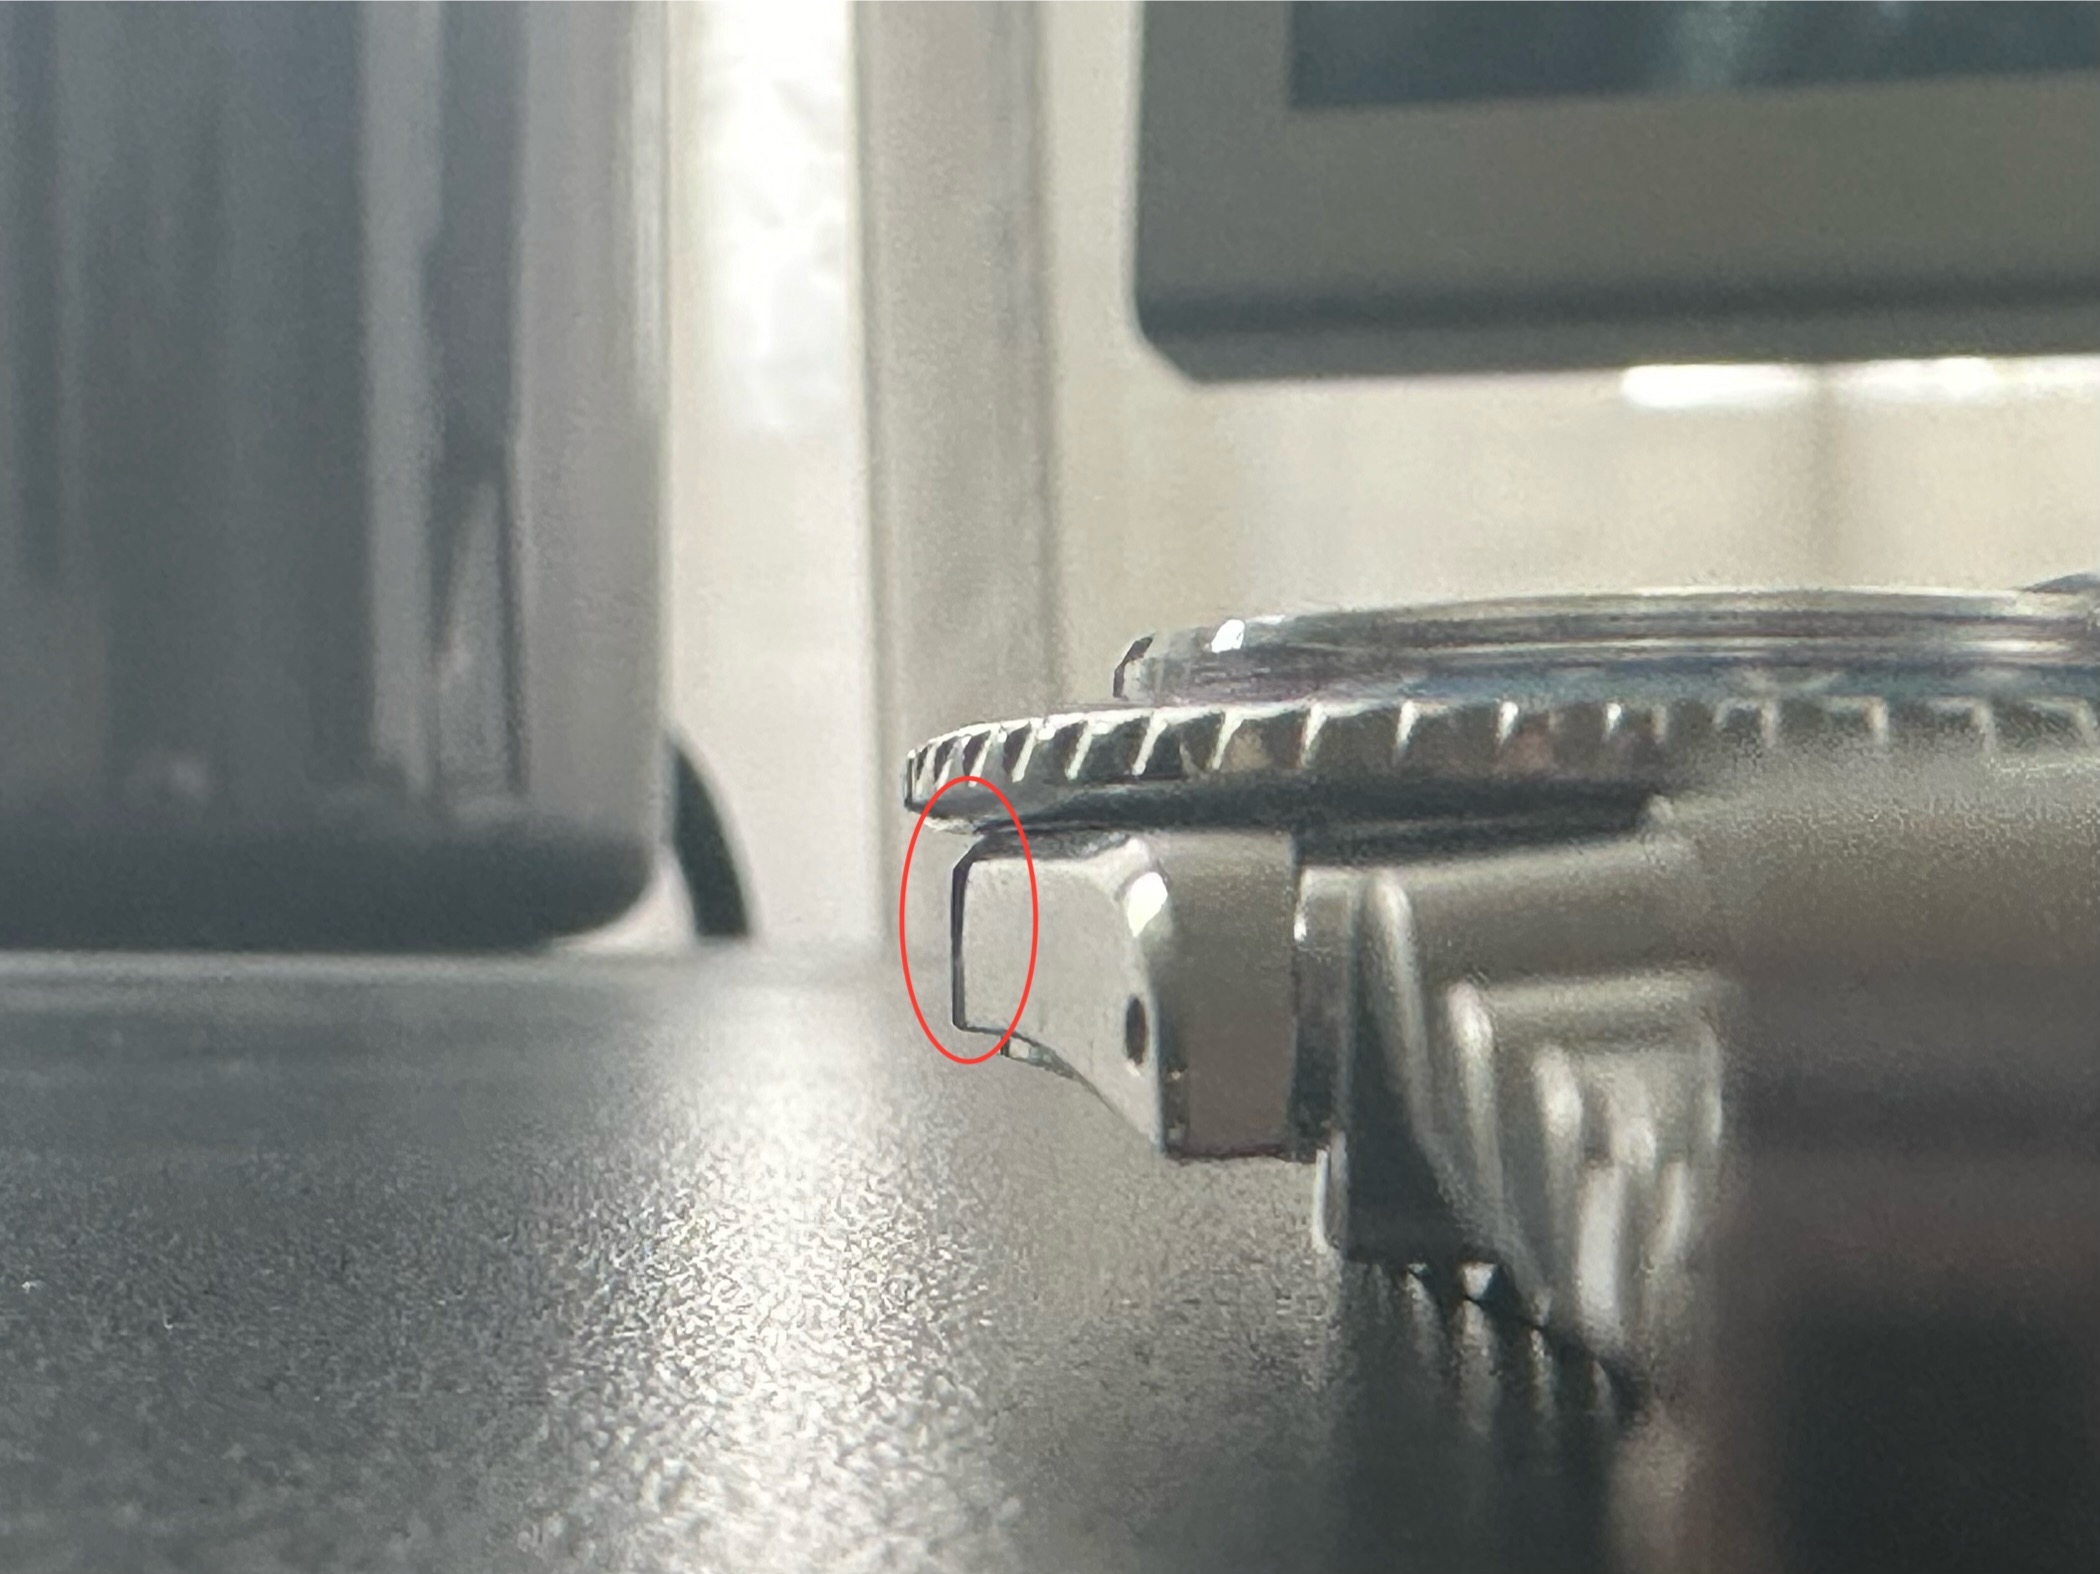
Mid 60s early rounded crown guards with a flat top was exactly my goal. especially since none of the available options out there offer this specific variation.
unfortunatly i am not at home for the next weeks so i can’t take pictures of the used tools.
If people are interested, i can make a little tutorial once i am back home.
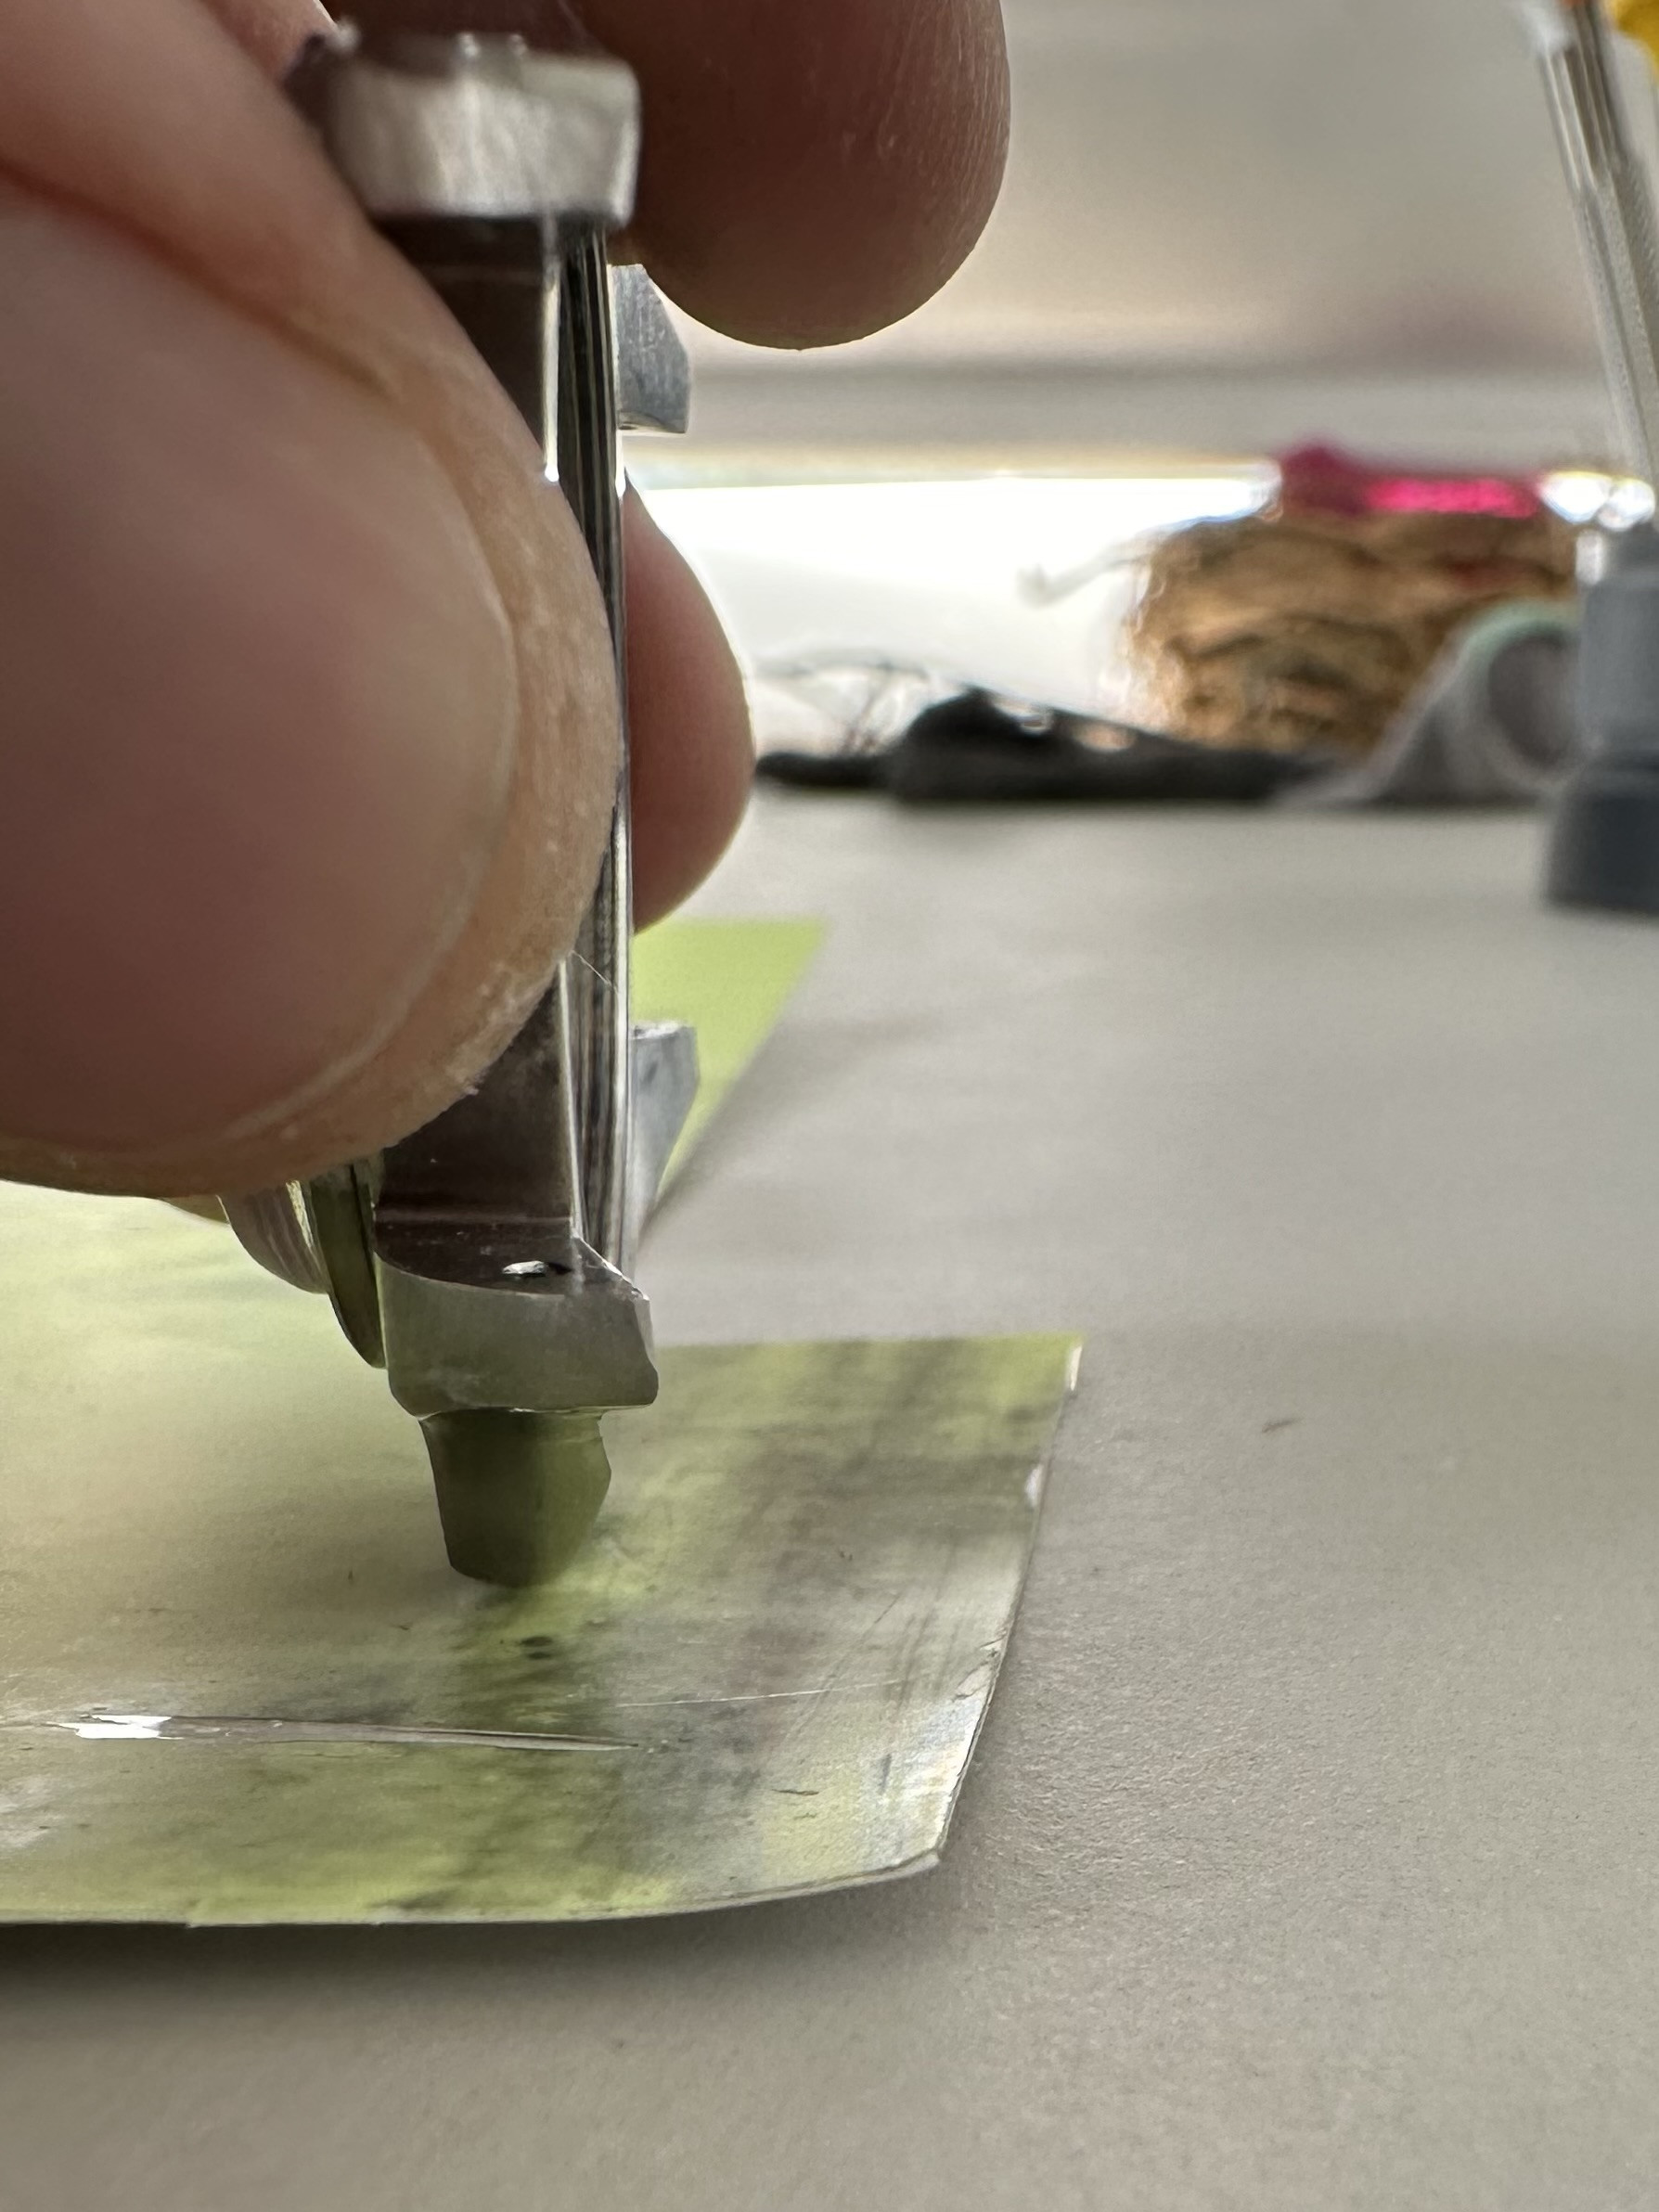
I mostly used dremel tools and sanding paper.
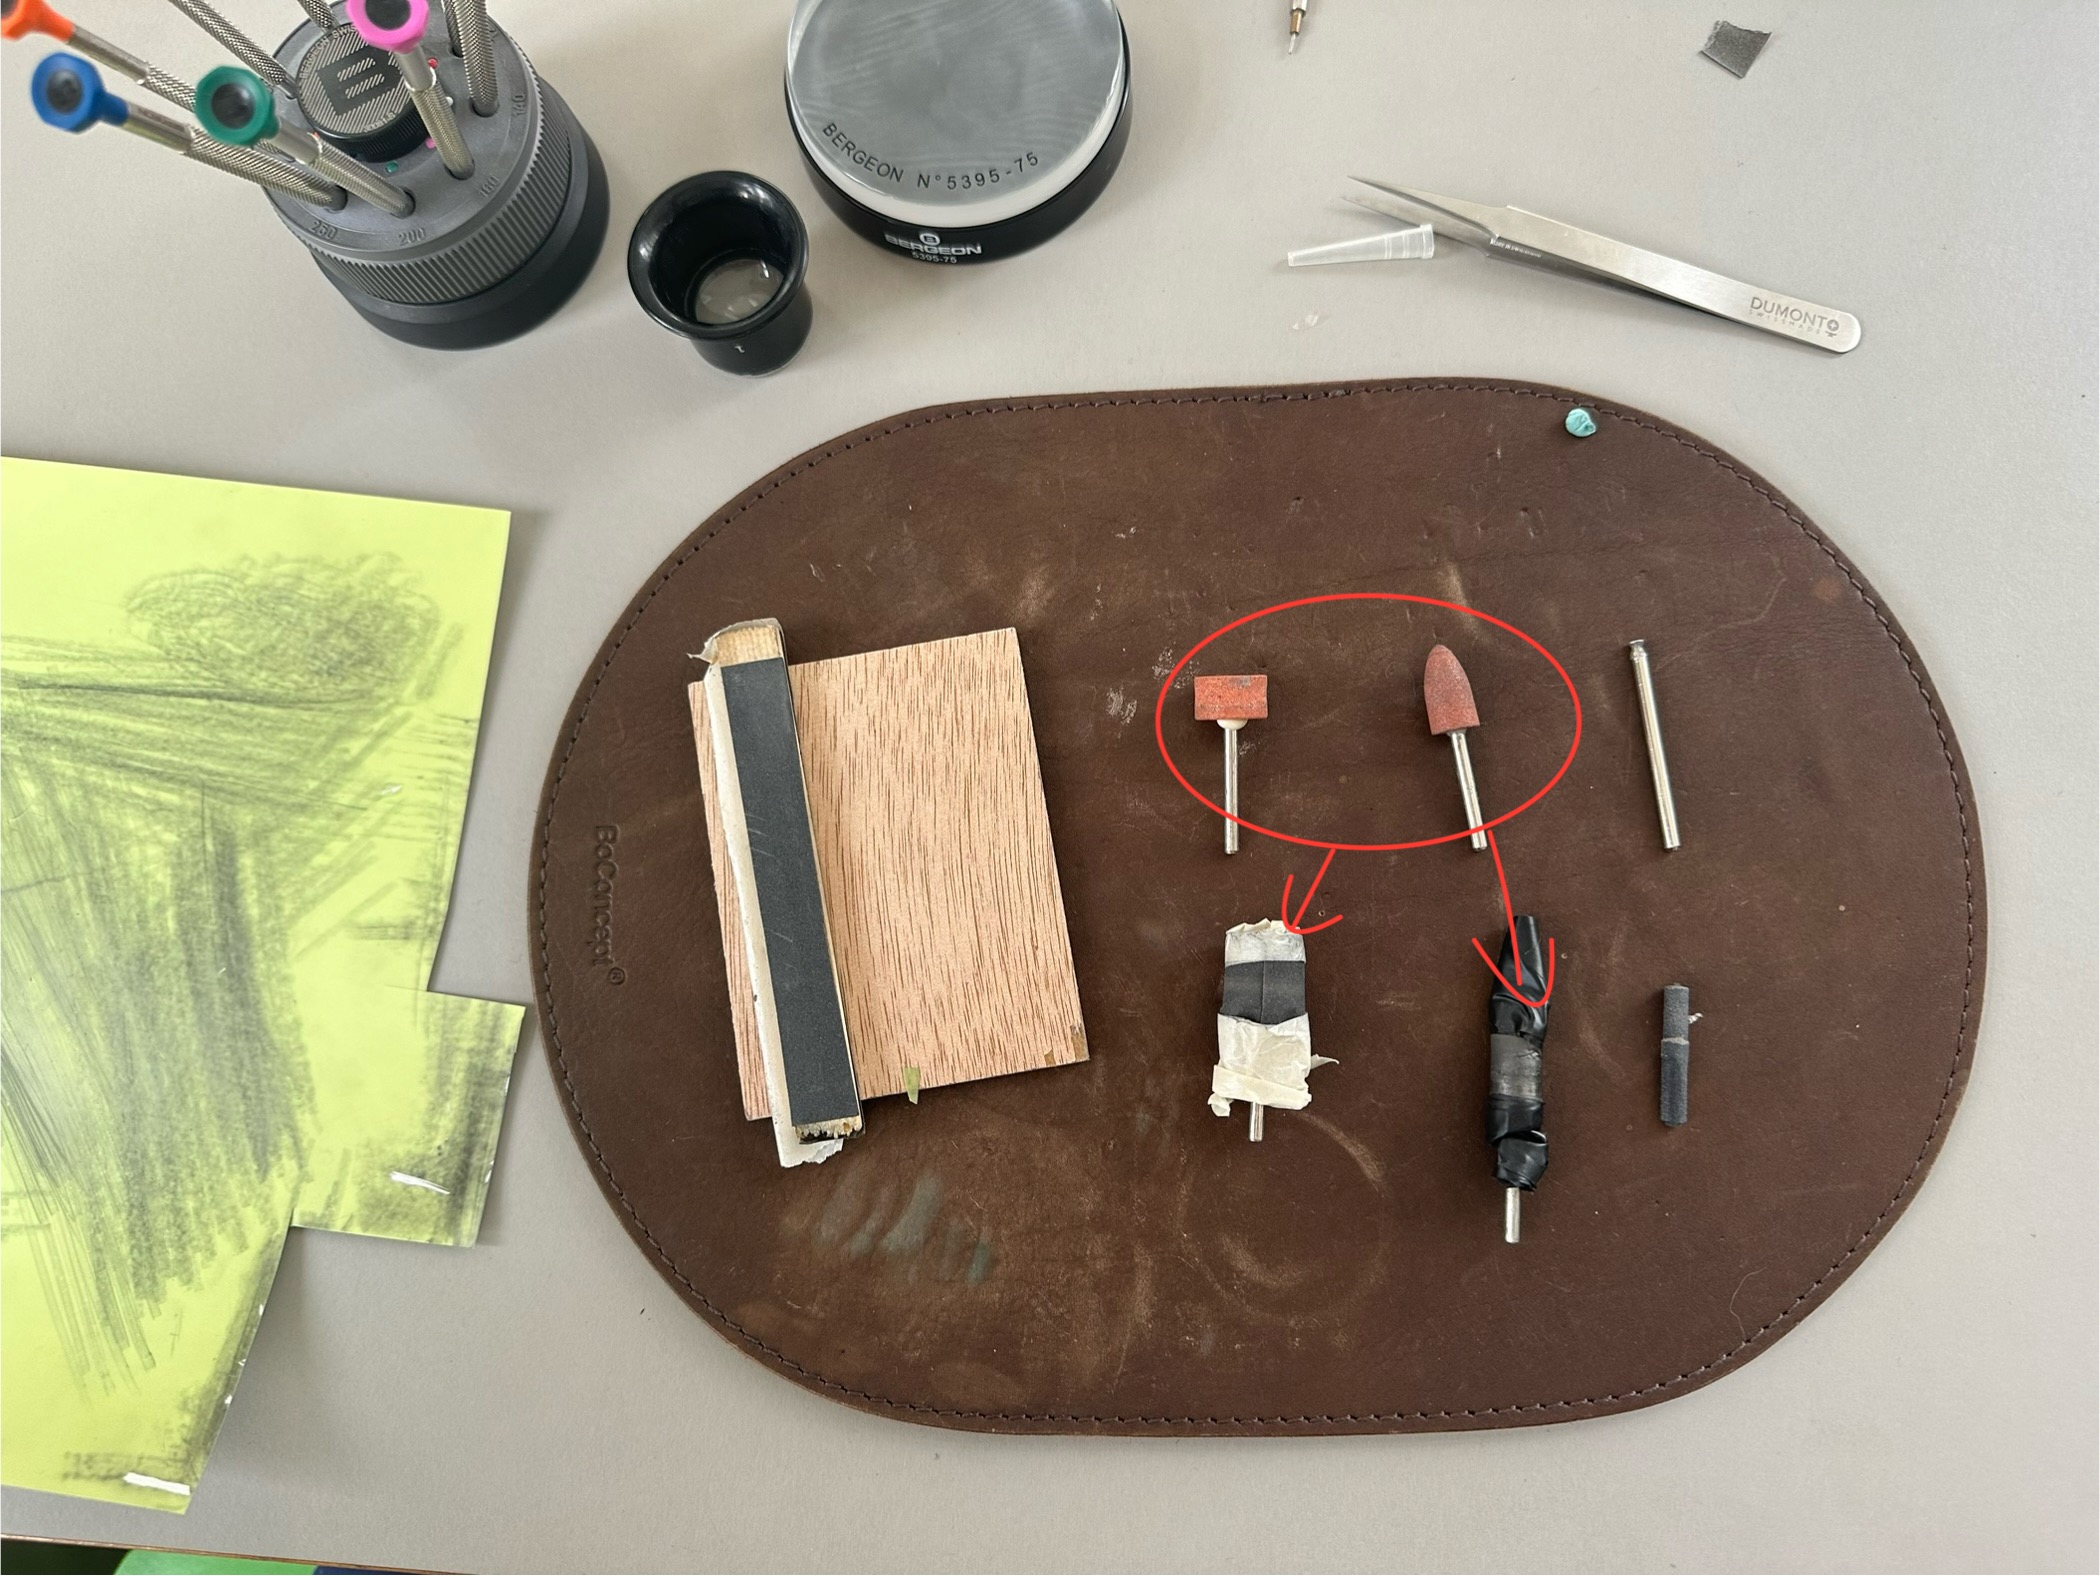
The wood sanding bit from the dremel tool kit for the rough work on the outer crown guards at the start and then i wrapped the flat dremel stone bits with sading paper to go further.
that gives you a really flat surface and good control over the process.
that is what i found out to be the best tool to make or sharpen chamfers as well if you don’t happen to have a lapping machine laying around. (and boy did i try lots of options for chamfers just wrap the stone bits with sanding paper made for metal. That will eat nicely into the case and gives you sharp chamfered edges. Then i do the same again with the finest available grit that has been made even finer by being used and therefore polished on some metal before using it on the case. That gives me an almost mirror finish on the chamfers and case. The key is to remember the exact angle used before to avoid rounding the chamfers.
I messed up 4 watch cases before i had the muscle memory to pull it off
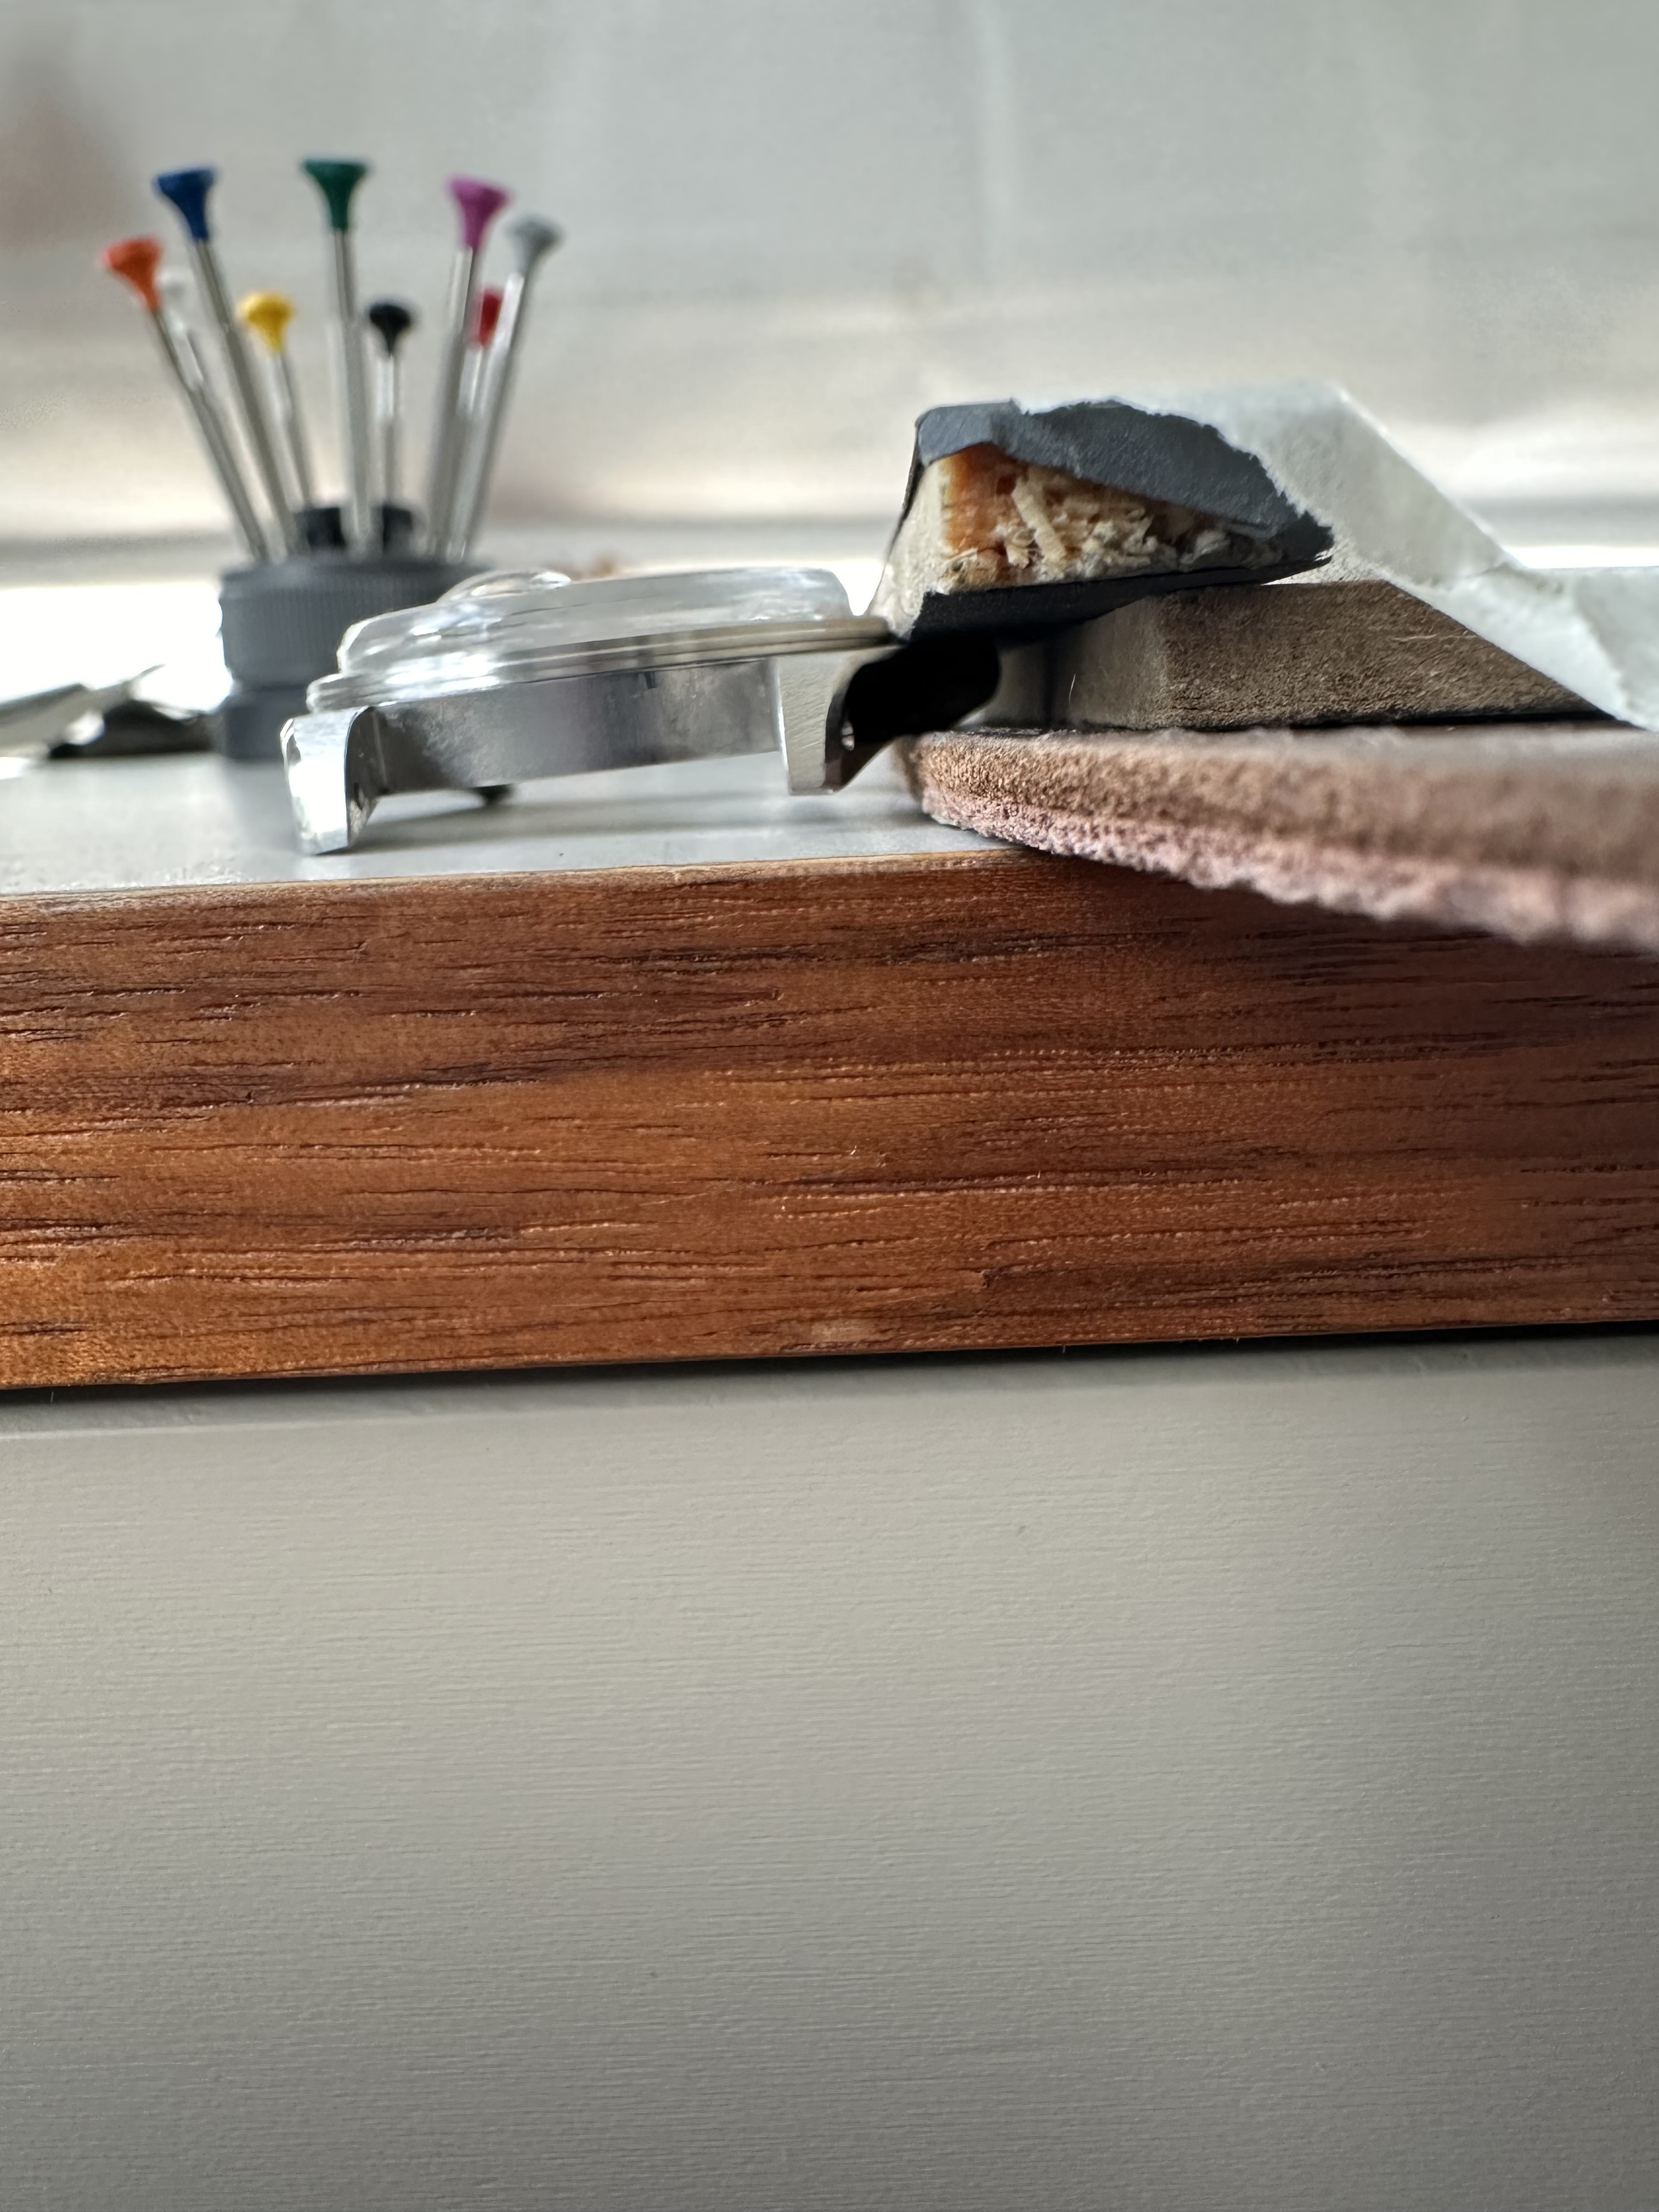
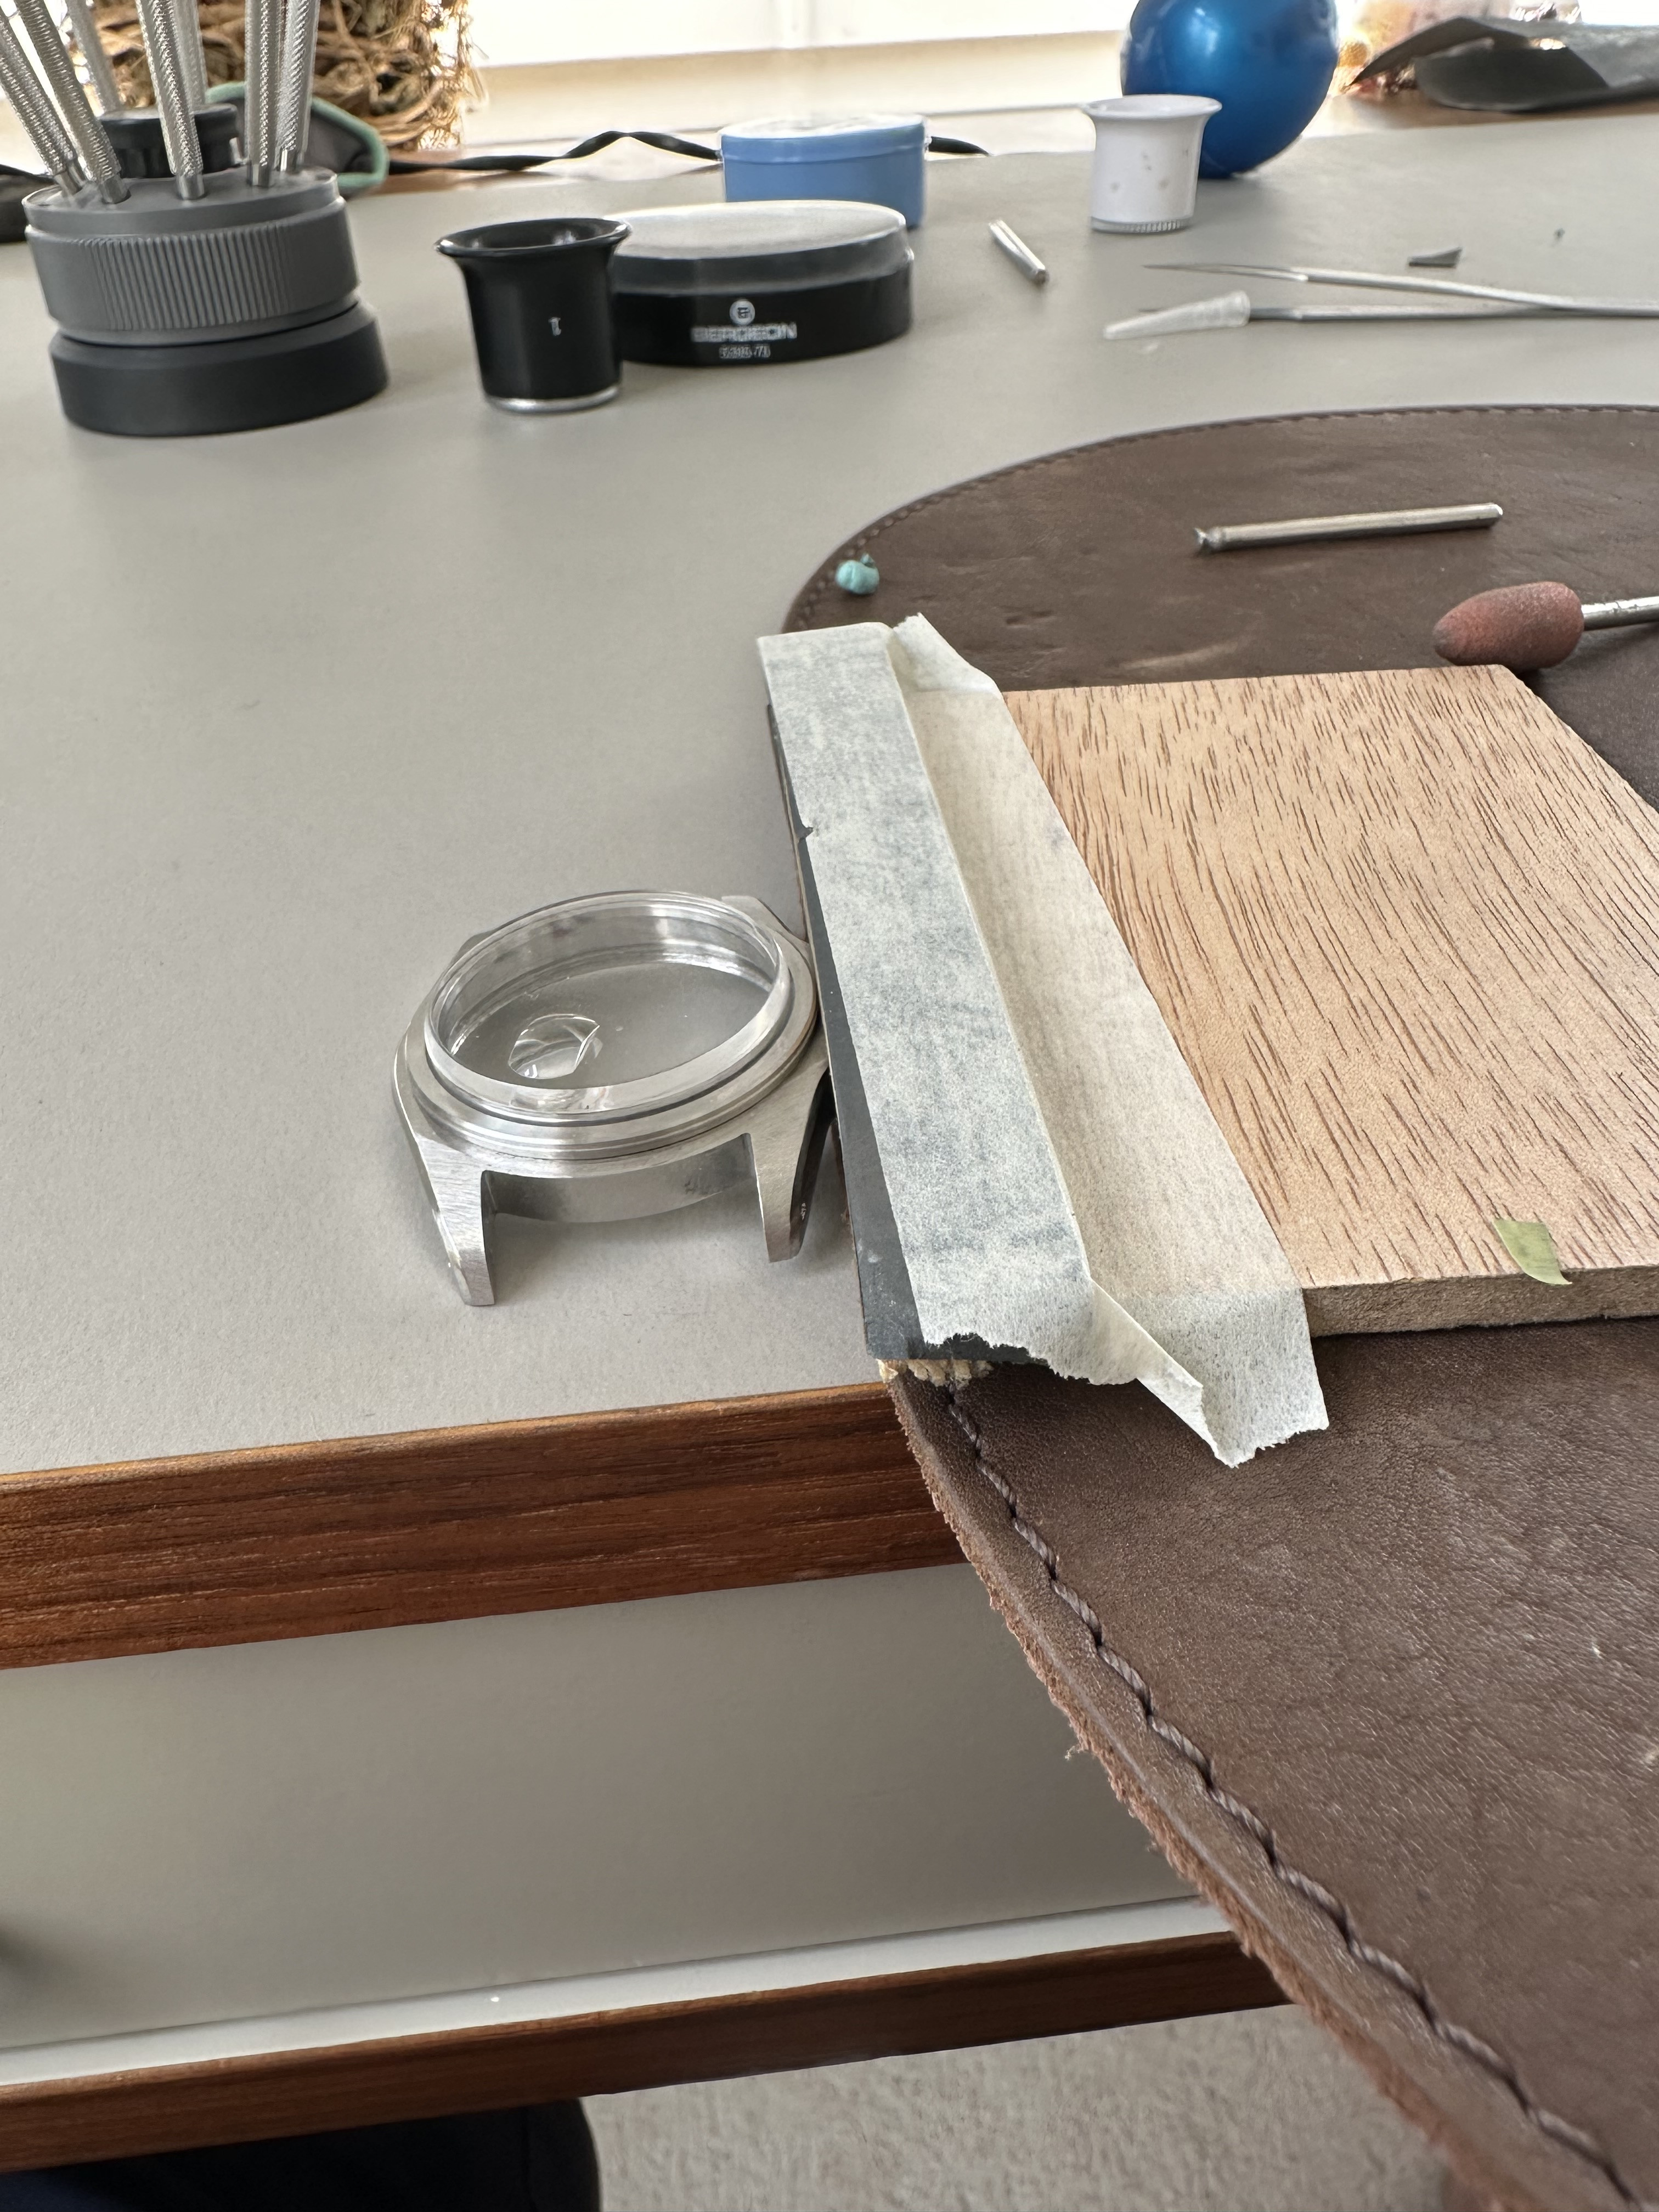
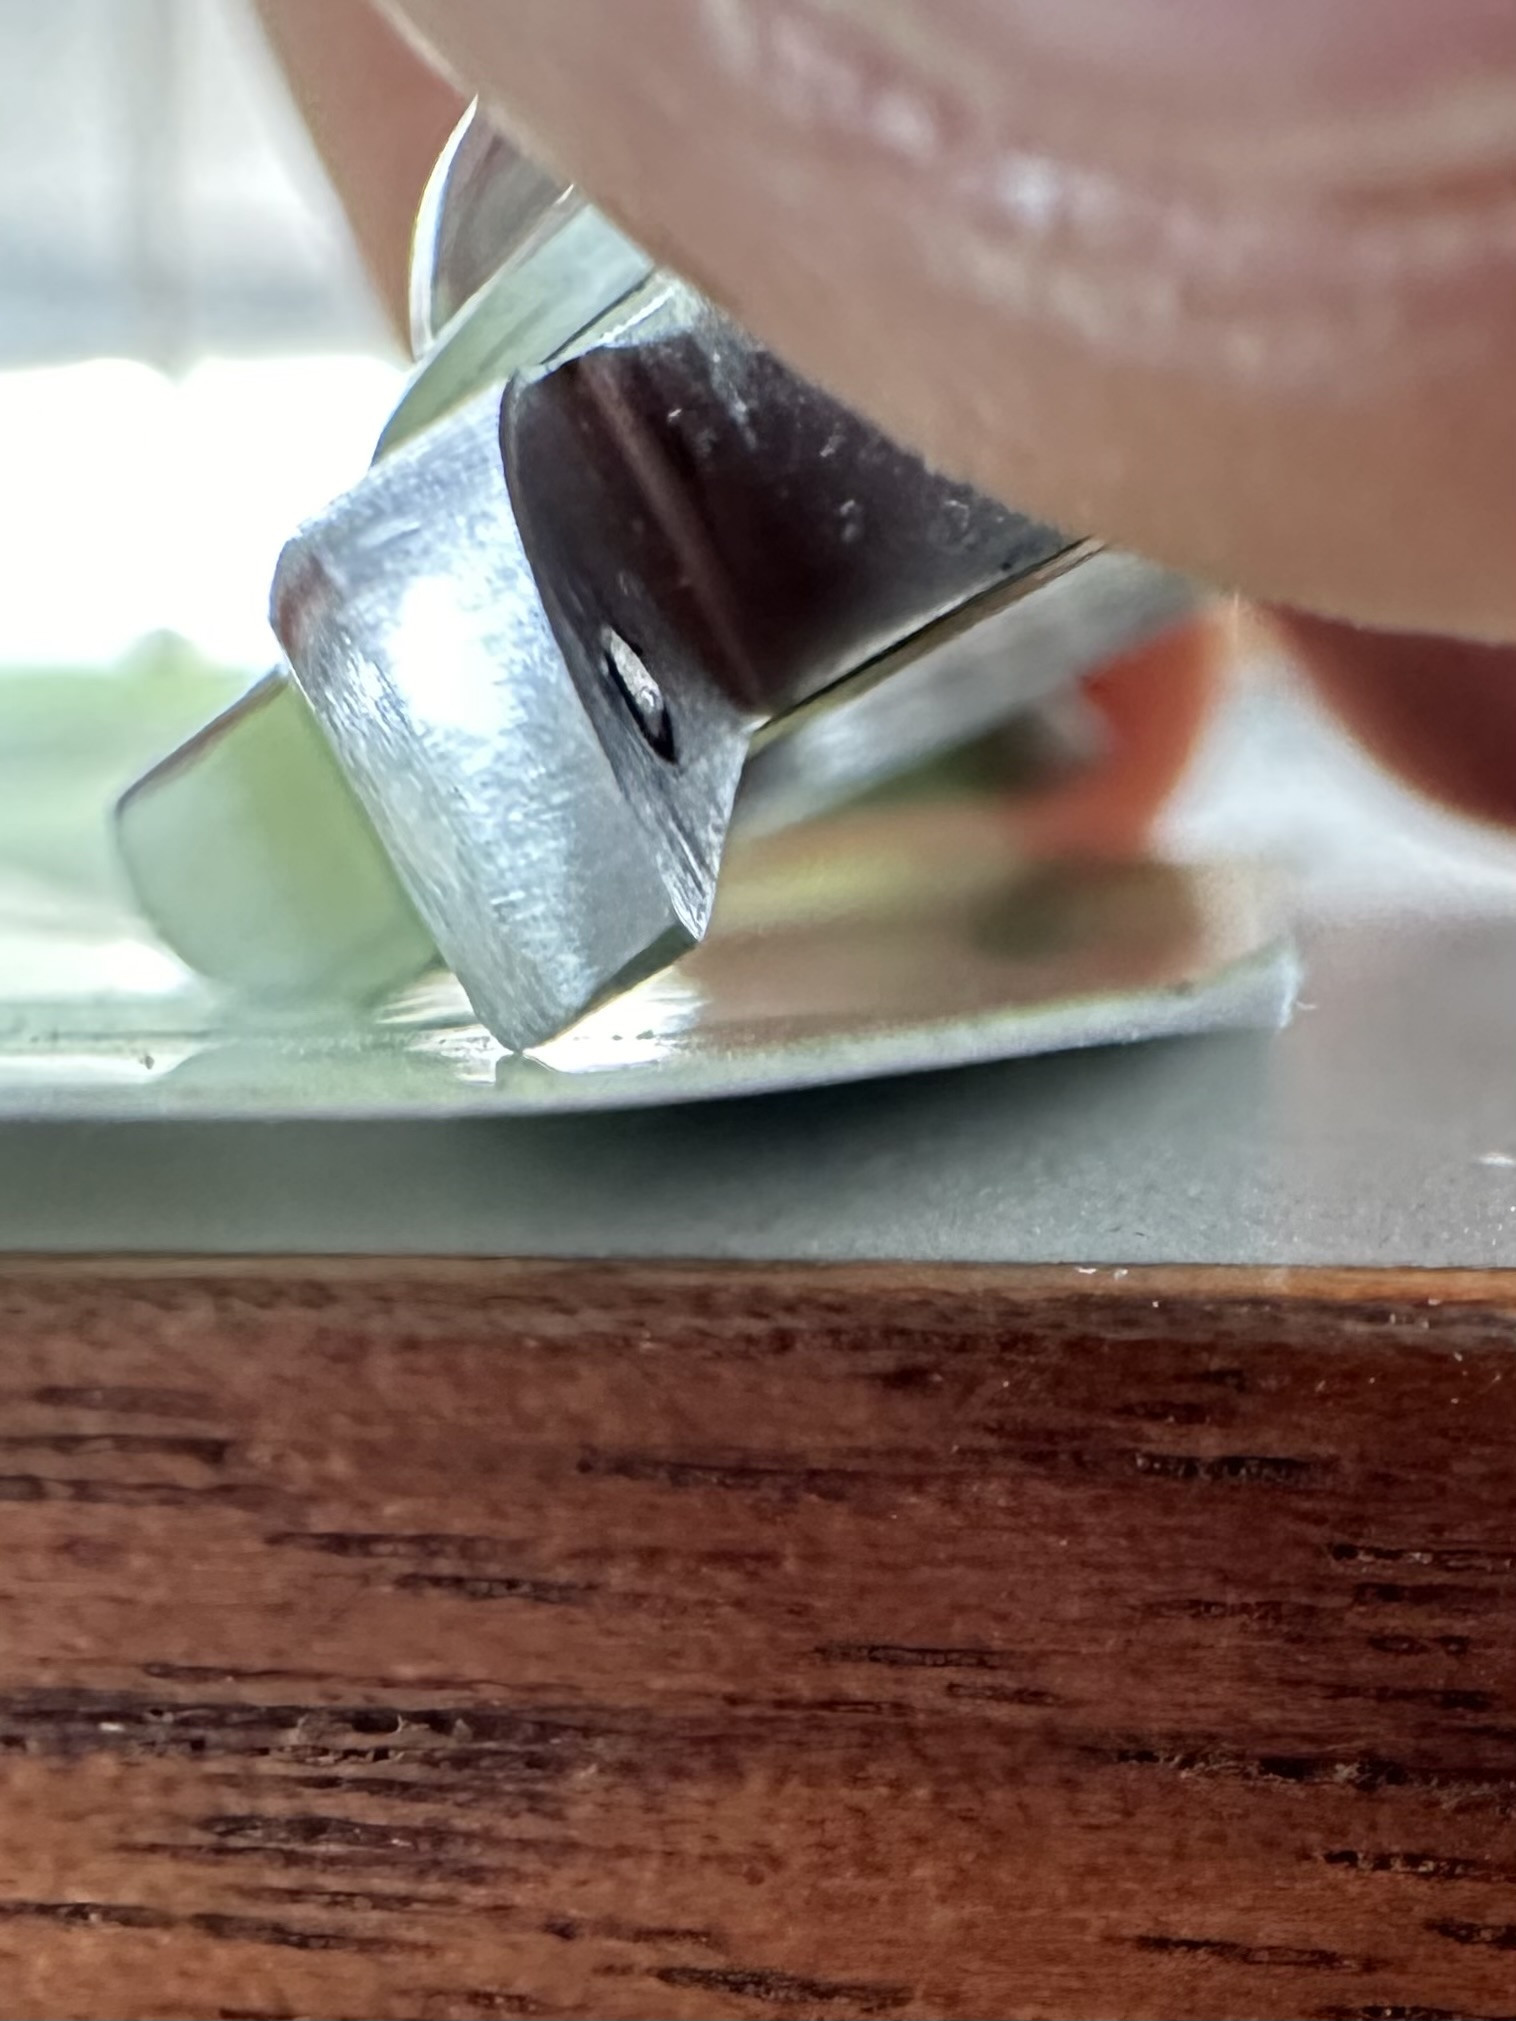
The best tipp i can give is to always try to have a hard and flat surface supporting the sanding paper to avoid rounding any surface on the case. any give underneath the sanding paper will lead to rounded and therefore overpolished looking watch cases.
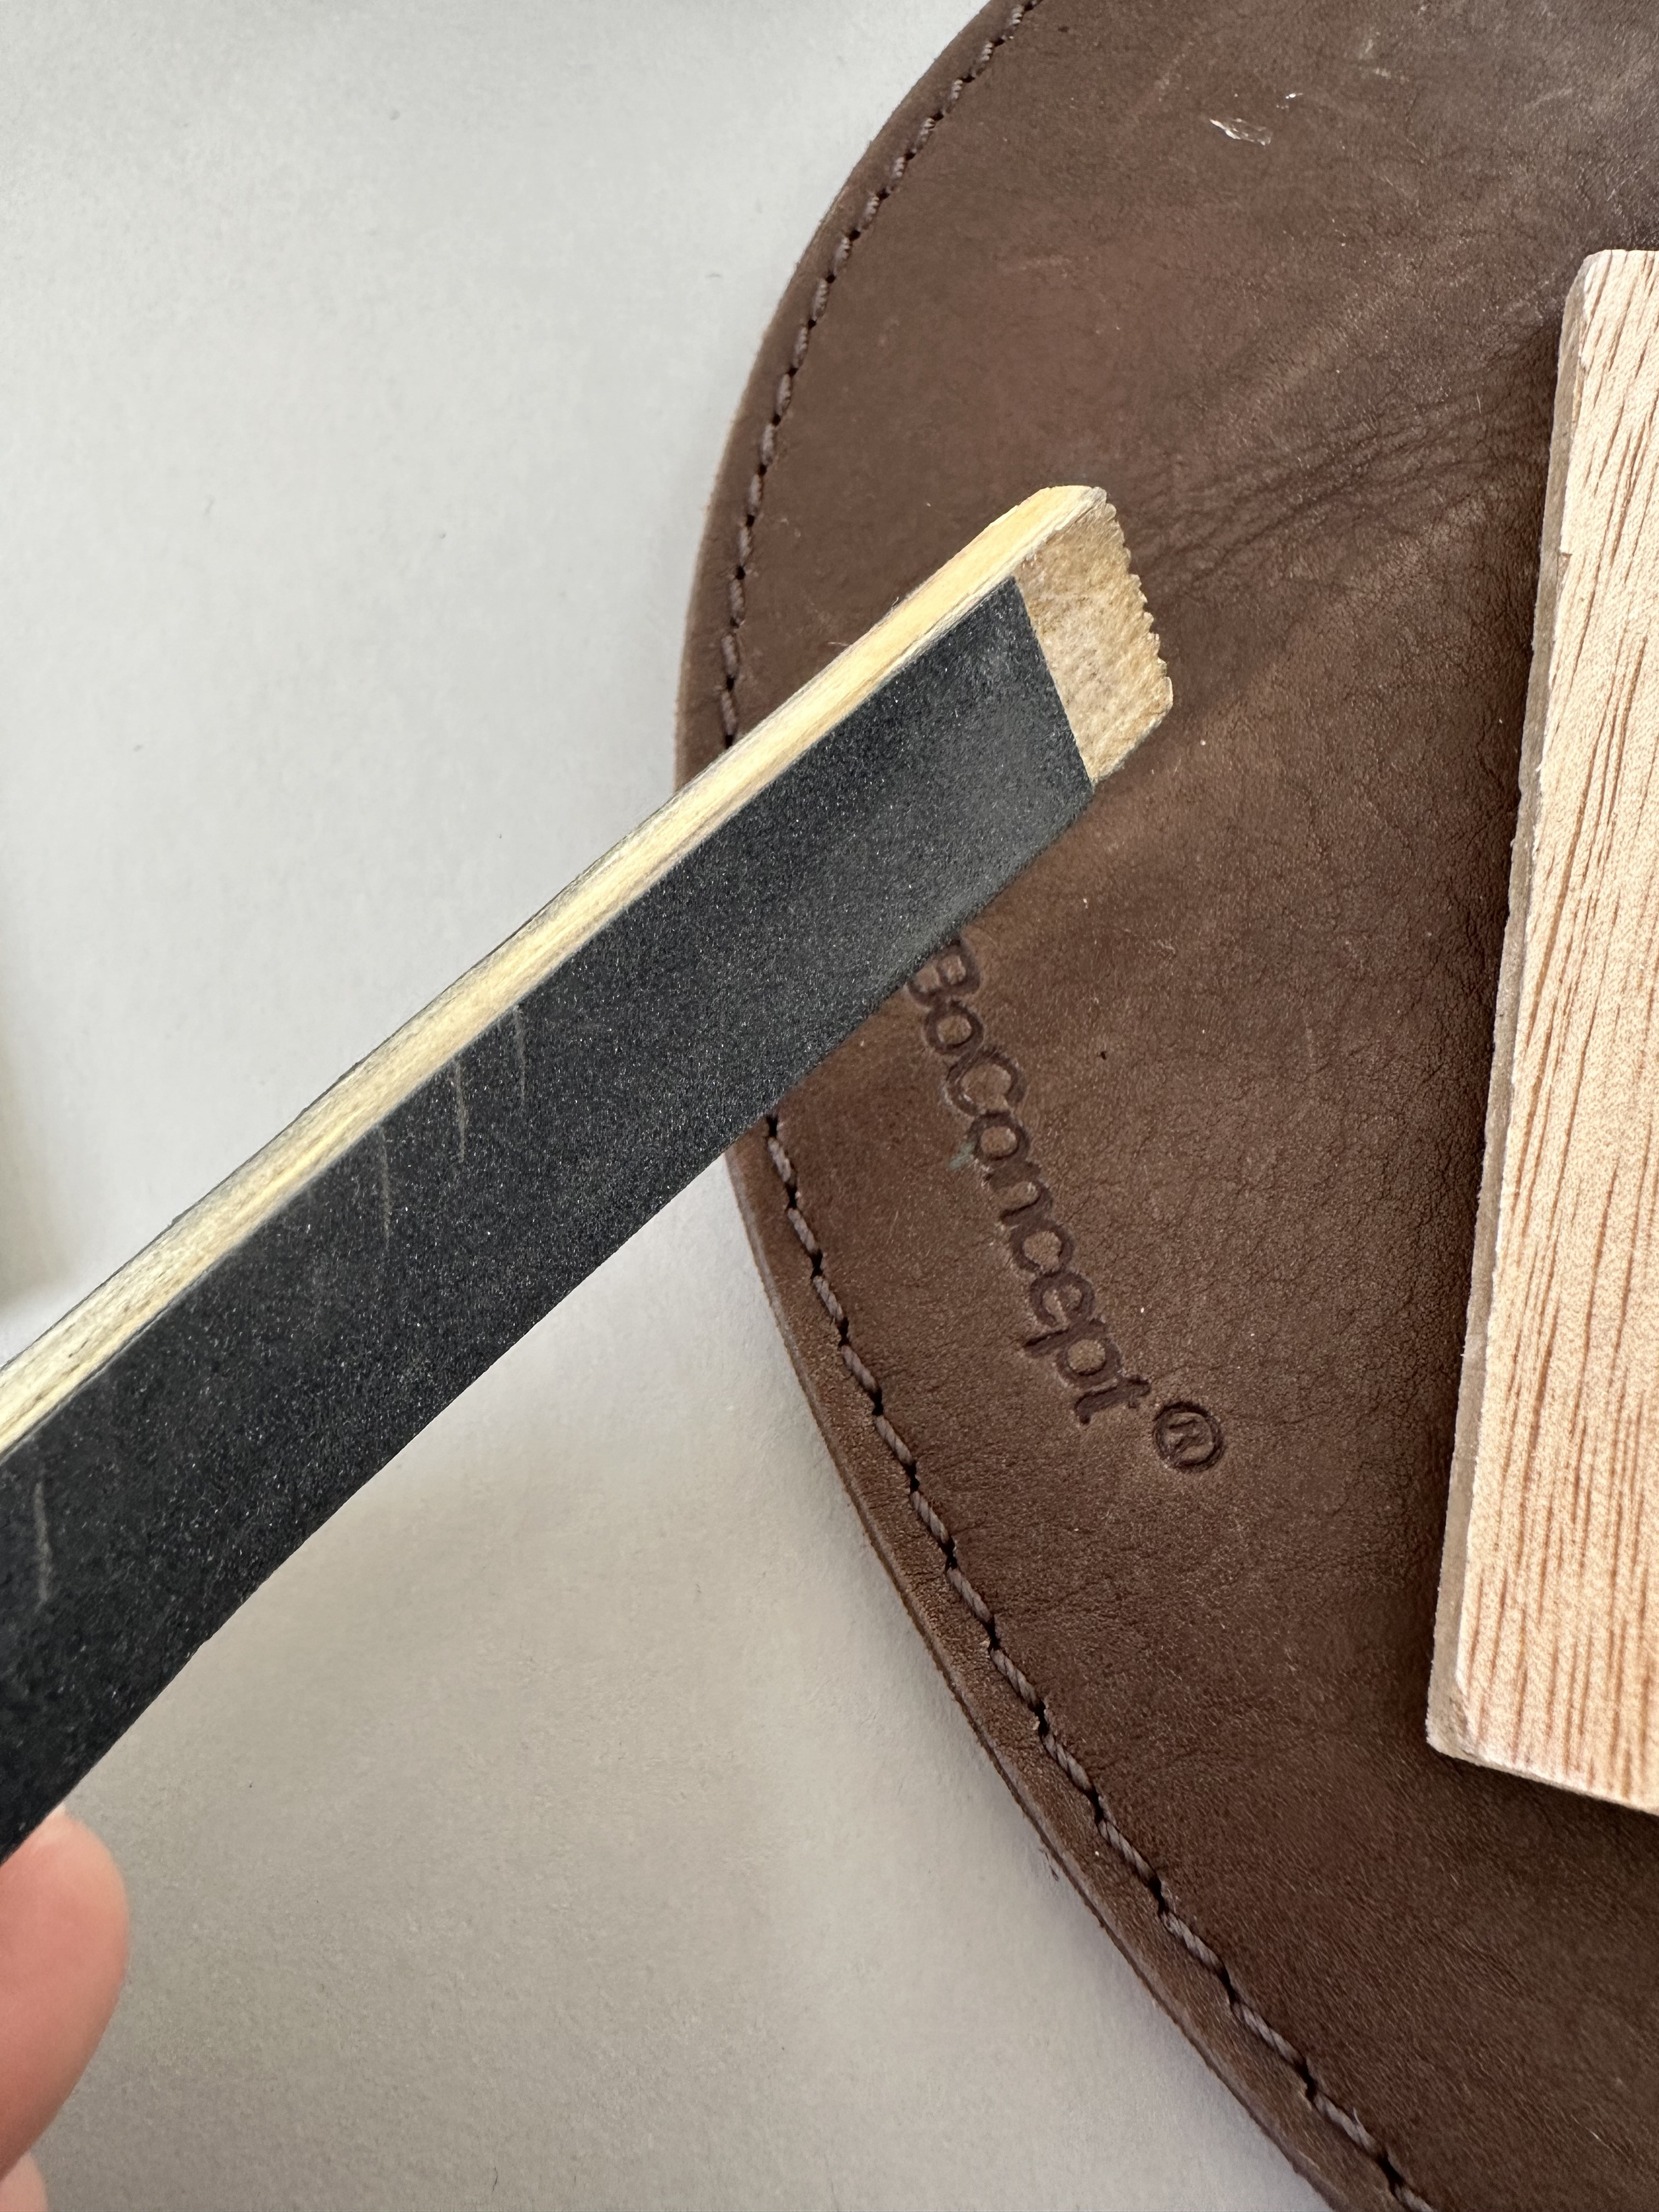
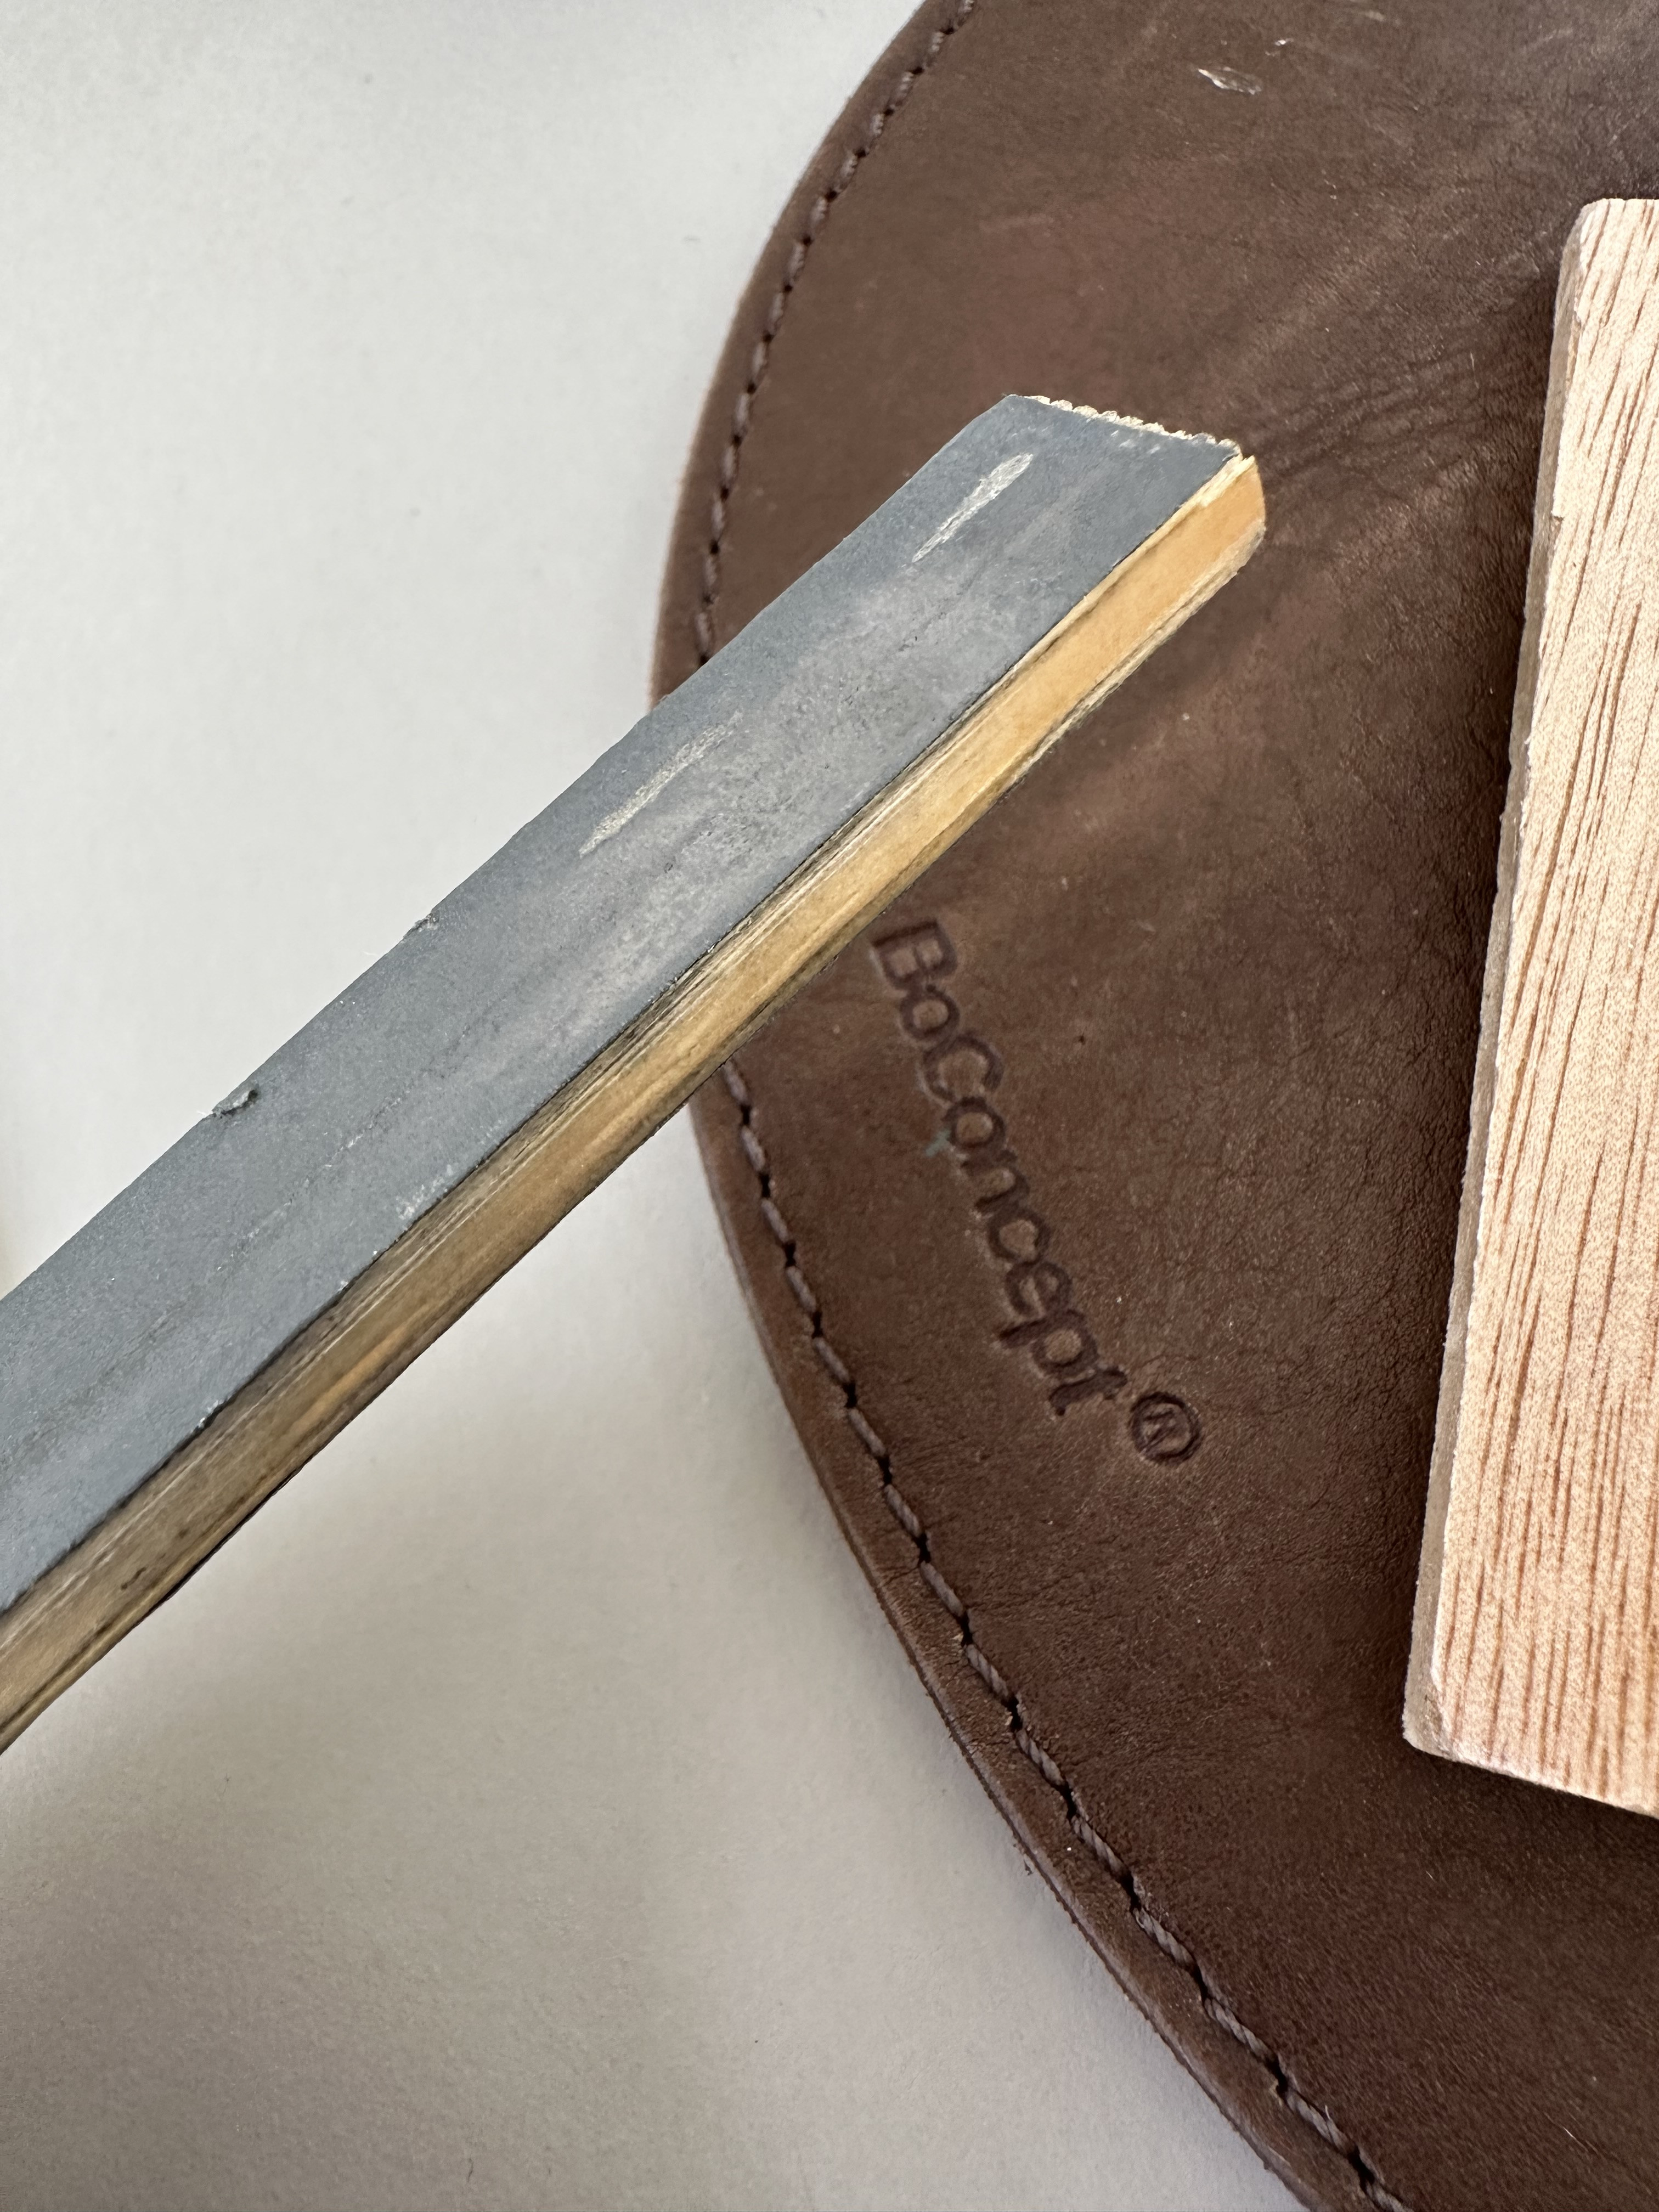
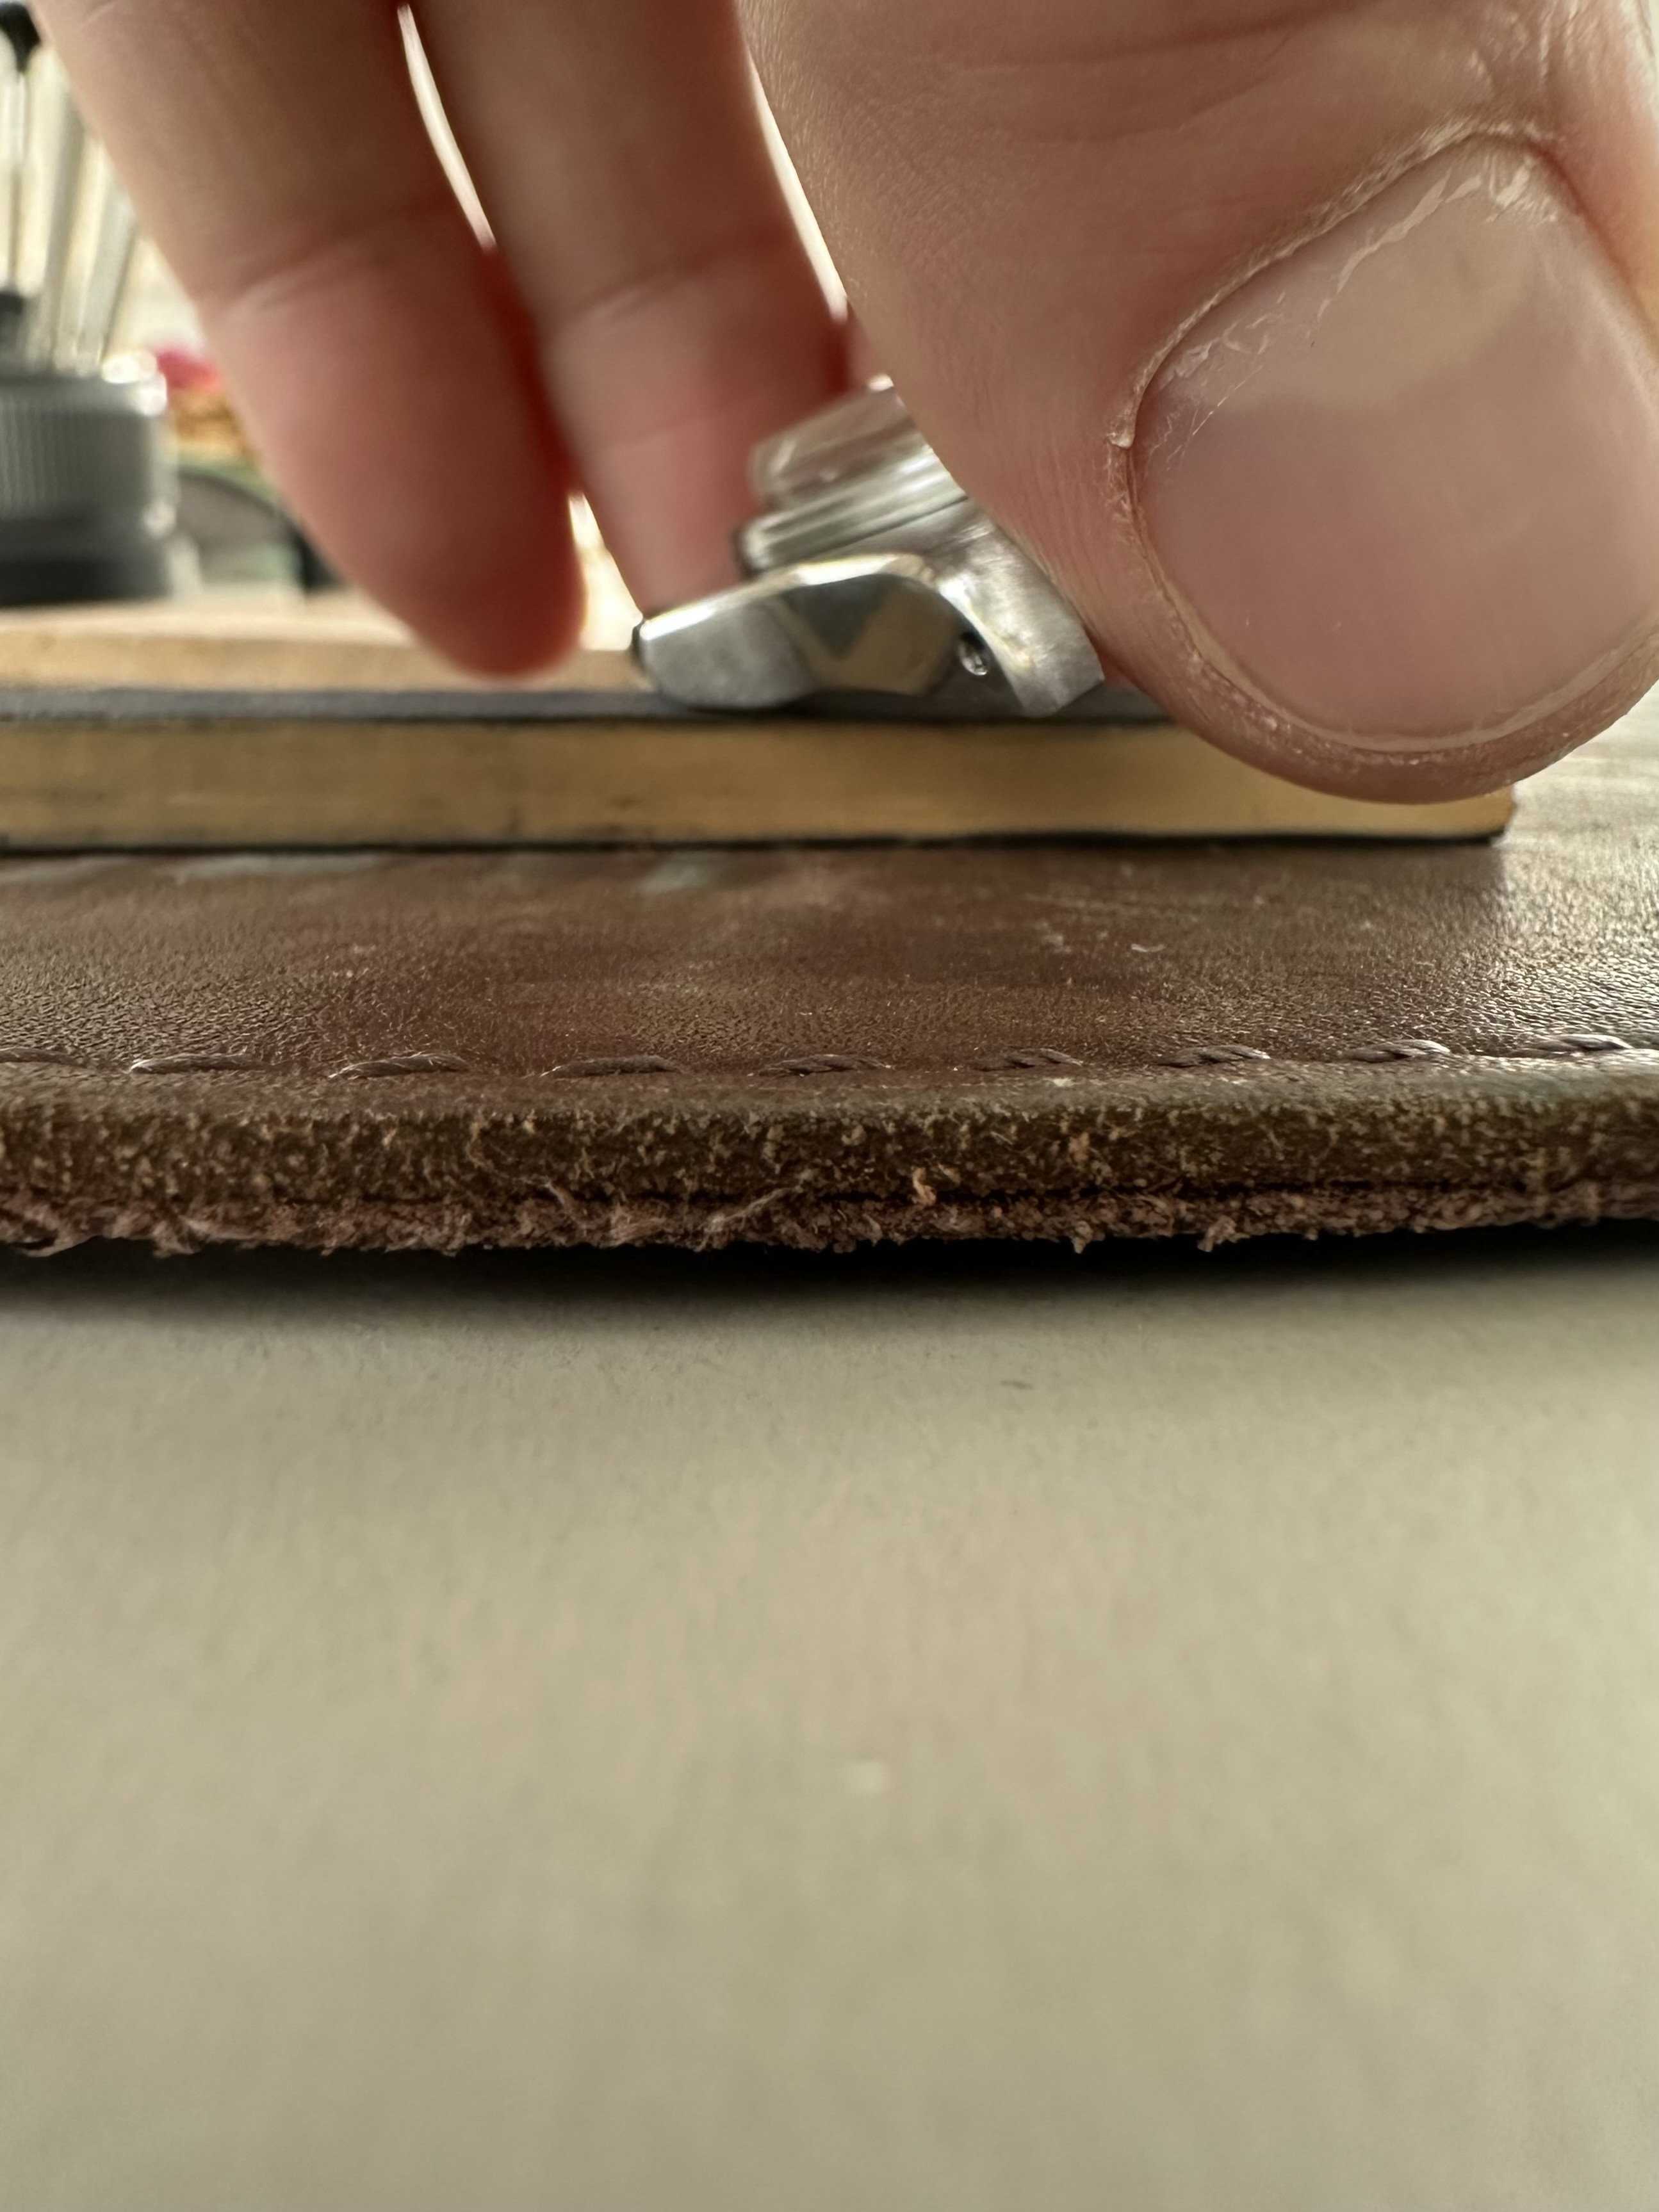
I used sanding paper layed flat on the table for the underside of the crown guards, sanding paper glued to a flat peace of wood for the top of the CGs.
you need a special construction to guide the movement of the sanding paper on the top, otherwise you will end up rounding up the edges of the flat surface. (I can take pictures once i am home).
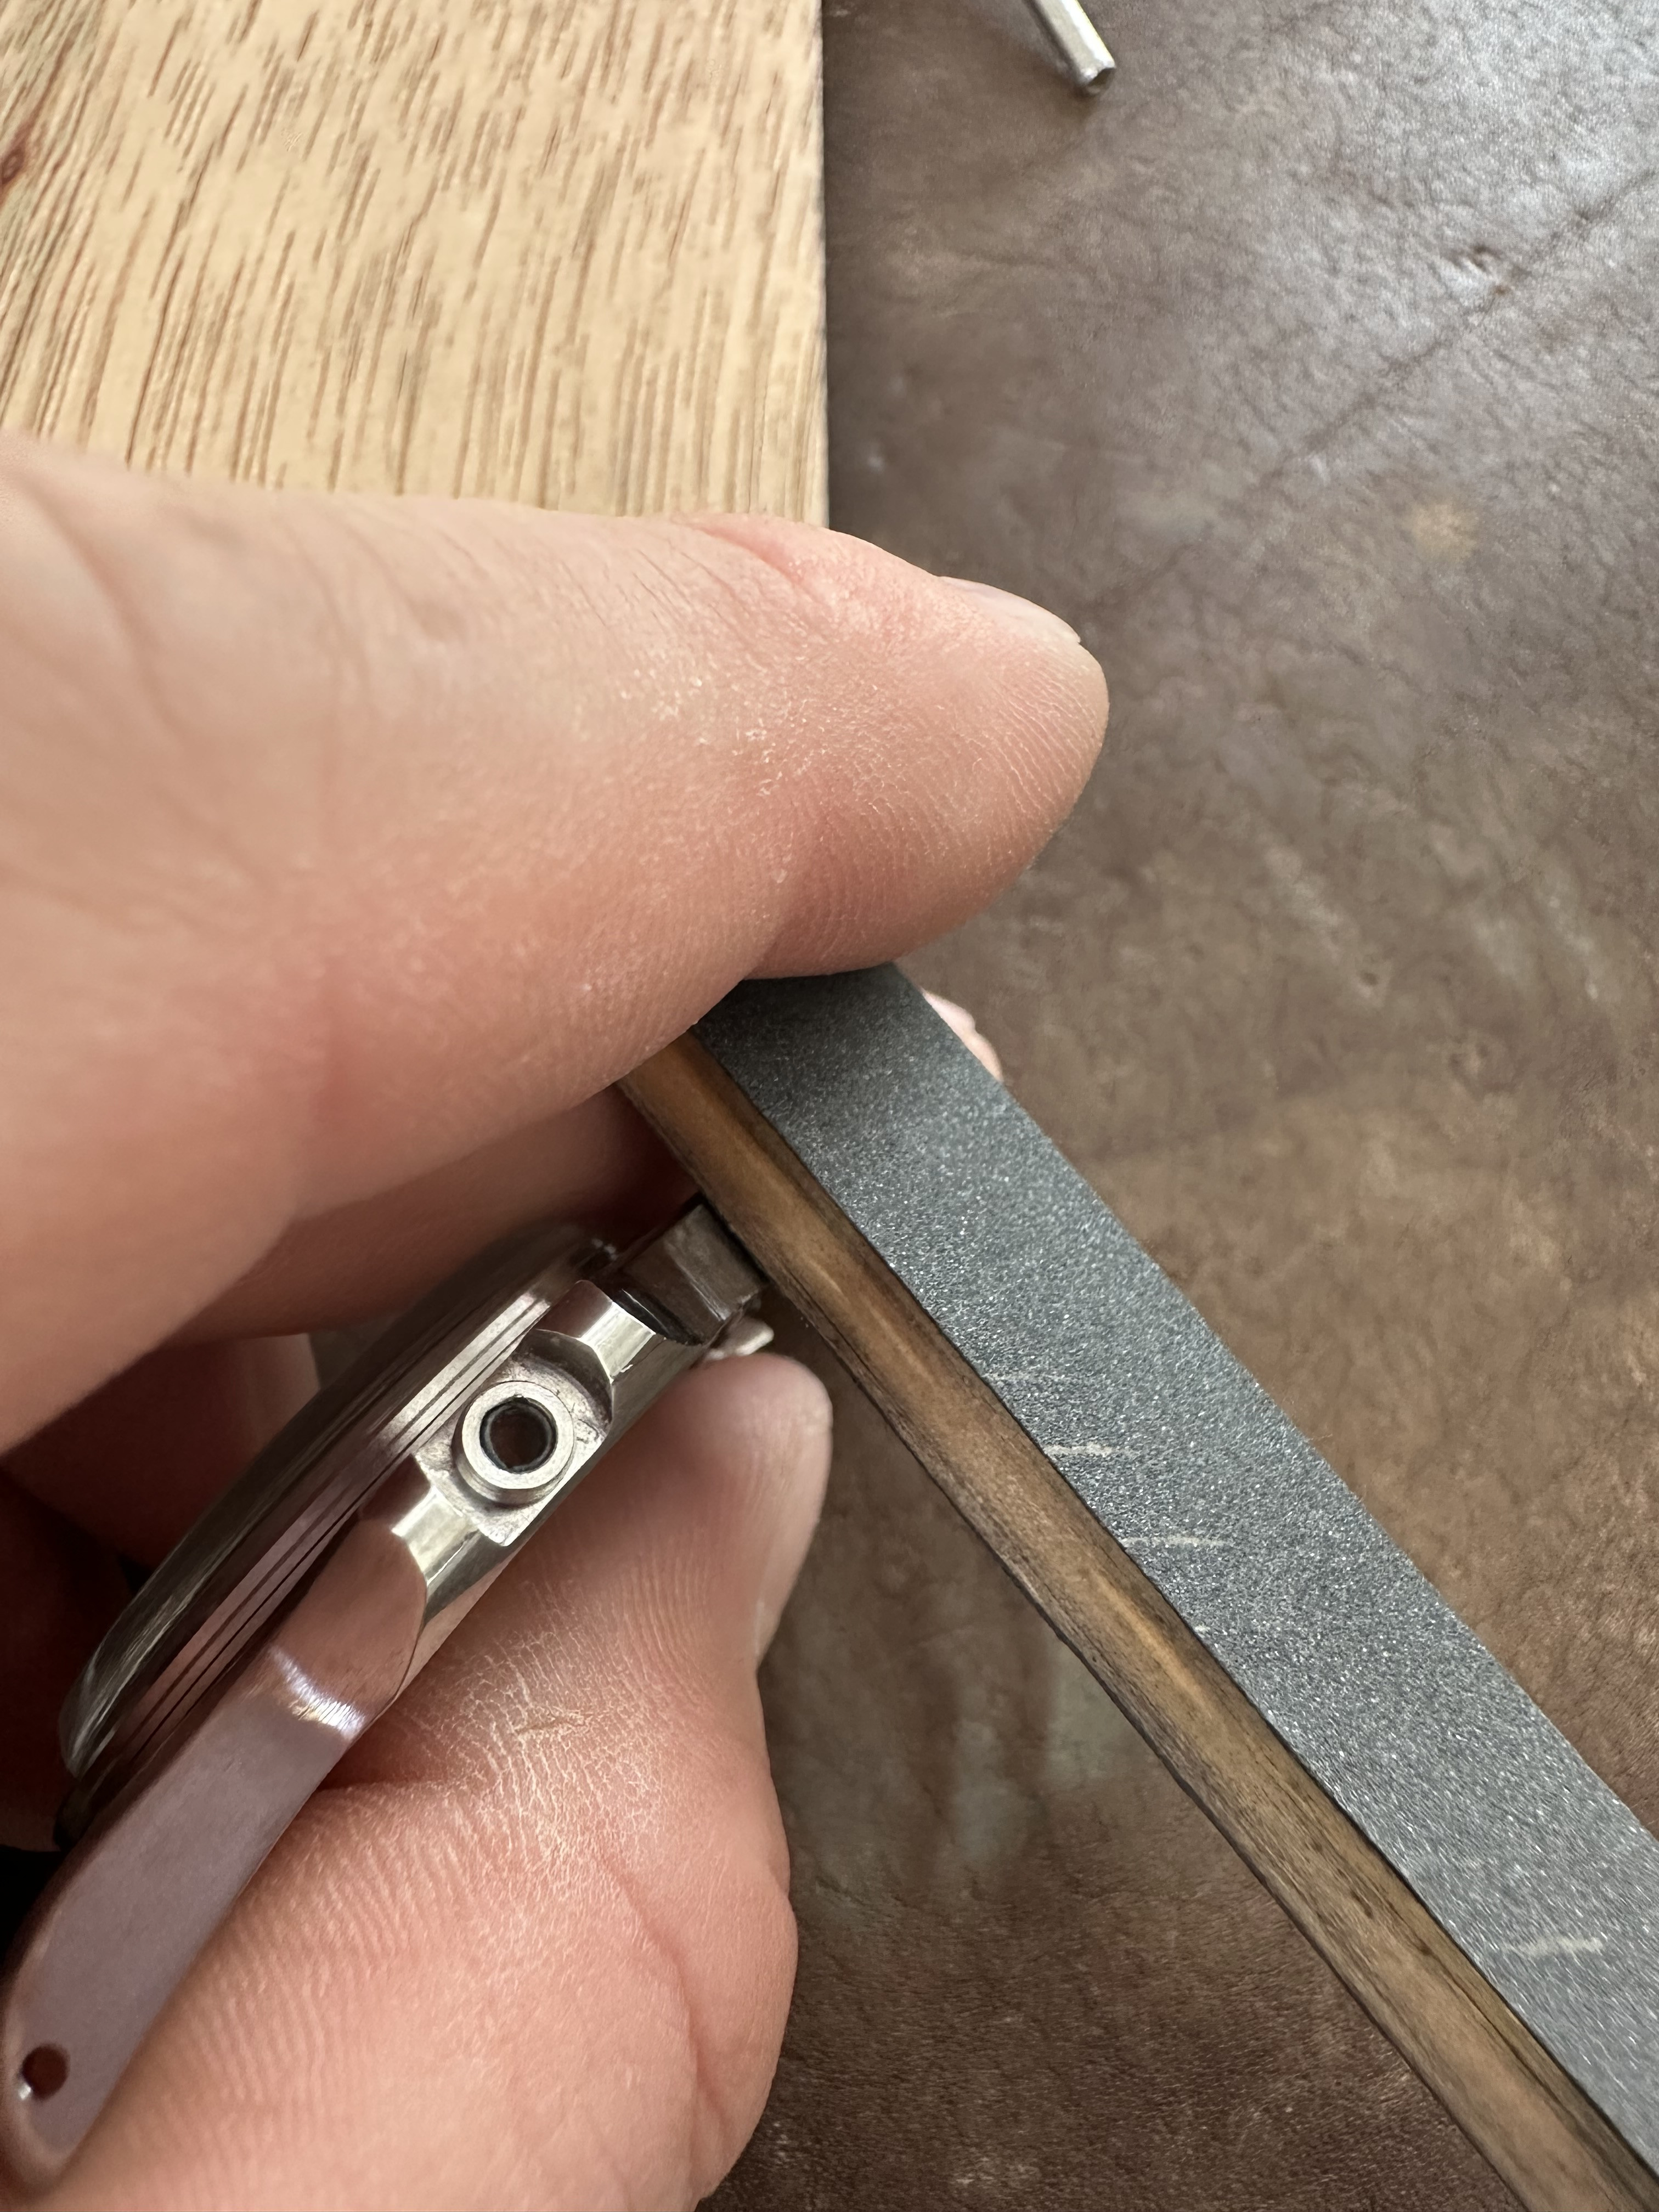
Sanding paper glued to a flat wooden stick for the flanks as well. Always going from coars to fine grits.
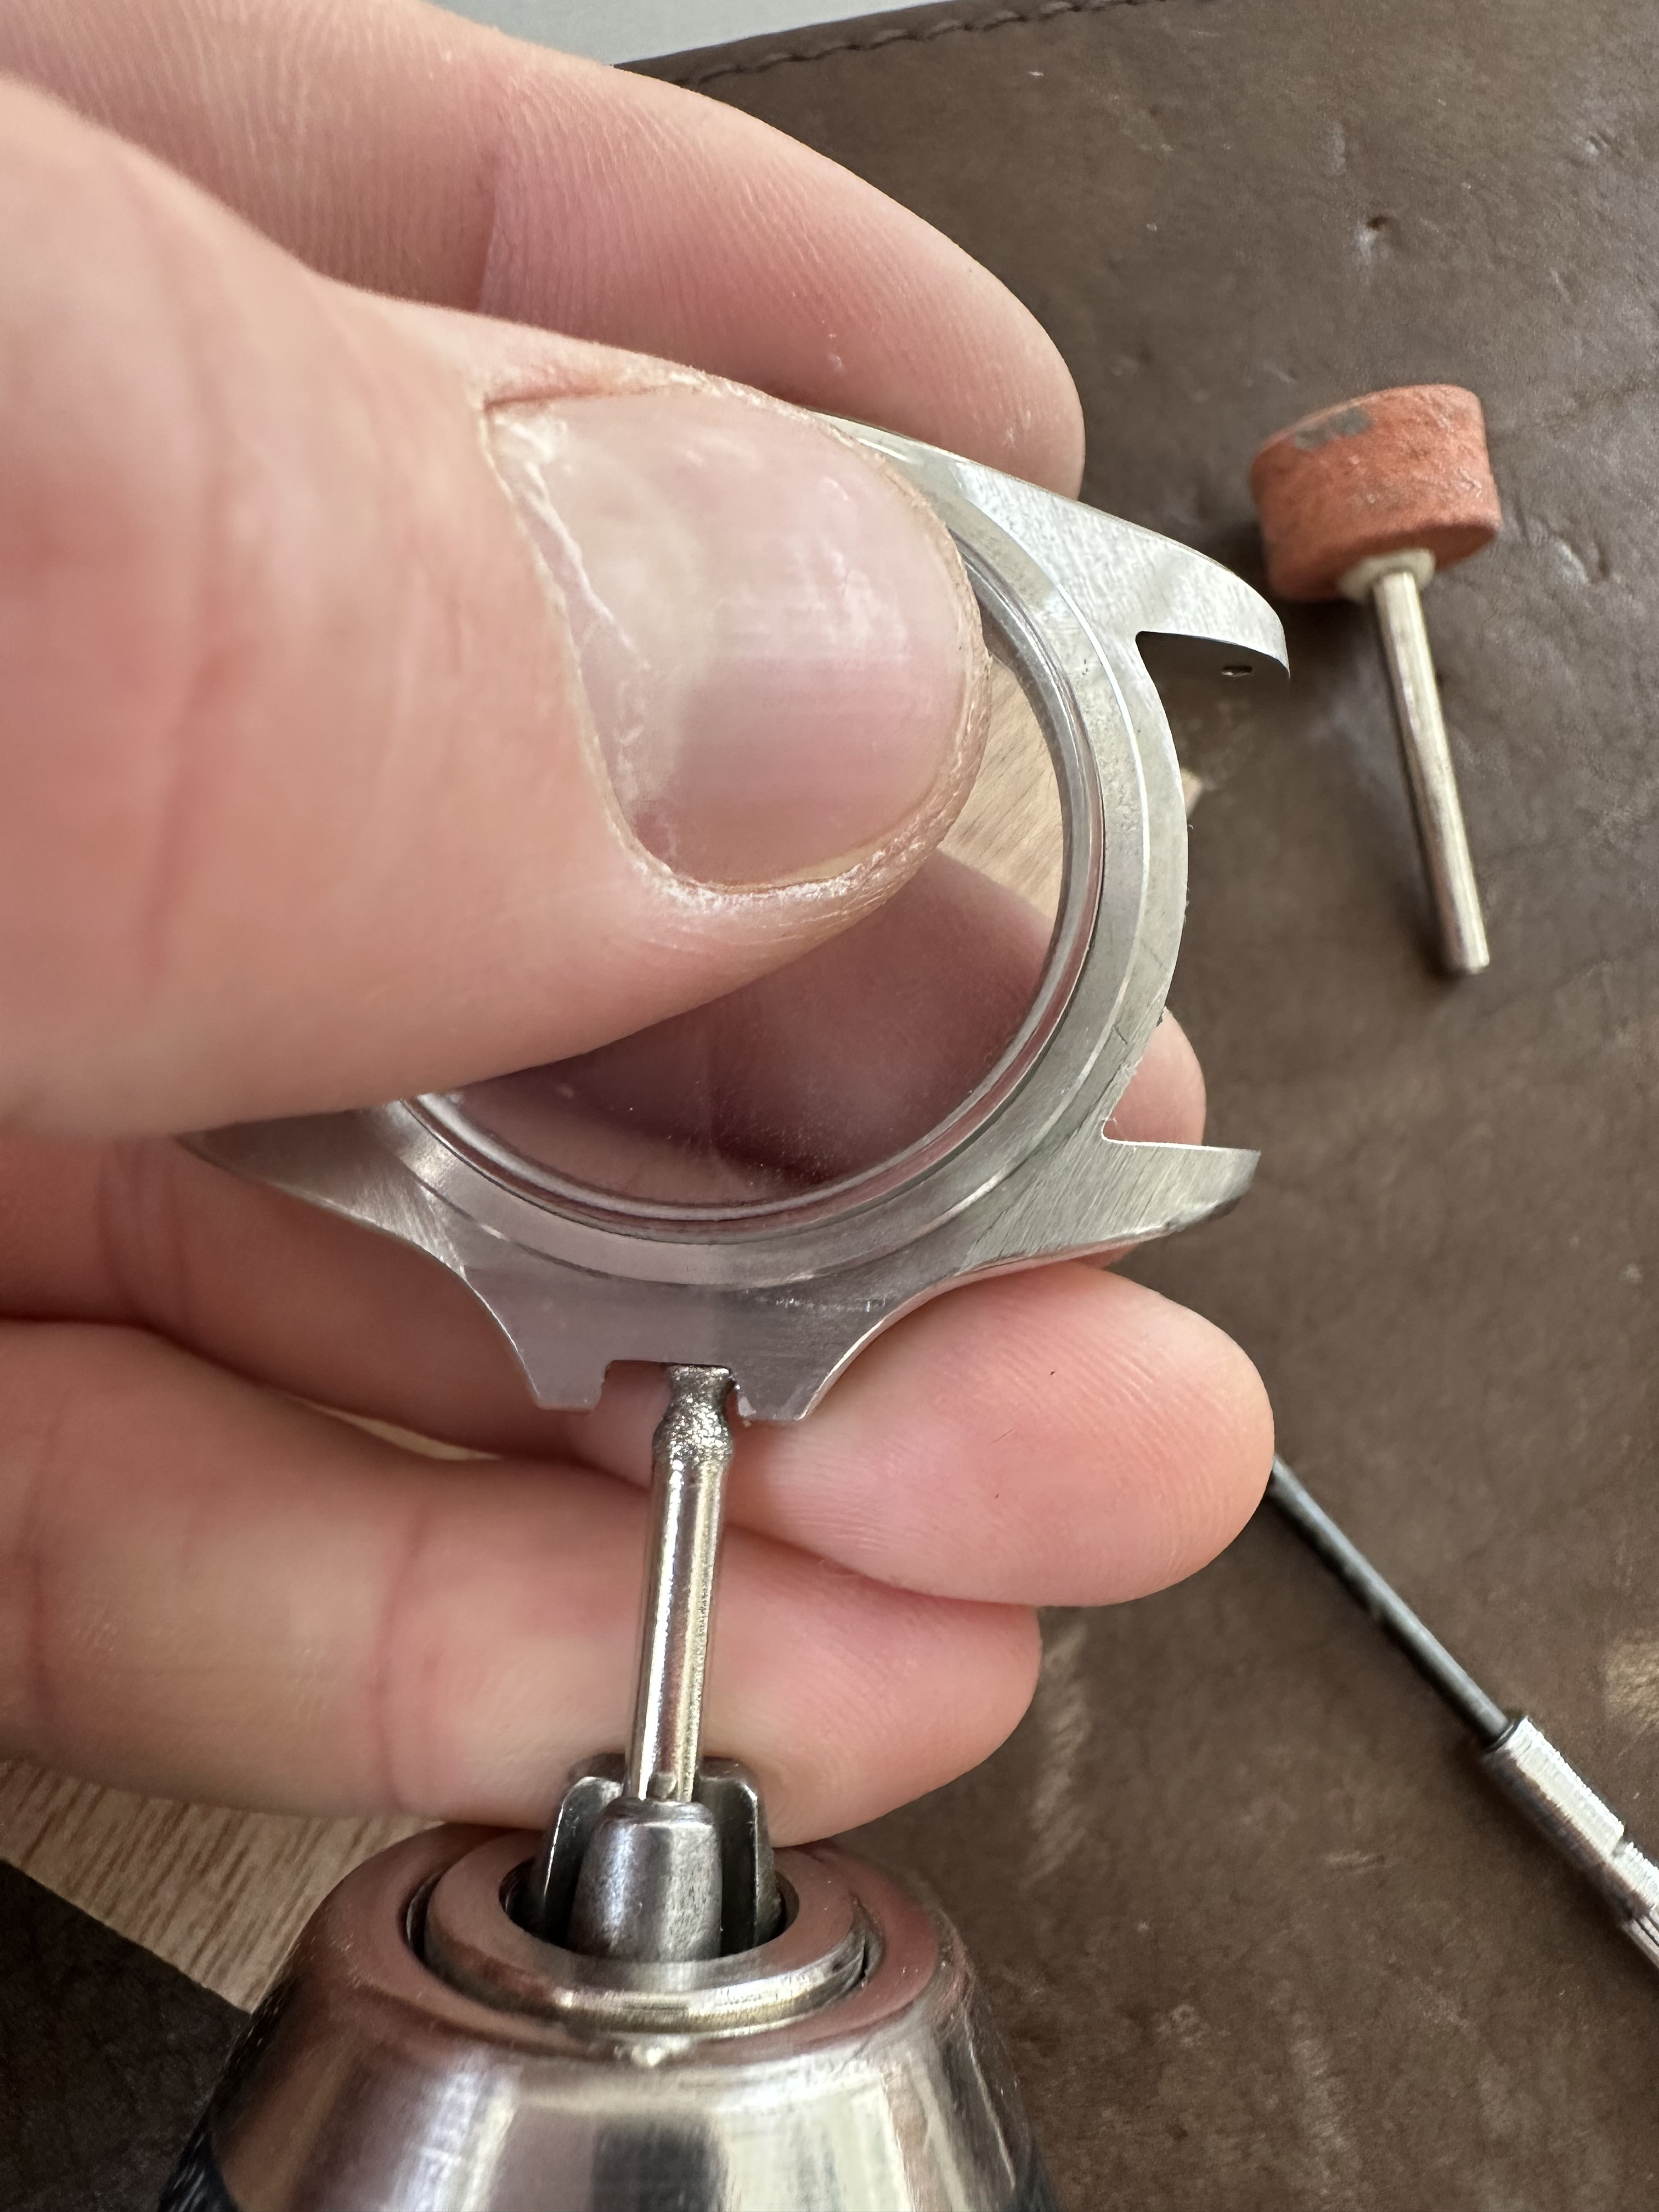
The inside of the crown guards is a bit more tricky.
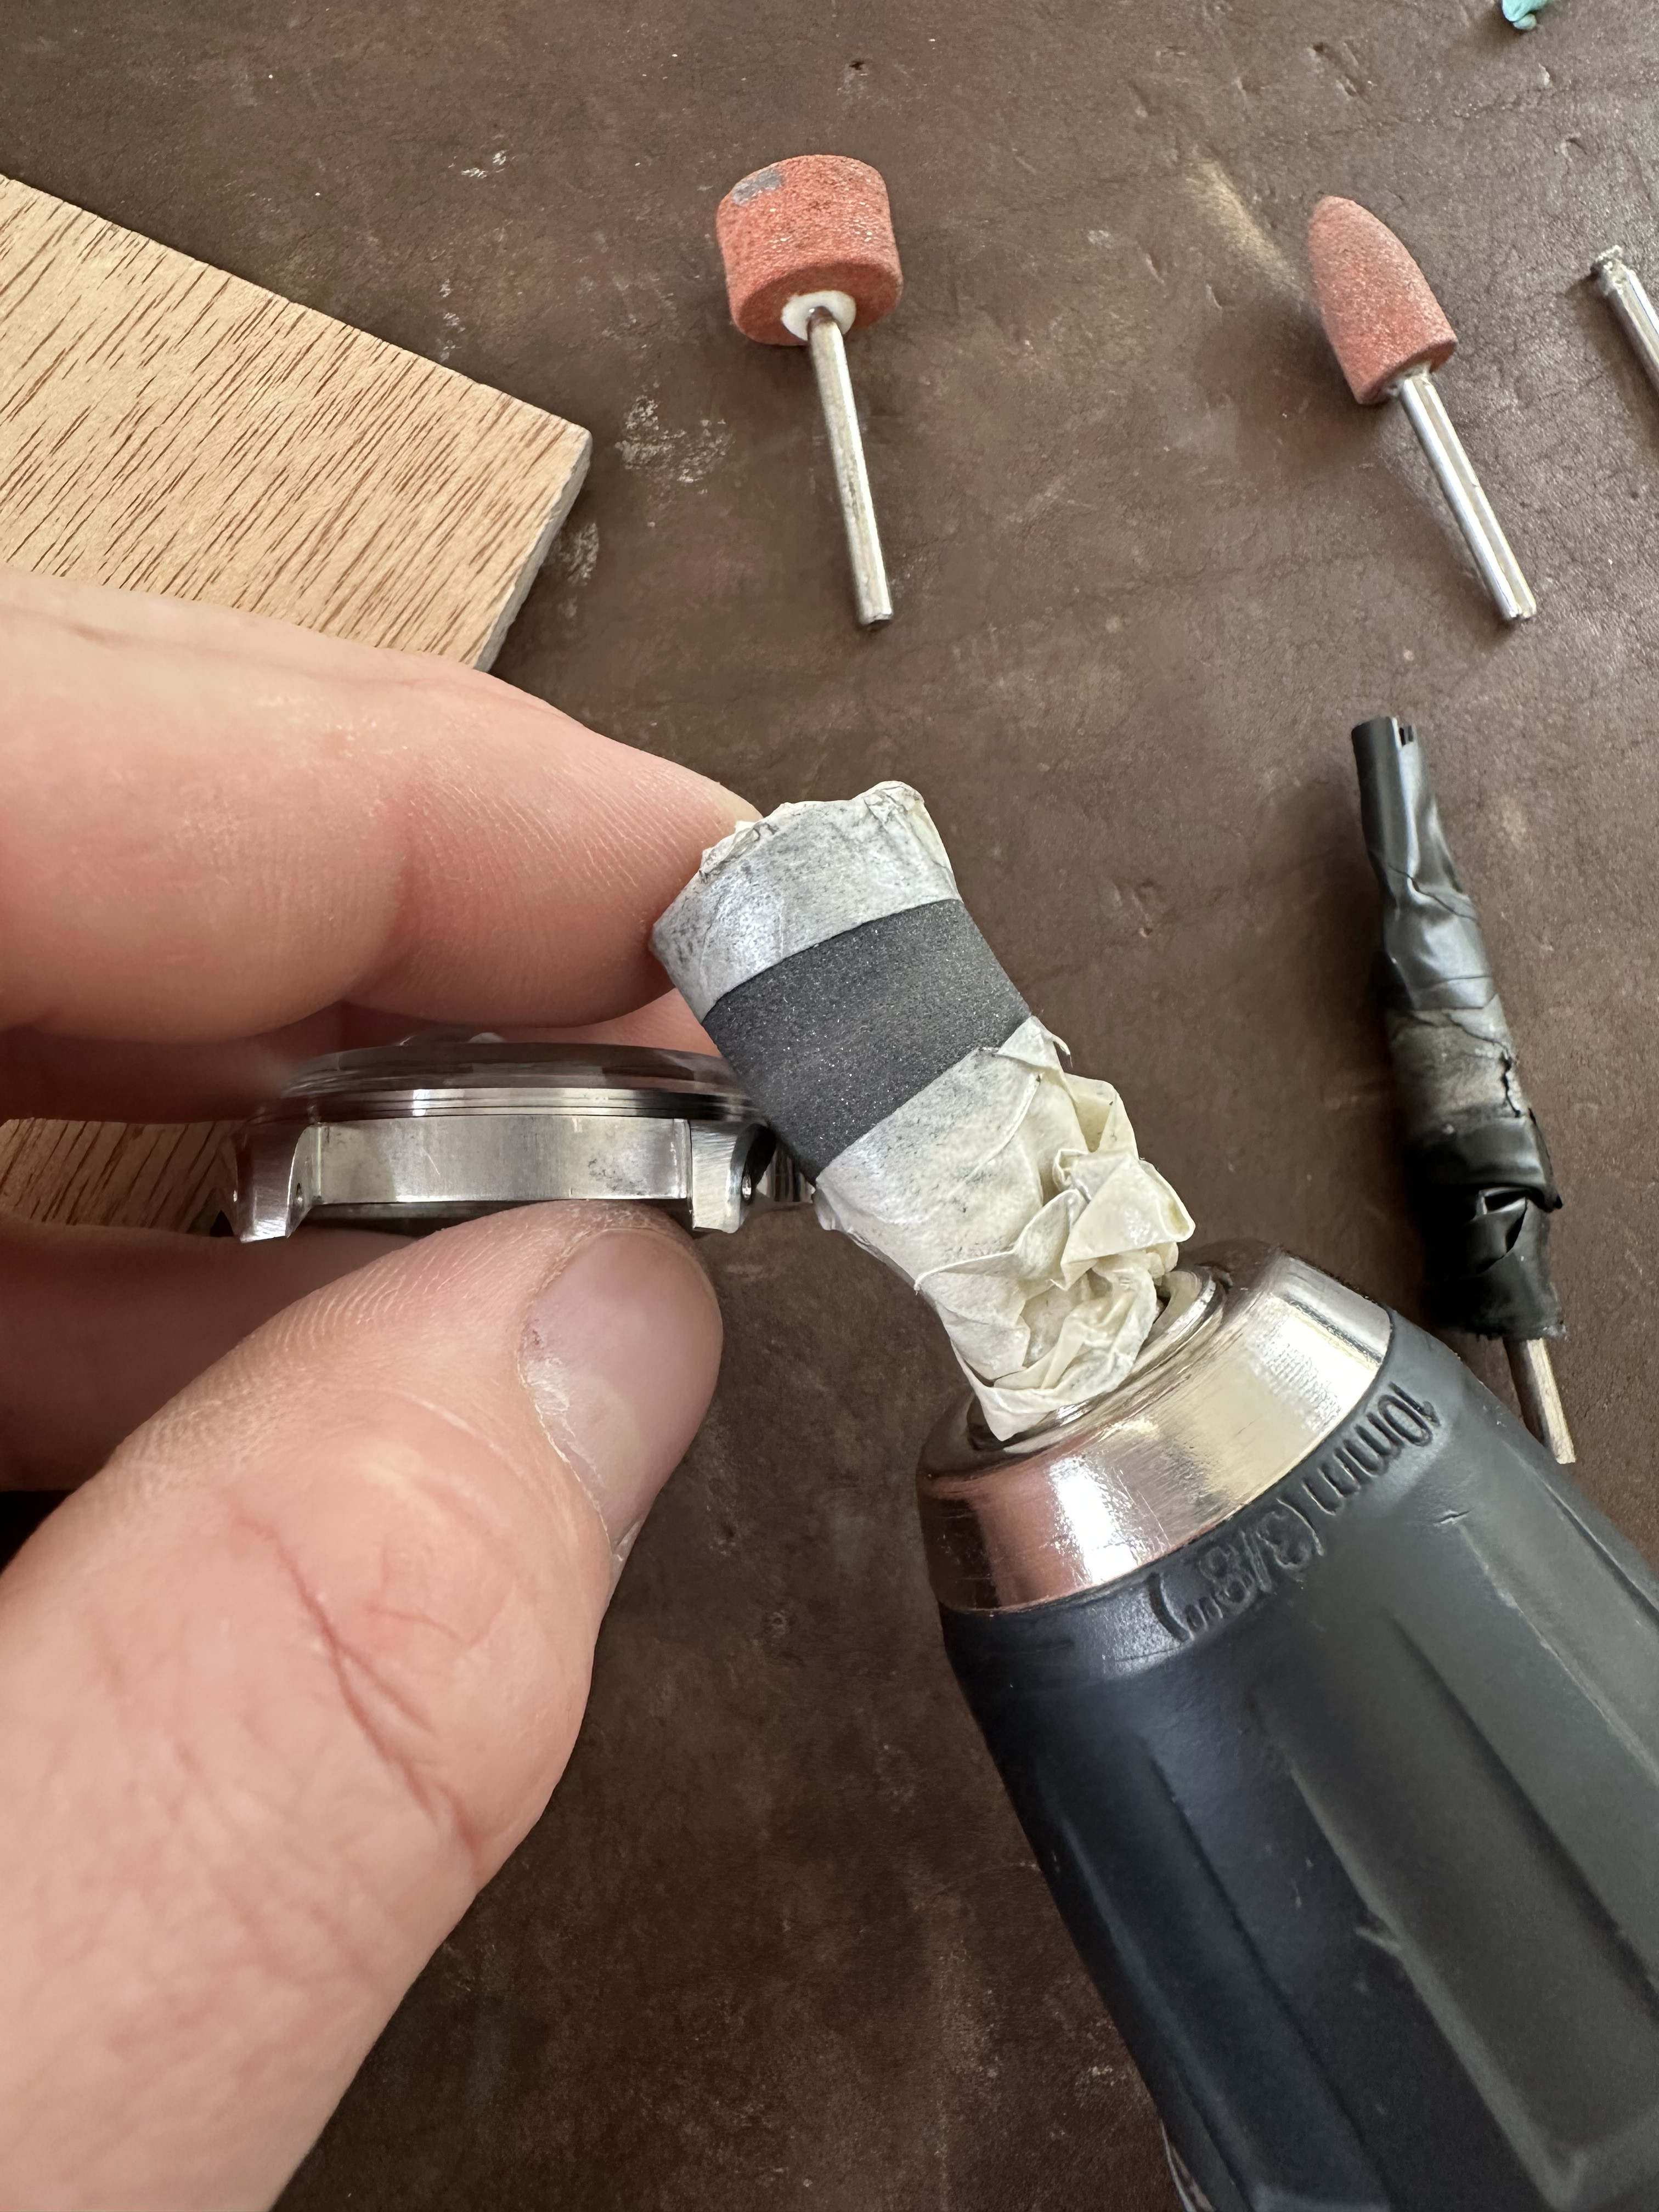
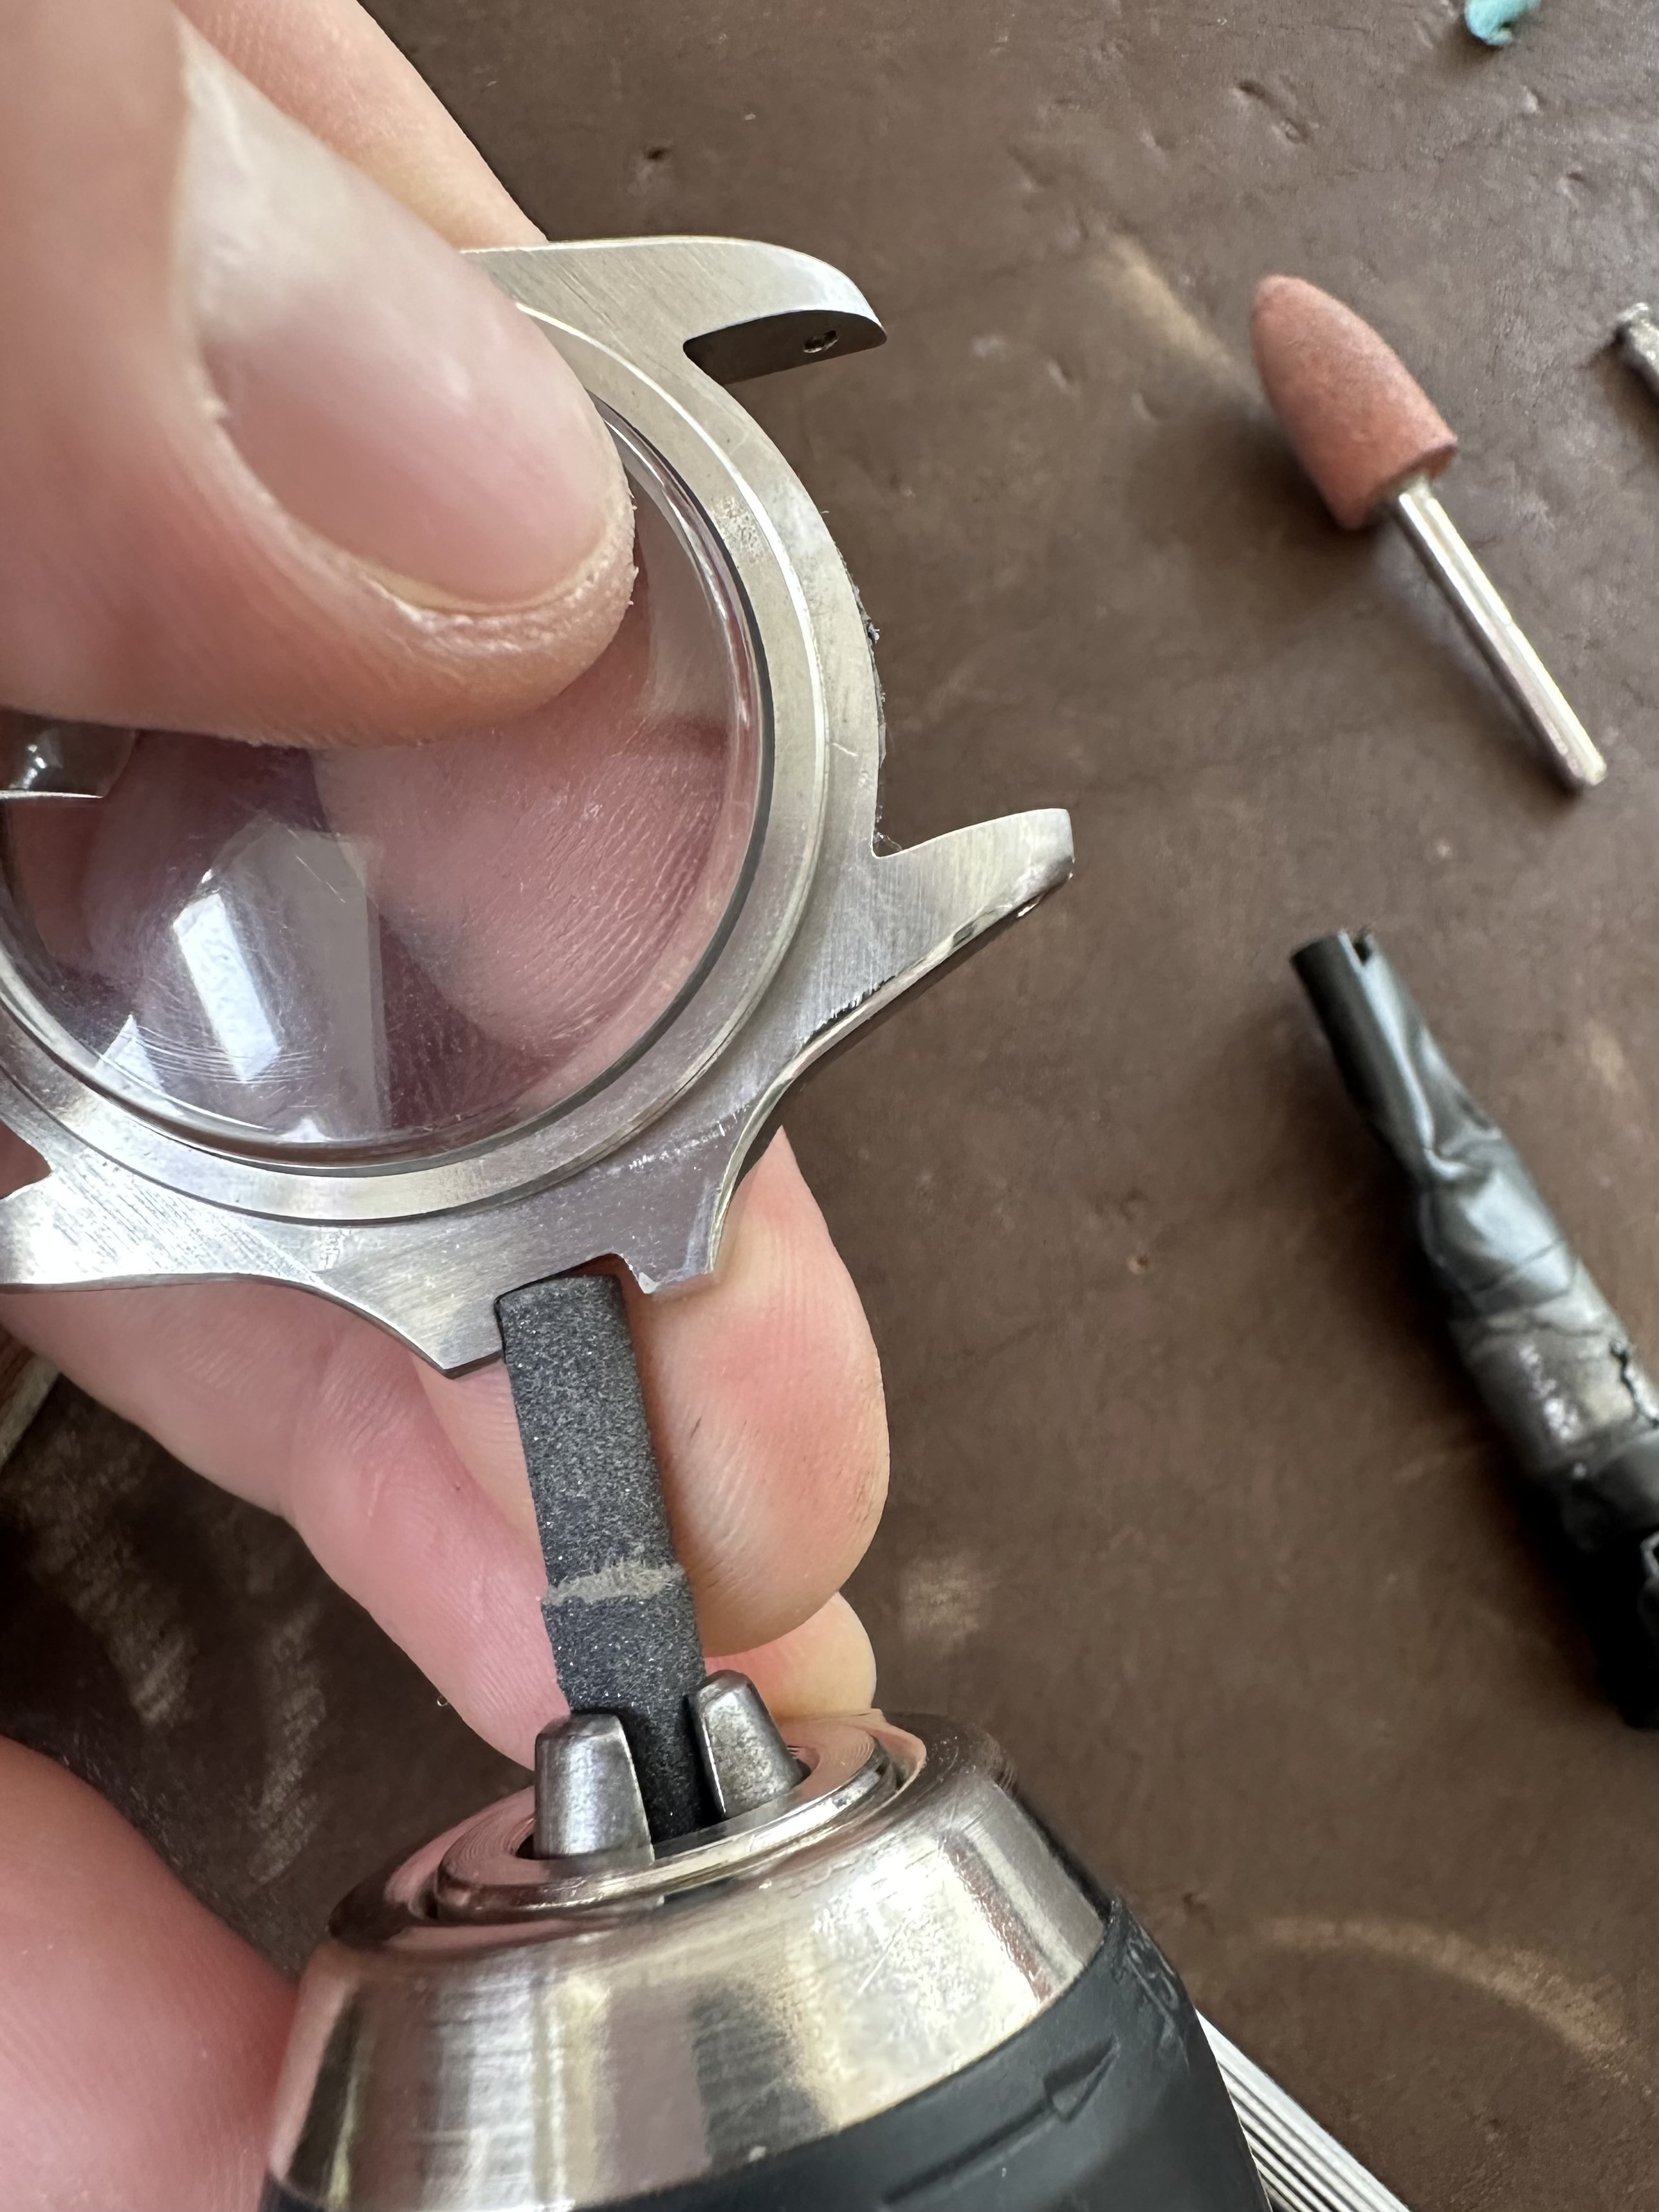
i used a peace of rolled sanding paper and a power drill and one of the dremel metal files. (I would need to take pictures to describe which one
I also used lapping paper and cape cod cloth for the final finish. (Avoid the chamfers, you will round them!)
The whole process was made by hand, not using any holder for the dremel or case.
This gives me the best control, but also needs some serious try and error to get there.
keeping the angles and pressure even is challenging.
I am sure there are more refined ways to do this, but that is what i found out to be the best way for me without professional tools or training
I am quite satisfied myself, still needs a tiny bit of refinement but is almost there.
Mid 60s early rounded crown guards with a flat top was exactly my goal. especially since none of the available options out there offer this specific variation.
unfortunatly i am not at home for the next weeks so i can’t take pictures of the used tools.
If people are interested, i can make a little tutorial once i am back home.
I mostly used dremel tools and sanding paper.
The wood sanding bit from the dremel tool kit for the rough work on the outer crown guards at the start and then i wrapped the flat dremel stone bits with sading paper to go further.
that gives you a really flat surface and good control over the process.
that is what i found out to be the best tool to make or sharpen chamfers as well if you don’t happen to have a lapping machine laying around. (and boy did i try lots of options for chamfers
I messed up 4 watch cases before i had the muscle memory to pull it off
The best tipp i can give is to always try to have a hard and flat surface supporting the sanding paper to avoid rounding any surface on the case. any give underneath the sanding paper will lead to rounded and therefore overpolished looking watch cases.
I used sanding paper layed flat on the table for the underside of the crown guards, sanding paper glued to a flat peace of wood for the top of the CGs.
you need a special construction to guide the movement of the sanding paper on the top, otherwise you will end up rounding up the edges of the flat surface. (I can take pictures once i am home).
Sanding paper glued to a flat wooden stick for the flanks as well. Always going from coars to fine grits.
The inside of the crown guards is a bit more tricky.
i used a peace of rolled sanding paper and a power drill and one of the dremel metal files. (I would need to take pictures to describe which one
I also used lapping paper and cape cod cloth for the final finish. (Avoid the chamfers, you will round them!)
The whole process was made by hand, not using any holder for the dremel or case.
This gives me the best control, but also needs some serious try and error to get there.
keeping the angles and pressure even is challenging.
I am sure there are more refined ways to do this, but that is what i found out to be the best way for me without professional tools or training

