UK based. I was thinking about going to a commercial place to print. I was a bit worried they may refuse though.If you are US based I found the UPS store’s printer worked perfectly. High chance of gumming up their printer and being banned from using that paper though. You will have to tape it down to a plain sheet before it gets fed into the paper tray. They should have the same printer across all locations is my guess. Some big industrial laser printer. No need to adjust settings. It just worked well.
-
Tired of adverts on RWI? - Subscribe by clicking HERE and PMing Trailboss for instructions and they will magically go away!
You are using an out of date browser. It may not display this or other websites correctly.
You should upgrade or use an alternative browser.
You should upgrade or use an alternative browser.
Making a gilt dial (not decal)
- Thread starter chrome72
- Start date
From my learnings xerox machines work well. A grocery store might have one or public library. You might be able to sneak your own paper in it.
bigtiddygothgf
Active Member
- 7/10/18
- 323
- 149
- 43
if you dont mind sharing, what printer are you using? your results always look incredible.Yes Sirfilm free method ...
- 13/10/16
- 4,013
- 2,661
- 113
if you dont mind sharing, what printer are you using? your results always look incredible.
many thanks for the "incredible" ... though I guess it's a little bit exagerated

I print on a RICOH IM C4500 ... professional printer we have at the office that can print natively up to 1200/1200
After years of trials on different printers I think that printer's quality is just part of the algorithm, the only "mandatory" fact beeing that you need to print 1200/1200 NATIVELY and not through interpolation (almost all 600/600 printers can print "interpolated 120/200).
Every printer owns it's specific drivers and the REAL definition (what you really get when you print) depends on drivers.
With some printers you get better results using designs with a much higher definition than the native printer's capacity ... with others yuo'd better use lower def designs ...
With our old printer I got my best results using designs at 4000/4000 ppi.
With the new one the prints became "blurry" so I had to redo my designs at 2400/2400 ppi.
BTW ... all my designs are vectors made on Illustrator and I print using Photoshop.
So it's all a story of trials and fails and success ...
You first need to get a printer than can do native 1200/1200 ppi without any interpolation then the trials start ... 2400/2400 design, 4000/4000 design, sometimes 600/600 designs if you want simulate some aging while printing.
Depending on the quality of the drivers you will have to make a really crispy desing or introduce some "blur" on it to get a "perfect" result.
Another important thing is the color mode you use while designing and printing ... I always use CMNJ mode and my "black" evolve between 80/4050/100 to 80/80/570/100 depending on the result I want to get and, of course, the printer's drivers as I always let the printer determine colors on Photoshop.
Starting from that, and after filling your wastpaper basket with a huge quantity of film-free sheet (yes ... result depends on the paper too so all my print tests are made on the same paper I will use for final work) you should get pretty crispy results.
- 13/10/16
- 4,013
- 2,661
- 113
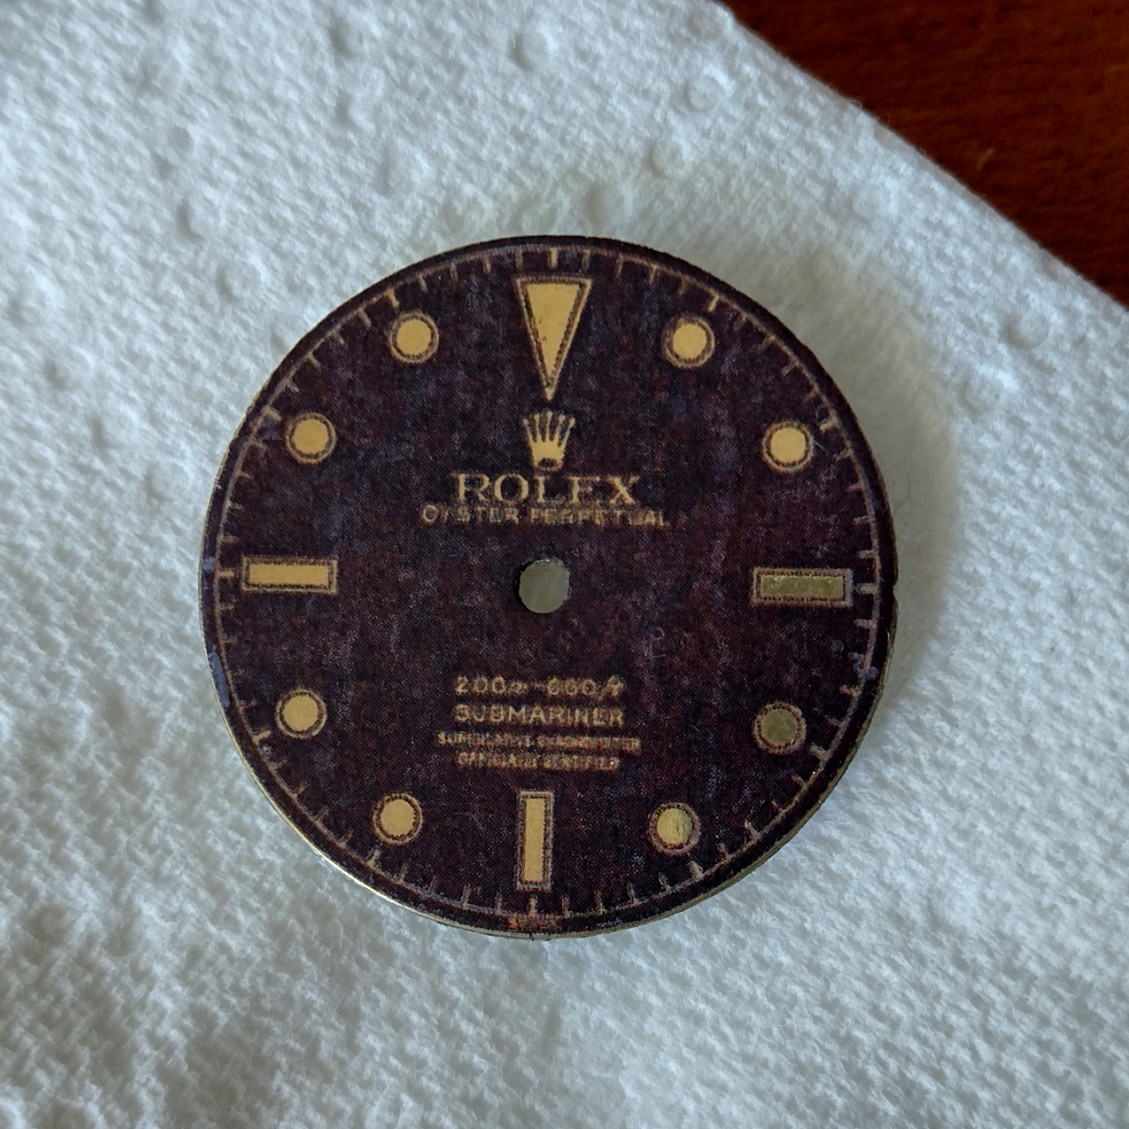
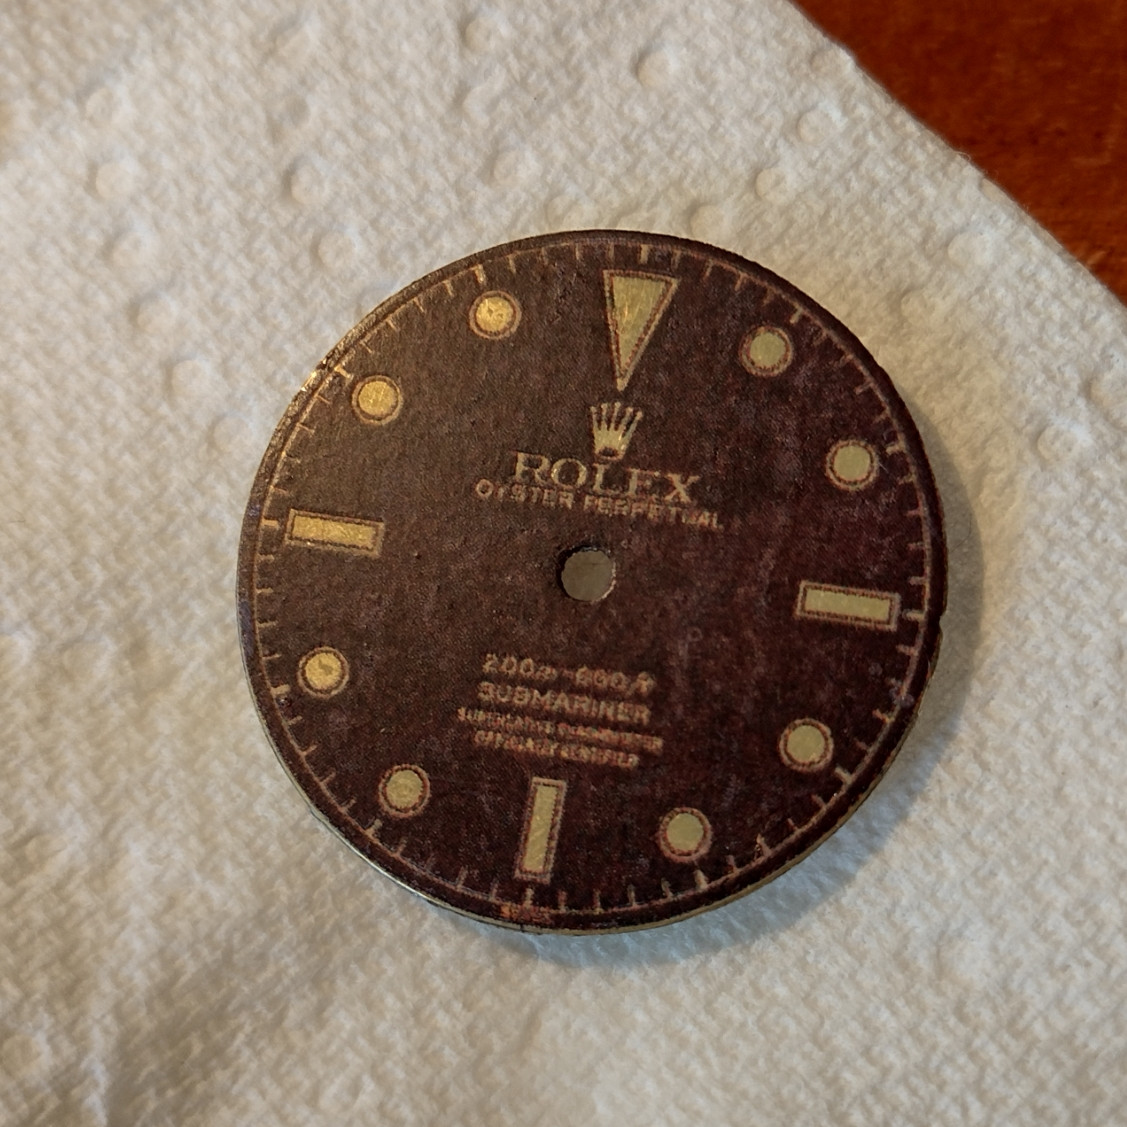
still making print t tests with the 4 lines 5512 ...
this weekend I tried to make a Tropical one
not a real succes but I got a nice Chocolate brown effect wrote some notes about the process so that I can try to reproduce it ...
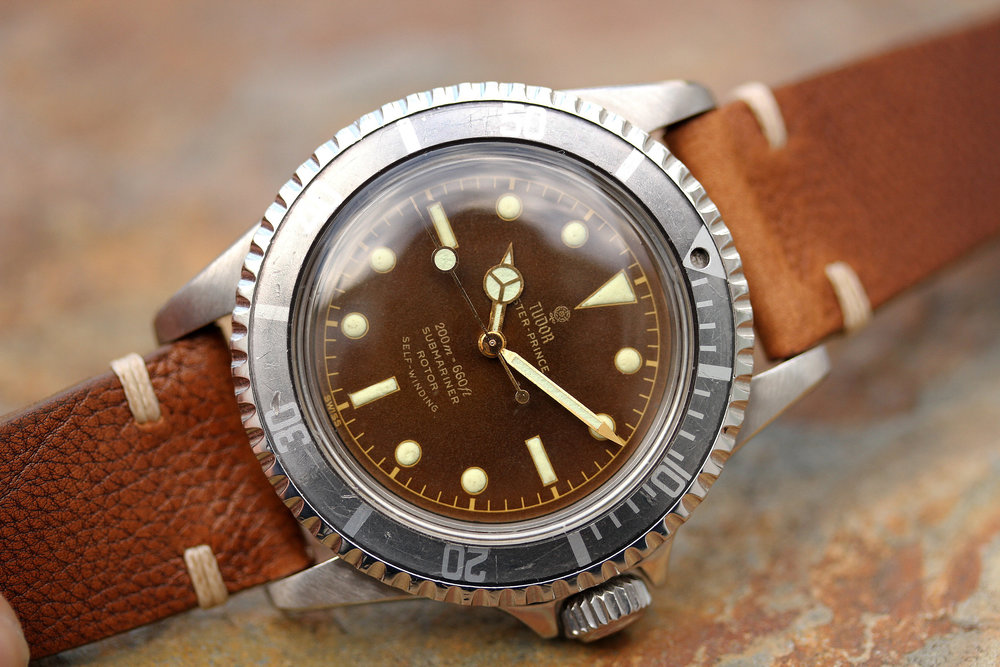
maybe with some more efforts I could achieve something like this
this weekend I tried to make a Tropical one
not a real succes but I got a nice Chocolate brown effect
wrote some notes about the process so that I can try to reproduce it ...
maybe with some more efforts I could achieve something like this
That is my goal too! I have achieved the color in my tests of oxidation of the brass.maybe with some more efforts I could achieve something like this
GuillermoUgarte
Known Member
- 13/10/16
- 4,013
- 2,661
- 113
Working on a radial dial project still just mockups but one will exist in real ...
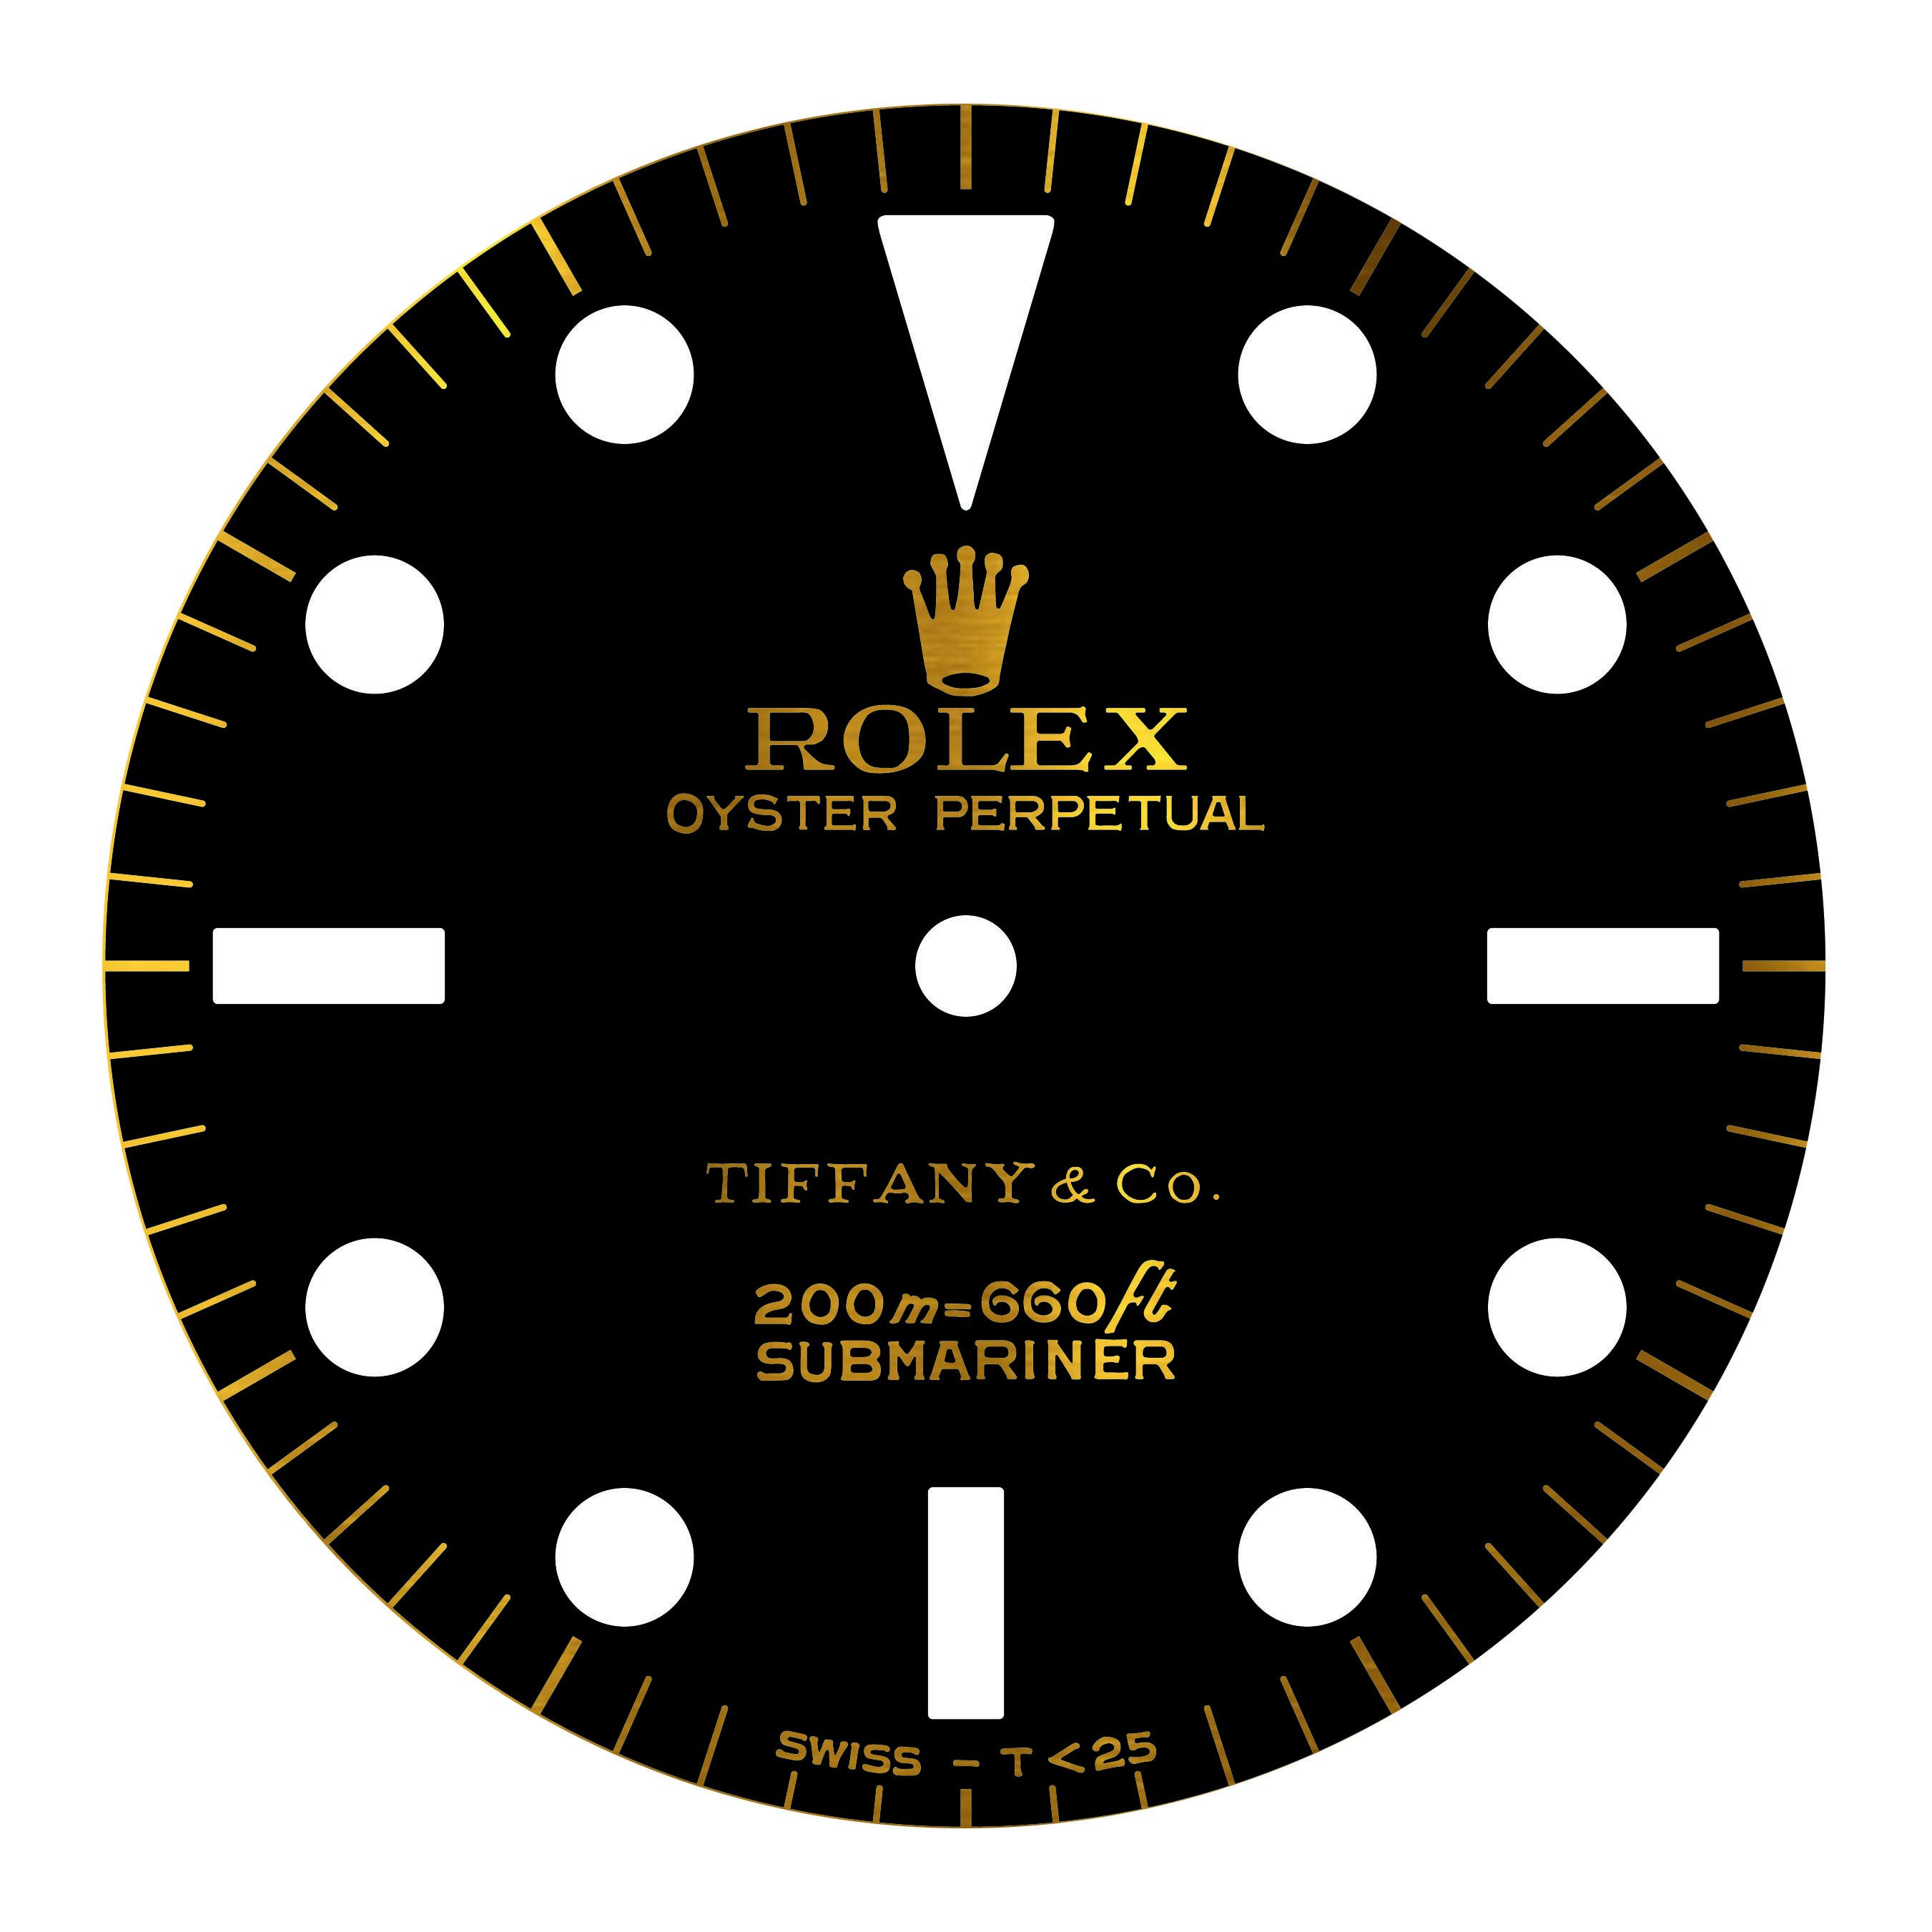
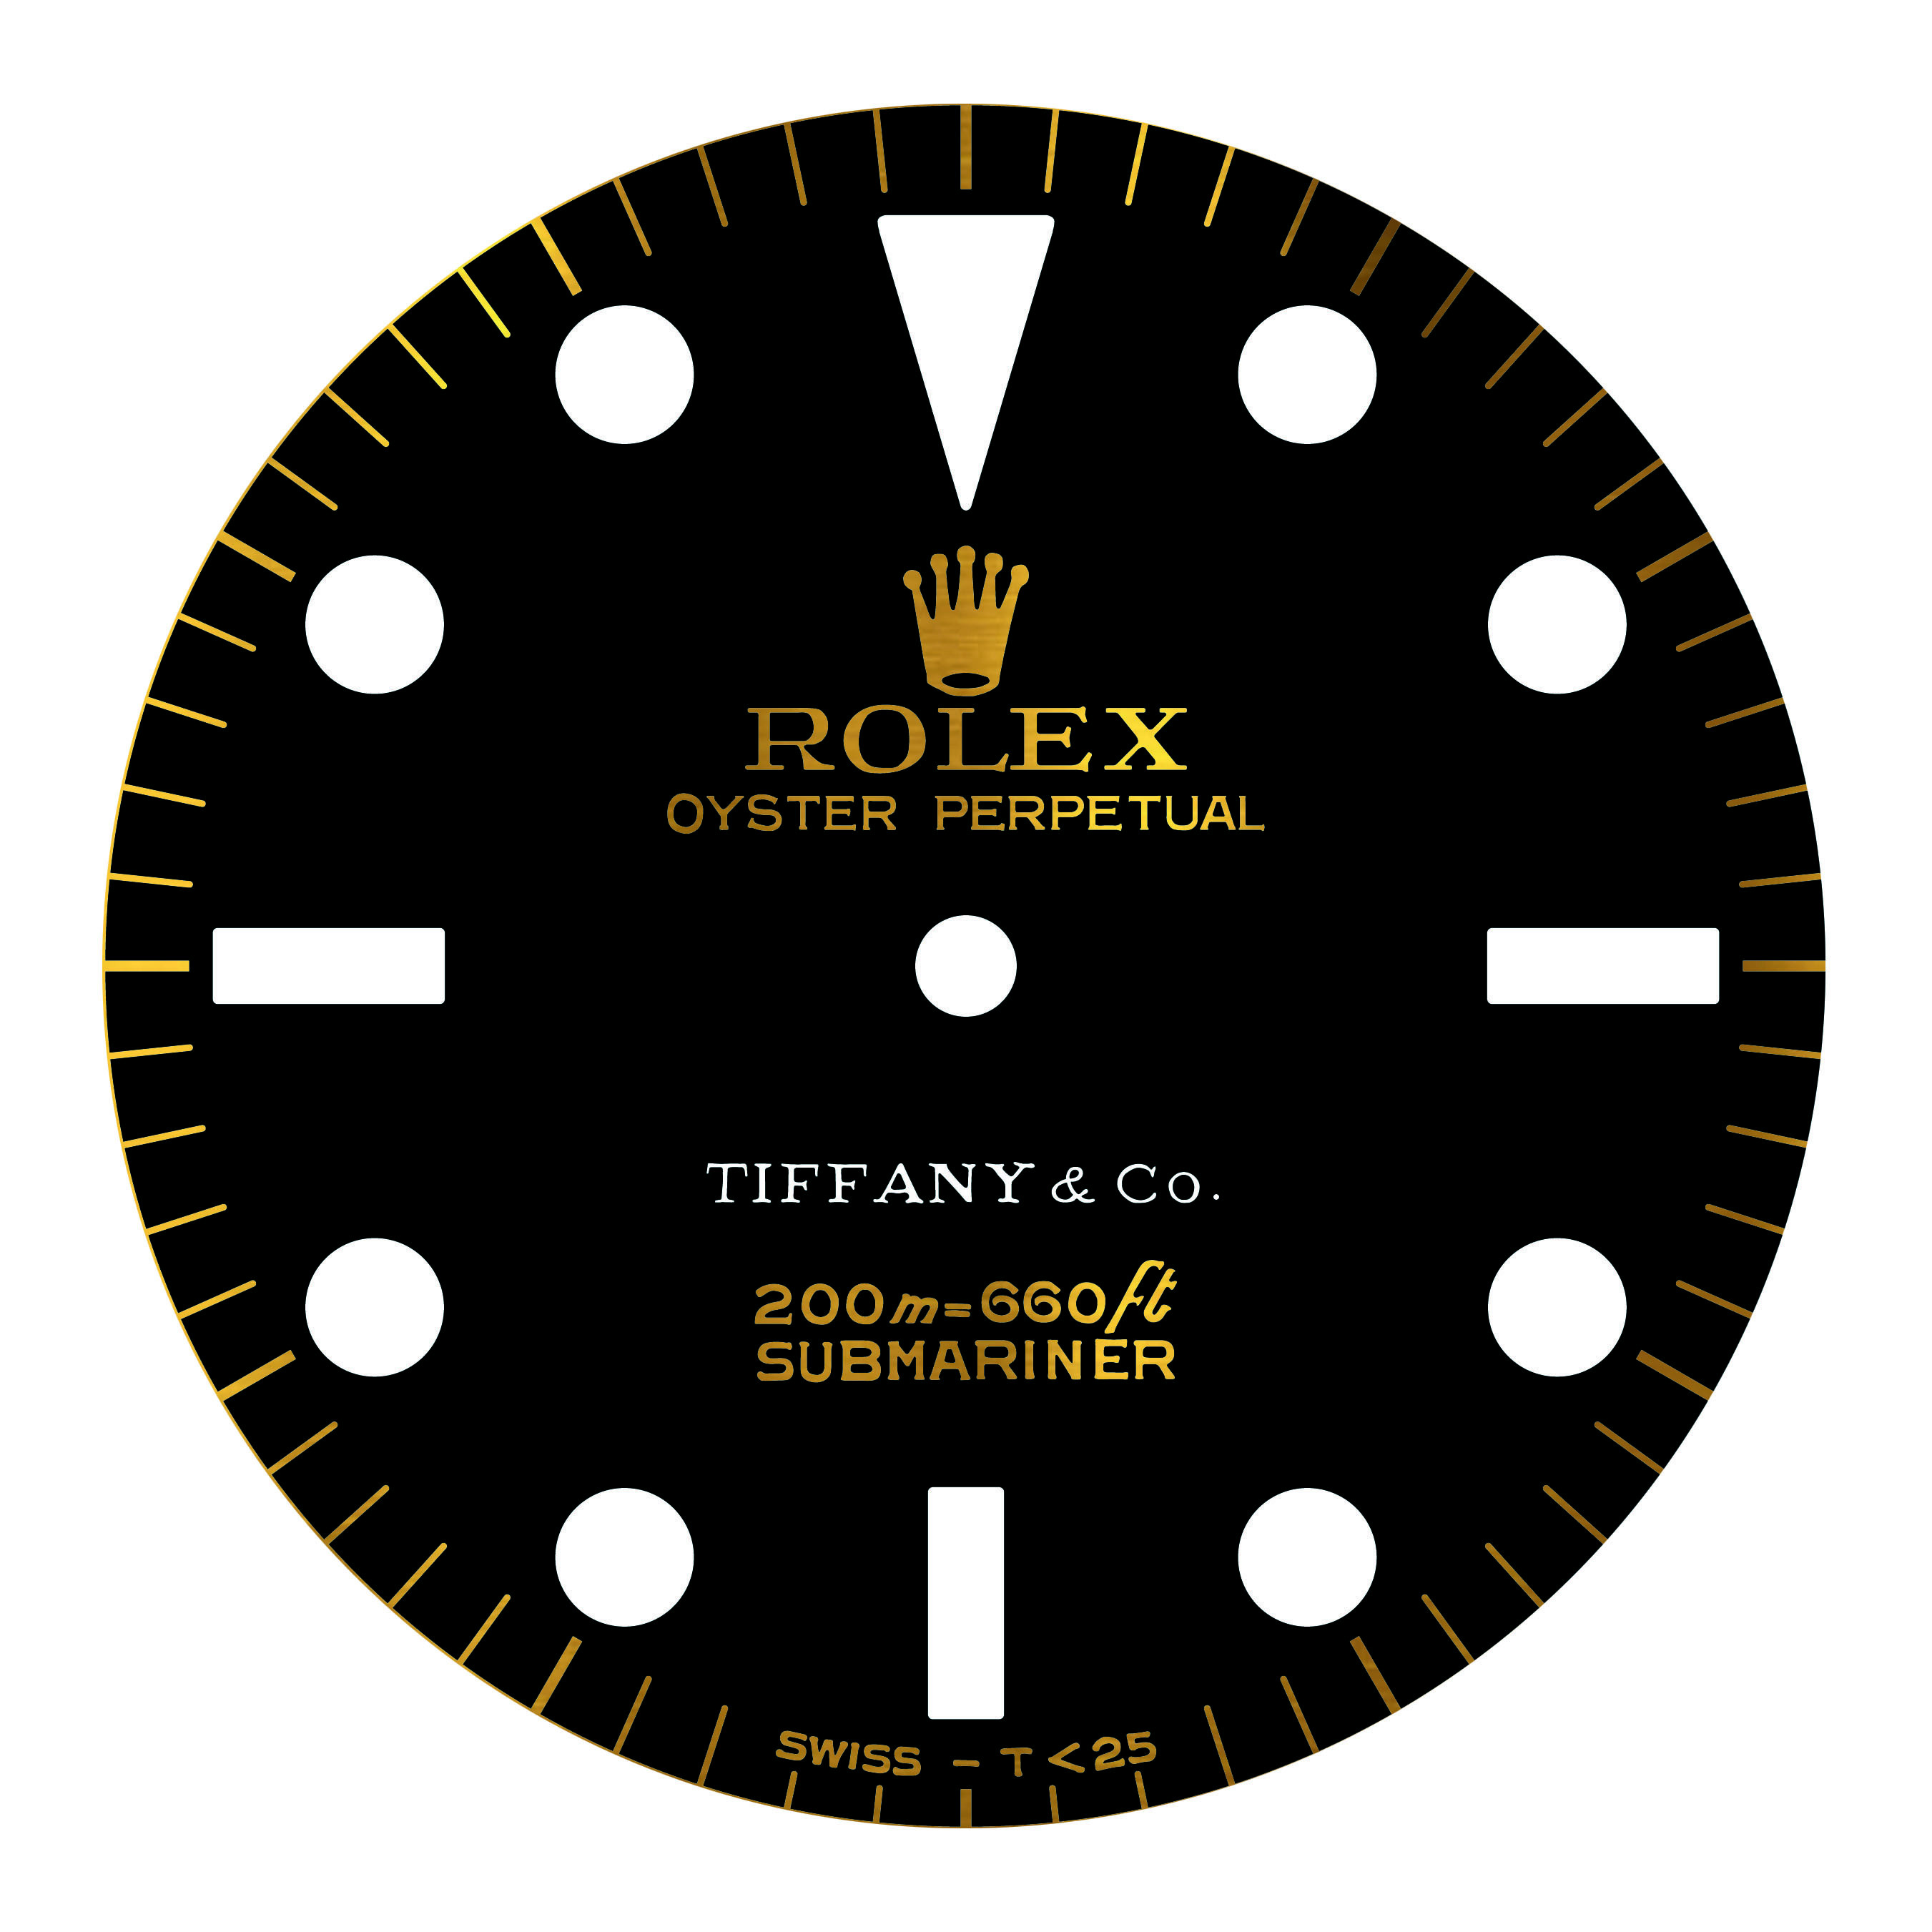
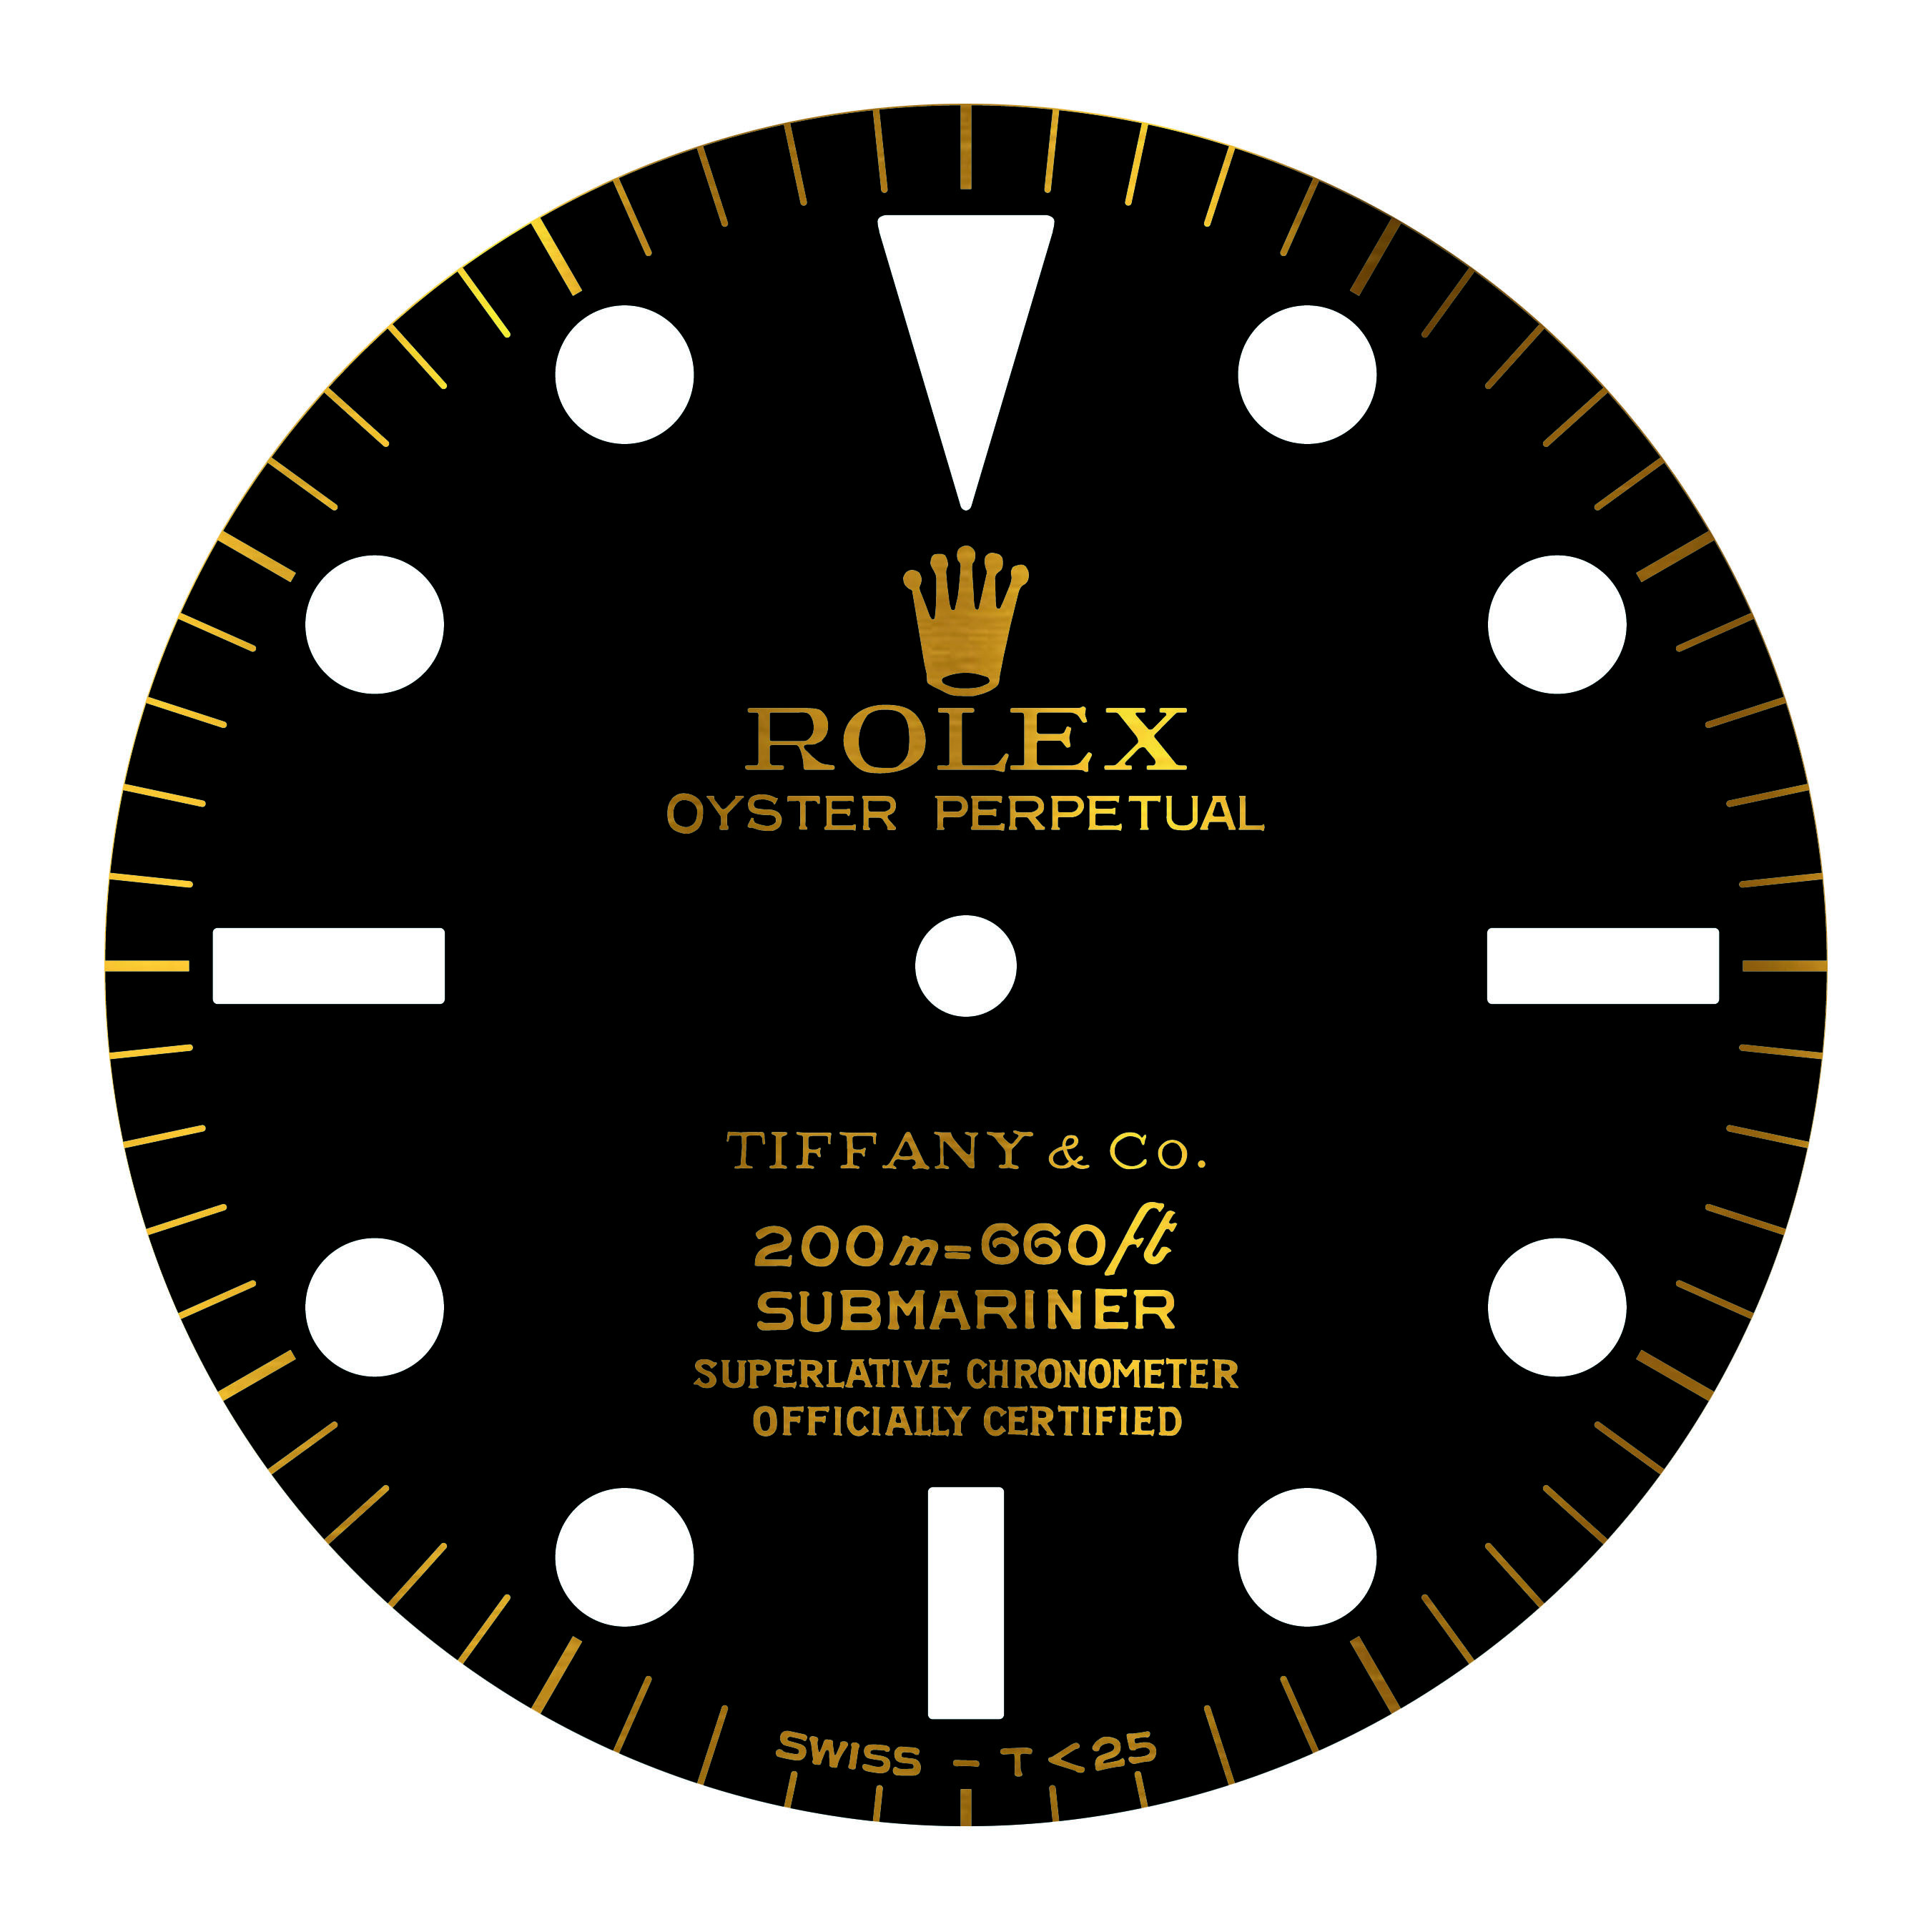
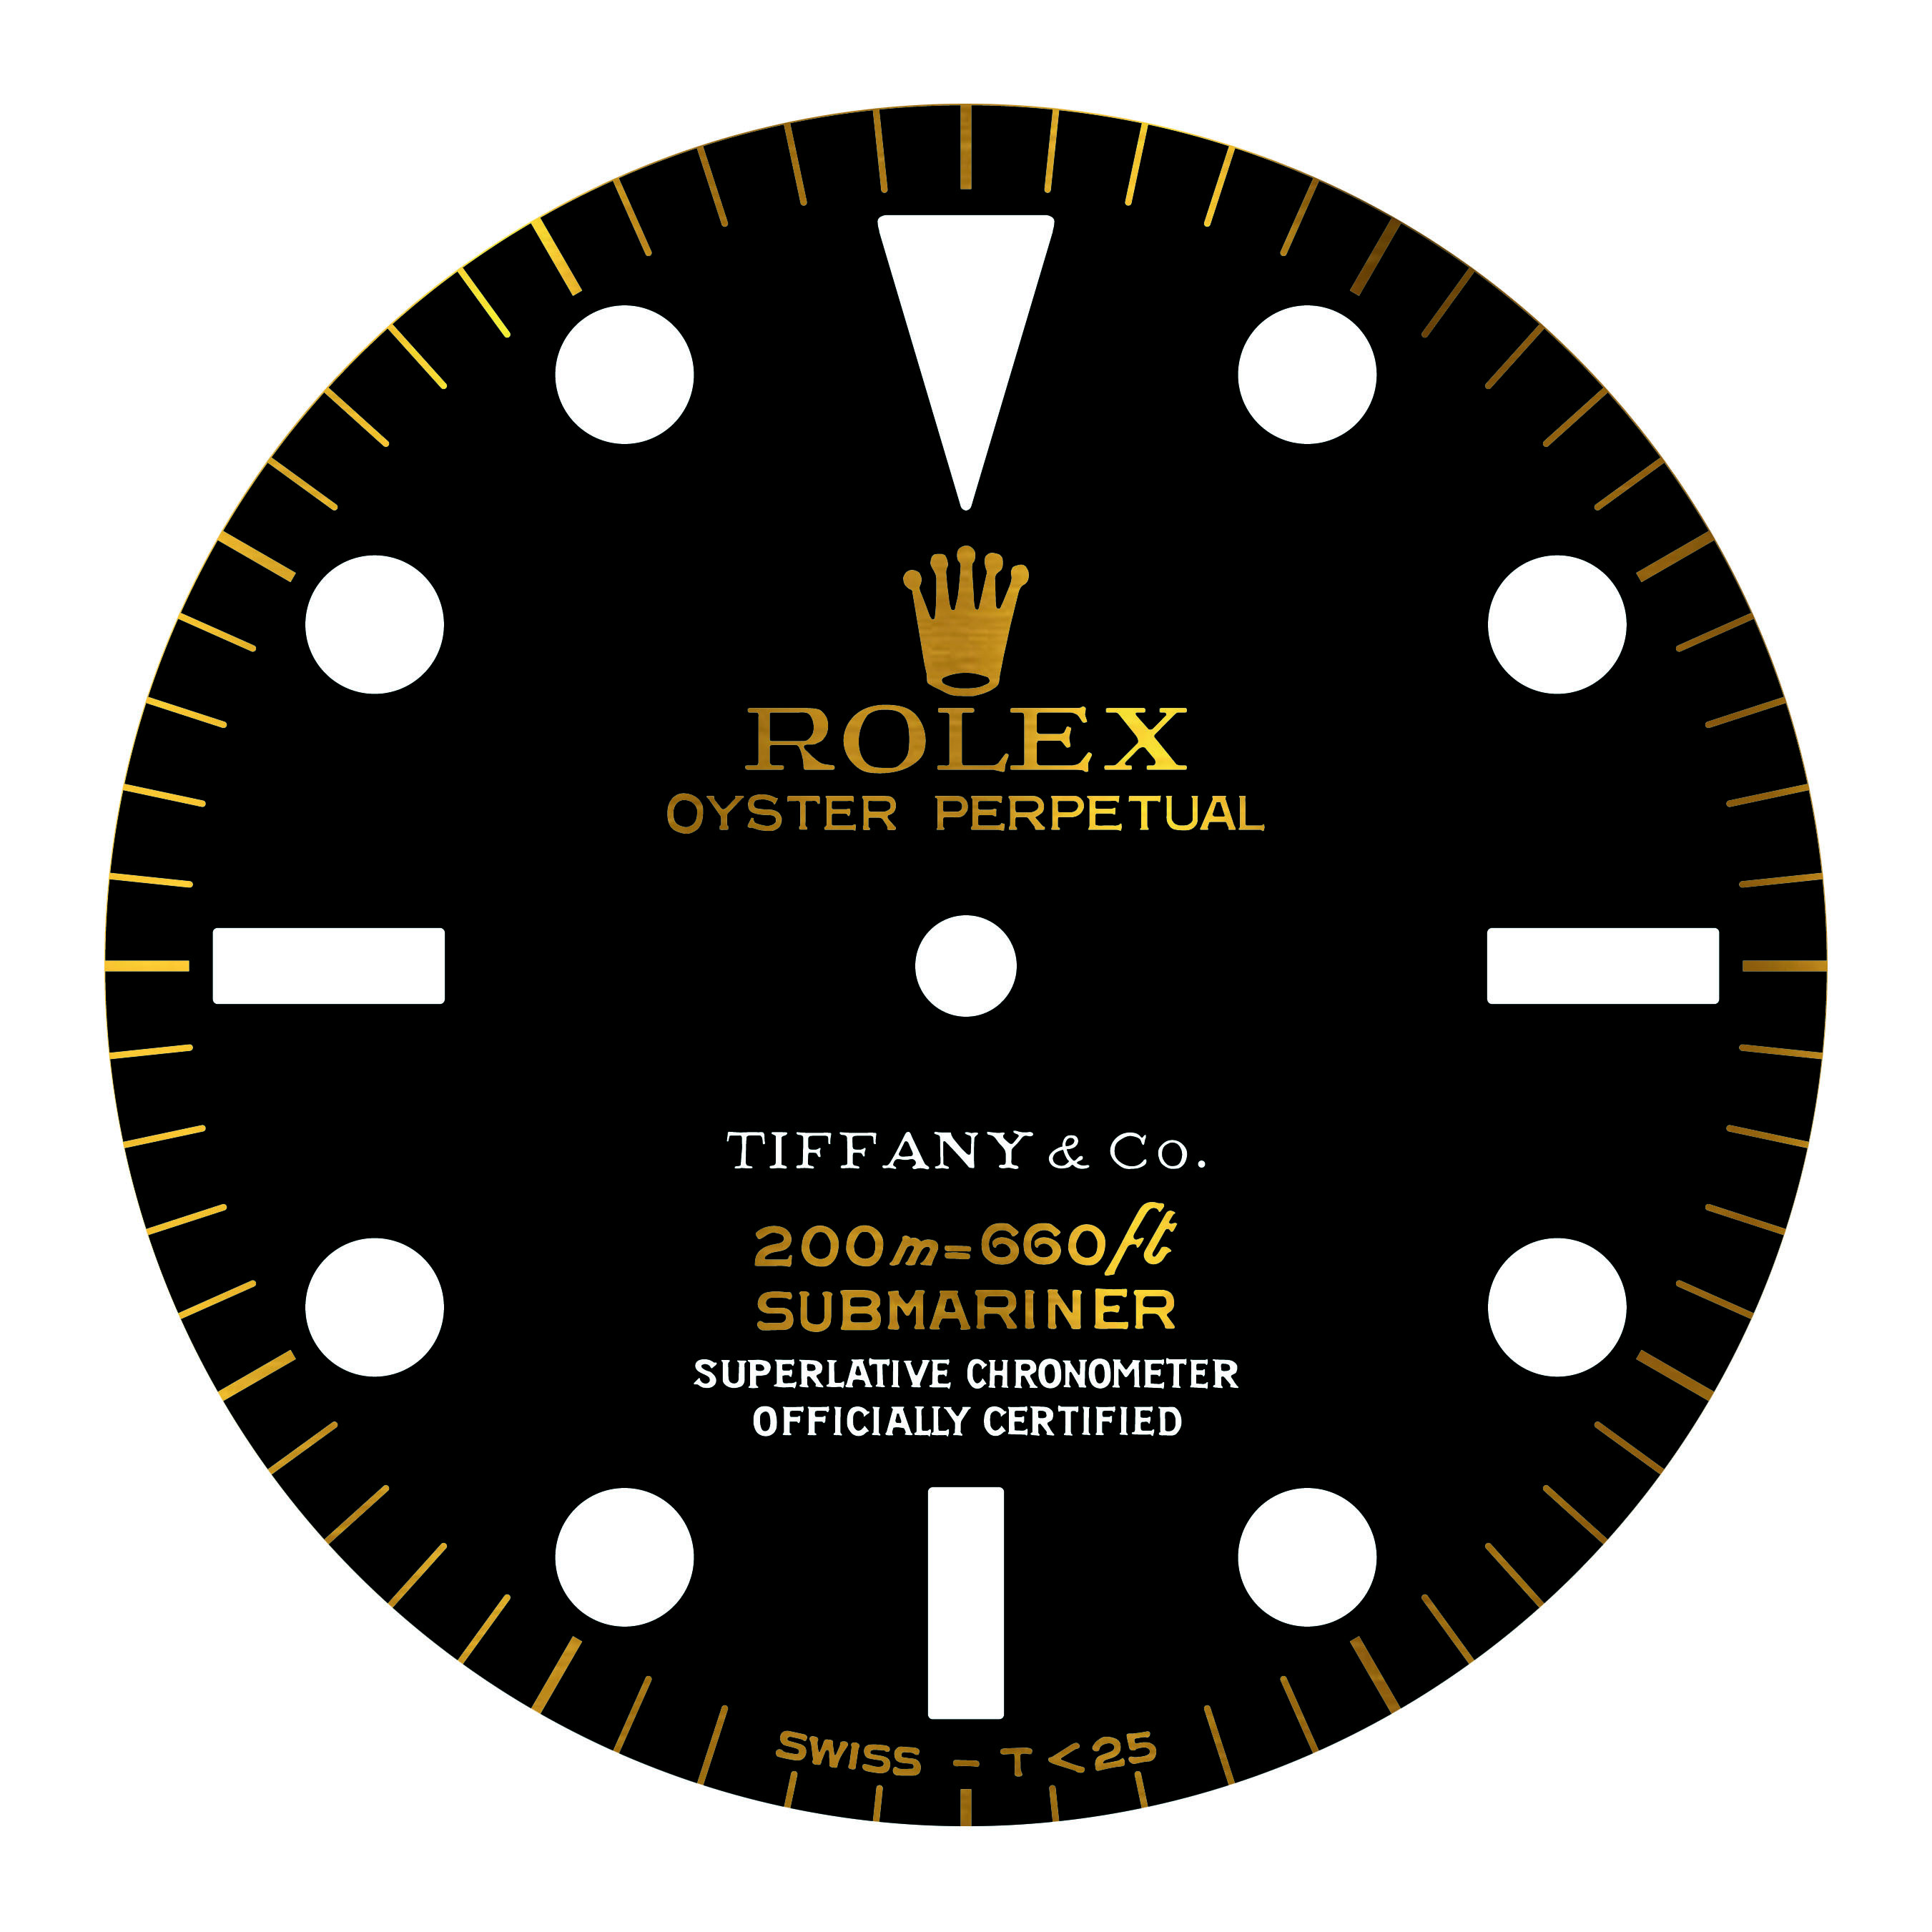
still just mockups but one will exist in real ...
Do you have a link to an image of the real deal?Working on a radial dial project
- 13/10/16
- 4,013
- 2,661
- 113
Do you have a link to an image of the real deal?
The only one I've seen (4 lines gilt / white) was May 2016 for 27K€ in HK
I'll print the 4 lines all gilt ... future owner's choice
It’s been awhile since I have had a chance to tinker. I have had time to think what goes right and what goes wrong. Adjusted my method and I finally had a chance to try it. It has that worked 100% of the time and it’s super simple! In under 1 minute I can get 1) a perfect print and 2) have it be perfectly centered.
Here is a perfect mask for electroplating or oxidizing.
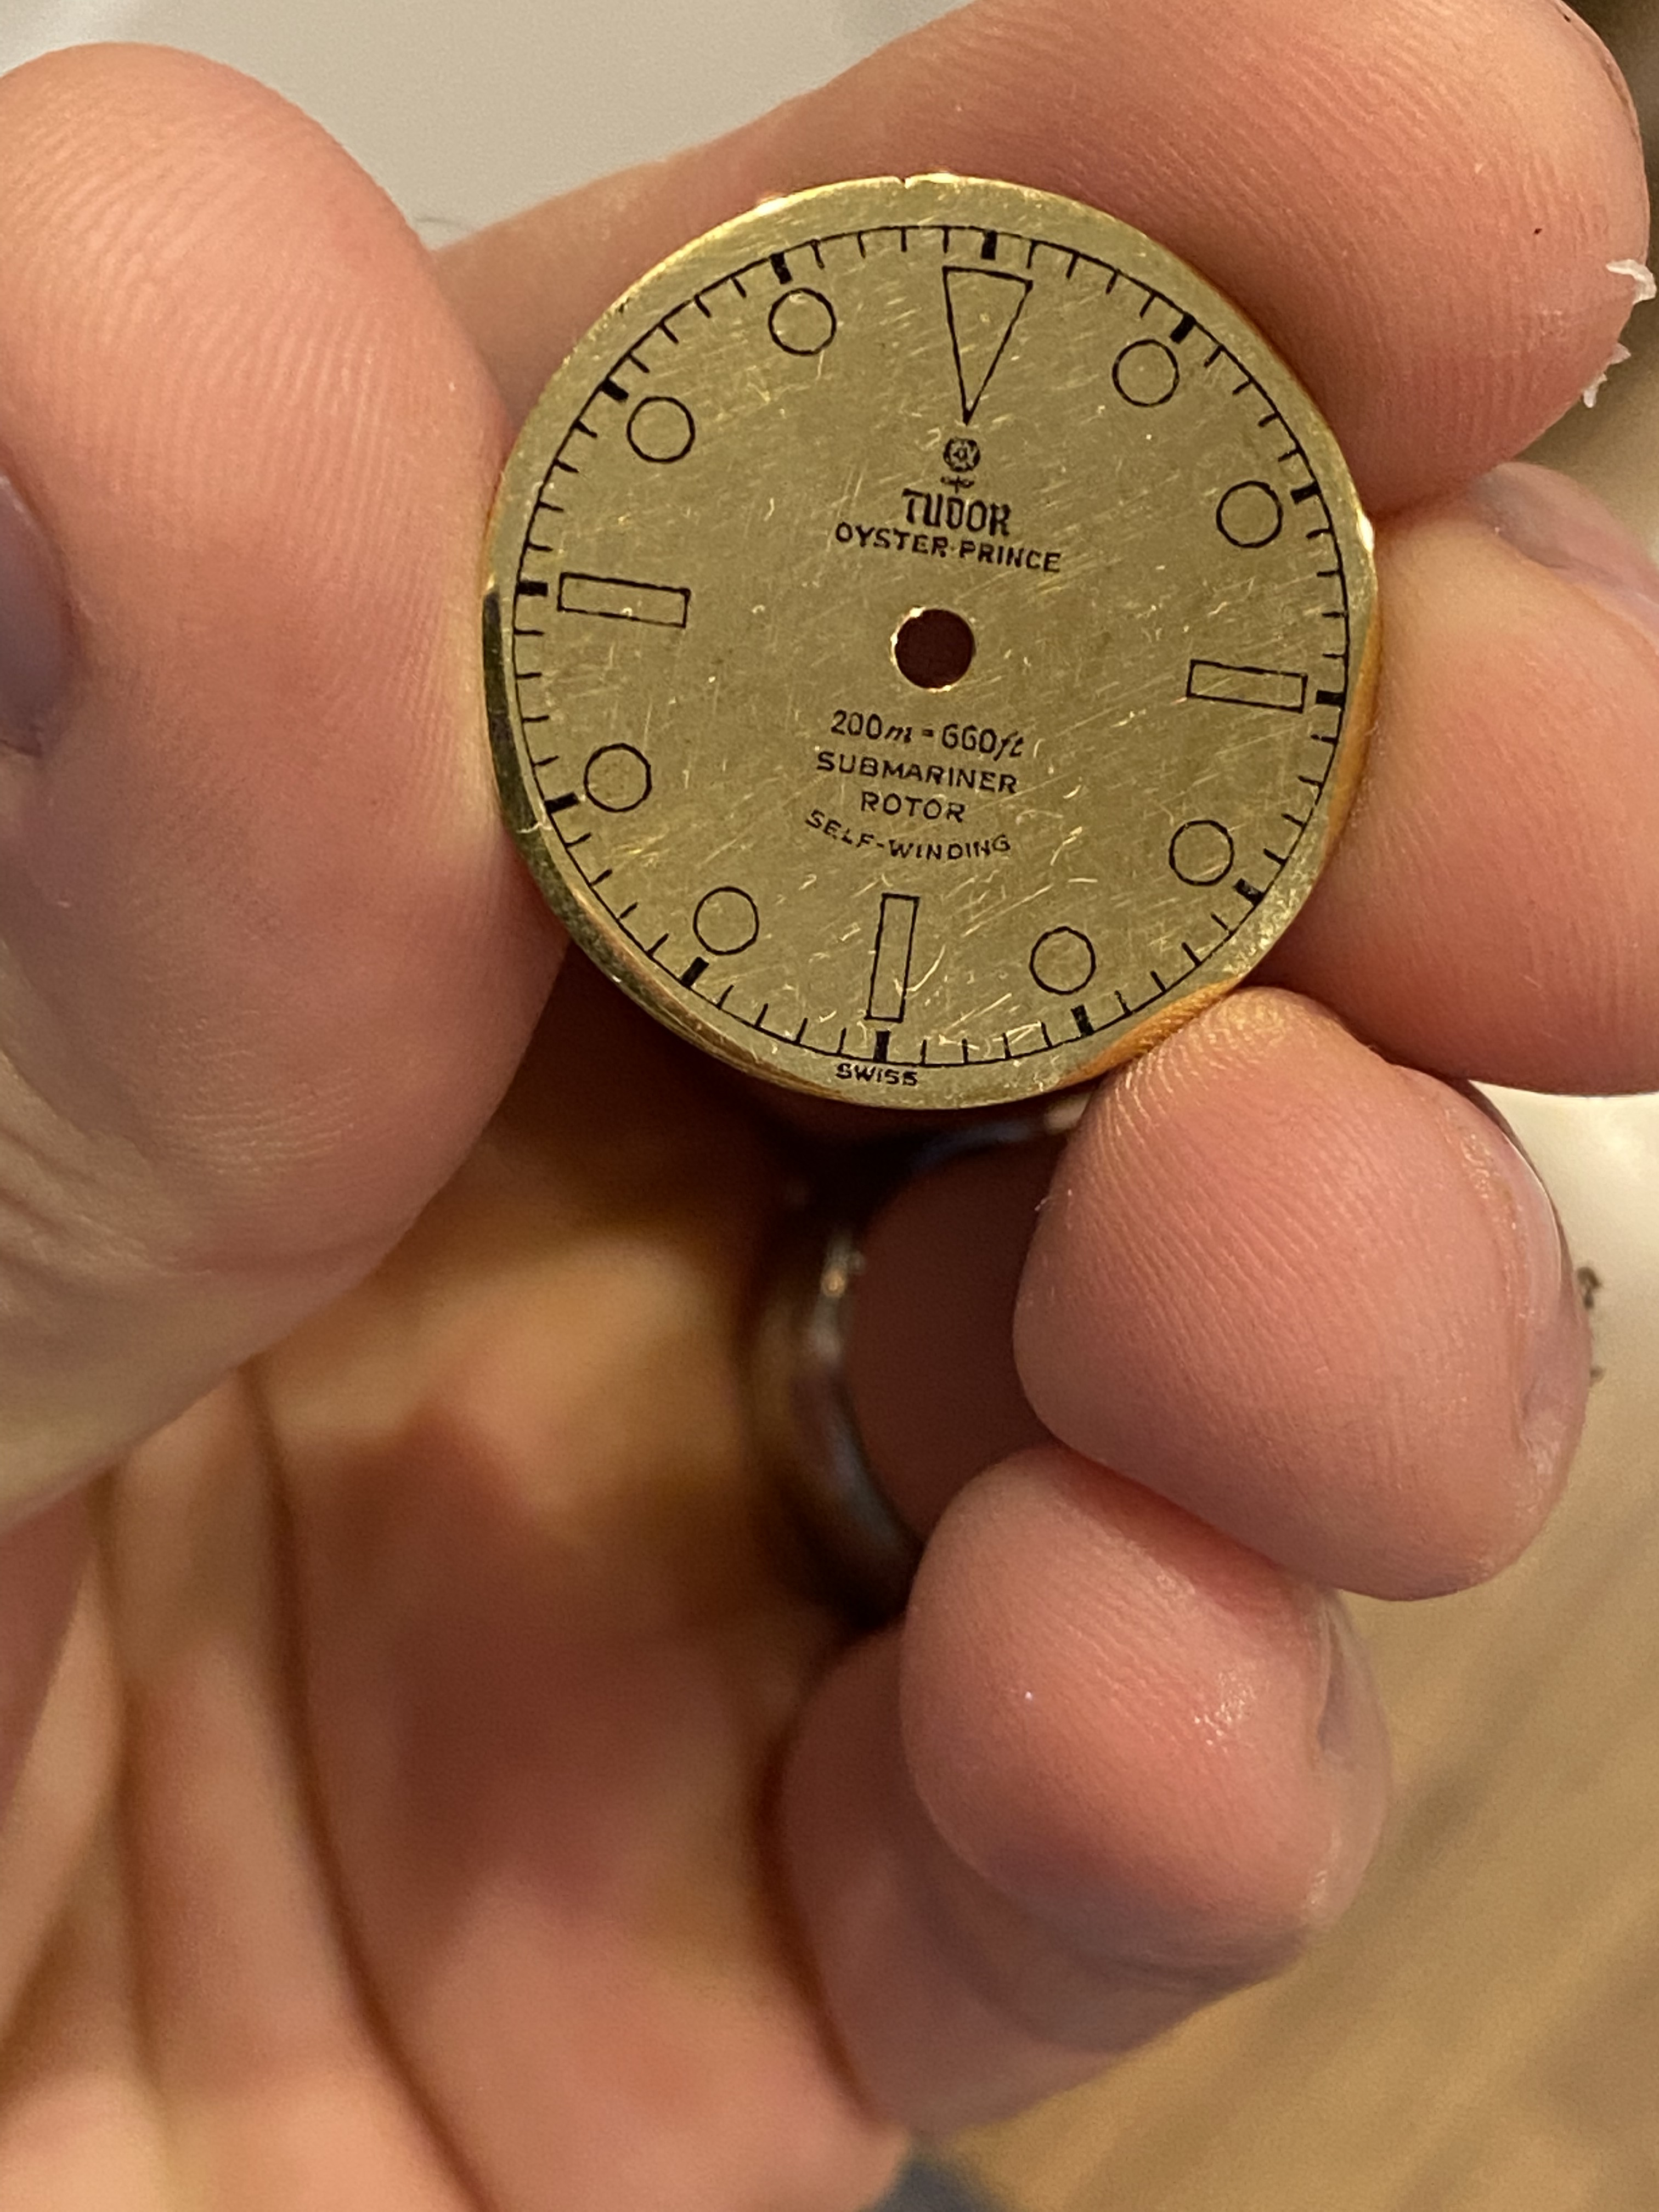
I’m going to order some more blanks before I plate this one since it’s a perfectly centered hole straight from the factory. I need to catch up on my plating skills and oxidizing skills. Oxidizing is the trickier of the two.
Here is a perfect mask for electroplating or oxidizing.
I’m going to order some more blanks before I plate this one since it’s a perfectly centered hole straight from the factory. I need to catch up on my plating skills and oxidizing skills. Oxidizing is the trickier of the two.
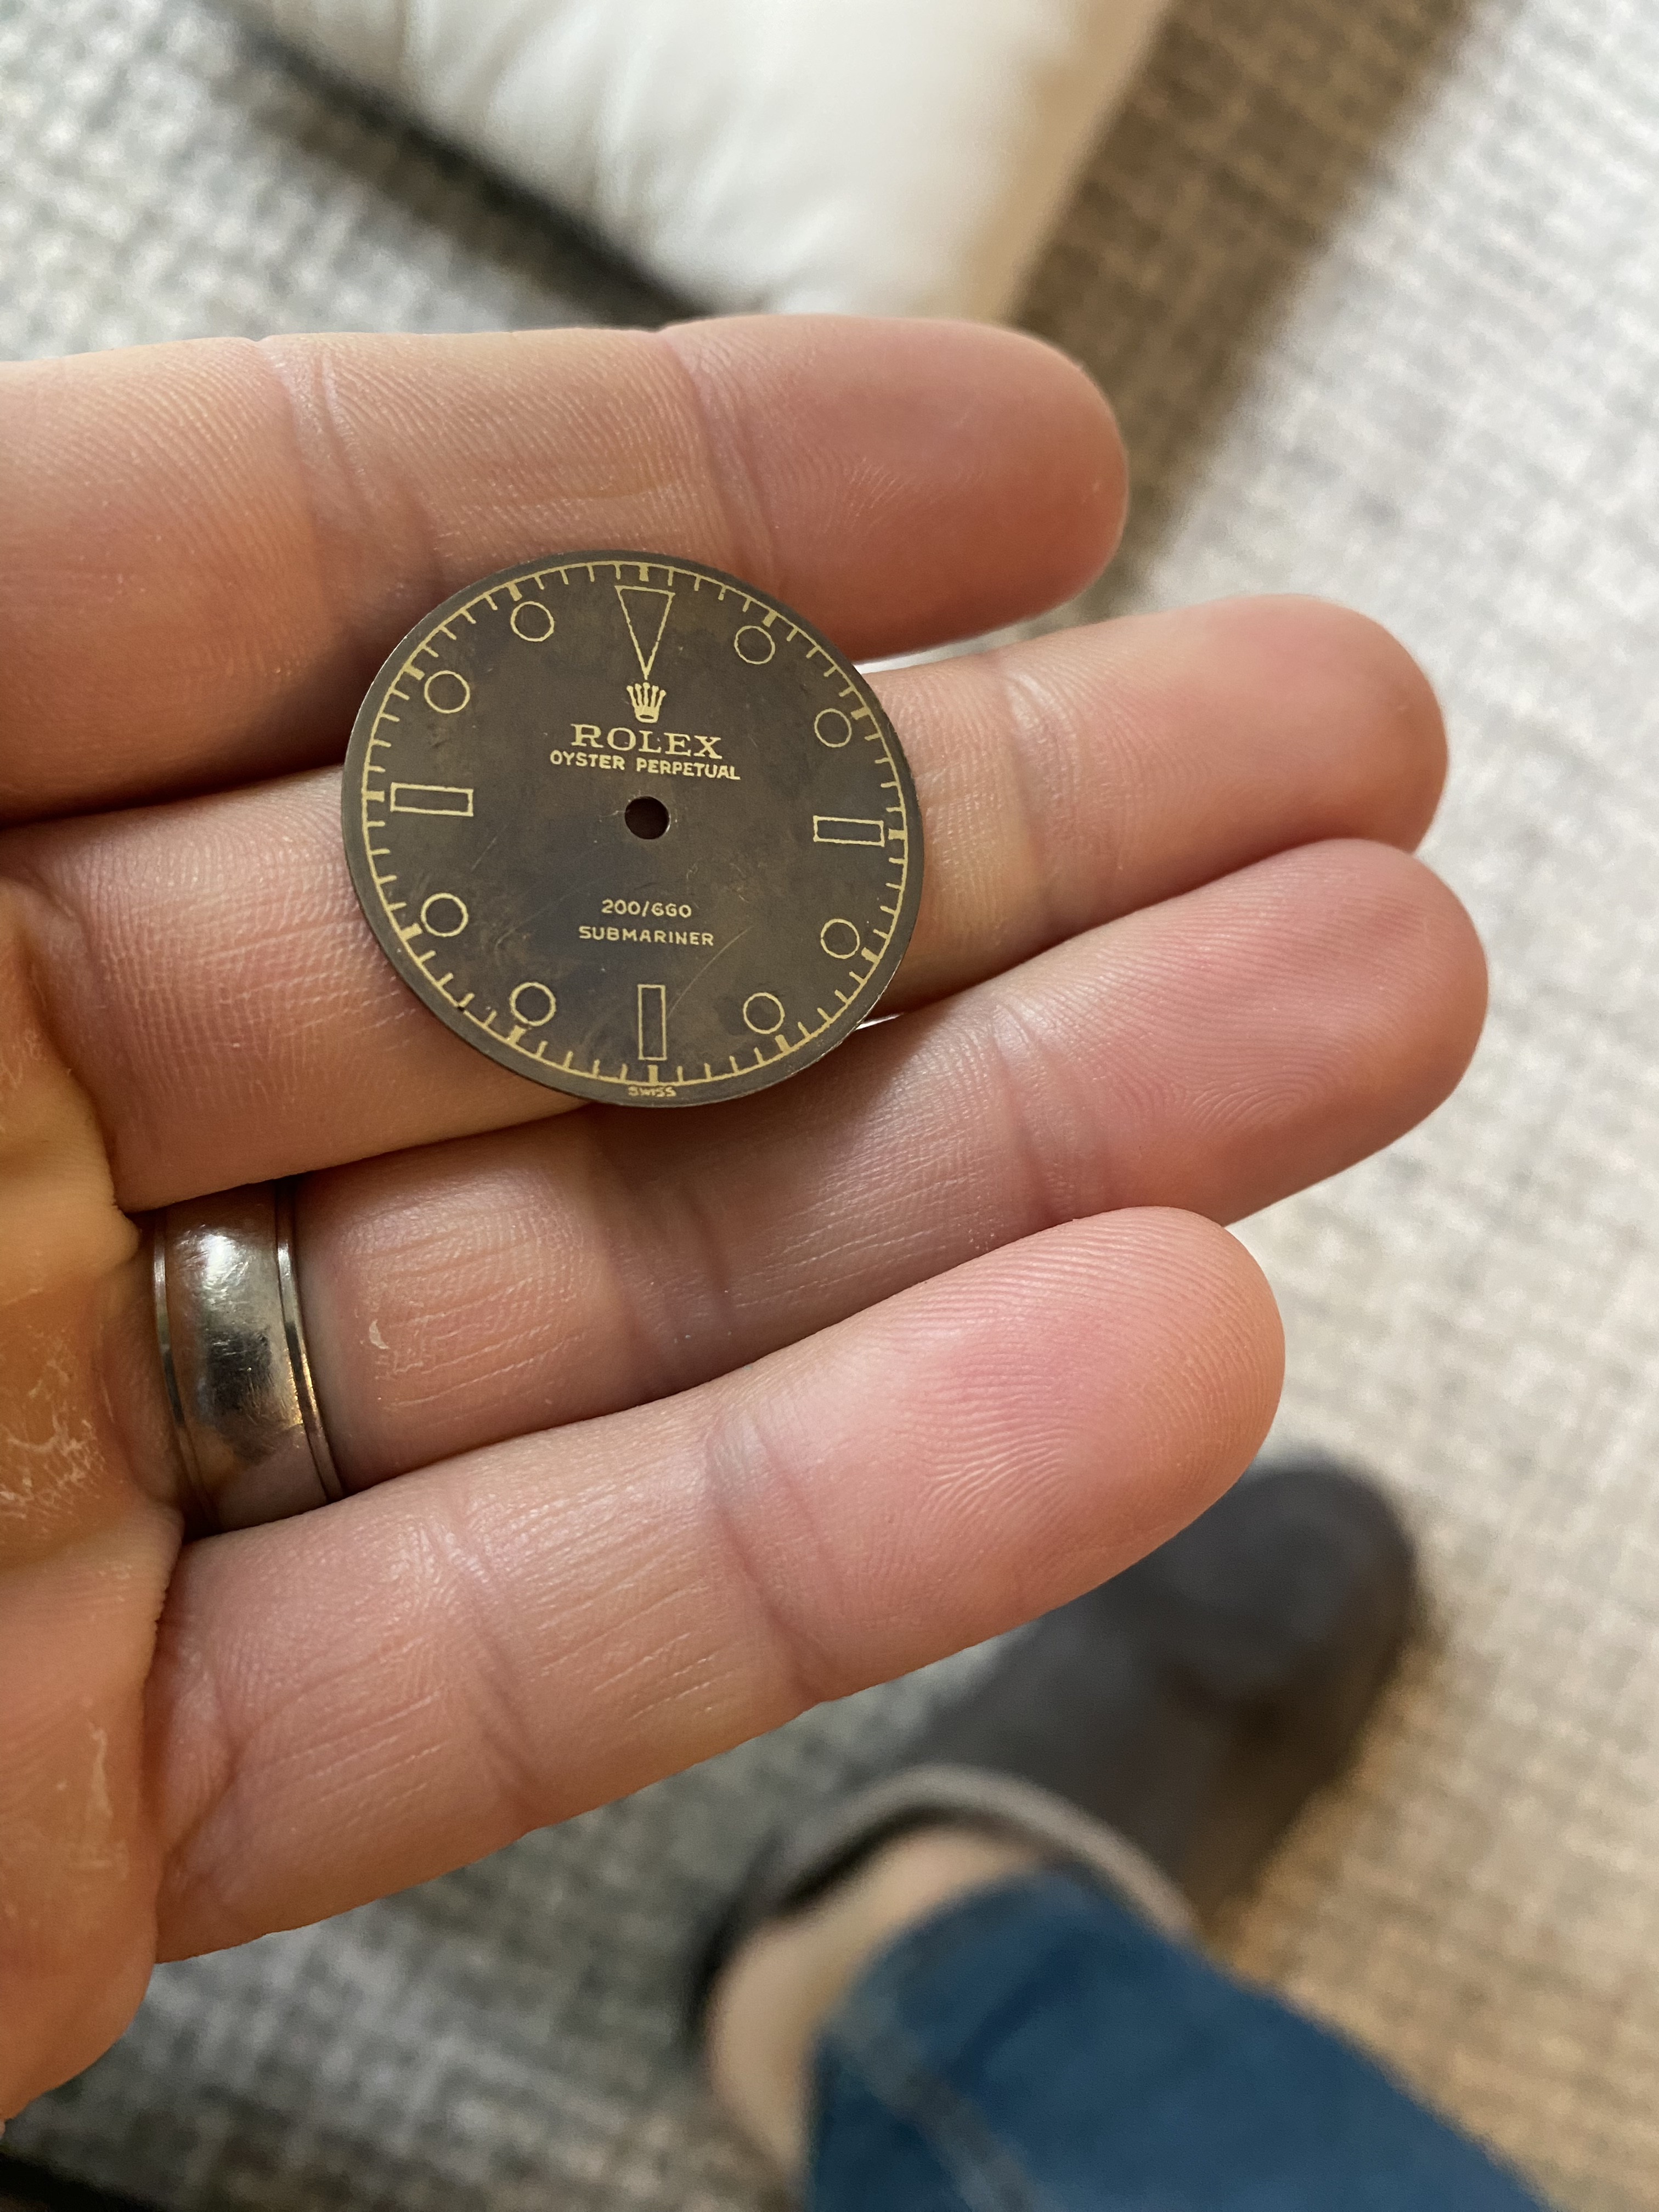
And another one! Tropicalized.
Need to thank @p0pperini for helping me with the centering issue because without any sort of alignment it would be off 95% of the time.
Need to thank @p0pperini for helping me with the centering issue because without any sort of alignment it would be off 95% of the time.
What method did you end up using for your mask and how easy is it to remove after plating?
And another one! Tropicalized.
Need to thank @p0pperini for helping me with the centering issue because without any sort of alignment it would be off 95% of the time.
Last edited:
@jamiex i am using the toner transfer method. You can Google it. People use it to make pcb boards. After plating it’s as easy as using a bit of acetone on a q tip and wiping off the toner to reveal the brass. I’ll do a more detailed “how to” in another thread after I take some more pics.
This method should make this available to anyone that has access to a laser printer and glossy magazine paper.
This method should make this available to anyone that has access to a laser printer and glossy magazine paper.
It’s looking good mate. I’ve still got my watch dial pad printer in it’s box, it’s not been out in anger yet and I really need to get a shift on with these again. At this point I think I’ve forgotten how to set my electroplating tanks up.@jamiex i am using the toner transfer method. You can Google it. People use it to make pcb boards. After plating it’s as easy as using a bit of acetone on a q tip and wiping off the toner to reveal the brass. I’ll do a more detailed “how to” in another thread after I take some more pics.
This method should make this available to anyone that has access to a laser printer and glossy magazine paper.
bondidave
VP Keepin' it Real
Hey folks - been out of the game for a few years, and just getting back in. Over the years, I've tried pretty much everything chrome72 has done in an attempt to get something close to a high-quality VN dial (let's be honest, they're absolutely gorgeous and after having continued down this rabbit hole: worth the money)... My focus has always been the Lazy-man's approach: make acceptable quality gilt dials at home with repeatable results, minimizing investment in terms of specialized equipment, time, money, skills/experience, and patience.
I have 2 additional / variation methods I have been using - one with mediocre results (requires nothing more than an inkjet printer with a formerly popular feature and a specific paint-on coating... although it is fairly limited in what you can make), and one more recent which is reproducible, and results in a true negative relief with crisp raised print for the printed-on top layers. This second method is not bound by having a black base, involves no chemical processing, and the only special equipment necessary is a decent quality diode laser engraver/cutter (I have an XTool D1 Pro 10W and cannot recommend it enough, although given the opportunity to go back in time, I would get the 20W model and/or their upcoming combo with IR laser). I'll provide a detailed tutorial / walkthrough once I refine the raised print technique - but I'll briefly describe both of my processes here before getting back to #2 - photos to come sooner.
Both methods for my "lazy" gilt dials combine techniques previously used, with some major 180s. First and foremost, they both involve directly placing the image on the dial, no transfers and no chemical etching or secondary processing after the image is on the dial (reduces errors, produces more consistent results). #1 is an additive process, starting with a blank dial substrate that will shine through the black ink on top (I haven't used this method with other colors, but anything dark enough should work, although even black is hard to get completely opaque with a single coat). #2 is a subtractive process (although upper layers is additive), where you take a polished substrate, coat it entirely in enamel / paint / lacquer / powder coat (basically anything that doesn't involve eating the metal below and can be safely burned off of a surface leaving no residue), and then "relieving the negative".
Process 1: The cheapskate method
Secret Sauce:
General process:
Issues:
I gave up on this method - it's great for experimenting and for going from zero to working setup for under $75 all-in (printer, coating, ink, substrate).... I only had to purchase the coating and brass blanks, so my out of pocket cost was around $20. While cheap - so are waterslide decals - and I think their price, quality, and time/effort required beat this method hands down.
I have 2 additional / variation methods I have been using - one with mediocre results (requires nothing more than an inkjet printer with a formerly popular feature and a specific paint-on coating... although it is fairly limited in what you can make), and one more recent which is reproducible, and results in a true negative relief with crisp raised print for the printed-on top layers. This second method is not bound by having a black base, involves no chemical processing, and the only special equipment necessary is a decent quality diode laser engraver/cutter (I have an XTool D1 Pro 10W and cannot recommend it enough, although given the opportunity to go back in time, I would get the 20W model and/or their upcoming combo with IR laser). I'll provide a detailed tutorial / walkthrough once I refine the raised print technique - but I'll briefly describe both of my processes here before getting back to #2 - photos to come sooner
.Both methods for my "lazy" gilt dials combine techniques previously used, with some major 180s. First and foremost, they both involve directly placing the image on the dial, no transfers and no chemical etching or secondary processing after the image is on the dial (reduces errors, produces more consistent results). #1 is an additive process, starting with a blank dial substrate that will shine through the black ink on top (I haven't used this method with other colors, but anything dark enough should work, although even black is hard to get completely opaque with a single coat). #2 is a subtractive process (although upper layers is additive), where you take a polished substrate, coat it entirely in enamel / paint / lacquer / powder coat (basically anything that doesn't involve eating the metal below and can be safely burned off of a surface leaving no residue), and then "relieving the negative".
Process 1: The cheapskate method
Secret Sauce:
- Dial substrate (these need to be no thicker than a DVD, although you might get away with a little extra in foot length, if you are printing onto a dial with feet). Mirror-polished brass discs work well, as do sanded and polished donor dials
- If you have a finished / damaged dial - use very fine grained sandpaper (3000 grit or finer as the last step)
- Cape Cod cloths work great for polishing, if you don't already have a mirror finish
- "Digital Ground" substrate coating (I use "Golden Digital Ground for non-Porous surfaces", although it has been discontinued. Turns out, Golden just relabeled a product from InkAid - and they have a newer (better?) version: https://inkaid1.com/products/inkaid)
- Inkjet that supports printing on CDs/DVDs (the Canon MX922 can be had for next to nothing these days - I don't recommend this printer, but it works) - it does need to work and have ink in it.
- A CD or (preferrably, due to the nasty stuff that's in CDs/DVDs) something the same size (actually 2 the same diameter that total the depth of a CD - with one the same thickness as your dial plate) that you can cut a dial-sized circle in(by hand/laser/CNC, whatever) - if you have a dial with feet, you would also benefit from having some thin drill bits.
General process:
- Polish your substrate (blank dial), coat it in your inkjet-receptive coating (I have found 2-3 coats of Golden Digital ground is good).
- Create a holder for your substrate (glue together two pieces of plastic cut in the shape of a CD, the top layer should be the same thickness as your substrate, and have a hole cut to fit it snugly, so the top is flush... if you have feet, drill holes for them in the bottom layer, but leave the rest intact)
- Practice on something other than your final dial to get the positioning of the image in software to line up with the position of your dial holder (I won't get into this, but this is the hardest part of this method and one of many reasons I moved to process #2).
- Print only the black part of your dial image directly on the coated dial
- Admire the results (most inkjet ink will run horribly if you use spray-on acrylic afterwards - I gave up trying to gloss these up further, I'm sure there are ways)
Issues:
- Getting the alignment/positioning of the image on the dial is infuriating (although, once you nail it, you never have to do it again for dials of the same size)
- The black printed on brass isn't as black as I'd like it to be. This may be OK for a more faded/tropical/aged look, but it doesn't feel authentic
- You're printing on the coating, not the dial itself, so resolution / detail isn't as good as you can get with decals, etching, or process #2.
- The printer I have sucks, but it's cheap and has good resolution.
I gave up on this method - it's great for experimenting and for going from zero to working setup for under $75 all-in (printer, coating, ink, substrate).... I only had to purchase the coating and brass blanks, so my out of pocket cost was around $20. While cheap - so are waterslide decals - and I think their price, quality, and time/effort required beat this method hands down.
bondidave
VP Keepin' it Real
Process 2: The Lazy Laser method (AKA My Excuse to Buy a Laser Cutter)
A little more background on how I came up with this idea:
I have seen and done chemical etching - but it's nasty stuff, and I could never get a finished product that was free of artifacts / flaws as a result of poor transfer coating (cycling back through chrome72s earlier experiments, I can see I'm not the only one who ran into these issues). I've also done CNC engraving and vinyl cutting (using a blade machine like a Cricut), the former doesn't allow for high-res imagery at reasonable cost, the latter only eliminates the etching problem. Then I saw some videos on laser cutters being used to put the photoresist image directly on the substrate (this was a copper-clad FR4 plate for making a PCB, but the same technique can be applied to any substrate) - cool - but you still have to etch the thing and then put your black on somehow (again, usually a chemical process: electoplating, galvanizing, etc). Too many steps, IMO. SO, I wondered what I could do to get the image with the background on the dial in a single step, have it be true negative relief, and allow for a top glossy clear-coat (and after I nailed that down: additional raised ink layers on top of the clear coat)... What remains: I still suck at luming, so I'll send mine out to a community member who kicks ass, big whoop
Secret Sauce:
General process:
A little more background on how I came up with this idea:
I have seen and done chemical etching - but it's nasty stuff, and I could never get a finished product that was free of artifacts / flaws as a result of poor transfer coating (cycling back through chrome72s earlier experiments, I can see I'm not the only one who ran into these issues). I've also done CNC engraving and vinyl cutting (using a blade machine like a Cricut), the former doesn't allow for high-res imagery at reasonable cost, the latter only eliminates the etching problem. Then I saw some videos on laser cutters being used to put the photoresist image directly on the substrate (this was a copper-clad FR4 plate for making a PCB, but the same technique can be applied to any substrate) - cool - but you still have to etch the thing and then put your black on somehow (again, usually a chemical process: electoplating, galvanizing, etc). Too many steps, IMO. SO, I wondered what I could do to get the image with the background on the dial in a single step, have it be true negative relief, and allow for a top glossy clear-coat (and after I nailed that down: additional raised ink layers on top of the clear coat)... What remains: I still suck at luming, so I'll send mine out to a community member who kicks ass, big whoop
Secret Sauce:
- Dial substrate (no changes here), mirror polished surface (see process #1)
- Spoil board / blank laser markable flat material you can use as a placement guide / dial holder
- I use cheap laserable plywood for this
- Decent quality diode laser engraver / cutter (again, I LOVE my XTool D1 Pro 10W - it cost me just over $700, and I use it for all kinds of cool stuff)
- Mine has a resolution of 0.03mm in diameter, with an accuracy of 0.01mm. For those keeping score, that's 715,000 DPI (845*845)
- Using bitmap / rasterized graphics is limited to 300 lines per cm (a paltry ~643,000 DPI - of 762*845)
- Curious as to the cost to resolution benefit (or loss?) of a laser printer and toner transfer / galvanization method. I have yet to see a huge benefit, aside from the VERY attractive property of more closely reproducing the original method used by Rolex and ability for it to develop character naturally with age and expose under the same conditions as the originals (again, my hat is off to you, sir ... Did I mention that I'm lazy?).
- Mine has a resolution of 0.03mm in diameter, with an accuracy of 0.01mm. For those keeping score, that's 715,000 DPI (845*845)
- Coatings: bare minimum would be your base dial color and clear coat.
- for the base dial color, you can really use anything, so long as it can be burned off the surface of your dial using the laser and without leaving residue (or thin enough residue that can be removed without affecting the desired base color around it). I have used spray-on engine enamel and spraypaint, both produce excellent results (plus, you can do all kinds of colors / combinations rather than just black if you want to have a tropical dial from the start),
- For clear coat, I use common acrylic spray (I'm sure there are better coatings that might even help with post-processing / aging, but I'm not there yet)
- Optionally - a coating / paint for printed-on-top imagery/text (the depth rating / COSC markings on many gilt subs and GMTs).
- I am currently experimenting with powder coating paint powder, and the potential is INCREDIBLE.
- While I haven't exhausted #1 yet, my next foray will be in something like pad printing or rubber stamping
- While writing this just now, I thought of another (likely not viable, but worth trying): more spraypaint, repeating the same general process after the base dial is finished and gloss-coated (if possible, will require more fine-tuned laser settings than the base so as to not burn off anything under the clear coat
General process:
- Mirror polish your substrate (blank dial)
- Coat your substrate entirely in your base color coating (I have had great results with 3 coats of spray paint / enamel), let it dry completely.
- I like to do many of these at the same time for consistency if you need to adjust the laser power / speed.
- Prepare your holder cutting template and gilt imagery (the inverse of process 1 - the black is transparent, the gilt is what your laser will burn)
- You will have at least 2 files - one which will serve as your positioning template / dial holder, another which is the gilt imagery / text (again, all in black, whatever your laser needs to fire on those spots).
- Beyond 2, you may want a layer for the text/graphics that go on top of the gloss-coat (see 4.3 above) - applicable to 4.3.1 and 4.3.3 (and likely 4.3.2, but not a requirement that it line up perfectly with the other 2 layers)
- The holder / template / guide may not be obvious to anyone who hasn't used a laser, once I get around to doing a more in-depth tutorial, this will become clear
- this image is just the outline of the dial, the center hole, and optionally feet - bonus if you engrave the area of the dial deep enough for a nice snug fit around the center hole, inside the border, and it sits flush with the template
- Lasers like vector graphics - they move according to G-Code paths, so curves are curves, not pixels. I have spent WAY too much time trying to make pixel-perfect vector versions of any gen dial - but I'm not an artist, and if it wasn't obvious having already stated it 4-5 times: I am lazy AF. What I have is good and crisp, but not 1:1 with gen (If anyone is willing to share their fonts, high-res graphics and/or vectors, I can offer some finished dials in return as gratitude). Fonts can easily be converted into vector graphics, so use them if what you have looks the way you want
- That being said, my laser will also engrave bitmaps, albeit at a slightly lower resolution, and doesn't benefit from G-Code curved paths. Since I have come up short in finding accurate OOTB fonts, I have used both bitmaps and vectors made from tracing bitmaps with more than acceptable results under 10x magnification (again, I expect better results with higher-quality imagery
- You will have at least 2 files - one which will serve as your positioning template / dial holder, another which is the gilt imagery / text (again, all in black, whatever your laser needs to fire on those spots).
- Burn your holder / template / guide file onto your spoil board - cut out feet holes if necessary
- what I do is make sure the dial area can be accessed when the laser is at it's home position - the key here is to not move the holder afterwards - tape it down: also, ensure your laser returns to the same starting position
- Settings here aren't anything special, bonus points if you can engrave deep enough to get the dial flush - it will result in crisper imagery without having to readjust the laser height, but this isn't a requirement and ability to do any of this may depend on your laser / software (an auto-focusing or auto-z laser eliminates the desire to get it flush)
- Without moving anything, place the coated dial right inside of the holder / template (alignment here is key, but WAY easier than anything else I've seen on this thread - wait until you see my photos) - the point is to have the same starting position and target the same area as your template/guide
- Burn off the gilt using the second file leaving only the shiny polished substrate - your true negative relief.
- Getting the settings right is the hardest part of this process and will require practice, and isn't always consistent due to the inconsistencies of different thicknesses of coatings. See 2.1 to minimize the impact, if you coat 10 dials at the same time, they're likely consistent with each other - so if you only get the settings right after the 5th try, that will give you 6 perfect dials. what I do is make one with varying settings (just small circles rather than the dial imagery, done at different powers/speeds that I can ID the one with the best results)
- DON'T OVER BURN! Settings that have too much power and/or go too slow could wreck your laser (shine a blue lazer at a mirrored metal suface and what happens? it reflects and burns itself). Start with low power and fast speed and do small increments (5% power up, and/ or d5mm/s down is what I do after starting with 50%, 30mms for three spray paint coats and a 10W output laser)
- Some small amount of coating that remains is OK, it won't be mirror finish, but it'll be visibly gilt - you can then follow the next step
- Getting the settings right is the hardest part of this process and will require practice, and isn't always consistent due to the inconsistencies of different thicknesses of coatings. See 2.1 to minimize the impact, if you coat 10 dials at the same time, they're likely consistent with each other - so if you only get the settings right after the 5th try, that will give you 6 perfect dials. what I do is make one with varying settings (just small circles rather than the dial imagery, done at different powers/speeds that I can ID the one with the best results)
- In the event you have just a bit of base color and want a perfect reflection, you can try GENTLY polishing away what remains. Note that this is entirely dependent on the kind of coating you use and how thick it is. Cape Cod cloths work if you have a nice thick coating of your base color, but you do risk taking off pieces around fine details if you're not REALLY good and patient (not something I would use to describe myself, being a lazy schlub)
- You CAN do another run with the laser, just be aware of 6.1.1
- By this point, you should have a really nice looking negative relief image. Clear coat it (I do 3 very thin layers, more if I am going to continue and do a powder-coated top-layer) - either lume it if it looks the way you want, or hold off until after you add the upper layer(s).
bondidave
VP Keepin' it Real
Process 2 continued
Optional (and still in proof-of-concept phase - I know it is possible, as I have seen the technique used for other applications of using a laser to melt/finish/cure precision imagery using powder coat paint (woah, I just realized the same would probably work for faux-lume as well...)
To get raised text (or lume plots) on top of the glossy gilt-only dial using powder coating powder, the process is similar:
Sweet merciful crap, I had no intention of writing nearly that much in just a "quick preview" of what I have coming - but seeing that this is still a hot and active topic with some other SUPER-IMPRESSIVE techniques being developed, I got excited and want to share what I'm doing as soon as possible, in the interest of helping others come up with new and better ideas / improvements - or even a different way to get started with DIY gilt dials. Happy to share the knowledge, shamelessly would love to get some higher quality design files (Illustrator or DXF ideally, but I can work with anything), and look for photos and a true tutorial soon! Cheers folks, it's good to be back.
Optional (and still in proof-of-concept phase - I know it is possible, as I have seen the technique used for other applications of using a laser to melt/finish/cure precision imagery using powder coat paint (woah, I just realized the same would probably work for faux-lume as well...)
To get raised text (or lume plots) on top of the glossy gilt-only dial using powder coating powder, the process is similar:
- Have a file for the areas you want to place raised ink on top of your glossy layer
- Process the file once to get a rough surface on the clear coat (it doesn't have to be deep, although there are pros and cons of deep vs shallow which I will get into once I have more repeatable results)
- This gives the powder something better to grab on to as it cures than the (relatively) smooth surface of the clear coat - deeper engraves hold better and can have a very strong finished look - shallower results in more consistent texture, requires less powder / power, and with less powder often comes out looking naturally aged (with a thin engrave, the cured powder can flake/scratch/break off easier, although when it does, what remains looks like natural damage / wear)
- A-la-pad printing or lume-filling engraved dials, put a layer of powder paint on the dial. Optionally use a flat edge to scrape off / fill in the areas engraved by the previous step.
- Using the flat edge is optional, and in some cases takes off too much powder to give a raised result - this is what I need to fine-tune before it's ready for prime-time. From my early tests, you want 3x the height off the dial's worth of raw powder than the height off the dial of the cured result - the most important thing here is that you're consistent in the distribution, otherwise it can come out looking funky with varying level of detail/thickness/height
- You can use any color you want (or even combine them in different concentration / level of mixture to create different effects)
- I have not tried any luminous powder paint (I think I have some, can't believe I am only now thinking of this), but there's no reason why this wouldn't work for raised lume plots
- General rule: the larger the surface area, more powder will be required to get a raised result
- Process the file again with the raw powder paint (settings may vary depending on the paint, how much of it there is, etc - I am working on making this repeatable without half-a-dozen runs before getting it right)
- Same best-practices as 6.1.1 apply here, although with FAR less risk of damaging your laser with a reasonable amount of over-power and/or multiple runs.
- If you don't use this process to apply lume, now would be the time to do that.
- At this point, you're done. Have a nice Islay single malt Scotch and/or a crisp Bavarian pilsner (my adult beverages of choice) and enjoy the fruits of your labor.
- GOOD laser engravers / cutters aren't cheap - if you want to go this route, you should either:
- Already have a laser cutter (hey, way to go, bud - you can now make dials with minimal additional investment)
- have an excess of space, money, and time and the adventure in going down this rabbit hole will bring you joy, regardless of the end result OR
- have seen the results of what I've made and you plan to make dials and offer them up at competition-crushing prices OR
- will use the laser for more than just making dials for personal use (as I mentioned, these things are fun, useful, and have LOADS of applications beyond the "hacks" I've outlined here)
- I have only tried with the XTool D1 Pro 10W - there are a ton of options out there for blue diode lasers with similar specs, and there are different laser types that are much better suited for working with metal substrates (fiber lasers, CO2 lasers, and IR lasers all engrave/mark metals directly and much better than even pre-treated metal using a diode (Dry Moly(bdynum) Lube will allow you to mark black on most metal using a blue diode laser) - which has potential to be even better than burning paint off). I am happy to take any equipment off your hands (no good deed goes unrewarded)
- Garbage in, garbage out. While this isn't exclusive to this method, it is worth noting as a concern that is accentuated with this approach. If your design files aren't high-res or are slapped-together inaccurate vectors, no amount of shiny brass is going to magically make design flaws disappear. If anything, it is more important using this method than those that require a secondary processing step of etching / plating / galvanization to achieve the final result - as what you see is what you will get (much more so than with the other methods: details are accentuated - and so are flaws)
- There is a ton of variability with nearly every piece of this process, and I have not yet gotten to the point where I can recommend specifics I would say anyone could use and get acceptably similar results - but I am getting there (and even my first few trial runs, which were more to determine if I should bail or )
Sweet merciful crap, I had no intention of writing nearly that much in just a "quick preview" of what I have coming - but seeing that this is still a hot and active topic with some other SUPER-IMPRESSIVE techniques being developed, I got excited and want to share what I'm doing as soon as possible, in the interest of helping others come up with new and better ideas / improvements - or even a different way to get started with DIY gilt dials. Happy to share the knowledge, shamelessly would love to get some higher quality design files (Illustrator or DXF ideally, but I can work with anything), and look for photos and a true tutorial soon! Cheers folks, it's good to be back.
I wanted to shift away from pad printing.It’s looking good mate. I’ve still got my watch dial pad printer in it’s box, it’s not been out in anger yet and I really need to get a shift on with these again. At this point I think I’ve forgotten how to set my electroplating tanks up.
that’s awesome. Glad others are tinkering. Would like to see some pics because that indeed is a lot of wordsProcess 2 continued
Optional (and still in proof-of-concept phase - I know it is possible, as I have seen the technique used for other applications of using a laser to melt/finish/cure precision imagery using powder coat paint (woah, I just realized the same would probably work for faux-lume as well...)
To get raised text (or lume plots) on top of the glossy gilt-only dial using powder coating powder, the process is similar:
- Have a file for the areas you want to place raised ink on top of your glossy layer
- Process the file once to get a rough surface on the clear coat (it doesn't have to be deep, although there are pros and cons of deep vs shallow which I will get into once I have more repeatable results)
- This gives the powder something better to grab on to as it cures than the (relatively) smooth surface of the clear coat - deeper engraves hold better and can have a very strong finished look - shallower results in more consistent texture, requires less powder / power, and with less powder often comes out looking naturally aged (with a thin engrave, the cured powder can flake/scratch/break off easier, although when it does, what remains looks like natural damage / wear)
- A-la-pad printing or lume-filling engraved dials, put a layer of powder paint on the dial. Optionally use a flat edge to scrape off / fill in the areas engraved by the previous step.
- Using the flat edge is optional, and in some cases takes off too much powder to give a raised result - this is what I need to fine-tune before it's ready for prime-time. From my early tests, you want 3x the height off the dial's worth of raw powder than the height off the dial of the cured result - the most important thing here is that you're consistent in the distribution, otherwise it can come out looking funky with varying level of detail/thickness/height
- You can use any color you want (or even combine them in different concentration / level of mixture to create different effects)
- I have not tried any luminous powder paint (I think I have some, can't believe I am only now thinking of this), but there's no reason why this wouldn't work for raised lume plots
- General rule: the larger the surface area, more powder will be required to get a raised result
- Process the file again with the raw powder paint (settings may vary depending on the paint, how much of it there is, etc - I am working on making this repeatable without half-a-dozen runs before getting it right)
- Same best-practices as 6.1.1 apply here, although with FAR less risk of damaging your laser with a reasonable amount of over-power and/or multiple runs.
- If you don't use this process to apply lume, now would be the time to do that.
- At this point, you're done. Have a nice Islay single malt Scotch and/or a crisp Bavarian pilsner (my adult beverages of choice) and enjoy the fruits of your labor.
- GOOD laser engravers / cutters aren't cheap - if you want to go this route, you should either:
- Already have a laser cutter (hey, way to go, bud - you can now make dials with minimal additional investment)
- have an excess of space, money, and time and the adventure in going down this rabbit hole will bring you joy, regardless of the end result OR
- have seen the results of what I've made and you plan to make dials and offer them up at competition-crushing prices OR
- will use the laser for more than just making dials for personal use (as I mentioned, these things are fun, useful, and have LOADS of applications beyond the "hacks" I've outlined here)
- I have only tried with the XTool D1 Pro 10W - there are a ton of options out there for blue diode lasers with similar specs, and there are different laser types that are much better suited for working with metal substrates (fiber lasers, CO2 lasers, and IR lasers all engrave/mark metals directly and much better than even pre-treated metal using a diode (Dry Moly(bdynum) Lube will allow you to mark black on most metal using a blue diode laser) - which has potential to be even better than burning paint off). I am happy to take any equipment off your hands (no good deed goes unrewarded)
- Garbage in, garbage out. While this isn't exclusive to this method, it is worth noting as a concern that is accentuated with this approach. If your design files aren't high-res or are slapped-together inaccurate vectors, no amount of shiny brass is going to magically make design flaws disappear. If anything, it is more important using this method than those that require a secondary processing step of etching / plating / galvanization to achieve the final result - as what you see is what you will get (much more so than with the other methods: details are accentuated - and so are flaws)
- There is a ton of variability with nearly every piece of this process, and I have not yet gotten to the point where I can recommend specifics I would say anyone could use and get acceptably similar results - but I am getting there (and even my first few trial runs, which were more to determine if I should bail or )
Sweet merciful crap, I had no intention of writing nearly that much in just a "quick preview" of what I have coming - but seeing that this is still a hot and active topic with some other SUPER-IMPRESSIVE techniques being developed, I got excited and want to share what I'm doing as soon as possible, in the interest of helping others come up with new and better ideas / improvements - or even a different way to get started with DIY gilt dials. Happy to share the knowledge, shamelessly would love to get some higher quality design files (Illustrator or DXF ideally, but I can work with anything), and look for photos and a true tutorial soon! Cheers folks, it's good to be back.

I had posted to a few forums about laser engraving a mask for electroresist and for making the cool pan am gmts but in gilt, like what MKII did for their Key West gmt. The xtool is would do it but like you said it’s like $700. The sculpfun s9 could do it too since it has a dot size of something like .05mm I believe. Those are like $230 and go on sale especially with the newer model that just came out. You could use the laser too to mark casebacks.