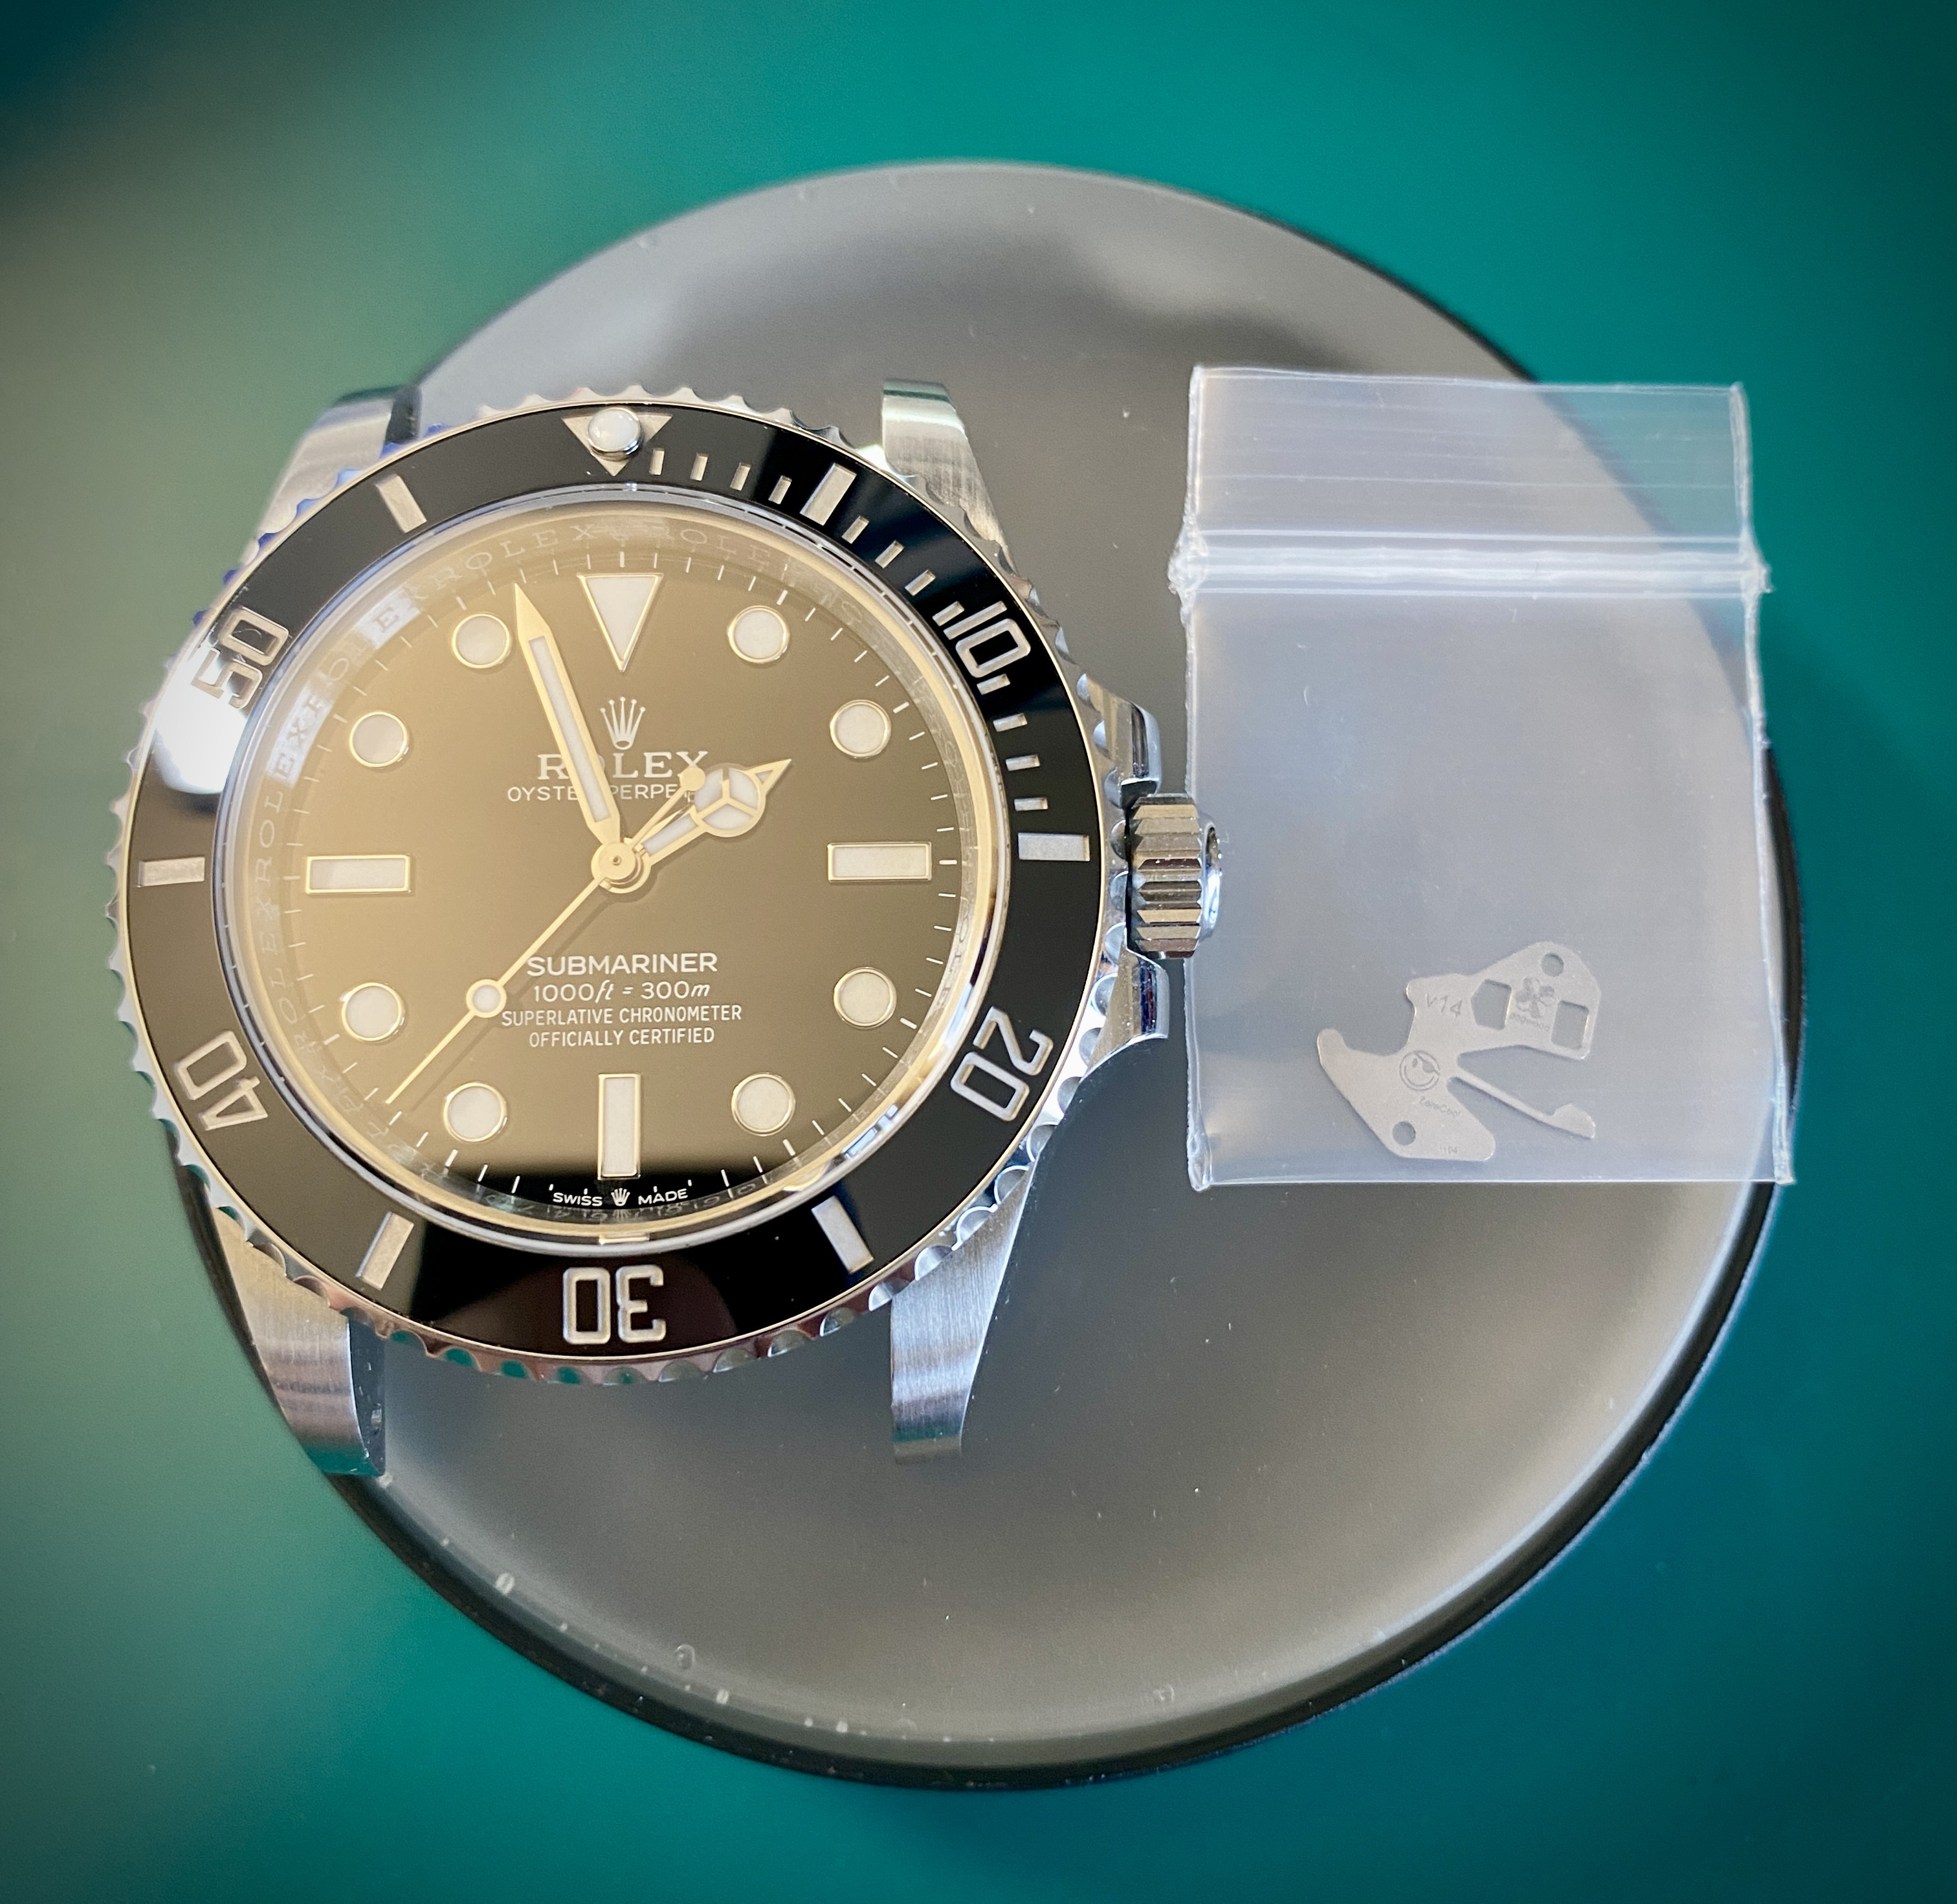
There have been a few requests for a step by step install guide for those attempting this mod on their own. So after much procrastination, here it is. I've tried to be as verbose as I can here and I've attempted to mention the specific tools I use in each step. But If something isn't obvious, please post a reply and I'll do my best to clarify. Here we go...
Congratulations, your new ZeroCool-Dogwood 3230 mod part has arrived in the mail. The first thing you're going to need to do is remove the bracelet from your watch. I'm assuming you are able to do this without my help, and if you can't, then you might want to reconsider if you're up for doing this install yourself.
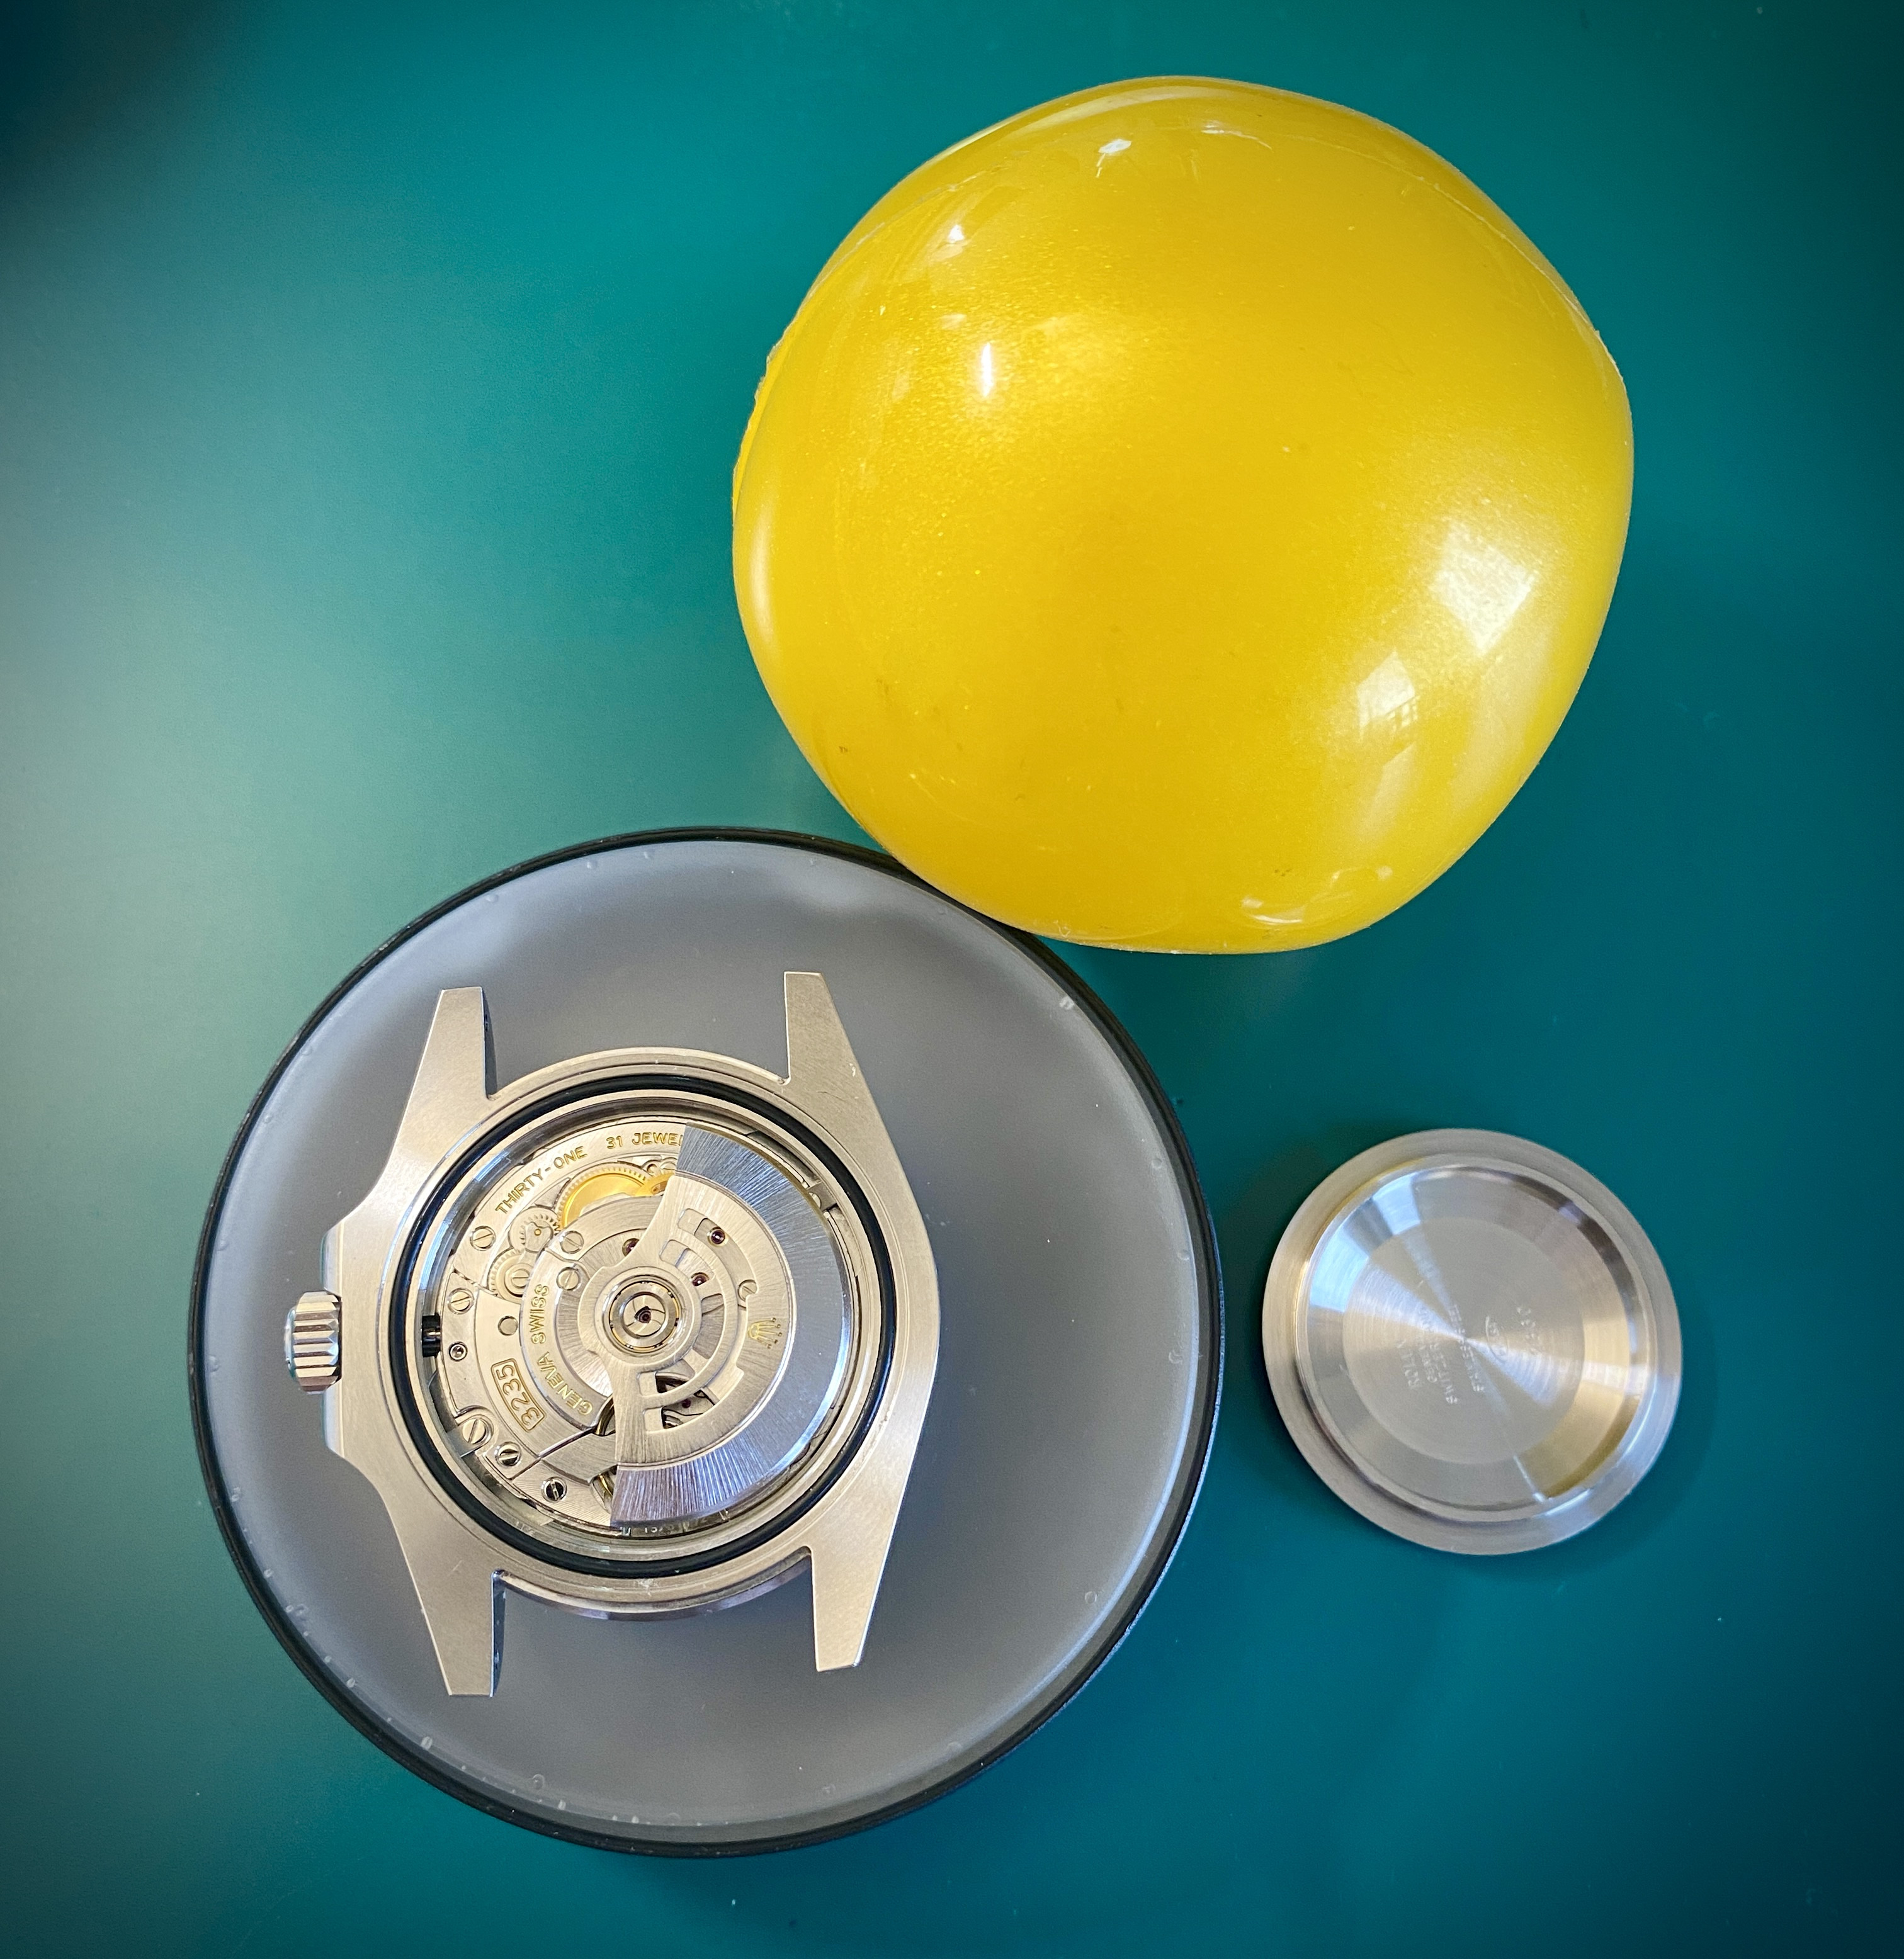
Next we're going to need to get the case back open. My preferred method is the rubber ball. But if you're in a pinch, a wadded up ball of duct tape also works.
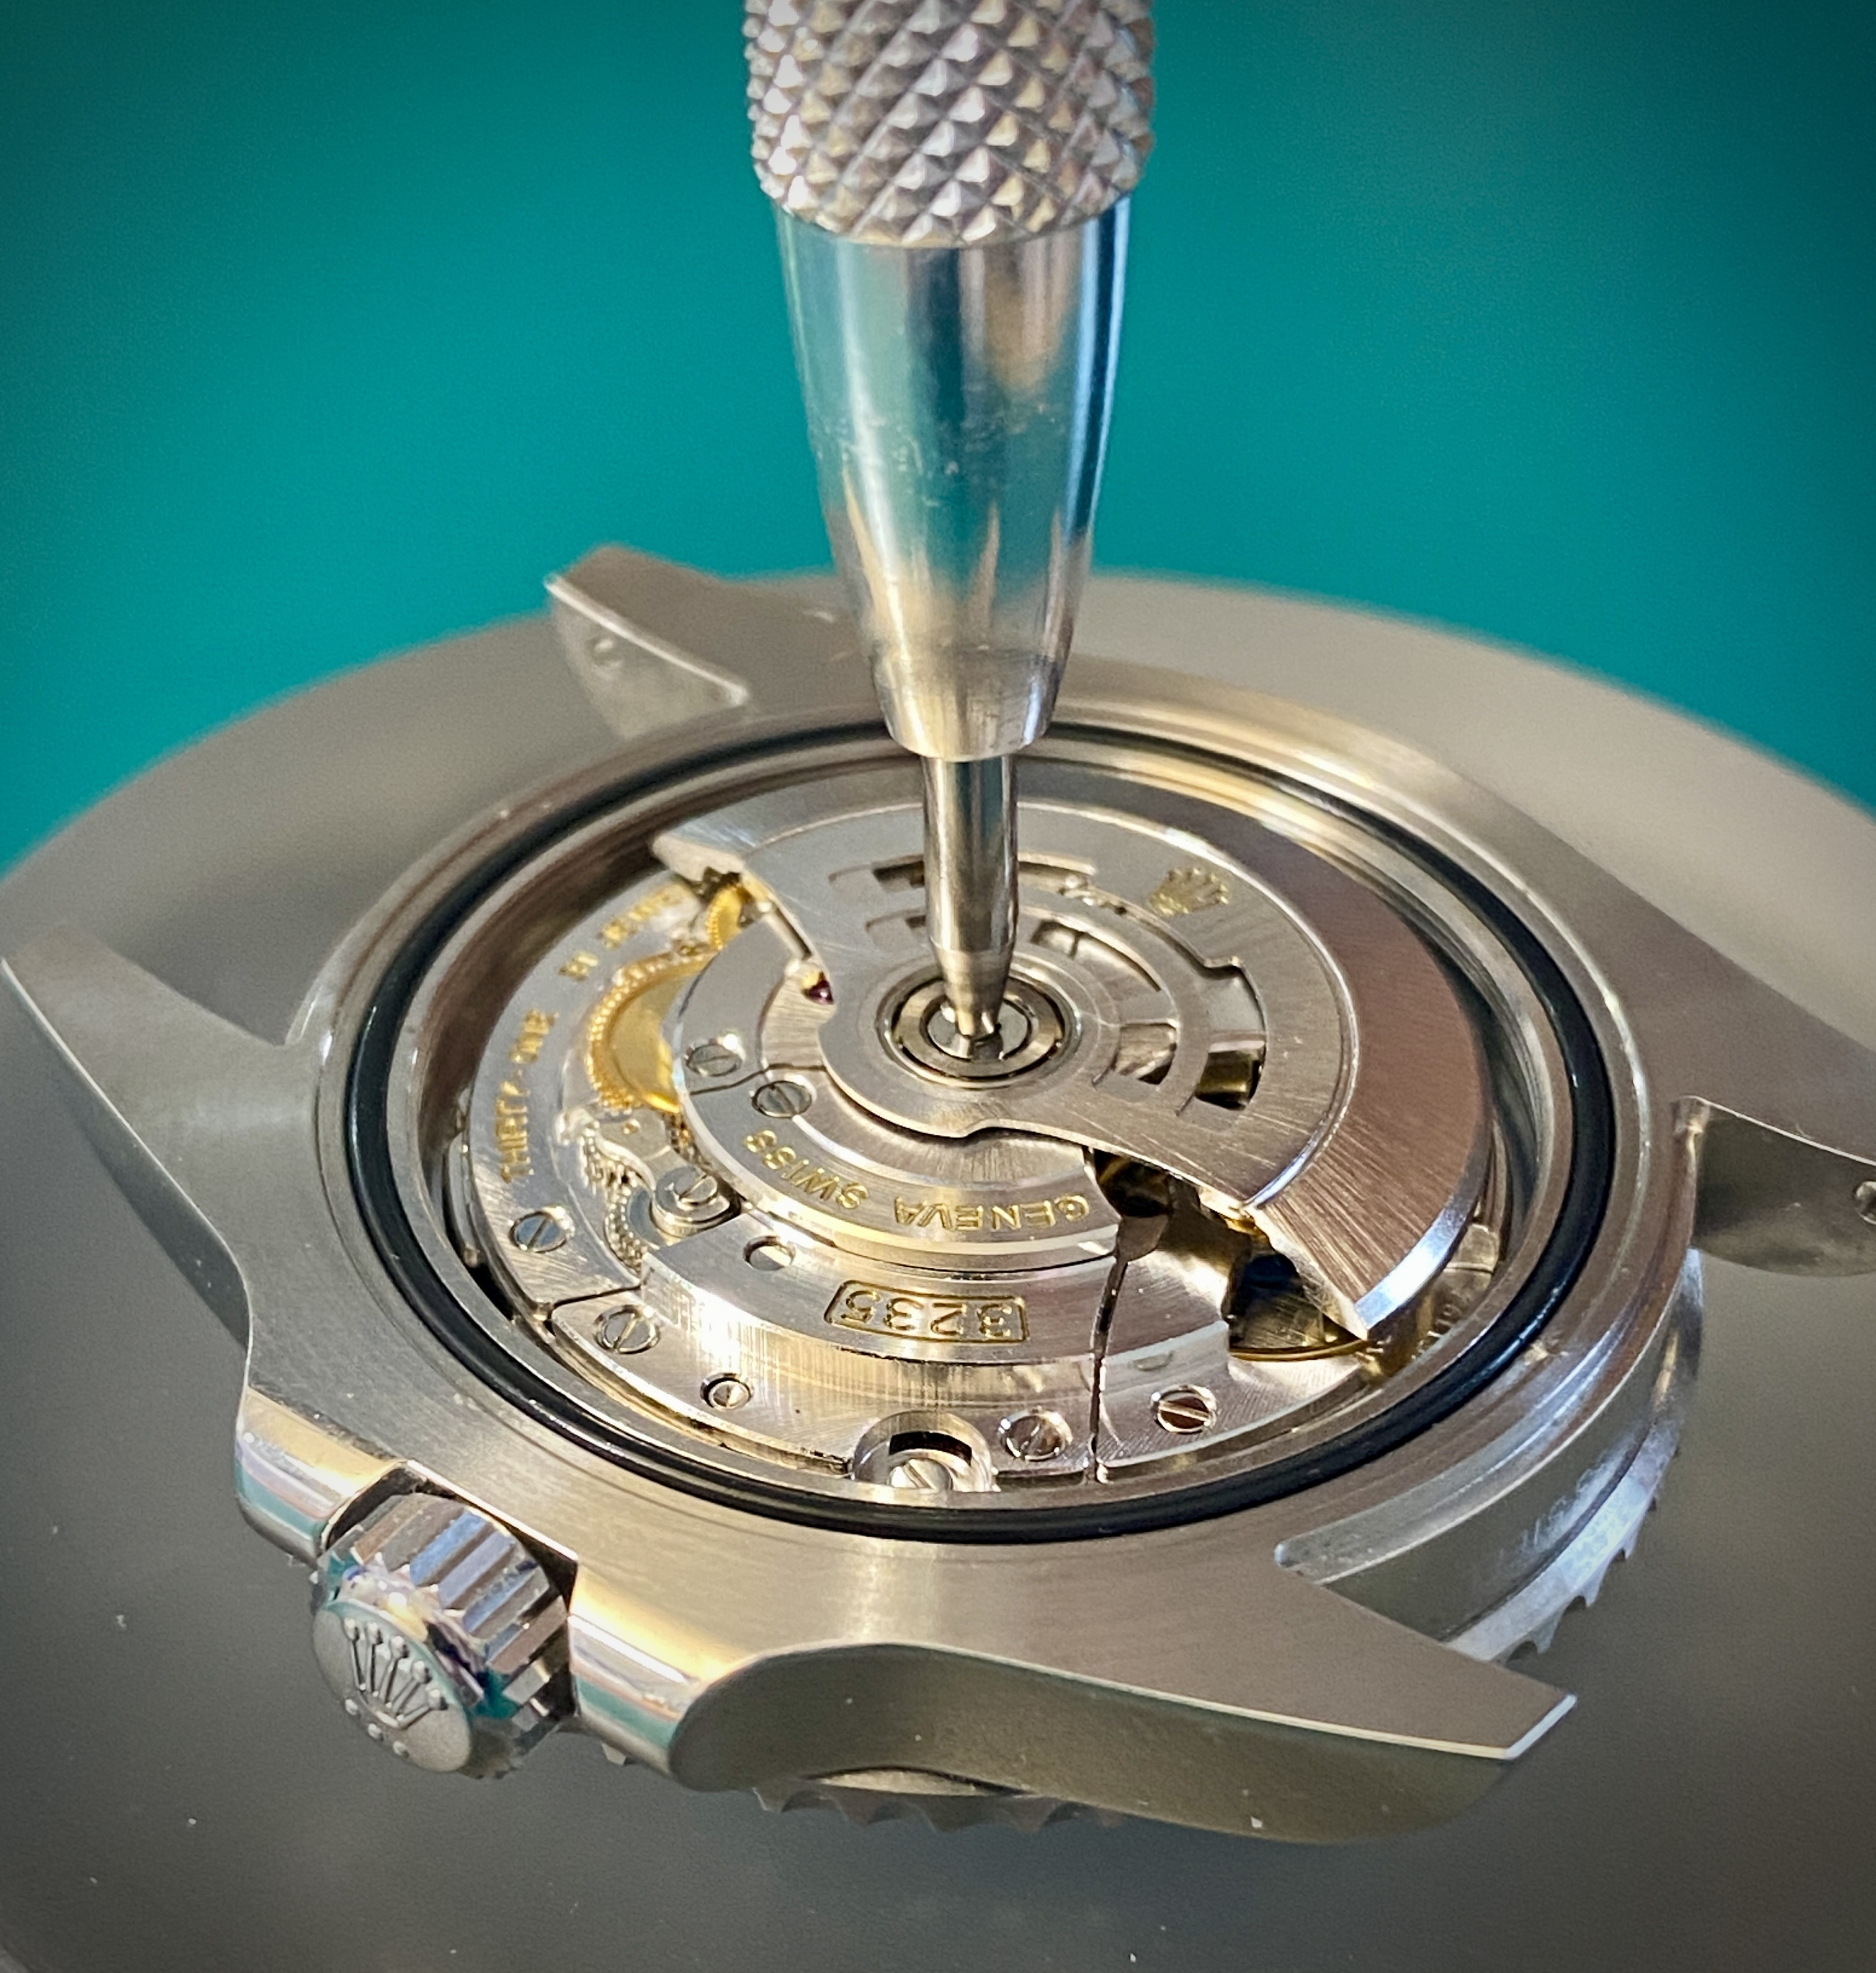
Next we need to remove the rotor. While this isn't strictly speaking necessary, it makes everything we're about to do WAY easier. You also don't want to have the movement resting on the rotor because that might stress the bearing block which may introduce slop and increase rotor noise. To remove the rotor, you'll need a small bespoke triangular screw driver socket. These can be purchased on AliExpress for around $20, just search for "3235 rotor tool" and you'll find what you need.
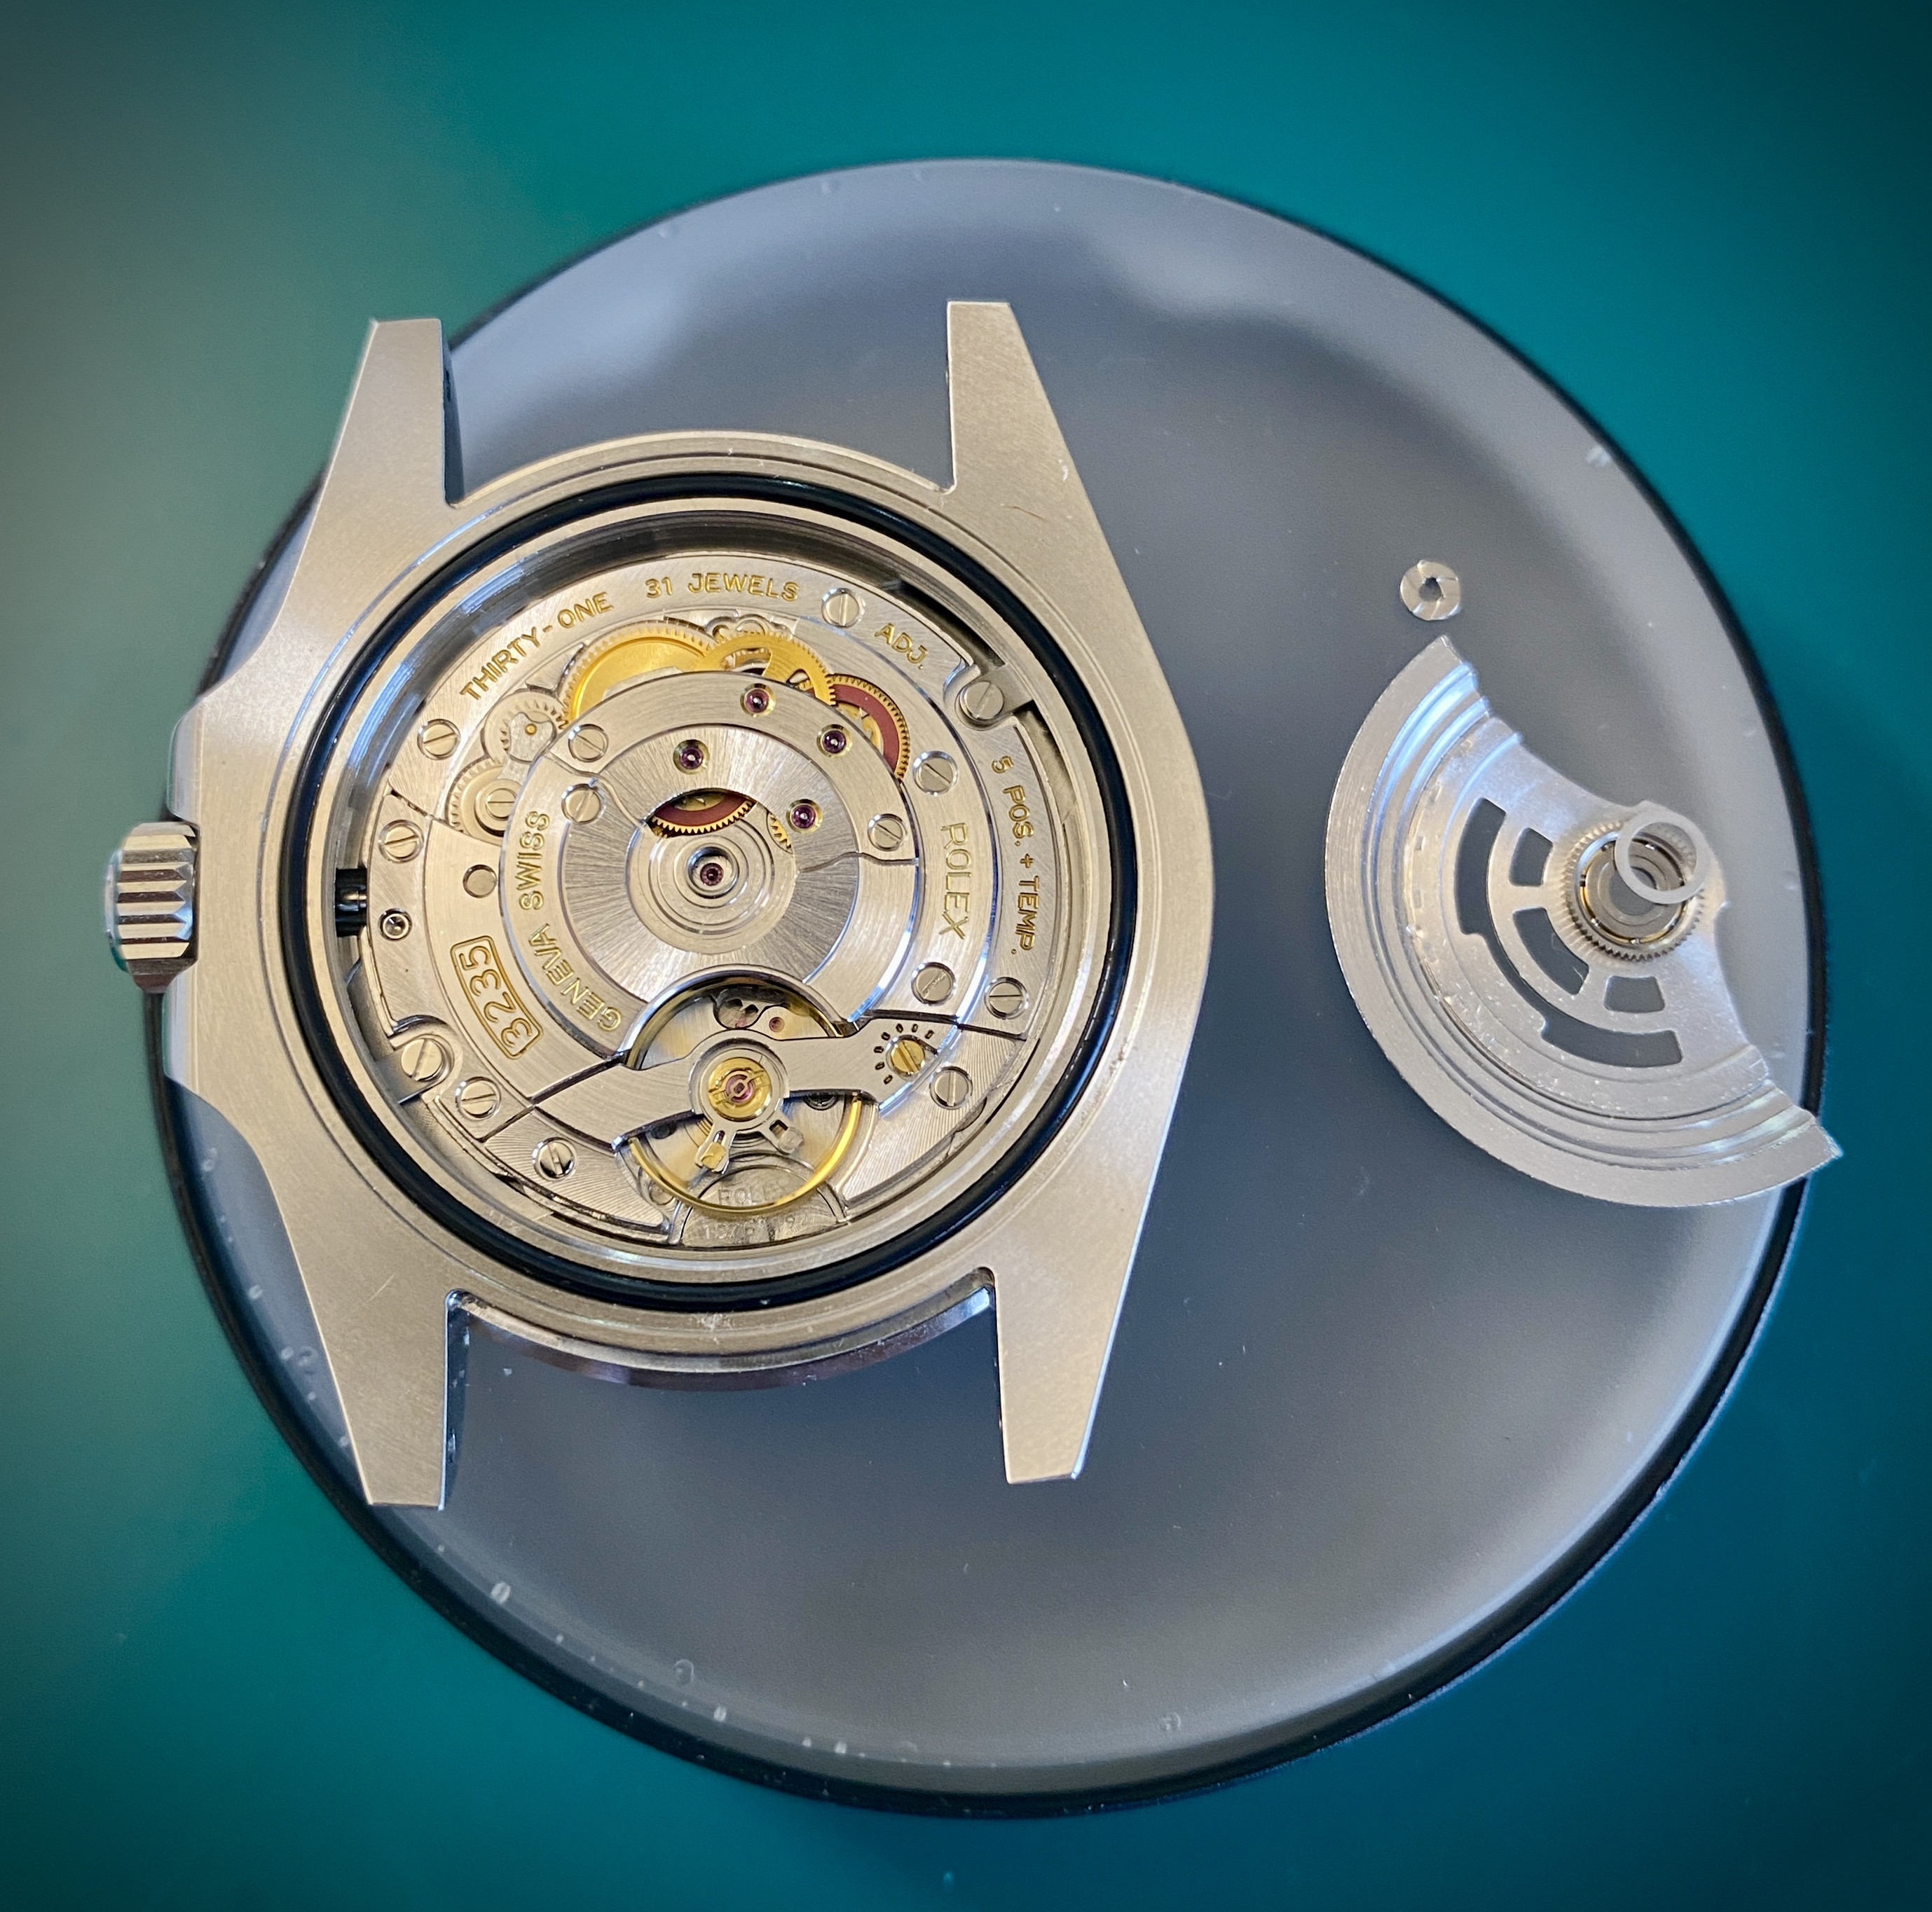
When you remove the rotor, watch out for the small spacer ring / washer that sits under the rotor bearing block. You don't want to lose that. Set these parts aside in a clean parts tray.
Next you'll want to release the stem. The 323X movement's keyless works is pretty impervious to getting upset, and it doesn't really matter what crown position you're in when you push the release button. Just apply a little pressure and the stem should slide out.
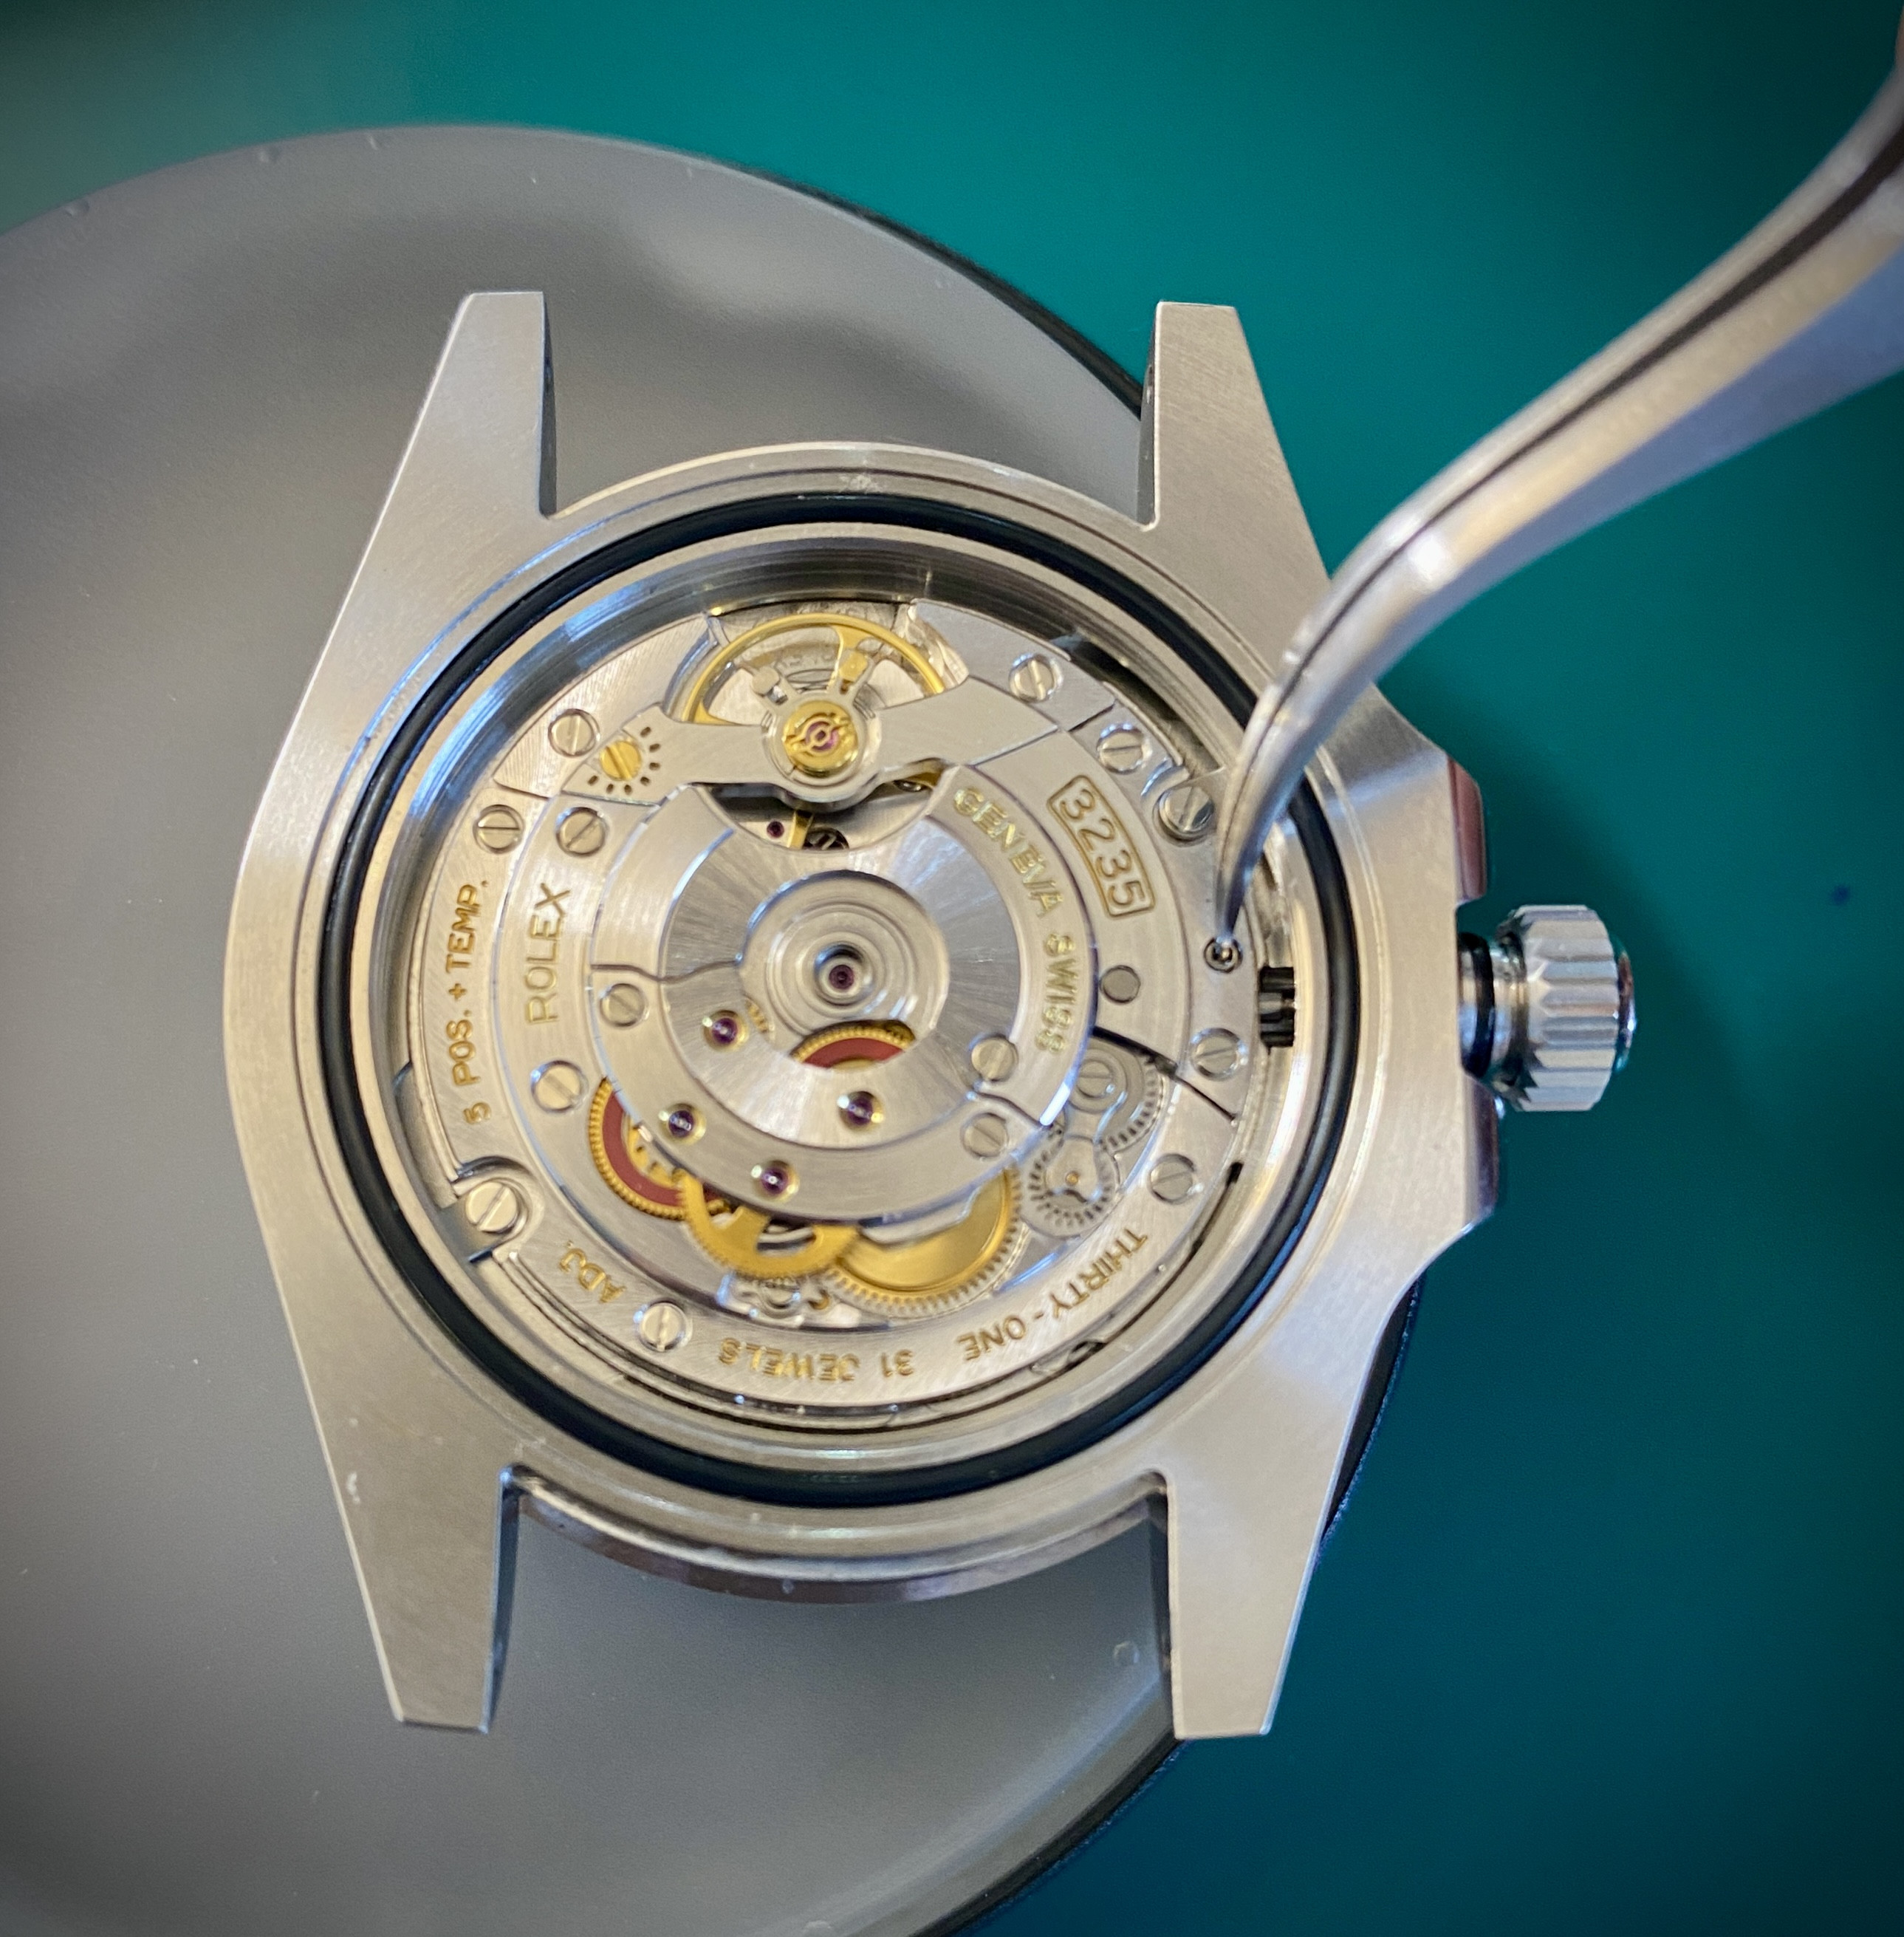
Here's what the crown should look like once it's come out. Set the crown and stem aside in your parts tray.
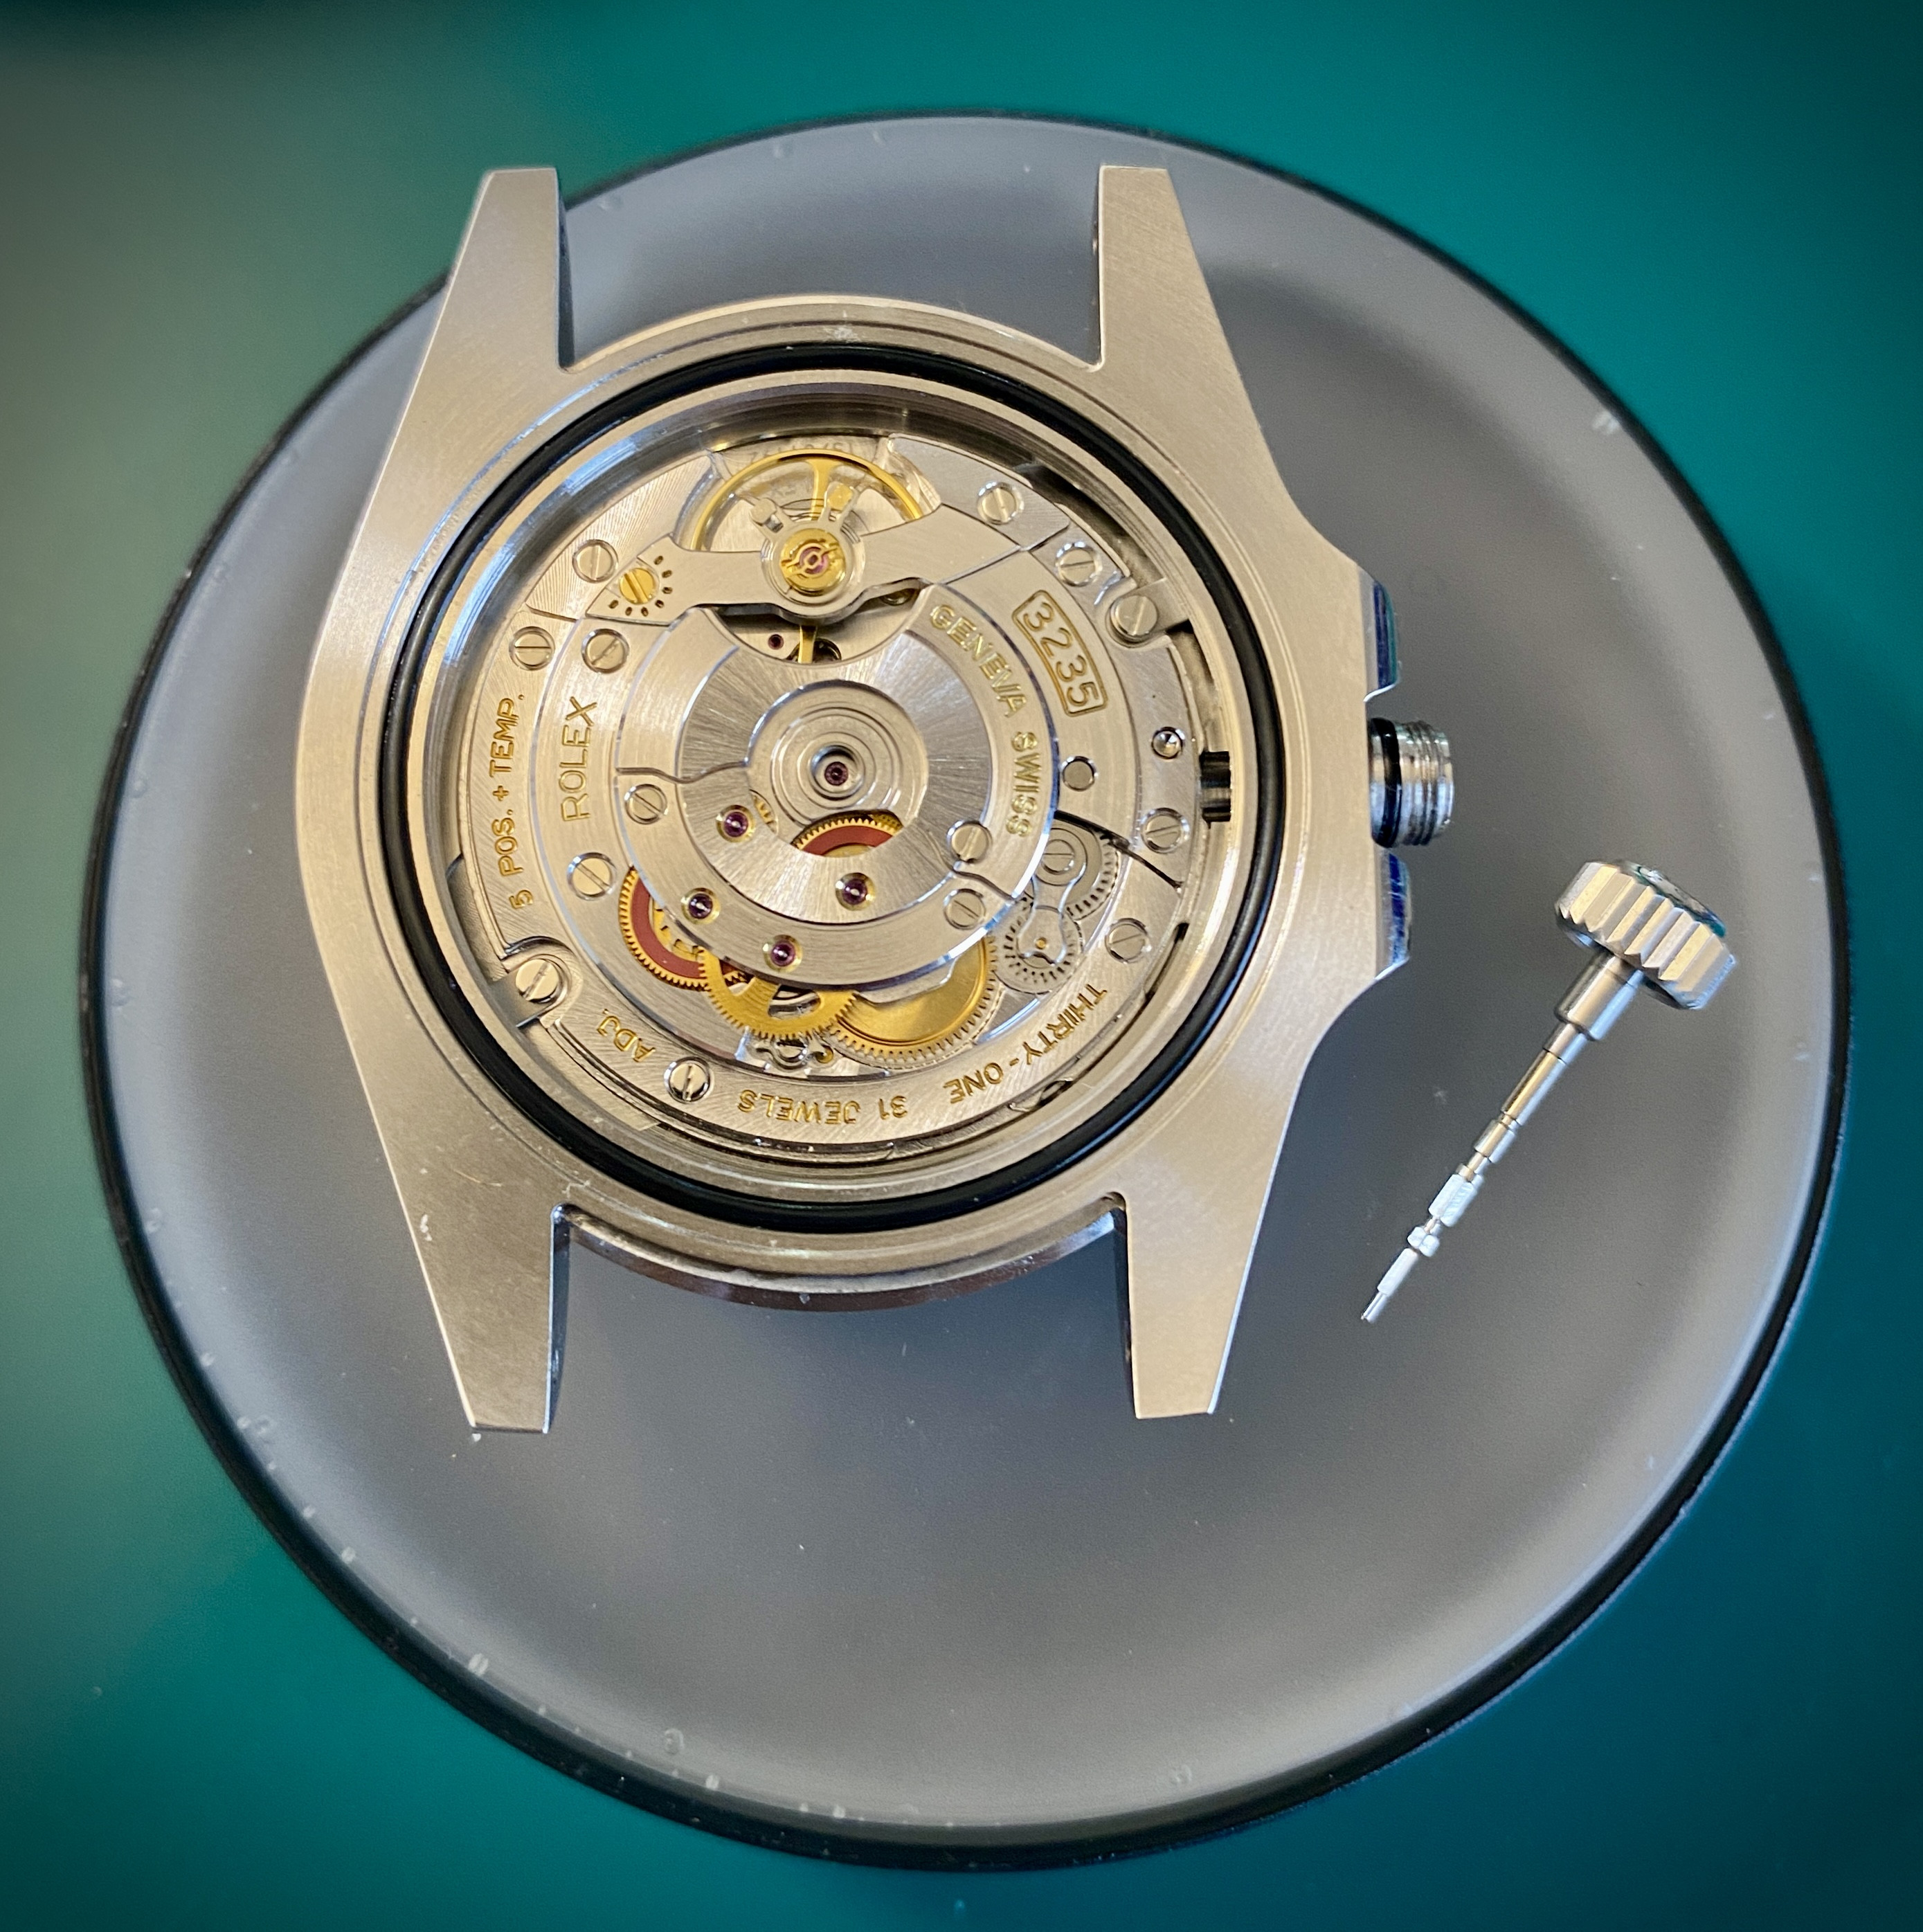
Now we need to remove the two case clamps. Use a 1.4mm (non-magnetic) screw driver to release the two clamps. It's helpful to loosen the first one a bit, then fully remove the second one before coming back to the first -- this method avoids any potential for sudden tension release (and parts flying across the room).
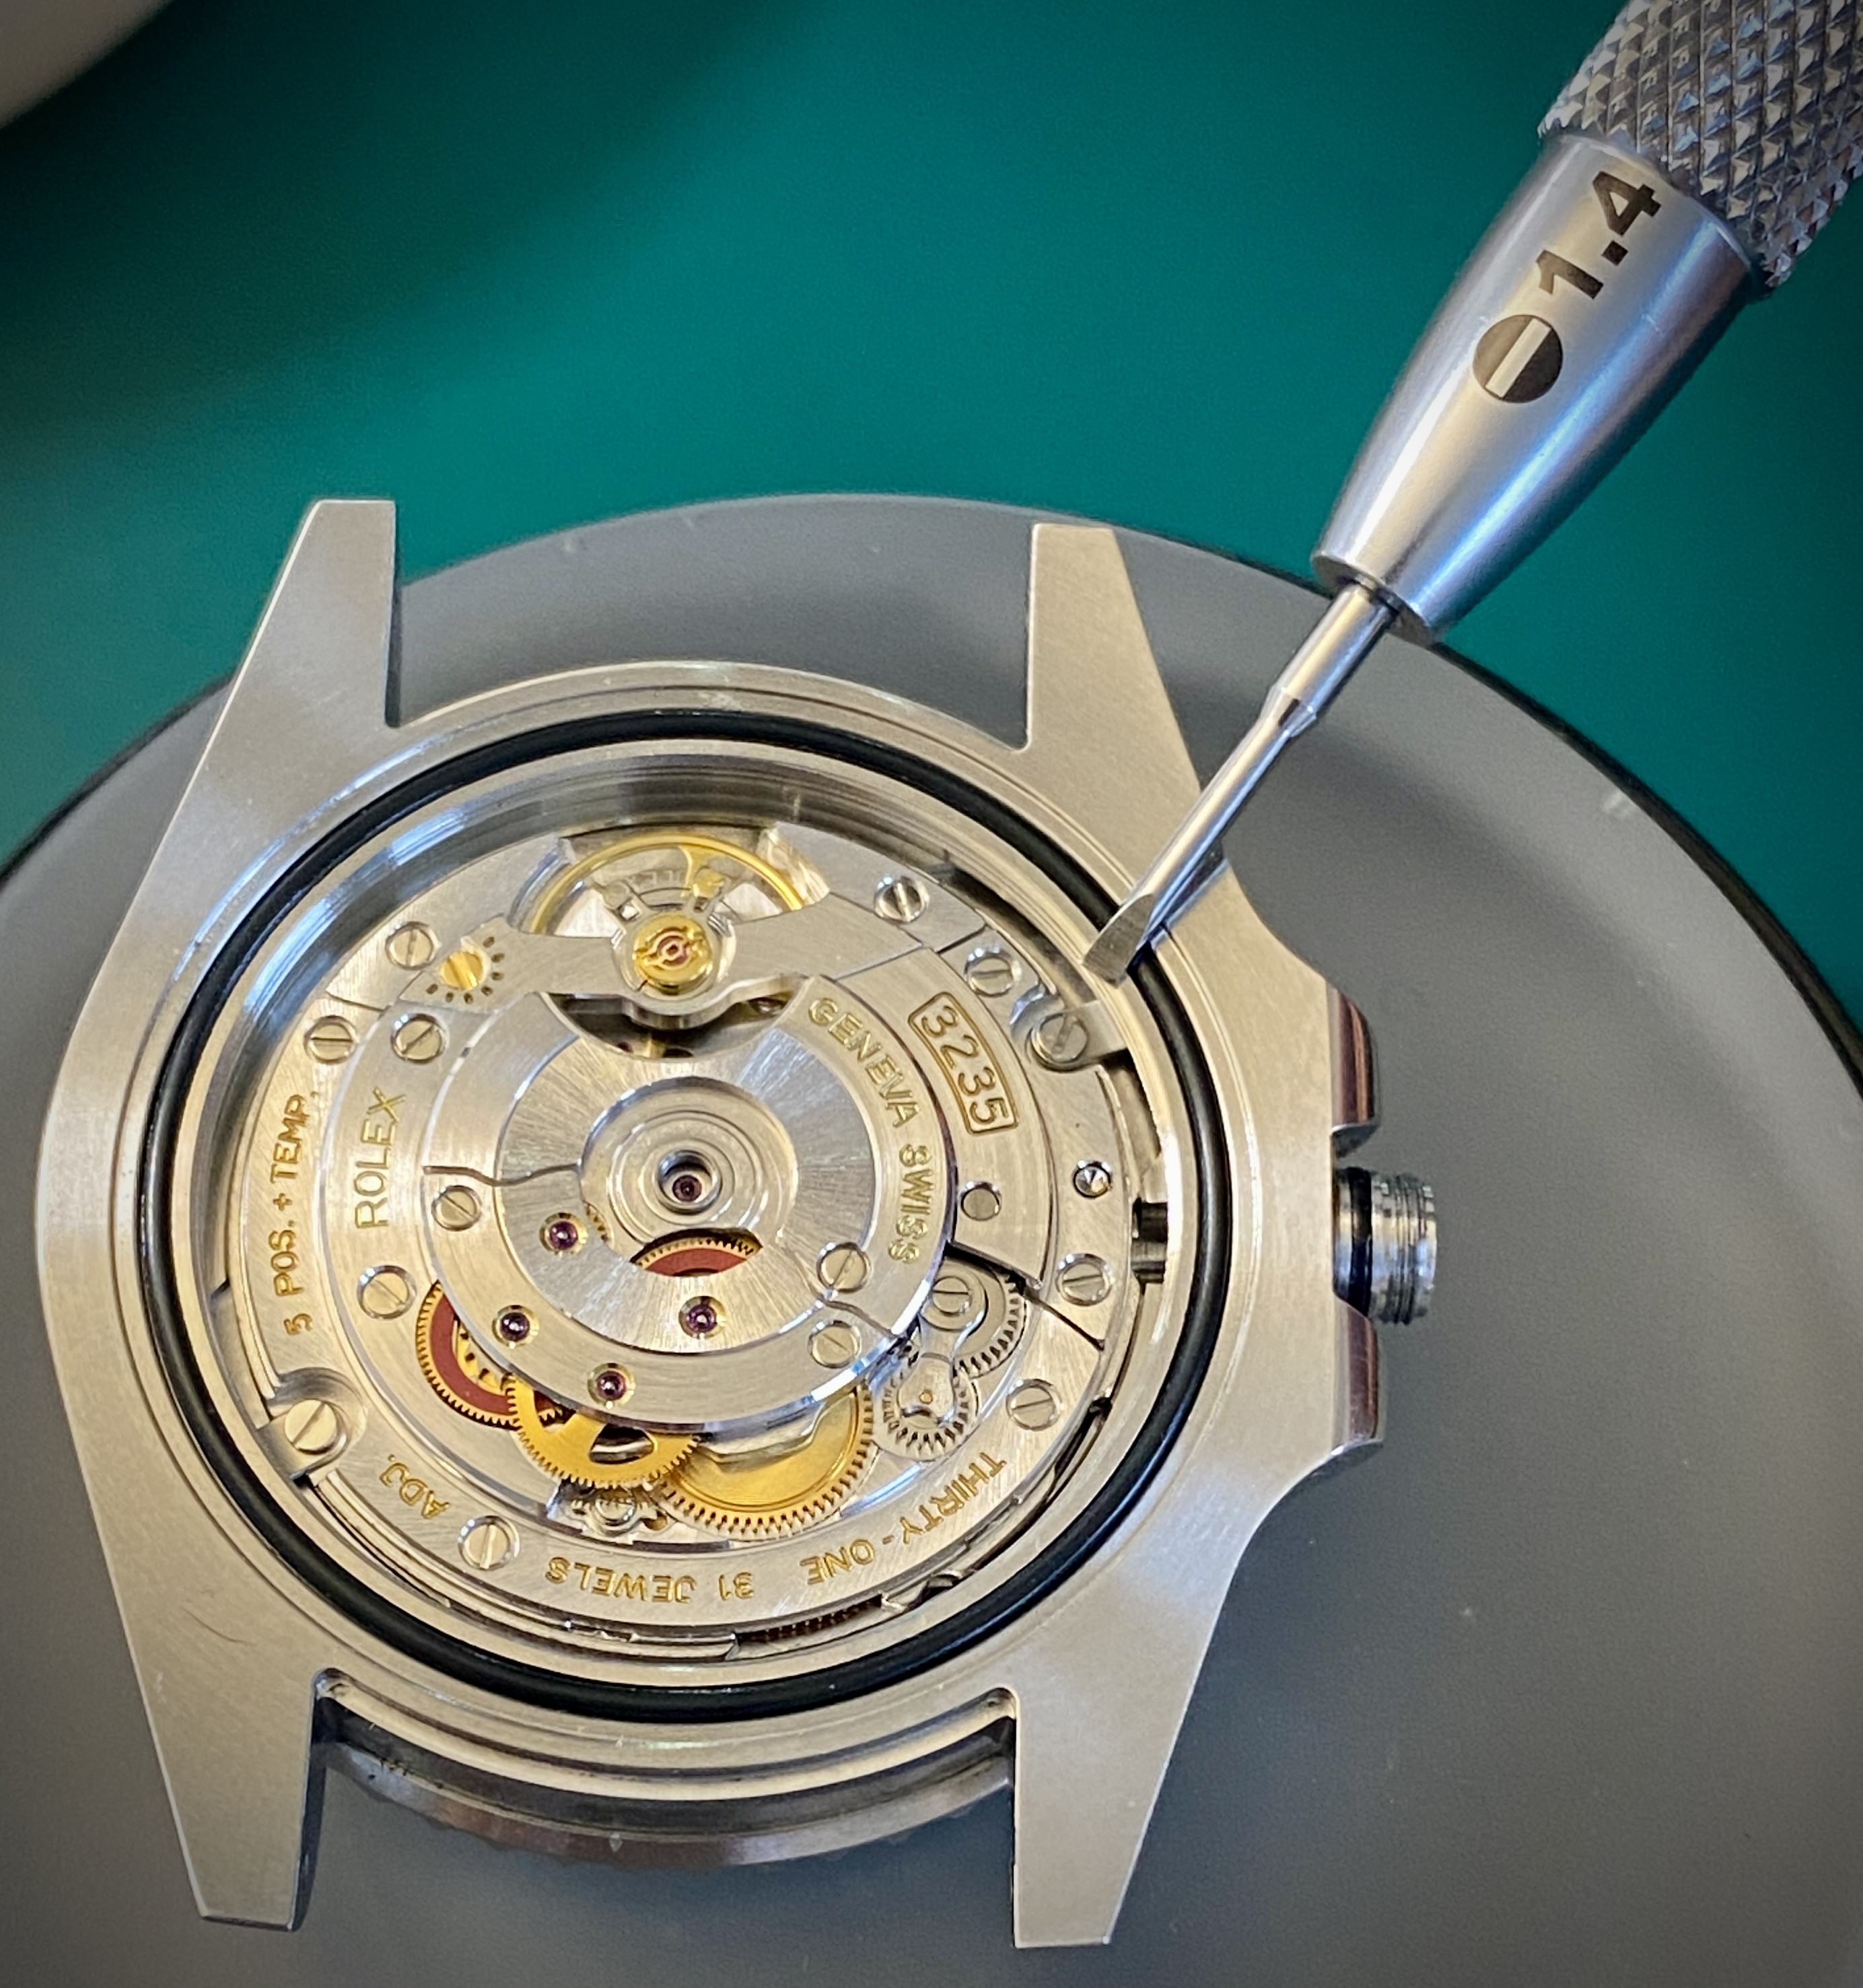
Now we need to get the movement out of the case. The easiest way to do this is to place a case cushion on top of the open back of the watch case, then flip the whole sandwich over, and lift the case up off the movement.
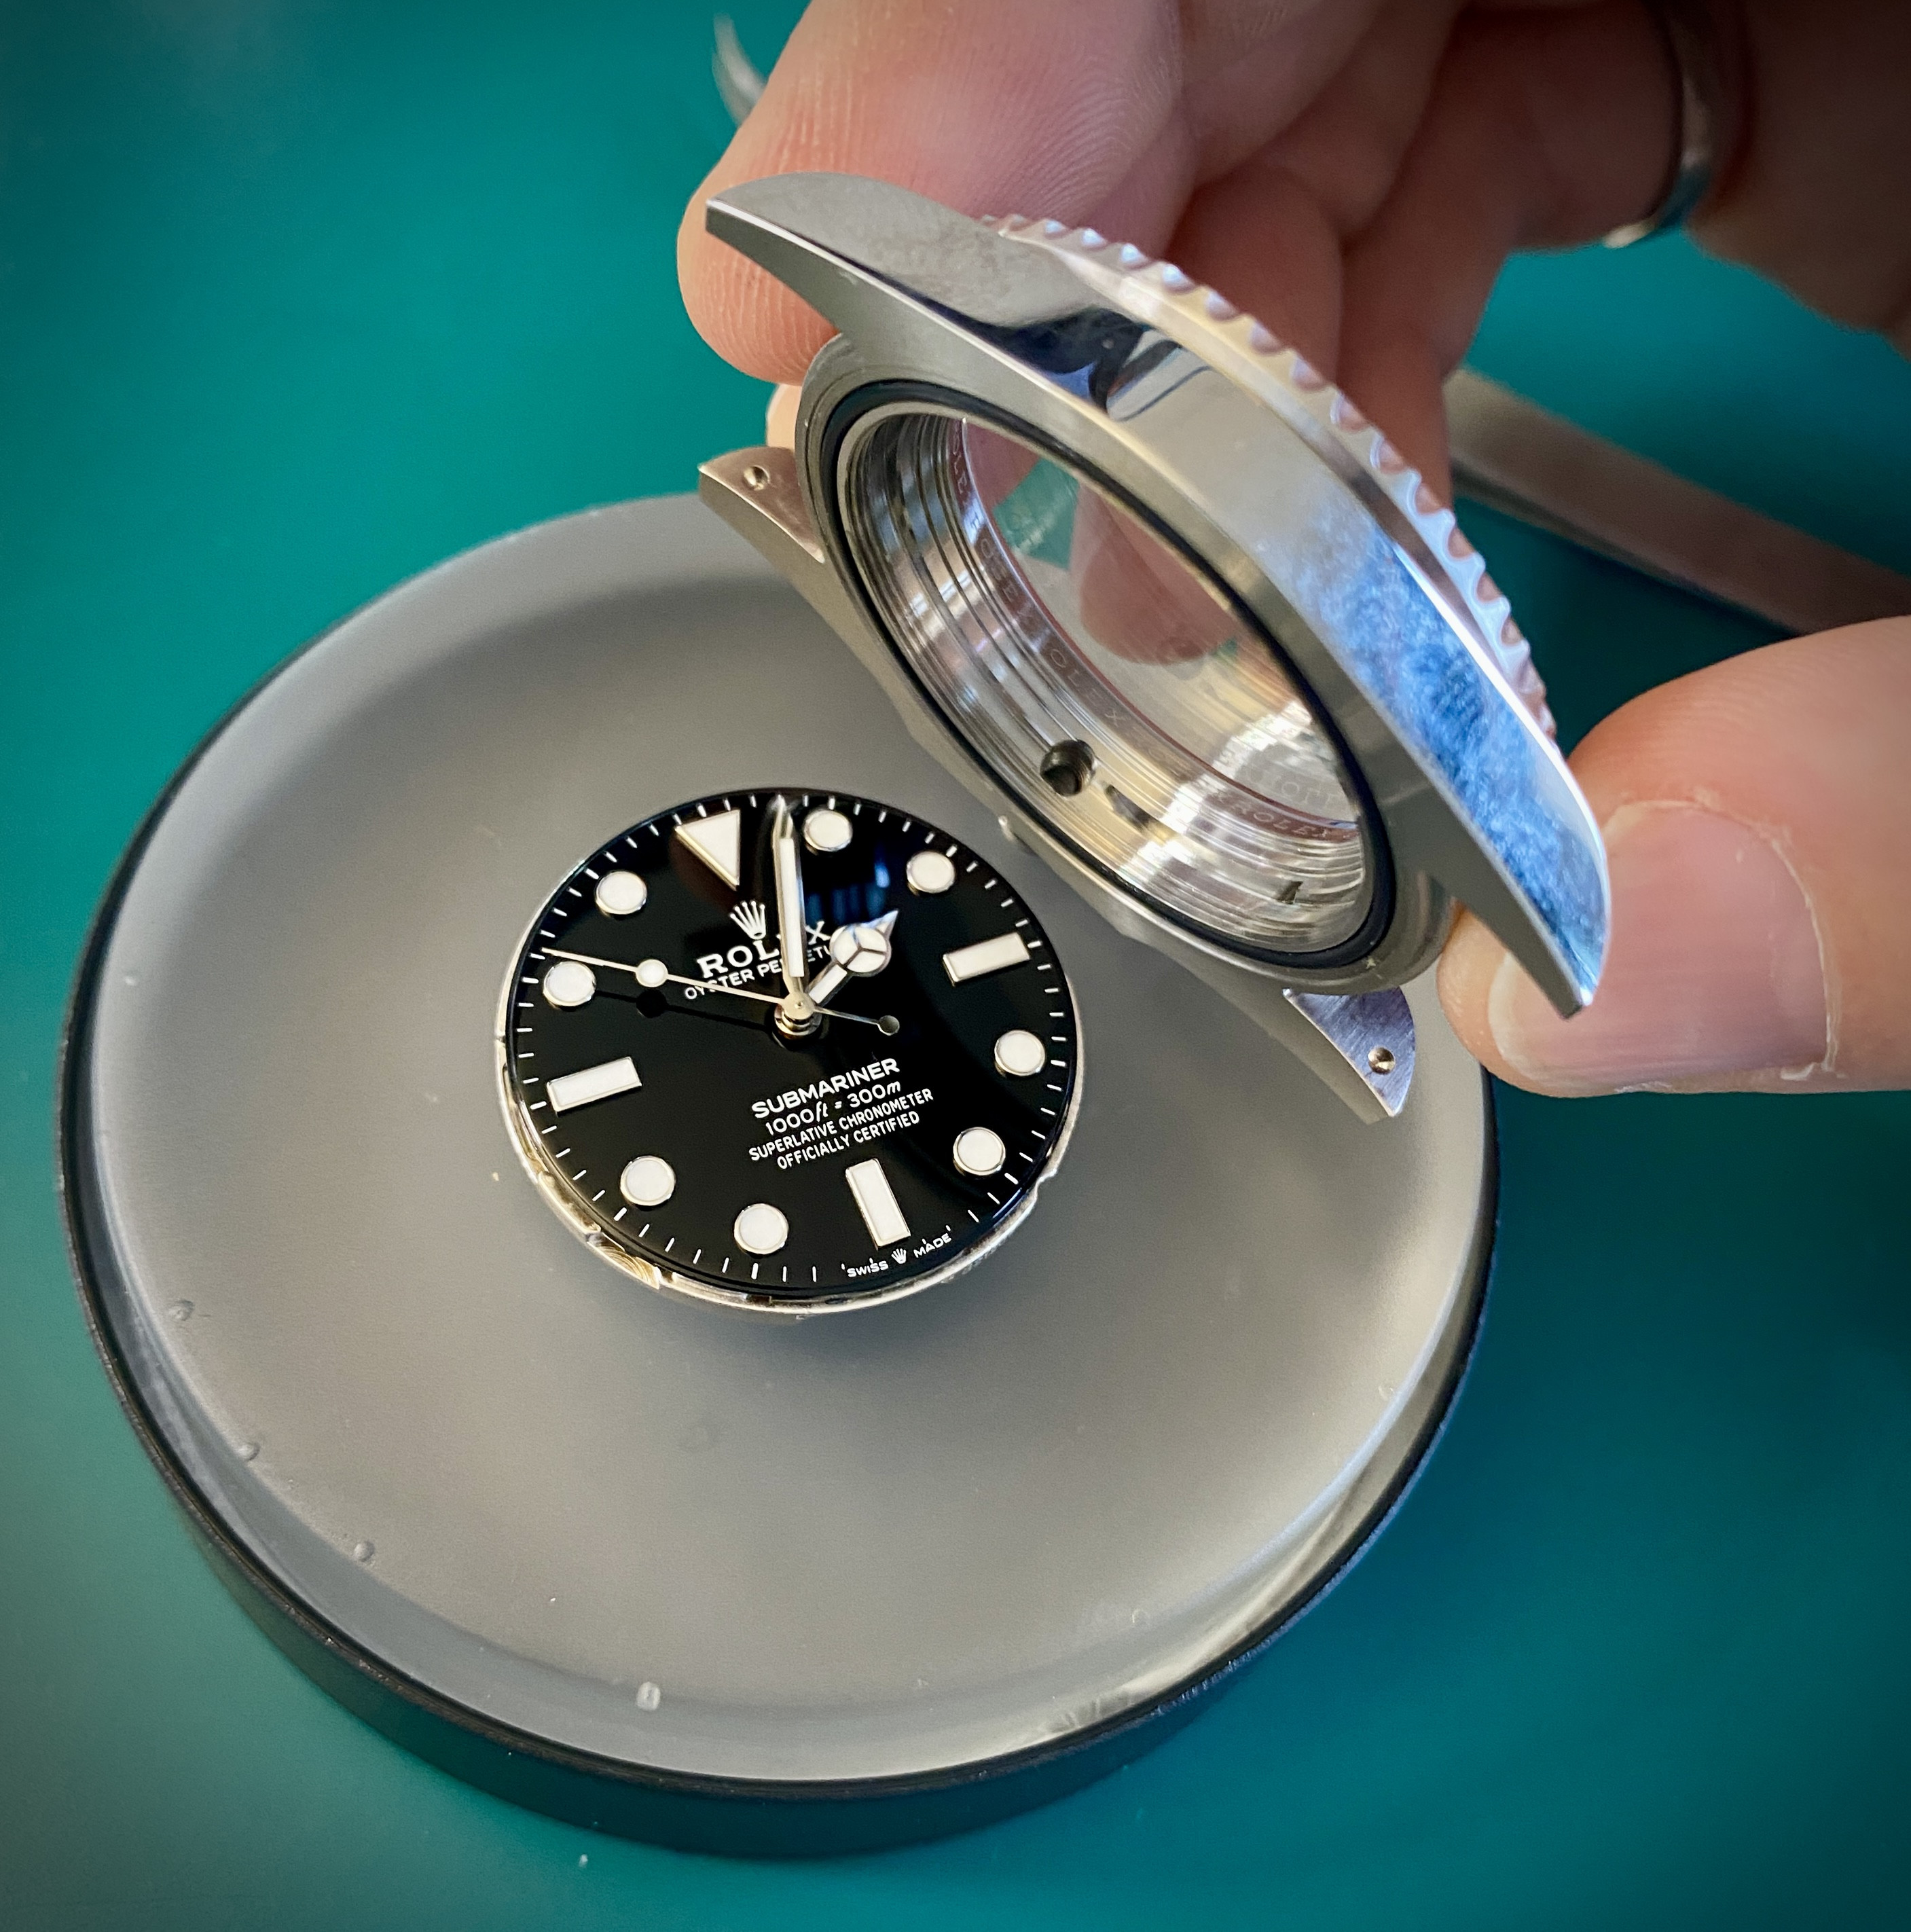
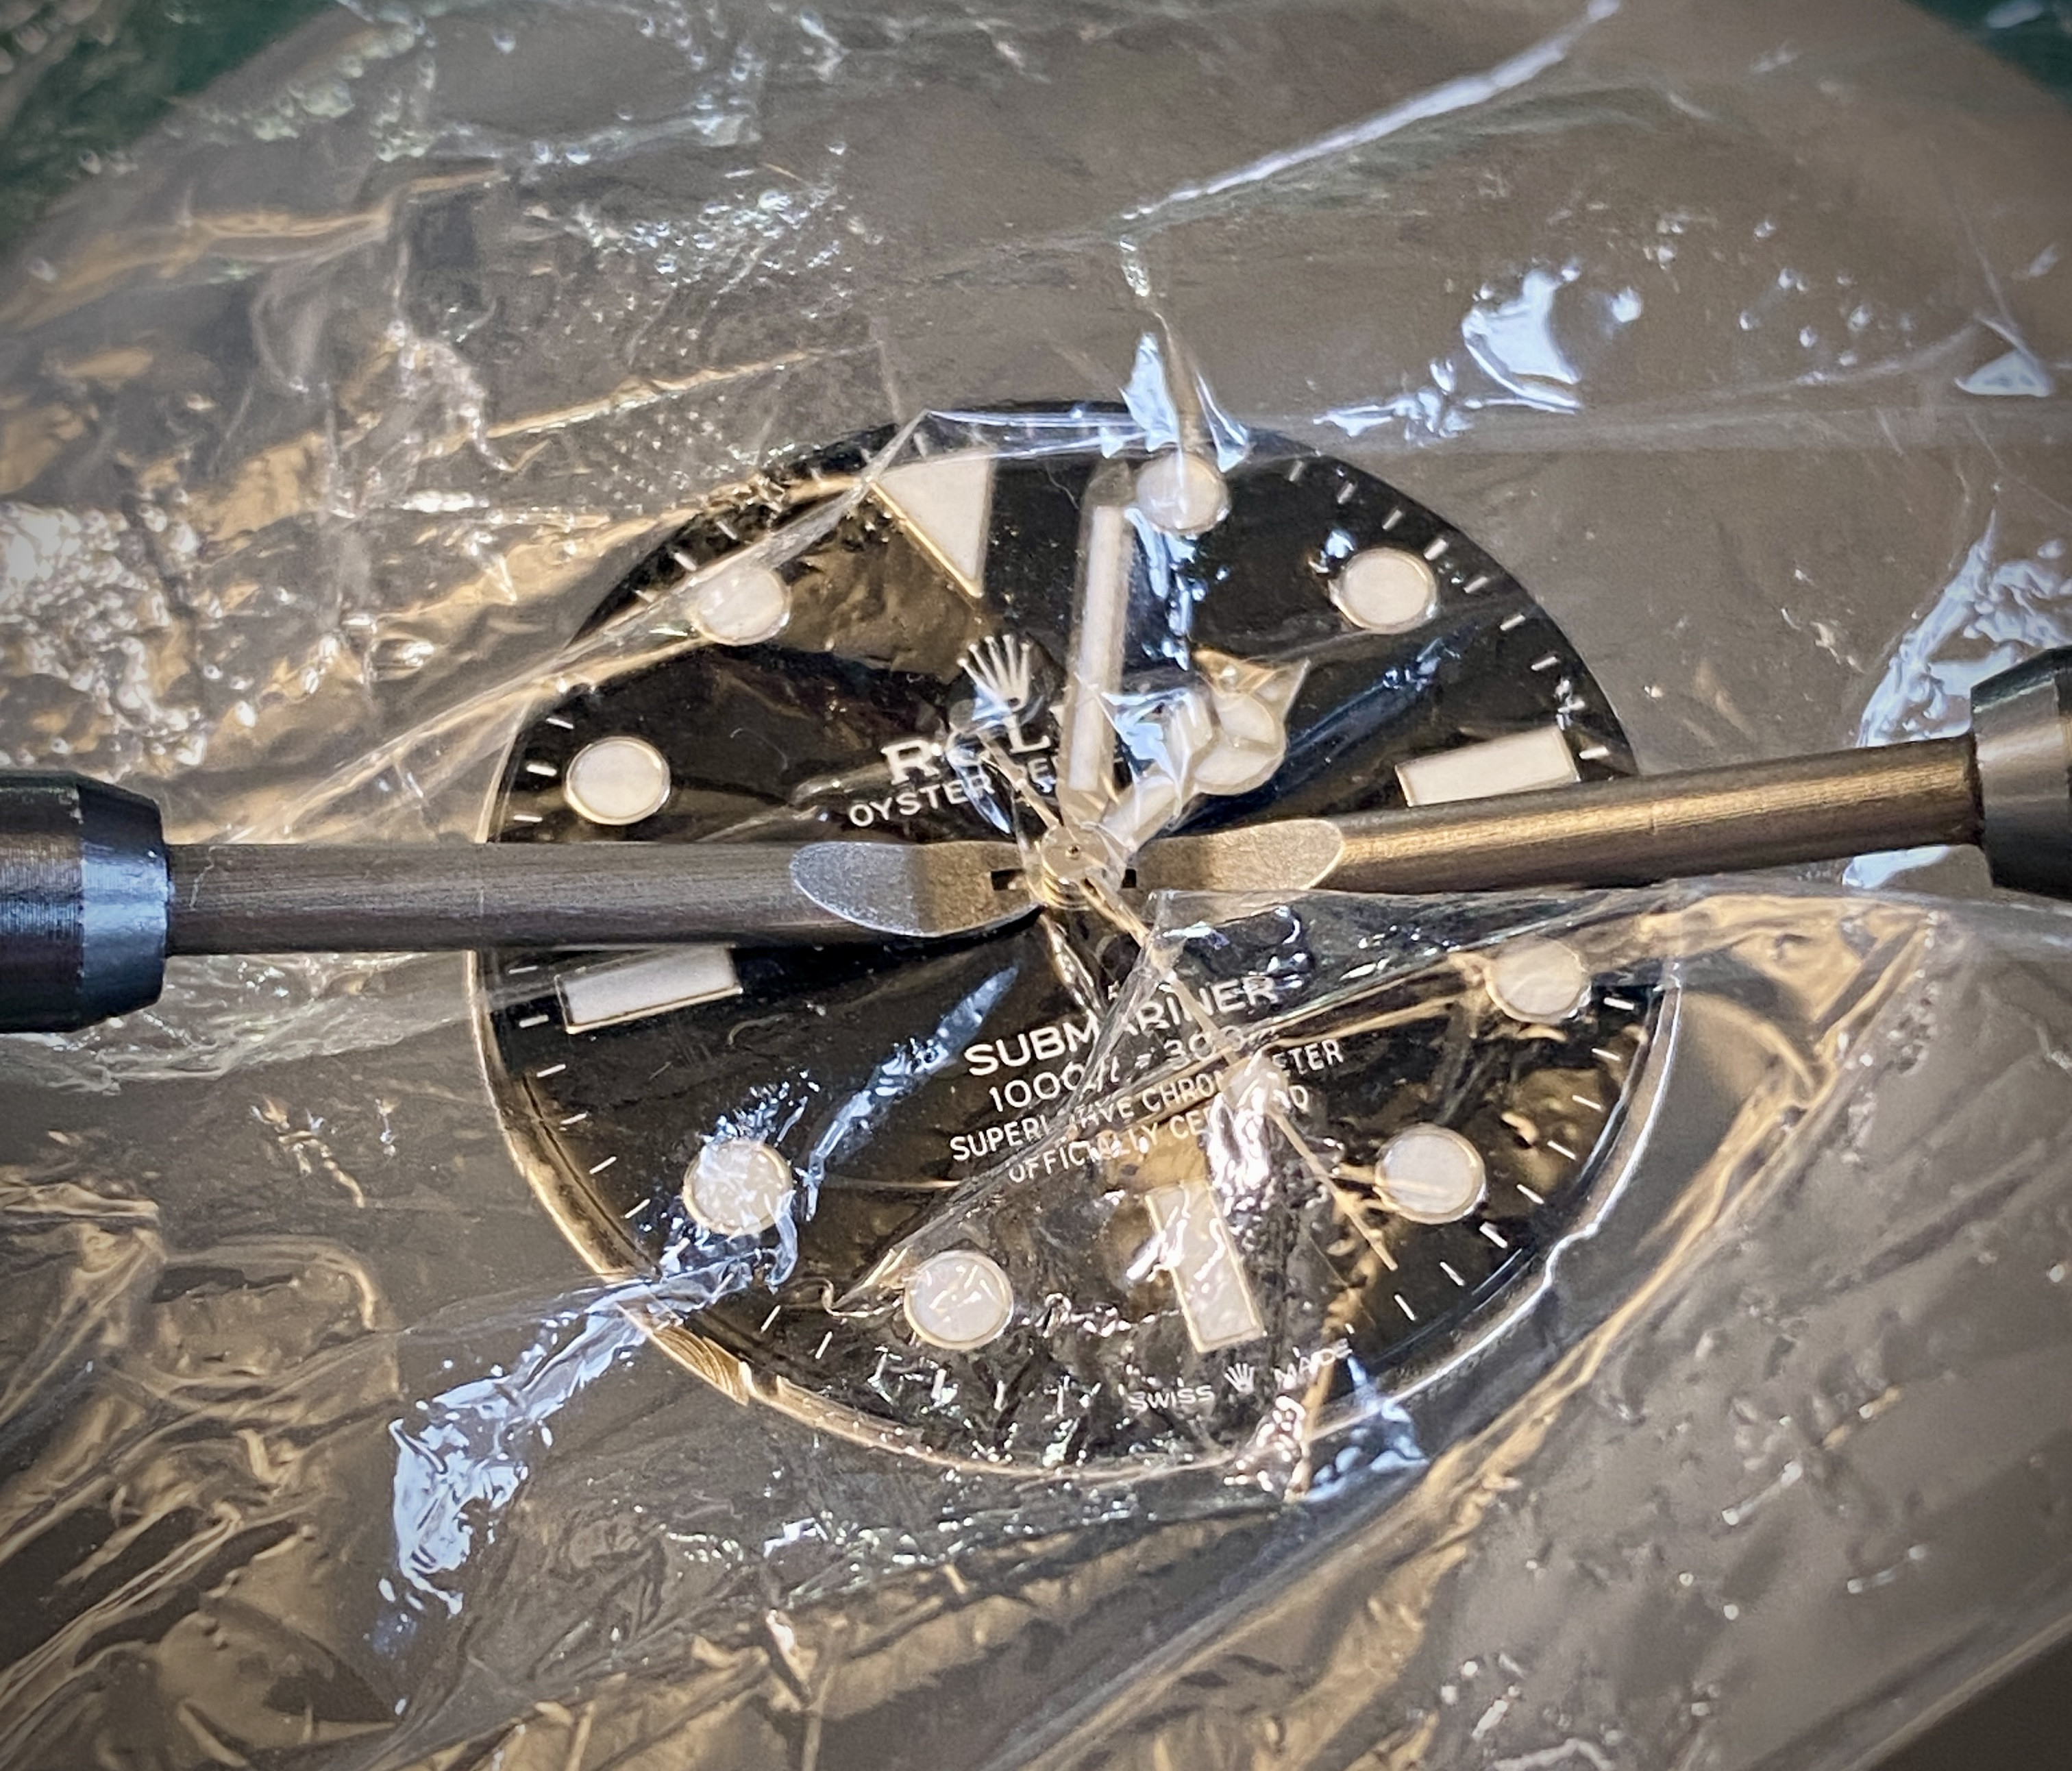
To remove the hands, I prefer to use hand removal lever tools rather than the "presto" style tool. I also lay a clean sheet of plastic food wrap over the dial to protect both the dial and the hands.
Now is a good time to mention that whenever you're handing watch parts (but especially hands and dials) you should wear finger cots to keep the oils from your fingers from getting onto any of the parts.
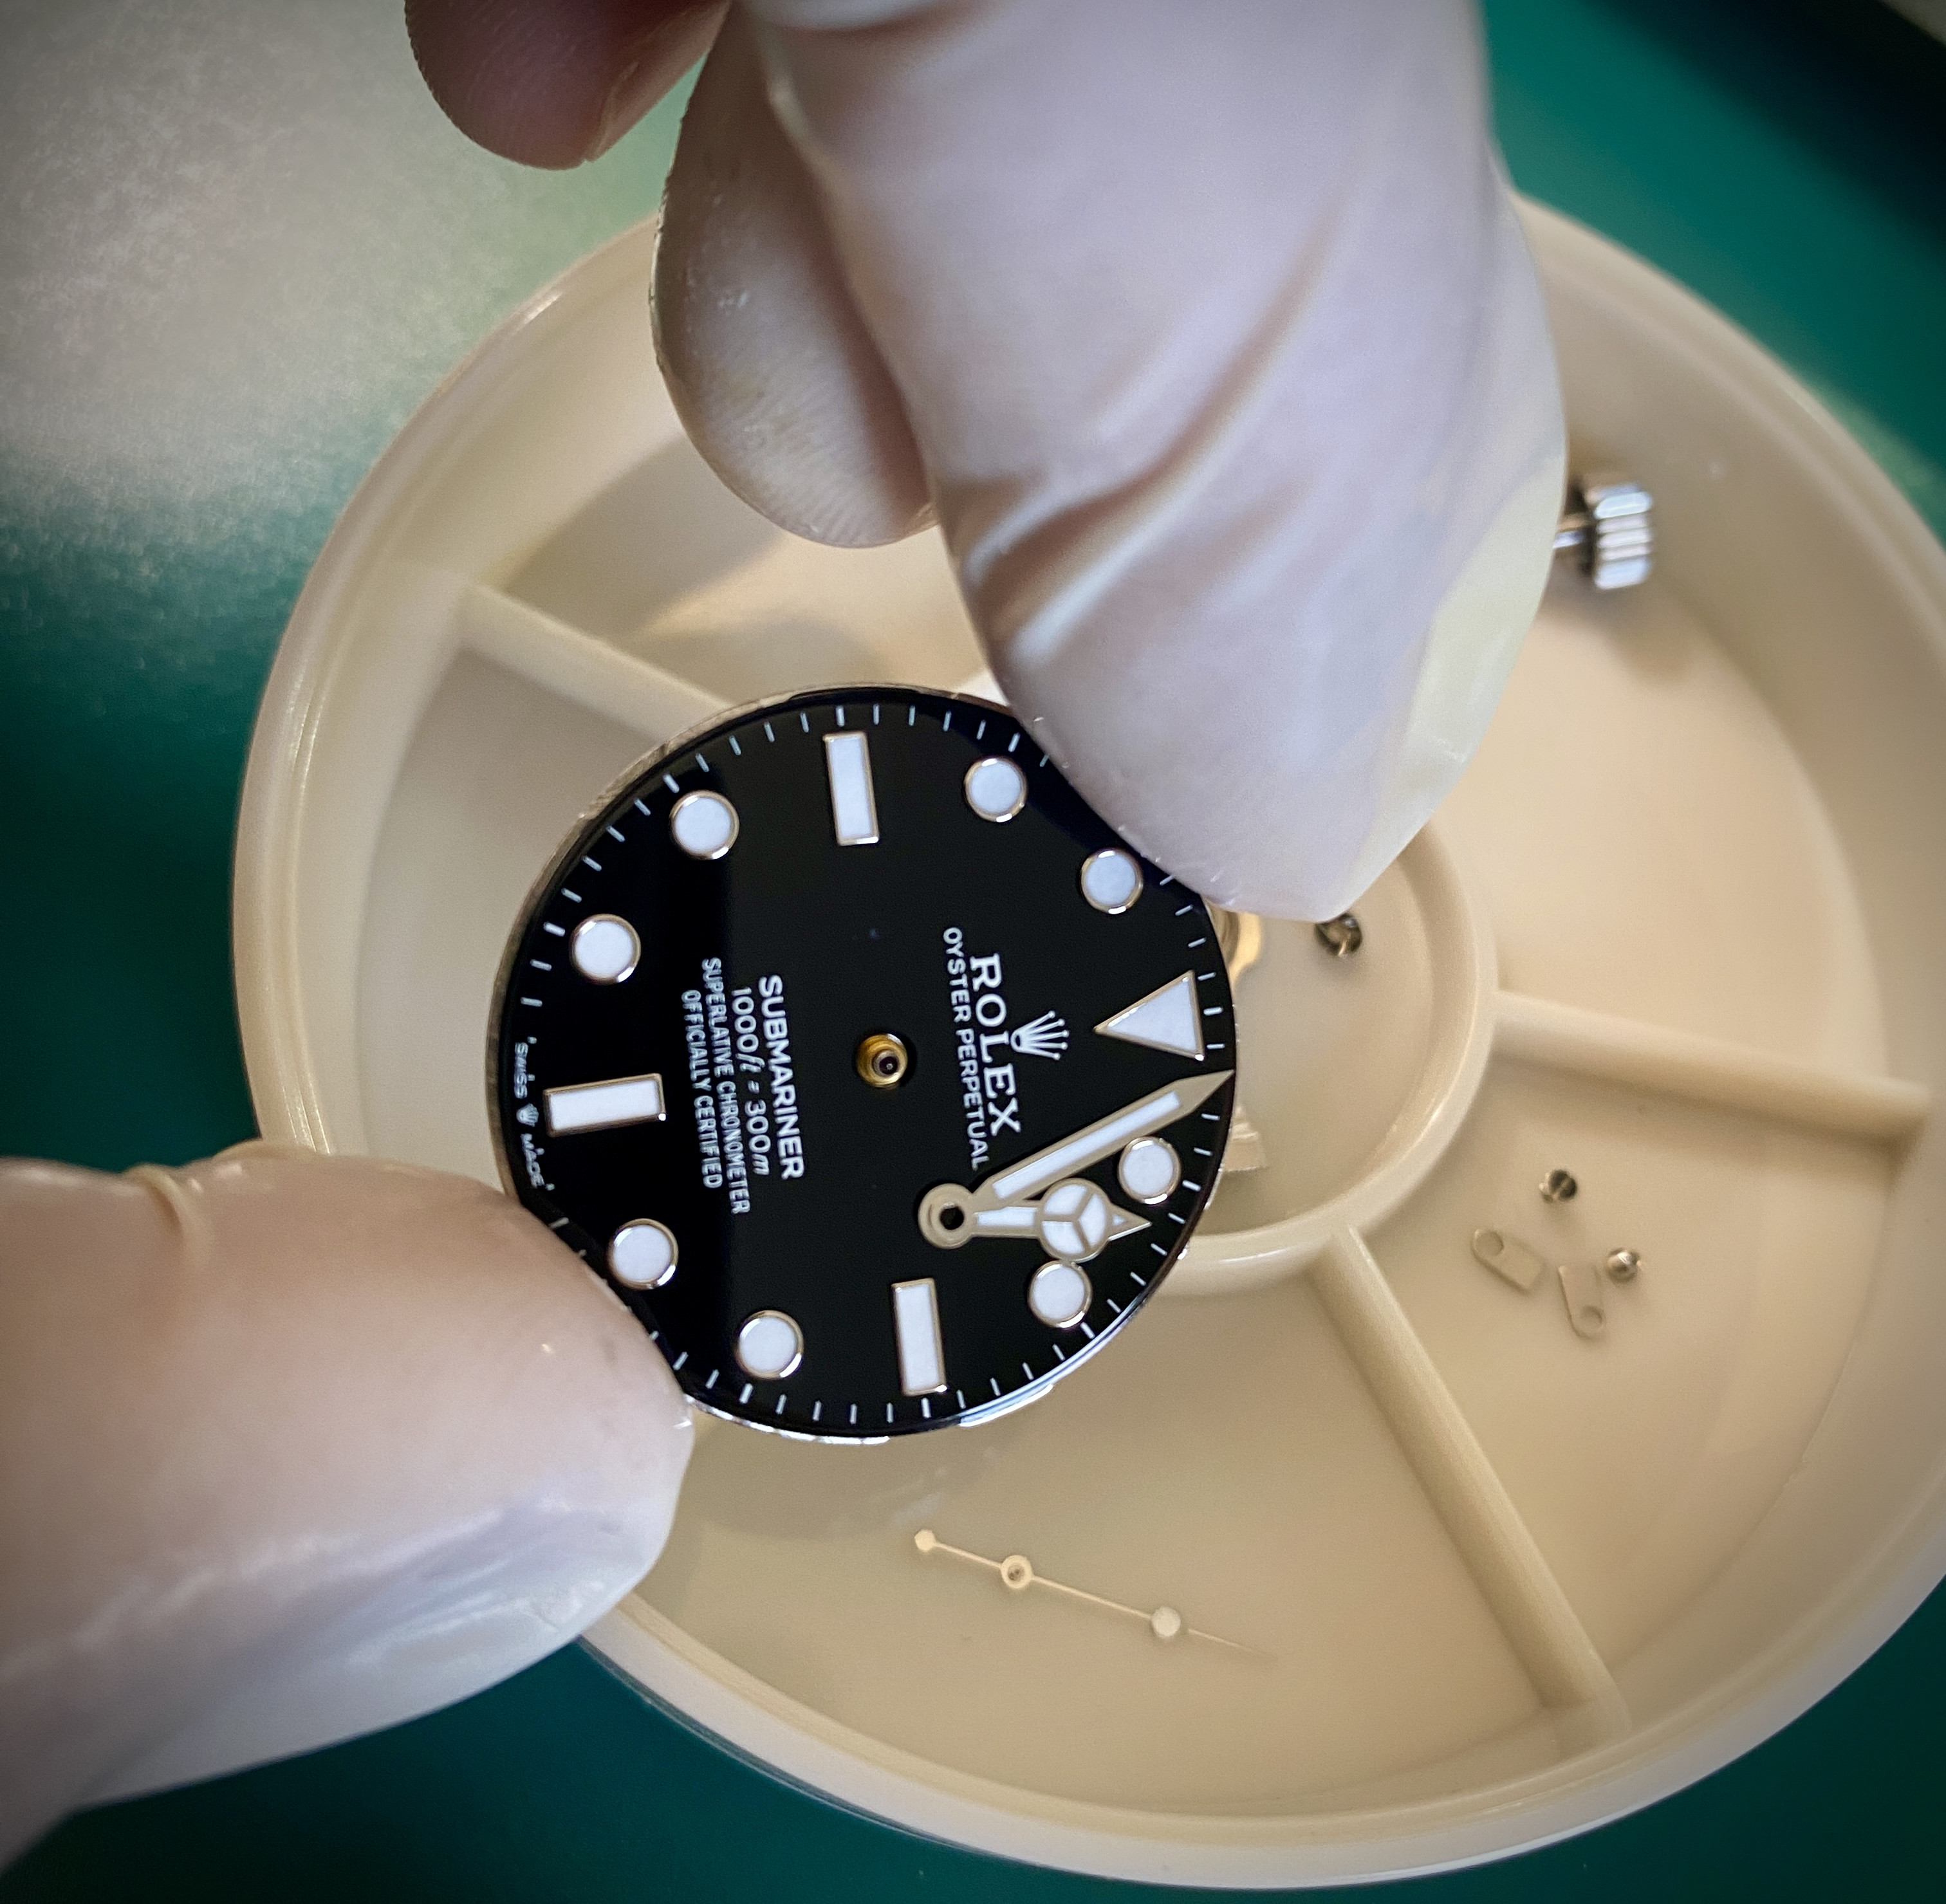
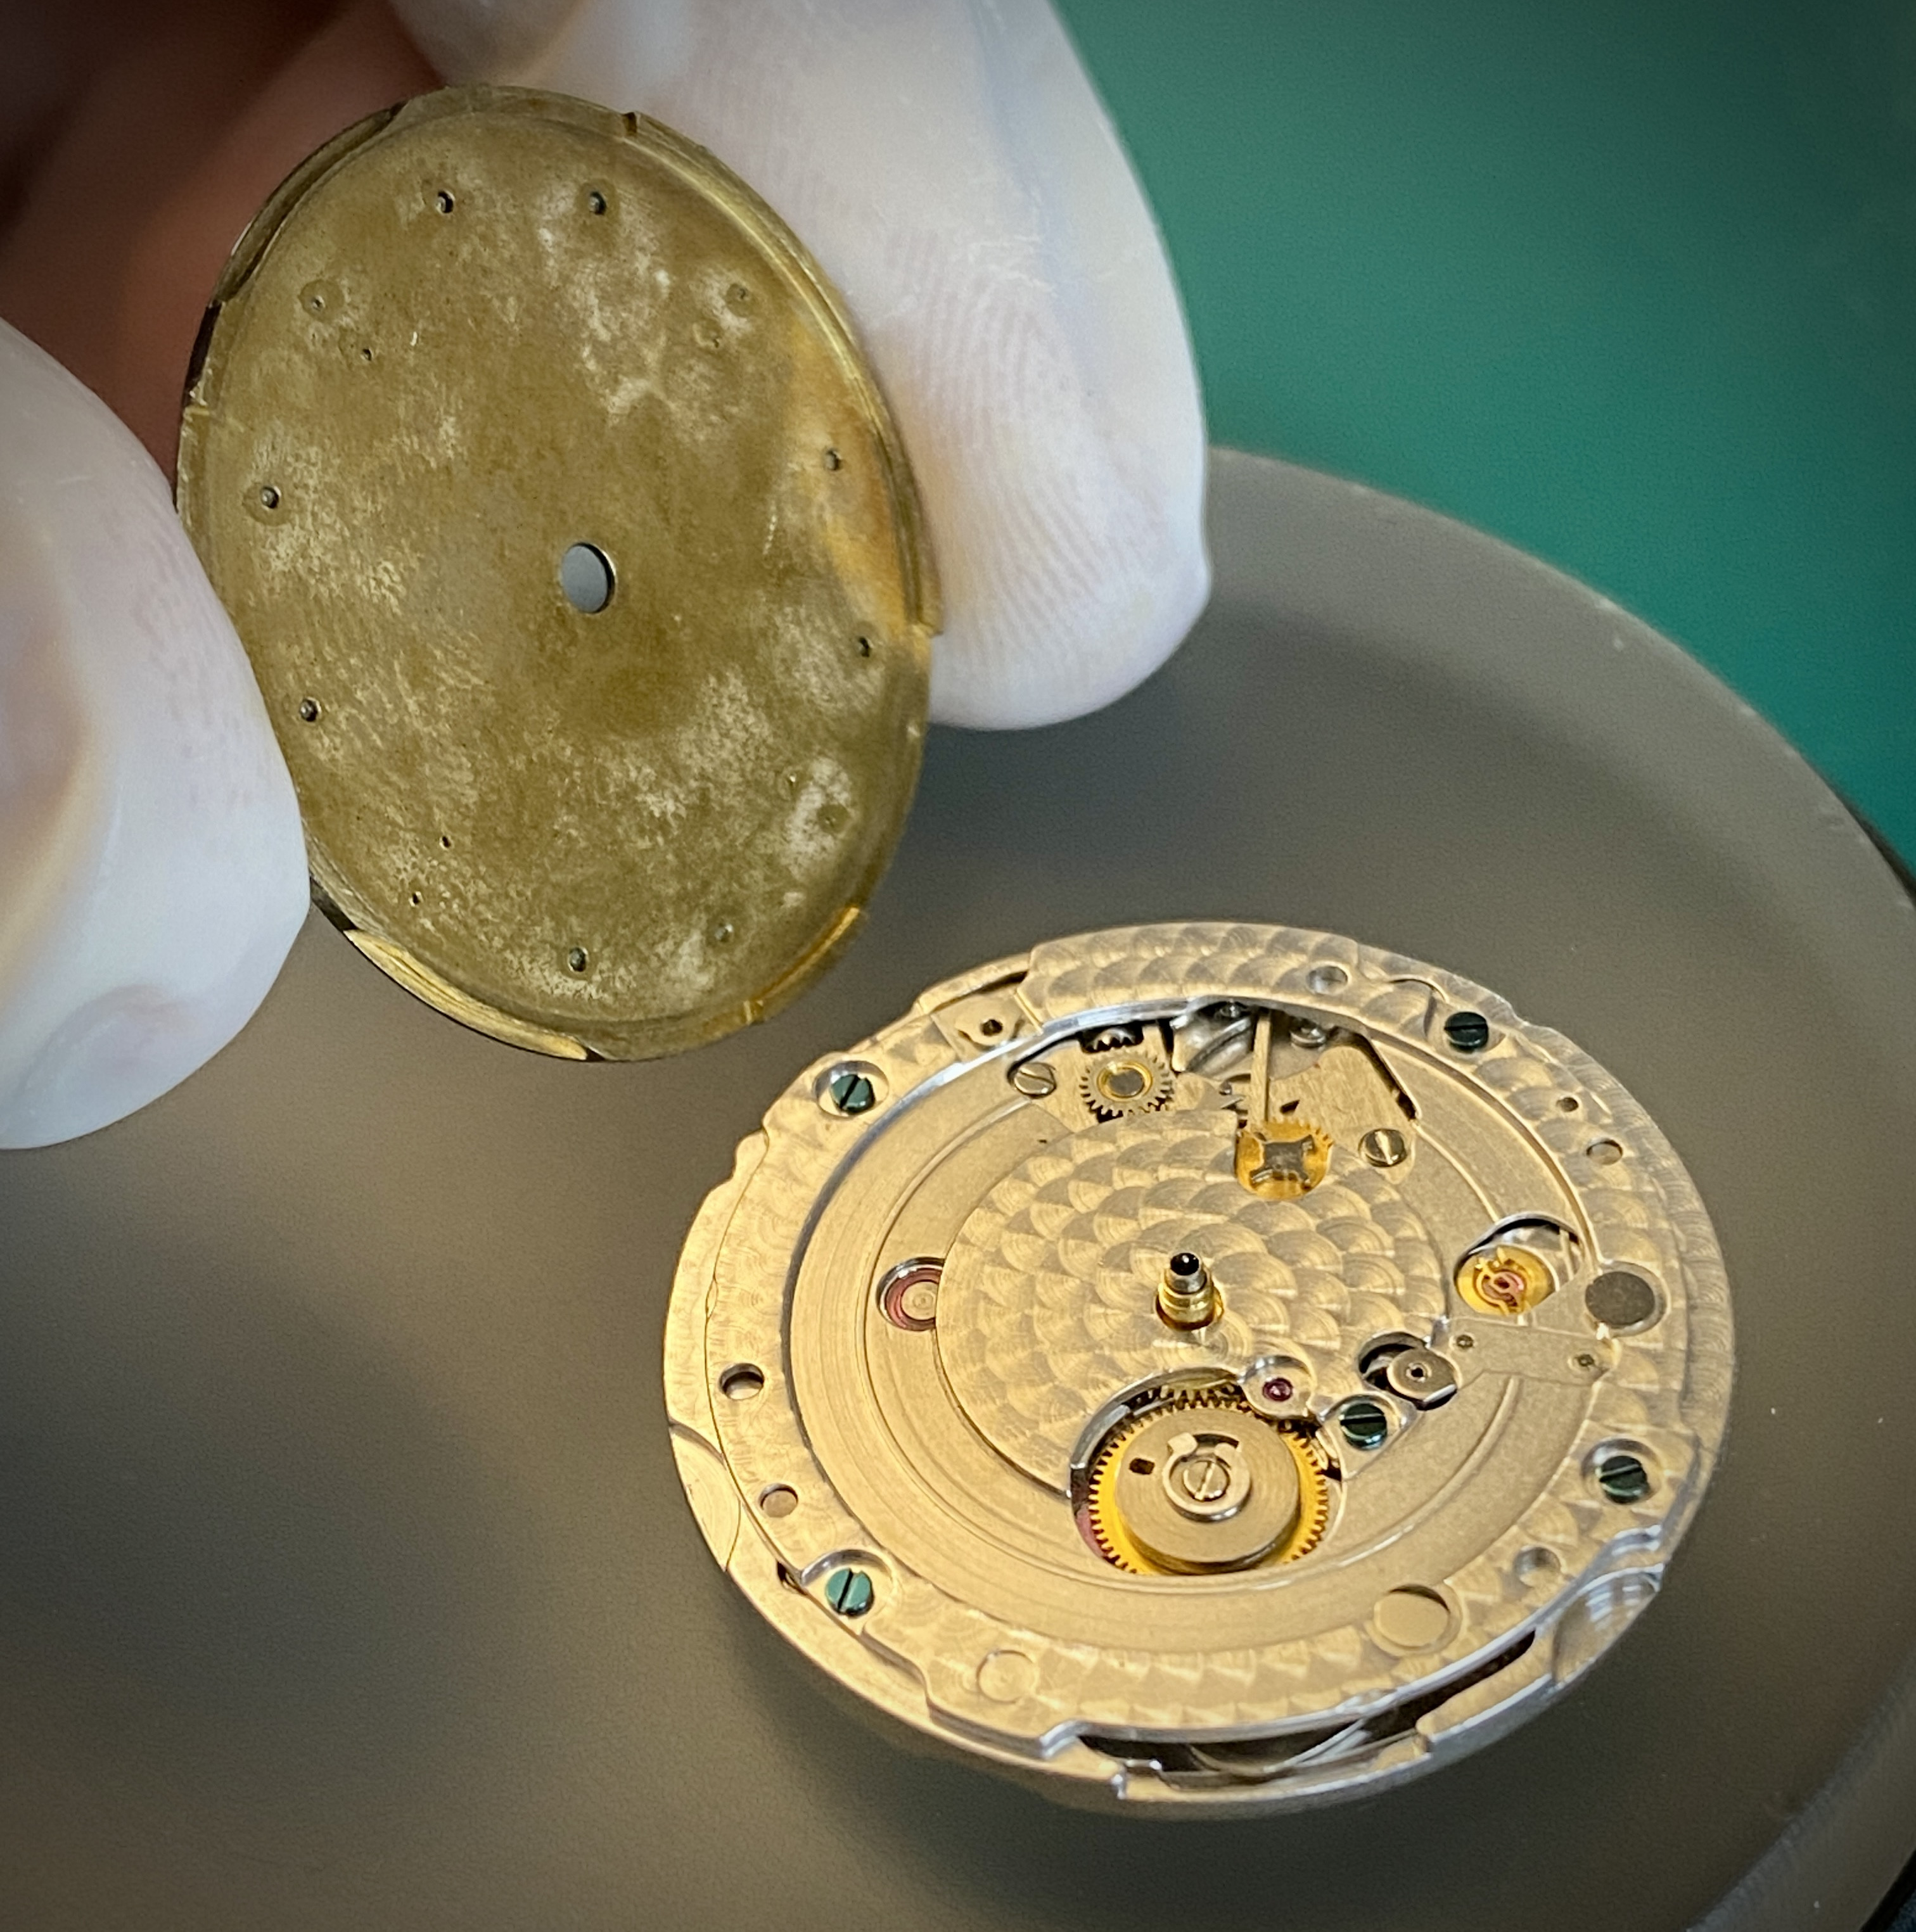
Removing the dial from a vs3235 movement is simple because (like gen) the dial is a press fit around the lip. Simply insert a tool like a hand lever or a screw driver along the edge and twist to separate the dial from the movement.
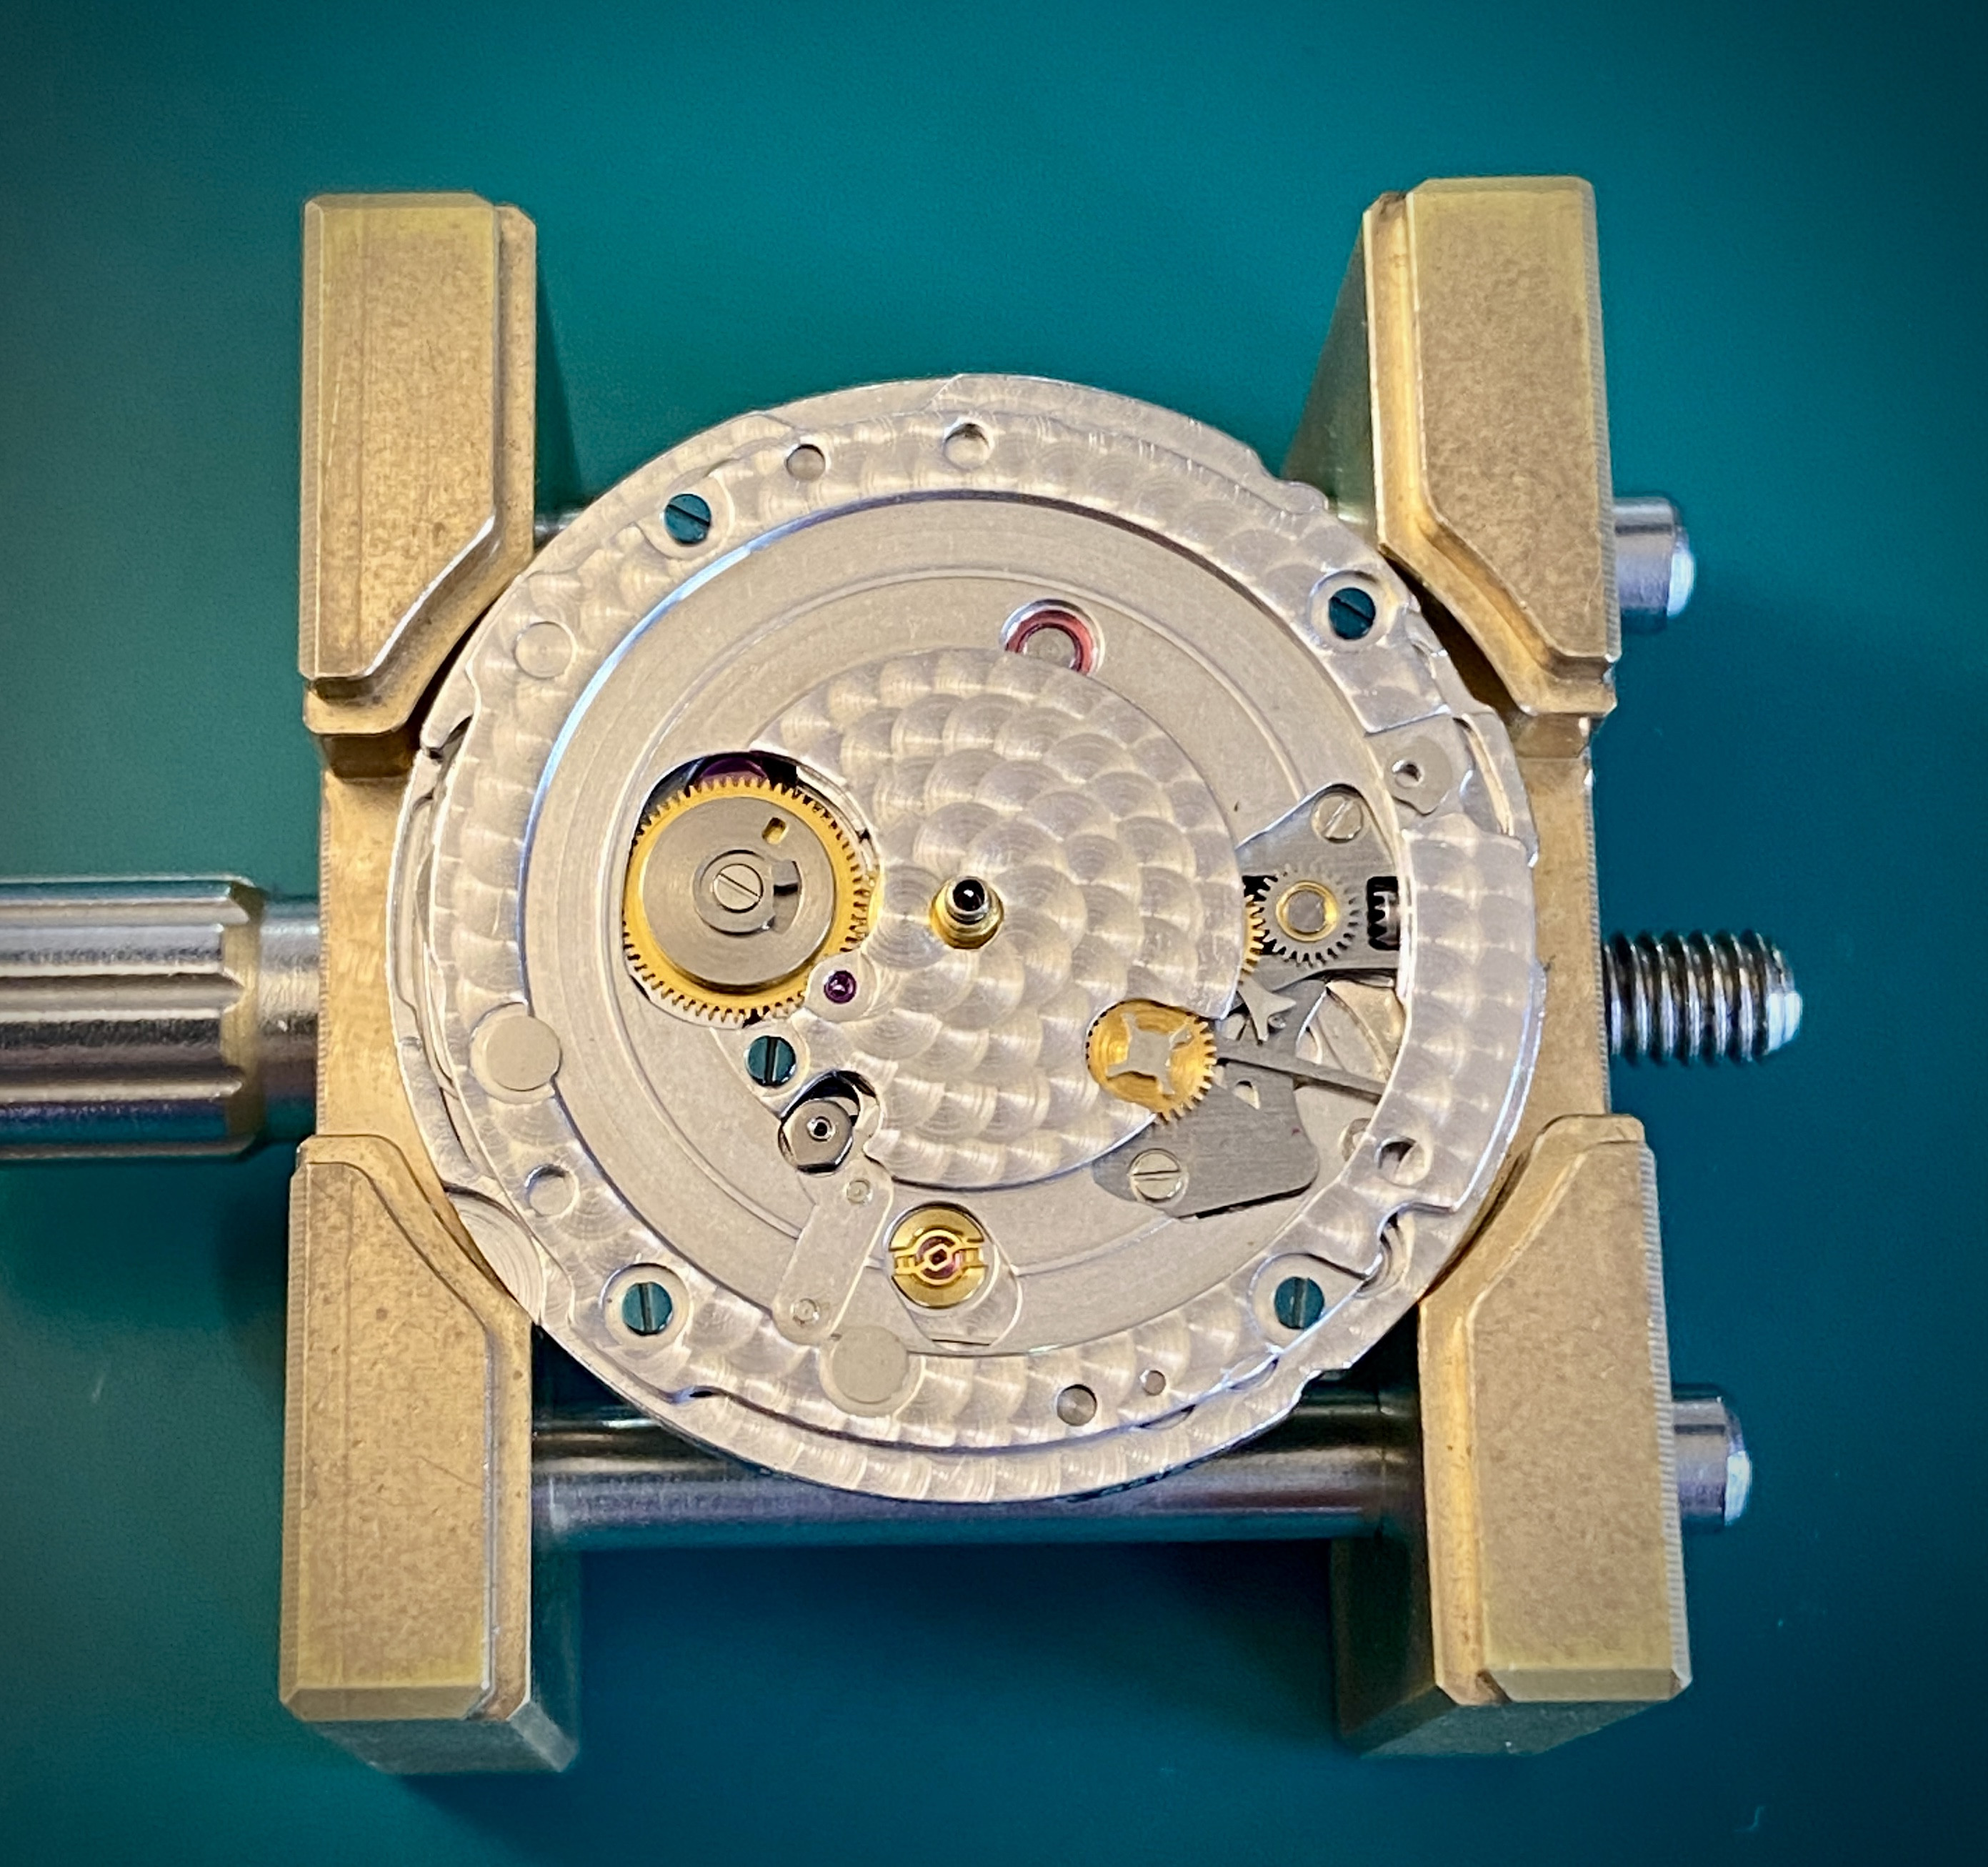
Now is a good time to transfer the movement into a movement holder if you have one. When loading the movement into the holder be sure that when you tighten it down, you're not touching the balance wheel.
Now we need to remove the date plate. Use a 1.2mm screw driver to remove the five blue screws that secure the date plate.
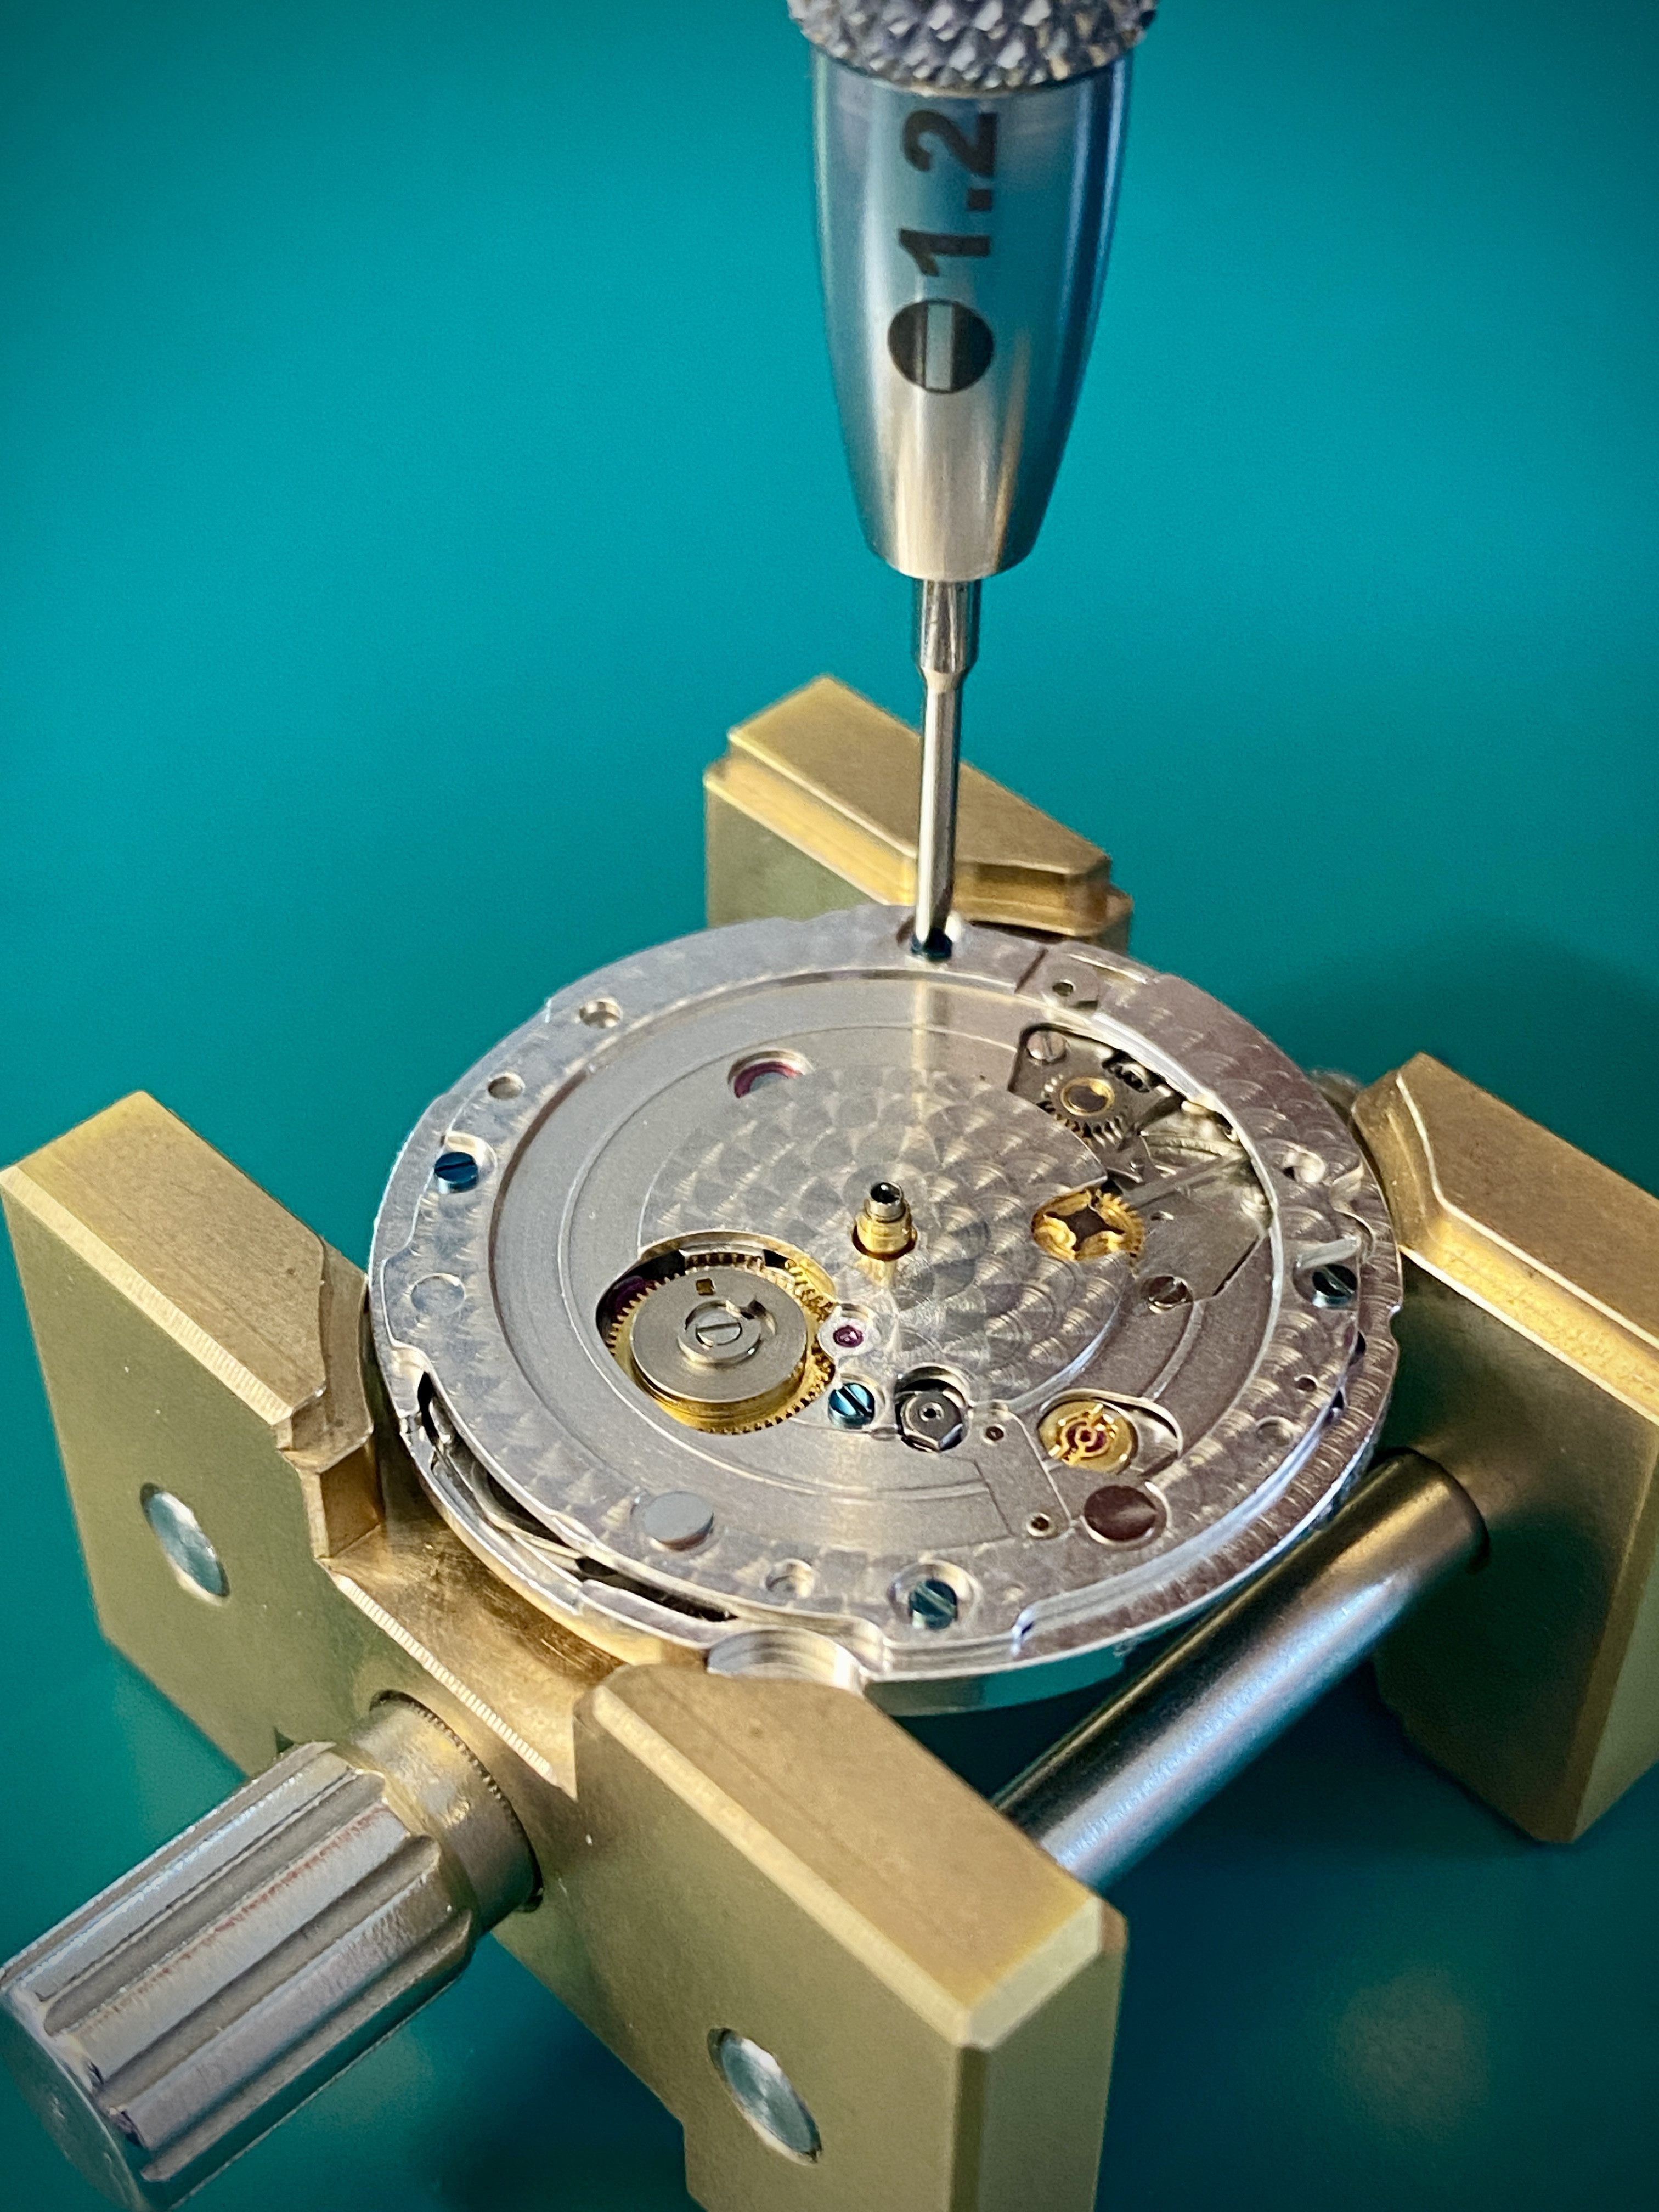
This is what the removed date plate and its screws should look like.
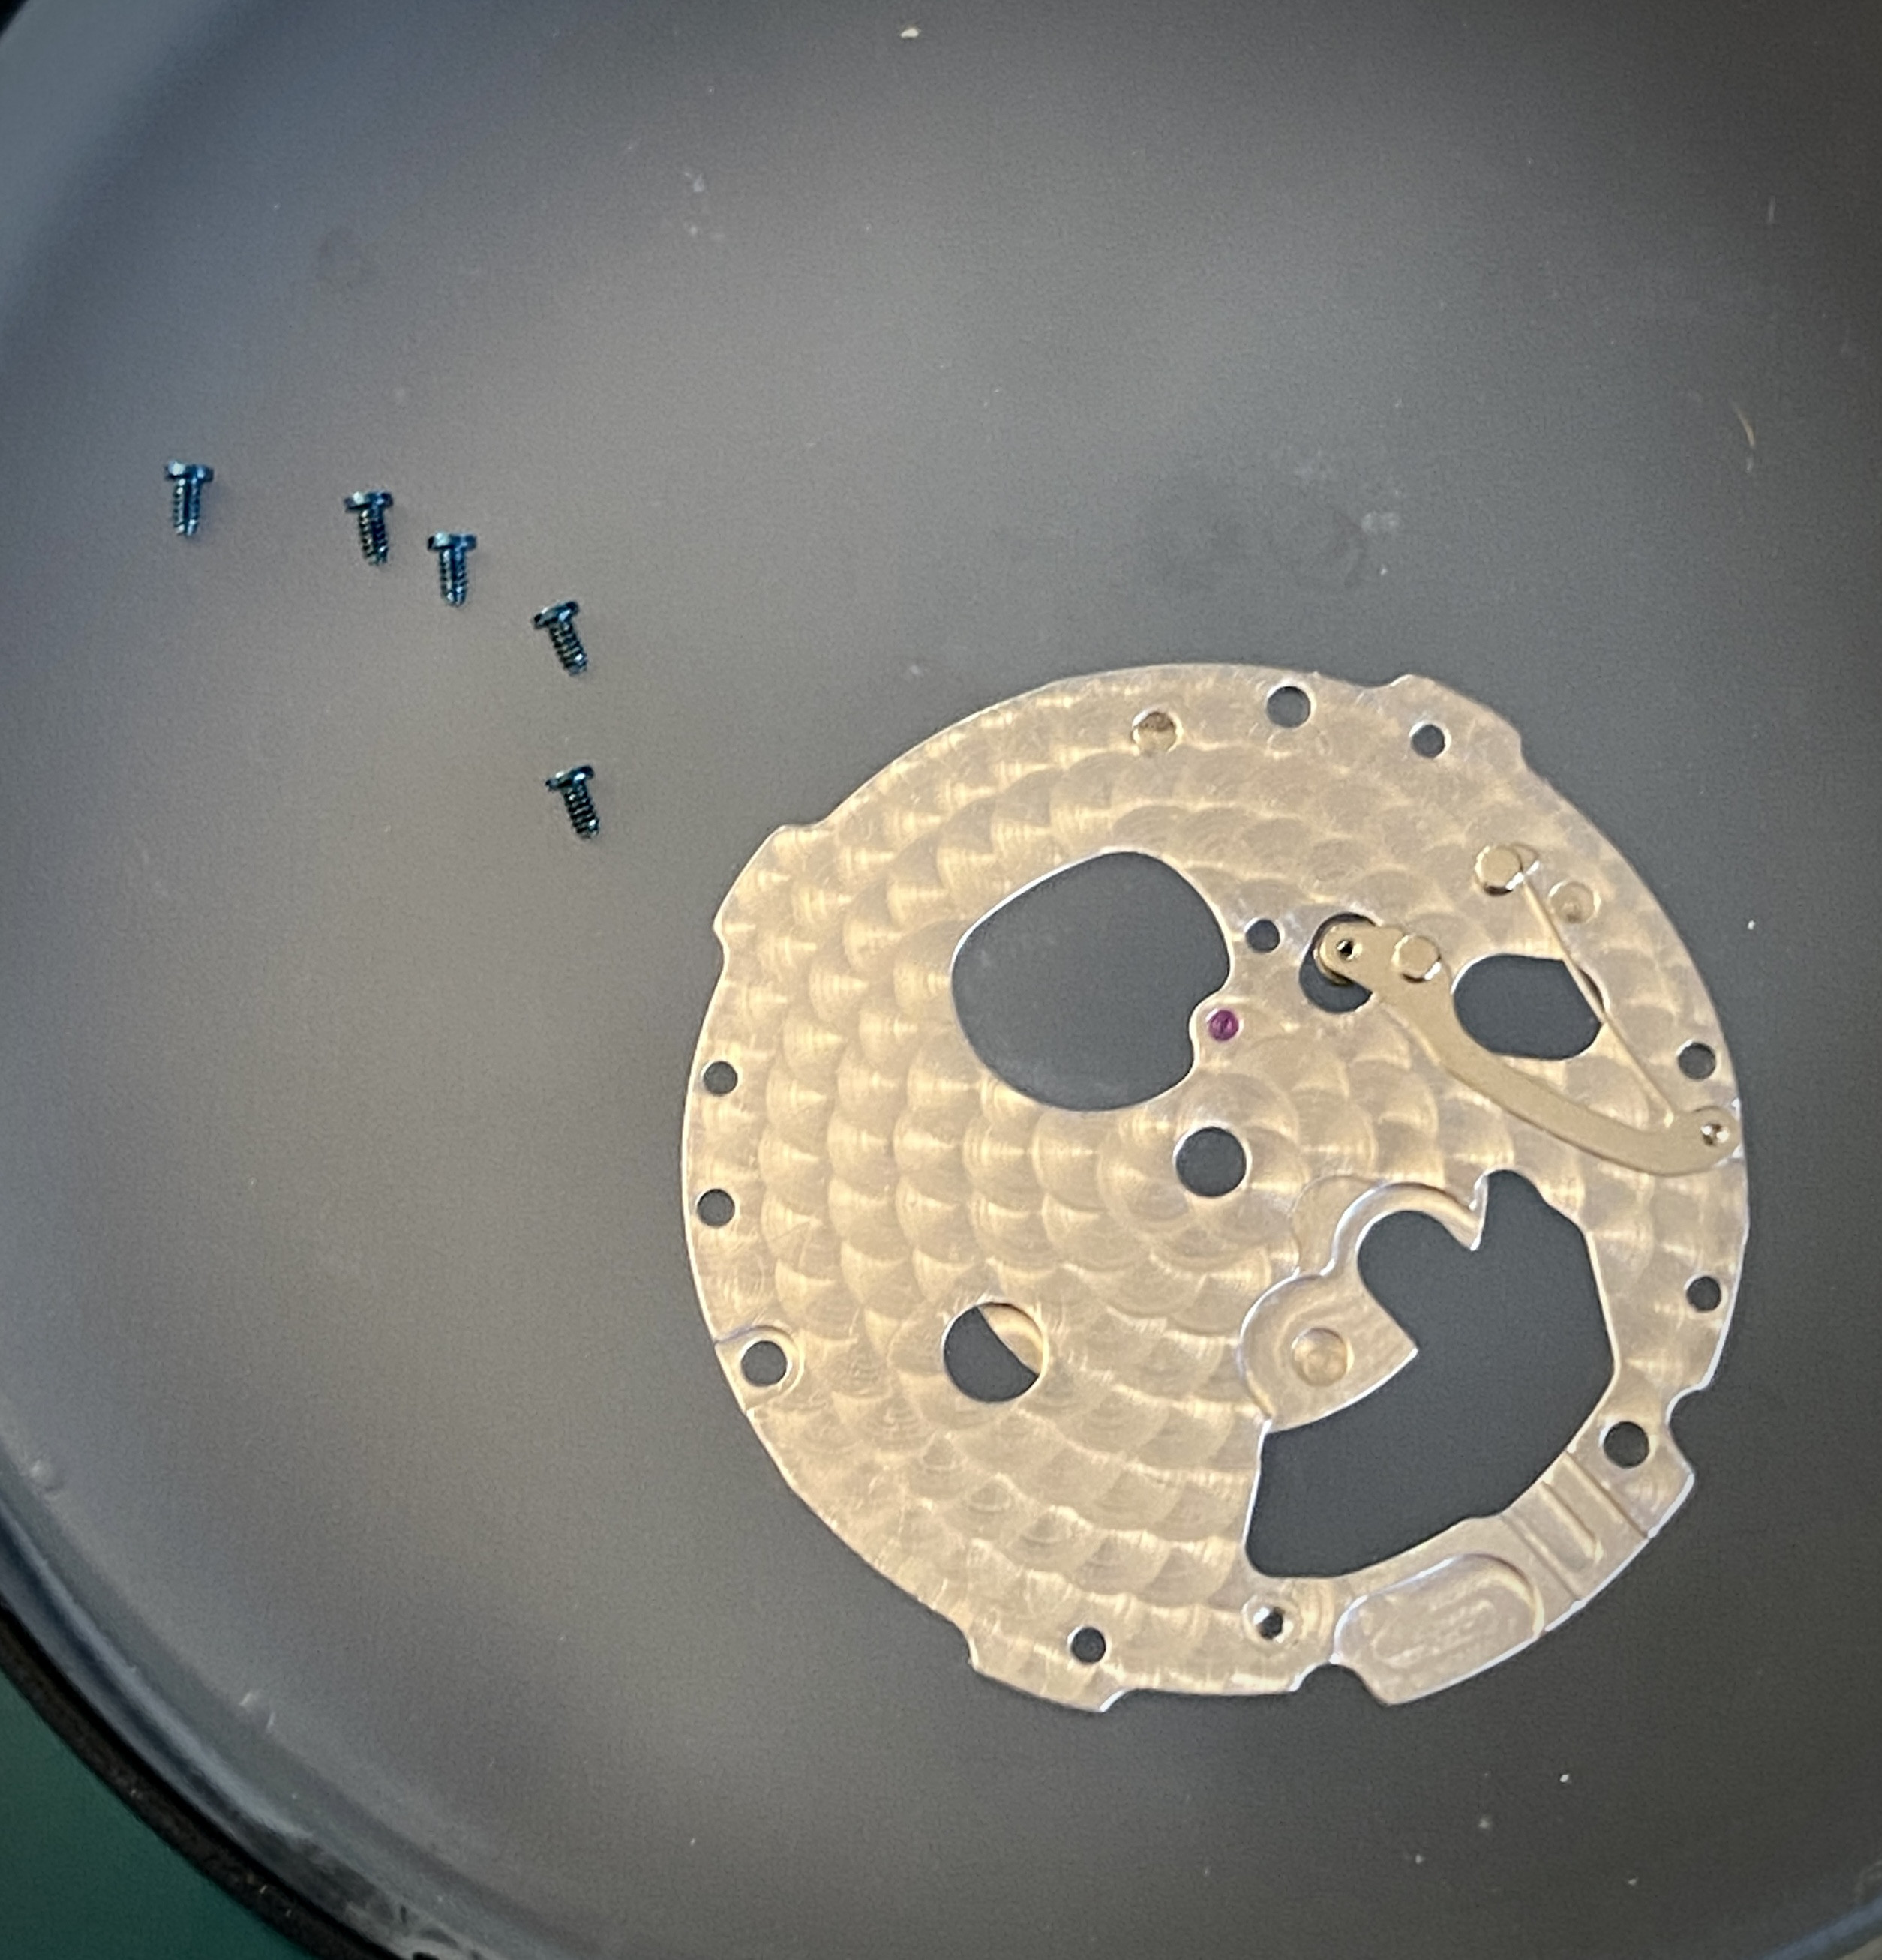
You can remove the date jumper spring from the date plate since it is not necessary on this no-date watch.
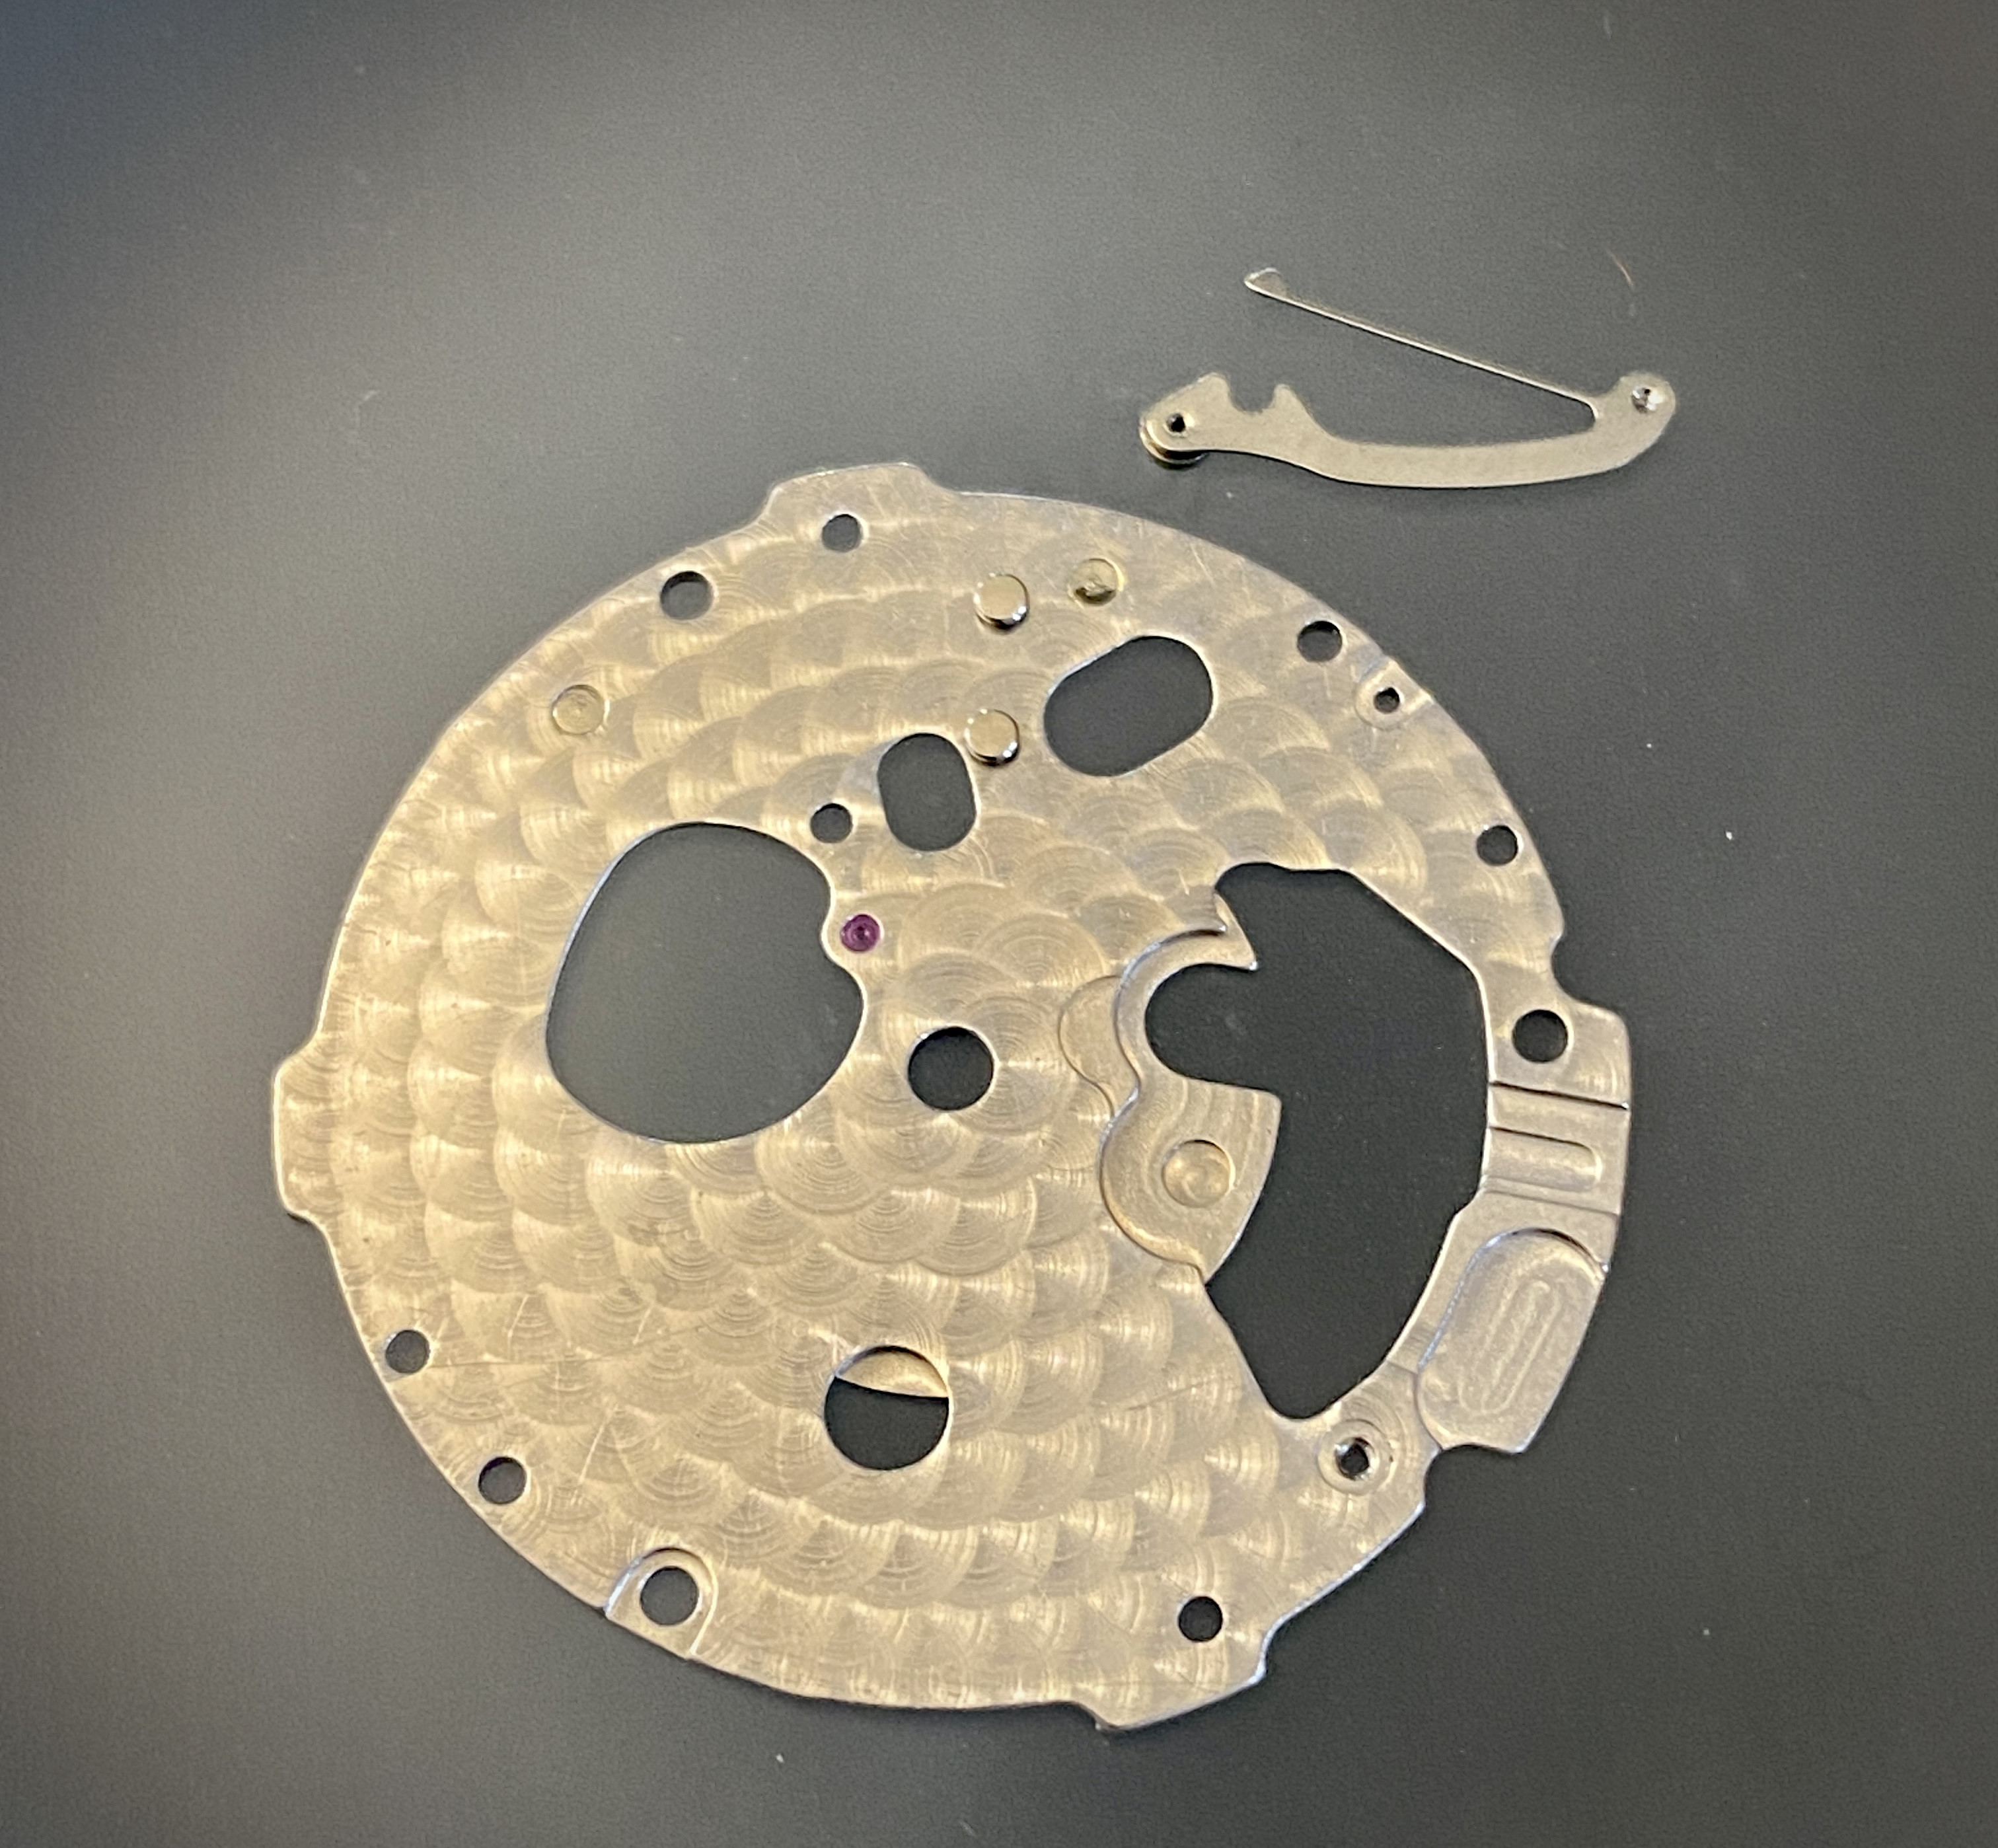
This is what the movement should look like after you've removed the date plate.
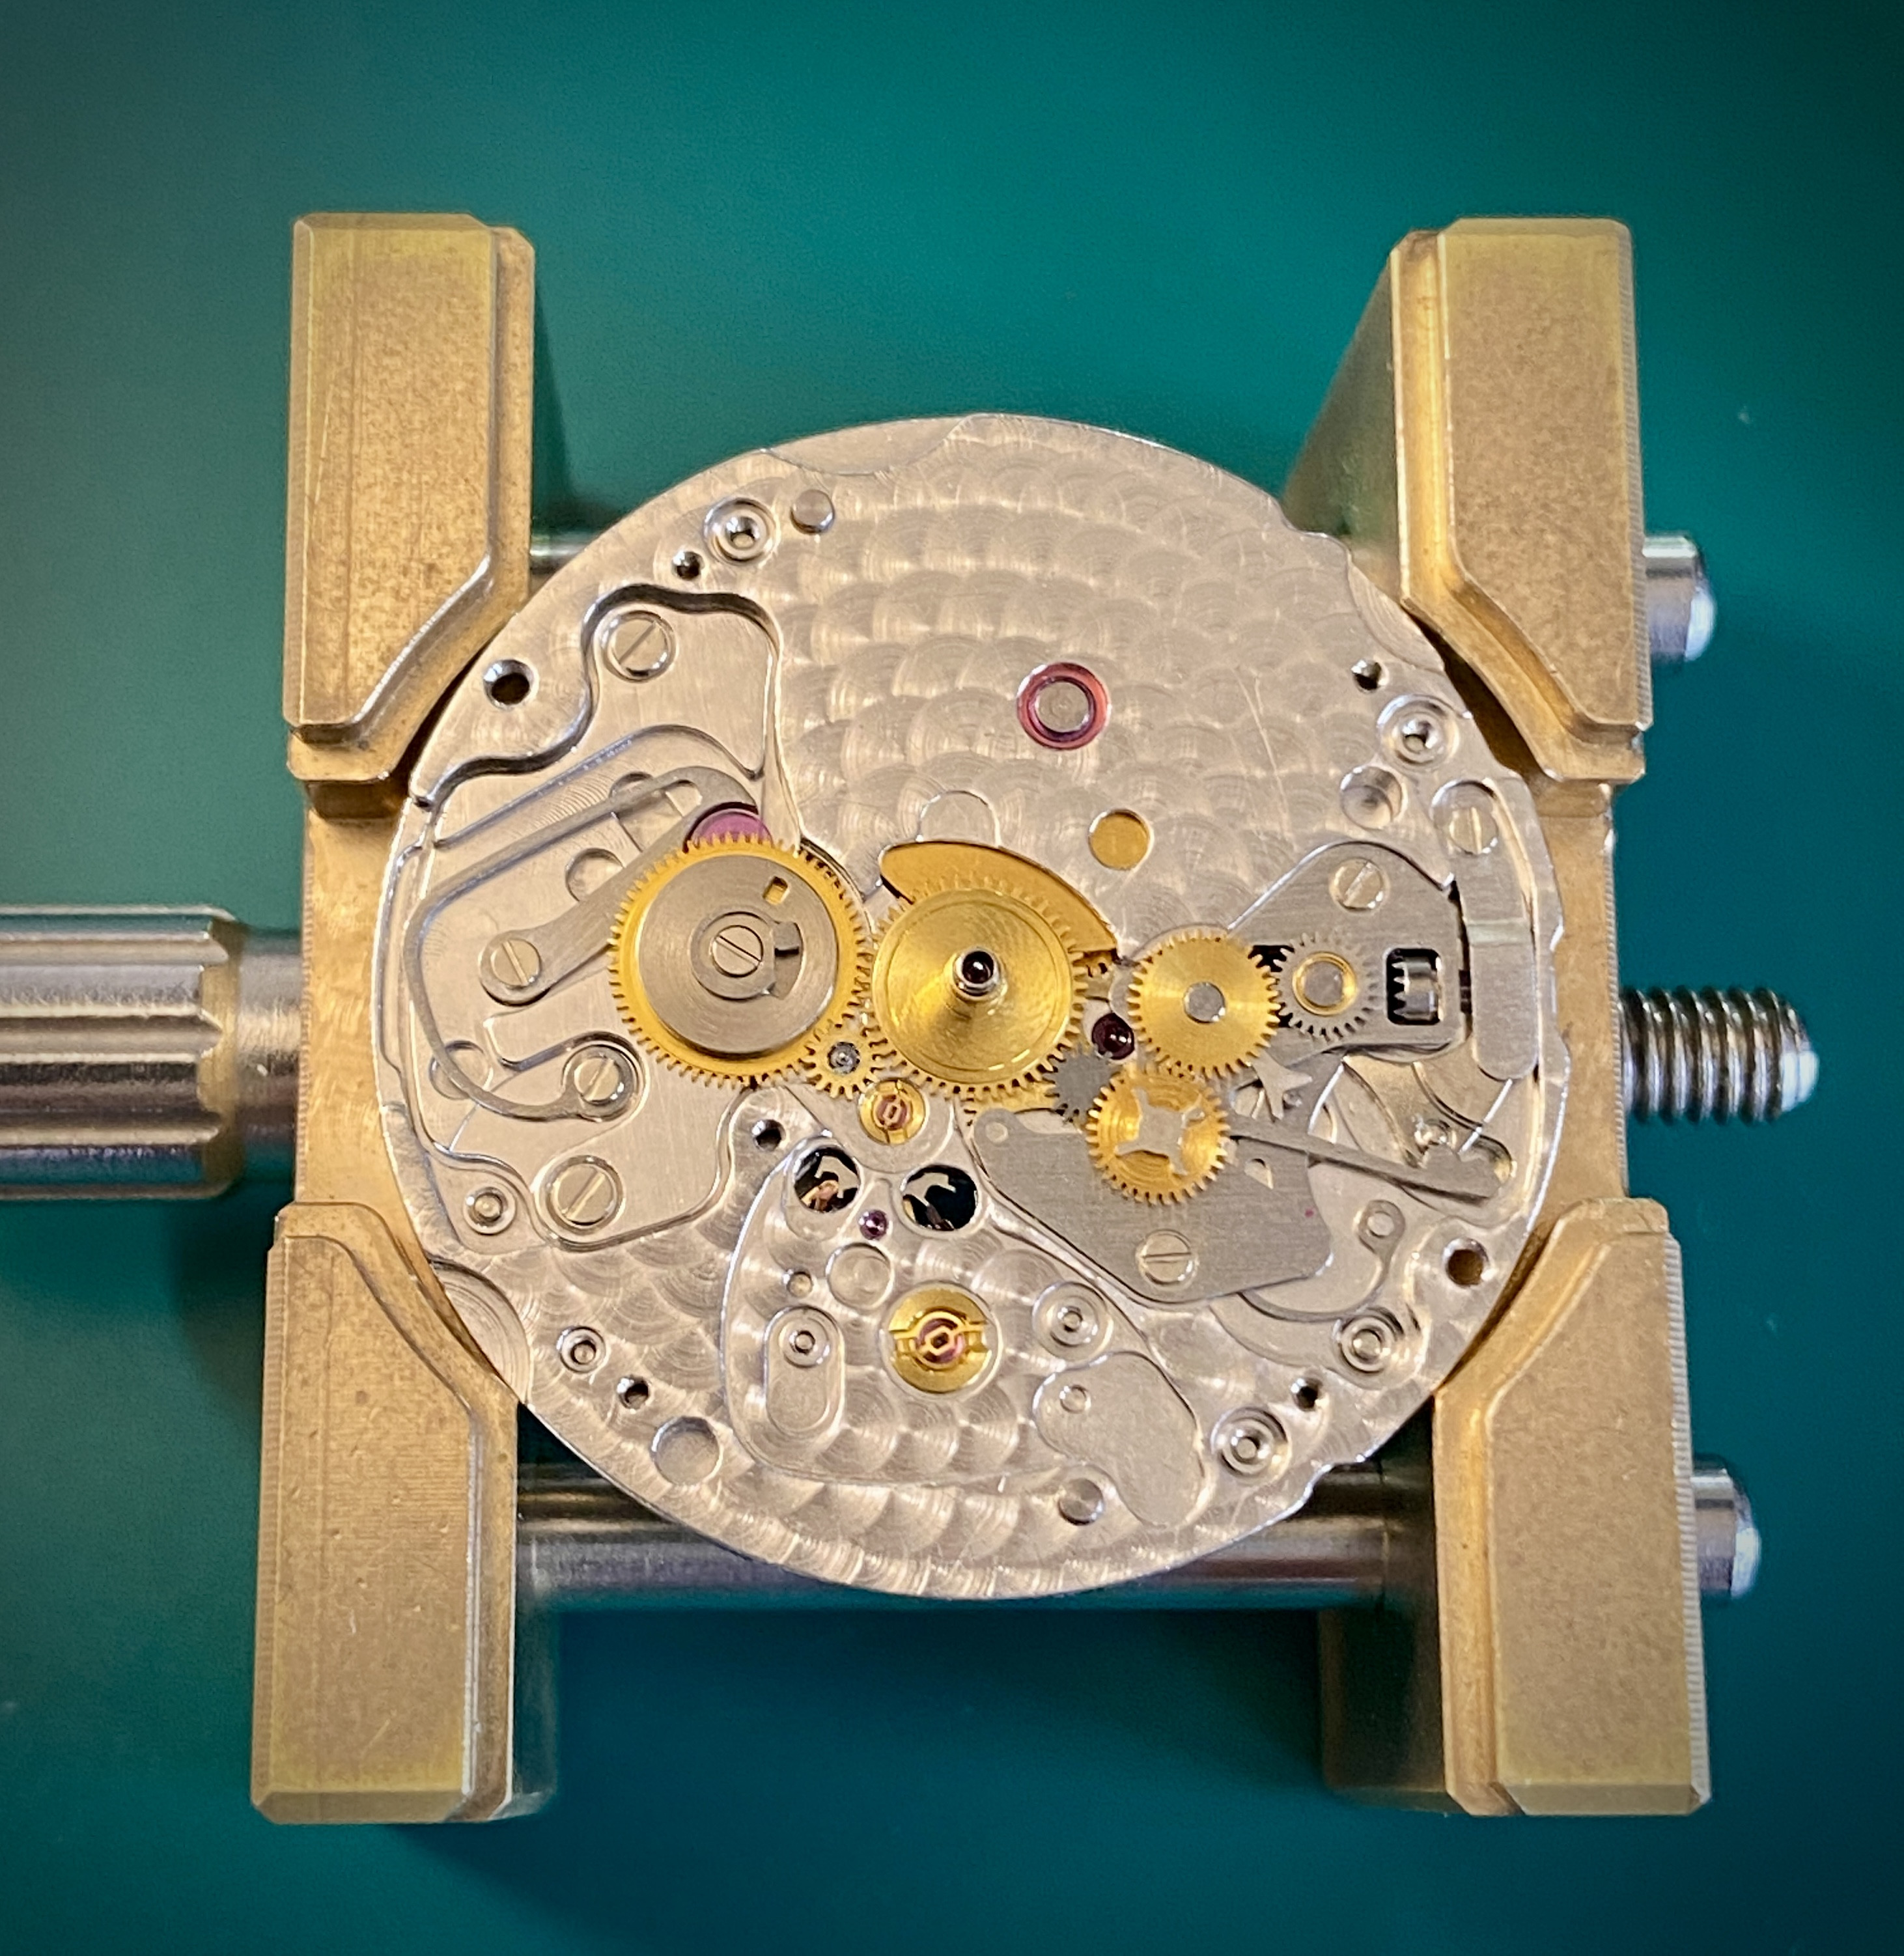
You can remove the date corrector, and date intermediate pinion from the movement. These parts are no longer necessary and can be set aside.
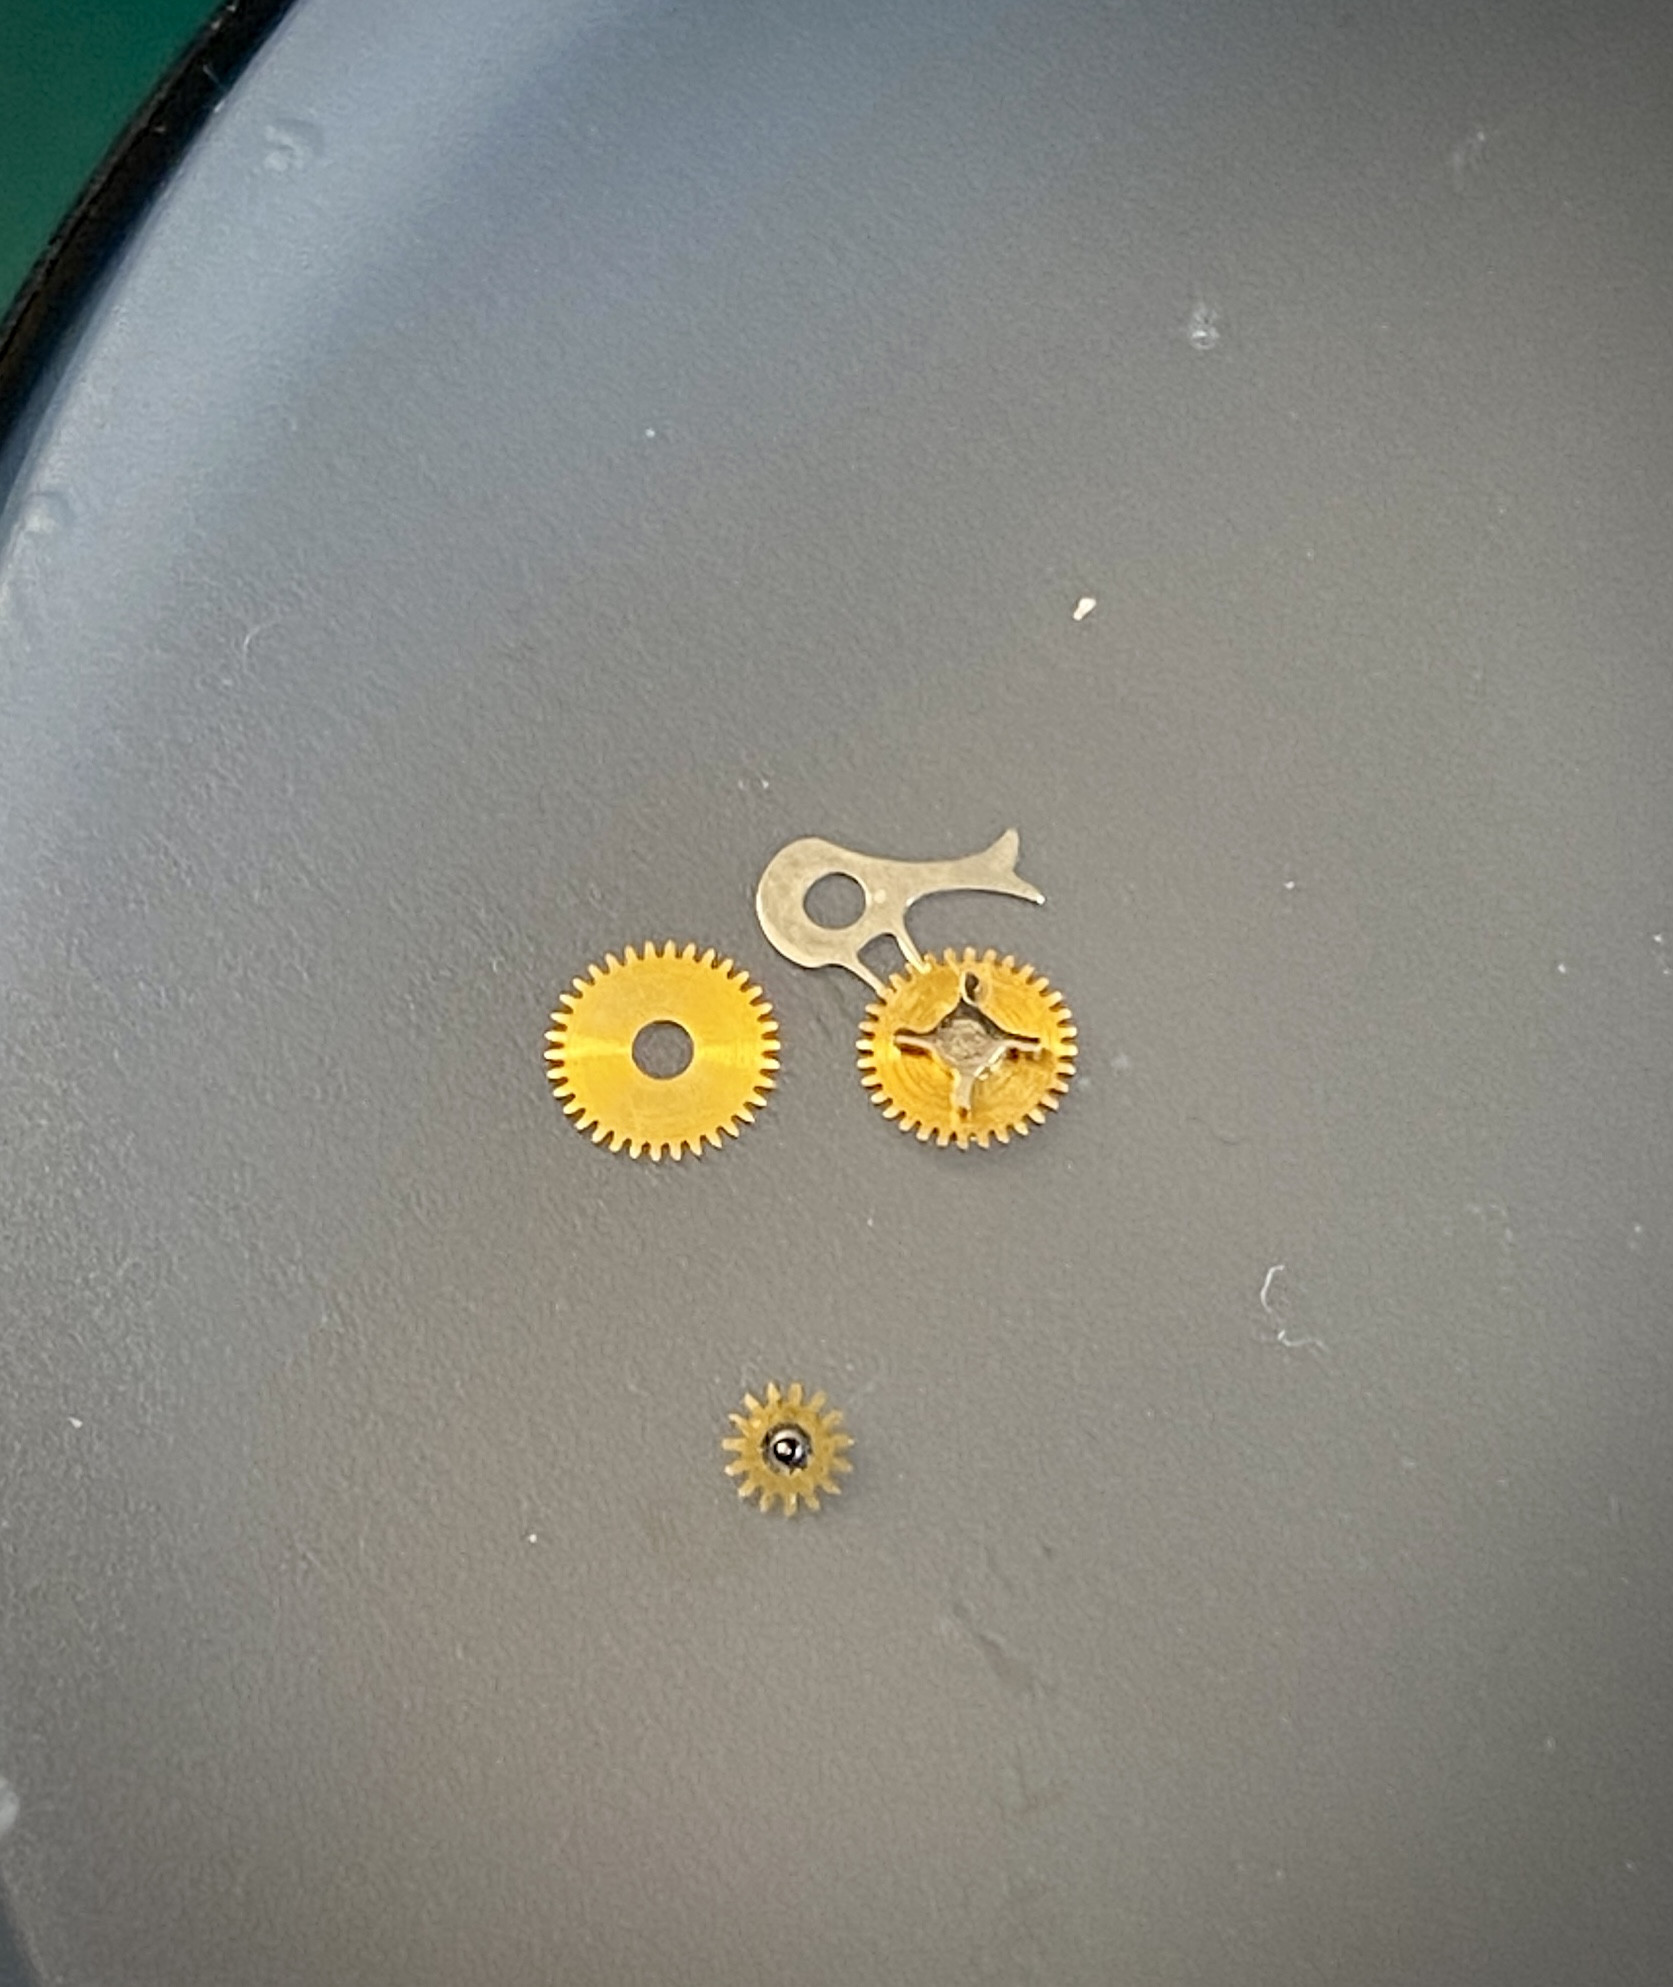
You'll also want to remove the hour wheel. Set this aside in your parts tray.
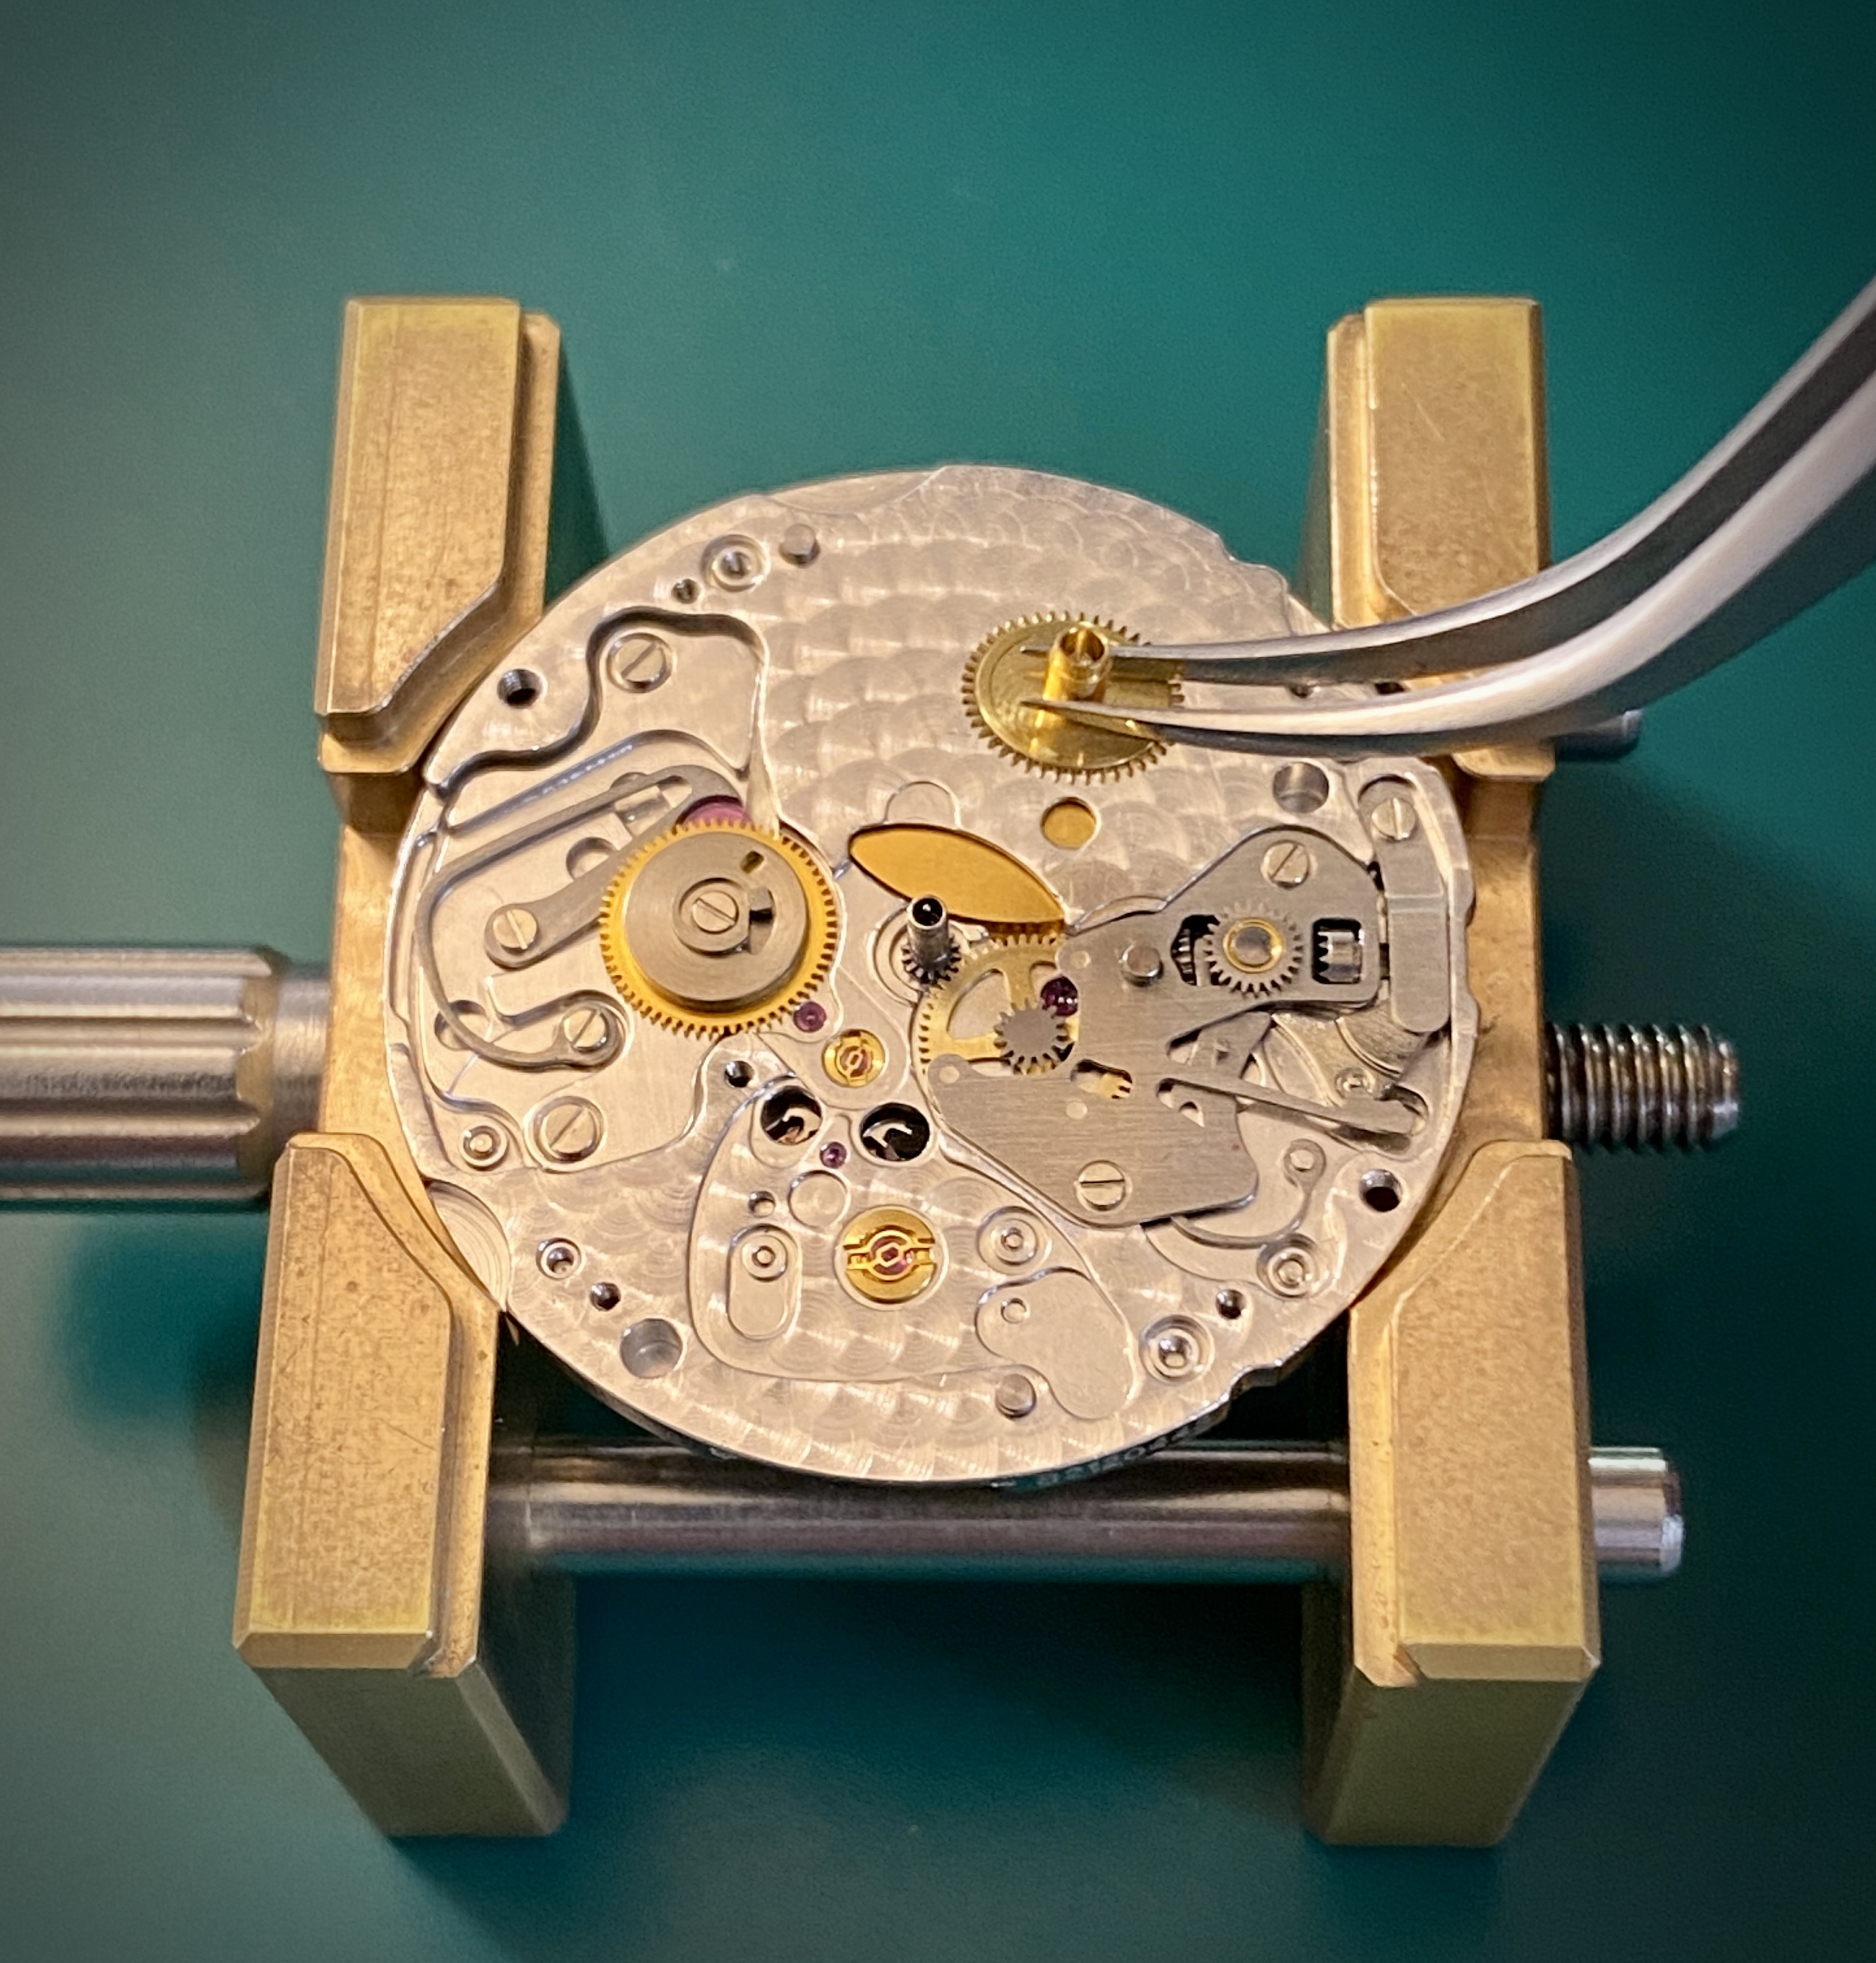
Optionally, you can now remove the entire date jumper assembly. This is not a necessary component on a no-date watch, so it can be removed. Use a 1.4mm screw driver to unscrew the two screws that secure the assembly.
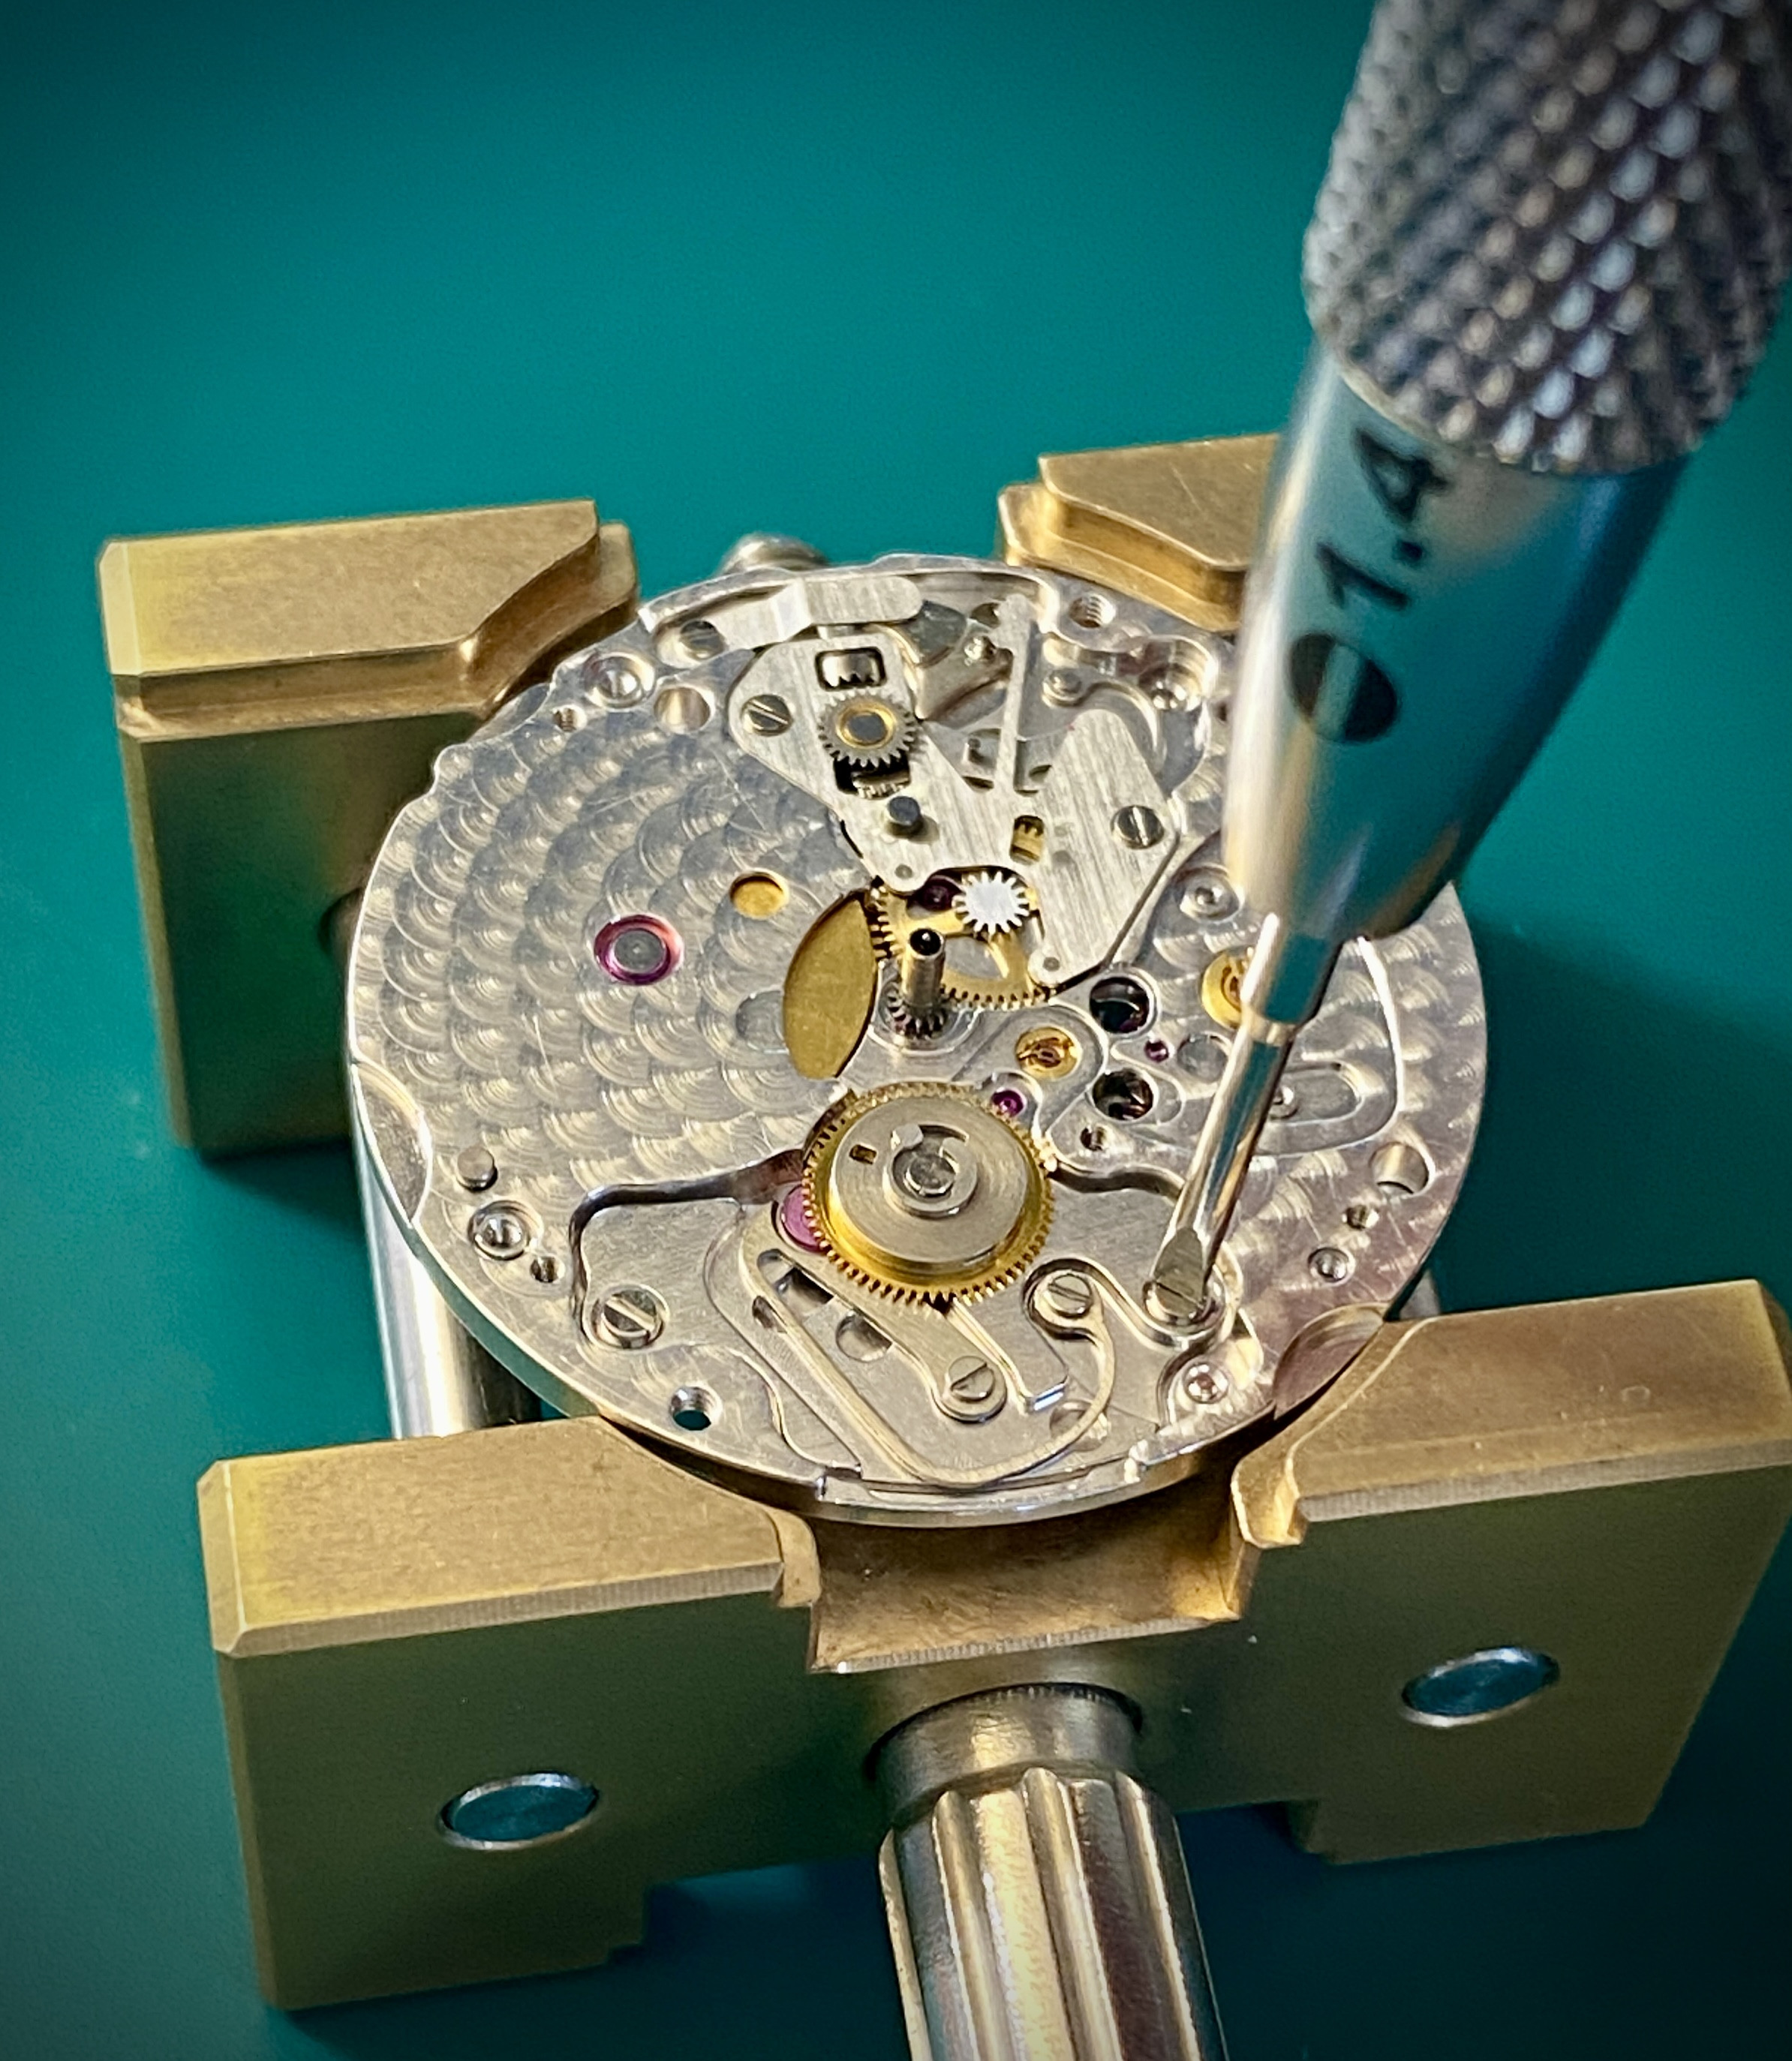
This is what the assembly should look like as you remove it. Set these parts aside. These parts aren't worthless, they are useful as spares for people who have vs3235 powered watches, so keep these parts in a clean dry place. You never know when somebody is going to post a WTB ad looking for vs3235 date parts.
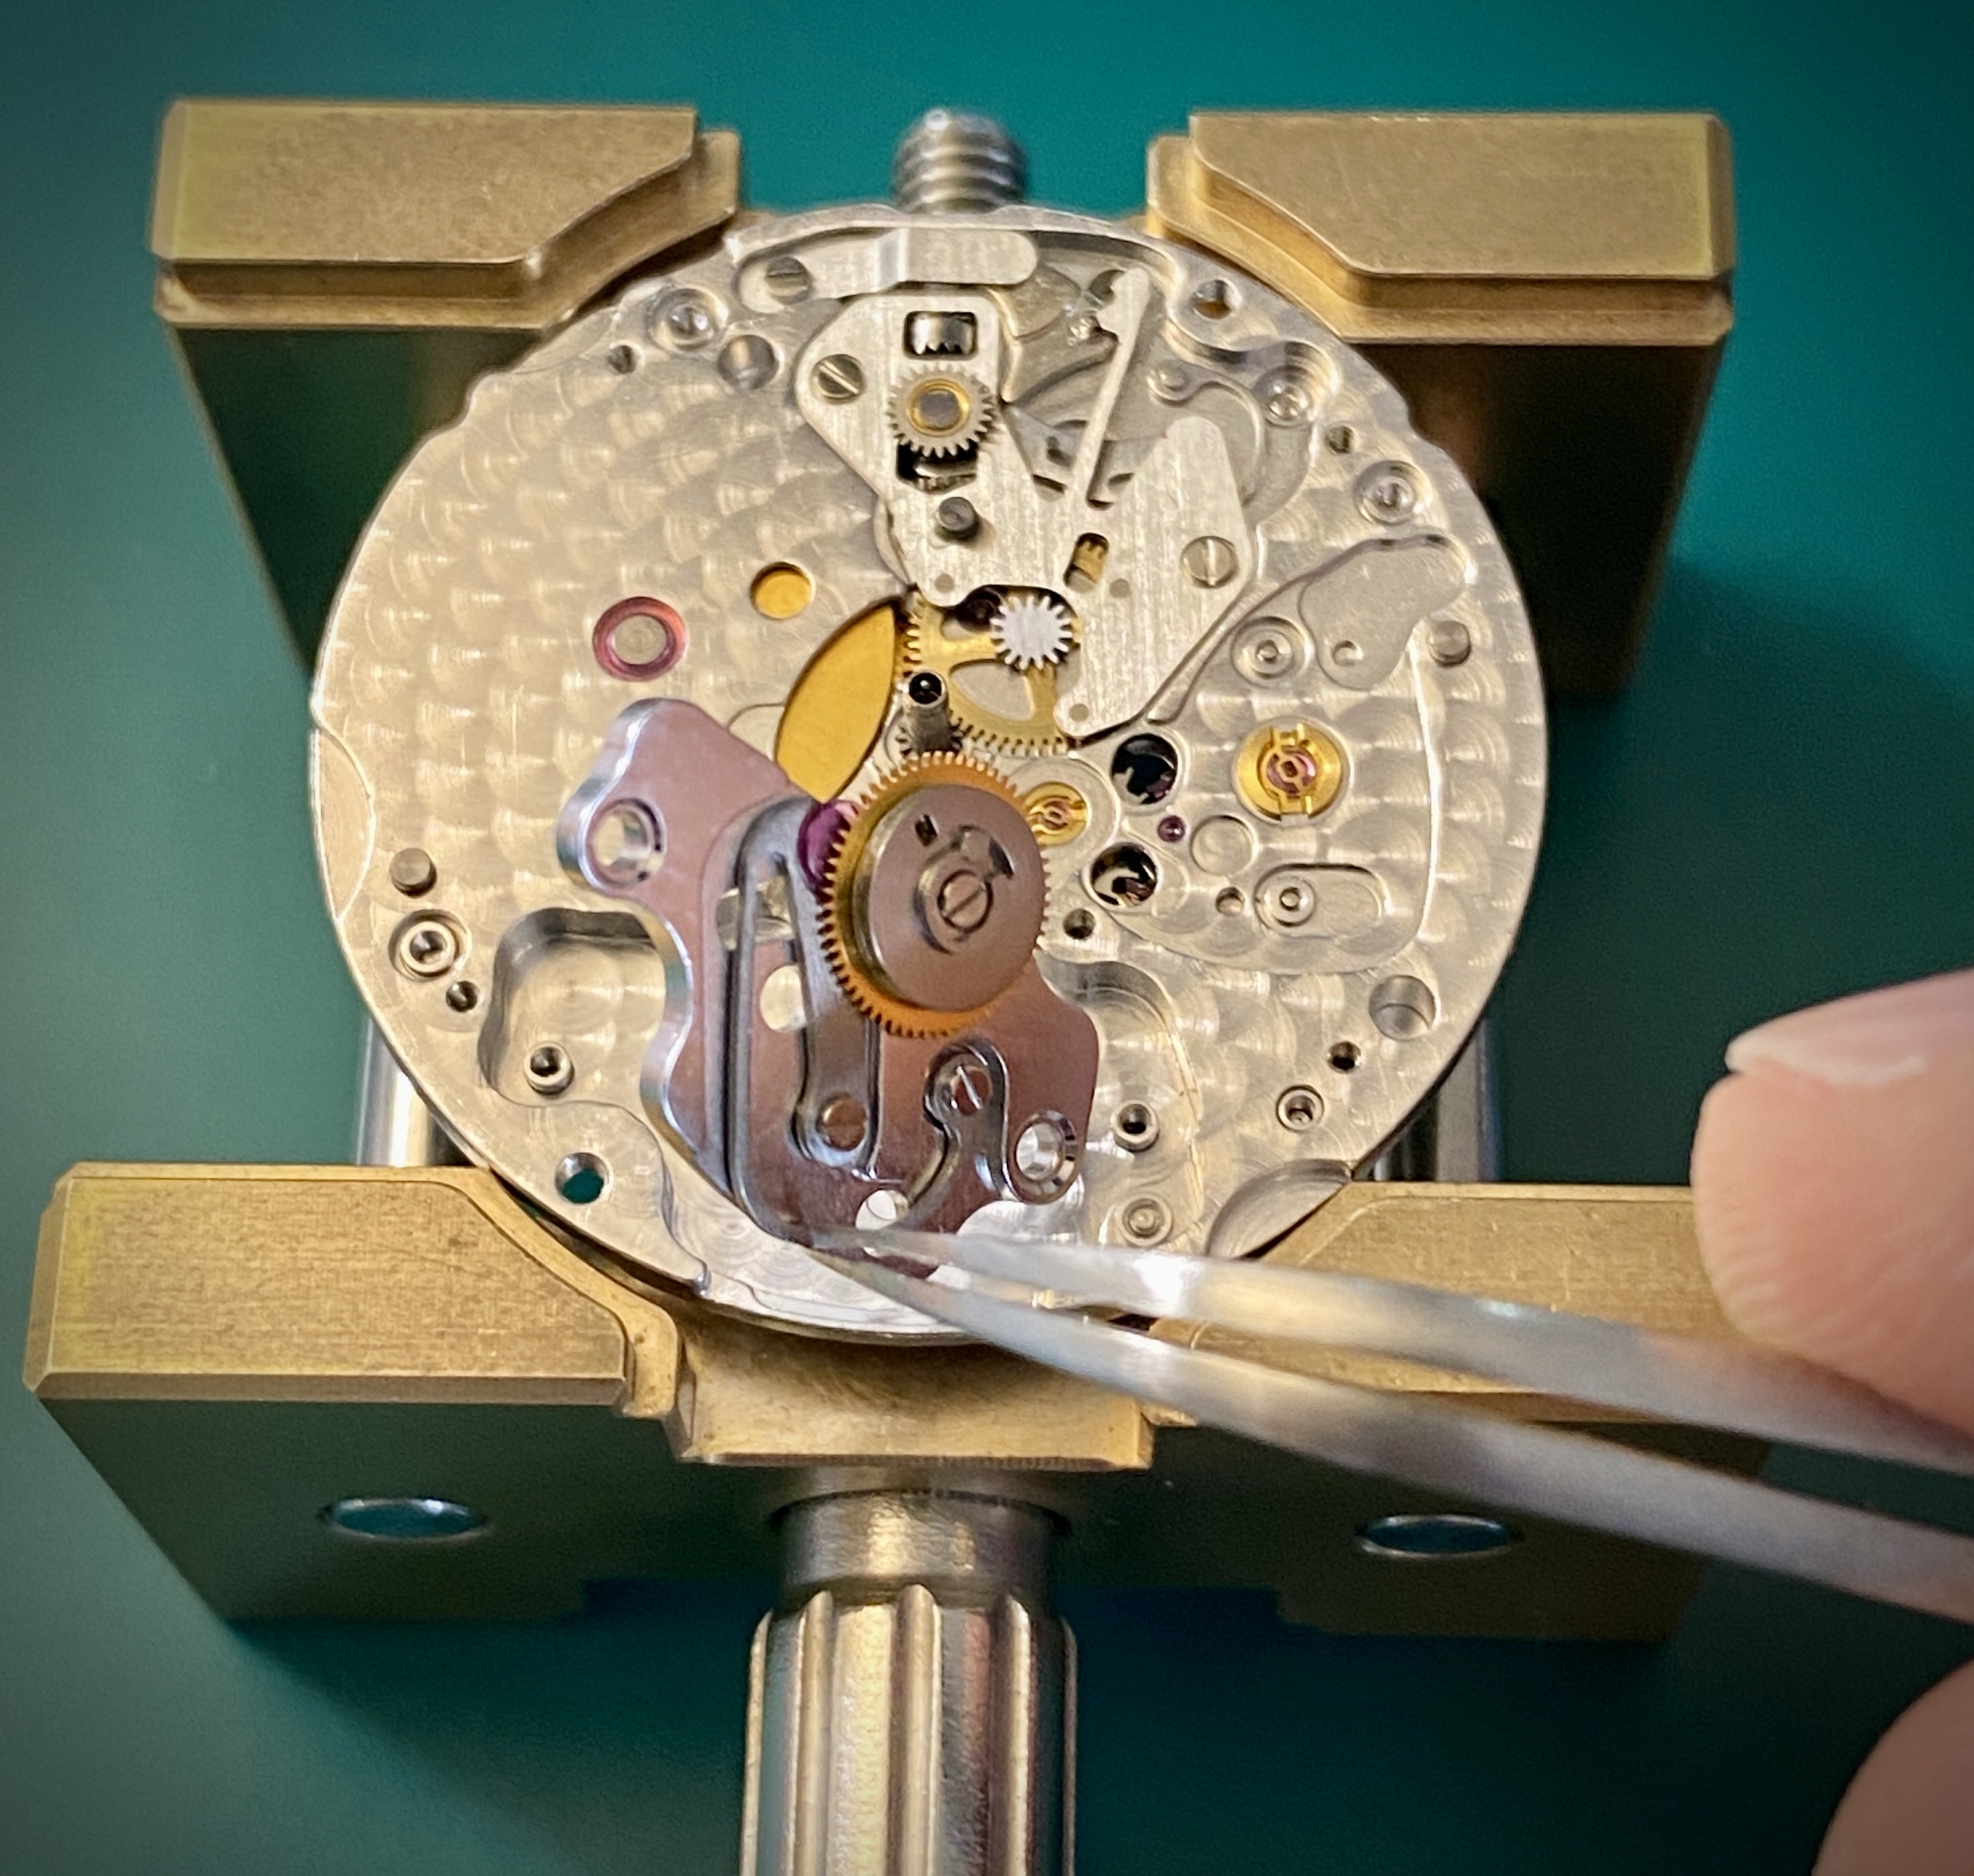
Next you'll want to re-insert the stem into the movement. This will help keep the keyless works nicely aligned while we go in an replace the setting lever spring. When inserting the stem be gentle and try rotating the stem back and forth if it ever feels like it's stuck.
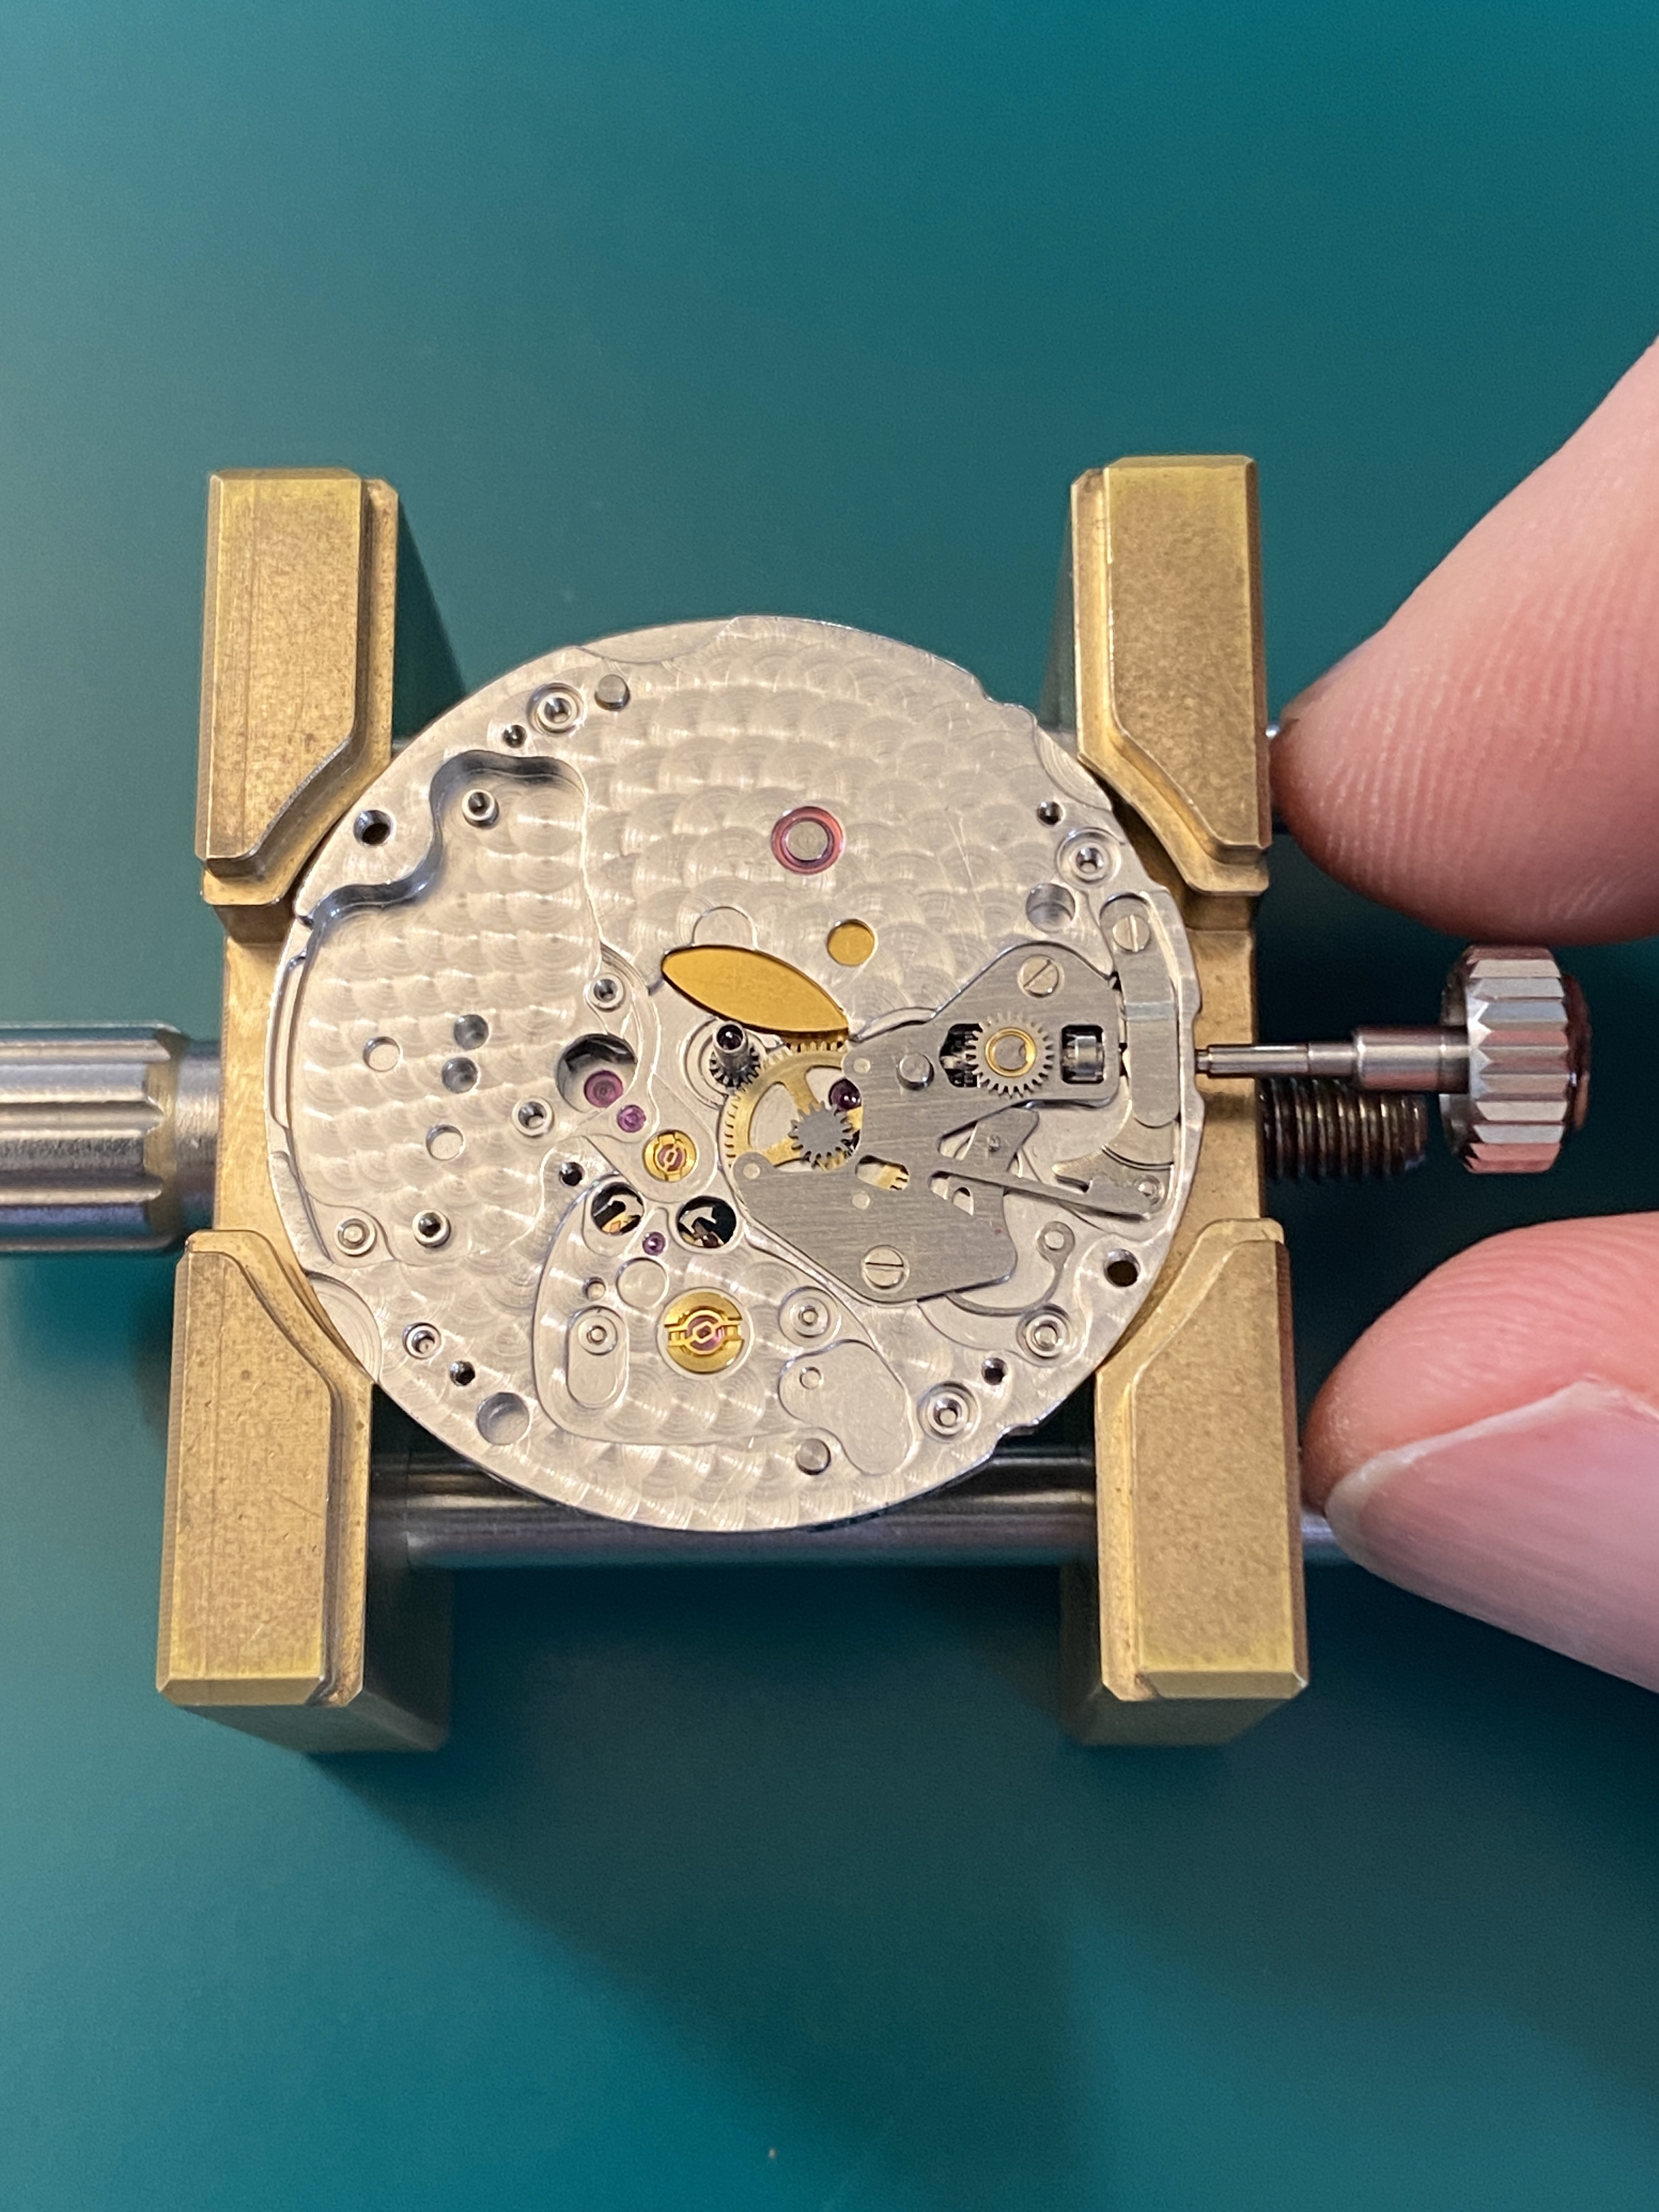
With the stem in place we need to remove the stock setting lever spring. To do this, use a 1.2mm screw driver to remove the two screws securing it.
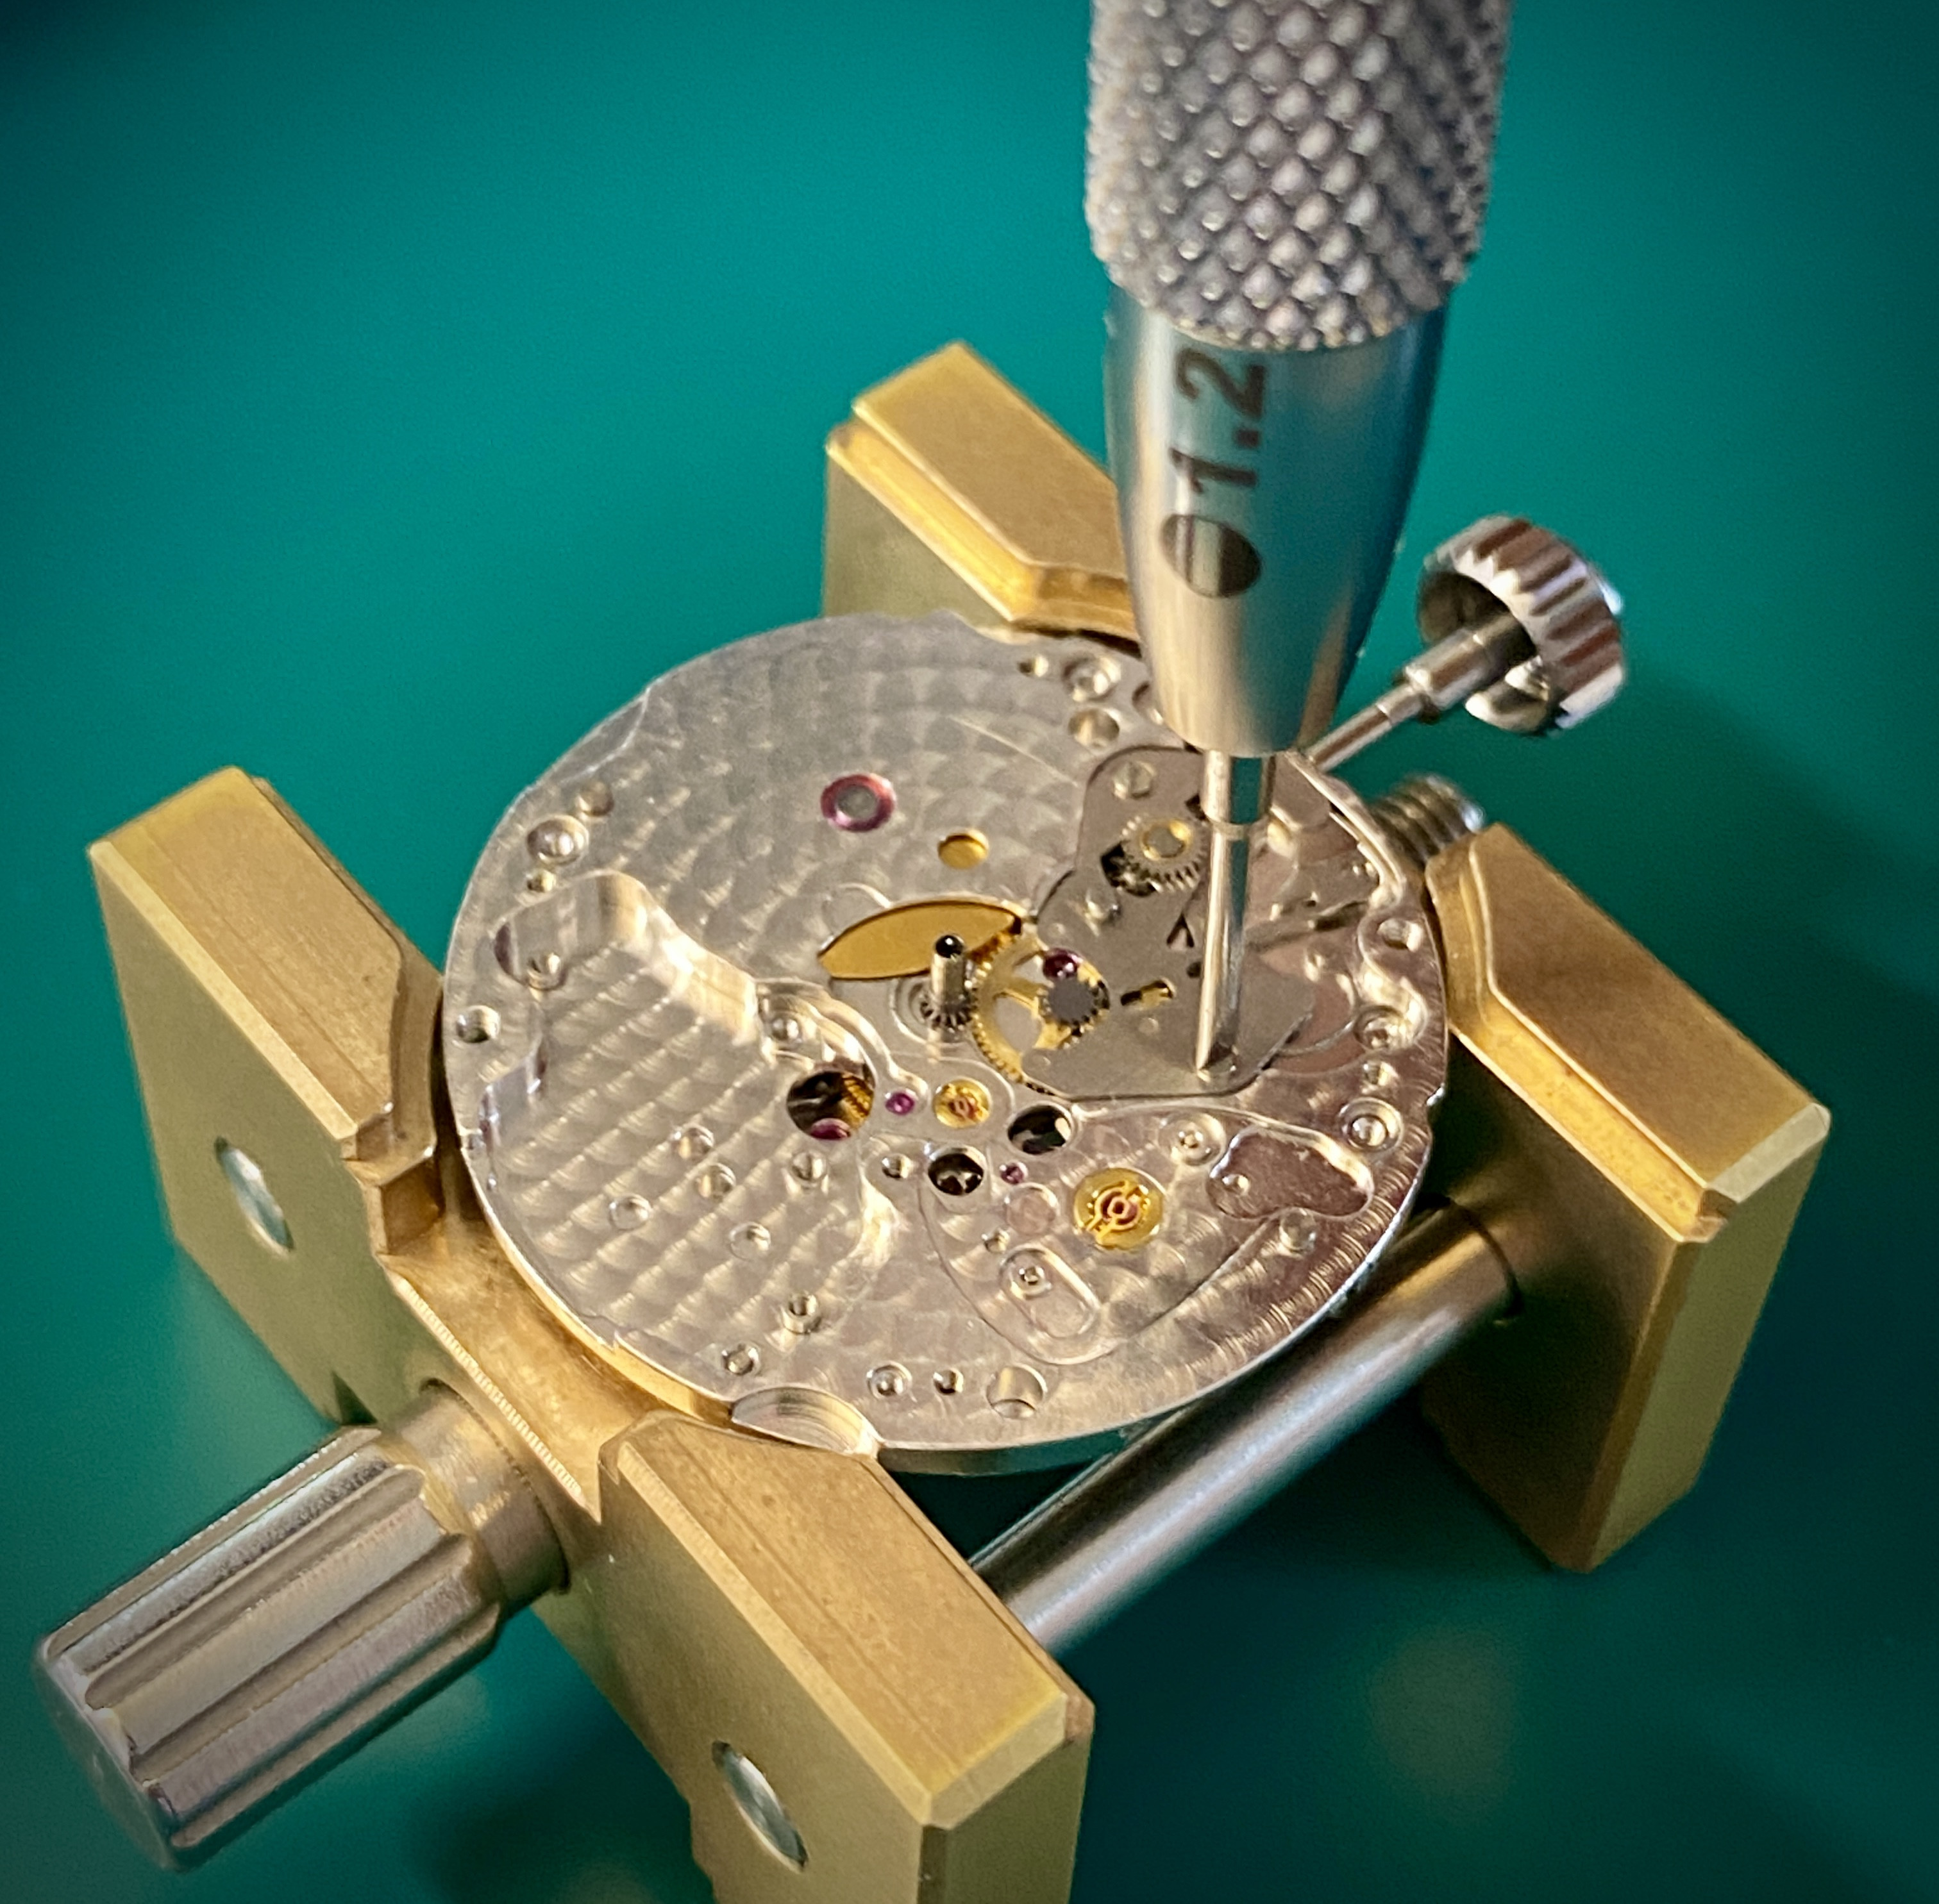
This is what the stock setting lever spring looks like when it has been removed. Note, be careful that the tiny steel pinion that sits between the sliding pinion and the large brass minute wheel stays in place. If they keyless works was over-oiled, then it's possible that the little steel pinion will stick to the bottom of the setting lever spring.
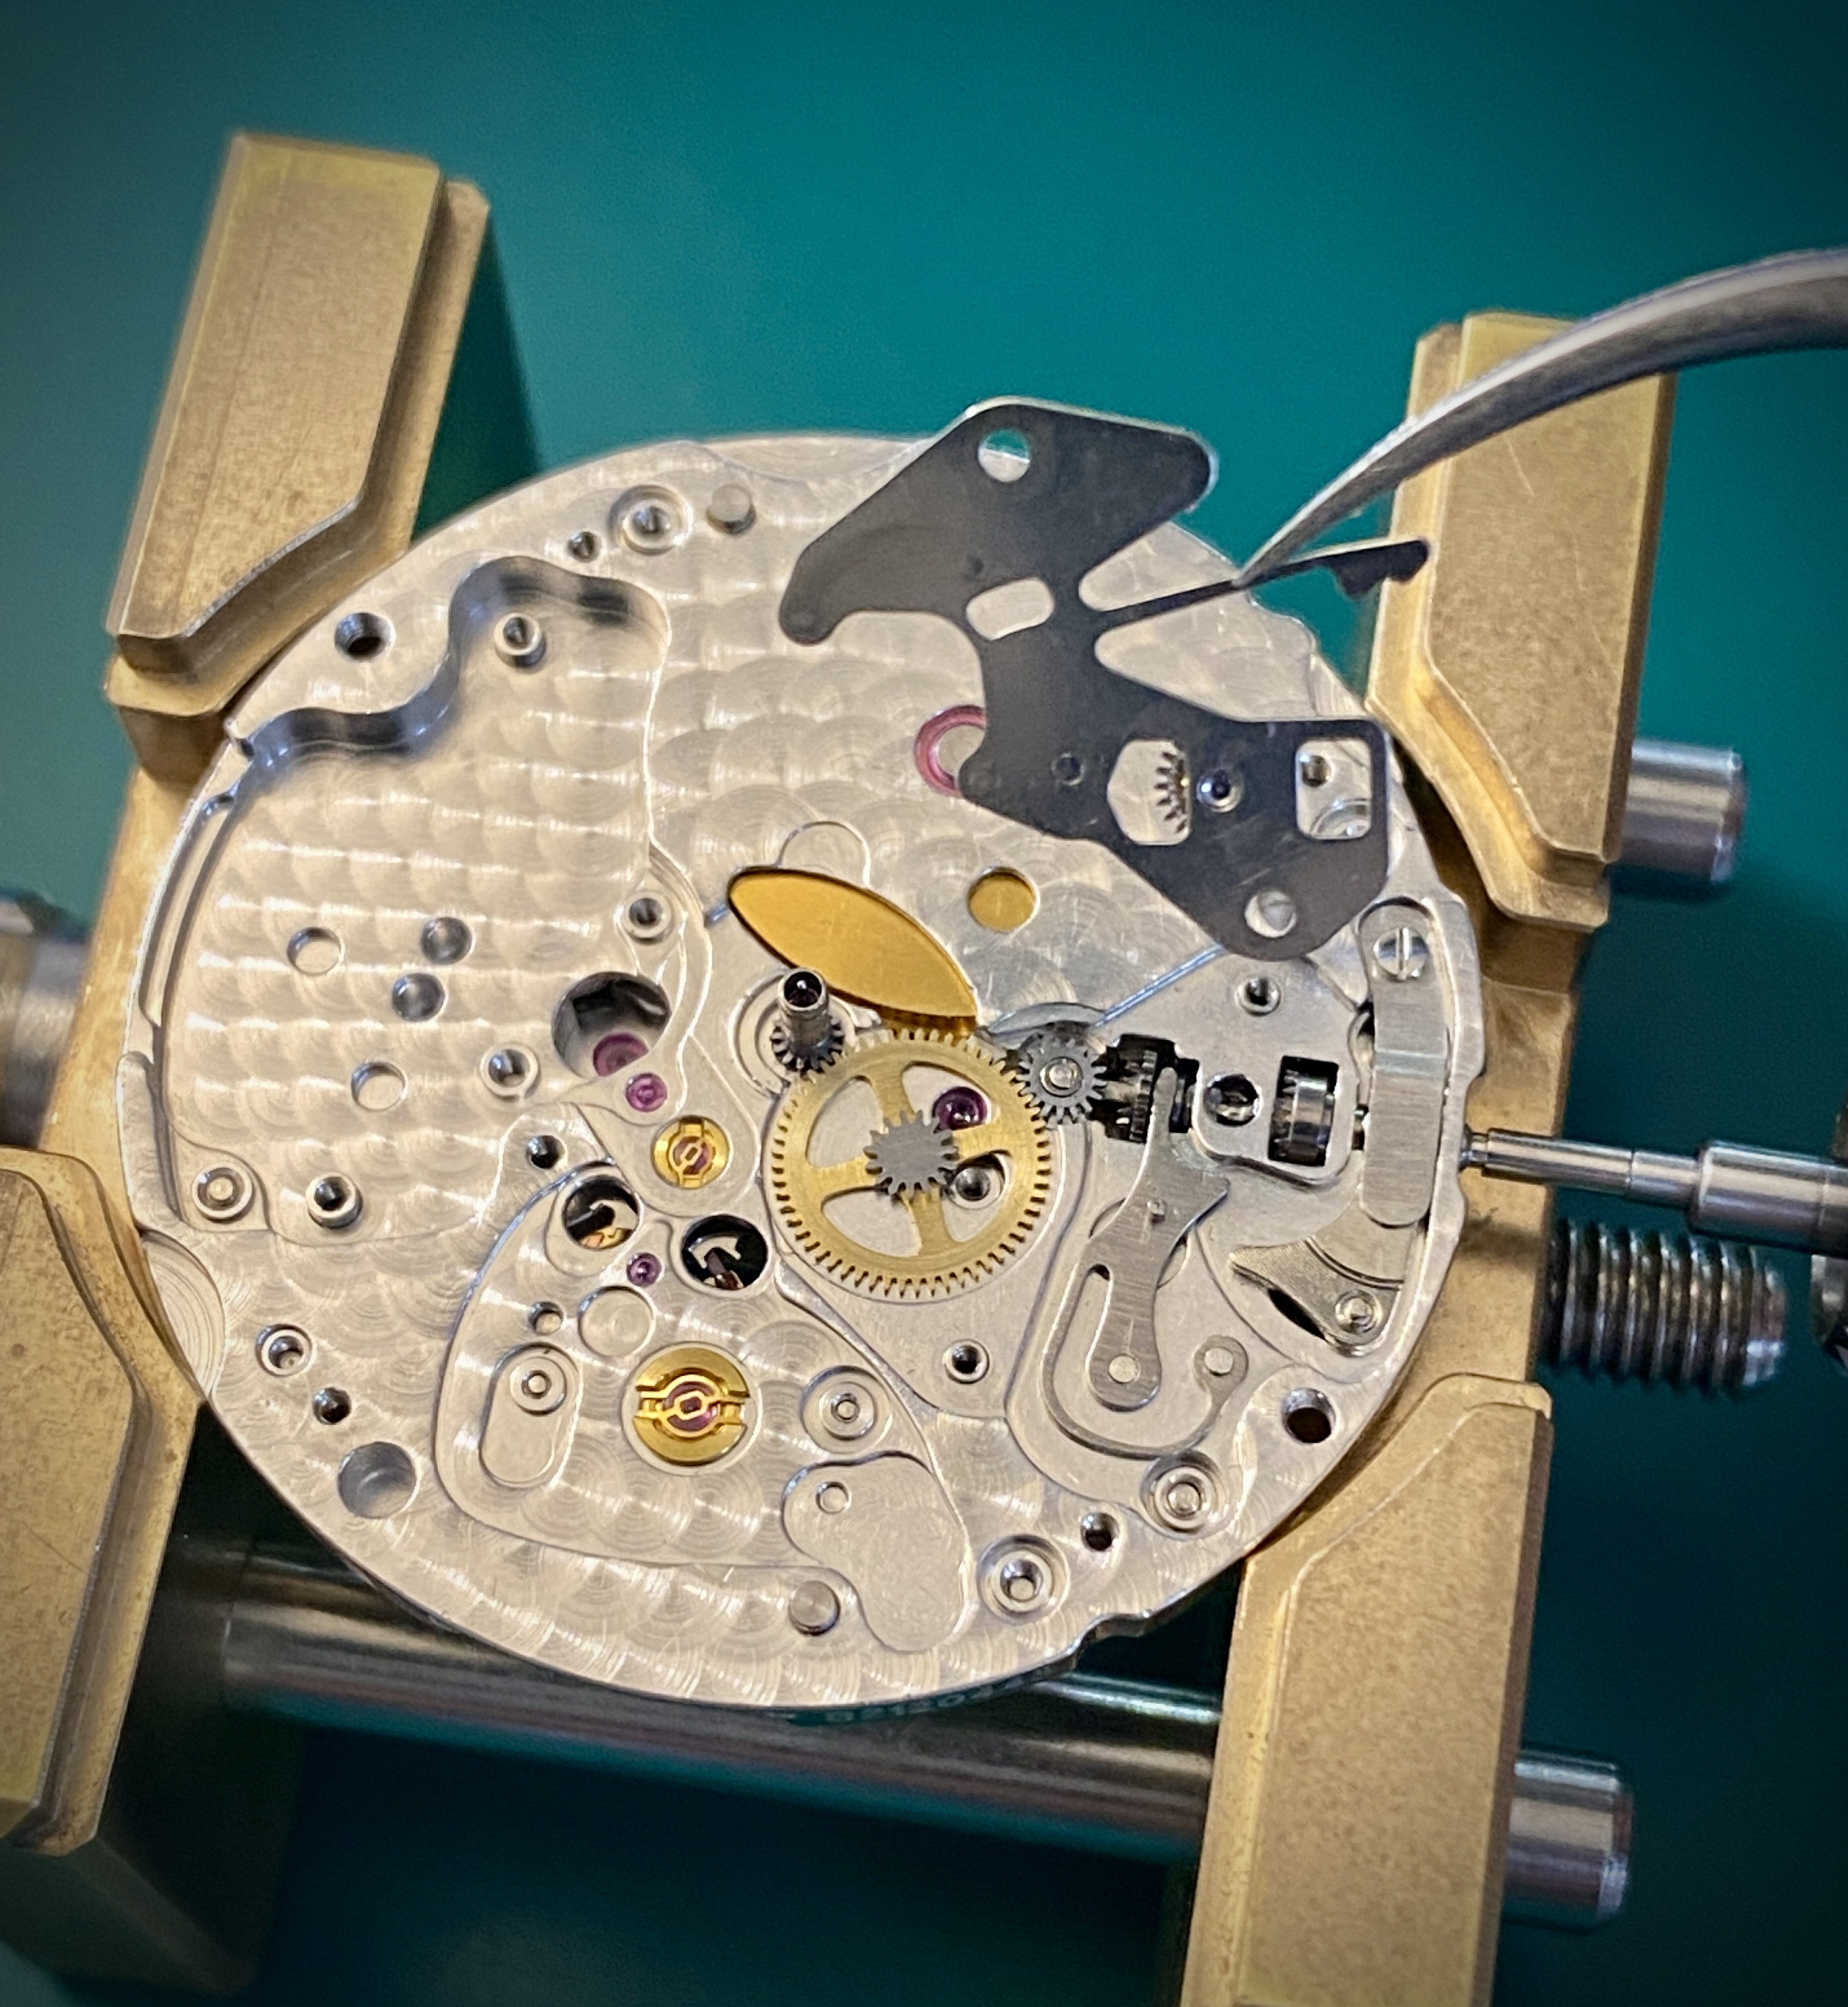
Now it's time to install the ZeroCool-Dogwood custom setting lever spring.
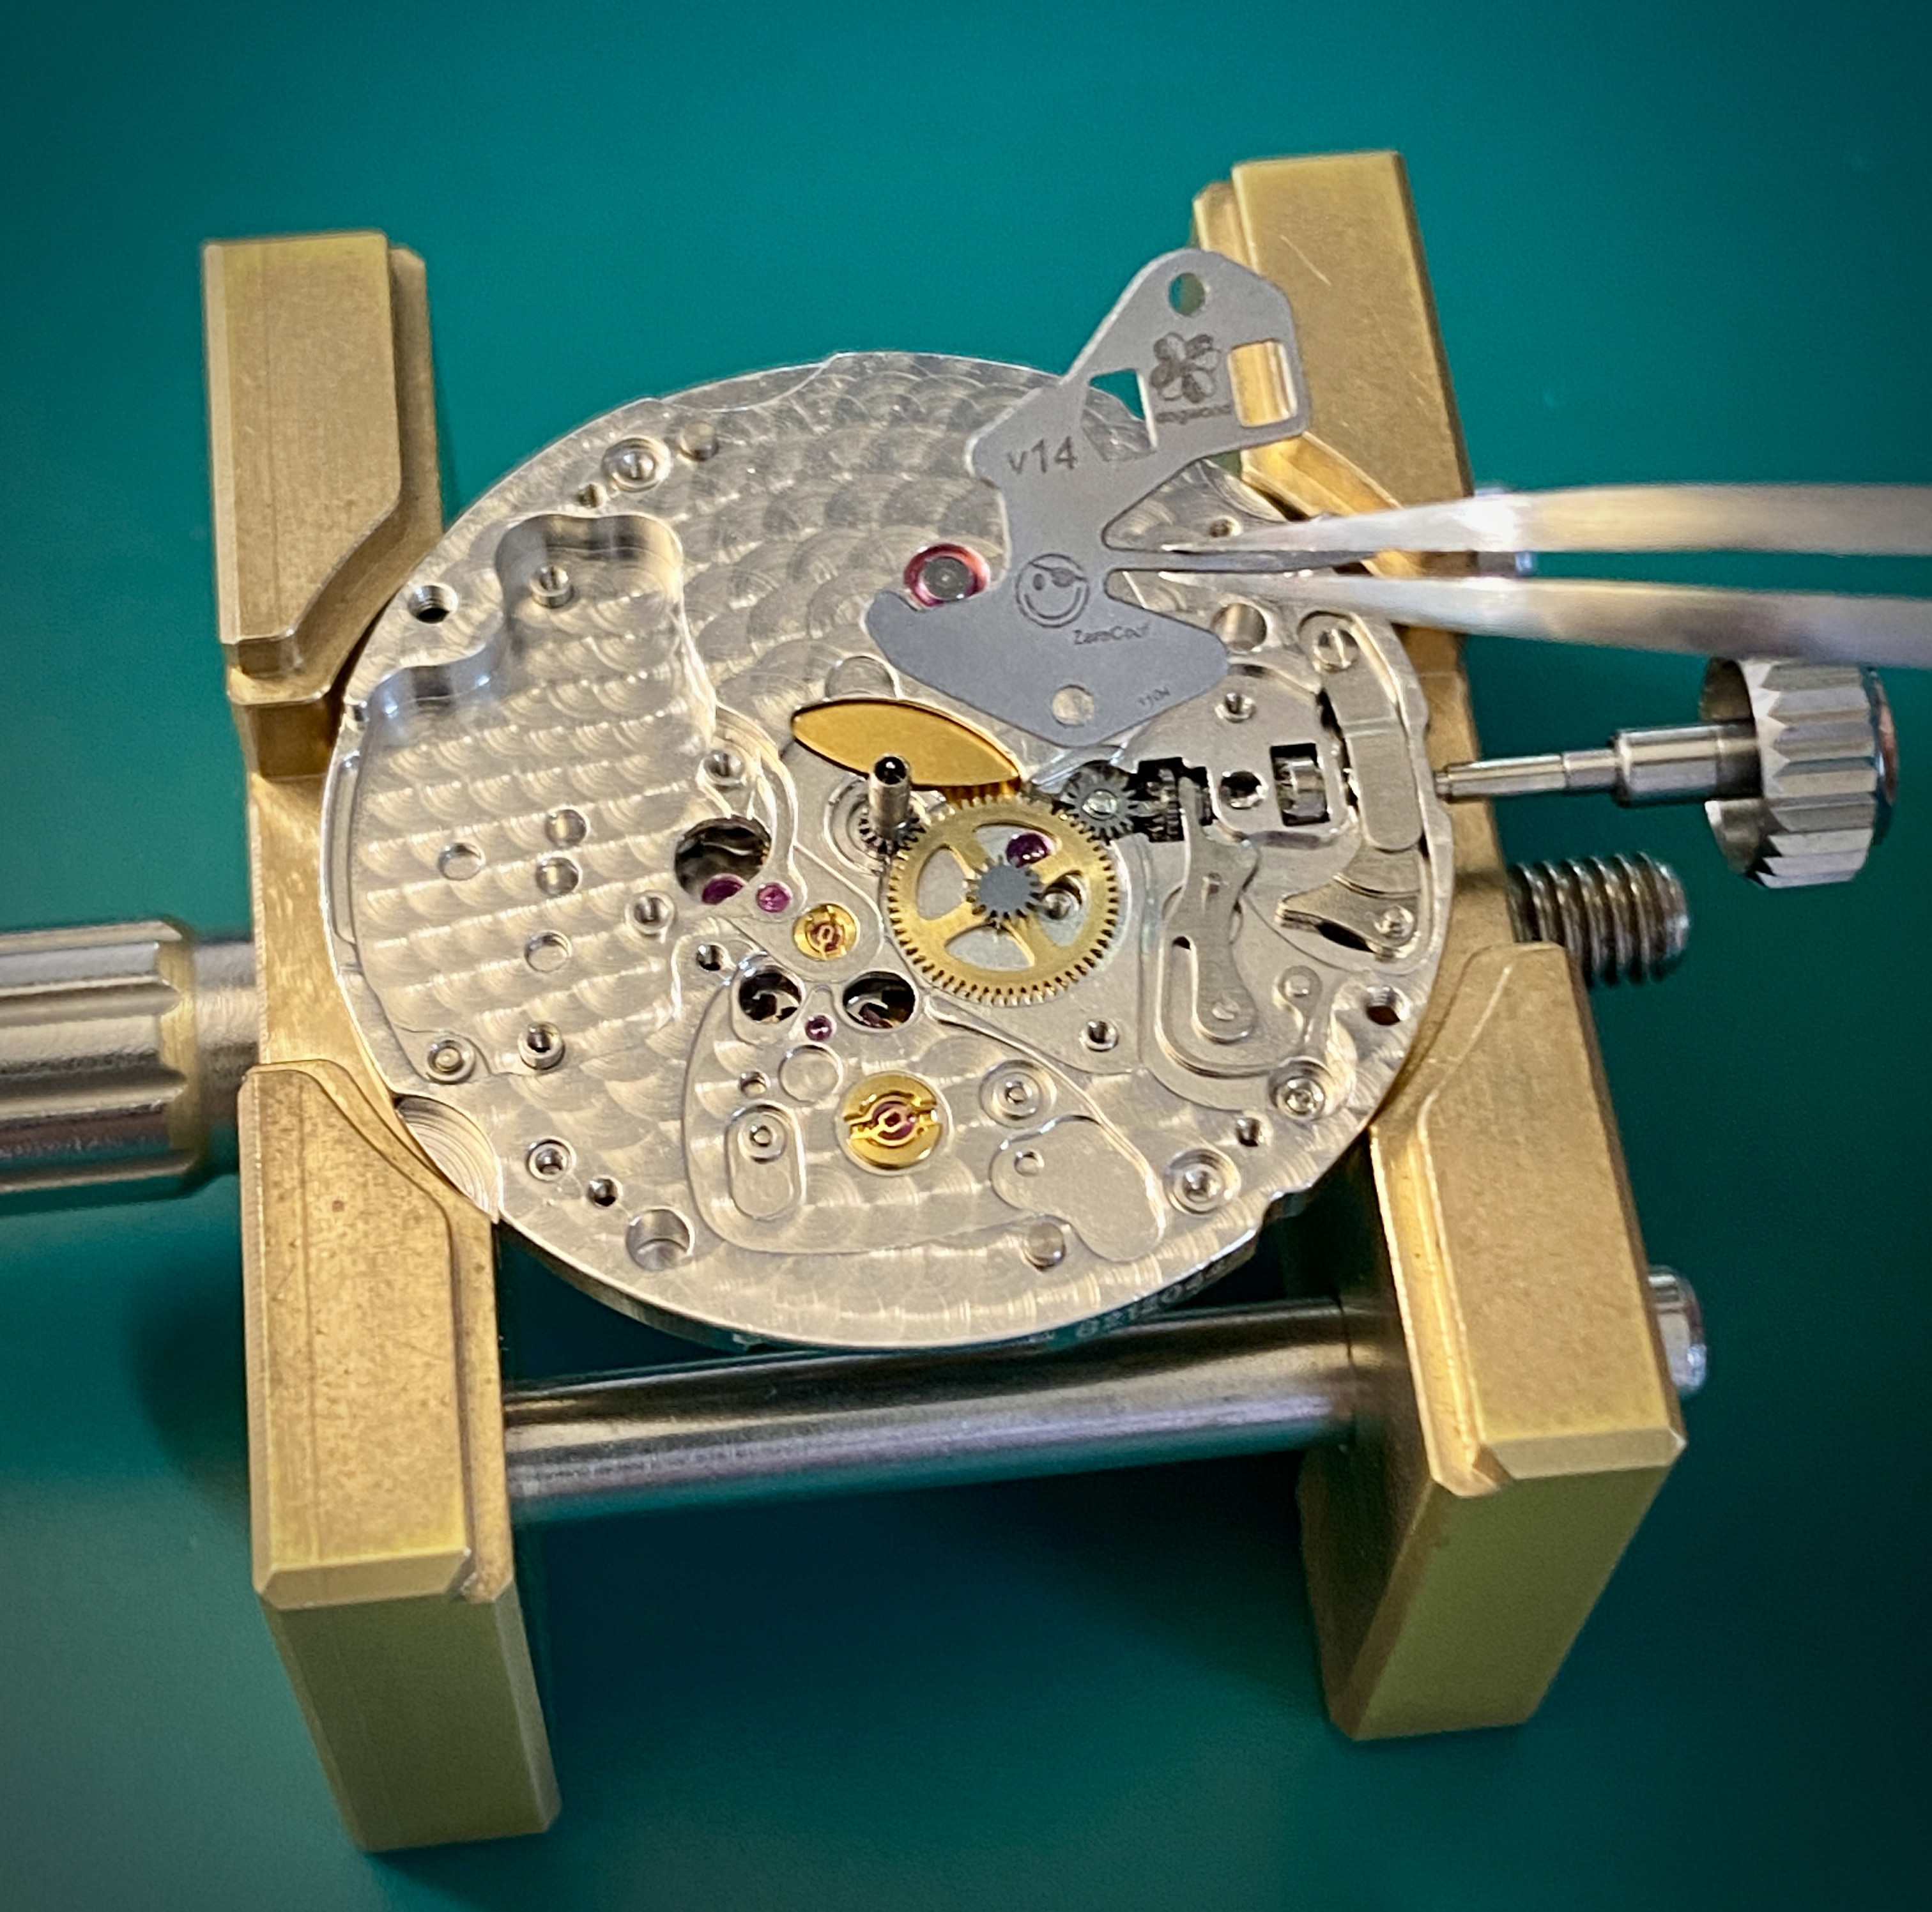
Align the new setting lever spring with the two mounting holes. Don't worry if the lobe at the end of the spring arm is in the right position relative to the pin on the setting lever, just get the two screw holes aligned.
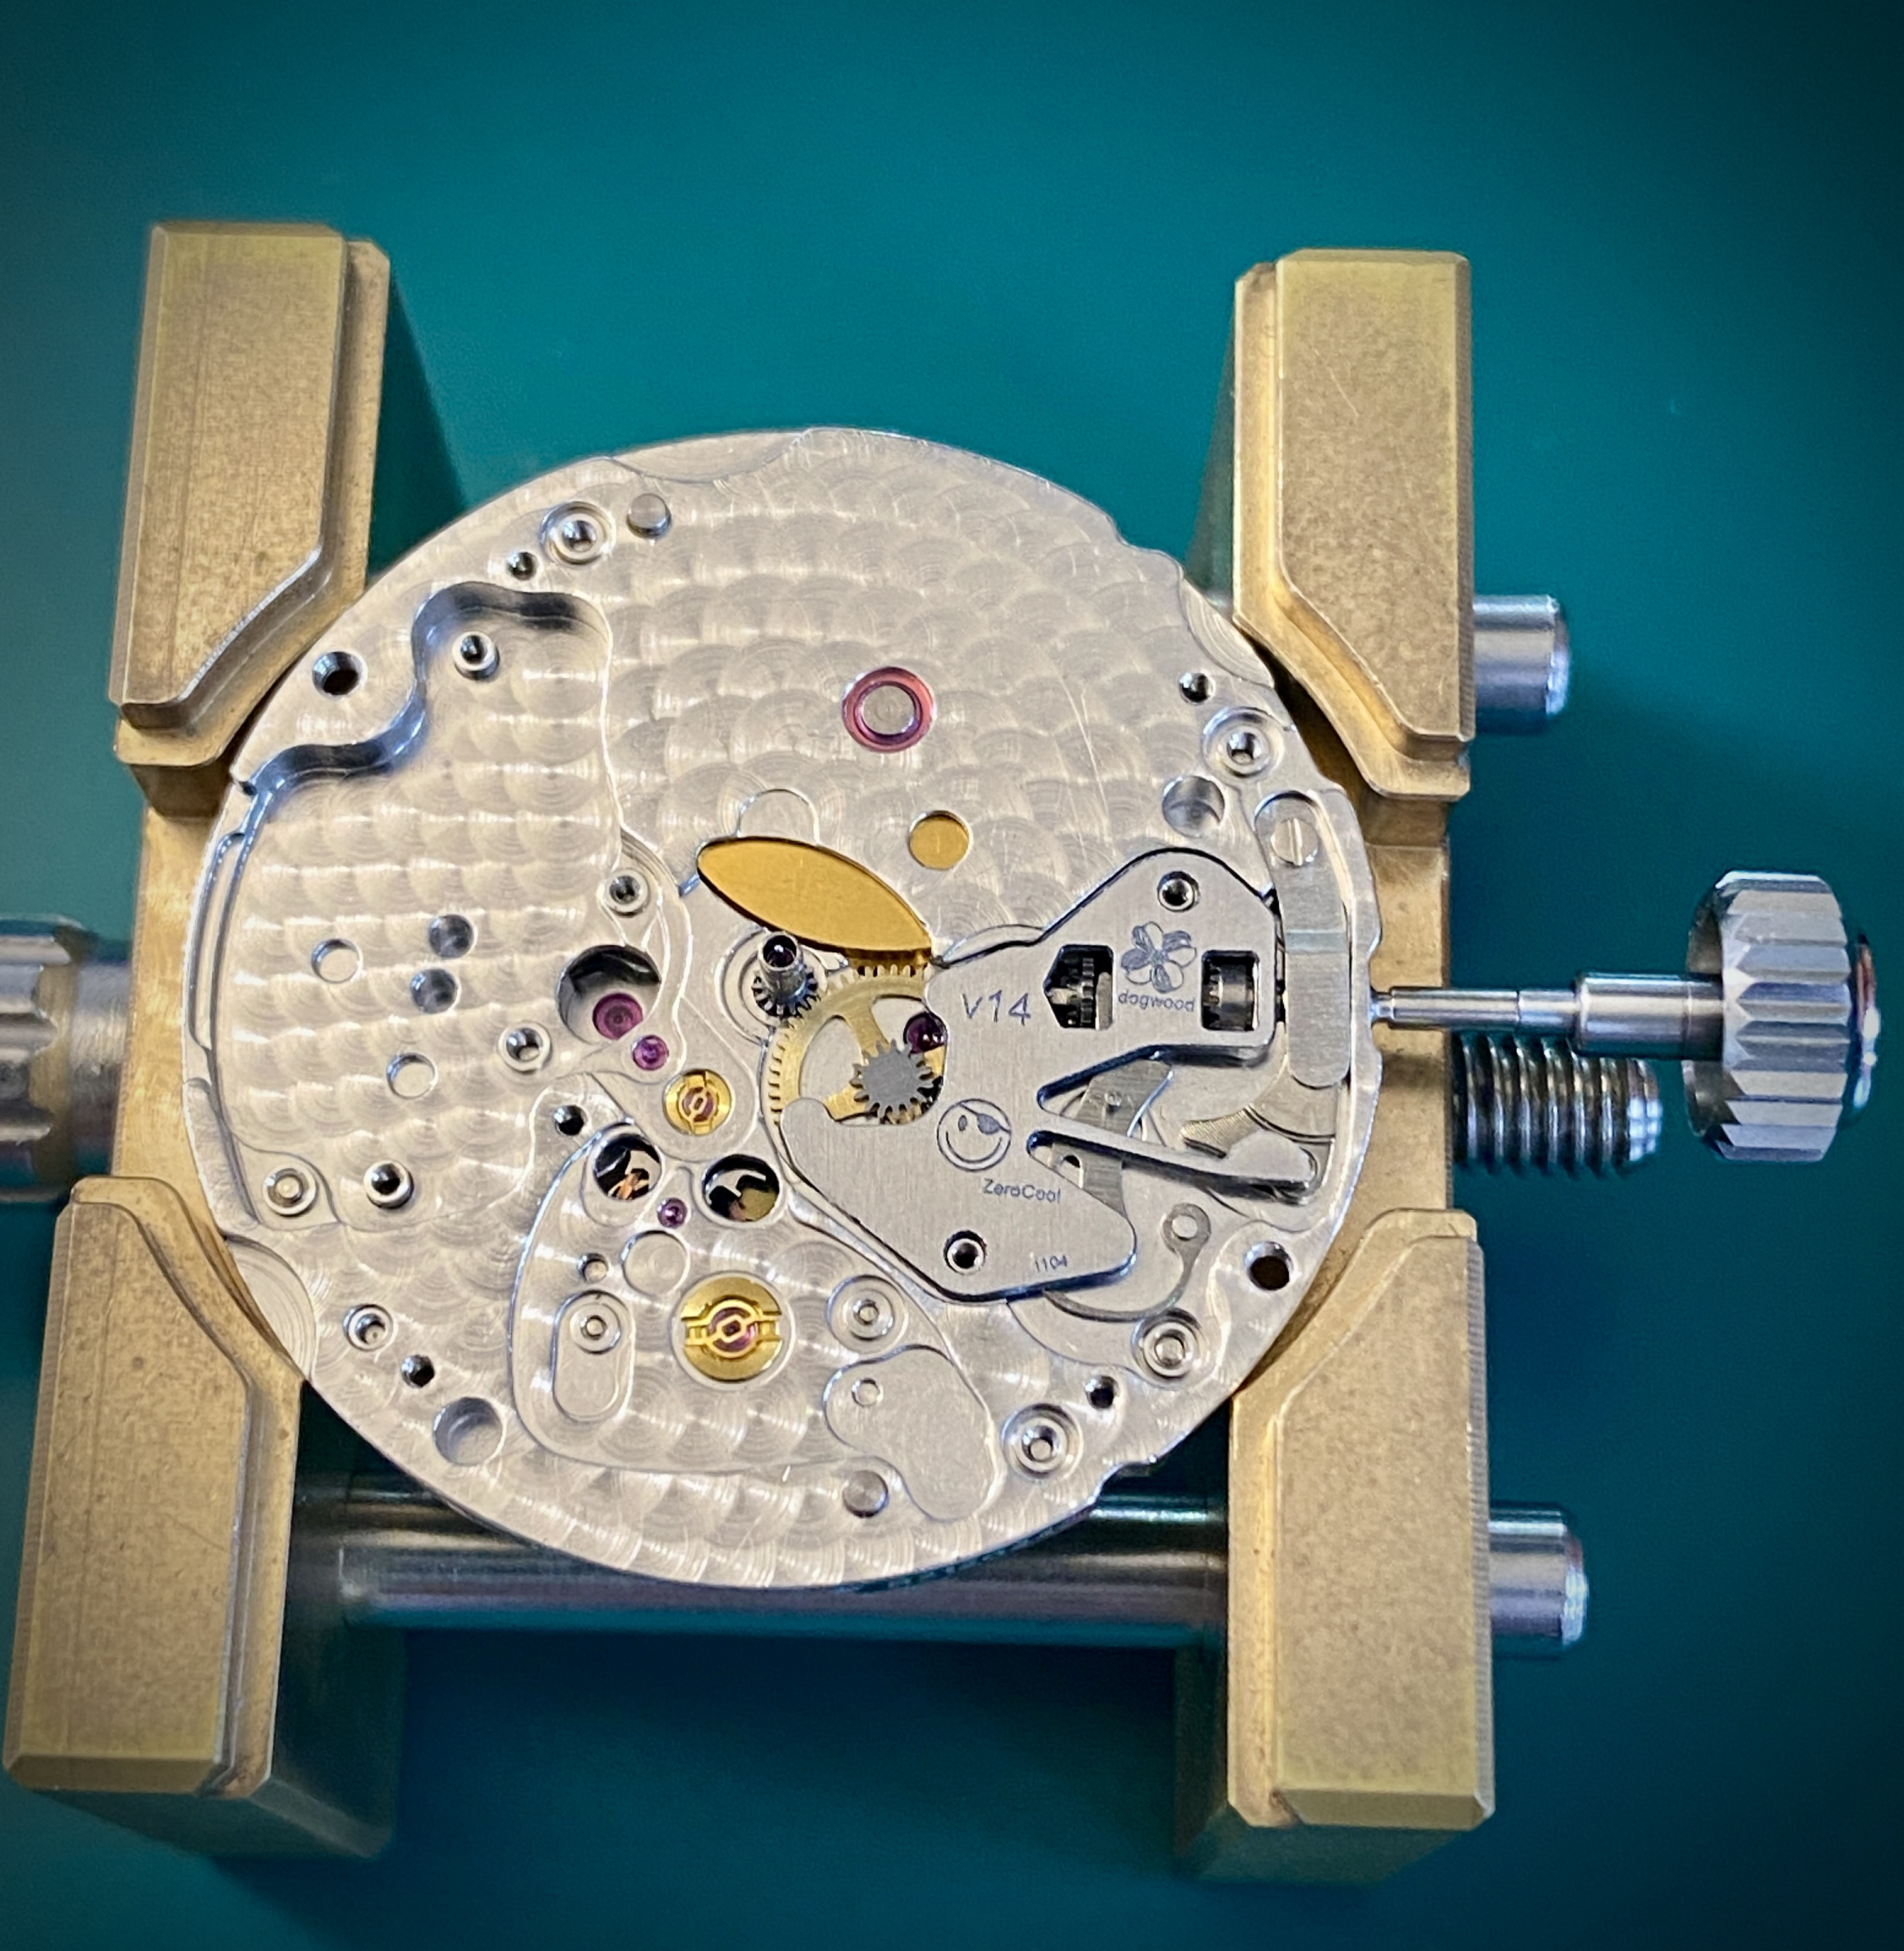
Use the two original screws that came from the stock setting lever spring to secure the new setting lever spring. Make sure that the setting lever spring sits flush with the main plate next to both mounting screws. The mounting holes on the custom setting lever spring are tight by design to ensure the spring sits in the correct location, you may need to apply downward pressure with a tool (e.g. a screw driver) to get the new setting lever spring to pop down and become flush. Don't use the mounting screws to apply downward pressure by tightening them if the new setting lever spring isn't already down and flush. The mounting screws have tiny threads which are easy to strip. The mounting screws are strong enough to hold the part in place, but aren't strong enough to squish the part onto the mounting posts if things aren't correctly aligned.
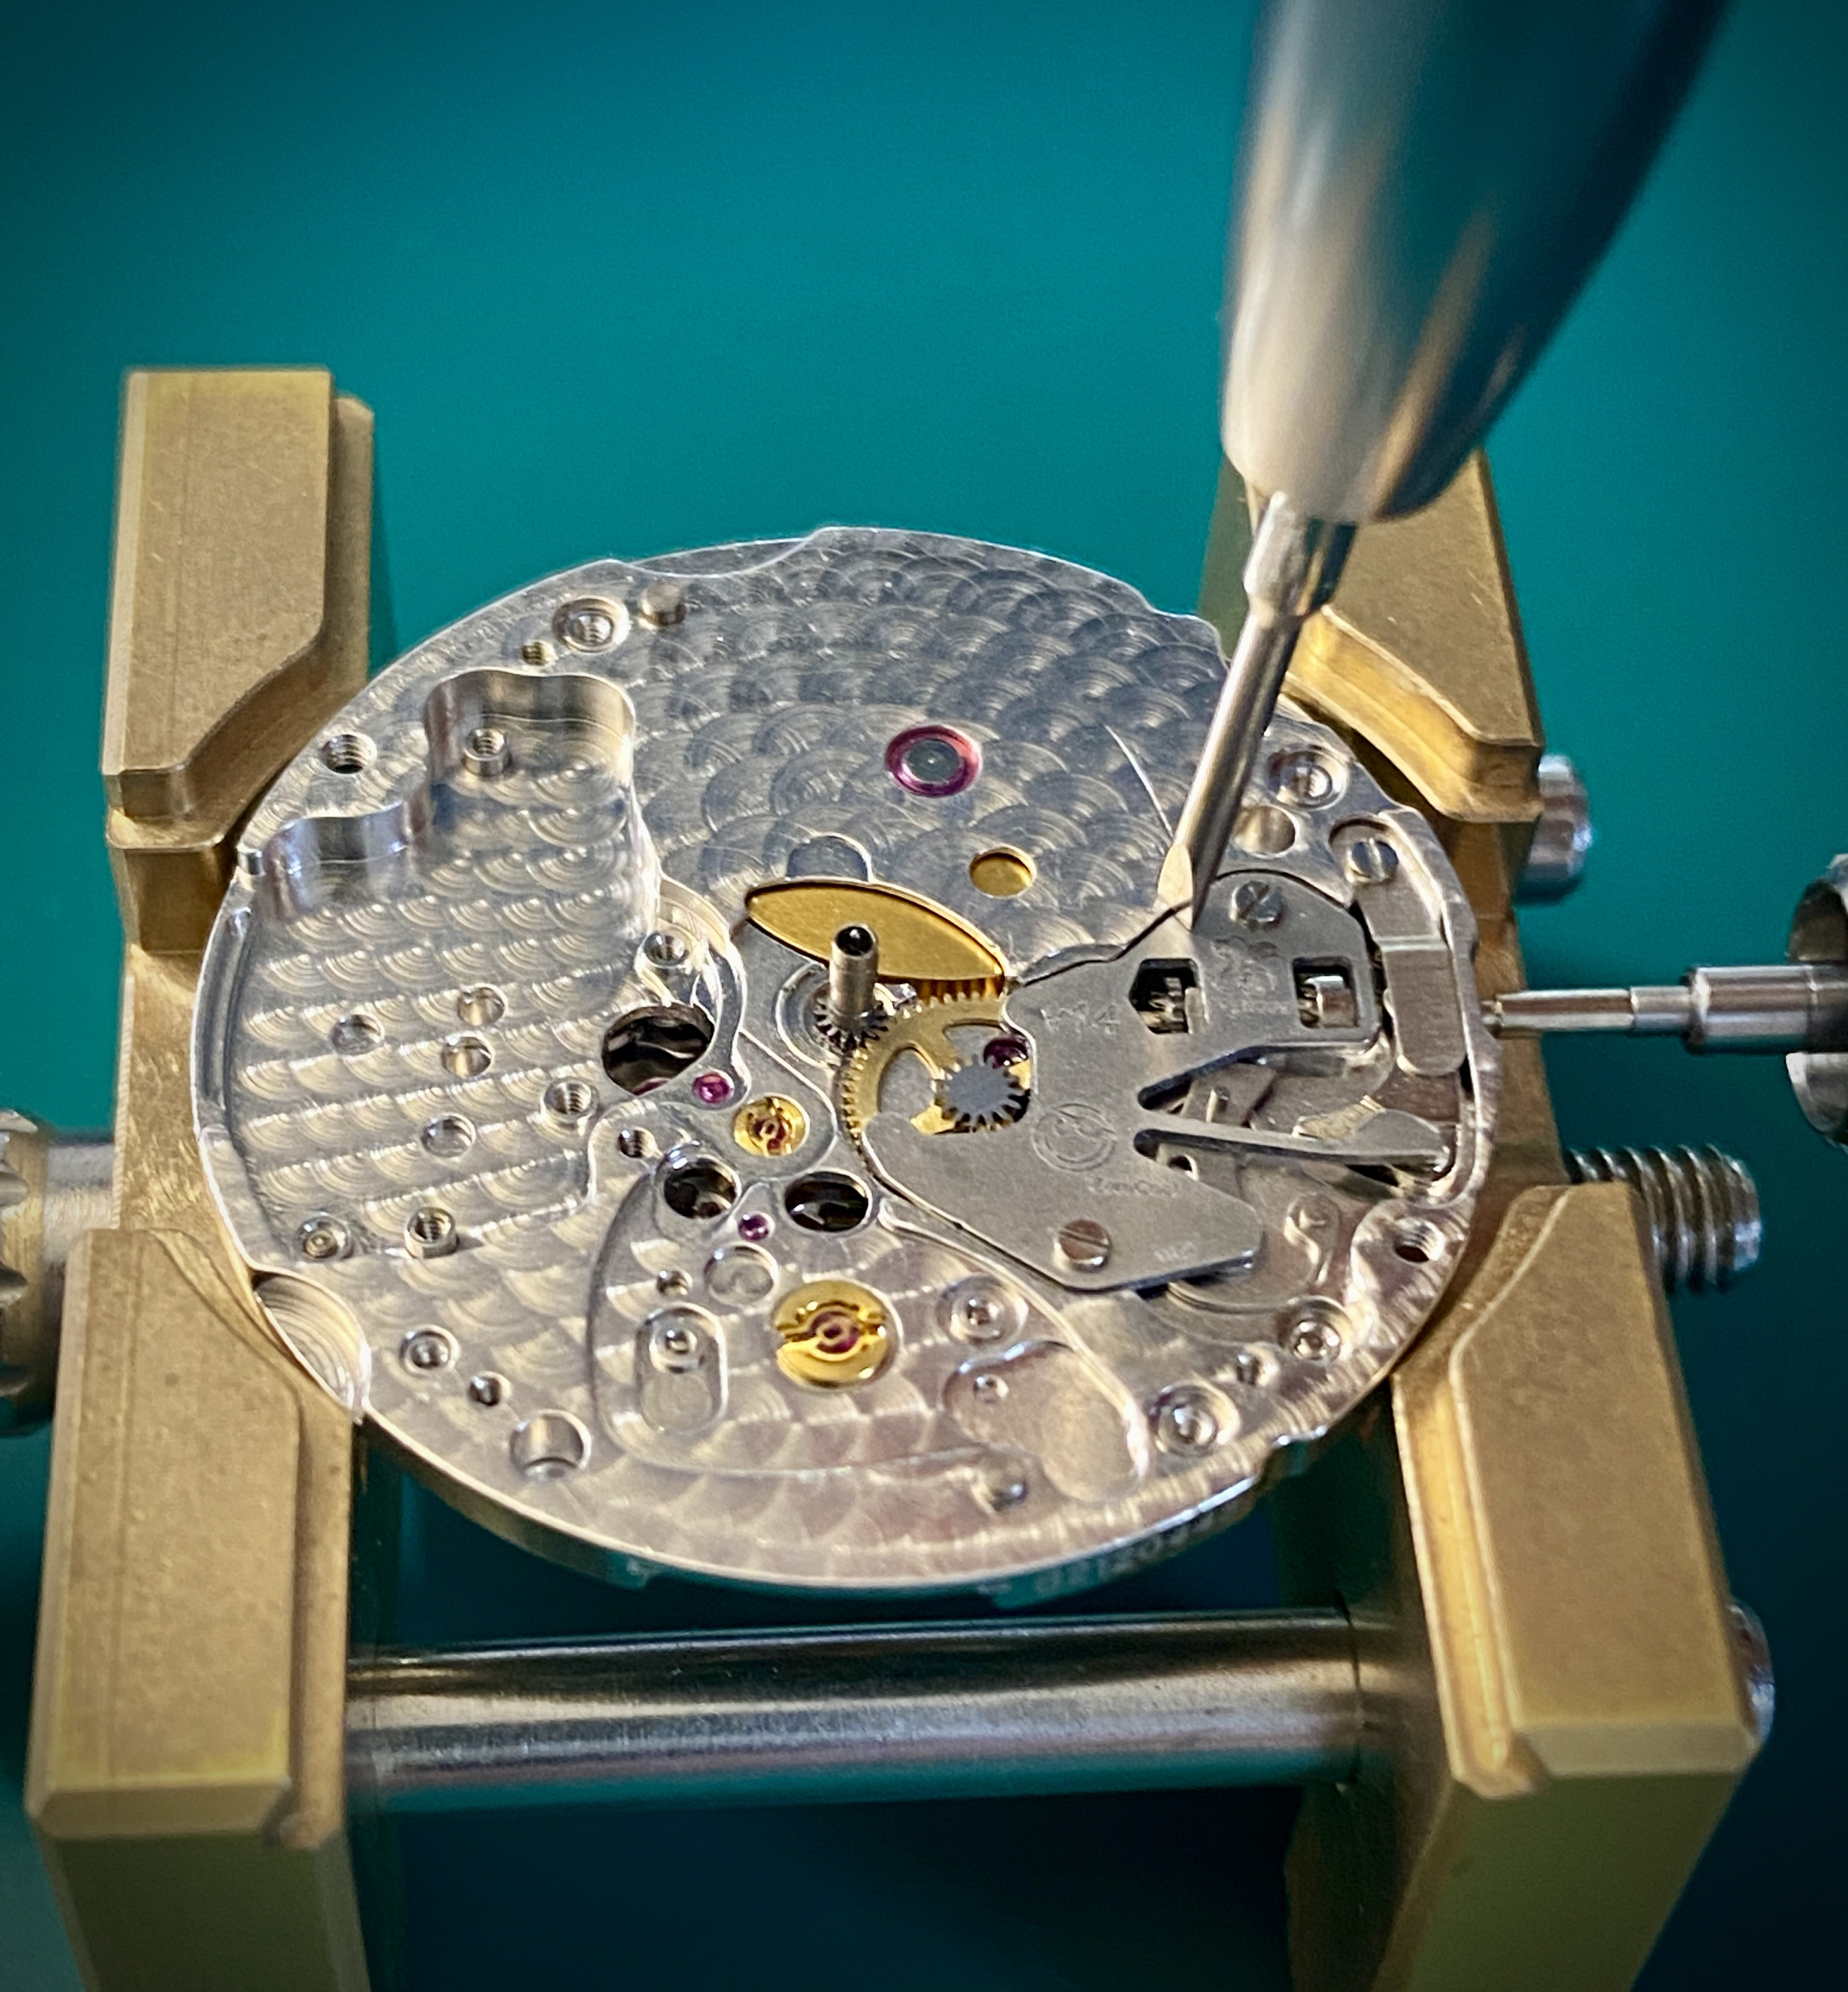
Next we're going to need to apply a tiny amount of lubrication onto the lobe of the new setting lever spring. You have a few options here: HP-1300, D-5, or Moebius 9504. Honestly you could use any of these lubricants and it would be fine, I used HP-1300.
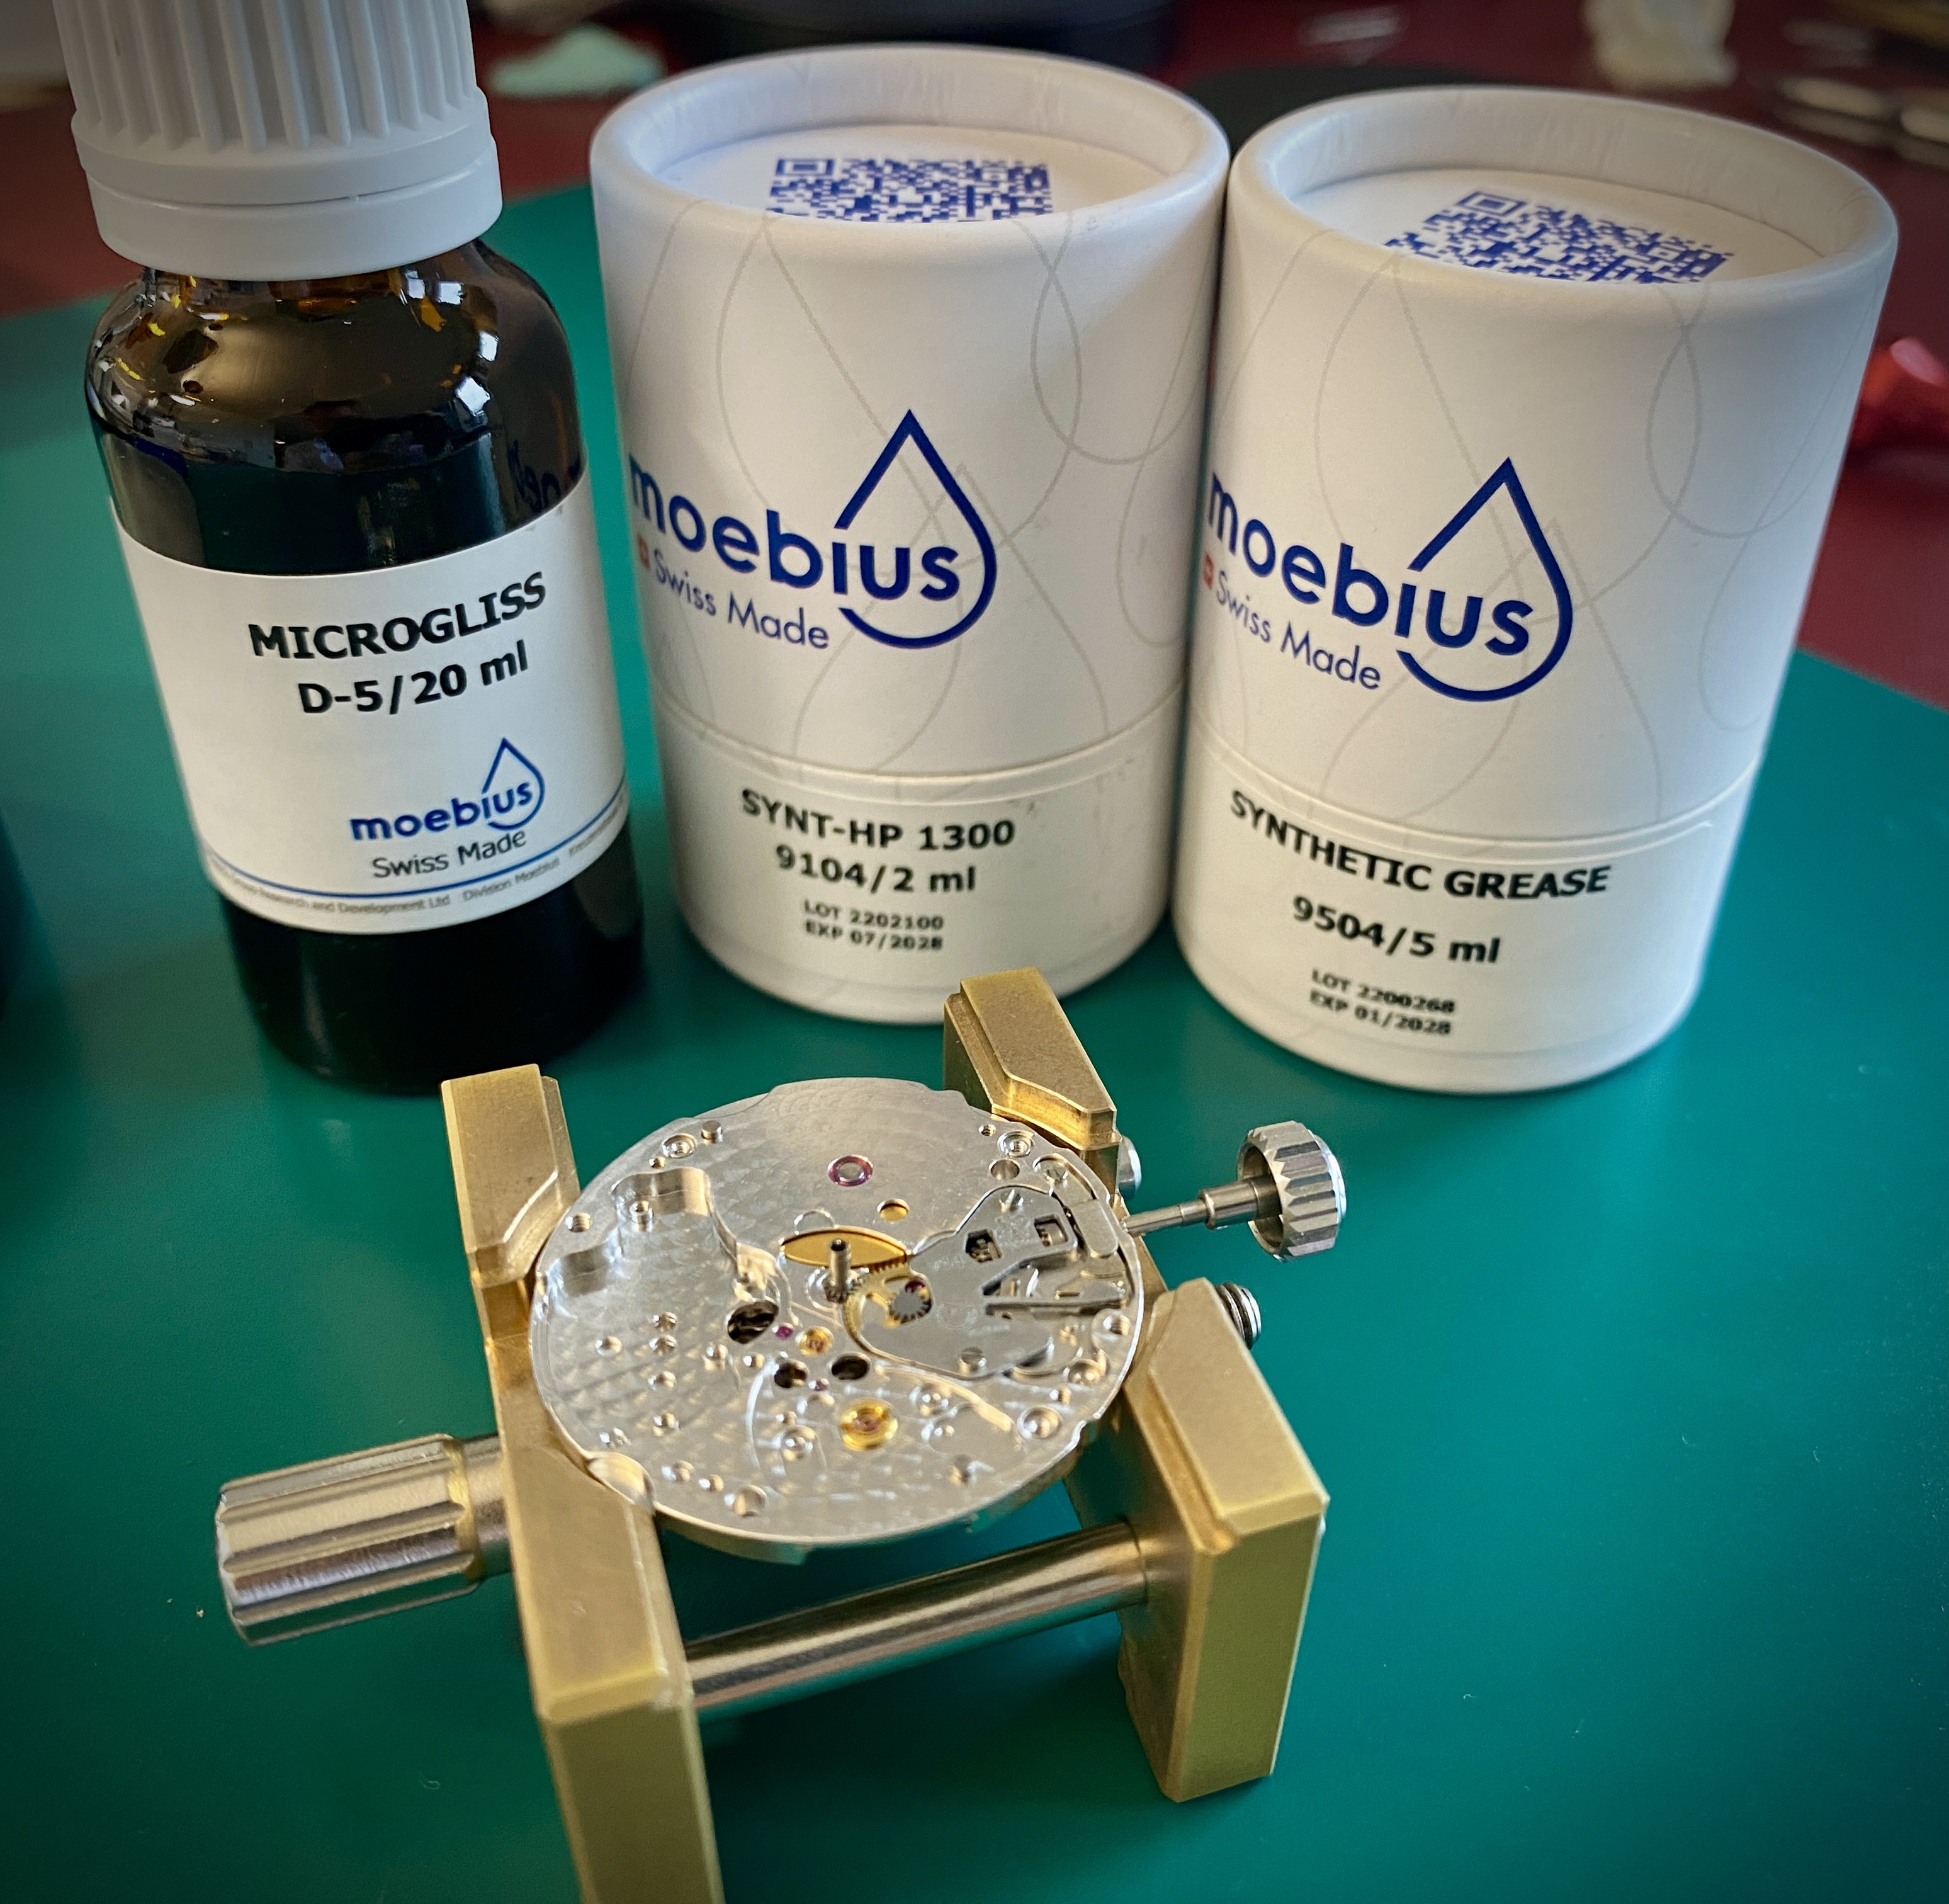
Your goal when lubricating the lobe of the setting lever spring is to ensure there's a film of oil or grease in between the pin on the setting lever and the lobe of the setting lever spring so that those two parts can slide past one another without sticking. If you're using D-5 or HP-1300, you'll want to use an oiler and only apply as much oil as will be held between the pin and the lobe with surface tension. You do NOT want to apply too much lubricant here. Lubricants will spread and if they get to the wrong place in a watch movement they will cause it to stall. Less is more when it comes to watch lubrication.
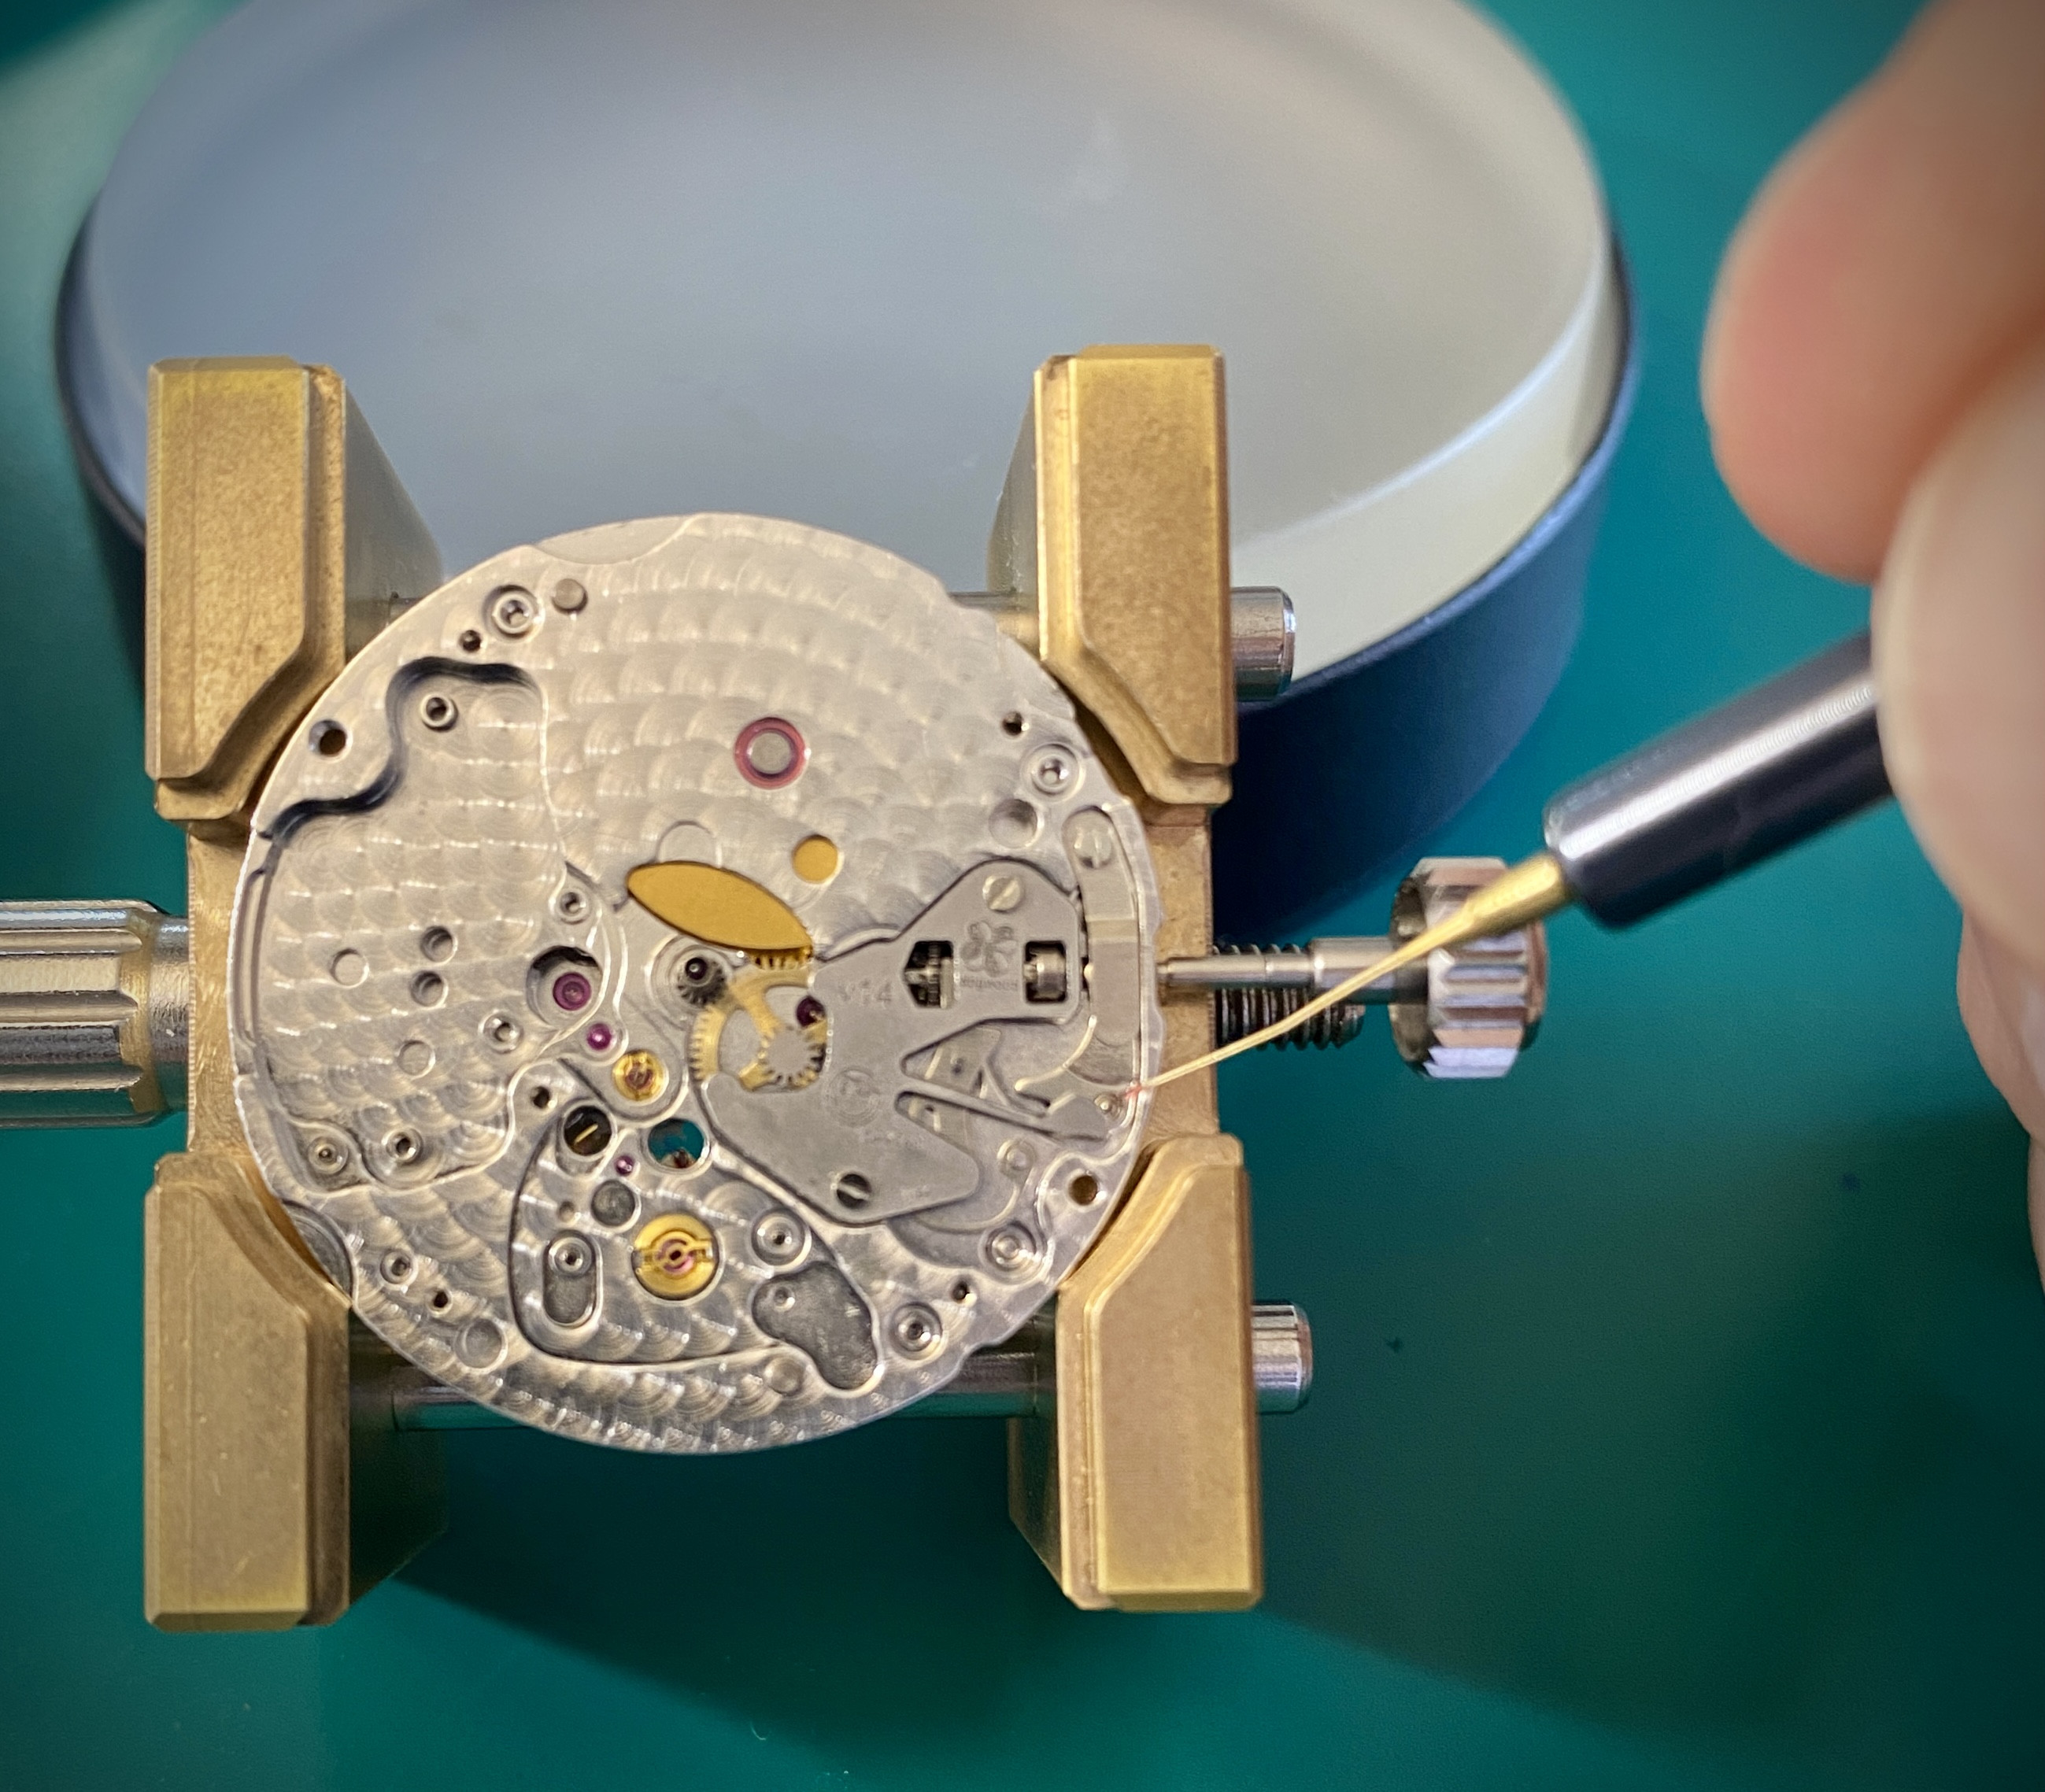
After you've applied the lubrication to the lobe, you can cycle the crown in and out to get a feel for the gen-like two crown positions. This is what the setting lever and setting lever spring should look like in both the positions. The pin should come to rest with a nice positive click on both sides of the setting lever spring lobe.
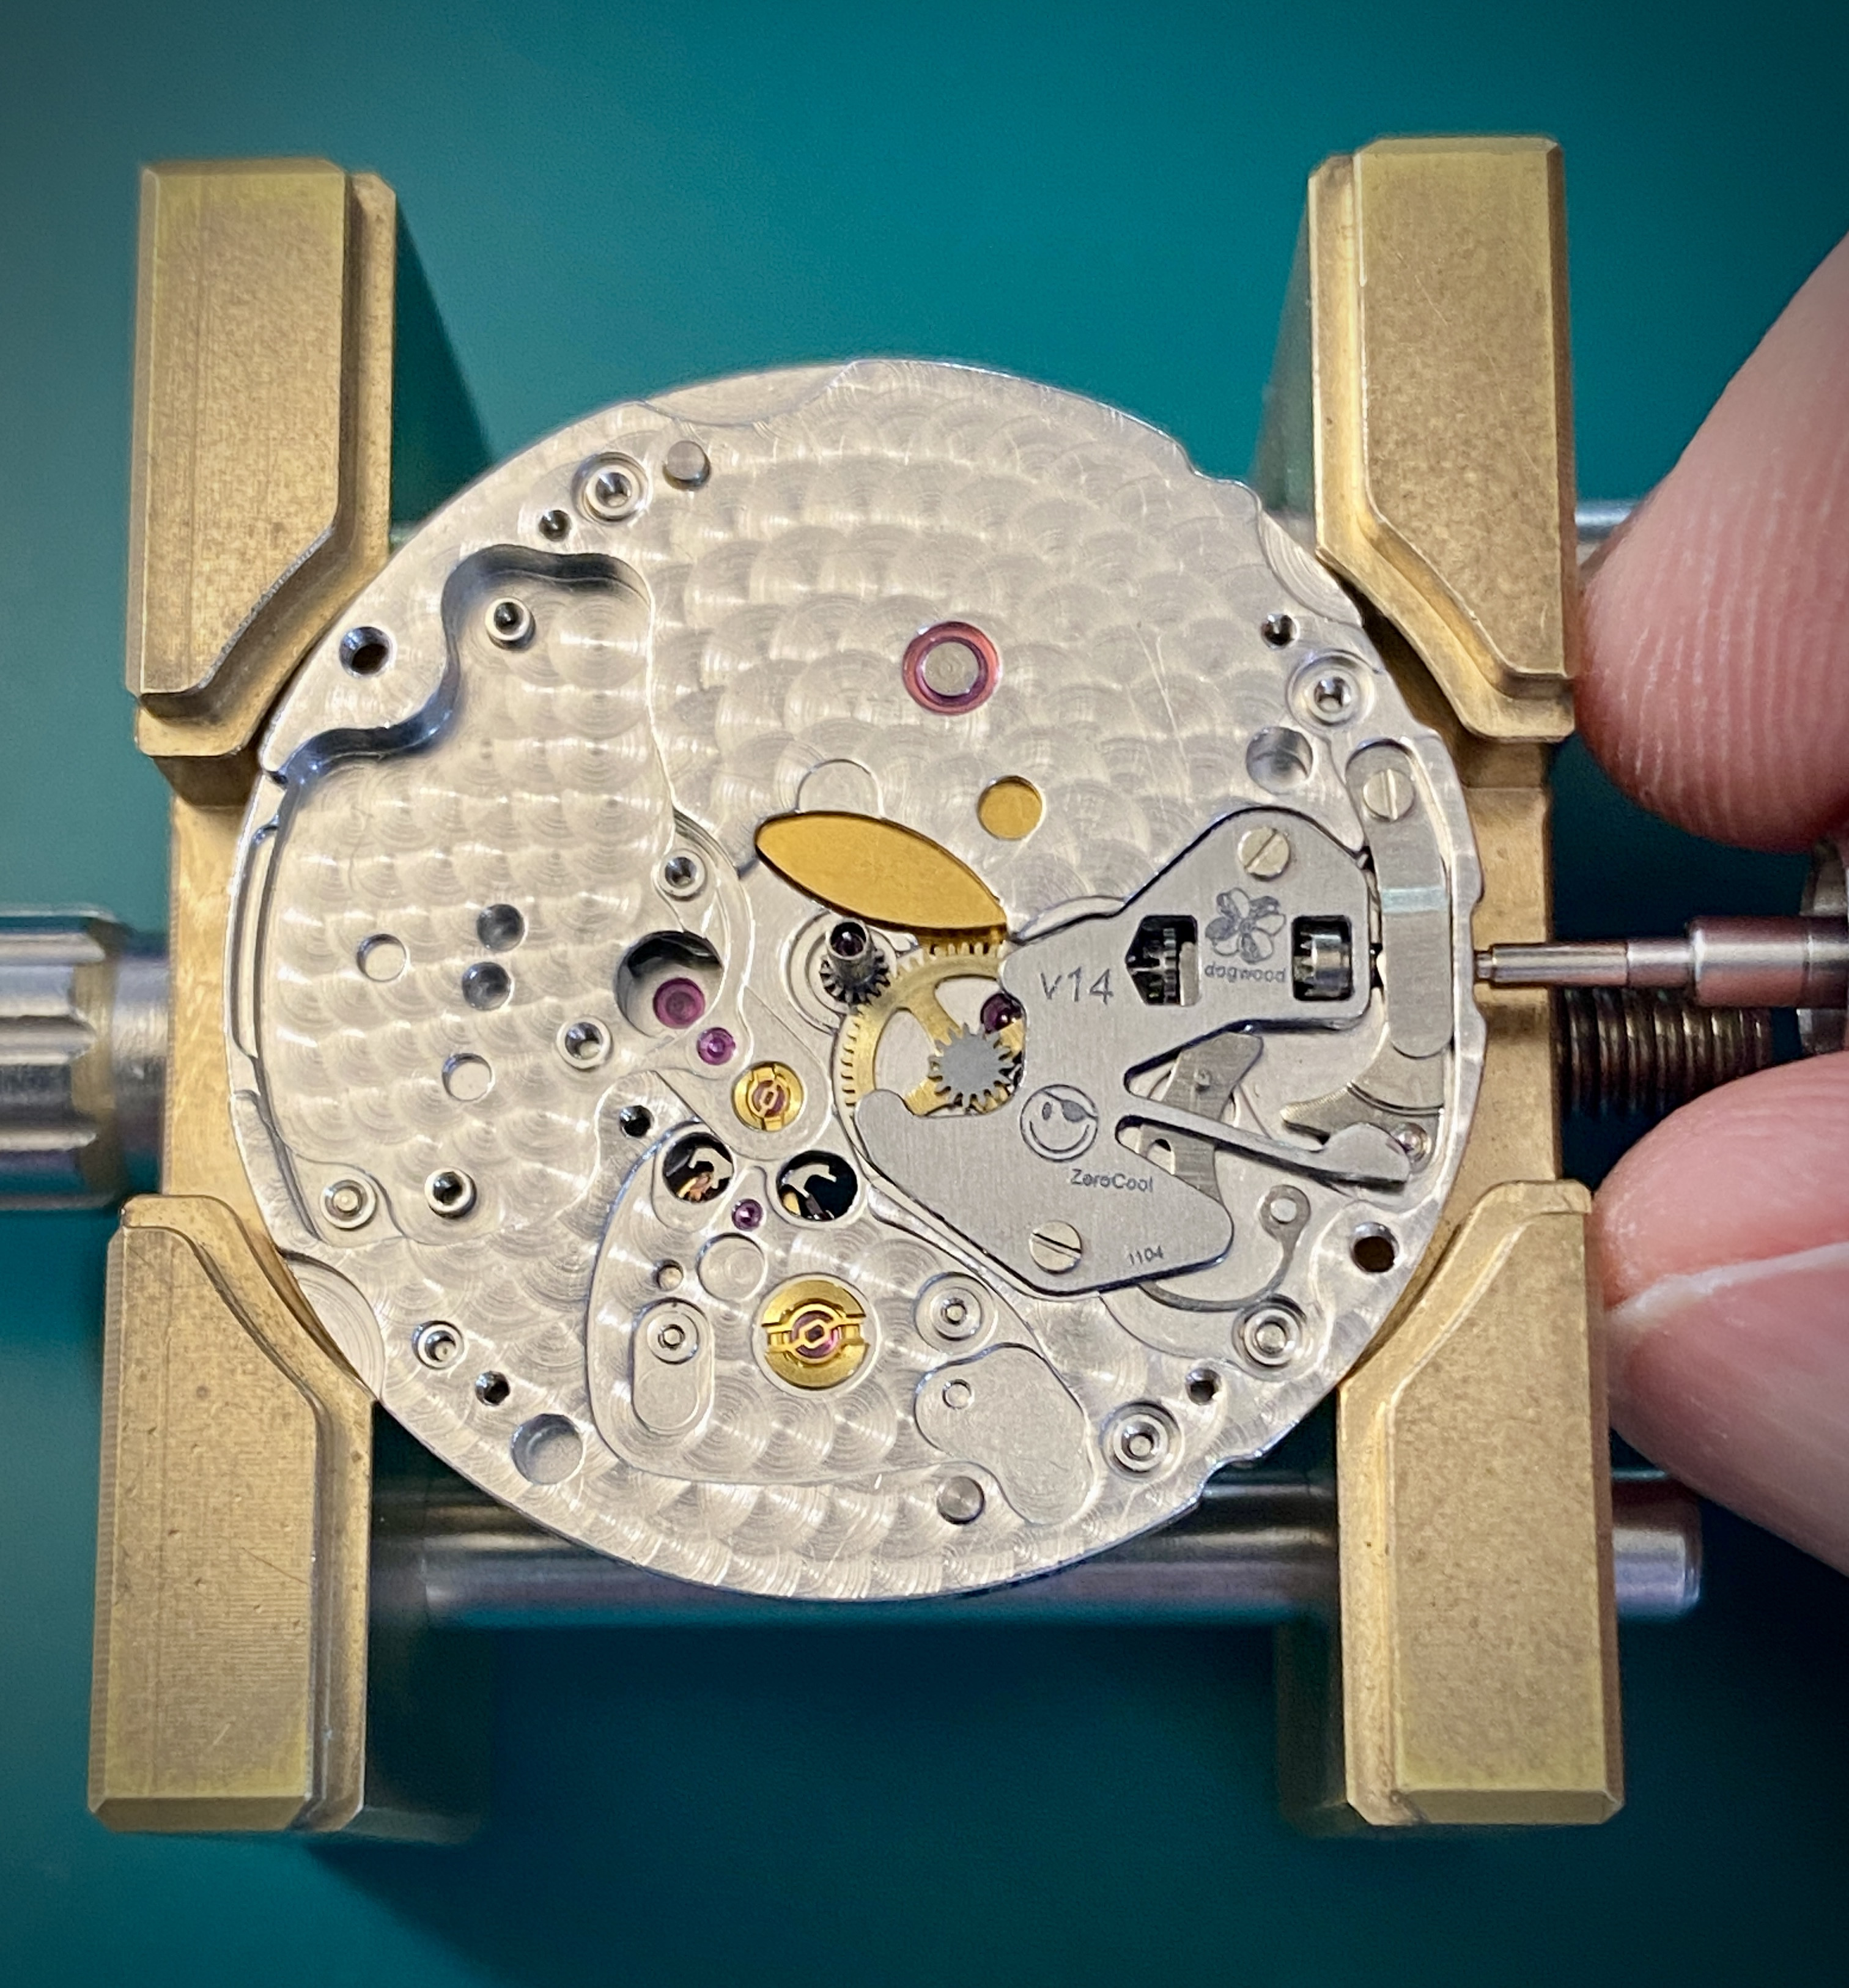
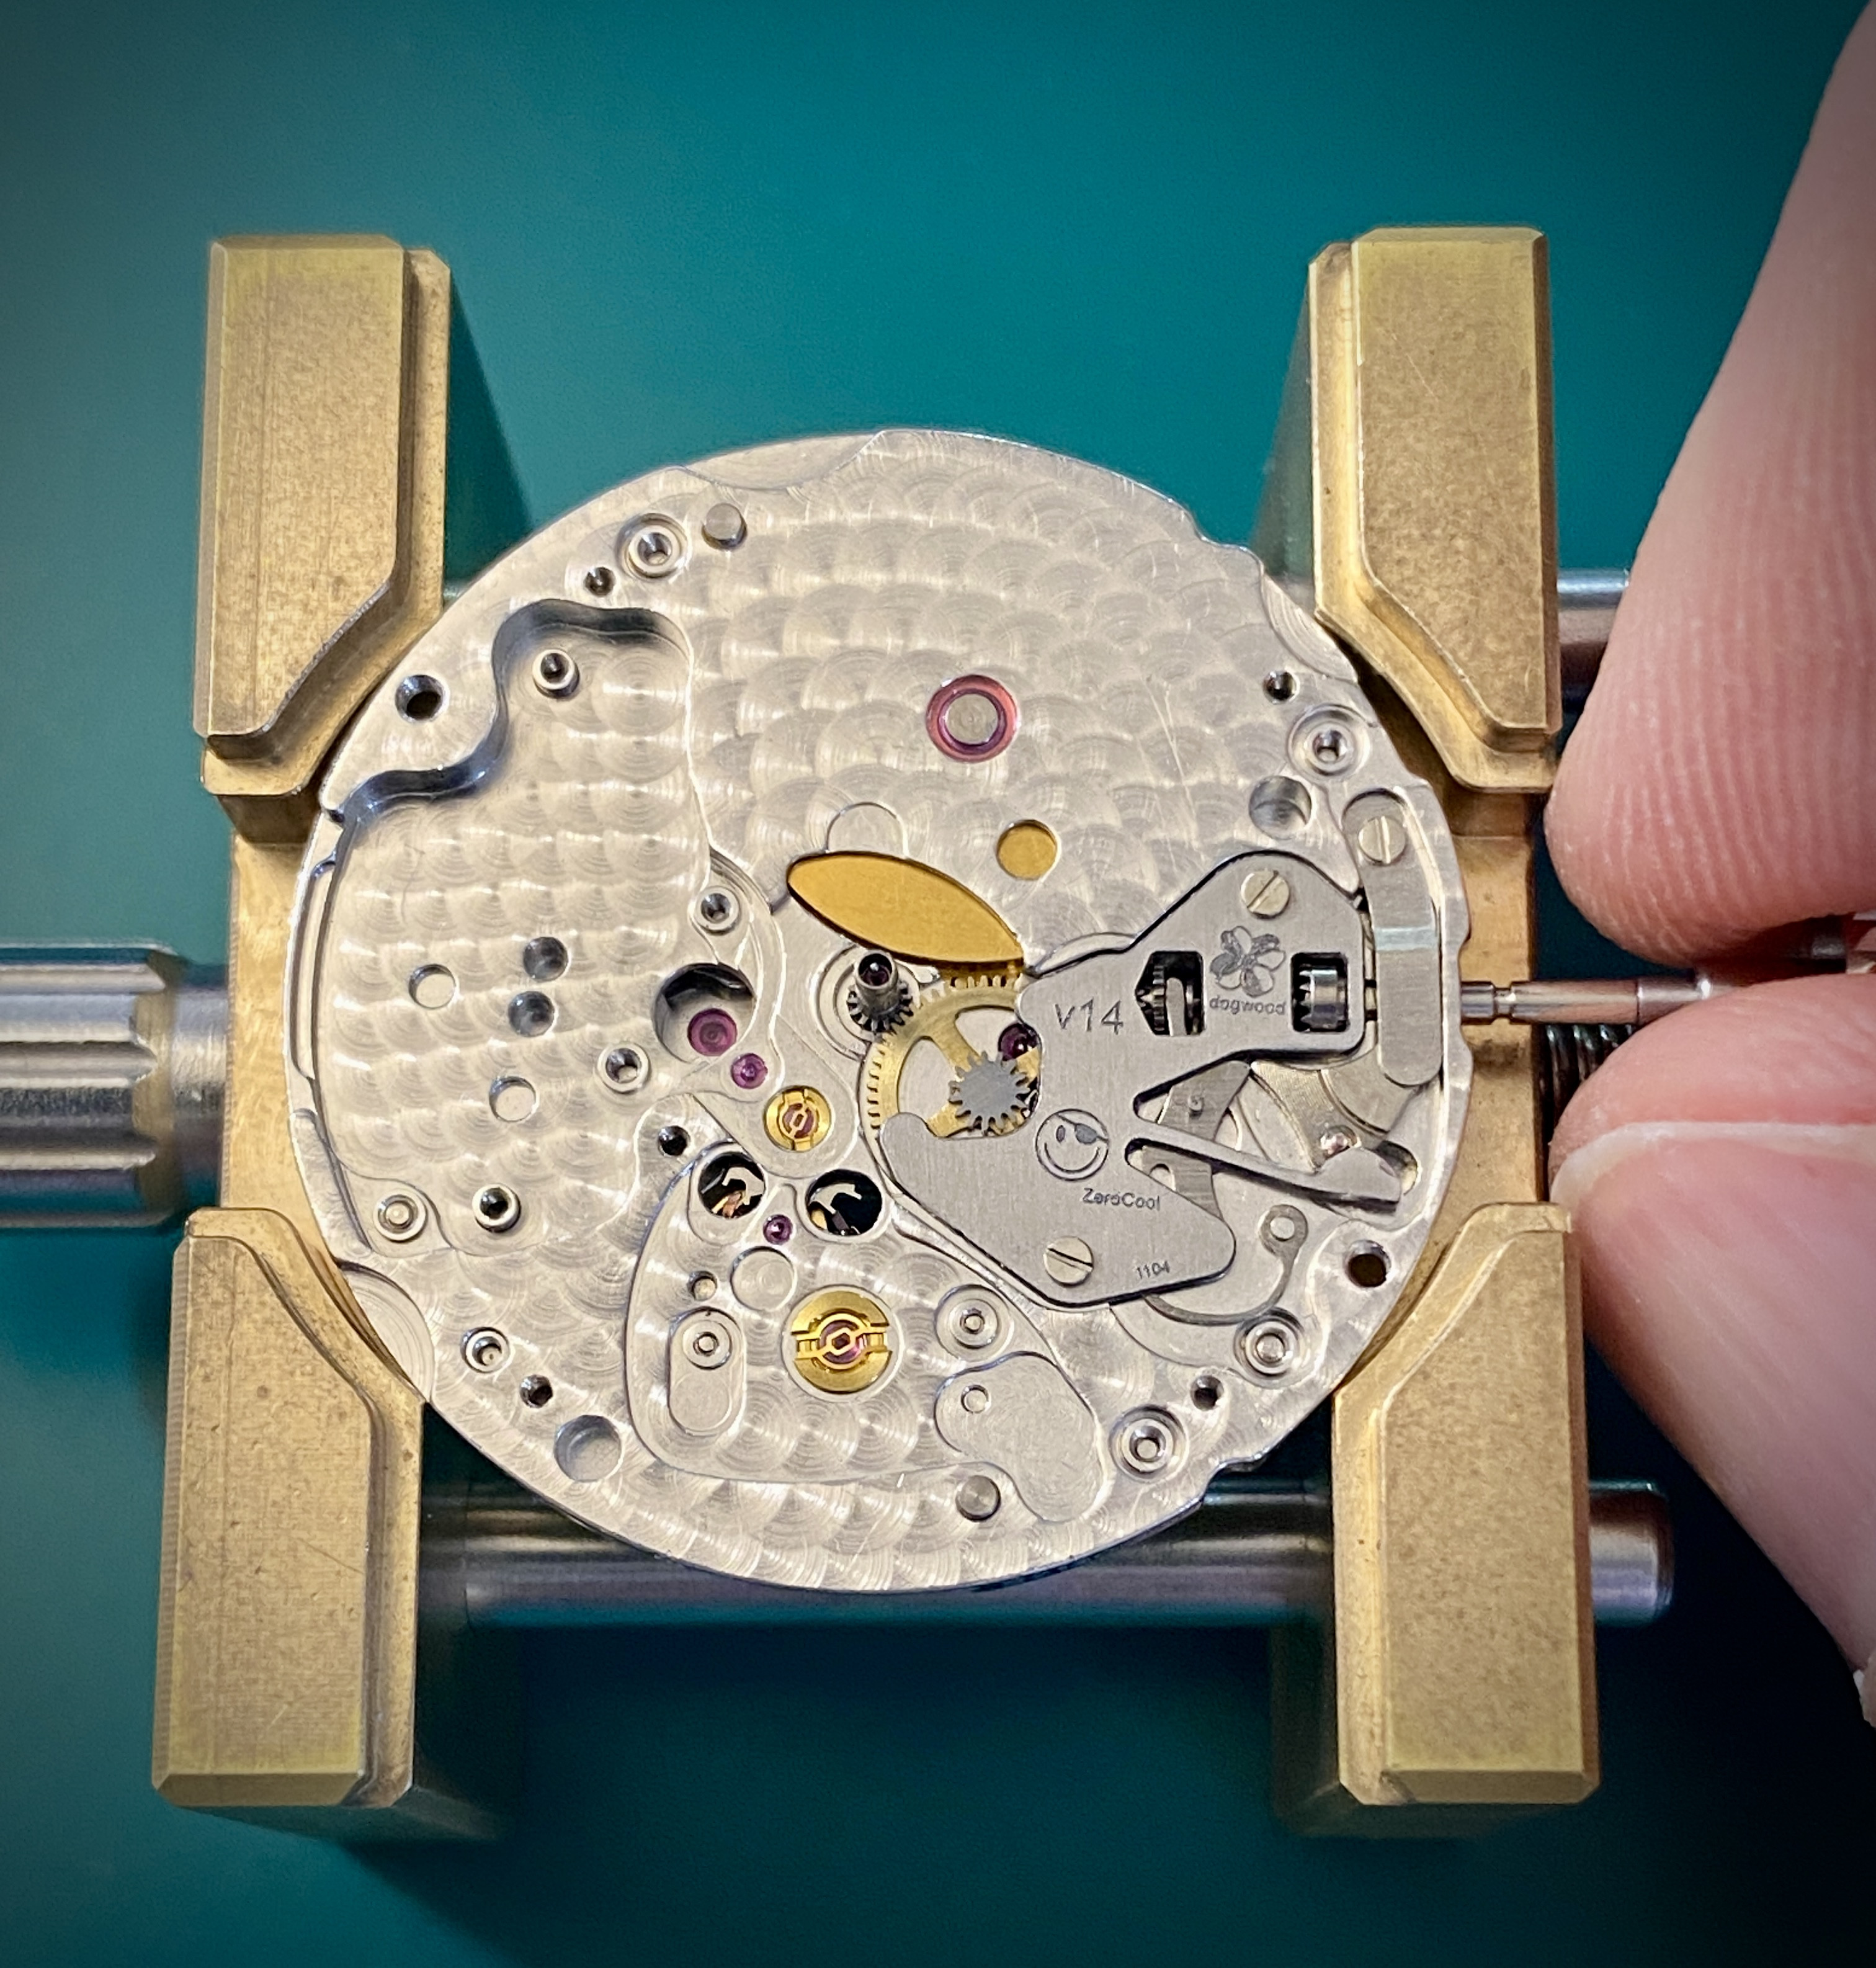
Now it's time to start re-assembly of the movement. Start by putting the hour wheel back in place.
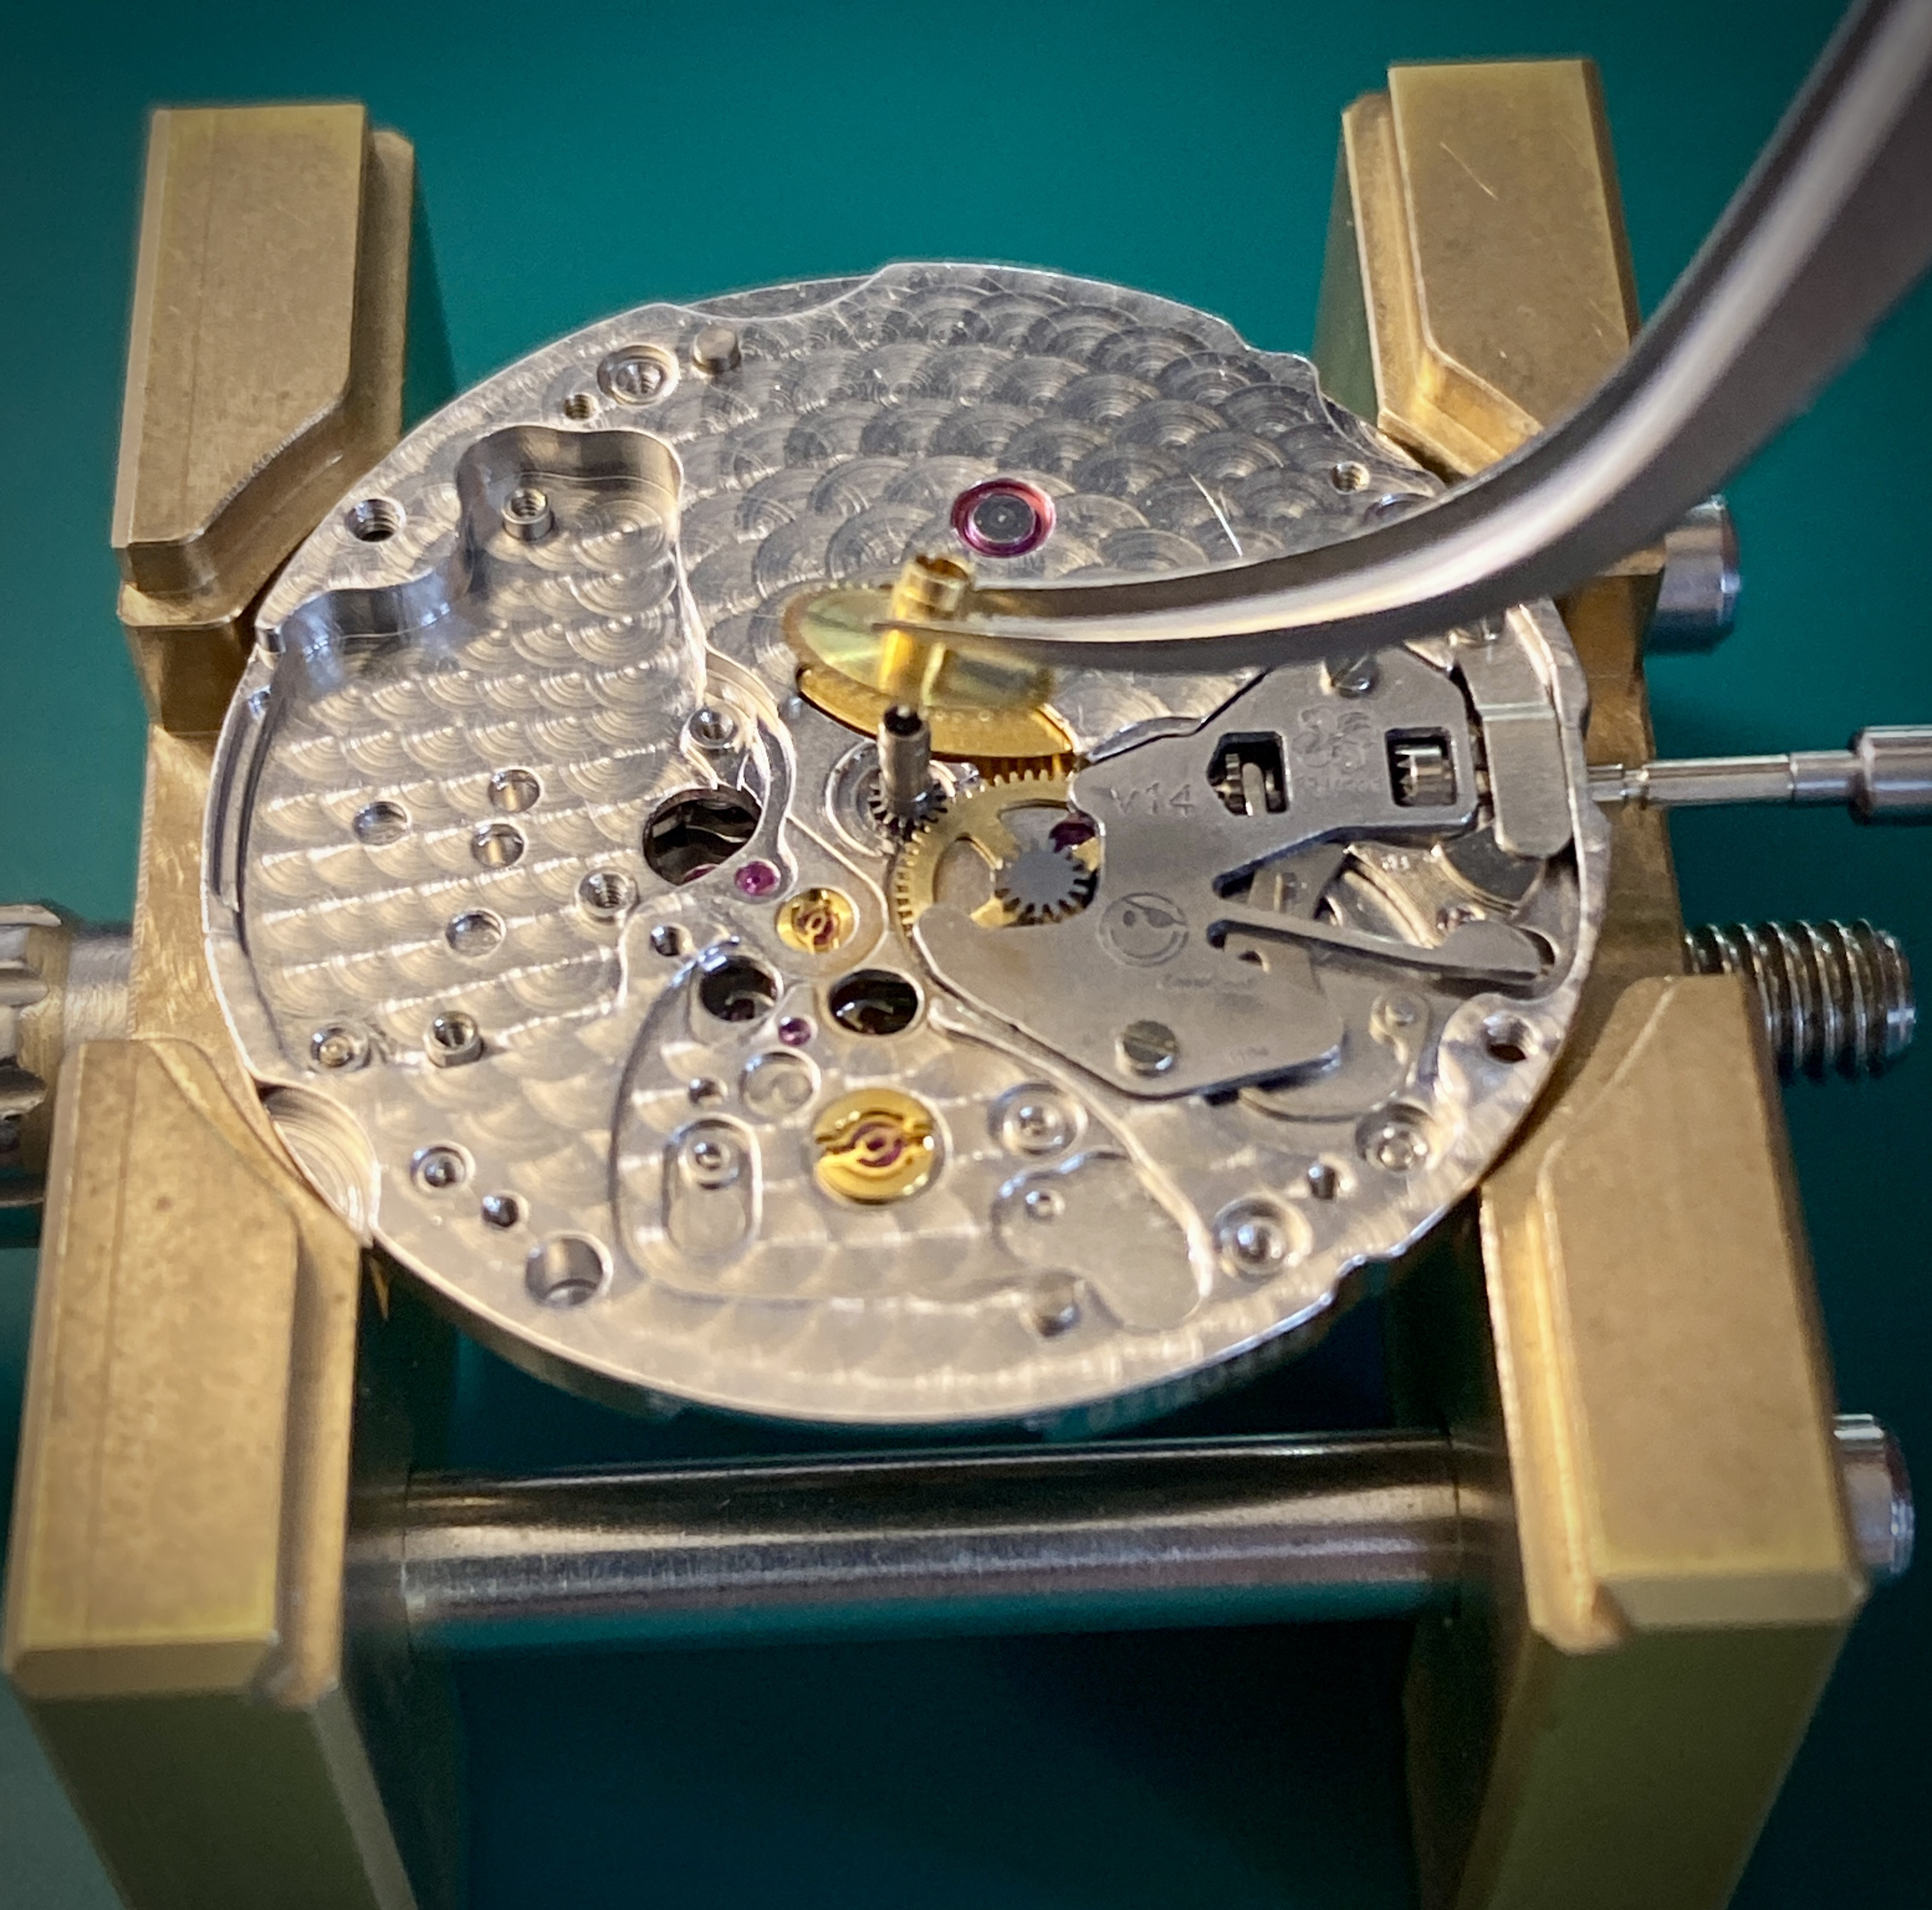
Next you can put the date plate back on. There's no need to replace all the date works parts since they aren't needed.
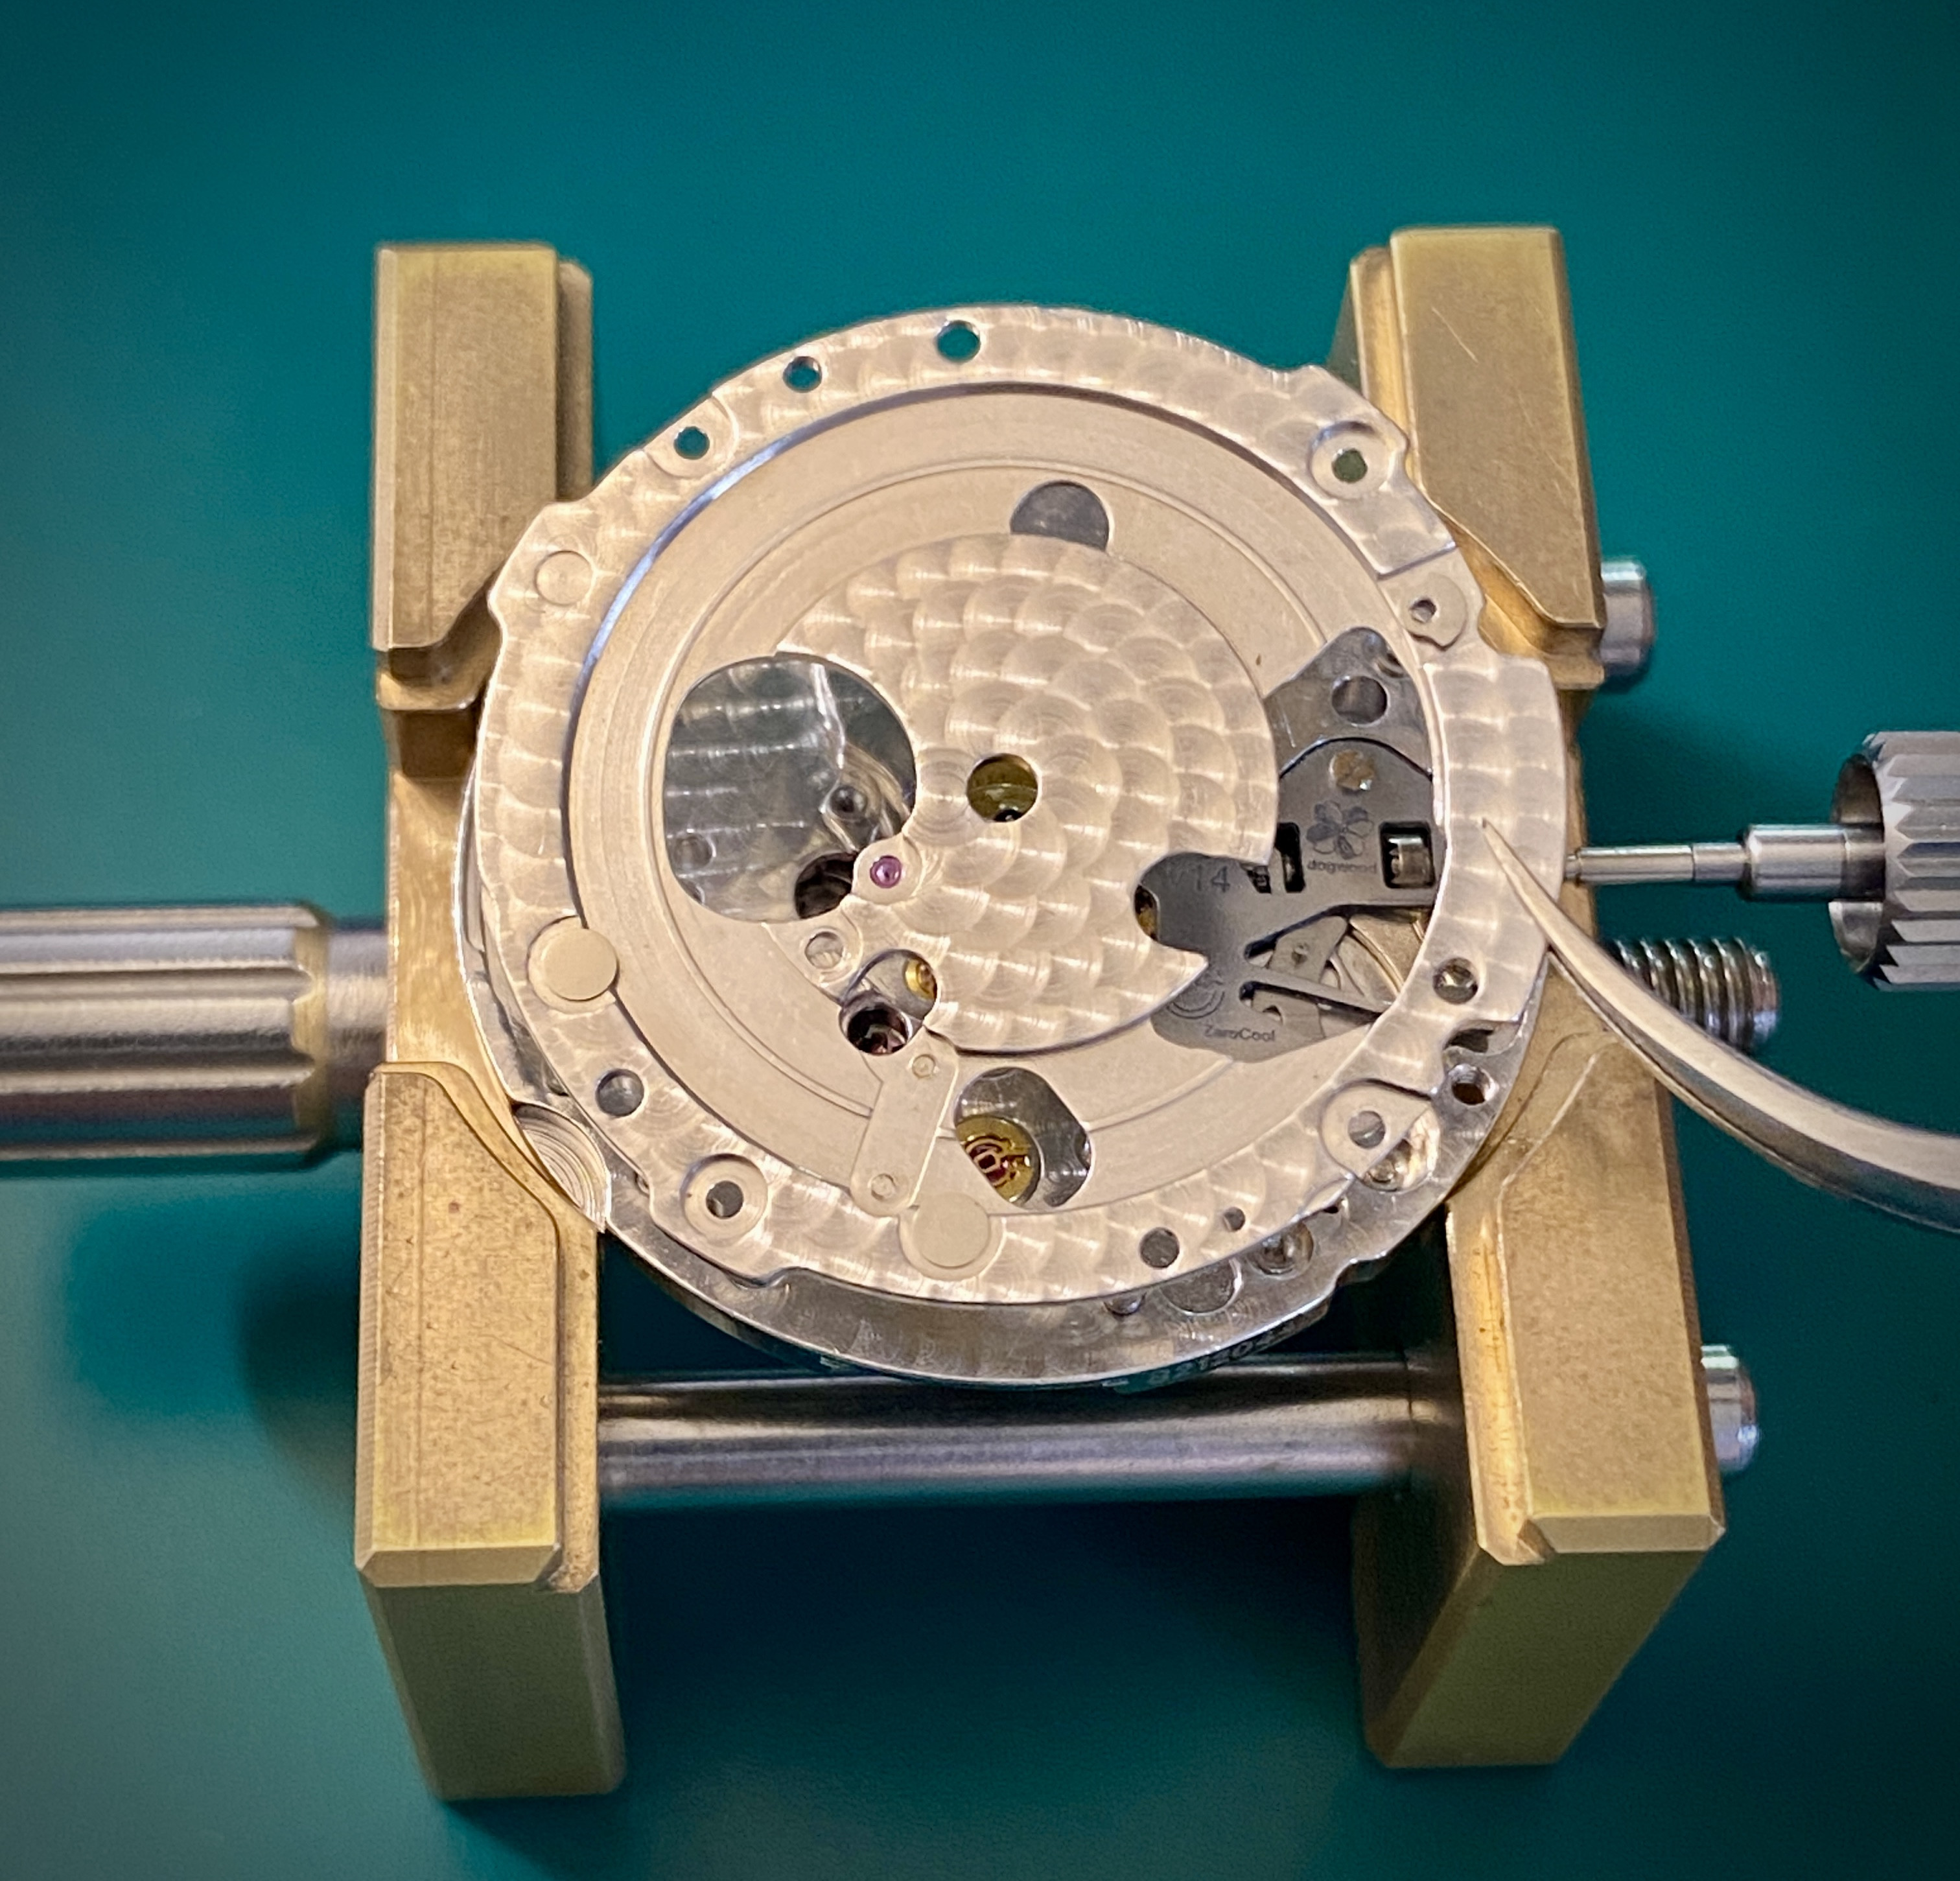
Use a 1.2mm screw driver to secure the date plate with the five blue screws from before. This is what things should look like after the date plate as been secured.
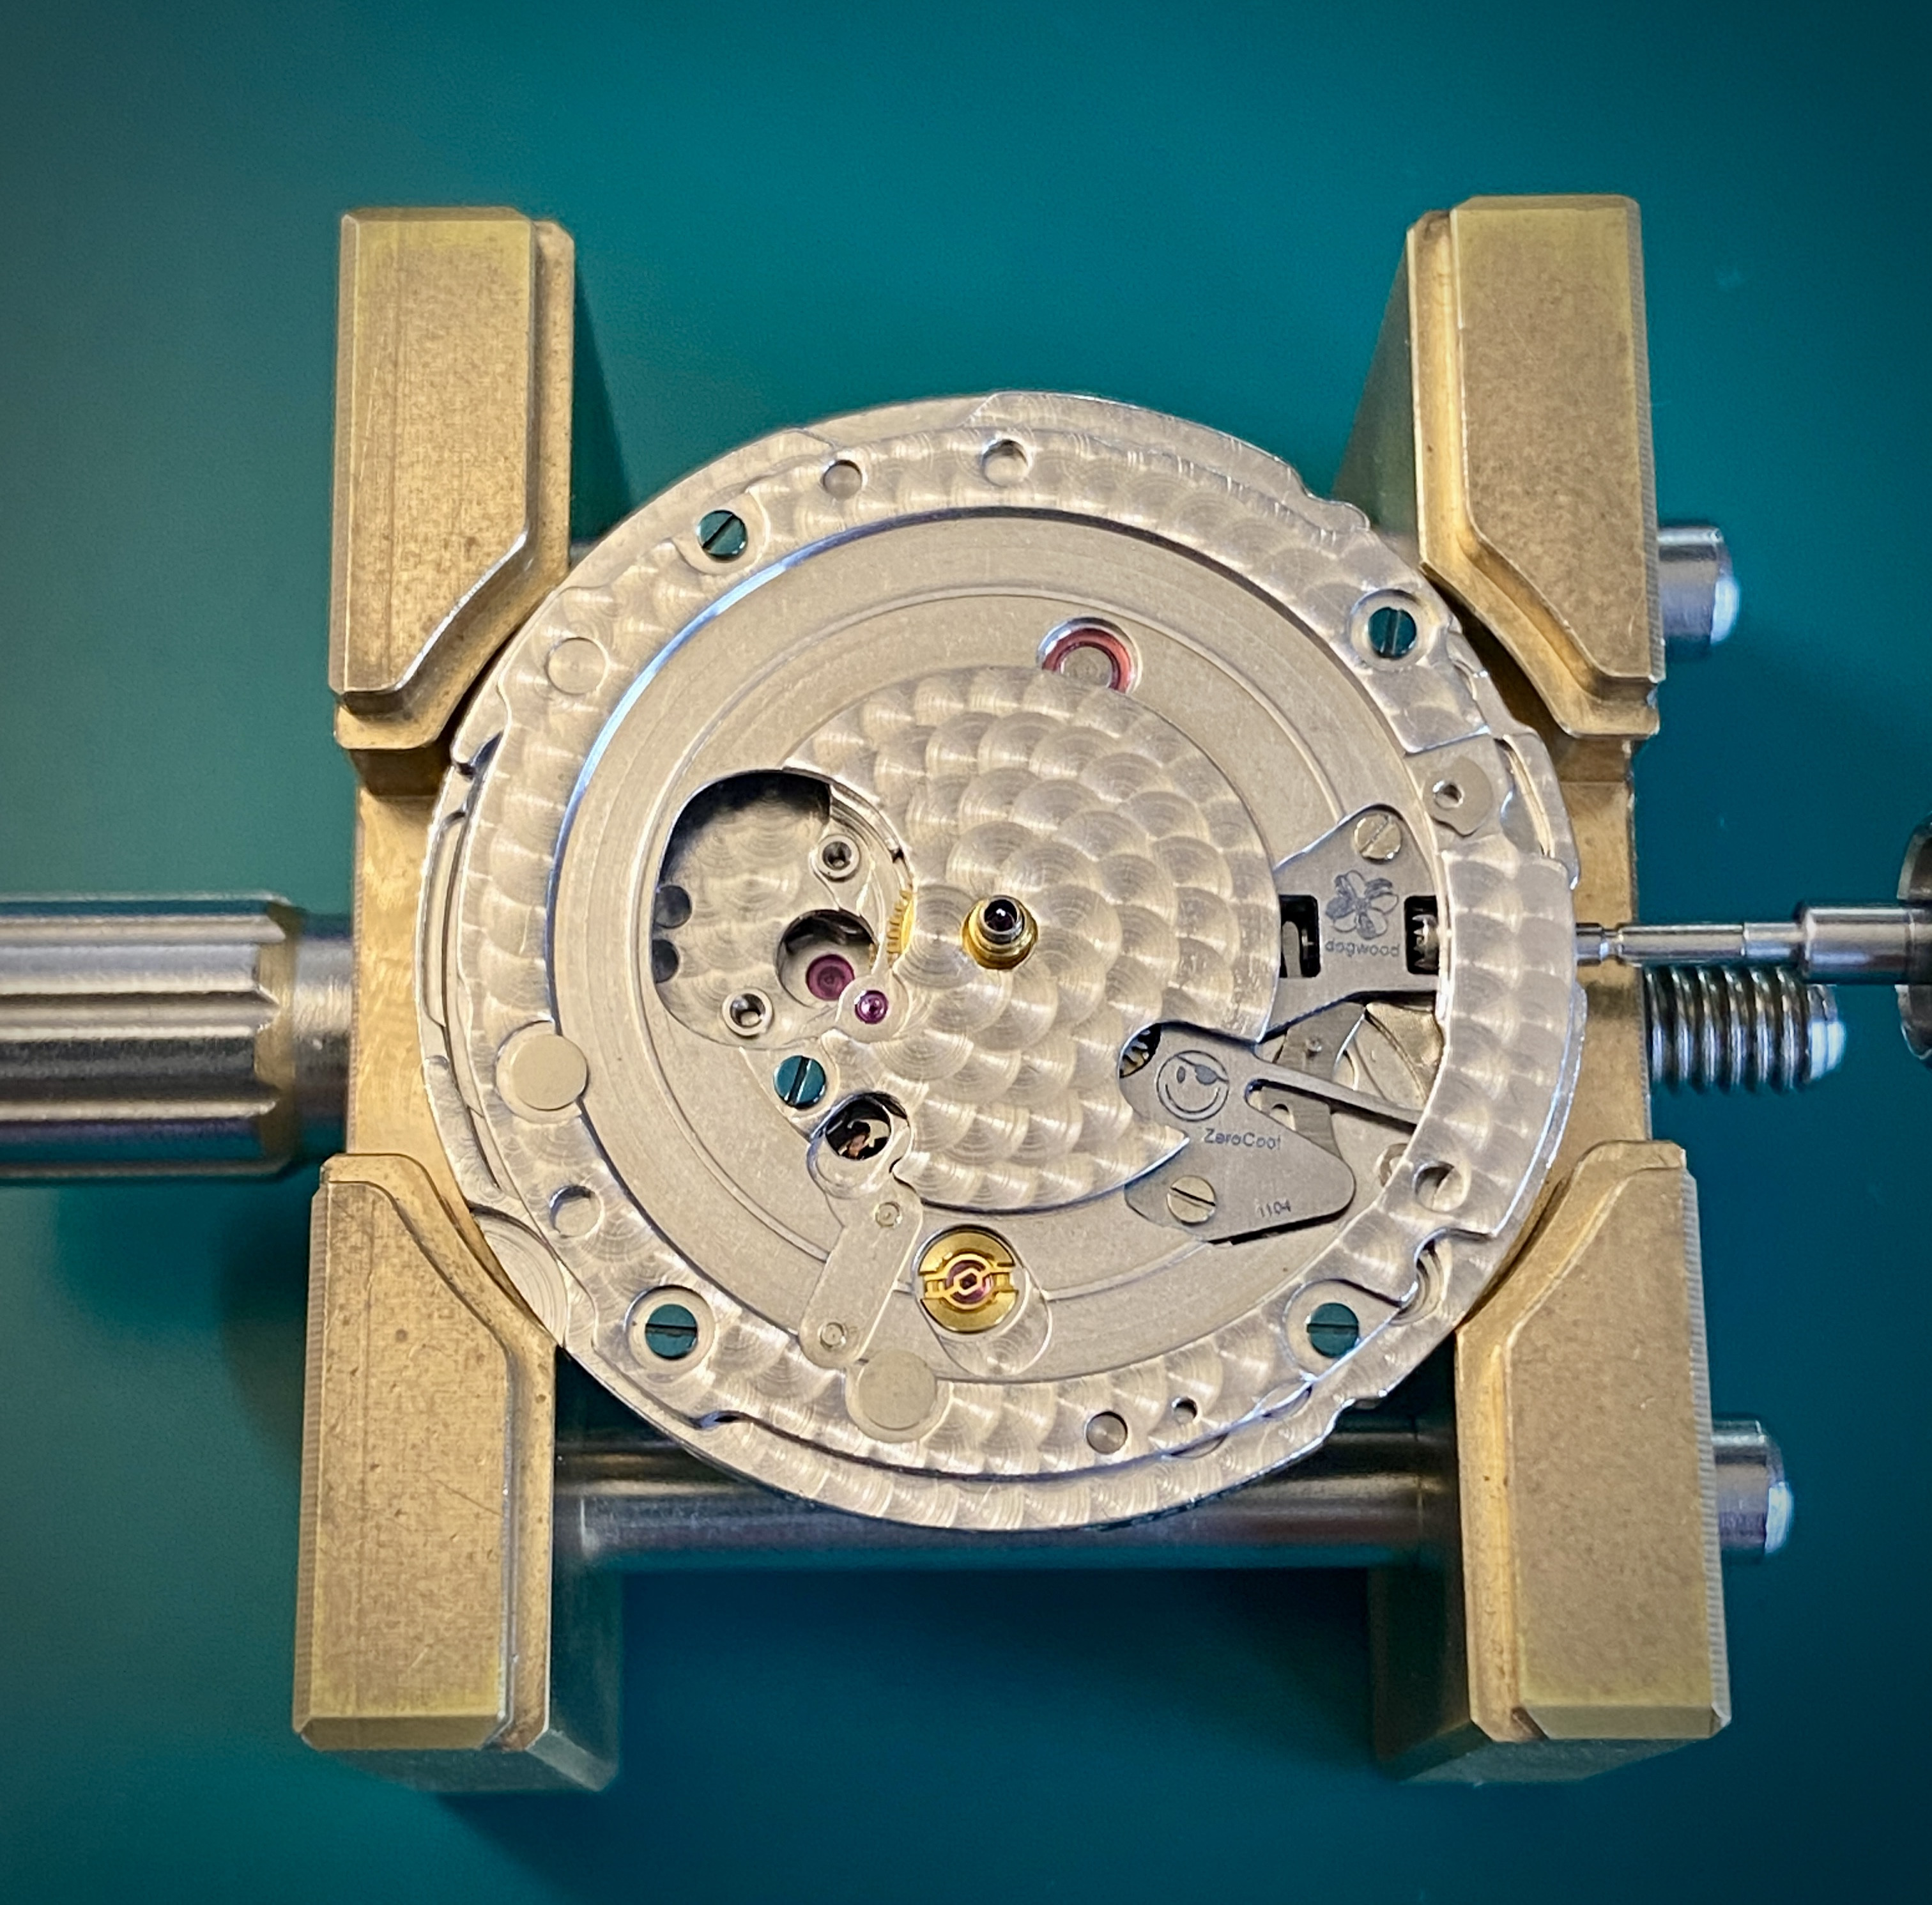
These are the unused date works parts, and old setting lever spring which you should have left over.
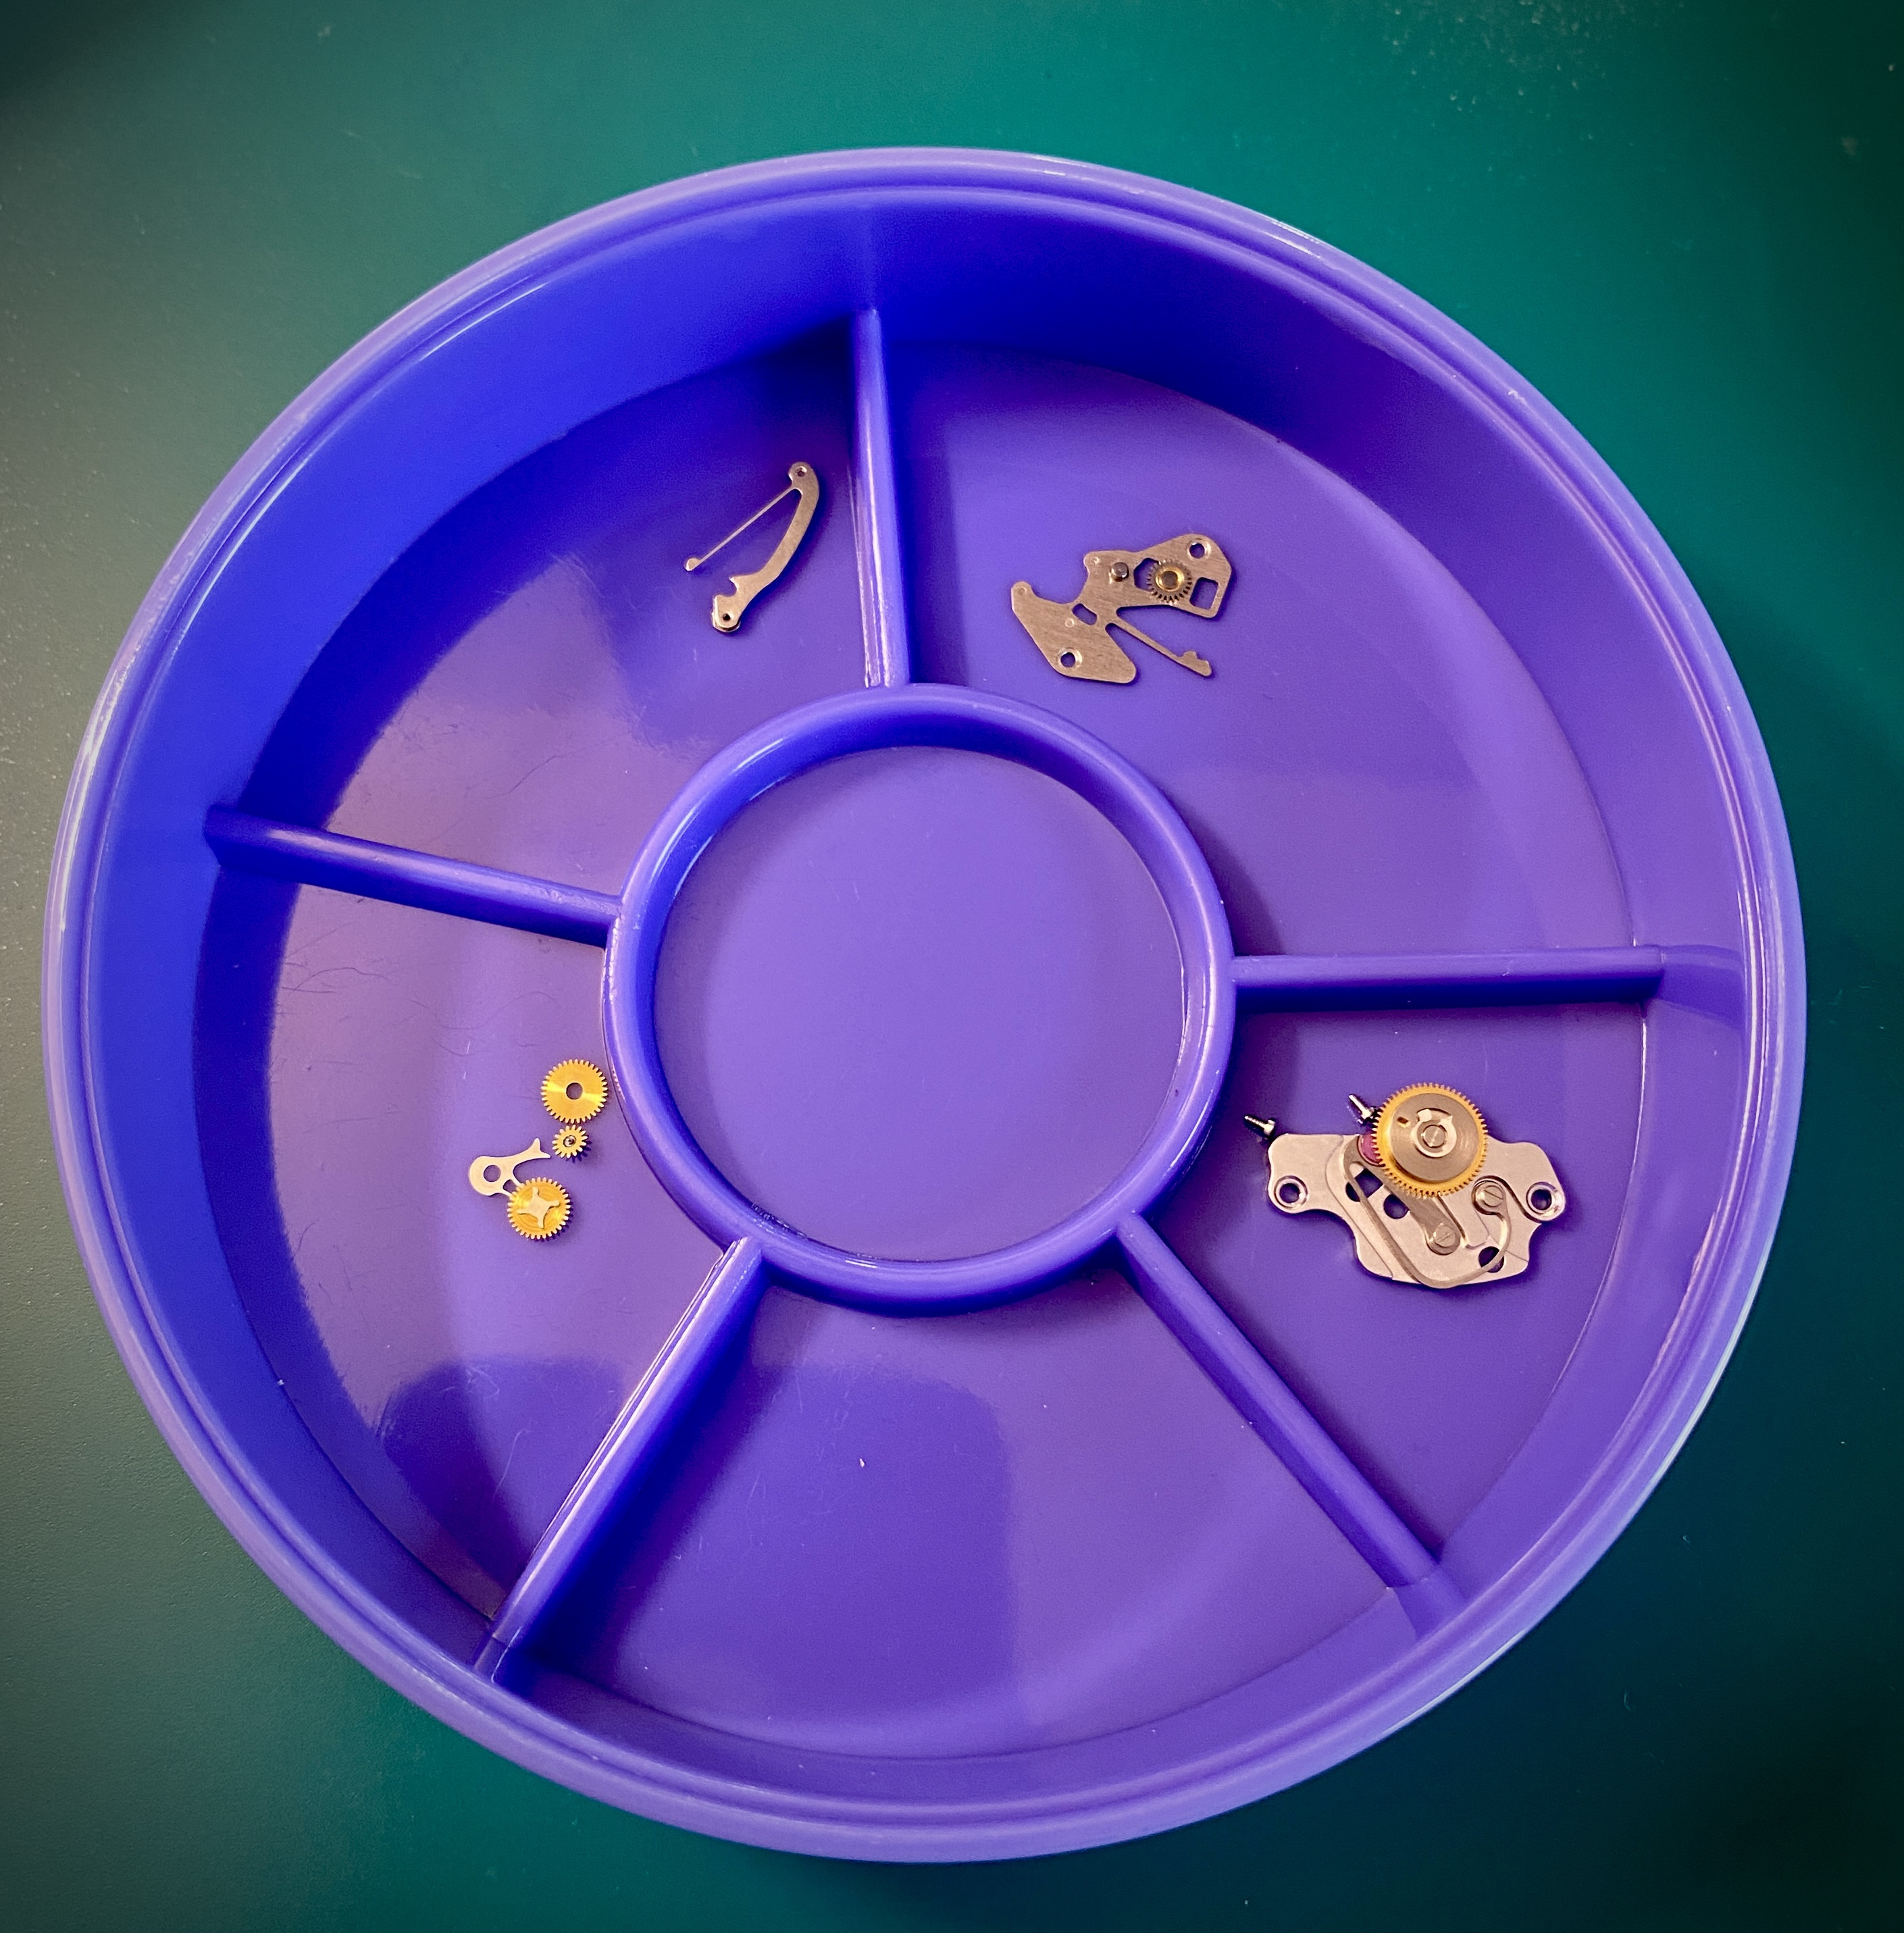
Now it's time to get the dial back onto your movement. The dial is a press fit, so simply align the 3 o'clock marker with the stem and press it down onto the movement. The lip on the back of the dial should hug the date plate of the movement and keep everything snugly in place.
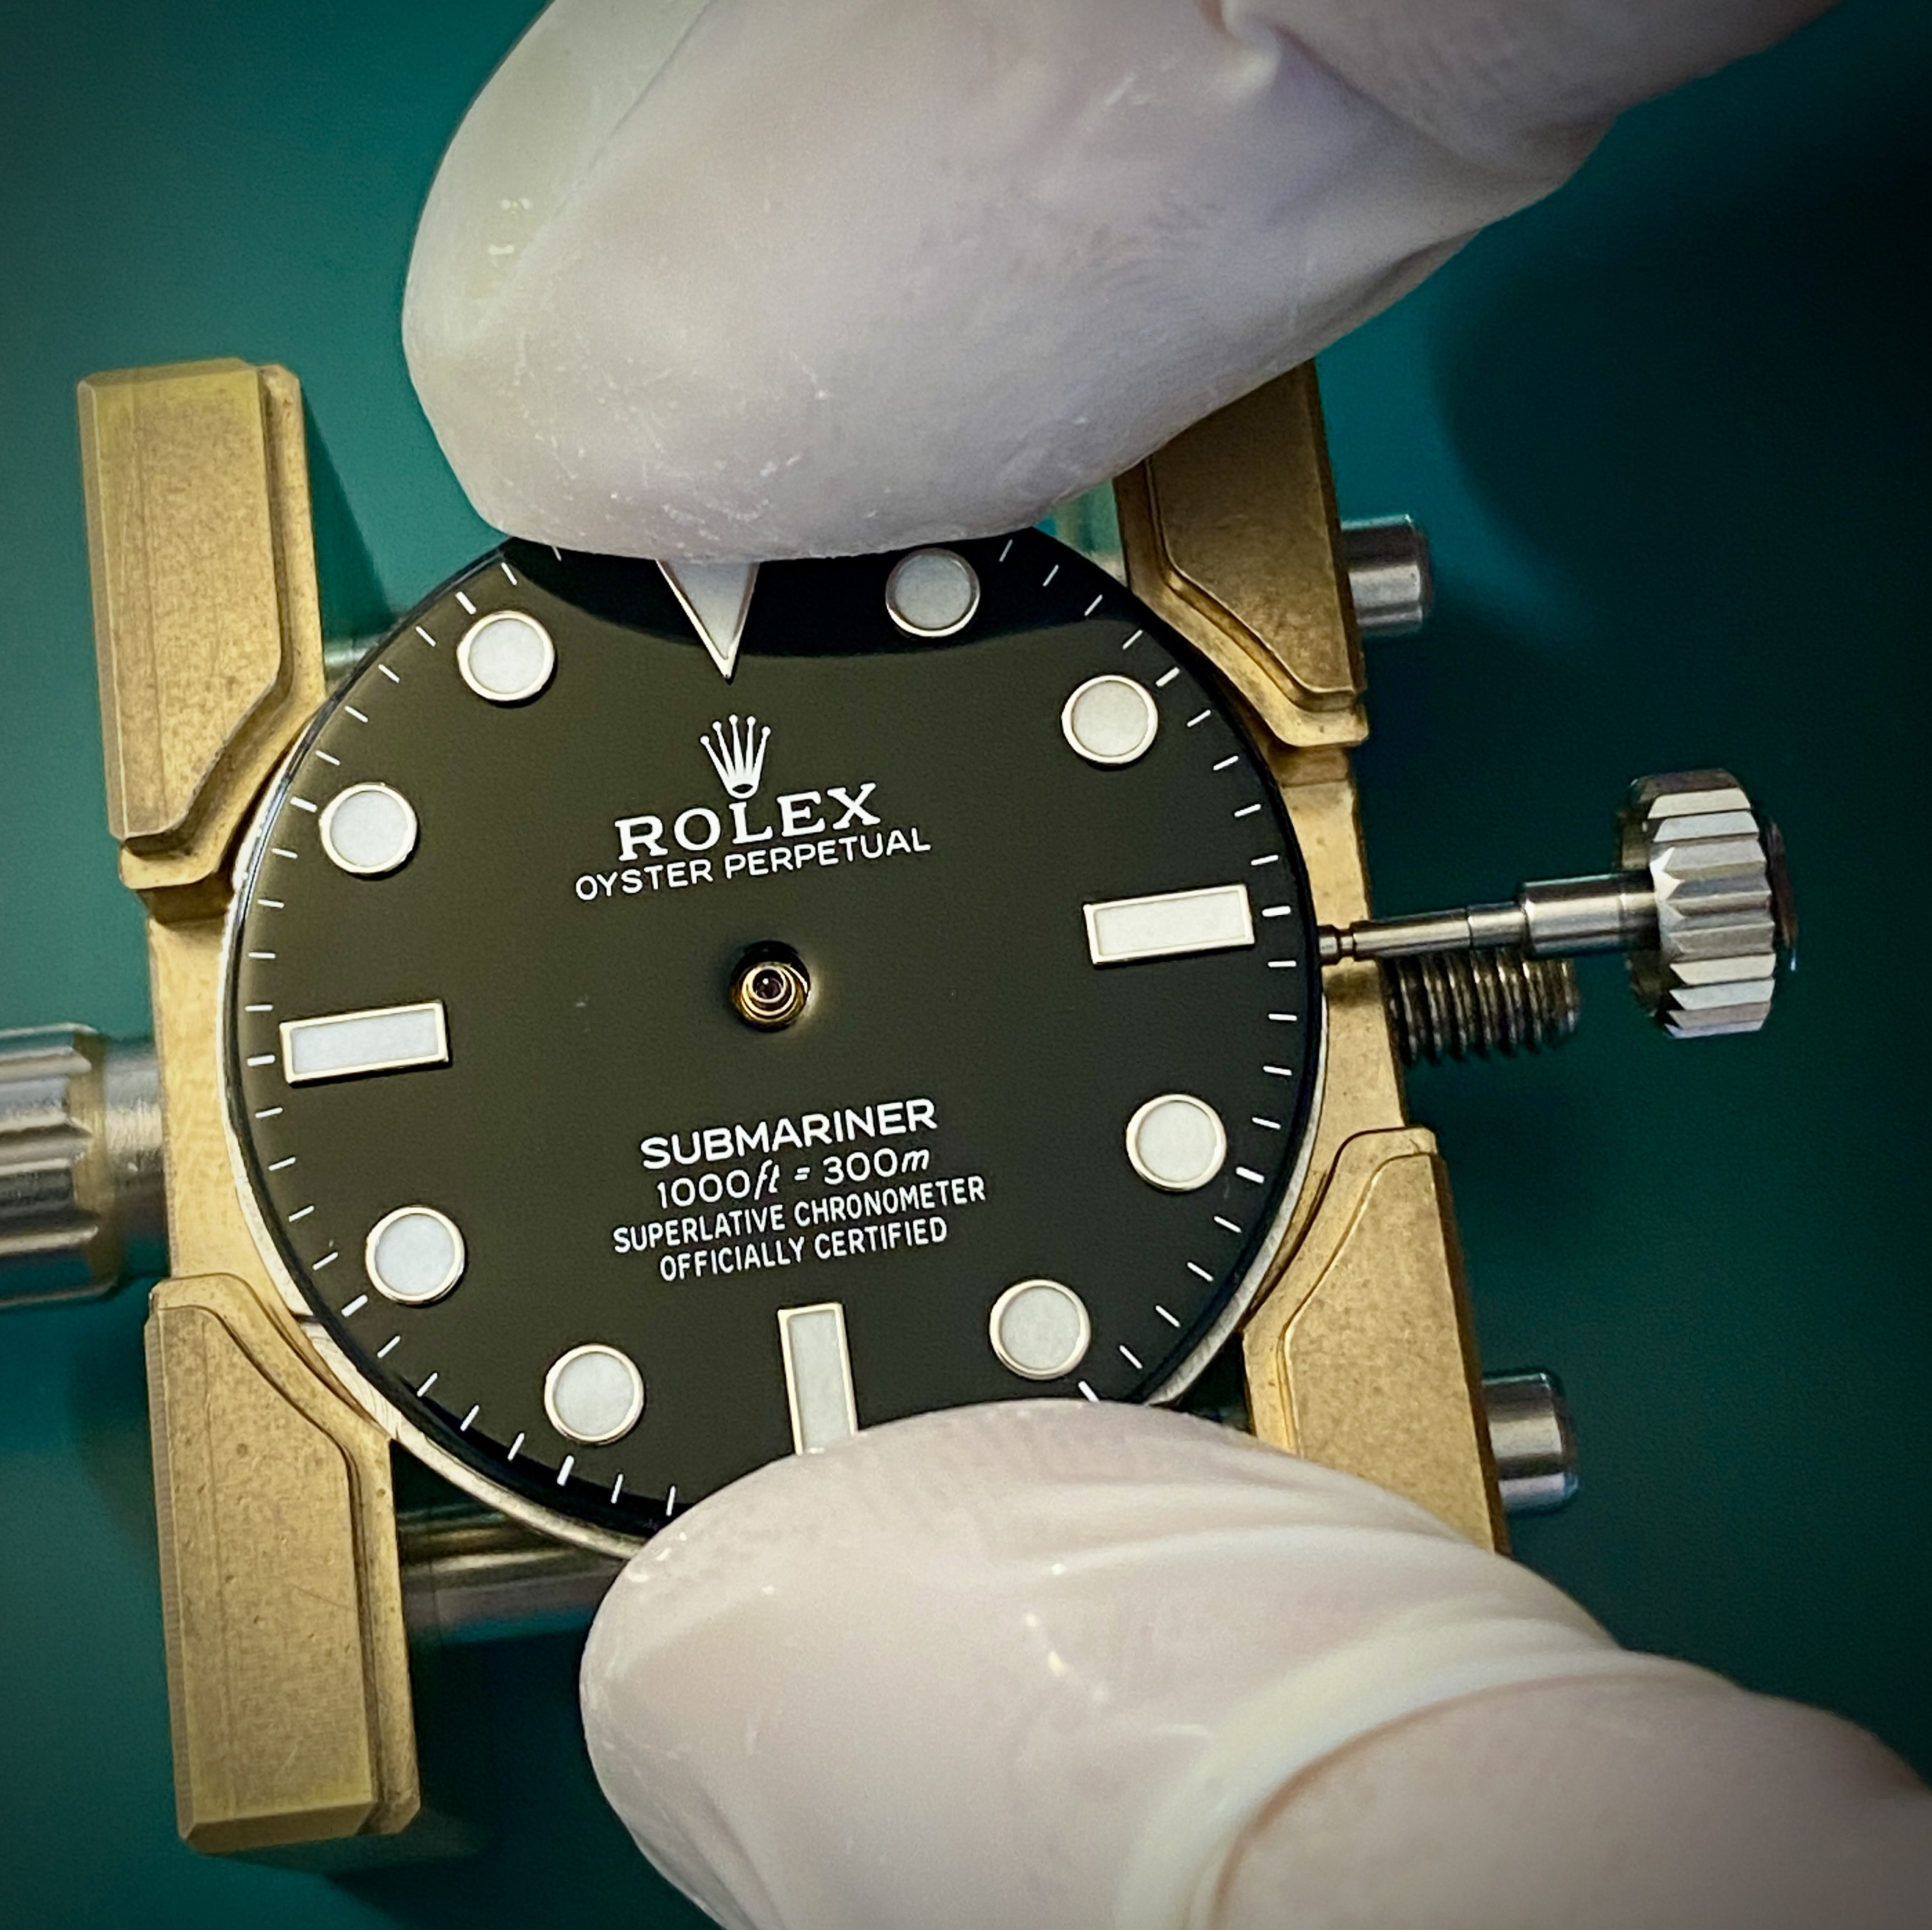
Setting the hands on a no-date movement is easier than on a movement with a date, because you can simply press the hour hand on and then use the crown to adjust it to point exactly at 12. Be sure to use soft tip tweezers when handling hands.
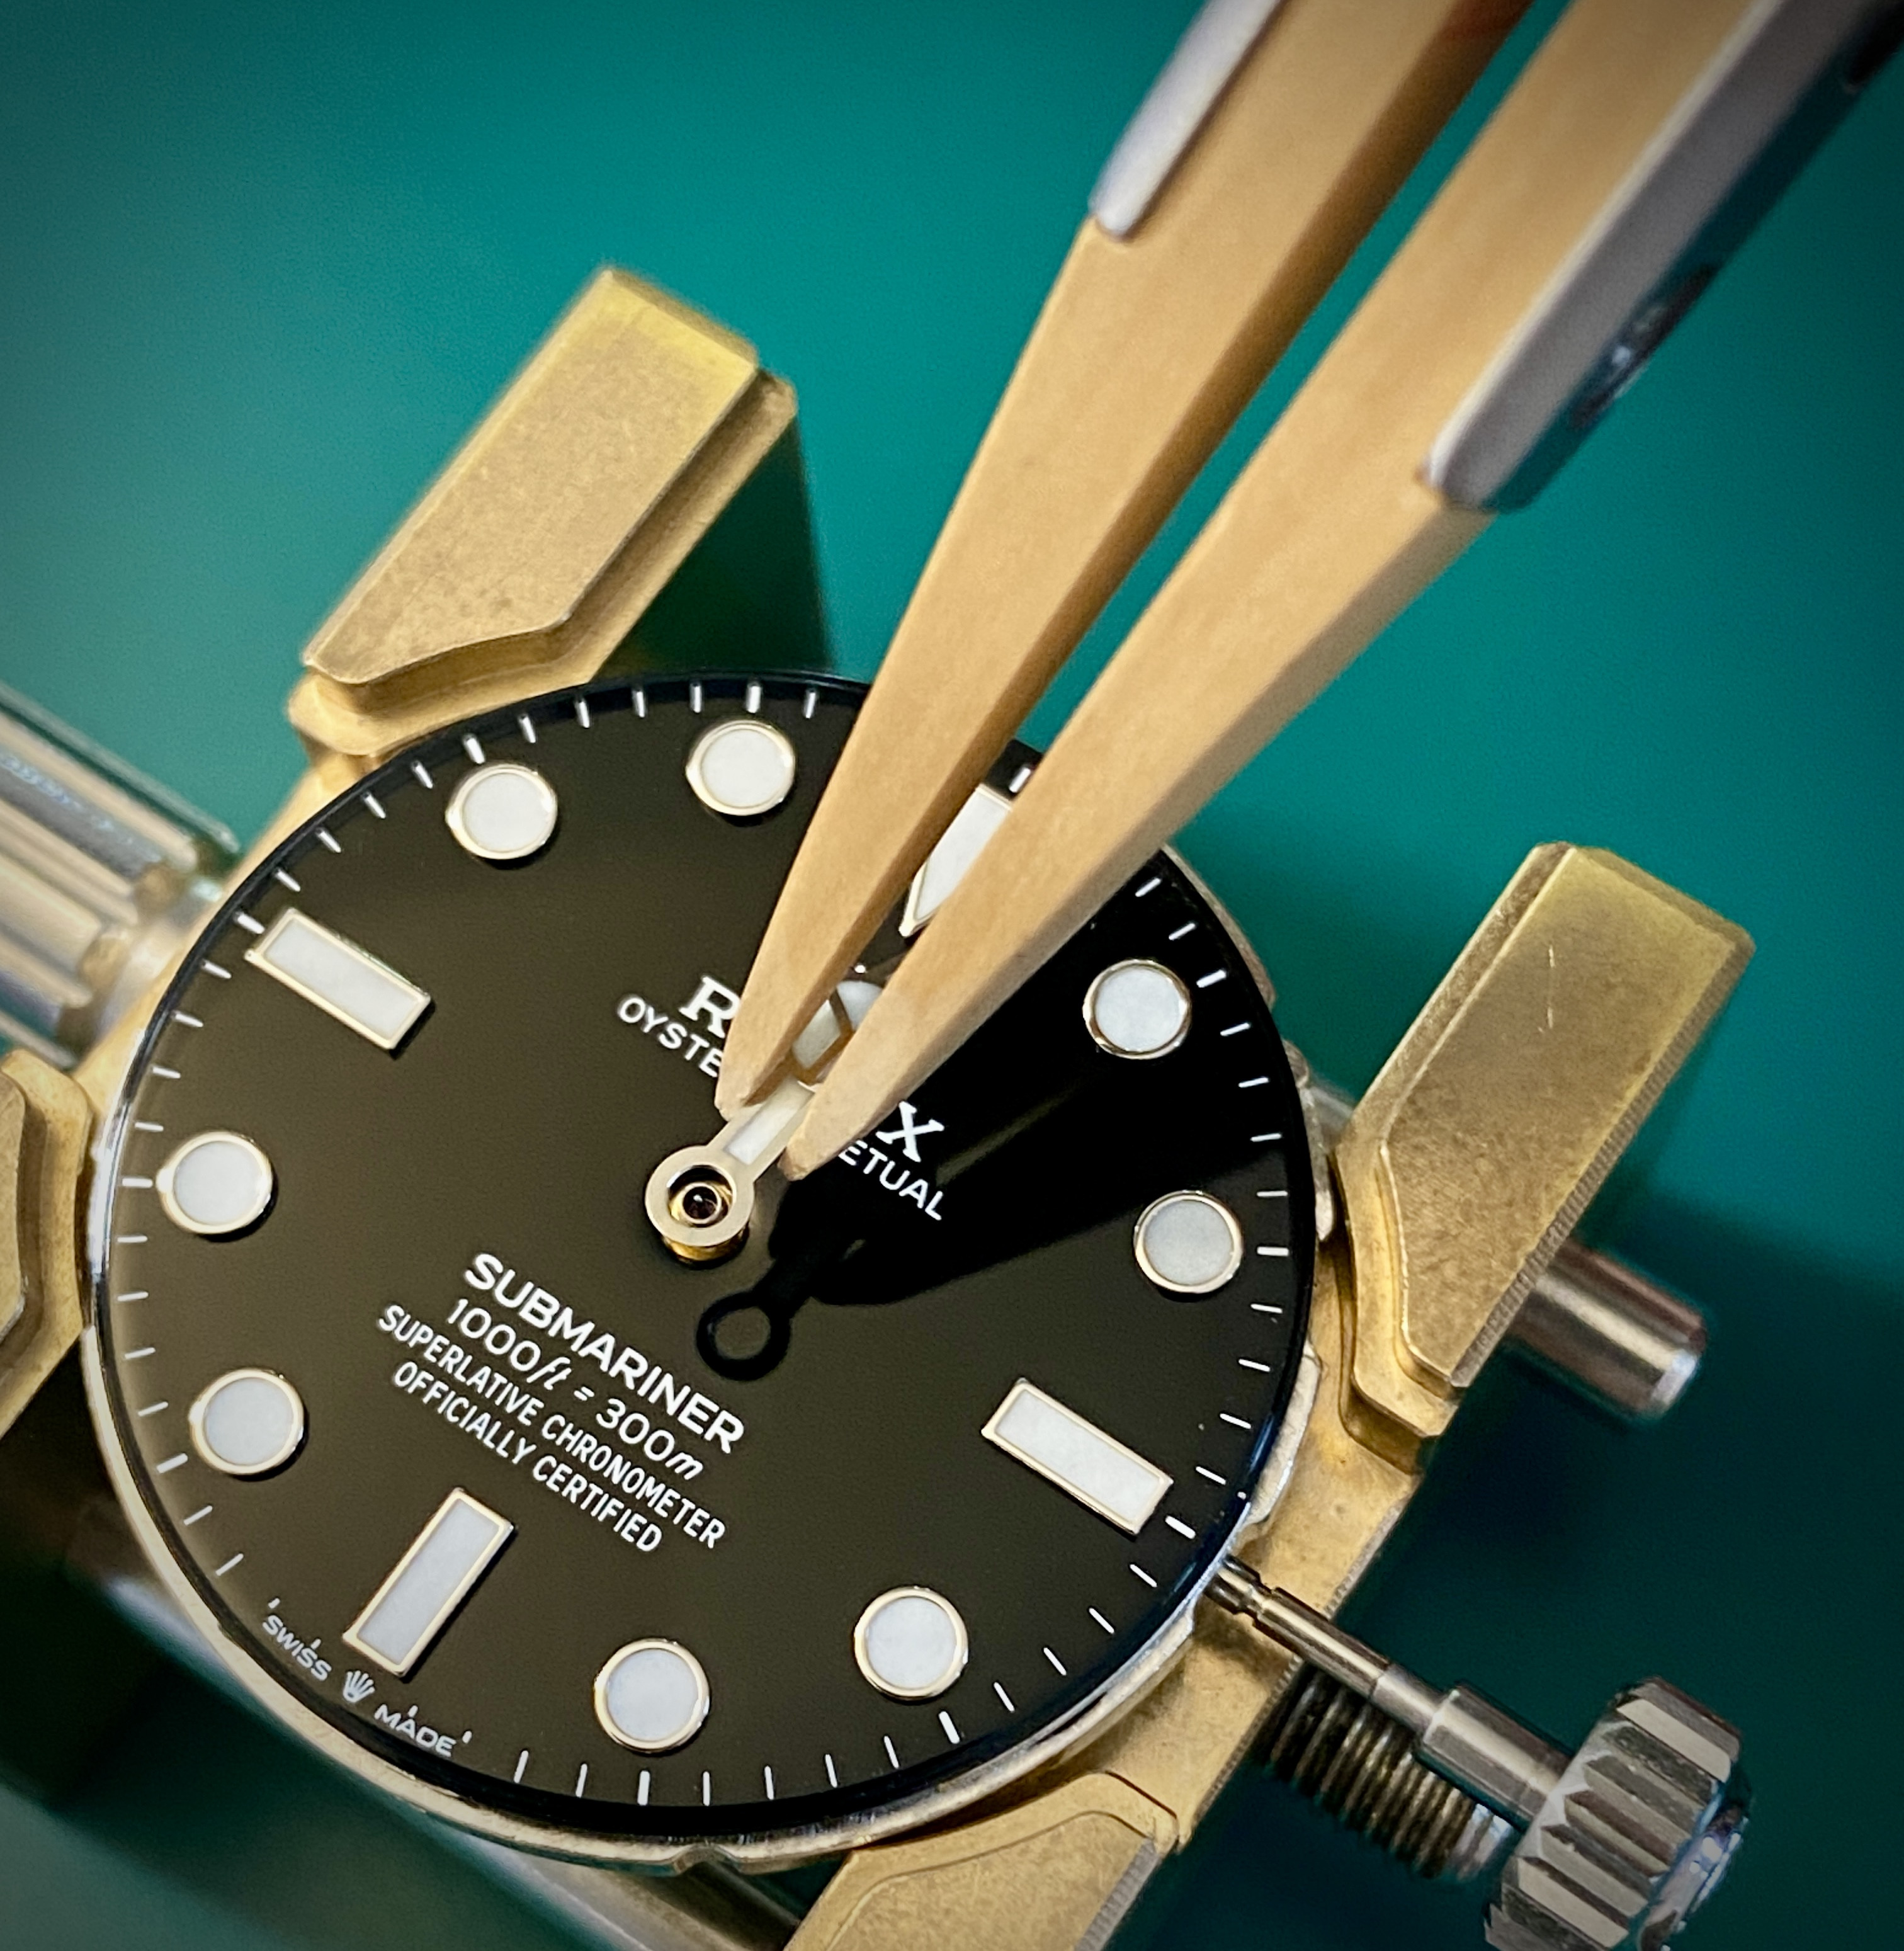
I have a fancy hand pressing tool, but it's possible to get good results using a free hand tools too.
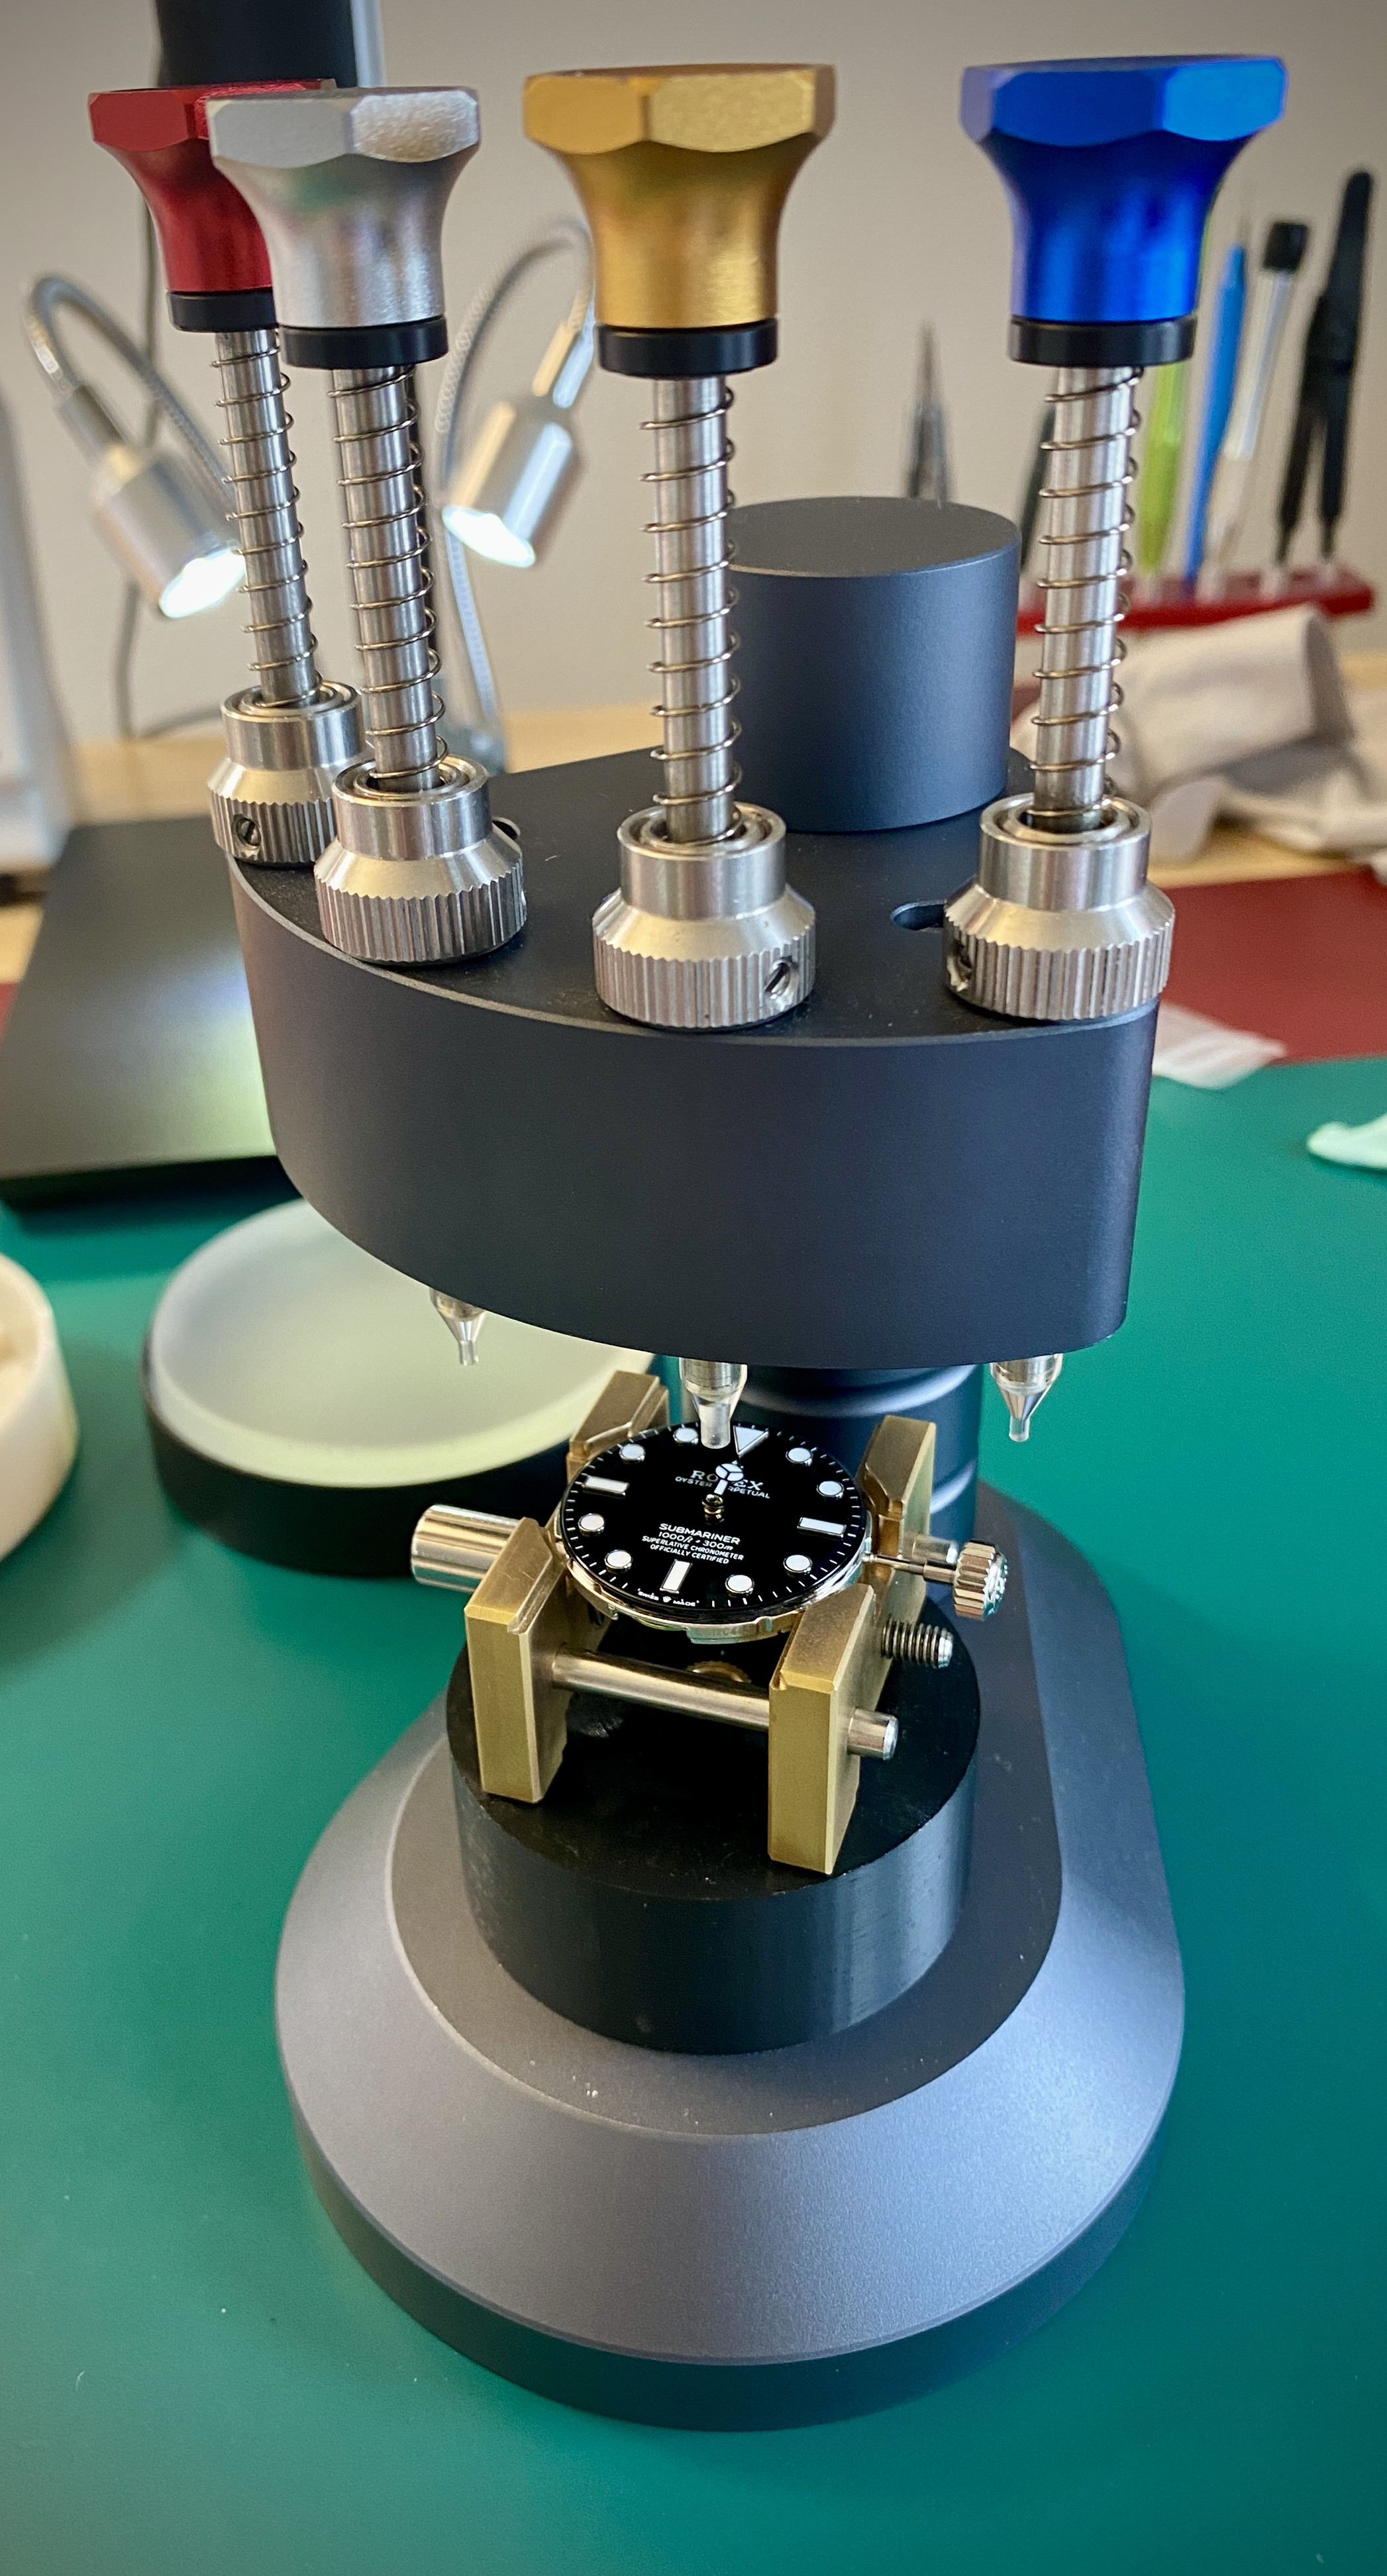
Before setting the minute hand, be sure the align the hour hand exactly at 12 o'clock.
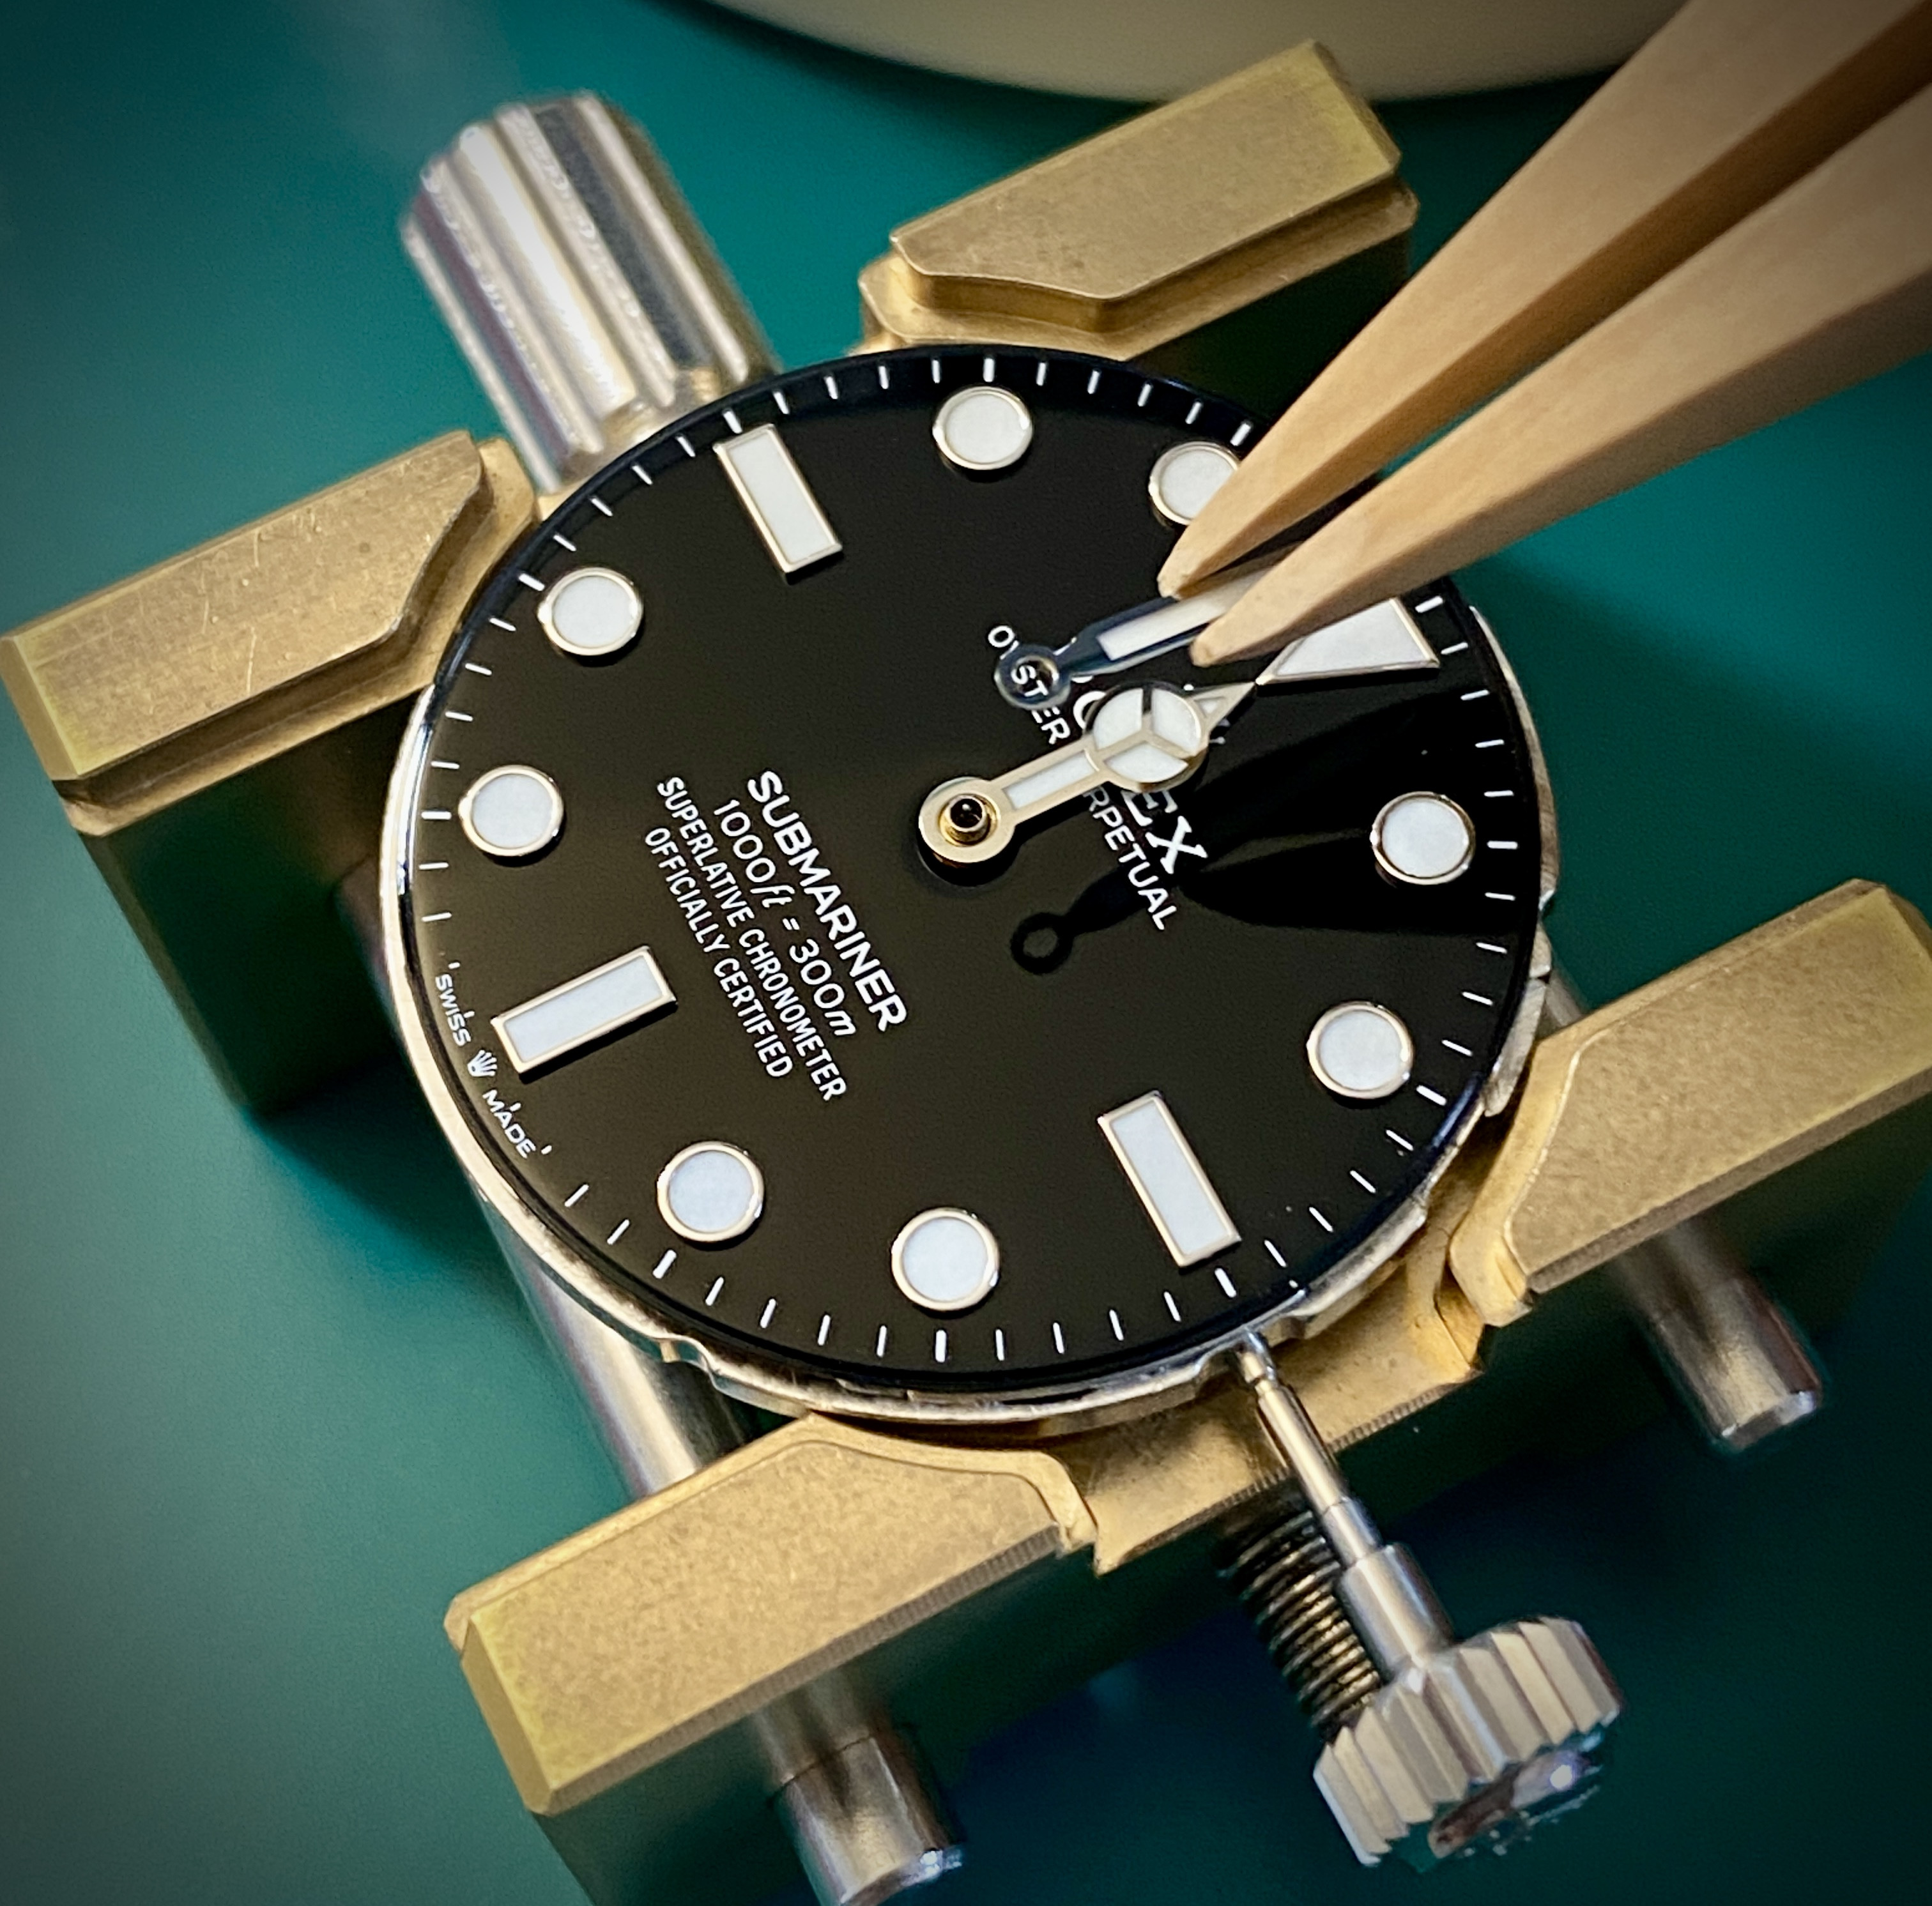
After setting the hour and minute hand, check to make sure that there is space between the hands and that the hour hand isn't rubbing on the dial.
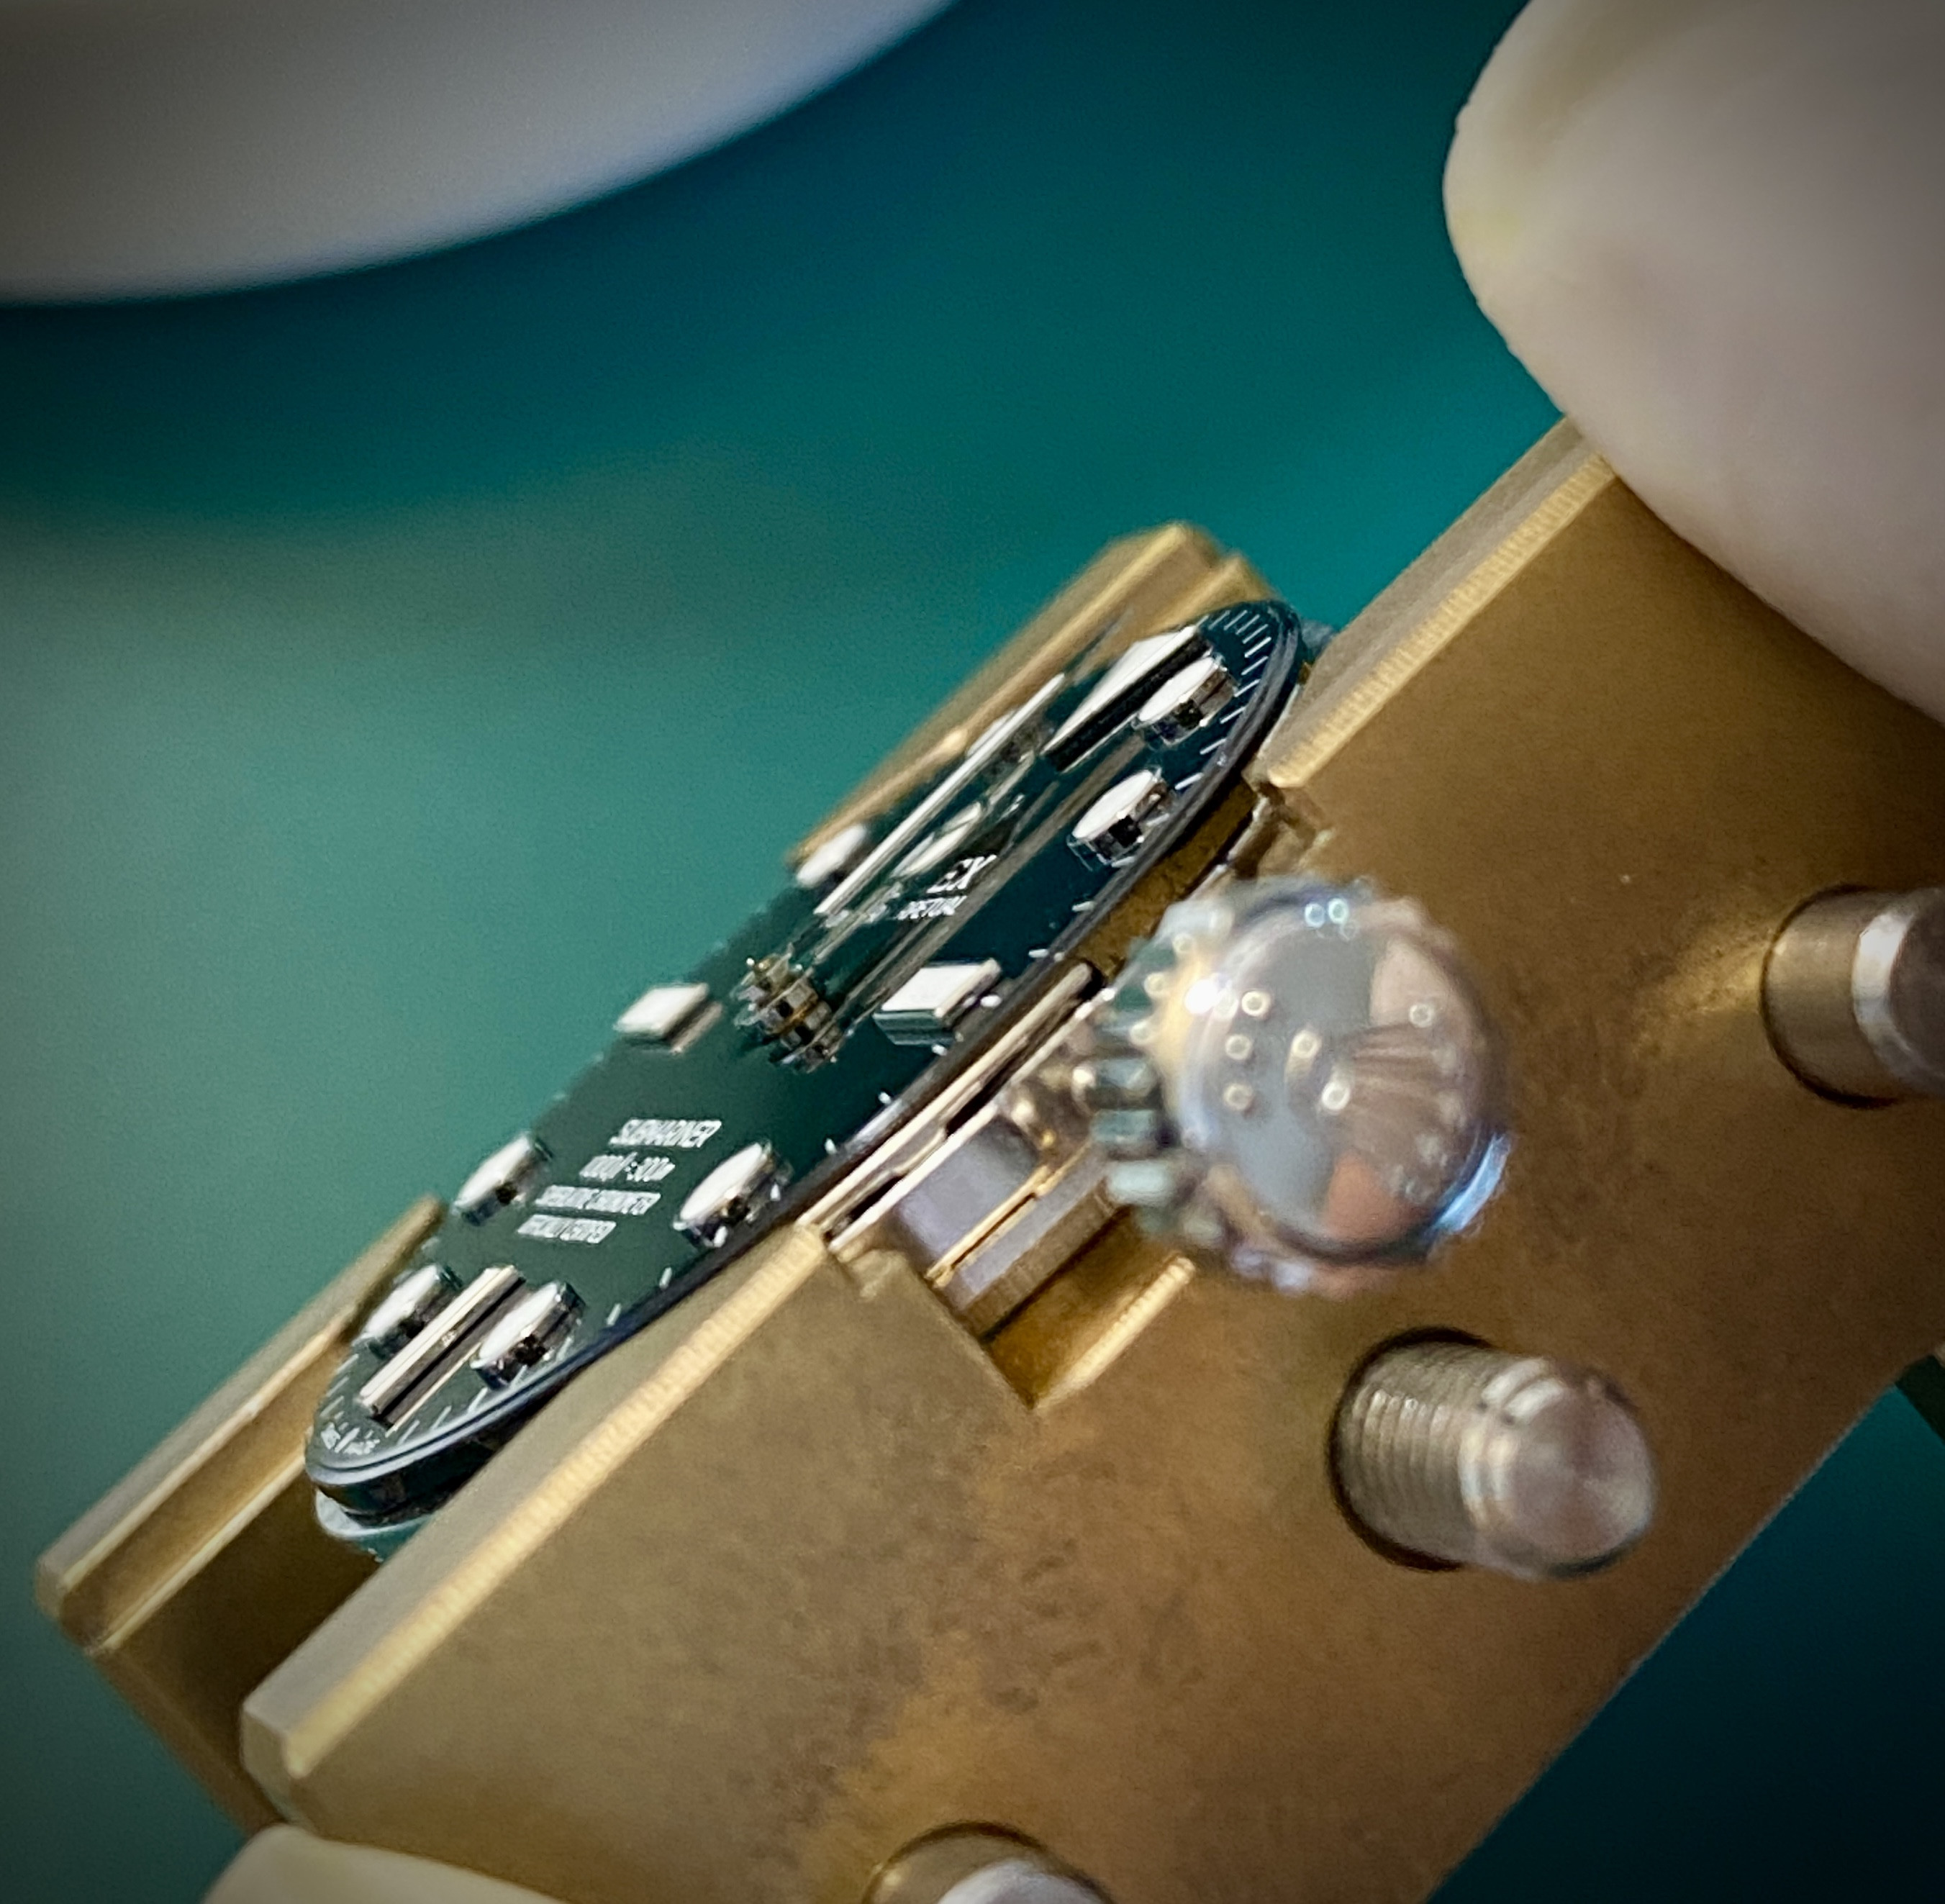
There's no need to align the seconds hand when you are placing / pressing it onto the watch.
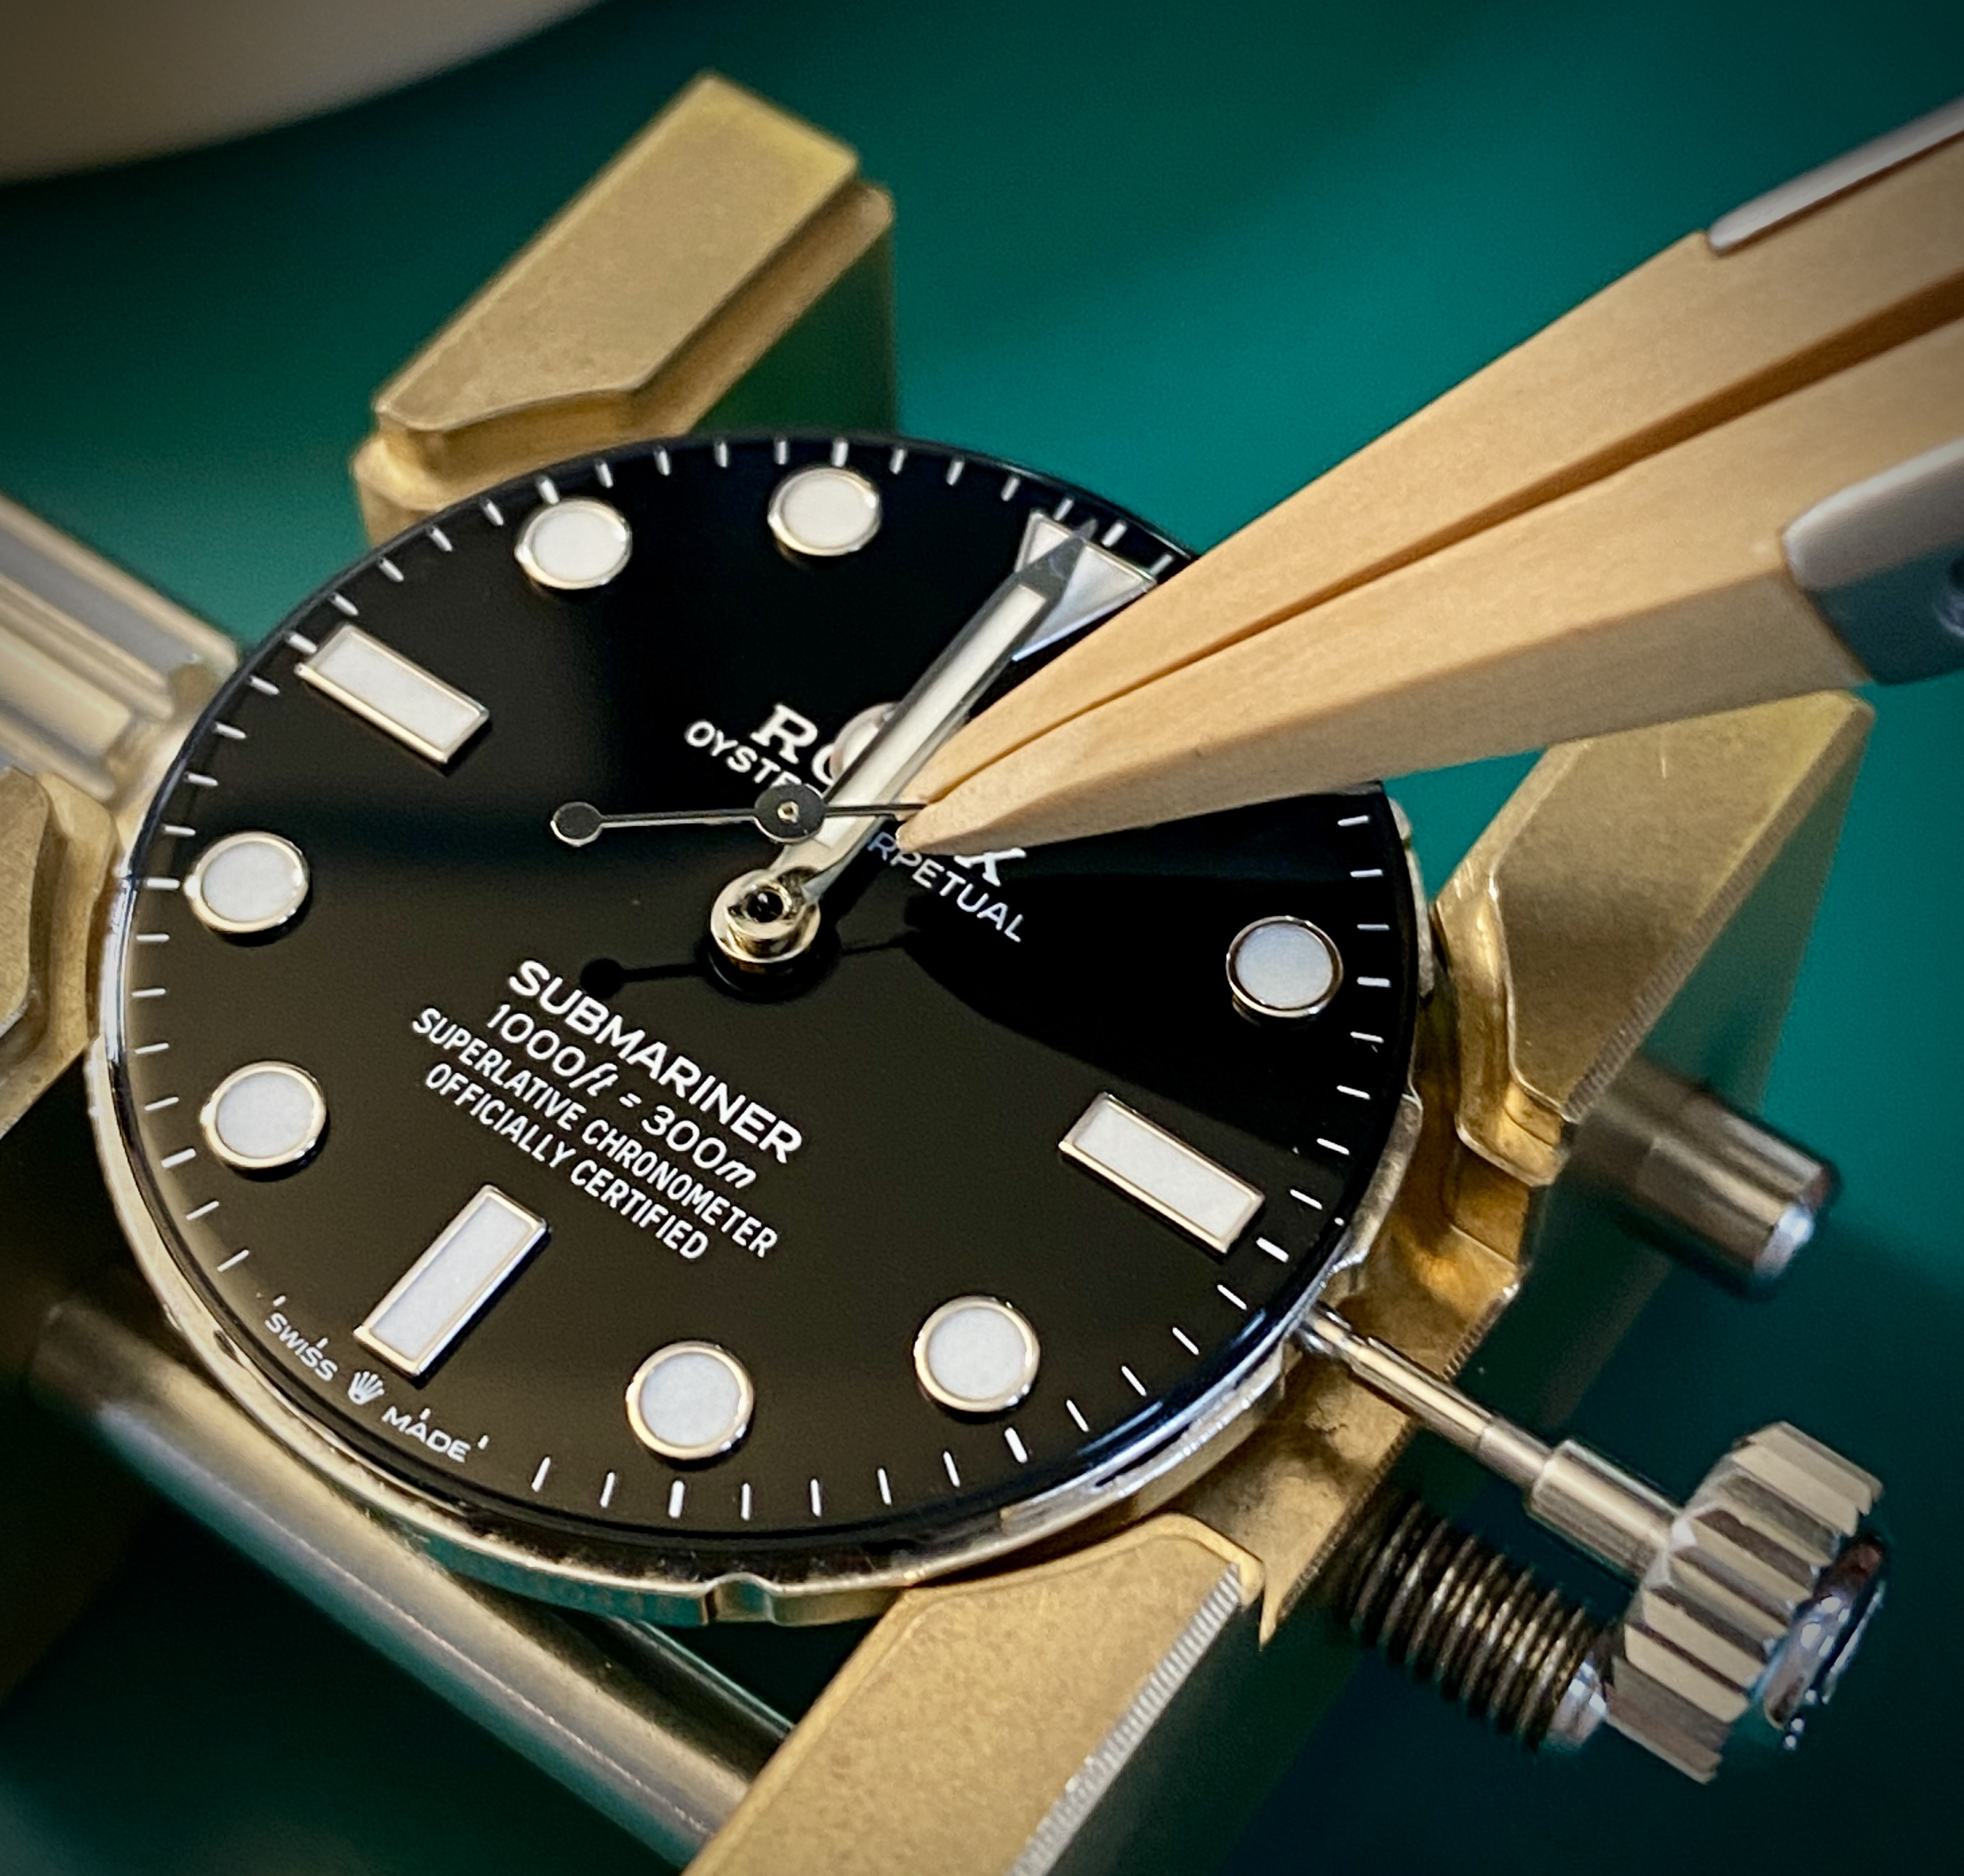
Before we case the movement up, remove the crown (sorry I couldn't get a picture of this because it involves using both hands), I hold the movement with my left fingers by the crown on it's side (9-facing down, crown facing upwards), and I use my right hand to use tweezers to push the stem release button. The stem will pull free in my left fingers and the movement can be let down dial side up on the case cushion.
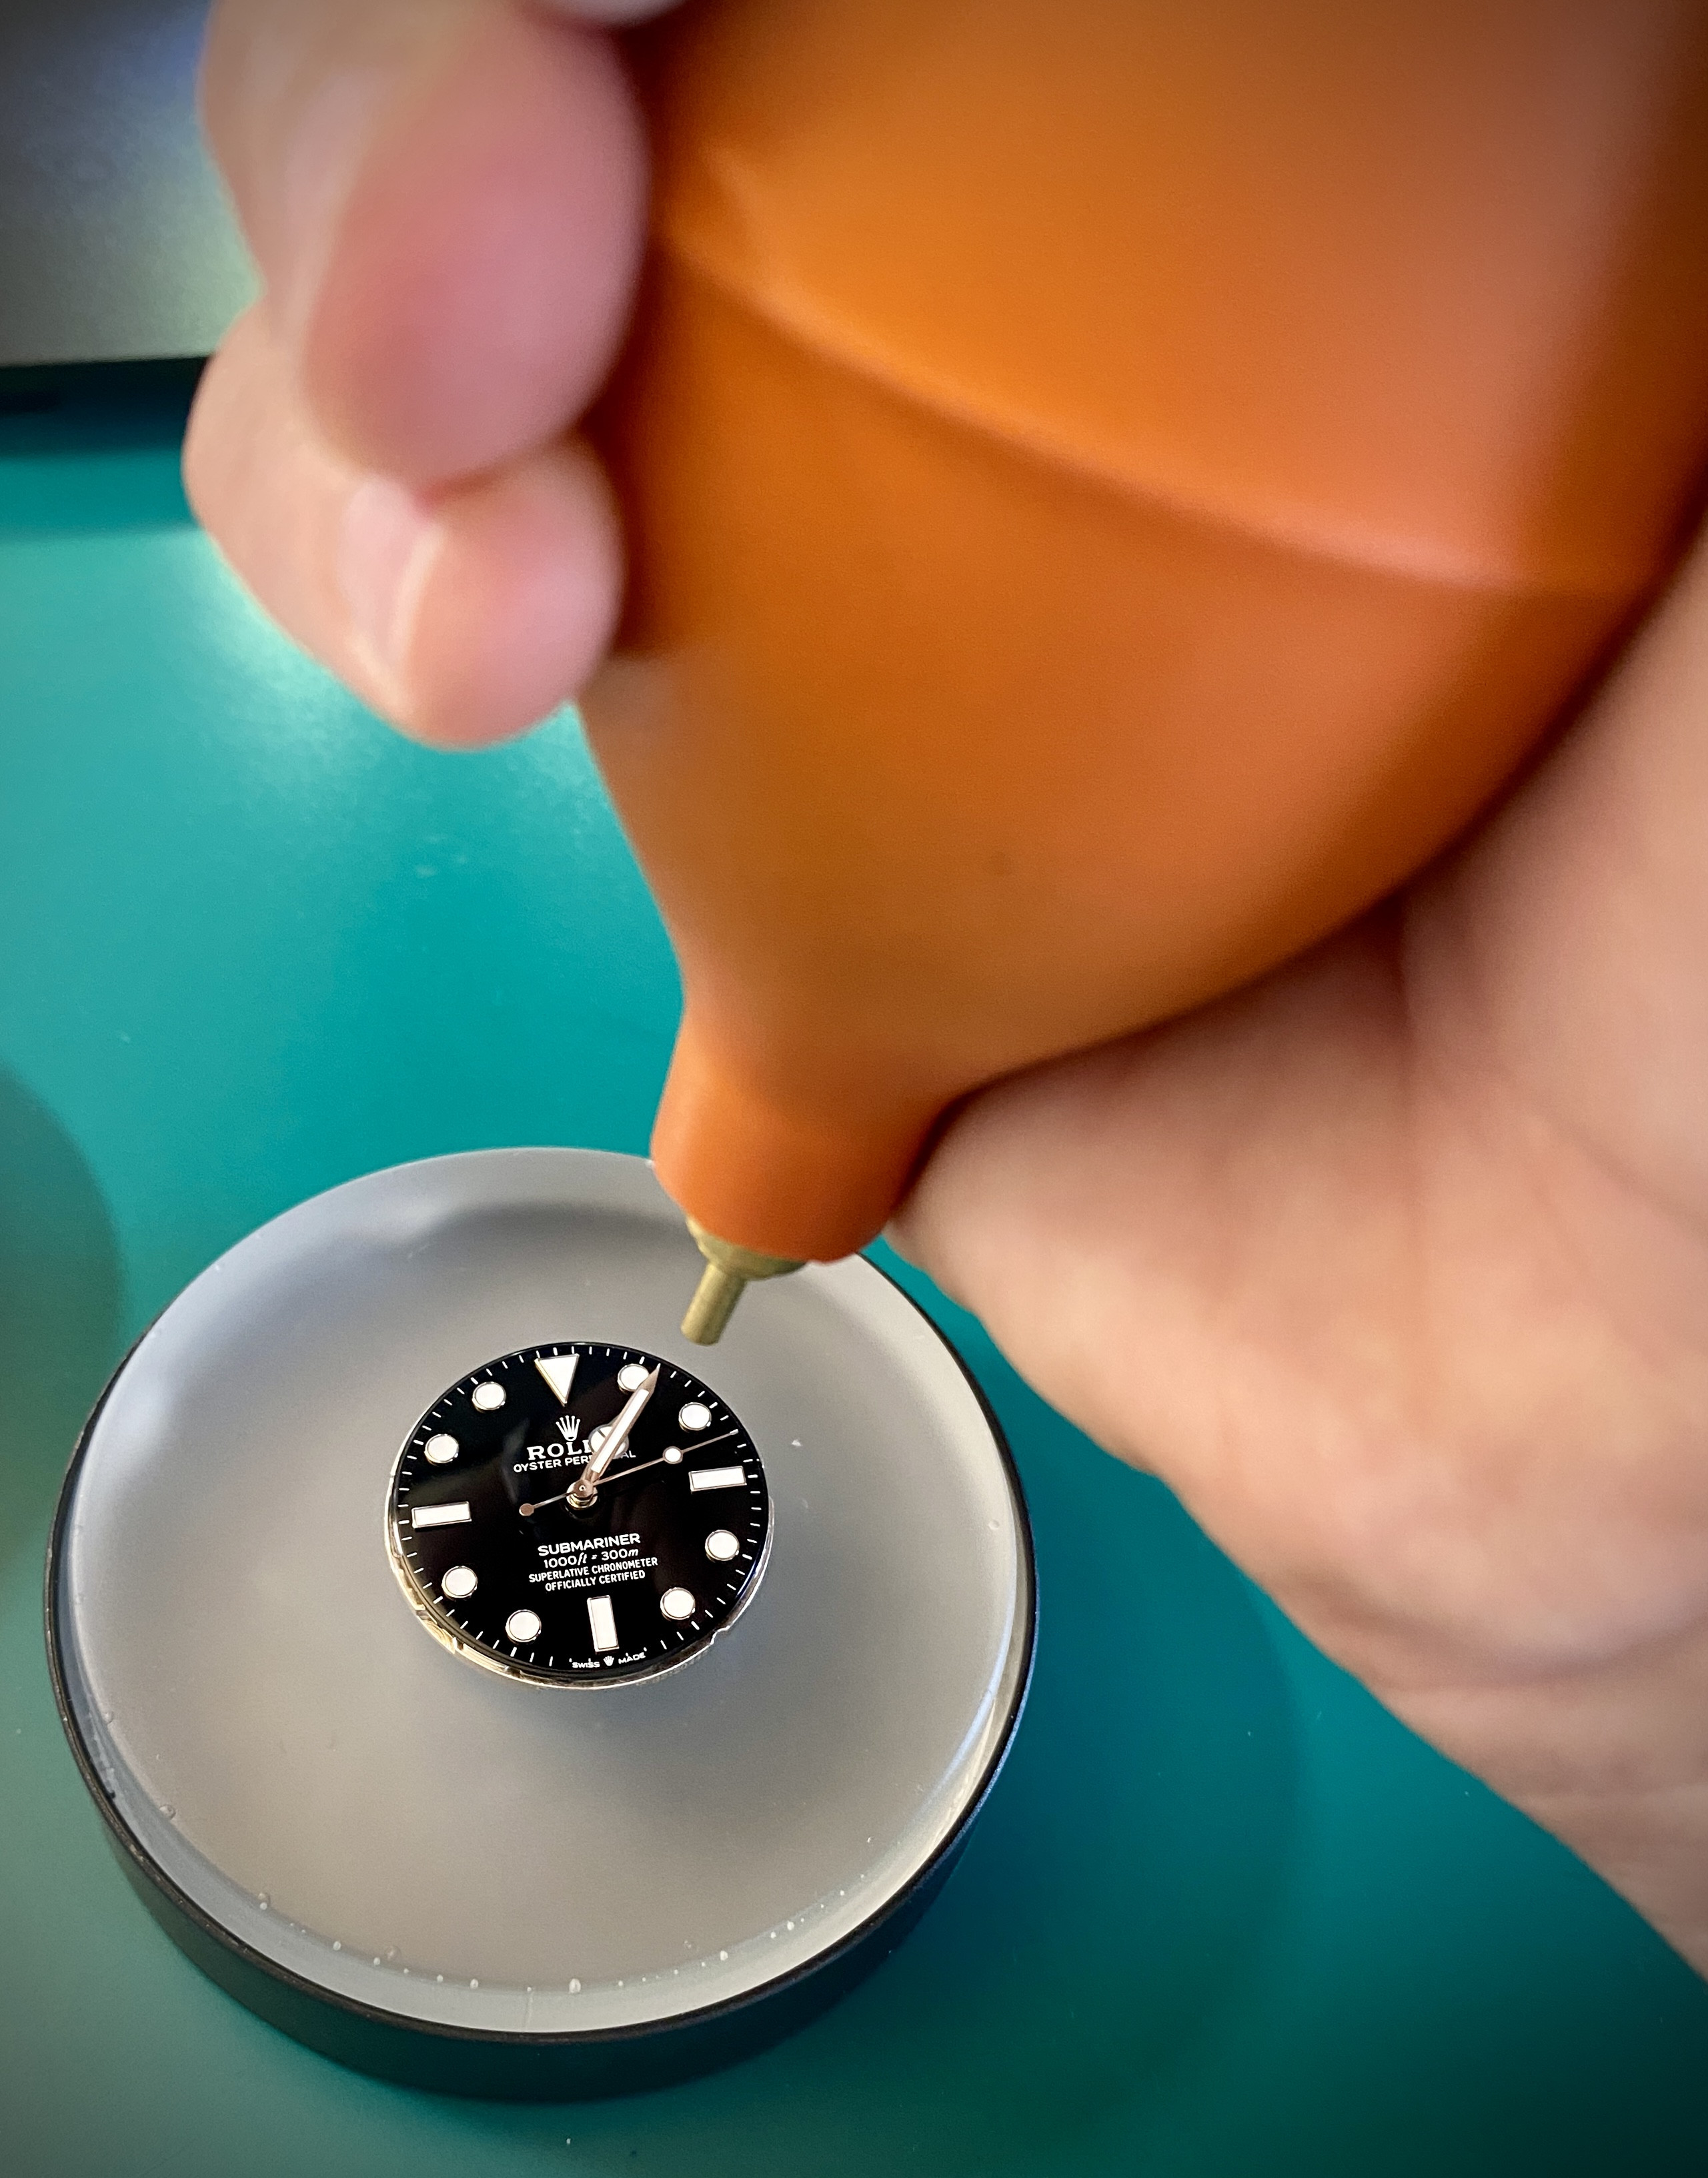
Now use a blower to blast away any dust or lint that may have found its way onto the dial or hands. (It's a really good idea to use a swiffer to dust your work area before you start on a project like this, and if you have a lint roller, it's a good idea to roll down the clothes you'll be wearing too -- you want a super clean work environment).
Now place the case over the movement, and flip the sandwich over so that the movement is inside the case and the case is crystal down on your case cushion. In this position we'll re-insert the crown. Do this the same as you did before, be gentle, use a finger (in a finger cot) on the back of the movement to hold the movement steady as you slide the stem in. Be careful, you don't want to upset the keyless works, if you do, you have to go all the way back to removing the setting lever spring to reset it. You're almost done, but you don't want to mess up here.
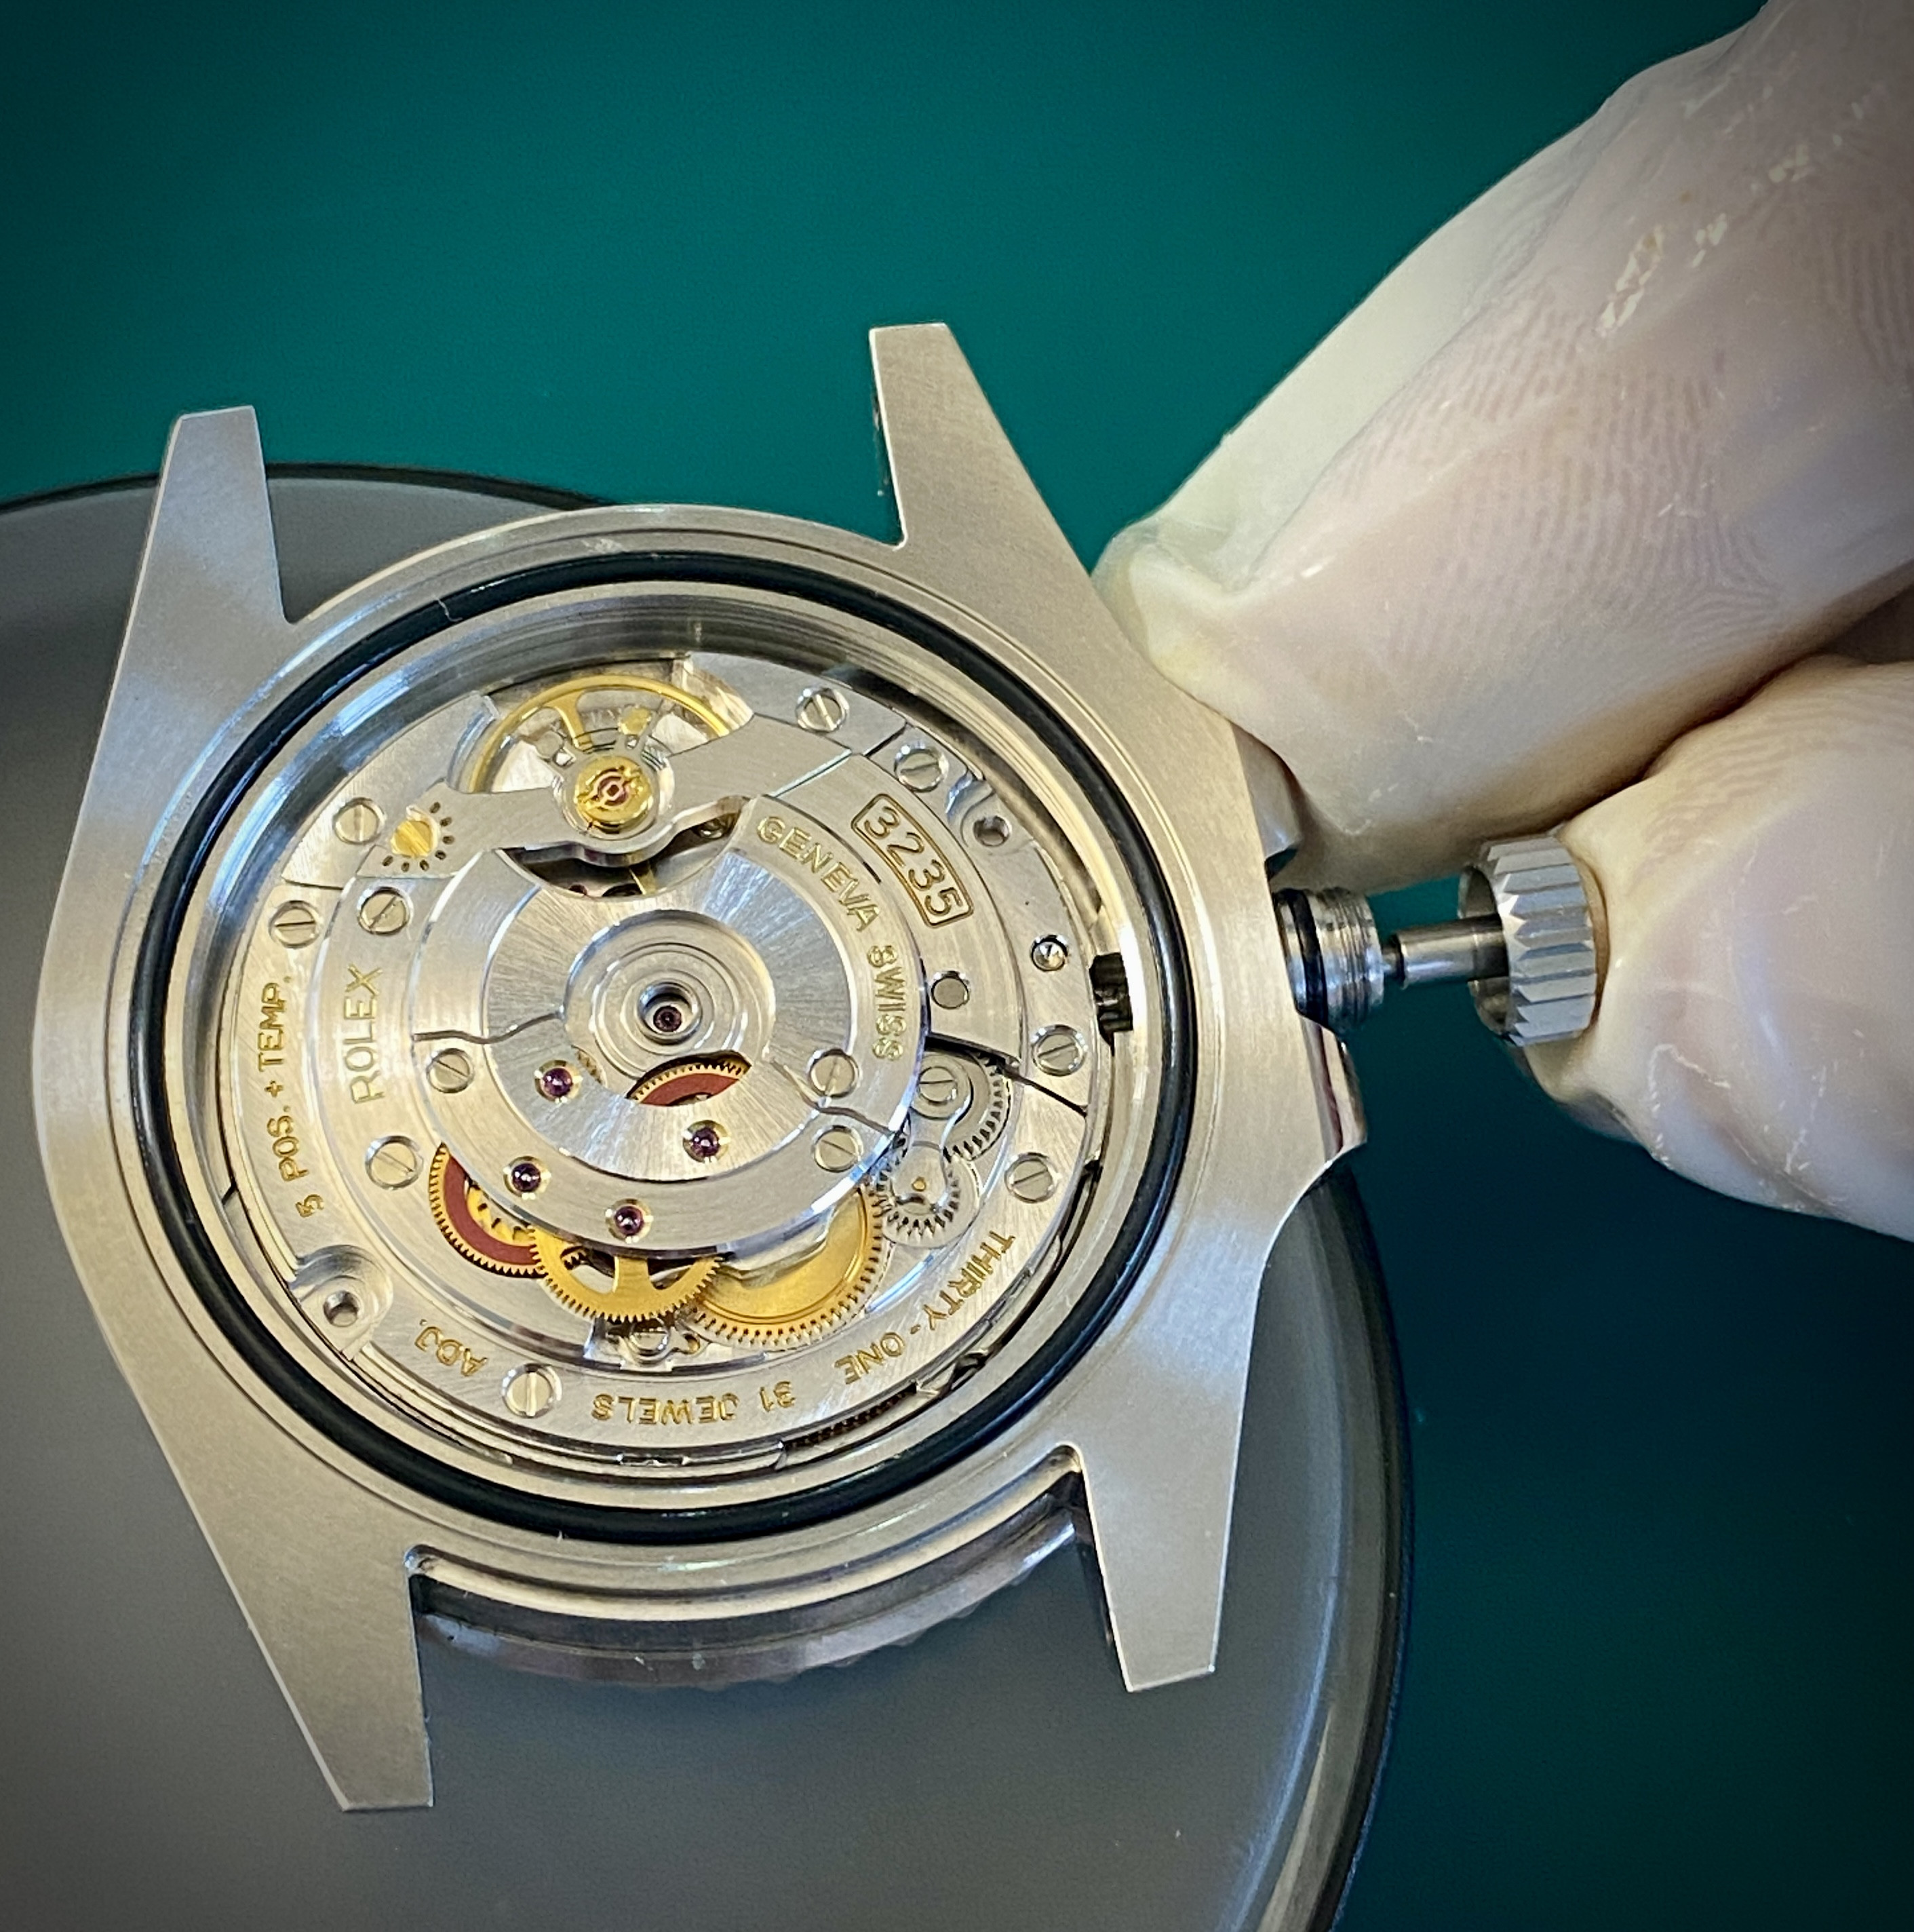
With the stem back into the movement, it's time to loosely re-install the case clamps. Do this one at a time and don't tighten the first one down (just get it threaded) before you install the second one. When both case clamps are threaded, DO NOT fully tighten them down (yet).
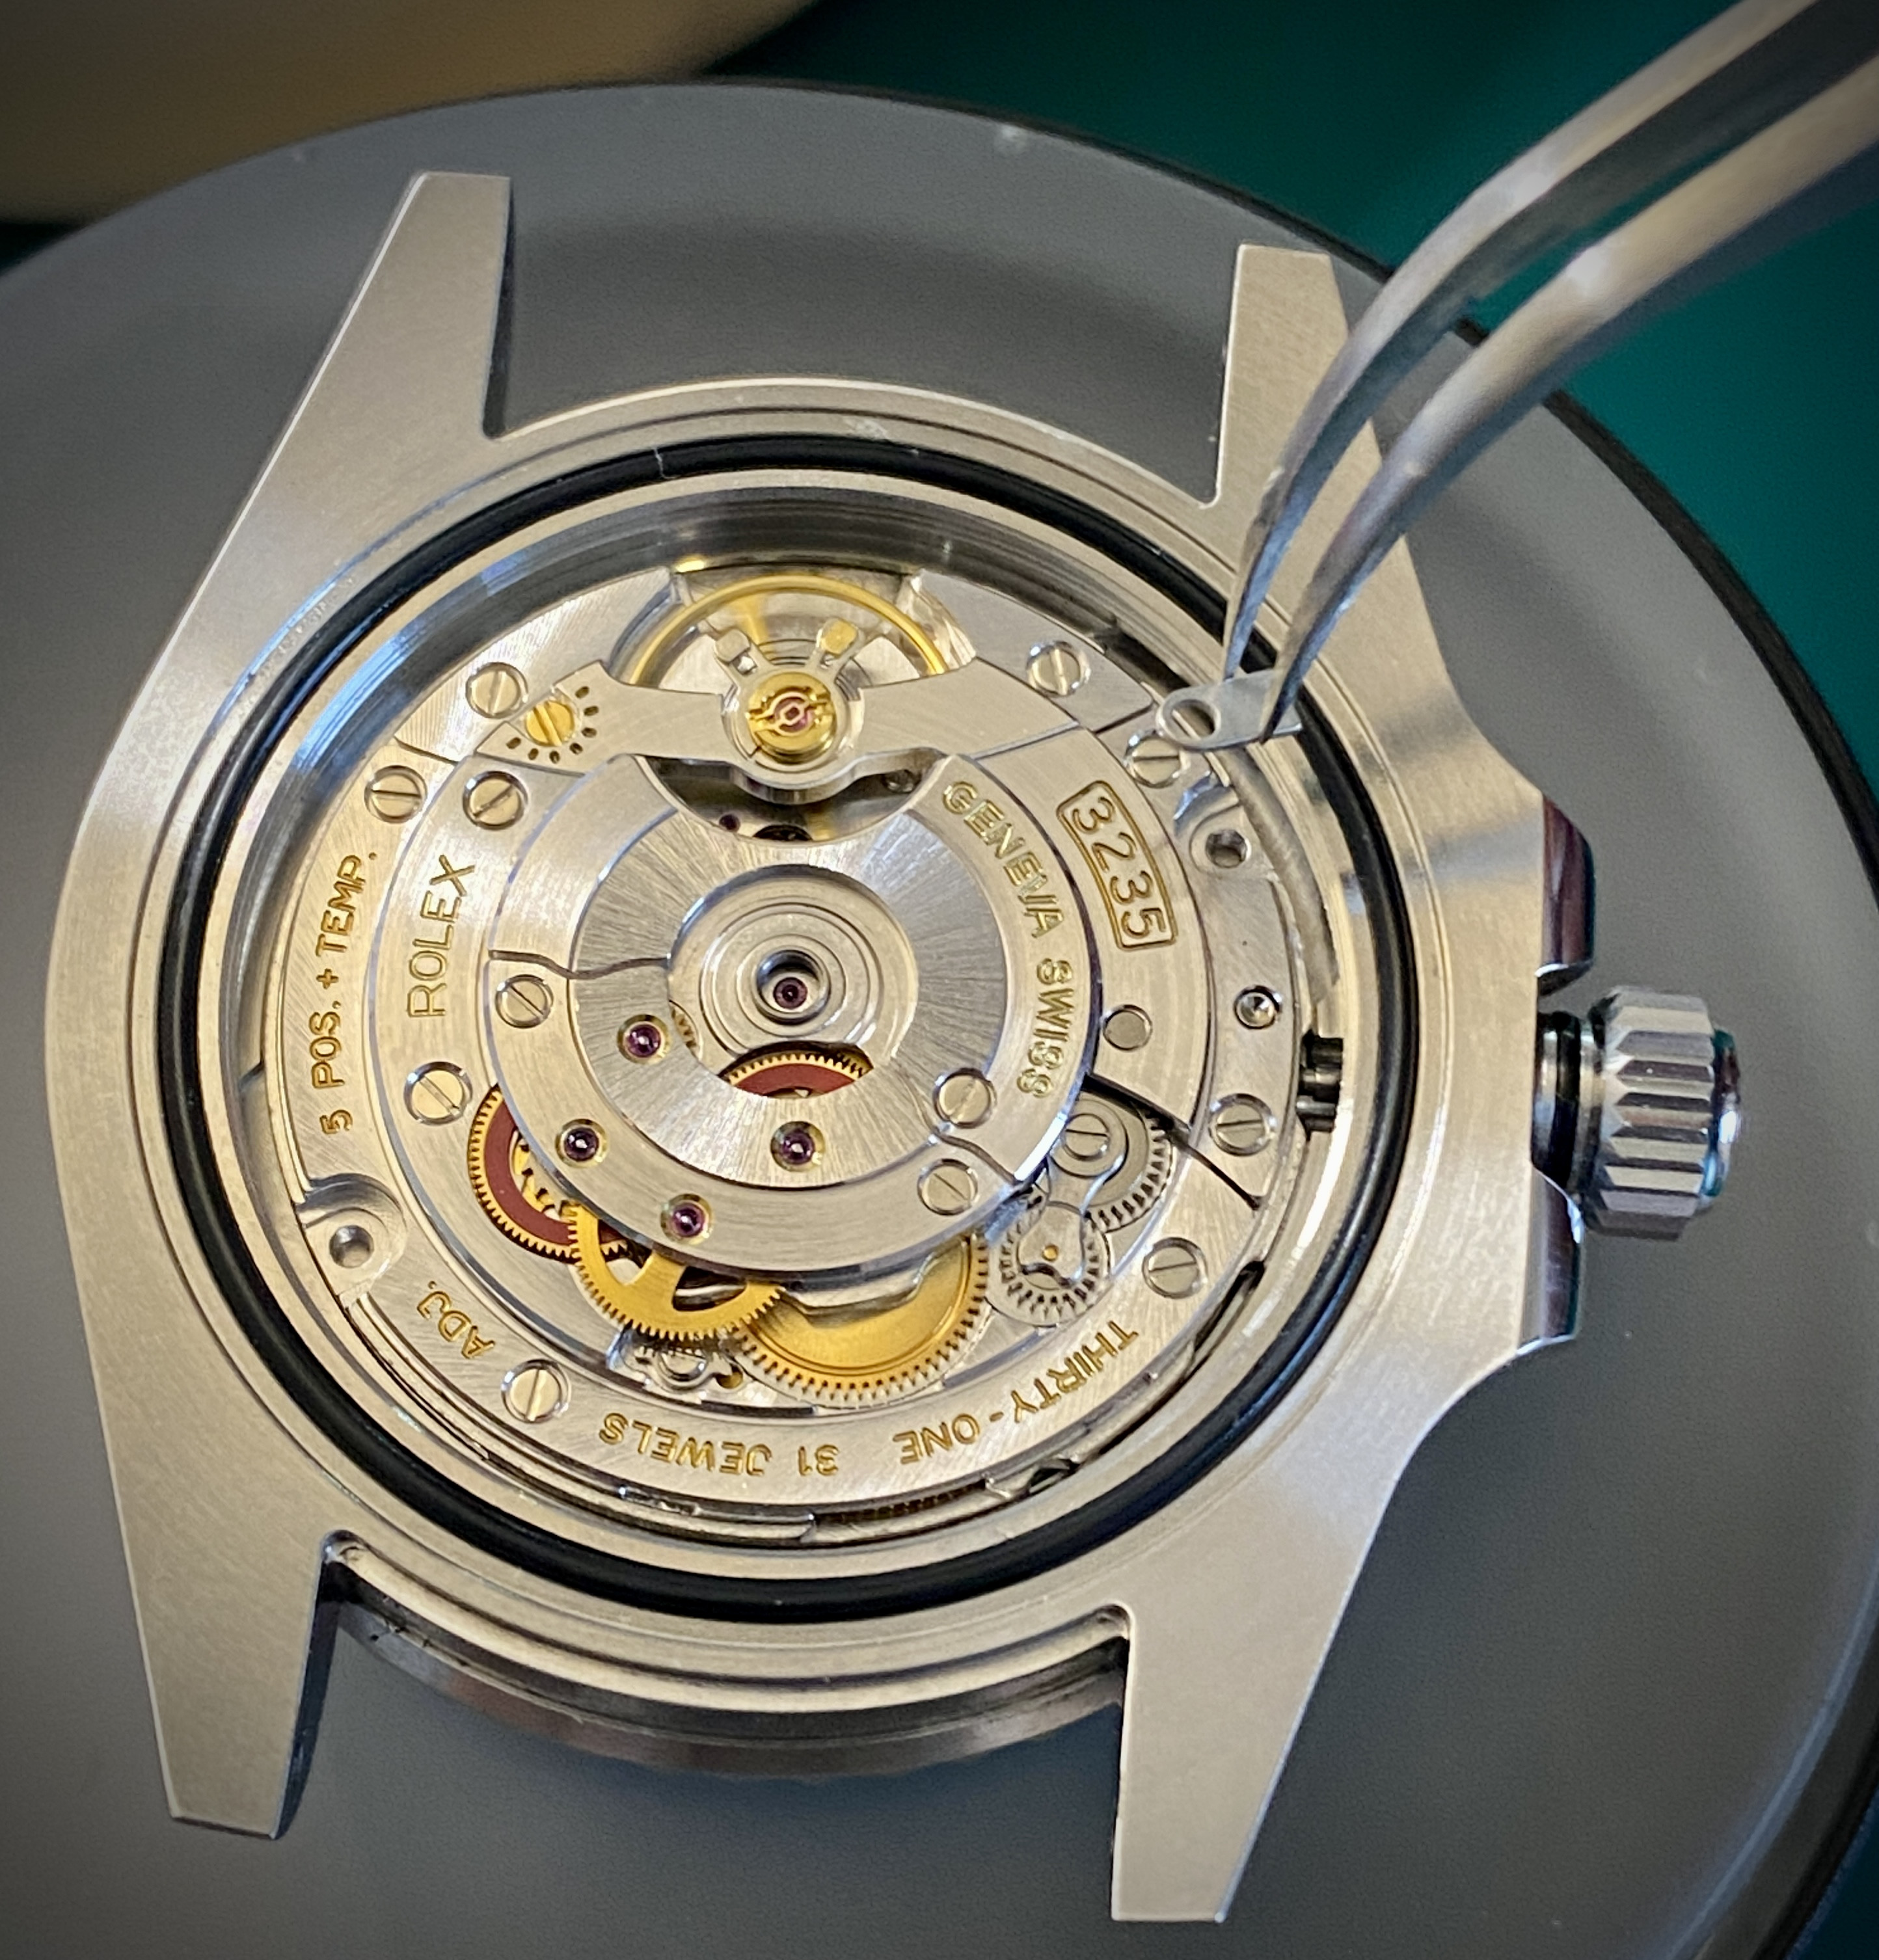
Before we tighten down the case clamps we need to ensure that the dial is aligned with the engraving on he rehaut. Flip the watch over and look a the alignment. If the alignment is off, you can flip the watch over and use a couple of tools to try to gently rotate the movement inside the case. There's a limit to how much you can adjust the rotation without putting stress on the stem (and you don't wan to break the stem!!!). If you can't get it perfect, don't worry, just always ski faster than 40mph and you won't get called out.

We're almost done... now we need to re-install the rotor. Make sure the spacer washer is in place on the bearing block and place the rotor onto the movement.
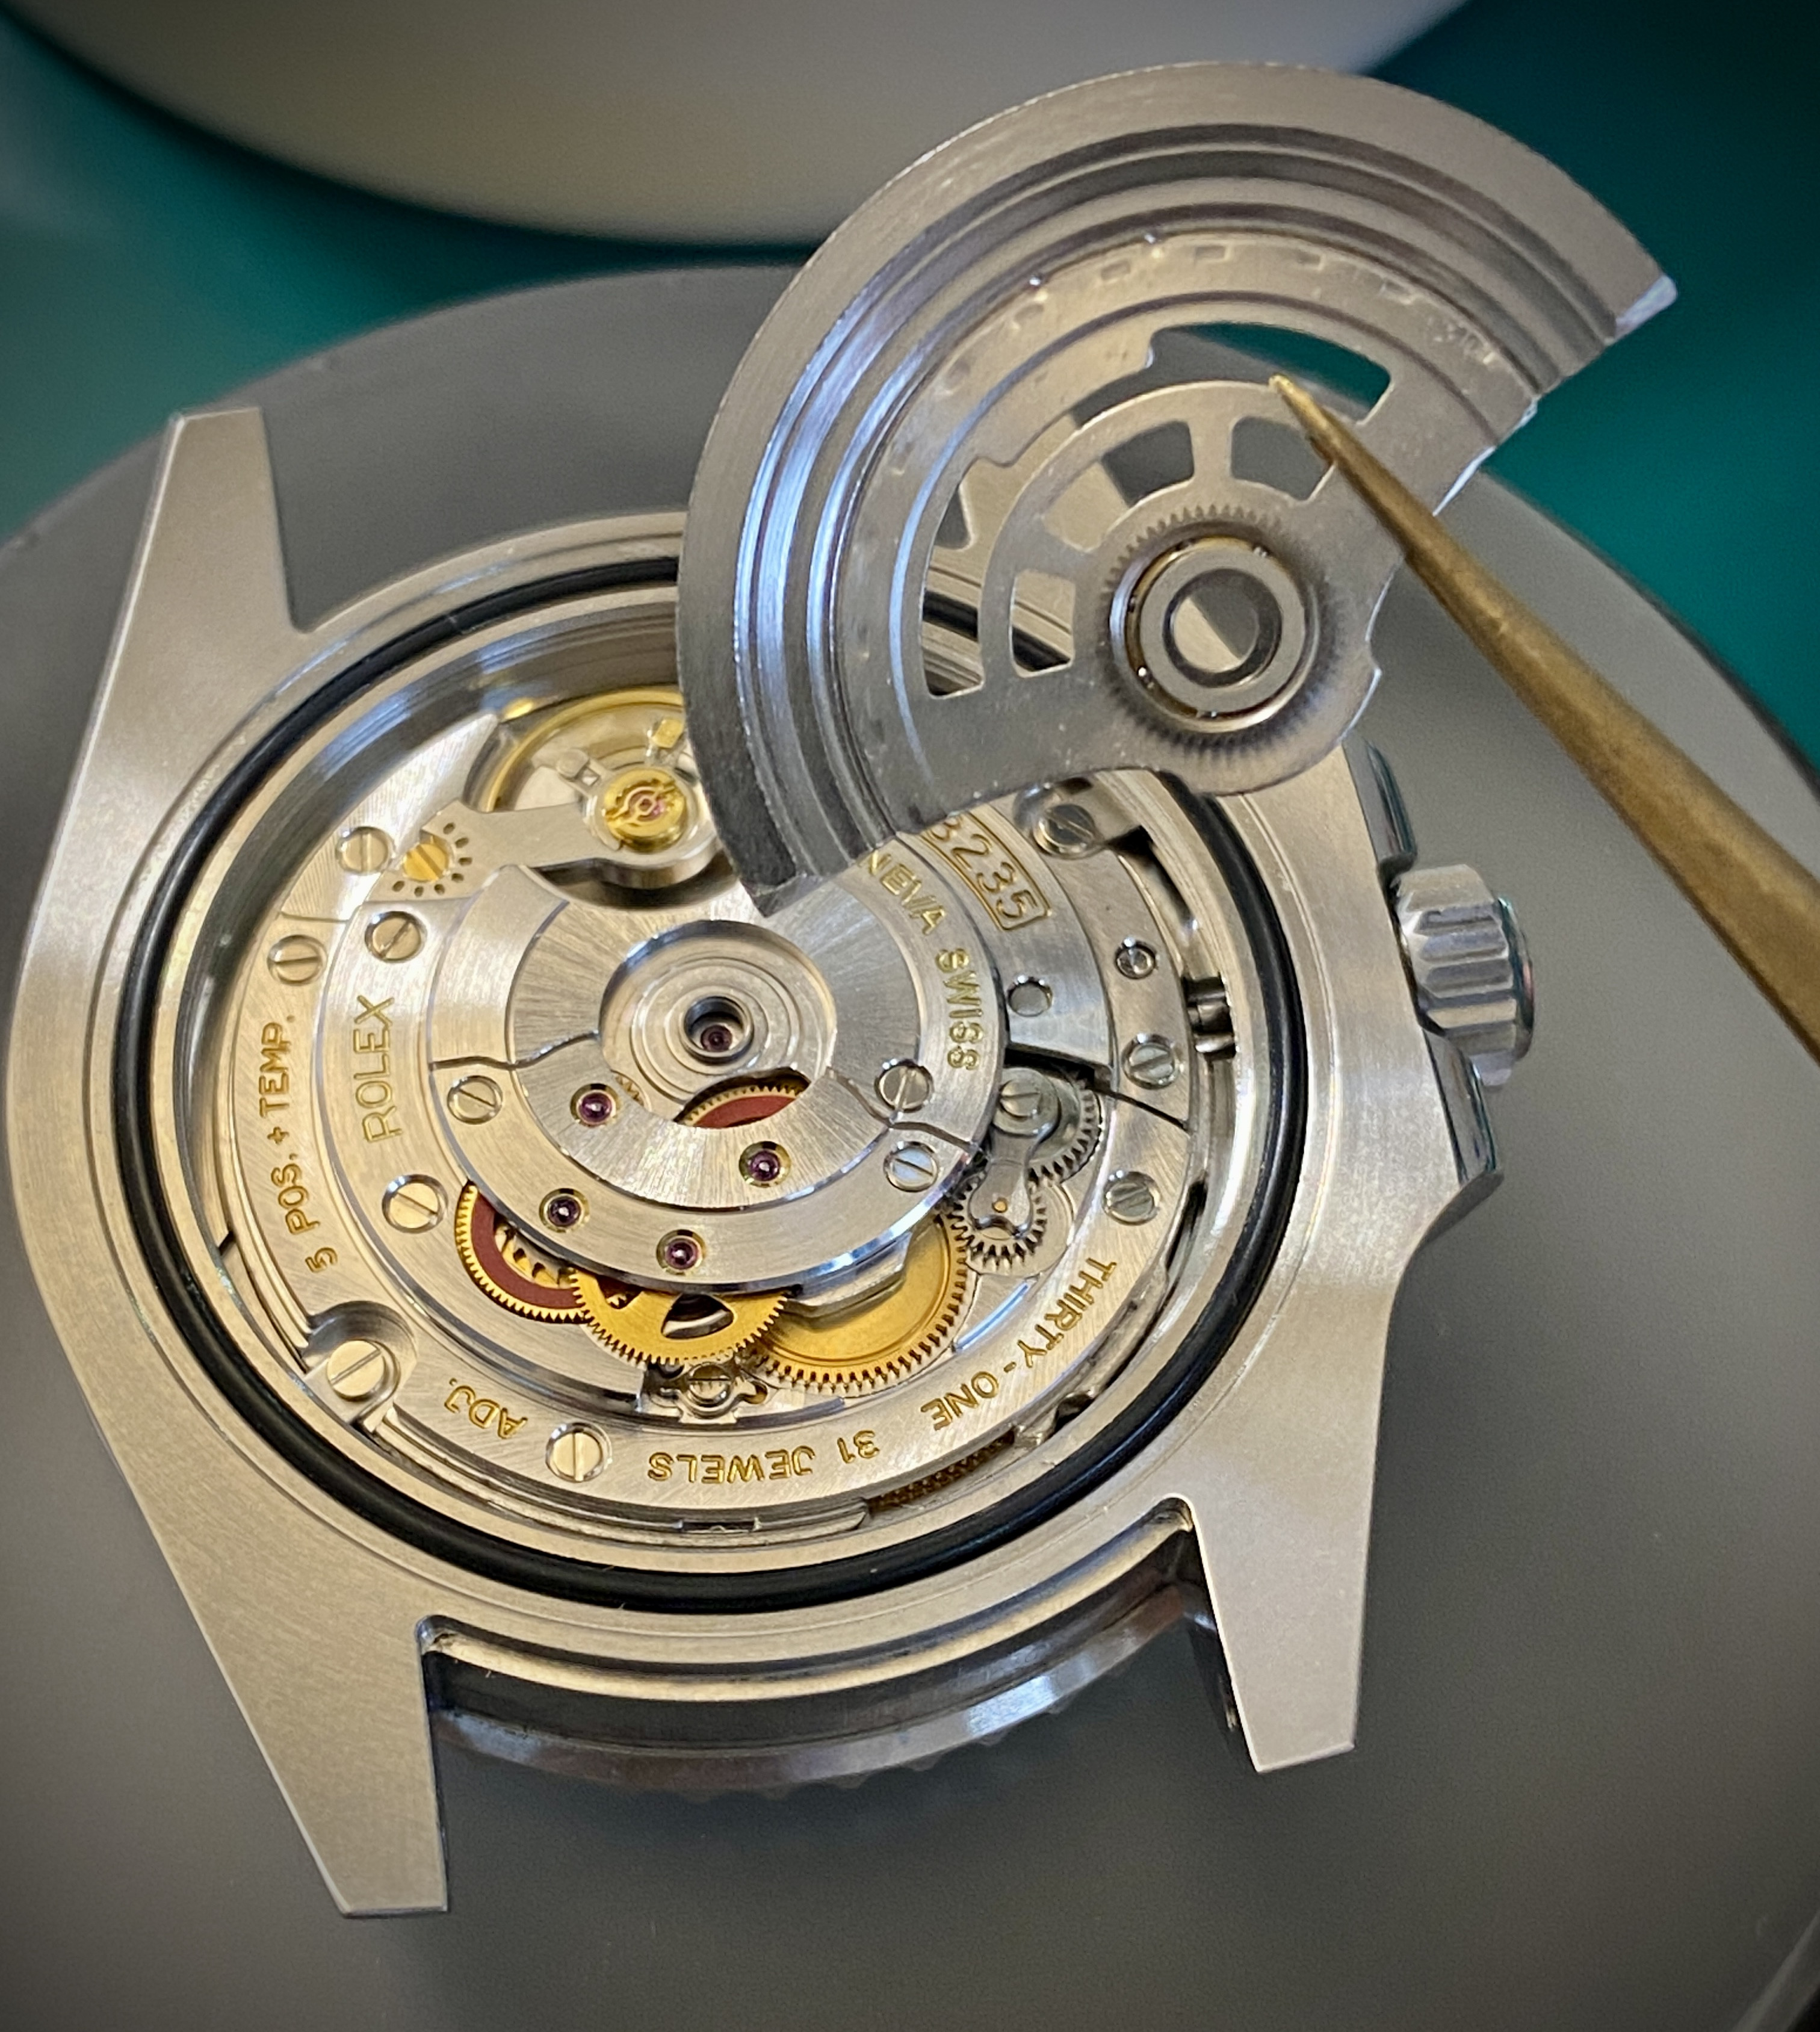
Use your triangular socket tool to secure the rotor fastener, but don't fully tighten the fastener without first moving the rotor a little bit left and right to ensure that the teeth on the rotor are meshed with the teeth of the pinion in the automatic works.
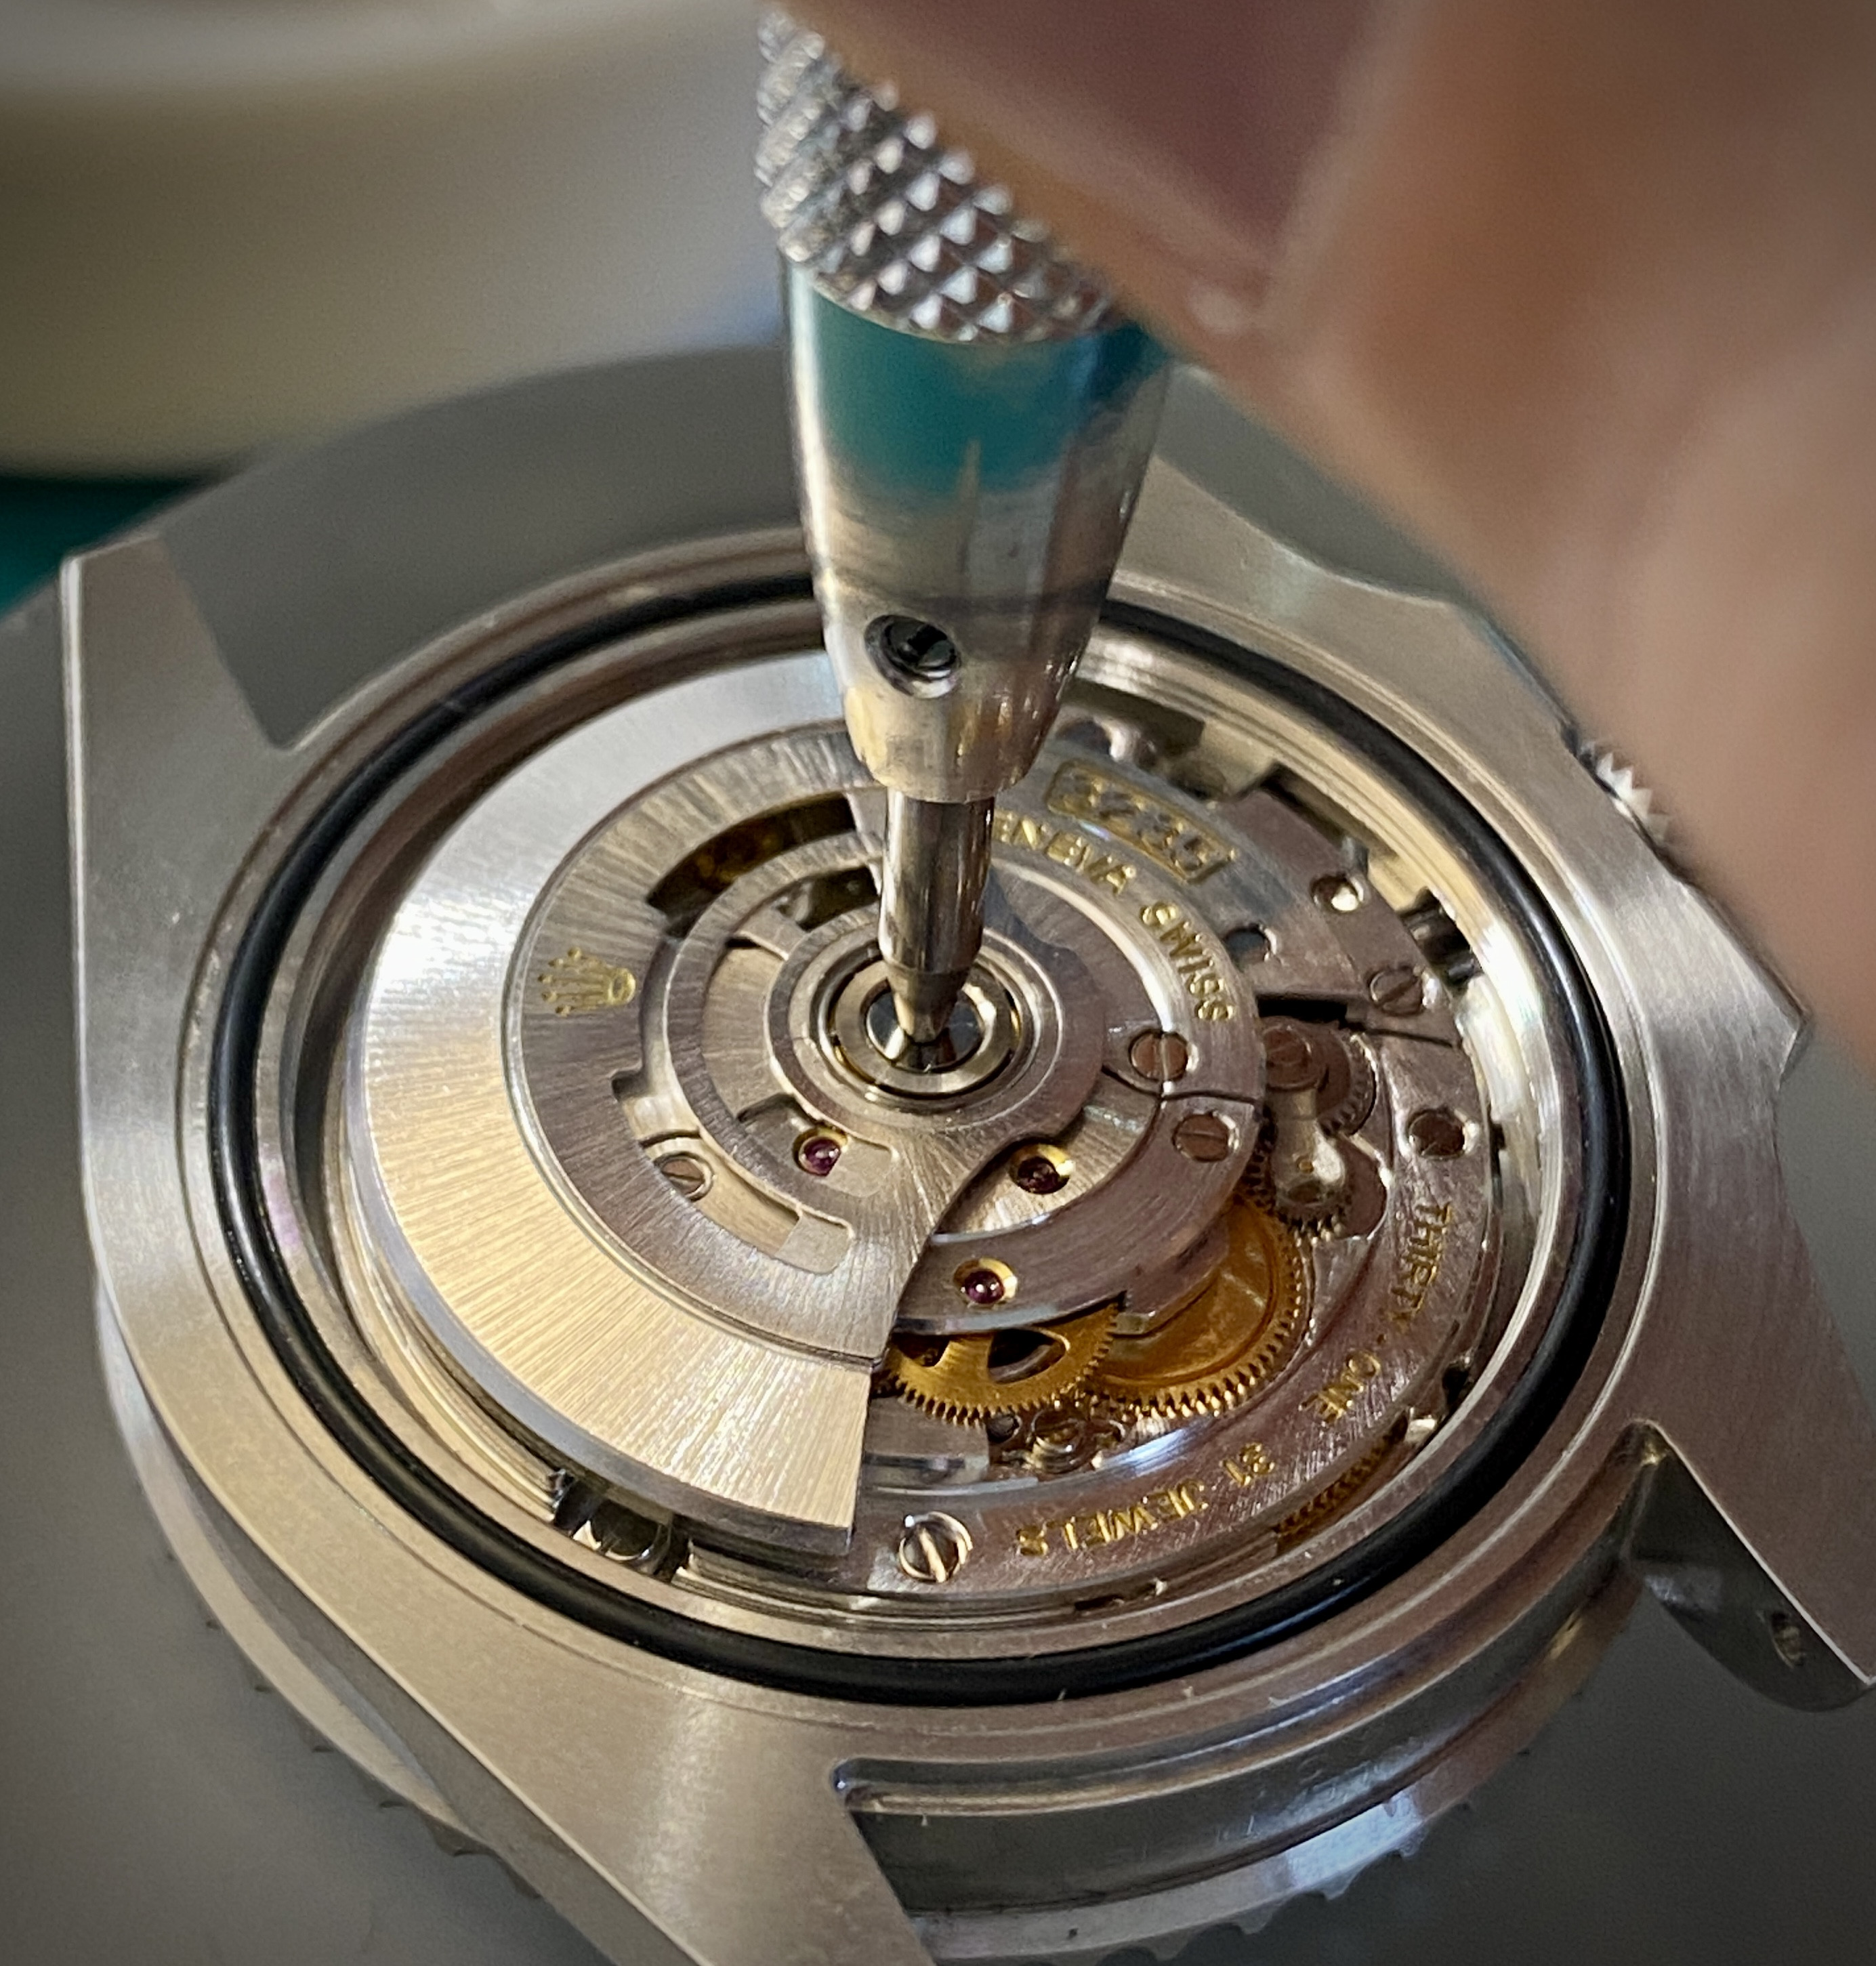
Ensure the rotor swings freely in both directions. If not, loosen the triangular socket fastener a bit, rotate the rotor until the teeth mesh, and then tighten the triangular socket fastener again.
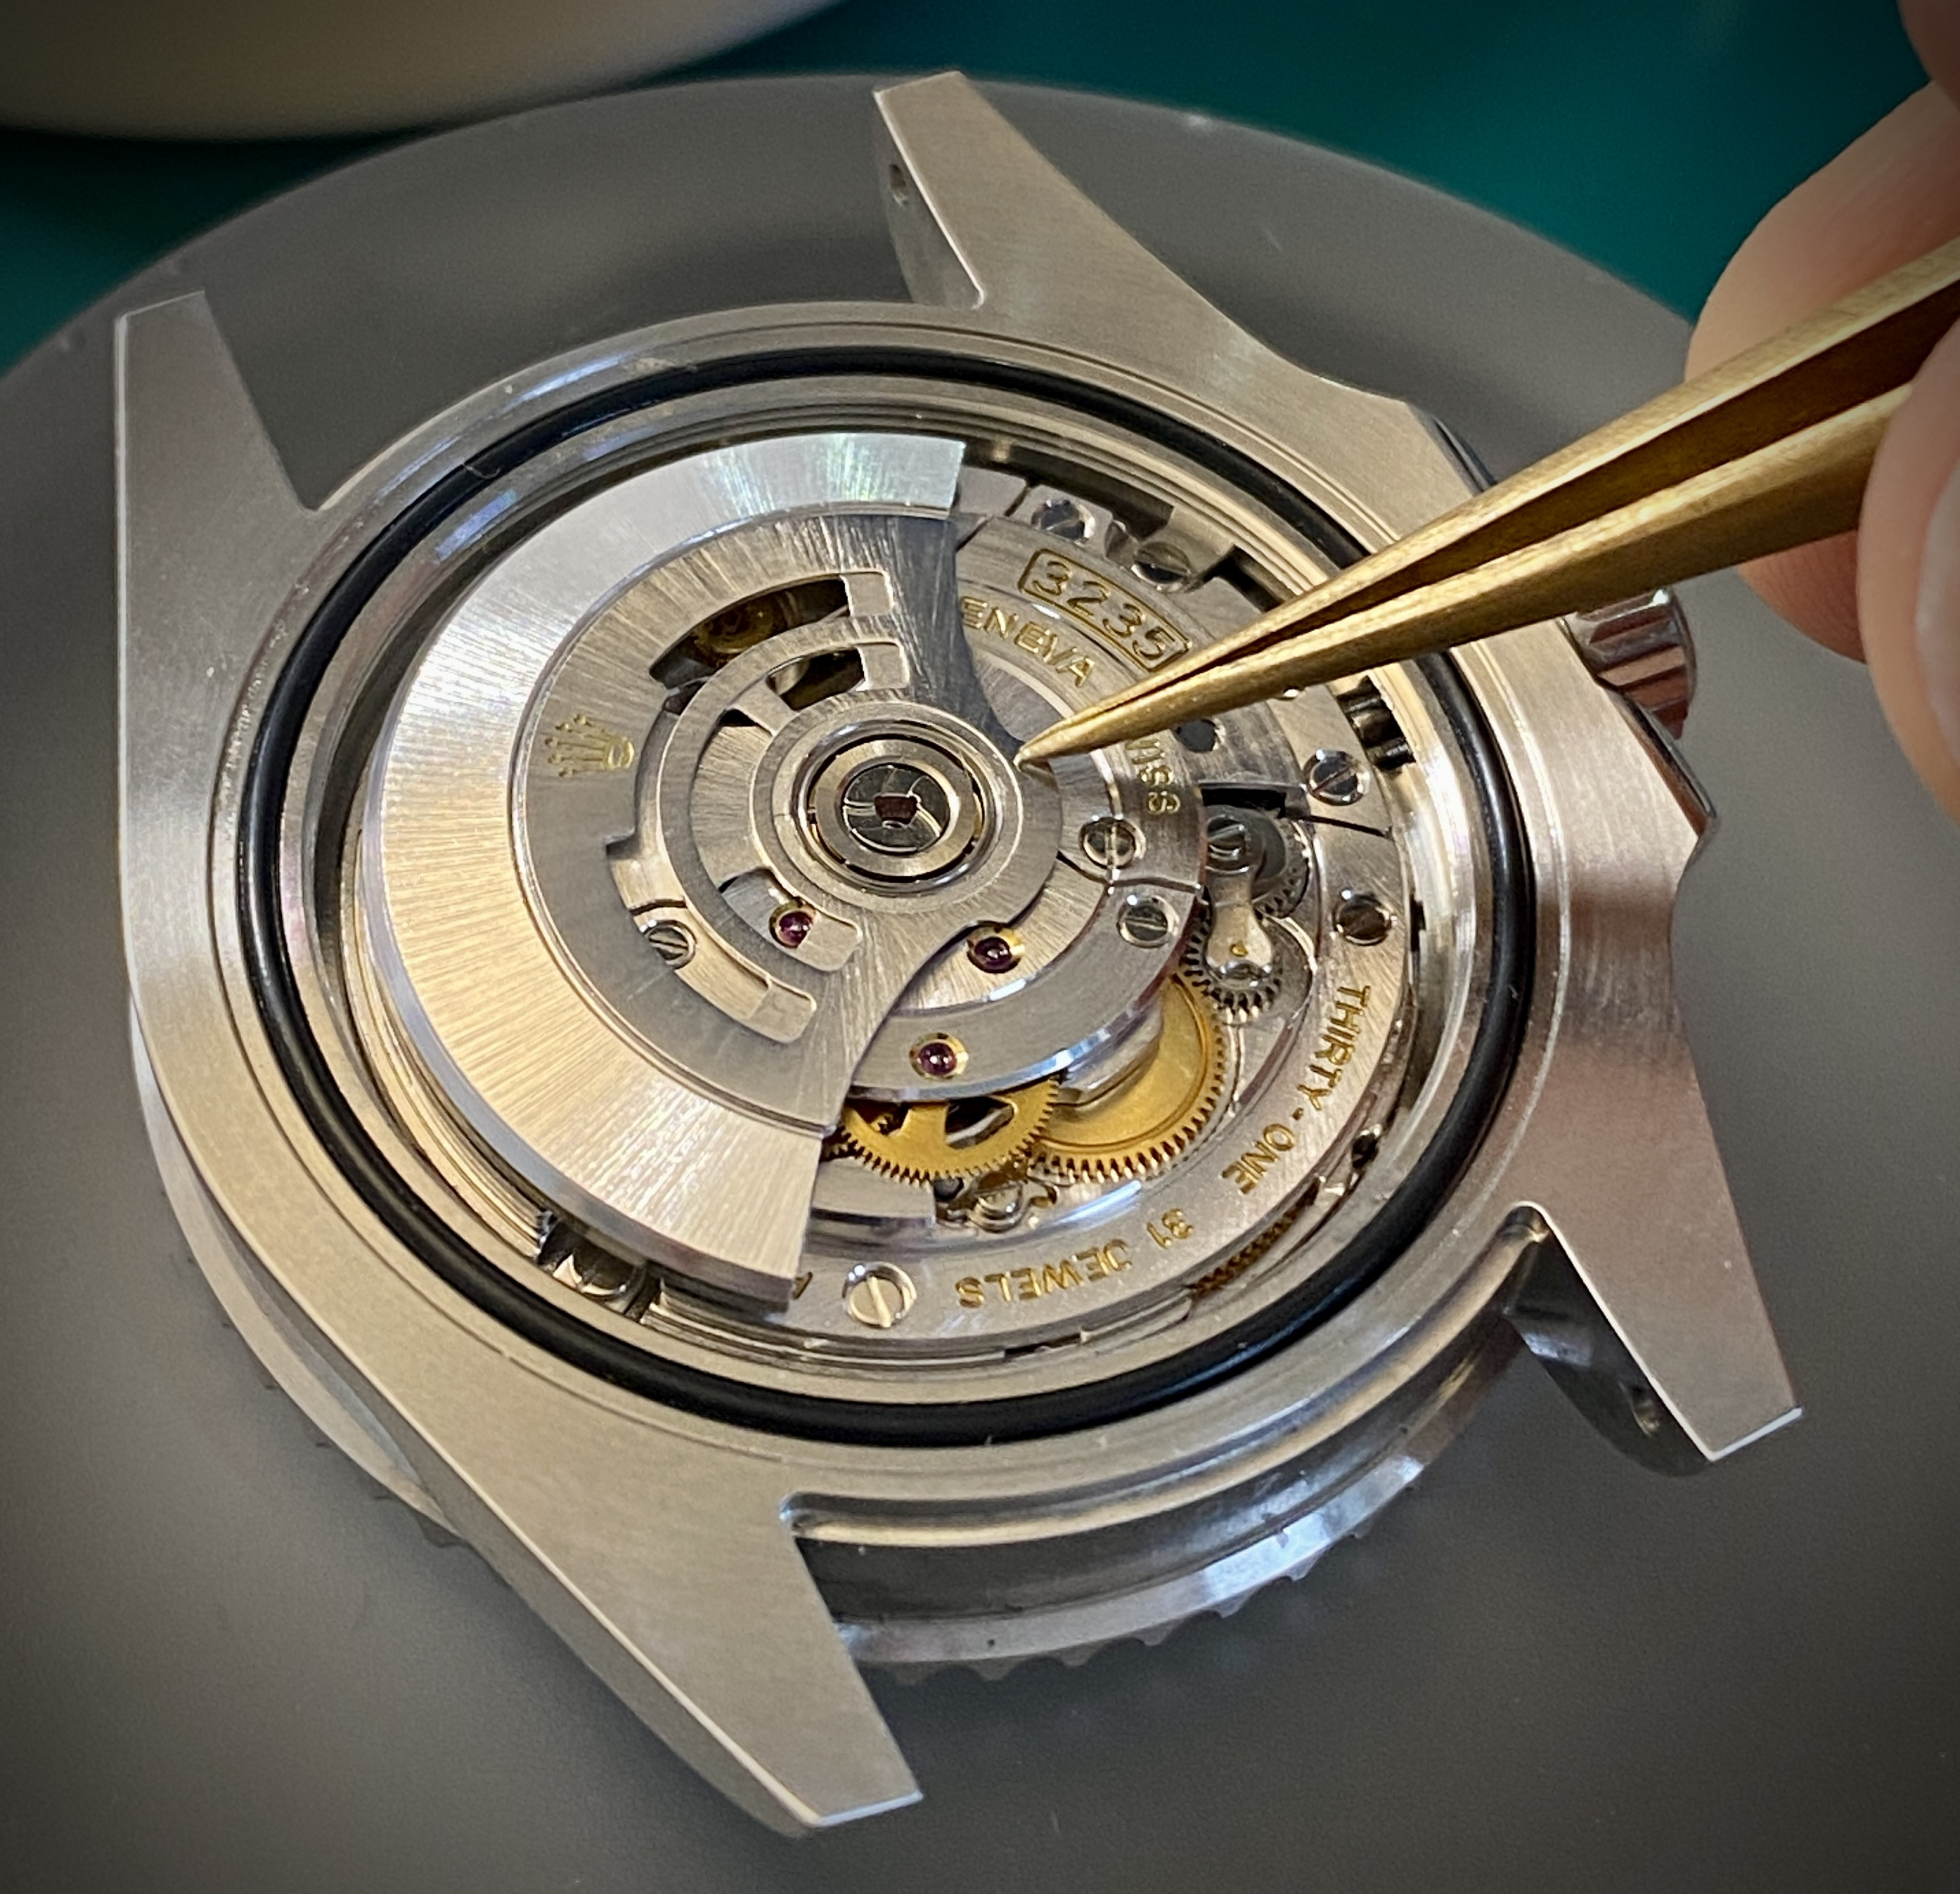
Final step: screw the caseback back into place using the rubber ball.
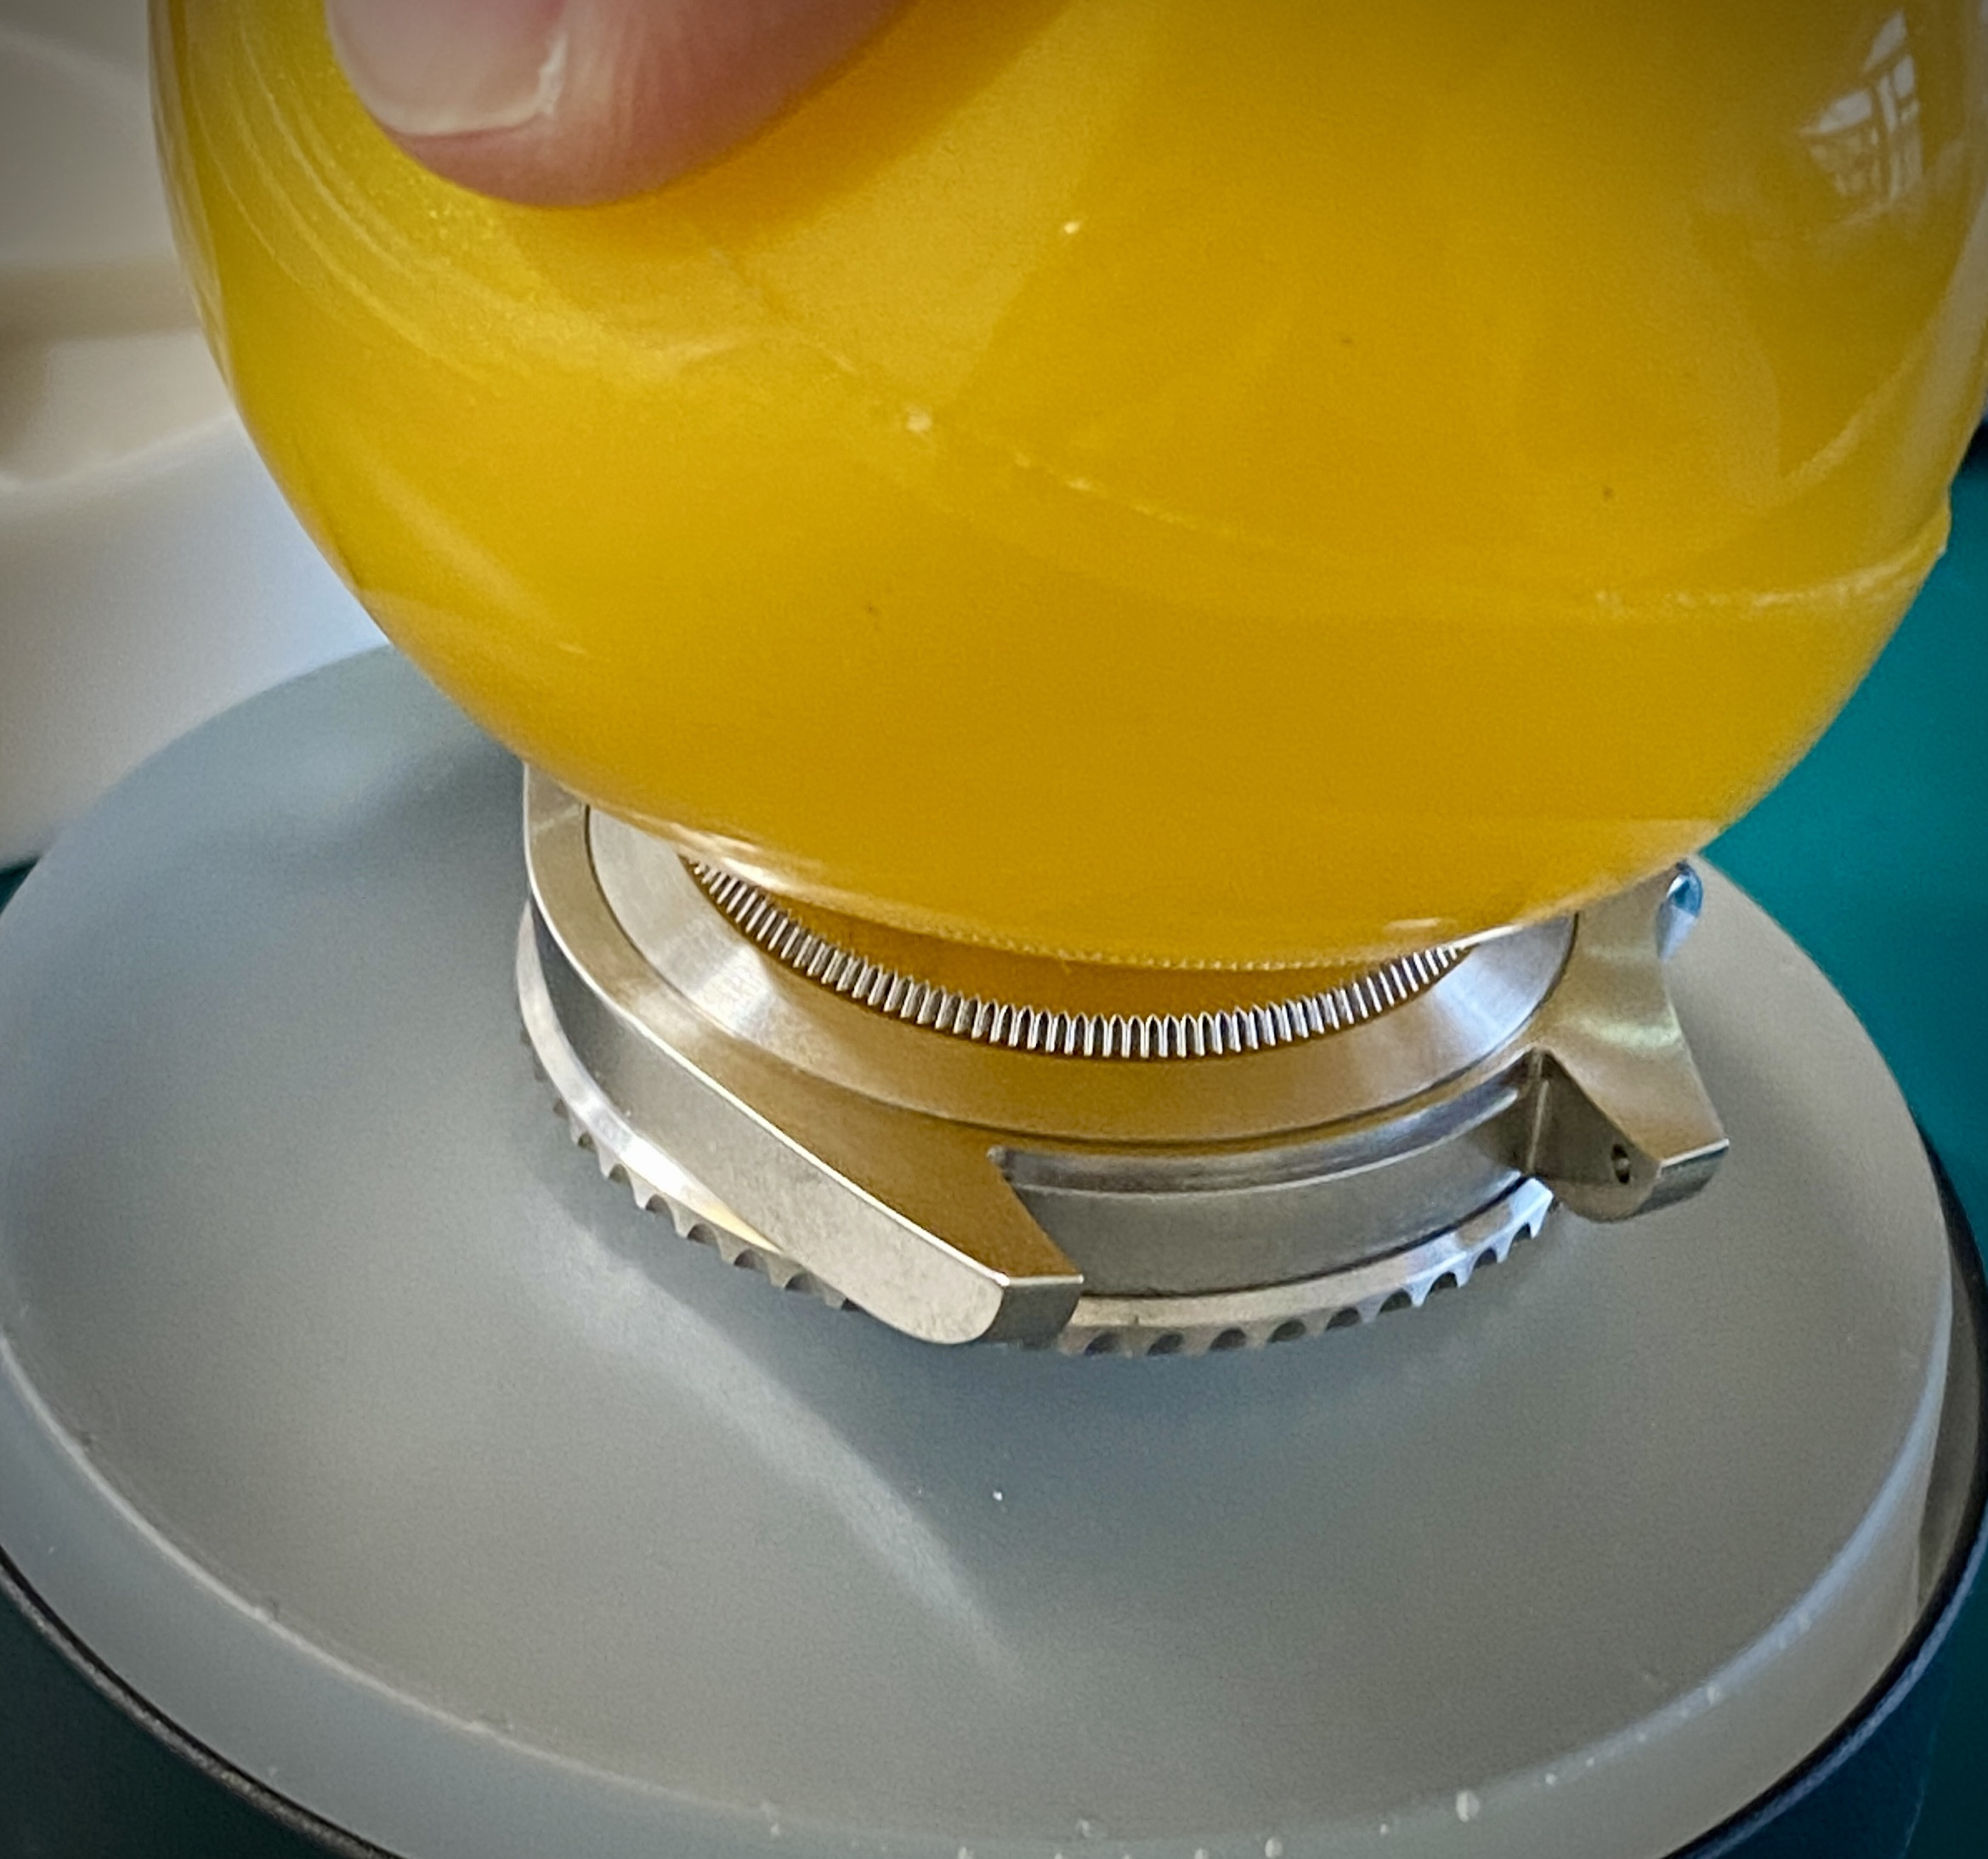
Congrats you now have a modded VSF 124060 with no phantom date position:
Congratulations, your new ZeroCool-Dogwood 3230 mod part has arrived in the mail. The first thing you're going to need to do is remove the bracelet from your watch. I'm assuming you are able to do this without my help, and if you can't, then you might want to reconsider if you're up for doing this install yourself.

Next we're going to need to get the case back open. My preferred method is the rubber ball. But if you're in a pinch, a wadded up ball of duct tape also works.

Next we need to remove the rotor. While this isn't strictly speaking necessary, it makes everything we're about to do WAY easier. You also don't want to have the movement resting on the rotor because that might stress the bearing block which may introduce slop and increase rotor noise. To remove the rotor, you'll need a small bespoke triangular screw driver socket. These can be purchased on AliExpress for around $20, just search for "3235 rotor tool" and you'll find what you need.

When you remove the rotor, watch out for the small spacer ring / washer that sits under the rotor bearing block. You don't want to lose that. Set these parts aside in a clean parts tray.

Next you'll want to release the stem. The 323X movement's keyless works is pretty impervious to getting upset, and it doesn't really matter what crown position you're in when you push the release button. Just apply a little pressure and the stem should slide out.

Here's what the crown should look like once it's come out. Set the crown and stem aside in your parts tray.

Now we need to remove the two case clamps. Use a 1.4mm (non-magnetic) screw driver to release the two clamps. It's helpful to loosen the first one a bit, then fully remove the second one before coming back to the first -- this method avoids any potential for sudden tension release (and parts flying across the room).

Now we need to get the movement out of the case. The easiest way to do this is to place a case cushion on top of the open back of the watch case, then flip the whole sandwich over, and lift the case up off the movement.

To remove the hands, I prefer to use hand removal lever tools rather than the "presto" style tool. I also lay a clean sheet of plastic food wrap over the dial to protect both the dial and the hands.

Now is a good time to mention that whenever you're handing watch parts (but especially hands and dials) you should wear finger cots to keep the oils from your fingers from getting onto any of the parts.

Removing the dial from a vs3235 movement is simple because (like gen) the dial is a press fit around the lip. Simply insert a tool like a hand lever or a screw driver along the edge and twist to separate the dial from the movement.

Now is a good time to transfer the movement into a movement holder if you have one. When loading the movement into the holder be sure that when you tighten it down, you're not touching the balance wheel.

Now we need to remove the date plate. Use a 1.2mm screw driver to remove the five blue screws that secure the date plate.

This is what the removed date plate and its screws should look like.

You can remove the date jumper spring from the date plate since it is not necessary on this no-date watch.

This is what the movement should look like after you've removed the date plate.

You can remove the date corrector, and date intermediate pinion from the movement. These parts are no longer necessary and can be set aside.

You'll also want to remove the hour wheel. Set this aside in your parts tray.

Optionally, you can now remove the entire date jumper assembly. This is not a necessary component on a no-date watch, so it can be removed. Use a 1.4mm screw driver to unscrew the two screws that secure the assembly.

This is what the assembly should look like as you remove it. Set these parts aside. These parts aren't worthless, they are useful as spares for people who have vs3235 powered watches, so keep these parts in a clean dry place. You never know when somebody is going to post a WTB ad looking for vs3235 date parts.

Next you'll want to re-insert the stem into the movement. This will help keep the keyless works nicely aligned while we go in an replace the setting lever spring. When inserting the stem be gentle and try rotating the stem back and forth if it ever feels like it's stuck.

With the stem in place we need to remove the stock setting lever spring. To do this, use a 1.2mm screw driver to remove the two screws securing it.

This is what the stock setting lever spring looks like when it has been removed. Note, be careful that the tiny steel pinion that sits between the sliding pinion and the large brass minute wheel stays in place. If they keyless works was over-oiled, then it's possible that the little steel pinion will stick to the bottom of the setting lever spring.

Now it's time to install the ZeroCool-Dogwood custom setting lever spring.

Align the new setting lever spring with the two mounting holes. Don't worry if the lobe at the end of the spring arm is in the right position relative to the pin on the setting lever, just get the two screw holes aligned.

Use the two original screws that came from the stock setting lever spring to secure the new setting lever spring. Make sure that the setting lever spring sits flush with the main plate next to both mounting screws. The mounting holes on the custom setting lever spring are tight by design to ensure the spring sits in the correct location, you may need to apply downward pressure with a tool (e.g. a screw driver) to get the new setting lever spring to pop down and become flush. Don't use the mounting screws to apply downward pressure by tightening them if the new setting lever spring isn't already down and flush. The mounting screws have tiny threads which are easy to strip. The mounting screws are strong enough to hold the part in place, but aren't strong enough to squish the part onto the mounting posts if things aren't correctly aligned.

Next we're going to need to apply a tiny amount of lubrication onto the lobe of the new setting lever spring. You have a few options here: HP-1300, D-5, or Moebius 9504. Honestly you could use any of these lubricants and it would be fine, I used HP-1300.

Your goal when lubricating the lobe of the setting lever spring is to ensure there's a film of oil or grease in between the pin on the setting lever and the lobe of the setting lever spring so that those two parts can slide past one another without sticking. If you're using D-5 or HP-1300, you'll want to use an oiler and only apply as much oil as will be held between the pin and the lobe with surface tension. You do NOT want to apply too much lubricant here. Lubricants will spread and if they get to the wrong place in a watch movement they will cause it to stall. Less is more when it comes to watch lubrication.

After you've applied the lubrication to the lobe, you can cycle the crown in and out to get a feel for the gen-like two crown positions. This is what the setting lever and setting lever spring should look like in both the positions. The pin should come to rest with a nice positive click on both sides of the setting lever spring lobe.


Now it's time to start re-assembly of the movement. Start by putting the hour wheel back in place.

Next you can put the date plate back on. There's no need to replace all the date works parts since they aren't needed.

Use a 1.2mm screw driver to secure the date plate with the five blue screws from before. This is what things should look like after the date plate as been secured.

These are the unused date works parts, and old setting lever spring which you should have left over.

Now it's time to get the dial back onto your movement. The dial is a press fit, so simply align the 3 o'clock marker with the stem and press it down onto the movement. The lip on the back of the dial should hug the date plate of the movement and keep everything snugly in place.

Setting the hands on a no-date movement is easier than on a movement with a date, because you can simply press the hour hand on and then use the crown to adjust it to point exactly at 12. Be sure to use soft tip tweezers when handling hands.

I have a fancy hand pressing tool, but it's possible to get good results using a free hand tools too.

Before setting the minute hand, be sure the align the hour hand exactly at 12 o'clock.

After setting the hour and minute hand, check to make sure that there is space between the hands and that the hour hand isn't rubbing on the dial.

There's no need to align the seconds hand when you are placing / pressing it onto the watch.

Before we case the movement up, remove the crown (sorry I couldn't get a picture of this because it involves using both hands), I hold the movement with my left fingers by the crown on it's side (9-facing down, crown facing upwards), and I use my right hand to use tweezers to push the stem release button. The stem will pull free in my left fingers and the movement can be let down dial side up on the case cushion.
Now use a blower to blast away any dust or lint that may have found its way onto the dial or hands. (It's a really good idea to use a swiffer to dust your work area before you start on a project like this, and if you have a lint roller, it's a good idea to roll down the clothes you'll be wearing too -- you want a super clean work environment).

Now place the case over the movement, and flip the sandwich over so that the movement is inside the case and the case is crystal down on your case cushion. In this position we'll re-insert the crown. Do this the same as you did before, be gentle, use a finger (in a finger cot) on the back of the movement to hold the movement steady as you slide the stem in. Be careful, you don't want to upset the keyless works, if you do, you have to go all the way back to removing the setting lever spring to reset it. You're almost done, but you don't want to mess up here.

With the stem back into the movement, it's time to loosely re-install the case clamps. Do this one at a time and don't tighten the first one down (just get it threaded) before you install the second one. When both case clamps are threaded, DO NOT fully tighten them down (yet).

Before we tighten down the case clamps we need to ensure that the dial is aligned with the engraving on he rehaut. Flip the watch over and look a the alignment. If the alignment is off, you can flip the watch over and use a couple of tools to try to gently rotate the movement inside the case. There's a limit to how much you can adjust the rotation without putting stress on the stem (and you don't wan to break the stem!!!). If you can't get it perfect, don't worry, just always ski faster than 40mph and you won't get called out.

We're almost done... now we need to re-install the rotor. Make sure the spacer washer is in place on the bearing block and place the rotor onto the movement.

Use your triangular socket tool to secure the rotor fastener, but don't fully tighten the fastener without first moving the rotor a little bit left and right to ensure that the teeth on the rotor are meshed with the teeth of the pinion in the automatic works.

Ensure the rotor swings freely in both directions. If not, loosen the triangular socket fastener a bit, rotate the rotor until the teeth mesh, and then tighten the triangular socket fastener again.

Final step: screw the caseback back into place using the rubber ball.

Congrats you now have a modded VSF 124060 with no phantom date position:
Last edited:
