- 9/8/10
- 964
- 855
- 93
Would love to read that!Following this with great interest...any chance of you posting a tutorial once you've got the bugs worked out?
Would love to read that!Following this with great interest...any chance of you posting a tutorial once you've got the bugs worked out?
May I ask how you got your photoresist so clear? I've recently got some to play with but I hear the film sheets are very difficult. Can you recommend any tips to minimize my future failures?Hi everyone,
I was bothered by the ugly serials that come with "cheap" cases (JKF, Raffles, etc...), but unfortunately I do not have access to a CNC nor to a pantograph engraver.
I know that there are members on the forum that do amazing serial engravings, but I prefer experimenting and doing this type of stuff by myself.
After having a look at this great article https://www.chrono-shop.net/en/blog/rolex-serial-numbers-find-your-rolex-production-date--n23 I decided to create my own design on Inkscape using images of period correct watches matching my builds (currently planning on doing this on 5513 and 1016 builds).
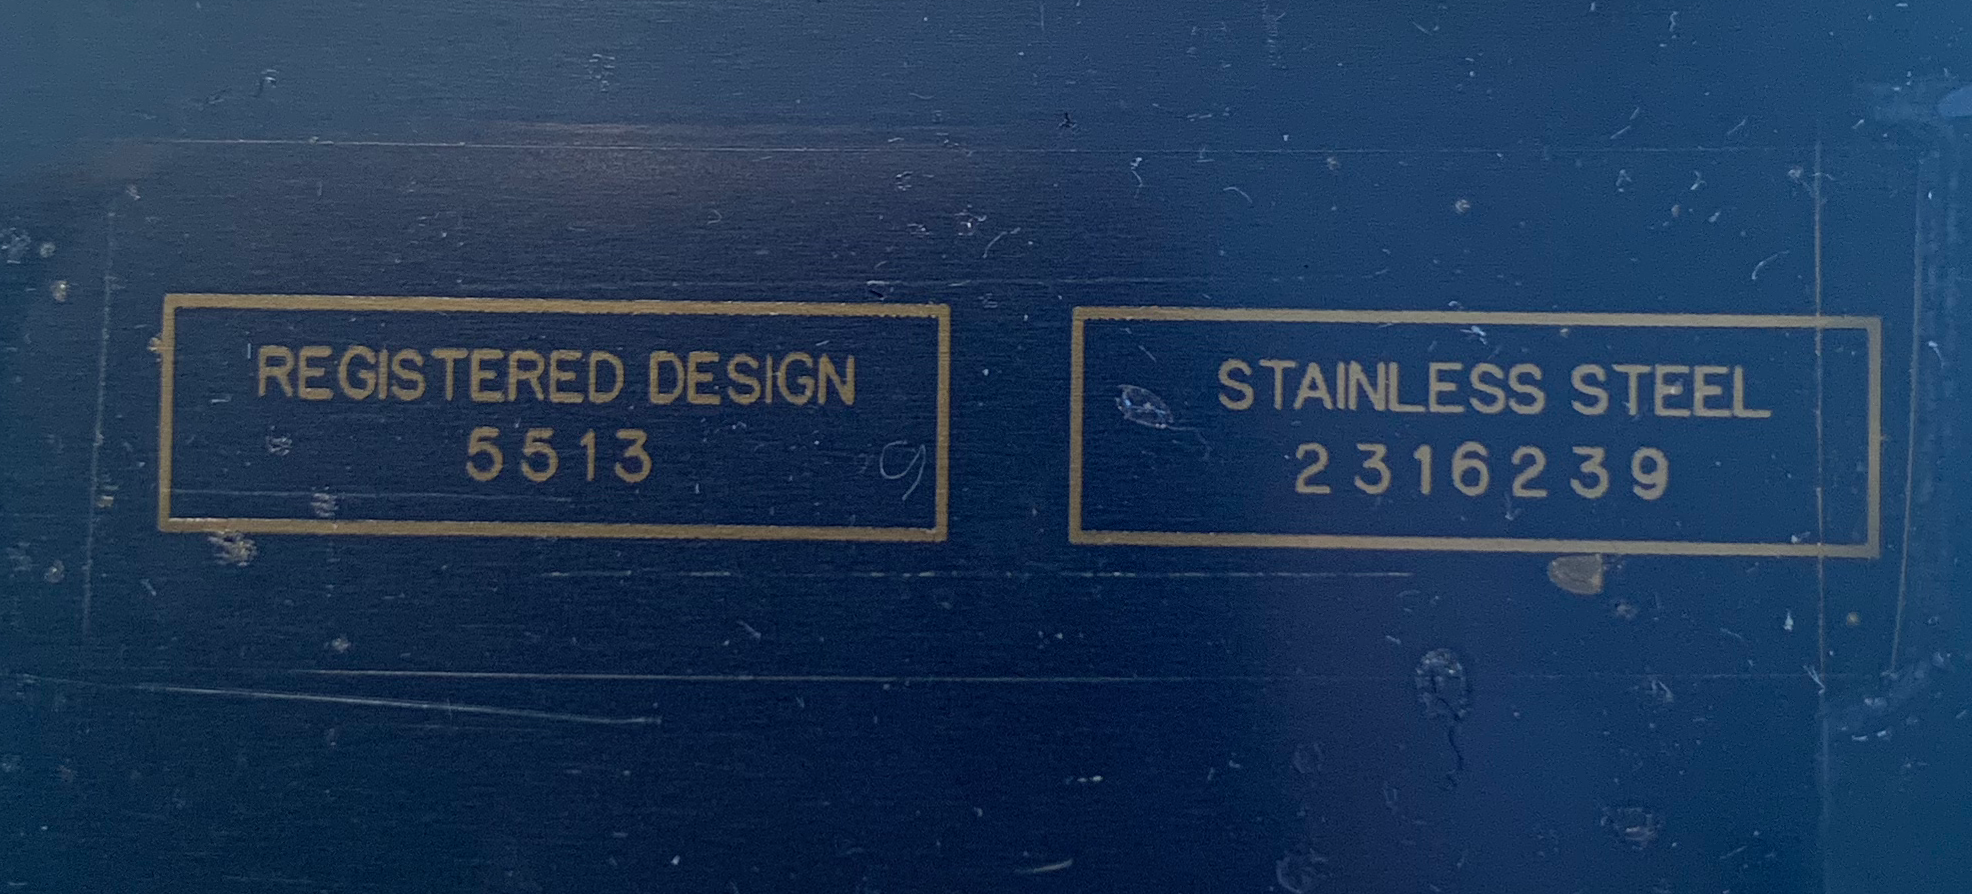
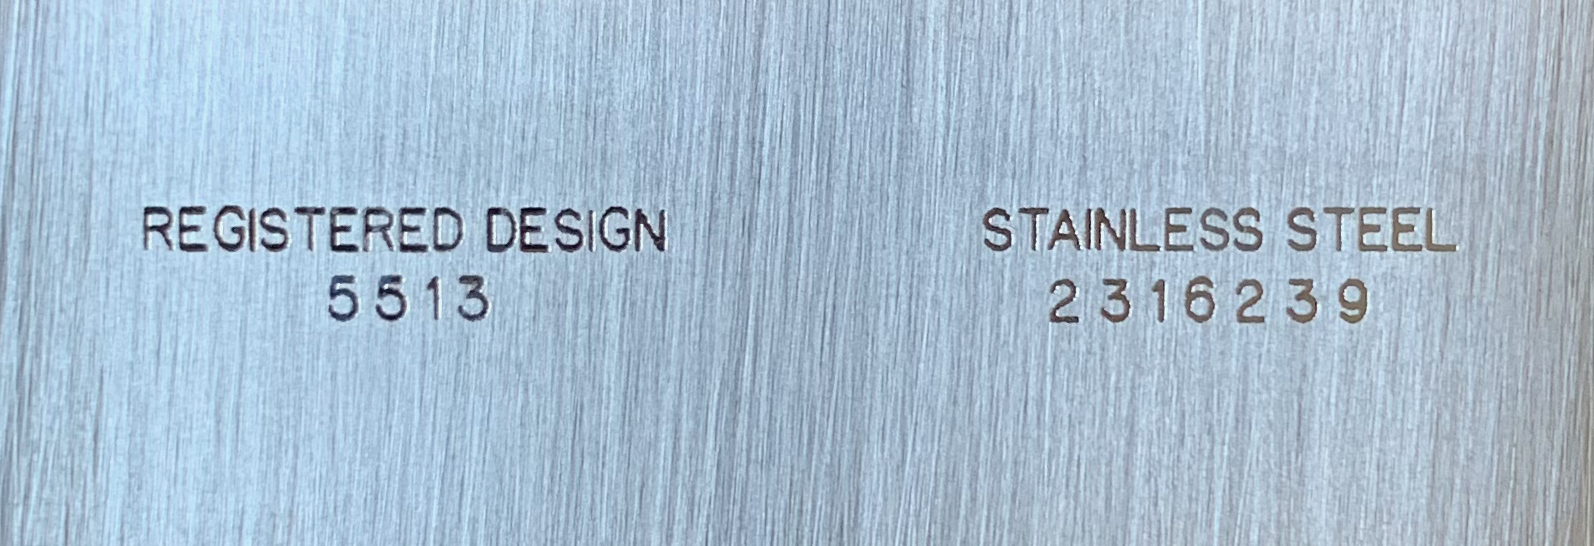
I am not yet ready to do this on an actual case, but for the moment I did some testing on a piece of SS. The process is done using PCB photosensitive film and saltwater etching and I think the results are pretty good considering how tiny the letters/numbers are.
Here some pics for you to judge!


Apart from the top portion of the letter "A" which should be flat, I think the results are good; remember that these are less than 20mm wide and look more consistent IRL.
Let me know what you think and if I should change something or if you see something wrong other than the letter "A", I am currently testing so your feedback is appreciated.
I will post progress and results as soon as I perfect the technique!
I have no clue what I'mMay I ask how you got your photoresist so clear? I've recently got some to play with but I hear the film sheets are very difficult. Can you recommend any tips to minimize my future failures?
What did you use for the negative relief, or whatever the proper term is? Did you use a laser printer for the final result?
The saltwater etching would be perfect regarding the dezincification of brass for a red patina gilt dial, and your photoresist technique might be perfect as well for prior to normal etching.
Thinking you might've accidentally killed two birds with one stone...
Your results are exceptional!!!
Sorry, missed your question.May I ask how you got your photoresist so clear? I've recently got some to play with but I hear the film sheets are very difficult. Can you recommend any tips to minimize my future failures?
What did you use for the negative relief, or whatever the proper term is? Did you use a laser printer for the final result?
The saltwater etching would be perfect regarding the dezincification of brass for a red patina gilt dial, and your photoresist technique might be perfect as well for prior to normal etching.
Thinking you might've accidentally killed two birds with one stone...
Your results are exceptional!!!
Hi @Megahz1Sorry, missed your question.
For the negative I just printed my designs in a local print shop with a laser printer on a transparent paper they provided, so nothing fancy.
The film was bought on AE for around €3 and I applied it with the tip of an electric iron, protecting it with a cloth to avoid melting it.
Exposed the film with the lamp in my kitchen. Then the unexposed part was removed with wash soda which can be bought for very cheap.
The whole procedure is kinda "ghetto", but I guess if it works it is not stupid
Yes a simple iron for clothes and a cotton cloth.If it works, it works!
What type of electric iron? Like, for clothes? Or something smaller for maybe for soldering or wood-burning?
In my head, I'm picture a clothing iron and maybe a cotton wash cloth to prevent melting...
Fix the film onto the watch with the iron, place negative paper with design, expose to light, remove top layer of the film and remove unexposed part with water wash soda solution with the help of a brush/cue tip.Hi @Megahz1
i don't get how you remove the unexposed part?
so you heat glue the printed negative transparent sheet on the PCB, then you expose.
Remove the negative and just wash the PCB? That simple?
and then the letters melt with the electric current and saltwater?
Yes a simple iron for clothes and a cotton cloth.
After that you will have a nice stencil and you can etch with saltwater.
Of course, nothing is free hand. the stencil stays attached to the case and only the exposed part will etch. There are plenty of videos on youtube which demonstrate the process and I think it is easier to understand with a video rather than words. It is pretty easy when you understand the concept.does the stencil protect the parts not to etch?
Sorry for my dumb questions. I am clumsy and if the stencil is just a guide, I will botch the job
sameThink I need to Youtube this as I am struggling to visualise it!
I think we got those two steps.Google “dry film photoresist” to see videos of how the resist mask is made. In this thread the resist mask is the numbers on the case.
Next google “salt water etching”. It shows once you have a resist mask on how the metal is eaten away by a current and salt water.
I don't think you really need to mask the rest of the case. The saltwater etching is going to take the path of least resistance...it will travel through the saltwater, directly to the metal, avoiding any "masked" part.I think we got those two steps.
What we don't get is how the mask remains on the case while the numbers get removed to create the stencil
It would mean that the washing soda only removes the photo exposed lettering?
For the mask the numbers portion would be the only thing that is printed. Everything else would just be transparent. The printed numbers would block the uv light and leave that portion to be washed away.I think we got those two steps.
What we don't get is how the mask remains on the case while the numbers get removed to create the stencil
It would mean that the washing soda only removes the photo exposed lettering?
