• Tired of adverts on RWI? - Subscribe by clicking HERE and PMing Trailboss for instructions and they will magically go away!

Project: Installing Gen Parts on 4130 Daytona Movement

dogwood

I'm Pretty Popular
Patron
Certified
7/9/21
1,890
3,550
113
Canada
With my project to install gen parts on a VS3235 movement currently stalled while I wait for a gen 3235 pallet fork, I opted to start my other gen parts project... installing a gen balance complete, balance bridge, and chronograph seconds wheel on my Noob 4130 Daytona. This will be my first time taking apart a chronograph movement. Wow... chrono movements are WAY more complicated than normal hour-minutes-seconds-date movements. But I do have a service manual for the 4130, so how hard could this be? (Famous last words).

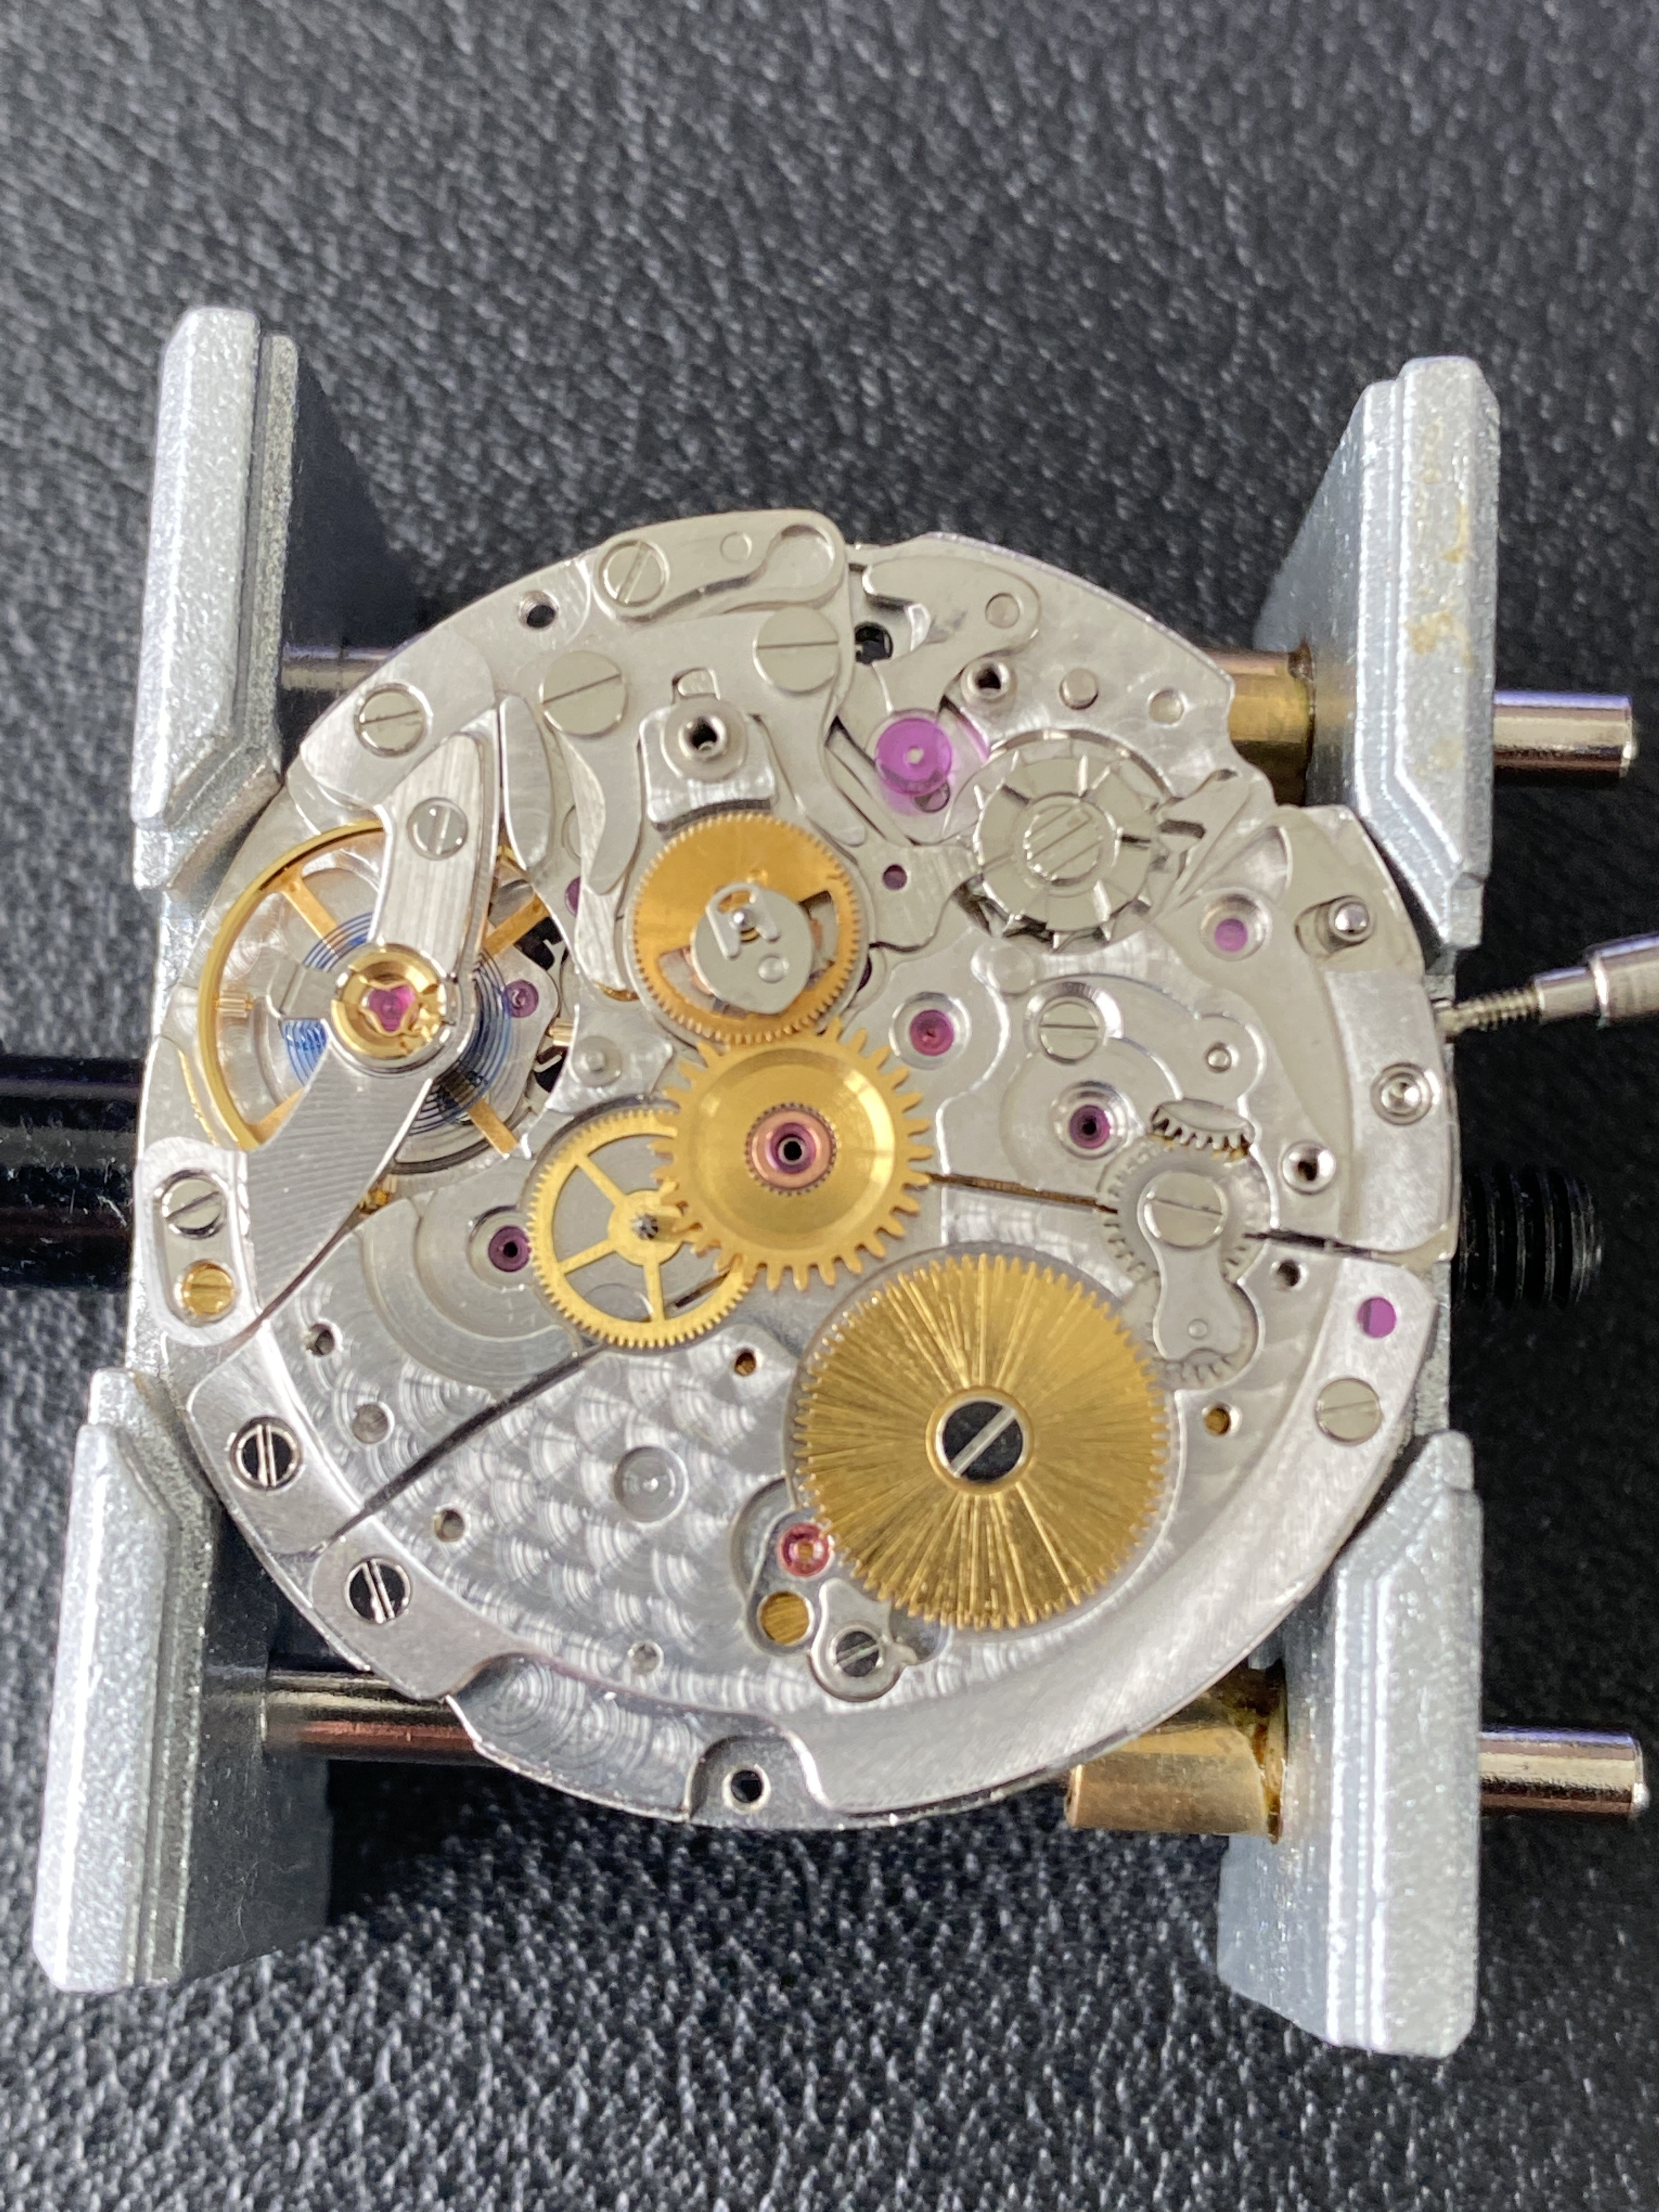
So let's start with the health of the movement before I started messing with it. This watch wasn't serviced after I bought it 9 months ago, and it's holding up pretty well:


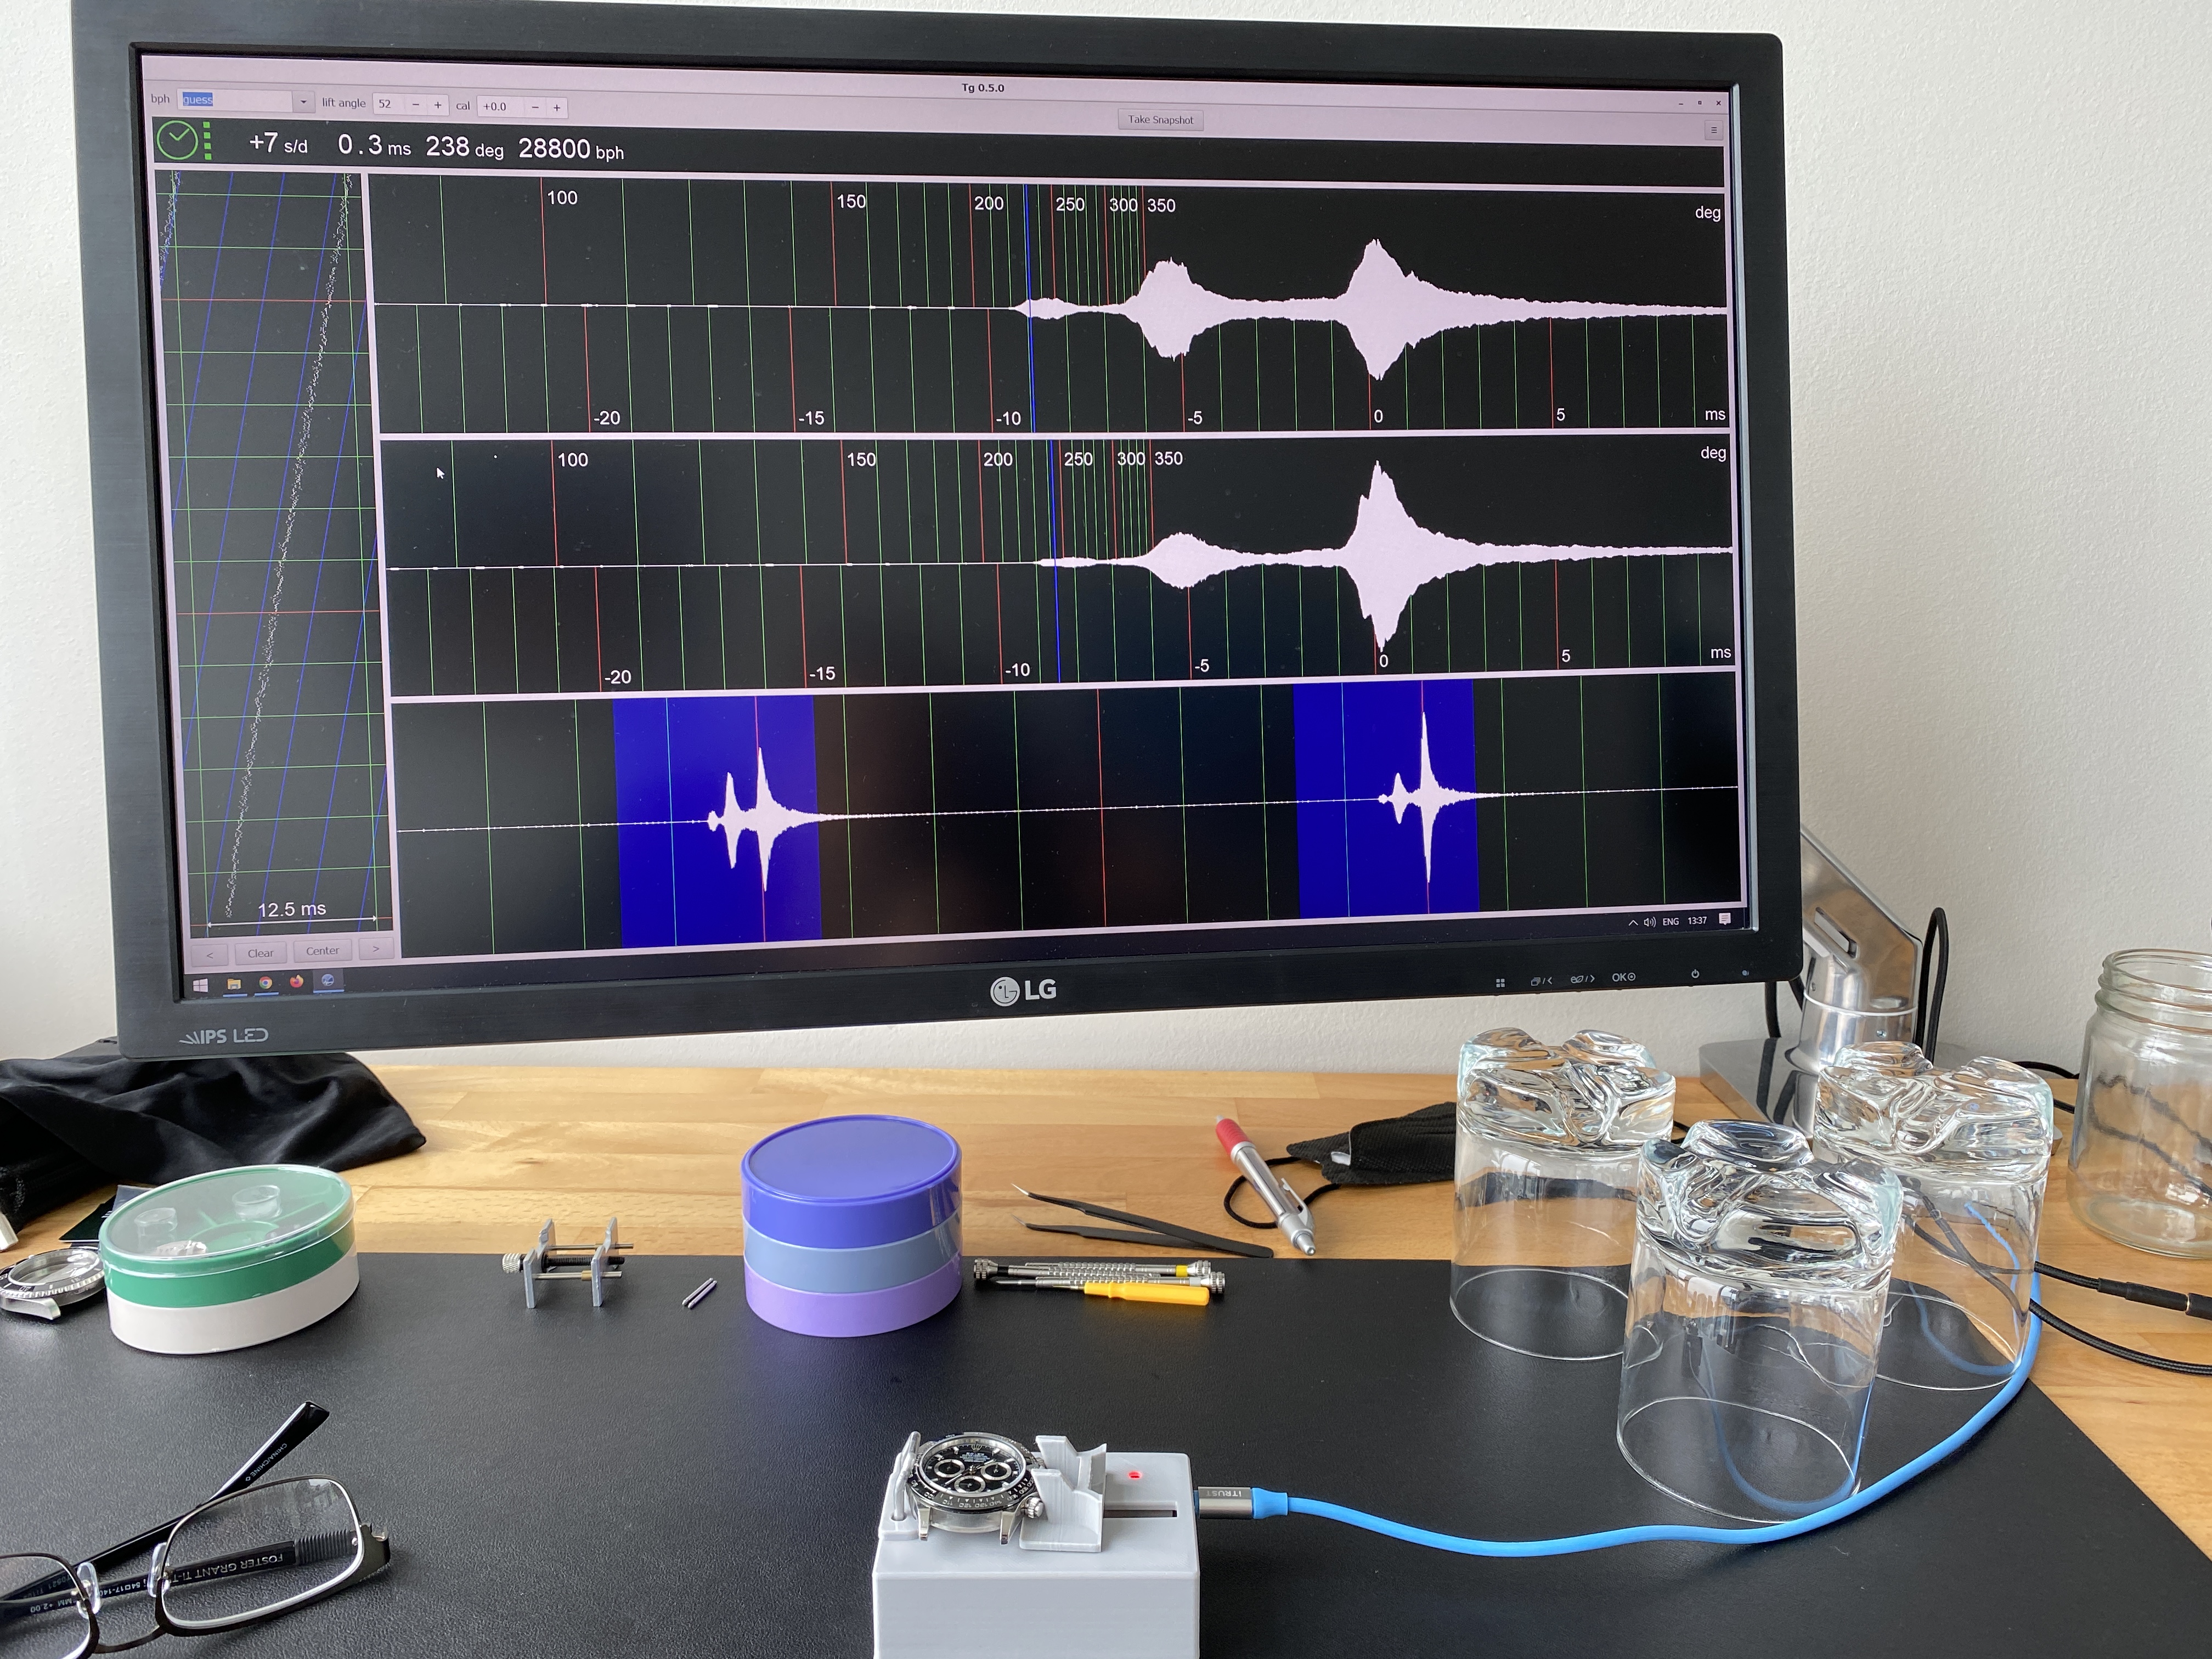
A normal person would leave "good enough" alone... I'm not that kind of person.

Off we go... the process started out pretty well. No problems getting the case open, automatic module off, the movement out of the case, and the hands and dial removed. I've done those things a few times now, and they're starting to feel less scary; although I still go slowly and double / triple check things to make sure I'm not doing anything stupid (don't worry, stupid things happen on their own with me).


Unlike the VS3235 where the gen balance bridge fit nicely onto the VS mainplate, in this case, the gen balance bridge didn't fit well onto the noob 4130 mainplate, so I was going to have to use a broach to open up one of the screw holes.


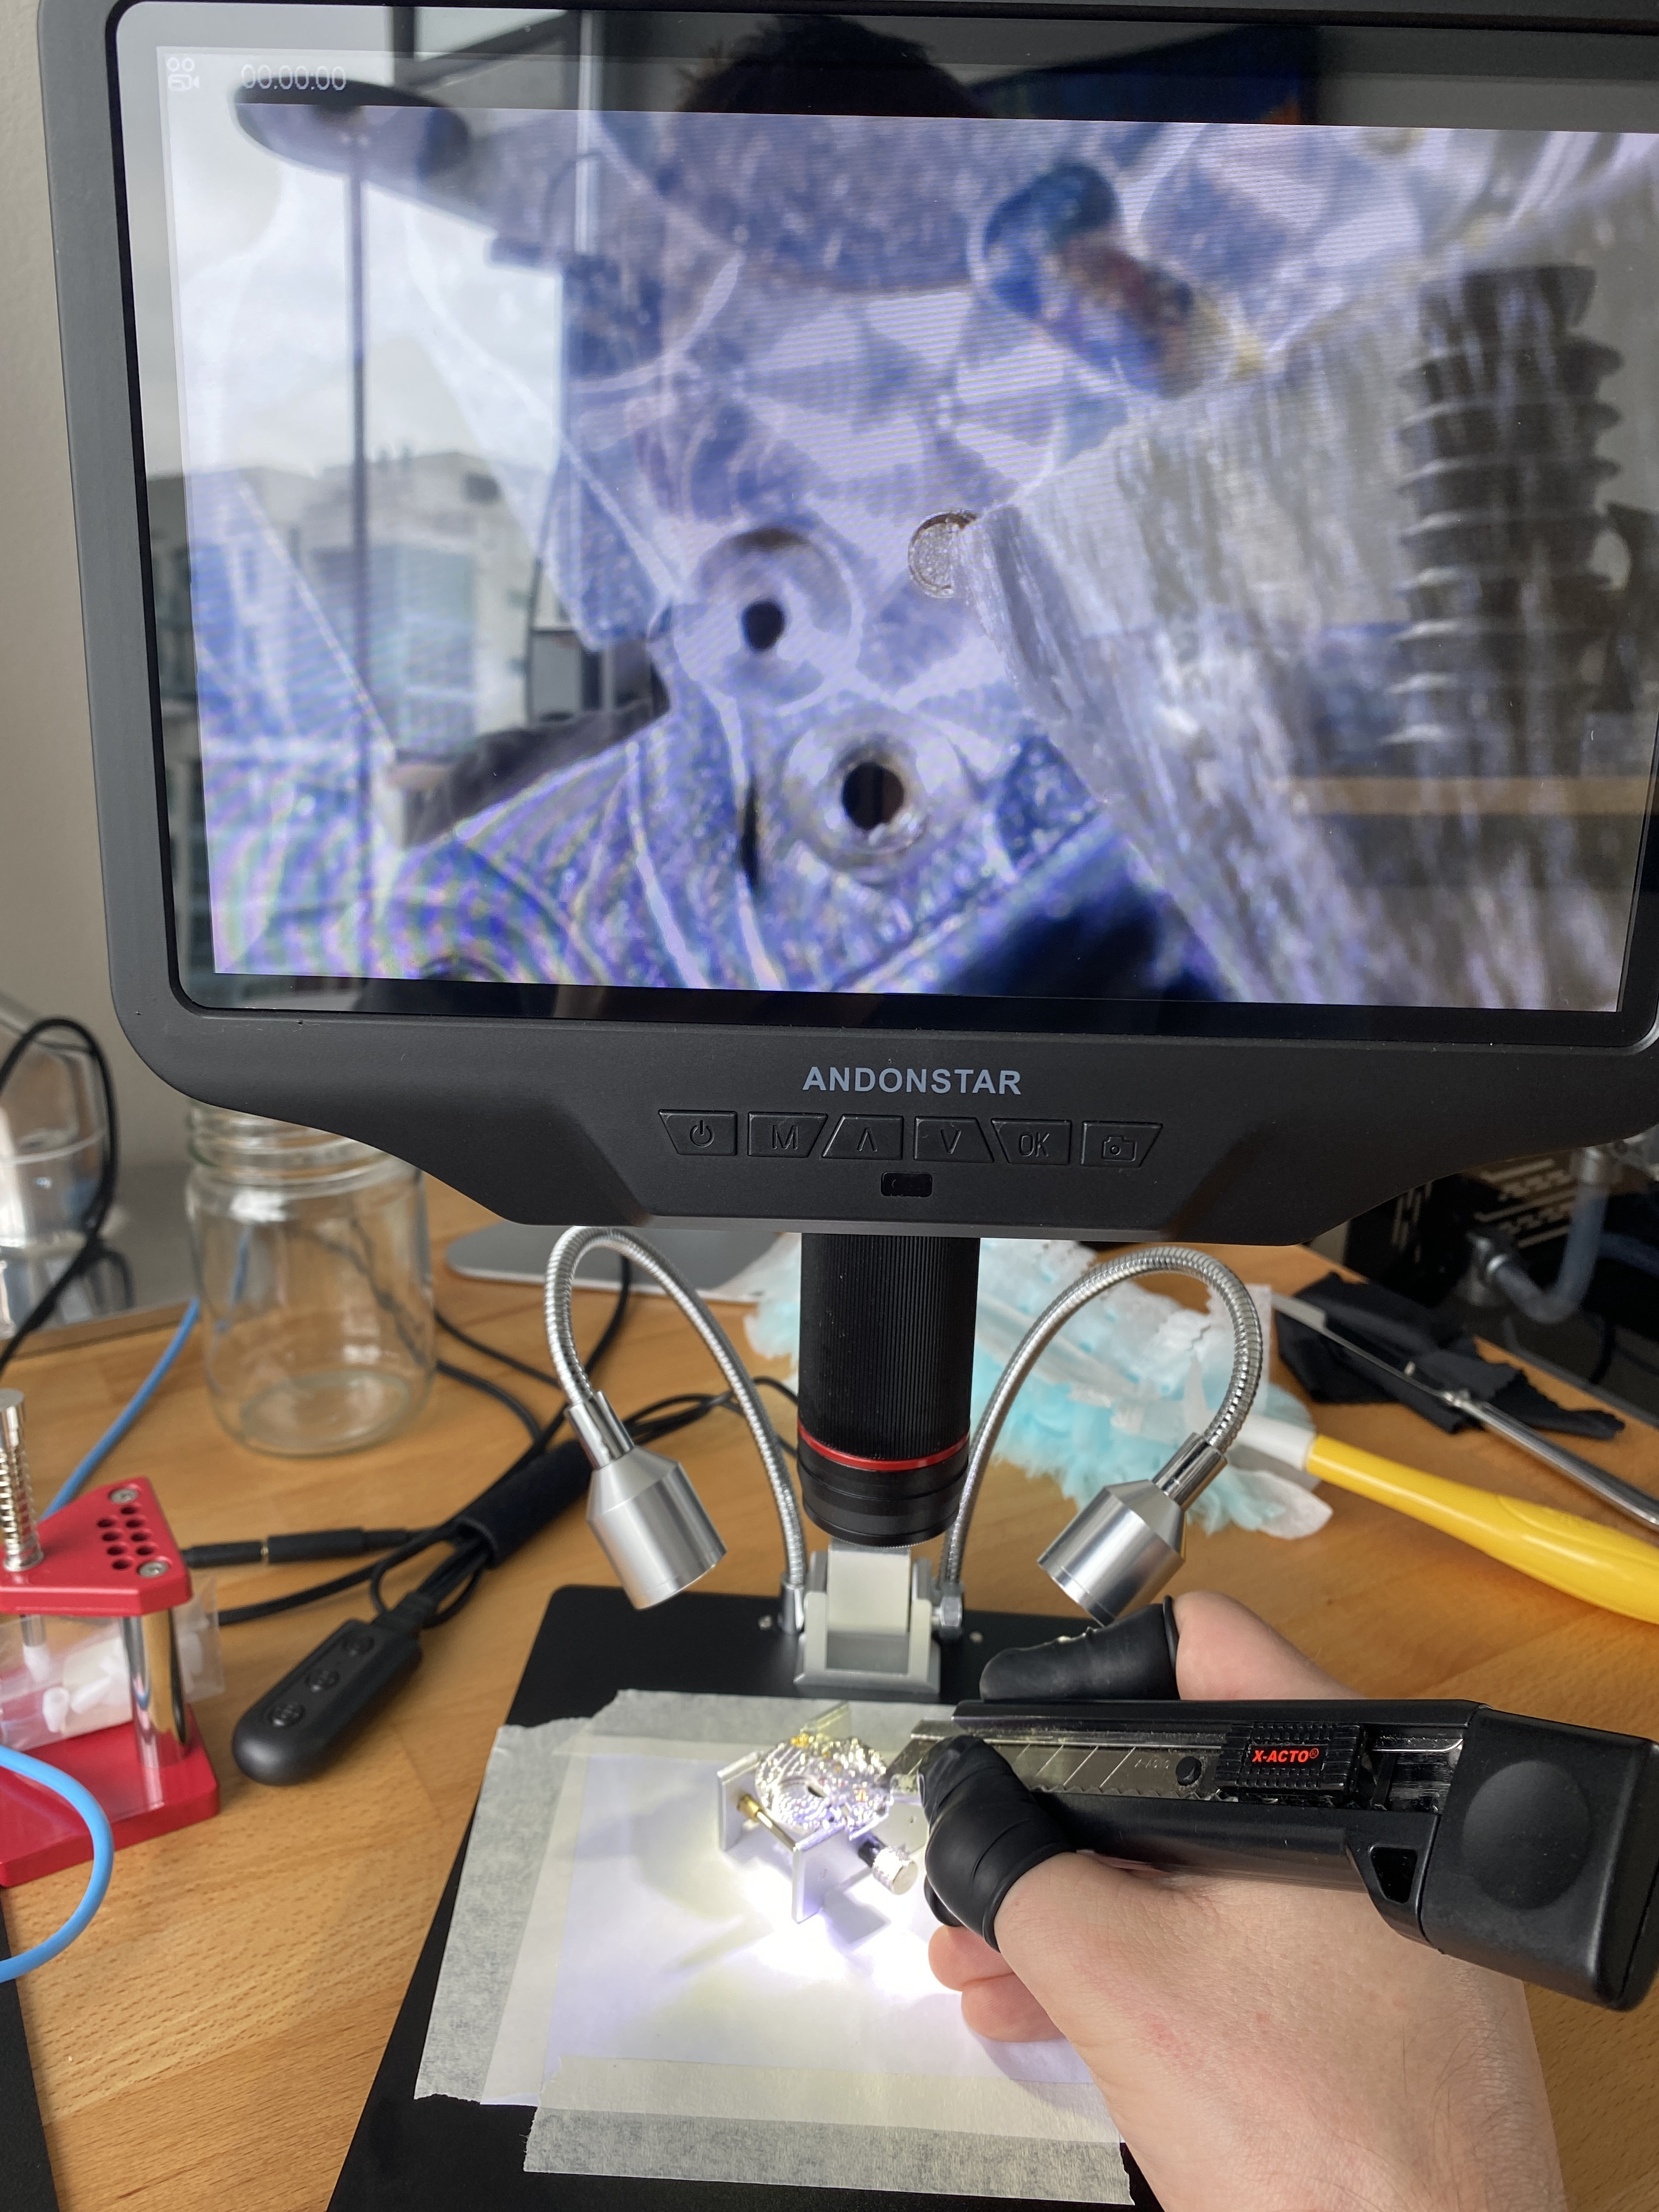
I have an inexpensive set of six broaches (0.8mm to 2.3mm) that I bought from Perrin. I didn't have a good way of holding the gen balance bridge so I used a few layers of foam tape on a small movement holder to improvise a set of soft jaws and a vise. It worked pretty well.


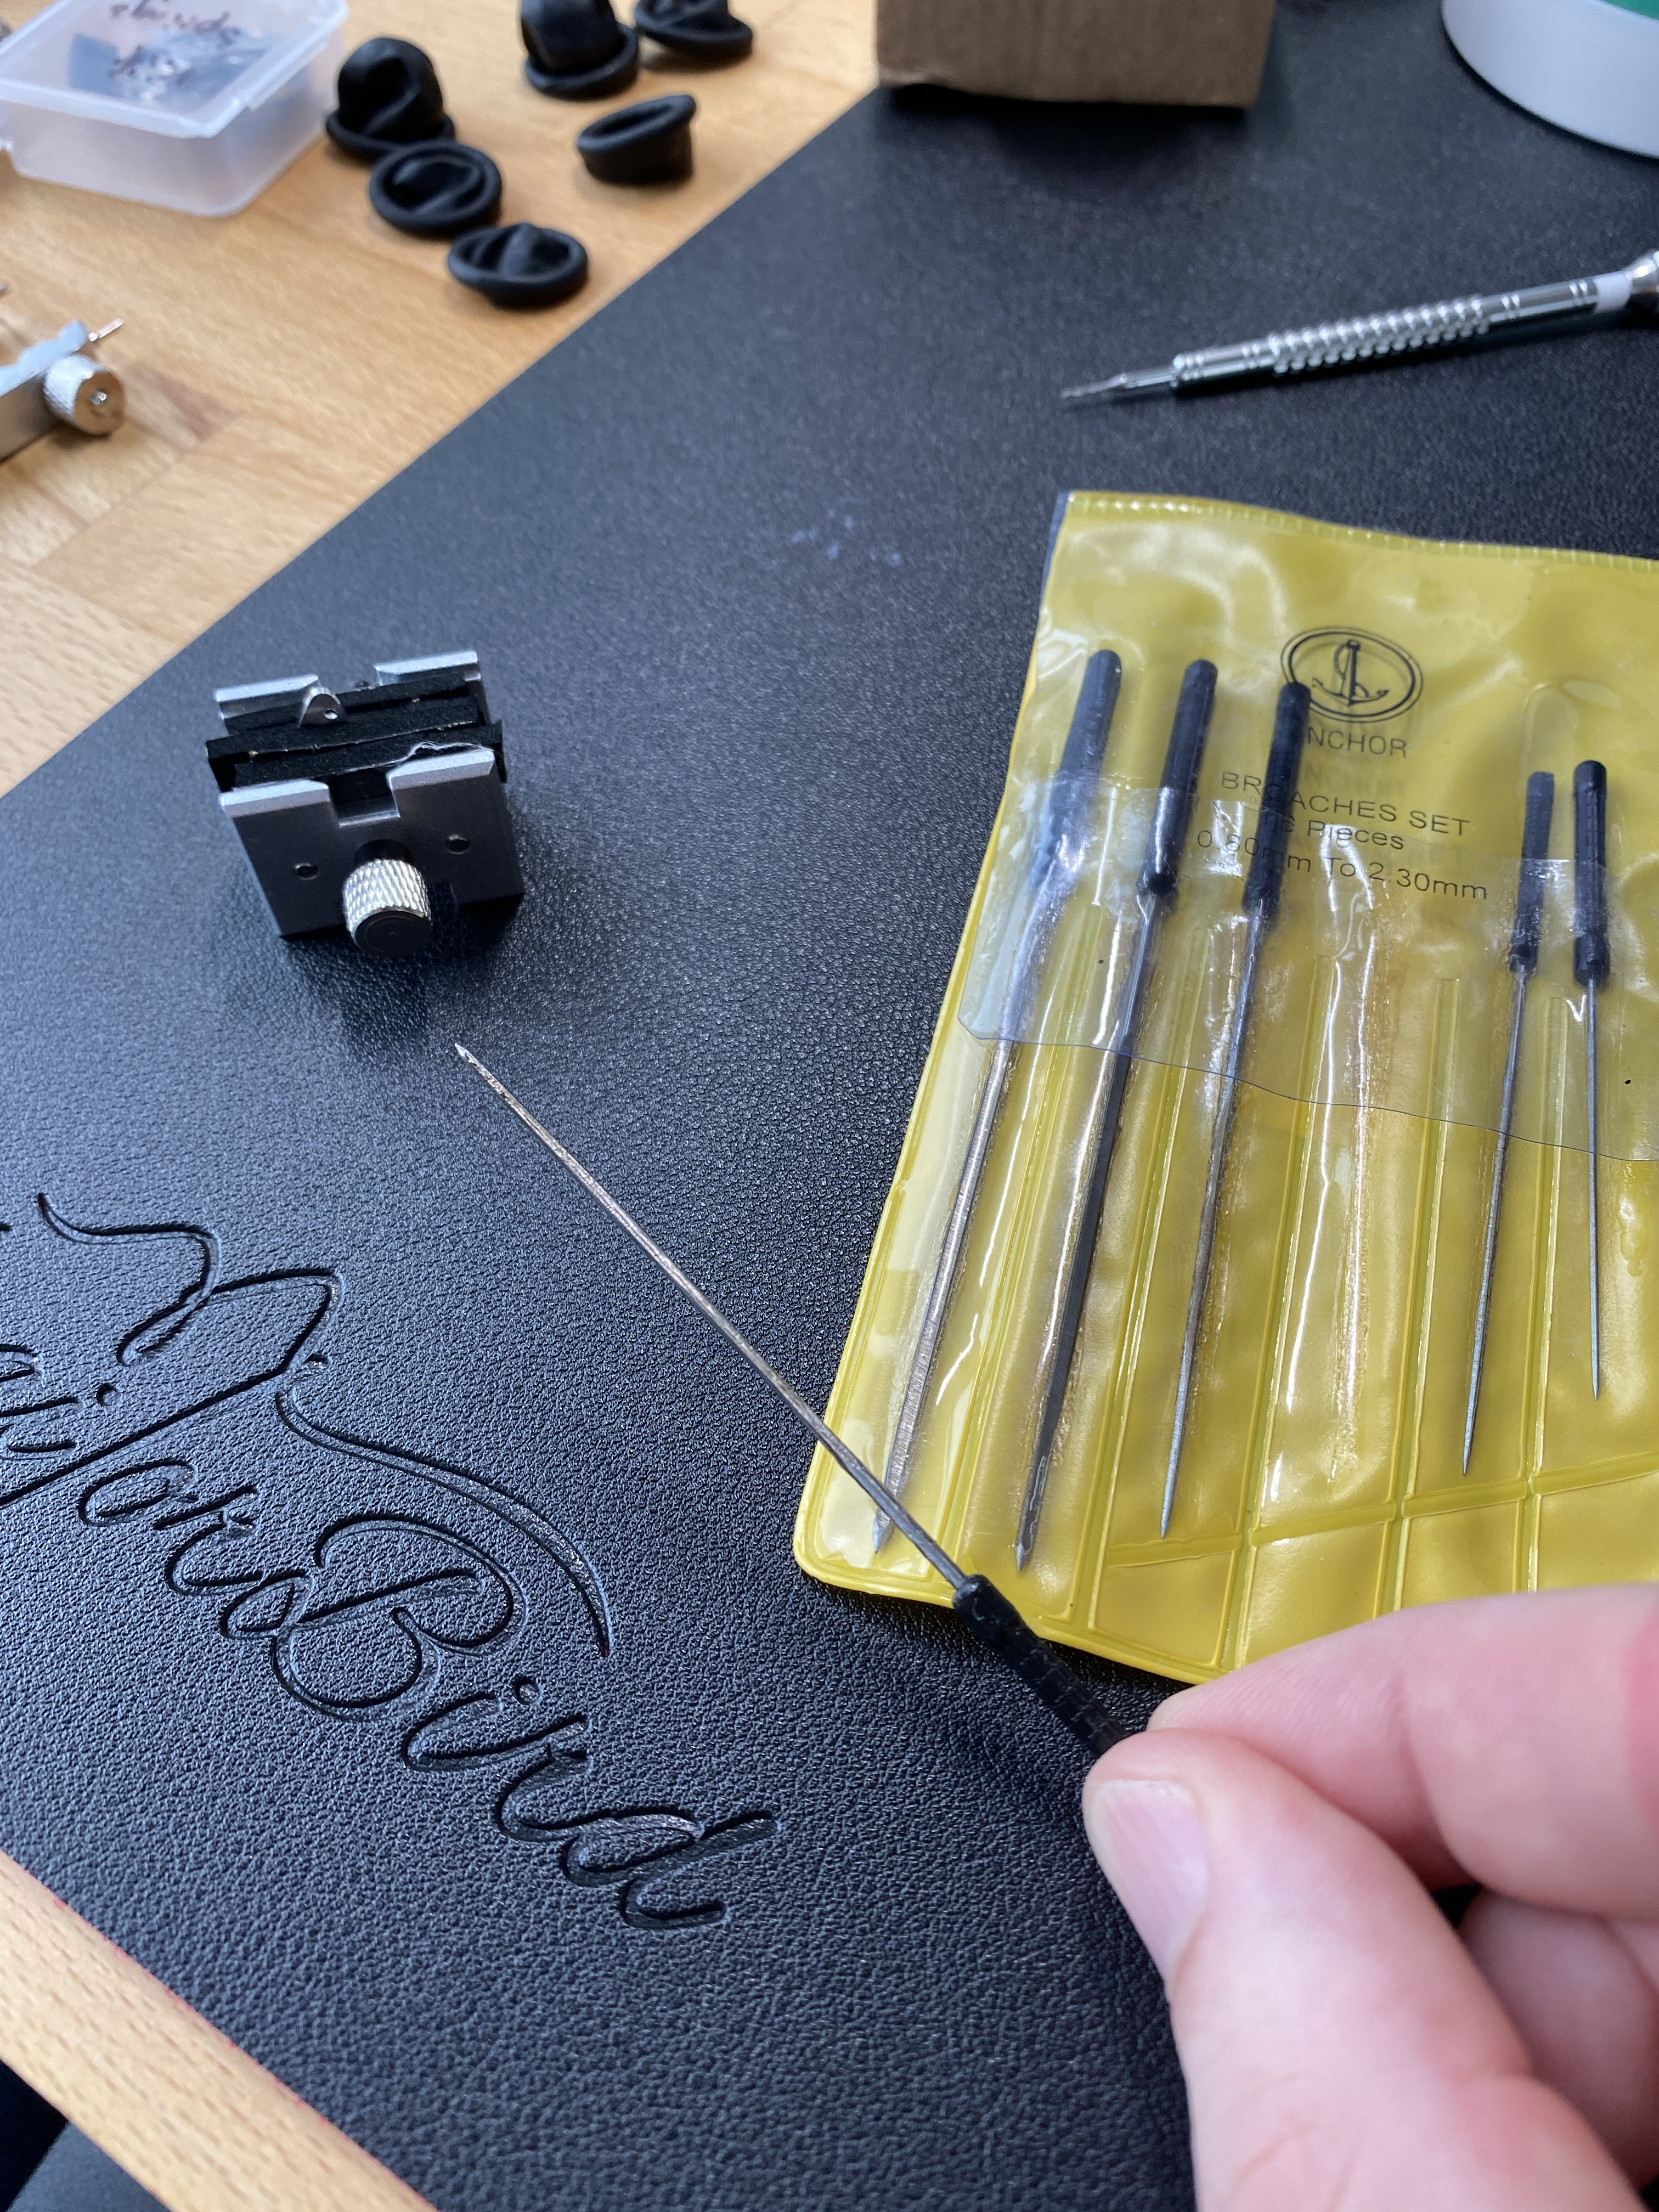
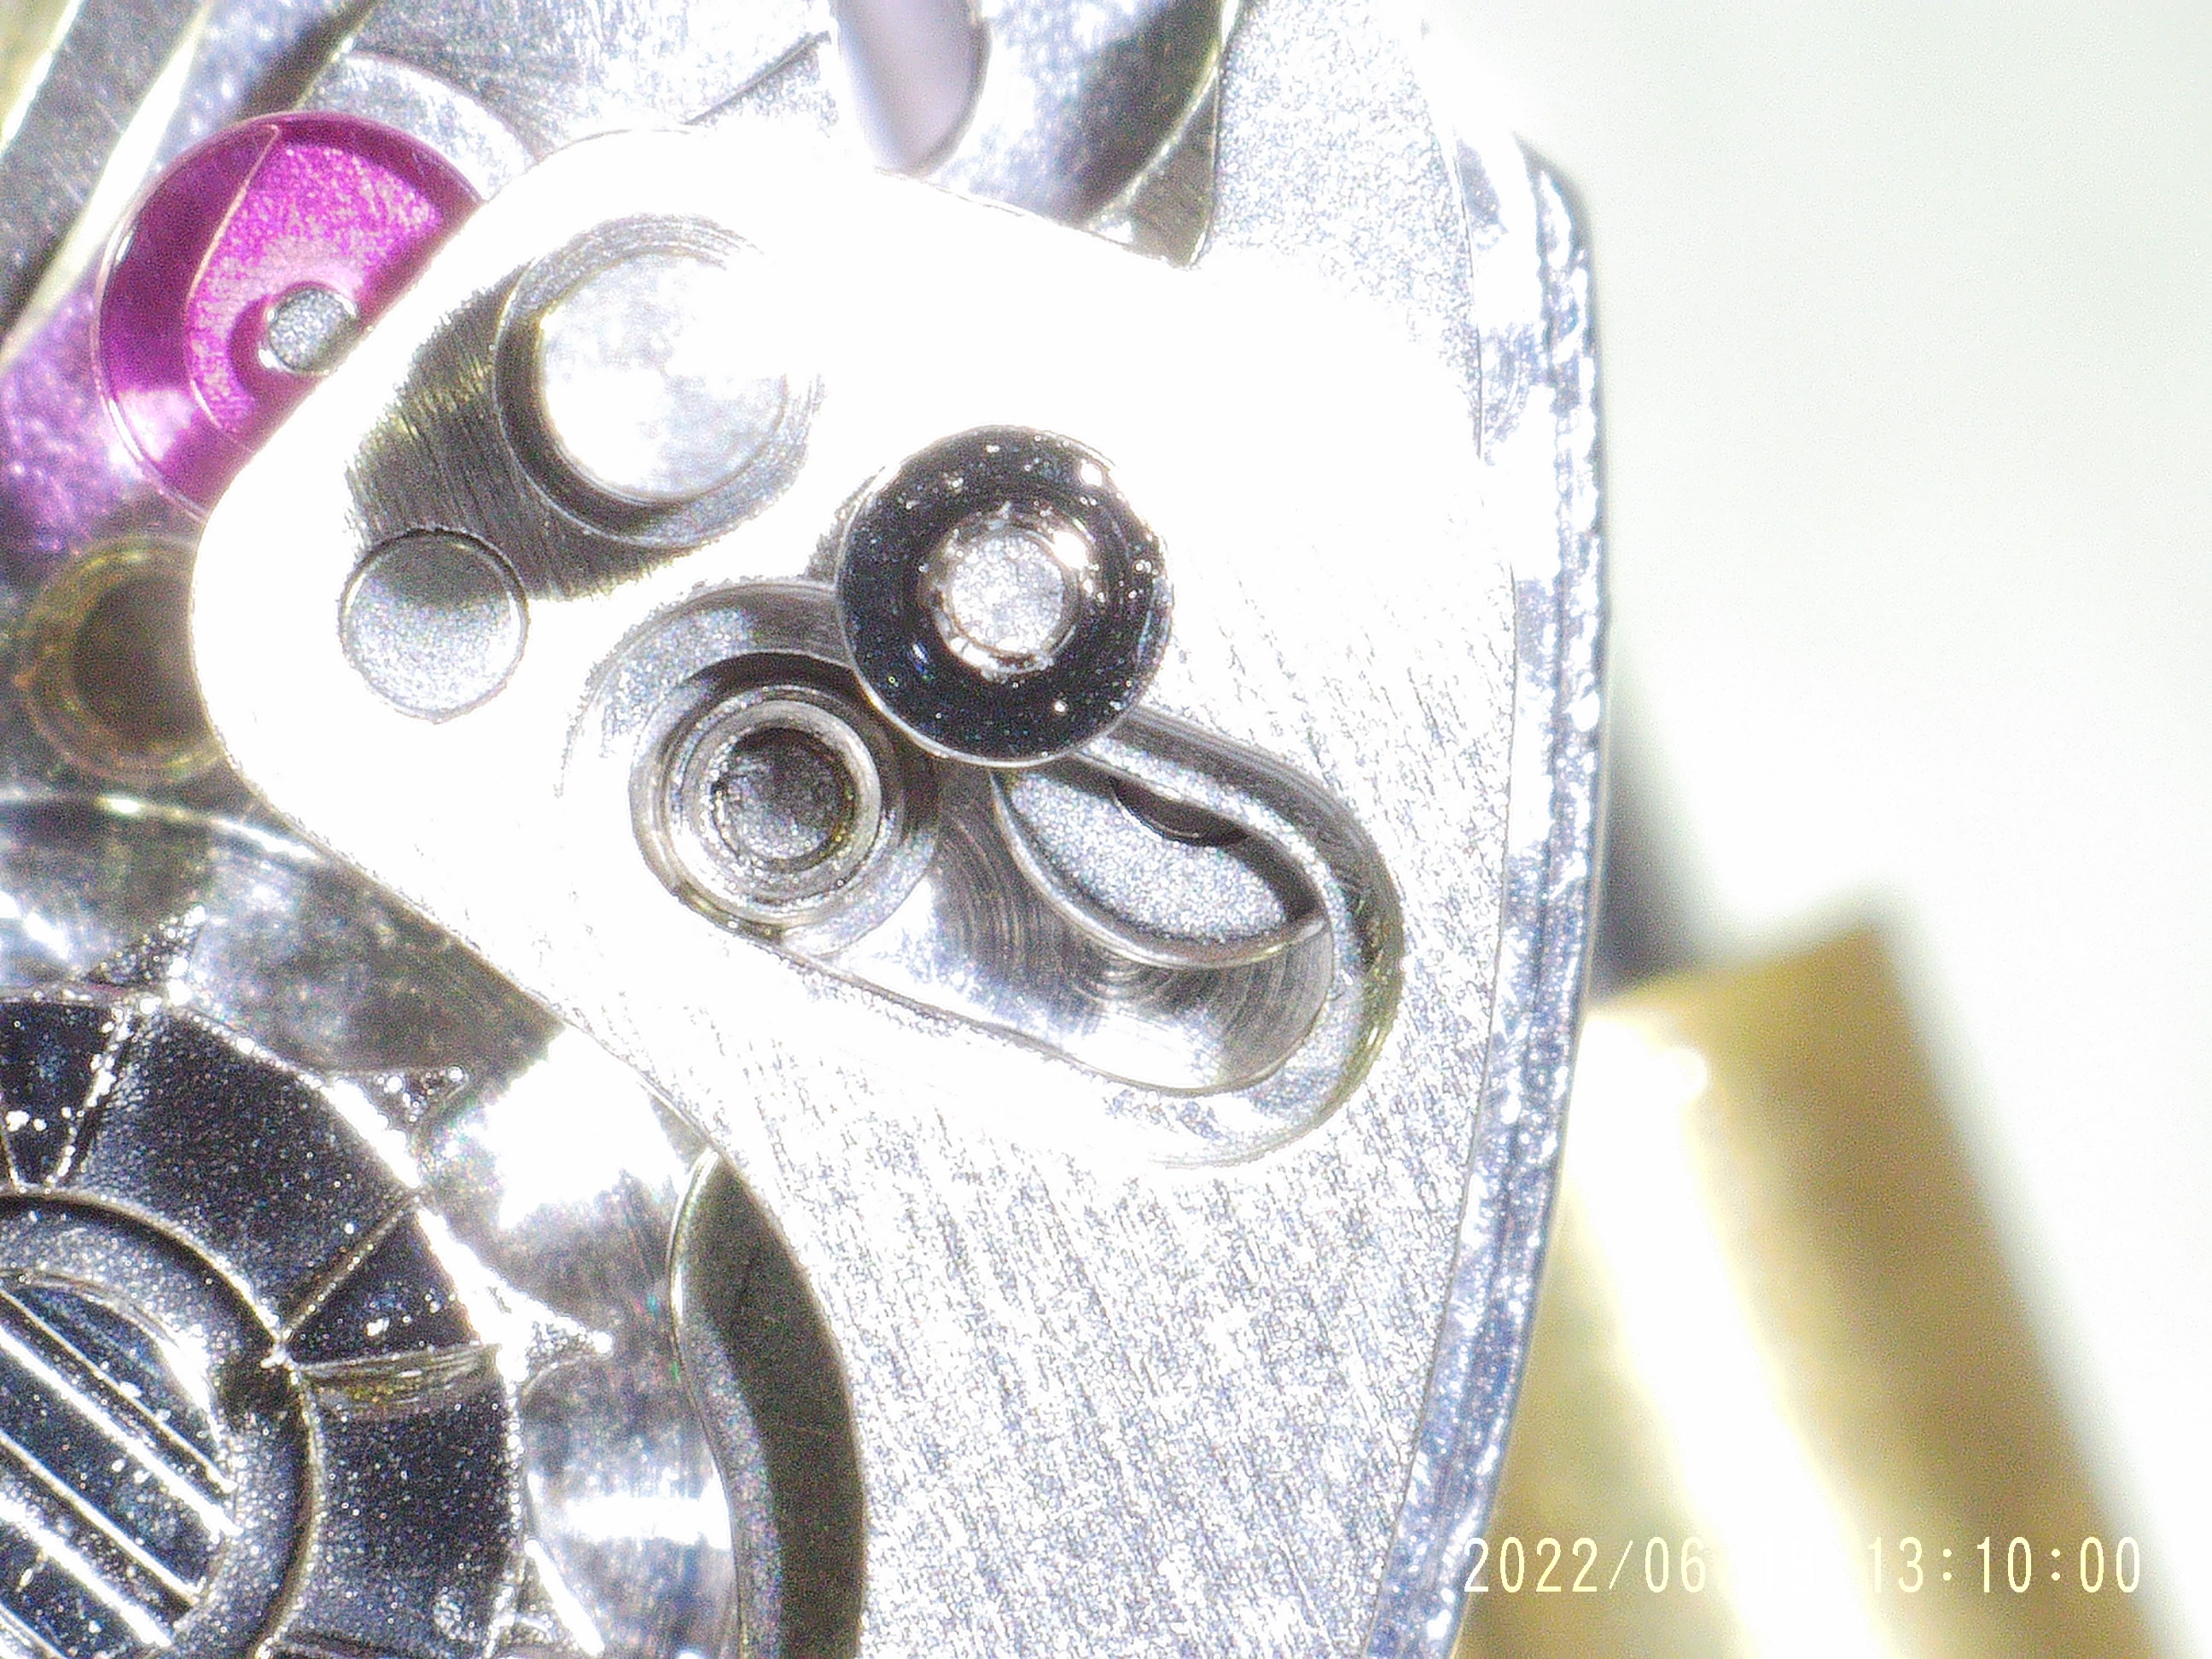
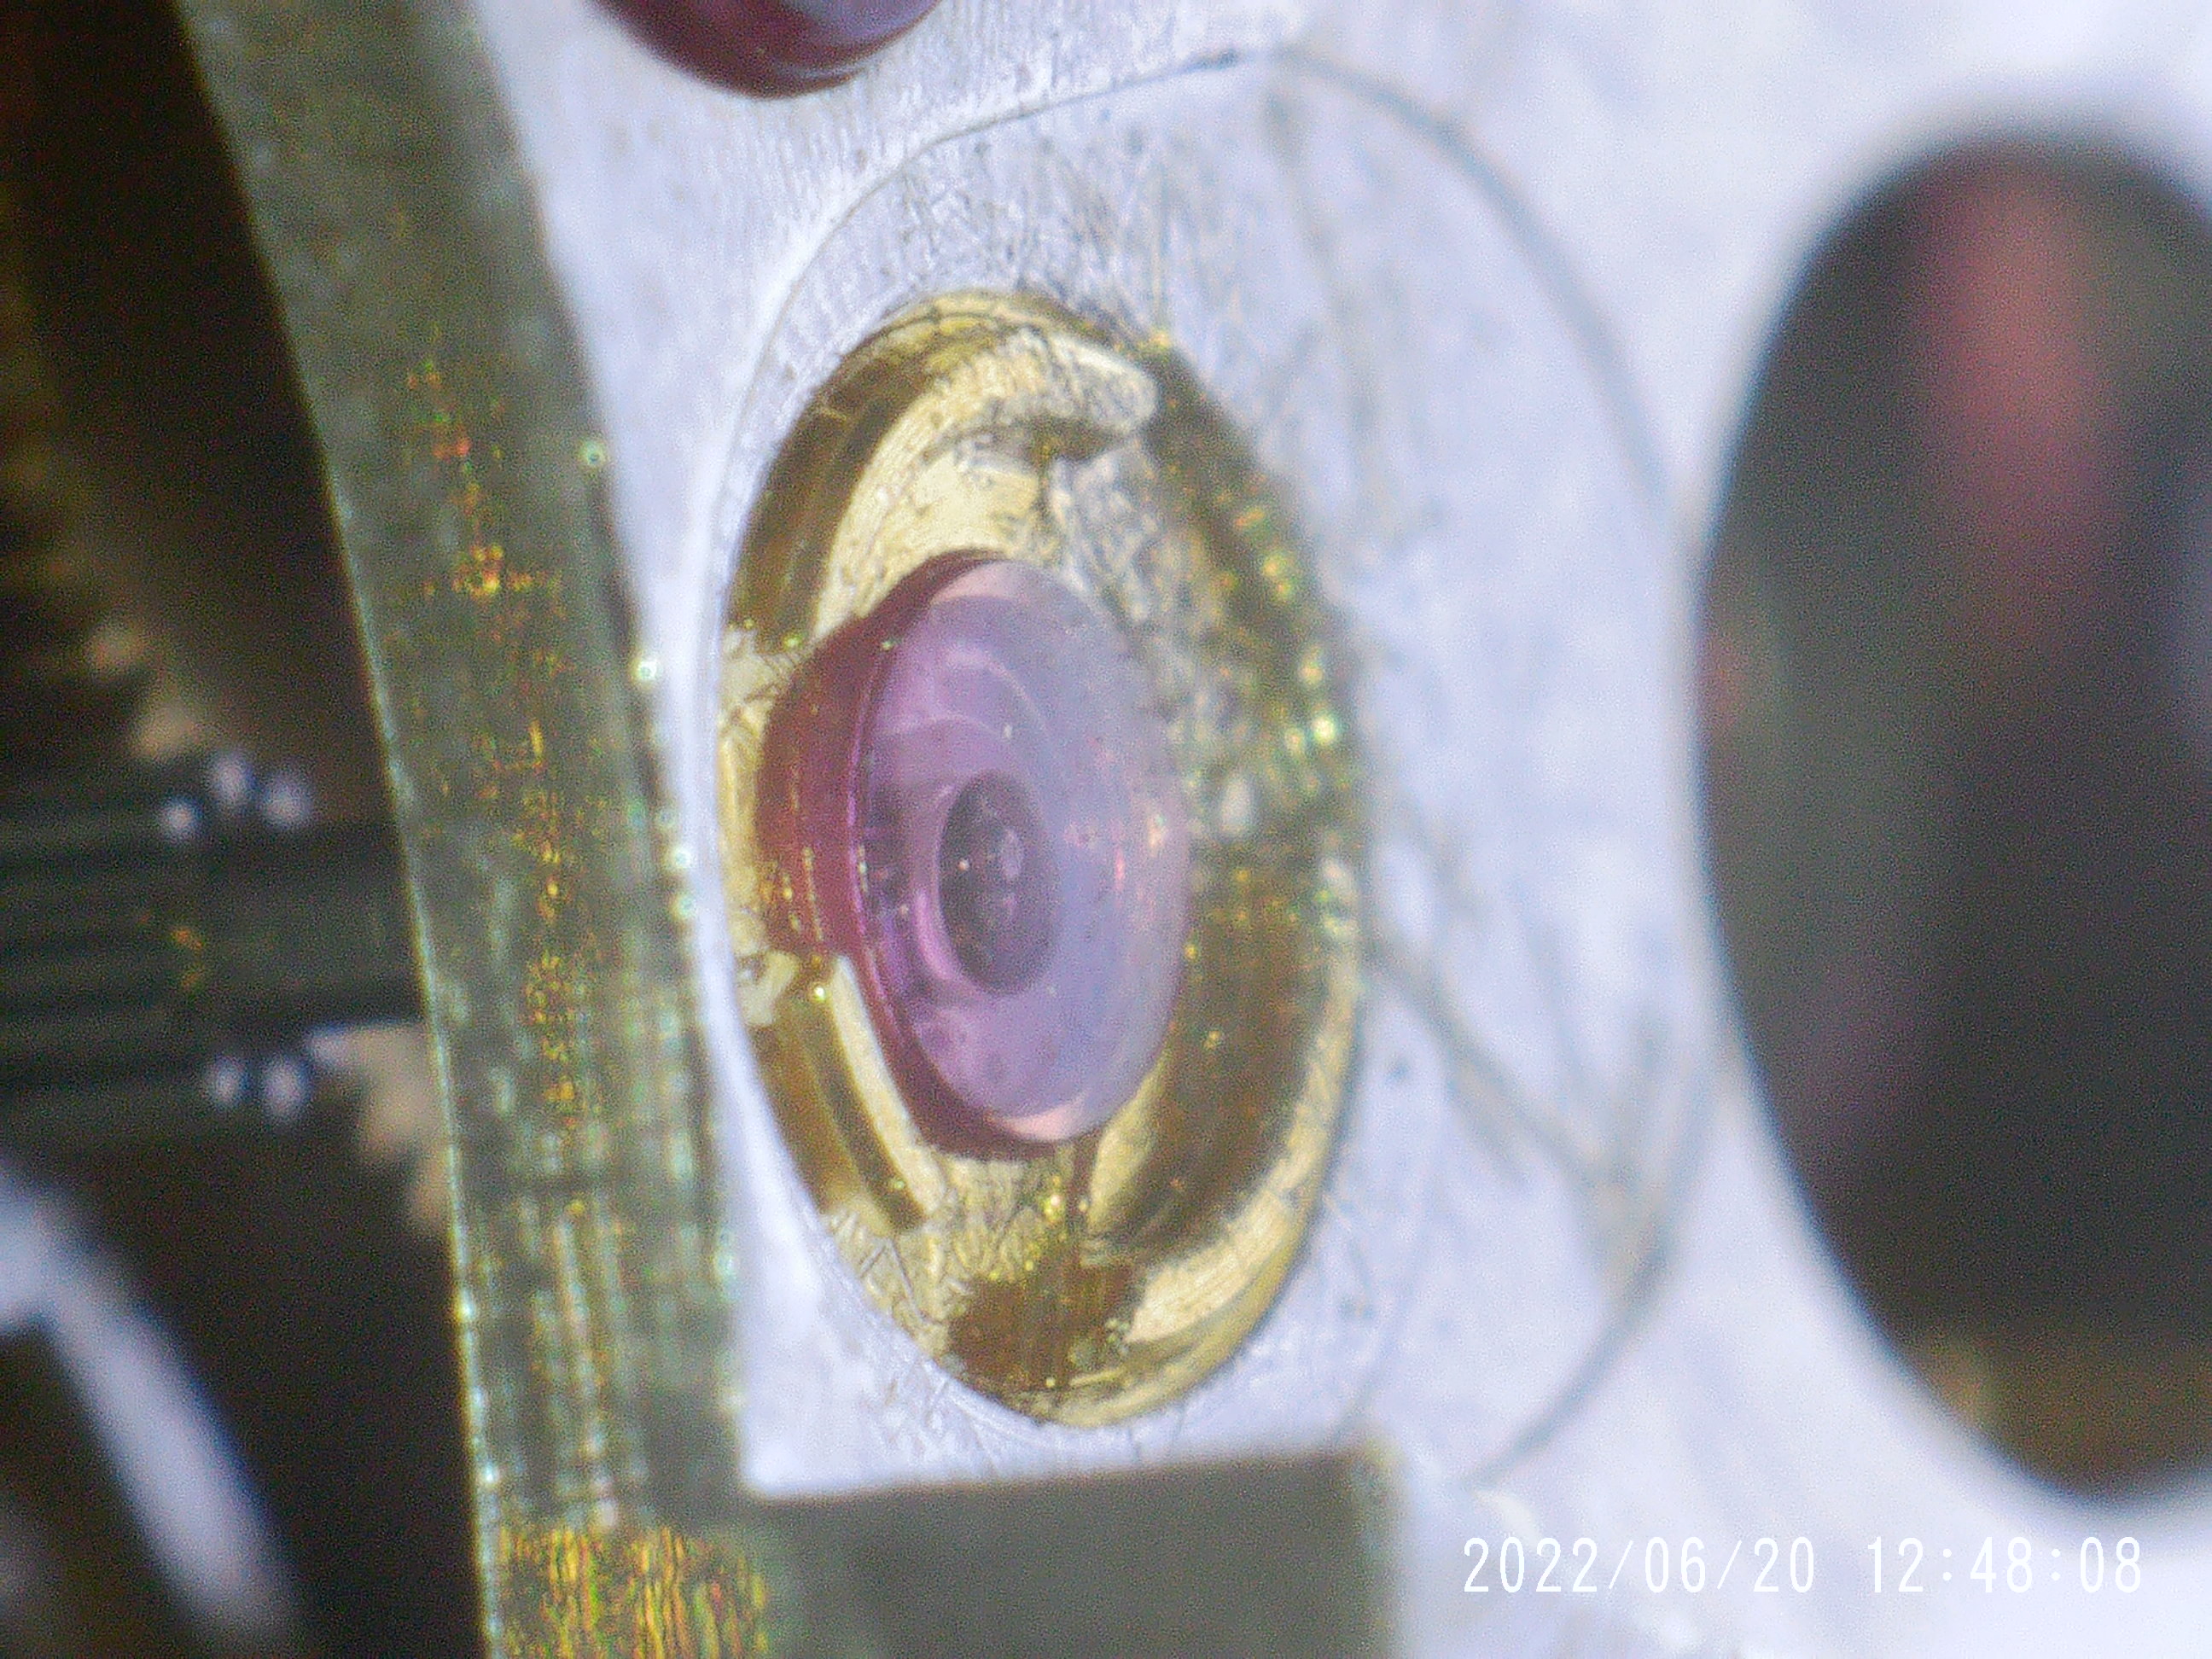
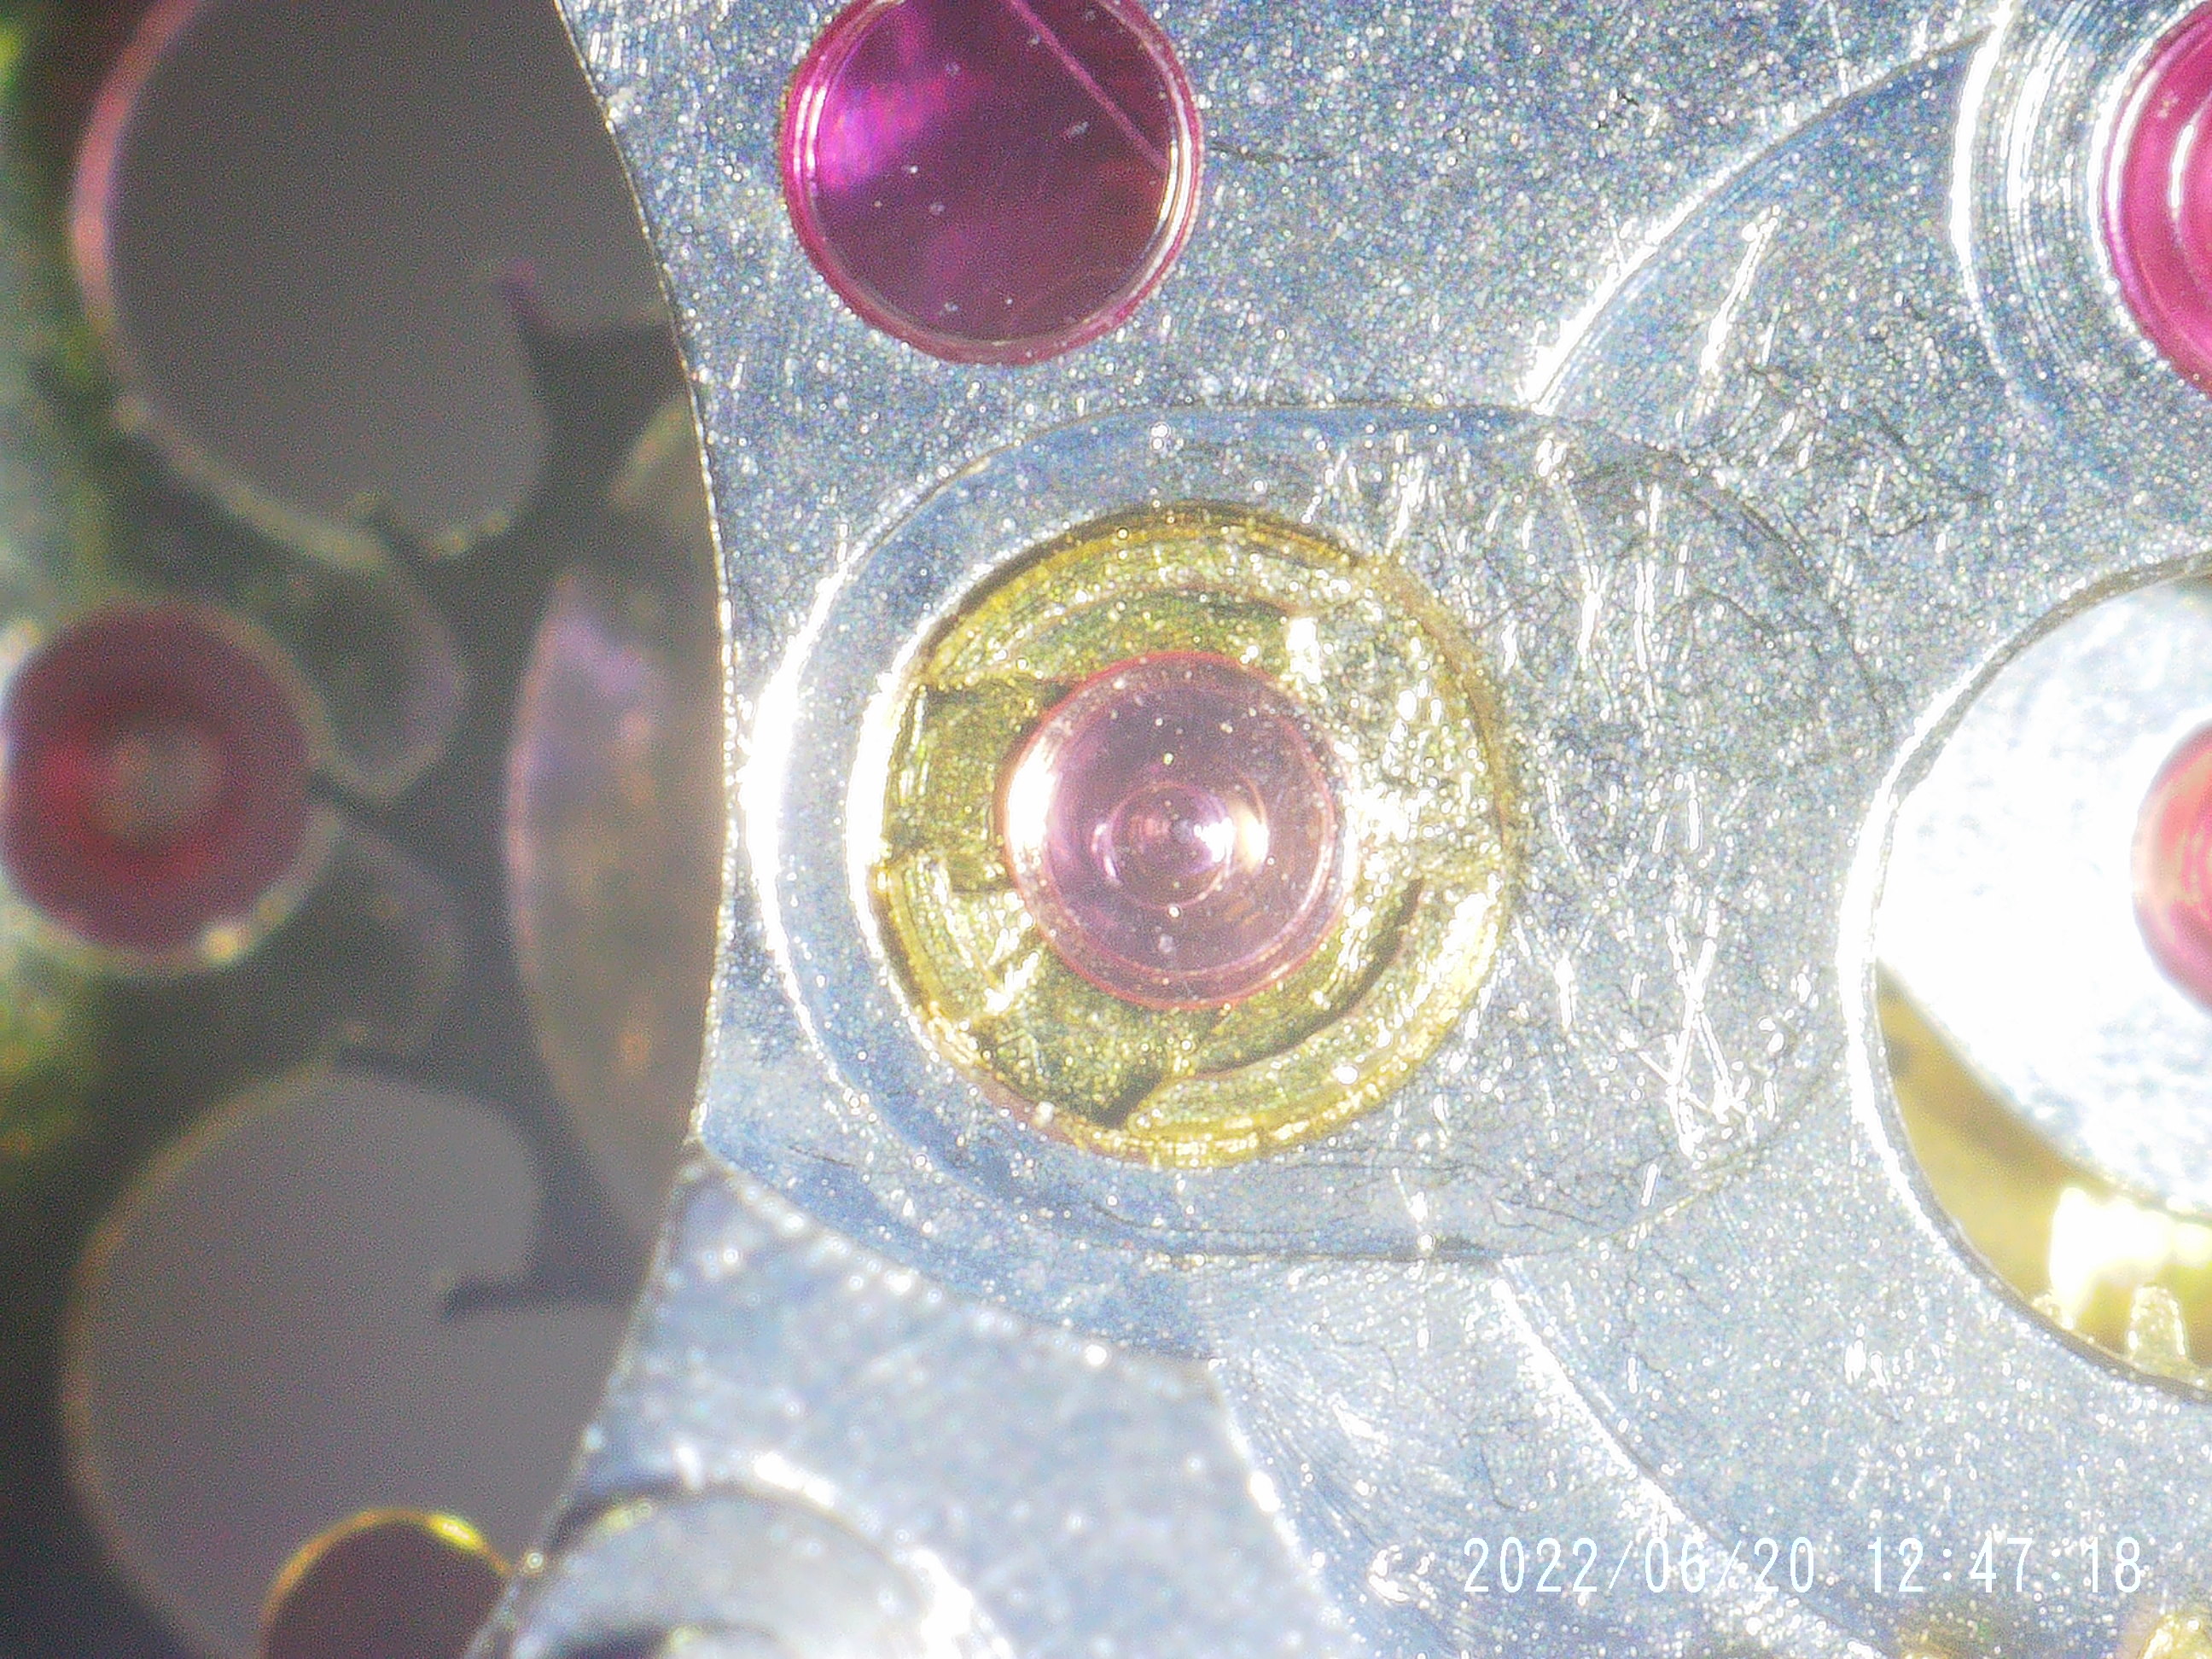
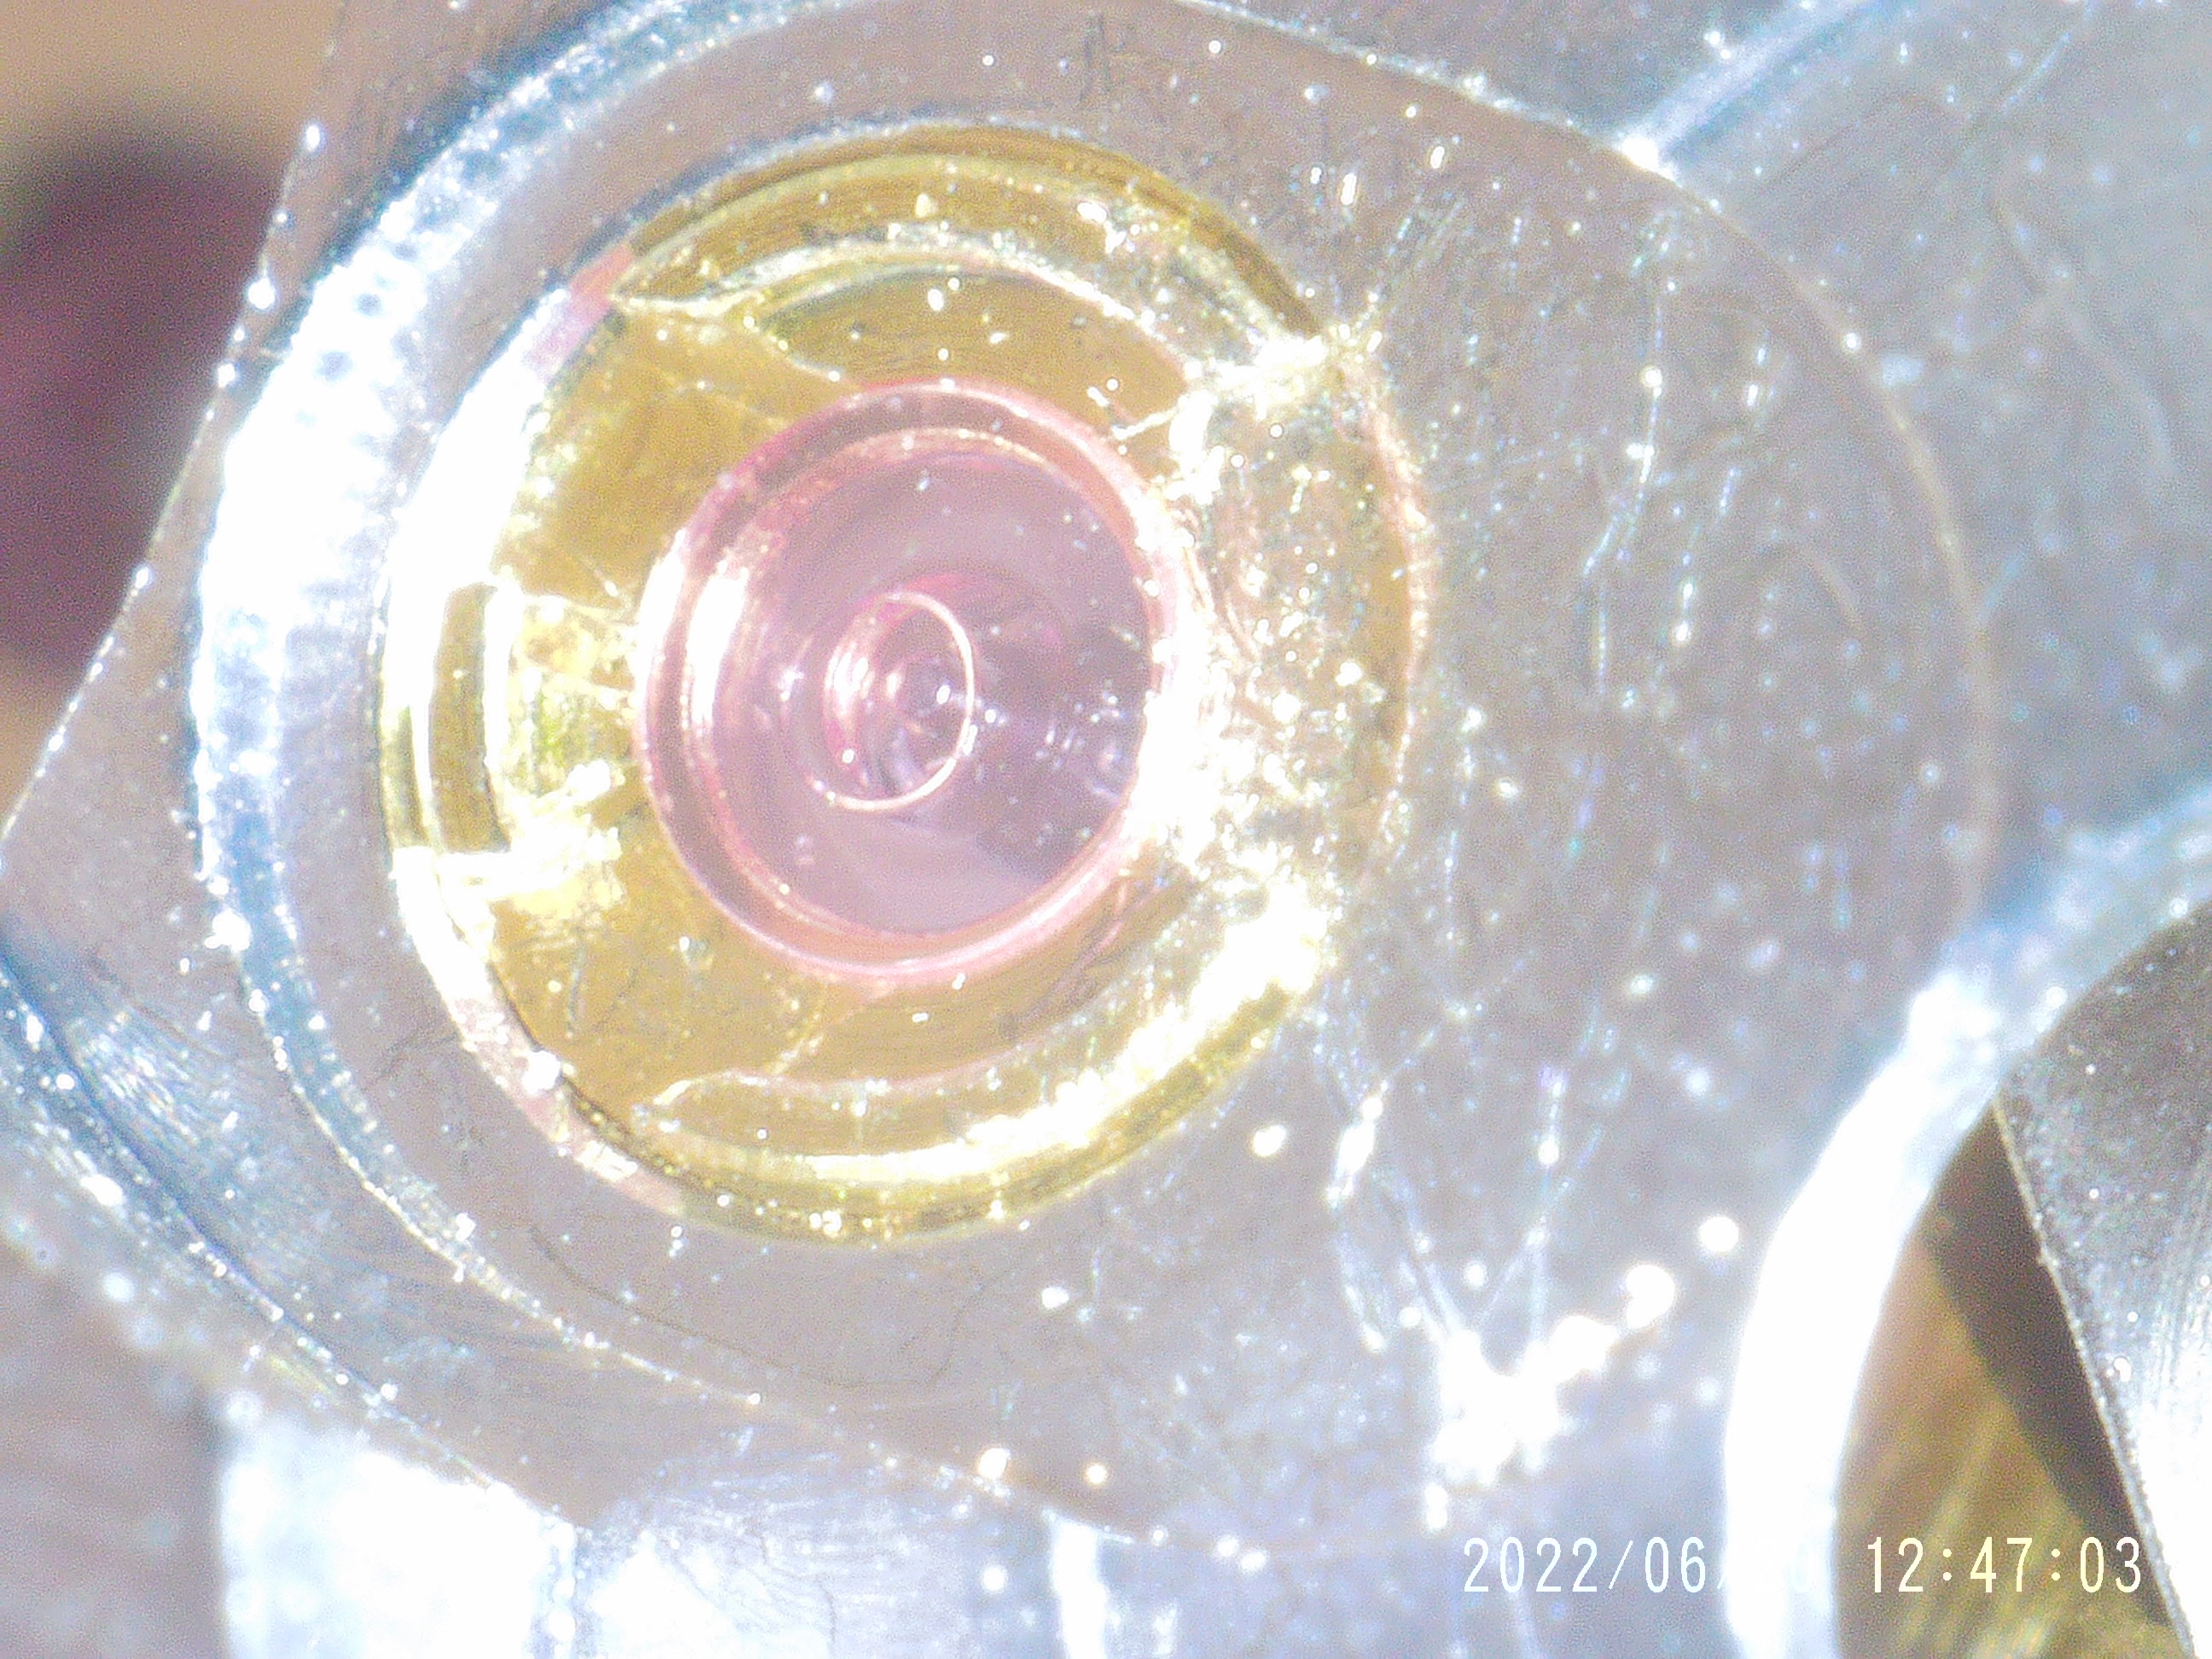
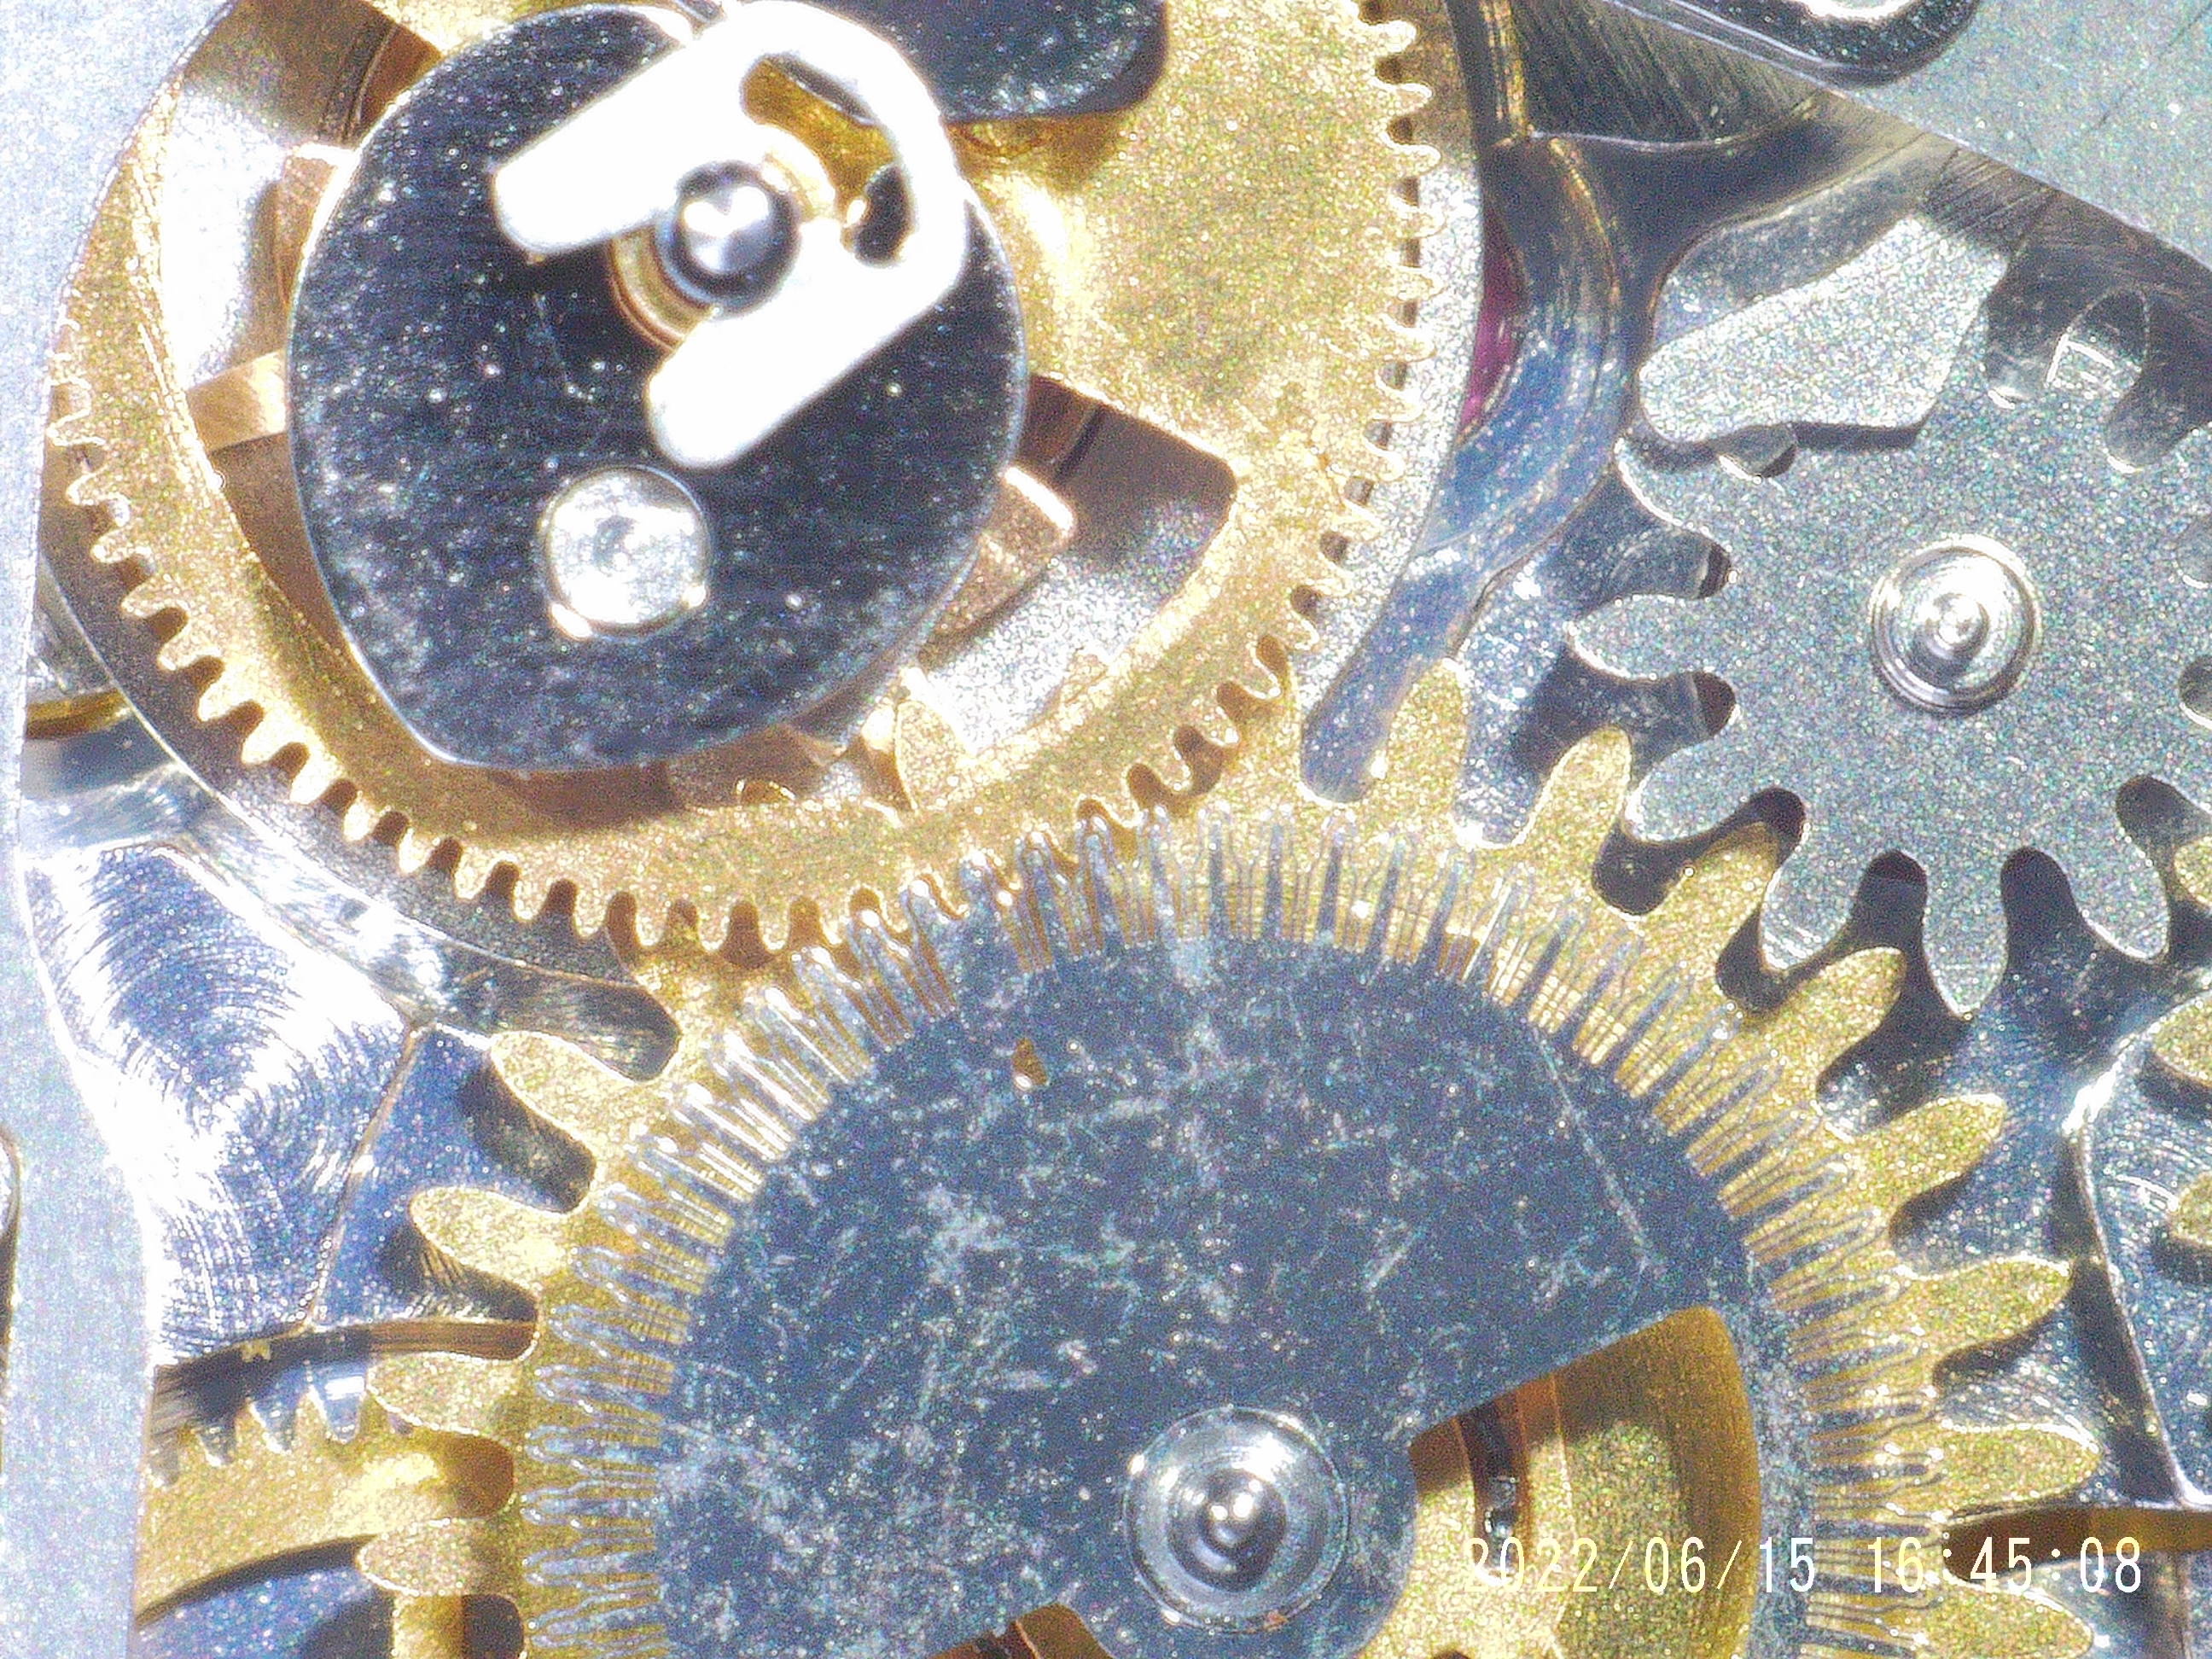
Here's a pic of the balance bridge hole that I boached... I cleaned up the metal shavings with one of those little between your teeth tooth brushes, so it ended up being pretty clean.


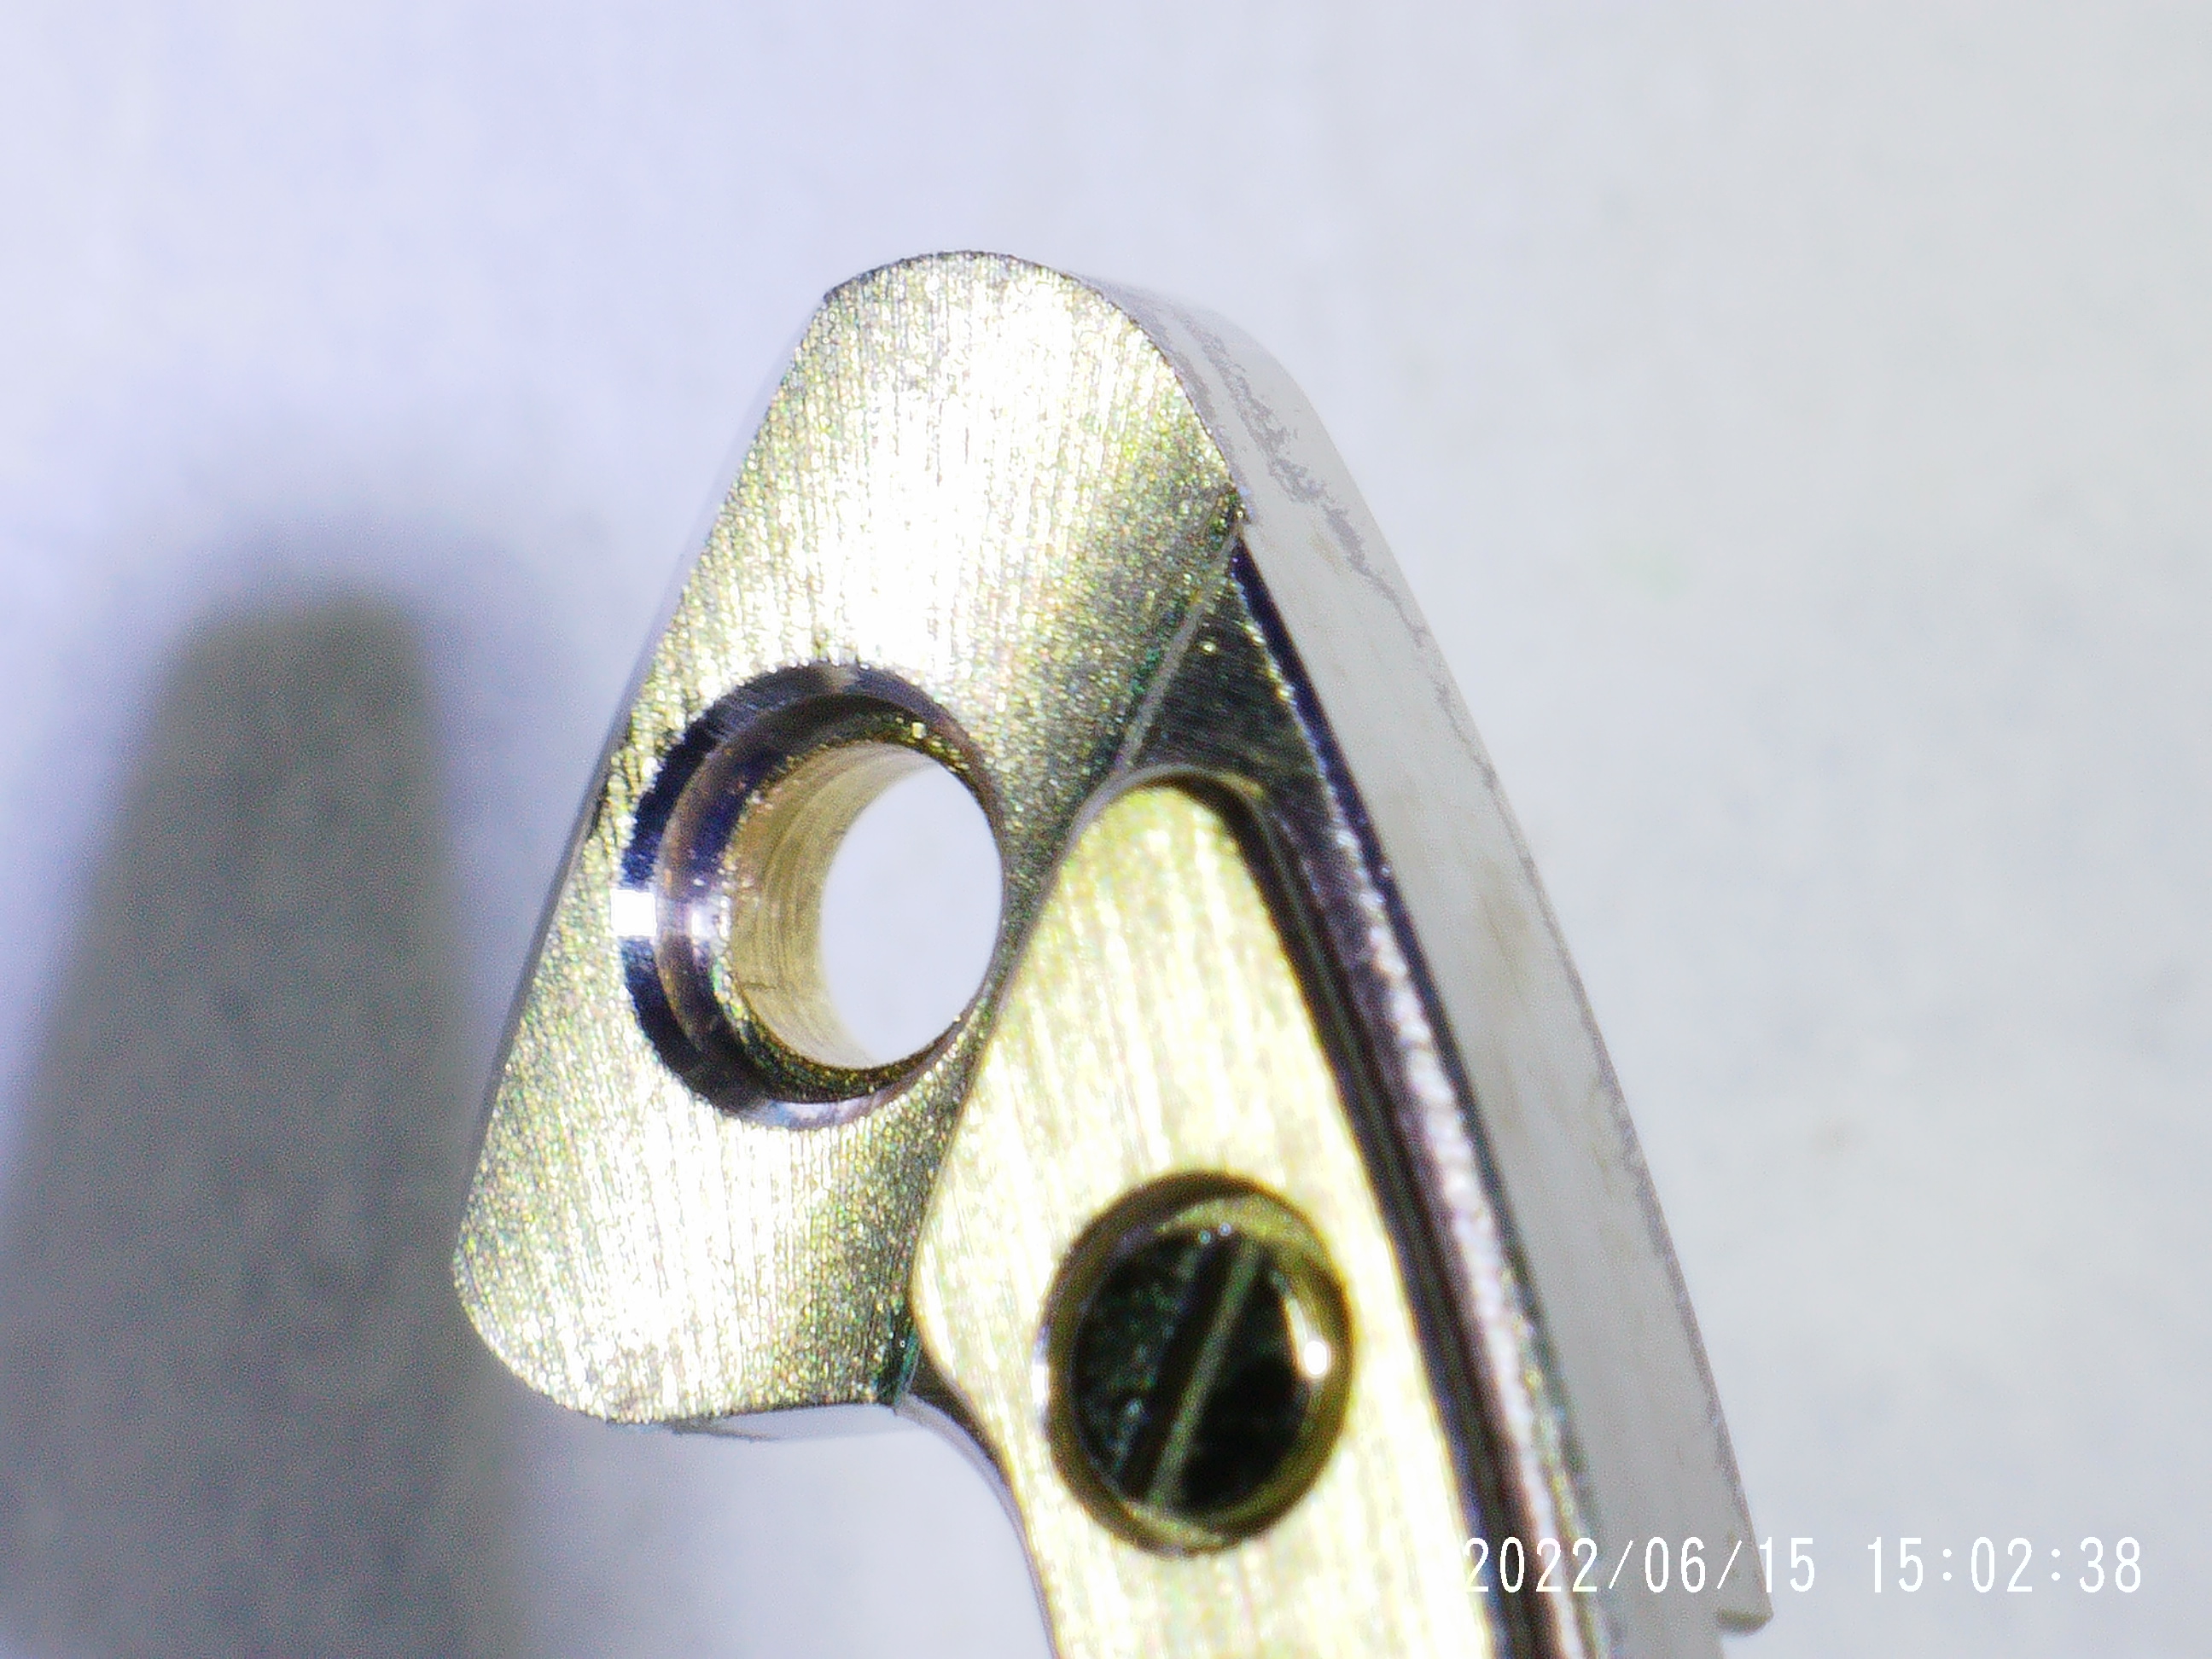
With the balance bridge broached, I was able to fit it nicely into place on the movement, and use the movement as a jig to connect the balance hairspring bridle to the balance bridge hairspring stud. Hat tip to Triplock for the suggestion to do it this way.

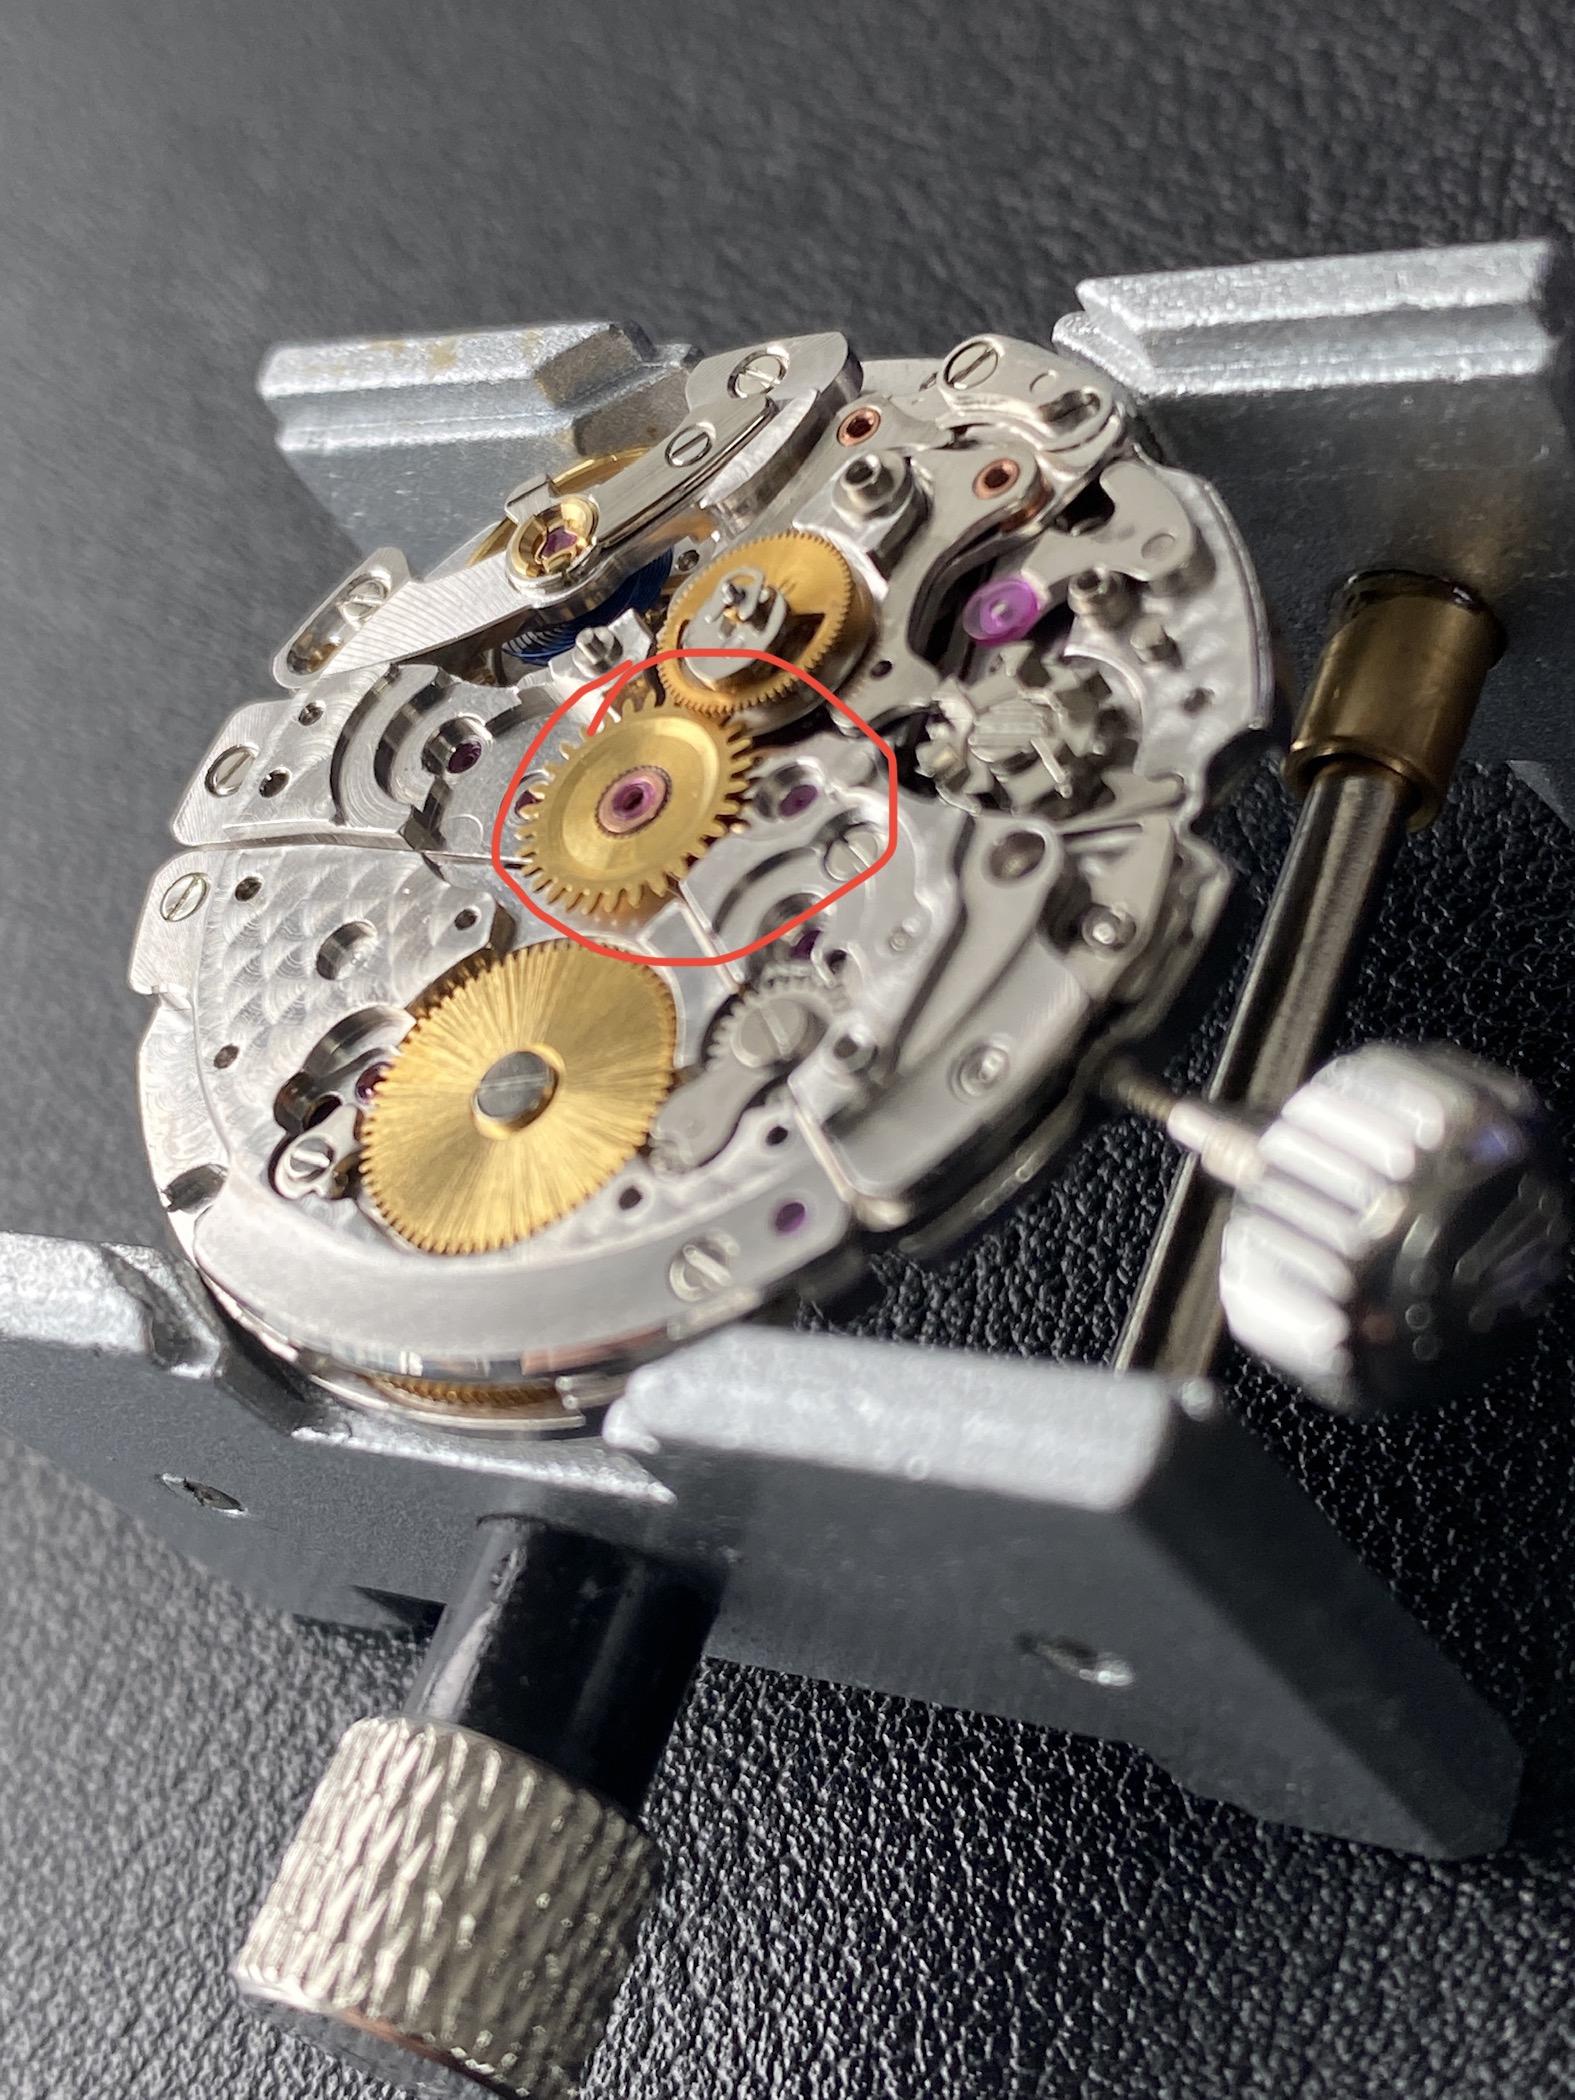
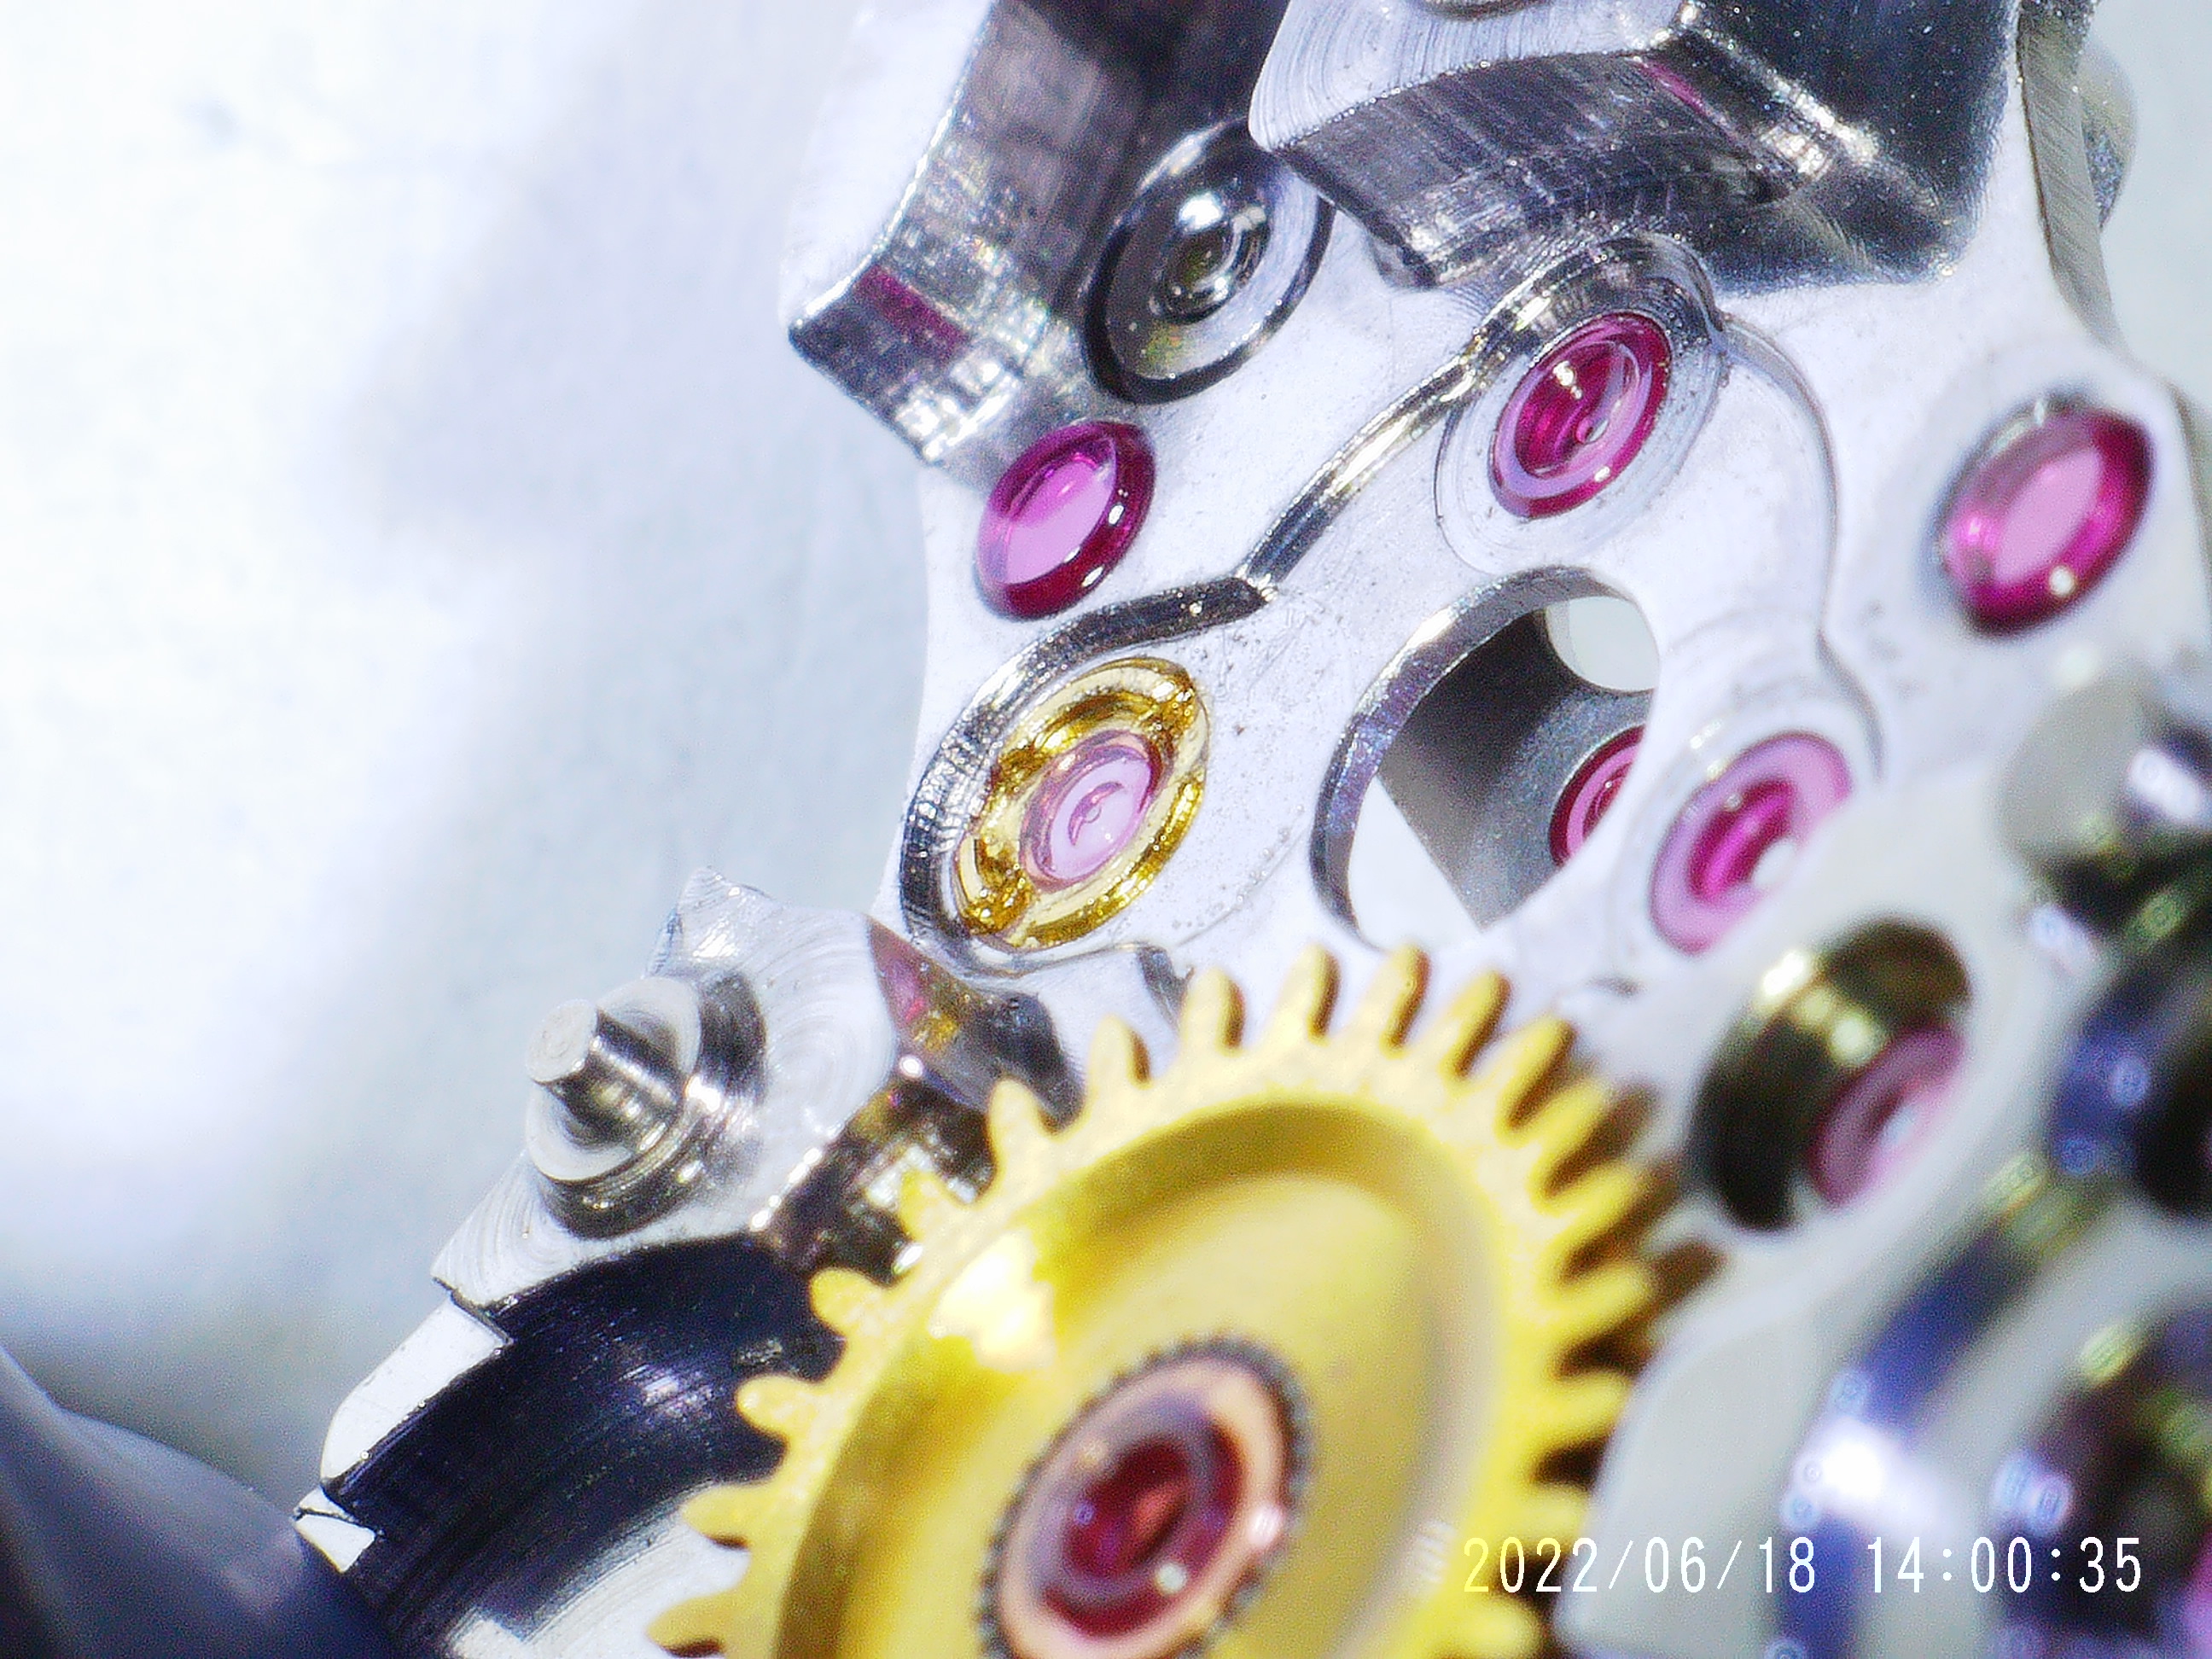
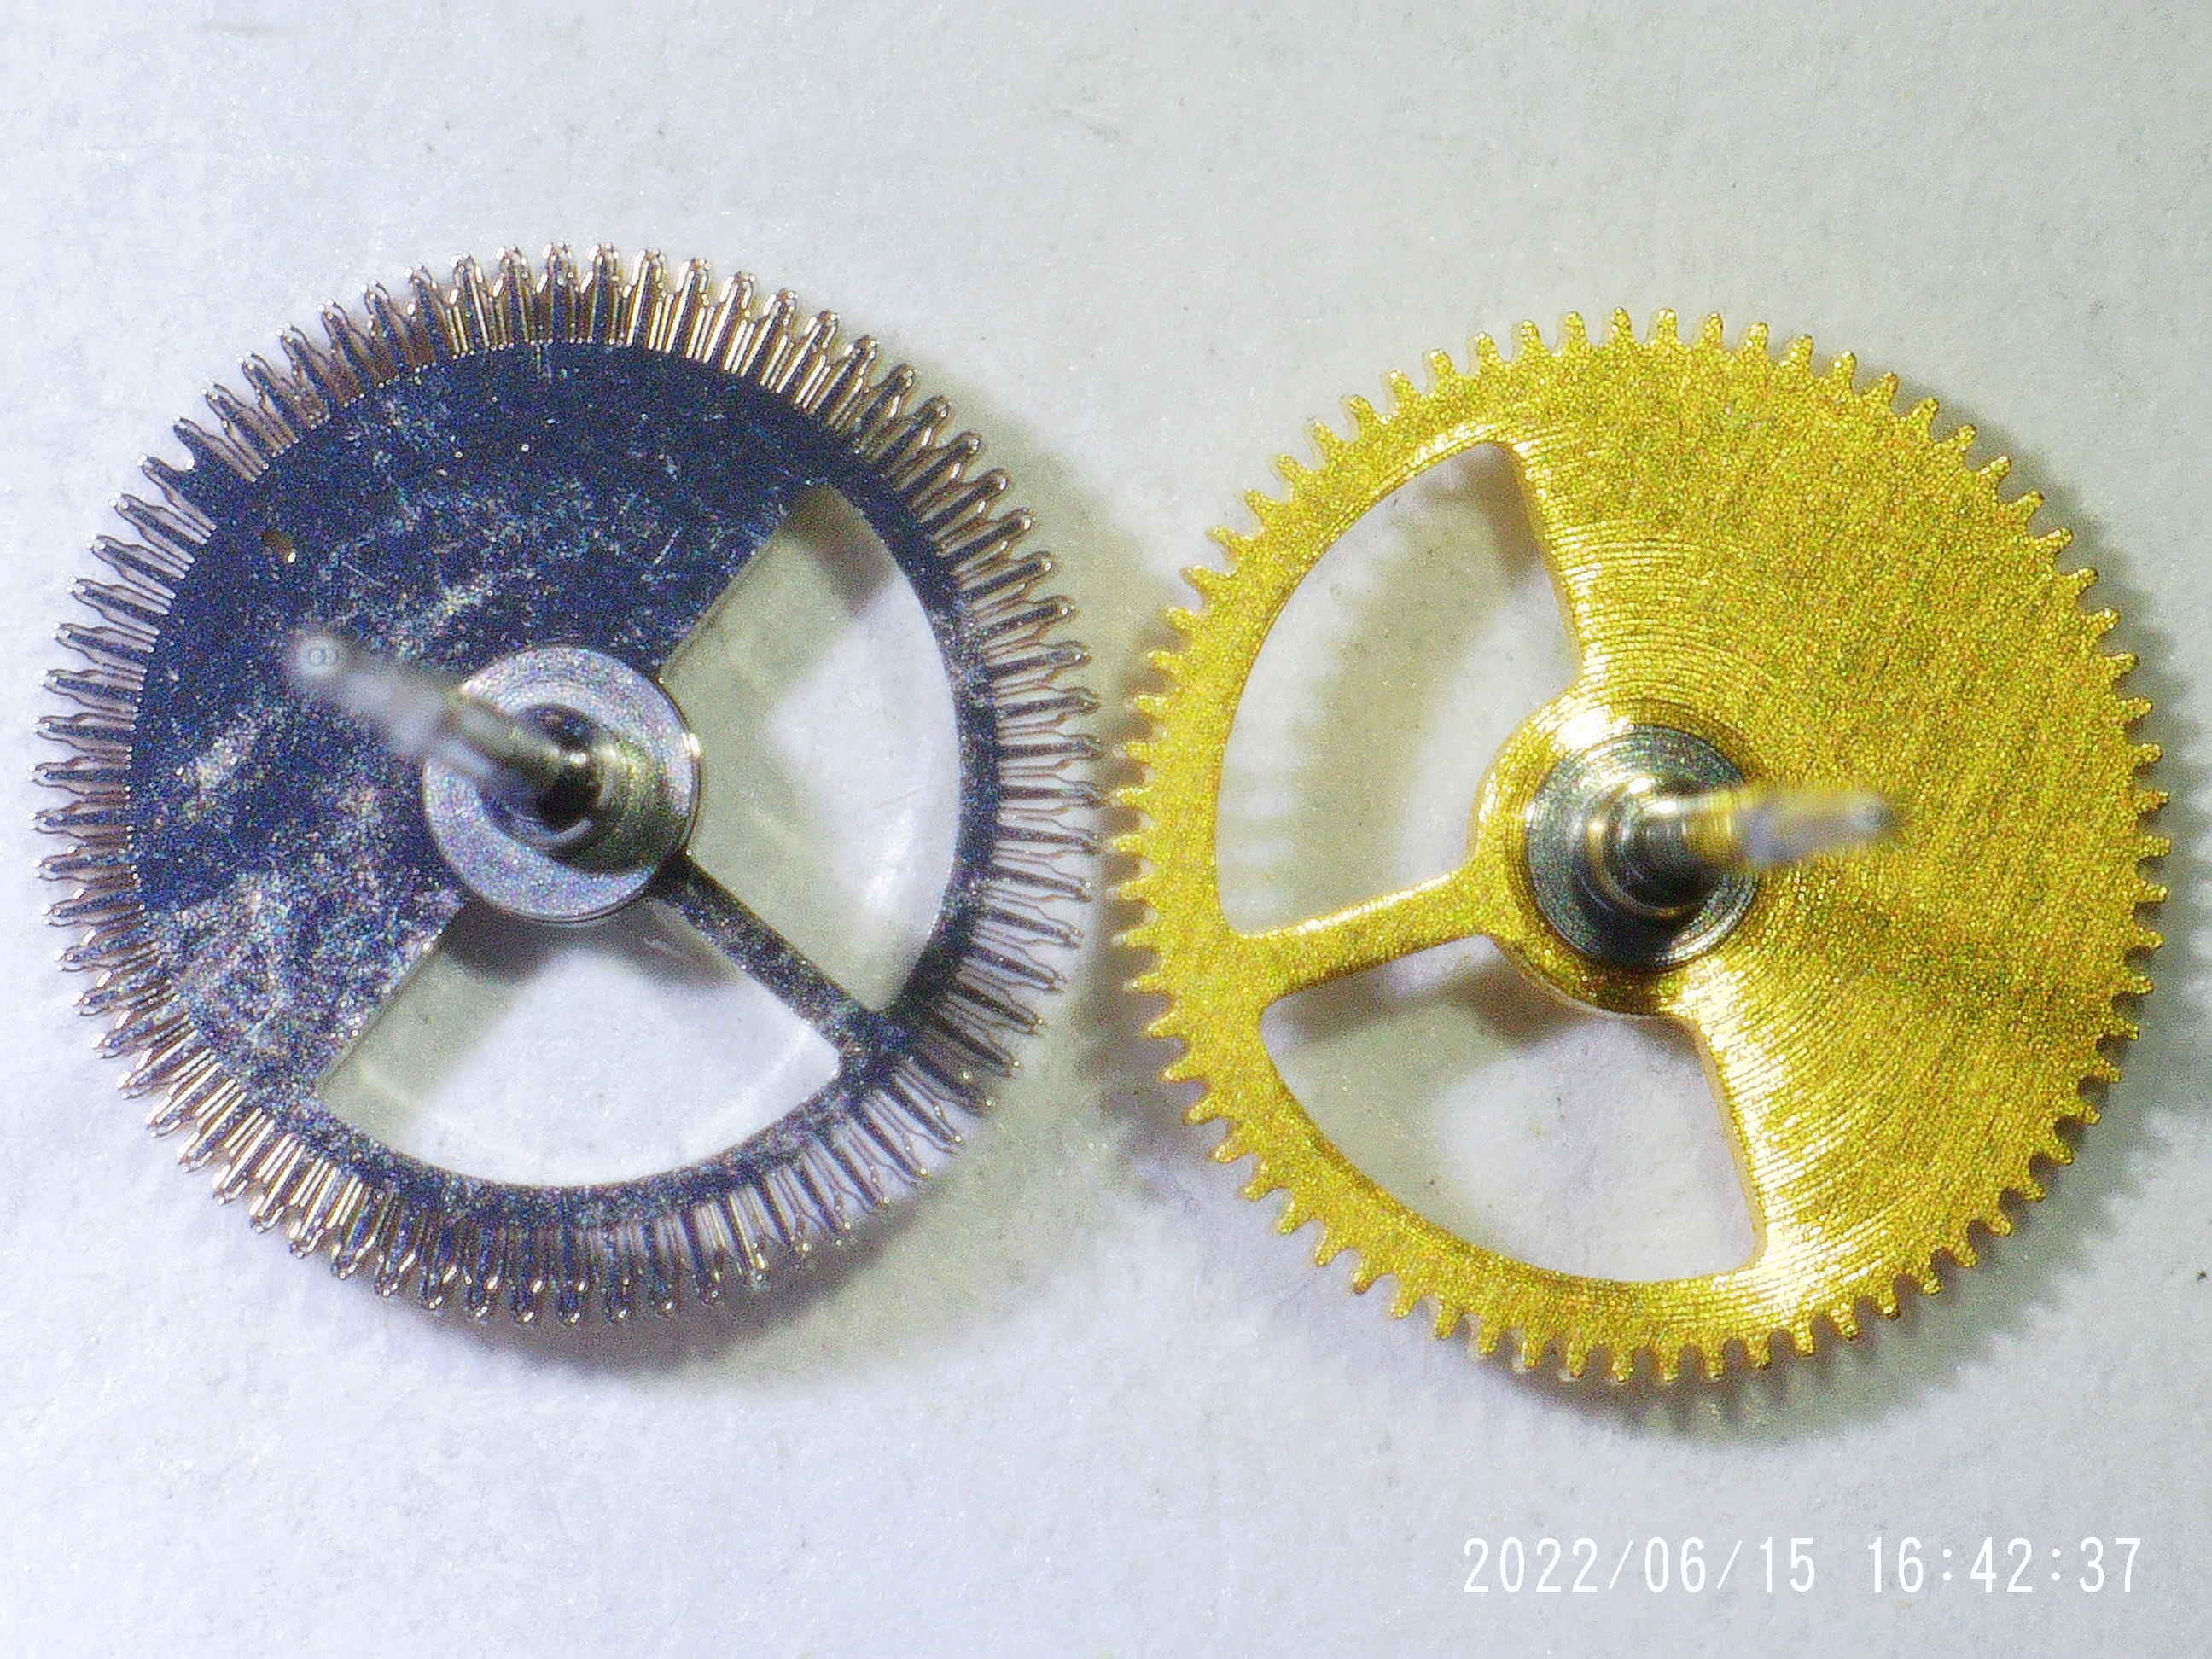
Next was swapping out the chronograph seconds wheel for the gen part. The gen part in a beautiful LIGA gear which is also a spring for gripping the teeth of the wheel driving it. These spring teeth basically eliminate backlash, meaning that the chronograph seconds hand should sweep more continuously than with the standard brass tooth gear which will cause the chronograph seconds hand to stutter from time to time.


The install was pretty simple, I simply needed to remove the chronograph bridge and pull out the noob part and drop in the gen. However, getting the chronograph bridge re-installed wasn't easy. There's a part called the "Jumper for counters" (part no. 4130-834) which sits under this bridge near the crown... this part is both incredibly delicate, and incredibly annoying to get aligned properly so that its pivot rests in the jewel in the chronograph bridge. This took me a couple of tries. But I eventually got it installed.


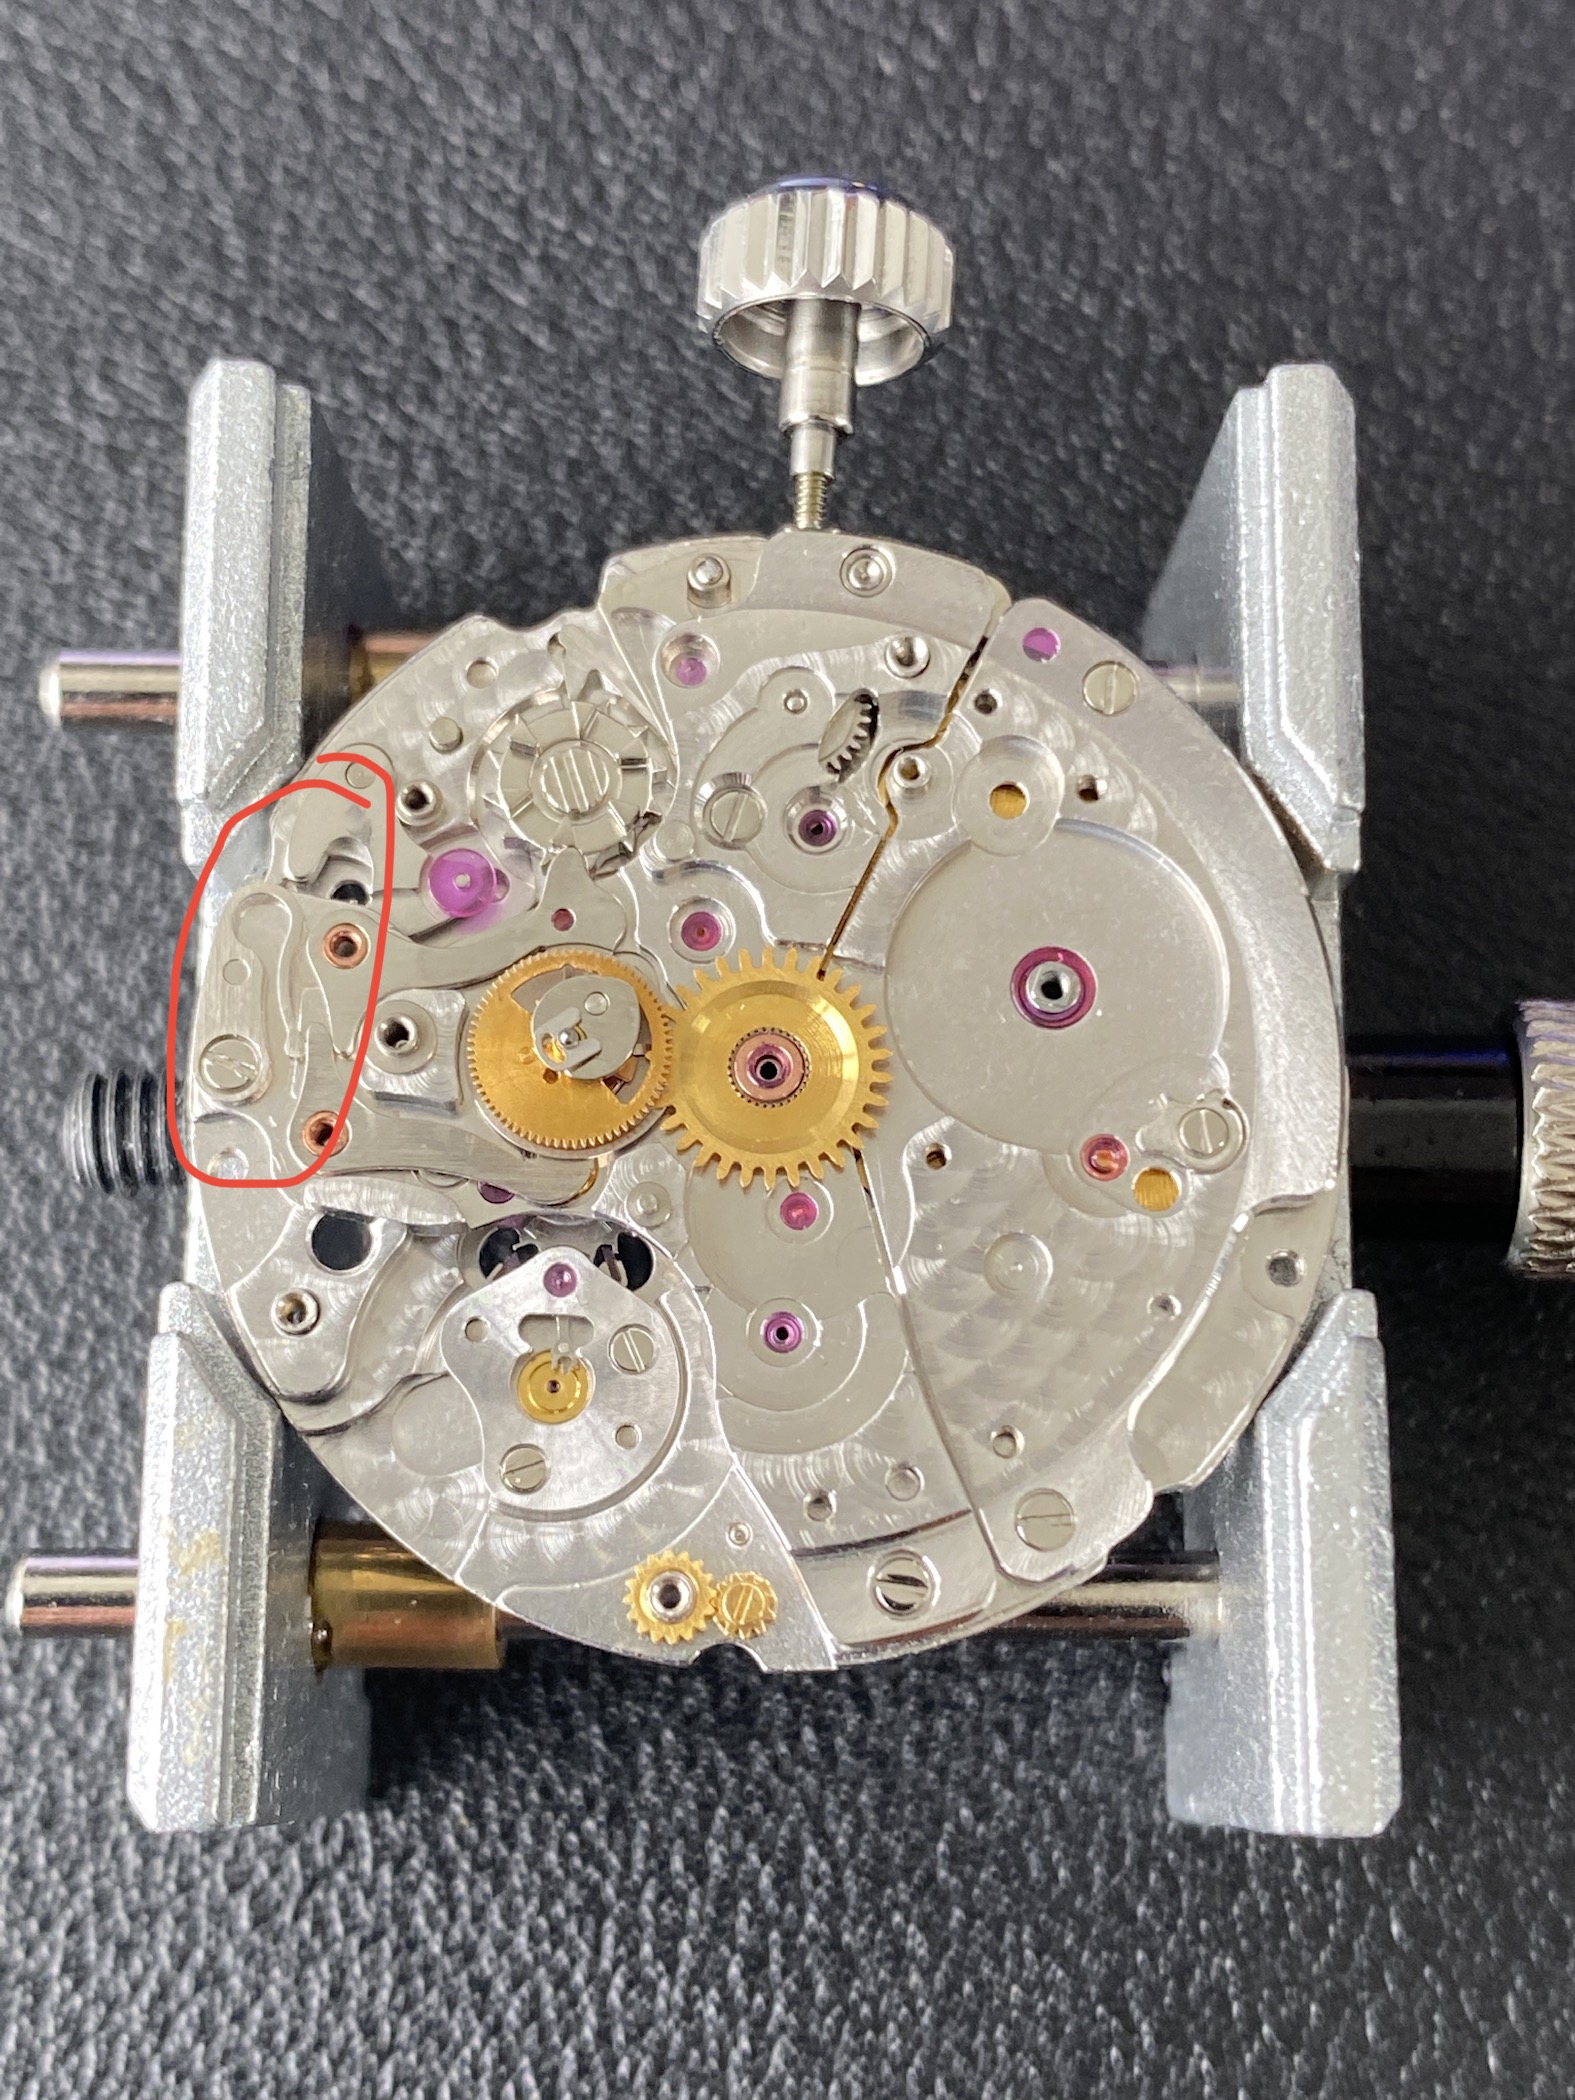
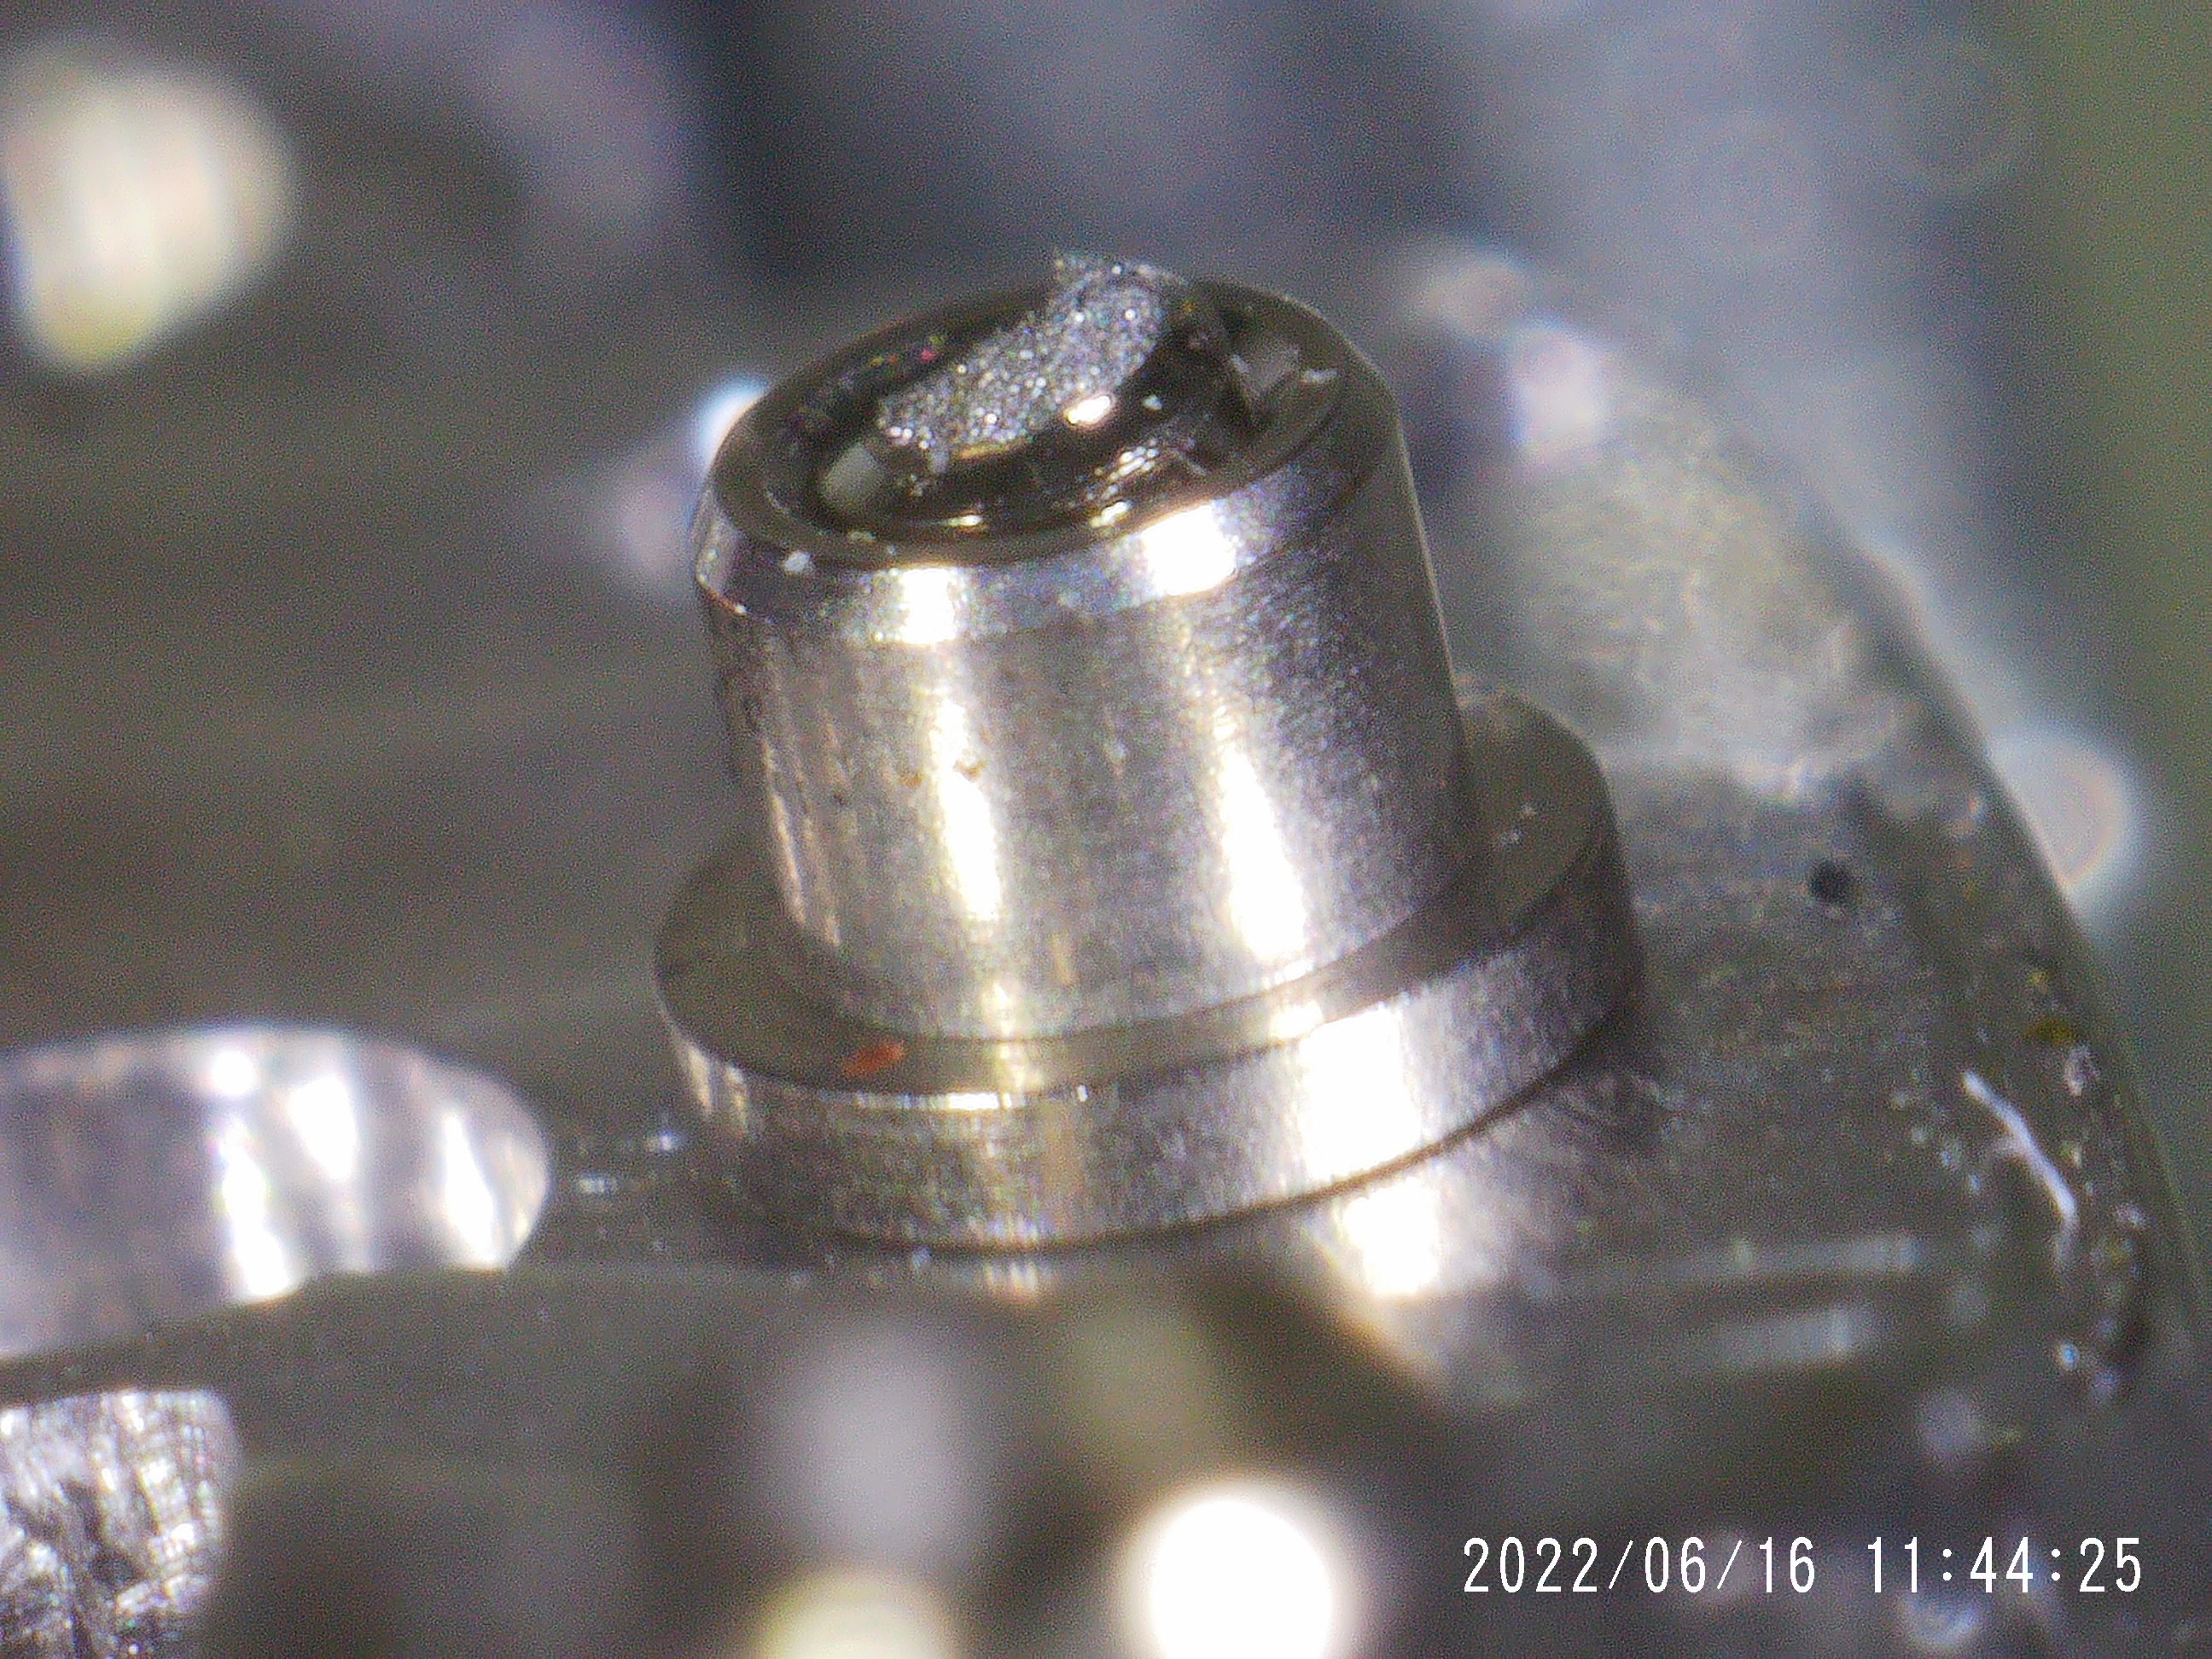
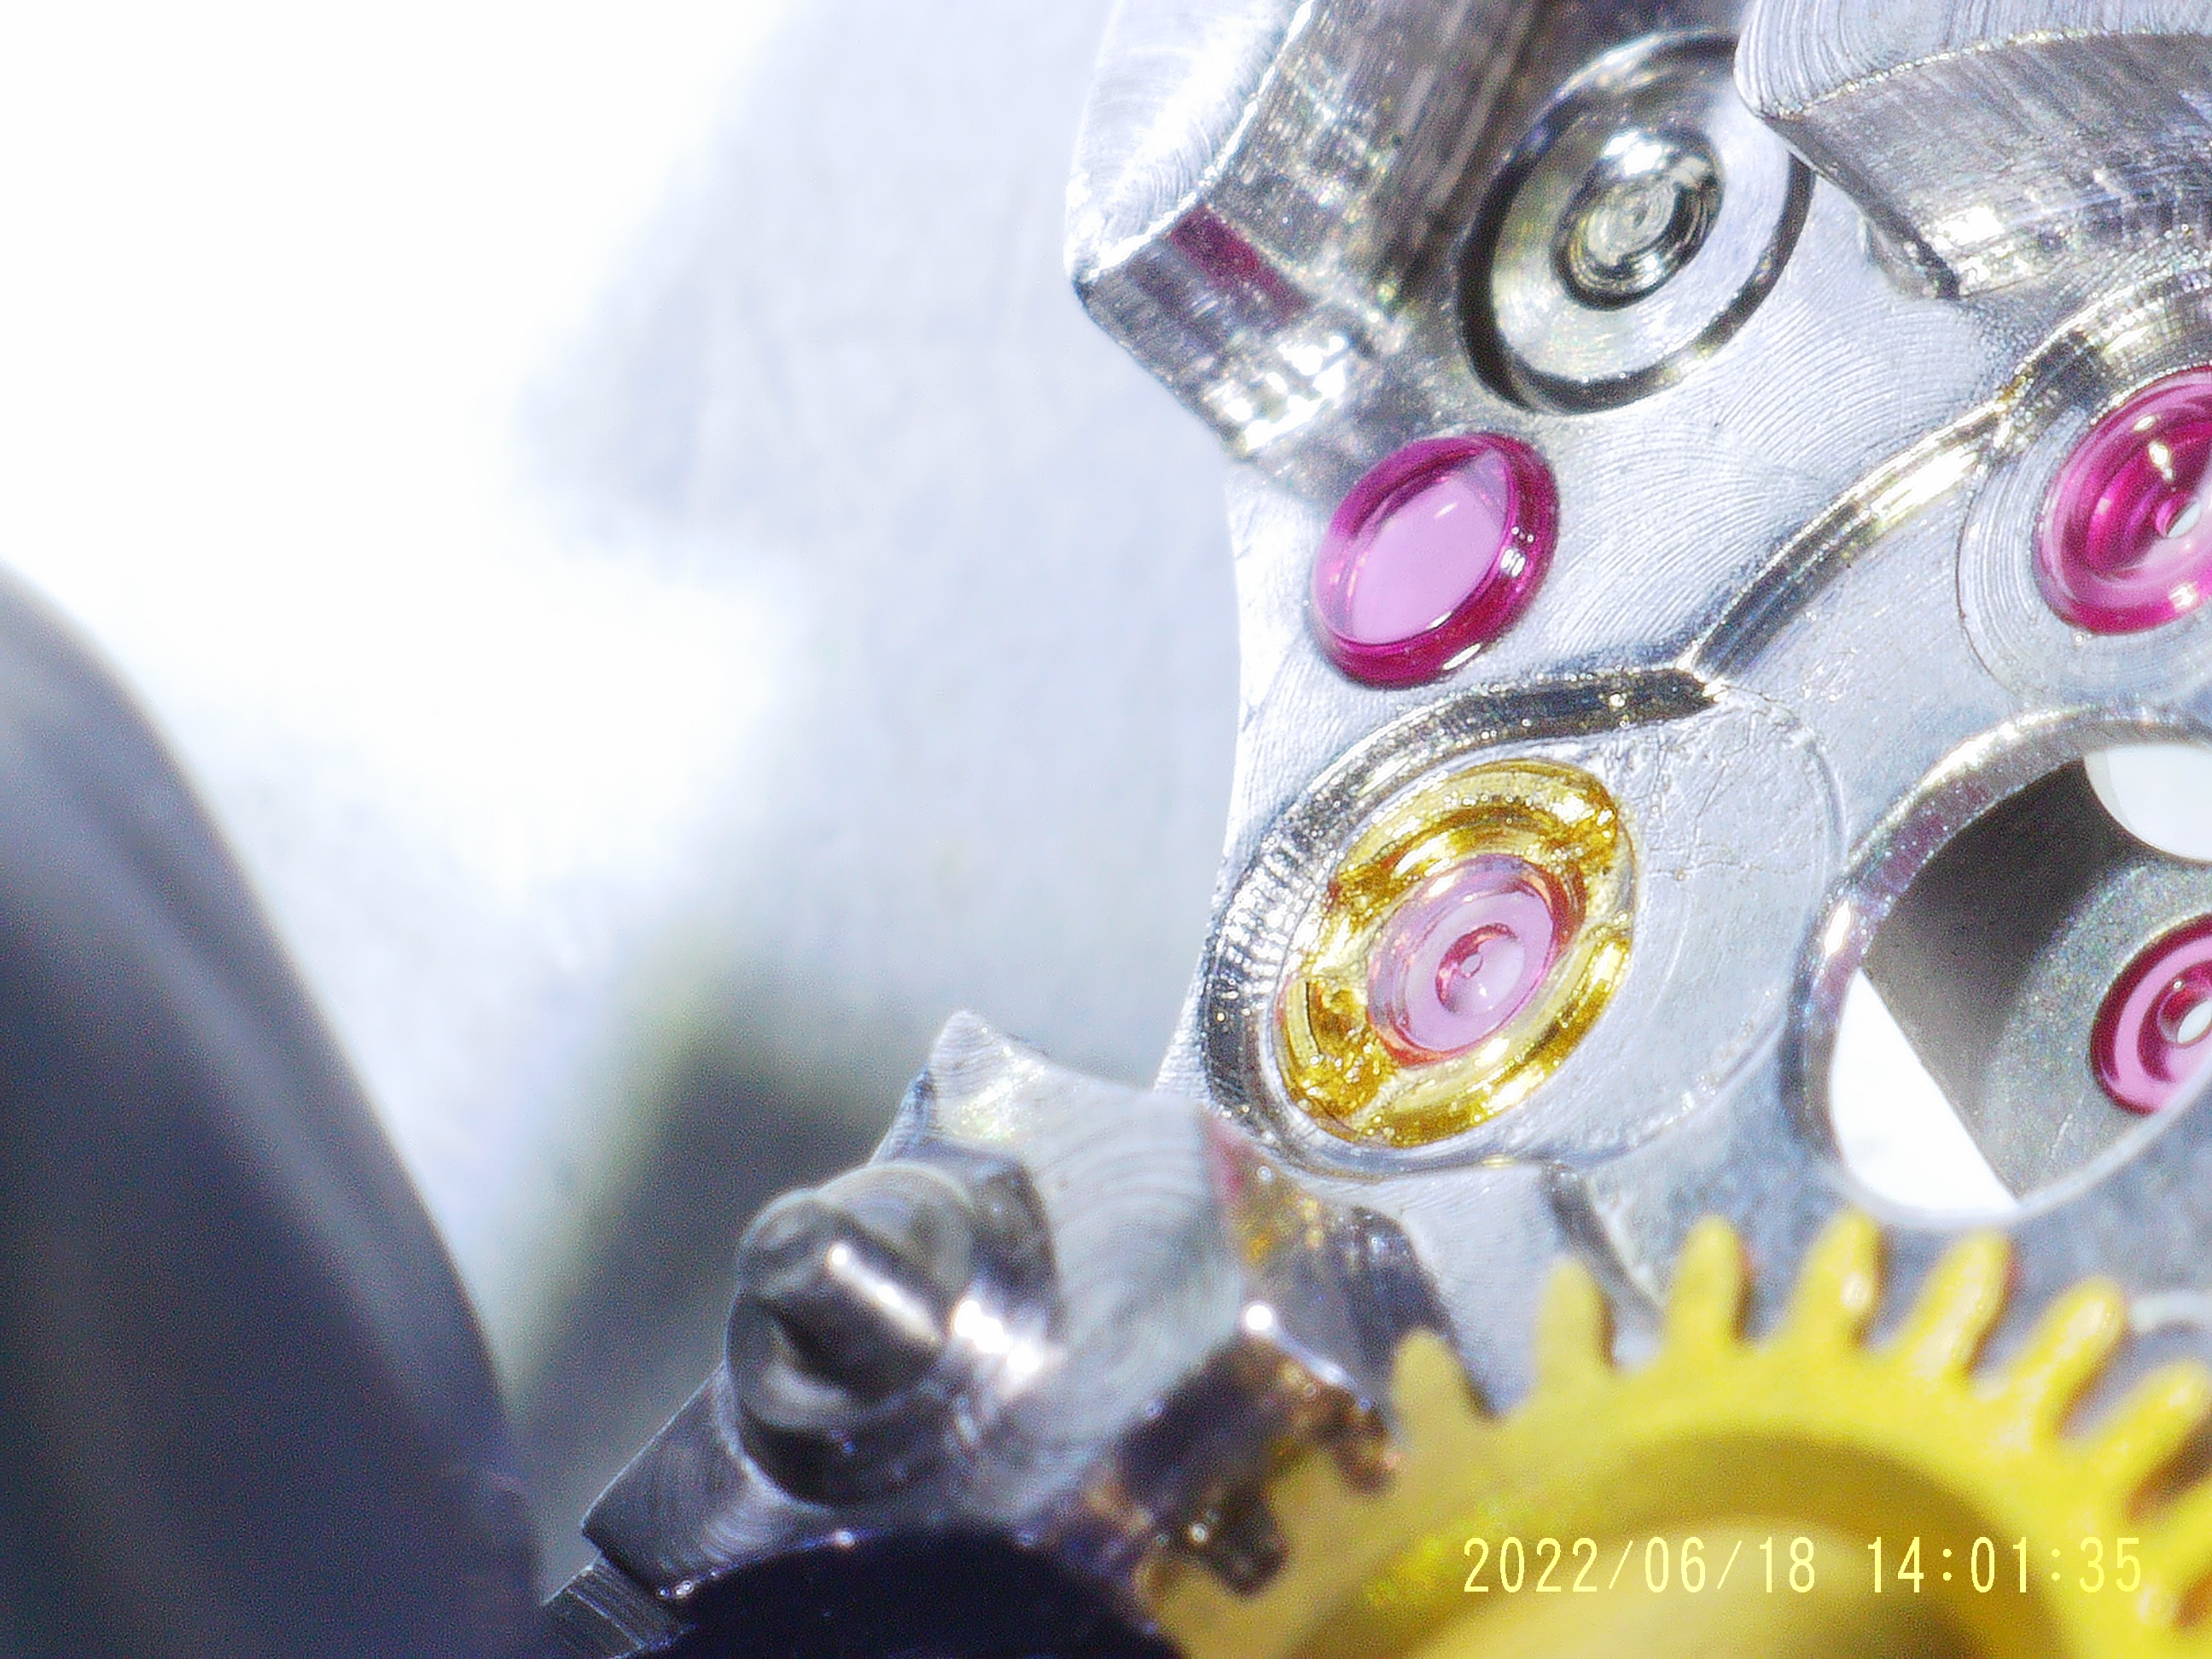
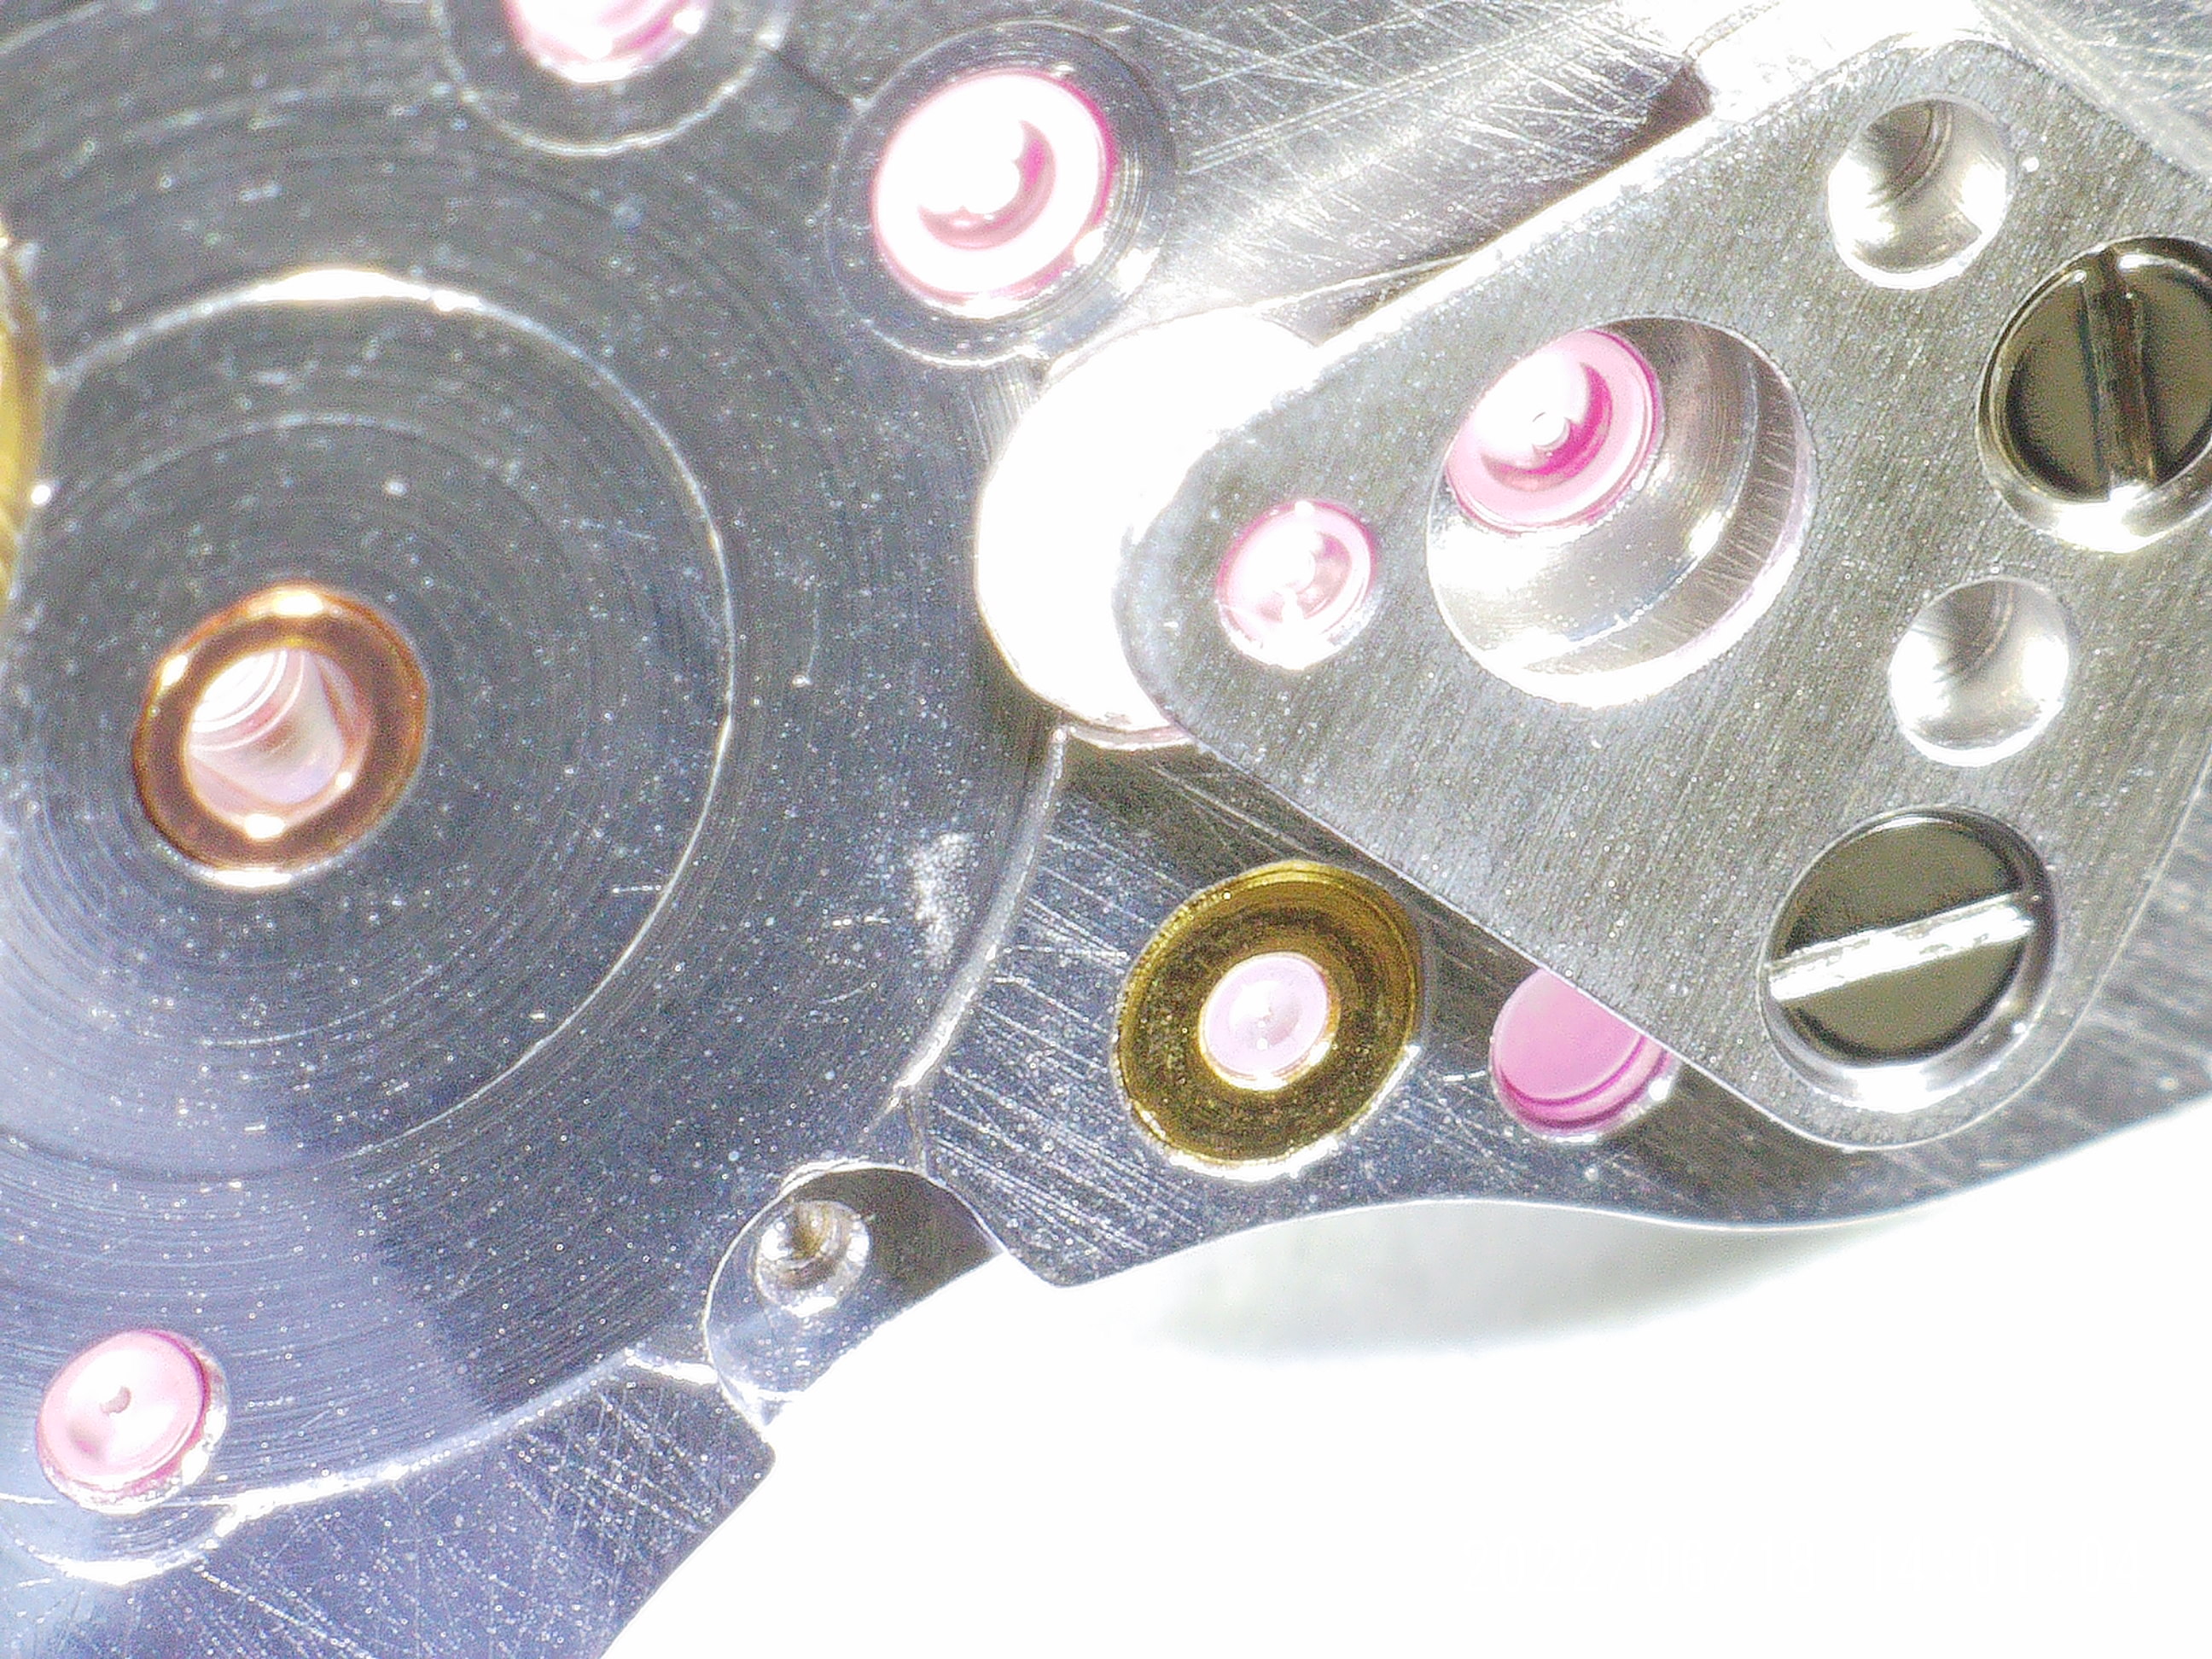
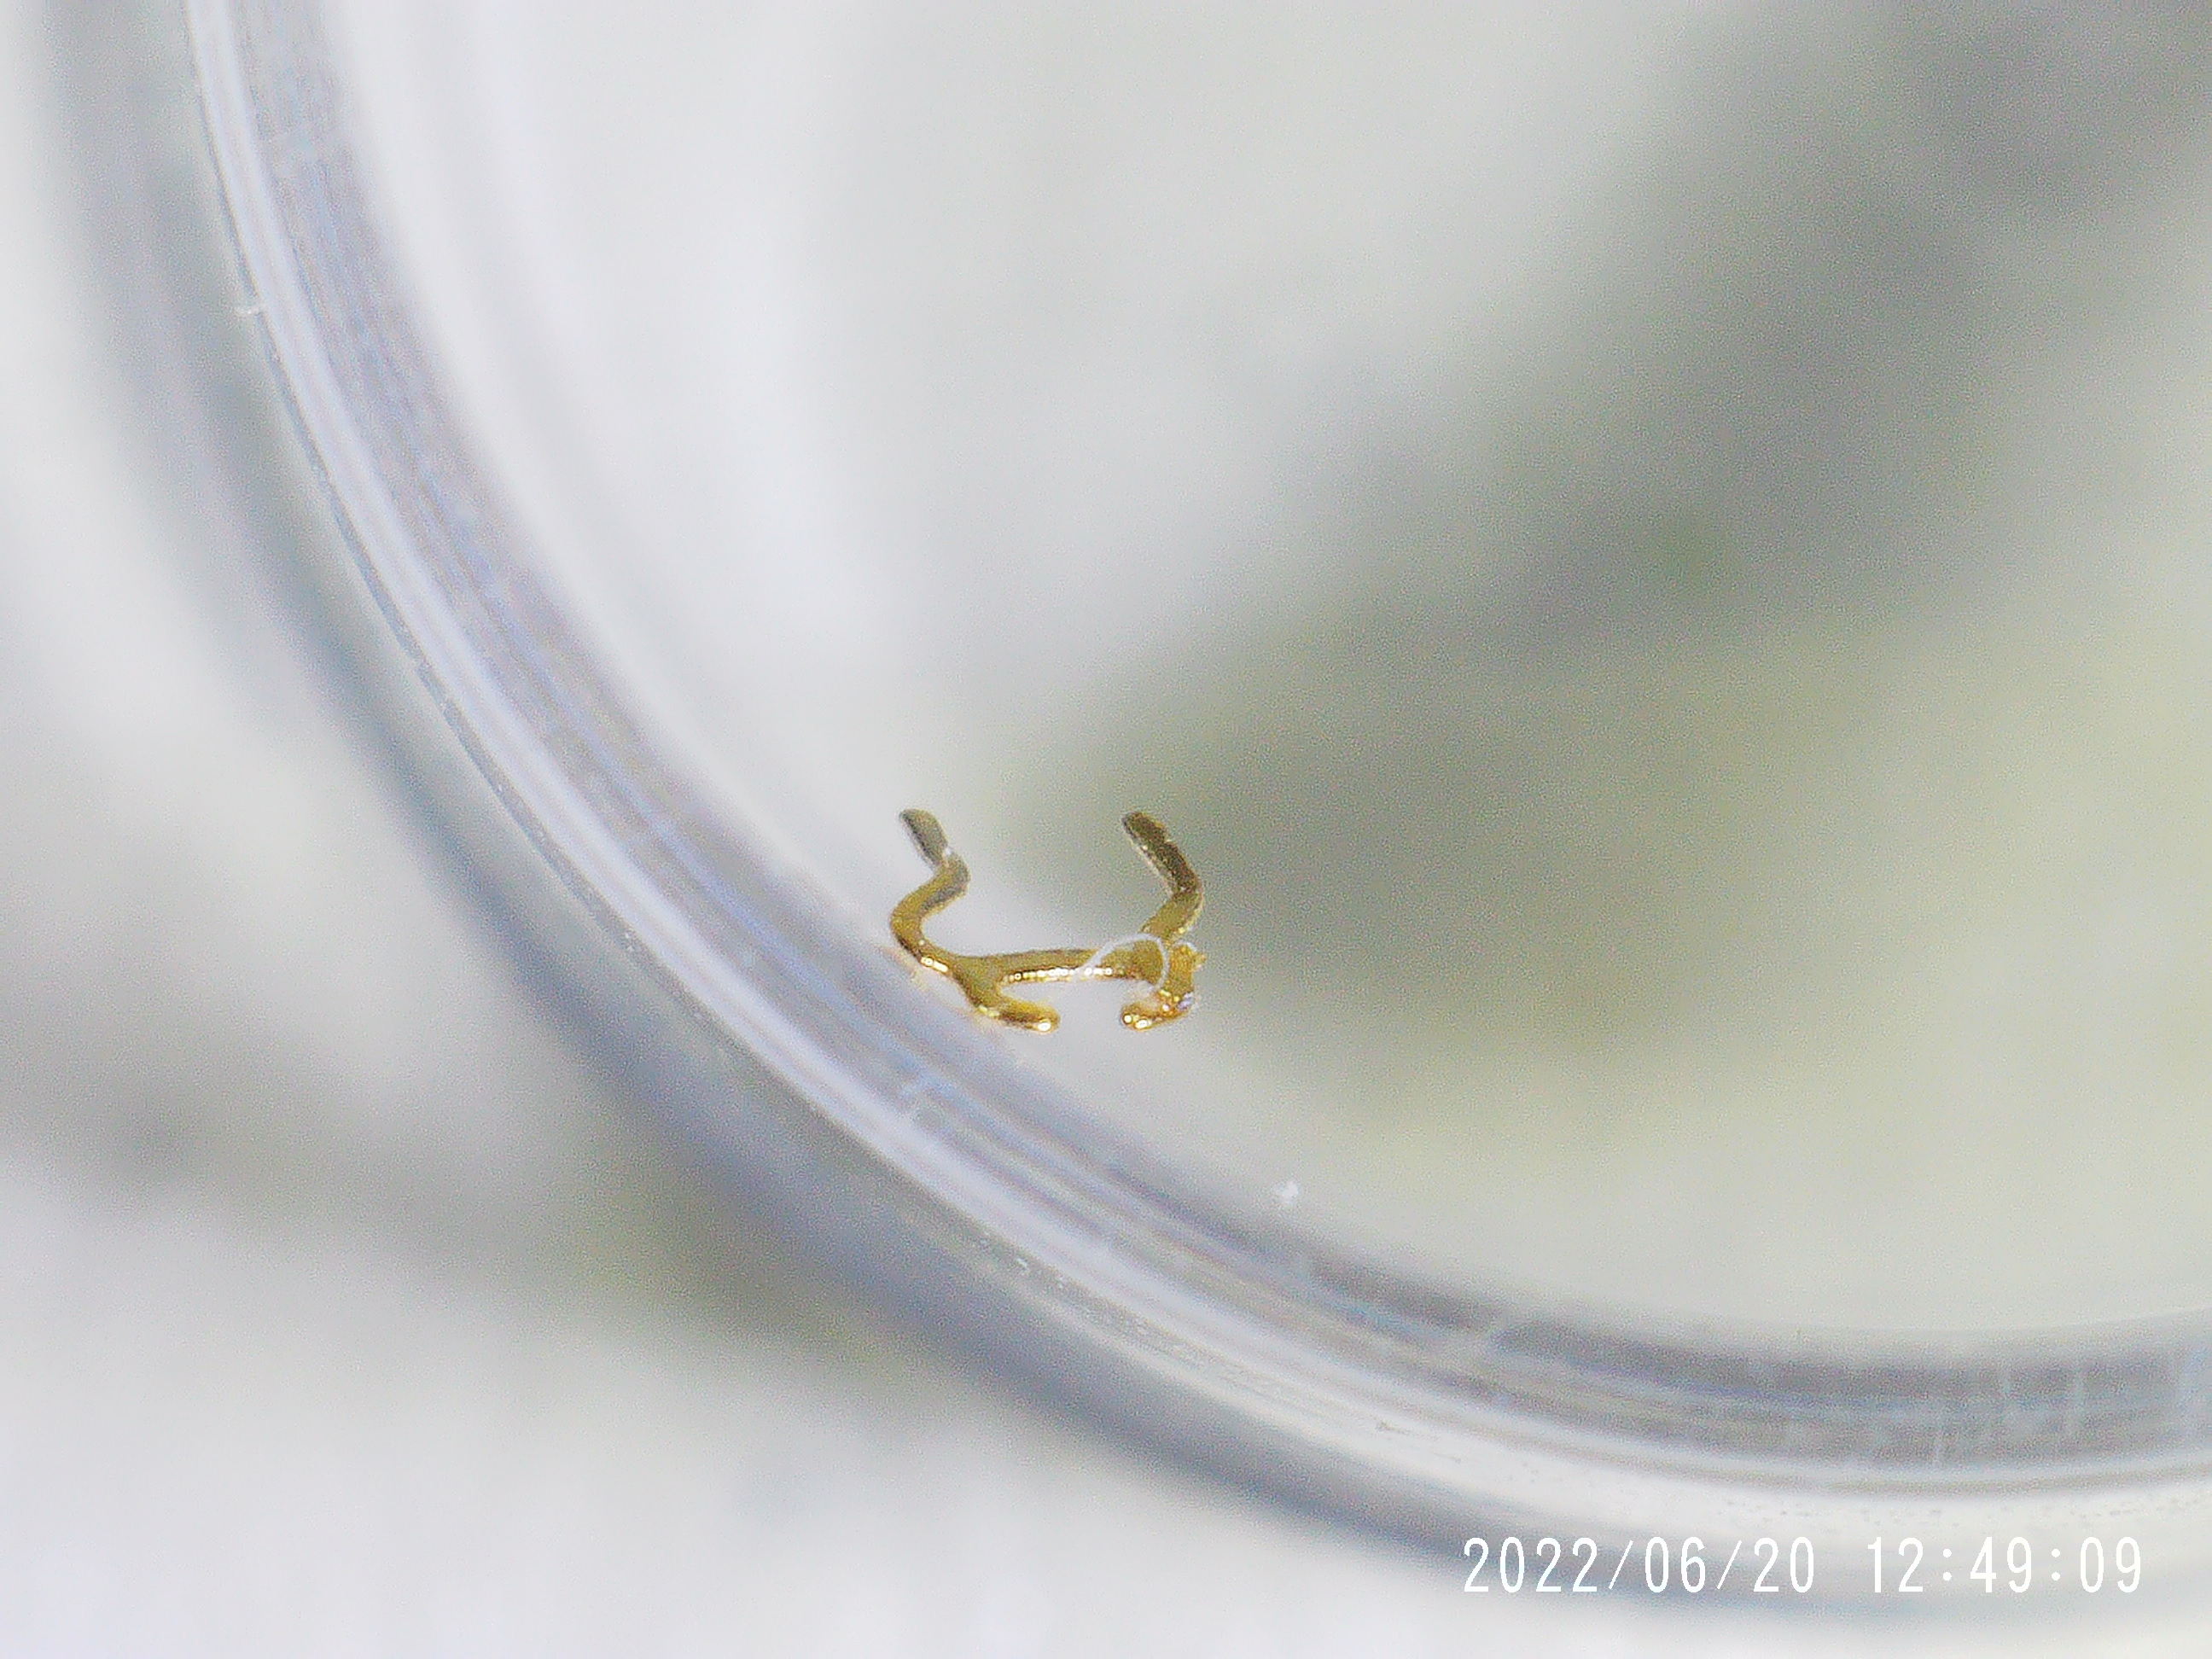
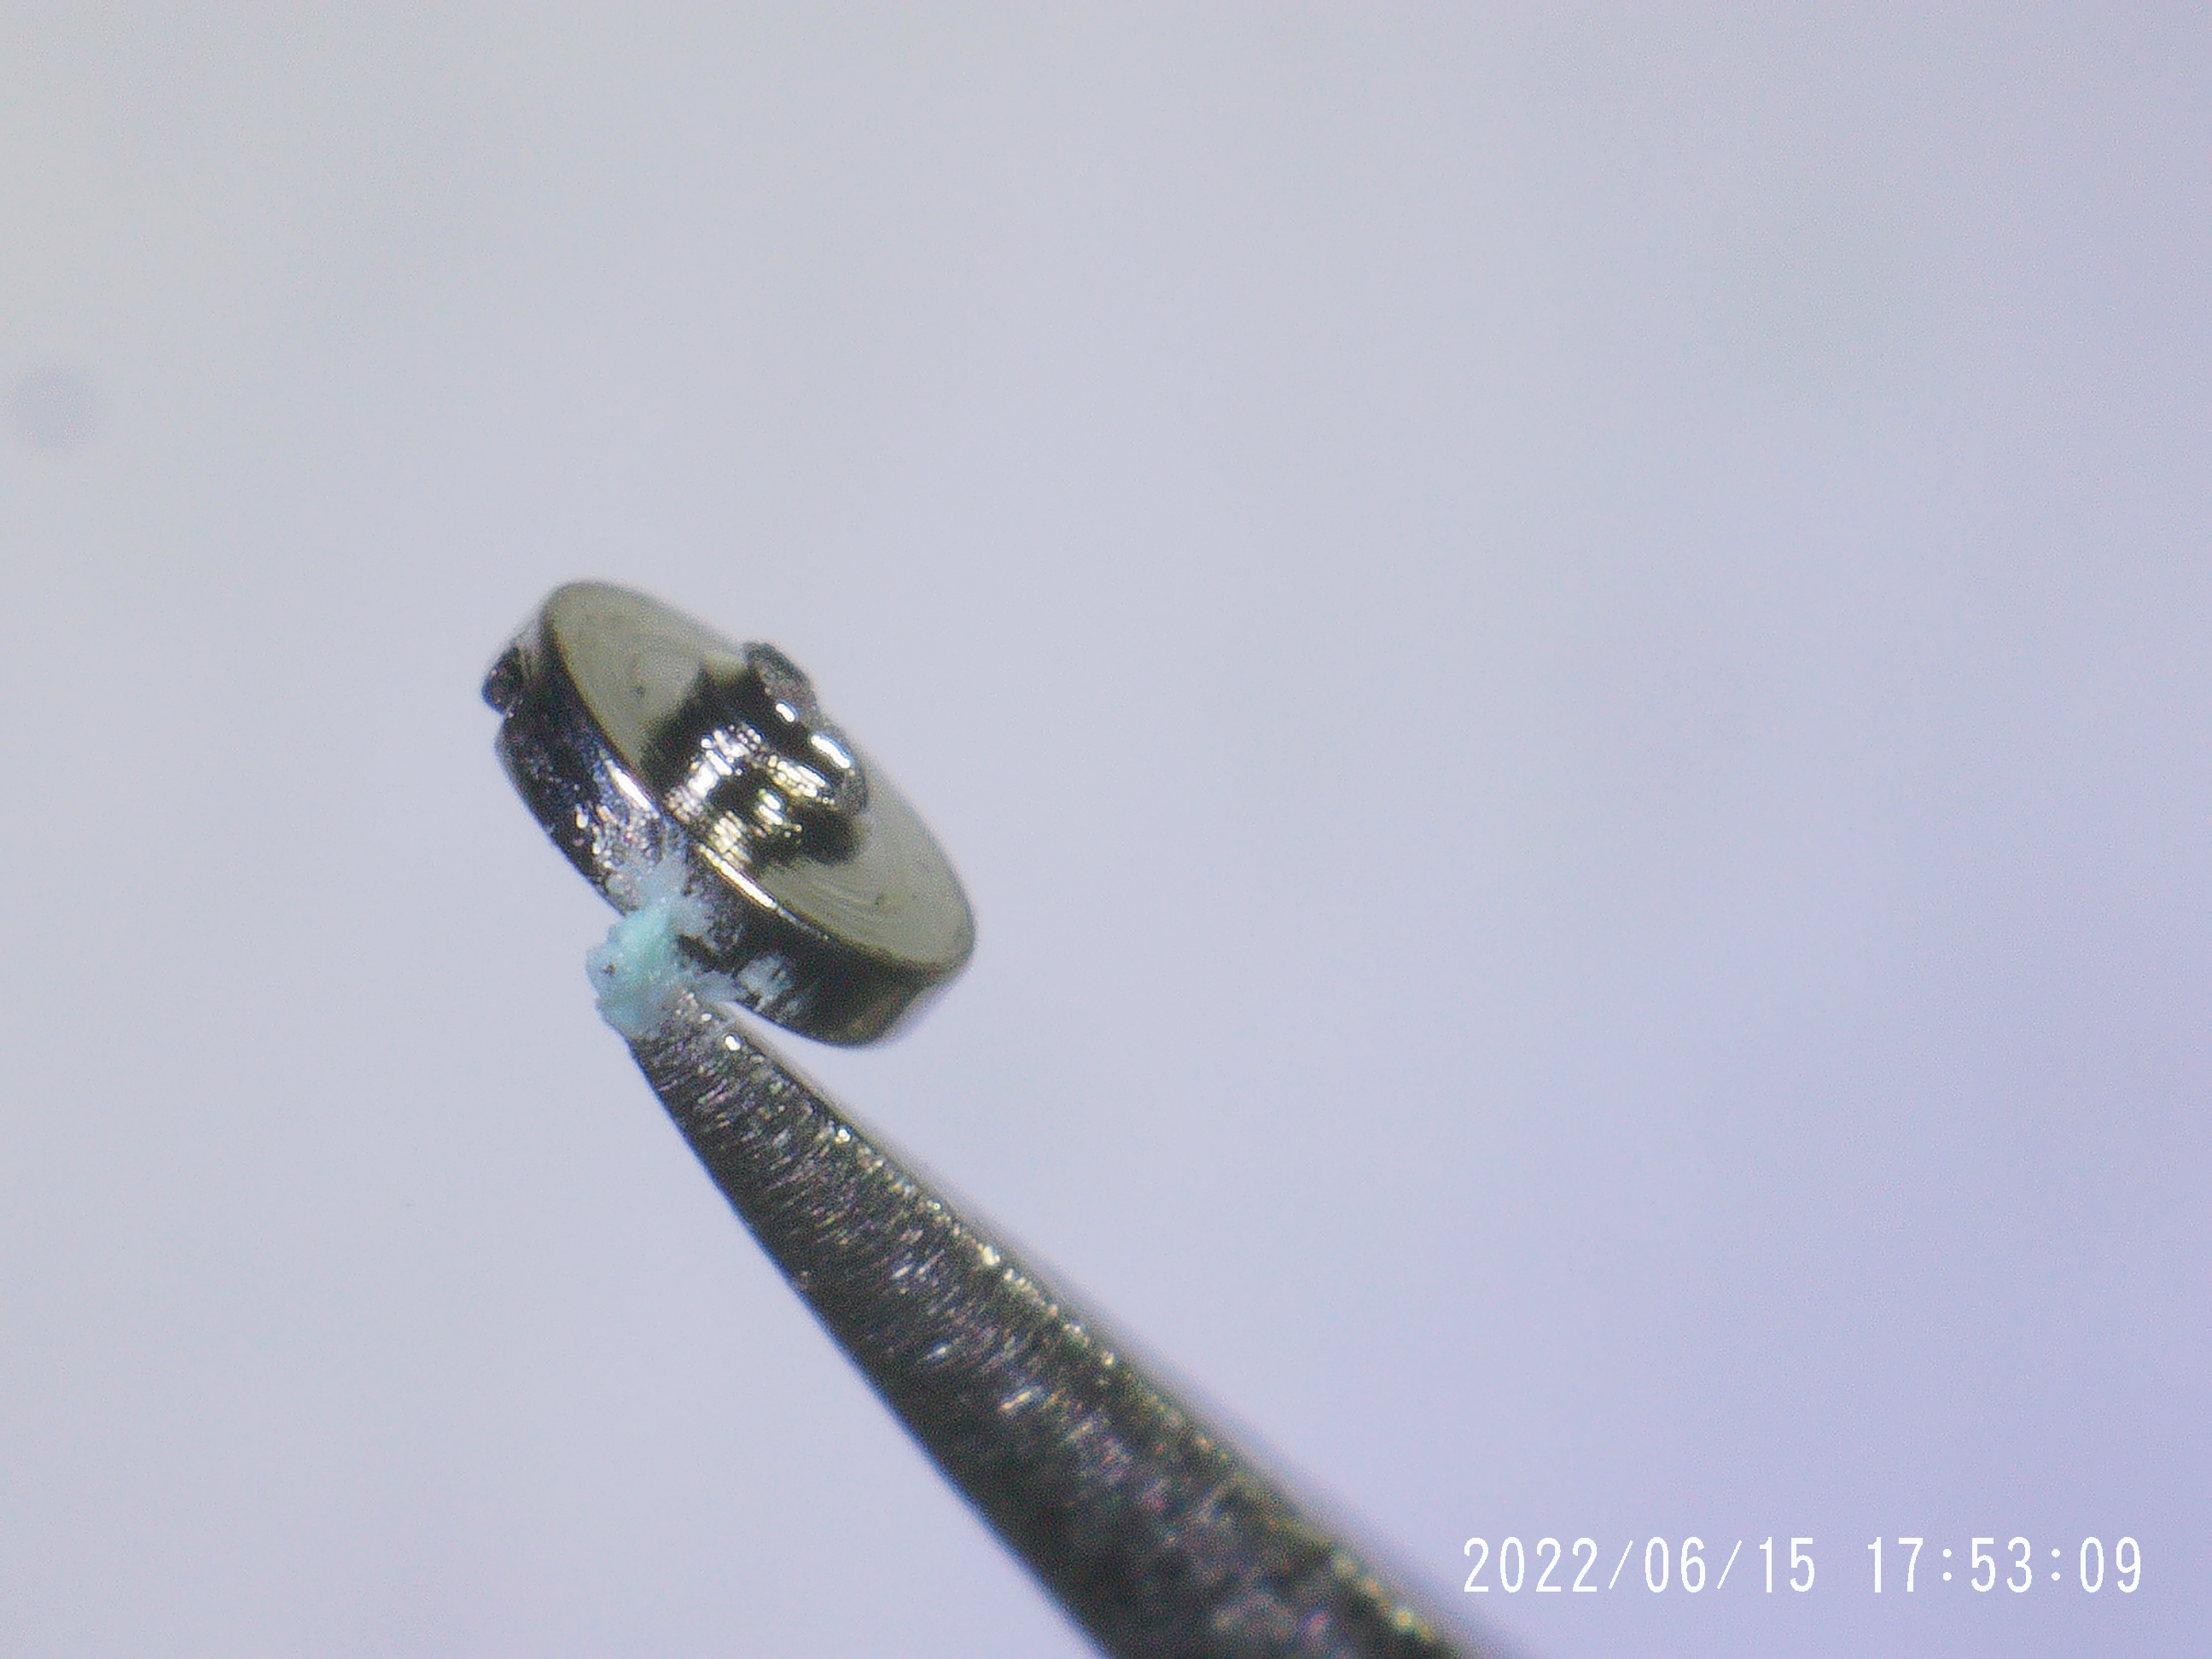
But just as I'd secured the chronograph bridge and was about to start the process of getting the dial and hands back on, I flipped the movement over, and something fell off it and hit the floor. I froze (remembering the hours I'd spent hunting screws when I first started tinkering with movements a few months ago. But this time, I was able to find the offending part reasonably easily... it was a screw. Or it was part of a screw. The screw holding down the Hammer Jumper (part no. 4130-883) had sheared off at the head.


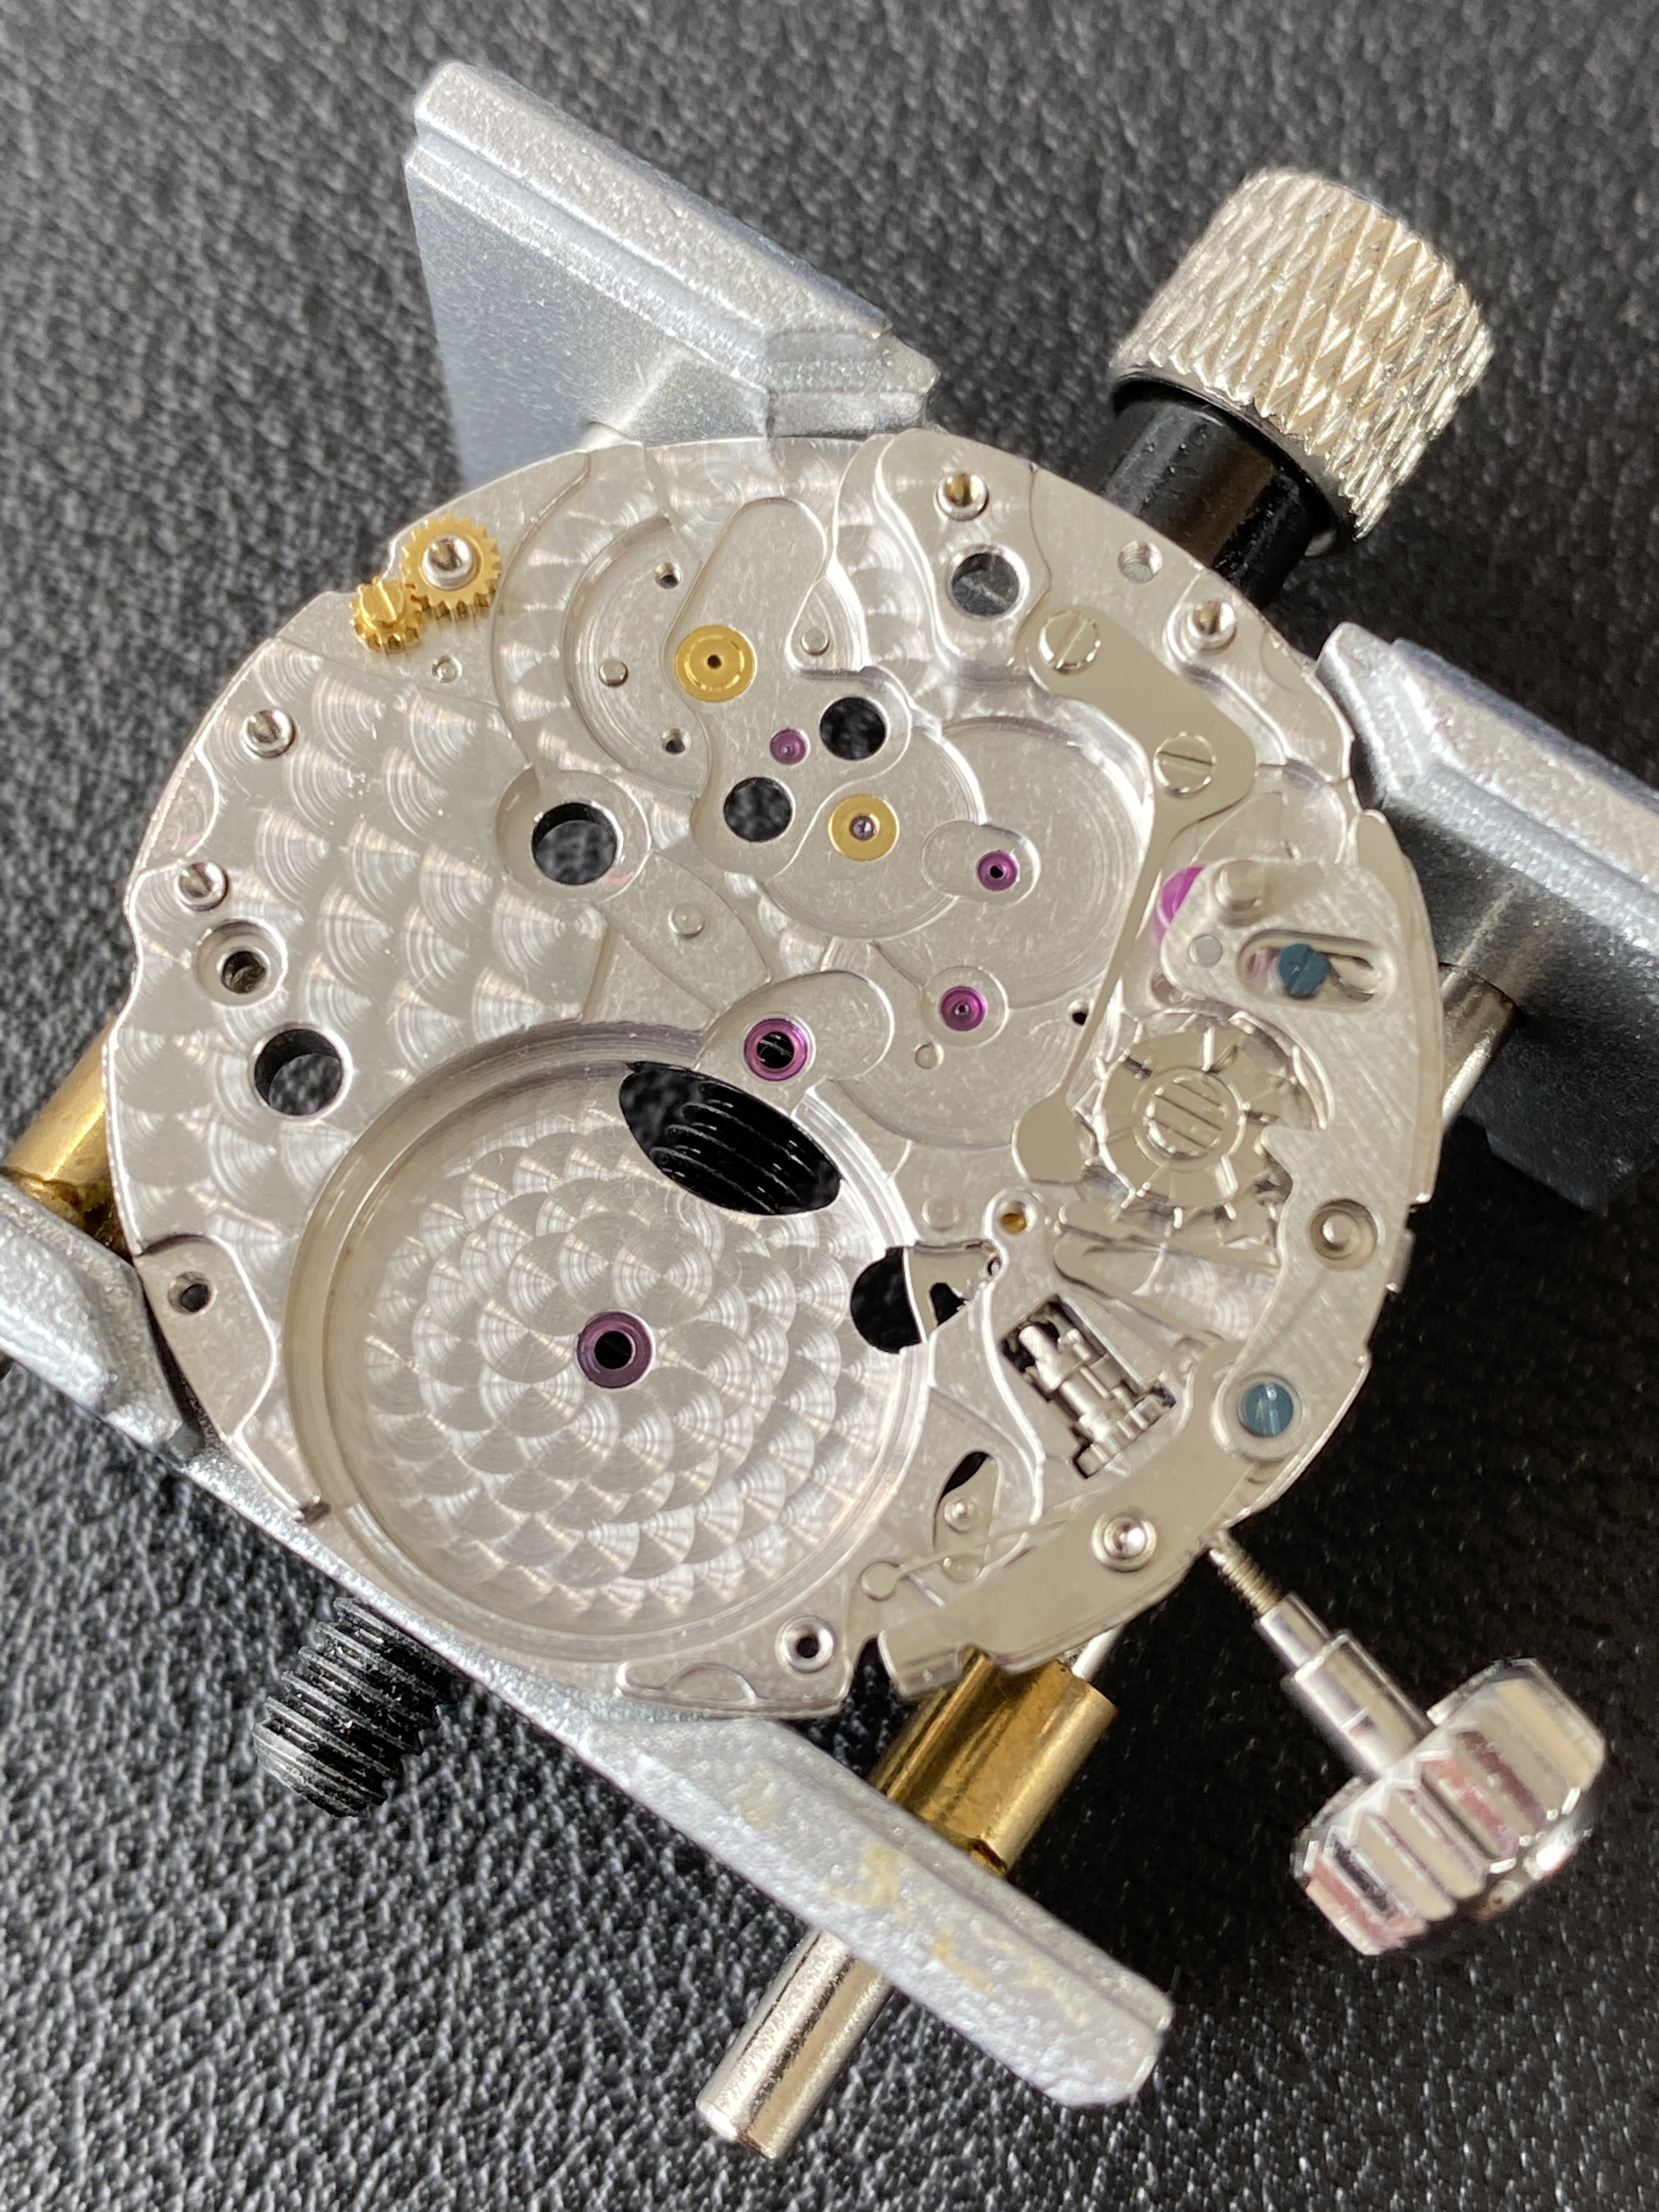
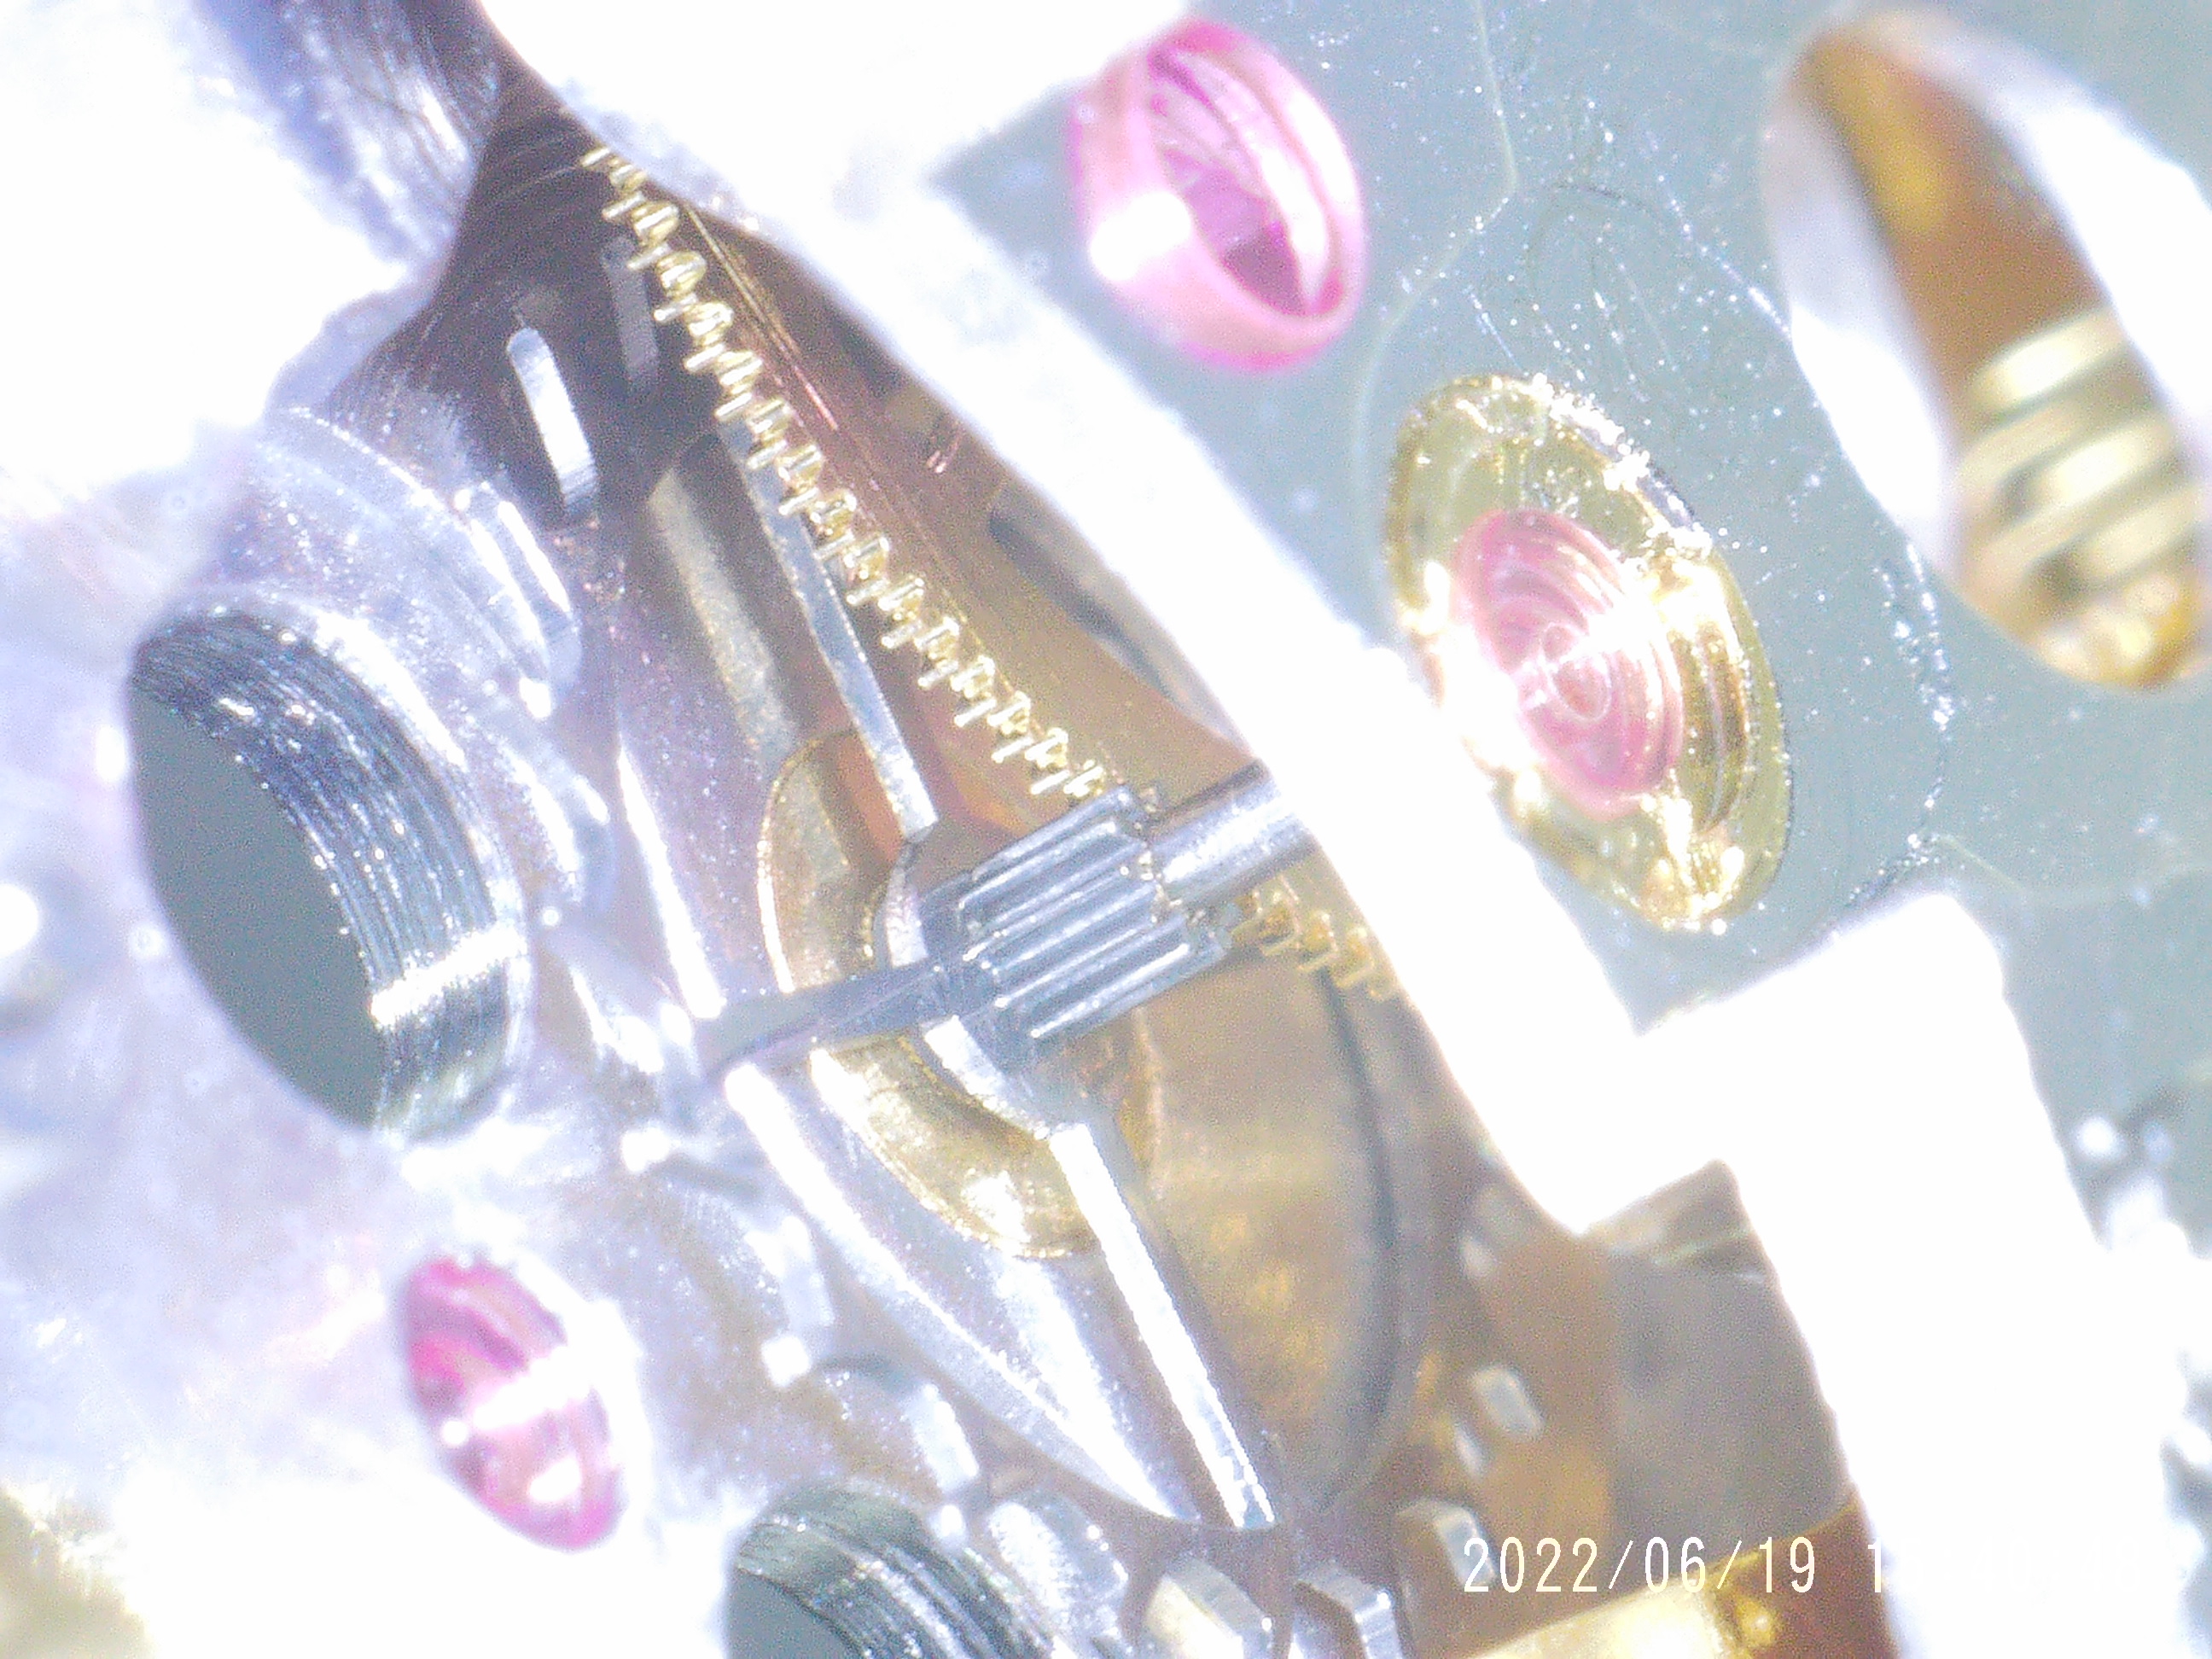
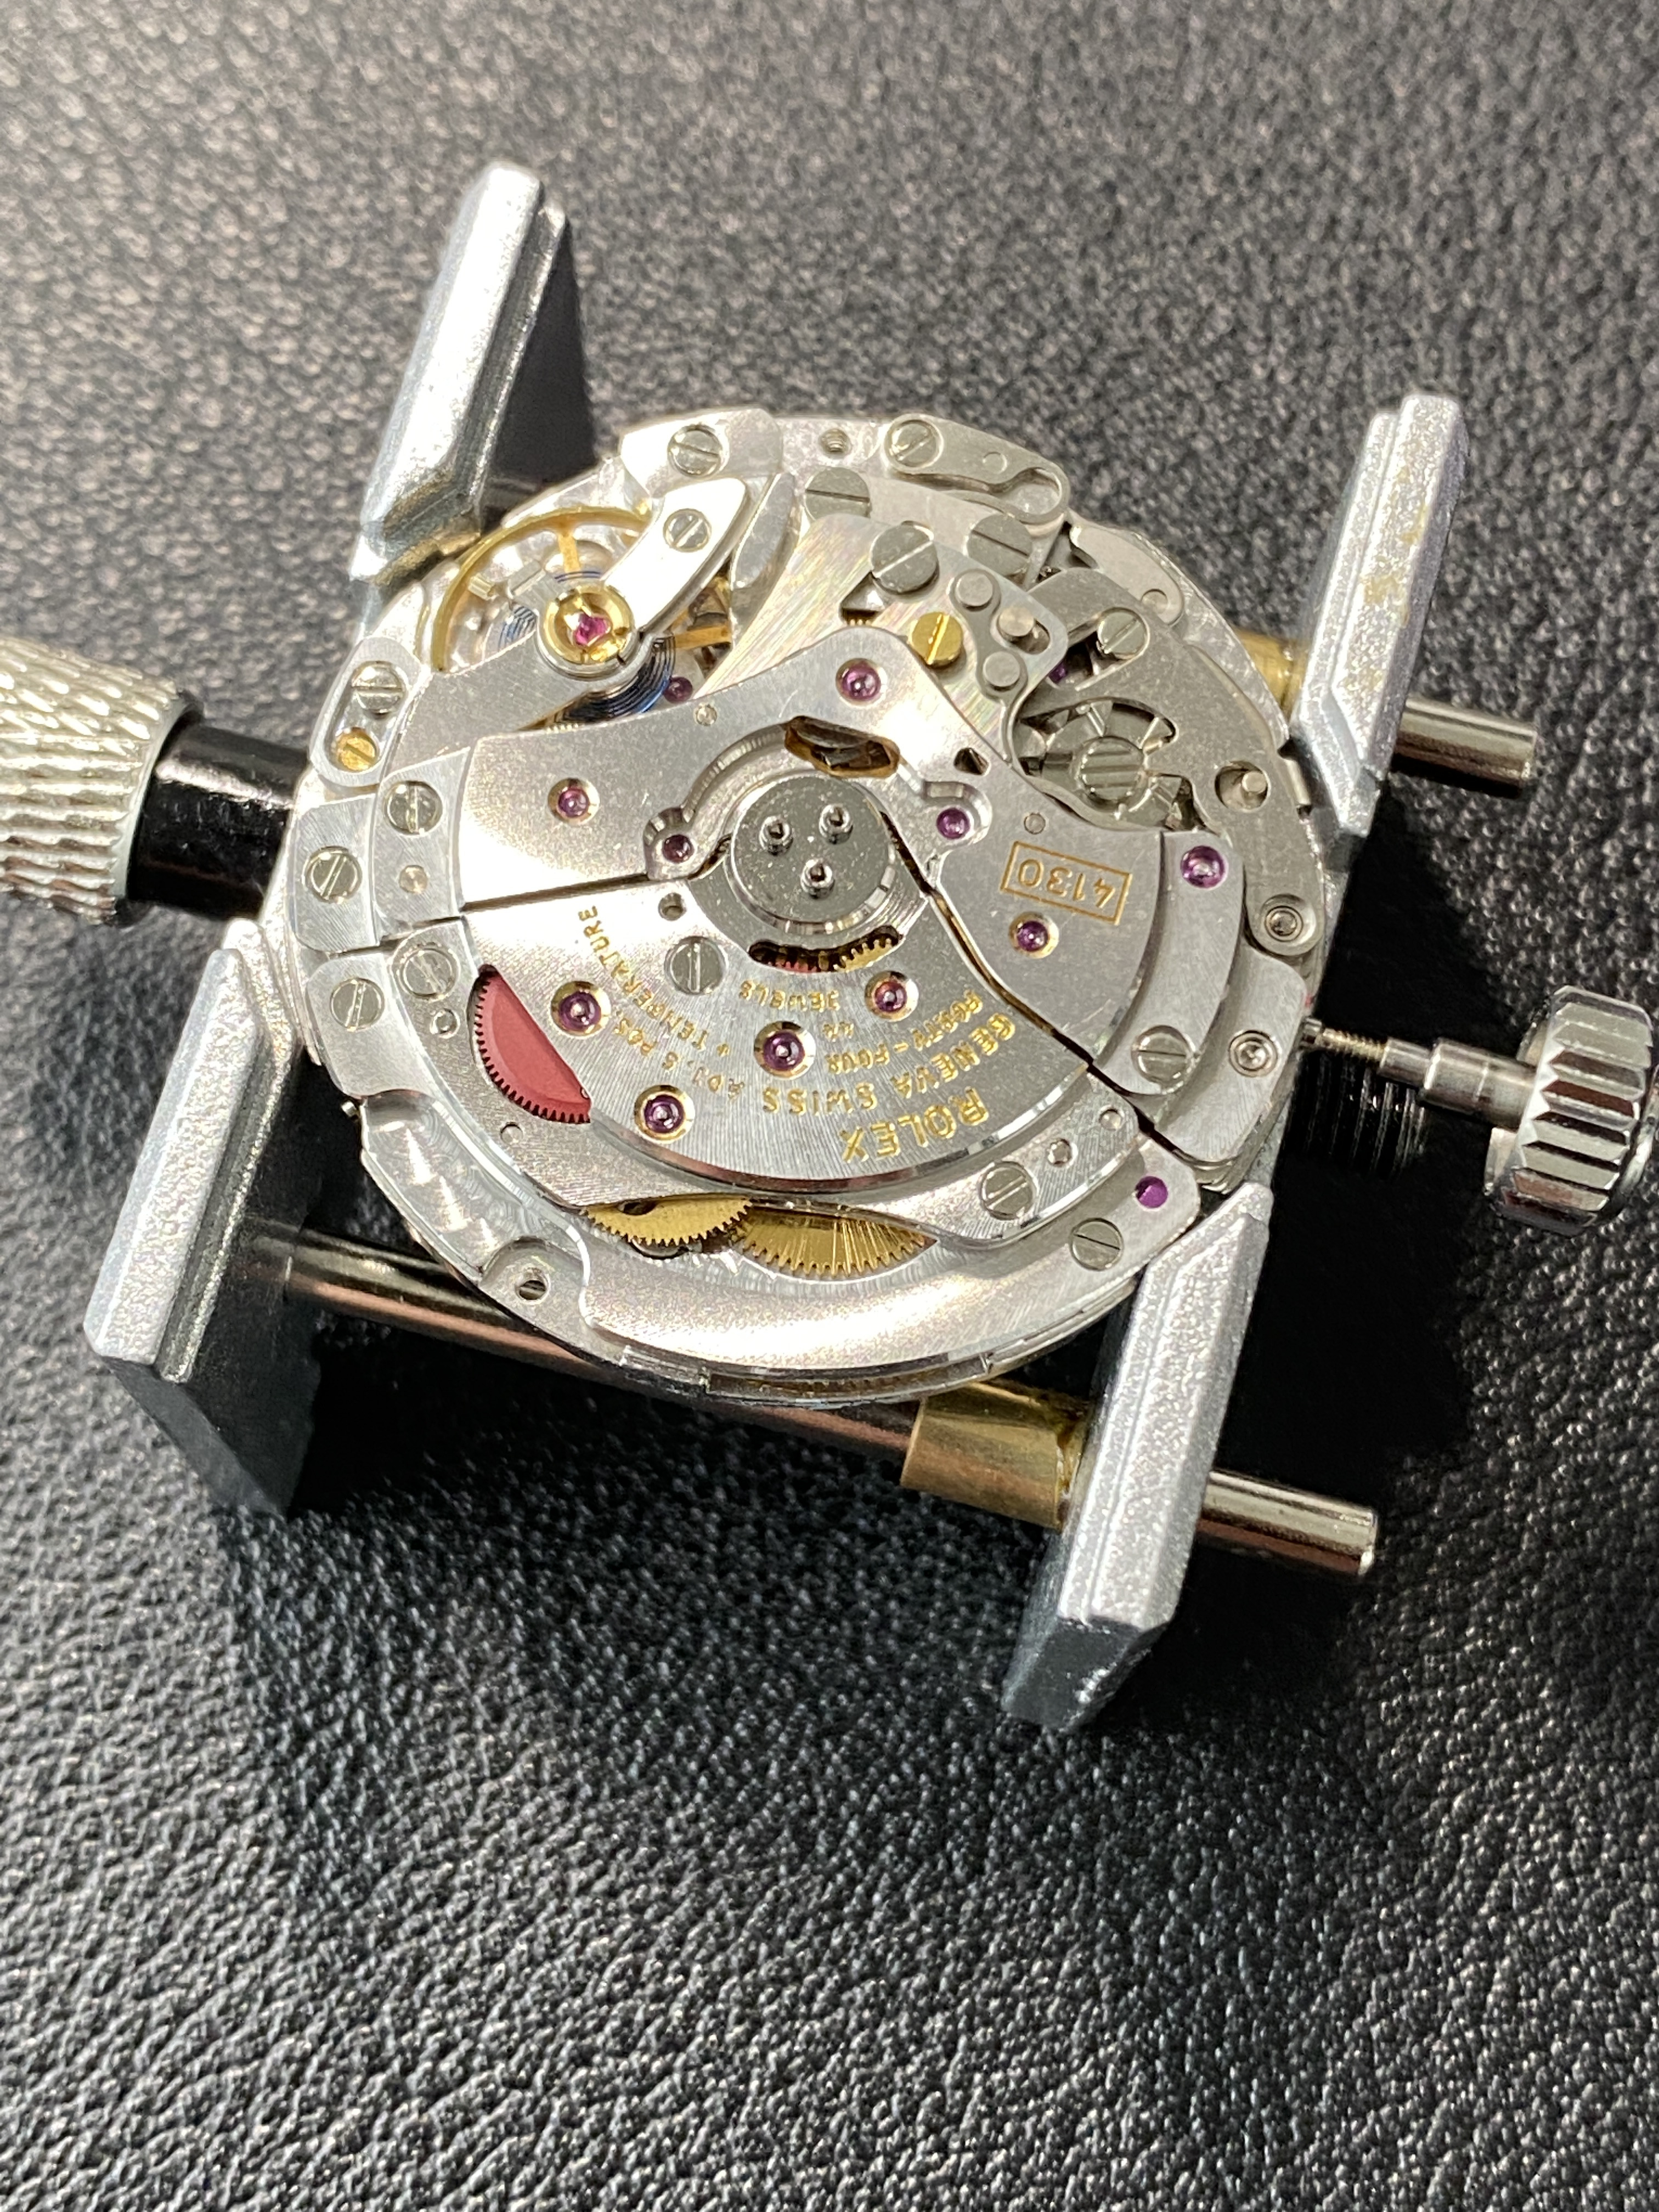
Here's a pic showing the movement with the missing screw head (look just above where the winding stem enters the movement).


This has me pretty worried. I'm sure I'll be able to find a replacement screw since I have a few spare rolex clone movements laying around... but I'm worried I won't be able to get the broken screw out. At least the screw didn't break flush to a plate or a bridge. If I take the movement apart, I'll be able to remove the Hammer Jumper and that will give me a few millimeters of threaded screw stem to work with. Regardless, this is turning into a project that's more involved that I'd hoped. I really didn't want to have to dis-assemble the entire 4130 chronograph works. But I have a feeling that I'm going to have to to replace this broken screw.

More learning ahead.
 

NoahNHP

Known Member
22/7/21
165
18
18
Australia
I'm about to do the same project with CF 4130 like you doing, may i ask how much for those gen parts in total? I'm thinking about adding the gen automatic module as well but is it necessary? Also best of luck mate!
 

dogwood

I'm Pretty Popular
Patron
Certified
7/9/21
1,890
3,550
113
Canada
I'm about to do the same project with CF 4130 like you doing, may i ask how much for those gen parts in total? I'm thinking about adding the gen automatic module as well but is it necessary? Also best of luck mate!

It depends on where you can source parts from. But probably around $700.
 
  • Like
Reactions: NoahNHP
29/3/22
56
49
18
USA
I’m so impressed and thanks for sharing this journey with us. Yea sure the screw is going to be a good size hurdle and I’m anxious to see you solve it. I think screws are killing you… like a broken screw head… or lost on the floor. ???? But I’m loving your project!!
 

dogwood

I'm Pretty Popular
Patron
Certified
7/9/21
1,890
3,550
113
Canada
I’m so impressed and thanks for sharing this journey with us. Yea sure the screw is going to be a good size hurdle and I’m anxious to see you solve it. I think screws are killing you… like a broken screw head… or lost on the floor. ???? But I’m loving your project!!

Thanks for coming along for the ride. I think I’m gonna try tackling the sheared off screw this morning. I’ll make sure to take plenty of pictures to both document the process, but also so that when I’m trying to put things back together I’ll know where all the little bits go.
 

dogwood

I'm Pretty Popular
Patron
Certified
7/9/21
1,890
3,550
113
Canada
Update: It appeared like I was going to have to fully disassemble the movement in order to get to the sheared off screw... so that's what I got my teeth into this morning. This is day 2 working on the 4130 and I'm starting to feel more comfortable with the parts of the movement that control the chronograph. I started excavating (wrong word but right feeling) my way down through the movement.


After removing the chronograph bridge, most of the wheels and jaws came free perfectly easily.


However, the "Intermediate Wheel For Chronograph" (circled in red) wouldn't come free for some reason. I spent a long time looking through the service manual and looking at the underside of the wheel from the side with my digital microscope, but I couldn't see what could be holding it down. From the part geometry, it should really just sit on the plate. I don't know what's going on. But the fact that I couldn't remove it, meant that I couldn't remove the vertical clutch beside it.


This was a problem, because without removing the vertical clutch it didn't look like I'd be able to remove the spring for the jaw for the clutch, and the screw the holds down the spring for the jaw, also holds down the train bridge. And I had to remove the train bridge in order to get at the sheared off screw.


In then end, I removed the screw for the spring, and coaxed the spring upwards with my finger on top so that it wouldn't fly away when it came loose. This worked, and I was able to remove the clutch jaws, and then simply removed the entire train bridge with the vertical clutch and chronograph intermediate wheel still attached. This took me down to the main train of wheels, which all came away easily, as did the column wheel and its various jumpers.


I then flipped the movement over and disassembled the keyless works to get the mainplate on its own. This allowed me to get up close and personal with the screw that had been sheared off. There is a tiny protrusion sitting proud of the top of the insert in the main plate.


Interestingly, and I don't know if this will help or not, but the threaded insert isn't blind... that is, it goes all the way through the mainplate and comes out the other side. The same insert is used for a screw to fasten part of the keyless works on the other side. I feel like this *might* be somehow helpful in getting the broken screw out since I can access both the top and the bottom of the hole. Well, at least it might be, I don't really know how to get a broken screw out of a hole.

I was thinking maybe I could use a blade or a very fine file to try to cut a slot into the part of the screw that's still sitting proud of the hole, and then try to use this slot and a fine screw driver to unscrew it? But I'm reluctant to try anything that removes material from the screw, since removing anything I can hold on to makes it, well, harder to hold on to.

Has anybody faced a similar situation before? Any suggestions for how to deal with a broken screw that's stuck in the mainplate of a movement?
 
  • Like
Reactions: AG91

Raddave

Most Delicious of all Nipples!
Staff member
Global Moderator
Administrator
Certified
24/12/11
66,221
17,220
113
can you get a pin vice on it ?
 
  • Like
Reactions: dogwood

dogwood

I'm Pretty Popular
Patron
Certified
7/9/21
1,890
3,550
113
Canada
Wow… ok… so I figured I’d try to use an exacto blade to score. Line across the top of the busted screw to get some purchase with a screw driver. I got things setup under my digital microscope. But as soon as I touched the blade to the top of the screw, it moved!!! The screw was loose in the threaded hole. With a little encouragement to spin with the tip of the blade, I was able to simply unscrew the broken bit. Easy as pie. I’m kinda feeling dumb for having disassembled the entire movement only to have the solution take less than 30 seconds. Sigh. Learning moment I guess.

sorry about the crappy picture. The memory card for the microscope was in my computer… so just grabbed my phone to get the victory shot.

now I just need to re-assemble this thing. But I’m thinking I might as well clean / service it while I’ve got it apart.
 
  • Like
Reactions: Giammy and ZMCoupe

dogwood

I'm Pretty Popular
Patron
Certified
7/9/21
1,890
3,550
113
Canada
can you get a pin vice on it ?

Great suggestion. I’m not sure there was enough “meat” sitting proud for a pin vice to grab onto. But the situation is moot because I’m an idiot and didn’t realize that the screw wasn’t tight in the hole and rotated with trivial torque.
 
  • Like
Reactions: AG91 and Raddave
29/3/22
56
49
18
USA
That’s wild! You got so lucky with it being so loose!! I would have done the same as you… thinking this was much harder to remove. Who would have thought a screw would have been so loose like that? NONE of your efforts are wasted. You probably learned or reinforced things you knew with this hurdle. Good job!!
 
  • Like
Reactions: AG91 and dogwood

dogwood

I'm Pretty Popular
Patron
Certified
7/9/21
1,890
3,550
113
Canada
Progress Update: So with the movement fully disassembled, I figured I might as well clean all the parts and re-lubricate it as I put it back together. This movement has never been serviced, so I figured it wouldn't be a terrible idea to do that sine I did notice a bit of dried up gunk around some of the pivot points. I'm still so new at this watch "service" thing, that I don't really have a good sense of if a movement is too dry or has been over lubricated; but I'm starting to get a feel for when things are dirty :)

My procedure for cleaning this time around involved 2 minutes in the ultrasonic cleaner in a solution of naphtha, followed by drying out the parts on blotting paper, and then 2 minute in the ultrasonic cleaner in a solution of iso-propyl-alcohol. The parts were noticeably cleaner when I was all done. I did the parts in small batches since when I was doing my first movement service on the VR3235, I ended up confused about which screws went with which parts when they came out of the cleaner. And that ended up being an issue on the VR3235 since I ended up using a screw with too large a head in the date works near the date quick-set wheel, which caused that wheel to jam. Anyway... I took it slowly and in batches this time around to make sure I kept parts and their screws organized.

Then I started re-assembling the movement. So far I've reassembled the keyless works (the sliding pinion yoke spring is a pain in the ass to get into place!), and I've assembled the column wheel and it's jumpers and the levers and springs for the start/stop and reset pushers. However, something interesting happened. I BROKE ANOTHER SCREW!!! As I was going to re-assemble the Yoke For Flyback, I figured I'd screw in the one remaining screw I had just to keep all the parts in place while I then went and hunted for a replacement for the screw that broke from before. But as soon as I screwed the screw into place it started spinning. At first I thought I must have messed up and somehow placed a smaller screw with the column wheel parts during cleaning, but it wasn't a mistake. The screw sheared off in exactly the same way as the other one had before. Here's a pic showing the sheared off screw head and the broken bit of screw still in the hole.


I'm a little pissed off that both of these screws have broken. This makes me think that there's a design flaw in the noob 4130 clone? or maybe I just got two low quality screws in my movement and they both happened to be securing the same piece, and both happened to fail within days of each other. Regardless, I ended up replacing these two screws with some spare 3135-5600 screws I had laying around (these are the date indicator seating screws for a 3135 movement). The replacement screws are blue and can be seen in the pic below. These were the only screws with the correct thread diameter from my set of spares. I do have a spare VR3235 which I could tear down for parts, but I didn't want to go digging at this point. My only worry is that the size of the head on the blue replacement screws is a little smaller than the stock ones, and in one case, the screw head slides along in a channel of the part it secures, so I'm worried that maybe I should find a better replacement. Thoughts?


The next issue I'm up against, is that there's a tiny KIF shock setting for the escape wheel on the train wheel bridge. I was able to remove the KIF spring but for some reason I can't seem to get the cap jewel to come free. I've tried soaking it in naphtha and putting it back into the ultrasonic cleaner to break up whatever dried up lubricant is gluing the cap jewel into the shock setting, but so far nothing seems to be even getting it to budge. I've tried poking at it with pegwood, a screw driver, and even tried to get the tip of a razor blade under the edge of the cap jewel. Nothing budges it. Is it possible that this is a "fake" shock setting? Is it possible that this isn't actually a two piece shock setting? The small shock setting on the main plate did come apart though, so I strongly suspect this is a "real" setting. Has anybody who has serviced a clone 4130 been able to disassemble the escape wheel shock setting on the train bridge?
 

NoahNHP

Known Member
22/7/21
165
18
18
Australia
Out of curiosity do you ever take any watchmaking course in order to do this? I'm thinking of doing the service myself as it's very hard to find a watchmaker at my place but I'm also afraid that I'll break the movement accidentally lol
 

dogwood

I'm Pretty Popular
Patron
Certified
7/9/21
1,890
3,550
113
Canada
Out of curiosity do you ever take any watchmaking course in order to do this? I'm thinking of doing the service myself as it's very hard to find a watchmaker at my place but I'm also afraid that I'll break the movement accidentally lol

I enrolled in Mark Lovik’s online watch repair course. I found it extremely useful to get started.
 
29/3/22
56
49
18
USA
Out of curiosity do you ever take any watchmaking course in order to do this? I'm thinking of doing the service myself as it's very hard to find a watchmaker at my place but I'm also afraid that I'll break the movement accidentally lol

I'm planning on taking the Mark Lovik's online courses. In as much as that course wants you to learn on a particular movement for the course… I also planning on ordering the same movement as my rep from the TD. This way I have the same movement as the rep to practice on AND I’d have spare parts.
 
  • Like
Reactions: NoahNHP

dogwood

I'm Pretty Popular
Patron
Certified
7/9/21
1,890
3,550
113
Canada
I'm planning on taking the Mark Lovik's online courses. In as much as that course wants you to learn on a particular movement for the course… I also planning on ordering the same movement as my rep from the TD. This way I have the same movement as the rep to practice on AND I’d have spare parts.

Yeah the course focuses on the Unitas 6497 which is a very standard movement. Honestly the base layer of almost every mechanical watch follows the same pattern as the 6497, so it’s a great movement to start on. Also the parts in the 6497 are nice and big, so it’s much easier to work with as you develop the bench time needed to feel more confident to manipulate small parts without them flying across the room. also the 6497 is very cheap at around $30, so mistakes aren’t expensive to recover from.

This is a little bit “do as I say, not as I do” because I started on a vr3235 since my Unitas 6497 was stuck in customers and I wanted to start on something. See this thread for details on my first attempt at servicing a movement.

https://forum.replica-watch.info/fo...ment-my-first-attempt-at-servicing-a-movement
 
  • Like
Reactions: NoahNHP

dogwood

I'm Pretty Popular
Patron
Certified
7/9/21
1,890
3,550
113
Canada
UPDATE: I was never able to get the cap jewel to come free from the escape wheel shock setting on the train bridge. I tried everything I could think of (soaking in warm Iso-propyl-alcohol, ultrasonic cleaner, trying to pry it loose with a razor blade), nothing worked. Eventually I figured I'd simply oil it "from the bottom" (that is, through the hold on the other side of the setting), and hope for the best. I was able to get some oil into the setting (less than optimal, but still got some 9010 in there). But, when it came to getting the KIF spring back into place it was a real battle. I spent hours fiddling with that fucking spring. I built different tools to get better purchase on the spring. I built enclosures to hold my cling wrap "force field" to catch the spring when it invariably tried to escape. And eventually I somehow managed to break one of the little spring arms. I've ordered a blister pack of five KIF 3-2 springs (these are the 1.50mm long ones for the small shock settings on the 4130 movement, the balance wheel uses KIF 3-3 springs which are 1.75mm long).

Interestingly, when I serviced the shock setting on the bottom of the main plate, getting the spring into place wasn't that brutal. I mean it was still hard, but it wasn't an hours long battle that ended up with broken parts. So, I'm thinking that I might have somehow damaged the setting during my attempts to free the cap jewel. Specifically, maybe the destroyed the little overhangs that the spring legs are supposed to sit under when the spring is in place? If I have destroyed the actual setting then my options to fix that problem are somewhat expensive. I could spend 375 ERUO on a new gen train bridge. Or I could spend around C$200 on an AliExpress jewel setting press thingy + whatever the cost of the new setting would be (I haven't found exactly which one I'd need yet, but I'm guessing it wouldn't be cheap if it's gen, but maybe I can find a generic version that's compatible). My other option is simply to leave it as it is without the shock spring... I mean the cap jewel is completely stuck in place, so the KIF spring would be purely ornamental anyway. If I wasn't able to pry that cap jewel free, then I don't think any forces that the escape wheel pivot could apply to it would be enough to send it off. Still, the idea of the jewel eventually coming loose inside the movement doesn't give me the warm-and-fuzzies.

Here are some pics.


Suggestions on what to try next welcomed.

In other news, my gen 3235 pallet fork arrived this morning, so at least I'll be able to re-start my other project.