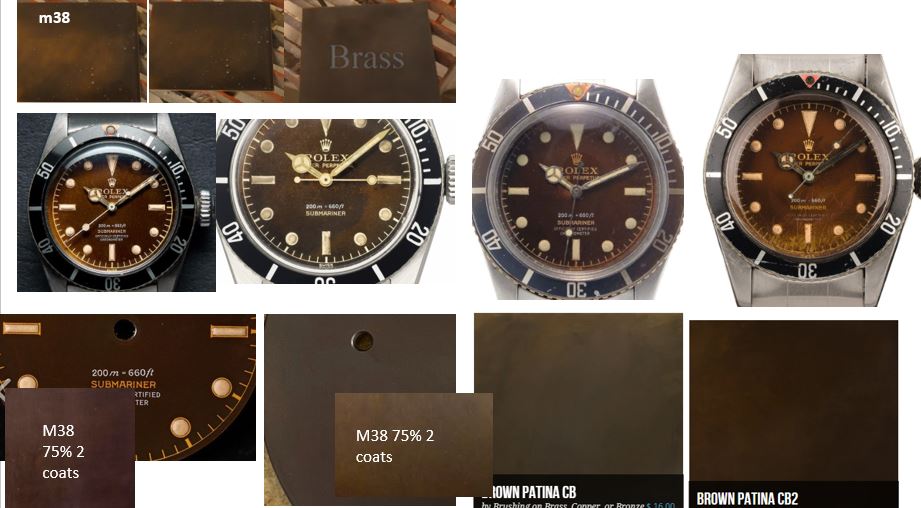
You can follow the synthesis of this with the original thread on a gilt dial.
Was initially inspired by the @Bart Cordell how to make a water slide decal gilt dial. Made my own but wanted more. Spent way to much time reading and figured I'd try to DIY. So here we go! This also would not be possible without help from @p0pperini. He is the designer of the art and graciously let me bother him over the past almost 2 years since I started brainstorming this. Below is the culmination of all my success and failures. If I haven't explained something good enough, ask away!
Method: I borrowed an idea from the DIY computer chip makers. The method is called Toner Transfer with heat. You can also use the chemical method which requires a 75/25 mixture of acetone/water. You can also use a laminator if you can get that to work. I found it got me 95% of the way there. I believe that do to the highly polished nature of the metal and the very fine details, the method below works the best.
TOOLS NEEDED:
-Your design, mirror imaged with a small centered hole in the art.
-A donor dial or make your own dial (you are looking for .4mm thick (roughly 27 gauge) brass)
-Polish (I used Mothers Mag, worked great. If you have to sand the dial, you need to use 600, 800, 1000, 1200,2000,3000 grit to get a good shine).
-A laser jet printer (your office has them, your library, post offices, they are everywhere)
-Toner transfer paper. If you google "yellow toner transfer paper" you will find cheap yellow paper that works great. Also glossy magazine paper works just as good.
-A source of heat (i used my stove, you can use a sandwich press, an oven, hair straightener, whatever)
-A burnisher (i just used a wooden clothespin)
-Acetone and isopropyl alcohol.
-A oxidizing agent OR a plating kit. See notes below for what I found worked great.
If you buy everything I have mentioned above and just use someone else's laser jet and I assume you have acetone and isopropyl alcohol around your house and use magazine paper, you are talking about $25 worth of supplies. After that you can make dials for essentially the cost of just the dial itself. I buy brass blanks off etsy for 10 for $4.
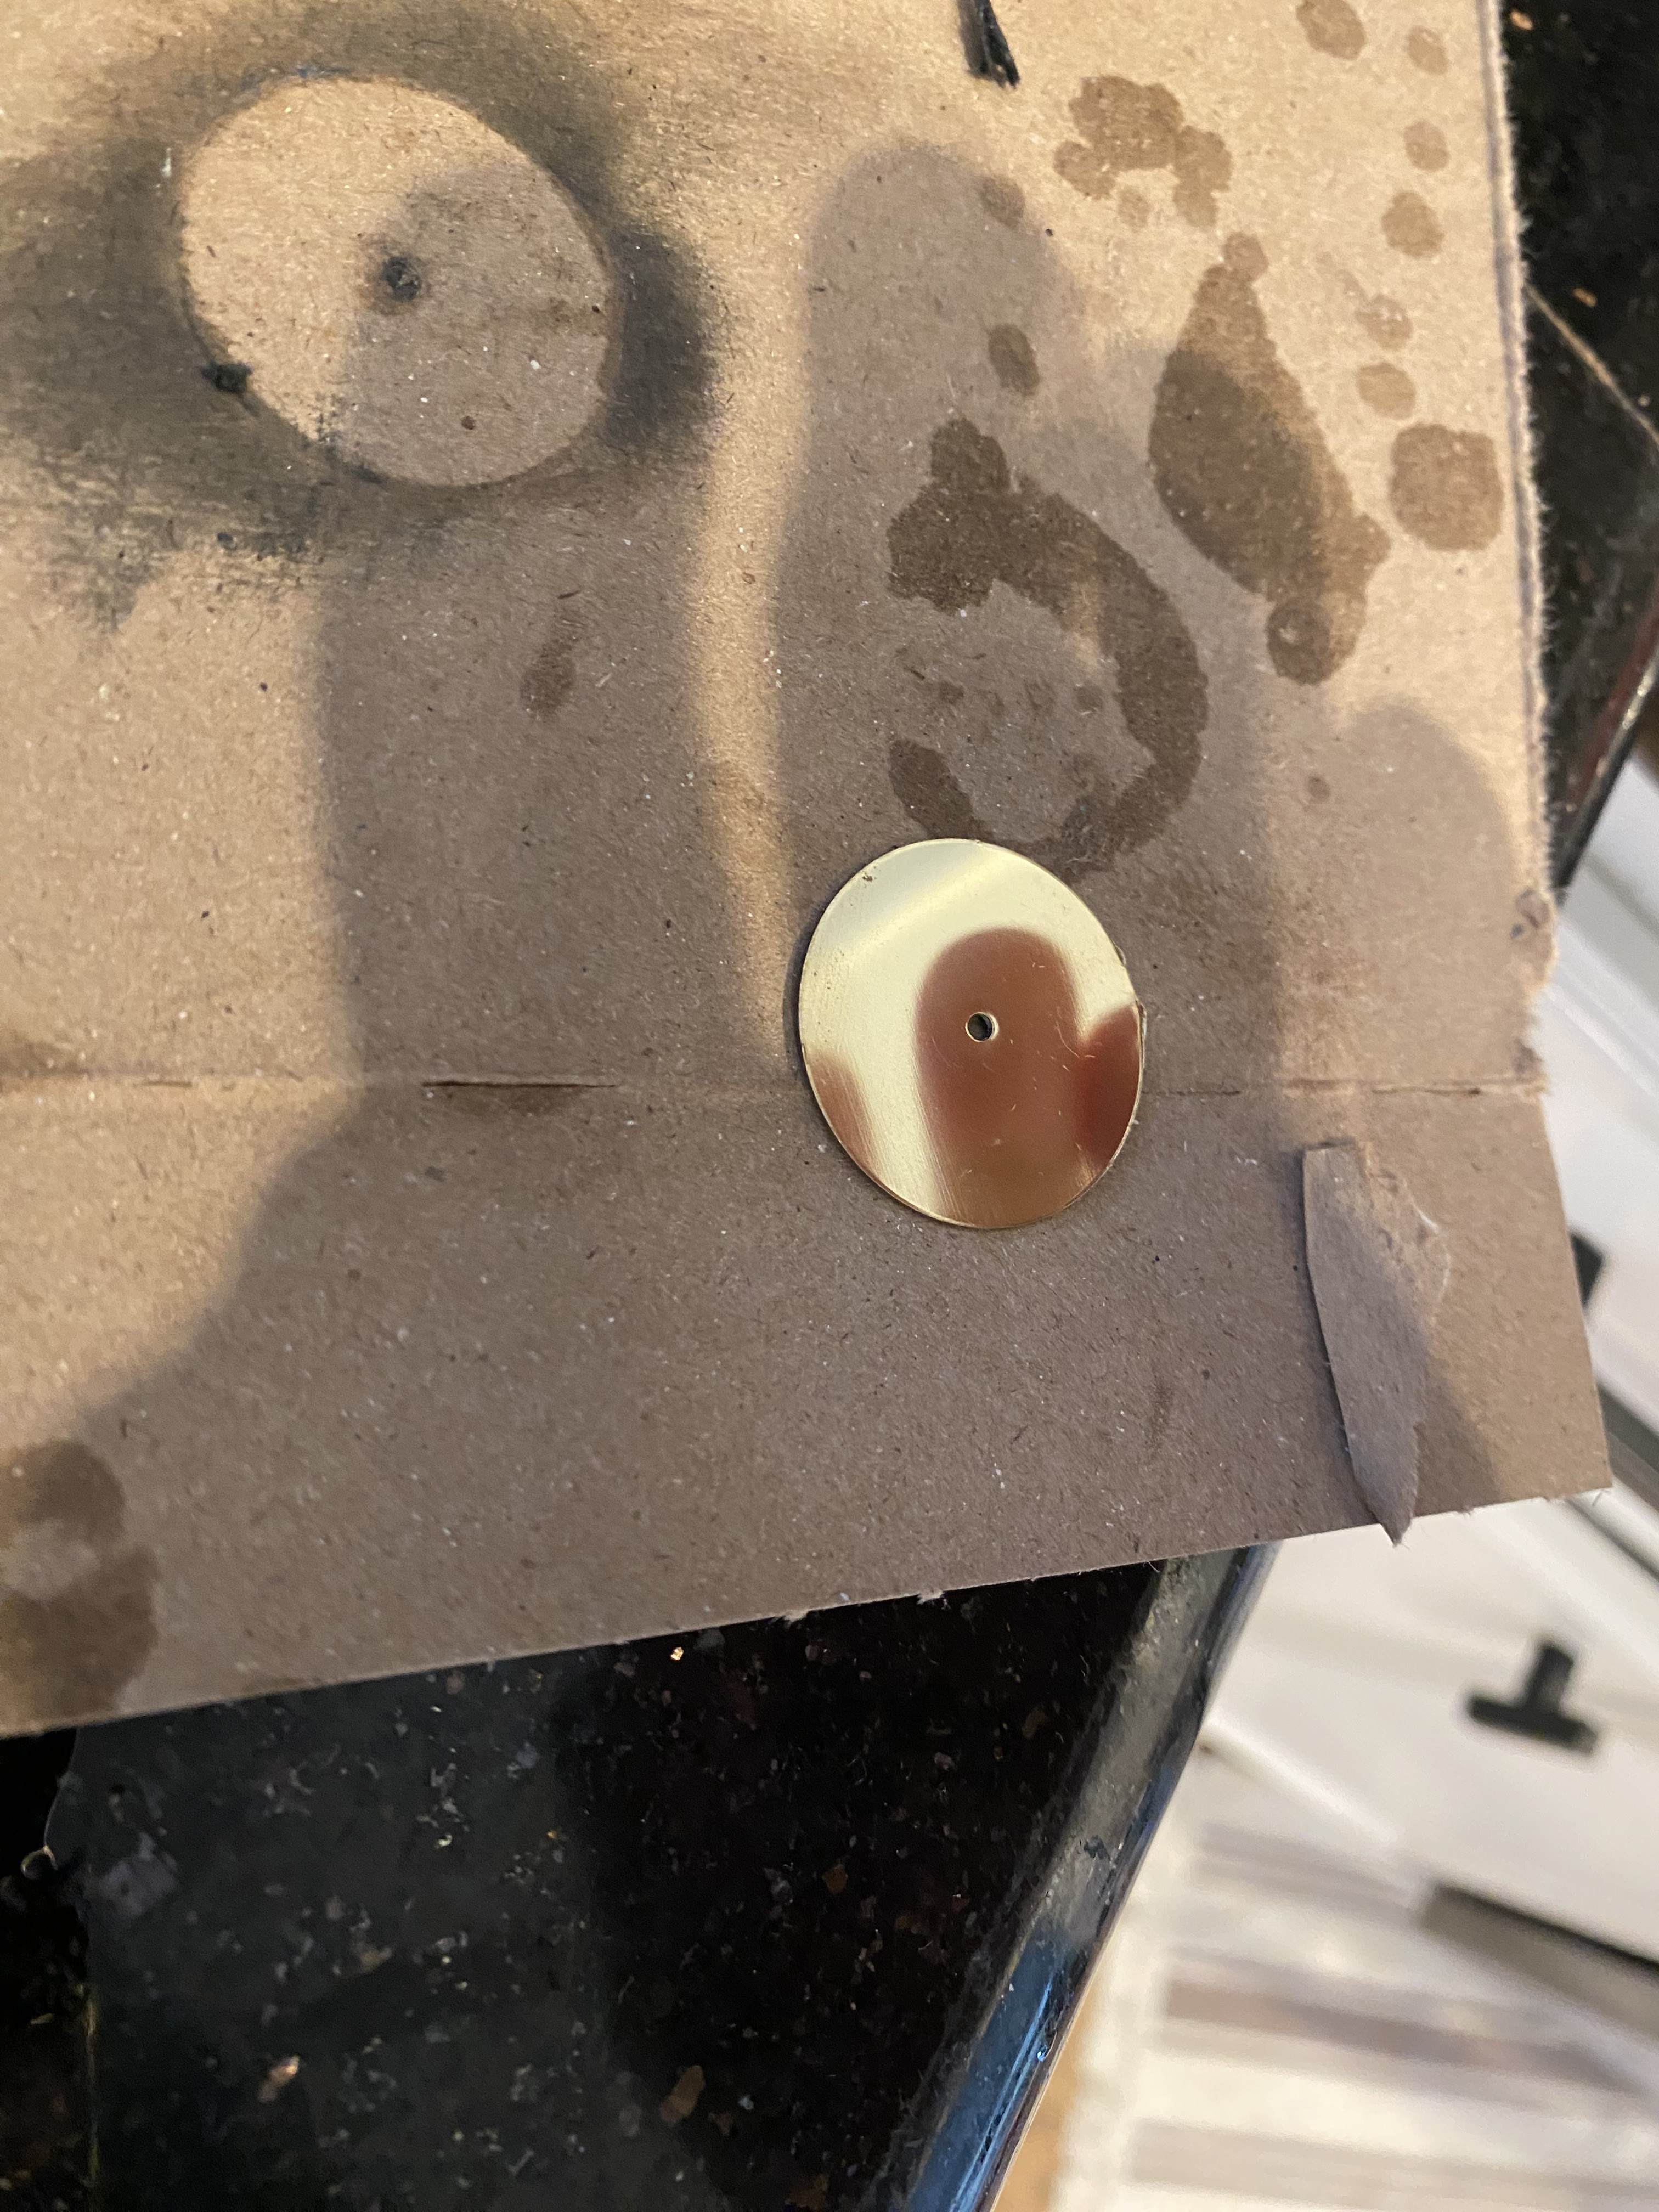
Step 1: Get a blank dial or order brass blanks. If you already have a dial you can just use acetone to wipe off the print. If you buy your own brass blanks, you will have to punch a 2mm hole in the middle. You will need a donor dial for perfect alignment of your hole. I used this for punching holes. Works like a charm
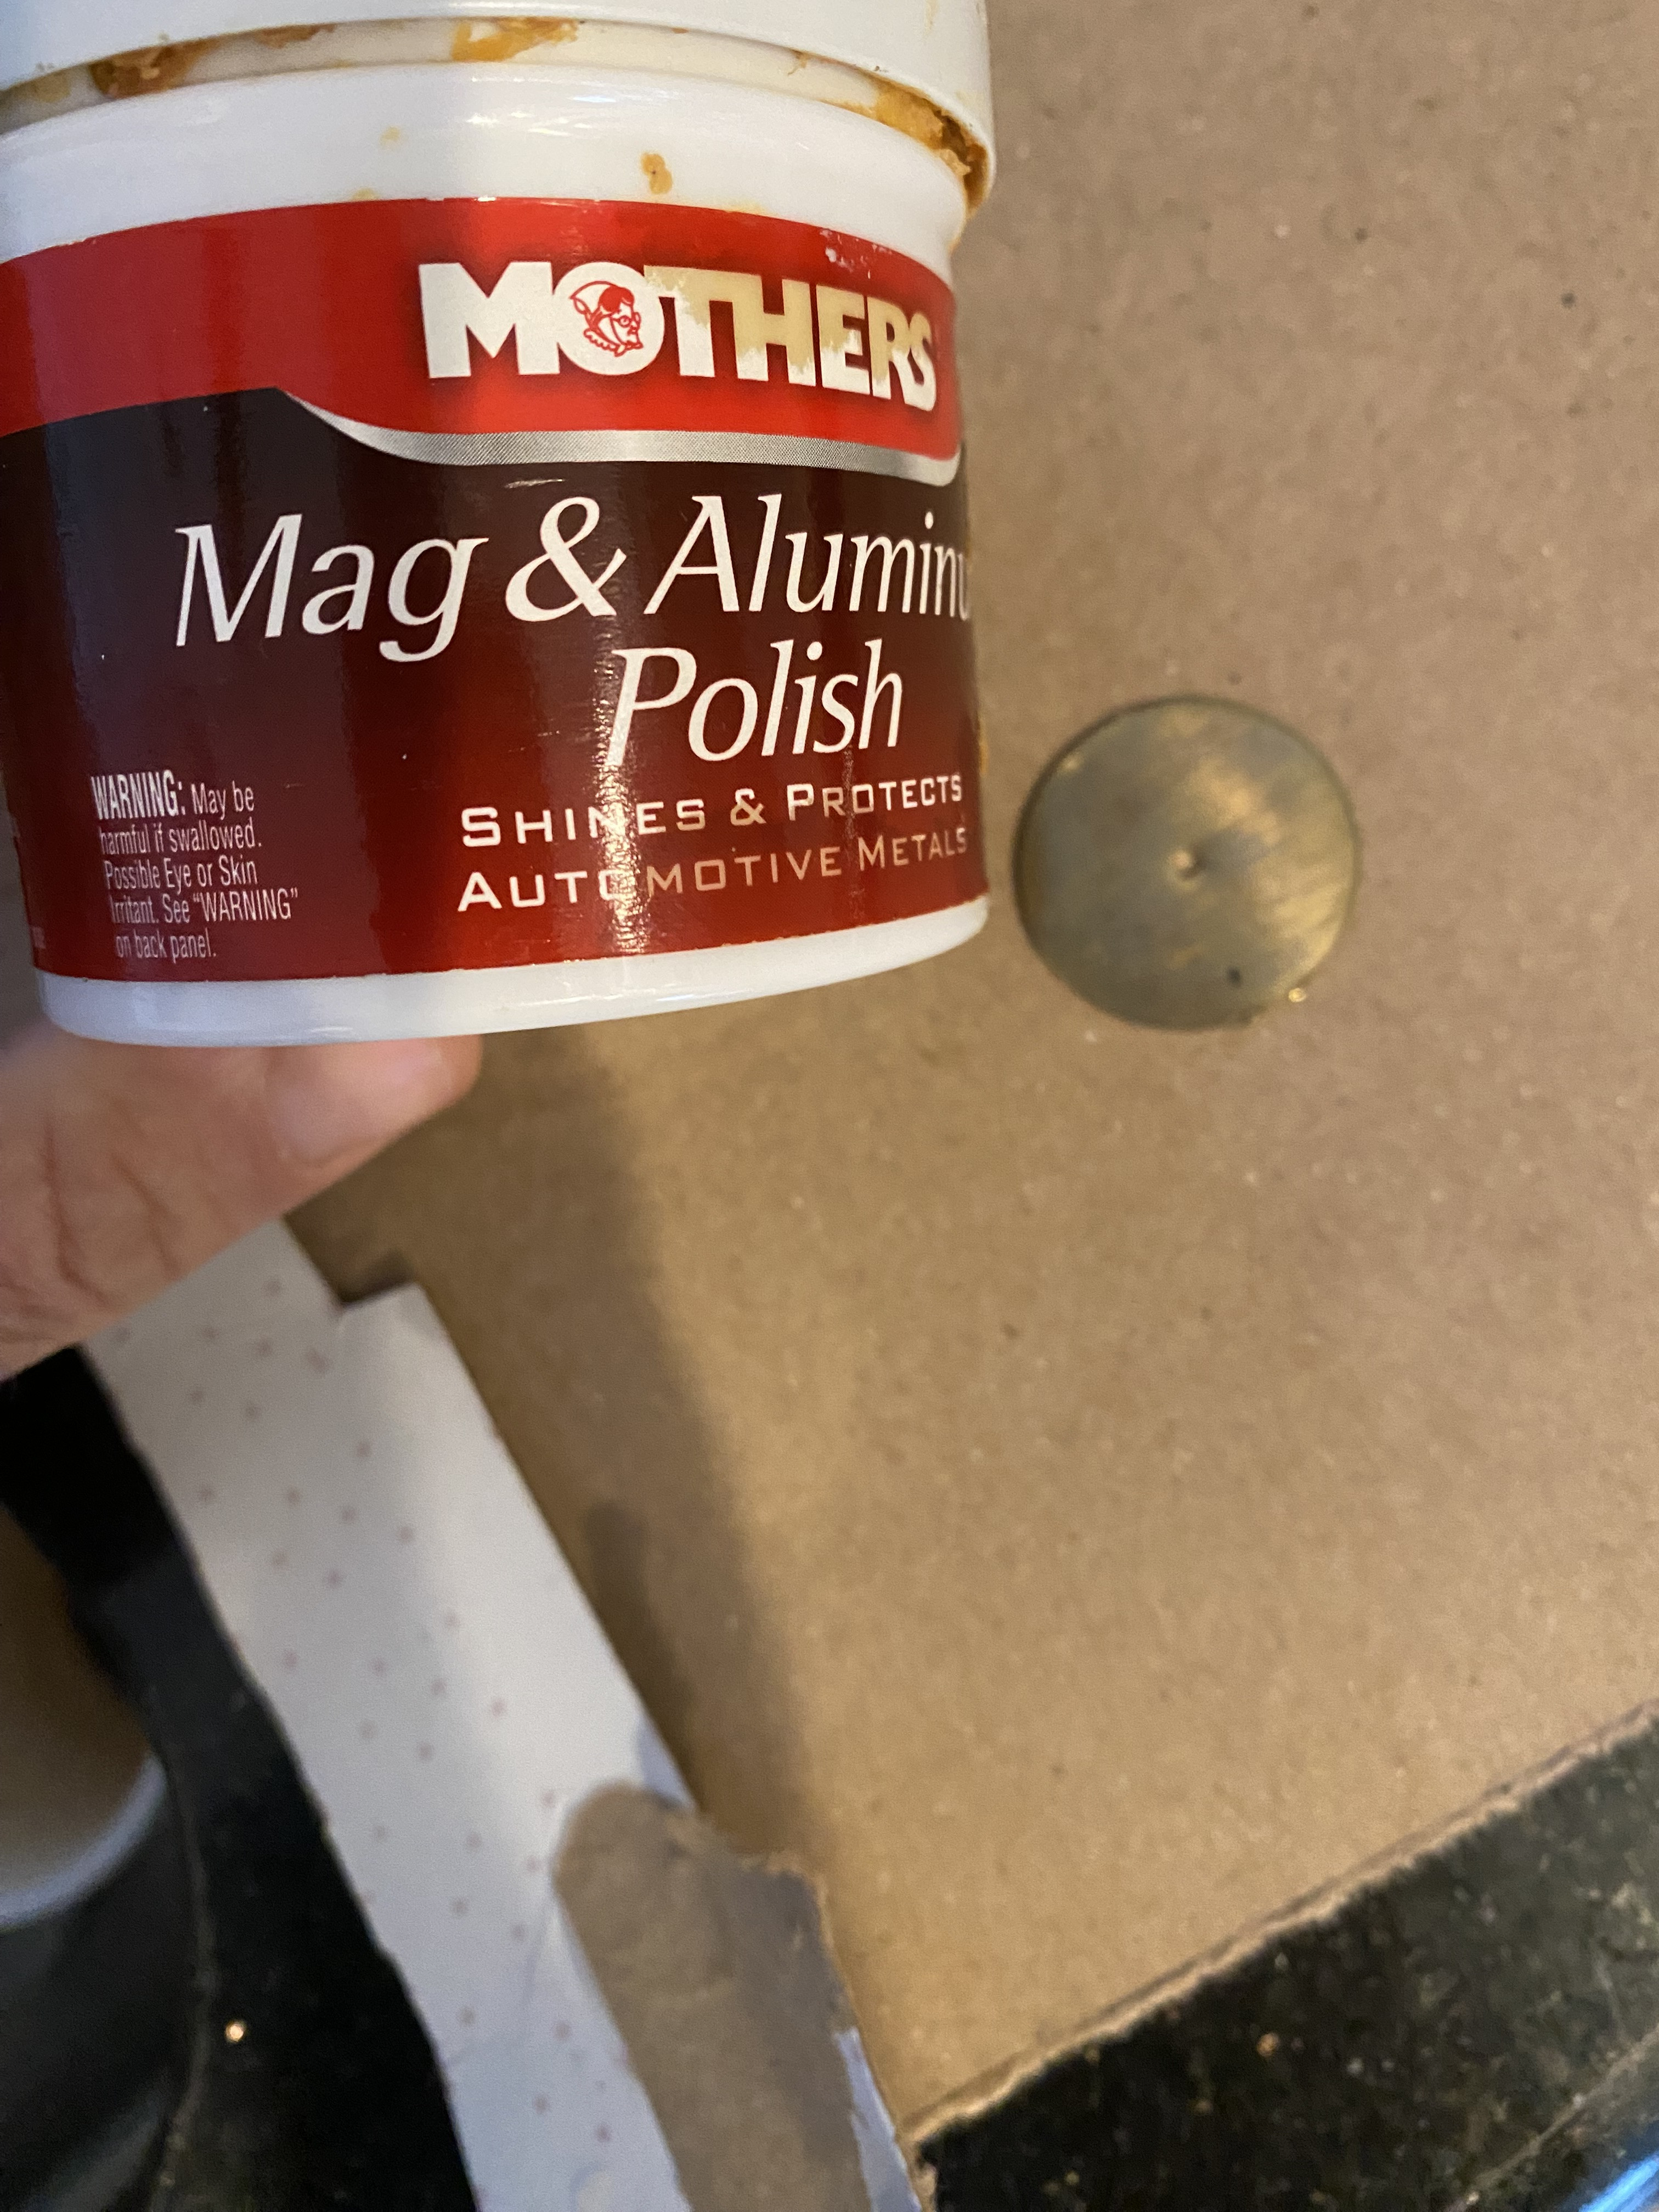
Step 2: Polish your dial to a mirror shine. I used Mothers Mag, its amazing! Wash dial thoroughly and remove grease with acetone or isopropyl alcohol.
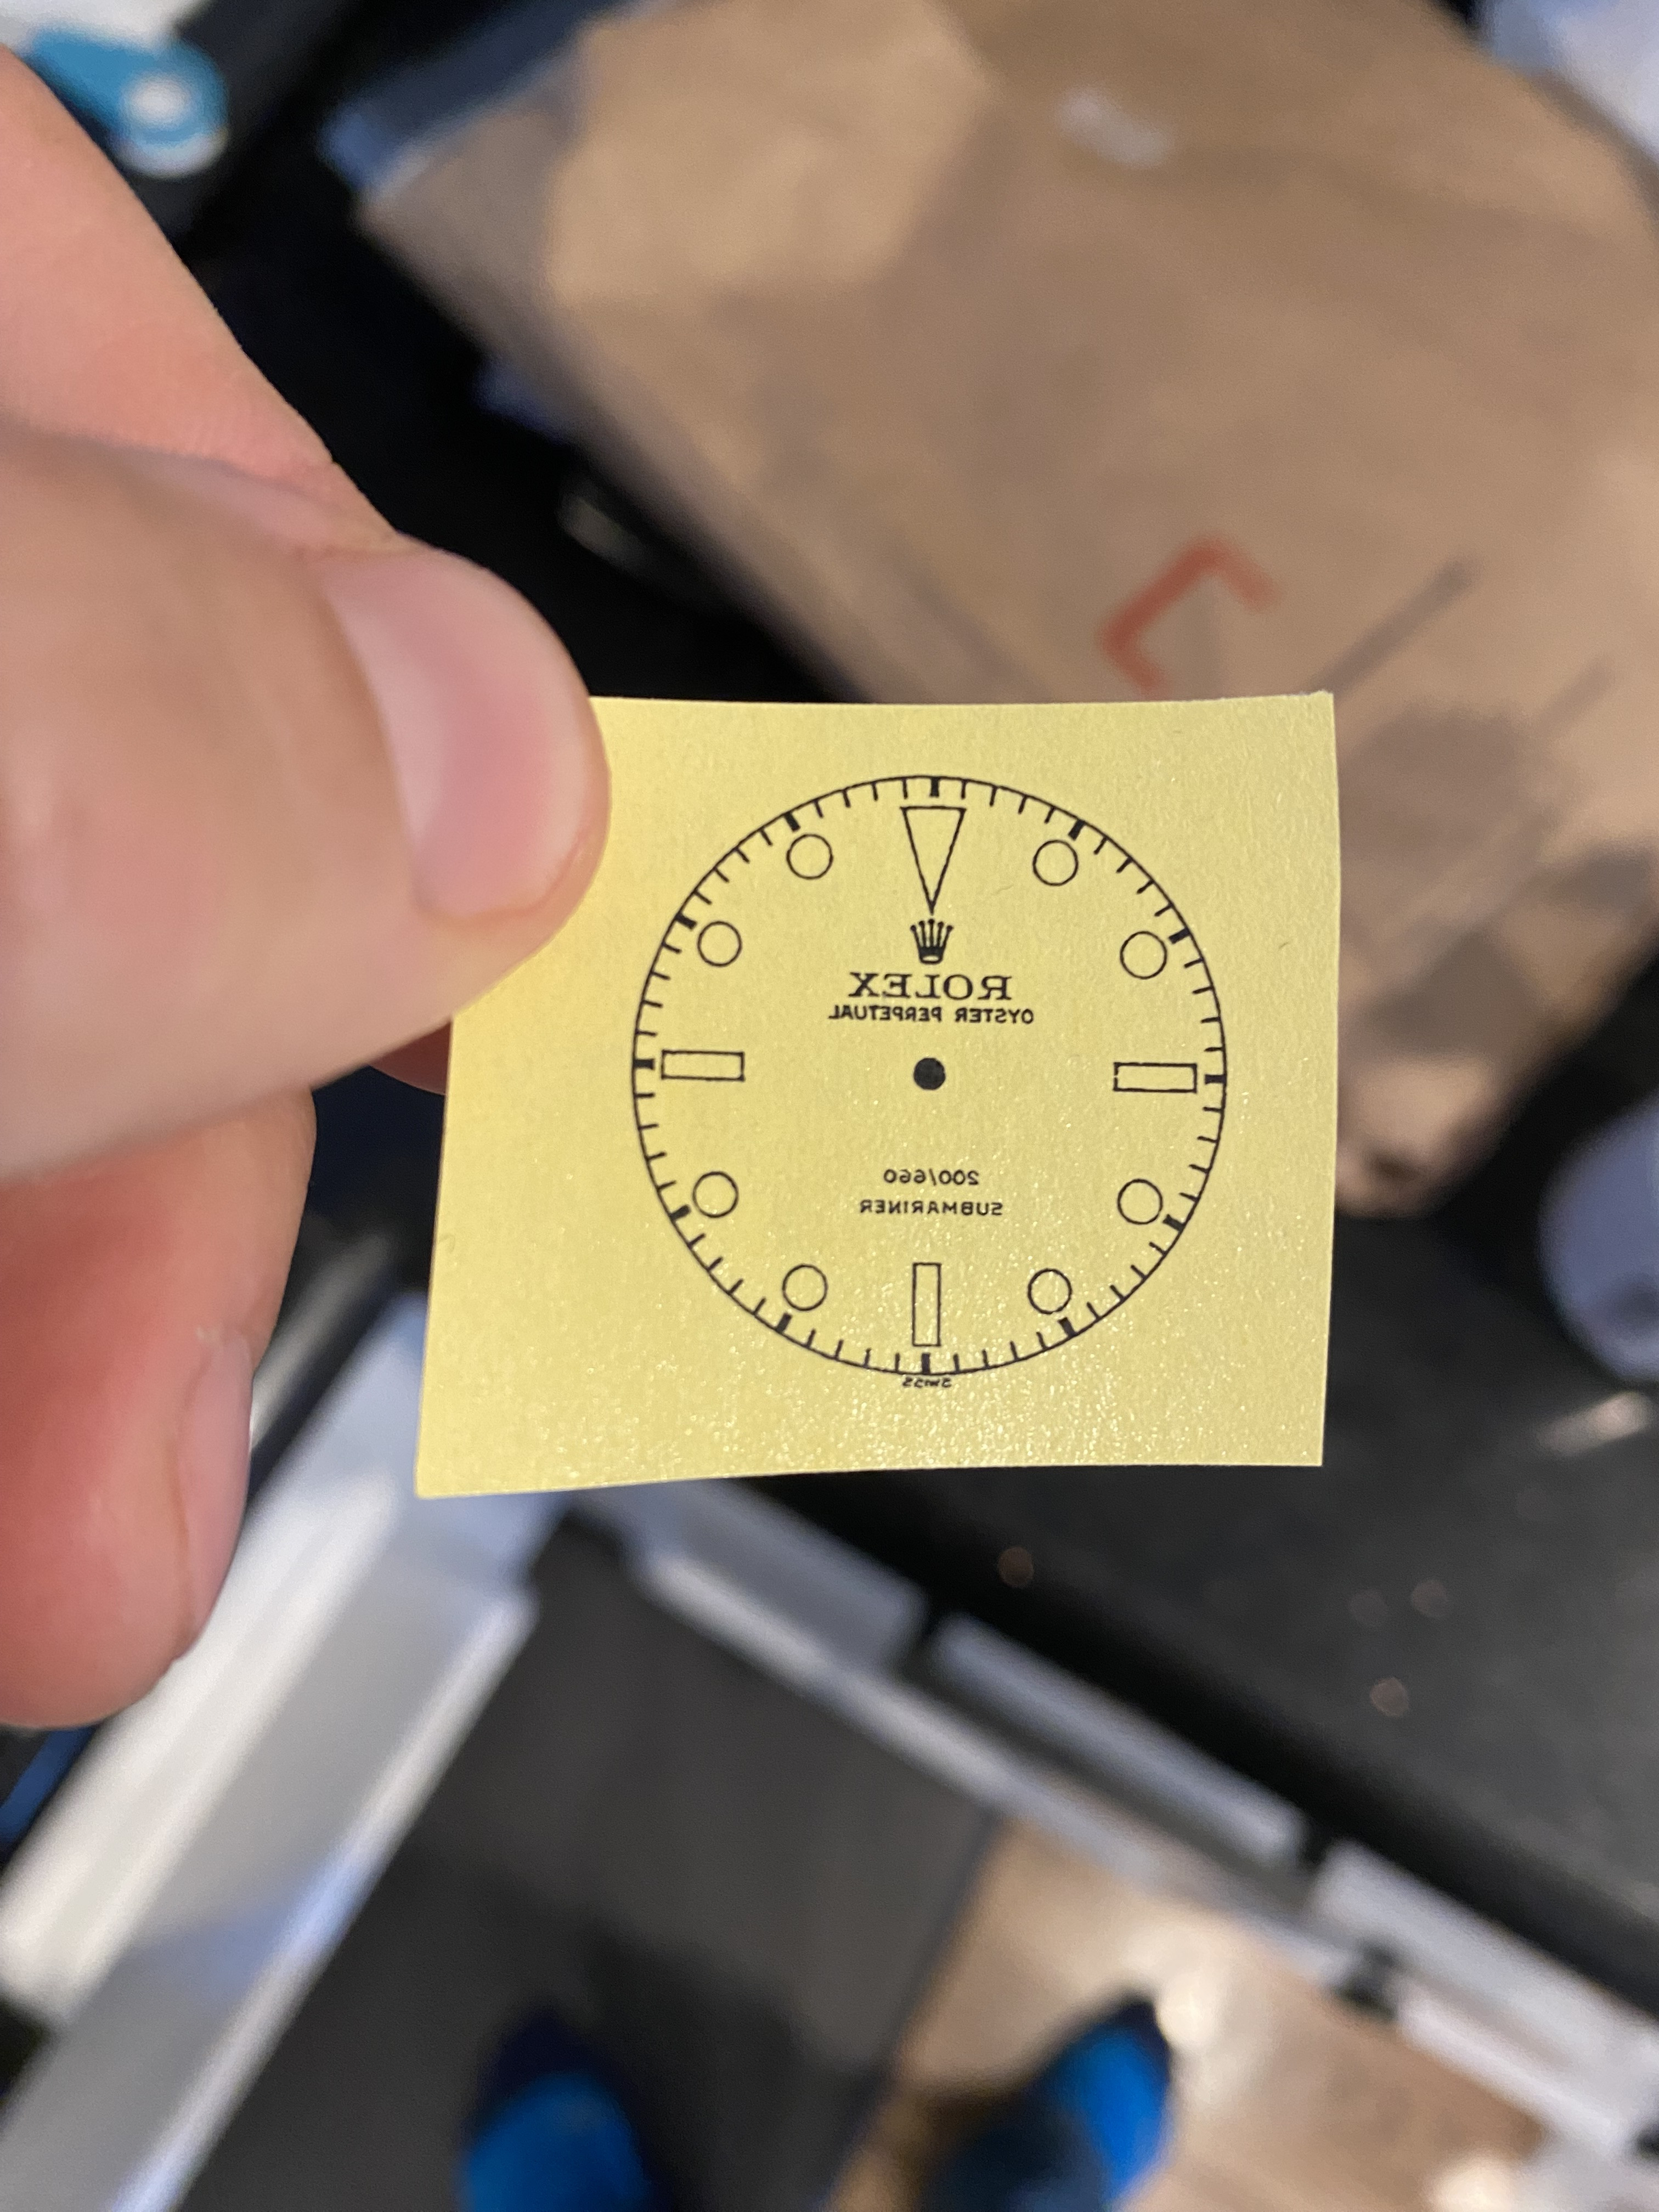
Step 3: Print out your artwork on a laser printer (ink jet will not work). You will need to mirror image the art AND put a small centering hole in the middle of your art. This is important given the small size of the dial.
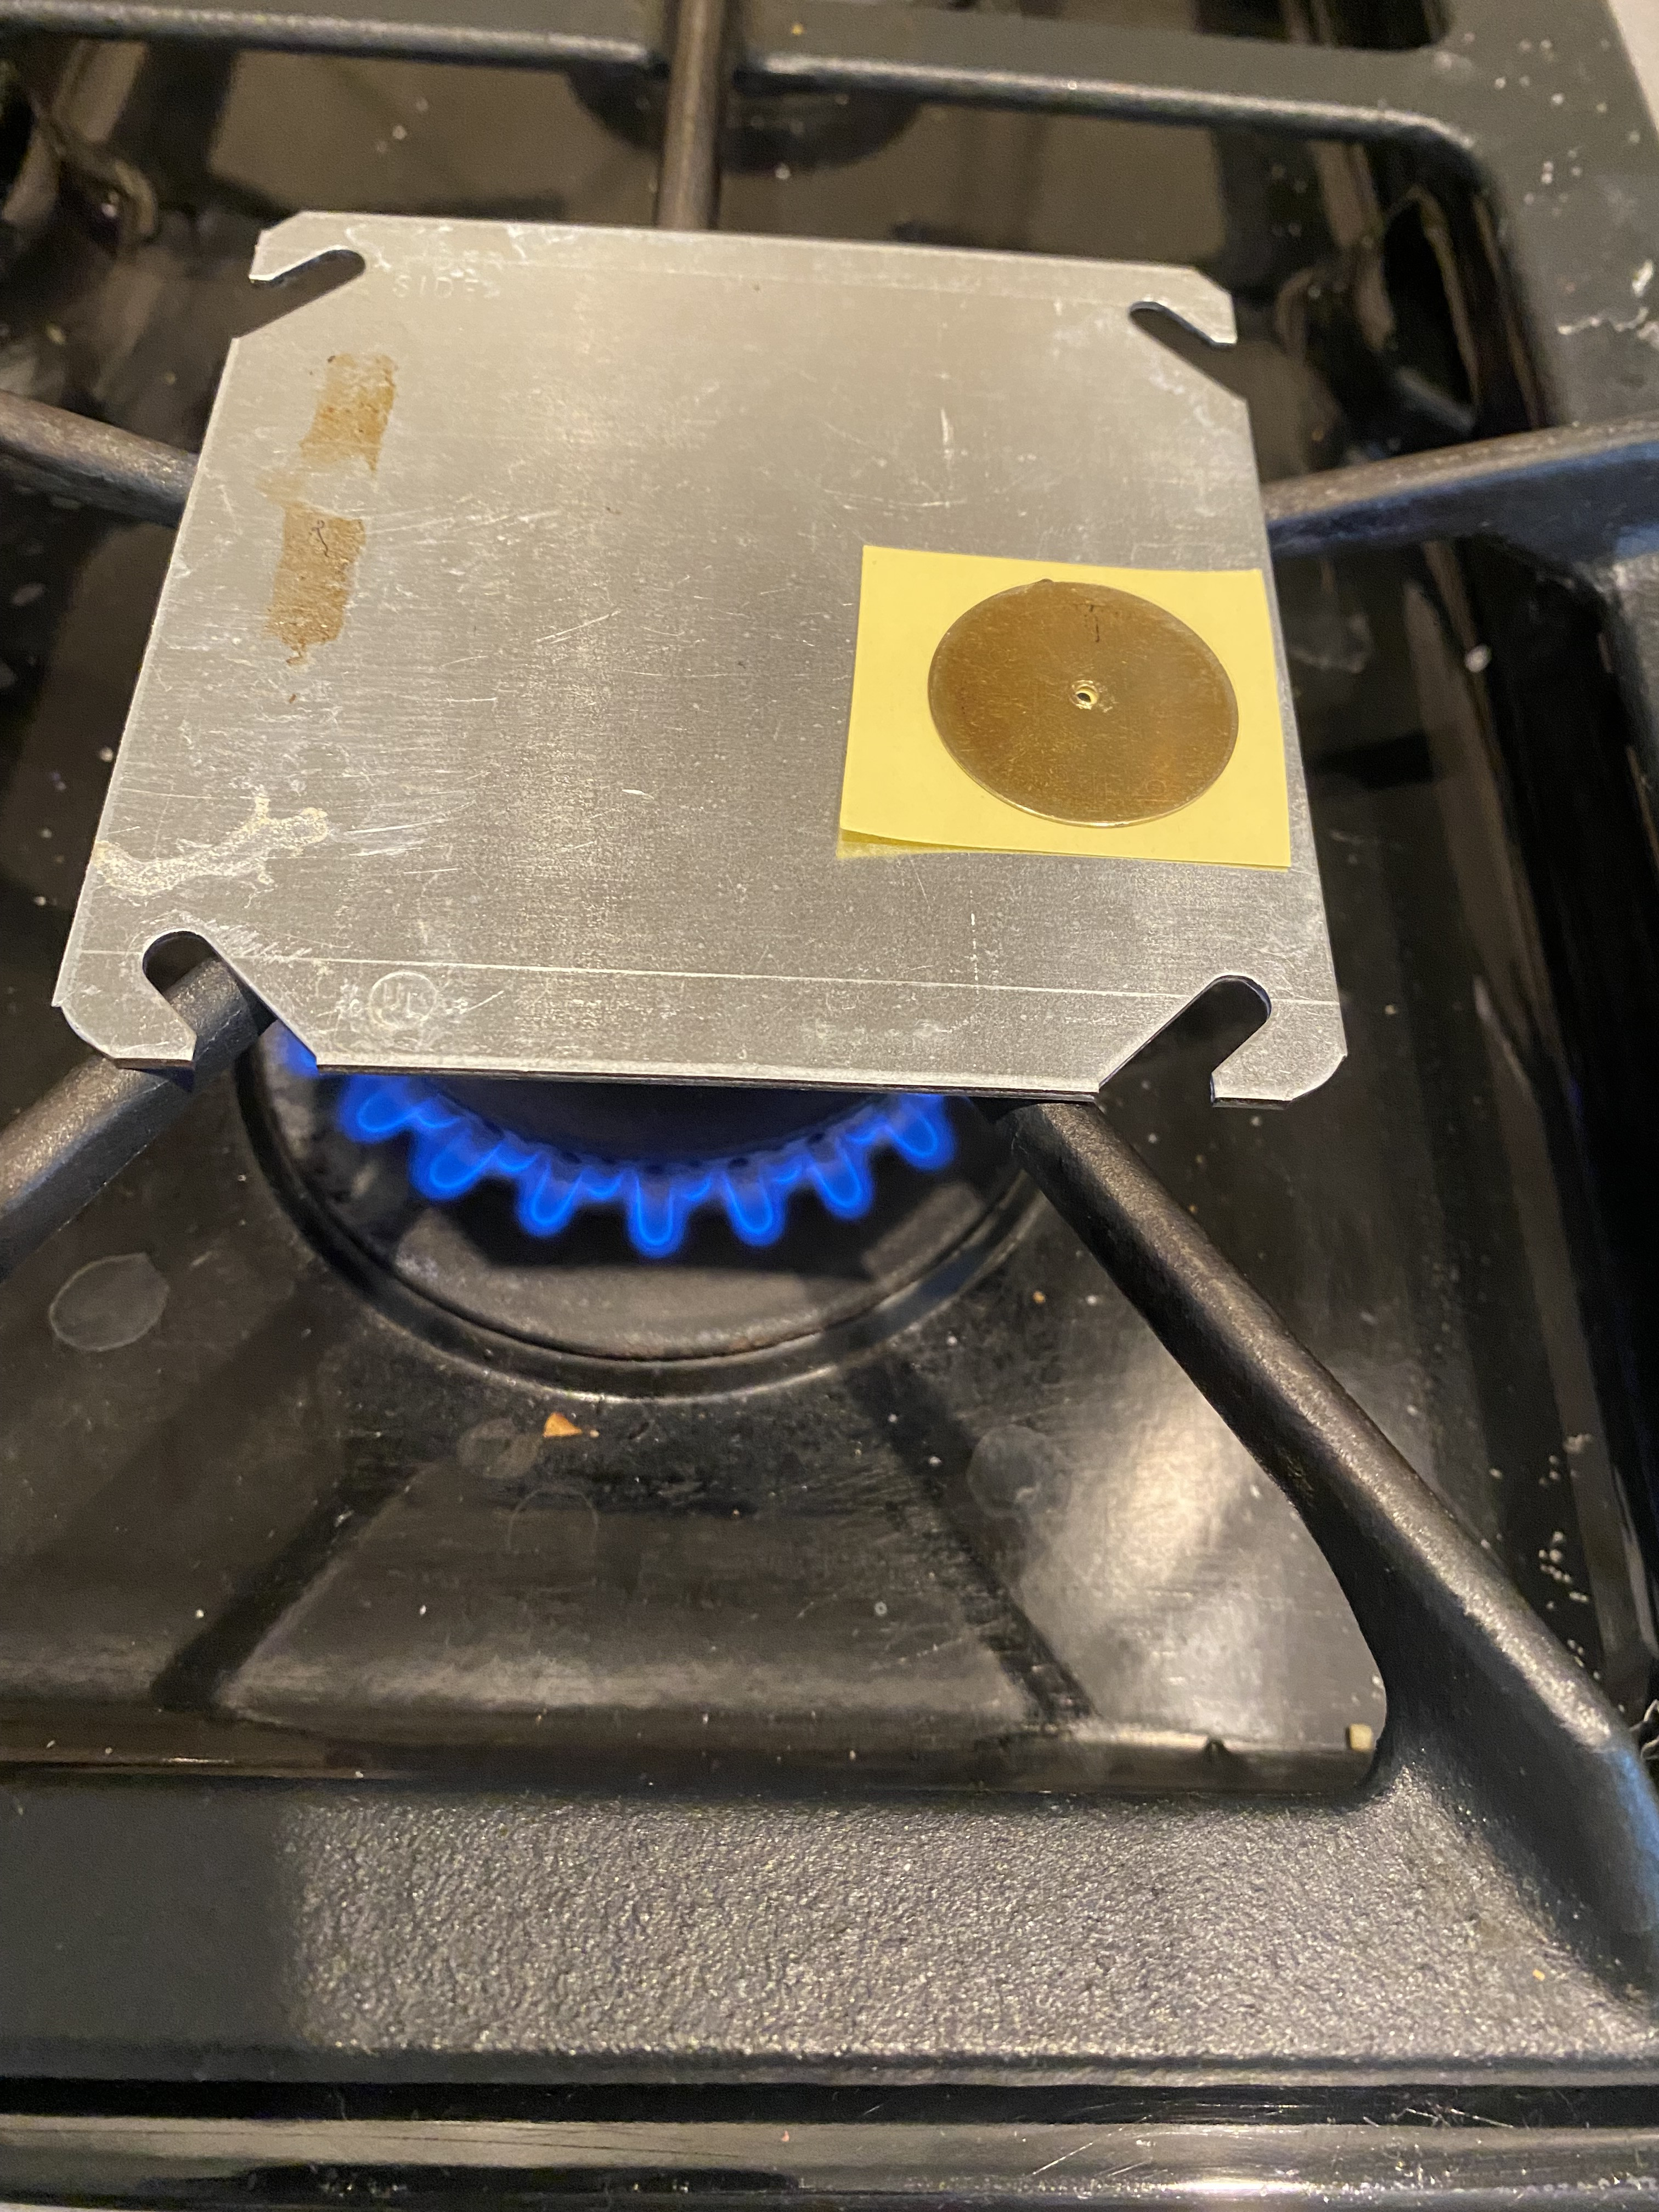
Step 4: Get some kind of metal you can heat up. I got a cheap piece of electrical stainless steel plate from the hardware store for $1.20. You can use a sandwhich press, a hair straightener, whatever gets hot! You will place your artwork facing up on the heat source. Place your dial polished side down on the art, align the centered dot on the artwork with the hole on the dial. This will ensure perfect centering of final product.
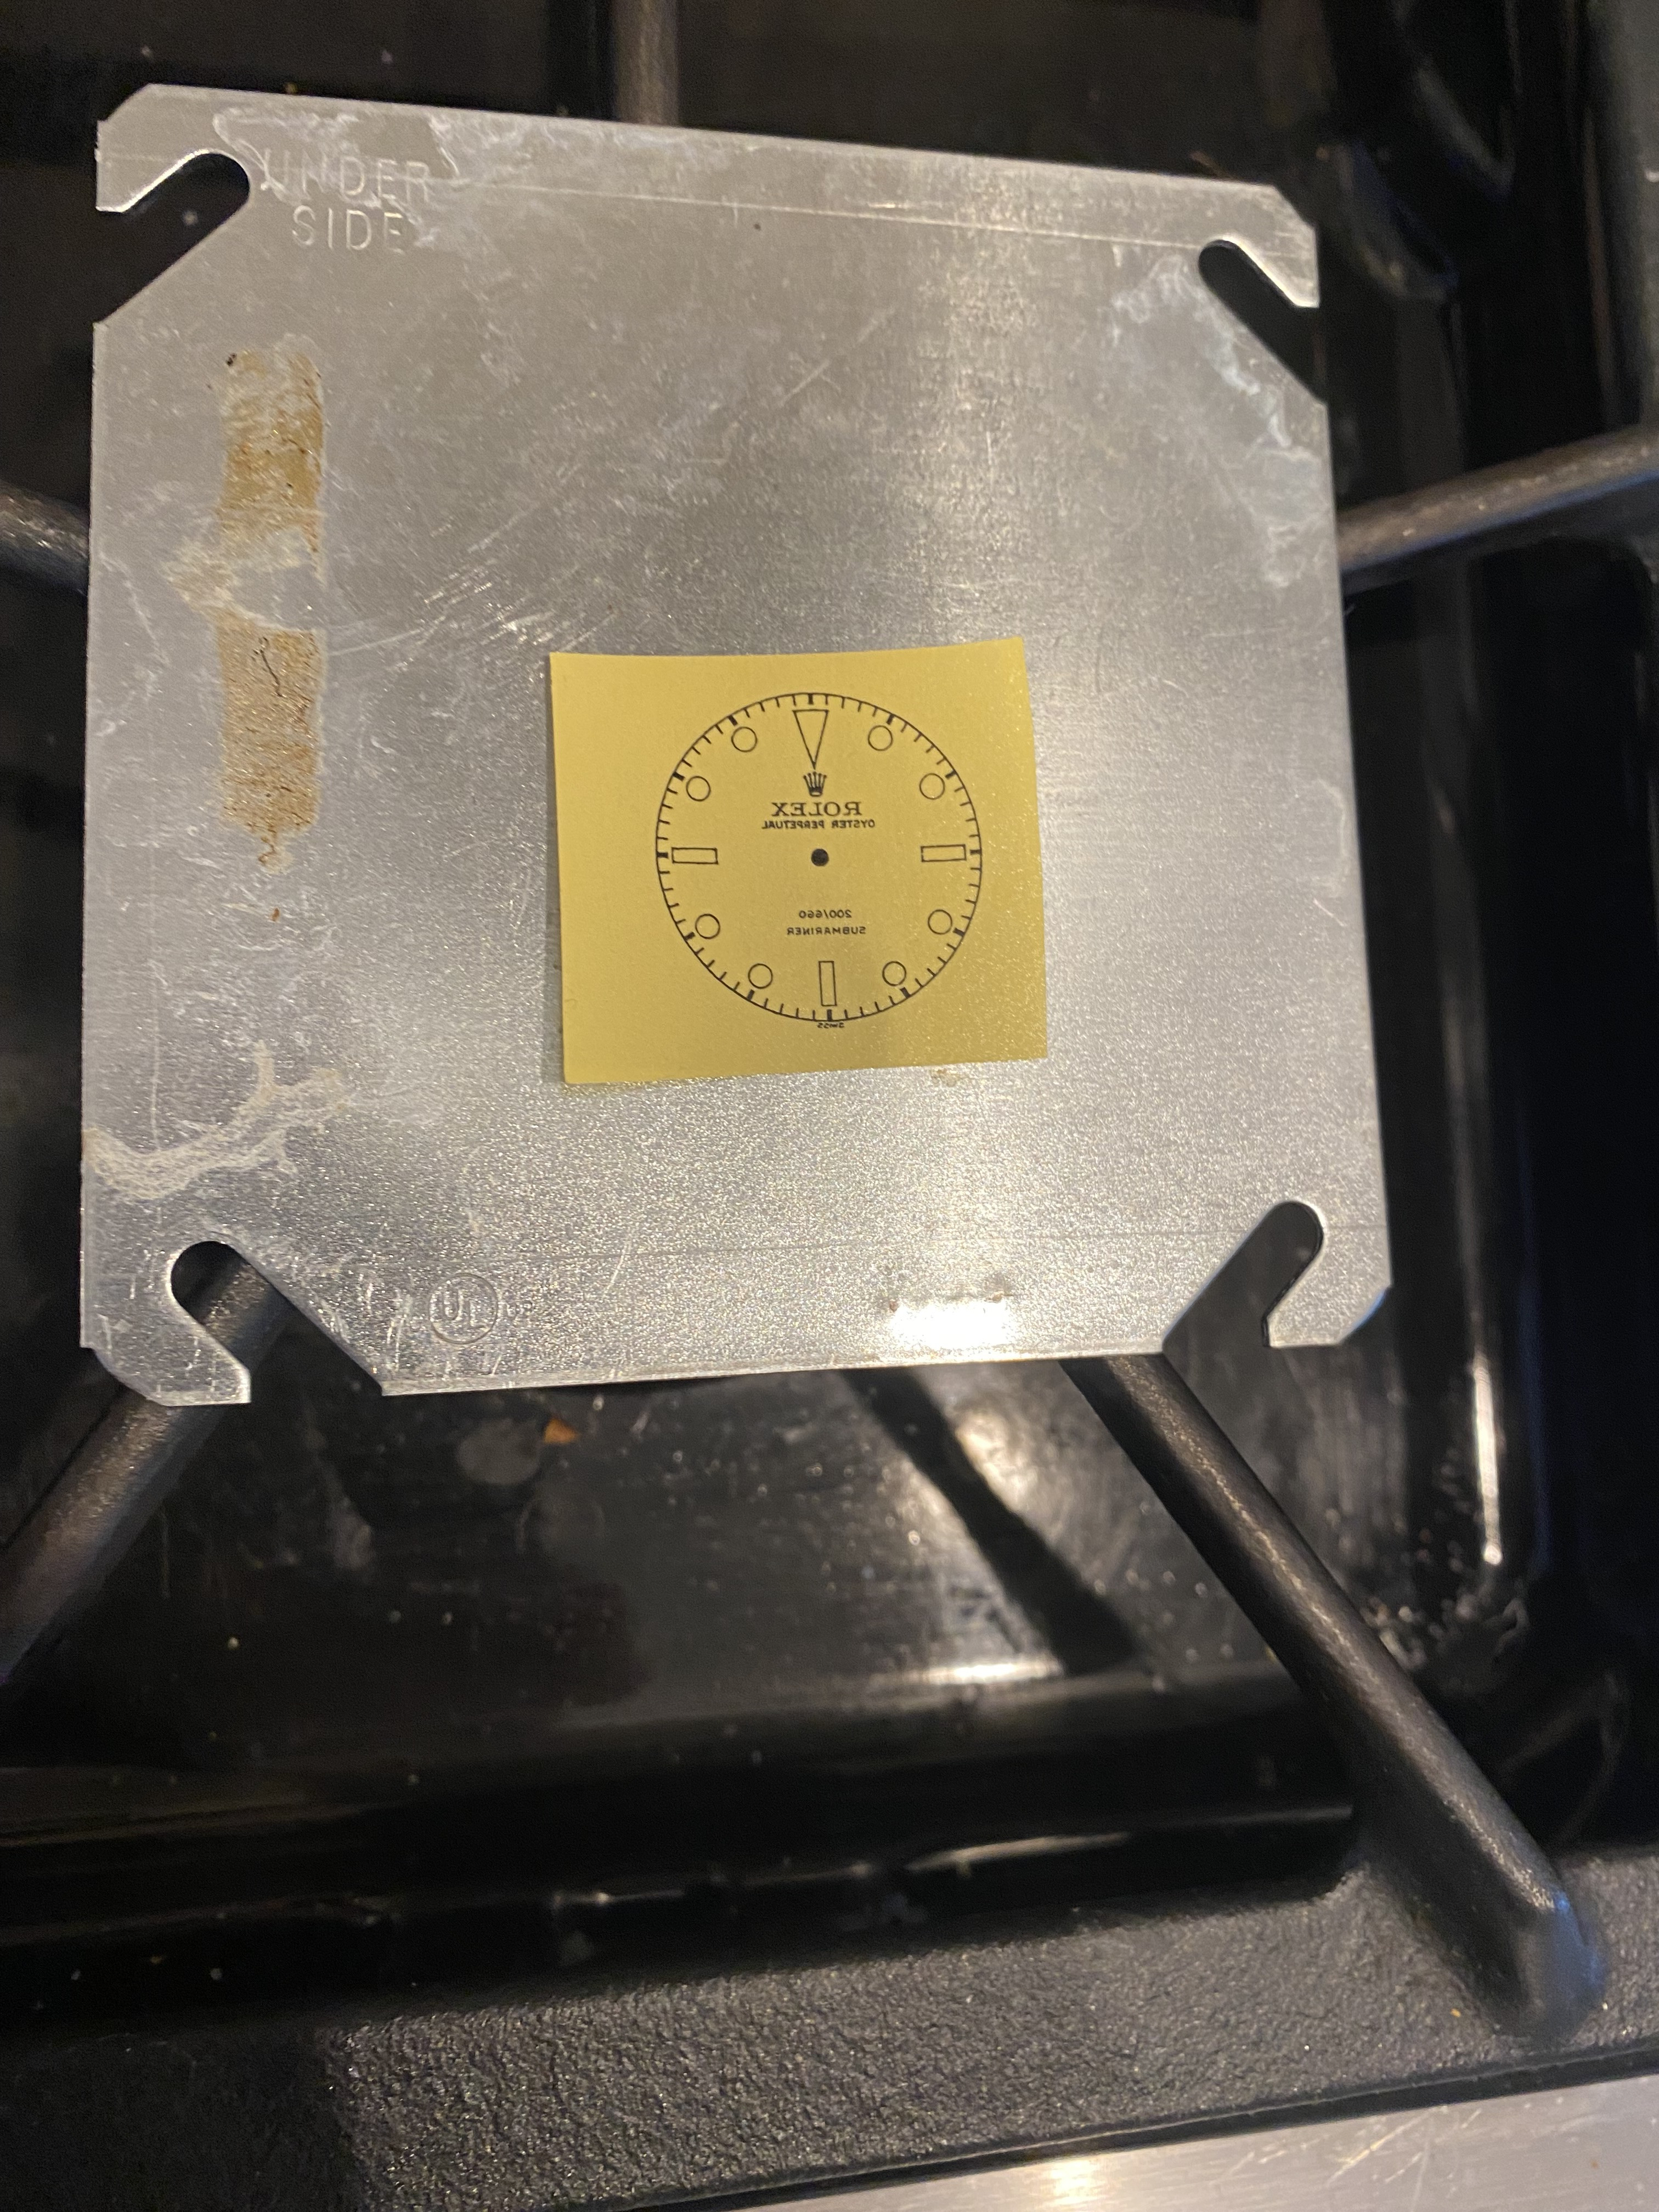
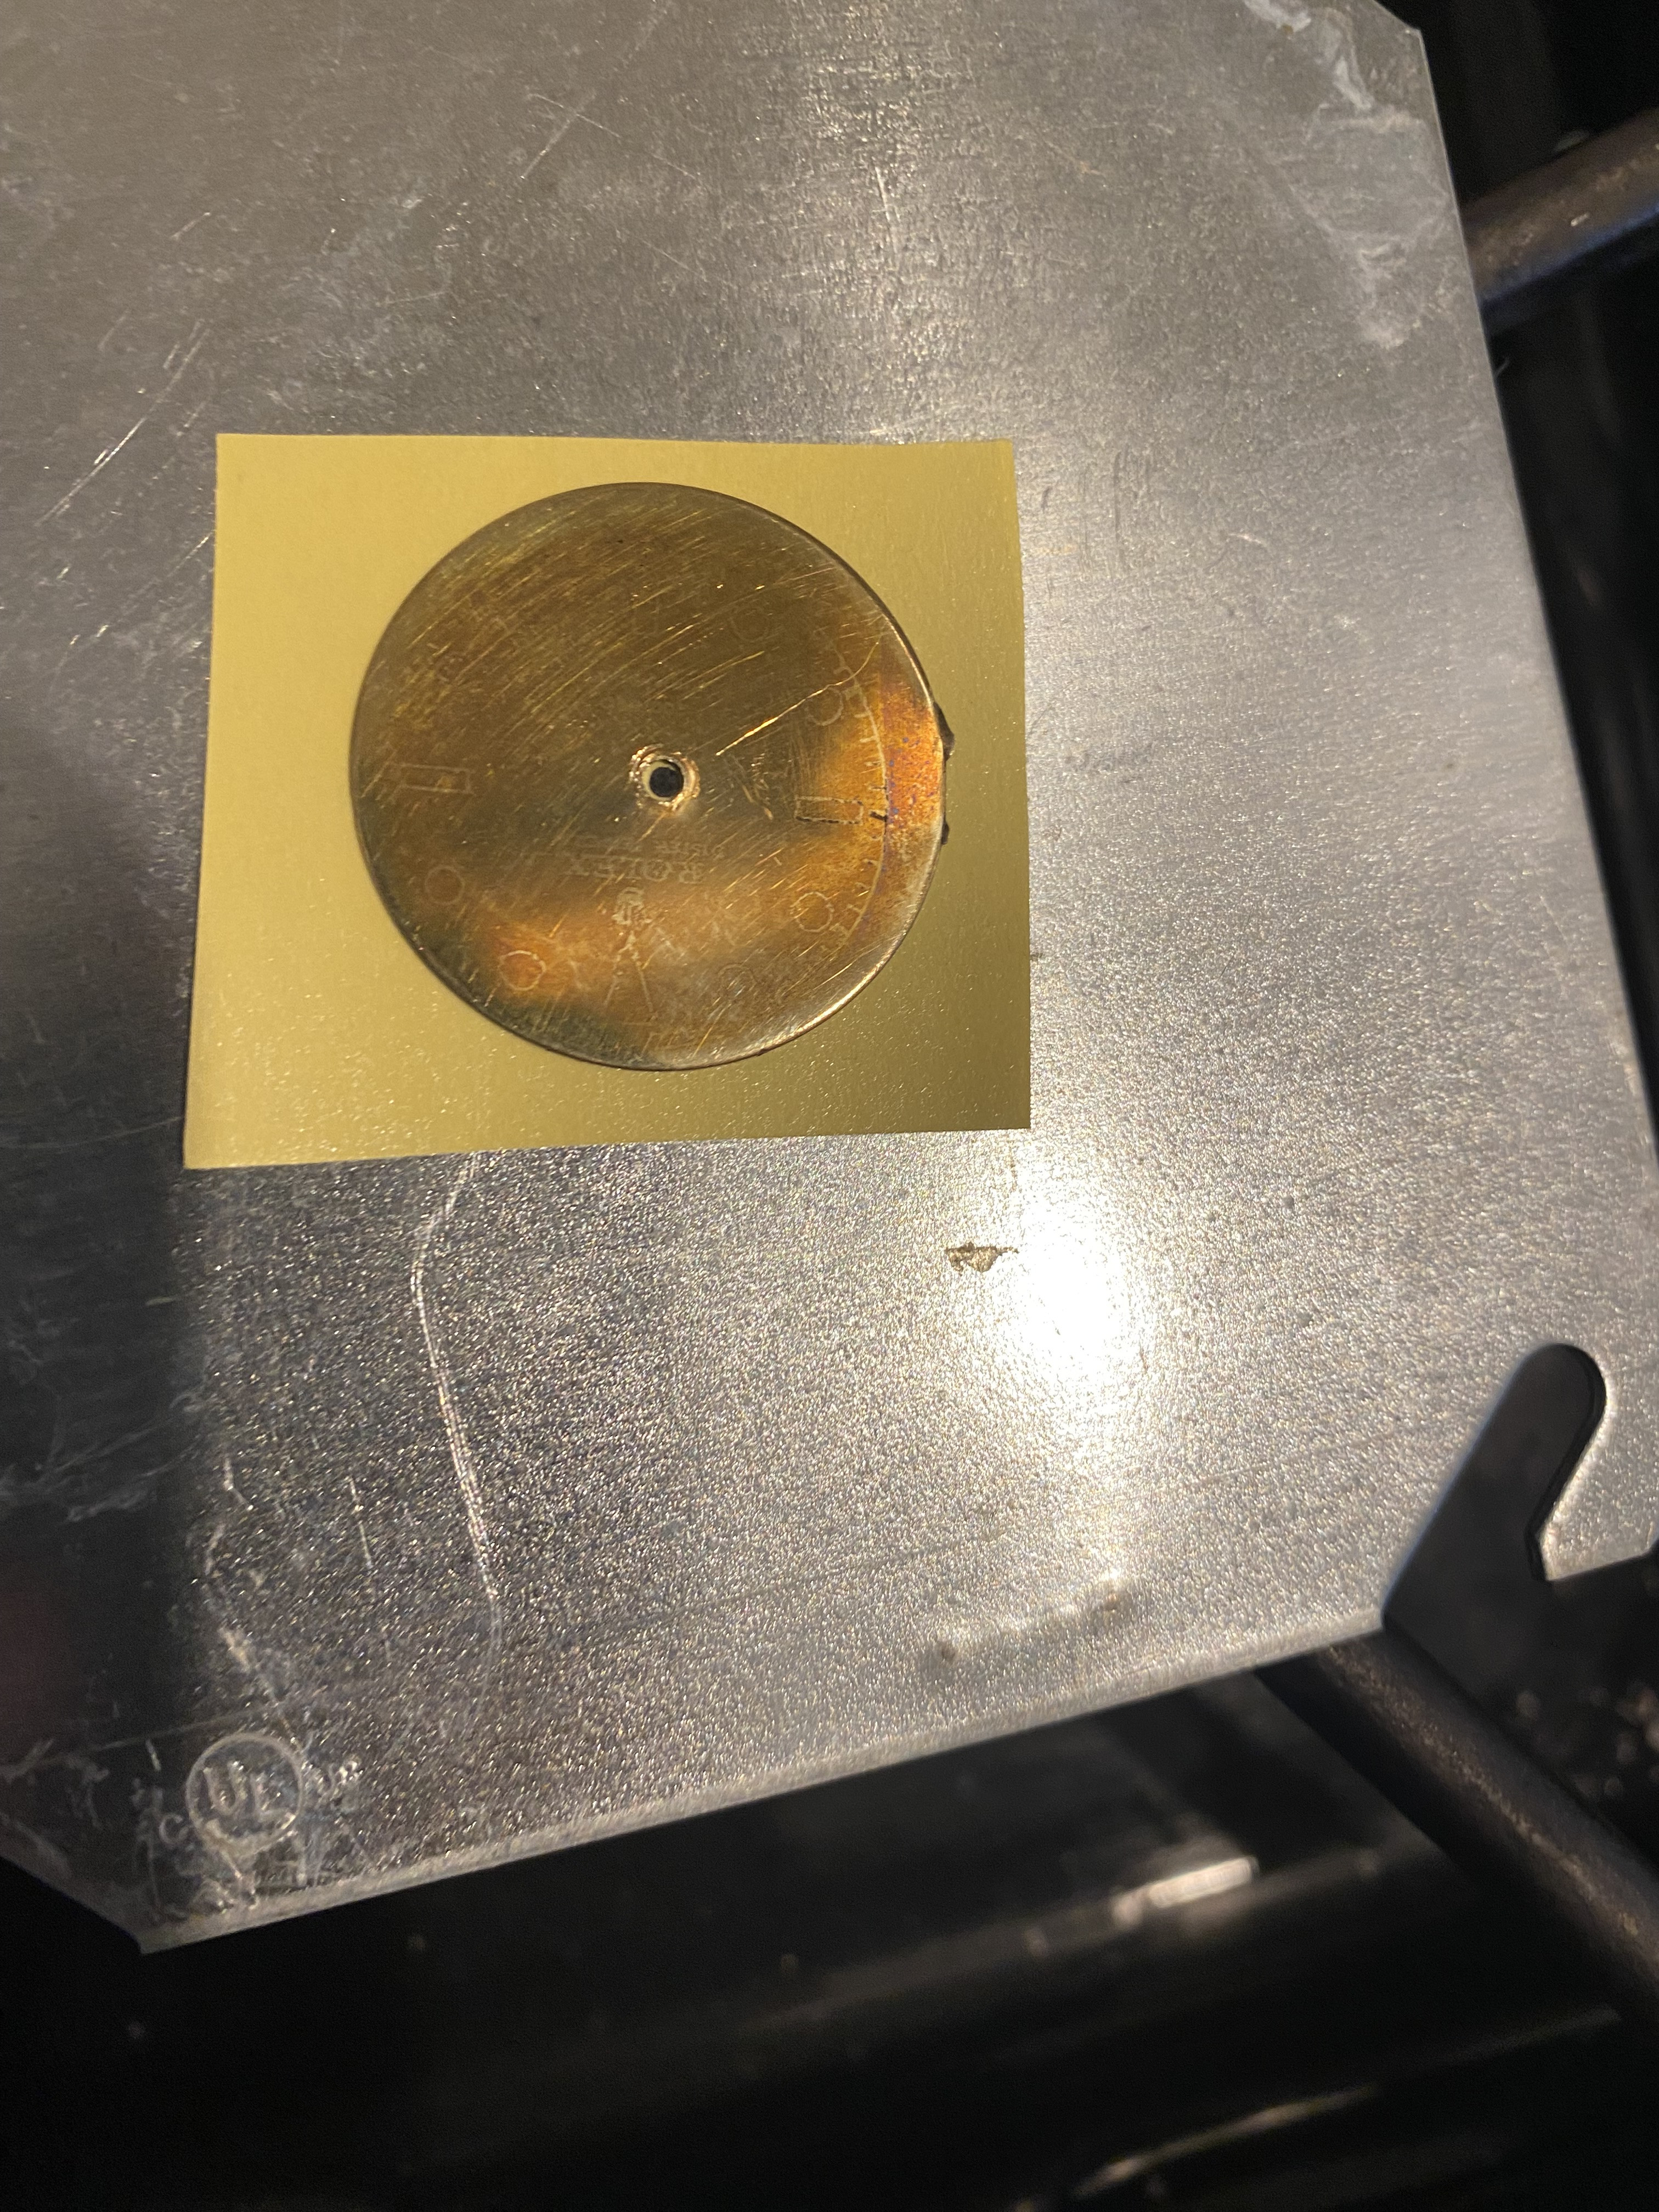
Step 5: Heat up your metal. You will want it to get to about 180 F - 220 F. Any lower, it probably wont work. Any hotter, it might make your small details get distorted. Let this reach the desired temp and let it sit for 30-45 secs. The toner from the laser printer will be tacky and stick to the brass dial.
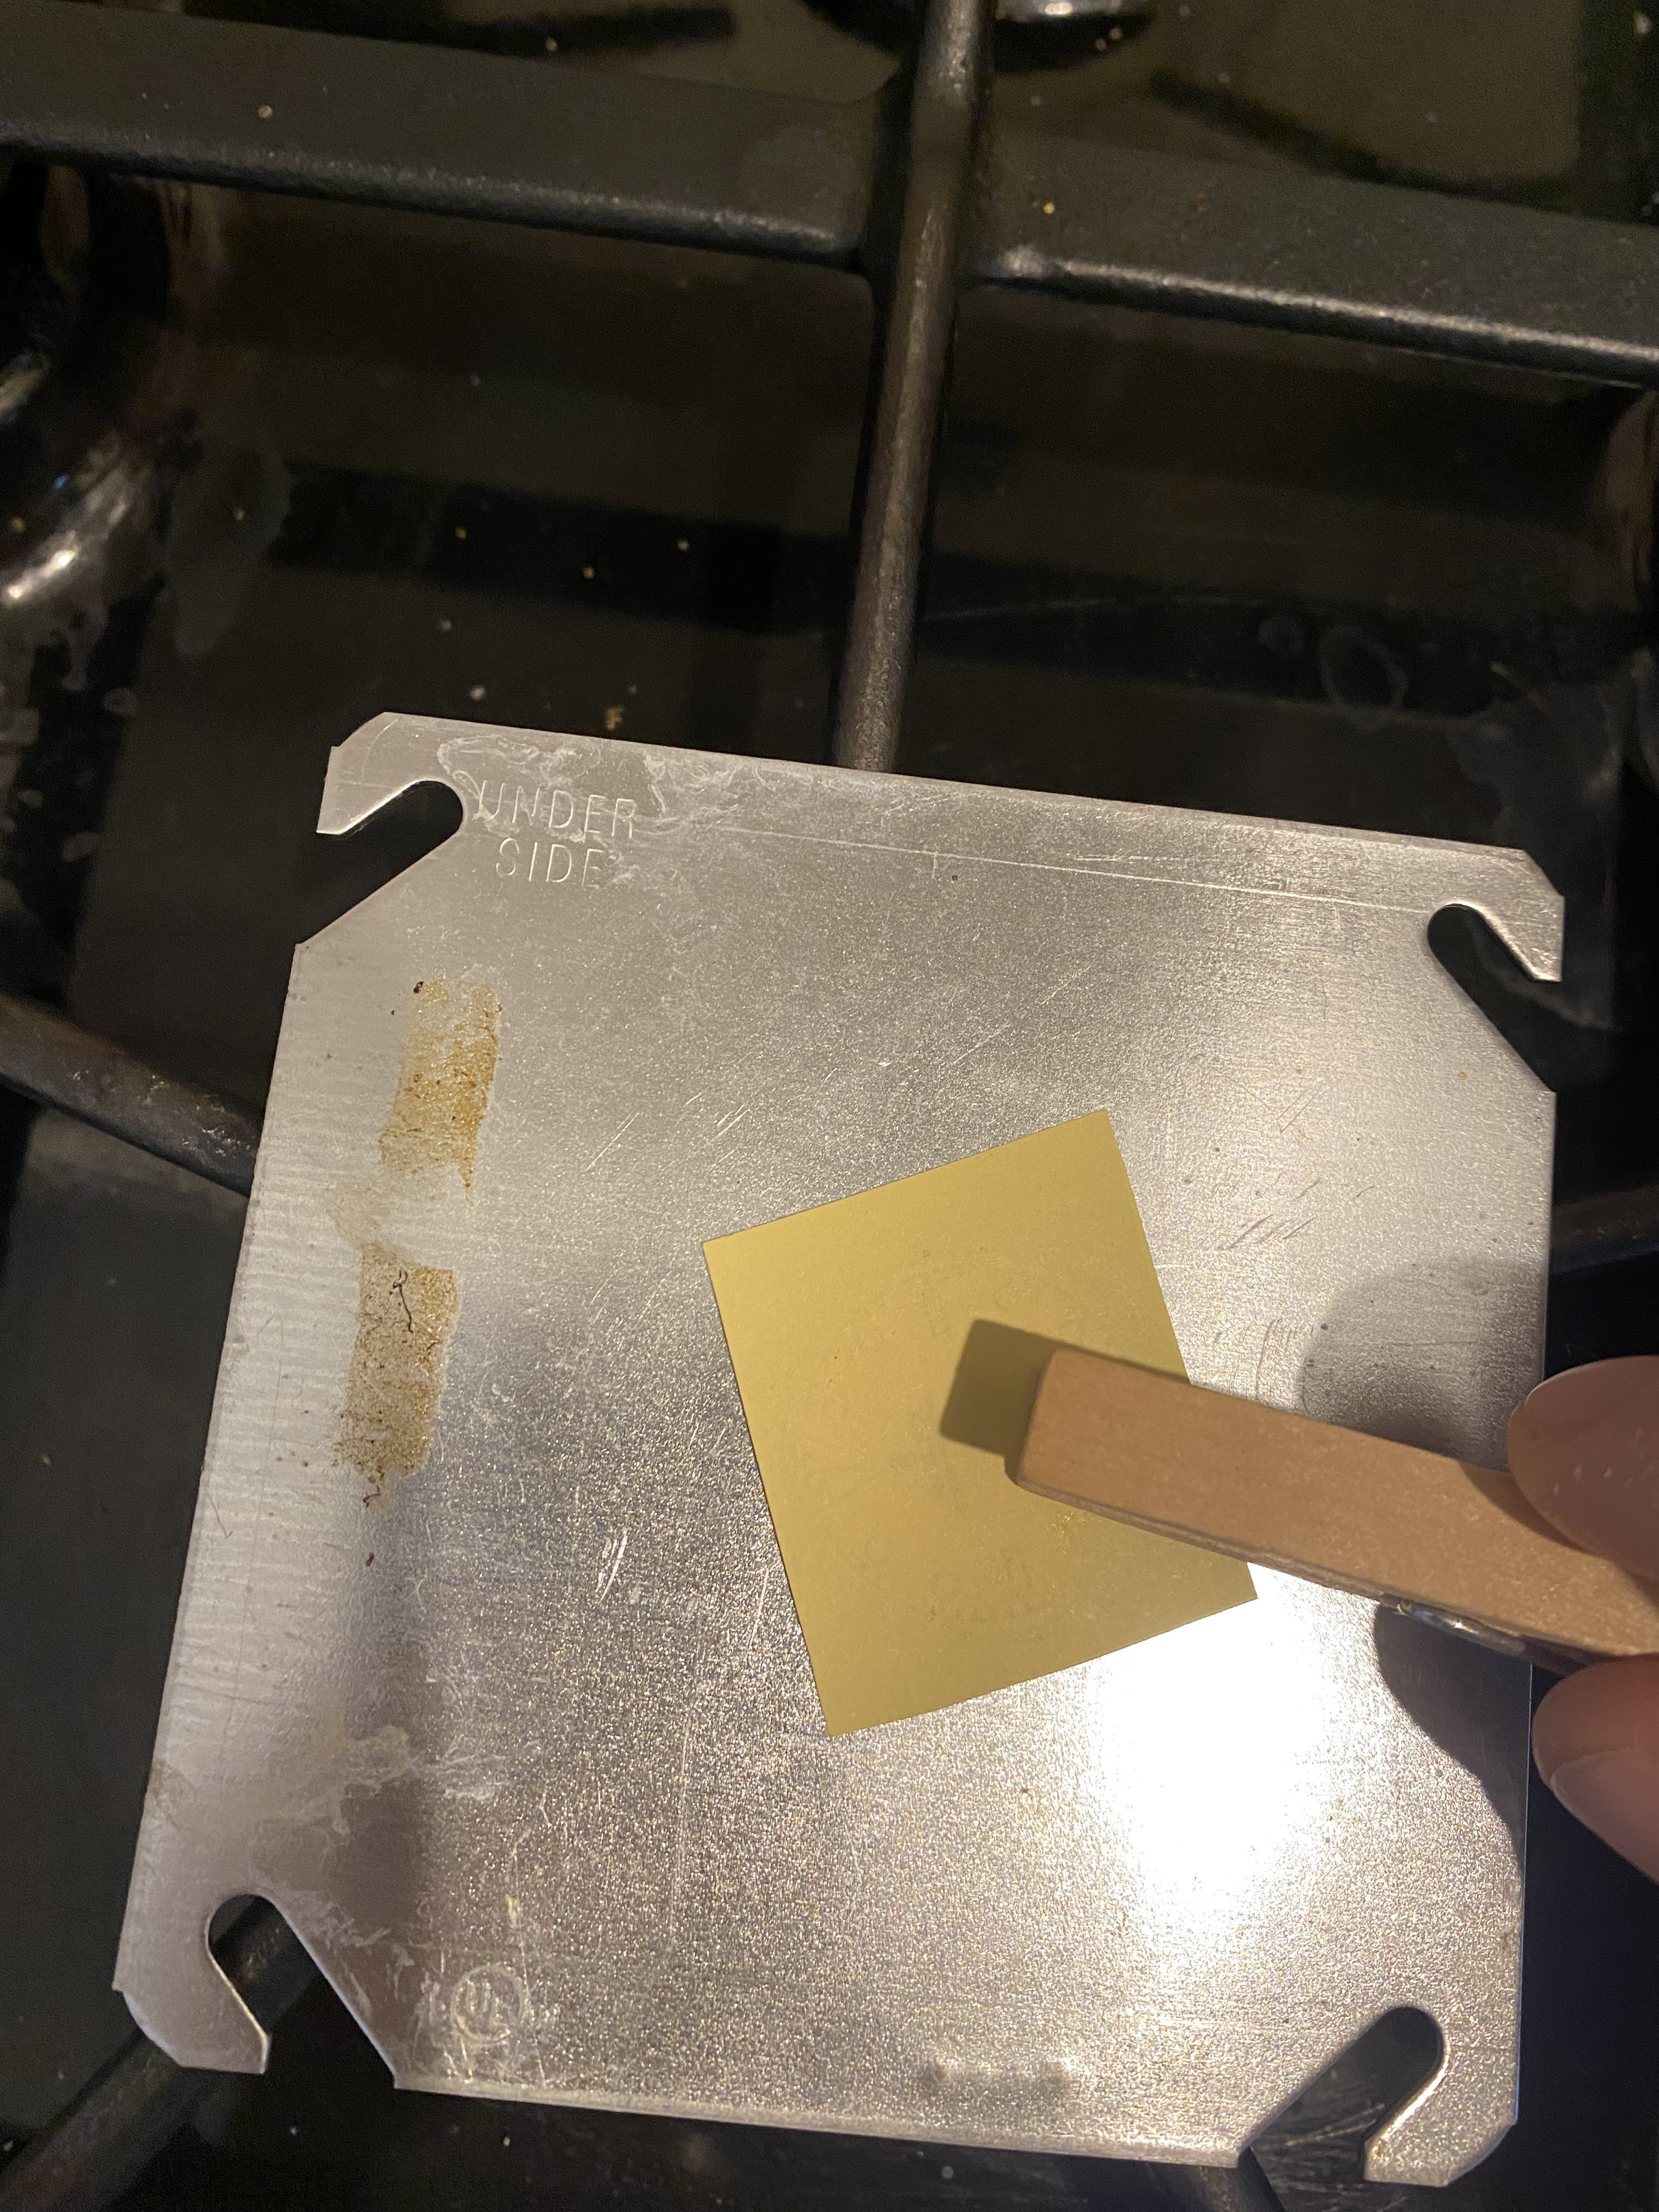
Step 6: Flip the art work/dial over (they should be stuck together). Very lightly burnish the art to ensure the art is fully transferred from the paper to the brass. I used a wooden clothespin and it worked great. I am talking very lightly. Too much and the toner might distort. Imagine the pressure you put on caressing someone's skin. Doesn't take much!
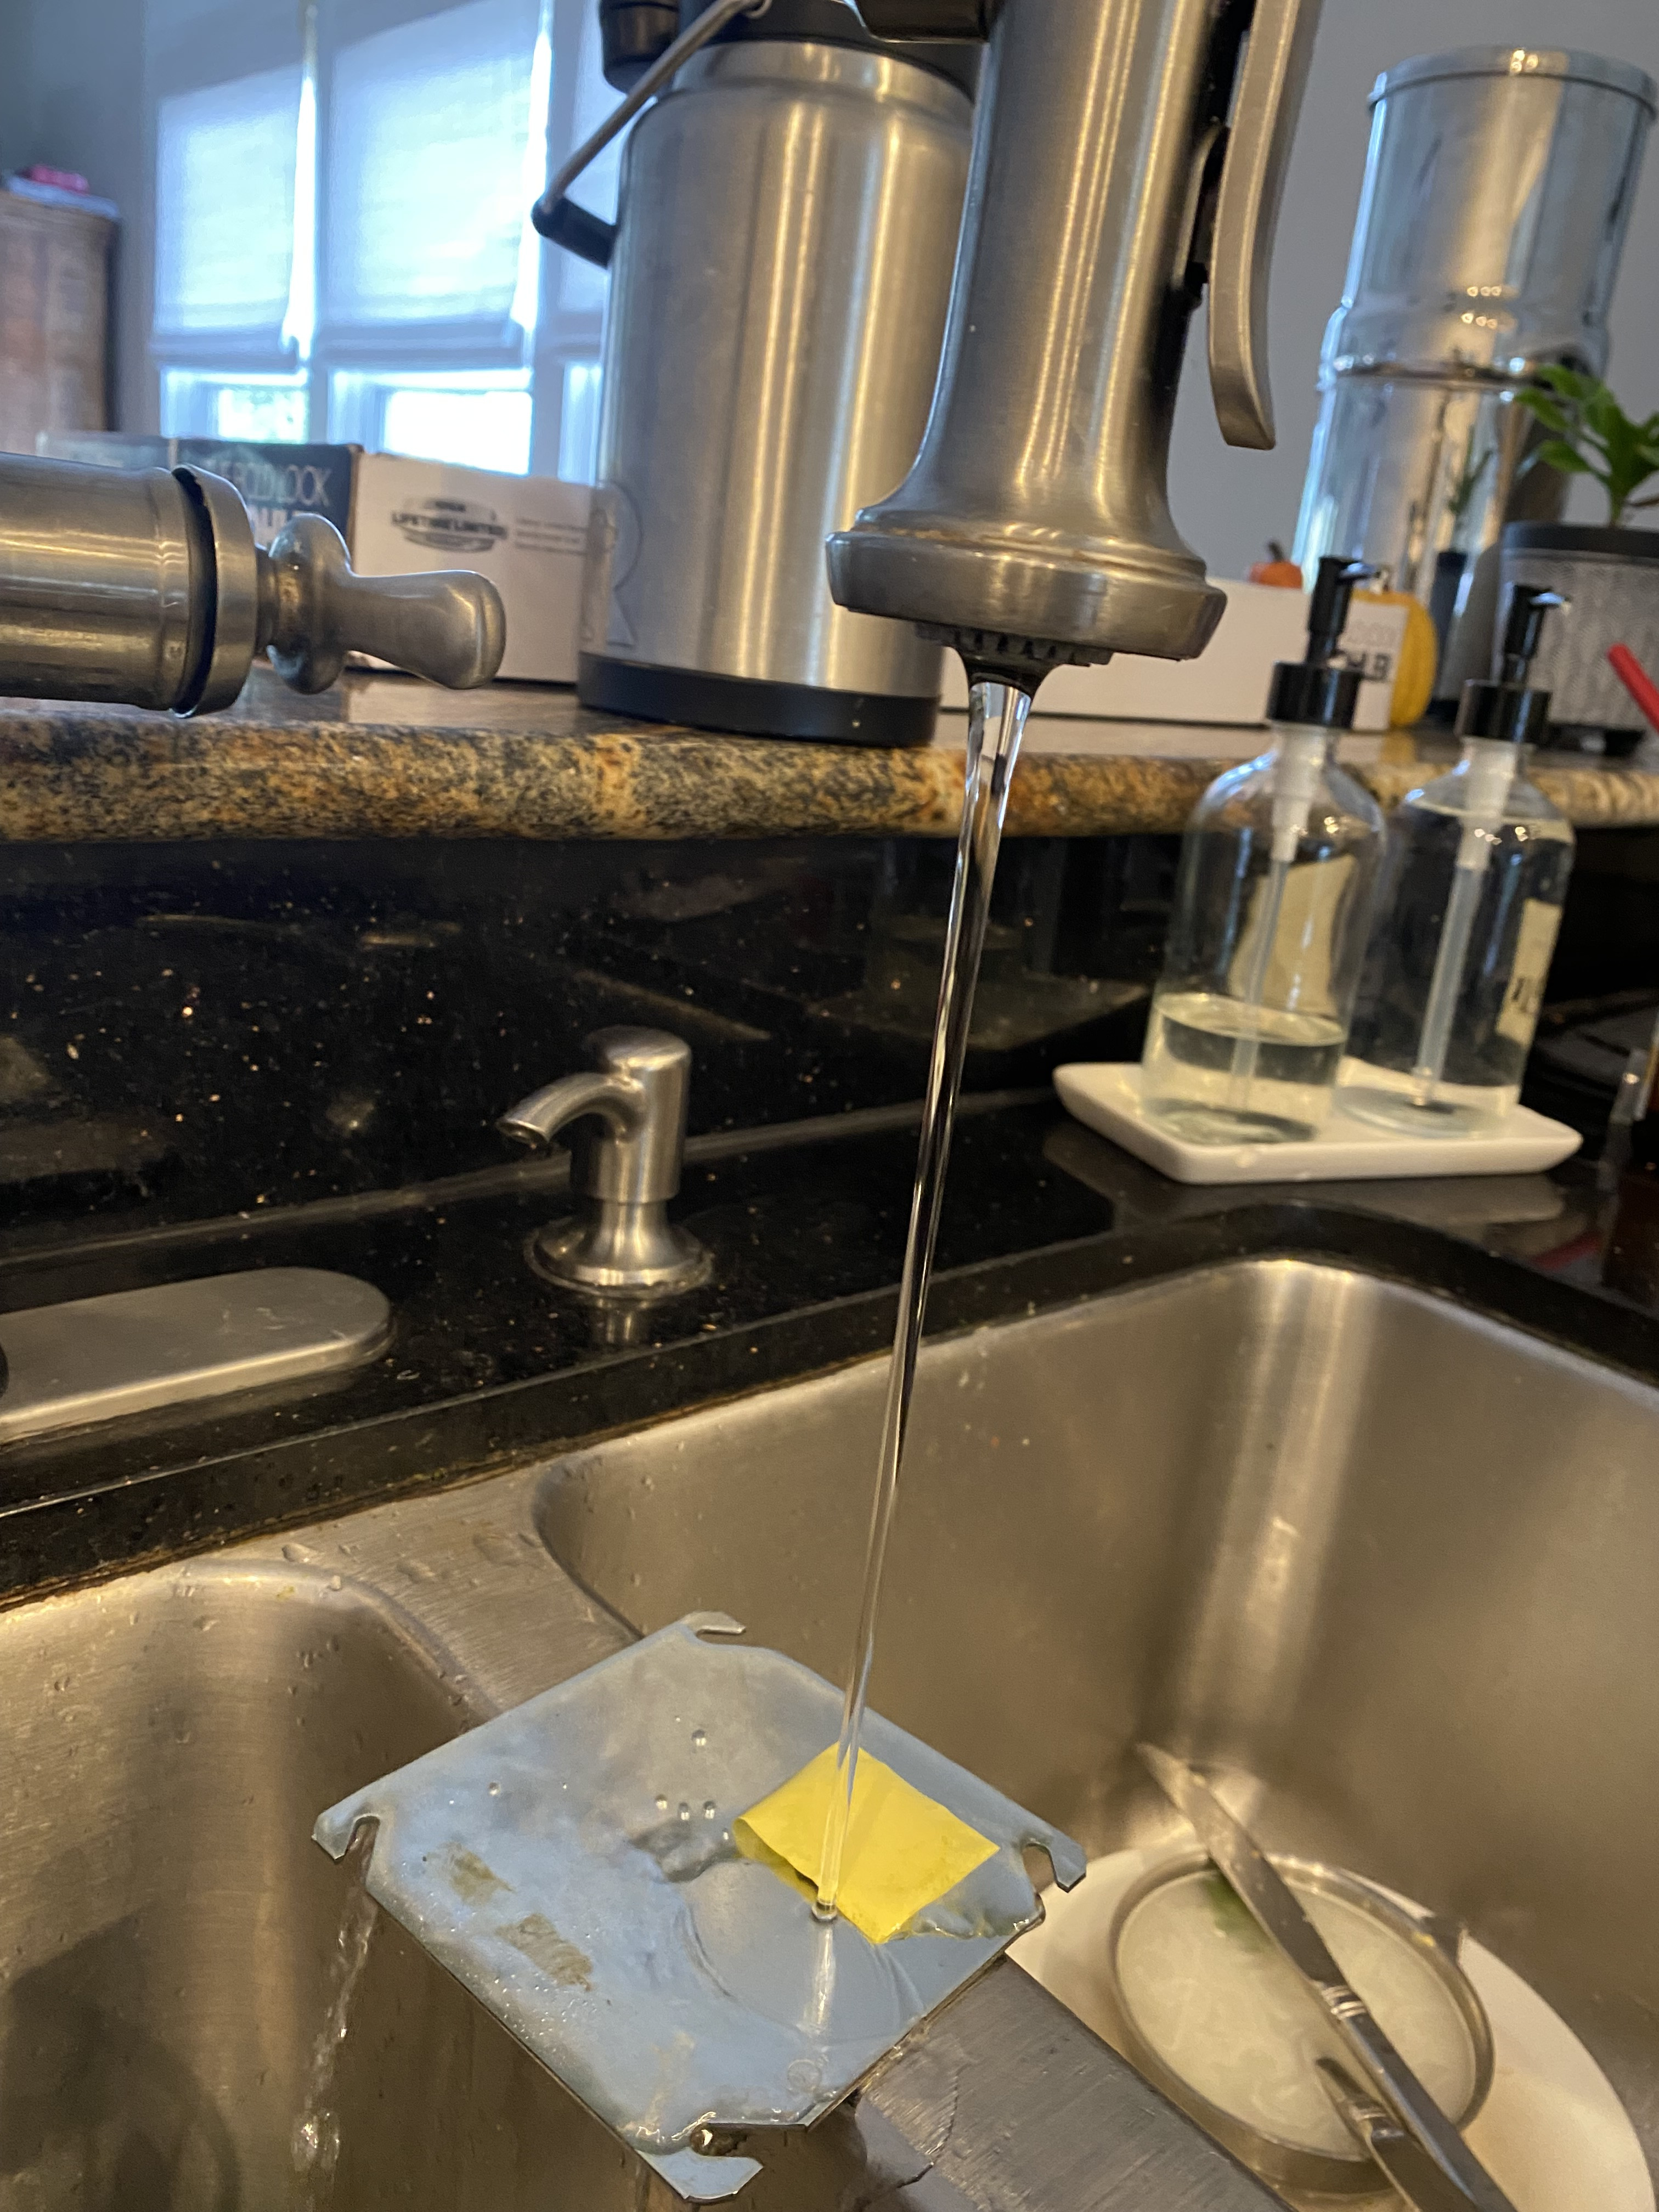
Step 7: Take the art/dial to a source of water and cool it down. I used my sink. You could just submerge it in a bowl of water.
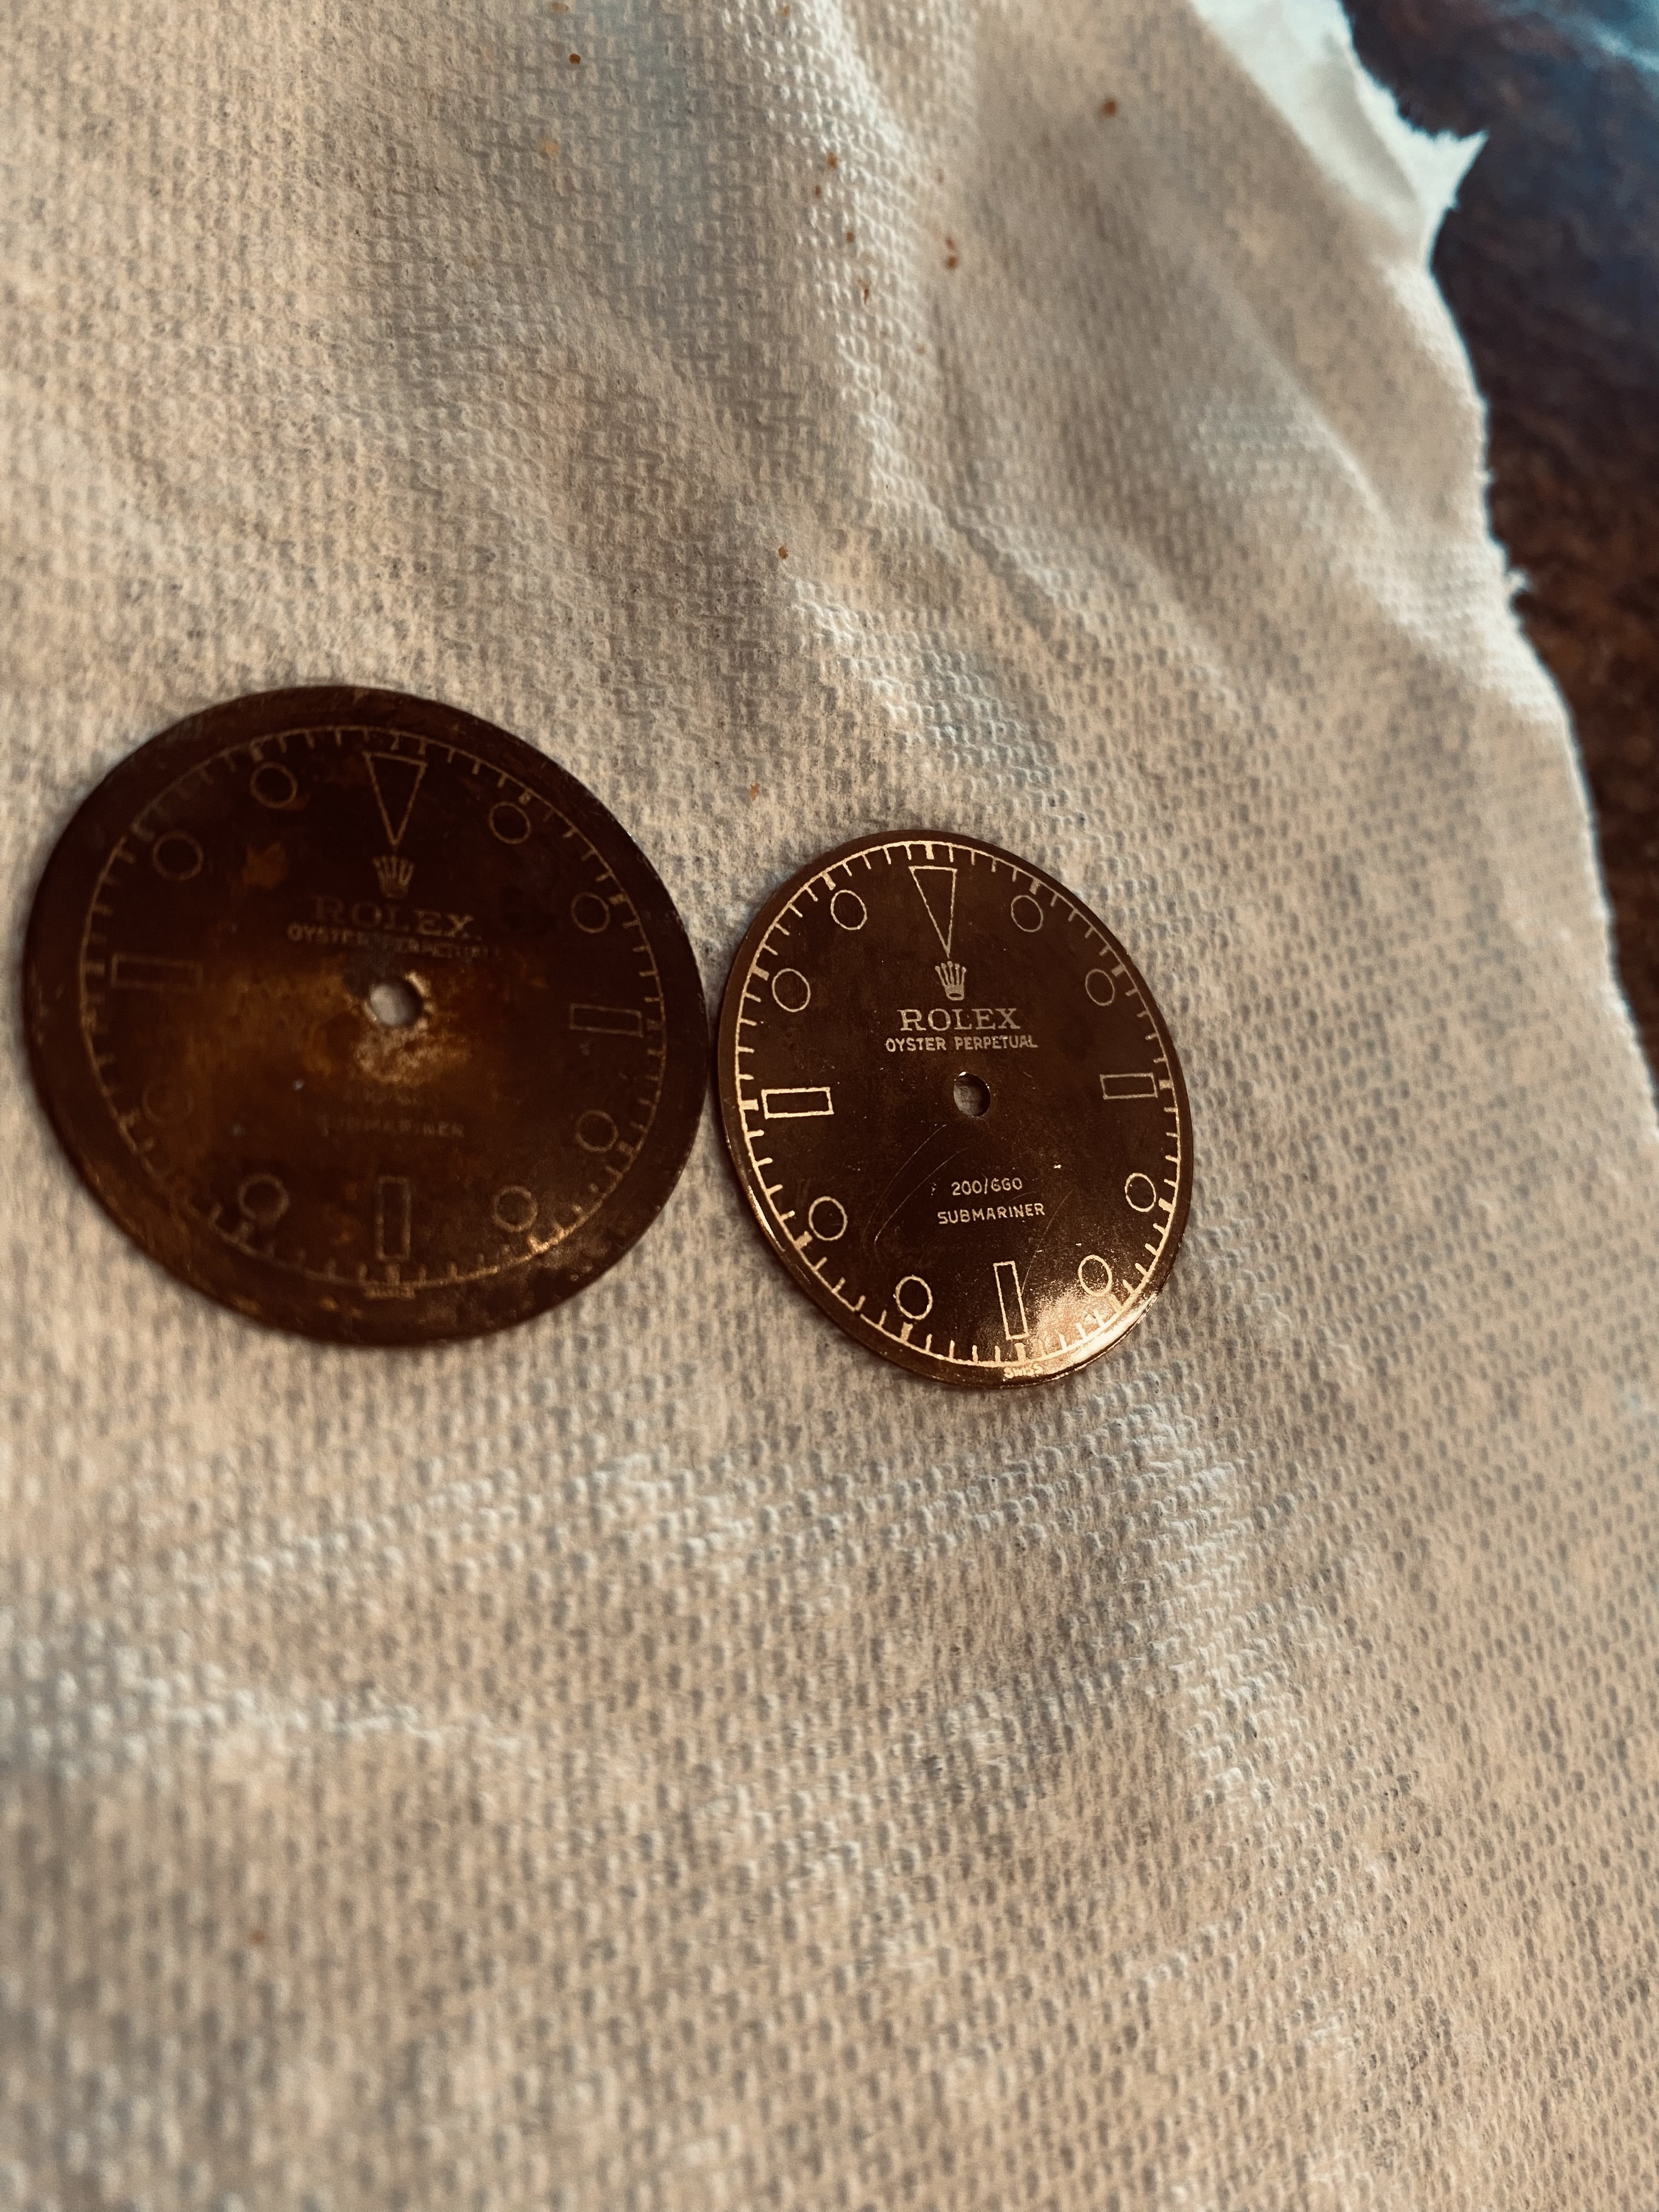
Step 8: Slowly peel off the paper. The design should be fully transferred to the dial now. (I used a reject dial for this tutorial and it had a small lip which prevented a tiny portion of the art from transferring). Dry the dial. Careful not to touch with your bare fingers! You do not want oils/grease on the dial.
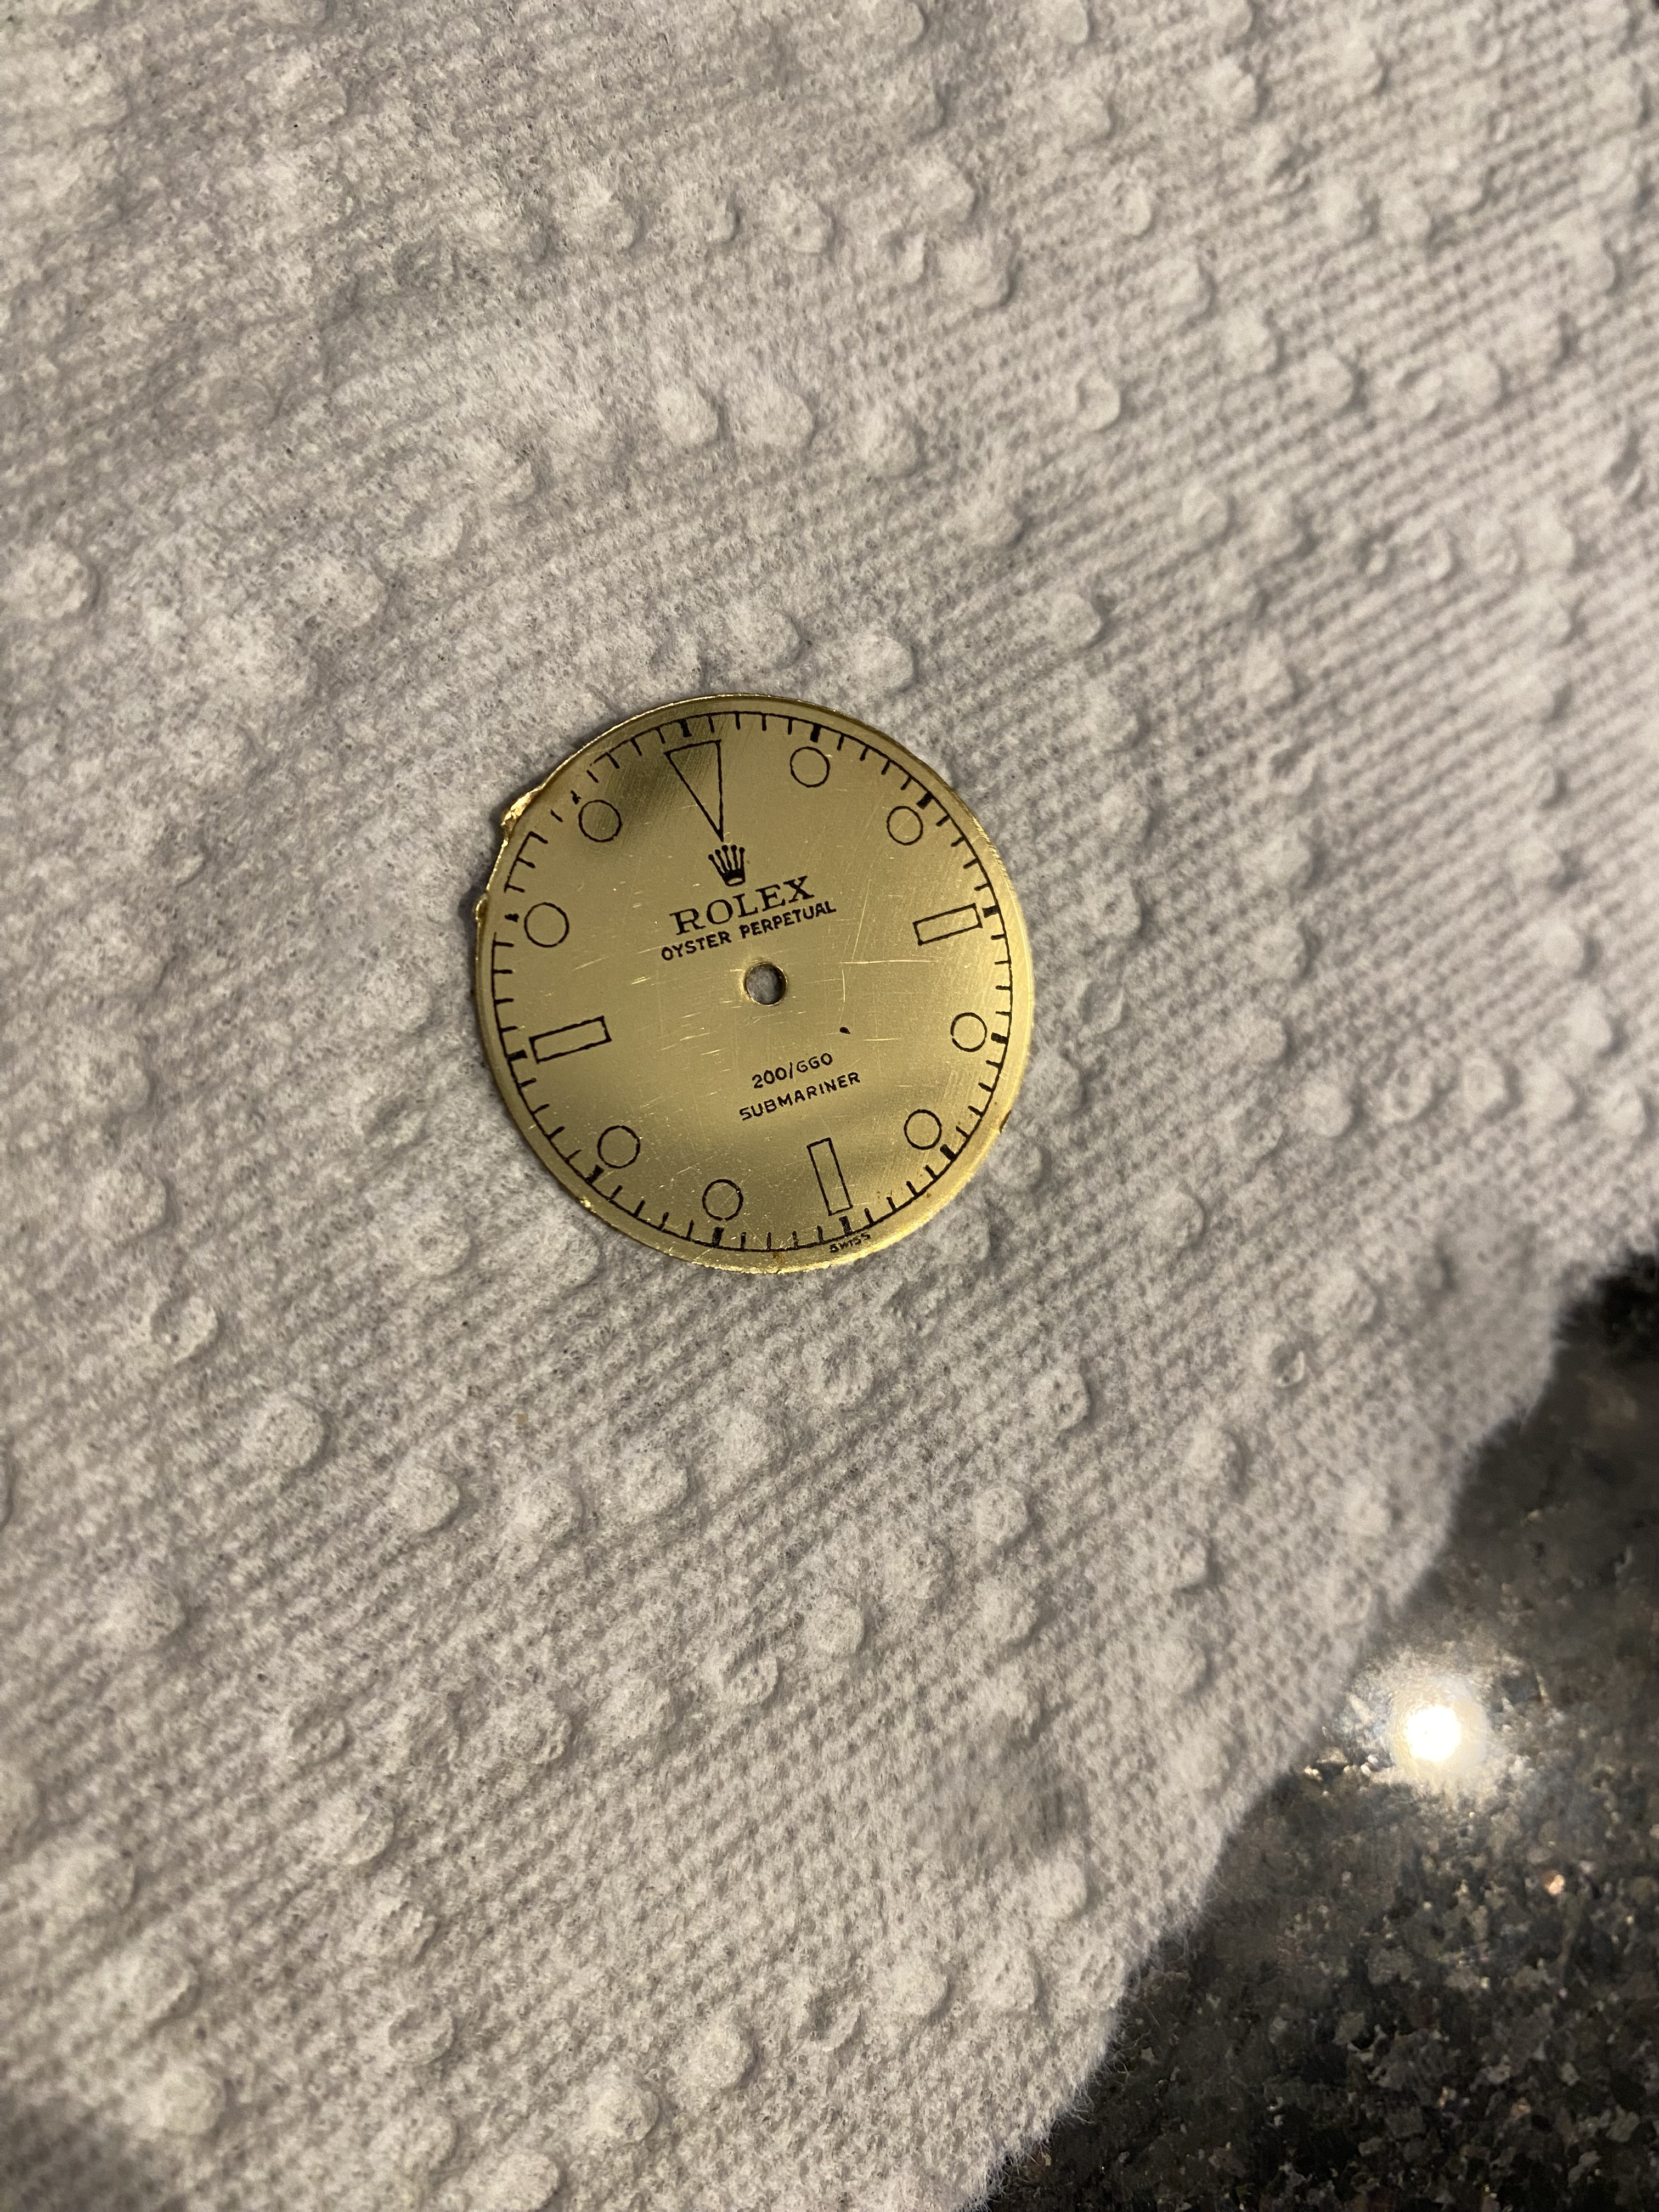
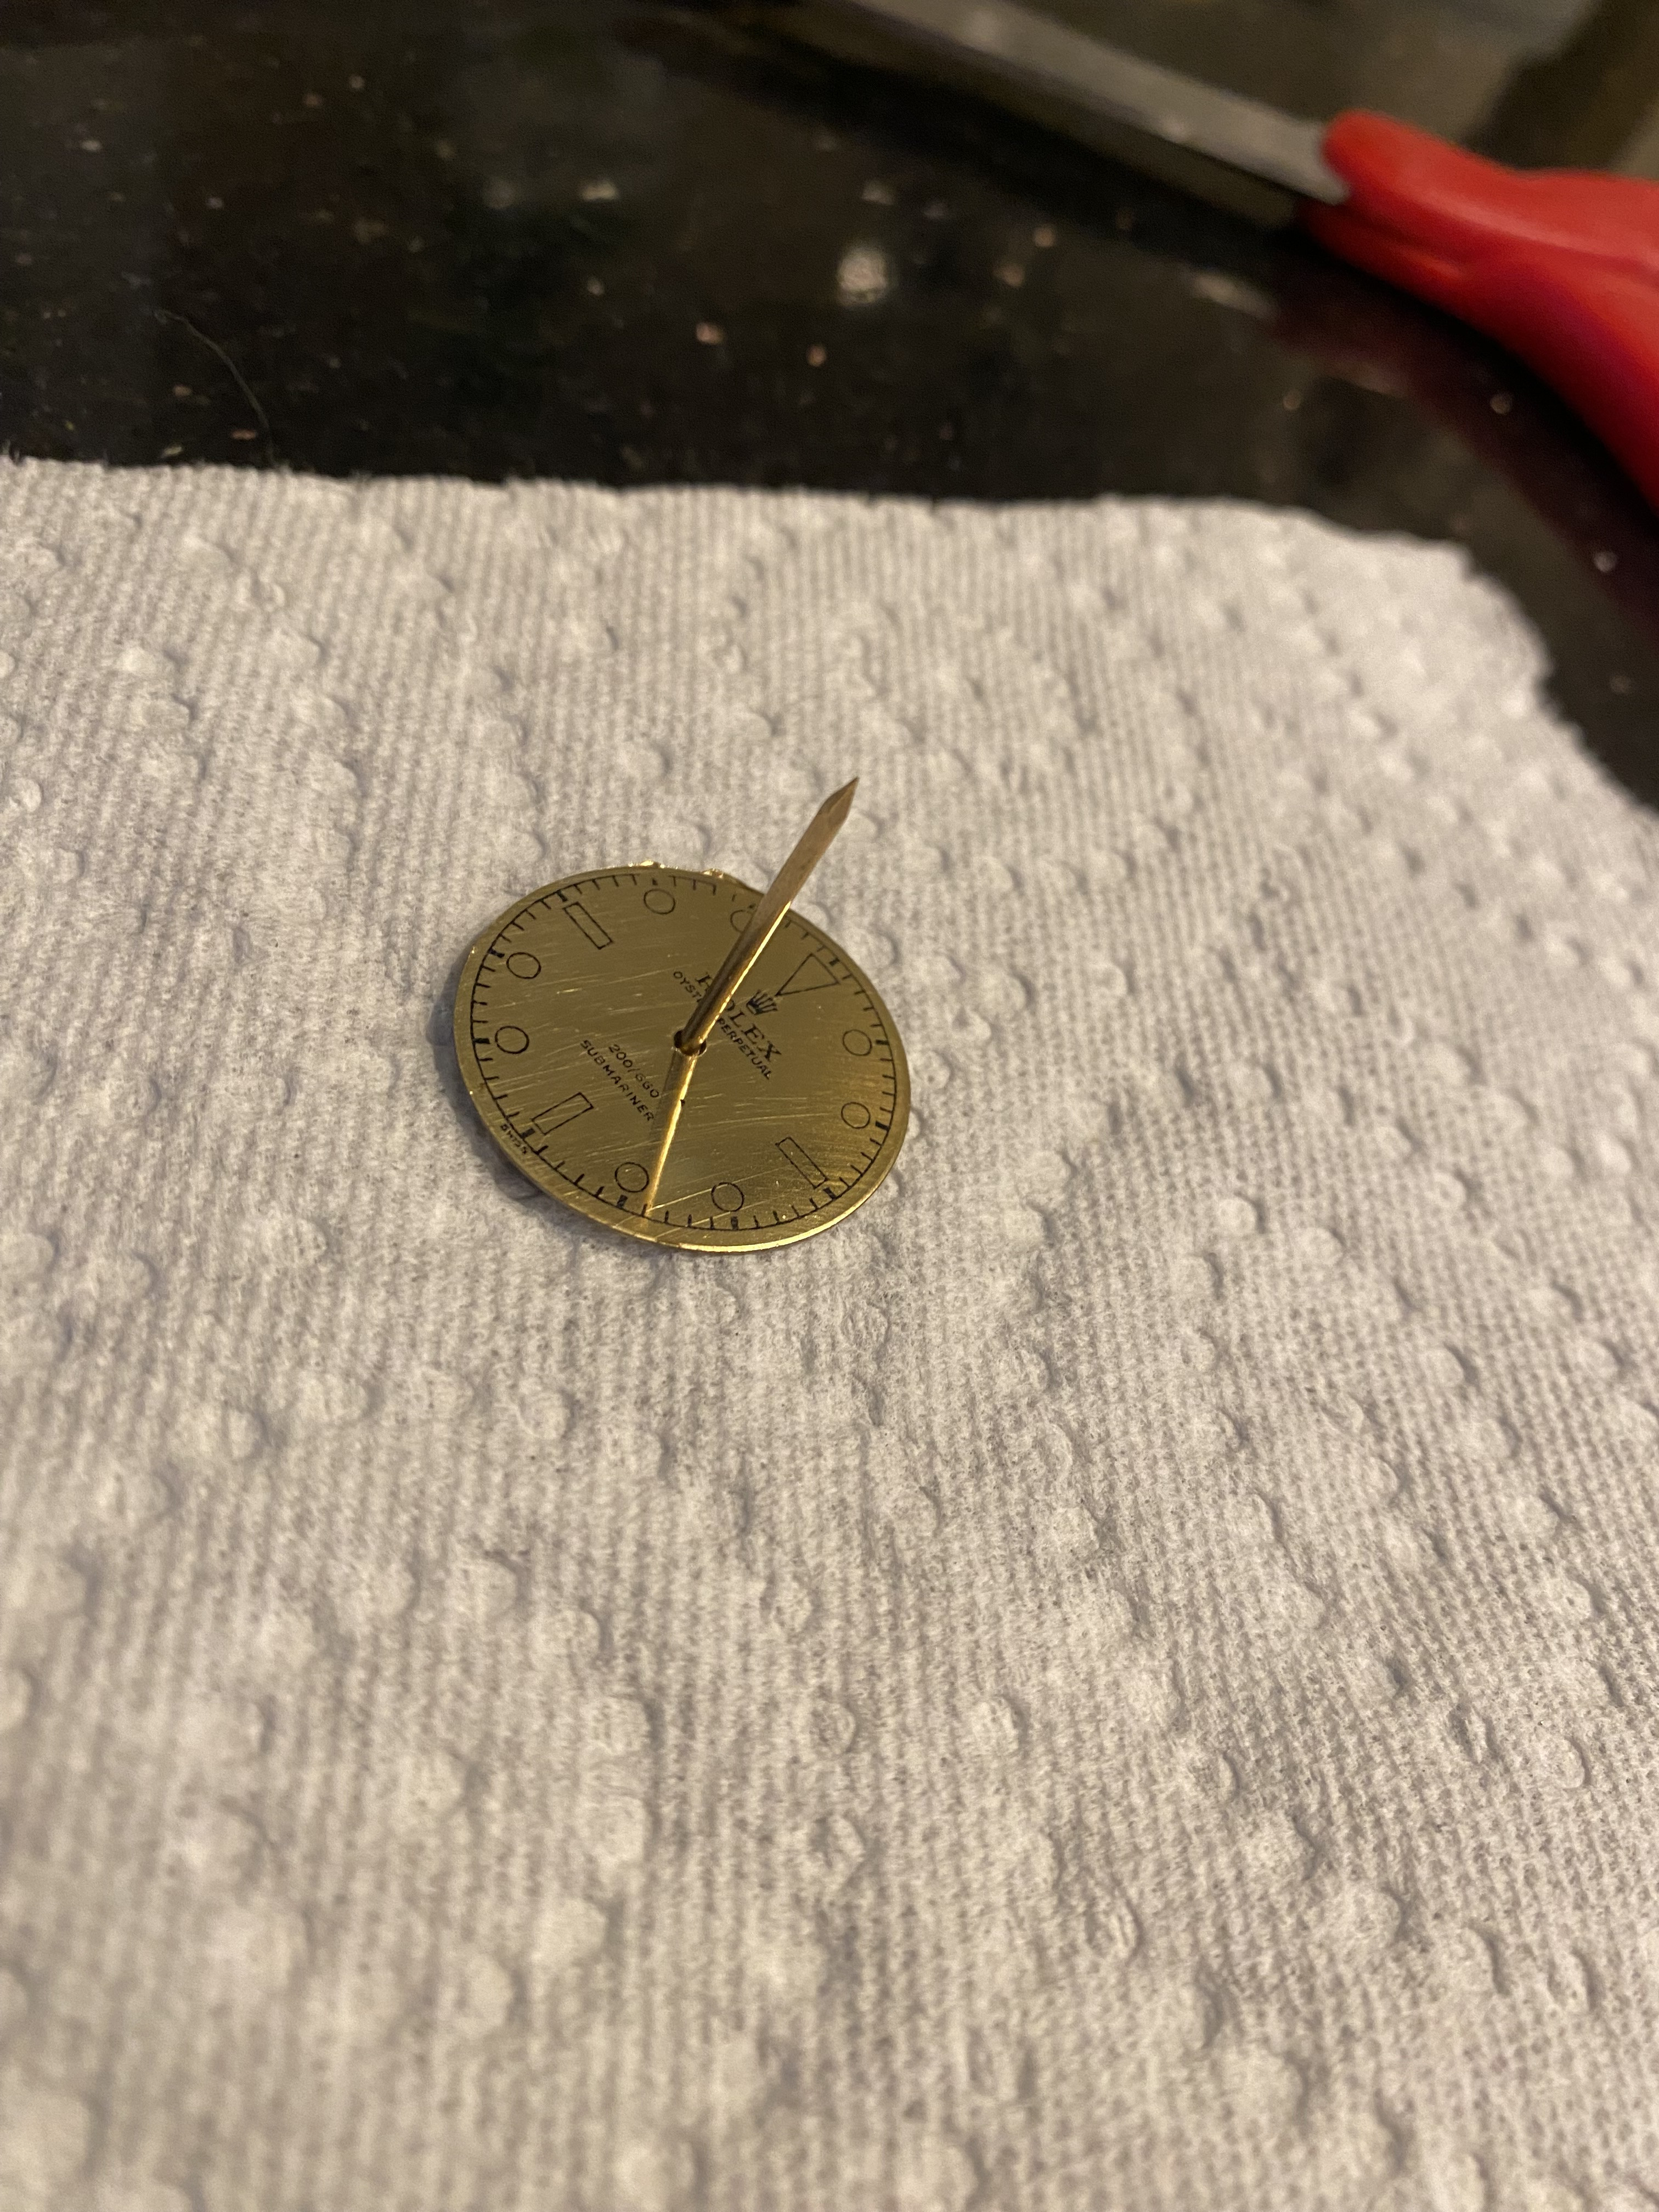
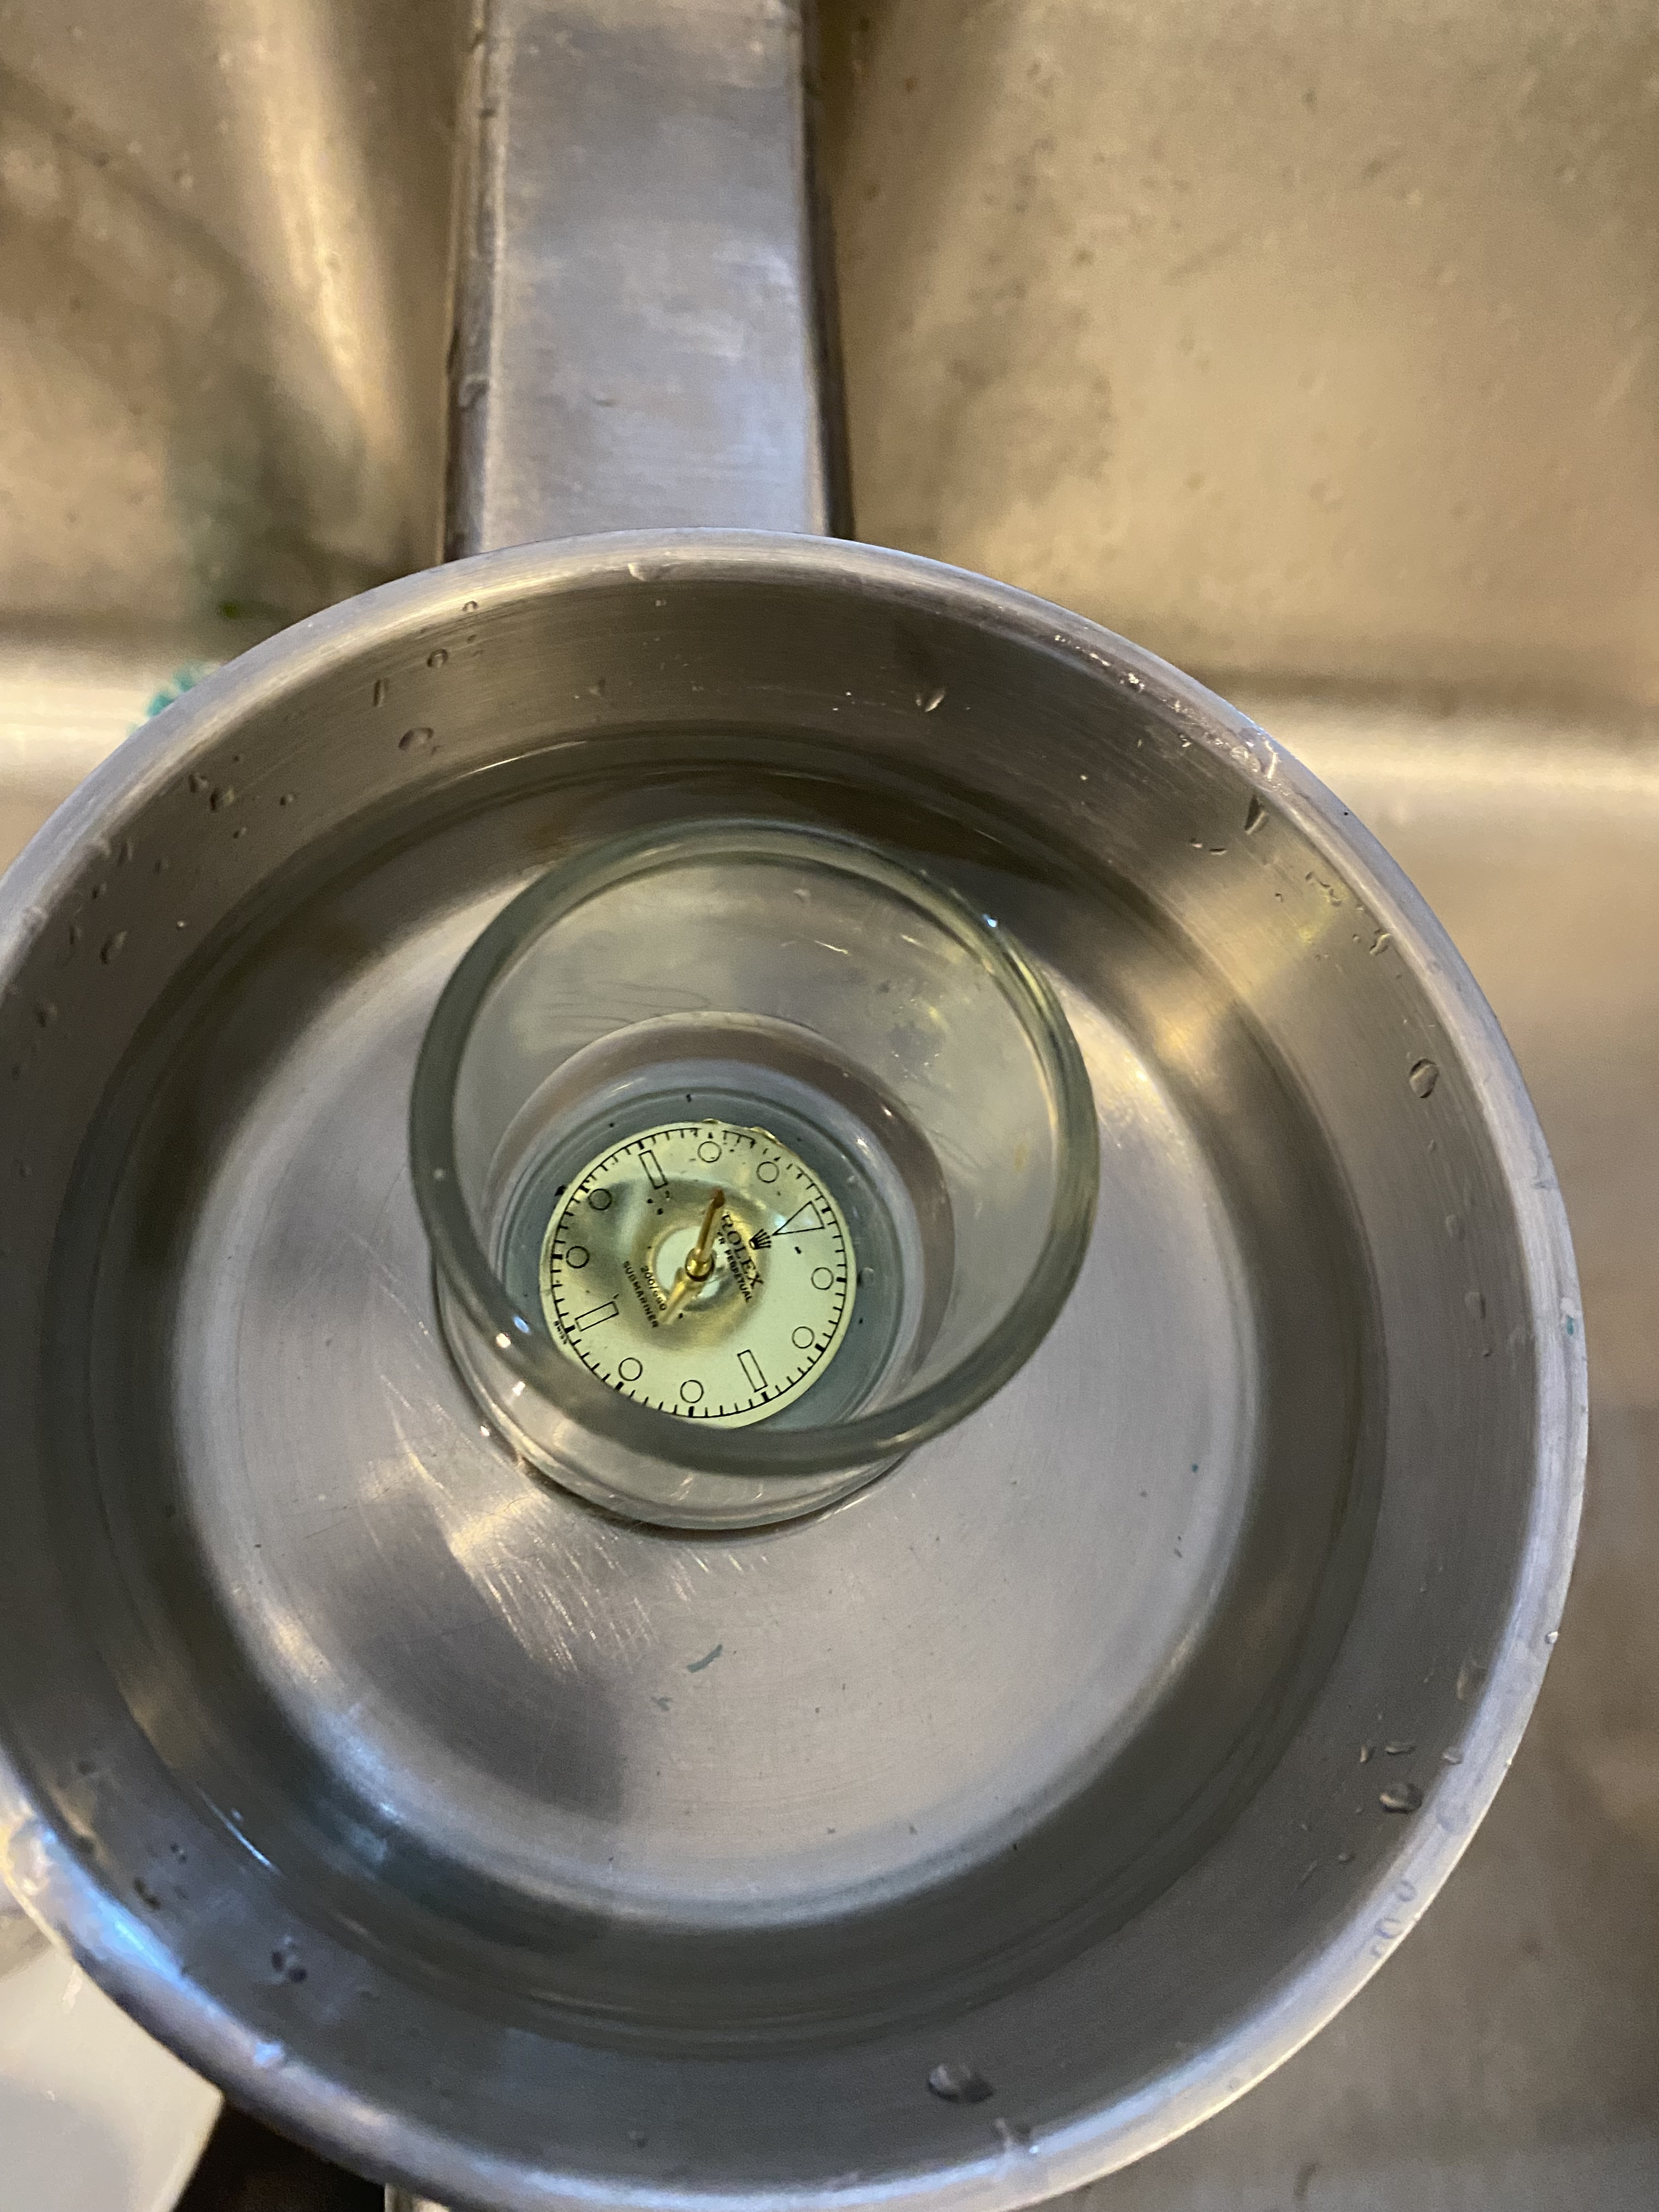
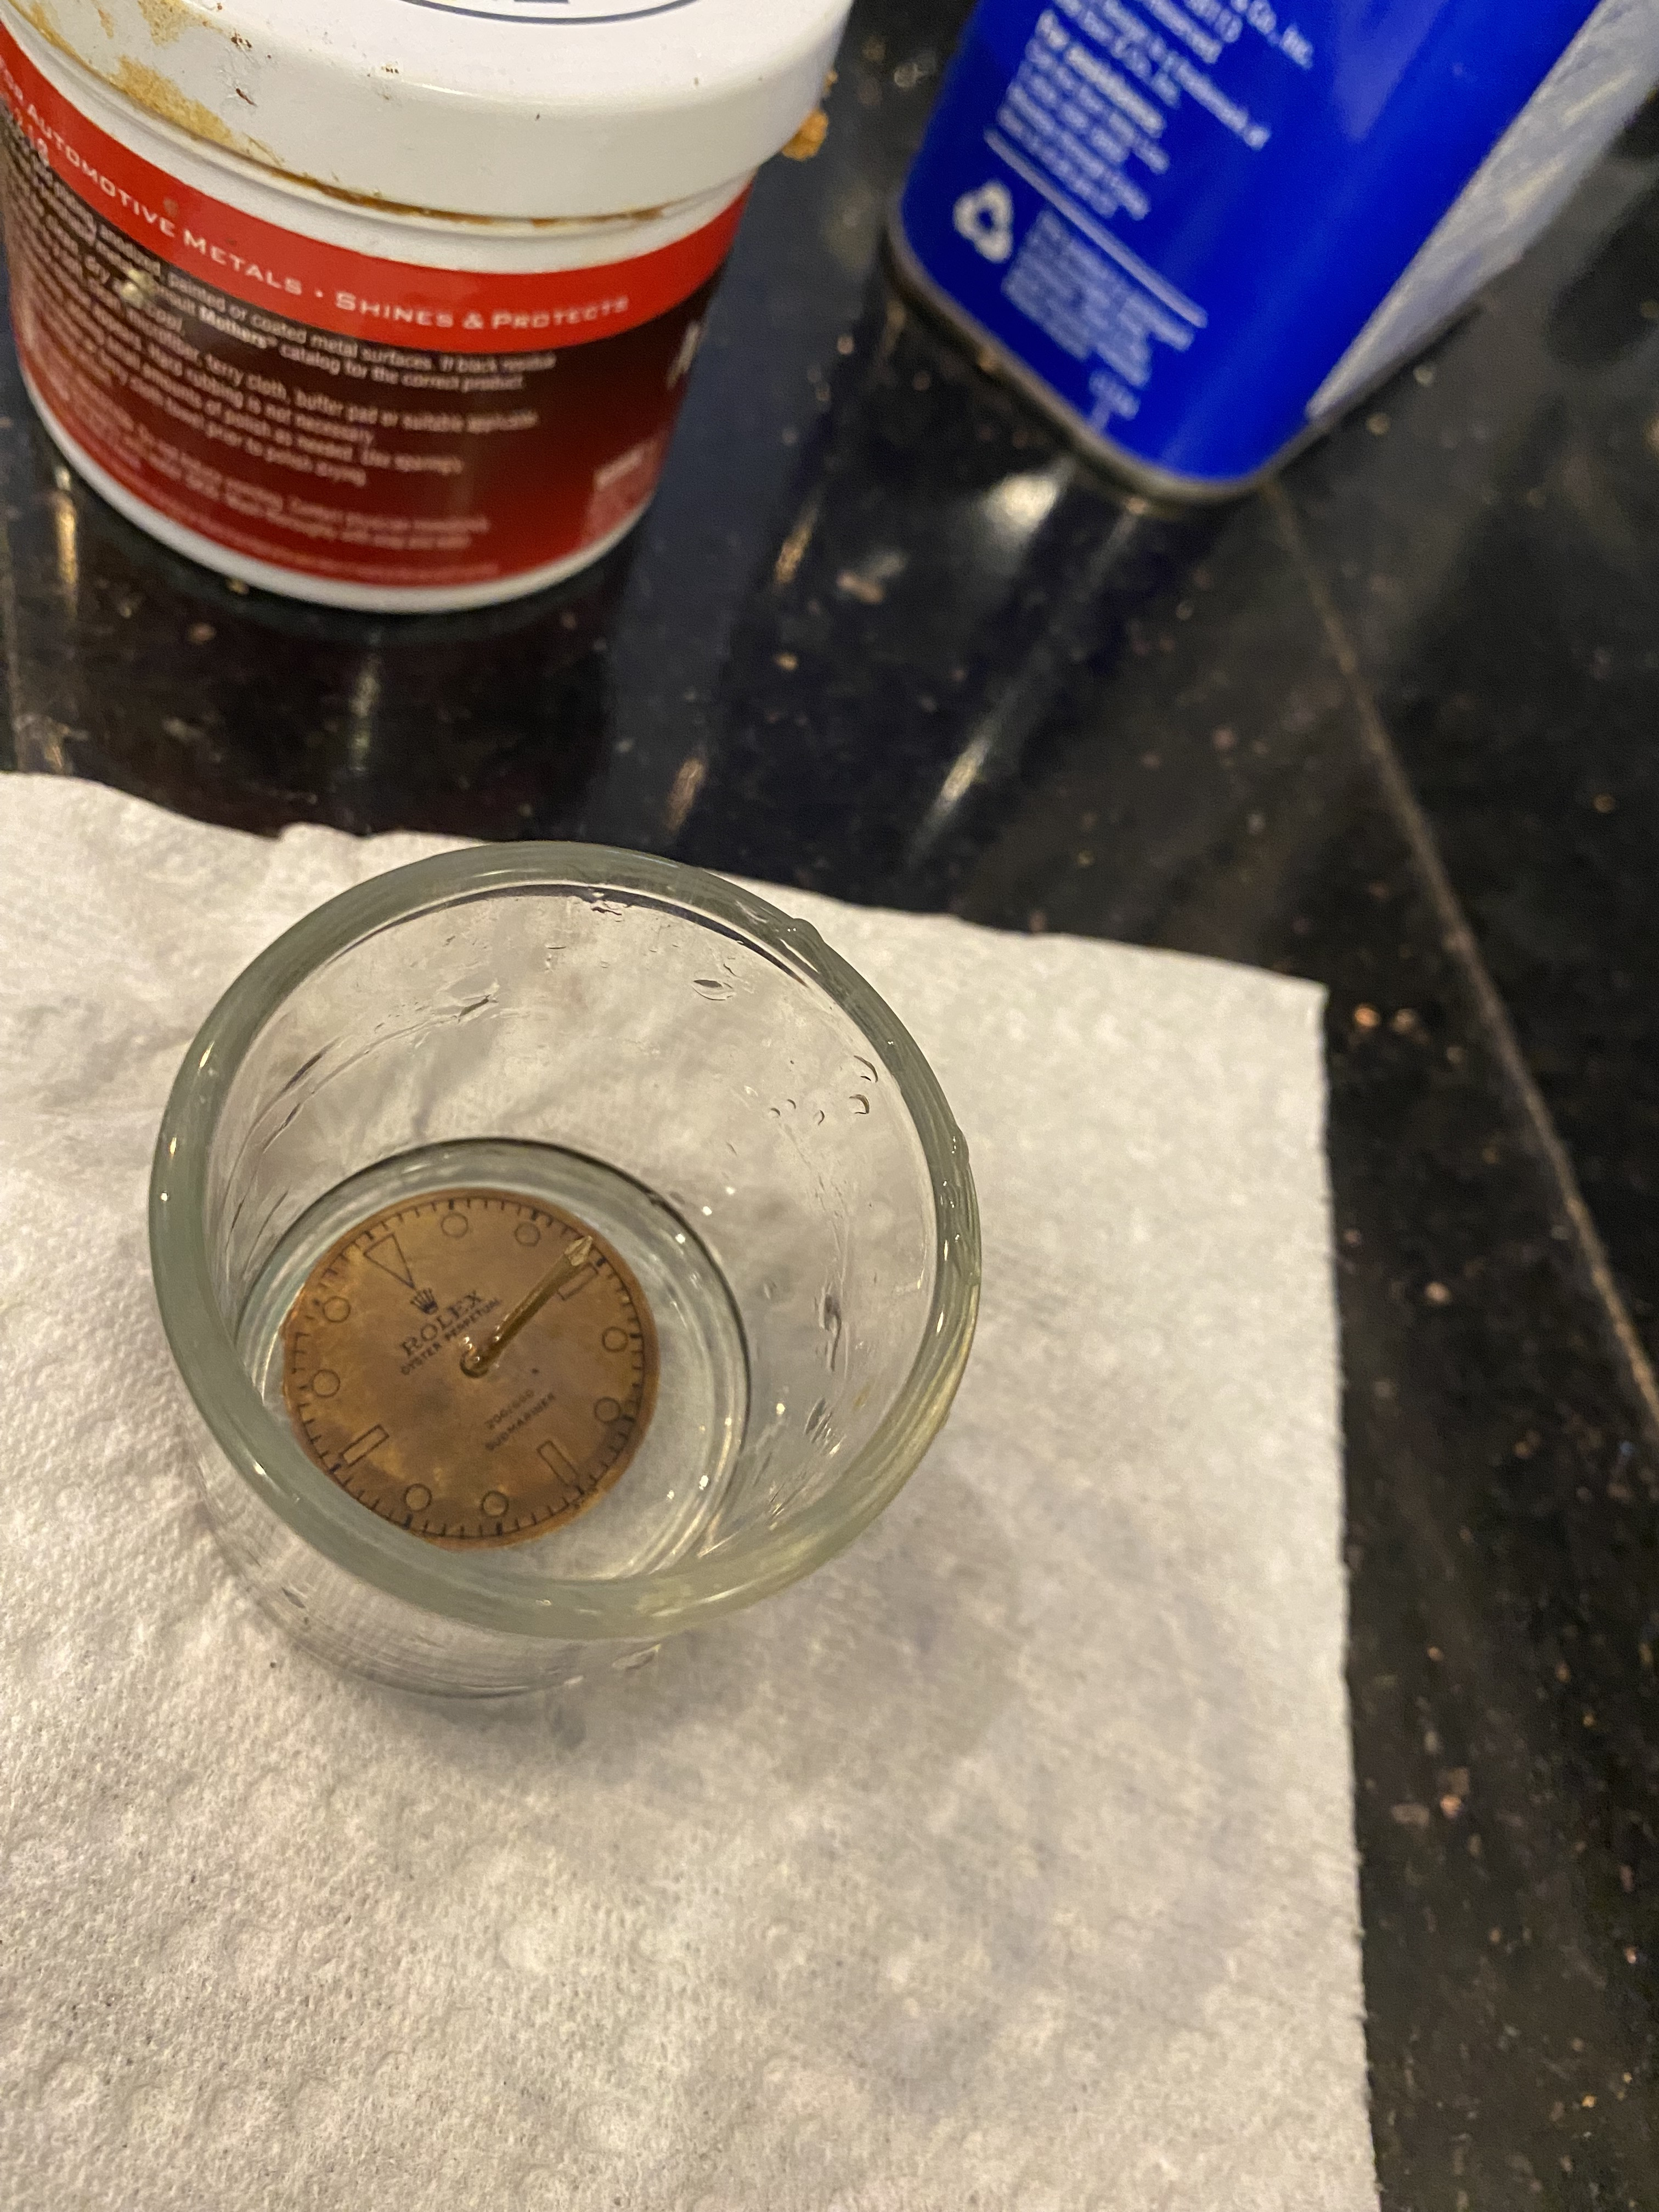
Step 9: Time to electroplate or oxidize. For this tutorial we are going to oxidize it. Just the right amount will give you a tropical brown. Too much and the dial will turn black. After lots of researching I found Sculpt Neavou M38 to be my best bet. There are other options out there, but this worked great. You will have to tinker with the proportions of the oxidizing agent and water. I found 1 part M38 to 1 part water gave a bit slower reaction which was better for control* I put in a small amount of the mixture into a shot glass, used a finishing nail through the back of the dial and lowered the dial into the shot glass. Helped me get some dunks. People I talked to who use this recommend dunking it slowly and as flat as you can. You can also spray the dial with a spray bottle of the mixture, just cant let the mixture dry out. Once you have the color you like, rinse off ASAP and dry.
*if your metal is warm, the mixture is warm, too much humidity, too little, too short exposure, too long exposure can all effect final color. You will need to tinker. For this example, it took about 40ish secs in the mixture, took it out, rinsed it with water, put it back in for 10 more secs.

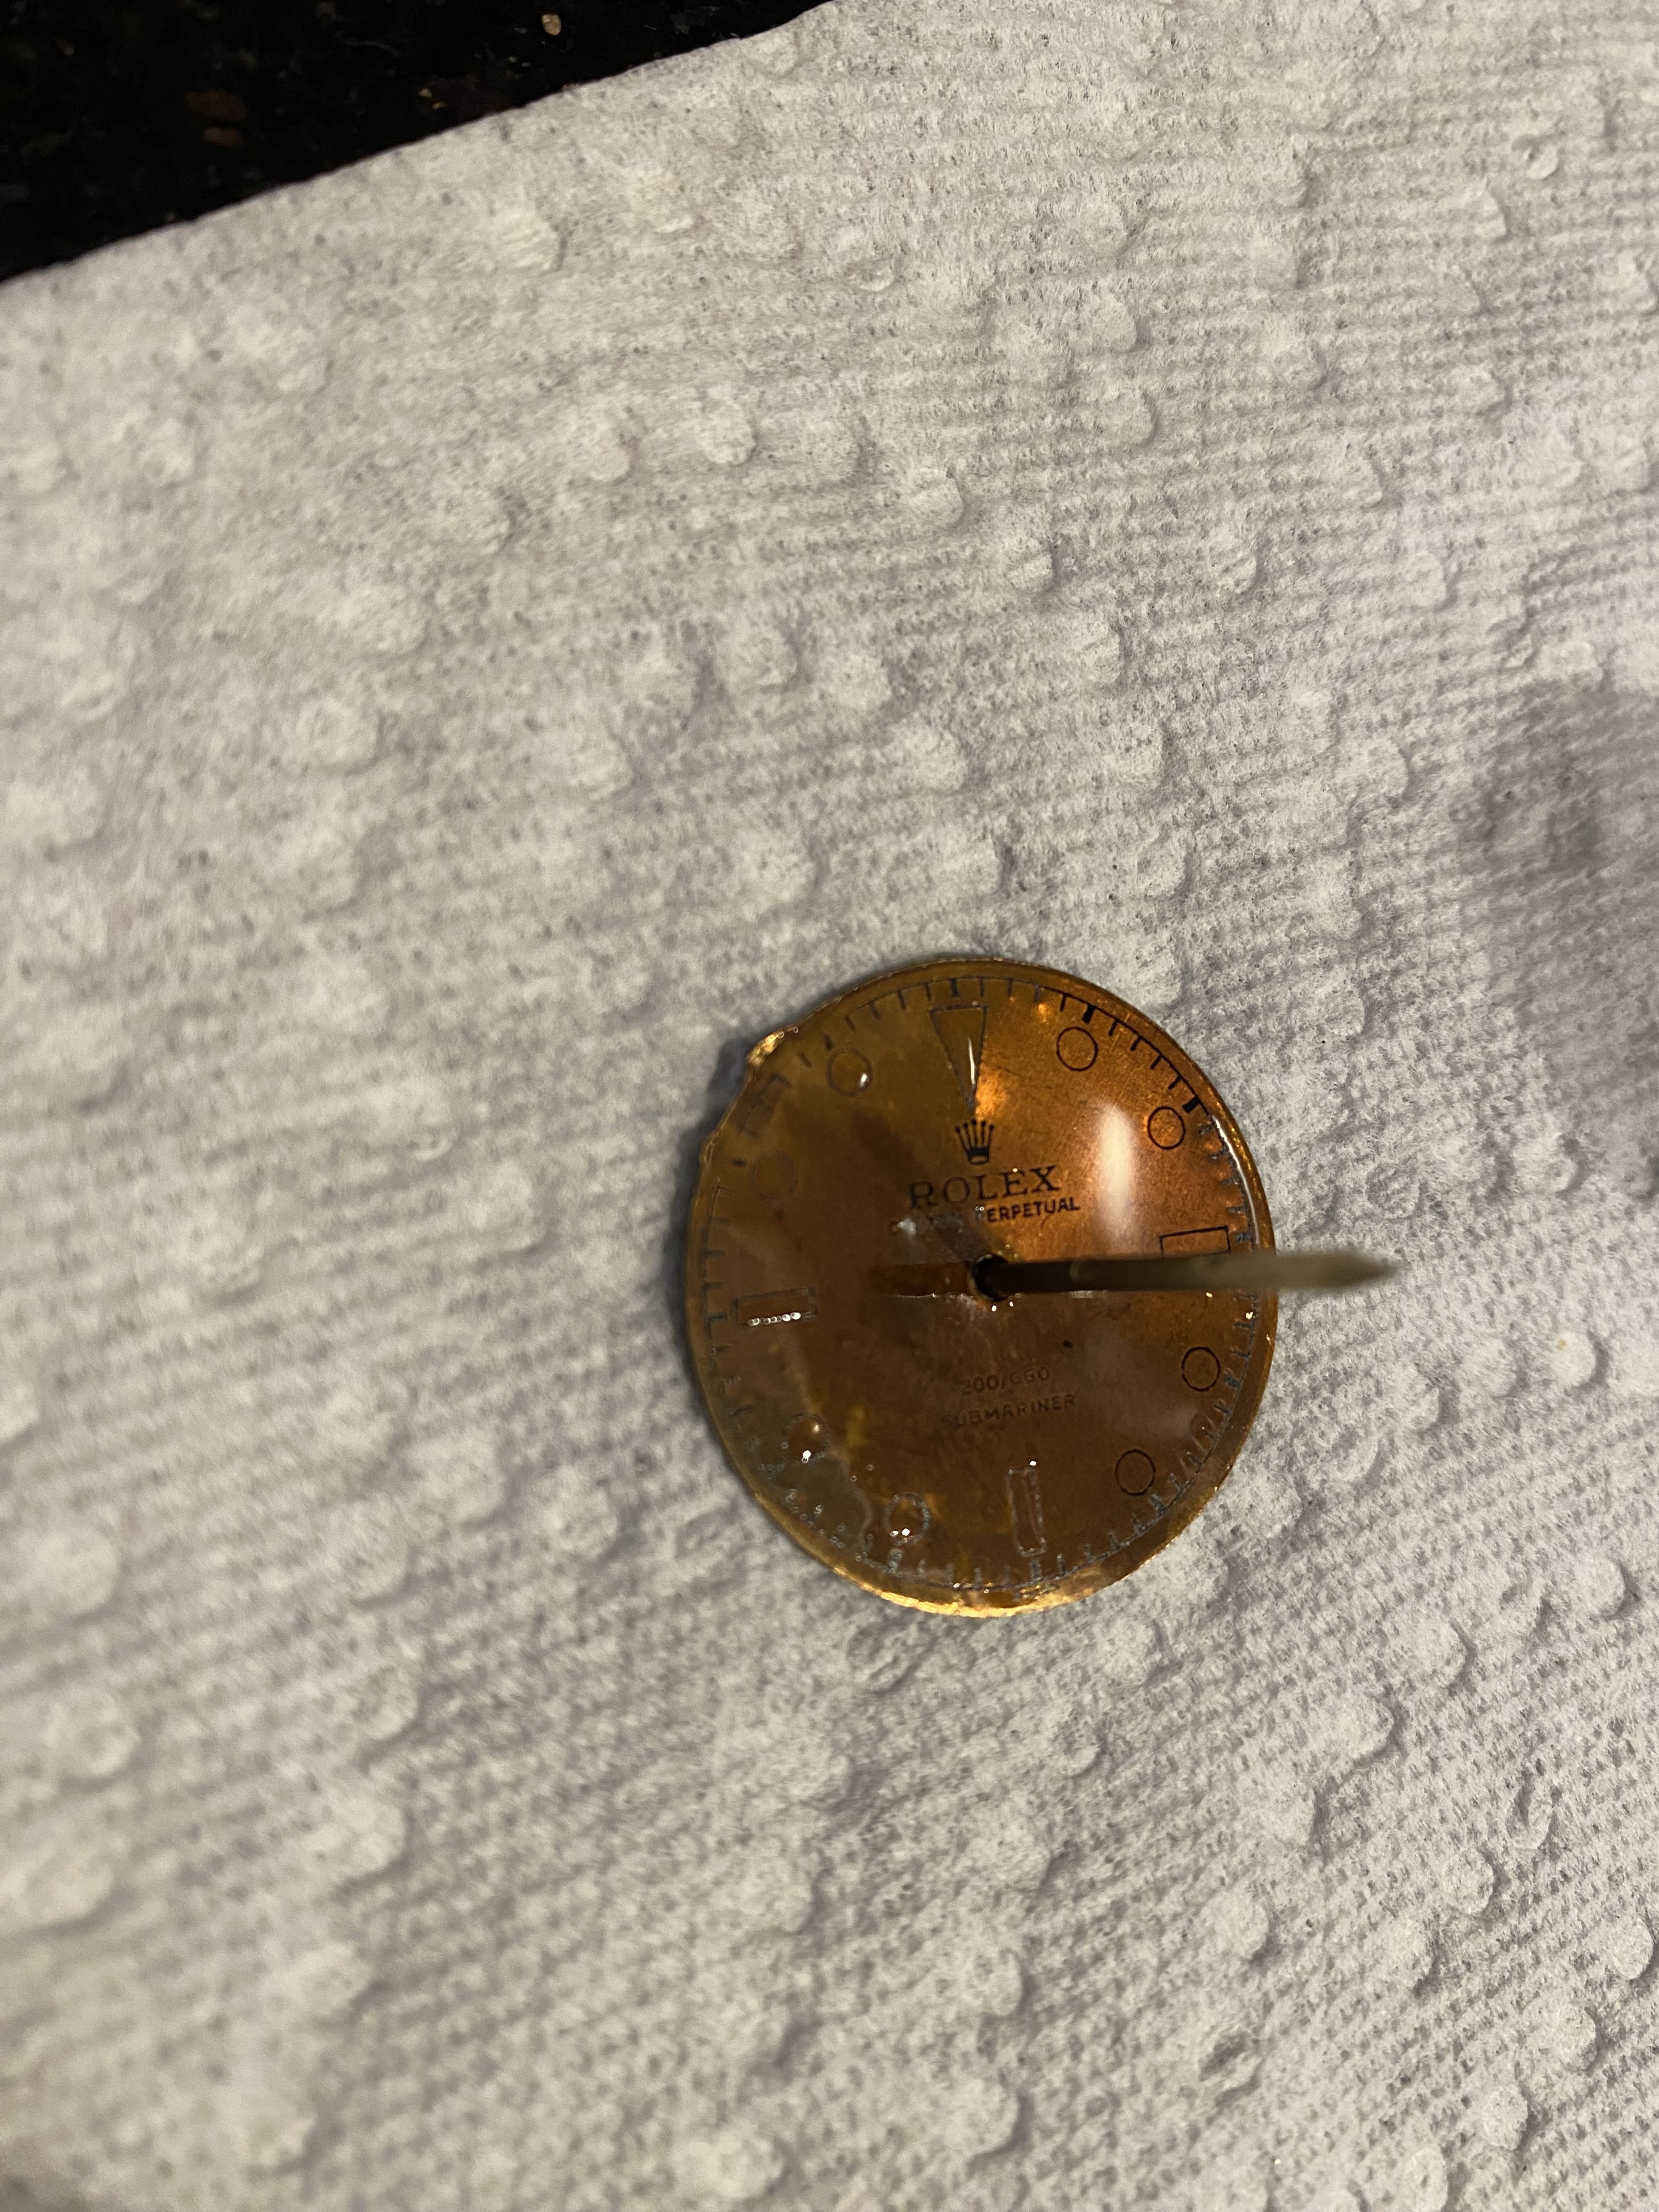
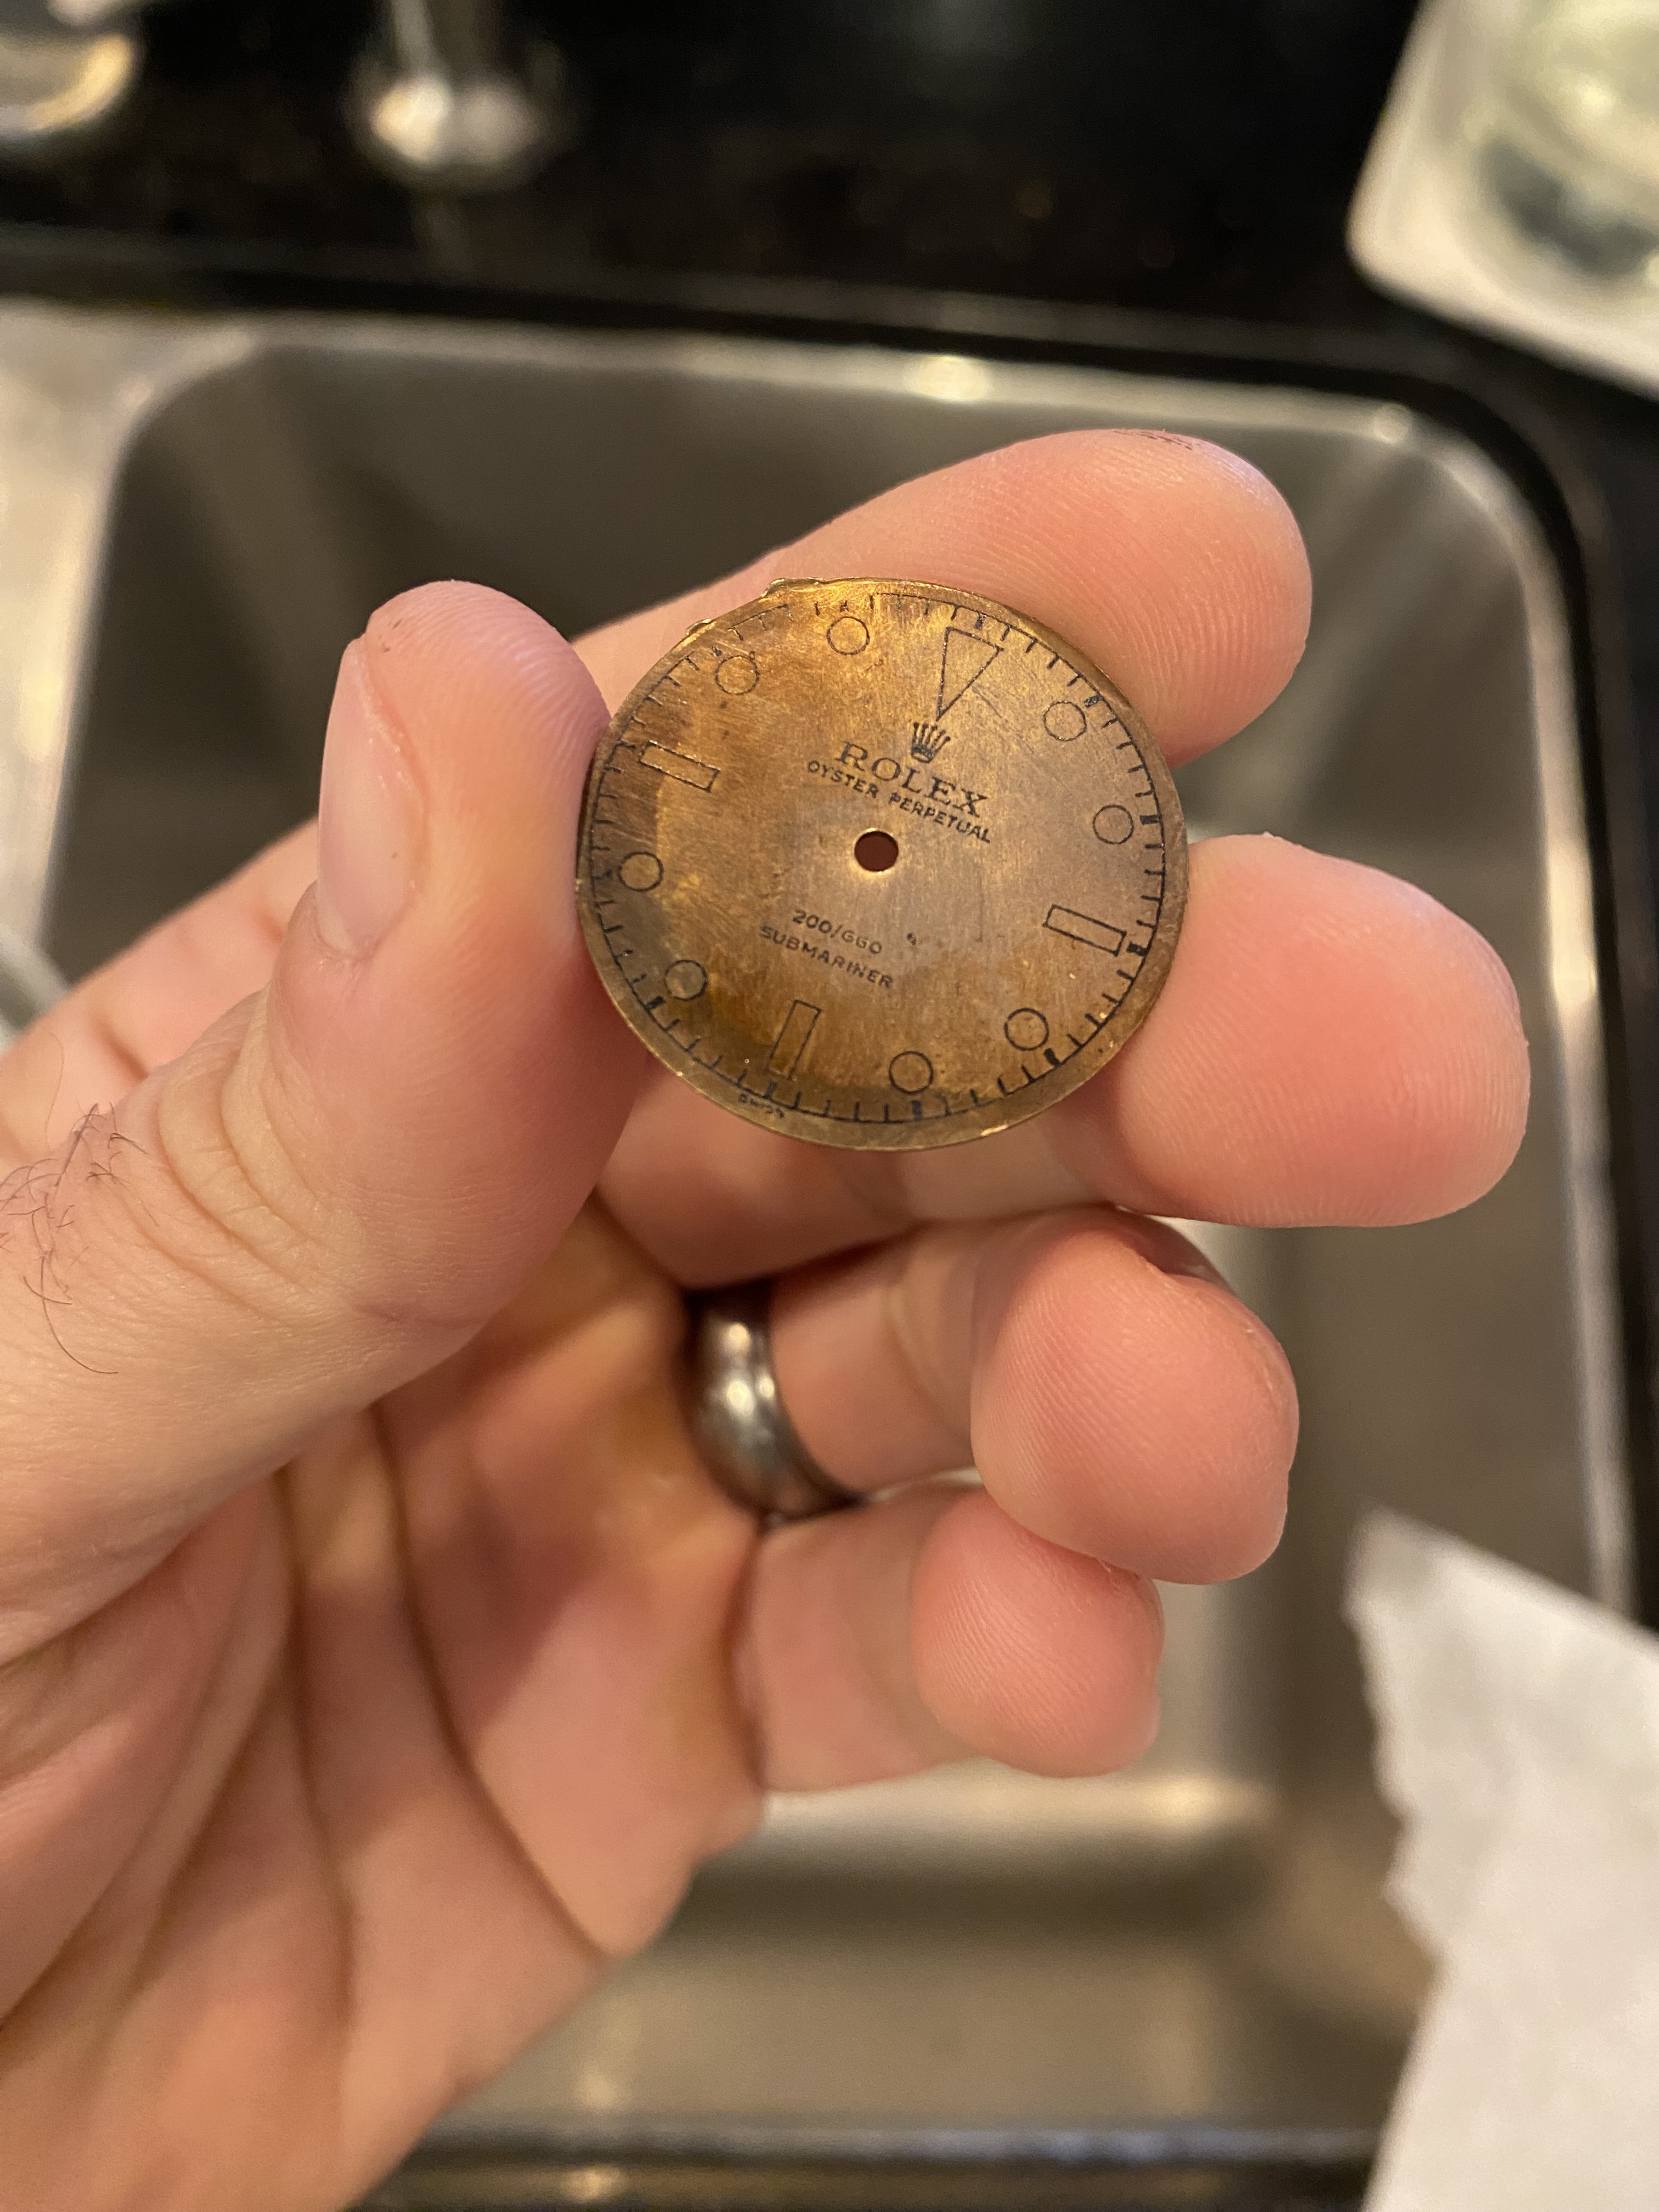
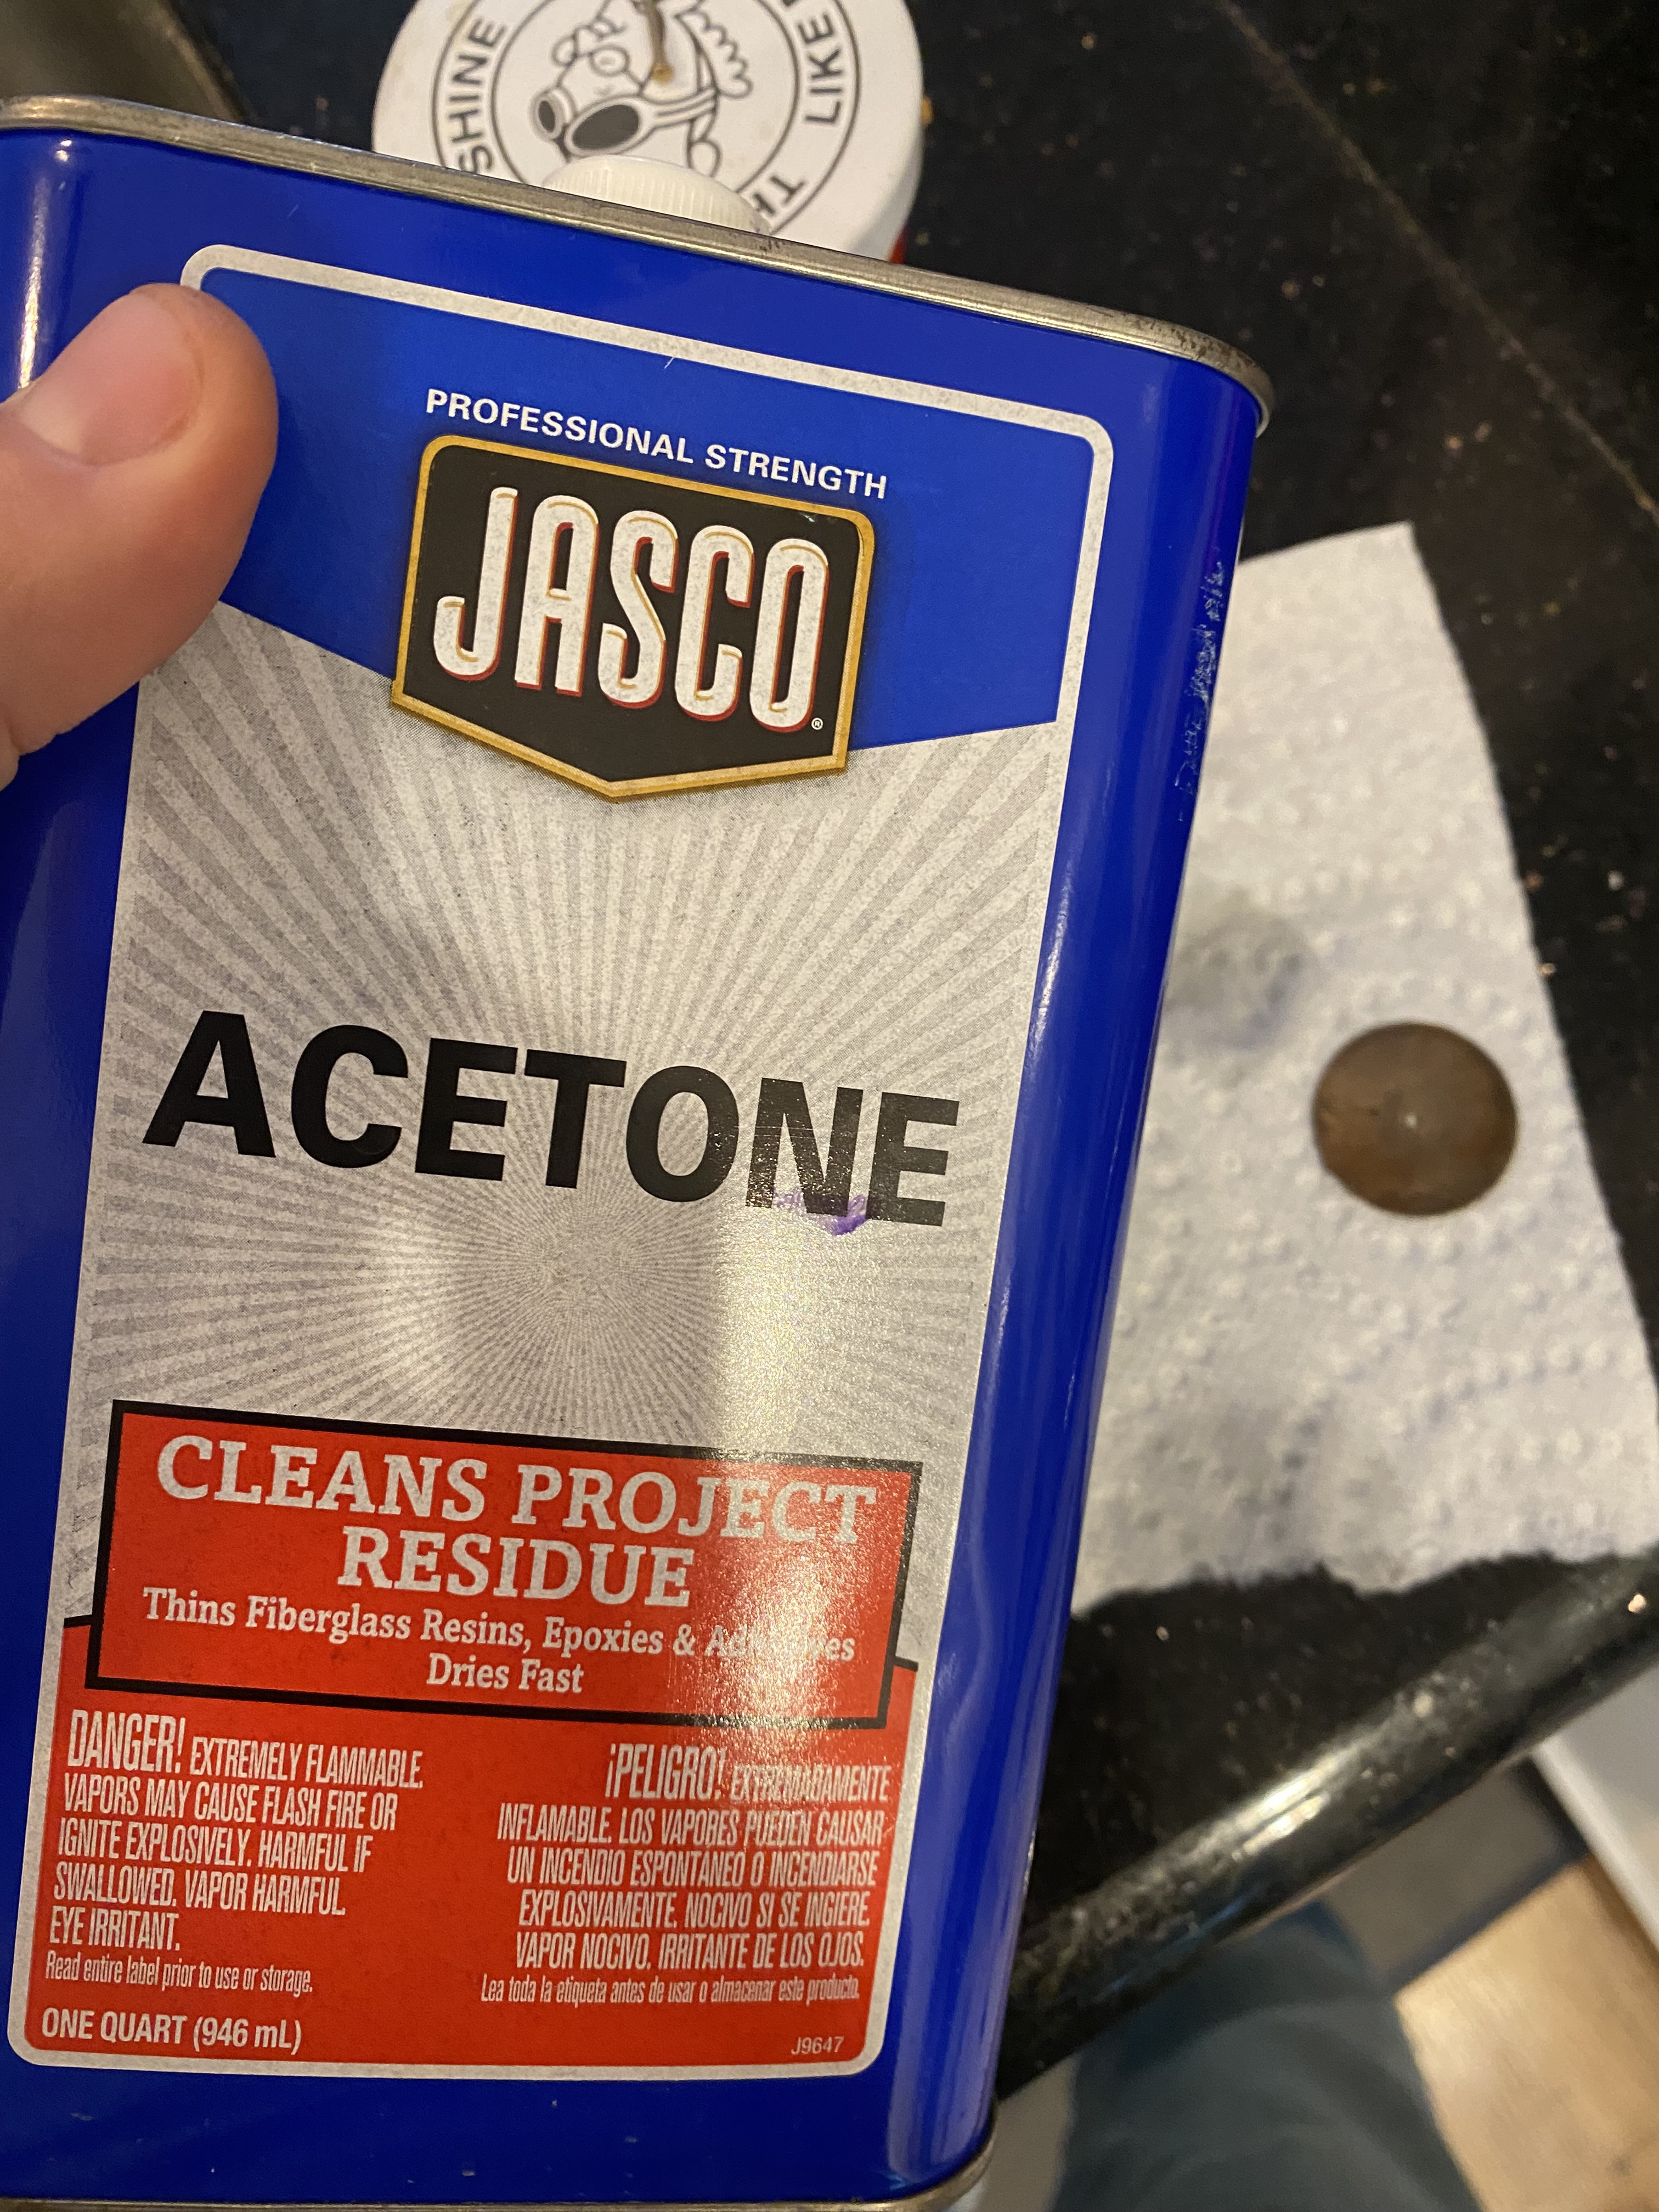
Step 10: Use acetone to wipe off the art on the brass dial, revealing the polished brass beneath. I normally have used a cotton ball or q tip soaked in acetone but didn't have those so I dunked it in a small amount of acetone and just wiped with a paper towel.
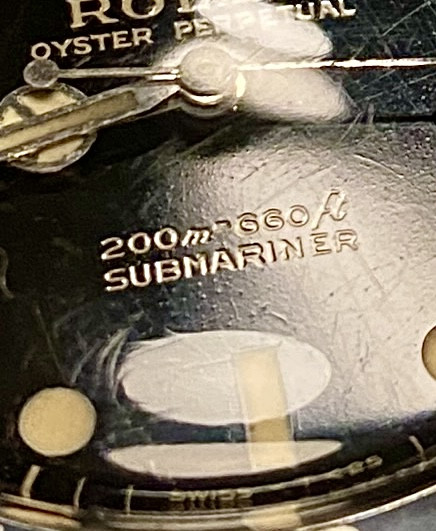
Step 11: Marvel at a gilt dial!
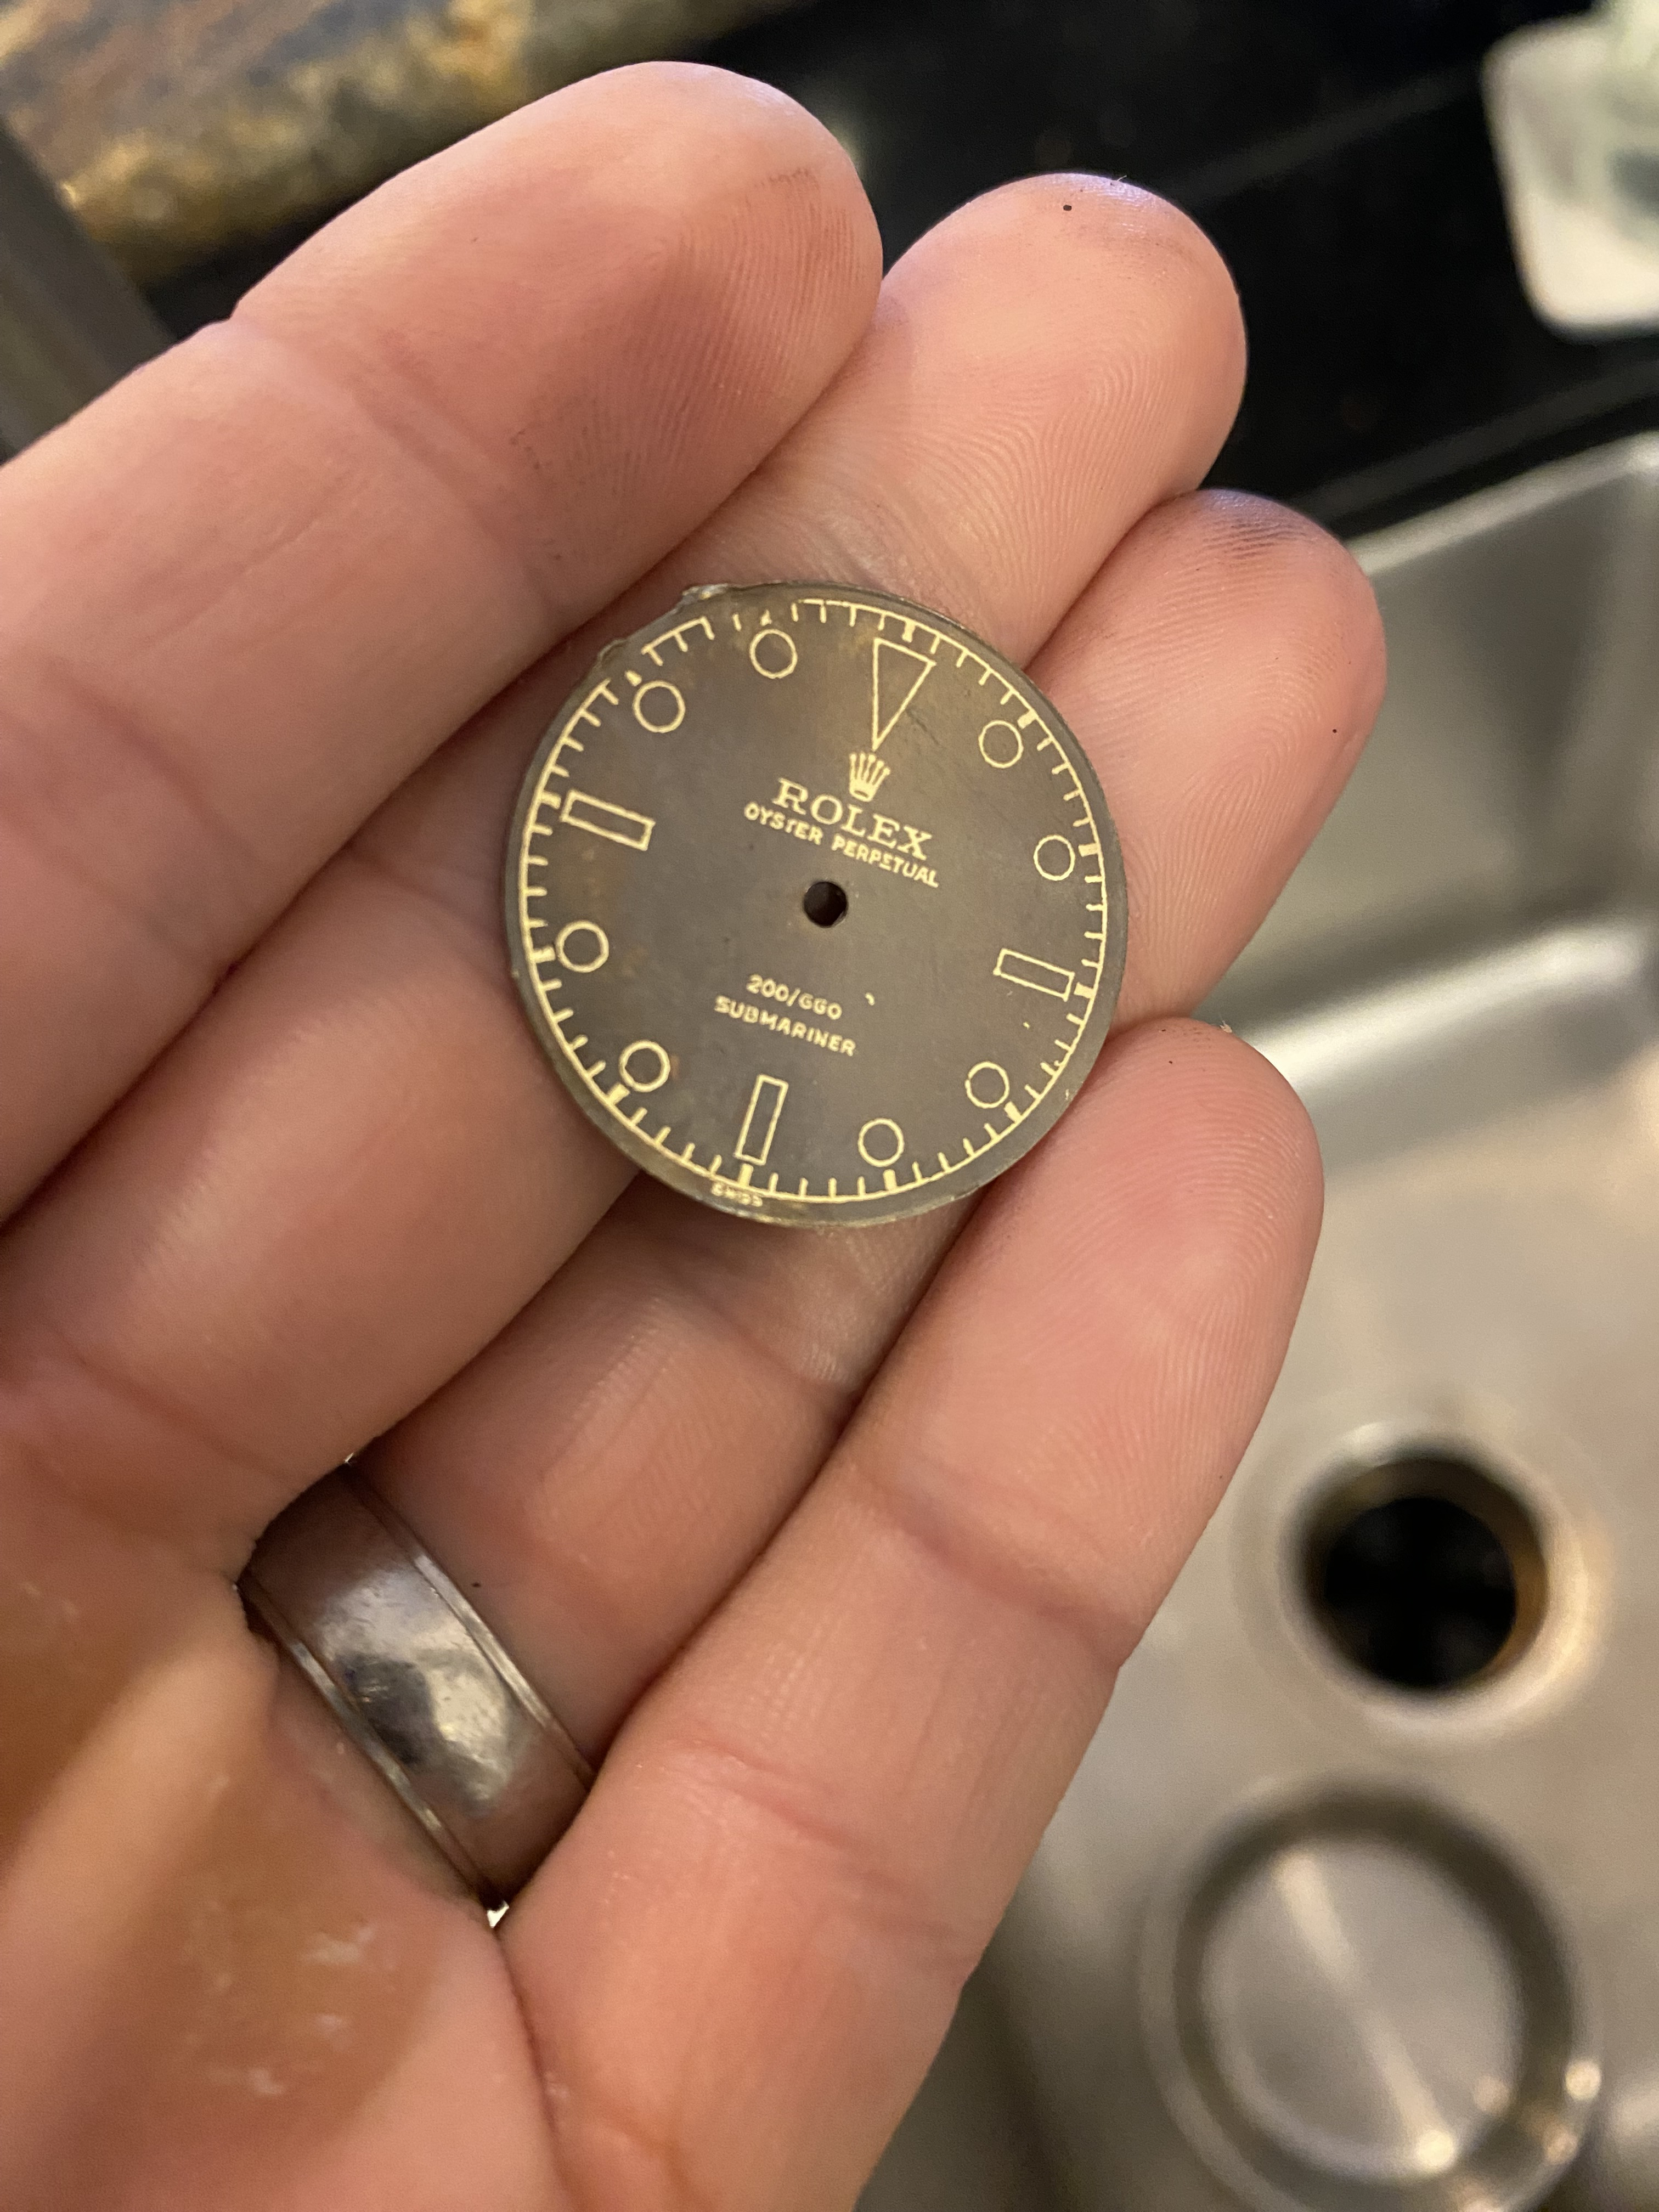
Step 12: Lacquer it up! The gens used to use Nitrocellulose Lacquer. This type of lacquer is not synthetic and over time dried out and could turn yellow if exposed to UV. That is why some gilt dials have that nice orangey hue to the gilt portions. Guitar makers hack this and exposure their lacquered guitars to UV. You can also cheat and buy amber tinted nitrocellulose lacquer. Or just use what you have. Downside to nitrocellulose is it takes quite a while to cure.
Step 13: Polish it up, lume it up. Enjoy your DIY dial!
Again, this would not be possible without @p0pperini and his amazing digital skills and his willingness to help a stranger out. My skills are stuck as MS Paint.
Try this out and post your results!
Was initially inspired by the @Bart Cordell how to make a water slide decal gilt dial. Made my own but wanted more. Spent way to much time reading and figured I'd try to DIY. So here we go! This also would not be possible without help from @p0pperini. He is the designer of the art and graciously let me bother him over the past almost 2 years since I started brainstorming this. Below is the culmination of all my success and failures. If I haven't explained something good enough, ask away!
Method: I borrowed an idea from the DIY computer chip makers. The method is called Toner Transfer with heat. You can also use the chemical method which requires a 75/25 mixture of acetone/water. You can also use a laminator if you can get that to work. I found it got me 95% of the way there. I believe that do to the highly polished nature of the metal and the very fine details, the method below works the best.
TOOLS NEEDED:
-Your design, mirror imaged with a small centered hole in the art.
-A donor dial or make your own dial (you are looking for .4mm thick (roughly 27 gauge) brass)
-Polish (I used Mothers Mag, worked great. If you have to sand the dial, you need to use 600, 800, 1000, 1200,2000,3000 grit to get a good shine).
-A laser jet printer (your office has them, your library, post offices, they are everywhere)
-Toner transfer paper. If you google "yellow toner transfer paper" you will find cheap yellow paper that works great. Also glossy magazine paper works just as good.
-A source of heat (i used my stove, you can use a sandwich press, an oven, hair straightener, whatever)
-A burnisher (i just used a wooden clothespin)
-Acetone and isopropyl alcohol.
-A oxidizing agent OR a plating kit. See notes below for what I found worked great.
If you buy everything I have mentioned above and just use someone else's laser jet and I assume you have acetone and isopropyl alcohol around your house and use magazine paper, you are talking about $25 worth of supplies. After that you can make dials for essentially the cost of just the dial itself. I buy brass blanks off etsy for 10 for $4.
Step 1: Get a blank dial or order brass blanks. If you already have a dial you can just use acetone to wipe off the print. If you buy your own brass blanks, you will have to punch a 2mm hole in the middle. You will need a donor dial for perfect alignment of your hole. I used this for punching holes. Works like a charm
Step 2: Polish your dial to a mirror shine. I used Mothers Mag, its amazing! Wash dial thoroughly and remove grease with acetone or isopropyl alcohol.


Step 3: Print out your artwork on a laser printer (ink jet will not work). You will need to mirror image the art AND put a small centering hole in the middle of your art. This is important given the small size of the dial.

Step 4: Get some kind of metal you can heat up. I got a cheap piece of electrical stainless steel plate from the hardware store for $1.20. You can use a sandwhich press, a hair straightener, whatever gets hot! You will place your artwork facing up on the heat source. Place your dial polished side down on the art, align the centered dot on the artwork with the hole on the dial. This will ensure perfect centering of final product.


Step 5: Heat up your metal. You will want it to get to about 180 F - 220 F. Any lower, it probably wont work. Any hotter, it might make your small details get distorted. Let this reach the desired temp and let it sit for 30-45 secs. The toner from the laser printer will be tacky and stick to the brass dial.

Step 6: Flip the art work/dial over (they should be stuck together). Very lightly burnish the art to ensure the art is fully transferred from the paper to the brass. I used a wooden clothespin and it worked great. I am talking very lightly. Too much and the toner might distort. Imagine the pressure you put on caressing someone's skin. Doesn't take much!

Step 7: Take the art/dial to a source of water and cool it down. I used my sink. You could just submerge it in a bowl of water.

Step 8: Slowly peel off the paper. The design should be fully transferred to the dial now. (I used a reject dial for this tutorial and it had a small lip which prevented a tiny portion of the art from transferring). Dry the dial. Careful not to touch with your bare fingers! You do not want oils/grease on the dial.

Step 9: Time to electroplate or oxidize. For this tutorial we are going to oxidize it. Just the right amount will give you a tropical brown. Too much and the dial will turn black. After lots of researching I found Sculpt Neavou M38 to be my best bet. There are other options out there, but this worked great. You will have to tinker with the proportions of the oxidizing agent and water. I found 1 part M38 to 1 part water gave a bit slower reaction which was better for control* I put in a small amount of the mixture into a shot glass, used a finishing nail through the back of the dial and lowered the dial into the shot glass. Helped me get some dunks. People I talked to who use this recommend dunking it slowly and as flat as you can. You can also spray the dial with a spray bottle of the mixture, just cant let the mixture dry out. Once you have the color you like, rinse off ASAP and dry.
*if your metal is warm, the mixture is warm, too much humidity, too little, too short exposure, too long exposure can all effect final color. You will need to tinker. For this example, it took about 40ish secs in the mixture, took it out, rinsed it with water, put it back in for 10 more secs.


Step 10: Use acetone to wipe off the art on the brass dial, revealing the polished brass beneath. I normally have used a cotton ball or q tip soaked in acetone but didn't have those so I dunked it in a small amount of acetone and just wiped with a paper towel.


Step 11: Marvel at a gilt dial!

Step 12: Lacquer it up! The gens used to use Nitrocellulose Lacquer. This type of lacquer is not synthetic and over time dried out and could turn yellow if exposed to UV. That is why some gilt dials have that nice orangey hue to the gilt portions. Guitar makers hack this and exposure their lacquered guitars to UV. You can also cheat and buy amber tinted nitrocellulose lacquer. Or just use what you have. Downside to nitrocellulose is it takes quite a while to cure.
Step 13: Polish it up, lume it up. Enjoy your DIY dial!
Again, this would not be possible without @p0pperini and his amazing digital skills and his willingness to help a stranger out. My skills are stuck as MS Paint.
Try this out and post your results!

