-
Tired of adverts on RWI? - Subscribe by clicking HERE and PMing Trailboss for instructions and they will magically go away!
Ex-ki Corner - Watchmaking tools, reports & tutorials
- Thread starter Ex-ki
- Start date
Here we go, my first project as an apprentice watchmaker.
I have prepared a full report for you with as many photos as possible.
1) This project was a movement swap for a March-LAB Seventy before selling it. I had lost parts when removing the battery. This watch is equipped with a particularly fragile Myiota quartz 2115 movement, since many parts are made of plastic. In anticipation I had bought a new Myiota movement for 6€. Very cheap.
Here is this little beauty. Let's go:

2) The first step is simply to open the case. As you can see, there is almost nothing left on this movement because I removed half of the parts in preparation for the operation.

3) I extract the dial and the movement to remove the hands. It's my first time, you have to go without trembling:

4) I thought I would use a piece of plastic to protect the dial like in Mark Lovick's videos but the Bergeon dial protector that I had in my Watchbitz tools kit does the job very well.

5) Done... and no breakage!

6) Then, I have to dismantle the datewheel from the old movement to place it on the new one. It is held by a plate which is itself held by 3 tiny screws:

7) Done. It takes a certain dexterity to screw and unscrew these small screws which are microscopic and easily slide:

8) The new Myiota 2115 is ready to take office:

9) I start by removing the battery (without losing any parts this time) and the winding stem that comes with the movement. I had a hard time because on this type of very cheap movement there is no screw or pusher to disengage the stem. I searched for at least 10 minutes before discovering that there was some kind of notch that put pressure on the stem and that had to be raised with a screwdriver:

10) The datewheel is wound on the new movement. All internal mechanisms under the dial and the driving parts are made of plastic. It's really cheap from cheap:

11) Reinserting the battery and preparing to put it back into the case:

12) I put the hands back. It's really a delicate operation. I realize that when you see Mark Lovick doing this in 30 seconds on his videos it's really high-flying mastery. I must have taken 10 minutes to get there and I made a few scratches on the hour hand that I could not clip on its axis:

13) Back in the case. Voila! The watch is working again. Very happy with this first successful experience.

To be continued...
I have prepared a full report for you with as many photos as possible.
1) This project was a movement swap for a March-LAB Seventy before selling it. I had lost parts when removing the battery. This watch is equipped with a particularly fragile Myiota quartz 2115 movement, since many parts are made of plastic. In anticipation I had bought a new Myiota movement for 6€. Very cheap.
Here is this little beauty. Let's go:

2) The first step is simply to open the case. As you can see, there is almost nothing left on this movement because I removed half of the parts in preparation for the operation.

3) I extract the dial and the movement to remove the hands. It's my first time, you have to go without trembling:

4) I thought I would use a piece of plastic to protect the dial like in Mark Lovick's videos but the Bergeon dial protector that I had in my Watchbitz tools kit does the job very well.

5) Done... and no breakage!

6) Then, I have to dismantle the datewheel from the old movement to place it on the new one. It is held by a plate which is itself held by 3 tiny screws:

7) Done. It takes a certain dexterity to screw and unscrew these small screws which are microscopic and easily slide:

8) The new Myiota 2115 is ready to take office:

9) I start by removing the battery (without losing any parts this time) and the winding stem that comes with the movement. I had a hard time because on this type of very cheap movement there is no screw or pusher to disengage the stem. I searched for at least 10 minutes before discovering that there was some kind of notch that put pressure on the stem and that had to be raised with a screwdriver:

10) The datewheel is wound on the new movement. All internal mechanisms under the dial and the driving parts are made of plastic. It's really cheap from cheap:

11) Reinserting the battery and preparing to put it back into the case:

12) I put the hands back. It's really a delicate operation. I realize that when you see Mark Lovick doing this in 30 seconds on his videos it's really high-flying mastery. I must have taken 10 minutes to get there and I made a few scratches on the hour hand that I could not clip on its axis:

13) Back in the case. Voila! The watch is working again. Very happy with this first successful experience.

To be continued...
Great job! Dealing with those hands seems like a nightmare, I fear I would bend the crap out of them. I think I'll give it a try, though, someday!
Curious why the "3" on the datewheel is colored green?
Thank you.
With the cousinsuk hand removing levers it's easier than with the model I used here.
All March LAB watches have the DW number "3" colored green. It's a reference to the month of March, which is a part of the brand name.
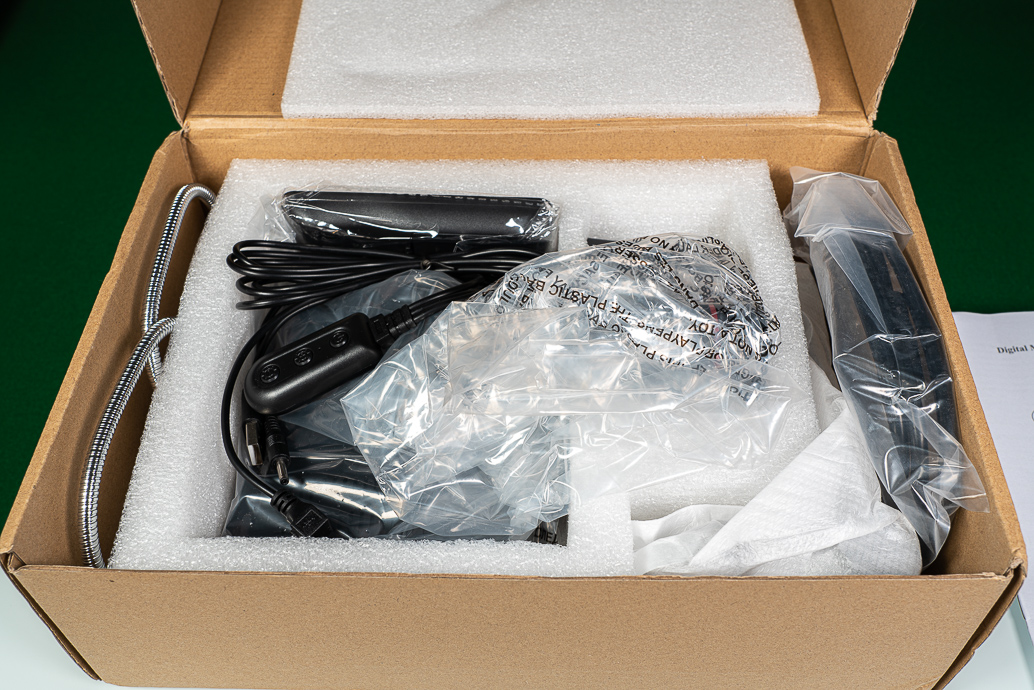
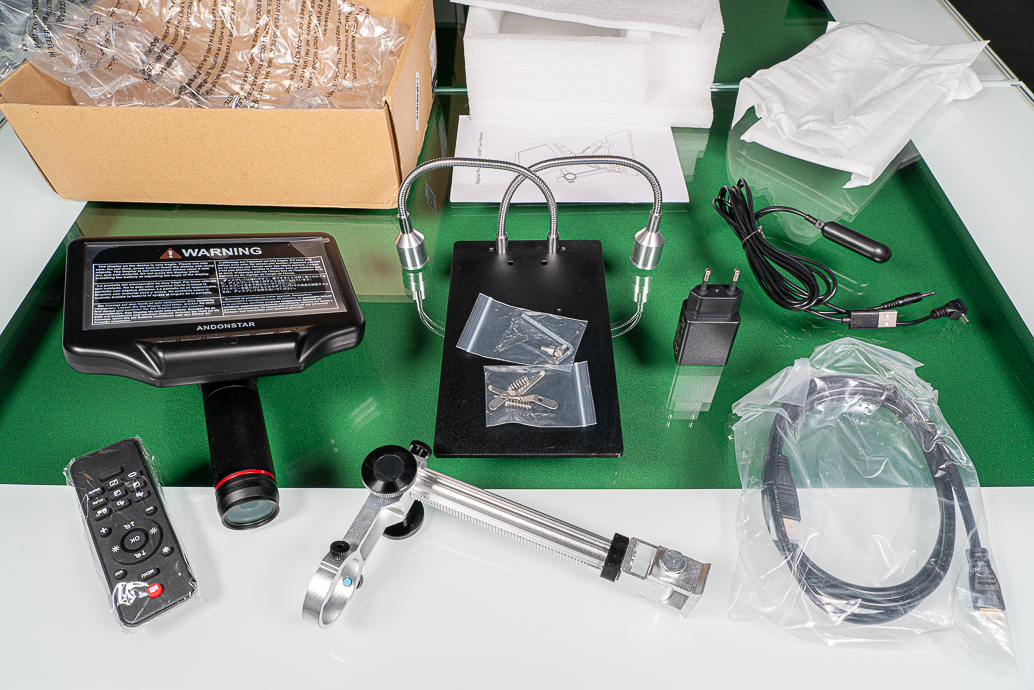
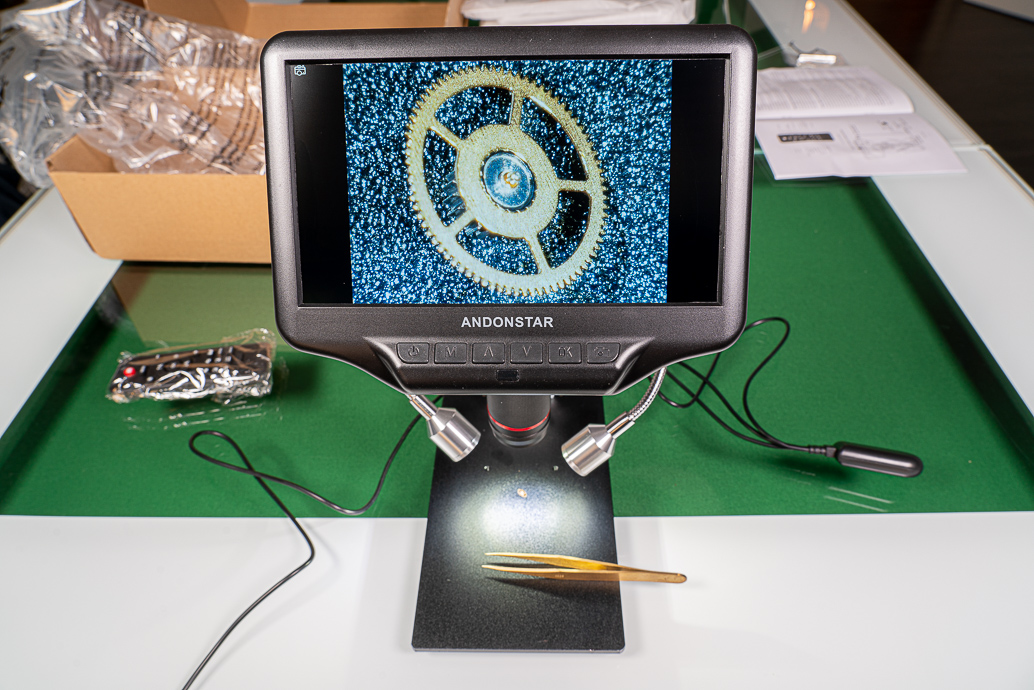
Wow this is a cool tool indeed, need to get one of those!
Envoyé de mon ELE-L29 en utilisant Tapatalk
Yes, don't hesitate, it's really very cool.
I had headaches from spending hours with a magnifying glass riveted to my eyes. I will be more comfortable with this!
- 28/2/17
- 2,403
- 1,980
- 113
Got to say i love my digital microscope for looking at parts for tiny imperfections, but i cant build a movement with one. Im just too used to the body position of being over the movement to have it that far in front of me. Also hard to use tool under it. Can be a pain in the arse getting the glare/reflections from the lights set up well.
Let's start some watchmaking tutorials now!
I will start with the full service of a ST36 movement in 3 steps: disassembly, cleaning, reassembly. The main advantage of the ST36/6497: it is 2x bigger than a standard movement. It's great to start with
To realise this operation I will be inspired by the following videos:
- Disassembly of the ST36/6497 by Mark Lovick: https://www.youtube.com/watch?v=i1Ur-lE4vzI
- Full service of an ETA 2836 by Magic of Wheels (for cleaning methodology and oiling instructions for each section of the movement): https://www.youtube.com/watch?v=EFiWVULL2Kg et https://www.youtube.com/watch?v=xCZg69fZgGA
Let's go!
Beginner watchmaking workshop #1: disassembly of the ST36
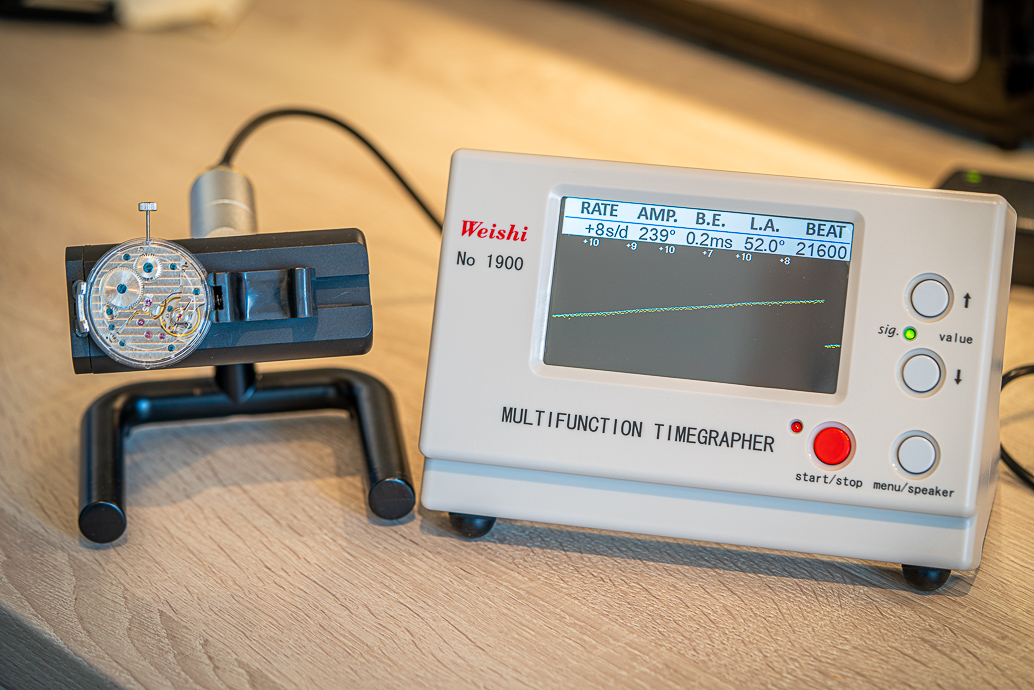
We begin by recording the initial performance. It's rather average: we see a gain of a few seconds/day and a fairly low amplitude.
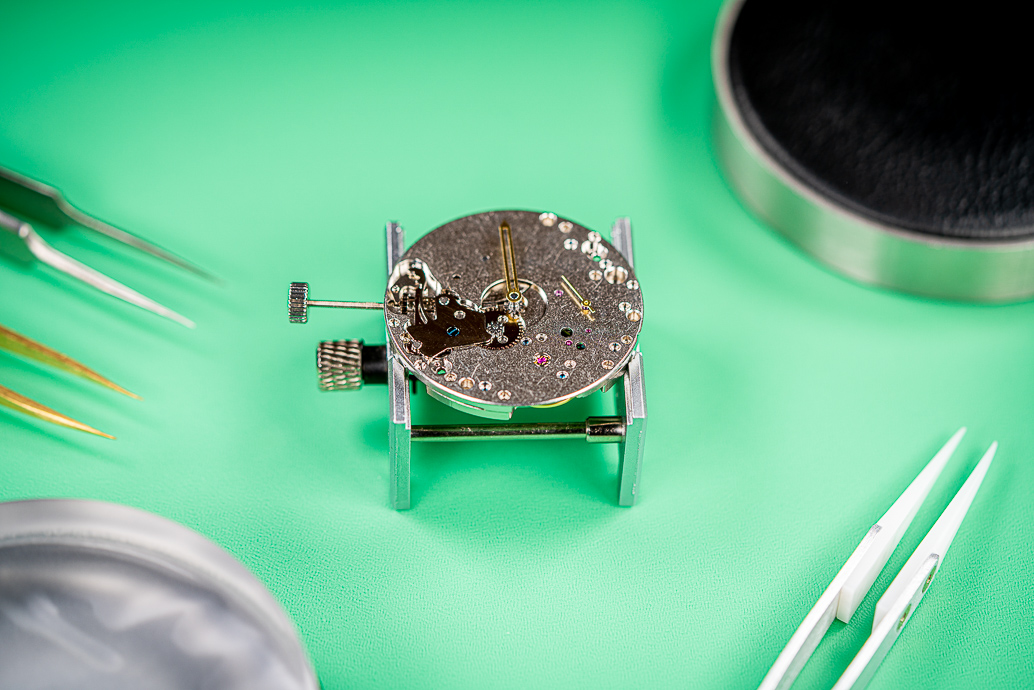
The ST36 is so large that it barely fits in my movement holder.
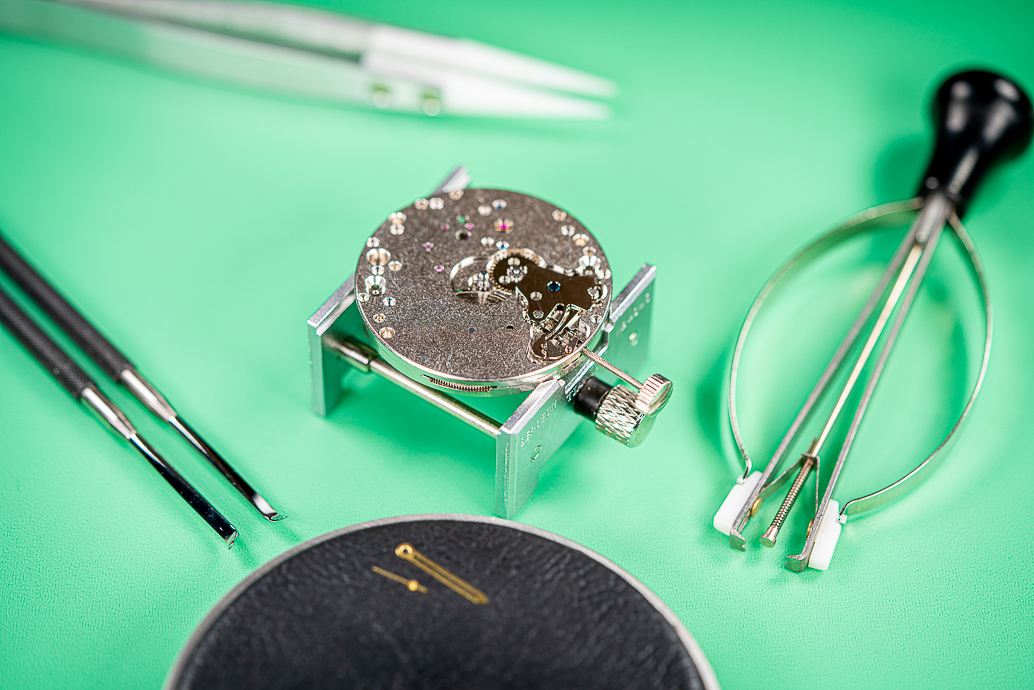
I start by removing the hands. The presto clamp is very useful in this configuration because the minute hand supplied with the movement is high-mounted on the main plate.
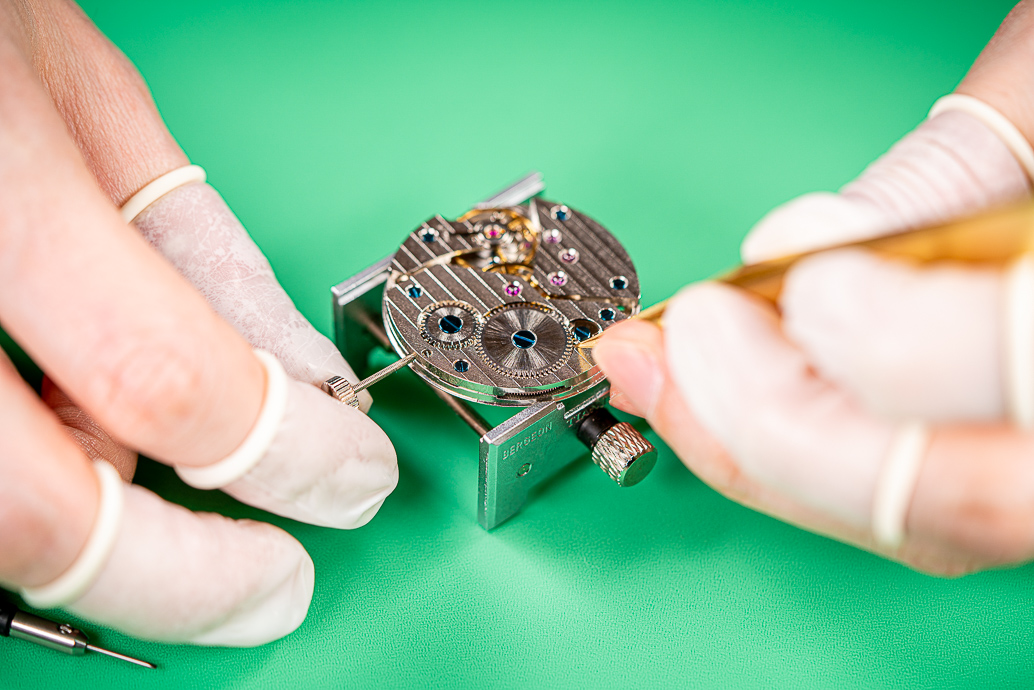
Then you have to remove the tension on the mainspring barrel. Just hold the click to let the ratchet wheel spin freely and the spring will unwind by itself. Remember to tighten the crown with your fingers in parallel.
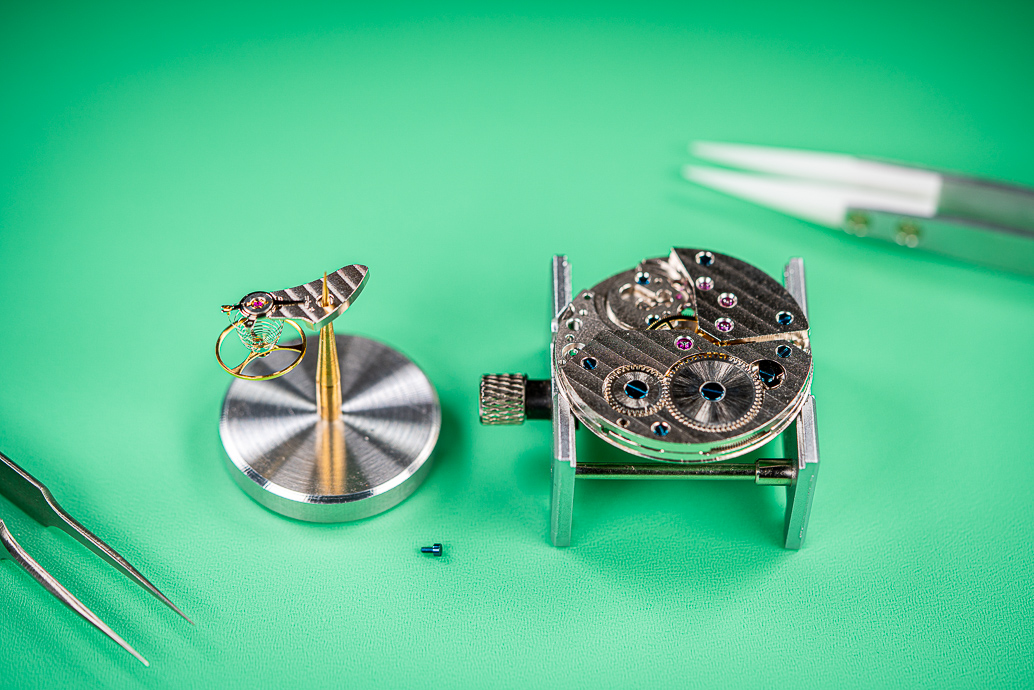
Removal of the balance wheel. No difficulty for this operation. The Bergeon clone support from our Chinese friends is very useful to store it safely (a good investment for 4€).
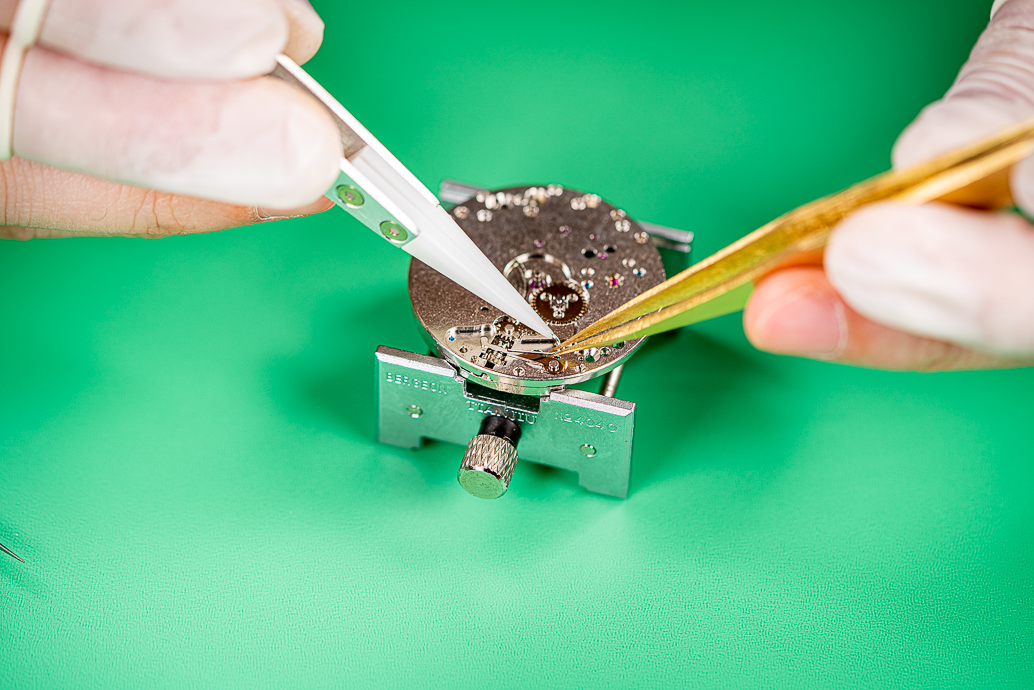
Now let's dismantle the keyless works. Removal of the yoke spring with 2 pair of tweezers, to prevent it from flying away. By the way, these 2 models of tweezers are good for handling fragile parts: the brass ones that I bought on eBay for a few euros and the Horotec Delrin tweezers, quite expensive but really very useful.
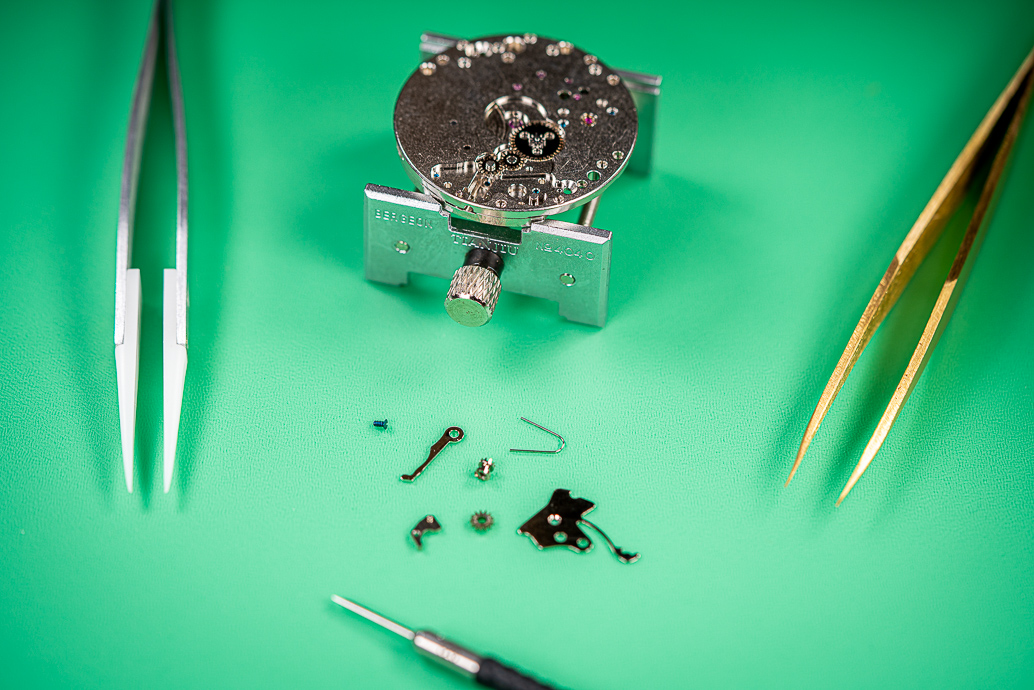
The keyless works completely disassembled.
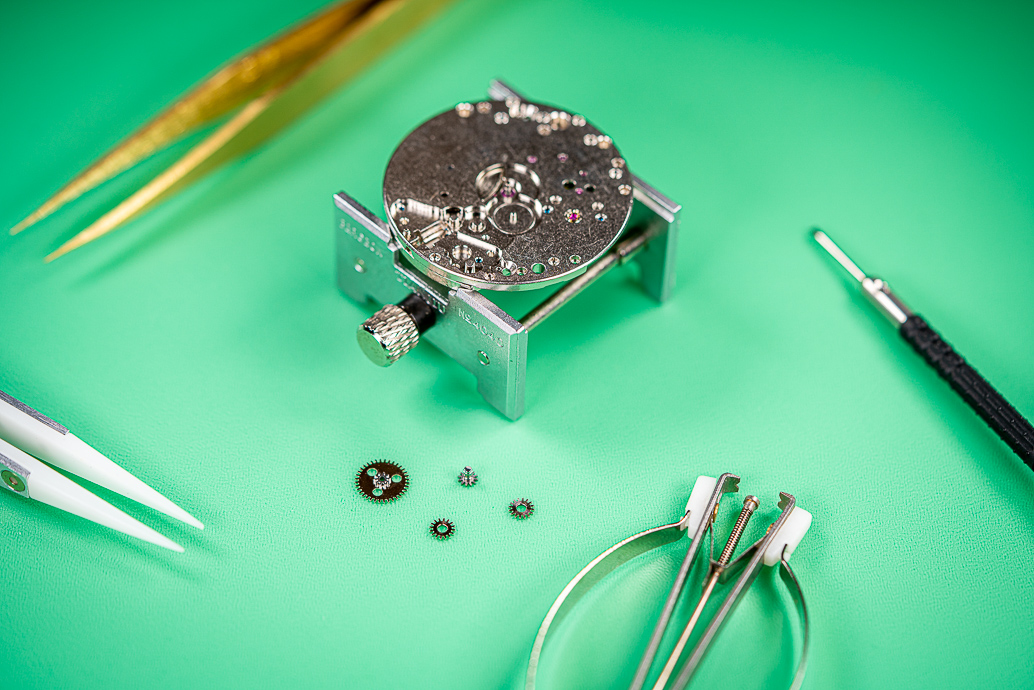
The motion work here consists of the cannon pinion, the minute wheel and 2 intermediate wheels (the hour wheel was not originally attached to the movement, no need to remove it). To remove the cannon pinion I confirm that the presto clamp works fine (no need for the expensive Bergeon tool used by Mark Lovick).
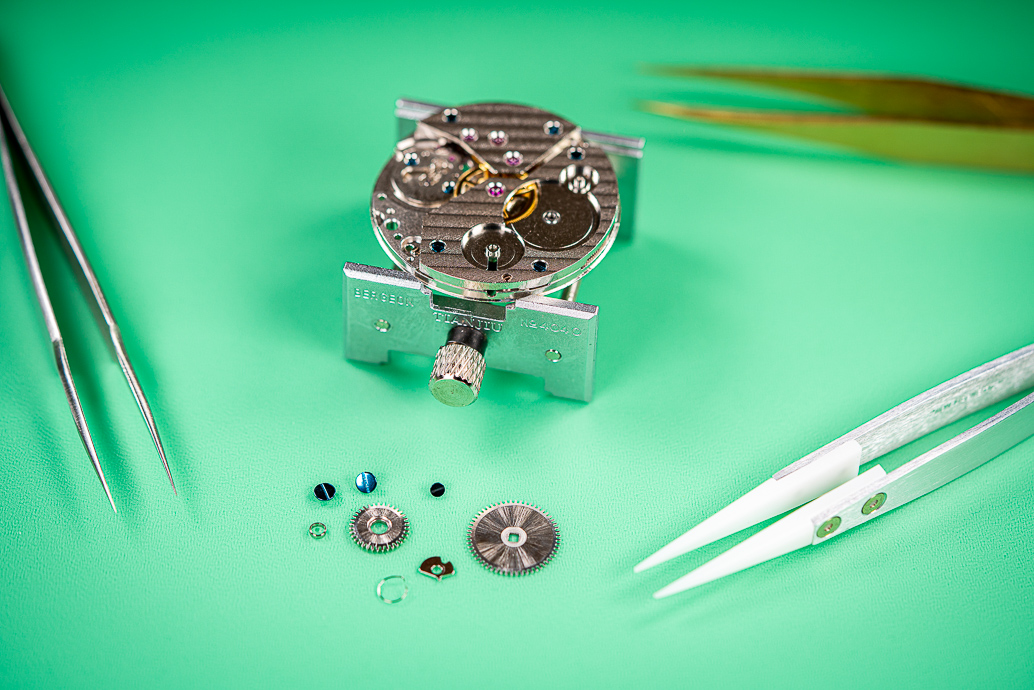
We turn the movement on the other side. Ratchet wheel, clic and crown wheel removed.
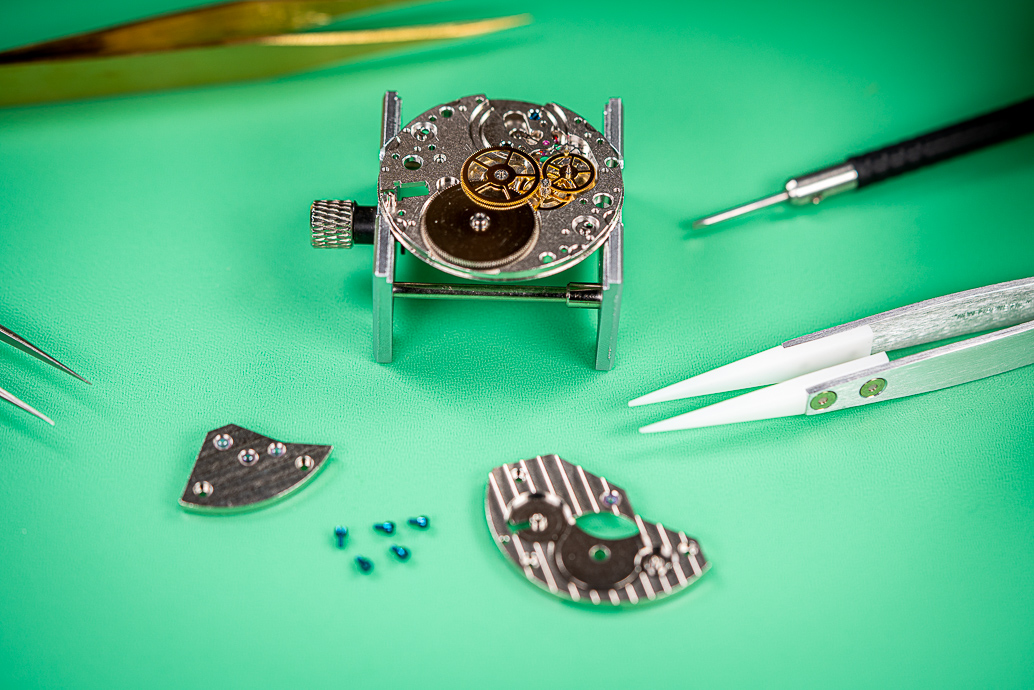
Removal of the 2 bridges of the train of wheels.
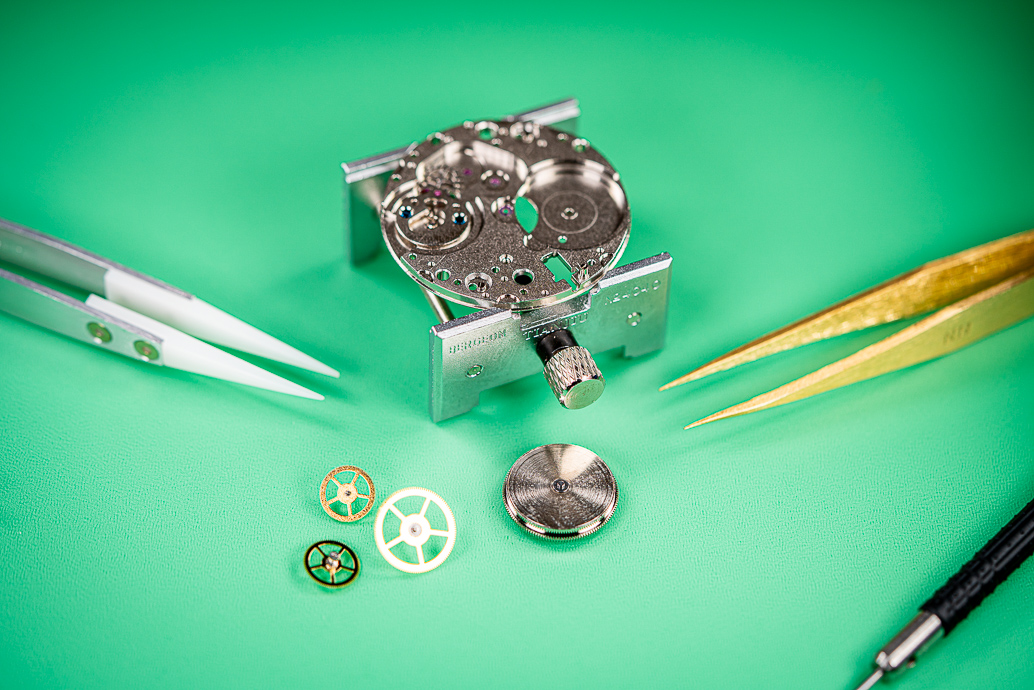
Center wheel, third wheel, second wheel and mainspring barrel also removed.
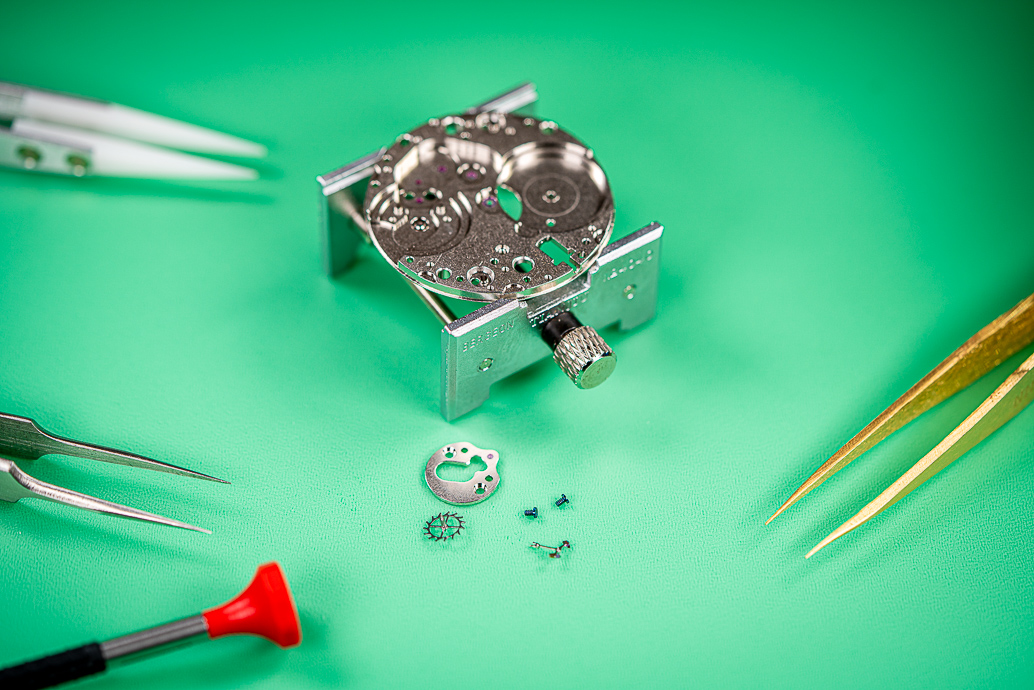
Finally the escapement section (escape wheel et pallet fork) is also removed.
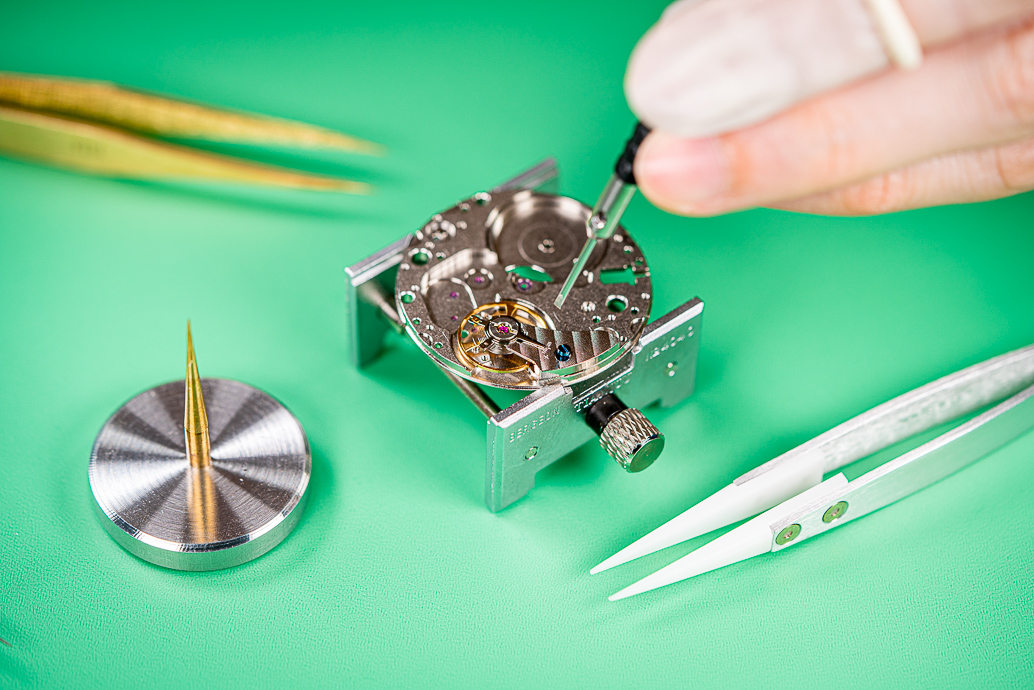
We put the balance cock back in place before cleaning, according to expert advice.
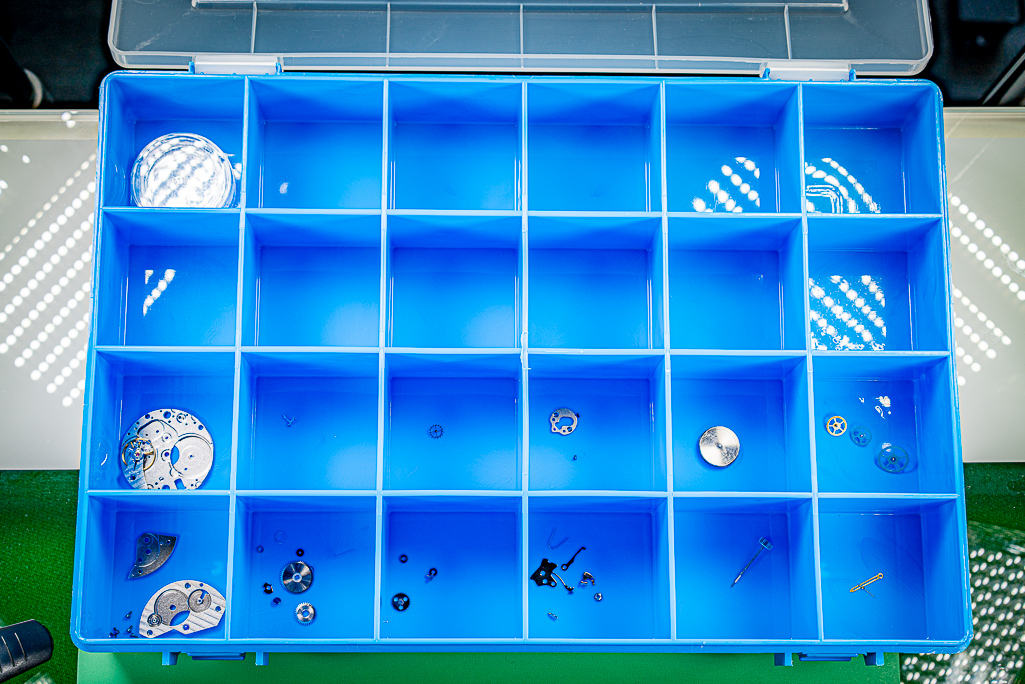
And everything is sorted in a beautiful box in preparation for the cleaning.
Next step : ultrasonic cleaning :thumbsup:
To be continued...
I will start with the full service of a ST36 movement in 3 steps: disassembly, cleaning, reassembly. The main advantage of the ST36/6497: it is 2x bigger than a standard movement. It's great to start with
To realise this operation I will be inspired by the following videos:
- Disassembly of the ST36/6497 by Mark Lovick: https://www.youtube.com/watch?v=i1Ur-lE4vzI
- Full service of an ETA 2836 by Magic of Wheels (for cleaning methodology and oiling instructions for each section of the movement): https://www.youtube.com/watch?v=EFiWVULL2Kg et https://www.youtube.com/watch?v=xCZg69fZgGA
Let's go!
Beginner watchmaking workshop #1: disassembly of the ST36

We begin by recording the initial performance. It's rather average: we see a gain of a few seconds/day and a fairly low amplitude.

The ST36 is so large that it barely fits in my movement holder.

I start by removing the hands. The presto clamp is very useful in this configuration because the minute hand supplied with the movement is high-mounted on the main plate.

Then you have to remove the tension on the mainspring barrel. Just hold the click to let the ratchet wheel spin freely and the spring will unwind by itself. Remember to tighten the crown with your fingers in parallel.

Removal of the balance wheel. No difficulty for this operation. The Bergeon clone support from our Chinese friends is very useful to store it safely (a good investment for 4€).

Now let's dismantle the keyless works. Removal of the yoke spring with 2 pair of tweezers, to prevent it from flying away. By the way, these 2 models of tweezers are good for handling fragile parts: the brass ones that I bought on eBay for a few euros and the Horotec Delrin tweezers, quite expensive but really very useful.

The keyless works completely disassembled.

The motion work here consists of the cannon pinion, the minute wheel and 2 intermediate wheels (the hour wheel was not originally attached to the movement, no need to remove it). To remove the cannon pinion I confirm that the presto clamp works fine (no need for the expensive Bergeon tool used by Mark Lovick).

We turn the movement on the other side. Ratchet wheel, clic and crown wheel removed.

Removal of the 2 bridges of the train of wheels.

Center wheel, third wheel, second wheel and mainspring barrel also removed.

Finally the escapement section (escape wheel et pallet fork) is also removed.

We put the balance cock back in place before cleaning, according to expert advice.

And everything is sorted in a beautiful box in preparation for the cleaning.
Next step : ultrasonic cleaning :thumbsup:
To be continued...
hope to see the next step ! the 6497 is a good movment ! very reliable ! i like it, and it seem to be simple to disassembling...
Yes, the 6497 is a recommended movement to start learning watchmaking.
Next steps are coming, stay tuned.
Let's continue my session on how to perform the full service of a ST36 movement.
Now step 2.
Note : I was inspired by different Youtube videos to establish this cleaning protocol.
Beginner watchmaking workshop #2: cleaning of the ST36
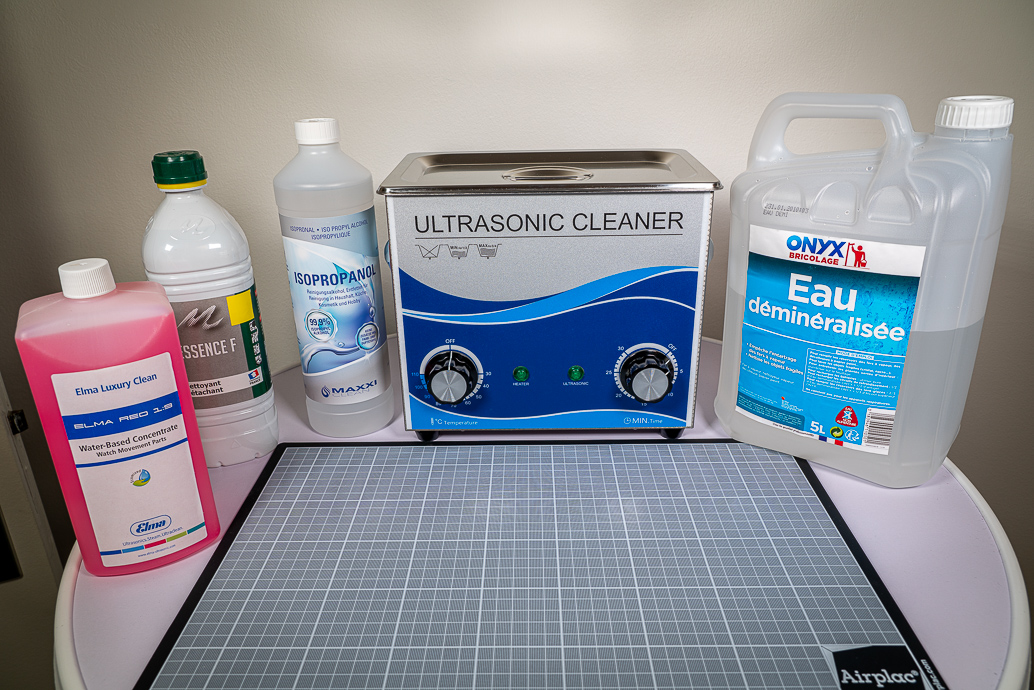
The equipment we will need to achieve this new workshop is the following: ultrasonic cleaner, Naphtha (F gasoline here) for degreasing, Elma Red 1: 9 for cleaning, demineralized water for rinsing and 99% alcohol (isopropanol) to remove traces of water during drying.
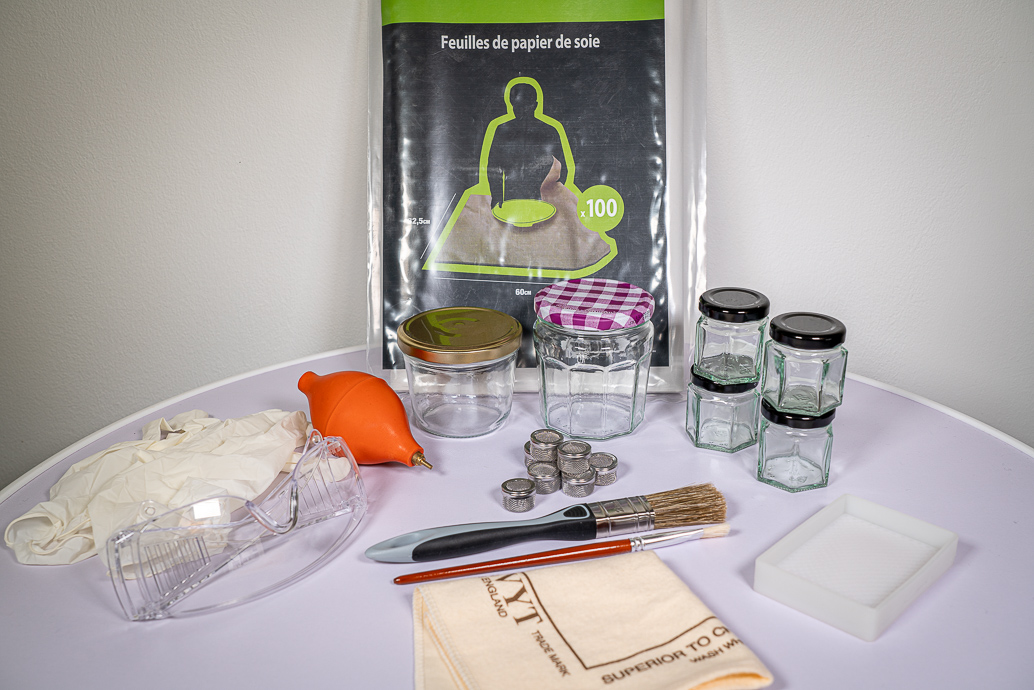
I will also need watchmaker paper (silk paper) to dry the parts, glass jars to hold the different liquids, ultrasonic cleaner mini baskets for holding small parts, paintbrushes, hand and eye protection (I wear a valved mask to protect myself from vapors: gasoline + ammonia + alcohol is not the healthiest cocktail to breathe) and a hand blower.
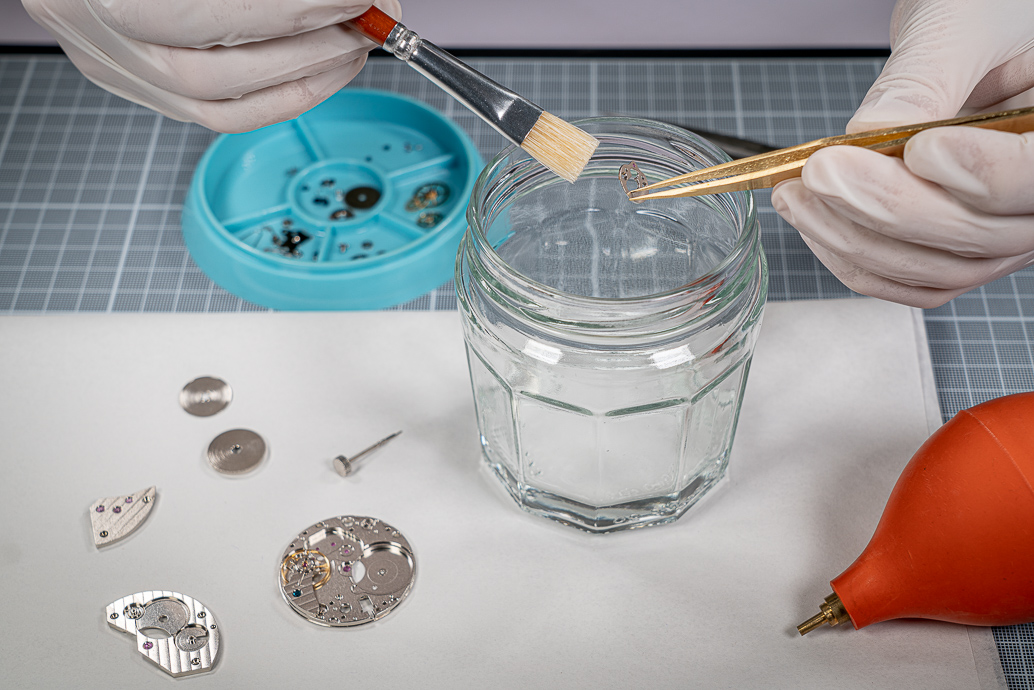
The first step consists in immersing each part in a degreasing liquid which can be: Zipo lighter fluid, C gasoline (prohibited for sale in France) or F gasoline, Bergeon B-Dip. I chose F gasoline because it is the easiest to find (in France) and the cheapest. I immerse each part into the gasoline, I brush the larger parts with a paintbrush and for the most fragile ones I use the blower to stir the gasoline without brushing them.
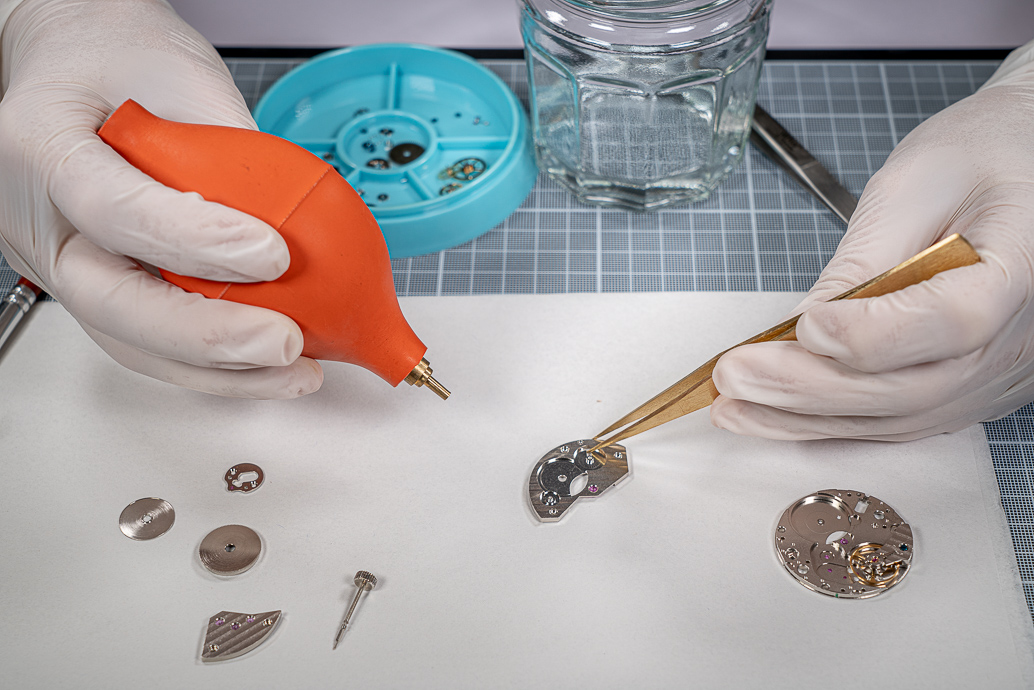
Then I proceed to the drying of each part with the hand blower. F gasoline evaporates quickly, and the silk paper helps to absorb residue.
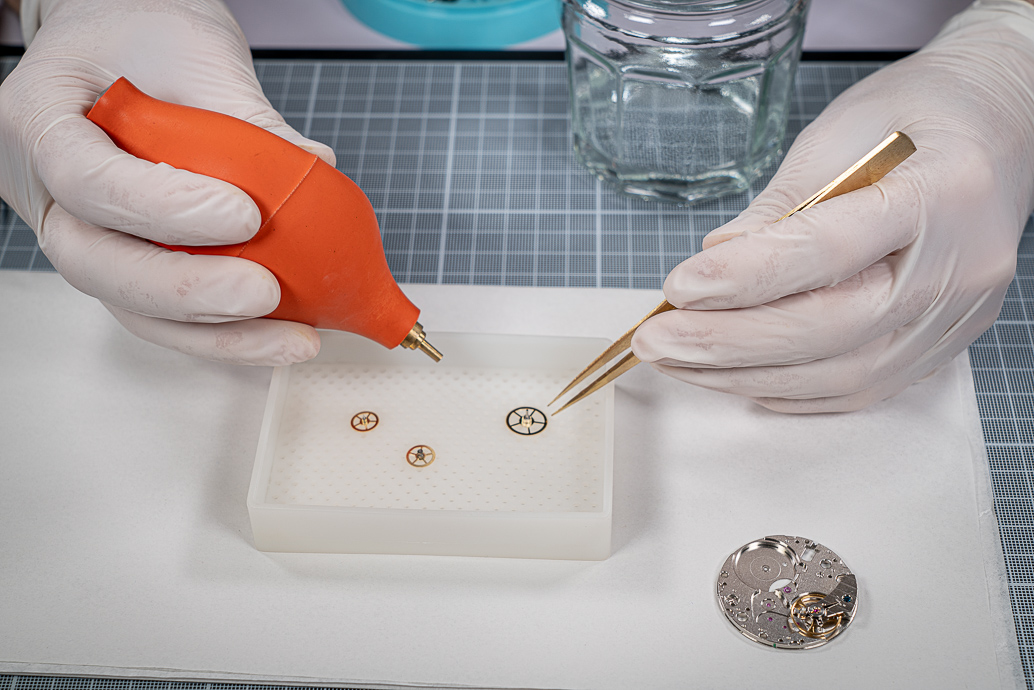
For small parts I found this plastic tray on AliExpress which prevents them from flying out when I use the blower. Very useful.
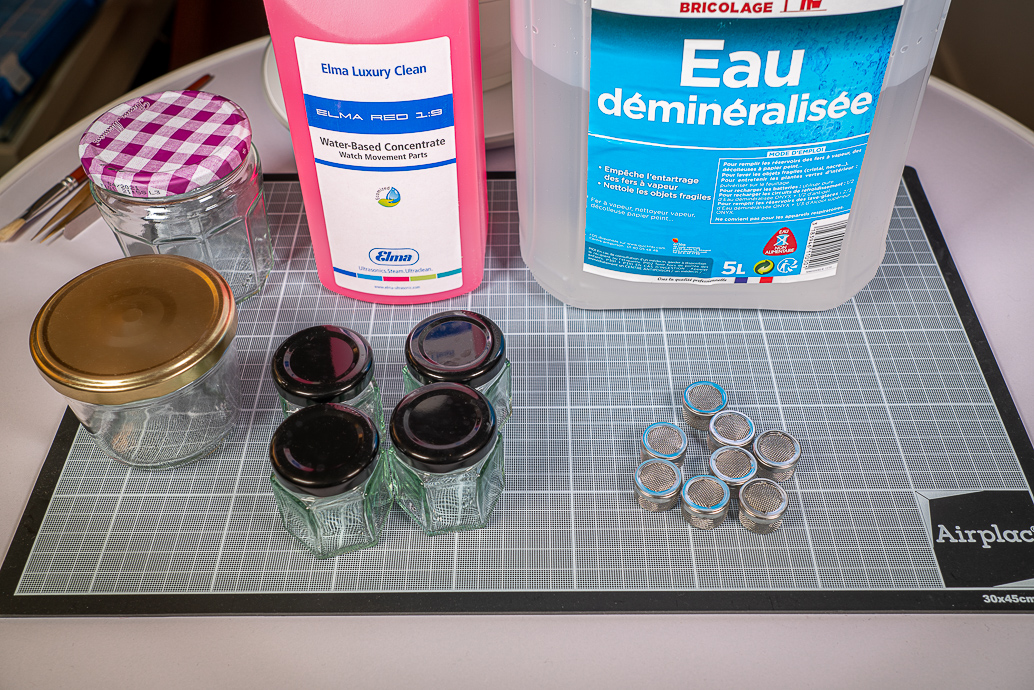
Parts are degreased, let's go to the cleaning stage. I will dilute 1 volume of Elma Red in 9 volumes of distilled water and I will transfer this solution into each jar after having placed my parts.
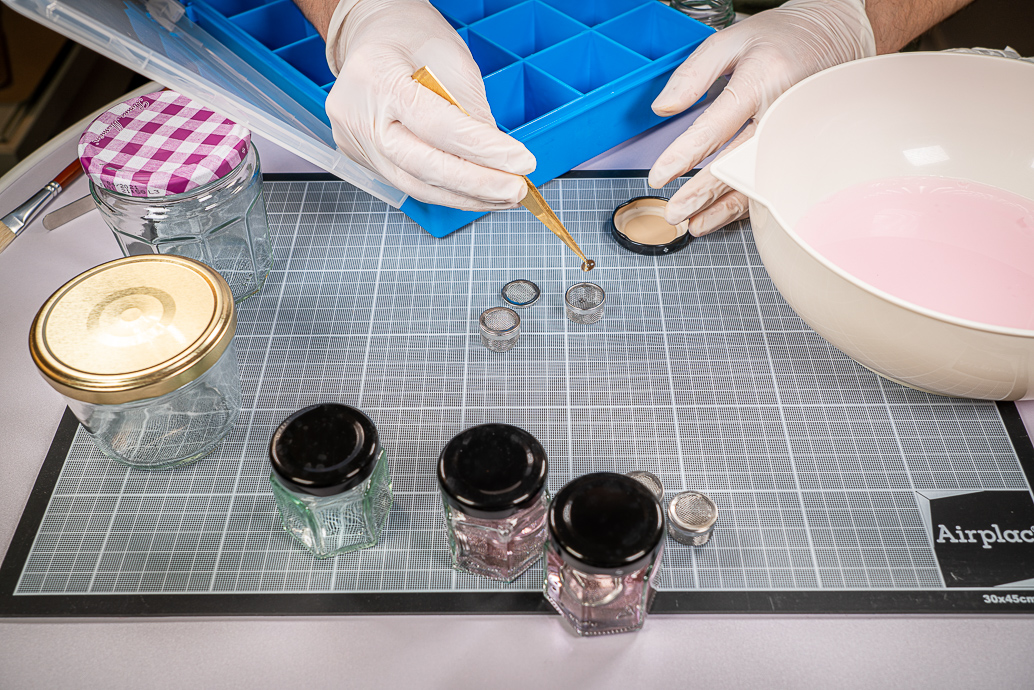
I secure the most fragile parts into the mini baskets.
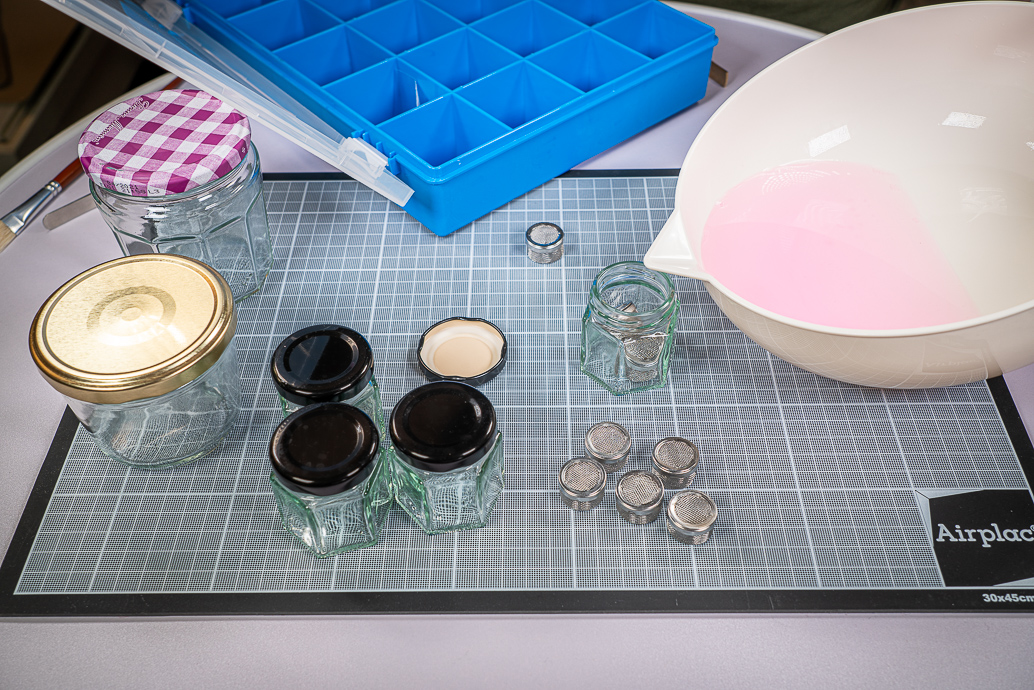
I filled each jar with the solution until the mini baskets are completely submerged in the liquid.
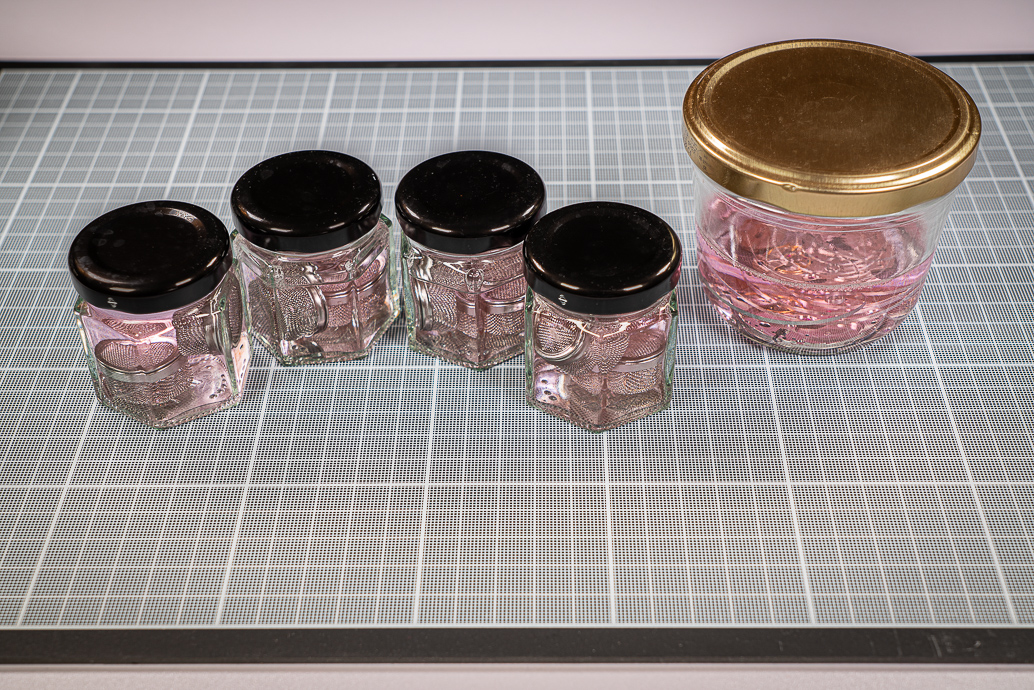
The jars are ready and sealed. Looks like some cocktail (but it's ammonia, be careful...).
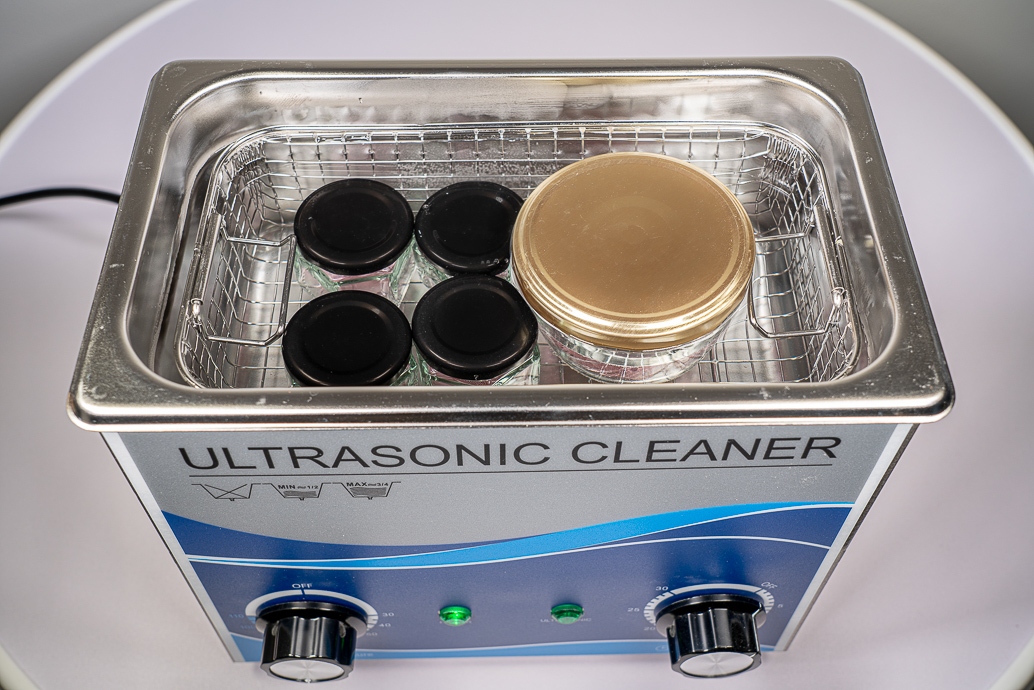
Let's go for a first cleaning cycle of 20 minutes. I place the jars into the ultrasonic cleaner, I fill it with water up to 3/4, I start the heating (very fast with this ultrasonic cleaner model) and the timer.
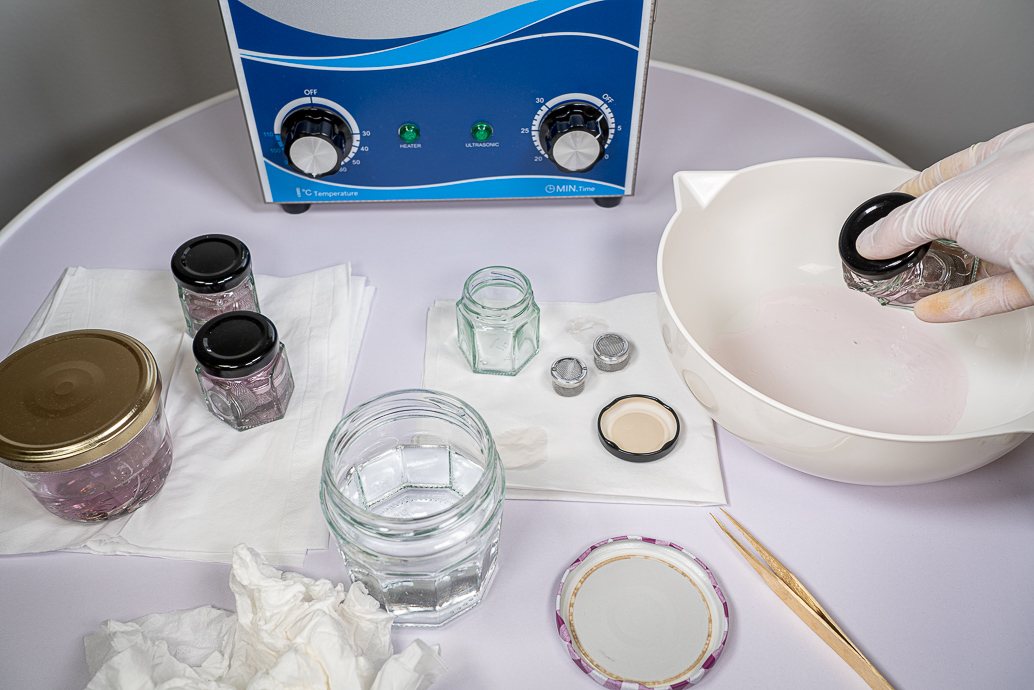
Once the cycle is finished, I take the jars out and empty them into a container because I need to reuse them for the second cycle in the ultrasonic cleaner. I have to buy other jars, to not have to wash them between the 2 cycles ( note: you have to like jam in this hobby!)
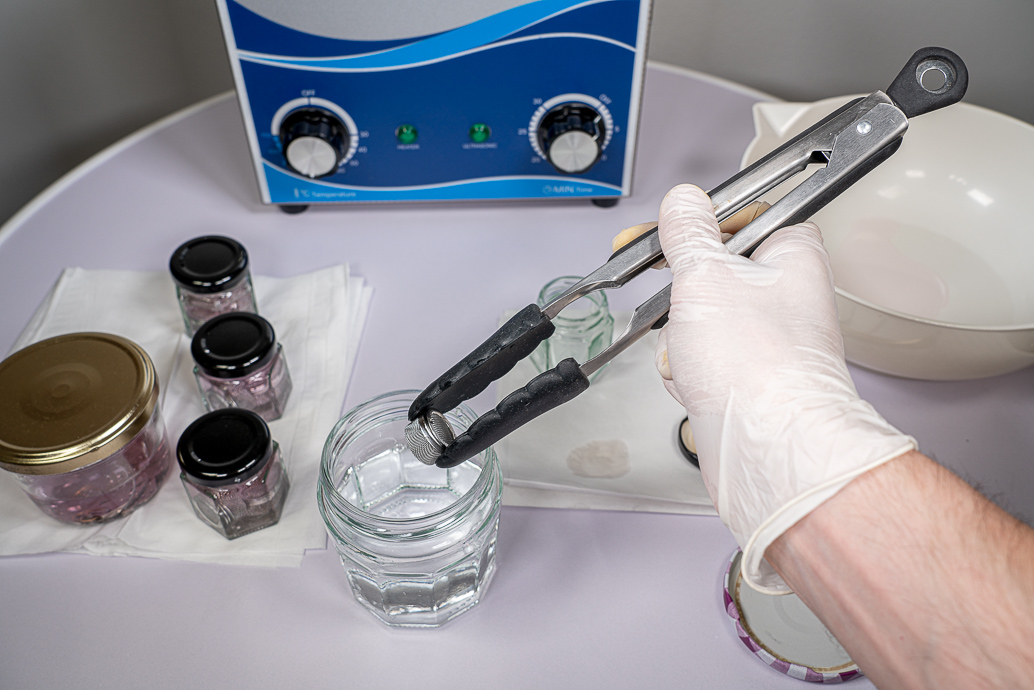
Between the 2 cycles I rinse the parts (still contained in the mini baskets) with distilled water to remove any residue of Elma Red.
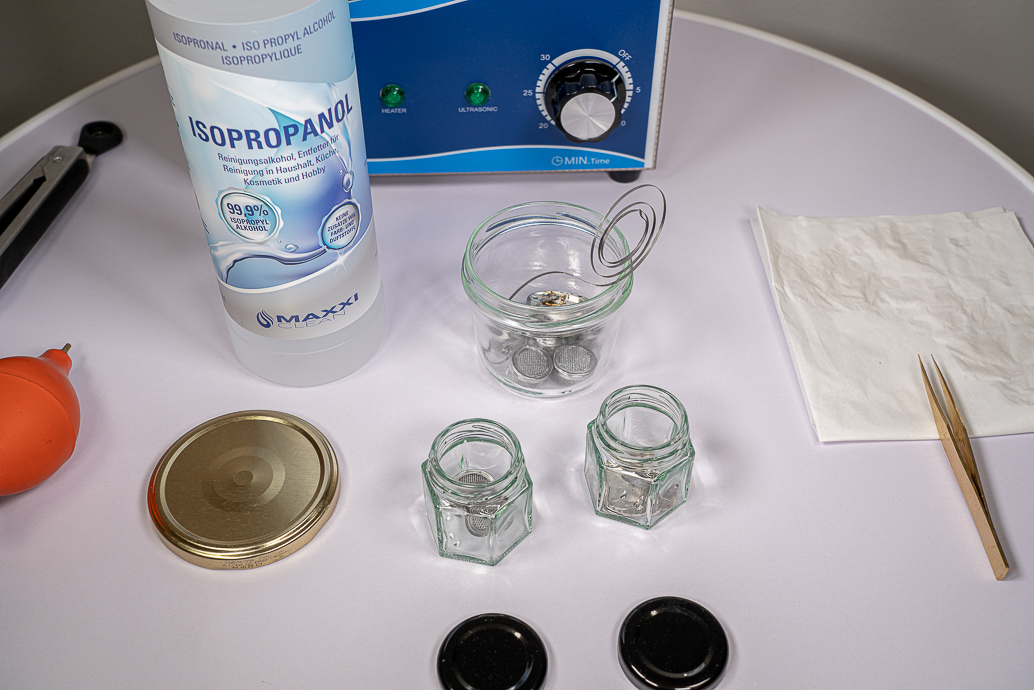
My jars are cleaned and my parts rinsed. Let's go to the last step: removing the residue of previous solutions with alcohol.
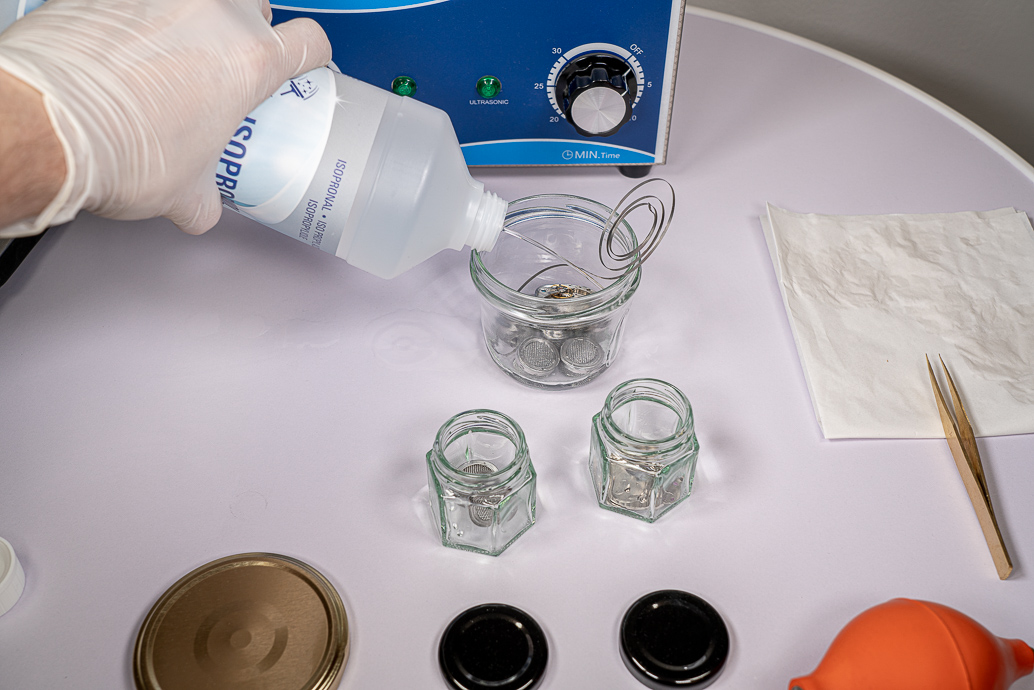
I simply filled my jars with isopropanol until parts are fully submerged, as before.
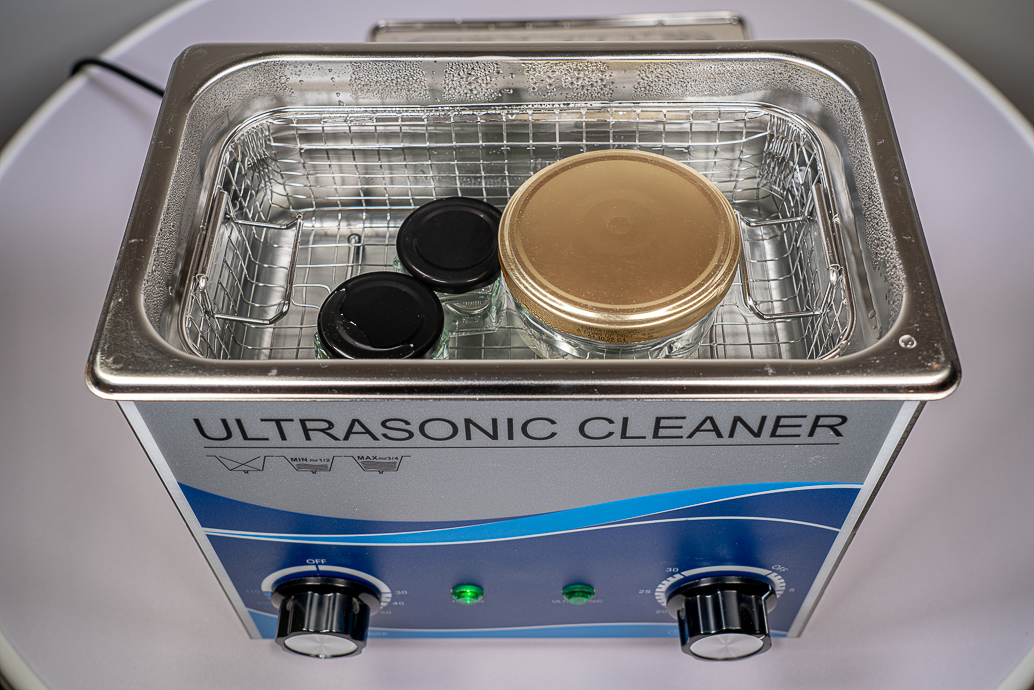
Back to the ultrasonic cleaner for 20 minutes again.
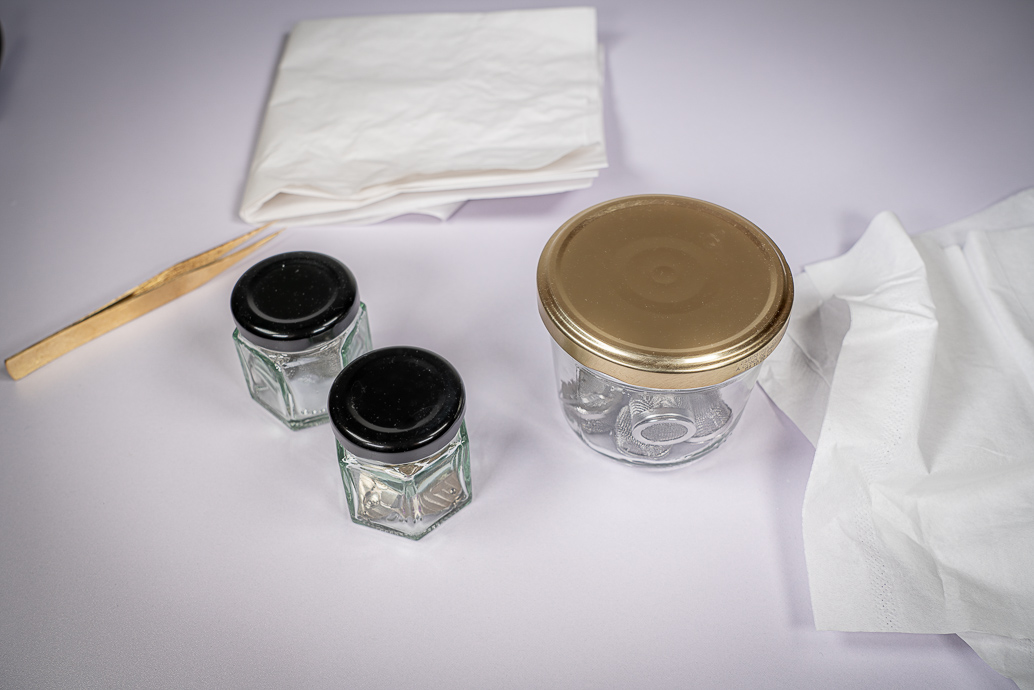
Dinner is served (it's very hot).
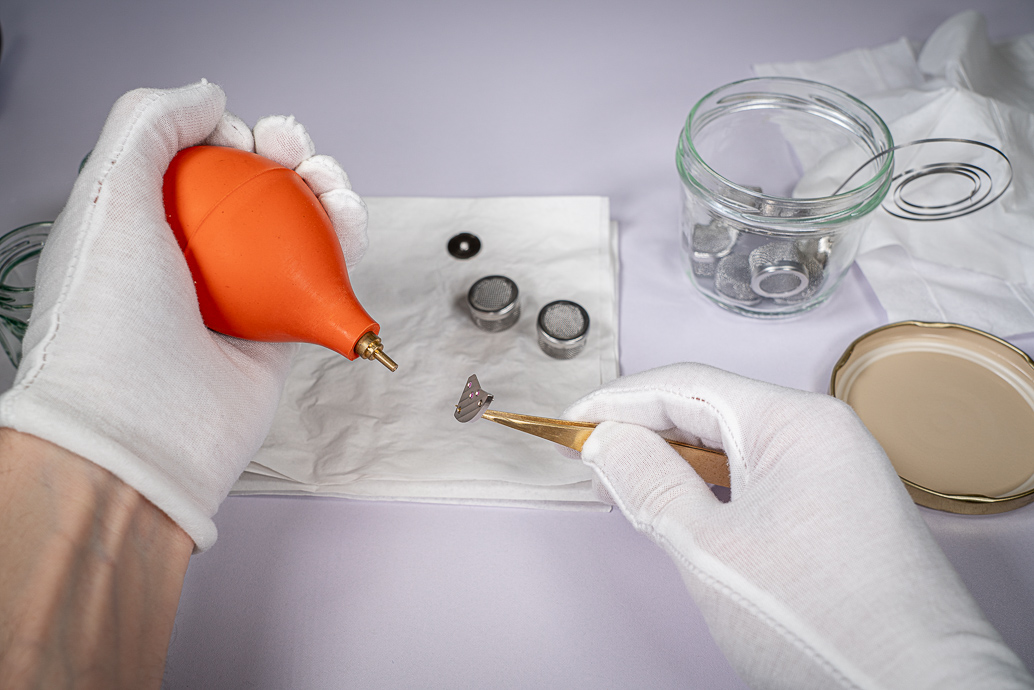
Finally, I take the parts out of the jars and dry them again on the silk paper with the hand blower, to remove any alcohol residue.
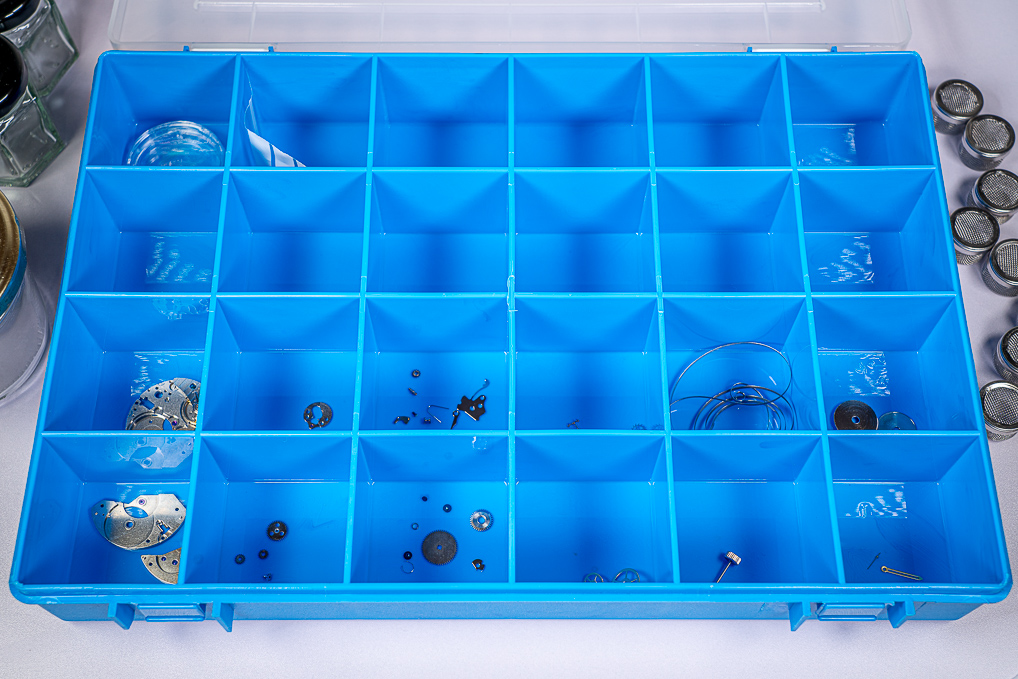
And parts return to the box in preparation for the next stage.
Next step: reassembly/lubrication :thumbsup:
To be continued...
Now step 2.
Note : I was inspired by different Youtube videos to establish this cleaning protocol.
Beginner watchmaking workshop #2: cleaning of the ST36

The equipment we will need to achieve this new workshop is the following: ultrasonic cleaner, Naphtha (F gasoline here) for degreasing, Elma Red 1: 9 for cleaning, demineralized water for rinsing and 99% alcohol (isopropanol) to remove traces of water during drying.

I will also need watchmaker paper (silk paper) to dry the parts, glass jars to hold the different liquids, ultrasonic cleaner mini baskets for holding small parts, paintbrushes, hand and eye protection (I wear a valved mask to protect myself from vapors: gasoline + ammonia + alcohol is not the healthiest cocktail to breathe) and a hand blower.

The first step consists in immersing each part in a degreasing liquid which can be: Zipo lighter fluid, C gasoline (prohibited for sale in France) or F gasoline, Bergeon B-Dip. I chose F gasoline because it is the easiest to find (in France) and the cheapest. I immerse each part into the gasoline, I brush the larger parts with a paintbrush and for the most fragile ones I use the blower to stir the gasoline without brushing them.

Then I proceed to the drying of each part with the hand blower. F gasoline evaporates quickly, and the silk paper helps to absorb residue.

For small parts I found this plastic tray on AliExpress which prevents them from flying out when I use the blower. Very useful.

Parts are degreased, let's go to the cleaning stage. I will dilute 1 volume of Elma Red in 9 volumes of distilled water and I will transfer this solution into each jar after having placed my parts.

I secure the most fragile parts into the mini baskets.

I filled each jar with the solution until the mini baskets are completely submerged in the liquid.

The jars are ready and sealed. Looks like some cocktail (but it's ammonia, be careful...).

Let's go for a first cleaning cycle of 20 minutes. I place the jars into the ultrasonic cleaner, I fill it with water up to 3/4, I start the heating (very fast with this ultrasonic cleaner model) and the timer.

Once the cycle is finished, I take the jars out and empty them into a container because I need to reuse them for the second cycle in the ultrasonic cleaner. I have to buy other jars, to not have to wash them between the 2 cycles ( note: you have to like jam in this hobby!)

Between the 2 cycles I rinse the parts (still contained in the mini baskets) with distilled water to remove any residue of Elma Red.

My jars are cleaned and my parts rinsed. Let's go to the last step: removing the residue of previous solutions with alcohol.

I simply filled my jars with isopropanol until parts are fully submerged, as before.

Back to the ultrasonic cleaner for 20 minutes again.

Dinner is served (it's very hot).

Finally, I take the parts out of the jars and dry them again on the silk paper with the hand blower, to remove any alcohol residue.

And parts return to the box in preparation for the next stage.
Next step: reassembly/lubrication :thumbsup:
To be continued...
Last step of my tutorial for the full service of a movement.
Let's go for the photos.
Beginner watchmaking workshop #3: lubrication and reassembly of the ST36
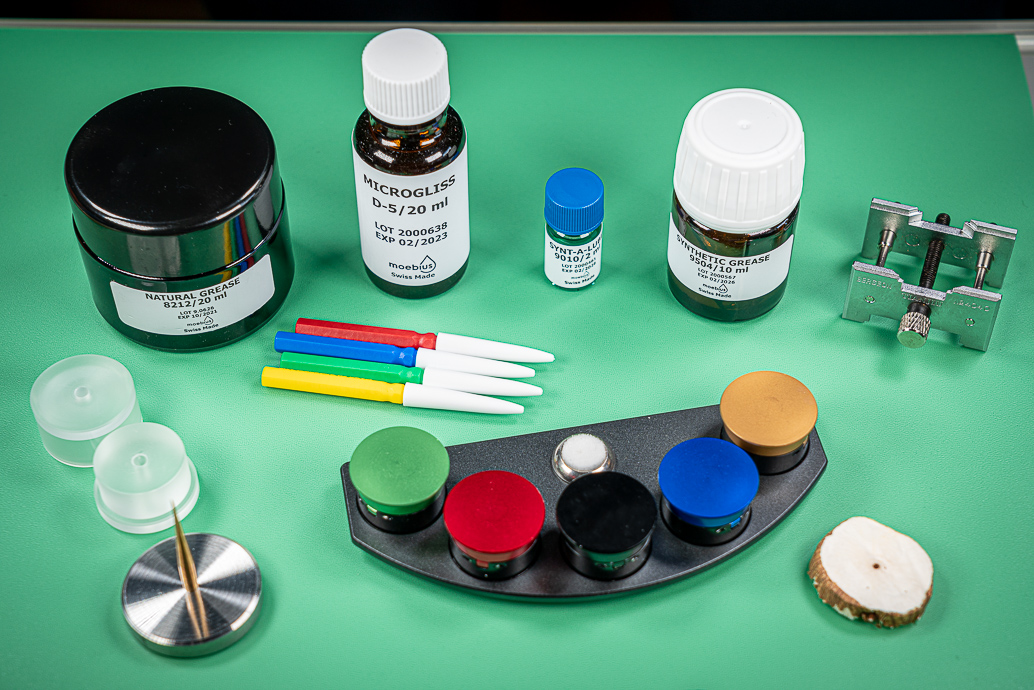
Here are the tools that I will use for this last step: oil cups, oiler sticks, movement holder, mini press to close the barrel spring, balance holder, pith wood to clean my oilers and the following Moebius oils & greases : 8212, D5, 9010, 9504 and 8200.
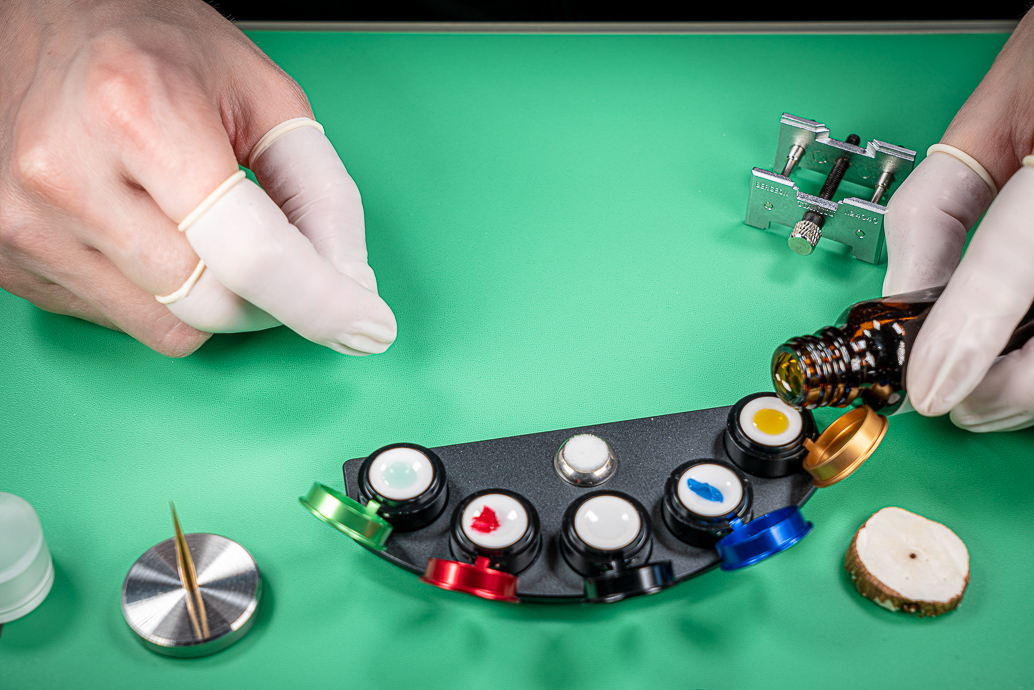
The first step is to prepare my oils. What is great about the selection I bought is that the colors of the oils match the colors of the cups.
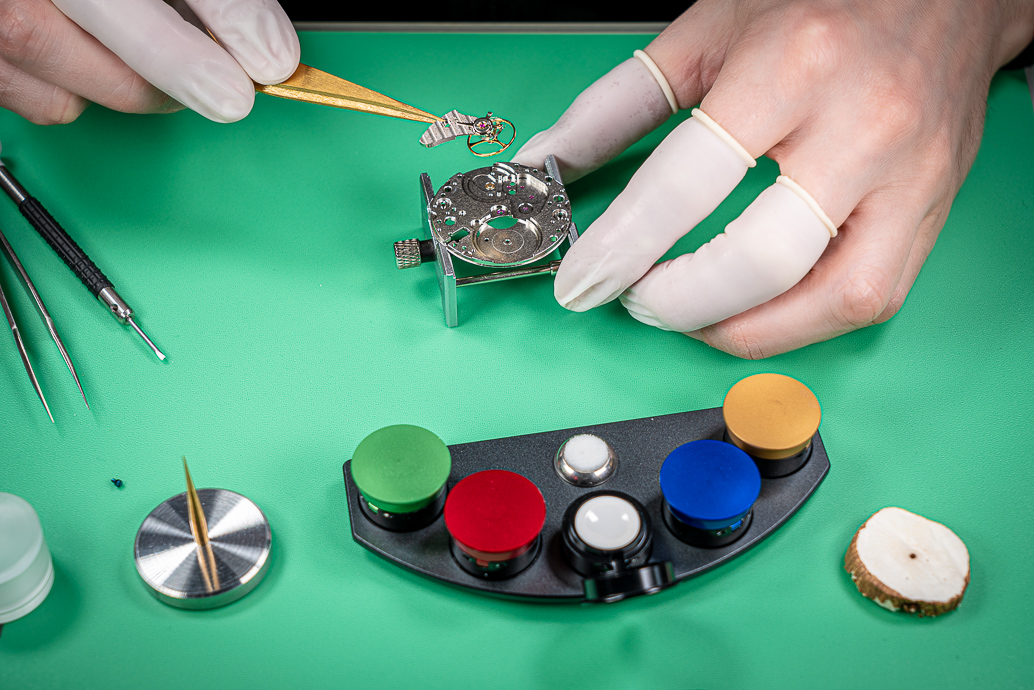
I start by removing the balance from the mainplate (it stayed on it during cleaning). Incablocs will be lubricated during a second step.
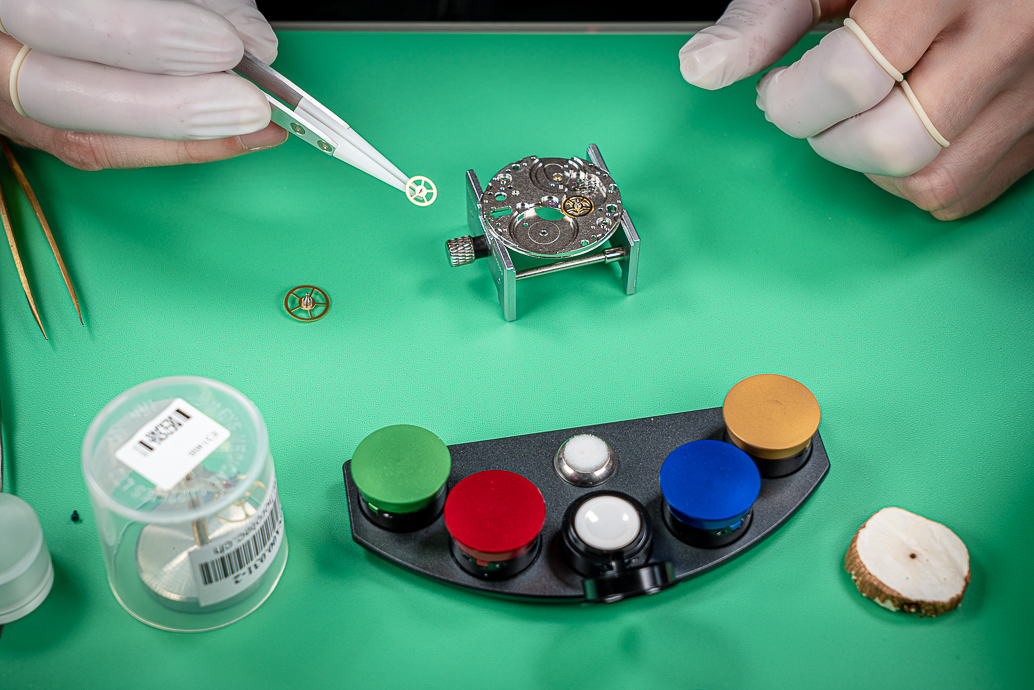
I reassemble the train of wheels section: center, middle and seconds wheels. These wheels will be lubricated after. Jewels are located on the bridge, which I also put back in place too.
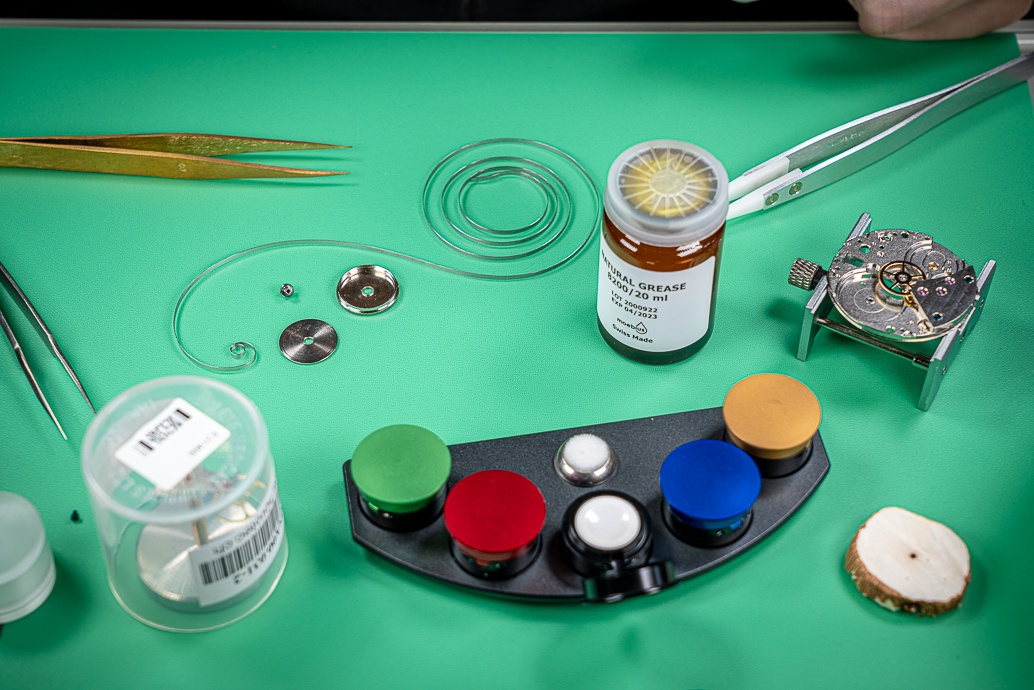
To lubricate the barrel spring I use natural grease Moebius 8200.
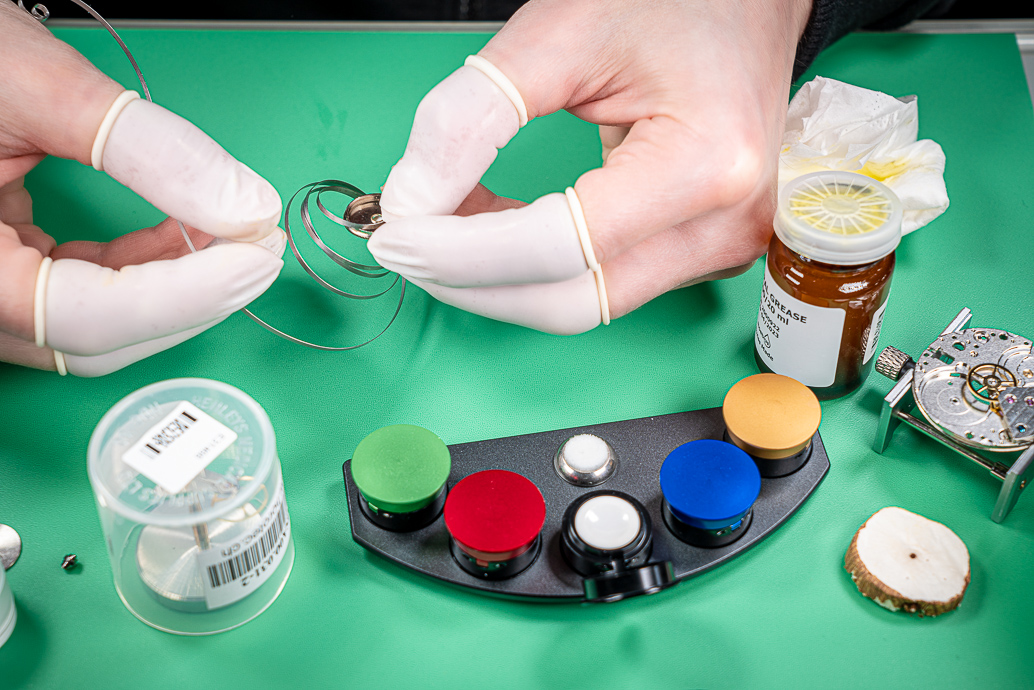
I spread grease in watchmaker paper and simply unroll the spring on it.
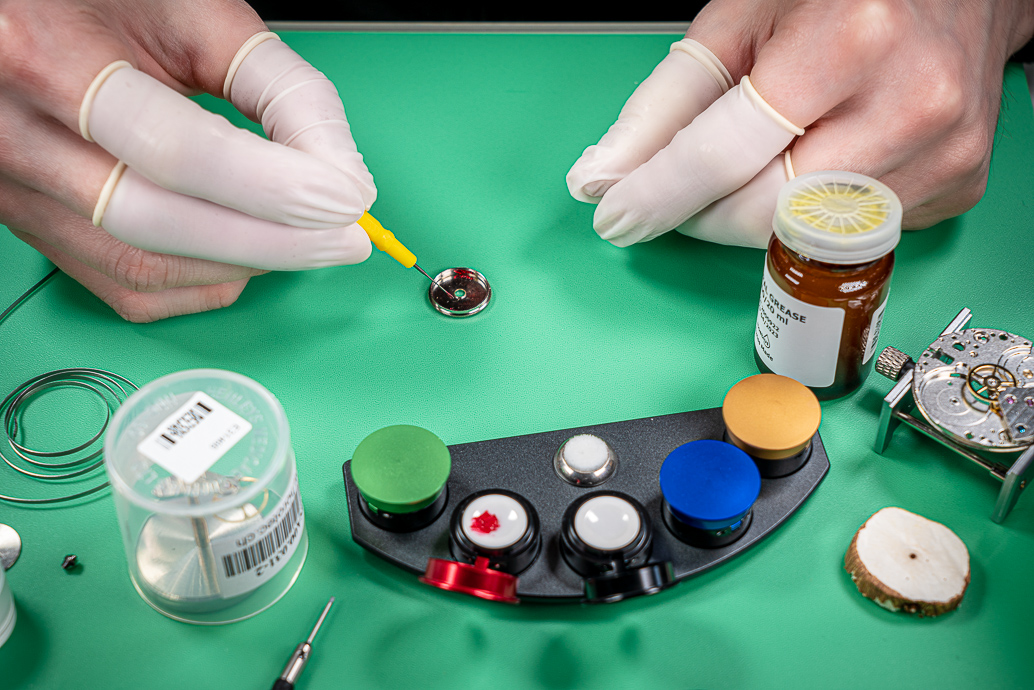
I then grease the inside of the barrel with Moebius 8212 grease. Thus the spring will pivot inside the barrel in a fluid manner.
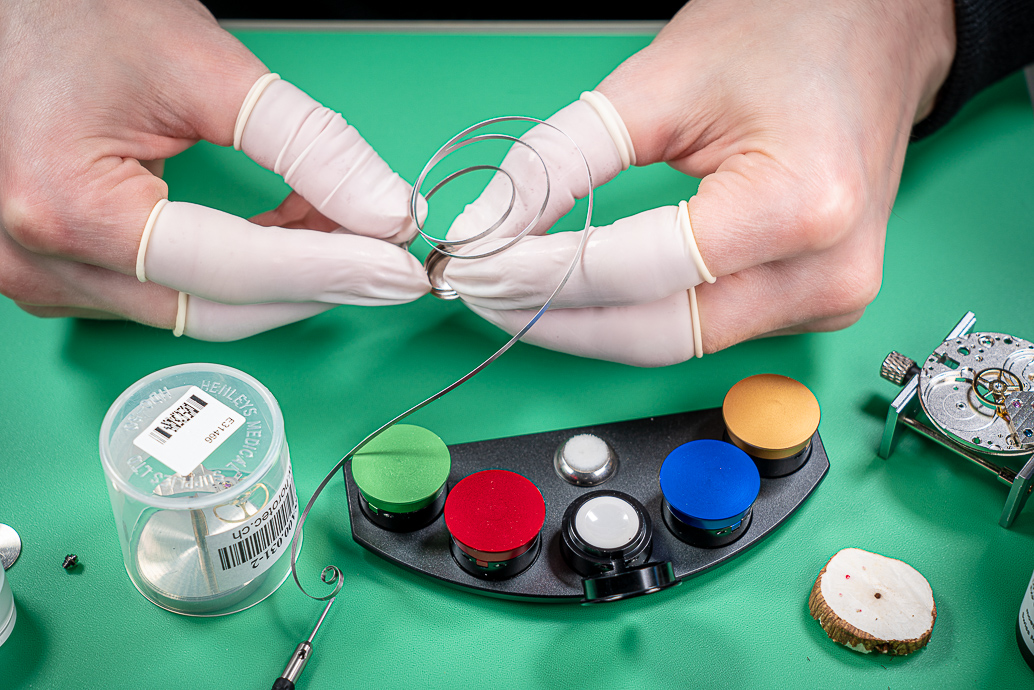
I put the spring back into its barrel. I do it by hand because I don't have a winder that corresponds to the barrel of the ST36.
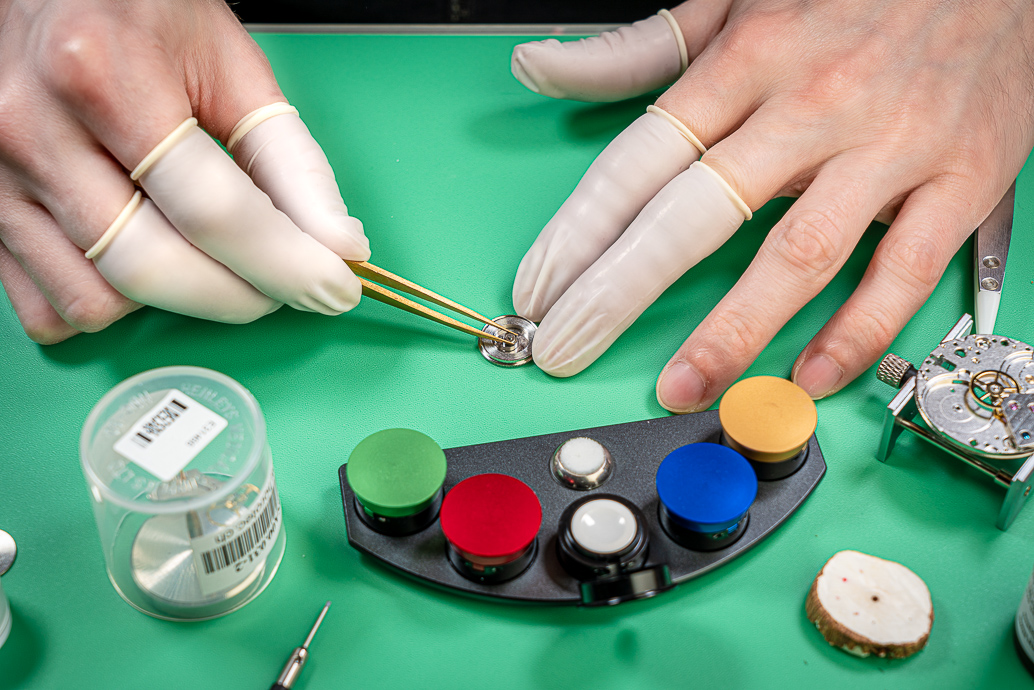
I replace the barrel arbor in the center of the spring.
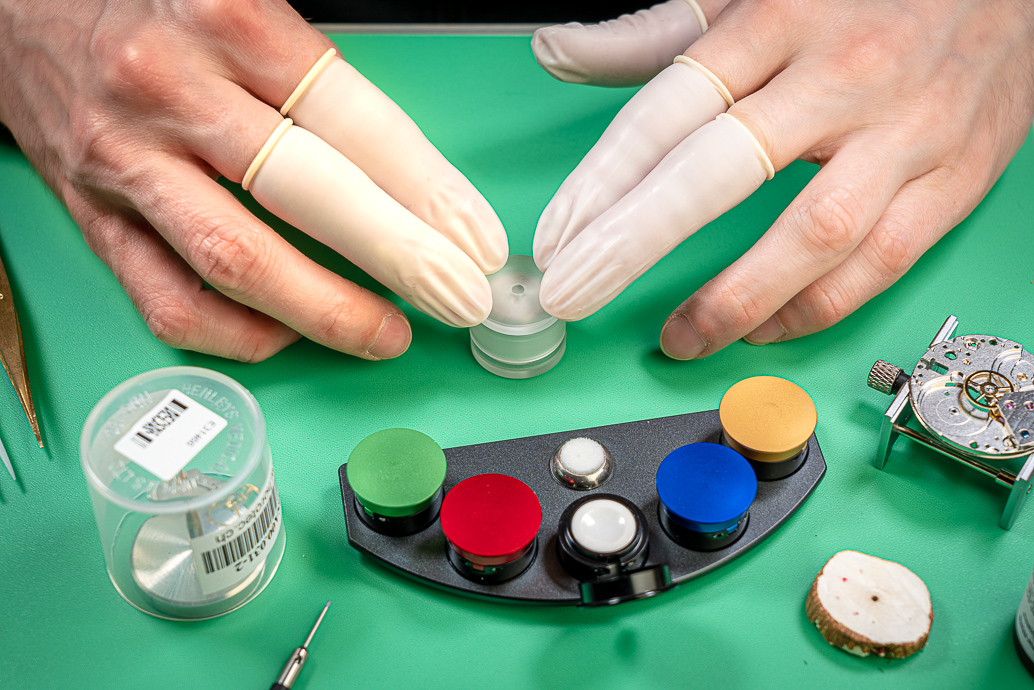
I close the barrel with the mini press.
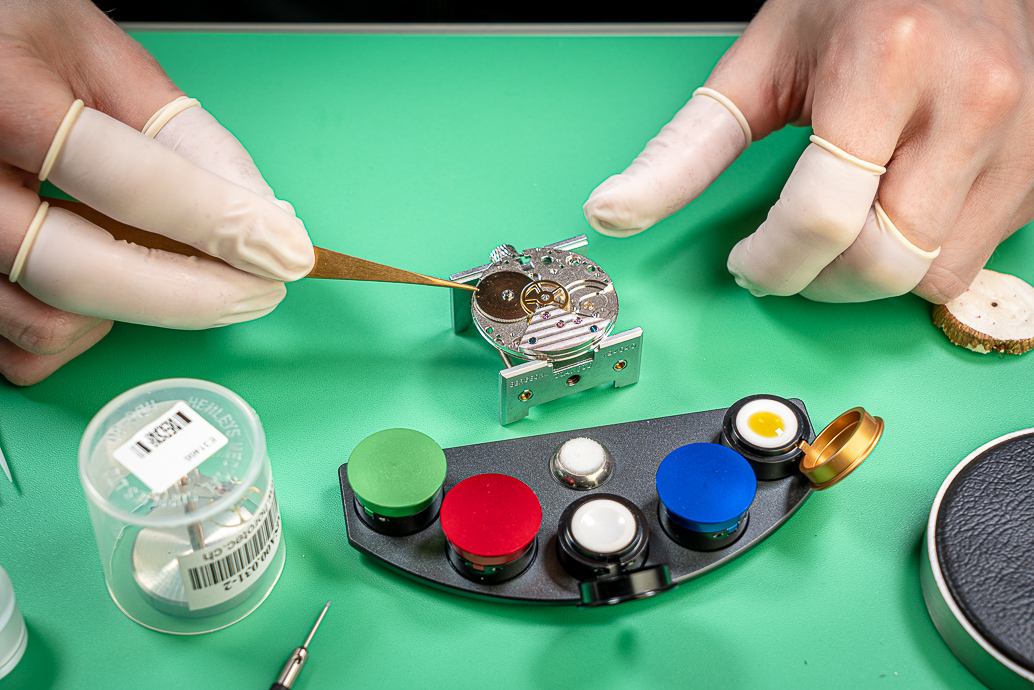
And the barrel can now be replaced on the mainplate.
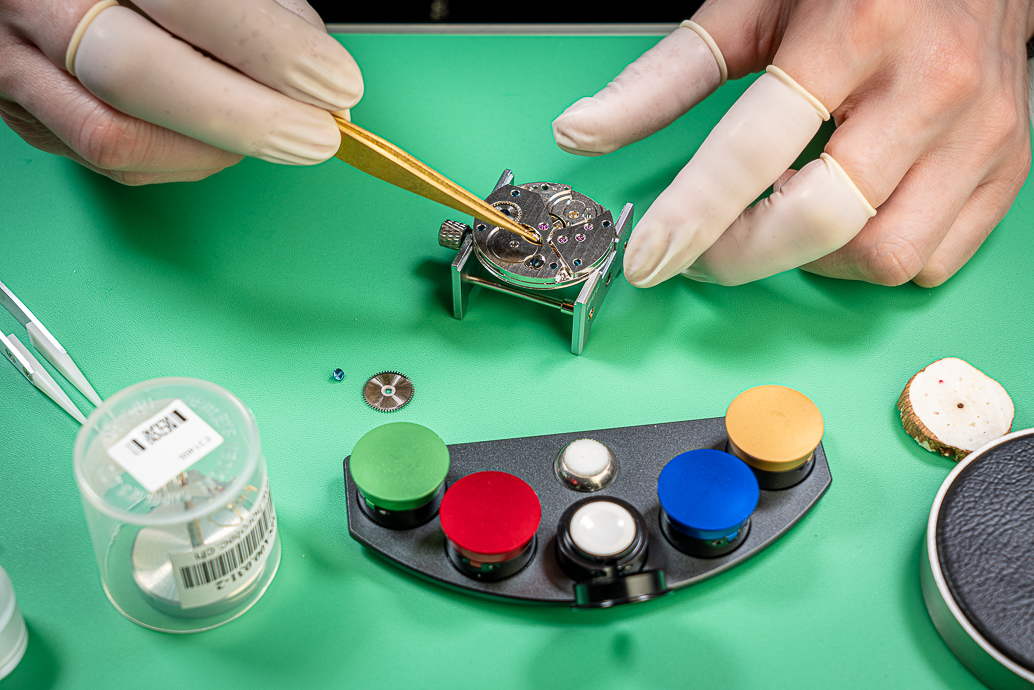
I then gradually reassembly all the parts. I didn't shoot all the operations one by one, you get the idea.
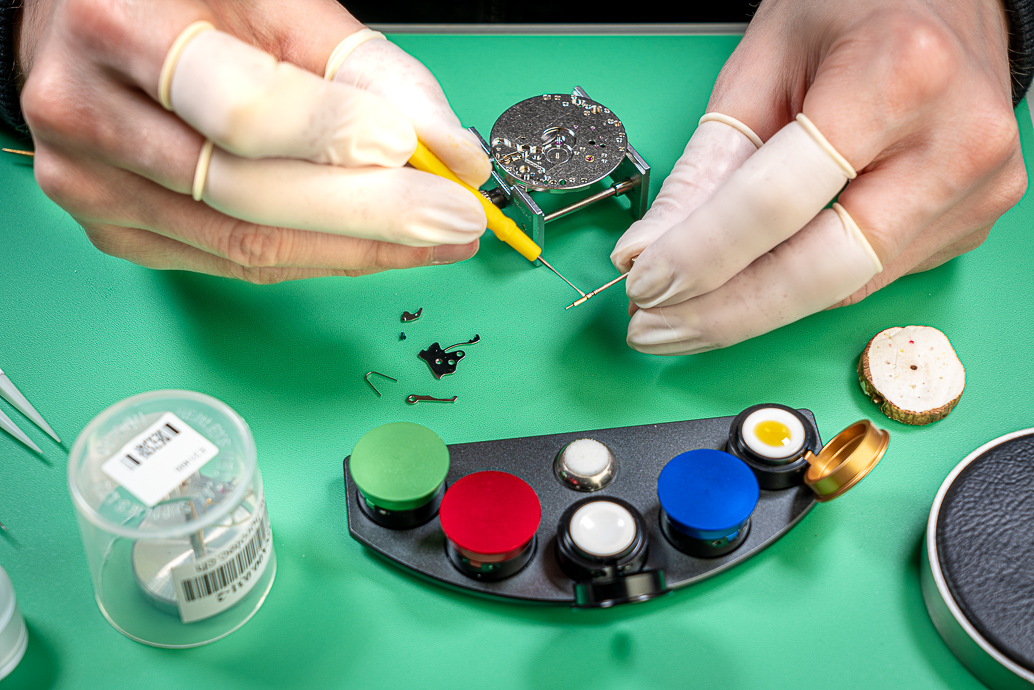
I lubricate the winding stem here. Contrary to what the photo may suggest, it's not oil that should be used (D5) but grease (9504). I forgot to close the golden cap for the photo.
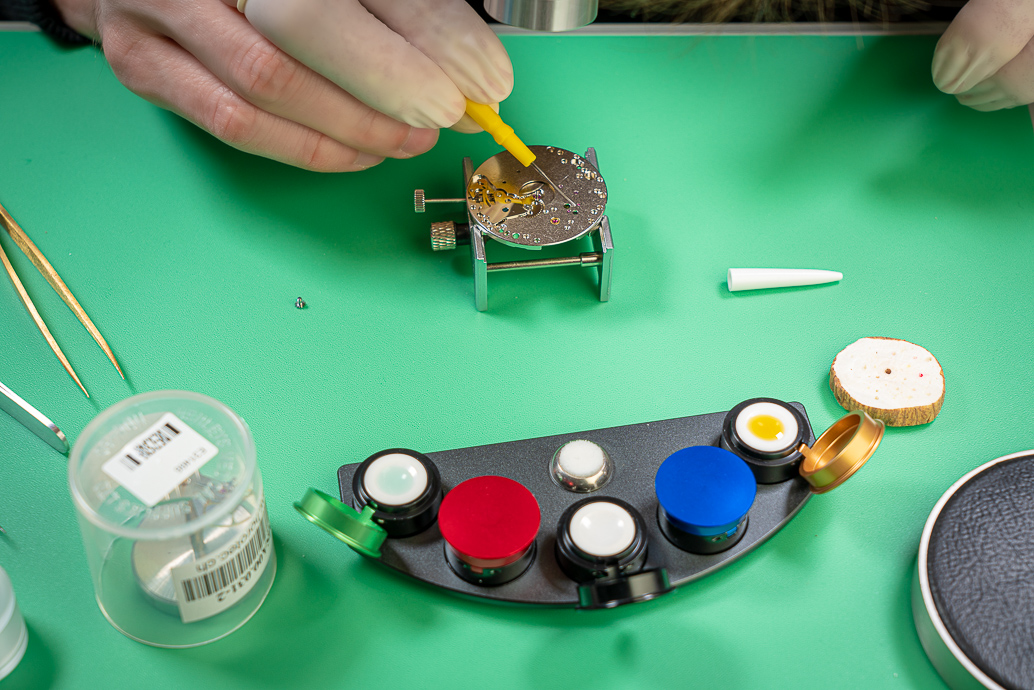
Some jewels on the wheels of the train of wheels section and incabloc jewels are lubricated using Moebius 9010 oil. For the rest of the parts I mainly use Moebius D5 oil.
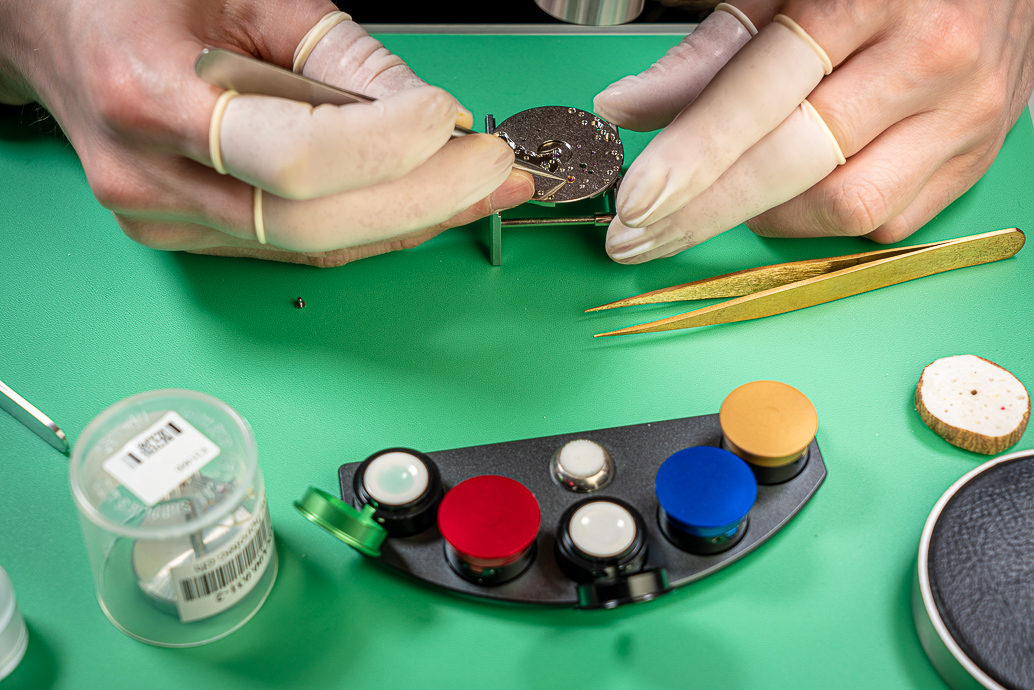
The delicate operation of replacing incablocs under a magnifying glass. You have to stay focused because the lyre-shaped springs are particularly fragile.
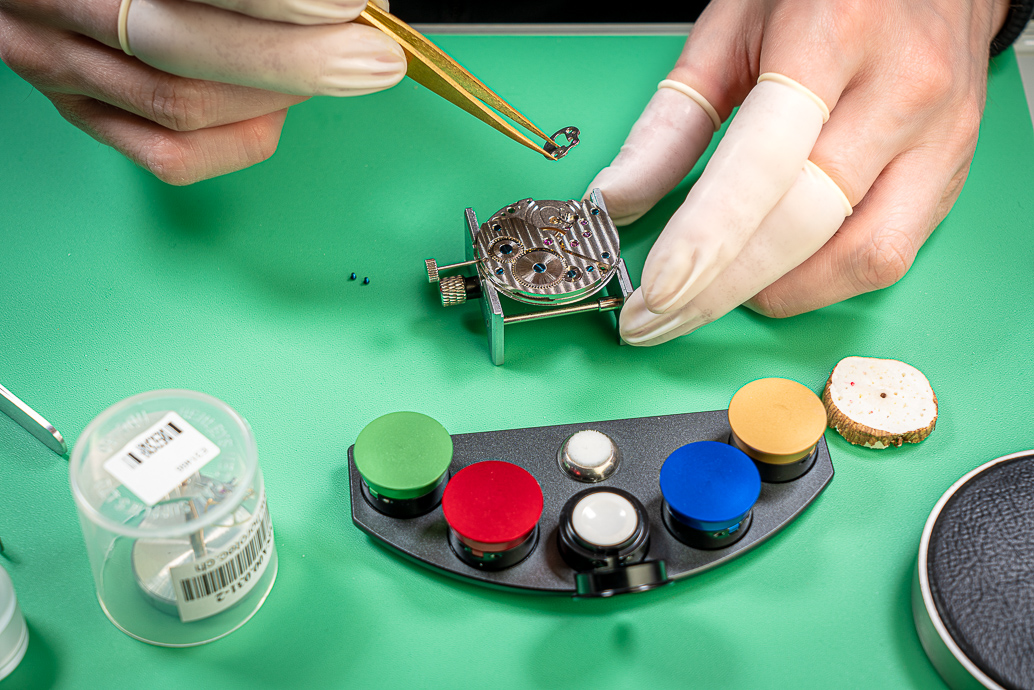
We are approaching the final stage. I reassemble the escape wheel and the anchor which I also lubricate with 9010 oil (recommended oils here are 941 or 9415 but I don't have these).
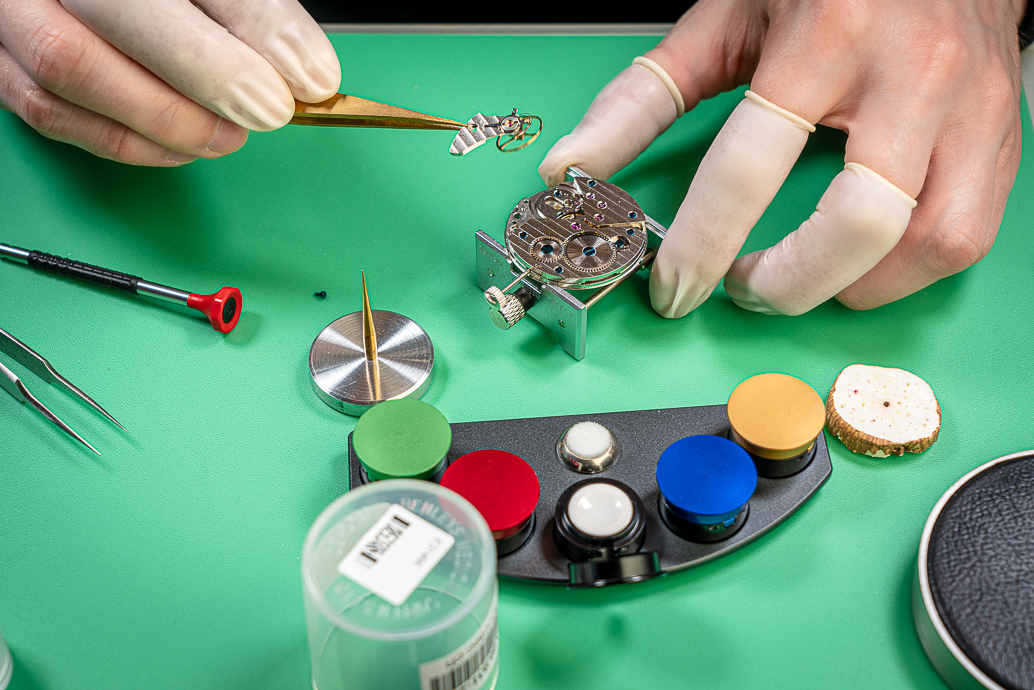
Last step: reassembly of the balance. I lubricate the incabloc using 9010 oil.
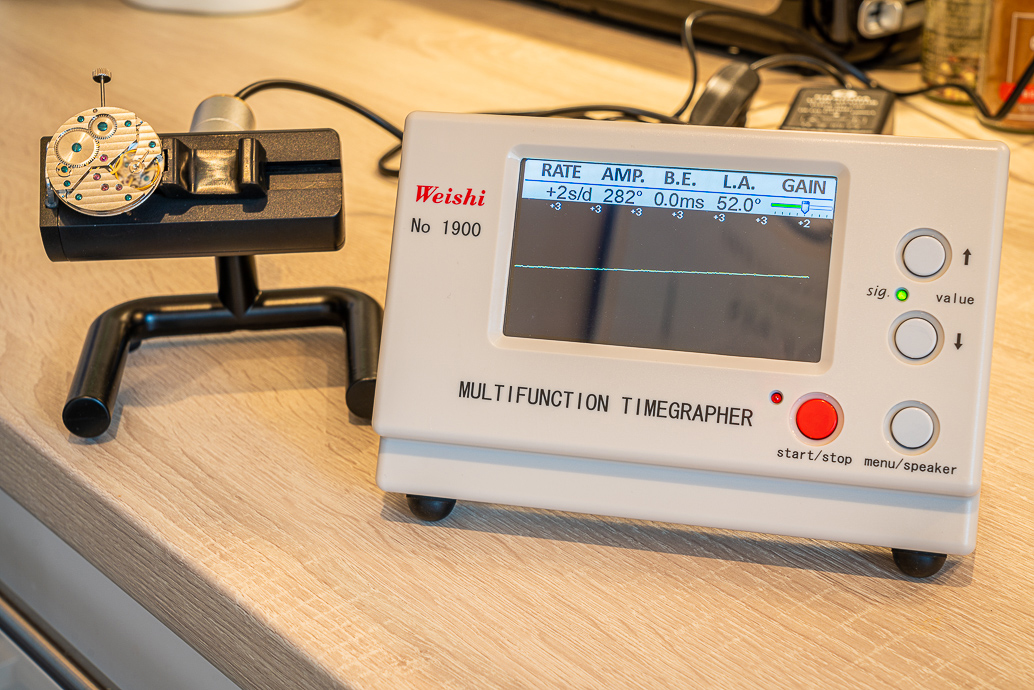
Here we are. Let see the performances: It's a very good result!
That's all folks
Let's go for the photos.
Beginner watchmaking workshop #3: lubrication and reassembly of the ST36

Here are the tools that I will use for this last step: oil cups, oiler sticks, movement holder, mini press to close the barrel spring, balance holder, pith wood to clean my oilers and the following Moebius oils & greases : 8212, D5, 9010, 9504 and 8200.

The first step is to prepare my oils. What is great about the selection I bought is that the colors of the oils match the colors of the cups.

I start by removing the balance from the mainplate (it stayed on it during cleaning). Incablocs will be lubricated during a second step.

I reassemble the train of wheels section: center, middle and seconds wheels. These wheels will be lubricated after. Jewels are located on the bridge, which I also put back in place too.

To lubricate the barrel spring I use natural grease Moebius 8200.

I spread grease in watchmaker paper and simply unroll the spring on it.

I then grease the inside of the barrel with Moebius 8212 grease. Thus the spring will pivot inside the barrel in a fluid manner.

I put the spring back into its barrel. I do it by hand because I don't have a winder that corresponds to the barrel of the ST36.

I replace the barrel arbor in the center of the spring.

I close the barrel with the mini press.

And the barrel can now be replaced on the mainplate.

I then gradually reassembly all the parts. I didn't shoot all the operations one by one, you get the idea.

I lubricate the winding stem here. Contrary to what the photo may suggest, it's not oil that should be used (D5) but grease (9504). I forgot to close the golden cap for the photo.

Some jewels on the wheels of the train of wheels section and incabloc jewels are lubricated using Moebius 9010 oil. For the rest of the parts I mainly use Moebius D5 oil.

The delicate operation of replacing incablocs under a magnifying glass. You have to stay focused because the lyre-shaped springs are particularly fragile.

We are approaching the final stage. I reassemble the escape wheel and the anchor which I also lubricate with 9010 oil (recommended oils here are 941 or 9415 but I don't have these).

Last step: reassembly of the balance. I lubricate the incabloc using 9010 oil.

Here we are. Let see the performances: It's a very good result!
That's all folks
Great pictures and great tutorial, merci!
Envoyé de mon ELE-L29 en utilisant Tapatalk

