• Tired of adverts on RWI? - Subscribe by clicking HERE and PMing Trailboss for instructions and they will magically go away!

CV2A10 Case, Pushers, Bezel Insert, Chapter Ring Work In Progress

SSTEEL

Banned
Banned
30/1/13
3,803
1
0
I have heard back from my genuine parts supplier that he cannot source a new case set other than from TAG themselves, and at the quoted $1000, I thin I will work on the spare case set I have, and see how I get on with it.

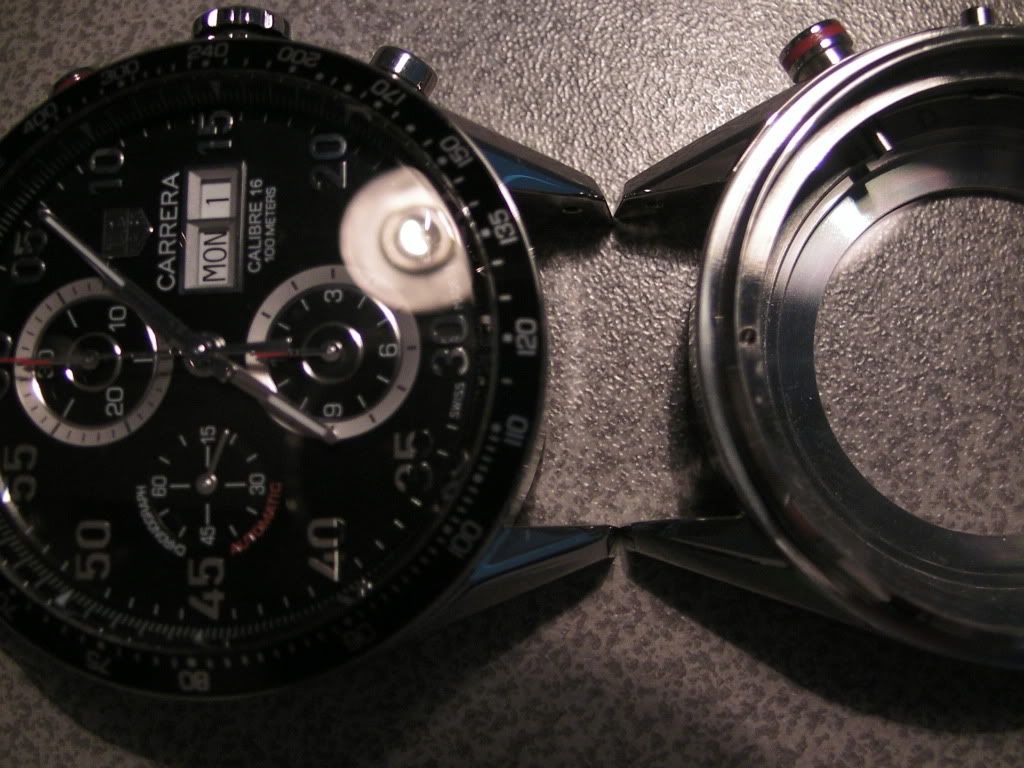
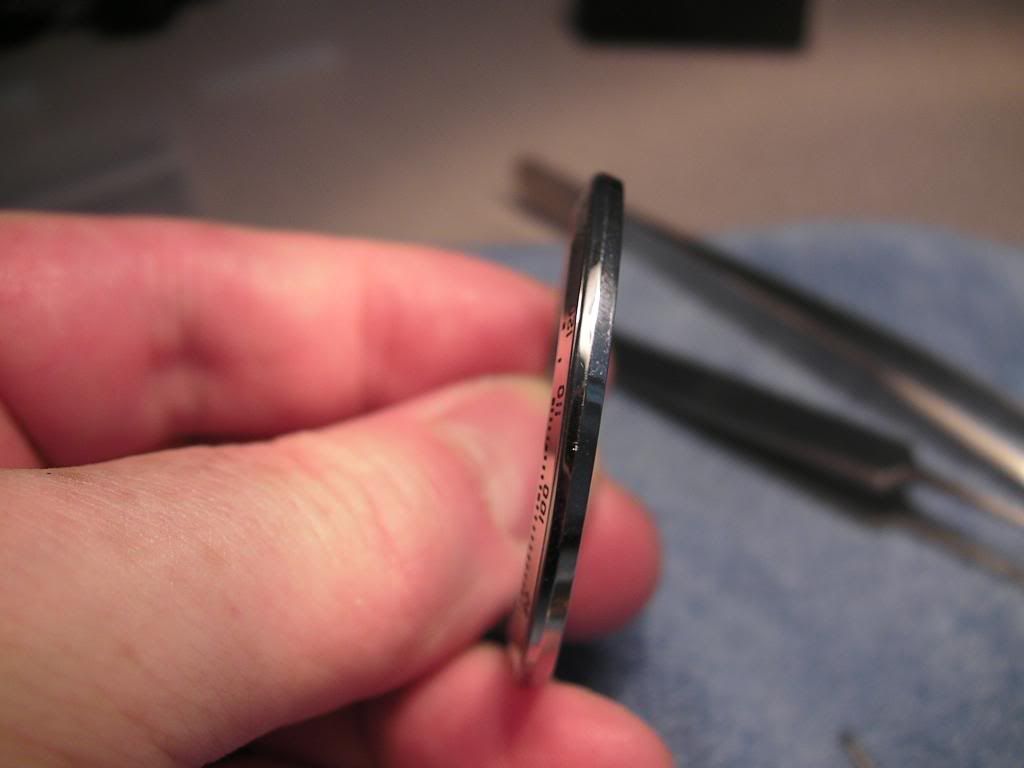
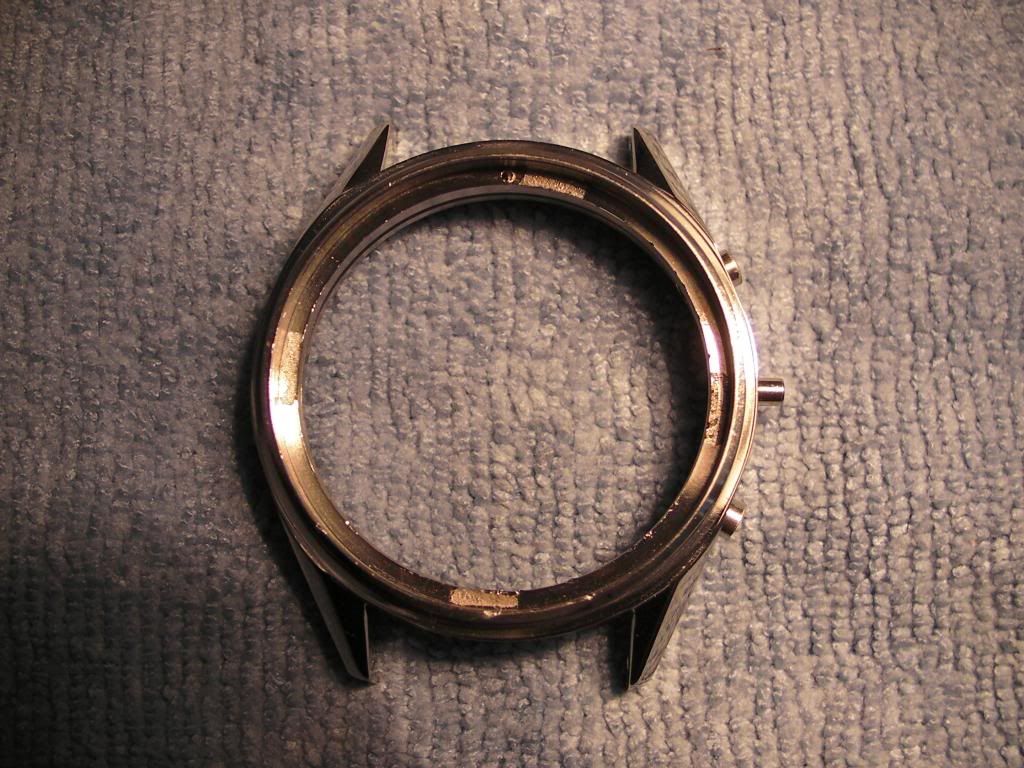
Had some free time today, and with a empty house, I set about disassembling the spare Carrera case. First, I wanted to remove the pushers from the rep case, these are held in place with tiny cir clips locking them into place. The construction, and functionality of these compared to the genuine pushers I have is slightly different, but more on that later.

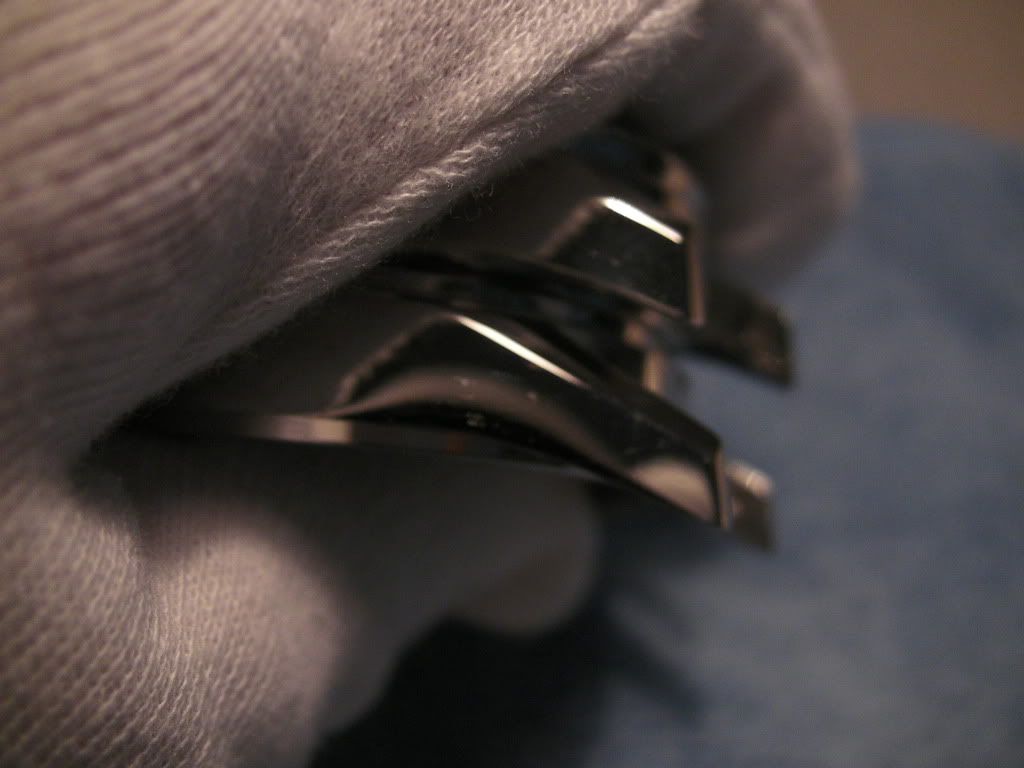
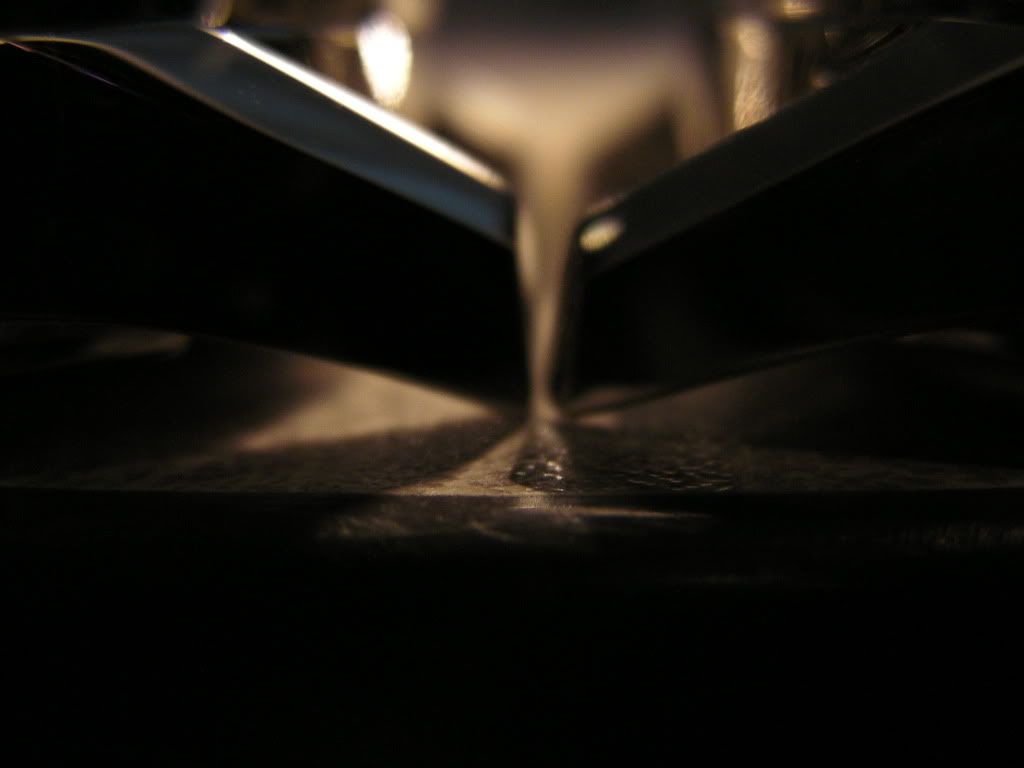
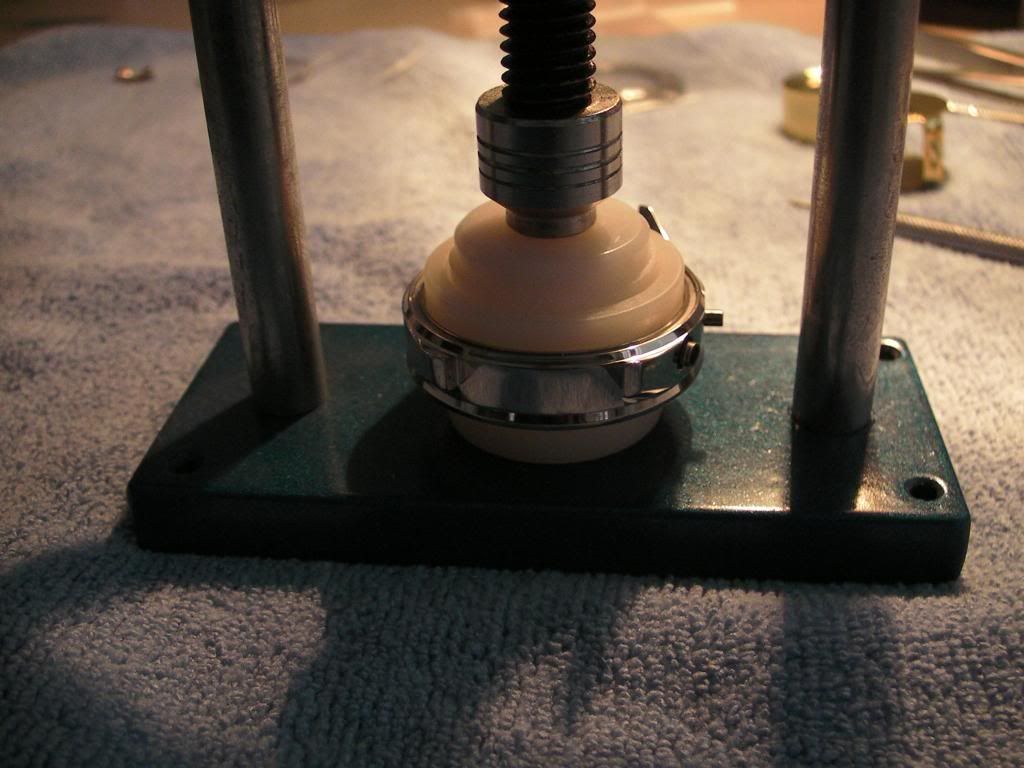
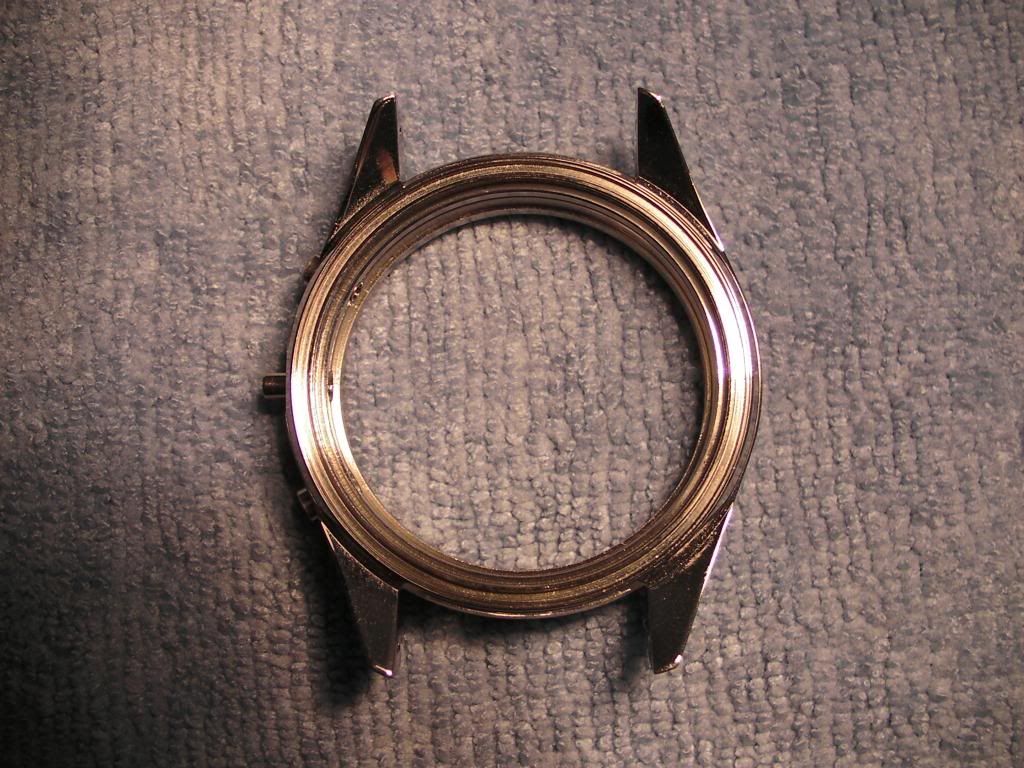
Pushers removed first so I could get a press die in there to remove crystal later...

SANY0697_zpsef56812e.jpg

SANY0698_zpsa5974735.jpg


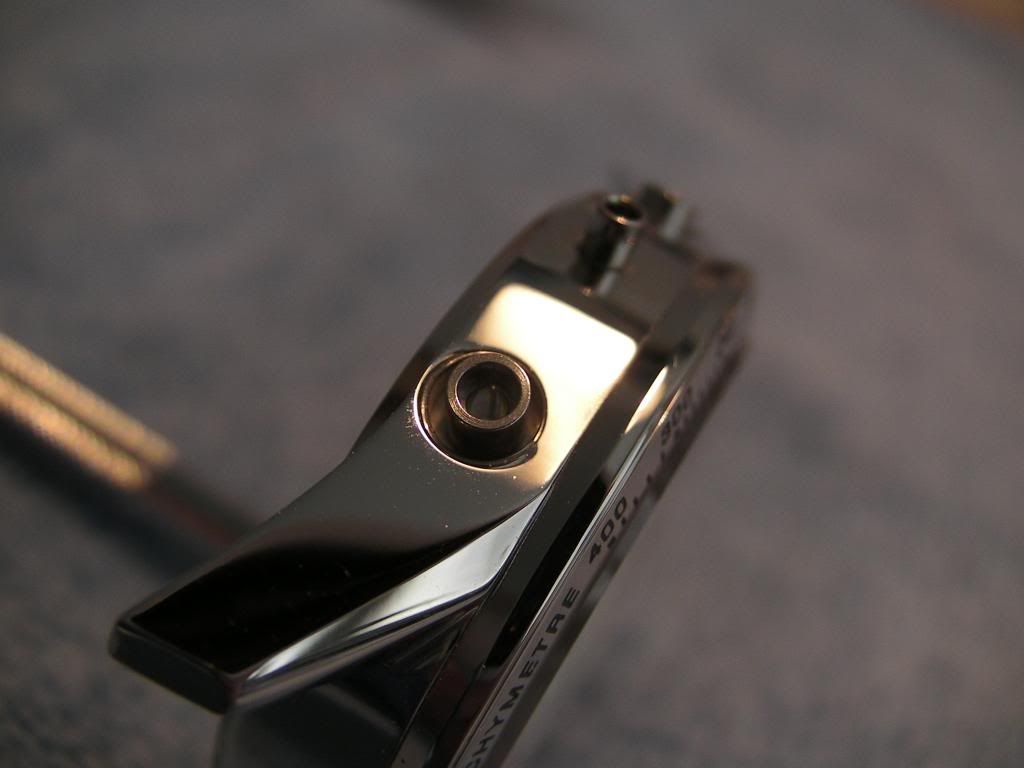
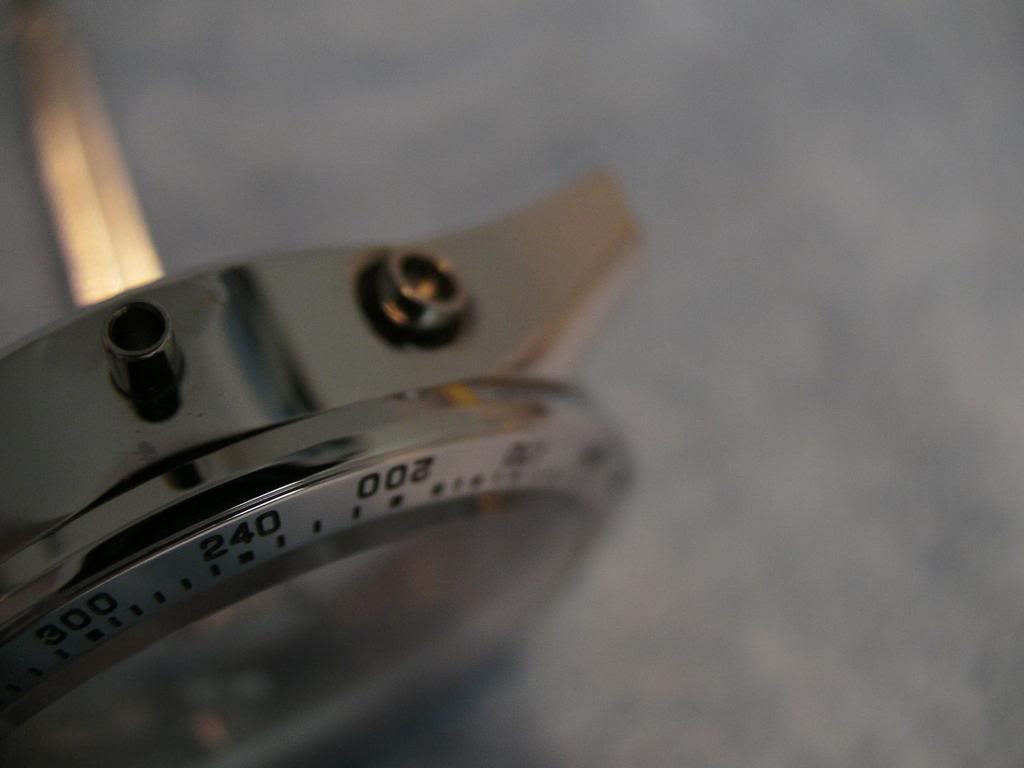
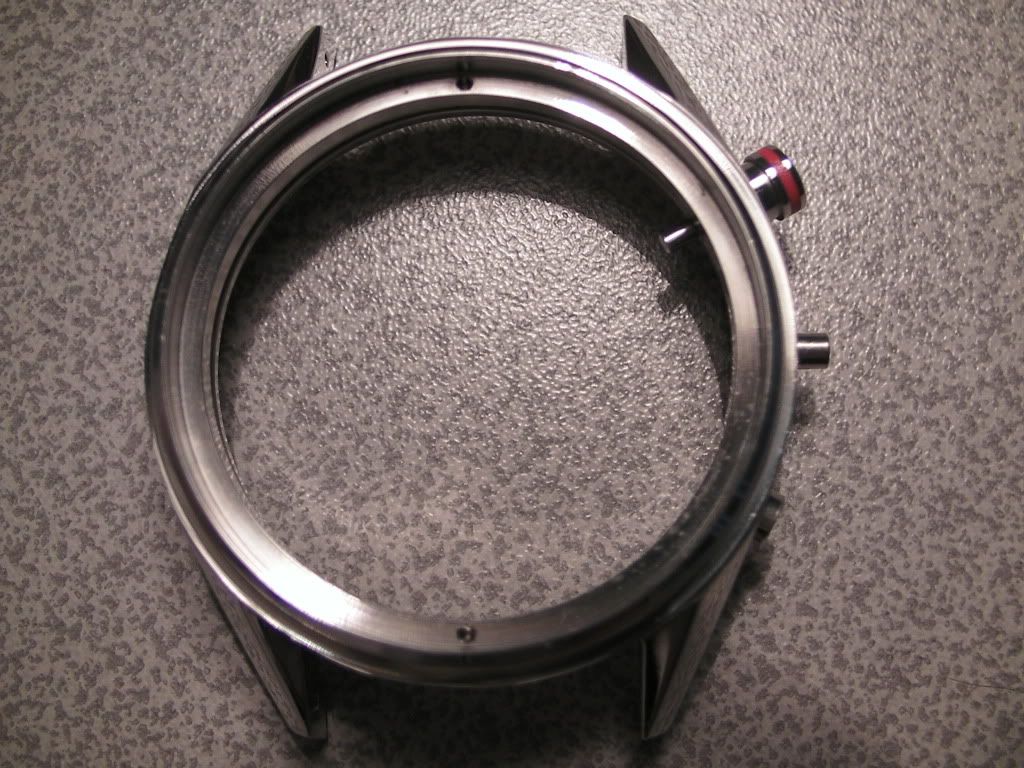
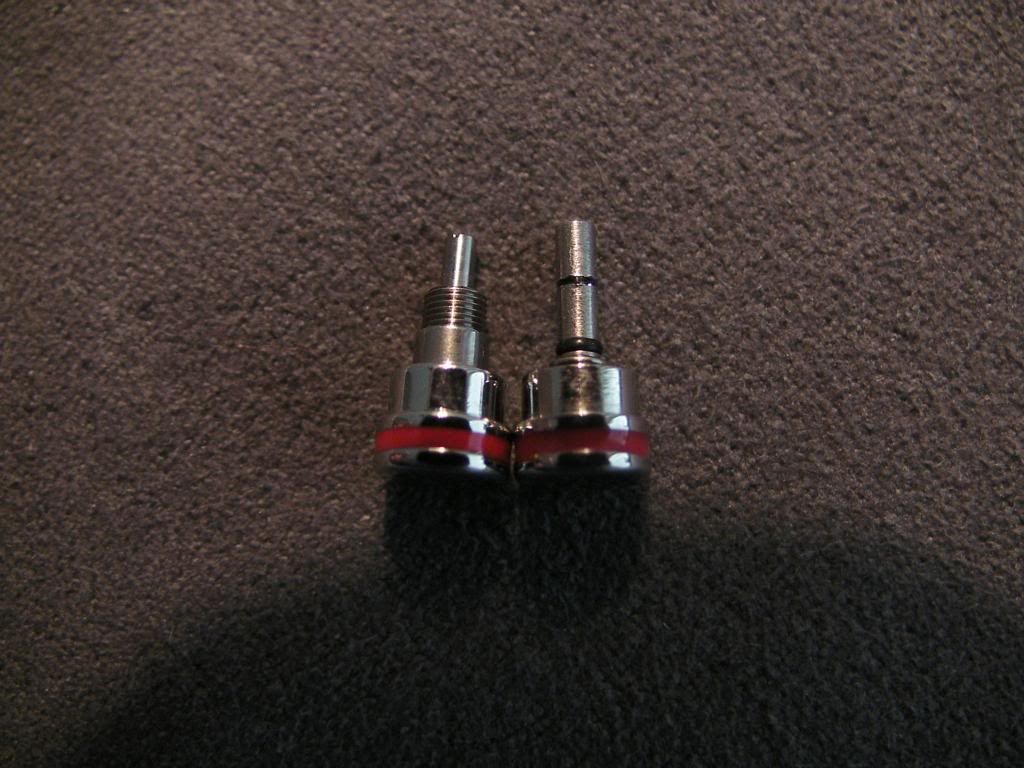
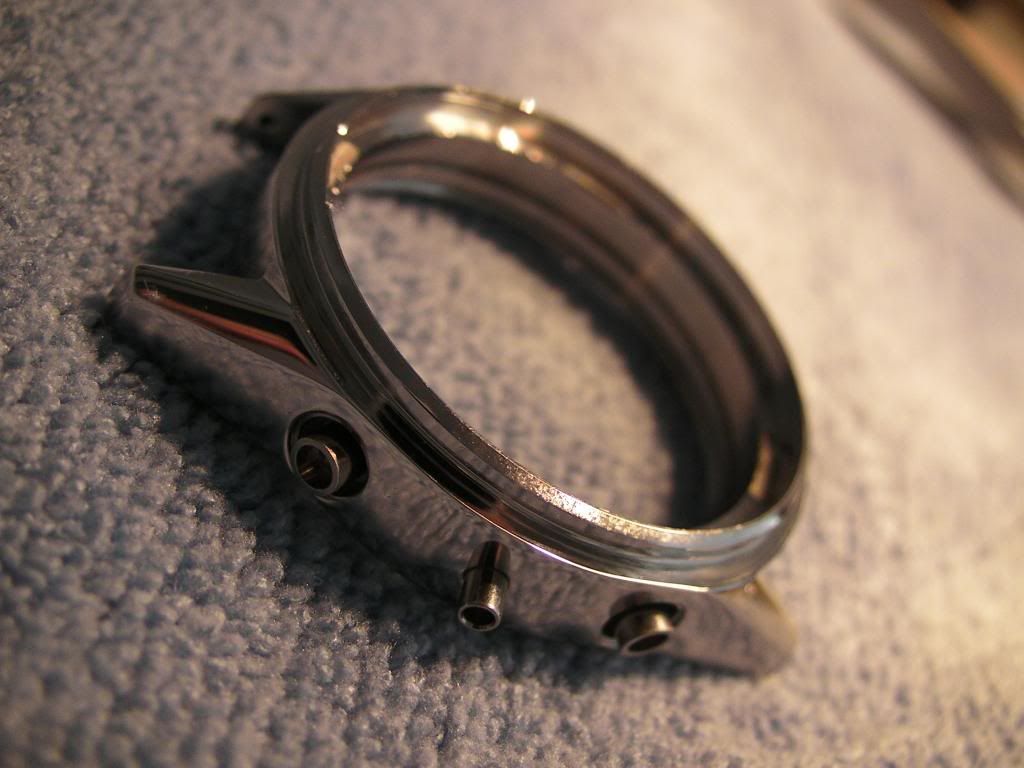
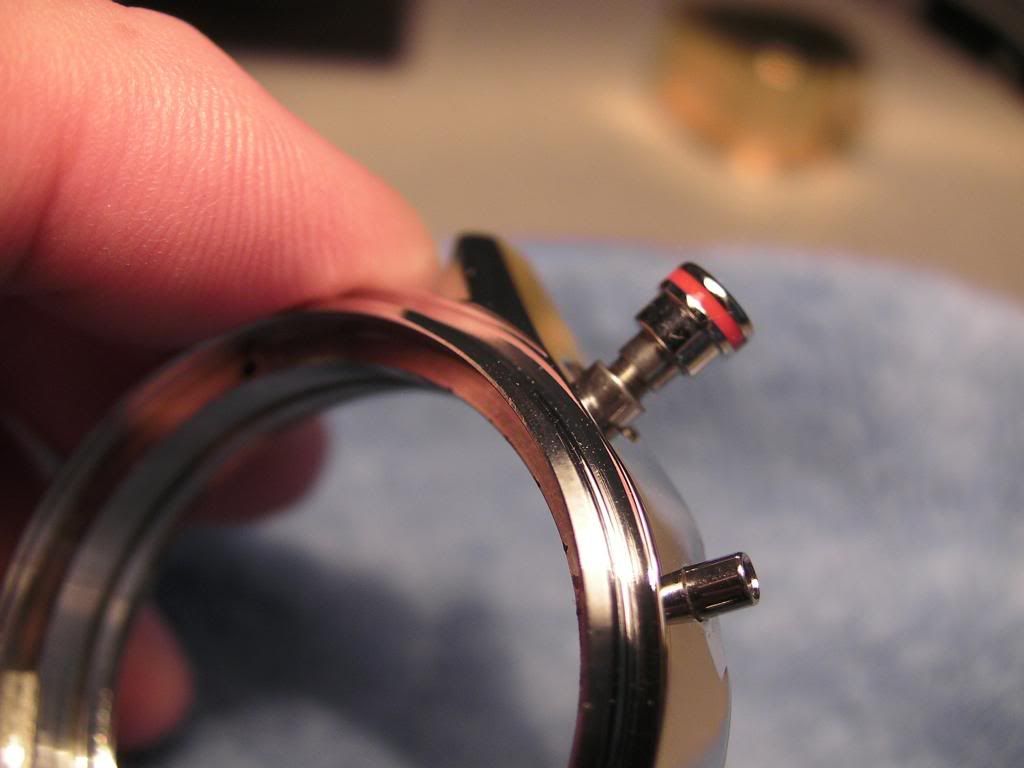
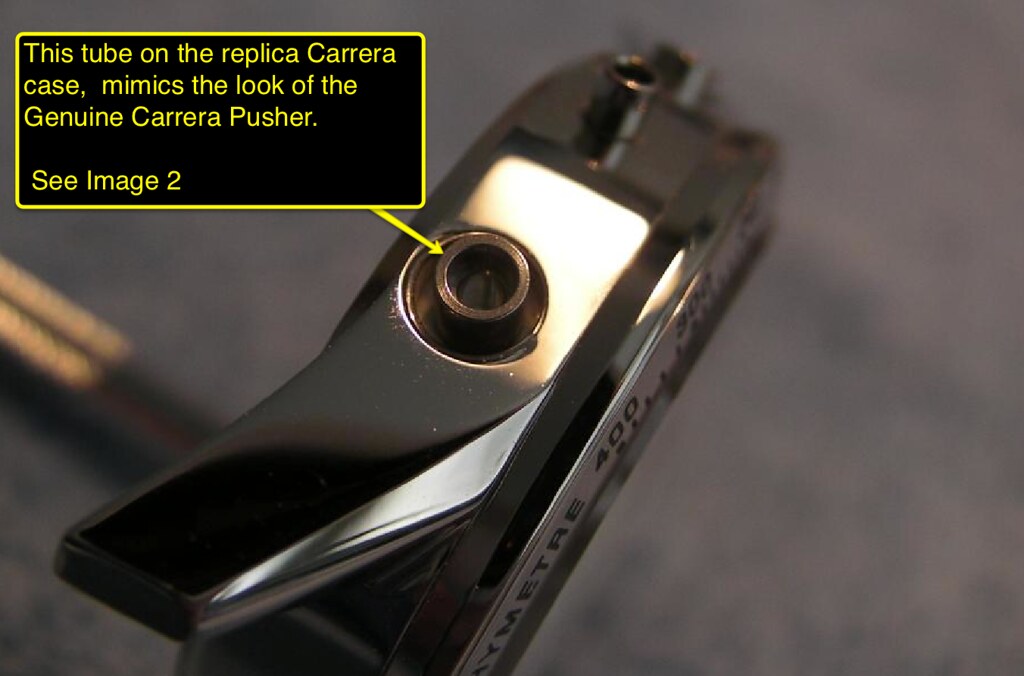
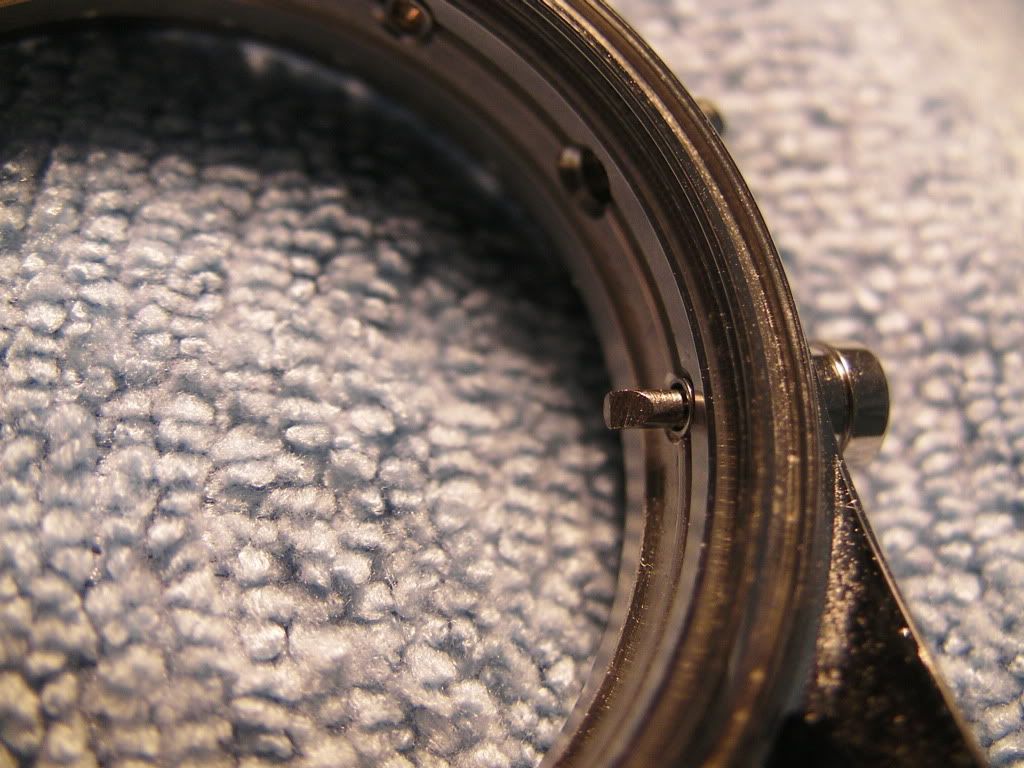
A look inside the area of the crown and pushers...

SANY0699_zps812c55f3.jpg


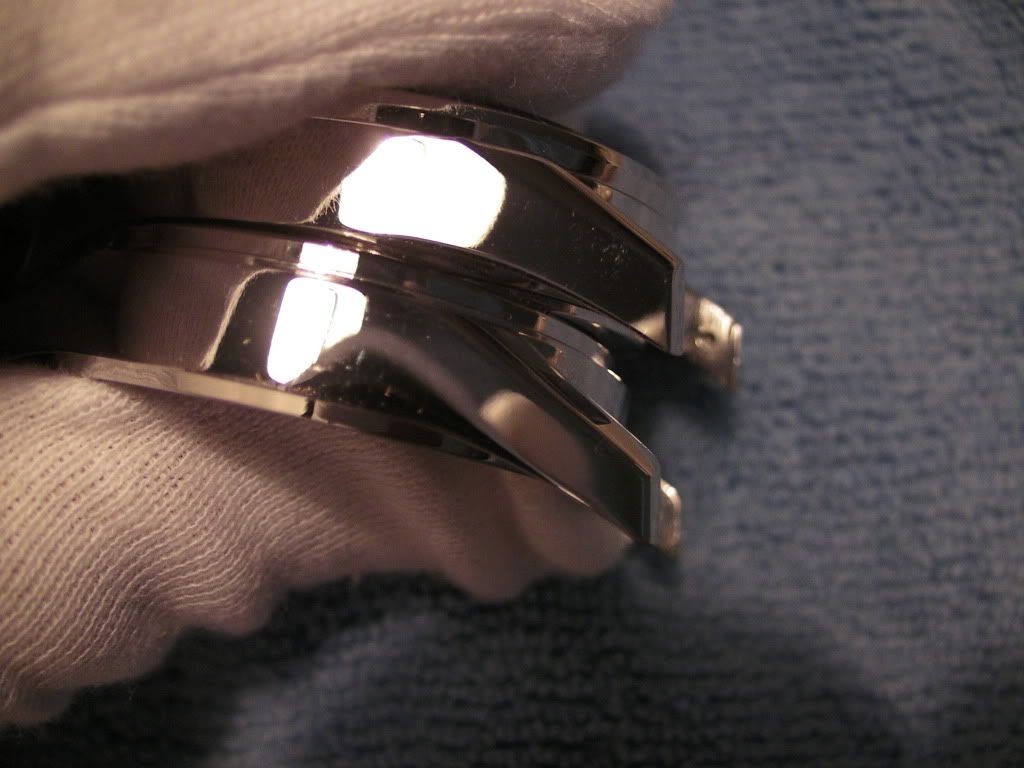
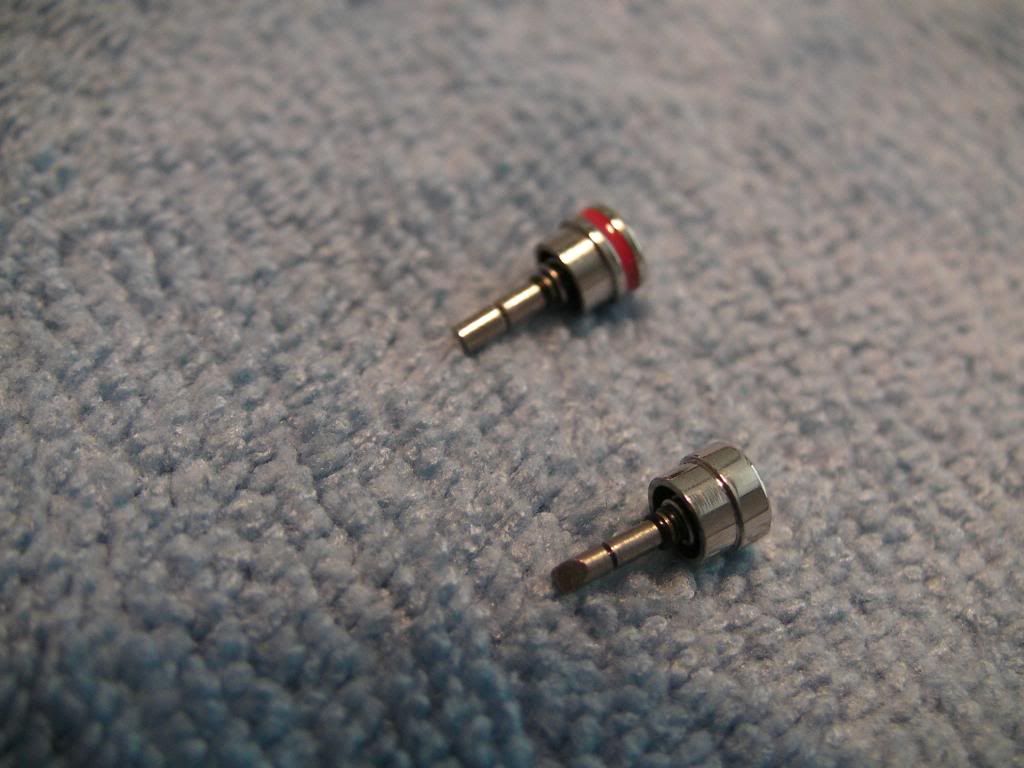
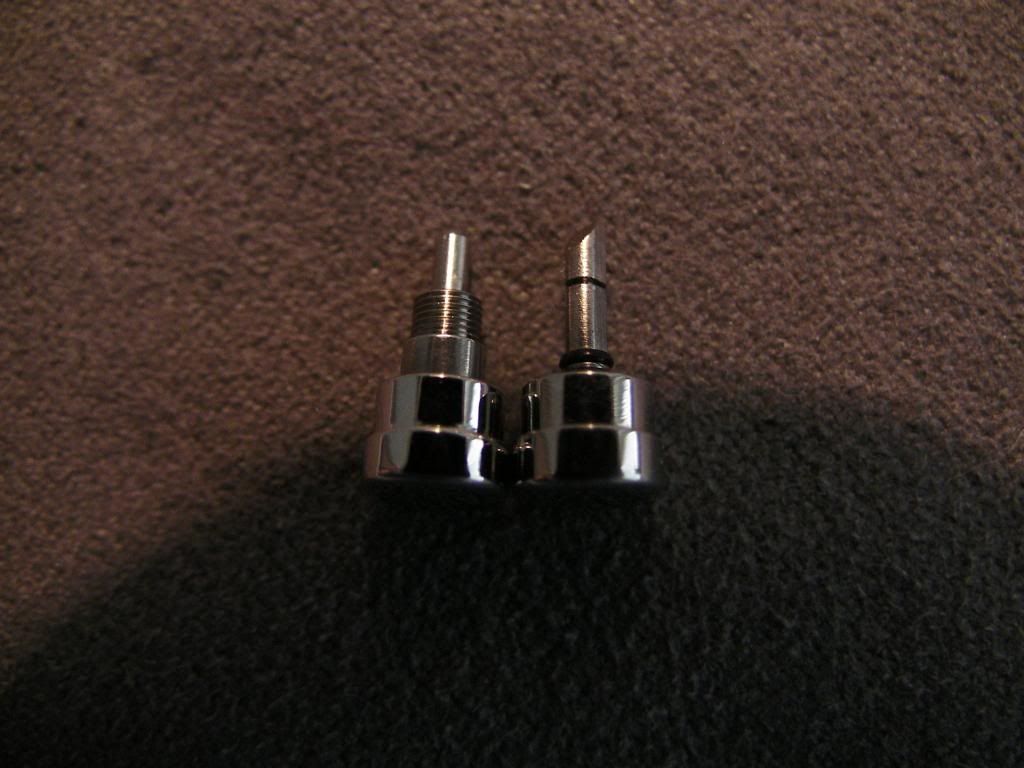
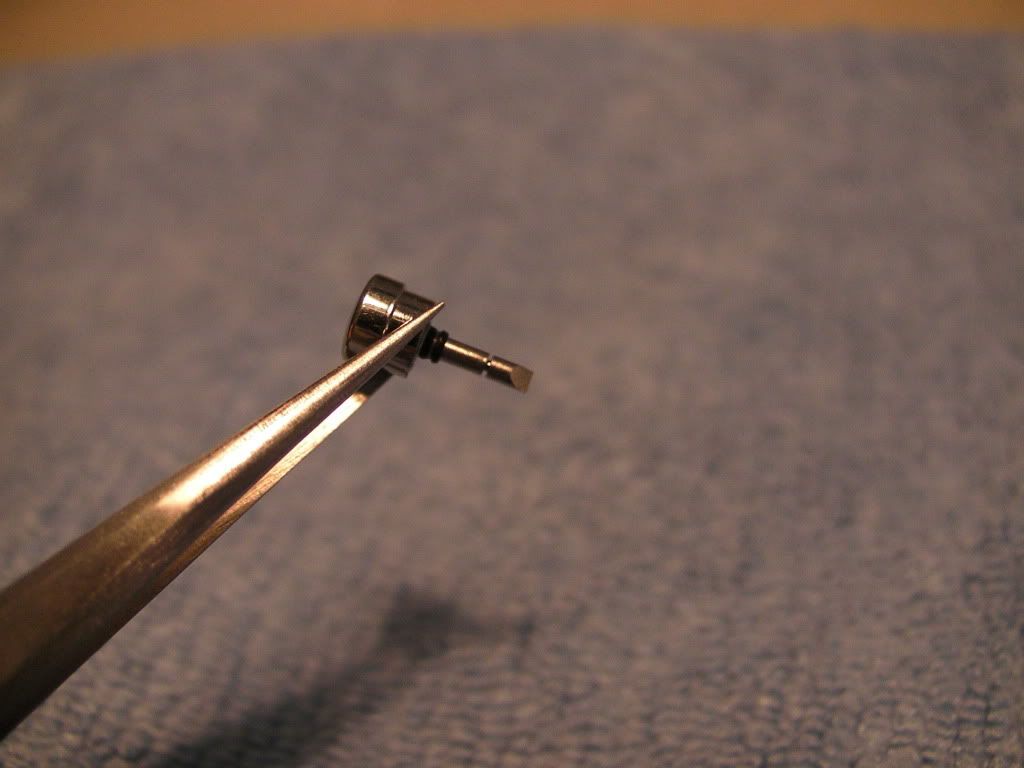
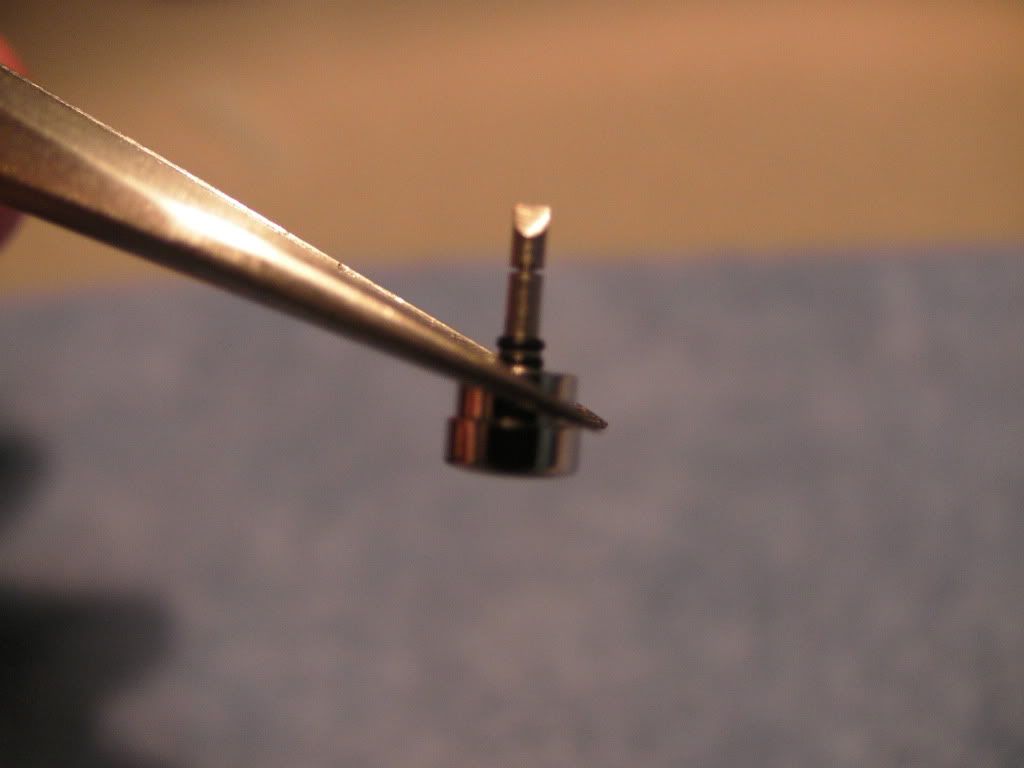
Now lets take a look at these pushers in more detail...

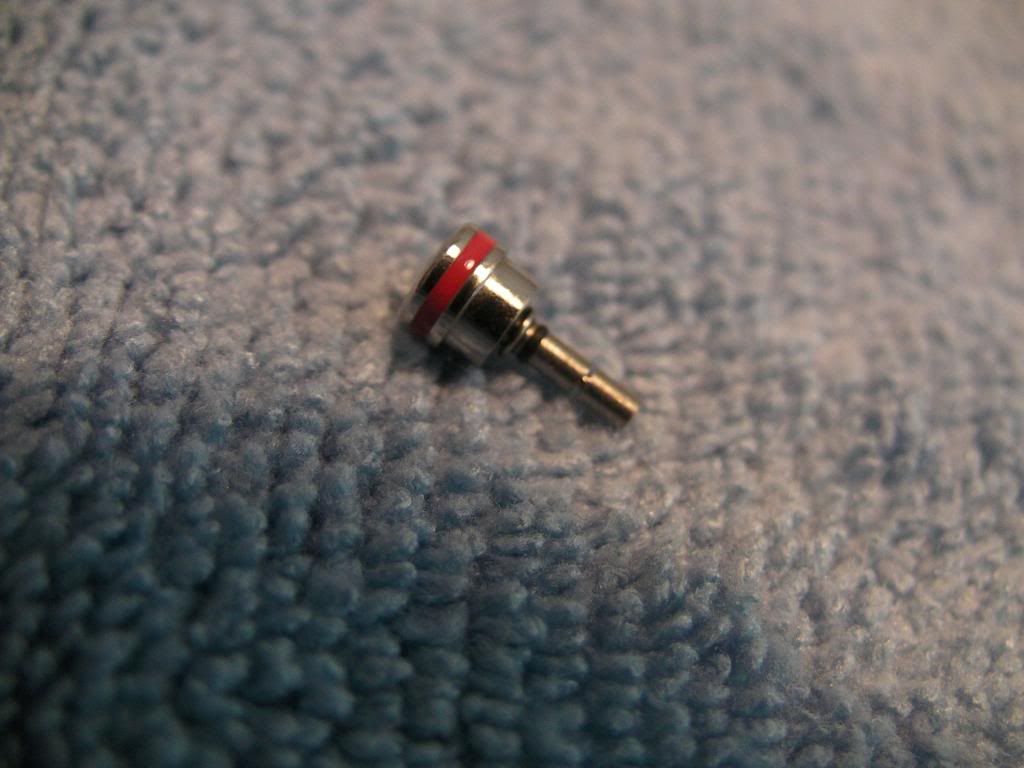
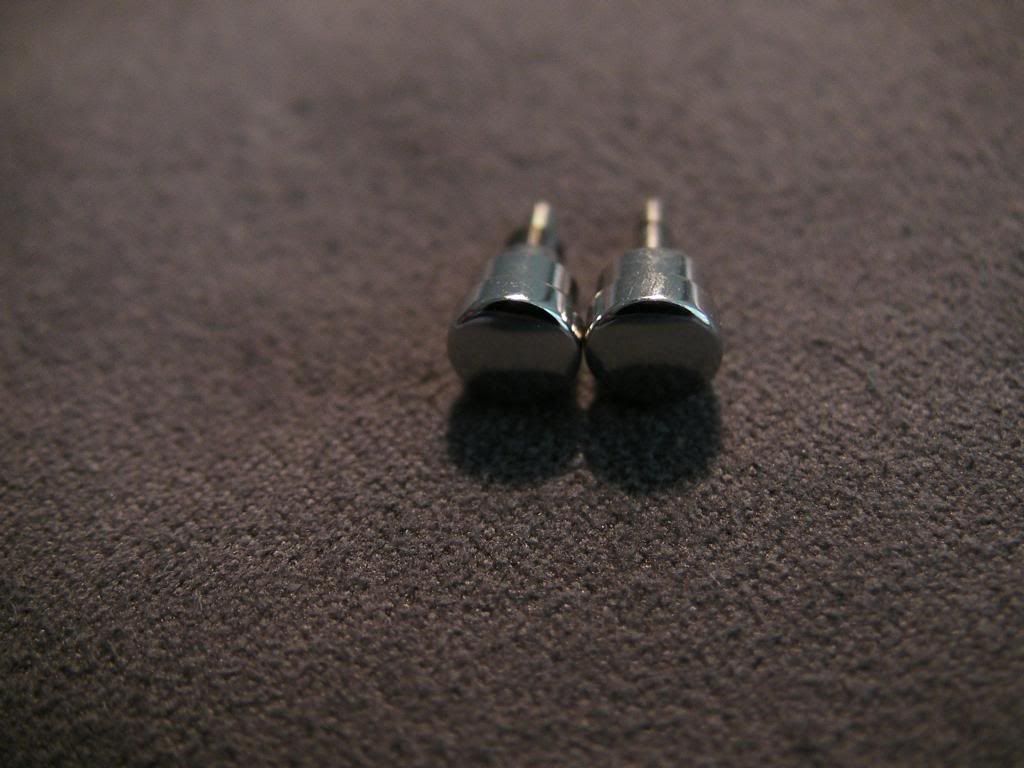
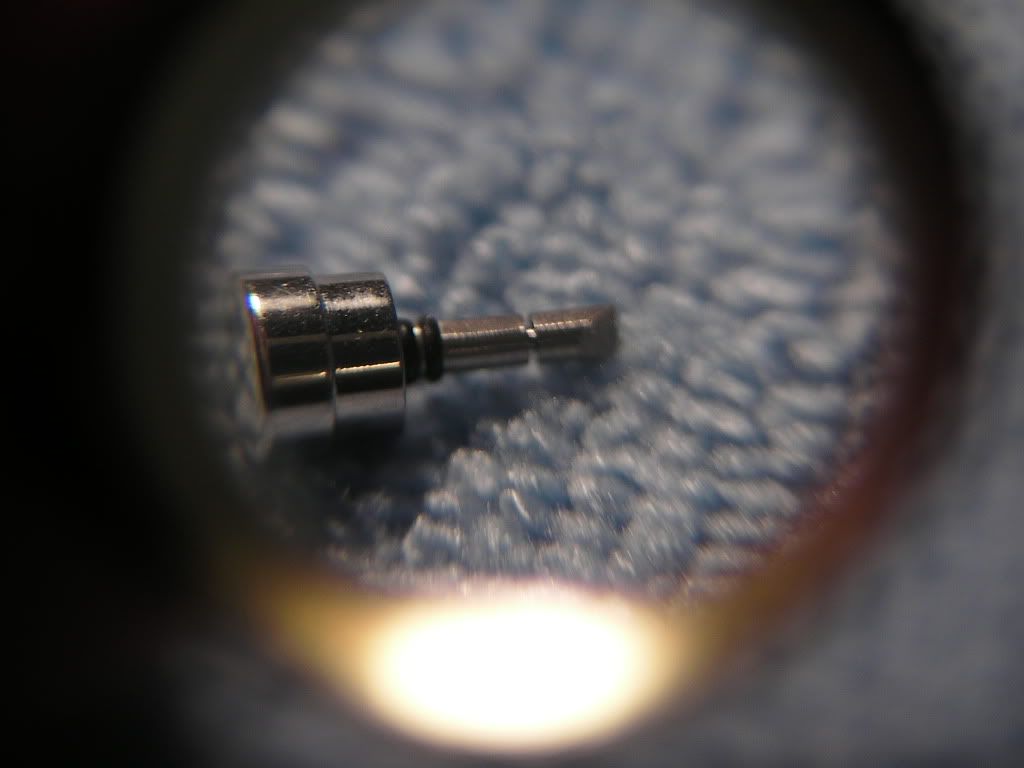
Rep pushers... (notice the small indented ring, this is where the tiny cir clip locks the pusher into place. Also noticed the small black o-ring.

SANY0700_zps32a6a784.jpg


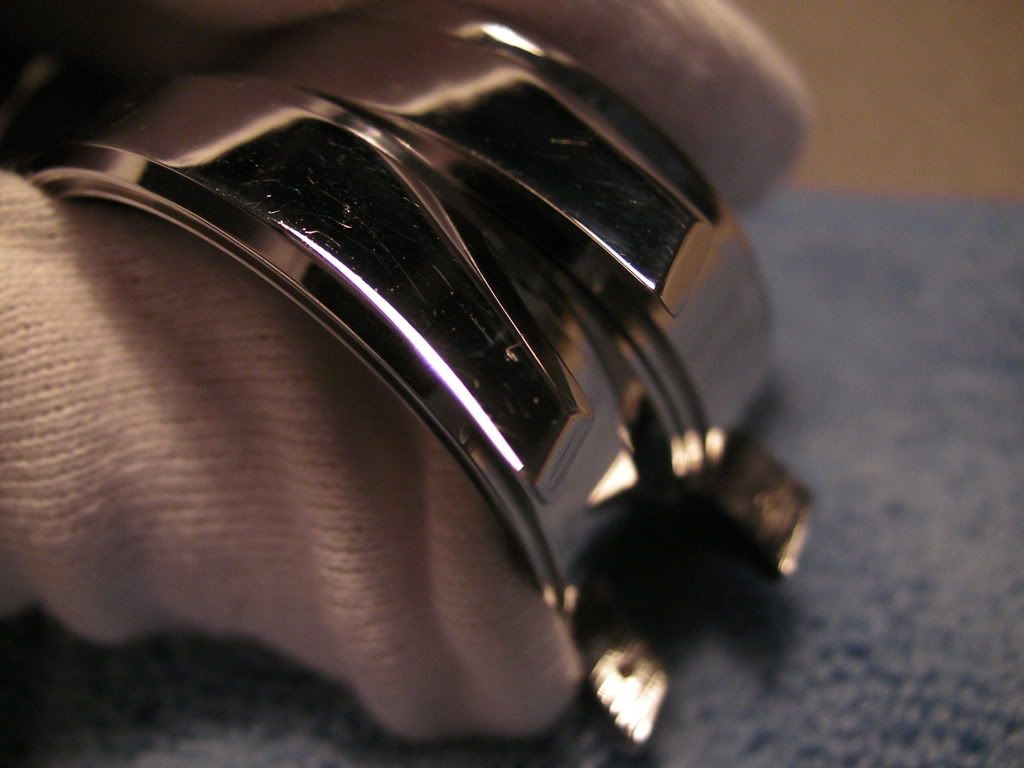
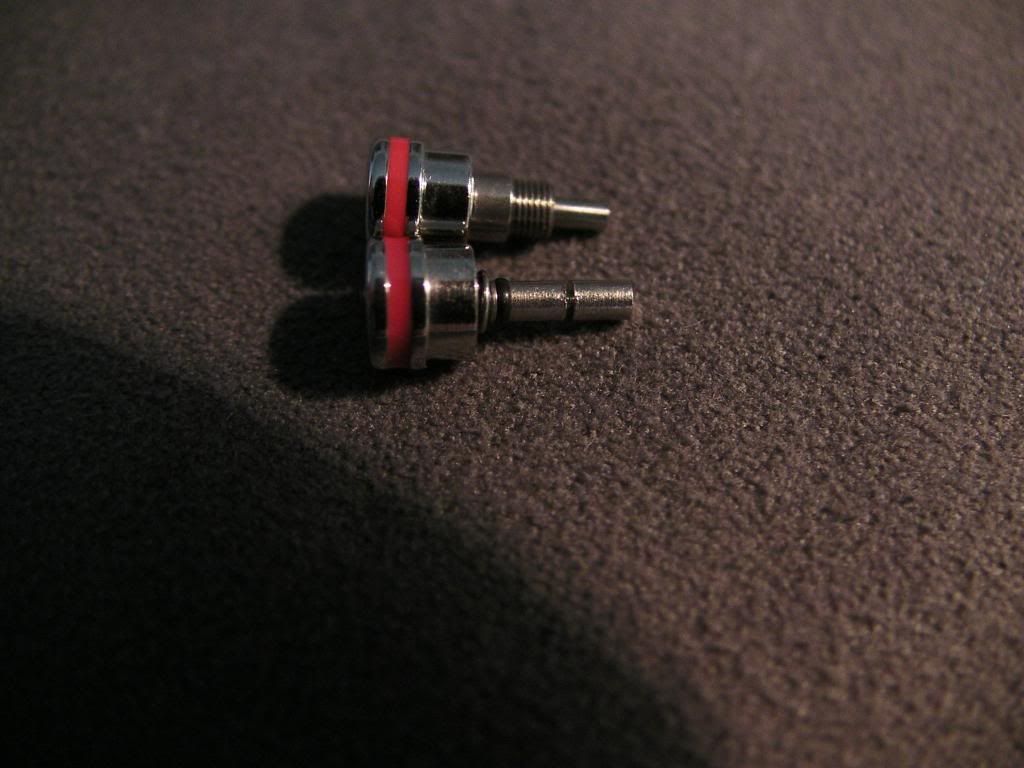
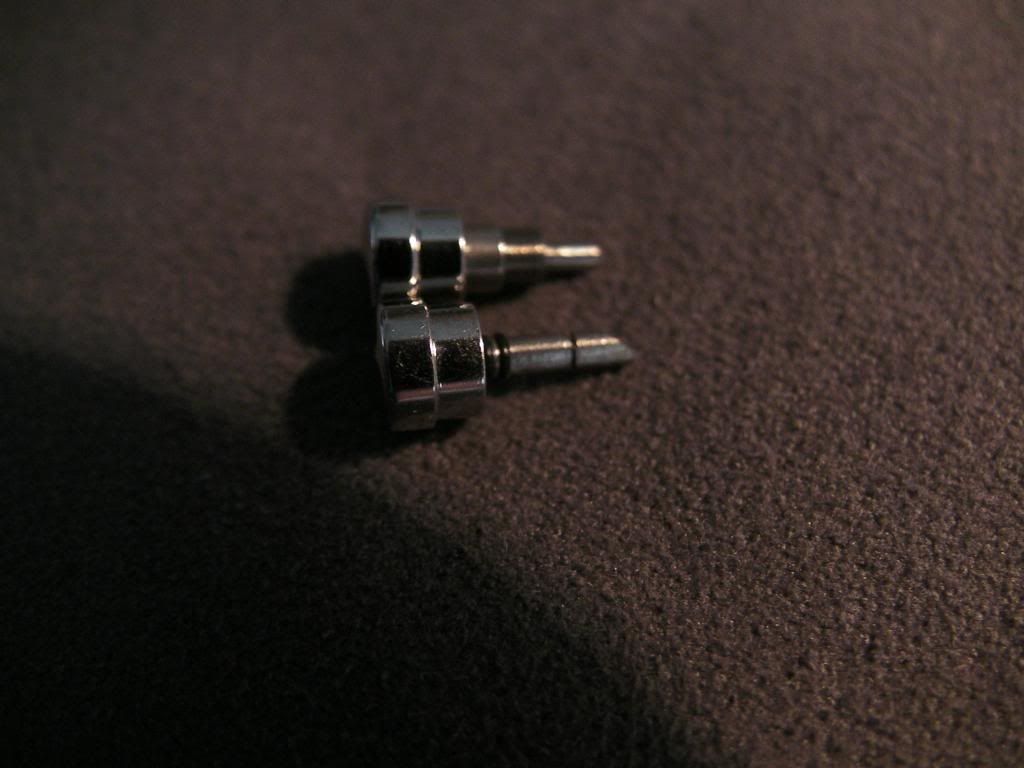
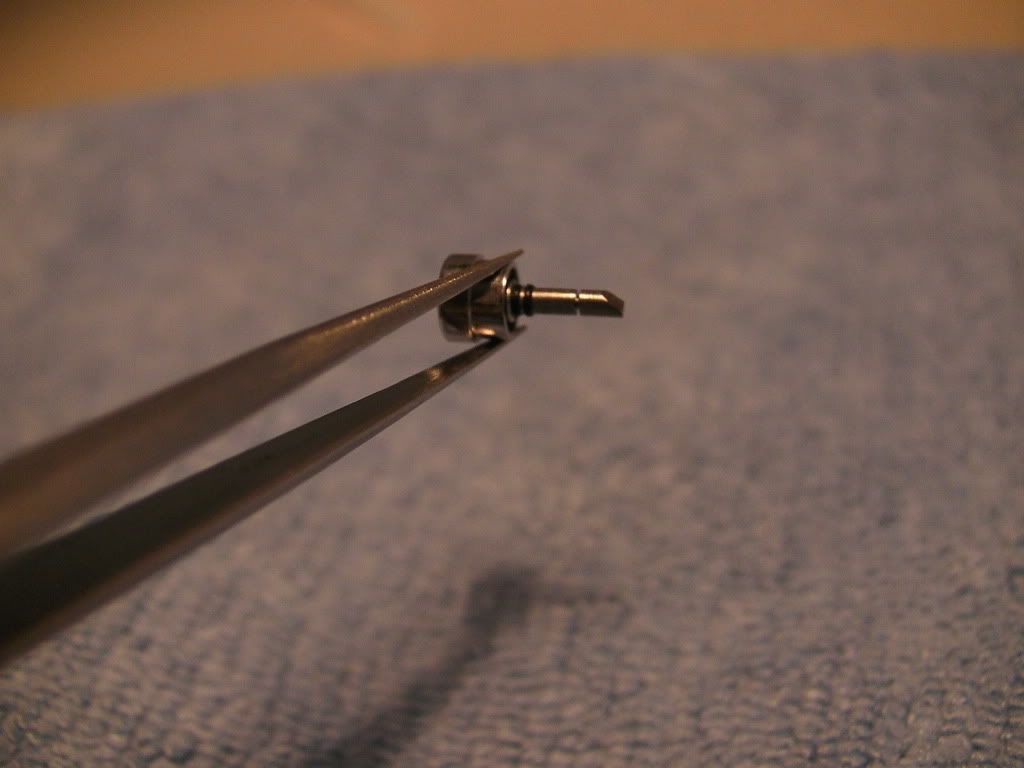
Rep Start/Stop Pusher...
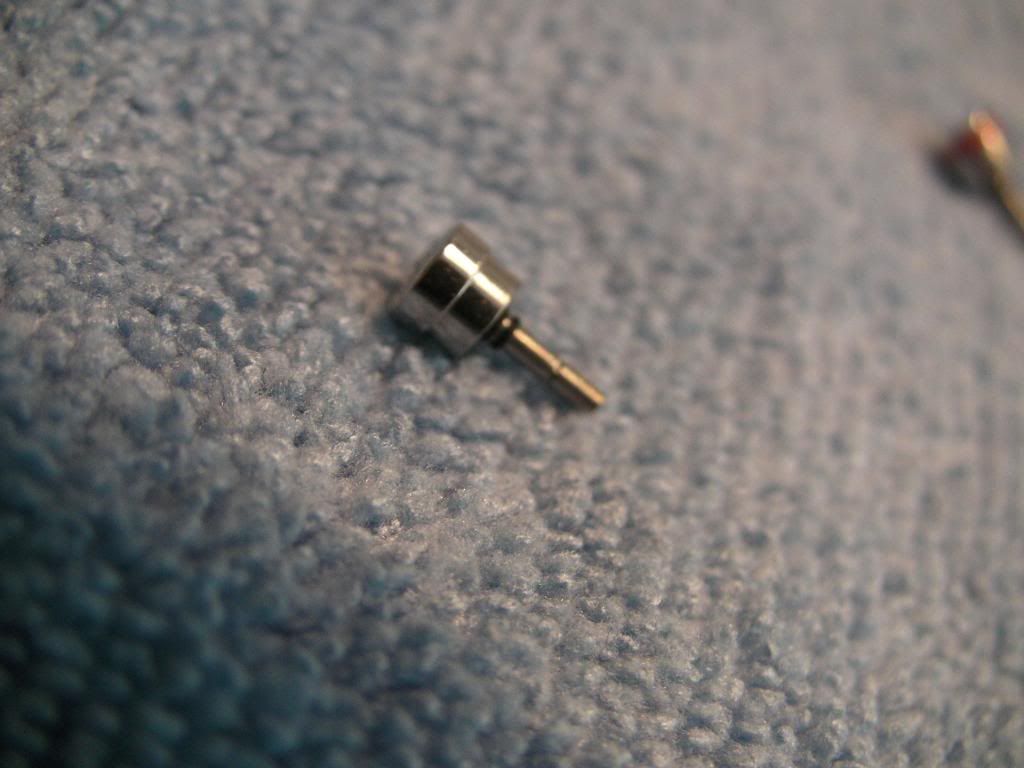
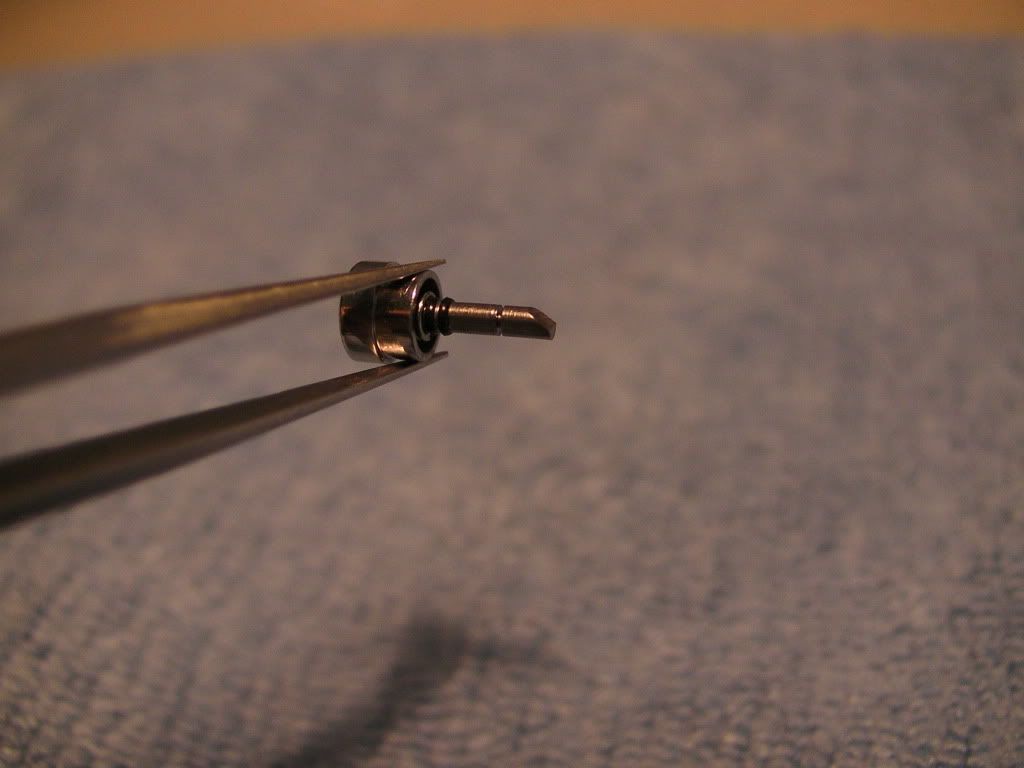
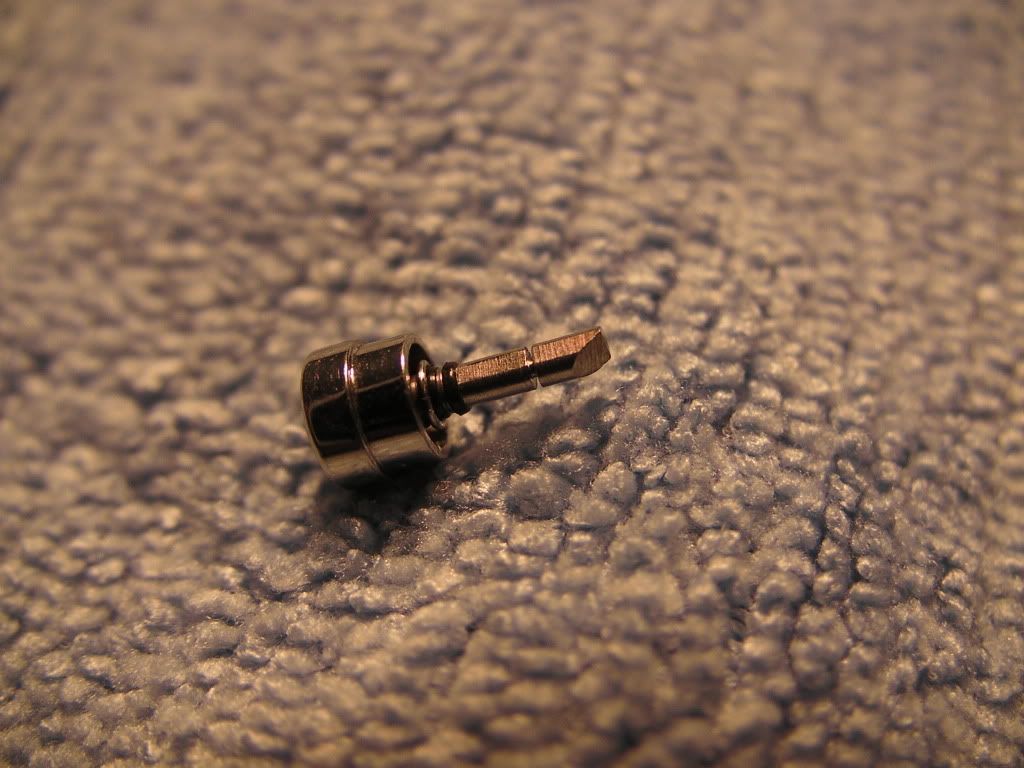
SANY0701_zps3b580c4d.jpg


Rep Reset Pusher...

SANY0702_zps4d1e0f6b.jpg


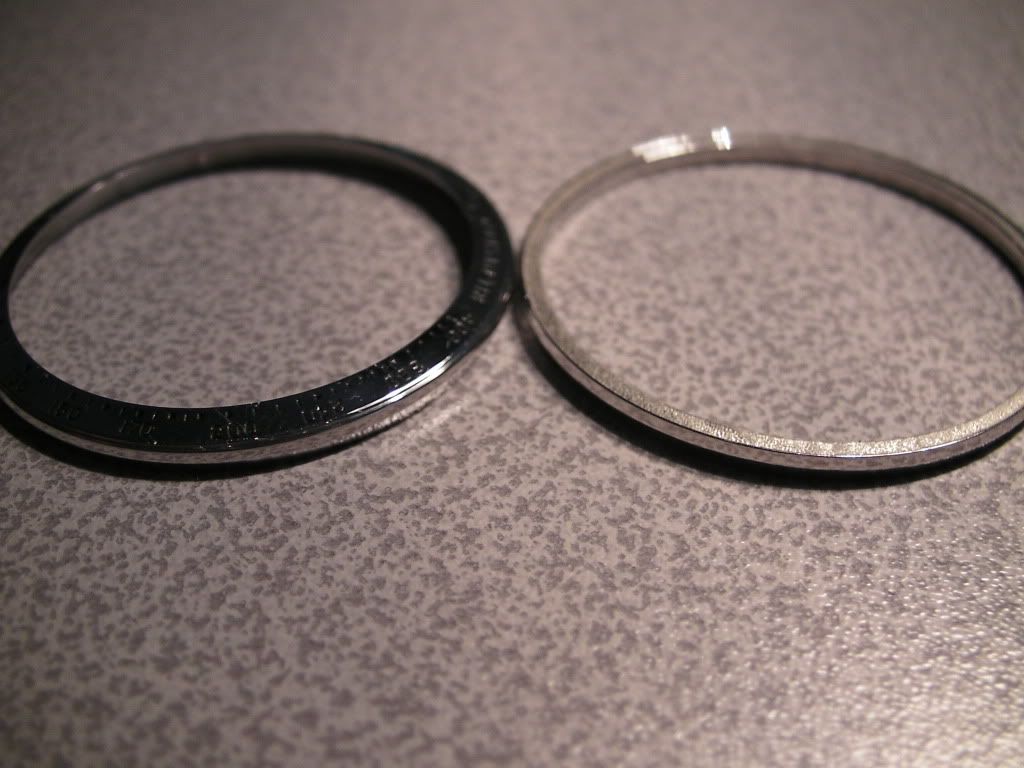
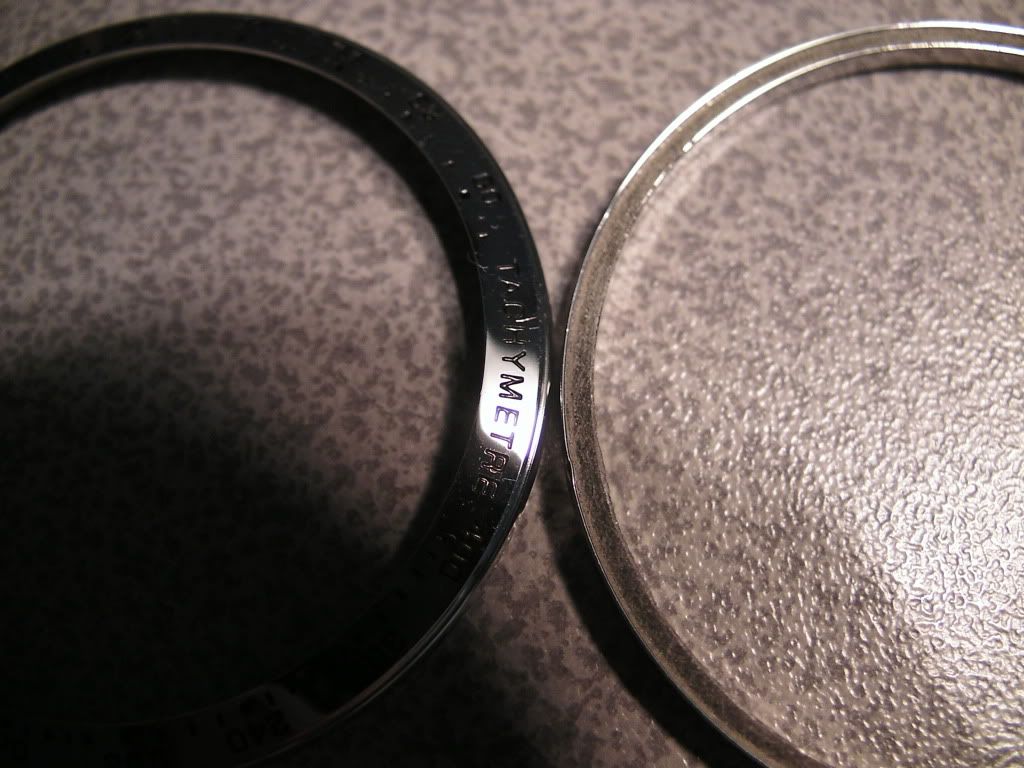
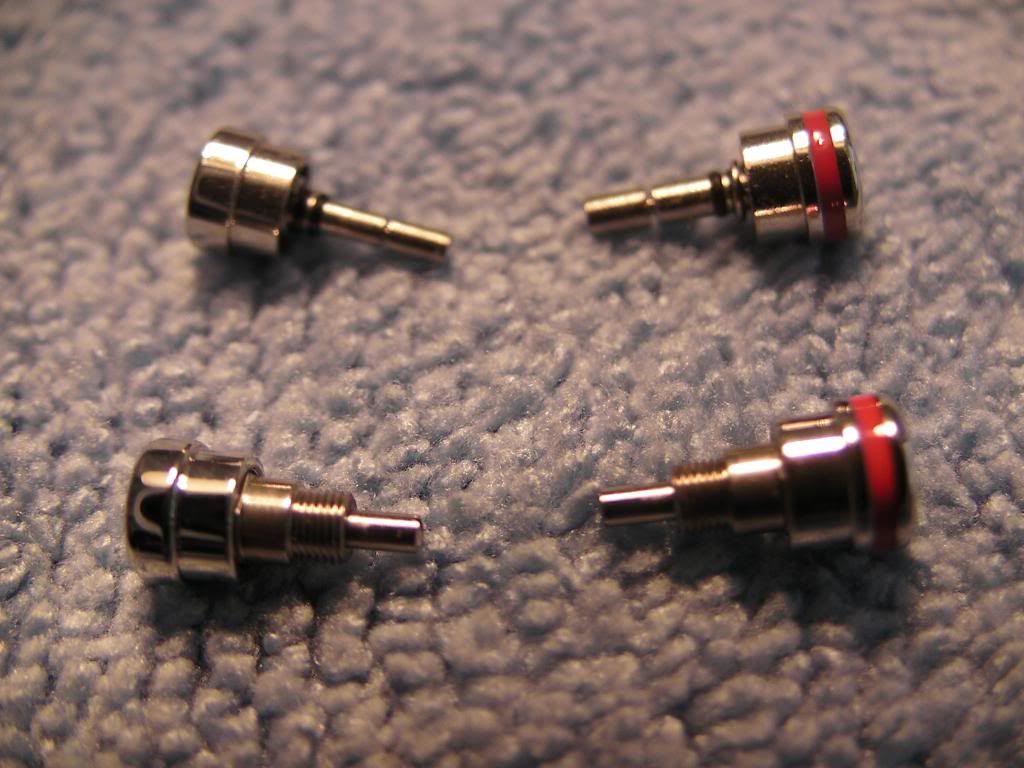
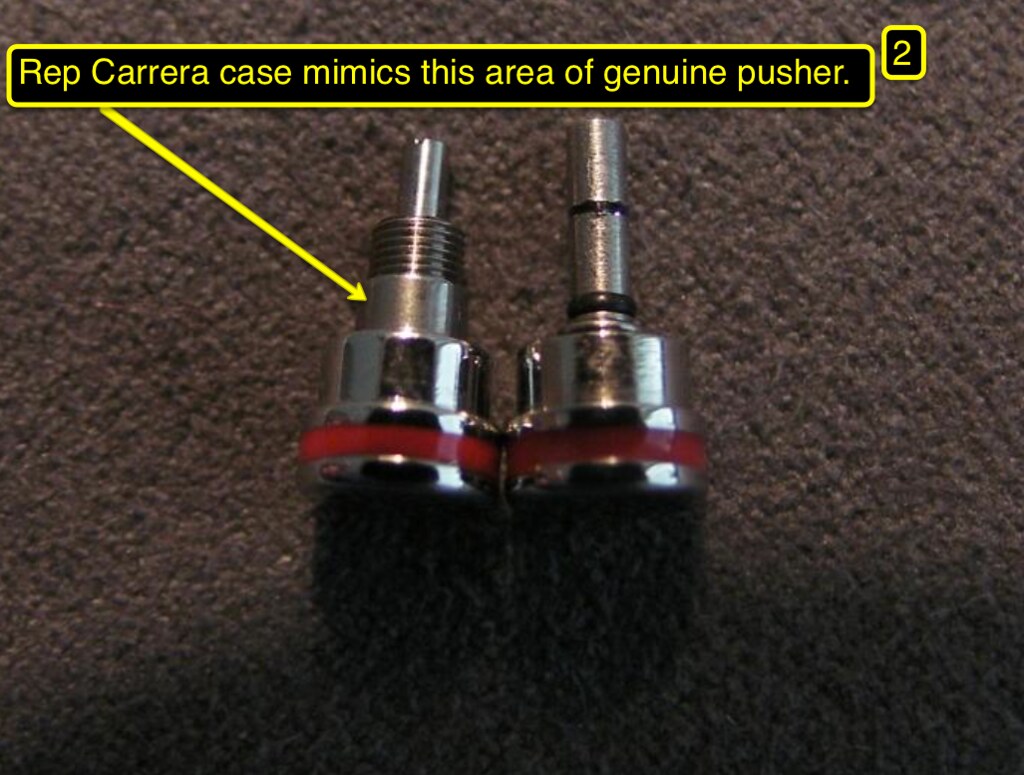
Now onto the comparison photos. The Genuine Pushers are on the bottom...

SANY0703_zps2cfe334b.jpg

SANY0704_zps4e29363d.jpg

SANY0705_zpsf601b7c9.jpg


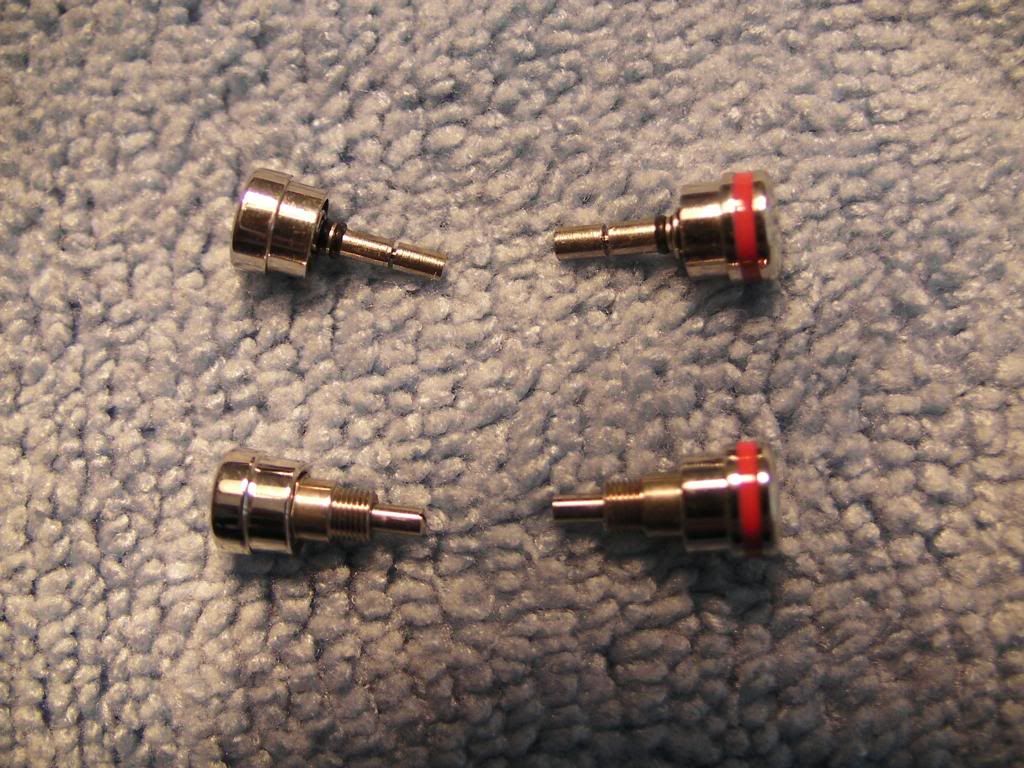
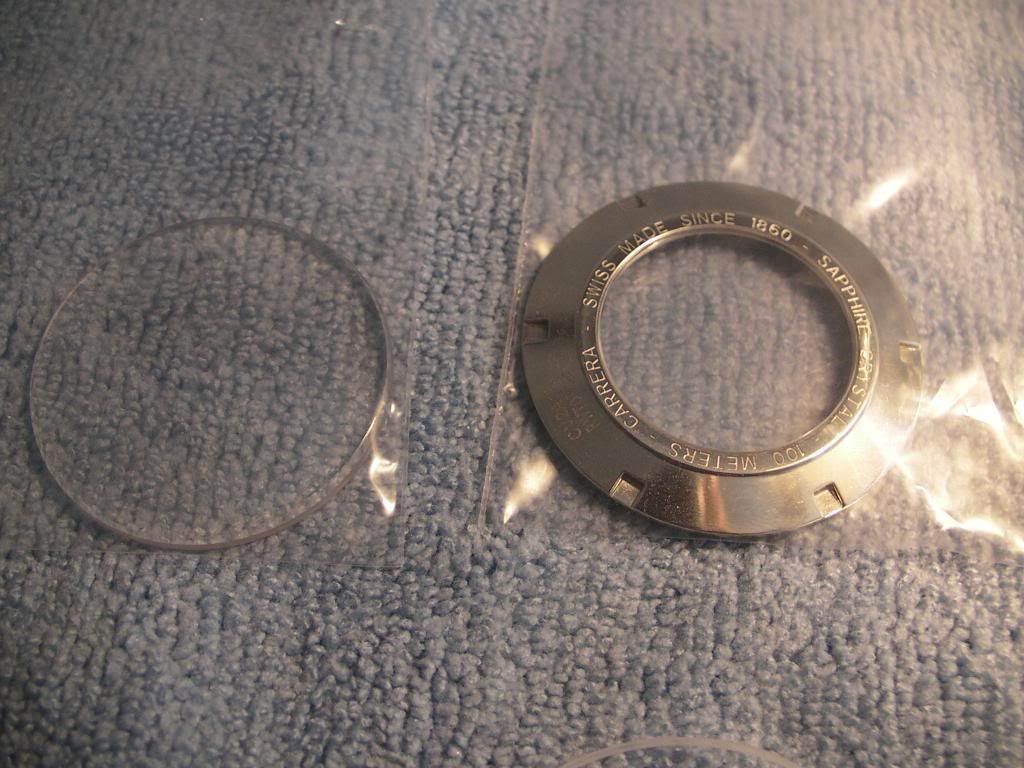
Genuine with the screw thread...

SANY0706_zpsa2fc1cc4.jpg

SANY0707_zpse08d46db.jpg

SANY0708_zps6562fc81.jpg

SANY0709_zps688ef48e.jpg


Genuine, Left...

SANY0710_zpsbfc42324.jpg


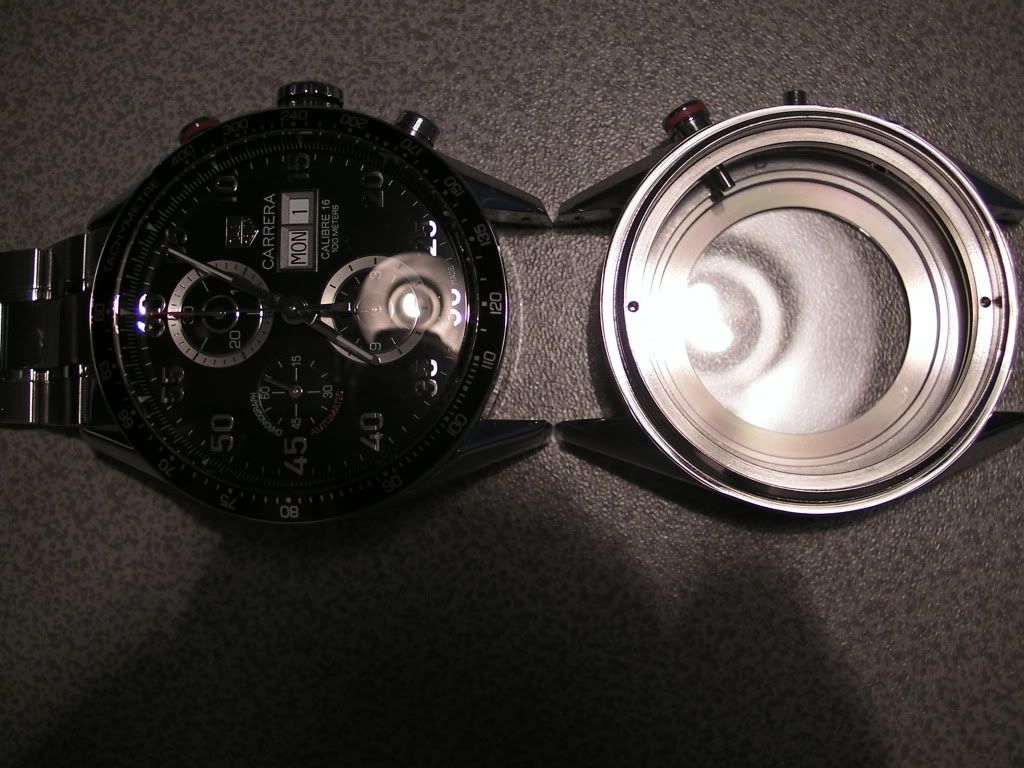
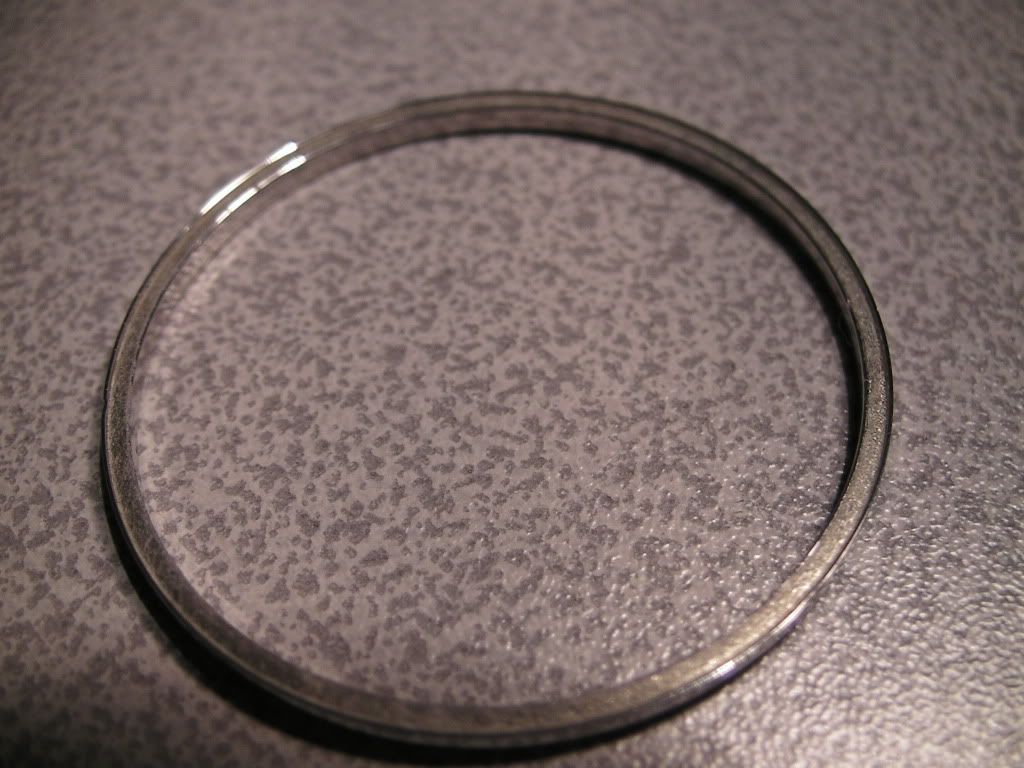
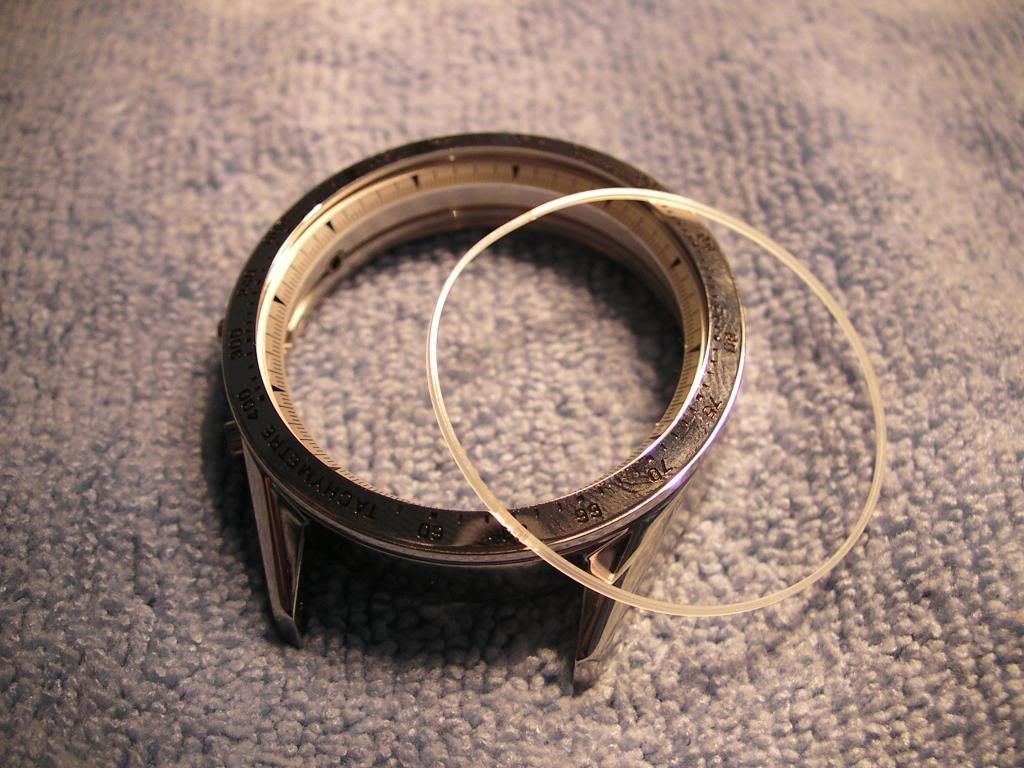
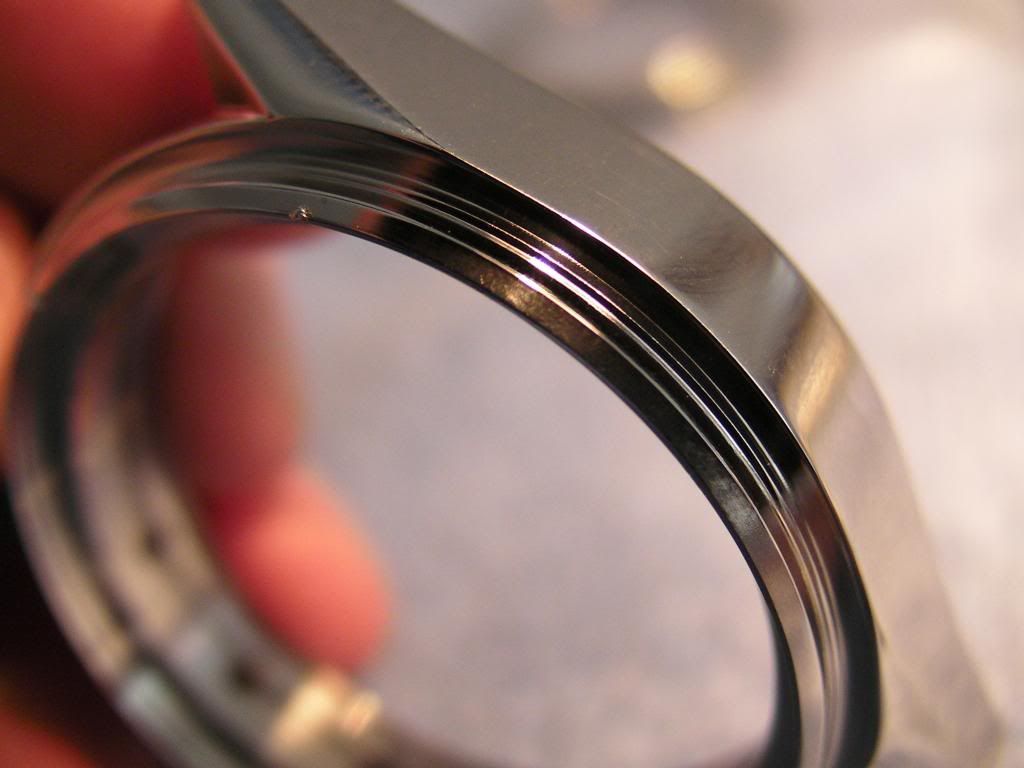
Next, I popped out the crystal...

SANY0711_zps059f2709.jpg


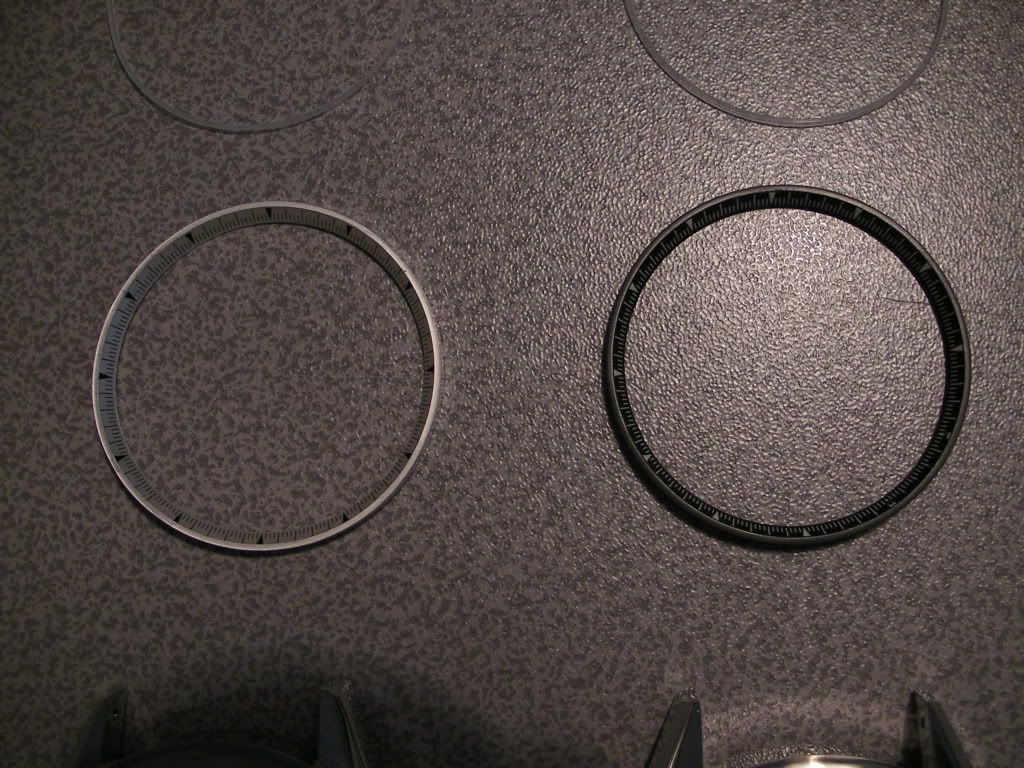
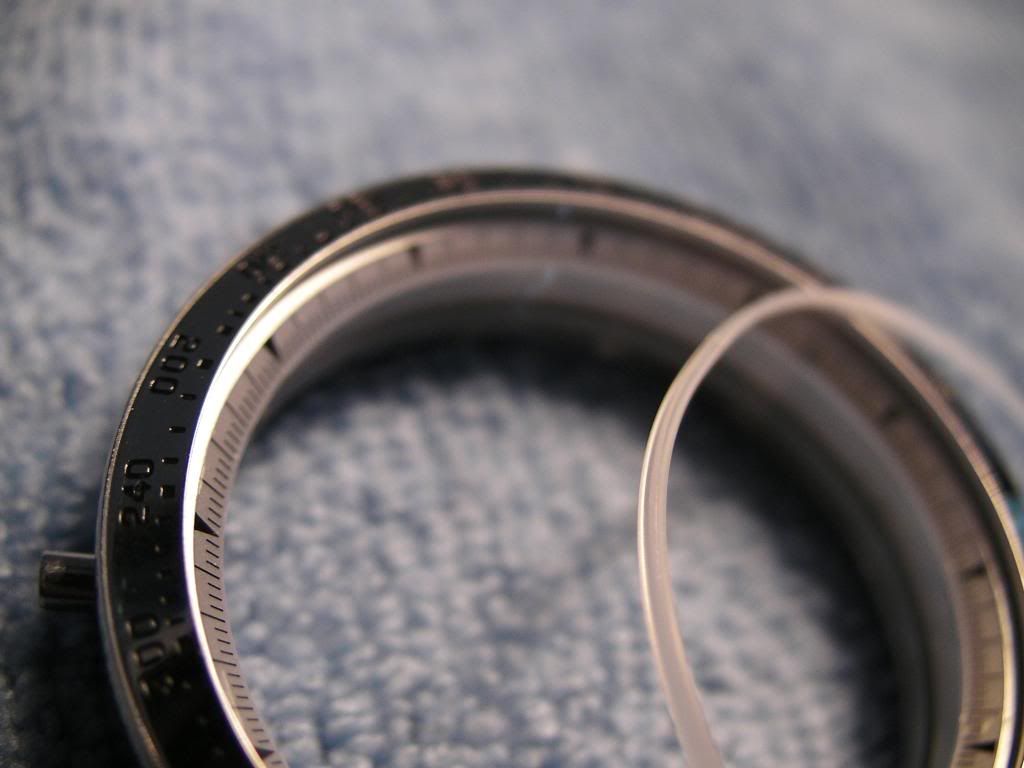
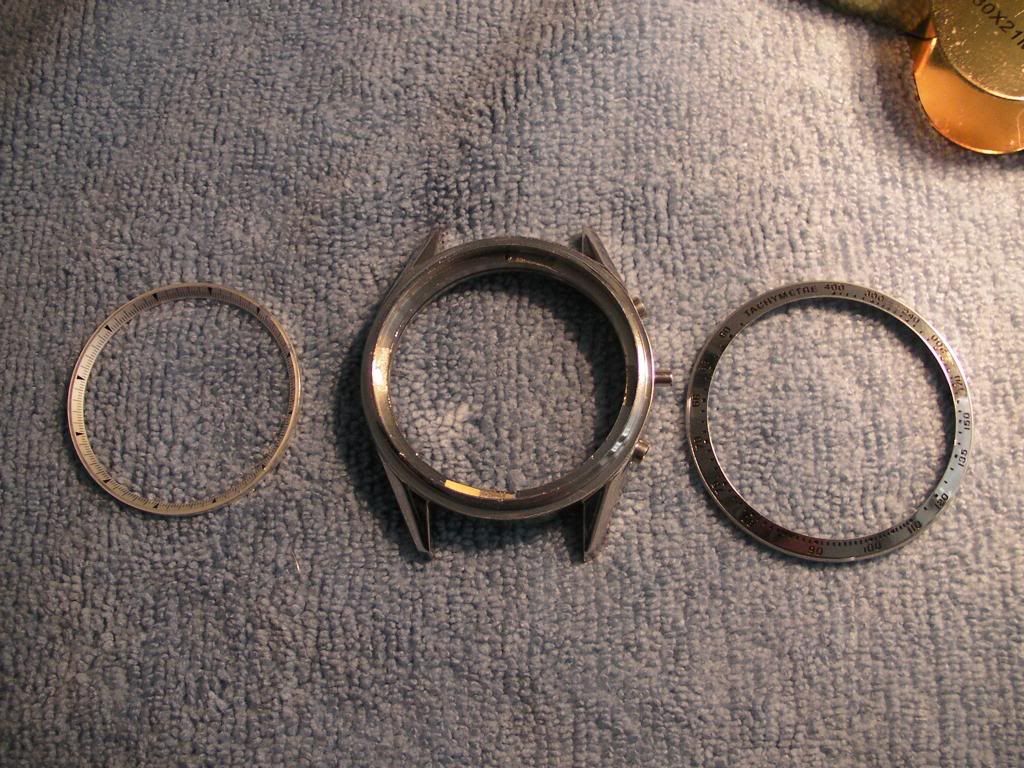
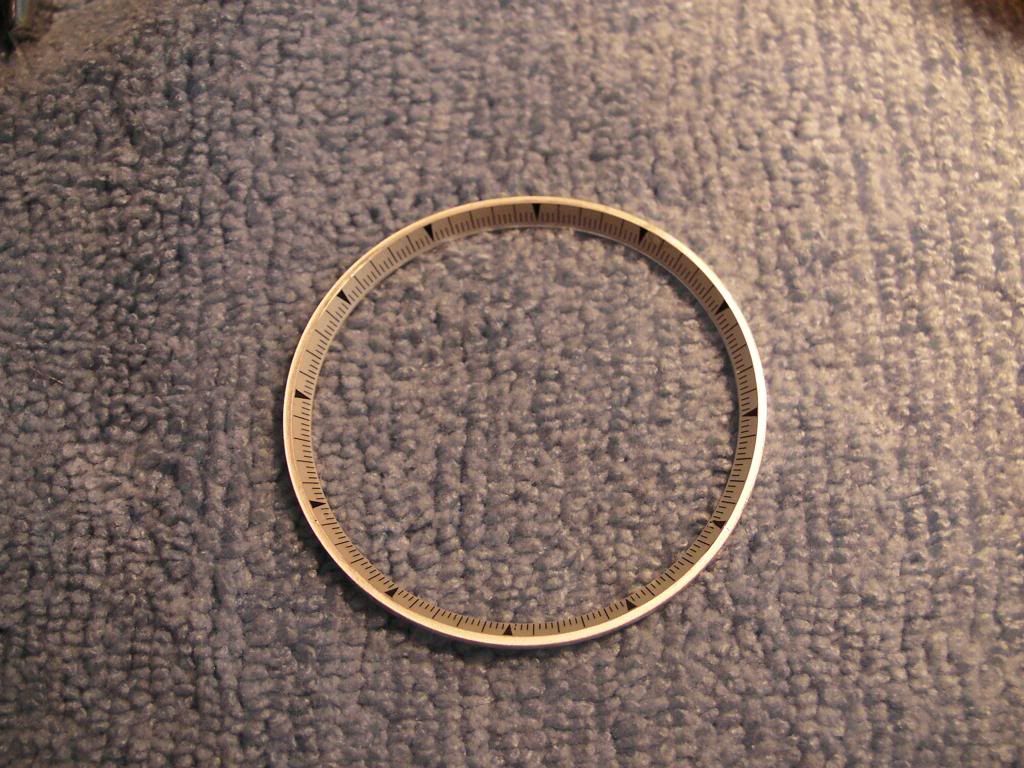
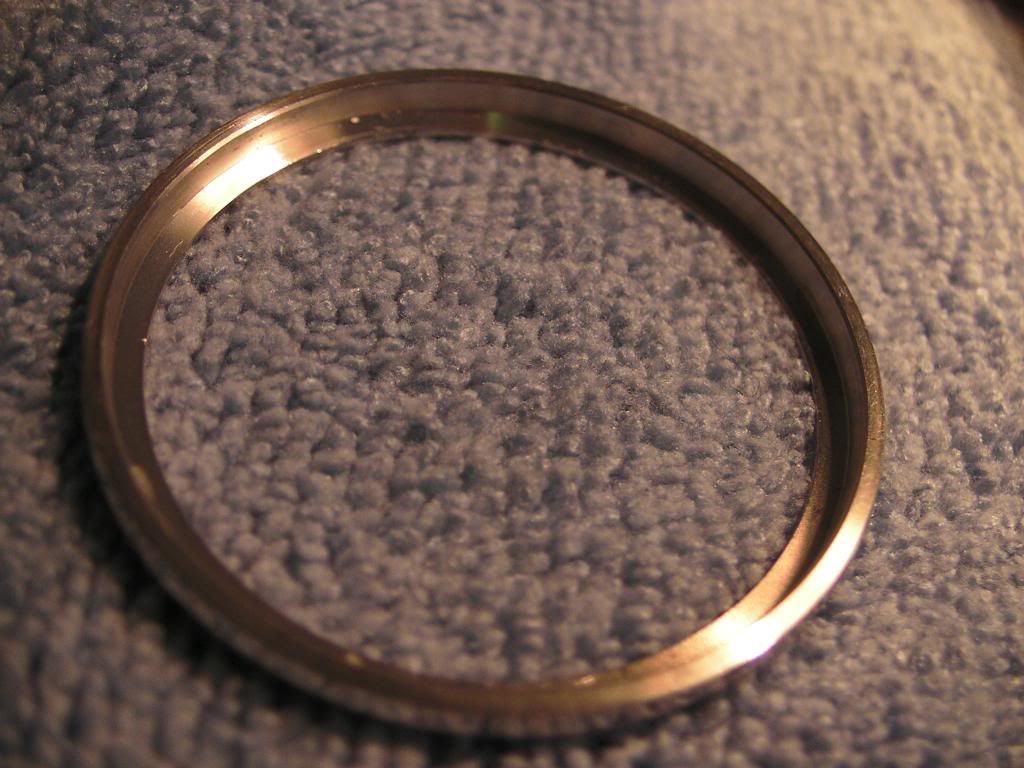
Closer look at the crystal gasket, and chapter ring...

SANY0712_zps2ad8ef16.jpg

SANY0713_zps441e200c.jpg

SANY0714_zpsc52c5a3e.jpg


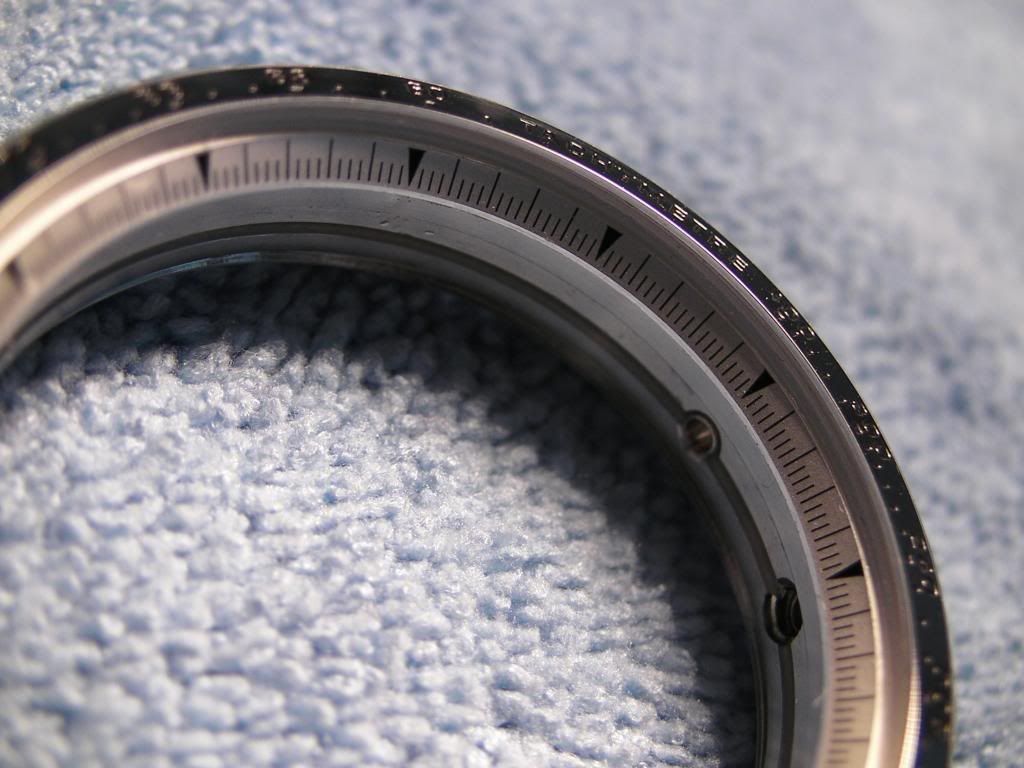
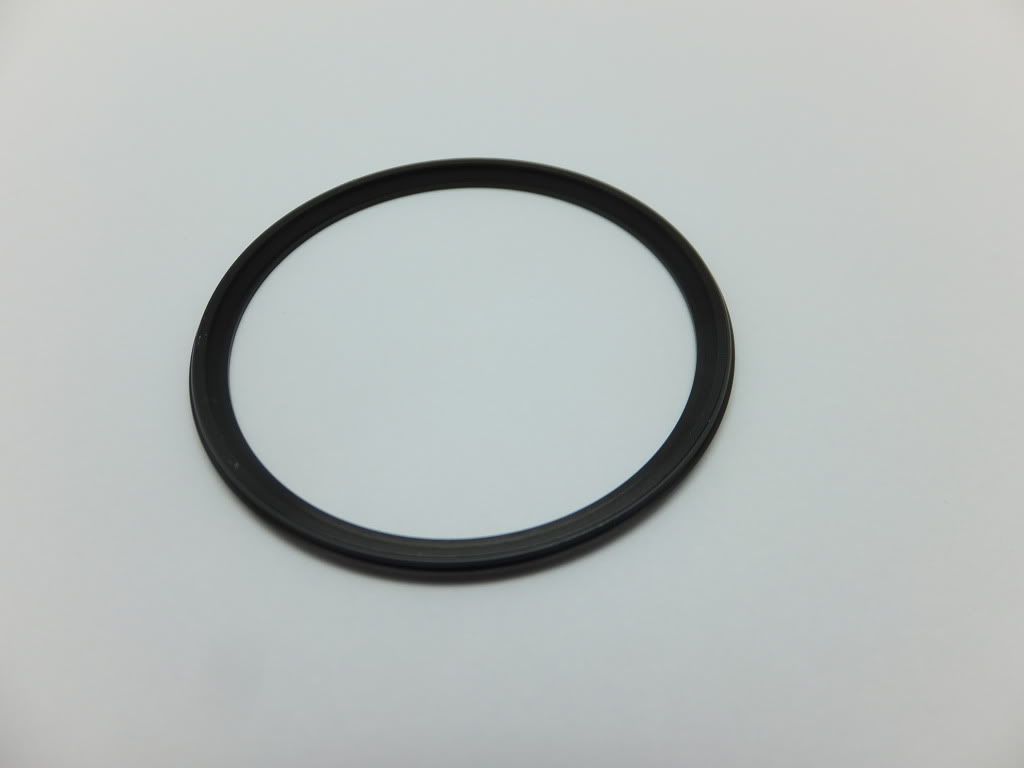
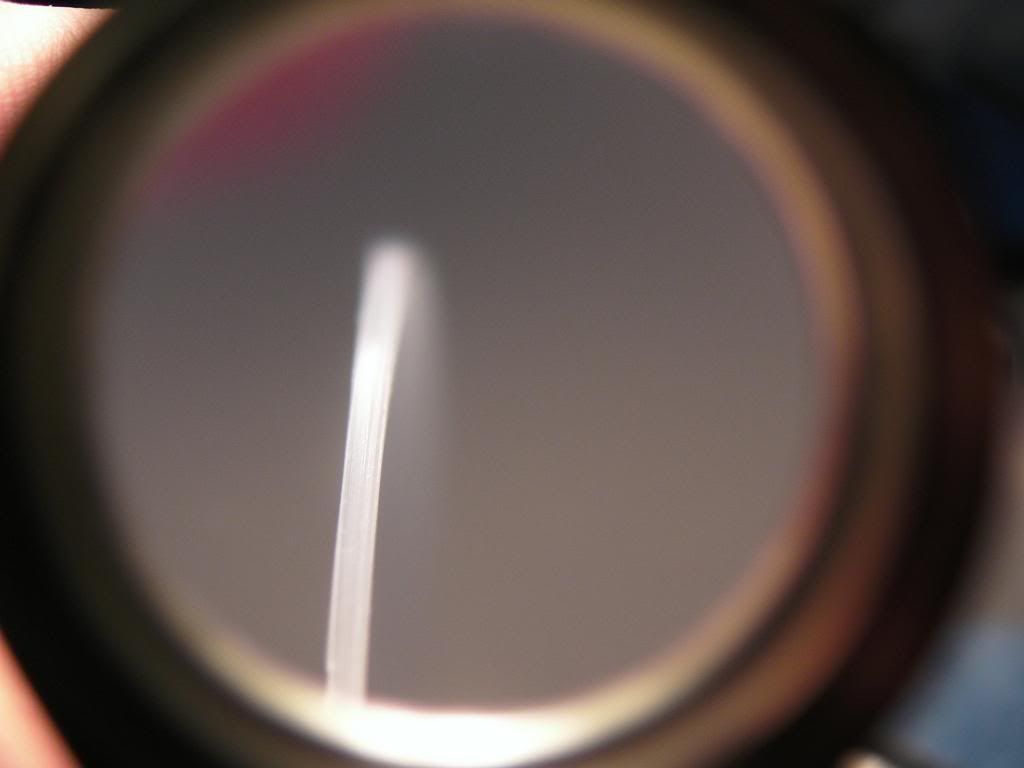
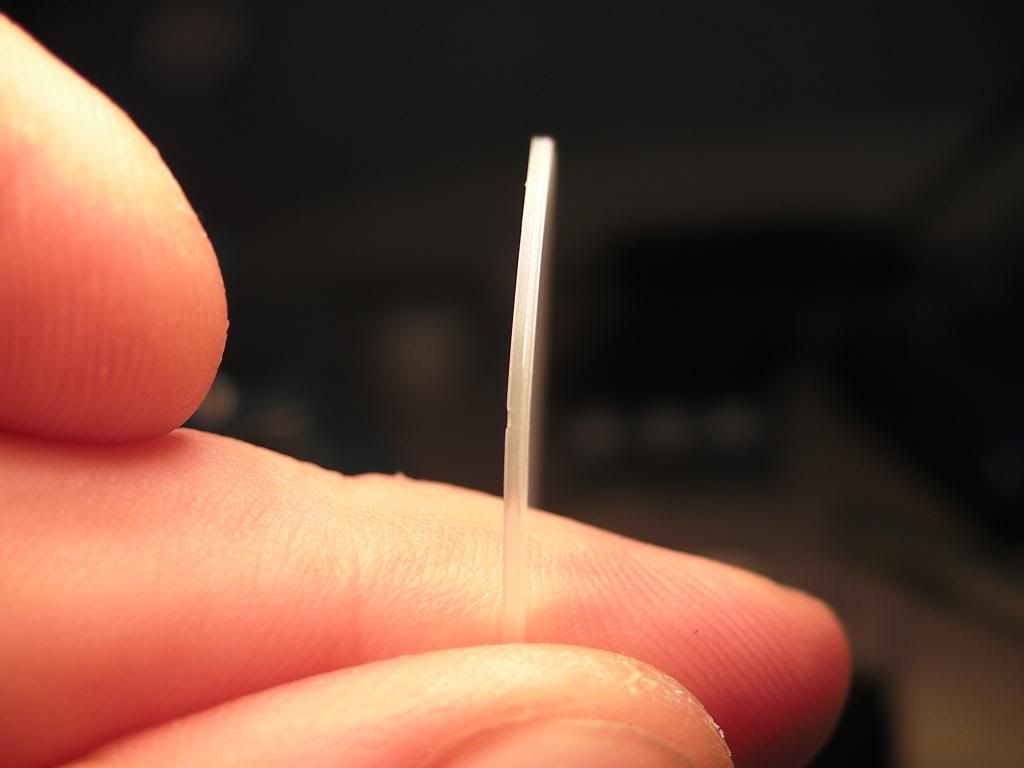
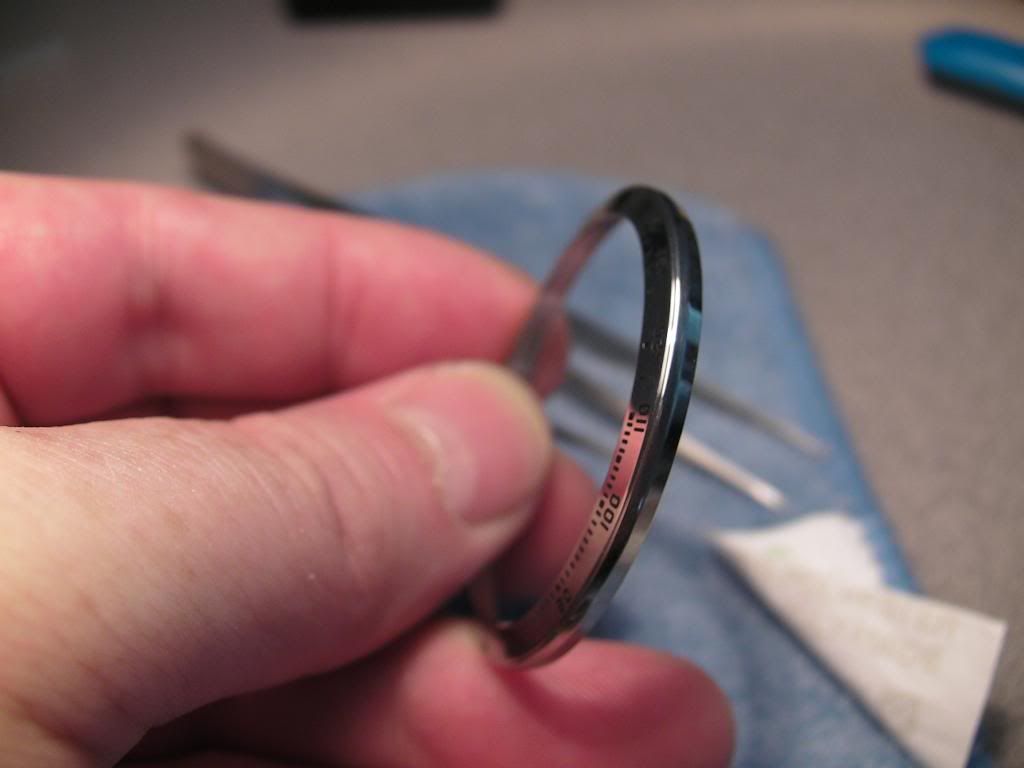
Removed the crystal gasket, and took some reference photos on which way its fitted...

SANY0715_zps0f94bb29.jpg

SANY0716_zps93f70ed6.jpg

SANY0718_zps7d47fcd3.jpg

SANY0719_zps50feb5fa.jpg


Then I set about removing the bezel/insert. This spare case is the chromed bezel insert model, not the black bezel insert like my franken. I am unsure if the construction of my franken bezel is the same as this one, but looking closely at this thing, the bezel insert, and bezel are one piece of machined stainless steel..

SANY0720_zpsbc979ab8.jpg


Also removed the chapter ring with the bezel as the chapter ring sits under the bezel...

SANY0721_zpsac2427f7.jpg


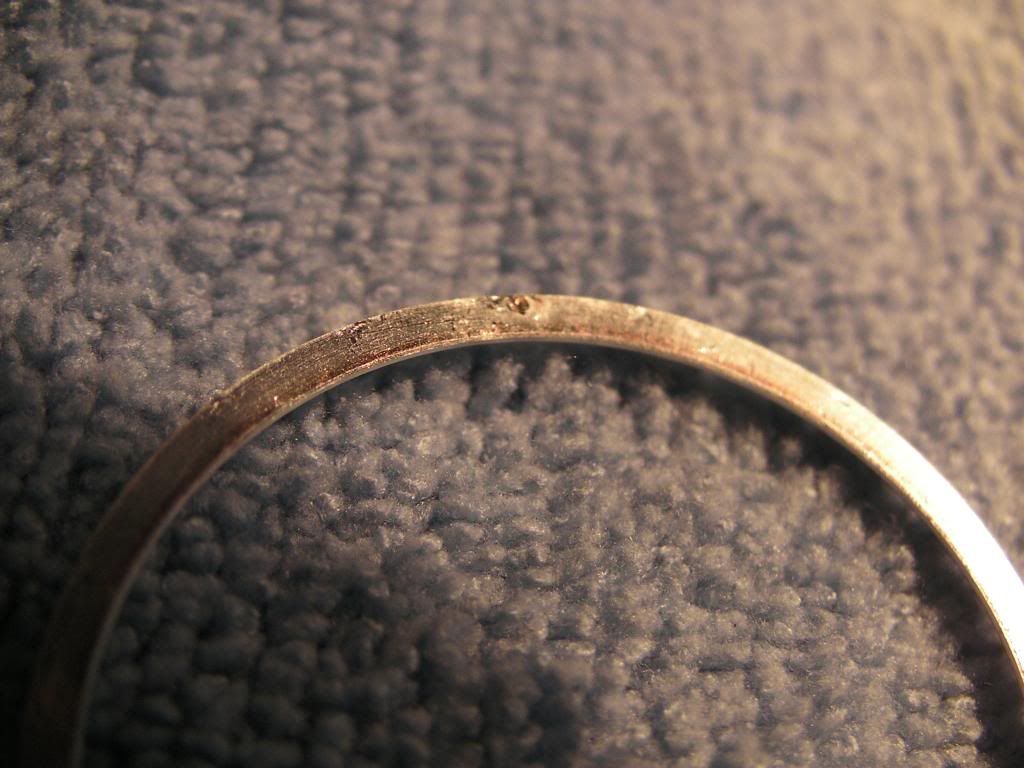
The chapter ring was held in place with 4 x sticky strips. I have also noticed some marking to the case in this area, which looks like its possibly had some correction work done, and marked in the process..

SANY0722_zps82626643.jpg


The small hole you see on the edge to the left of the sticky strip is to home the chapter ring centre.
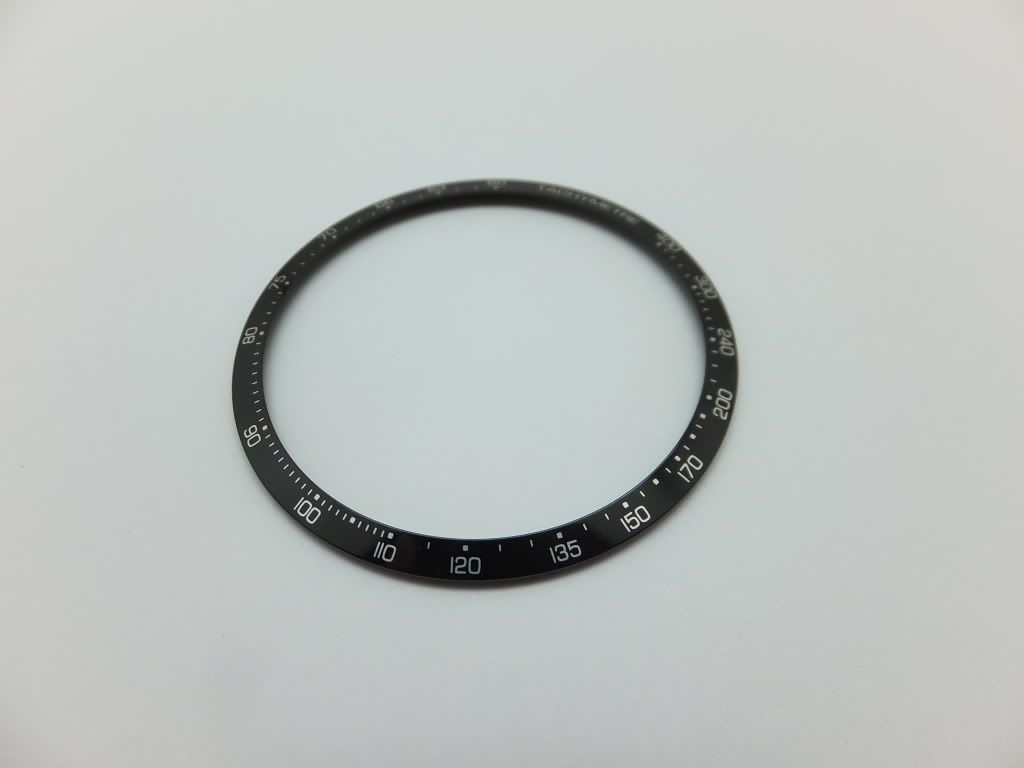
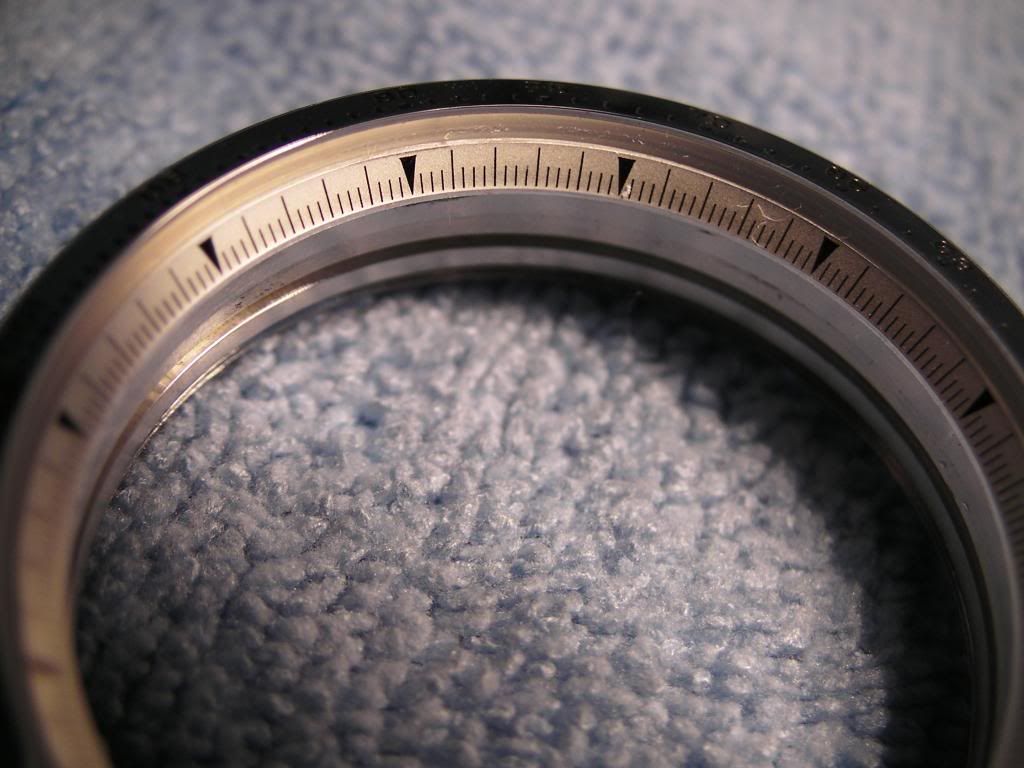
SANY0723_zps82c78a7e.jpg


Chapter Ring...

SANY0724_zps3f29ba5a.jpg


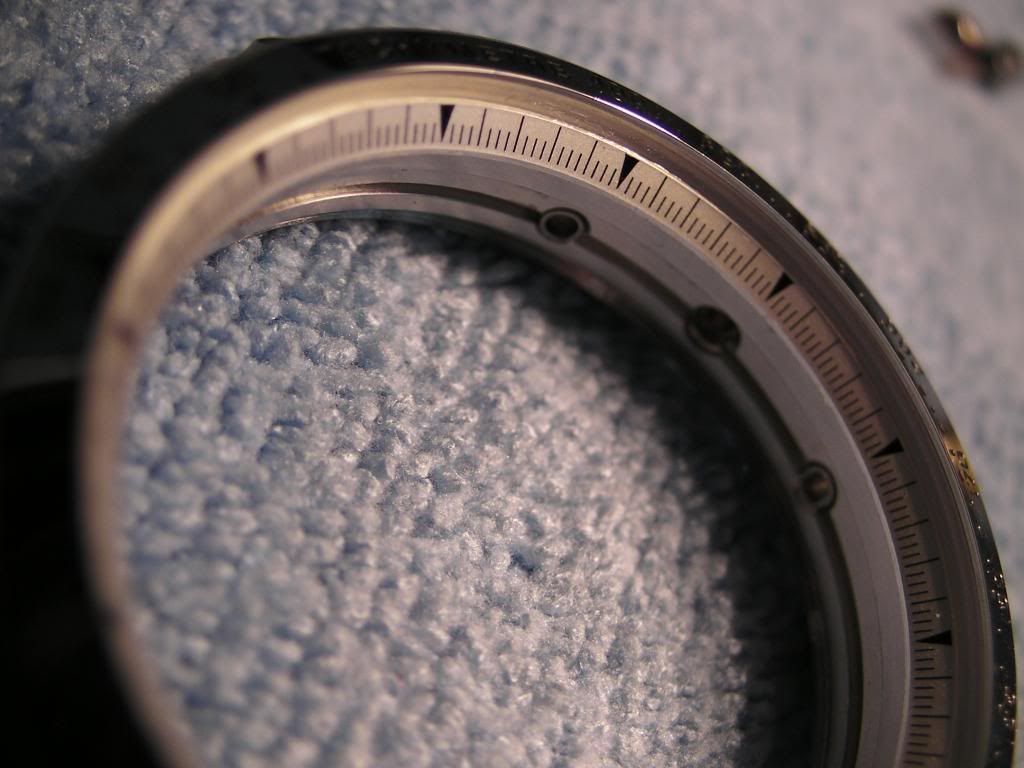
Rear of Chapter Ring, and the dimple which mates with the hole above mentioned...

SANY0725_zps6ca07adc.jpg


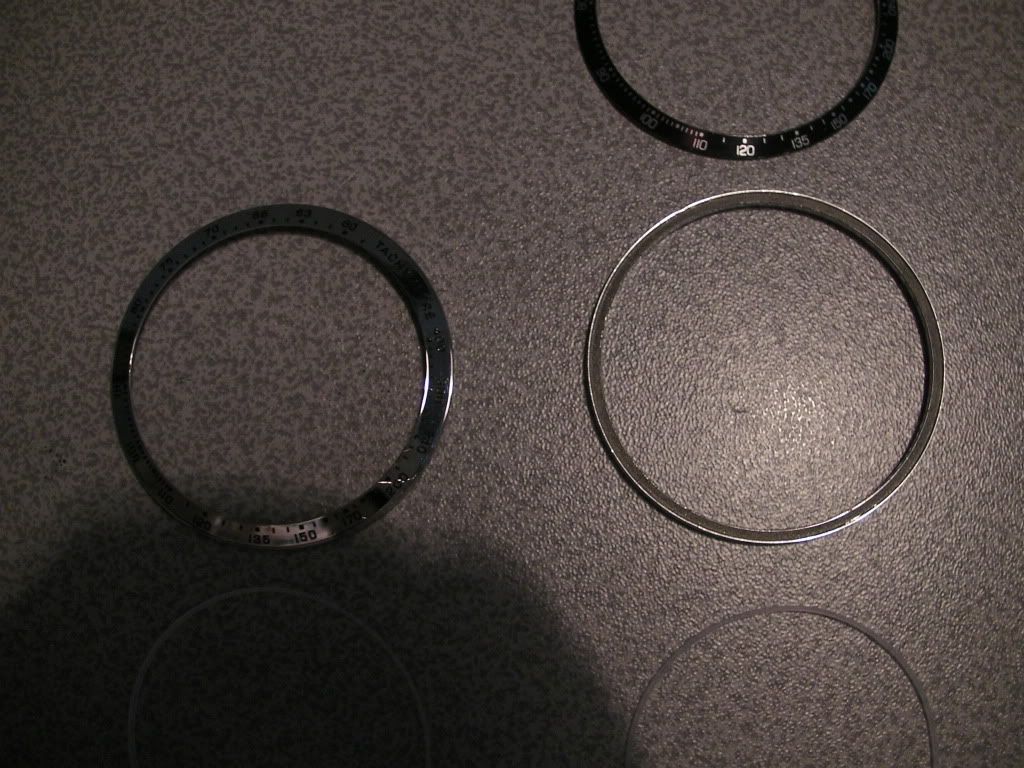
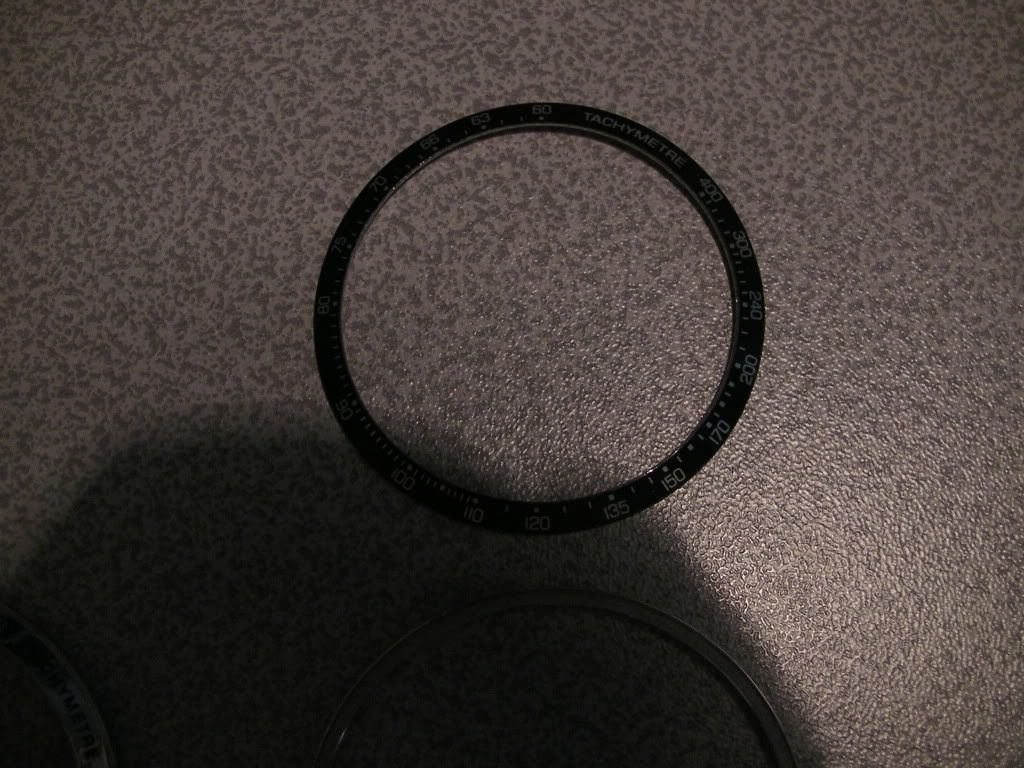
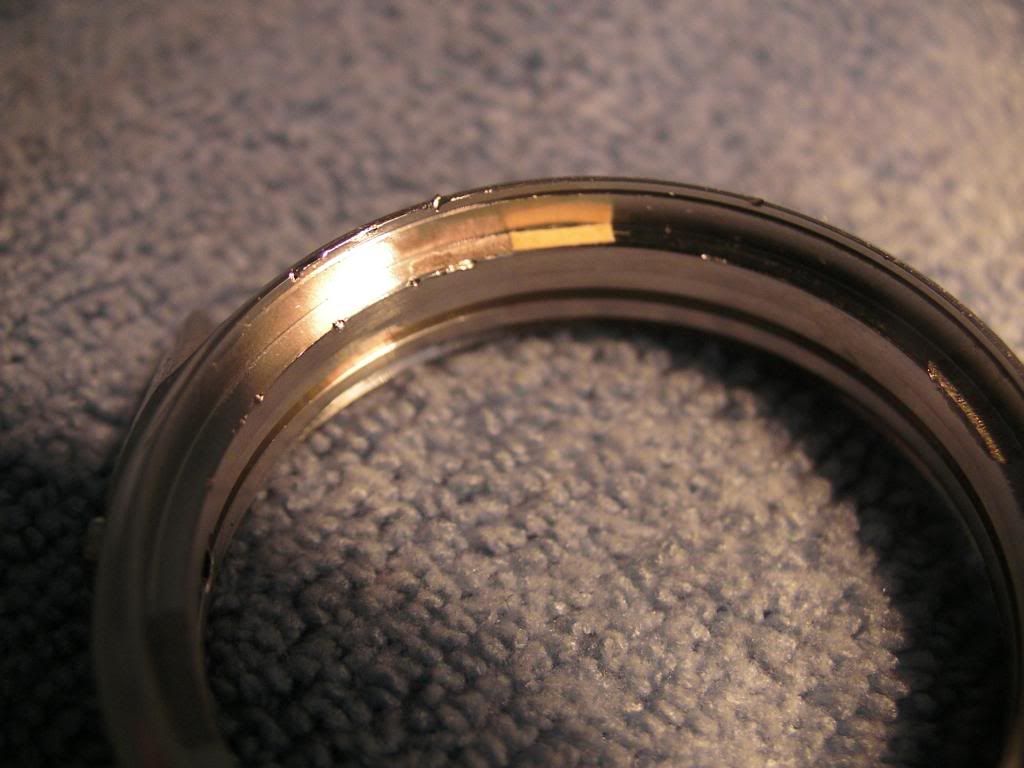
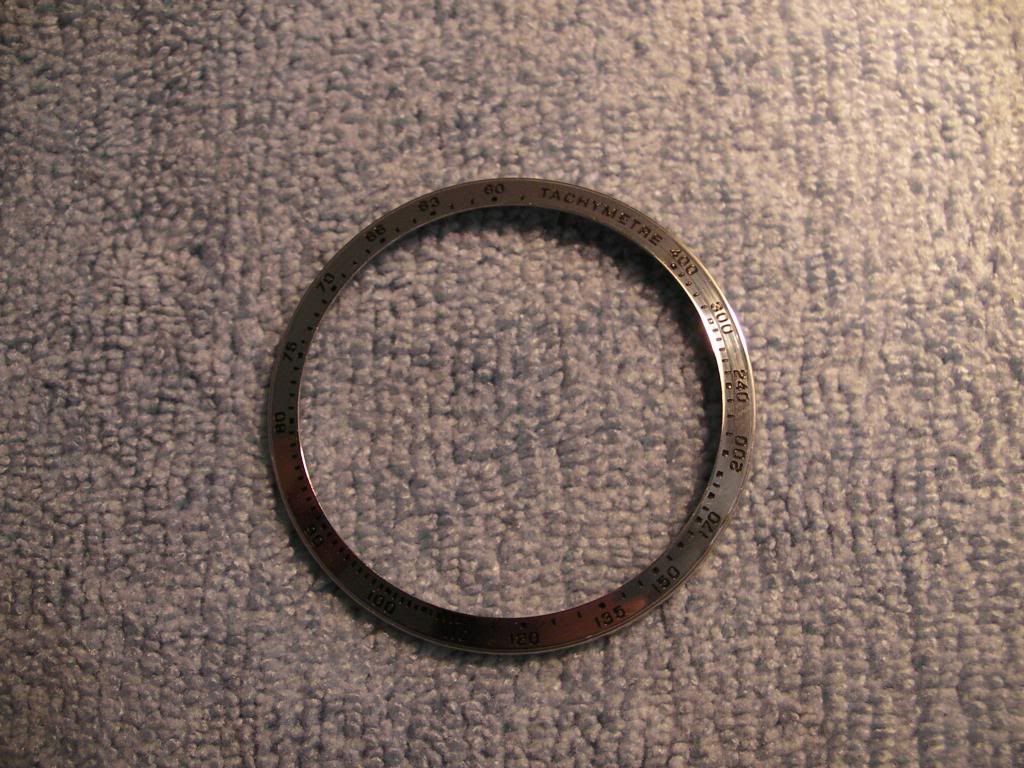
Some photos of the one piece removed Bezel. Looking closely at this, I cannot see anything that reflects that there is an insert, its all one piece...(looks like theres a lip around the circumference, but this is machined that way...

SANY0726_zps11978818.jpg

SANY0727_zpsaf44aacd.jpg

SANY0728_zps1113af13.jpg

SANY0729_zps0b95749e.jpg

SANY0730_zpse027f647.jpg

SANY0731_zps722b6613.jpg

SANY0732_zpsc8d82419.jpg


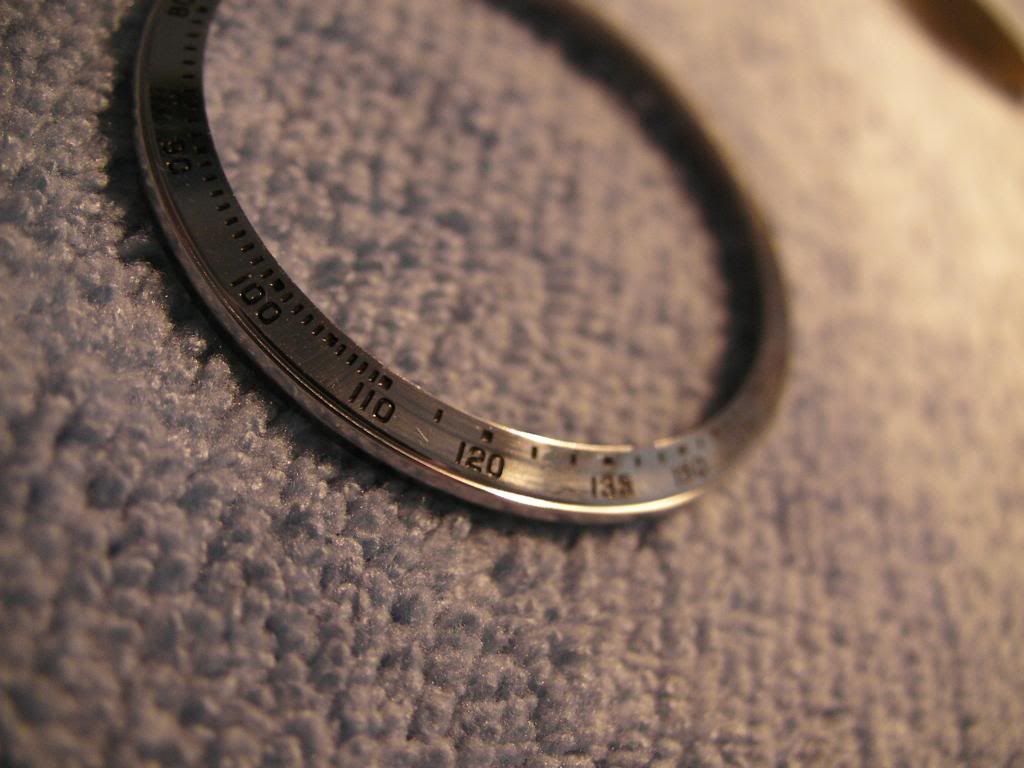
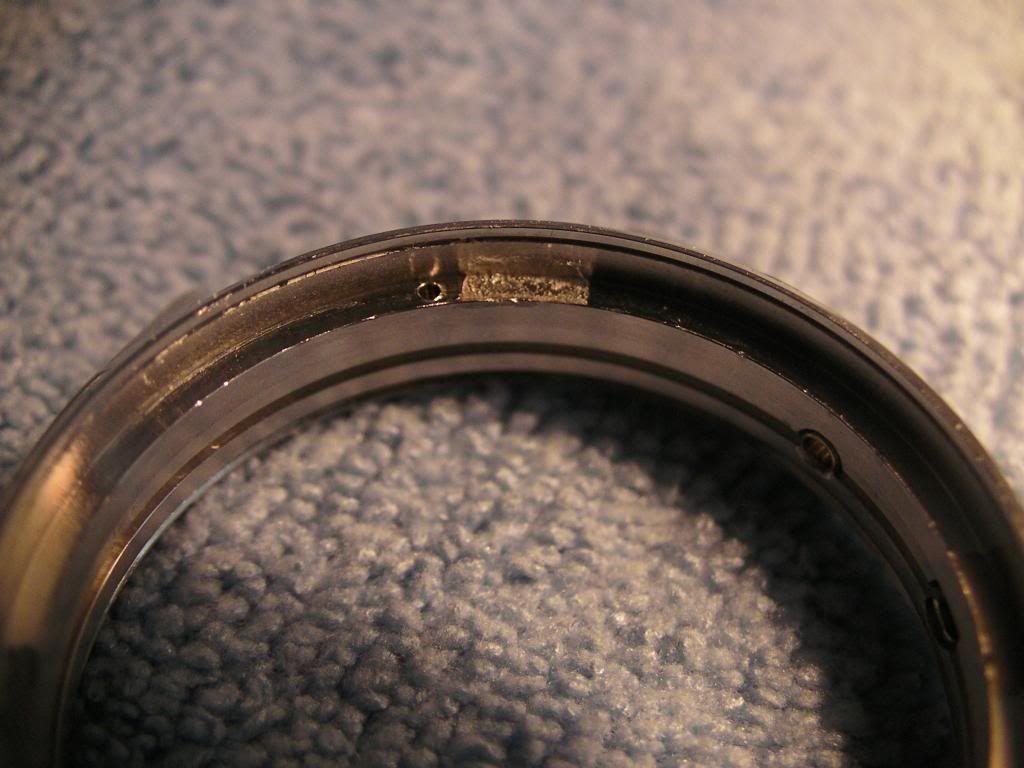
More marks visible on the rear of the bezel, which has to relate to the factory removing, or doing something with this watch prior to marketing/selling. Seems weird...

SANY0733_zps5f1e213a.jpg


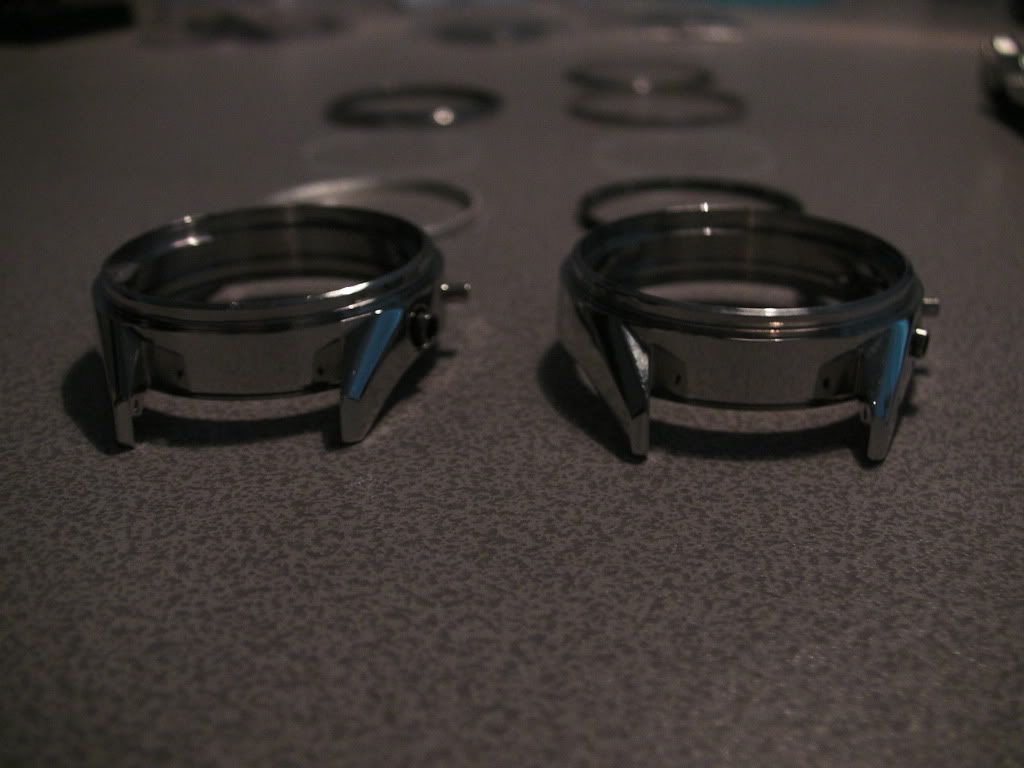
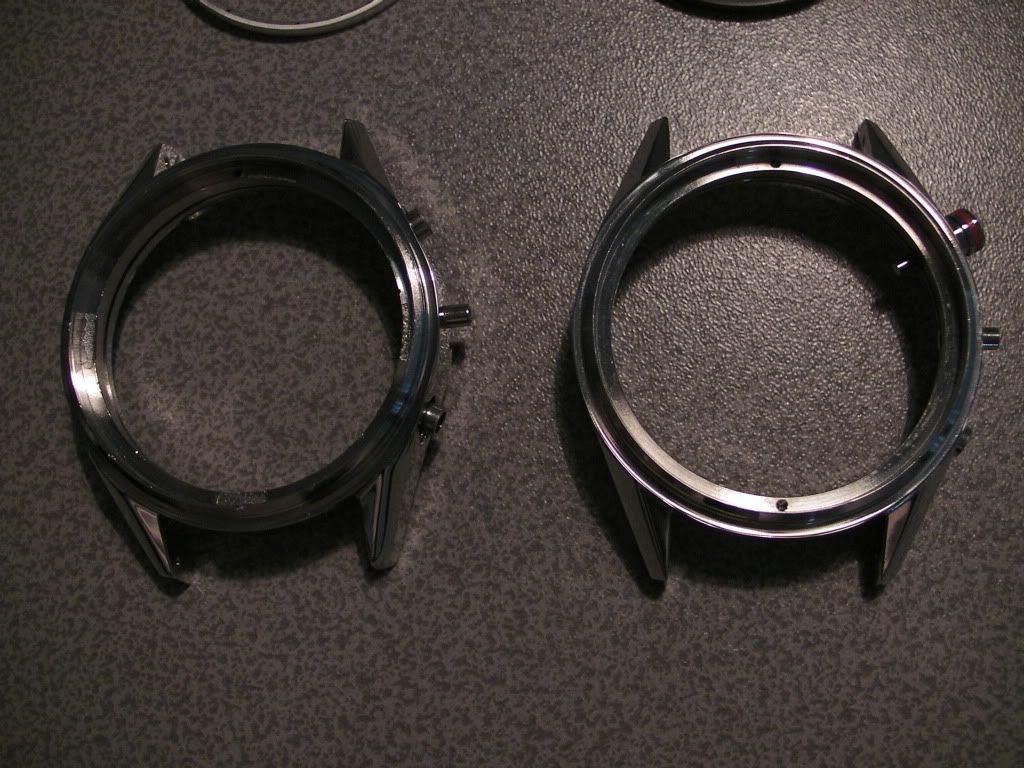
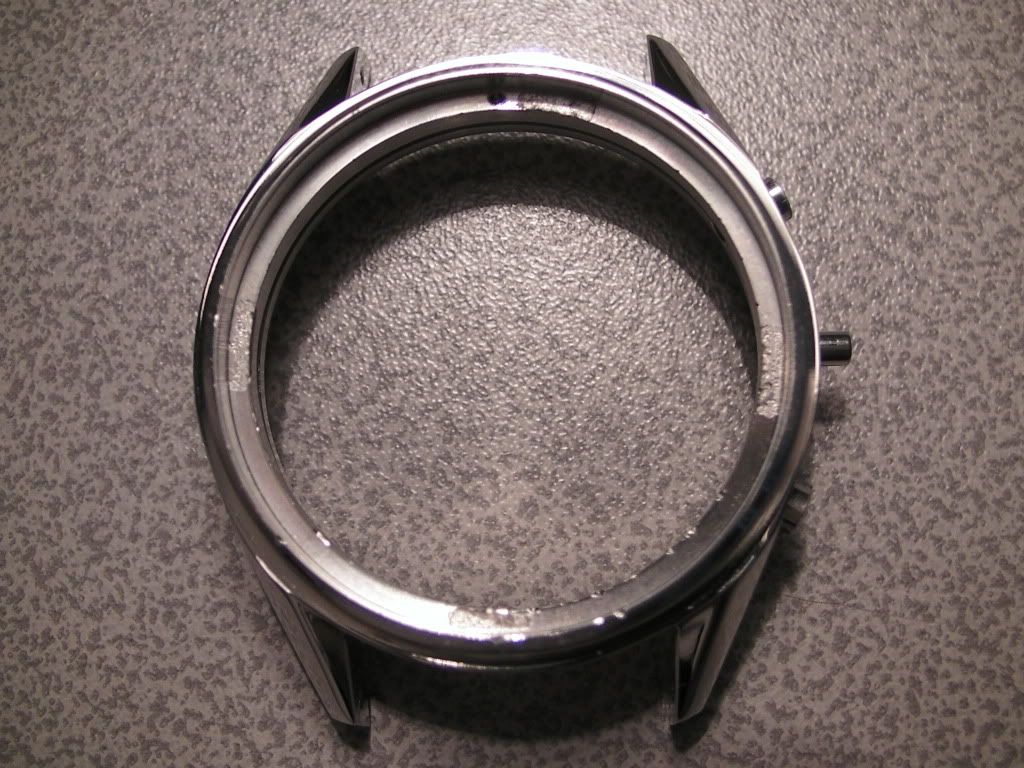
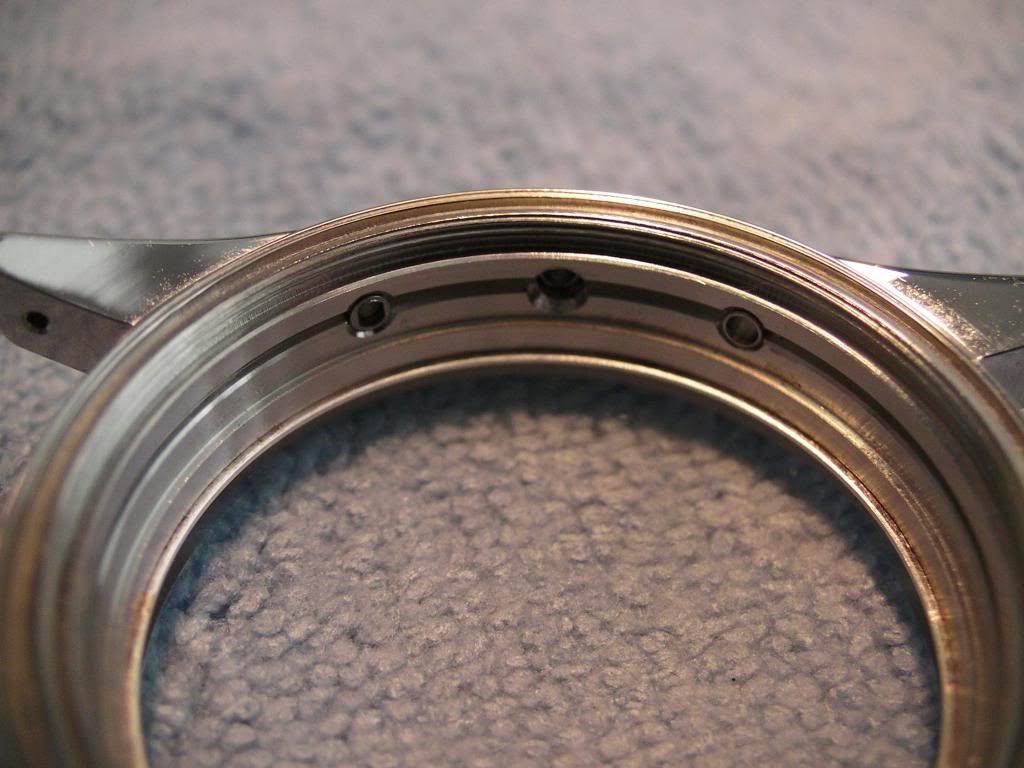
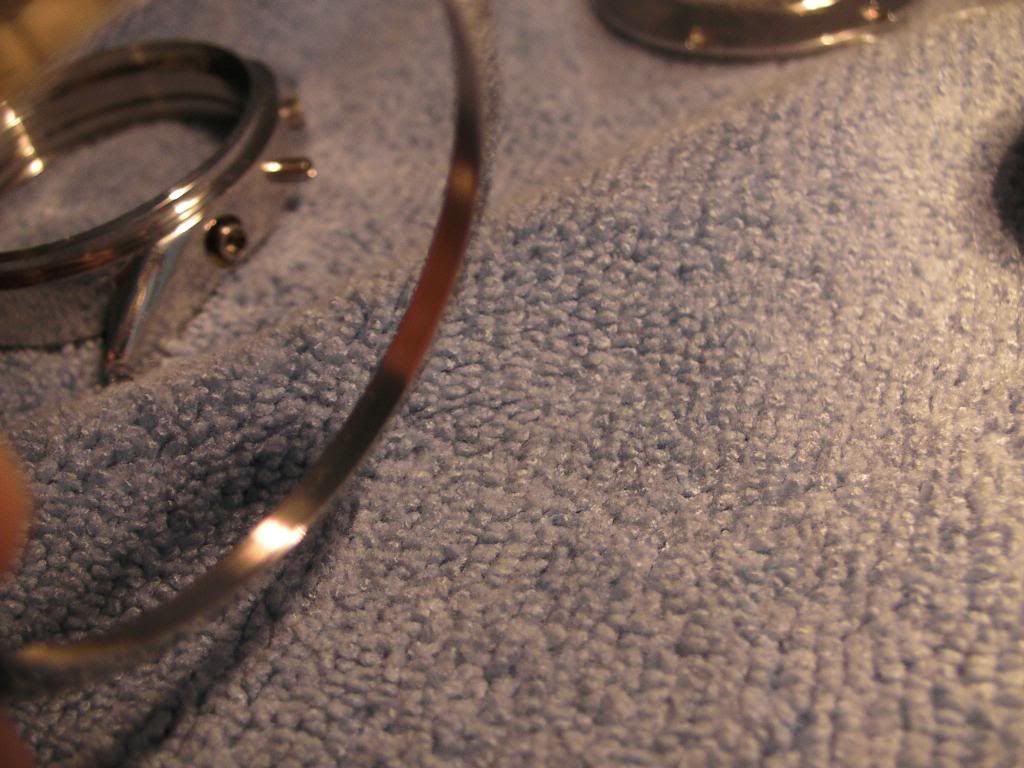
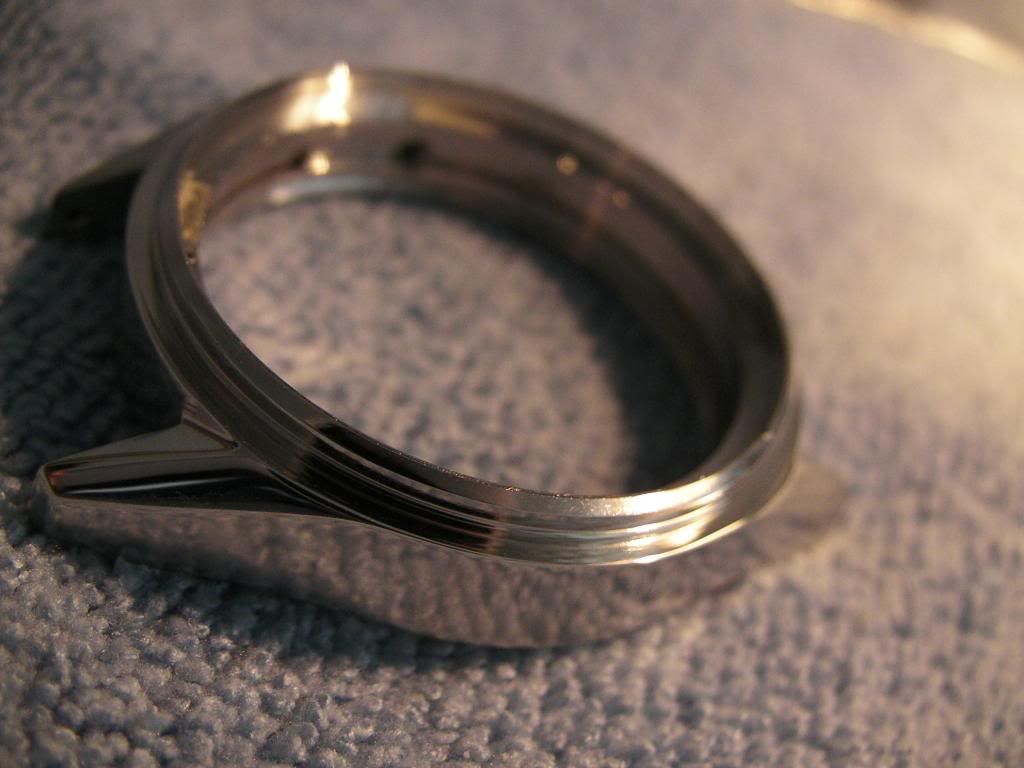
Now a look at the case with the bezel removed...

SANY0734_zpsac490926.jpg

SANY0735_zpsb60d1256.jpg

SANY0736_zpsbf349644.jpg

SANY0737_zpsbc4845e4.jpg


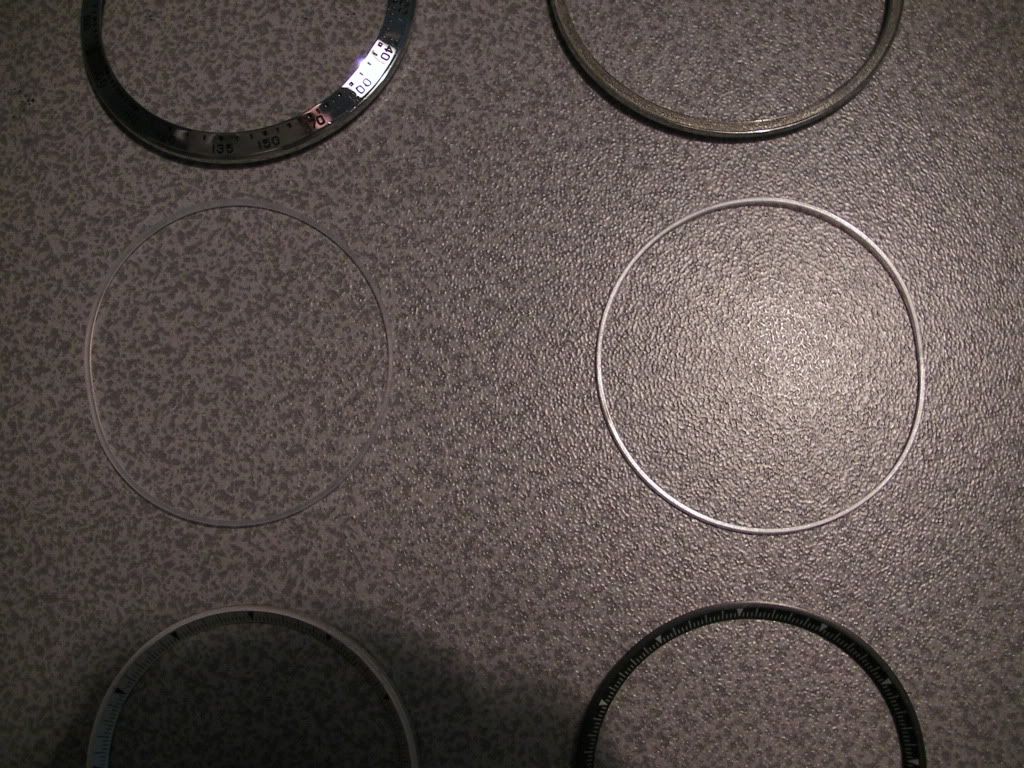
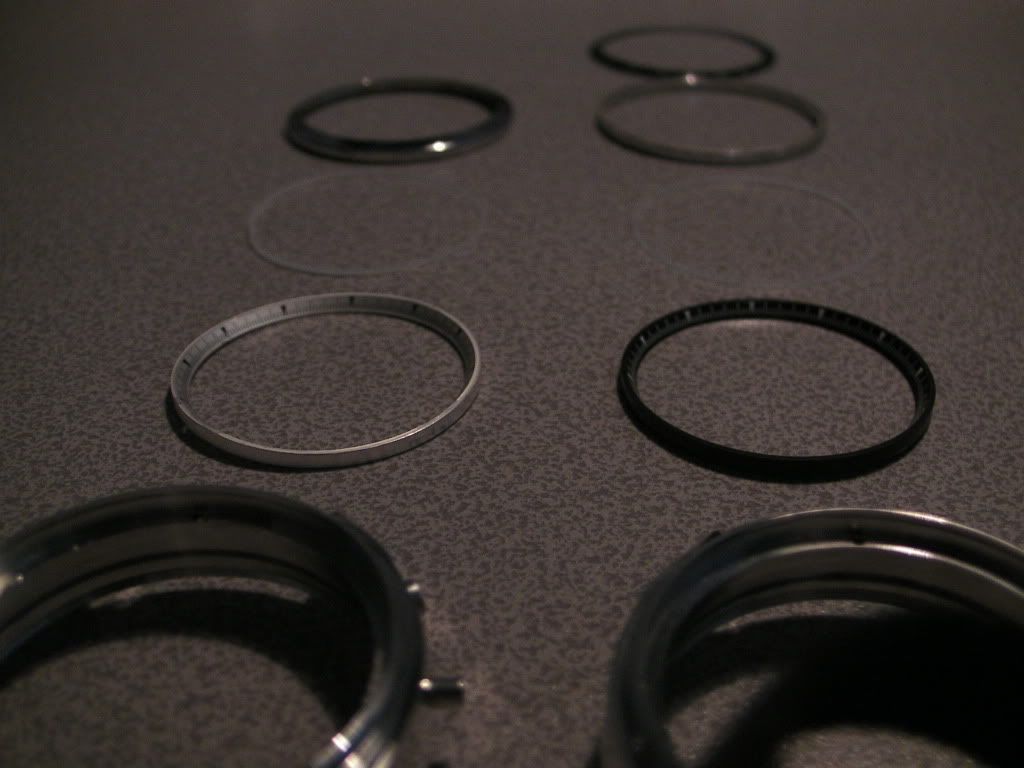
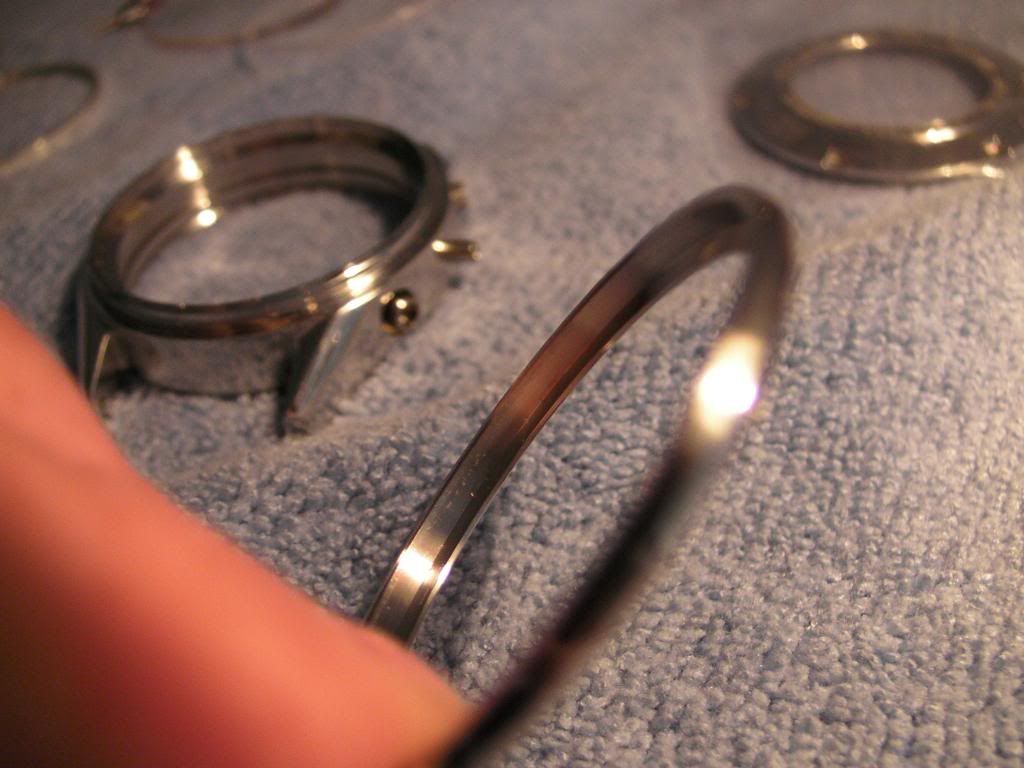
Group shot of dismantled parts...

SANY0738_zpsf69b31e6.jpg


Crystal, and case back put away for safe keeping. Awaiting for genuine crystal measurements at the moment, which will determine whether or not I will be able to fit a genuine crystal in this rep case set or not...

SANY0739_zps57b0acb4.jpg


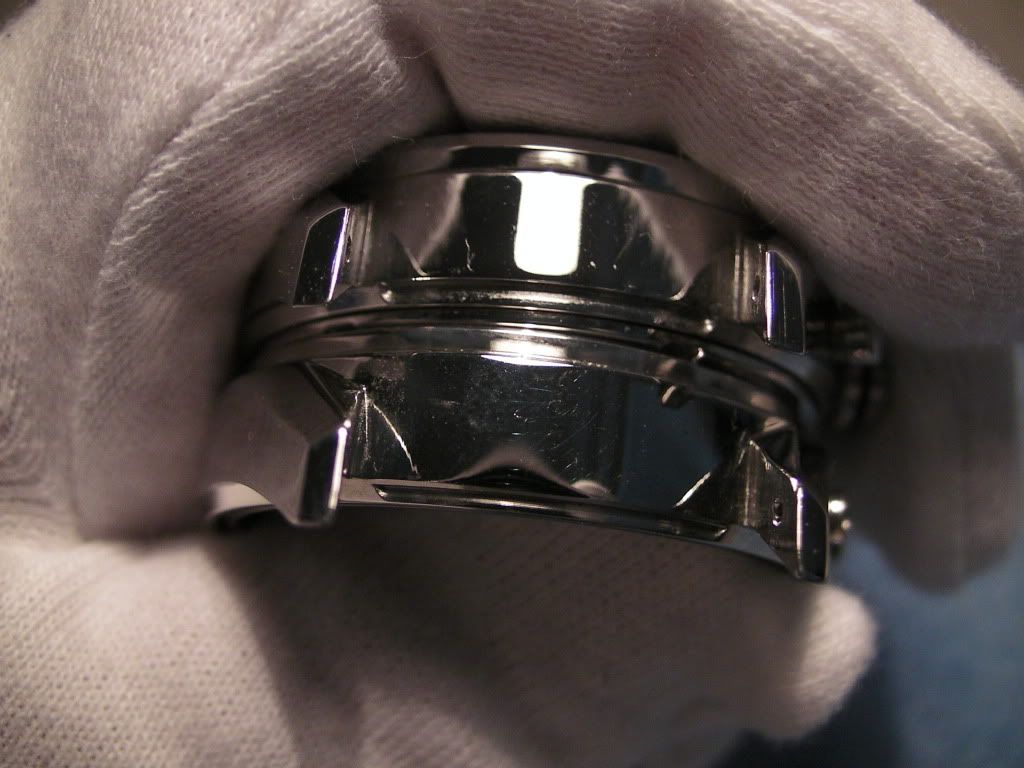
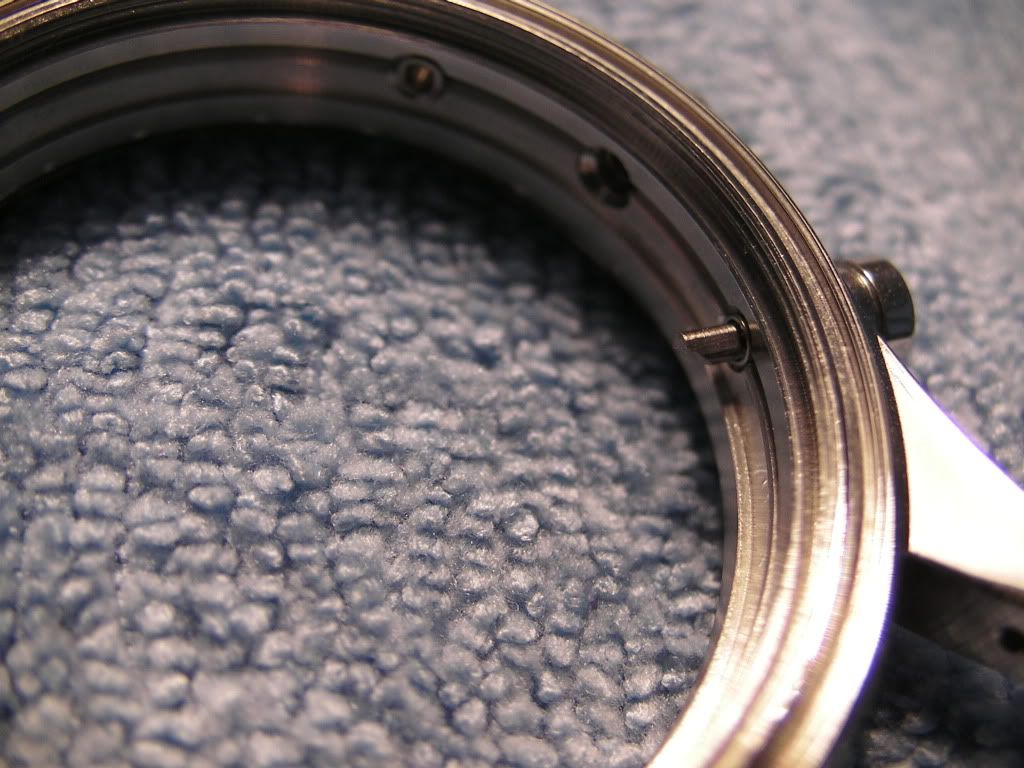
Trial fit of a gen pusher, just to check tolerances, and there's quite a difference. The thread slides into the case so far, then stops. Unsure at this point if I will be able to use the gen pushers or not due to the completely different construction, and design used with the rep pushers...

SANY0740_zps9e8e7306.jpg


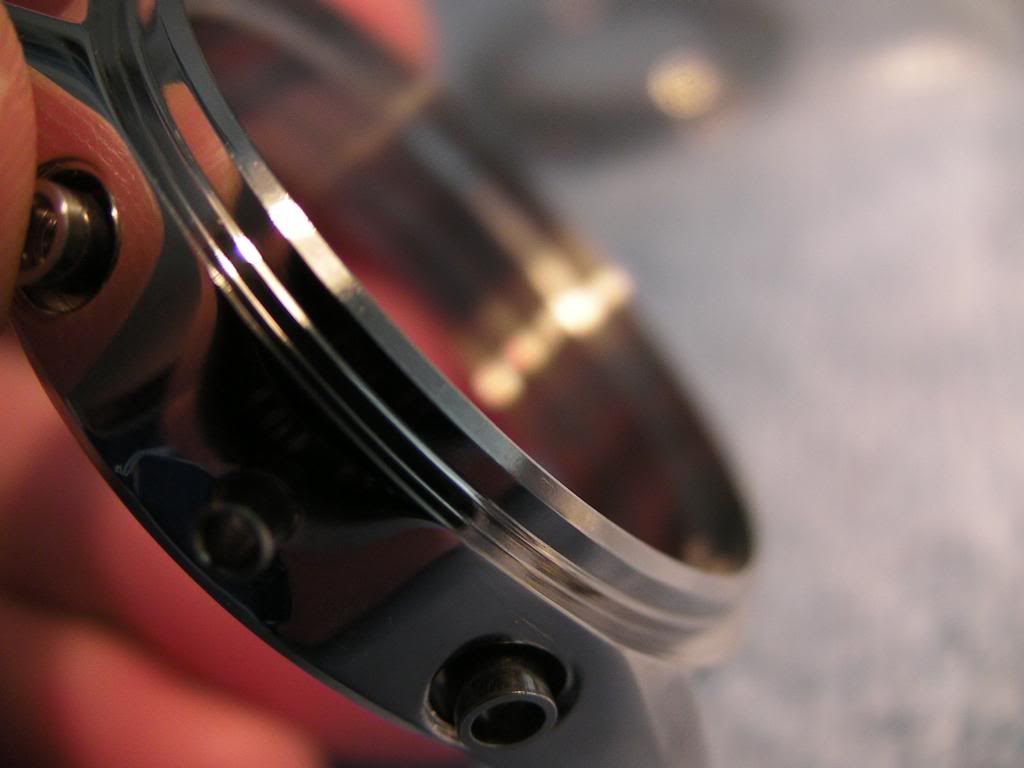
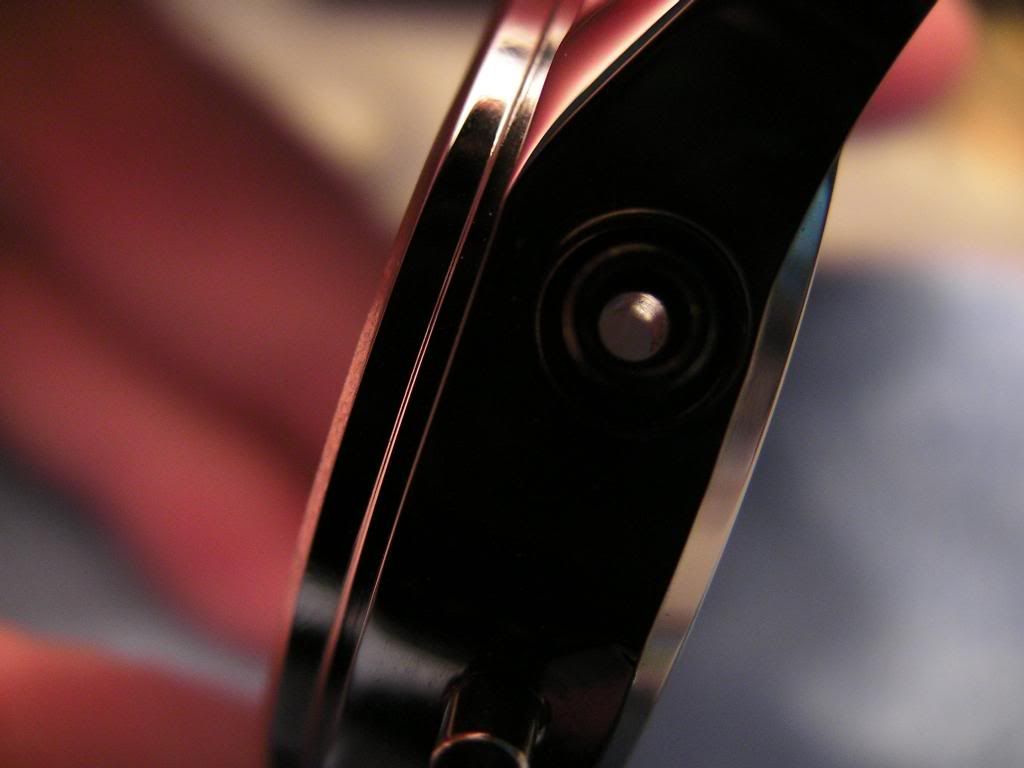
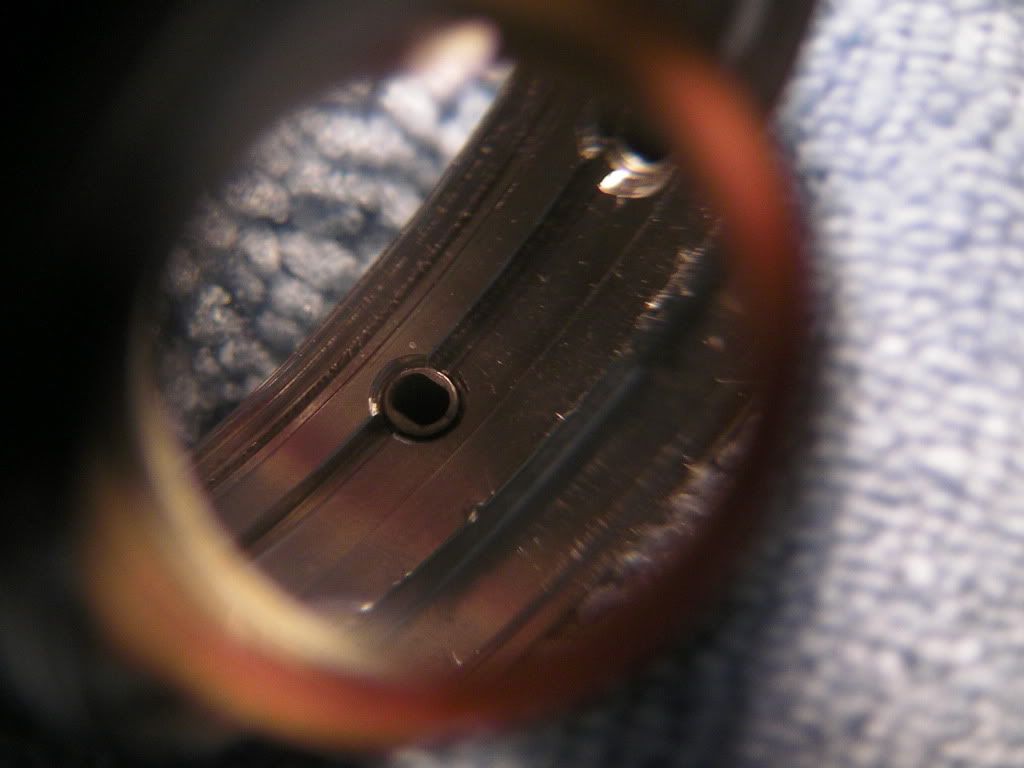
Closer look at the hole where the threaded part of the gen pusher stops at. It maybe possible to tap and die this inner area, but then can't see how the gen pusher would work, as its completely different in construction as the rep pusher. The rep pushers have an inner area of the tip of the pushers, which when pushed, the protruding case tubes go into.

SANY0741_zps2ec72708.jpg


So that was that for now, need to do some micro work, and measurements regarding the pushers.

Photo of disassembled case for reference..

SANY0742_zps1fc45a03.jpg

SANY0743_zps3fee6801.jpg


And that it for today. Will up date later once I get the tolerance measurements of the genuine crystal from my supplier.
 

SSTEEL

Banned
Banned
30/1/13
3,803
1
0
Something was bugging me about the look of the rep pushers compared to the genuine ones, then it struck me that, with the rep pushers, they were missing a cylinder type area below the push area. This cylinder area is part of the tubes pushed into the rep case.

The below photos will explain better. Basically the rep pushers tubes mimic part of the gen pushers, to make the rep look more accurate.

9074303415_b8b8270e19_b.jpg


9076556406_6a7e72aa55_b.jpg
 

SSTEEL

Banned
Banned
30/1/13
3,803
1
0
Well, following on from a thread of forums member Ceejay from the RWG next door and his Carrera, he noticed after a pusher coming out of his Carrera case, and discovering the small circlip that holds it in place, he set about refitting it. After reading about this, I asked a question I was puzzled about relating to the pushers on the rep Carrera Day Day model.


Me
My start pusher can be rotated in situ, but the reset pusher is fixed.

CeeJay
It was the start pusher on mine and the same, start pusher can be rotated, reset pusher can't (couldn't make out why?).

I found out today mate why the start pusher can be rotated, whilst the reset pusher cannot. The reset pusher, the part which touches the actual movement trigger is cut at an angle.

SANY0745_zps0ef2a347.jpg

SANY0746_zps539861db.jpg

SANY0747_zps91ae8a03.jpg

SANY0748_zps4d7c6a49.jpg

SANY0749_zps5ea8f1e5.jpg


But this is actually not what is preventing the reset button to rotate. Upon closer inspection, I notice that the reset pusher shaft has two flat edges, here's a shot of one of those flat edges...

SANY0750_zps337157ff.jpg


Then when you look closely at the reset tube/hole from the outside of the case, looks normal, and round, but its only when you look at the same tube/hole from inside the case you can see two flat edges on the circumference...

SANY0753_zpsea7464d1.jpg


So, I am guessing this has something to do with the A7750 reset trigger.

These two notches restrict the reset pusher from fitting into the case one of two ways....

SANY0751_zps3e753fb8.jpg

SANY0752_zps7dda527e.jpg


I need to take a look inside my franken Carrera, and get some photos of how the rep reset pusher touches the Swiss ETA 7750 reset trigger, as I don't want to be causing any damage to my genuine movement in there.
 

threeputtbogey

You're Saying I Can Sell?
7/6/13
88
0
0
Subscribed. Can't wait for more updates. Looks like a serious project. Good luck mate.

Sent from my DROID RAZR HD using Tapatalk 4 Beta
 

THXuk

I'm Pretty Popular
Certified
25/3/06
1,332
642
113
London
If you want another rep case to experiment with let me know.
 

DreambreaX

Renowned Member
26/11/12
842
0
0
I have the gen for this carrera version. I always amaze with SSTEEL. He doesnt want gen, but enjoying modifying reps. I sometimes think that he can work at tag heuer engineer, and perhaps have better skill.
 

SSTEEL

Banned
Banned
30/1/13
3,803
1
0

ThinkBachs

Mythical Poster
DO NOT TRADE WITH ME
9/2/09
8,917
77
0
Threads like this are the best! Thanks for putting so much work into taking the photos and sharing your thoughts. I think sometimes people don't realize the effort that goes into these things. I have no doubt that there are gen owners who will really appreciate this thread.
 

SSTEEL

Banned
Banned
30/1/13
3,803
1
0
The next steps are to measure, make notes, then offer up the gen pushers to the case, measure up again, then tap out those rep pusher tube, and make more measurements before finally cutting them down to size, and tap a thread into them for the gen pushers.

Once this is done I will screw in the gen pushers into the new threaded tubes, sealing with some good, waterproof sealant, but not too strong as I cannot unscrew at a later date.

Then offer up the modded tube/pusher to find its sweet spot, then bond into place with a very strong 2 part water resistant epoxy resin to ensure water resistance.
 

SSTEEL

Banned
Banned
30/1/13
3,803
1
0
Thanks!


Update: Got a second Carrera CV2A10 case with black bezel today from a great member here :) It came complete, minus the crystal, which is perfect for what I wanted to check.

I can now confirm that the black bezel 43mm Carrera is a different construction than that of the chromed bezel 43mm Carrera.

The black bezel insert came out very easily, and is held in place with double sided thin sticky tape, and not snapped into position.

Quite happy with this result, as now I know I can go ahead and replace the black insert on my franken with a genuine insert, although I will bond into place with either Hydro Cement of Gorilla Glue. I have confirmed dimensions from my genuine parts supplier of both the crystal, and bezel insert, and its good to go, so will be getting these gen parts soon.

Seeing as the Gen case set is a little over $1k, I have enquired about getting just a gen case back.

Both the first Carrera donor case, and this second one, even though both are stated on their case backs as CV2A10 Carrera models, I have to say, they looks very slightly different to my franken case. More noticeable in the lug areas, but very minor.

On the donor cases, the lug profile is shorter, and not as wide as my franken. I will add photos showing this difference, and also some measurements once my digital calliper is fixed as I broke my lcd.

Hope the above info is of some help to you should you be wanting to carry out any similar mods to your Carrera :)

Thanks for reading, photos, and measurements to follow in the next update.
 

SSTEEL

Banned
Banned
30/1/13
3,803
1
0
Photos of Genuine Tag Heuer black bezel insert...

DSCF2200_zps6e45b604.jpg


DSCF2202_zpsb4c99005.jpg


Measurement of this is 42.7mm. I have measured (with tape measure) my rep insert and its the same. Will measure the rep again once I fix my digital callipers.

The gen insert is part of my next gen parts order which consists of..

Bezel Insert
Chapter Ring (photos will be posted when I get them)
Case Back
Crystal
Crystal & Case Back gaskets.

Will update soon with photo comparisons of the CV2A10 Carrera Rep cases.
 

s3g0y

Renowned Member
15/12/10
756
3
0
It's impressing! Really.

But I start to worry that the total cost will be higher than buying a GEN! :0
 

SSTEEL

Banned
Banned
30/1/13
3,803
1
0
It's impressing! Really.

But I start to worry that the total cost will be higher than buying a GEN! :0

Even with my next gen parts, I will still be just under the price of buying the cheapest gen available online, but as said before, there is no fun in buying a gen when you can franken, learn, and enjoy building you own :)
 

SSTEEL

Banned
Banned
30/1/13
3,803
1
0
OK, had some more spare time today so got to work with the black bezelled Carrera case. Now you may recall me stating the following earlier about this case..

I can now confirm that the black bezel 43mm Carrera is a different construction than that of the chromed bezel 43mm Carrera.

The black bezel insert came out very easily, and is held in place with double sided thin sticky tape, and not snapped into position.

Now whilst the above quote is true, the construction is indeed different, this difference being the bezel. I first thought that the black bezelled Carrera case's bezel was fixed, and not removable, but looking closely through my loupe at the outer circumference there was evidence proving otherwise, but was my eyes playing tricks on me I asked myself.

Well, after some failed attempts prising the bezel off with a plastic phone tool (intended use for opening phones cases), I then turned my attention to something more suitable, but wondered if I was on a hiding to nothing, and would I screw up the case, resulting it being scrap. I thought sod it, only one way to find out, experiment in the aid of helping others learn ;)

My weapon of choice was the case back removal tool for push in case backs, you know the one, looks like a knife. Mine was in the RWG tool kit, and come in handy here, along with the RWG hammer, I lined up the sharp part of the blade into the bezel edge, and tapped it gently with the metal end of the hammer, and off the bezel popped :)

Here's a photo showing the difference in construction between the chromed bezel Carrera (left), and the black bezel Carrera (right).

SANY0756_zpsaf87c19d.jpg

SANY0757_zps424f6813.jpg

SANY0758_zpsb3e6a849.jpg

SANY0759_zpsbf73c297.jpg

SANY0760_zps648dee3f.jpg

SANY0761_zps4b2dd810.jpg

SANY0762_zpsedf27389.jpg


Arty shot :p
SANY0763_zpsb71cfd9c.jpg


A closer look at the chromed bezel case (note: only one hole at 12 inside to home the chapter ring).

SANY0764_zps2edcb6c0.jpg


And next the black bezel case (note: two holes, 1@12 & 1@6).

SANY0765_zps183a07a7.jpg


Now to my eye, looking at both these cases, they somehow looks slightly different as mentioned earlier..

Both the first Carrera donor case, and this second one, even though both are stated on their case backs as CV2A10 Carrera models, I have to say, they looks very slightly different to my franken case. More noticeable in the lug areas, but very minor.

On the donor cases, the lug profile is shorter, and not as wide as my franken. I will add photos showing this difference, and also some measurements once my digital calliper is fixed as I broke my lcd.

Still not had time to fix my digital calliper, so took a few photos in the hope to capture the slight differences in the case profiles. The two donor cases are identical in profile, so in the following photos I used my franken, removing the bracelet one side in a hope to detail these differences..

Franken on top..

SANY0766_zpsb179b93d.jpg

SANY0767_zpsb4d3e860.jpg

SANY0768_zps24bef0a2.jpg

SANY0769_zps2fa3a5fa.jpg


I then fitted the case back to the donor case, and took some more photos hoping to show the minute differences. (Just hope its not my eyes playing tricks on me as I am yet to see these photos, only looking at the thumbnails and IMG tags :p

SANY0770_zps146115f3.jpg

SANY0773_zps5caa7932.jpg

SANY0774_zps23ef2a8d.jpg

SANY0775_zpsbdee7550.jpg

SANY0776_zps5926467c.jpg

SANY0777_zpsb8349c05.jpg

SANY0778_zps0099310a.jpg


And just a reminder, and a closer look at the two types of Carrera removable bezels.

Black insert bezel

SANY0779_zps088345e5.jpg


Black insert bezel on the right

SANY0780_zps65bb7b42.jpg


Closer look at the two (The chromed bezel insert is not an insert at all, its all one piece, unlike the black bezel insert Carrera)..

SANY0781_zps344f3be0.jpg


So that concludes my investigational work on the cases, and now its just a case of fixing my digital calliper, and awaiting delivery of my genuine Tag parts to arrive.

Thanks for following :)
 

SSTEEL

Banned
Banned
30/1/13
3,803
1
0
Was getting ahead of myself then, what I meant to say, is, next to follow in this thread will be the pushers investigation, which may well lead to some tap, and die work.
 

SSTEEL

Banned
Banned
30/1/13
3,803
1
0
My plan is to utilise the rep pusher tubes which are glued into the case, removing them from the case, measuring them, cutting them down to the right size as to accommodate the gen pushers profile, and then tapping the thread into the tubes so far (not all the way through), then screwing in the gen pushers, applying waterproof adhesive in the process, then bonding the tubes back into the case with the appropriate bonding glue. And breath lol.

Also to add to my earlier post, the reasoning behind wanting to see if the bezel removed from the case of the black insert case was down to the crystal gasket fitting. I tried to refit the crystal gasket, which itself is pushed into place between the bezel, and chapter ring. I was unsuccessful in refitting the gasket, so I thought that surely the bezel must come off, and if so, refitting my new gasket should be a lot easier, as the gasket is pushed in with the bezel and crystal at the same time.

Let me try and explain some key difference between the two cases. With the chromed bezel case, the bezel had to be removed in order to remove the chapter ring. The gasket sits on top of the chapter ring.

With the black insert case, after removing the crystal gasket, although the chapter ring came out easily, this was not possible on the chromed version due to the one piece bezel construction, restricting room to pull out the chapter ring. I think you may get the picture now.

Sorry if I appeared to make things complicated by possible repeating myself on something that in real life here is quite straight forward to those in the know, and experienced watchmakers/watchsmiths, but I want to explain things in a way for others to learn too. Hope this makes sense.
 

SSTEEL

Banned
Banned
30/1/13
3,803
1
0
Not got round to the pushers yet, but I fixed my Digital Calliper today so got some finer measurements on a couple of parts.

For reference:

Genuine Crystal dia: 37mm
Replica Crystal dia: 36.95mm

Genuine Black Insert dia: 42.75mm
Replica Black Insert dia: 42.74mm

As you can see, the inserts are very very close, but the crystal difference, whilst small @0.05mm, when working with such small, precise fitting parts, this small 0.05mm is a big deal, and can ultimately halt a project.

I will see how I get on when I have the genuine crystal in hand, and also check the gen gasket also. I may need to carry out some milling work, but we shall see.

More measurements of other parts in this build to follow soon.