- 12/3/18
- 37,543
- 80,241
- 113
As some of you may know from other posts of mine, the Noob Skydweller is a favorite rep but it has a unique flaw that fortunately most owners won't encounter. The GMT wheel numbers are not printed on - they are STICKERS! So when I had the movement apart I removed the GMT wheel by lifting it out with Rodico as I usually do with datewheels and one of the stickers came off. It immediately got mangled up in the Rodico so there was no putting it back.
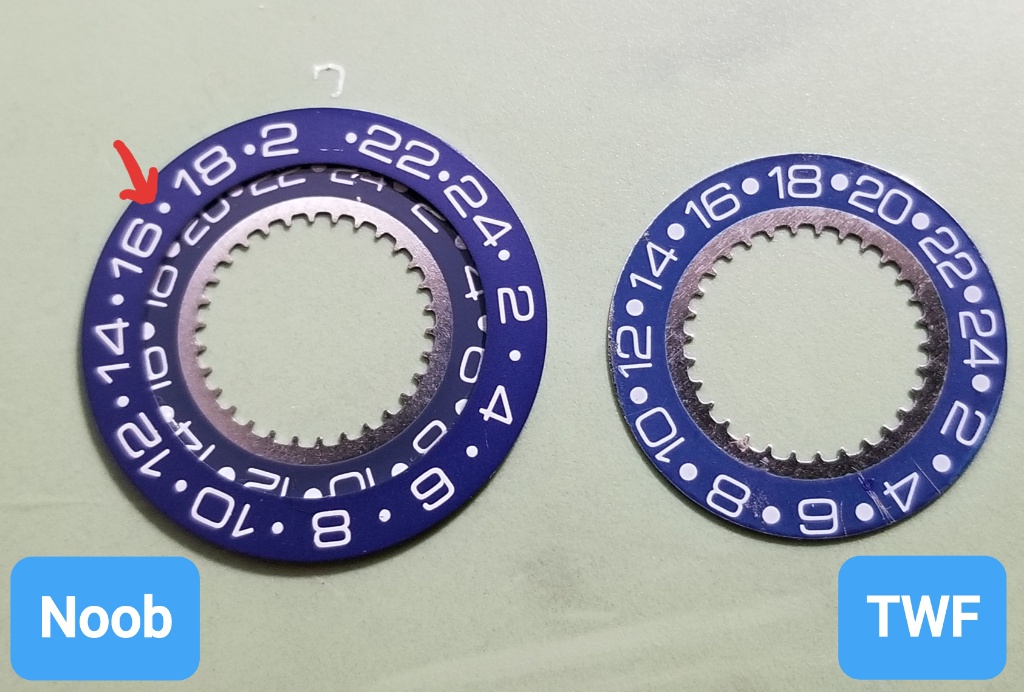
I tried unsuccessfully to get a replacement GMT wheel of course and even a new movement with the GMT wheel included but Noob wouldn't let either go. This was back in August 2020. I had my wife try painting the missing number and looked at some mini decals for train models, etc. All dead ends. Then member muiramas saw one of my posts and graciously offered to create the artwork for a new GMT wheel. (Thanks a million bro, your work is incredible!) After a few version tweaks with different weight fonts, etc. we had a good file. The really great thing about this new GMT wheel is muiramas made it with all the numbers properly oriented to center on the arc which eliminates the funky number alignment on the Noob wheel.
So we had the artwork printed on every kind of paper - matte, glossy, transparency, thick, thin, photo, sticker paper you name it, if it was available it was tried. Obviously if perfection is the goal only pad printing will deliver that but it costs hundreds of dollars ($500 +) just to get a cliche (stencil) made. So the printing method that worked best was Epson proofs. Those have a slight tendency for colors to run, so I chose a little thicker font which makes any bleeding into the white less evident. While not perfect, the results are completely satisfactory IMO, especially given the number alignment issue has been corrected and this will get my rep back into action. It had been been sidelined for nearly all of it's one year life.
I spent hours tinkering with different CYMK color combos and narrowed it down to about 10 choices, which interestingly came out very different on different types of paper.
The number of sheets printed to get one little GMT wheel was truly staggering.
Here are some random pics of print attempts.
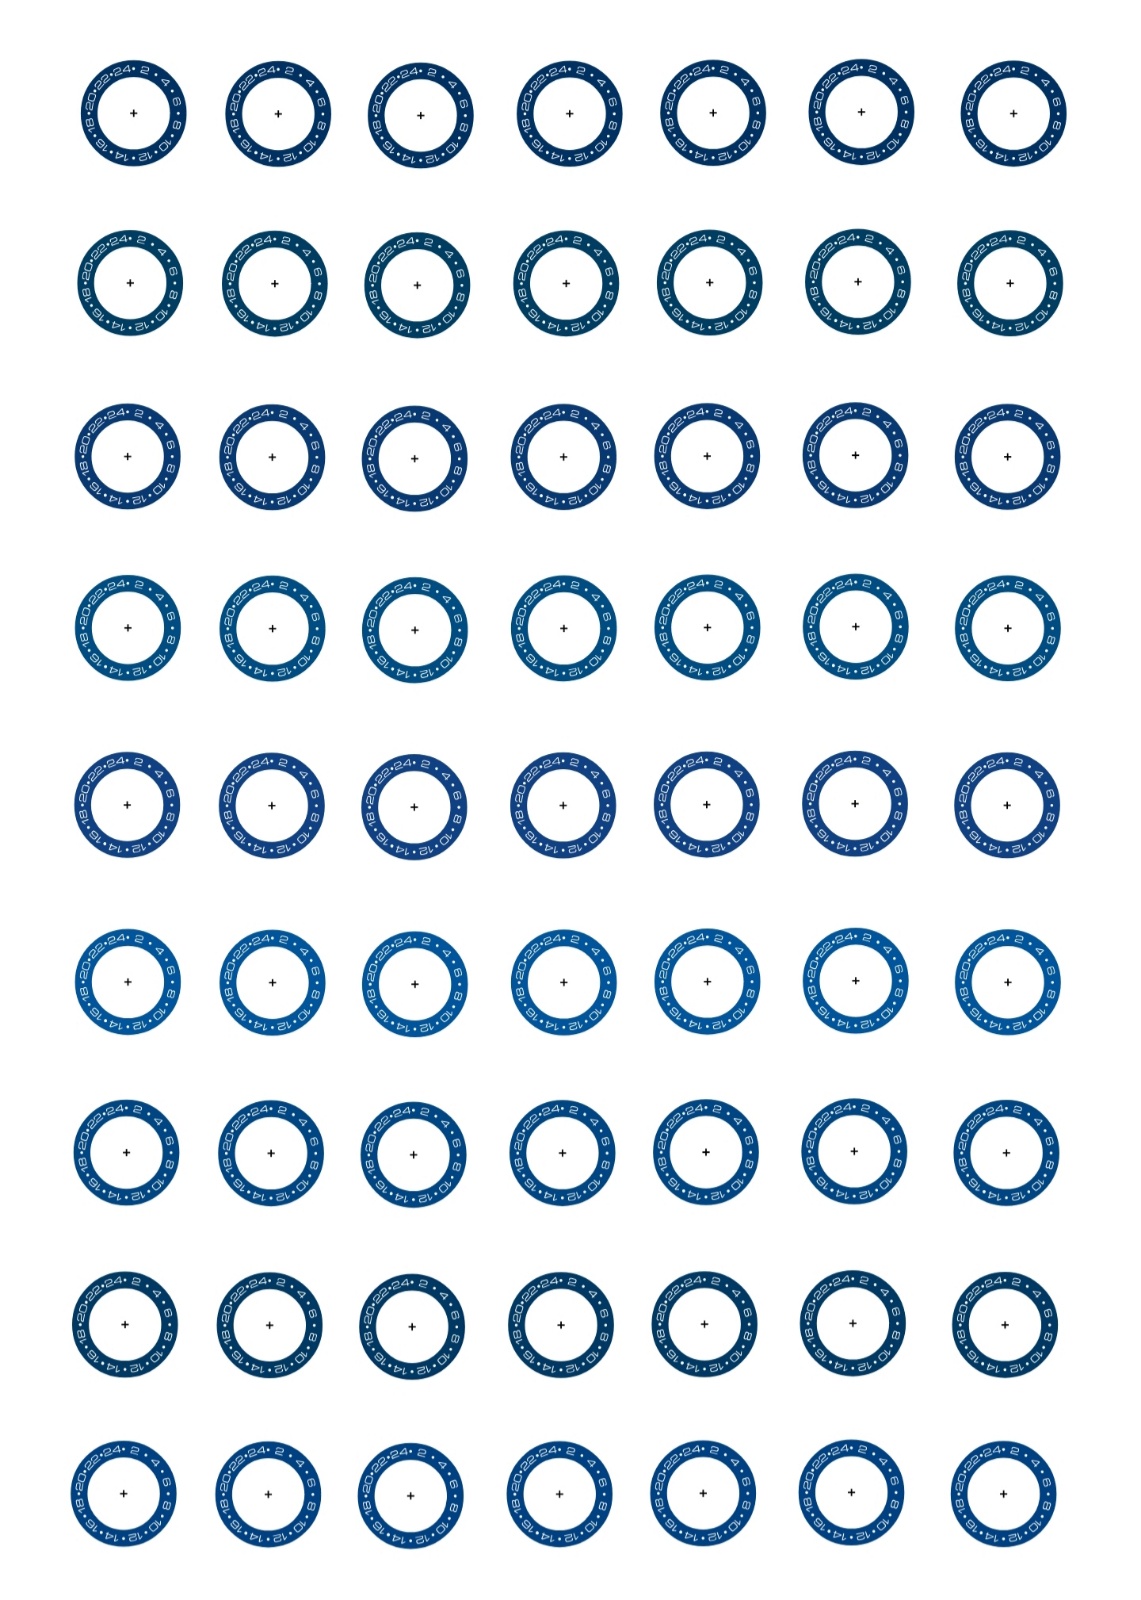
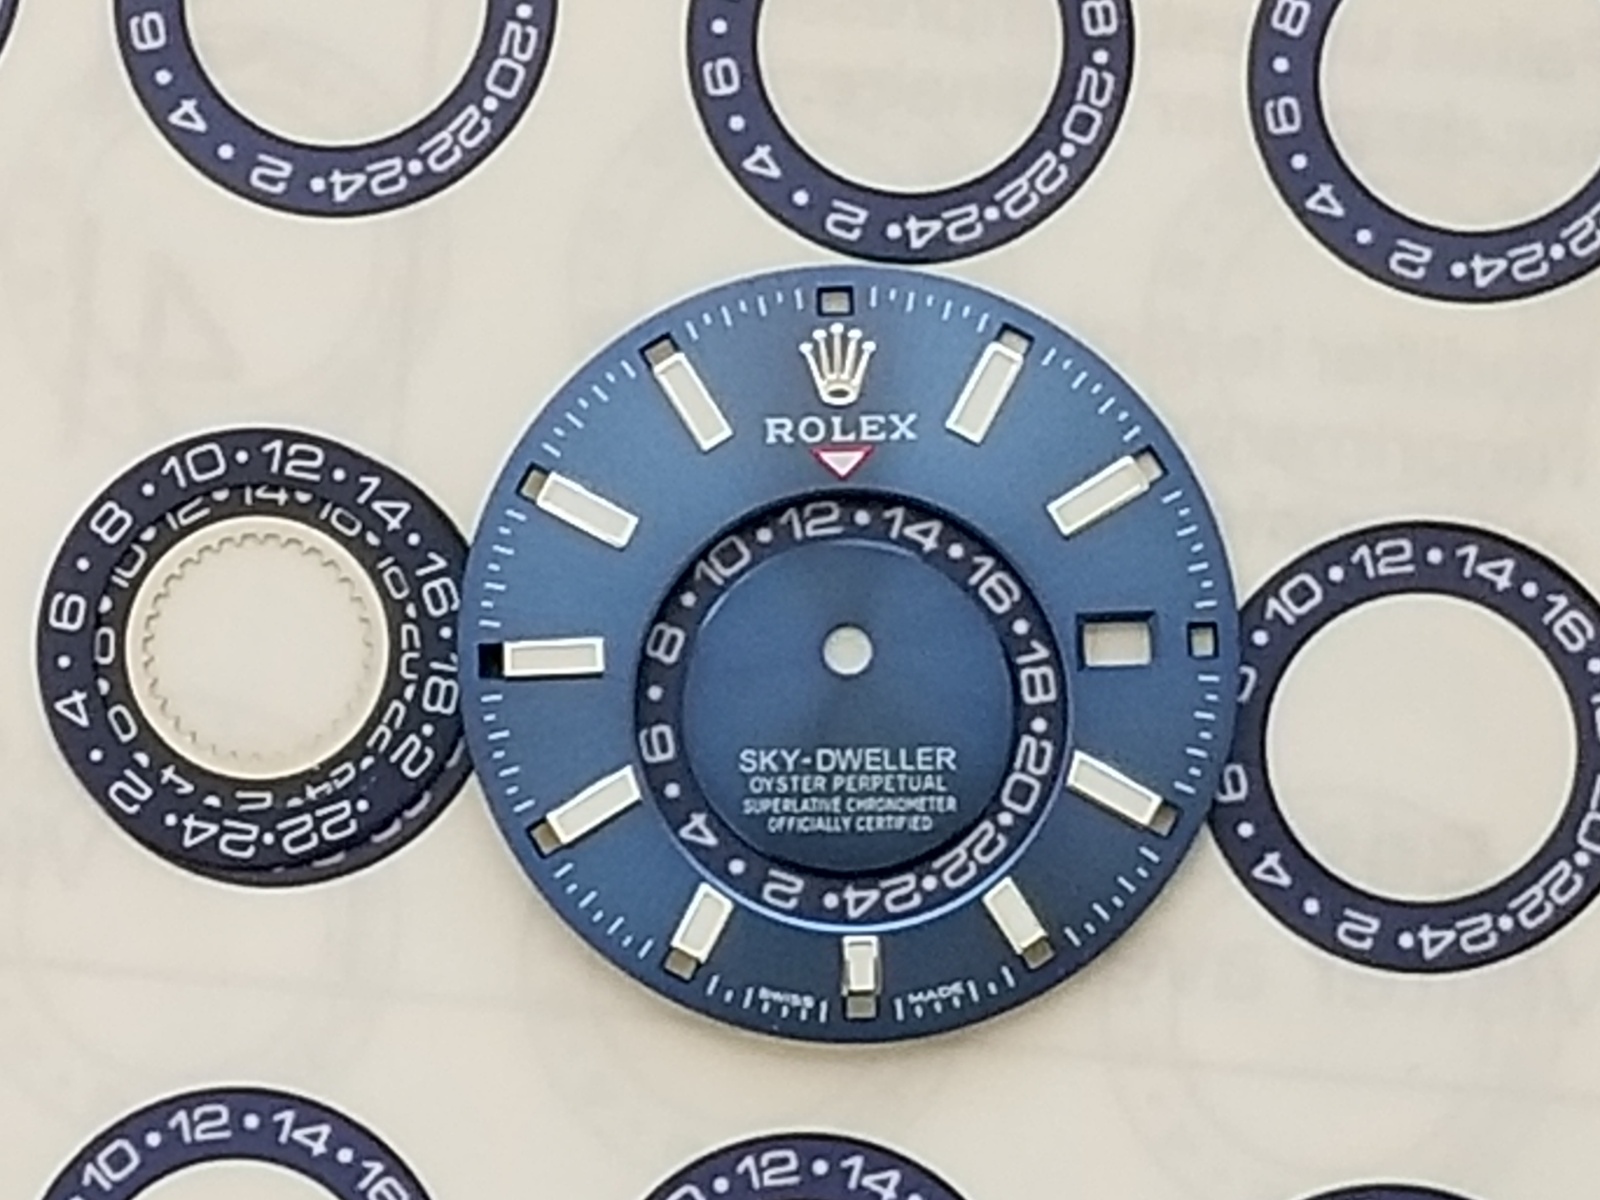
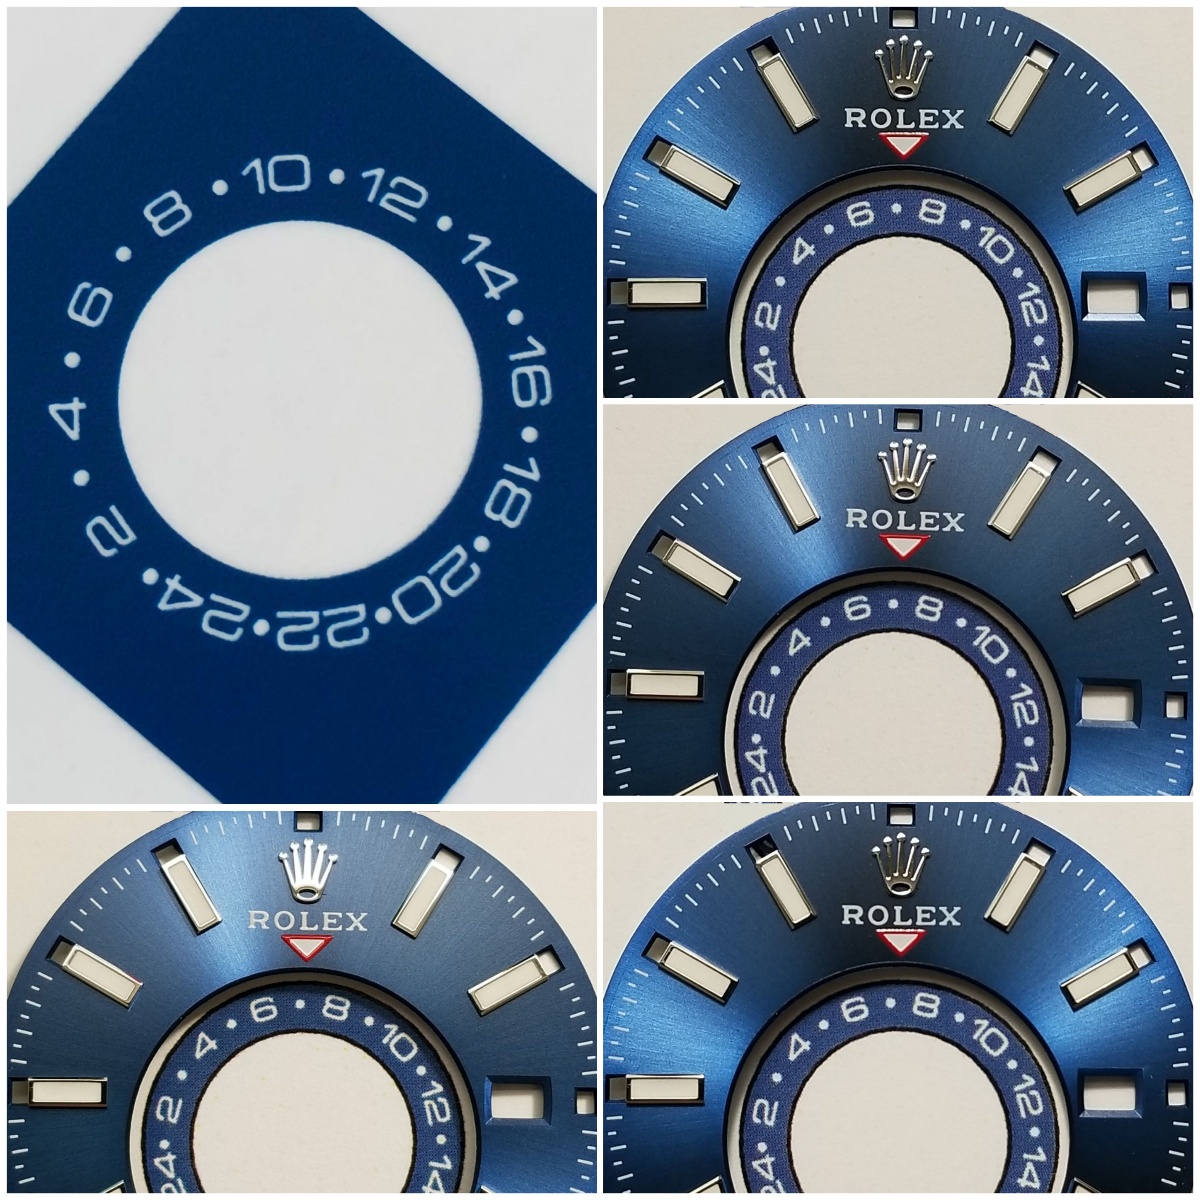
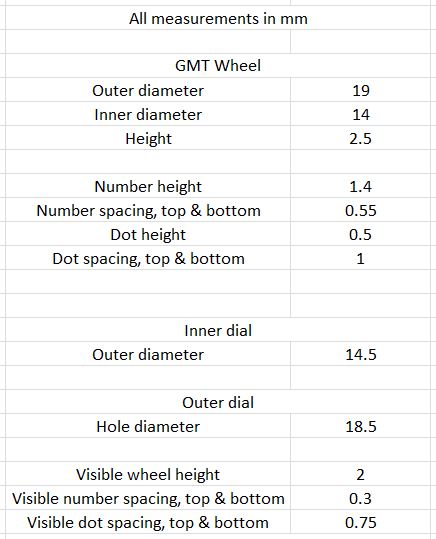
With the help of a forum poll, I picked a color choice and set about getting the replacement GMT wheel installed. You can take a look at the Poll thread if interested:
https://forum.replica-watch.info/forum/rolex-tudor-replicas/9957249-skydweller-poll
From the Poll thread:
So on to the installation!
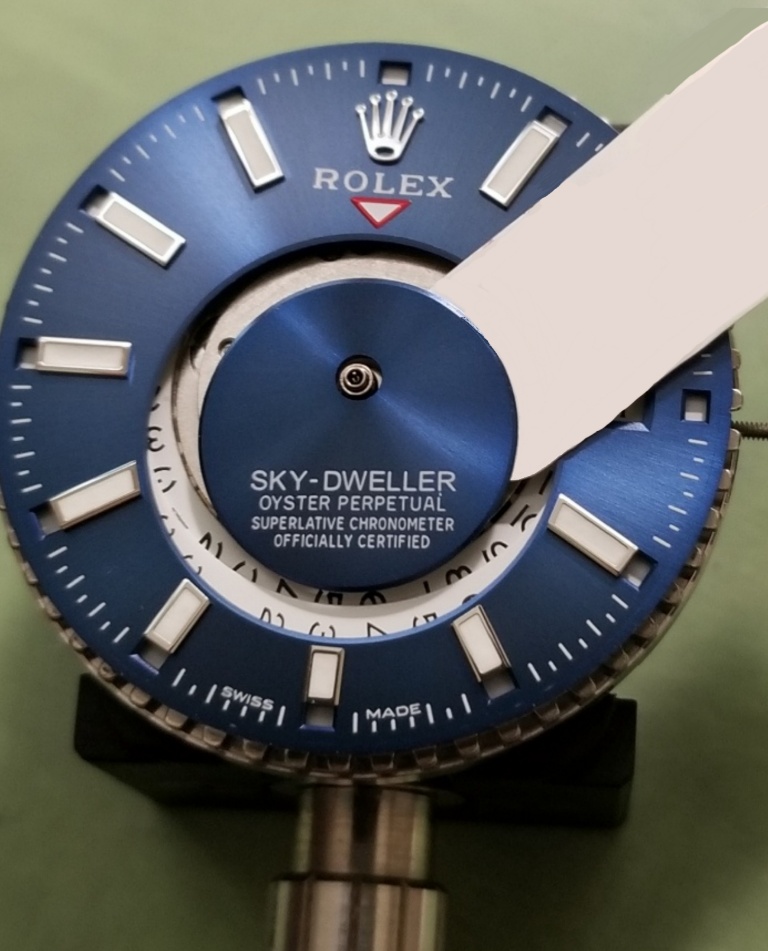
After removing the movement, hands, and dial, the center dial section has to be pried off. It is held on very strongly by two pieces of double-sided tape.
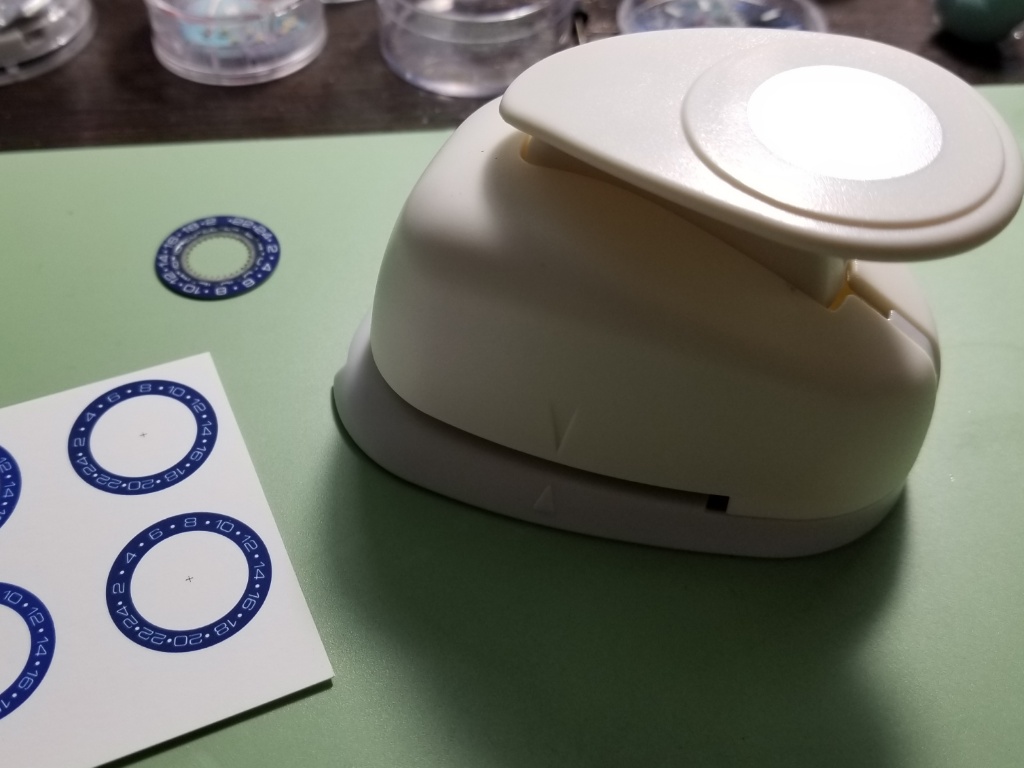
I bought a ¾” hole punch which coincidentally was the right outside diameter of the GMT wheel (19mm) so that made it easy to cut the wheel out. I then used a thin razor to cut away the inside area.
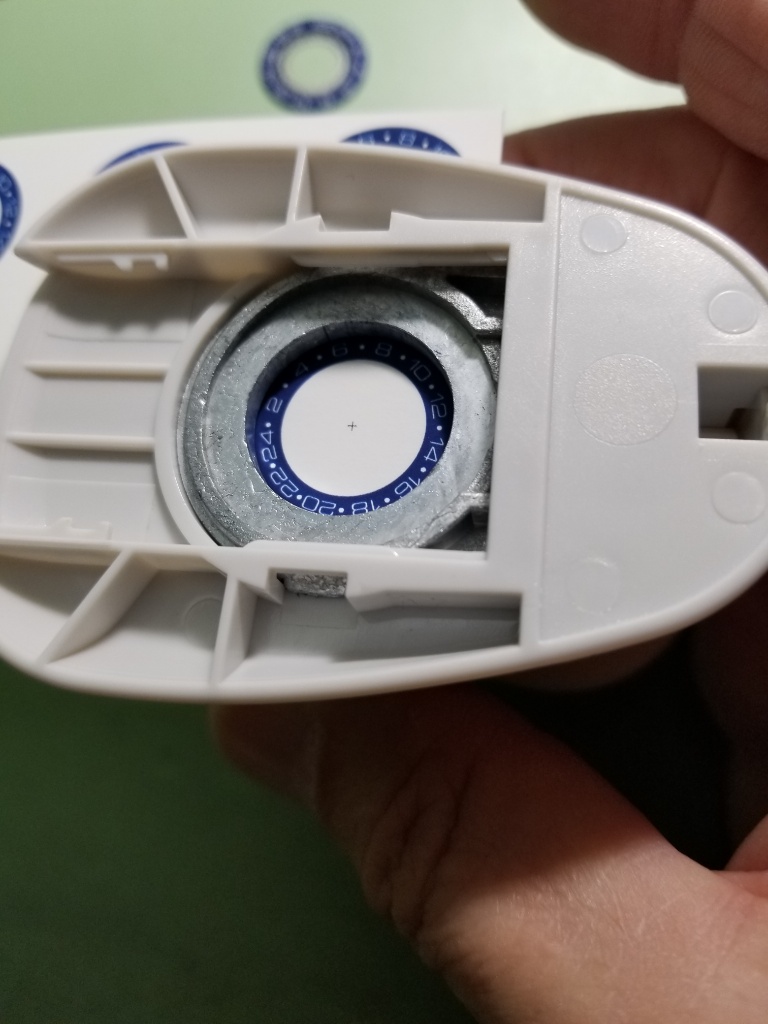
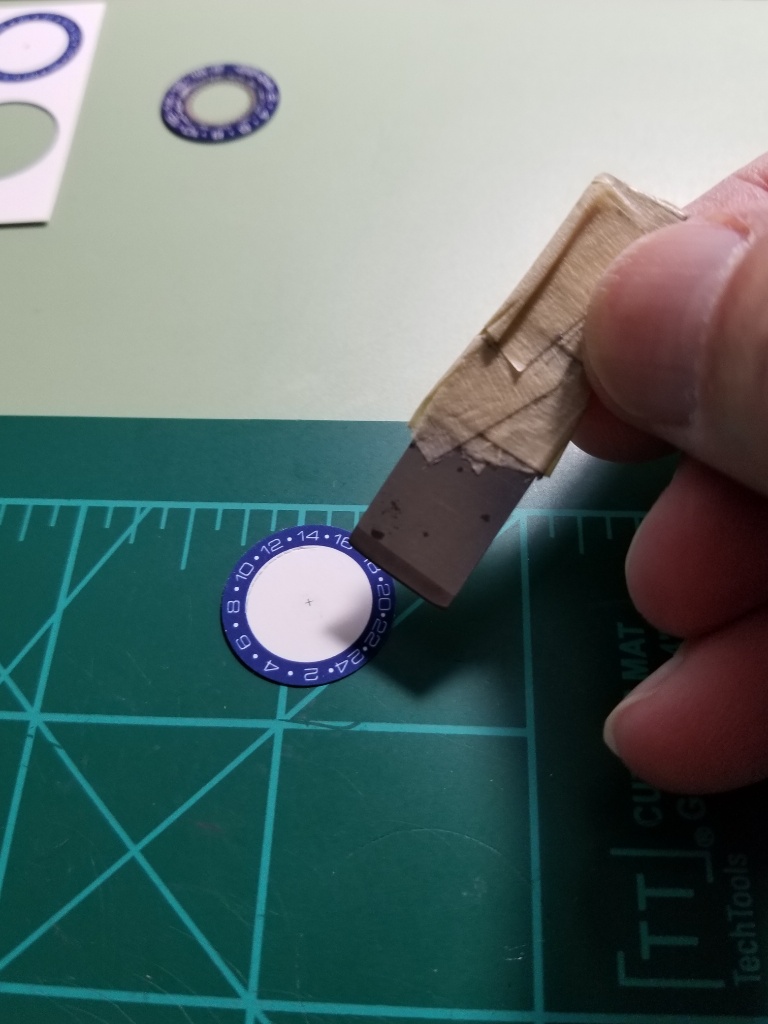
Then it’s just a hit and miss guessing game to make everything fit without scraping against each other or to the dial underside. This is very similar to adding a new DWO, except that now there are two overlays to deal with.
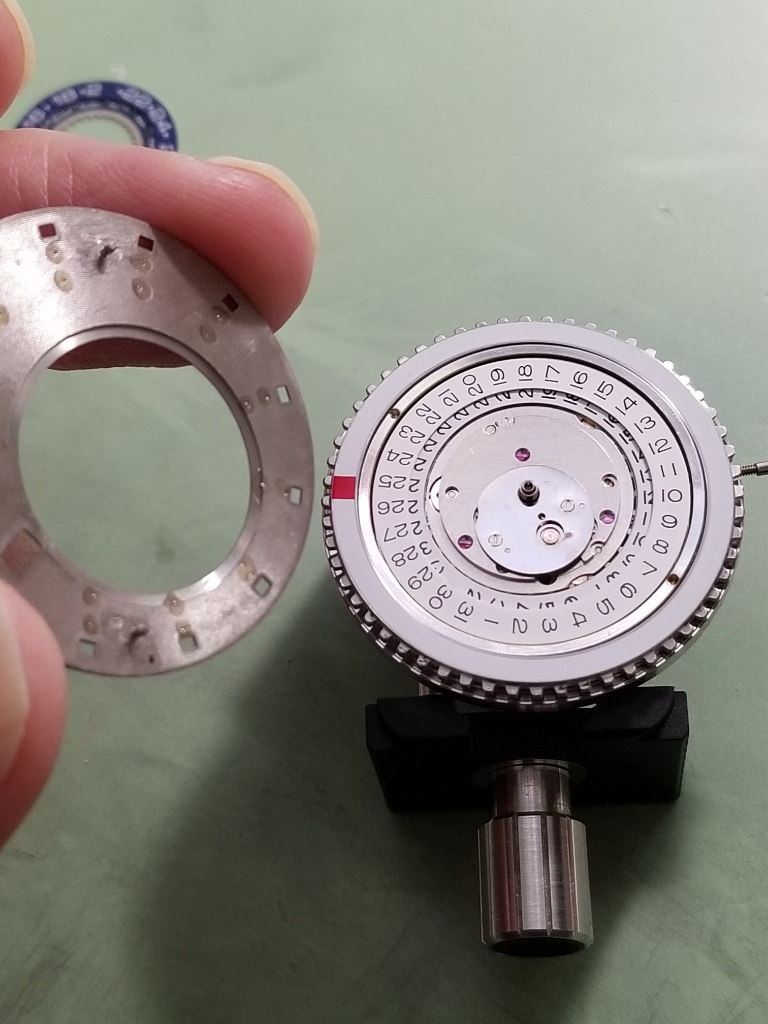
The GMT replacement wheel I picked had been printed on pretty thick stock paper so I knew I needed to take a lot off the Noob GMT wheel for it to fit under the dial.
Original Noob GMT wheel plus overlay
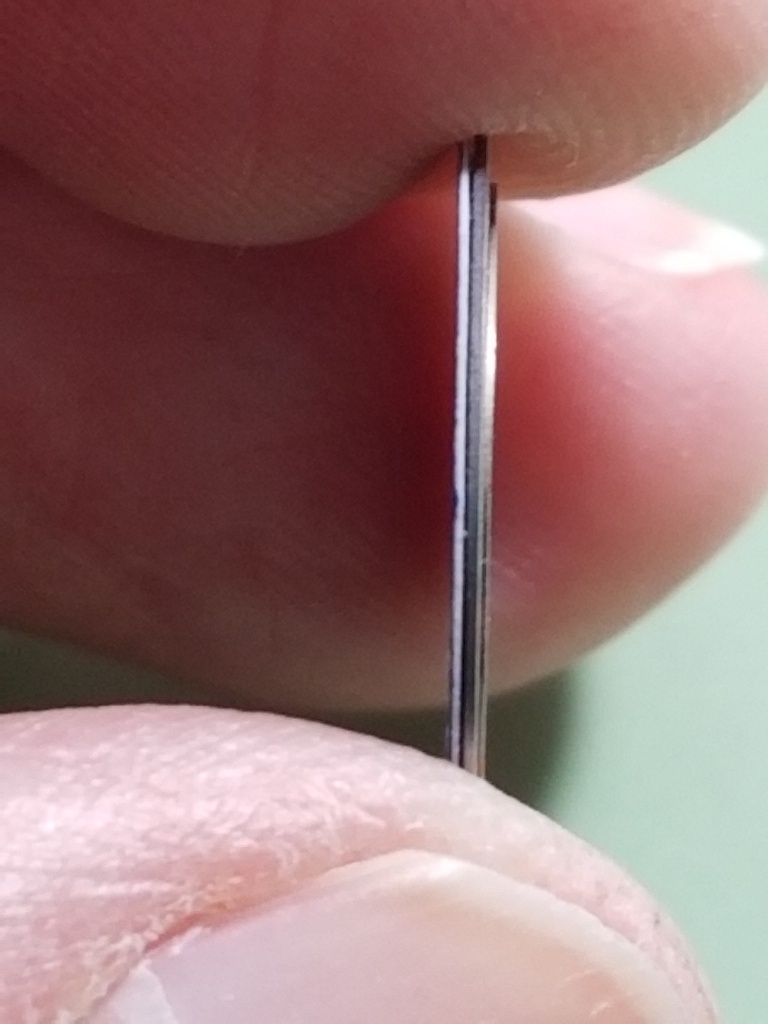
So I started sanding it down
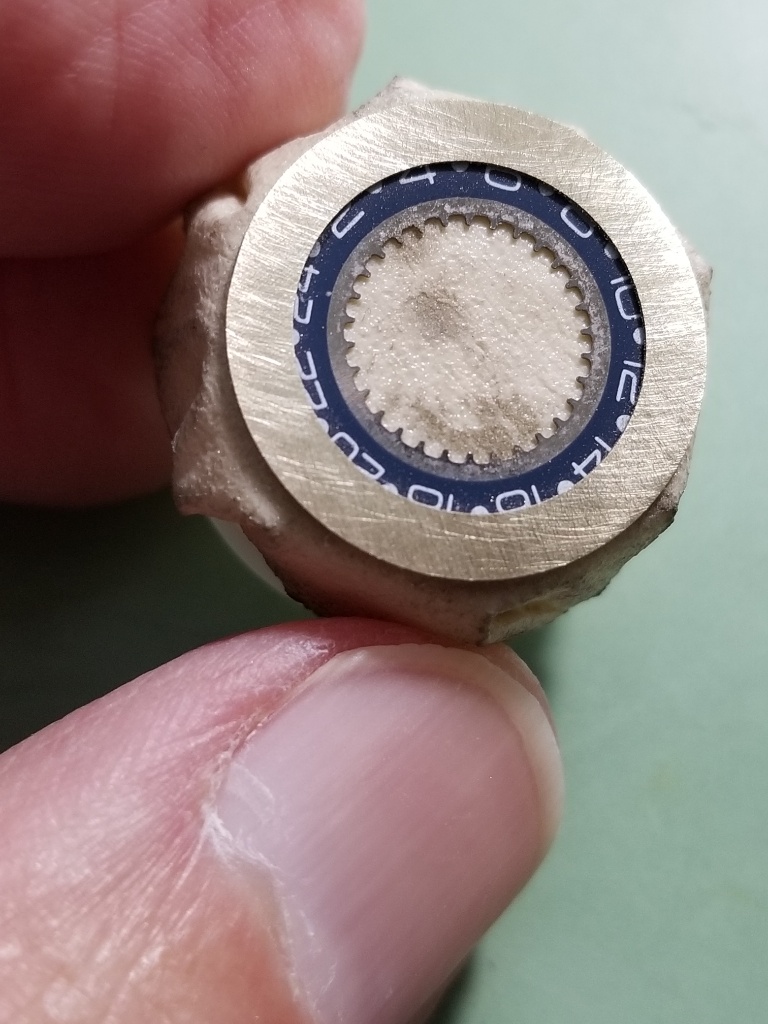
Before and after
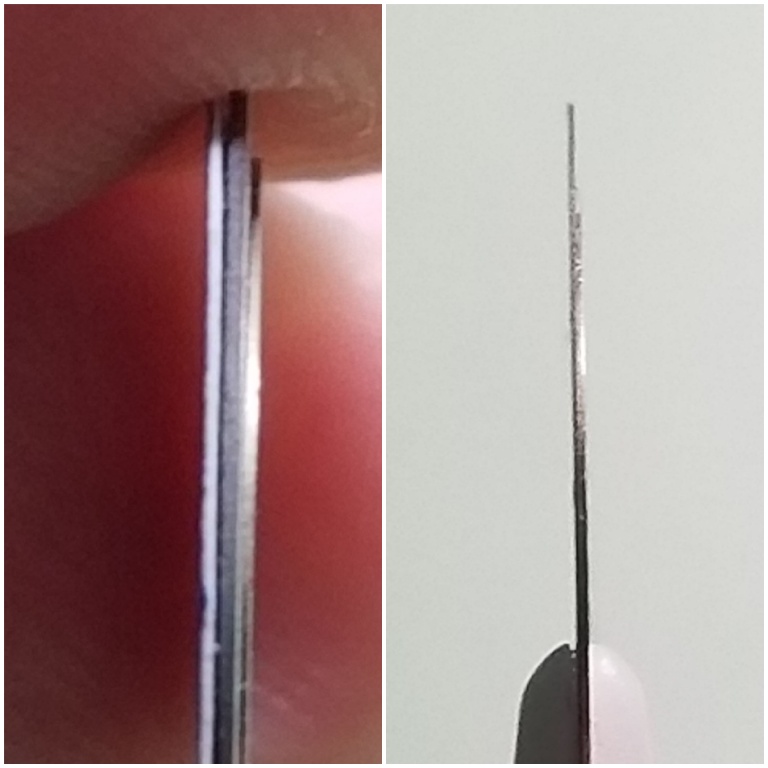
Even this thin I was concerned about the replacement GMT wheel scraping the underside of the dial so I took some off the inner tooth ring. Then it turned out to sit so low that it was touching the DWO beneath it, so I had to detach the DWO from the DW, thin both of those a little and re-glue them. This had the unintended benefit of moving the DWO further from the cyclops which increased the date mag a little, something that the Noob needed anyway.
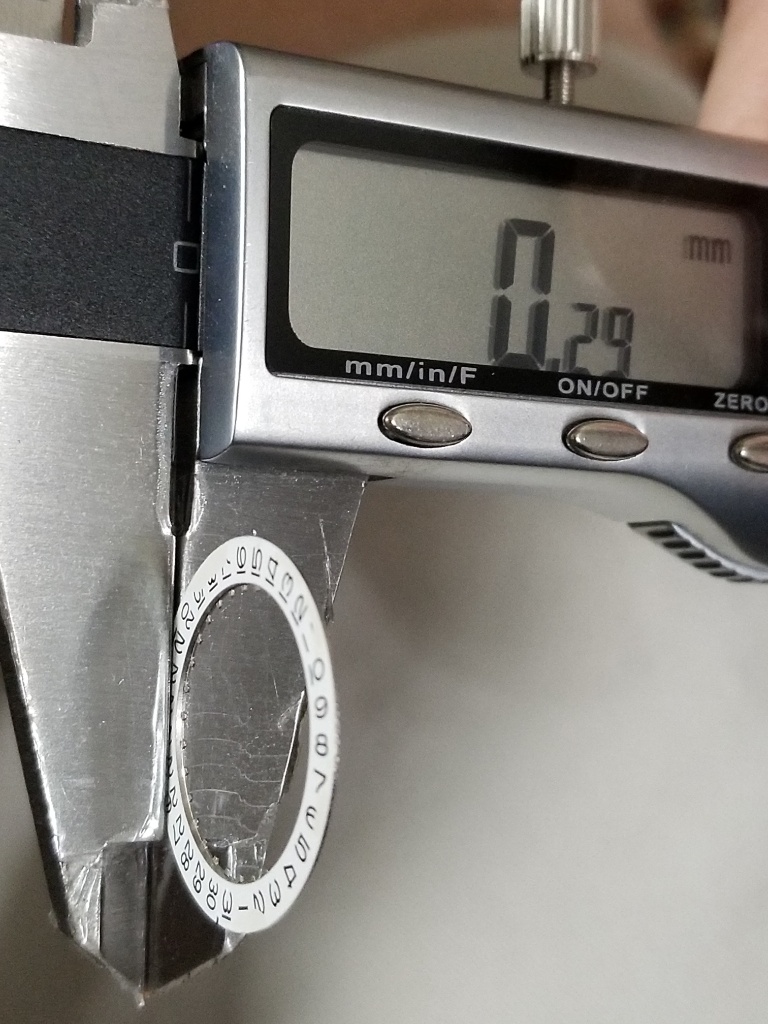
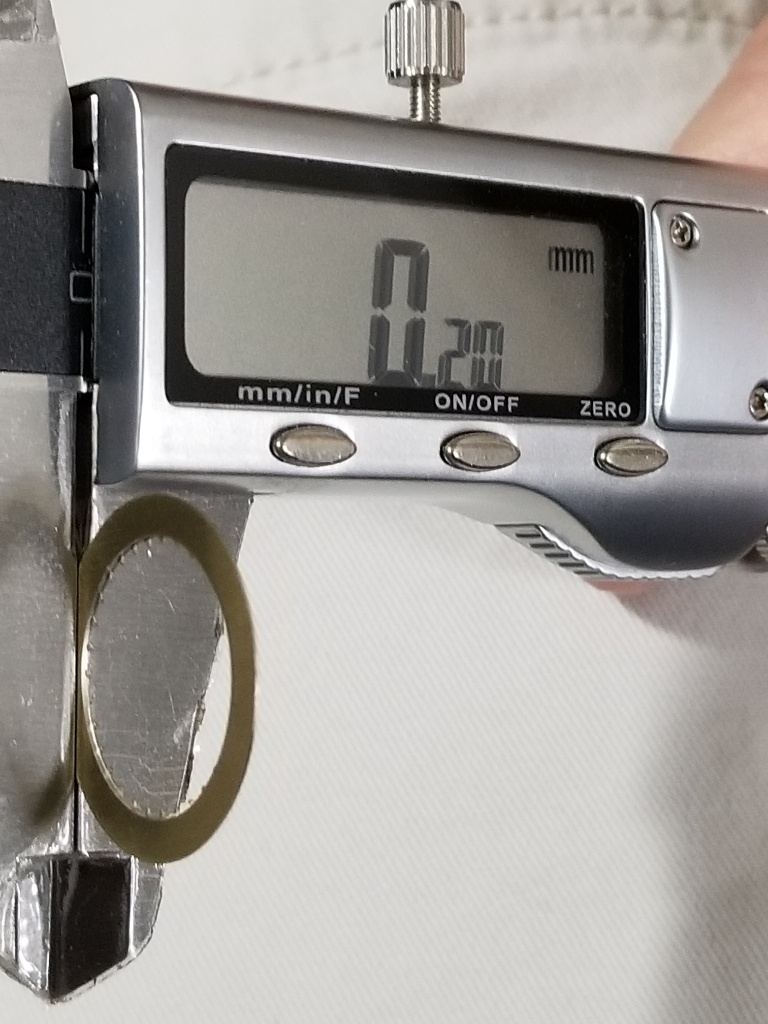
Talk about a tight fit!
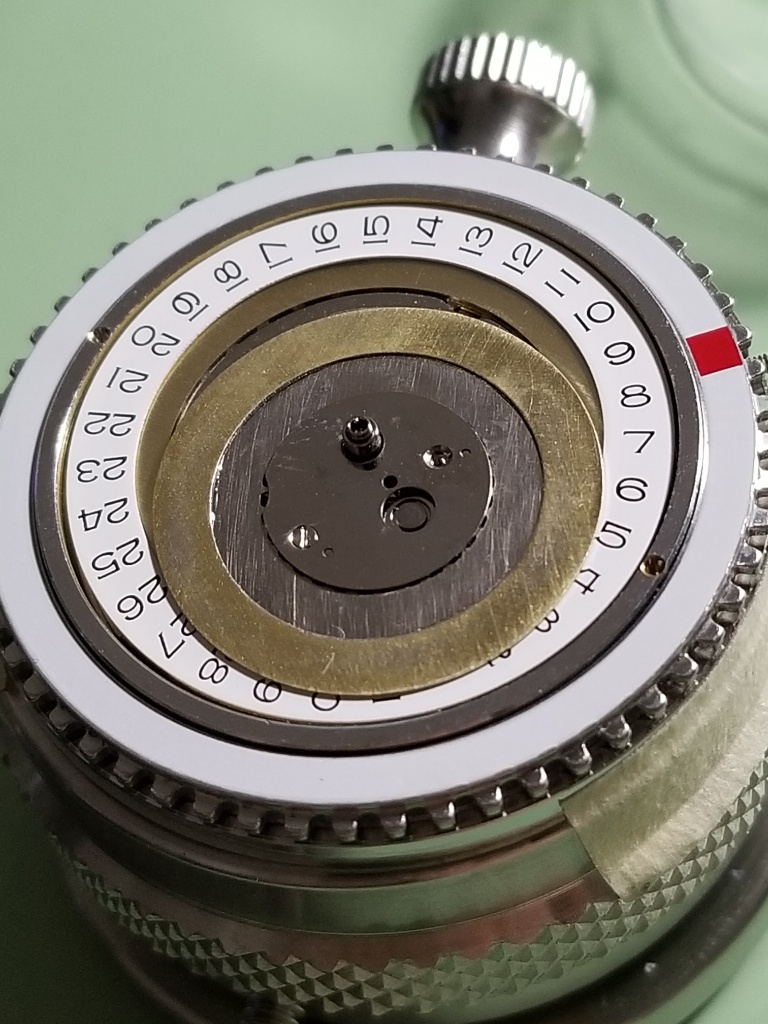
So then it’s just a matter of gluing the replacement GMT wheel overlay onto the GMT wheel overlay disc. I tried a few different types of glue, and ruined a couple of wheels either due to smearing or because the glue was thick enough to push the GMT overlay into the underside of the dial. Eventually I found the right combo, and GS Hypo cement worked the best.
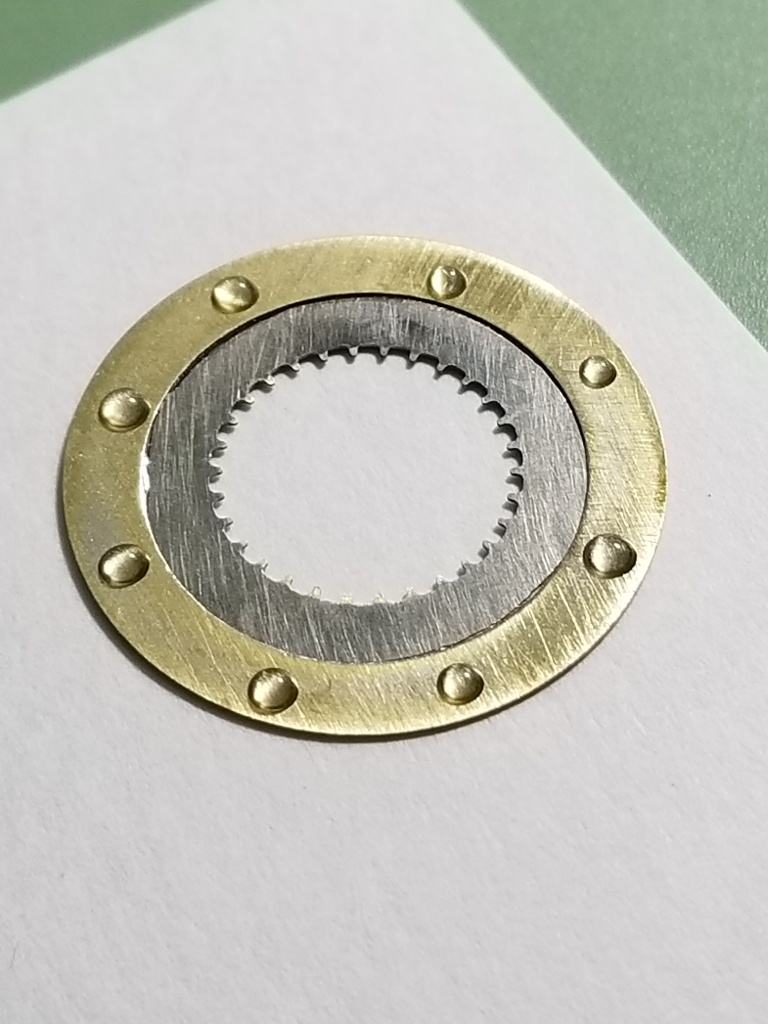
Surprisingly, one of the most challenging tasks was getting the center dial piece back on straight. I ended up using 3 dial dot halves oriented in 120 degree offset positions. I found the camera phone editing software to be the solution for getting the text lined up and no kidding it took more than a dozen attempts before I was satisfied they were aligned.
I made a little painter’s tape holder for the dial section so I could adjust its rotational position easily
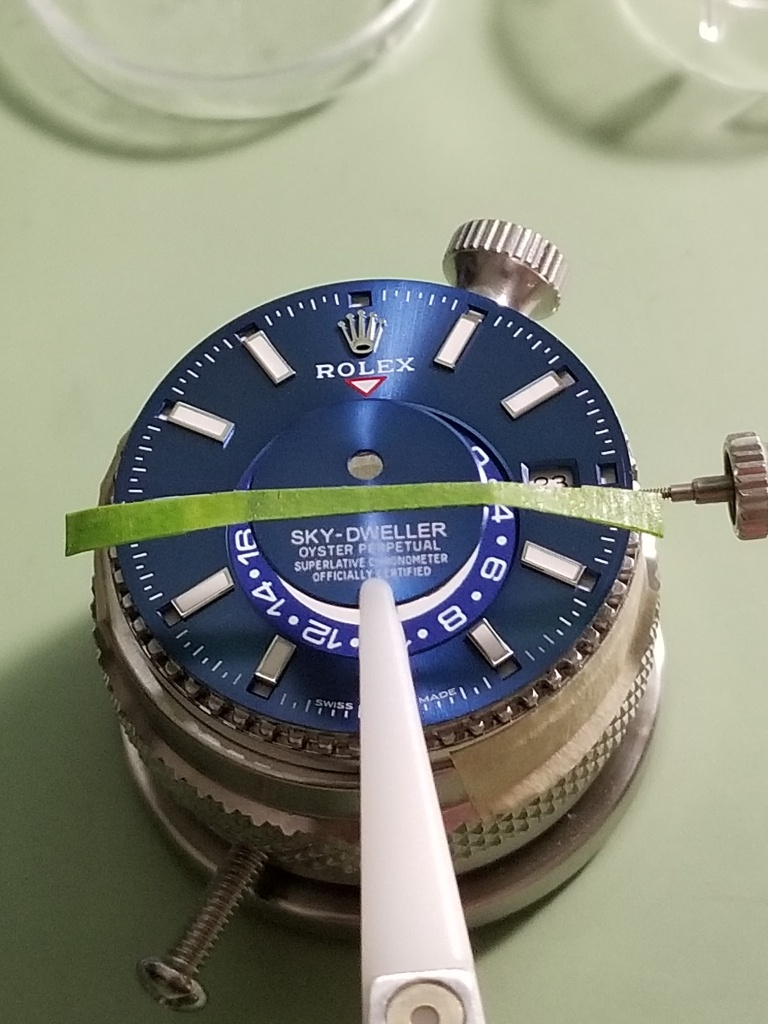
Then by taking pics and using the picture editing grid lines, I adjusted the center dial to get it perfect
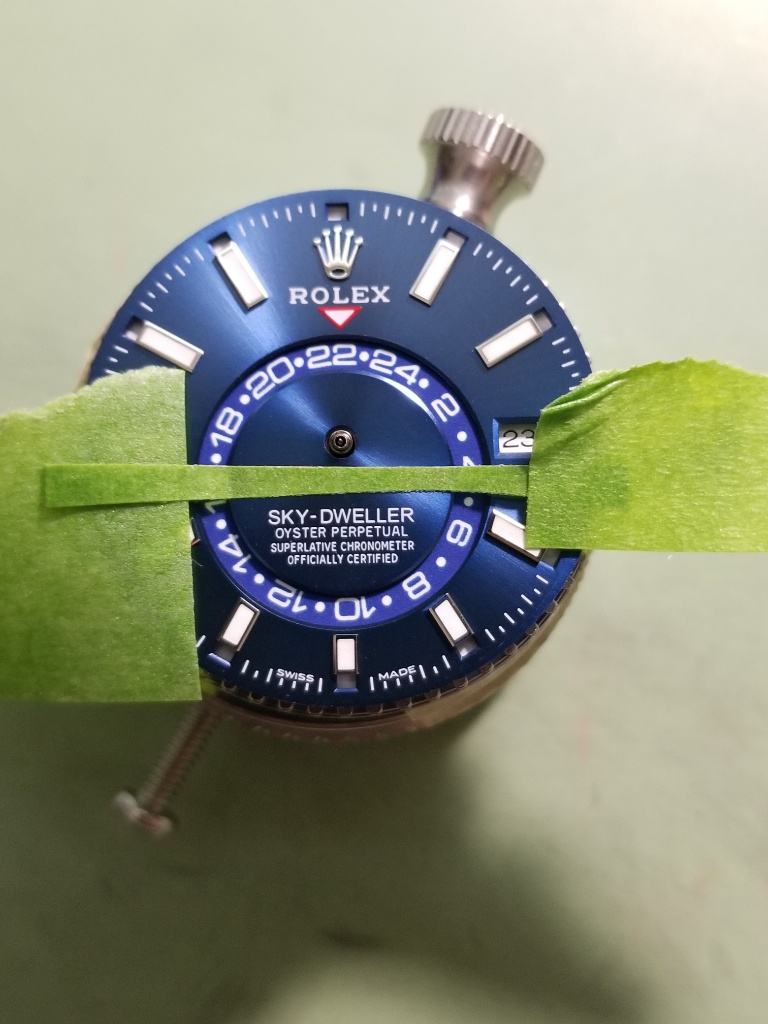
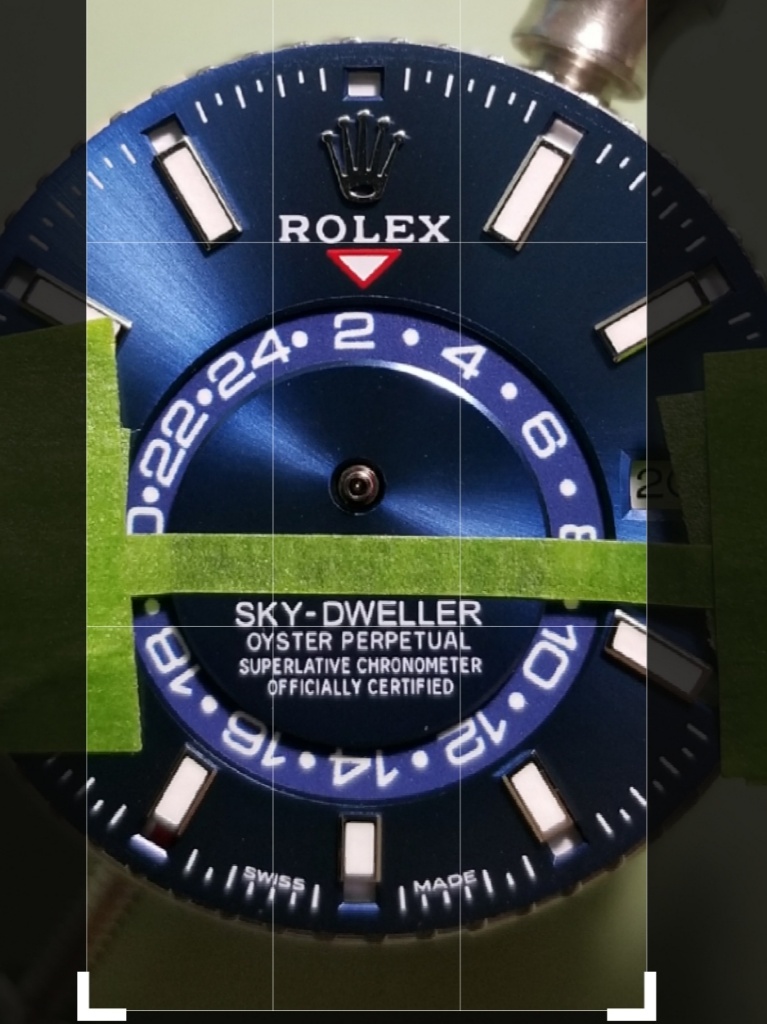
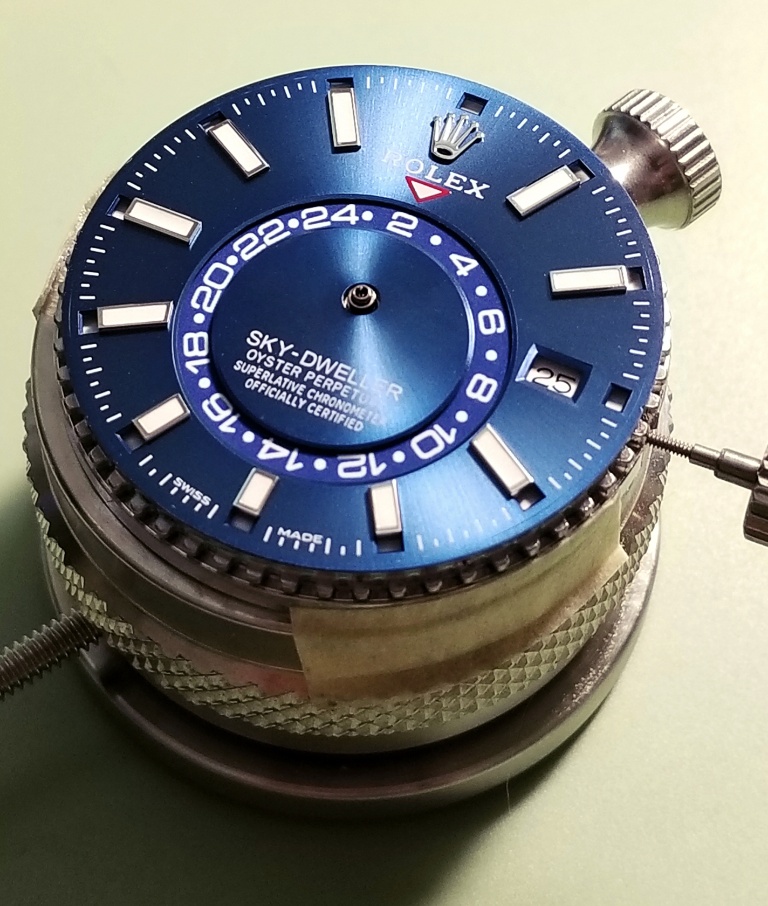
Then just put it all back together and there it is!
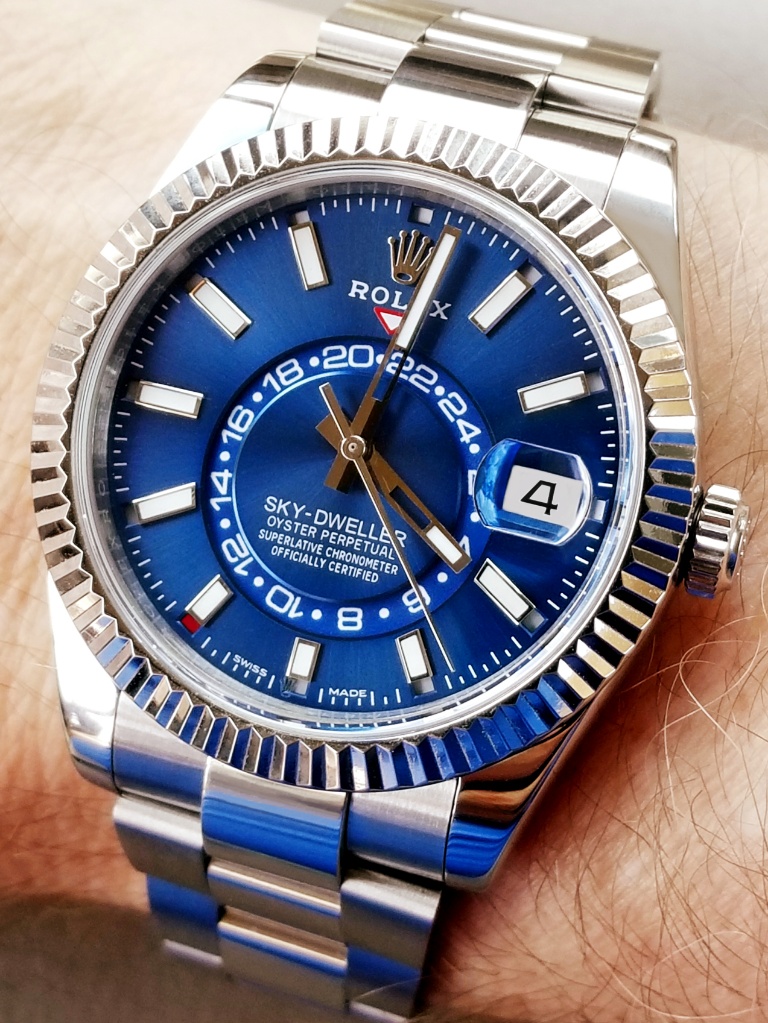
Thanks again to muiramas without whose tireless technical advice and professional work this watch would still be sitting in my drawer. Thanks bro!
Thanks for looking!

I tried unsuccessfully to get a replacement GMT wheel of course and even a new movement with the GMT wheel included but Noob wouldn't let either go. This was back in August 2020. I had my wife try painting the missing number and looked at some mini decals for train models, etc. All dead ends. Then member muiramas saw one of my posts and graciously offered to create the artwork for a new GMT wheel. (Thanks a million bro, your work is incredible!) After a few version tweaks with different weight fonts, etc. we had a good file. The really great thing about this new GMT wheel is muiramas made it with all the numbers properly oriented to center on the arc which eliminates the funky number alignment on the Noob wheel.
So we had the artwork printed on every kind of paper - matte, glossy, transparency, thick, thin, photo, sticker paper you name it, if it was available it was tried. Obviously if perfection is the goal only pad printing will deliver that but it costs hundreds of dollars ($500 +) just to get a cliche (stencil) made. So the printing method that worked best was Epson proofs. Those have a slight tendency for colors to run, so I chose a little thicker font which makes any bleeding into the white less evident. While not perfect, the results are completely satisfactory IMO, especially given the number alignment issue has been corrected and this will get my rep back into action. It had been been sidelined for nearly all of it's one year life.
I spent hours tinkering with different CYMK color combos and narrowed it down to about 10 choices, which interestingly came out very different on different types of paper.
The number of sheets printed to get one little GMT wheel was truly staggering.
Here are some random pics of print attempts.


With the help of a forum poll, I picked a color choice and set about getting the replacement GMT wheel installed. You can take a look at the Poll thread if interested:
https://forum.replica-watch.info/forum/rolex-tudor-replicas/9957249-skydweller-poll
From the Poll thread:
Generally, the printer you are using is far more important than the resolution of the file. Things like posters and stickers are really for viewing at 4-10 feet - nothing like a watch face, so the printers for these applications would never have achieved the result we needed for this project.
The file used in this case is an EPS file (vector) - see pic, which is resolution independent - it will only print at the maximum resolution of the printer. The output device used for KJ's GMT Wheel is an Epson Surecolour proofer, which has a 1,200 x 2,400 dpi actual resolution which is at the top end of what is possible (unless you are pad / litho in single colour). It is true that you can get inkjets with resolutions up to 5,000 dpi, but these 'consumer' grade printers do not use the same metrics - it's all interpolation, stretched truths and nonsense...

So on to the installation!
After removing the movement, hands, and dial, the center dial section has to be pried off. It is held on very strongly by two pieces of double-sided tape.

I bought a ¾” hole punch which coincidentally was the right outside diameter of the GMT wheel (19mm) so that made it easy to cut the wheel out. I then used a thin razor to cut away the inside area.


Then it’s just a hit and miss guessing game to make everything fit without scraping against each other or to the dial underside. This is very similar to adding a new DWO, except that now there are two overlays to deal with.

The GMT replacement wheel I picked had been printed on pretty thick stock paper so I knew I needed to take a lot off the Noob GMT wheel for it to fit under the dial.
Original Noob GMT wheel plus overlay

So I started sanding it down

Before and after

Even this thin I was concerned about the replacement GMT wheel scraping the underside of the dial so I took some off the inner tooth ring. Then it turned out to sit so low that it was touching the DWO beneath it, so I had to detach the DWO from the DW, thin both of those a little and re-glue them. This had the unintended benefit of moving the DWO further from the cyclops which increased the date mag a little, something that the Noob needed anyway.


Talk about a tight fit!

So then it’s just a matter of gluing the replacement GMT wheel overlay onto the GMT wheel overlay disc. I tried a few different types of glue, and ruined a couple of wheels either due to smearing or because the glue was thick enough to push the GMT overlay into the underside of the dial. Eventually I found the right combo, and GS Hypo cement worked the best.

Surprisingly, one of the most challenging tasks was getting the center dial piece back on straight. I ended up using 3 dial dot halves oriented in 120 degree offset positions. I found the camera phone editing software to be the solution for getting the text lined up and no kidding it took more than a dozen attempts before I was satisfied they were aligned.
I made a little painter’s tape holder for the dial section so I could adjust its rotational position easily

Then by taking pics and using the picture editing grid lines, I adjusted the center dial to get it perfect


Then just put it all back together and there it is!

Thanks again to muiramas without whose tireless technical advice and professional work this watch would still be sitting in my drawer. Thanks bro!
Thanks for looking!


