Maybe Raffles has them, mine was with the case but probably if you ask they can send it to youThanks, appreciated... I did wonder. Any ideas where I can buy one?
-
Tired of adverts on RWI? - Subscribe by clicking HERE and PMing Trailboss for instructions and they will magically go away!
You are using an out of date browser. It may not display this or other websites correctly.
You should upgrade or use an alternative browser.
You should upgrade or use an alternative browser.
NEW! 1675 GMT case set offering from Raffles.
- Thread starter 369mafia
- Start date
sonofprent
Getting To Know The Place
- 16/3/25
- 25
- 29
- 13
Yeah, I figured out the GMT-ness after you'd said. I guess for dual time you either rotate the bezel on the old ones or with this set the GMT hand where you want for the other timezone?Ah, now I can understand why you didn't know how the GMT hand worked ...
(If you had a GMT bezel on this, the GMT hand (red one) would be reading 12 noon...)
sonofprent
Getting To Know The Place
- 16/3/25
- 25
- 29
- 13
Yeah, it was supposed to come with the case - Ken's sending me one out. Thanks.Maybe Raffles has them, mine was with the case but probably if you ask they can send it to you
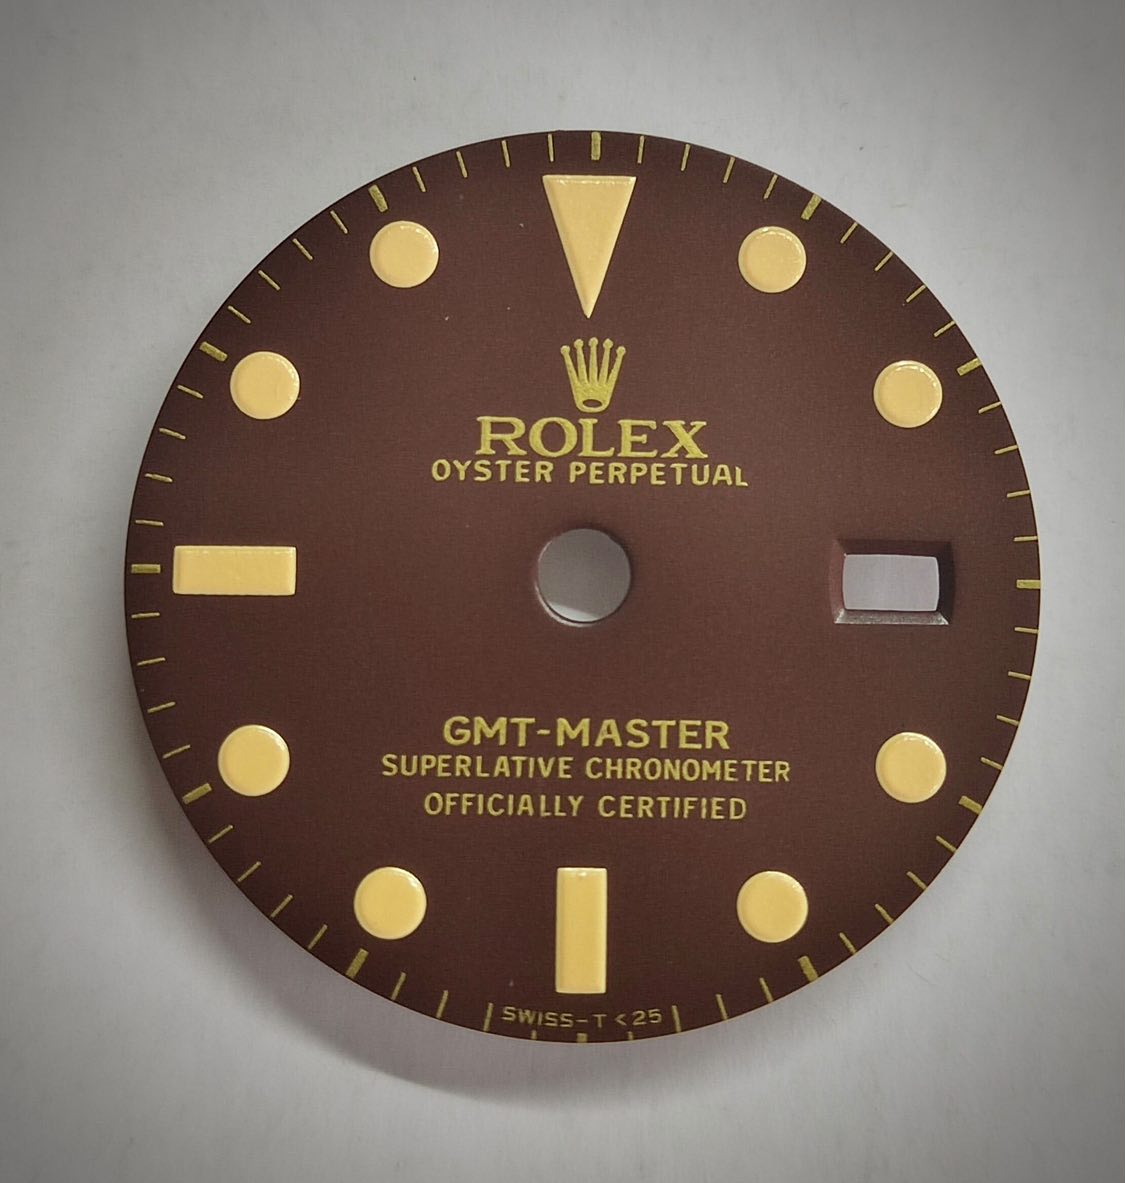
in other news.. raffles just sent me a preview of the tropical gmt dial sample.
lume is a bit brighter than I was hoping but the color and print look good after some airbrush aiging I was planning on touching up or reluming the dial anyway and these plots are much easier to deal with than the 369 explorer.
looking fwd to getting my hands on these
lume is a bit brighter than I was hoping but the color and print look good after some airbrush aiging I was planning on touching up or reluming the dial anyway and these plots are much easier to deal with than the 369 explorer.
looking fwd to getting my hands on these
Last edited:
Super stoked Raffles is so into the what's wanted, and extremely thankful for the effort, but I was personally hoping for a more accurate matte dial (or gilt dial that was actually gilt).
Grumpy old man that's never satisfied? Perhaps, but I think this is a slurry of 1963-1985 dials with made with different fonts, materials, methods, etc.
I might be 1 or 2 for supporting the cause, but I'm ultimately underwhelmed. I feel awful admitting it though. Always happy for additional options!!!
rangan
Renowned Member
- 8/4/12
- 840
- 239
- 43
I don't think there are any real gilts around for sale , except at the prohibitive price of Mq ,Super stoked Raffles is so into the what's wanted, and extremely thankful for the effort, but I was personally hoping for a more accurate matte dial (or gilt dial that was actually gilt).
Grumpy old man that's never satisfied? Perhaps, but I think this is a slurry of 1963-1985 dials with made with different fonts, materials, methods, etc.
I might be 1 or 2 for supporting the cause, but I'm ultimately underwhelmed. I feel awful admitting it though. Always happy for additional options!!!
I think you have to appreciate what Raffle has done , though not a true tropical since the brown color is uniform with no variants of the same color, but in any case at $35 I think it is not to be commented on rather it is to be appreciated the willingness to do it
")
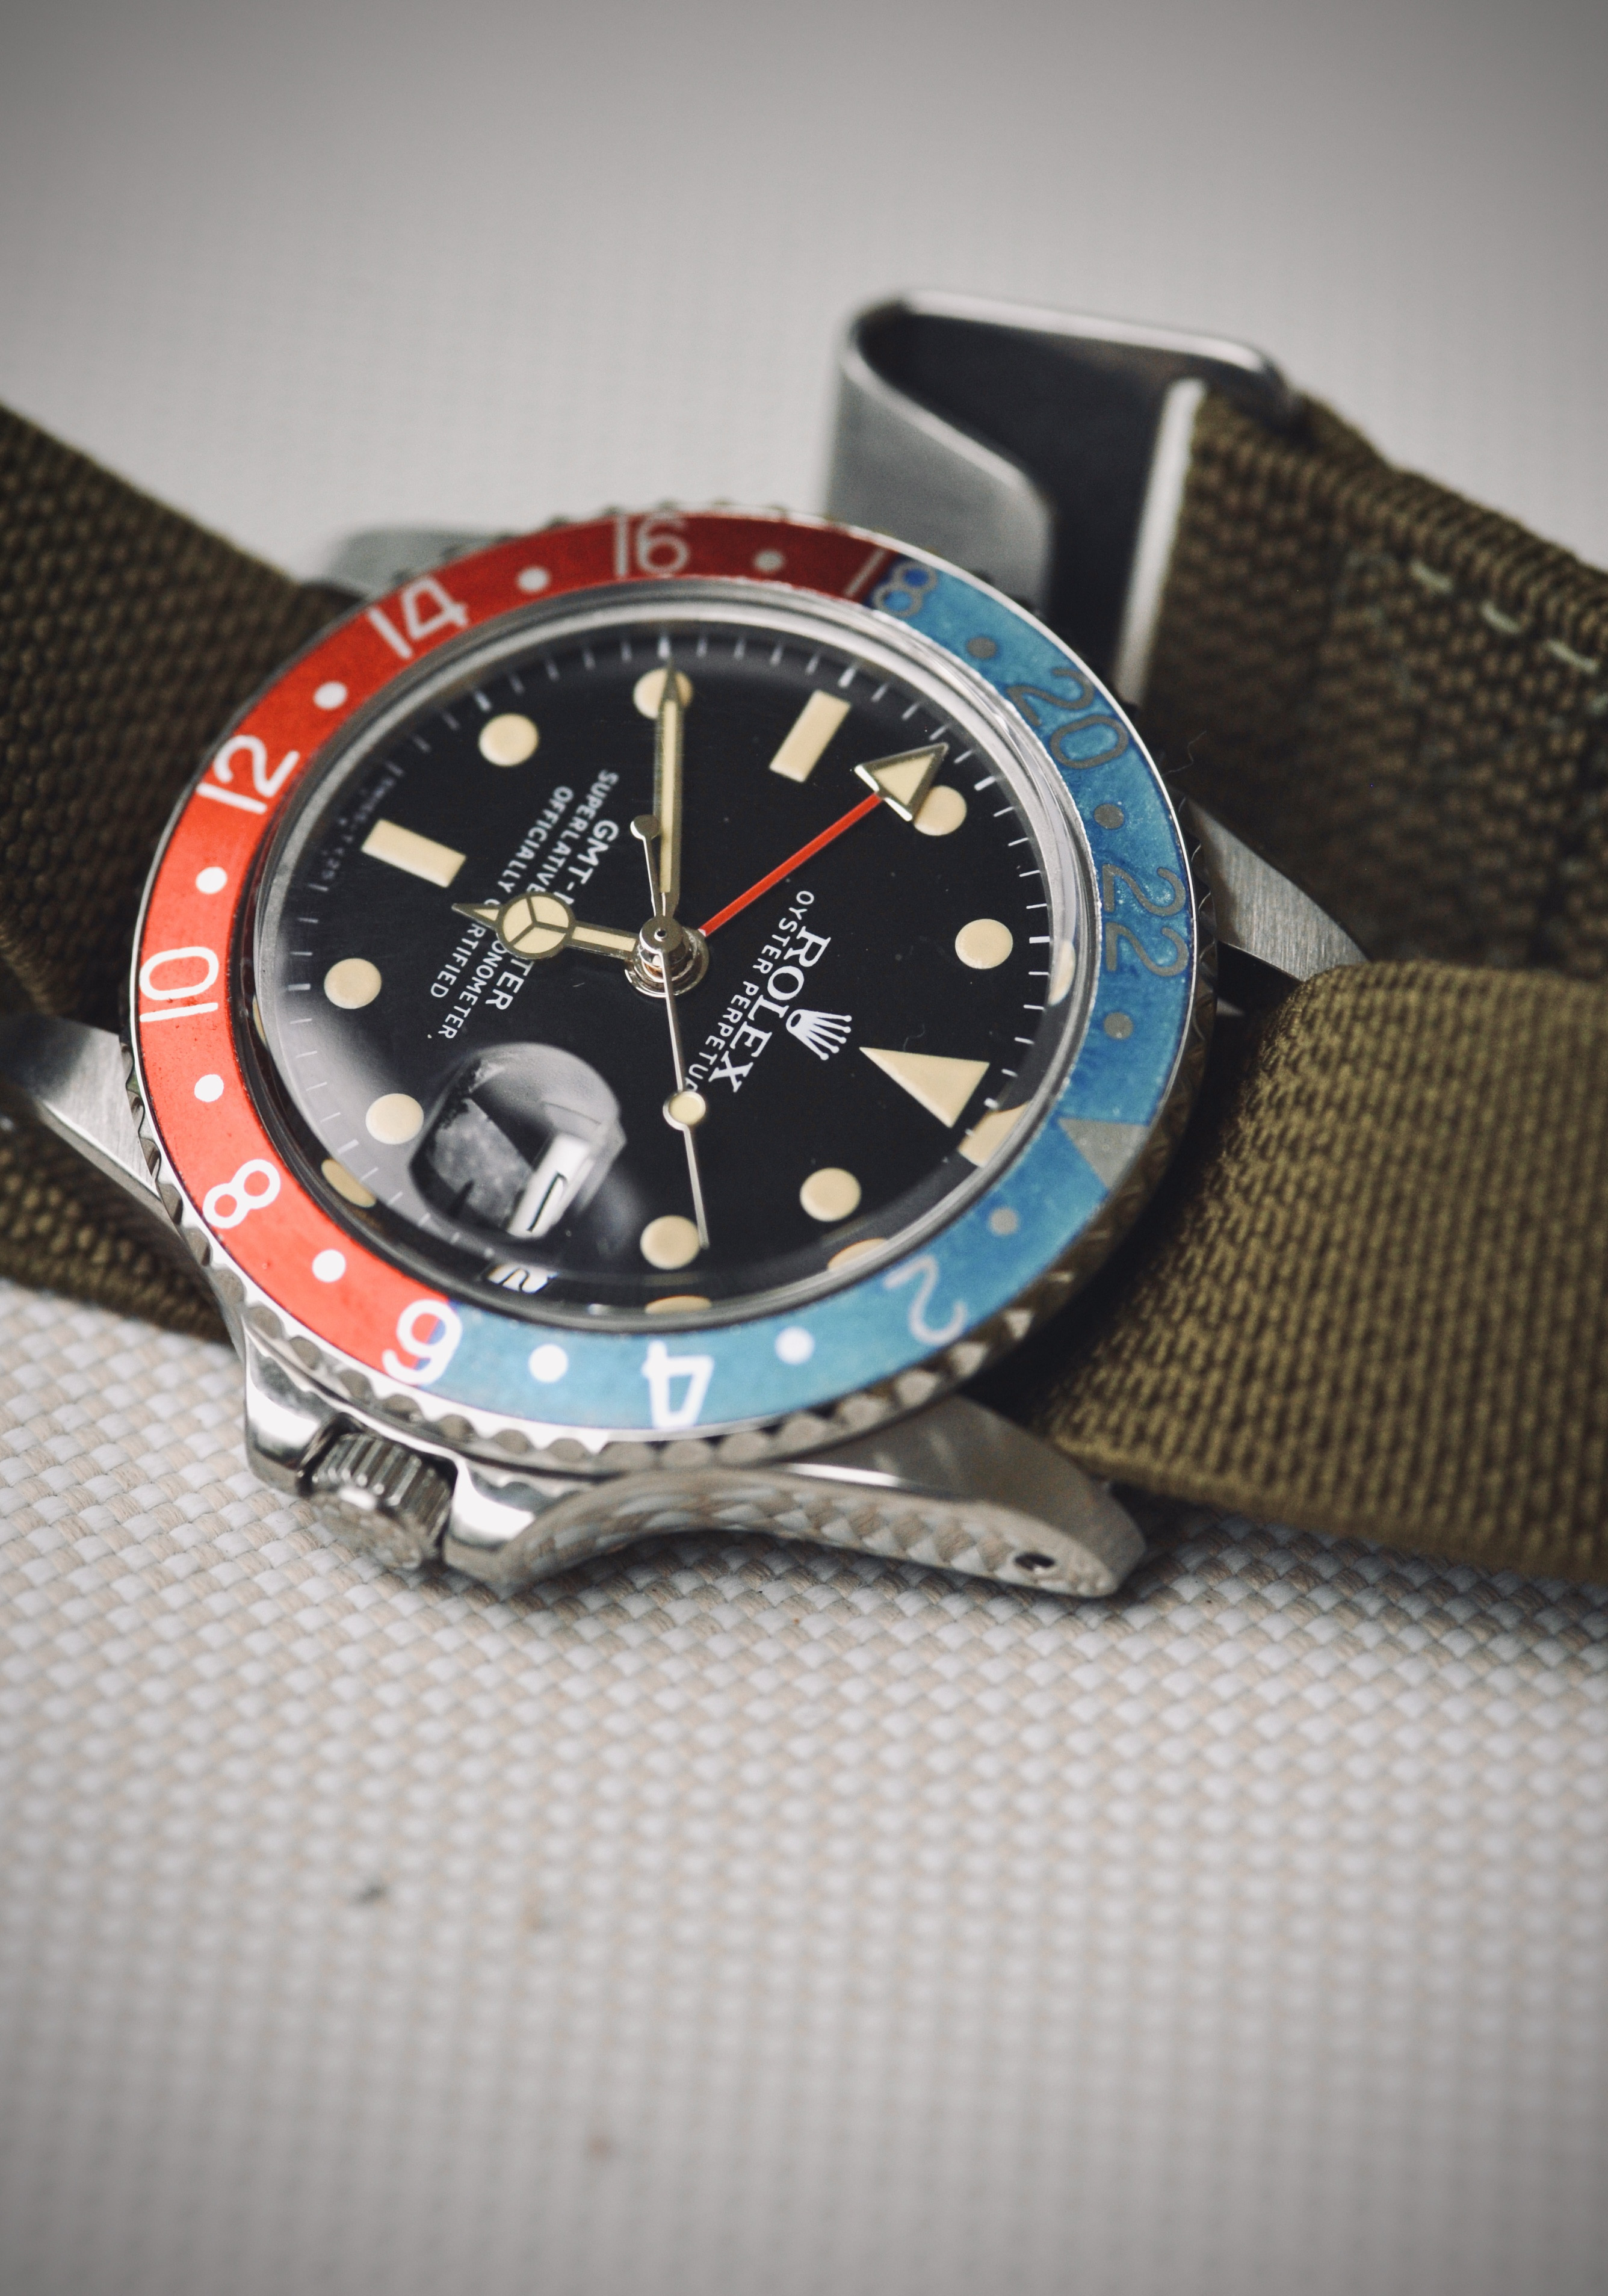
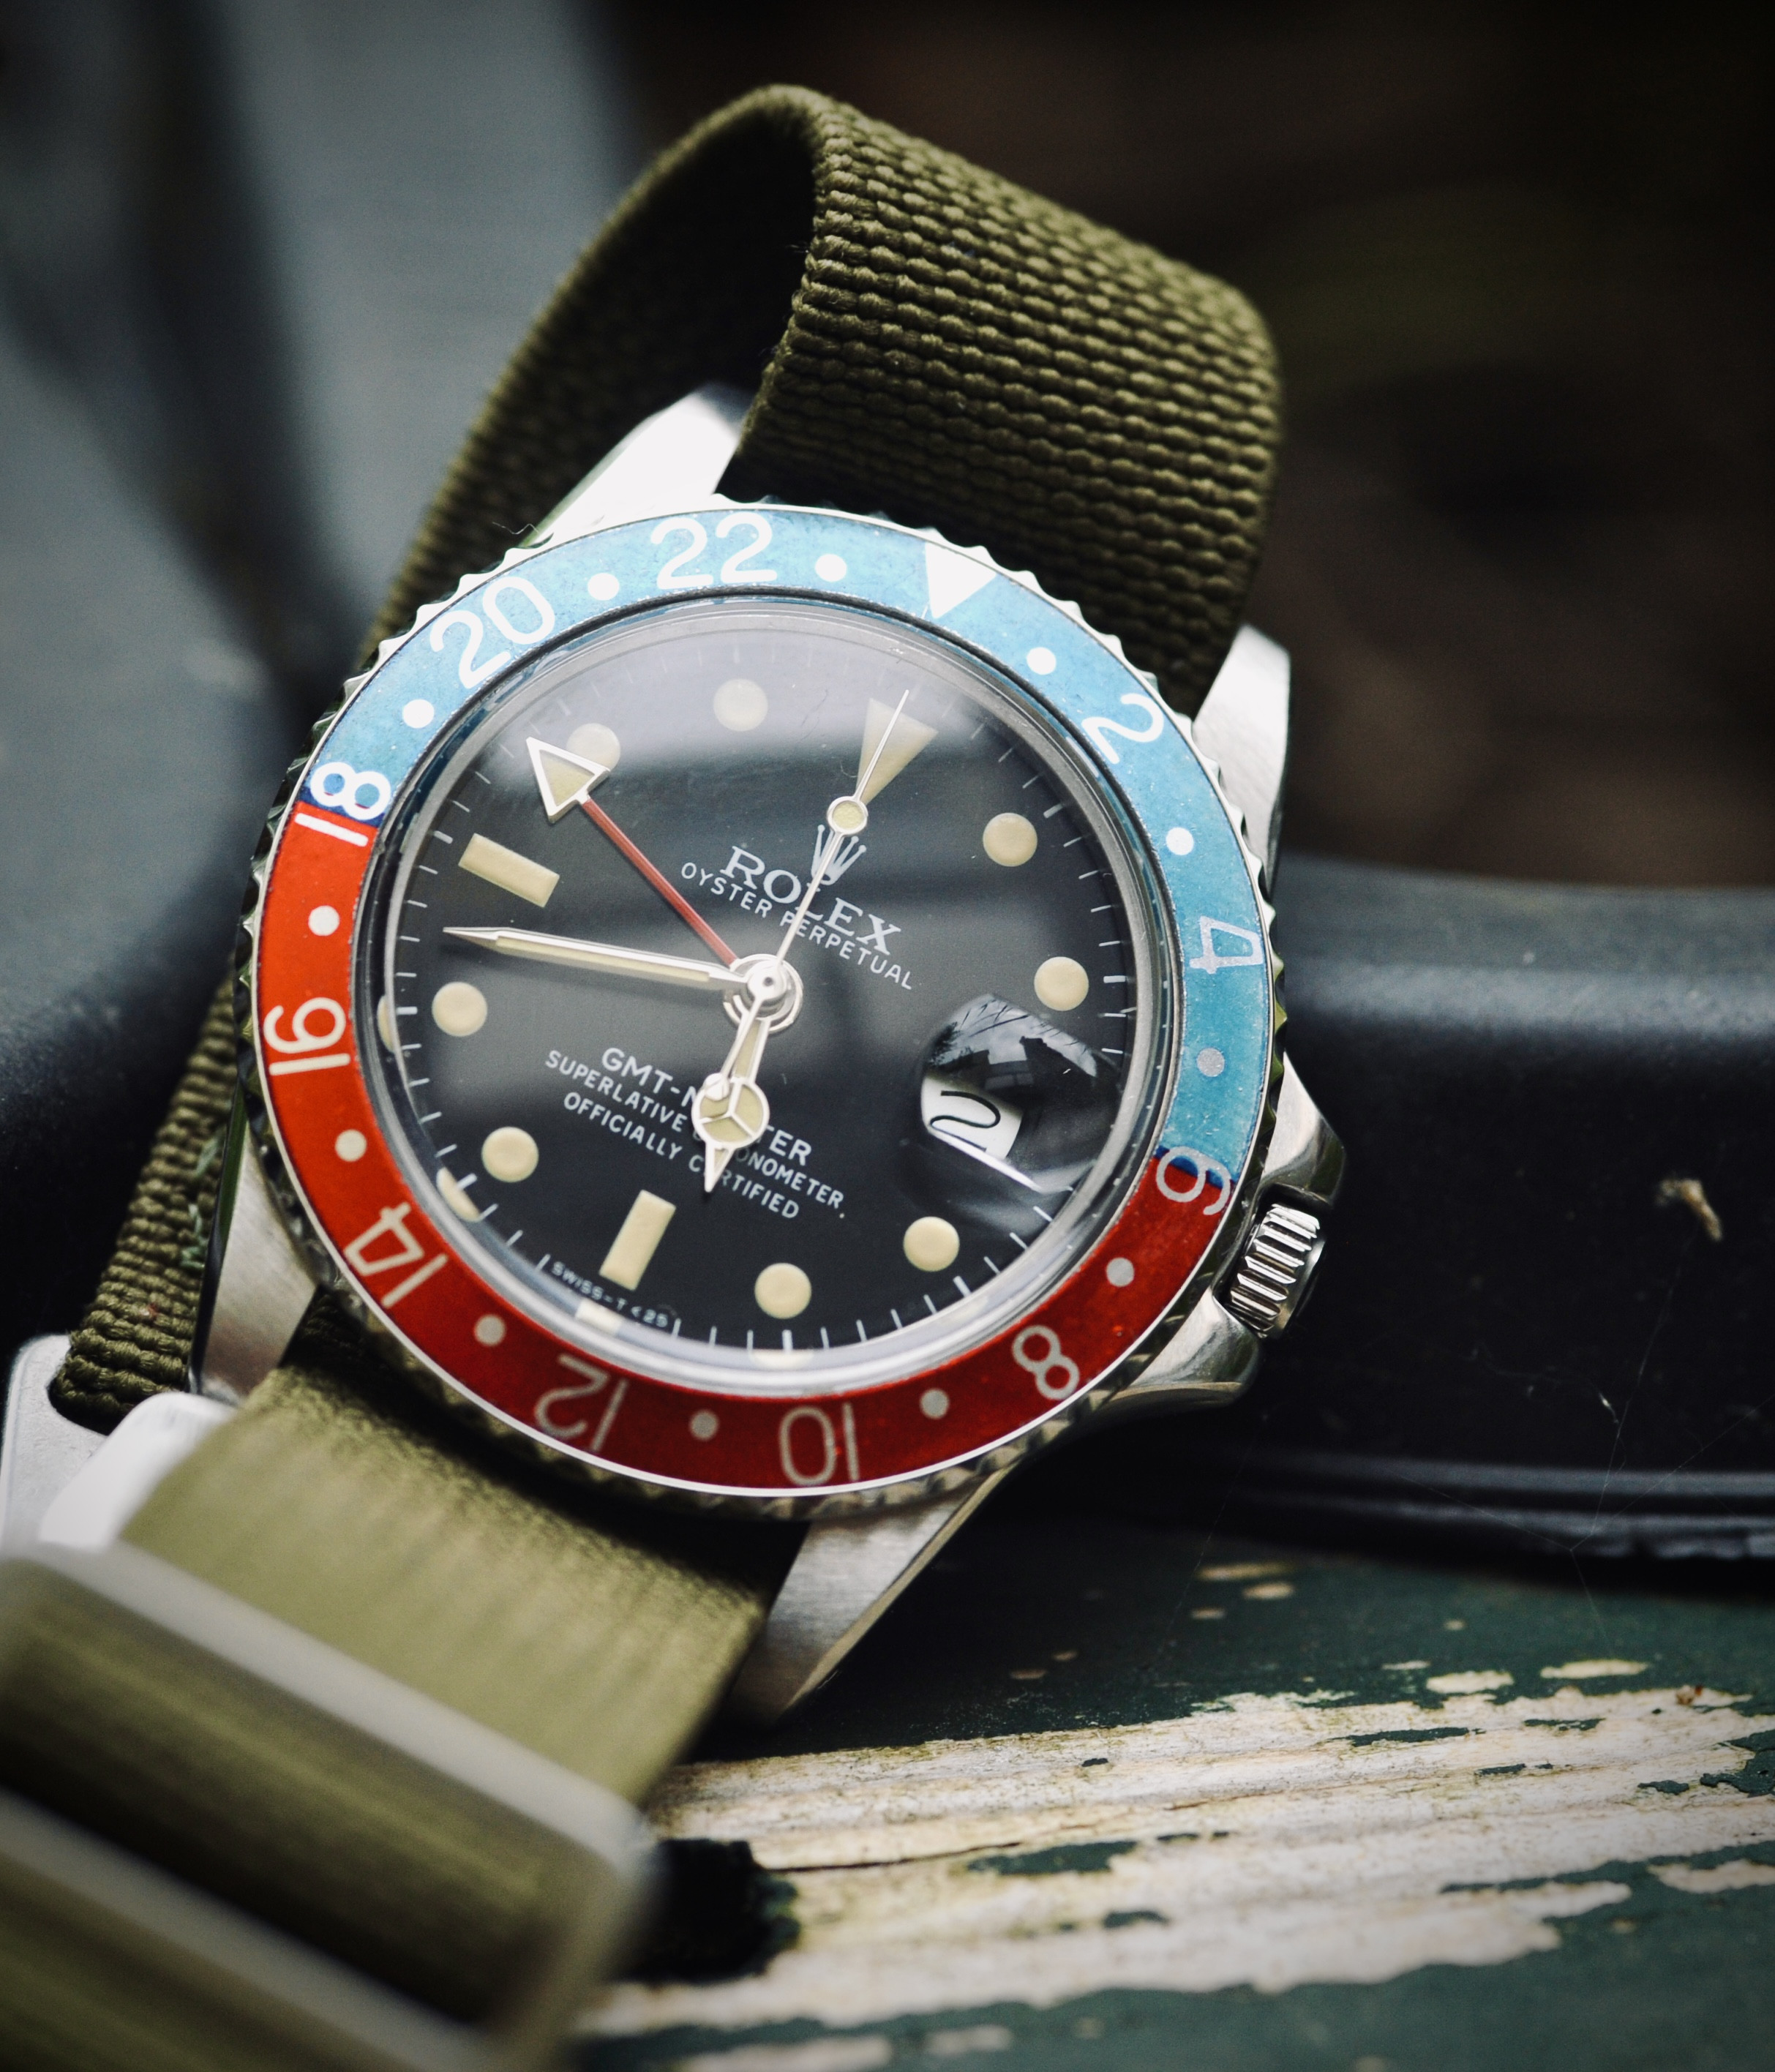
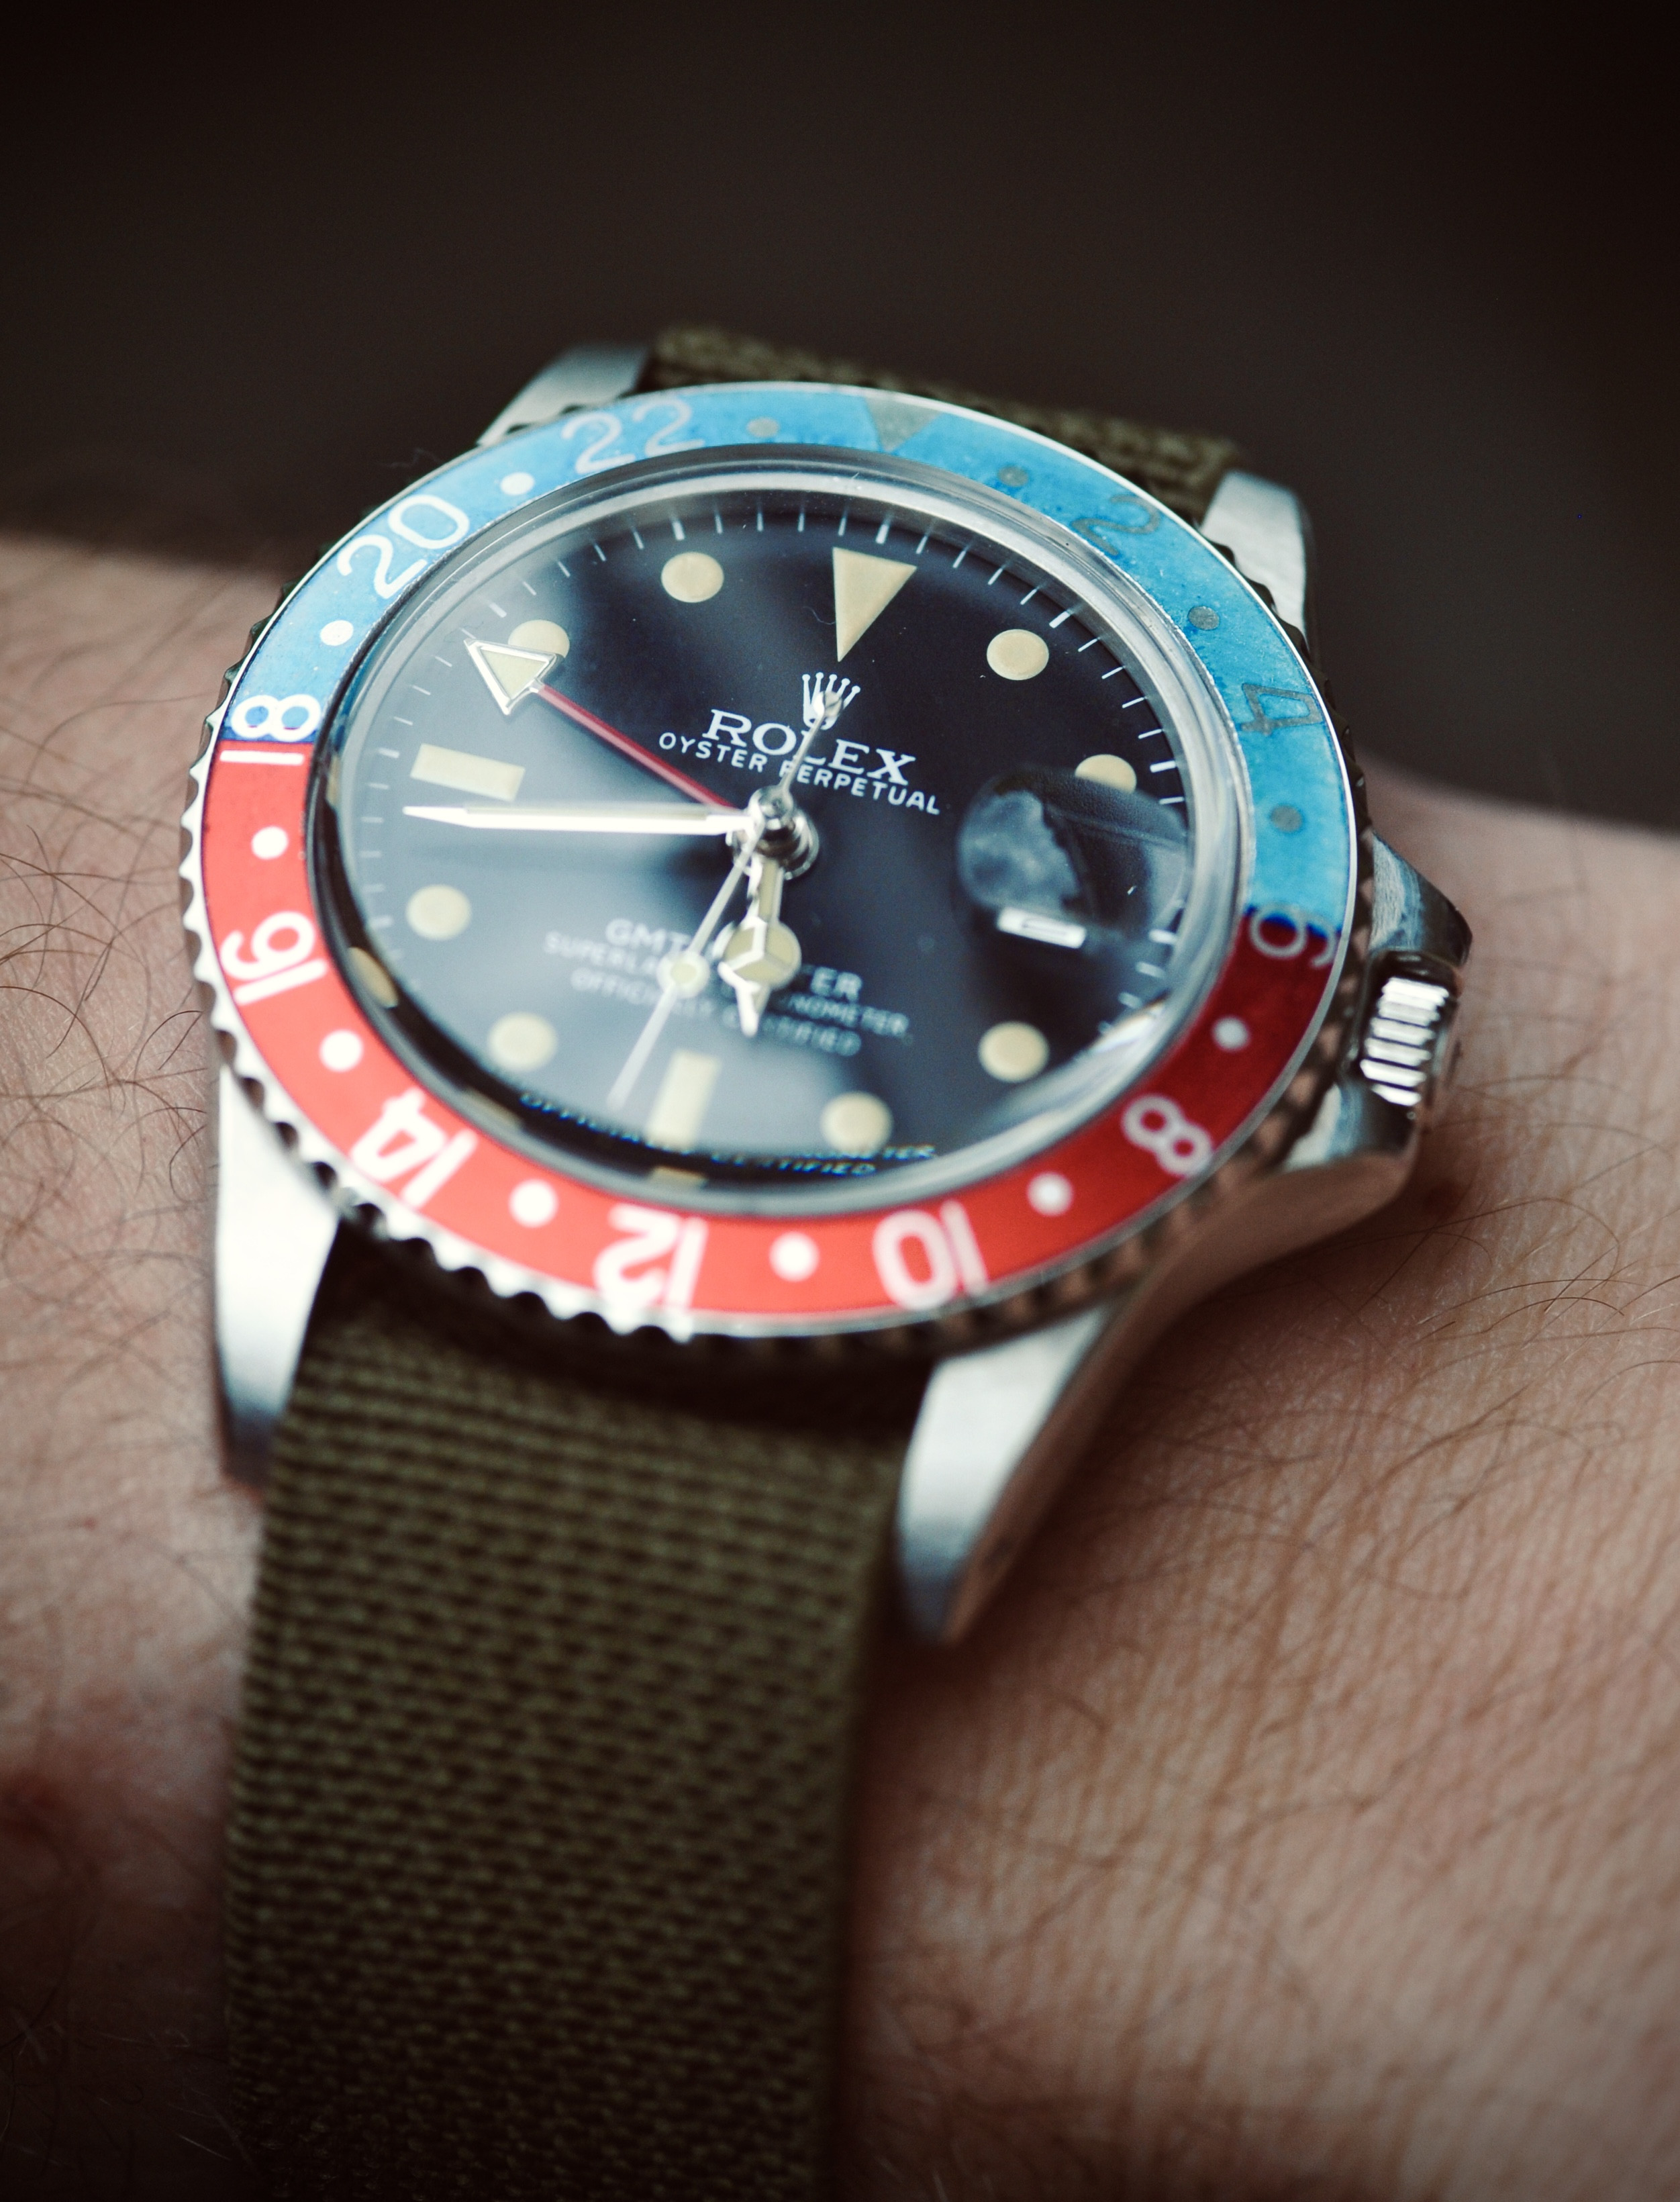
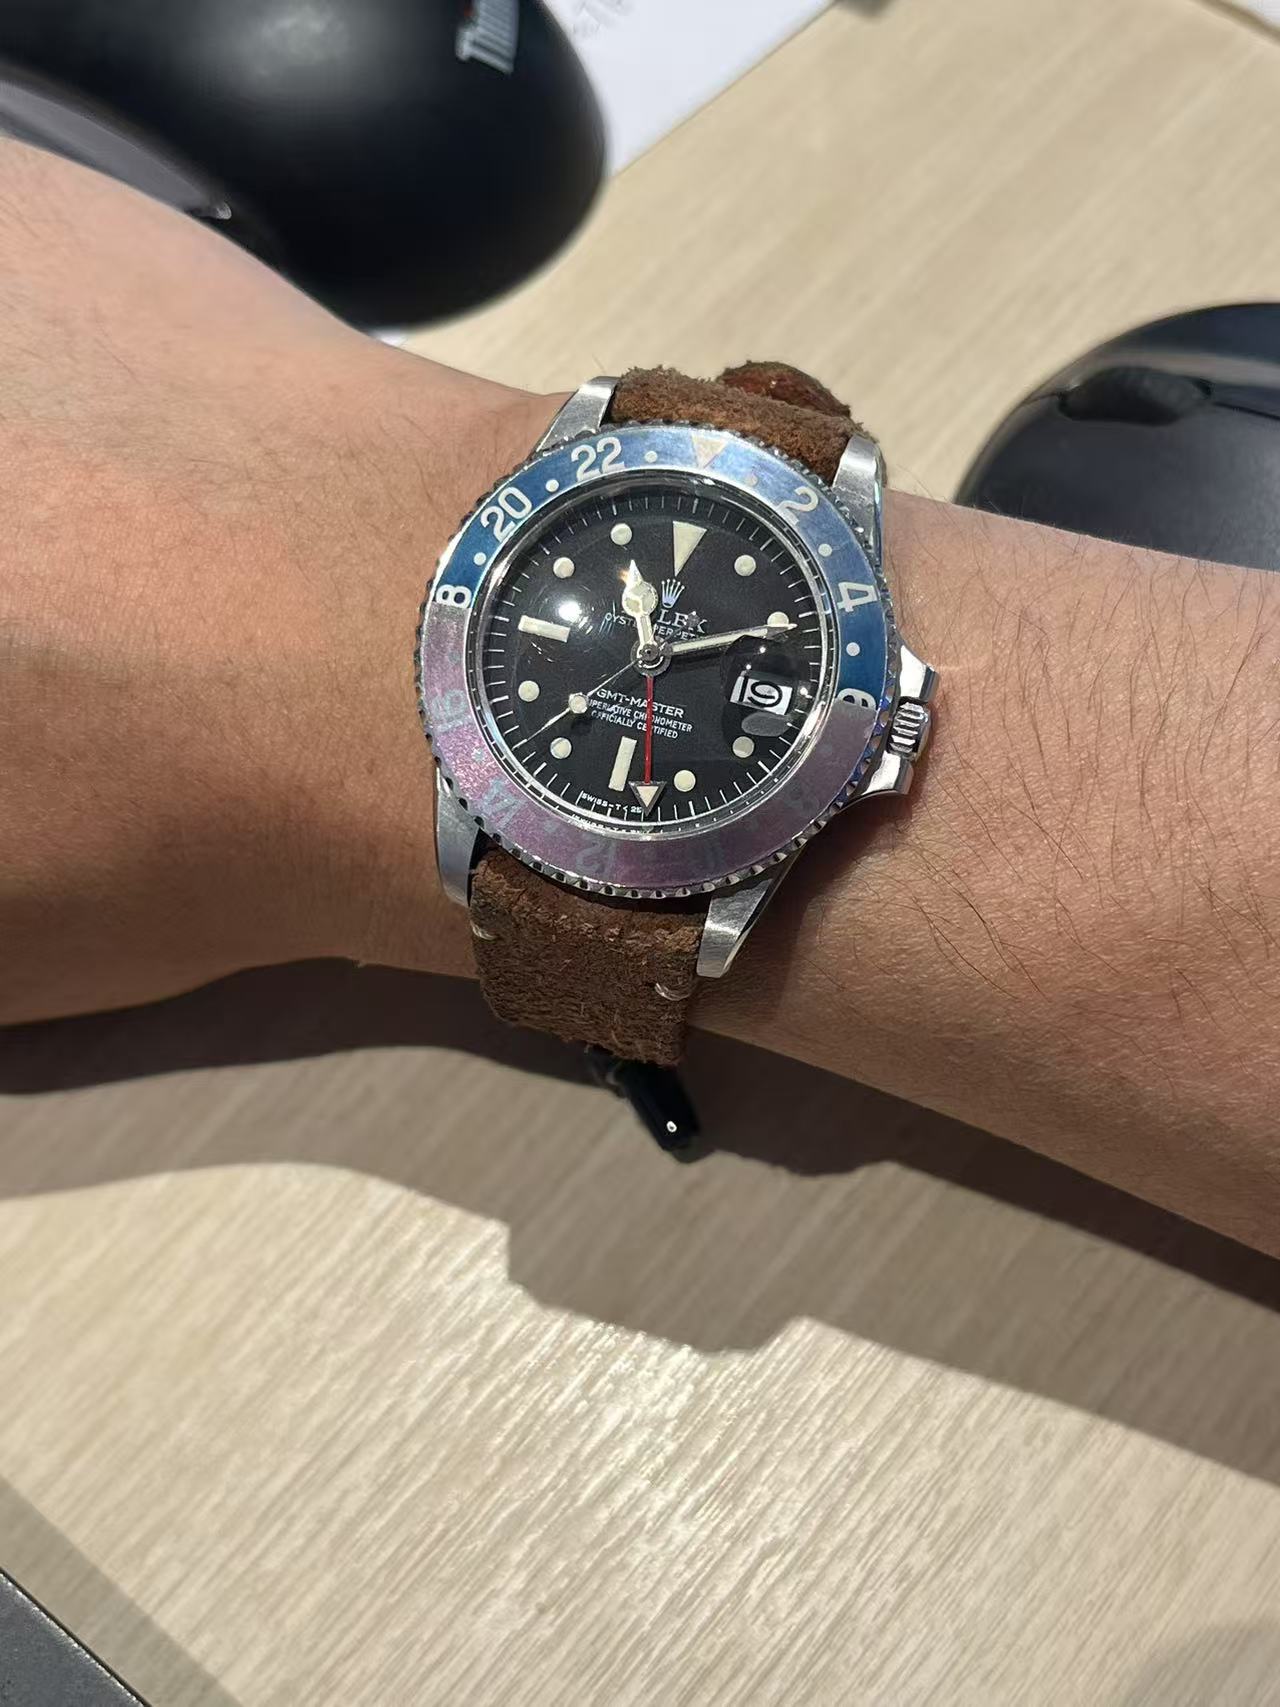
Latest build, 6460 inside, aged Raffles dial, Cousins insert, and a reduced down cheapy 93150 clasp to make it an GMT style short one.
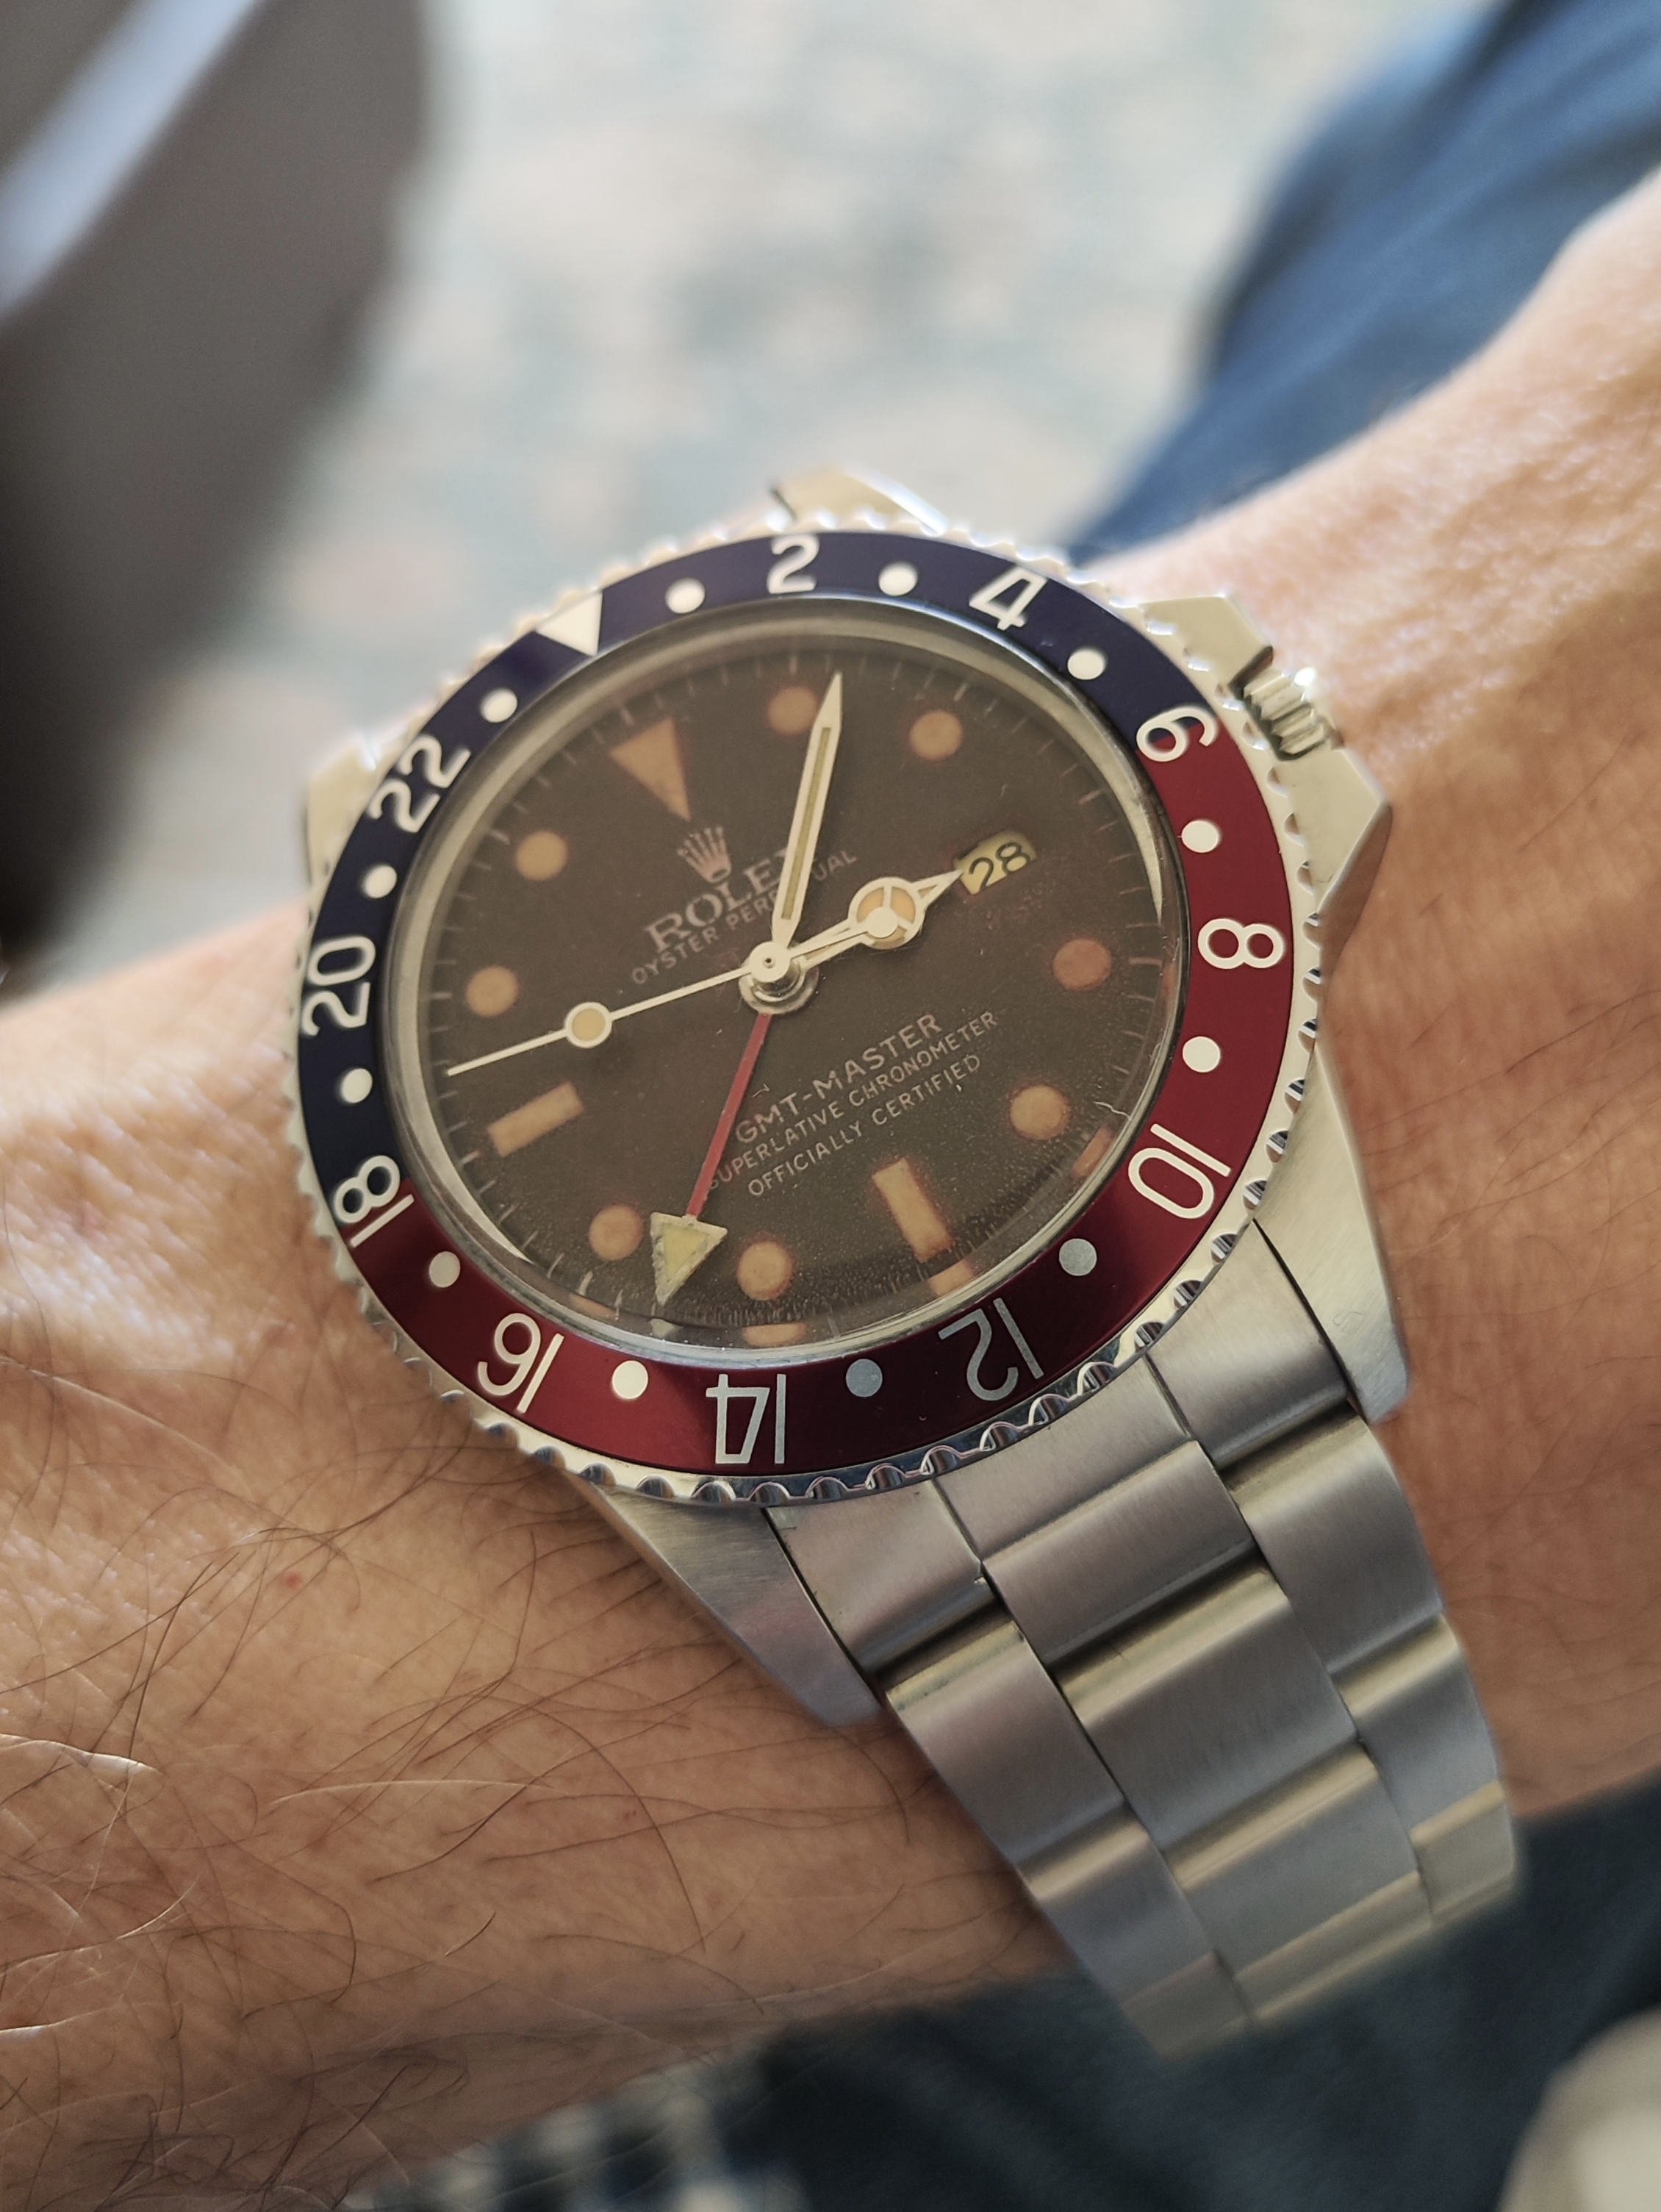

more pics of the dial please. I like your aging techniques ....Latest build, 6460 inside, aged Raffles dial, Cousins insert, and a reduced down cheapy 93150 clasp to make it an GMT style short one.
Ah, thank you for taking the time to answer. Looks clean without itThe Cyclops that came with the case was not quite in the right position so I polished it off.

Greg Petronzi on Instagram: "Up close with the elusive and mythical blueberry insert!! Full video coming to YouTube in the next few weeks. Special thanks to my friends @danieldaekim and @bfmotorclub for providing these amazing blueberries!"
785 likes, 81 comments - true_patina on May 1, 2025: "Up close with the elusive and mythical blueberry insert!! Full video coming to YouTube in the next few weeks. Special thanks to my friends @danieldaekim and @bfmotorclub for providing these amazing blueberries!".
 www.instagram.com
sonofprent
Getting To Know The Place
- 16/3/25
- 25
- 29
- 13
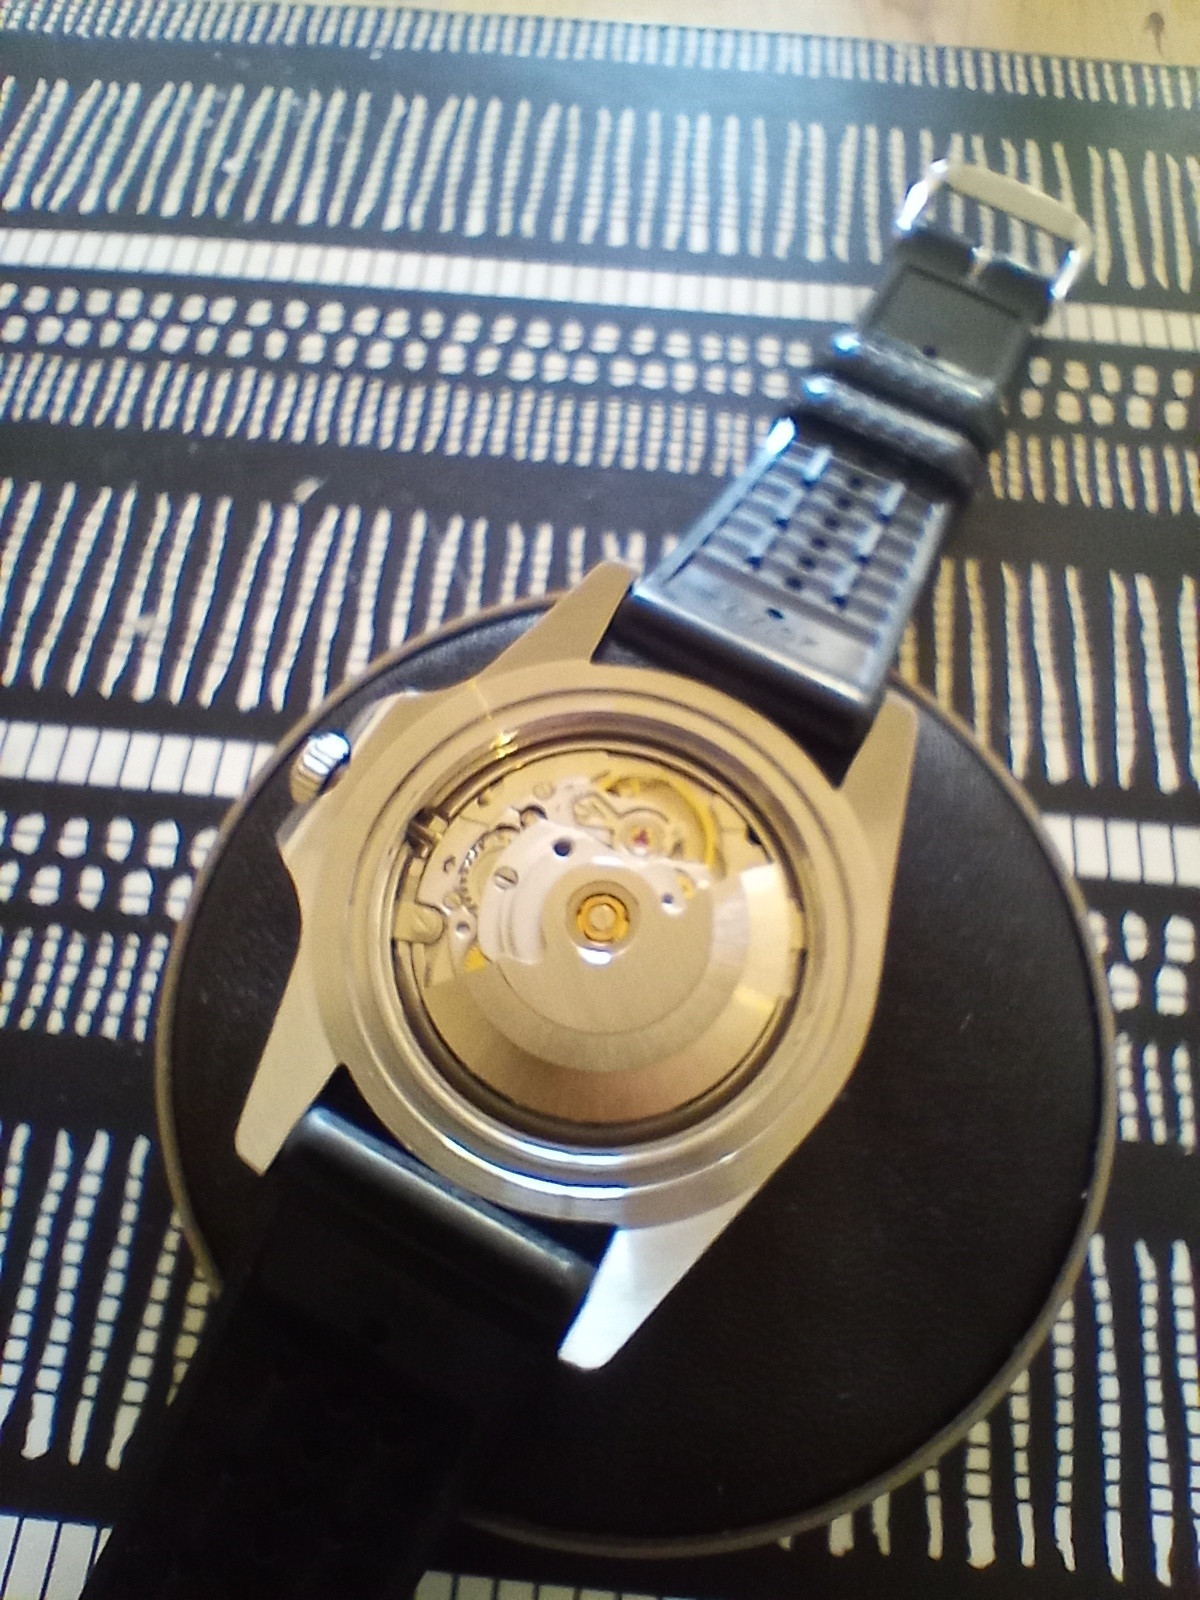
Can't beat ken's service - movement holder now where it should be, bravo!
Capt. Chaos
Do not accept unsolicited offers
I came across this forum a couple weeks ago and read through all kinds of threads on how to reshape cases, assemble watches etc.
Since I love tinkering with all things mechanical and always loved watches- I bought some tools and a raffles 1675 set to get started.
Because I found the knowledge on this site very helpful I wanted to give something back and maybe help others who are at the beginning of this hobby too - I wanted to share my experiences with this build.
So I started with the bezel - there was some kind of protective plastic on top that I had to polish away (you can still see some traces at the 8) because I was afraid that it would give uneven fading once the insert hit the bleach.
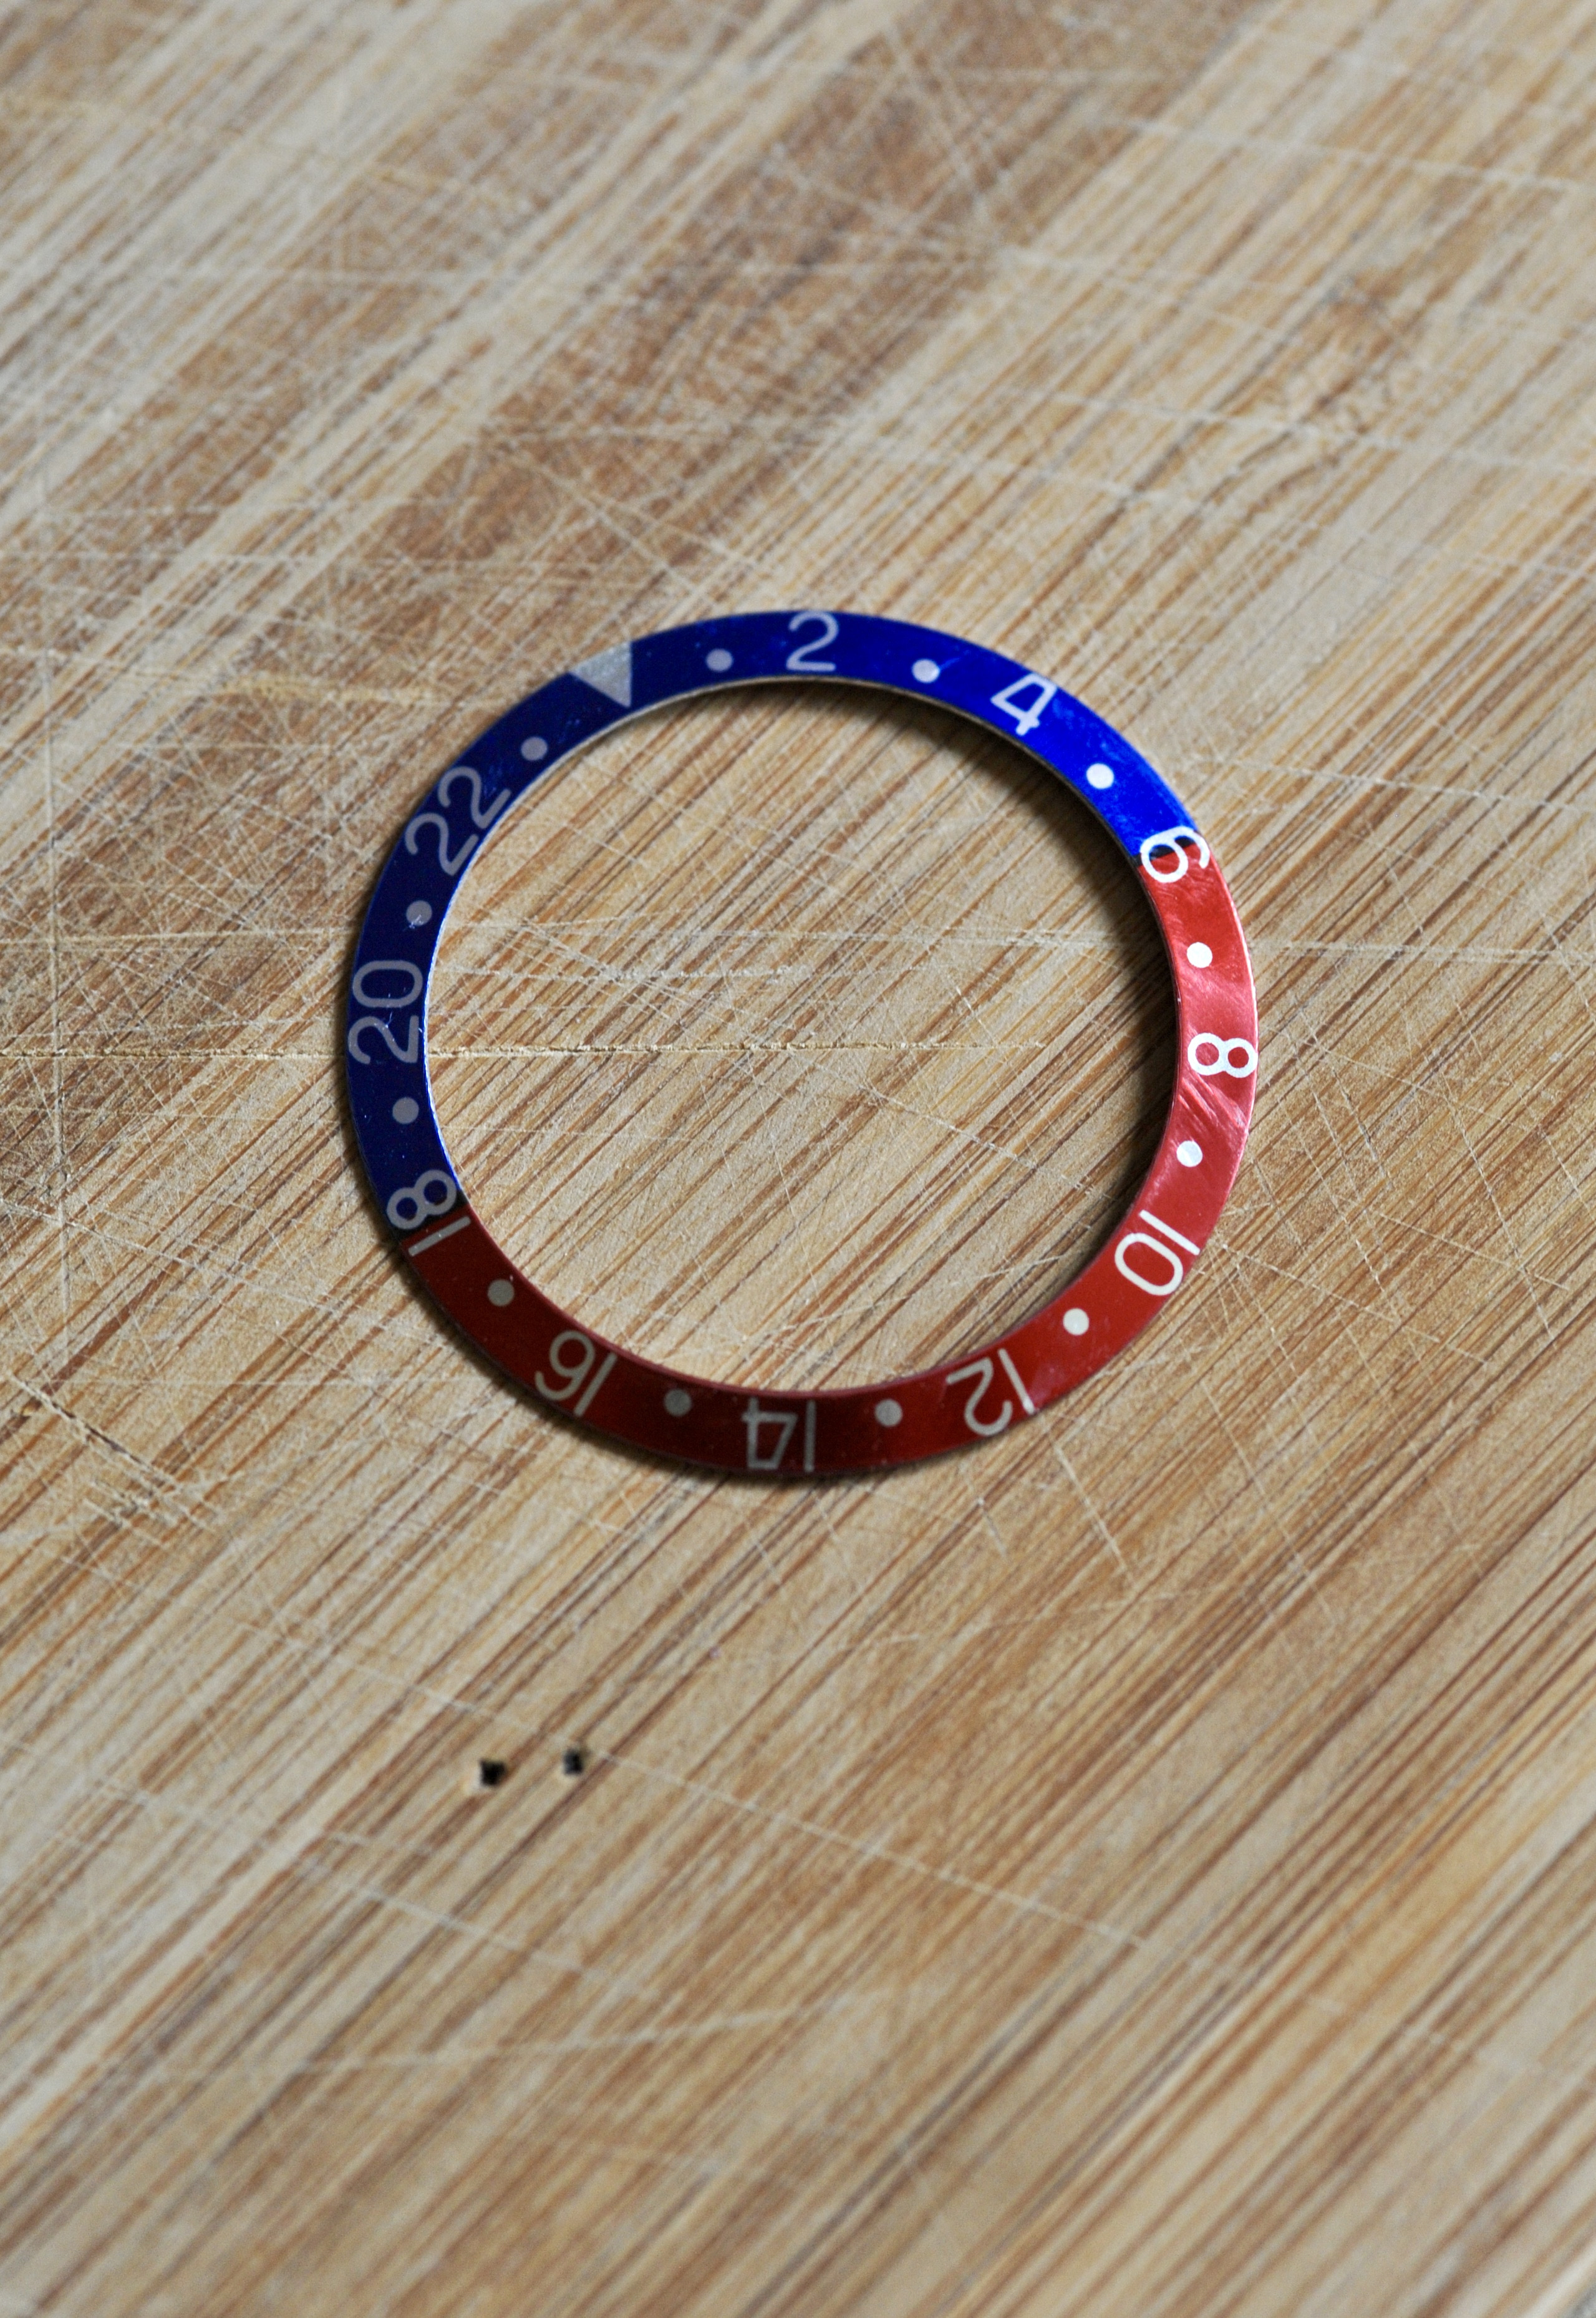
I mixed common German bleach with water in a 50/50 ratio- because I found that pure bleach would fade the insert too quickly (I tried this with a JKF 1665 first - which came out too faded).
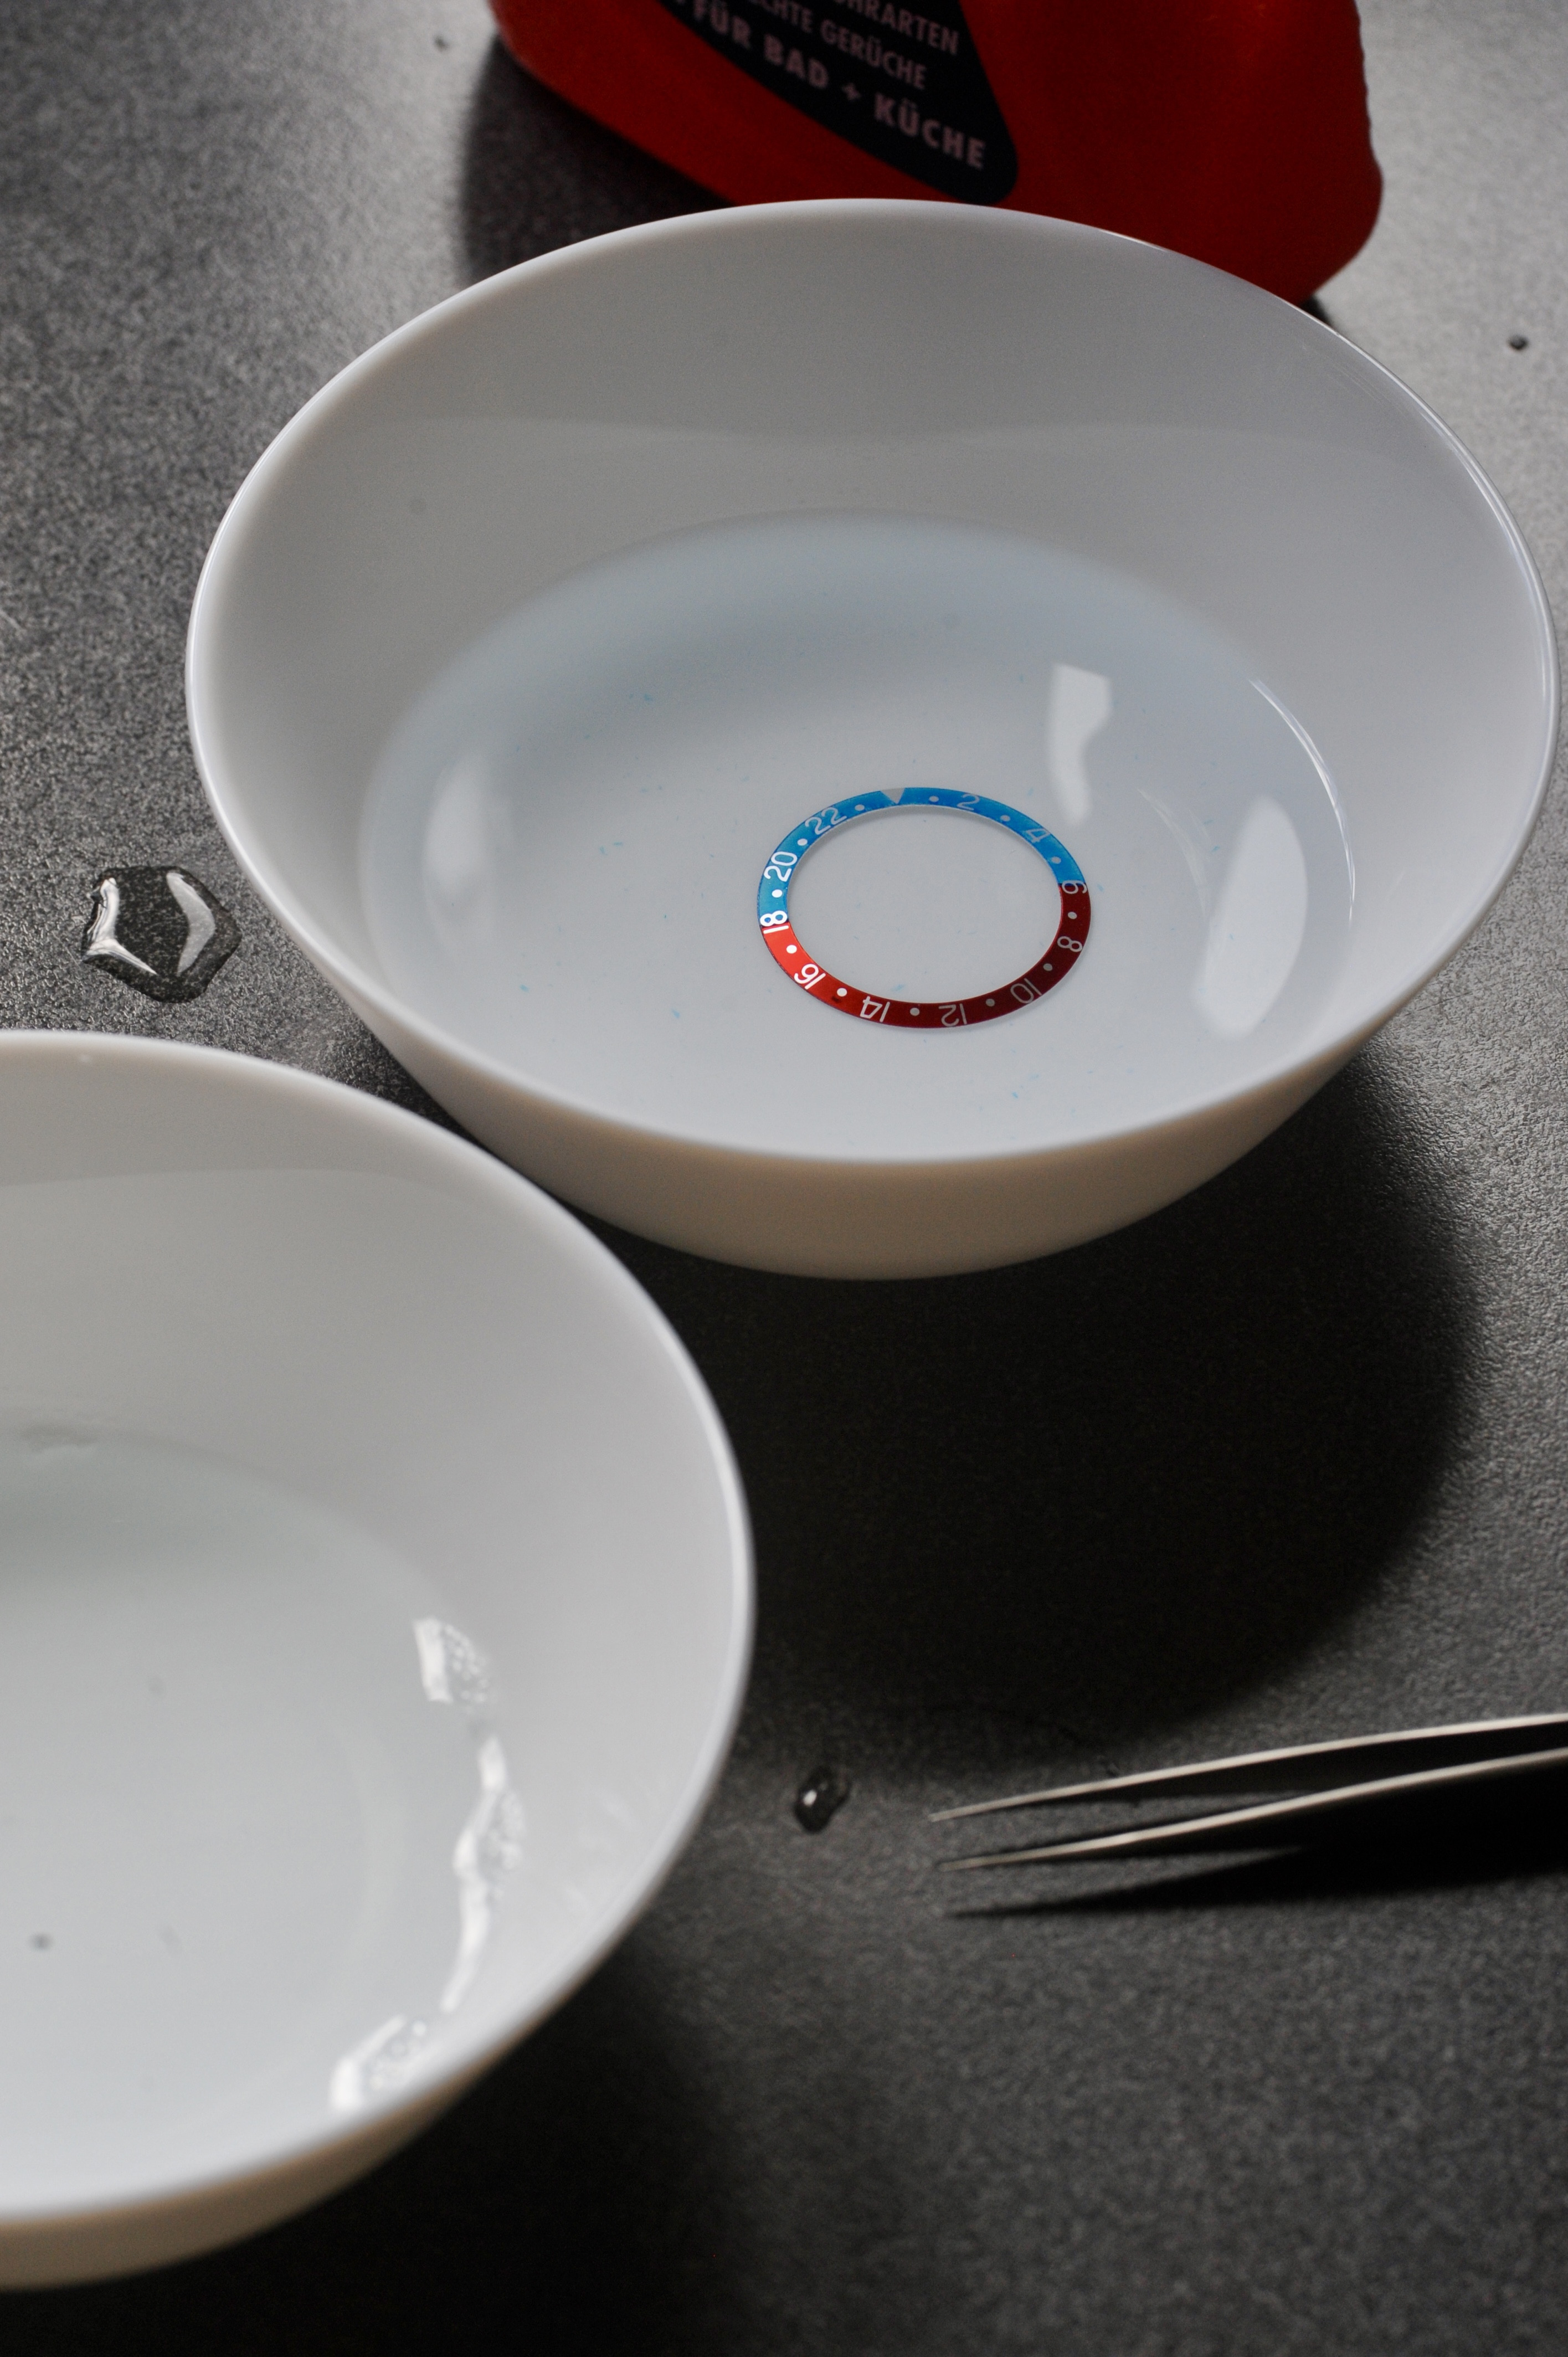

The other thing I found out with the 1665 was that you should not touch the insert once it’s in the bleach and the first minutes after. With the 1665 I went over it with a brush and it left streaks - I guess it’s a look, but if you want to achieve an even fade: just touch the insert at the sides and check it periodically by placing it in a bowl of water, because it will keep fading some more.
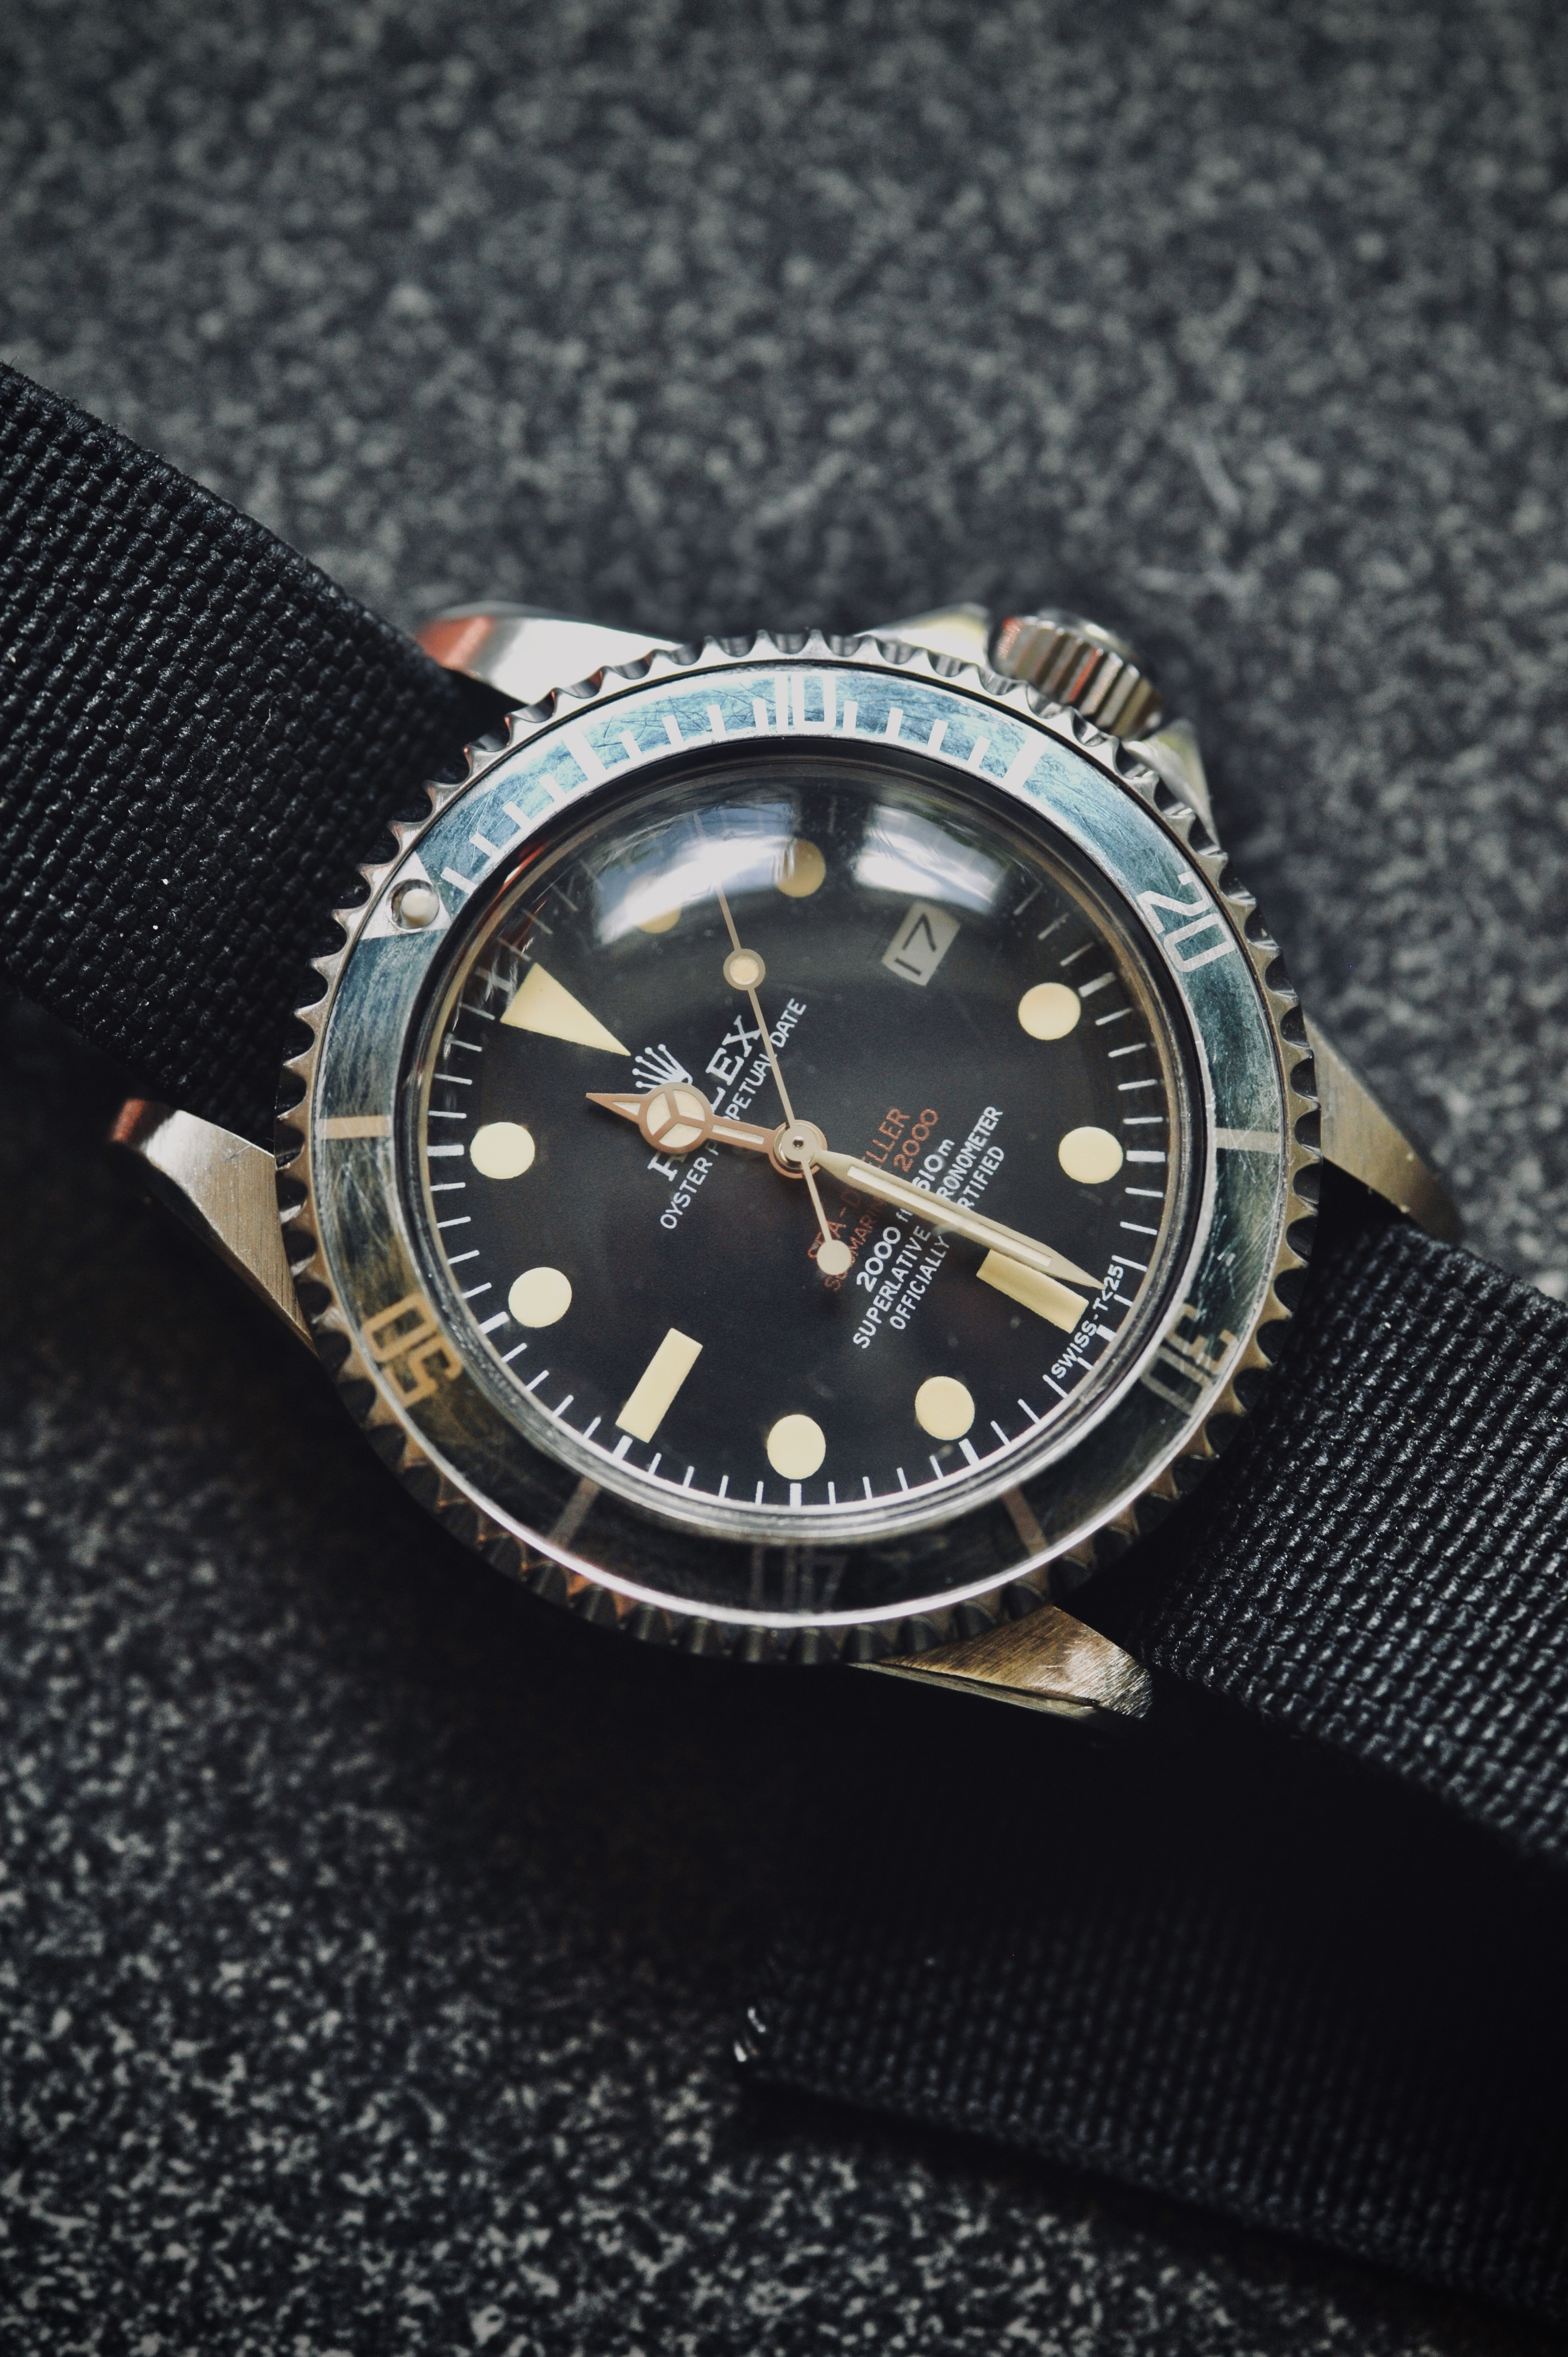
Here’s the 1665 for comparison:
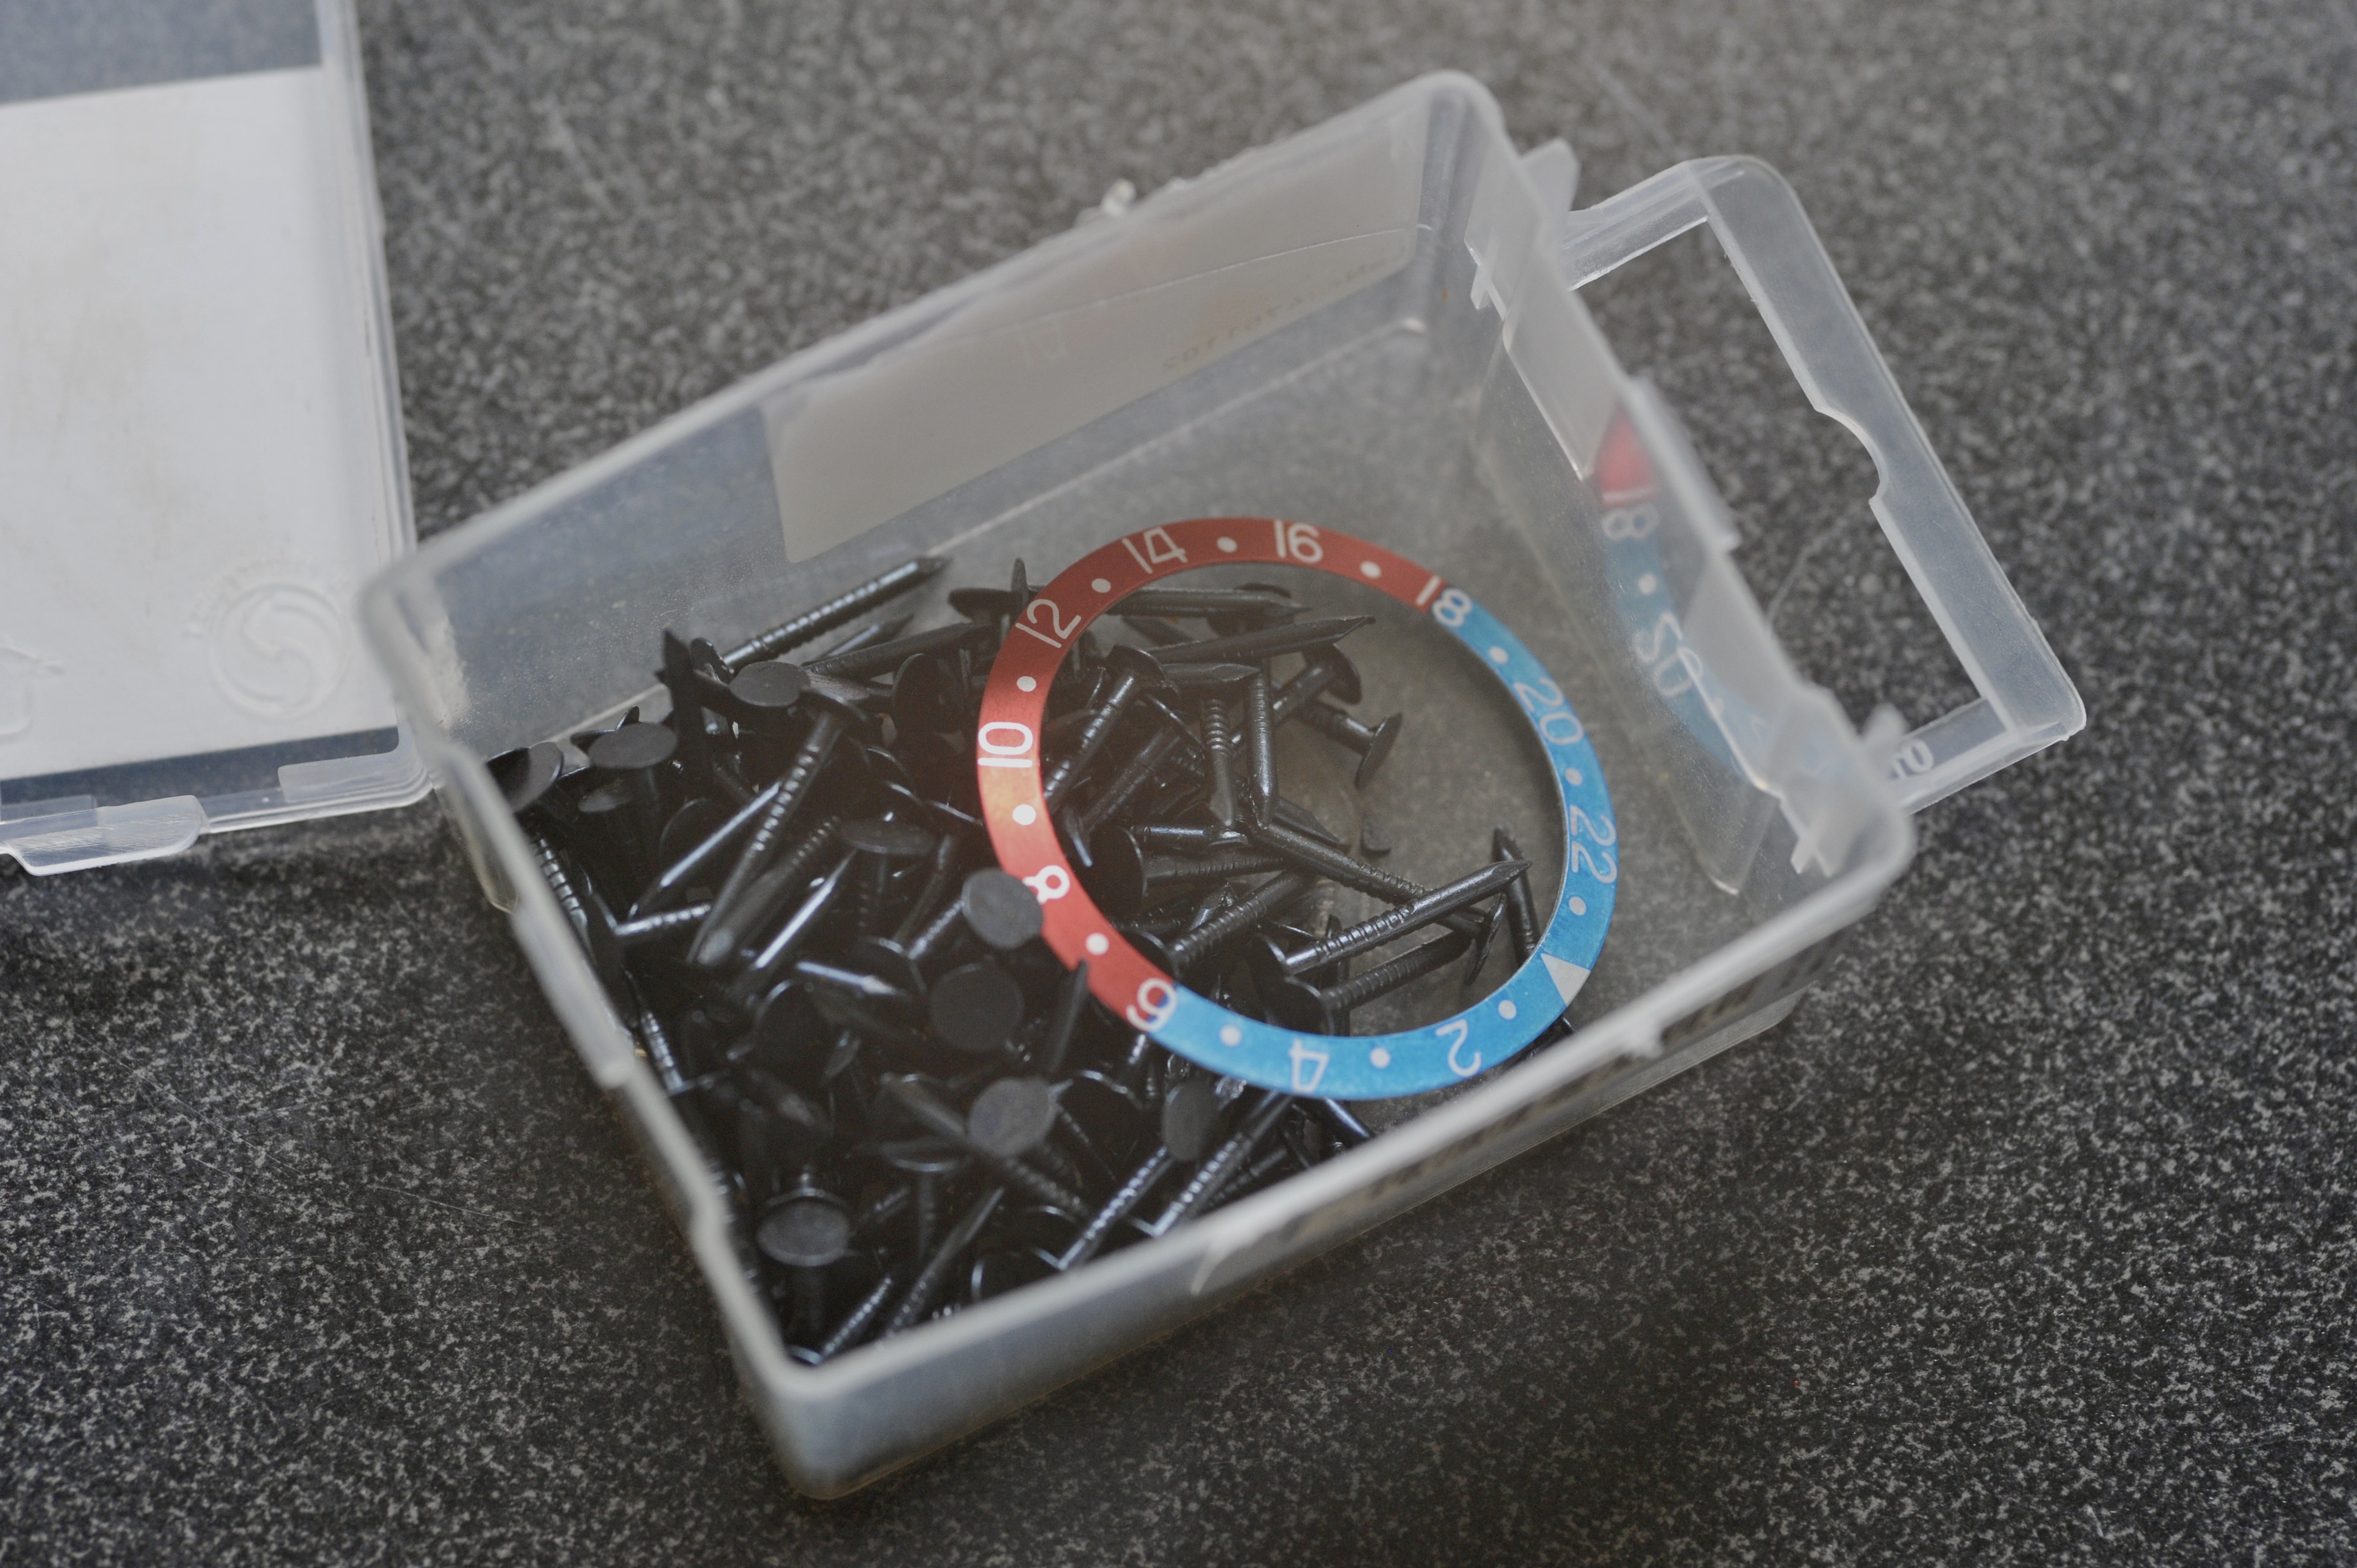
Then I put the insert in a box with nails and gave it a good shake to give it some smaller dings.
For the crownguards I removed the tube and prepared two photos of gen cgs that I liked. I found that if you look at too many pictures you tend to loose the eye for the form.
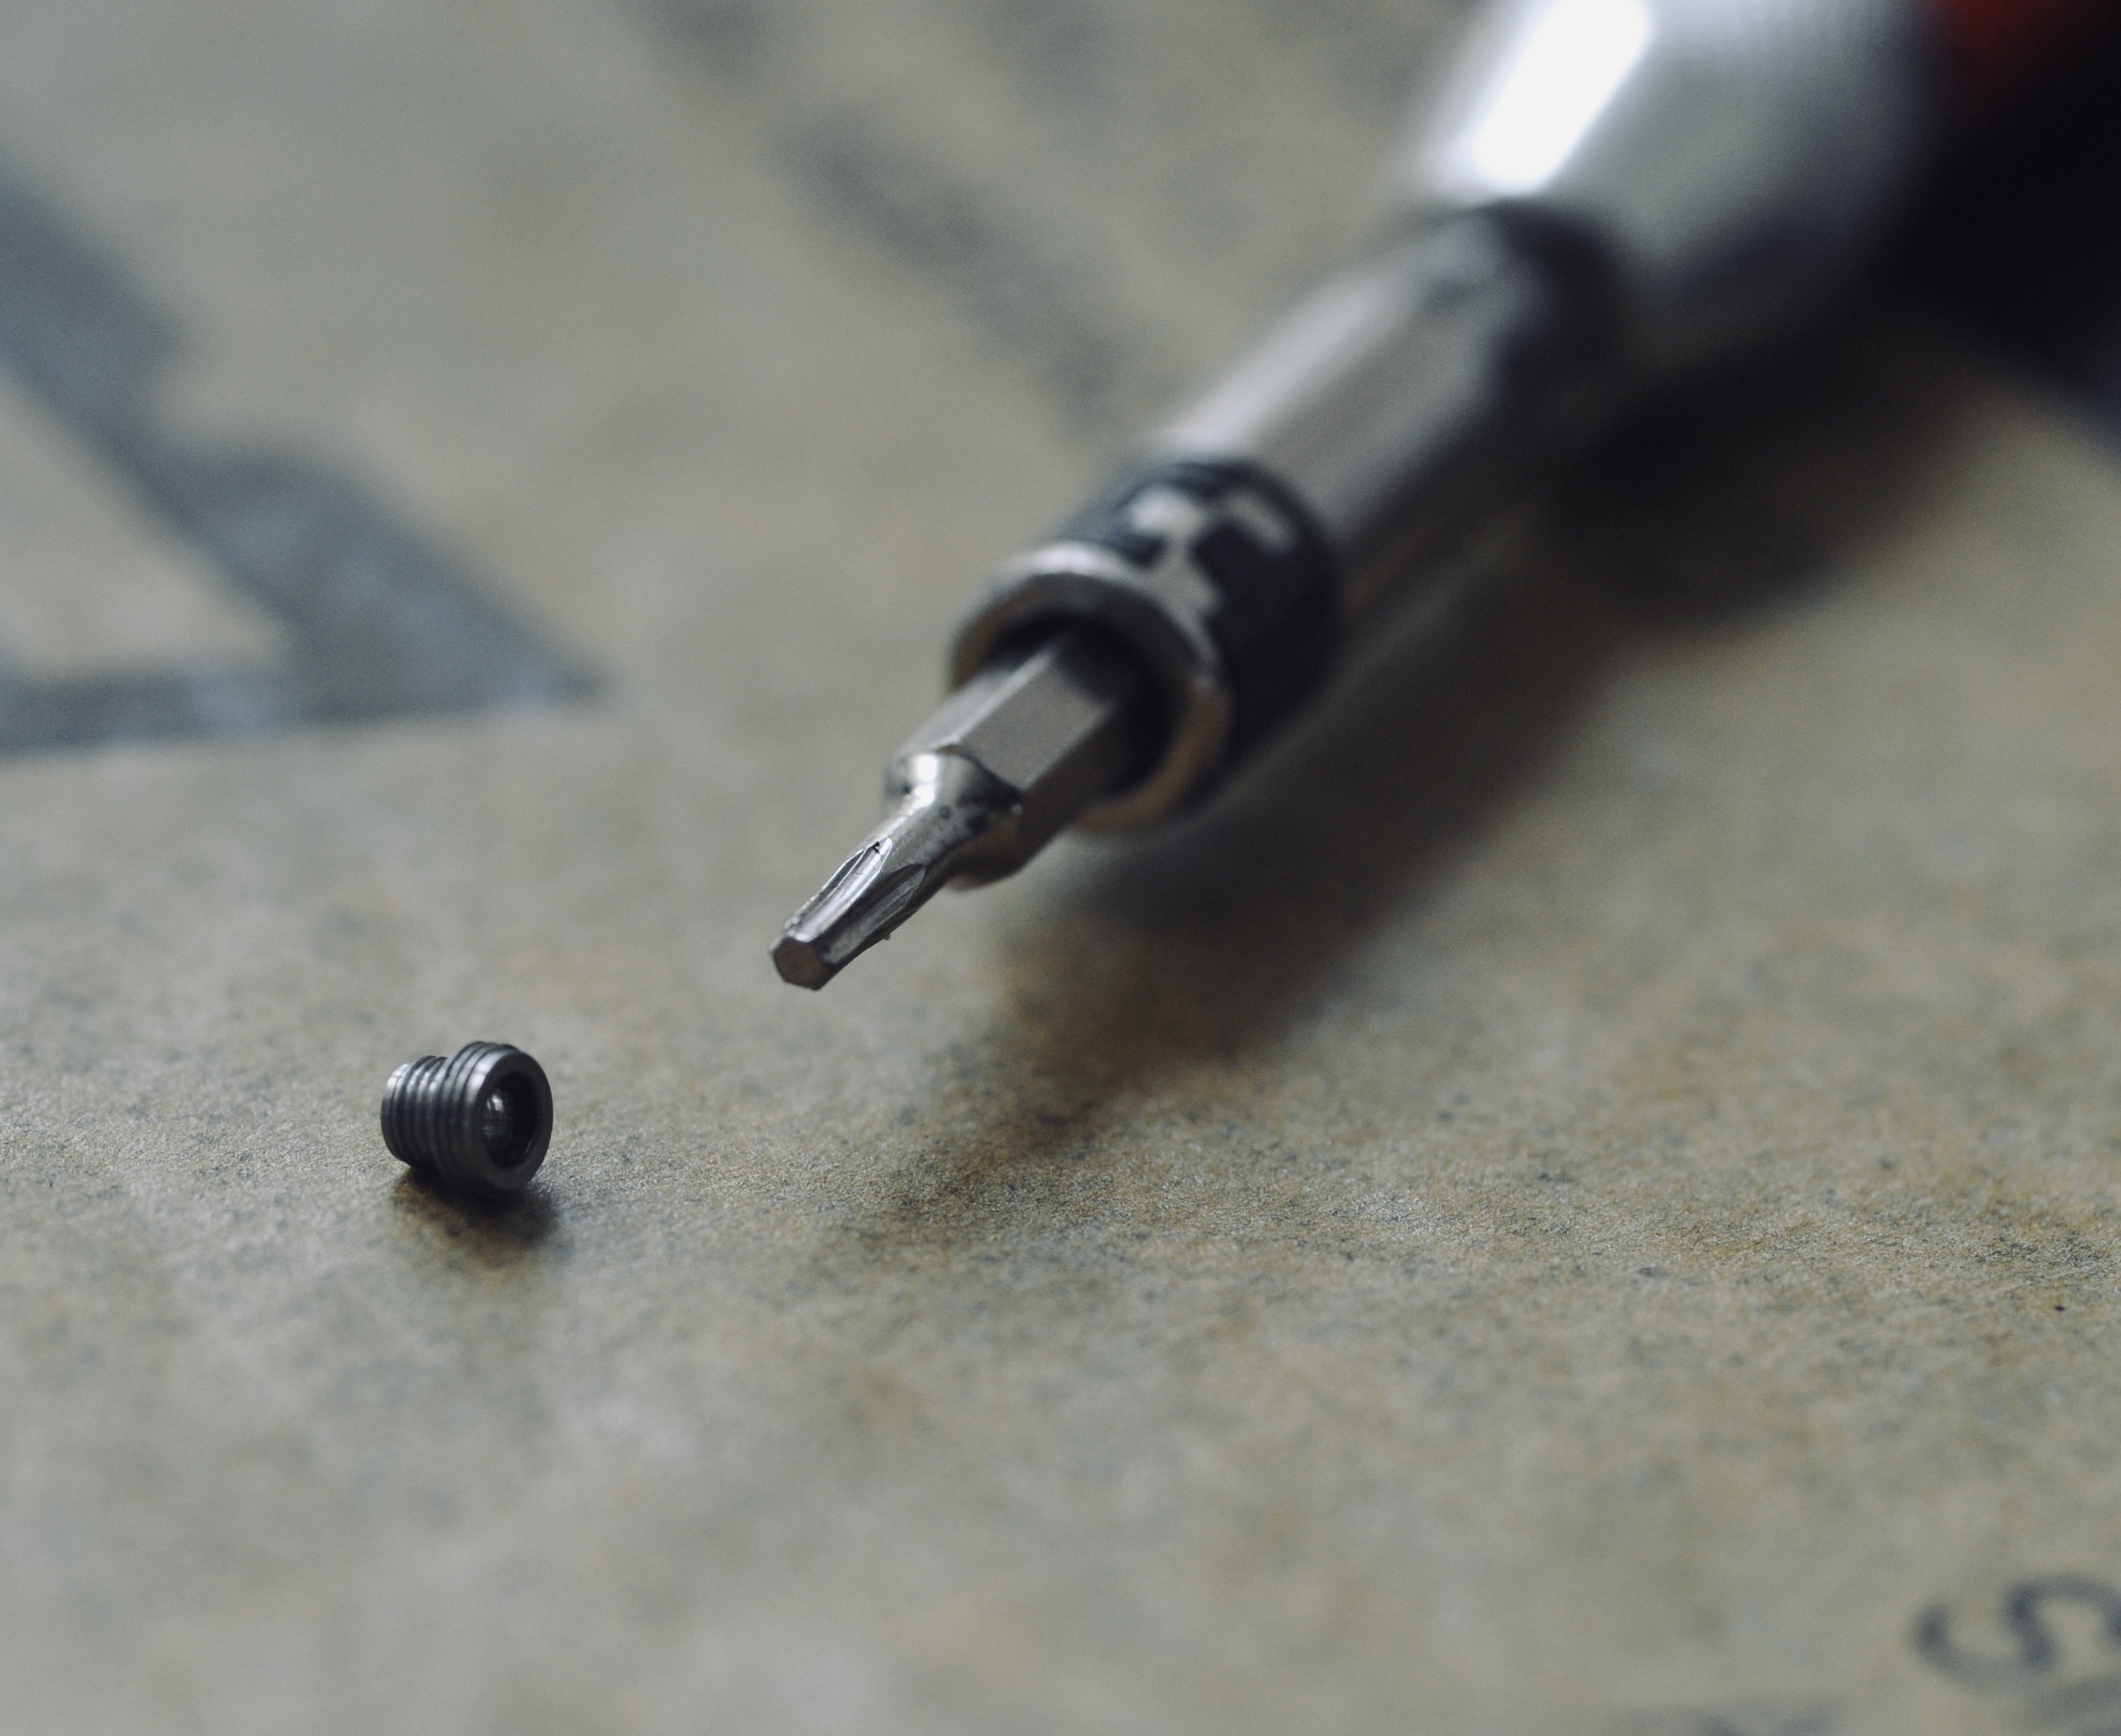
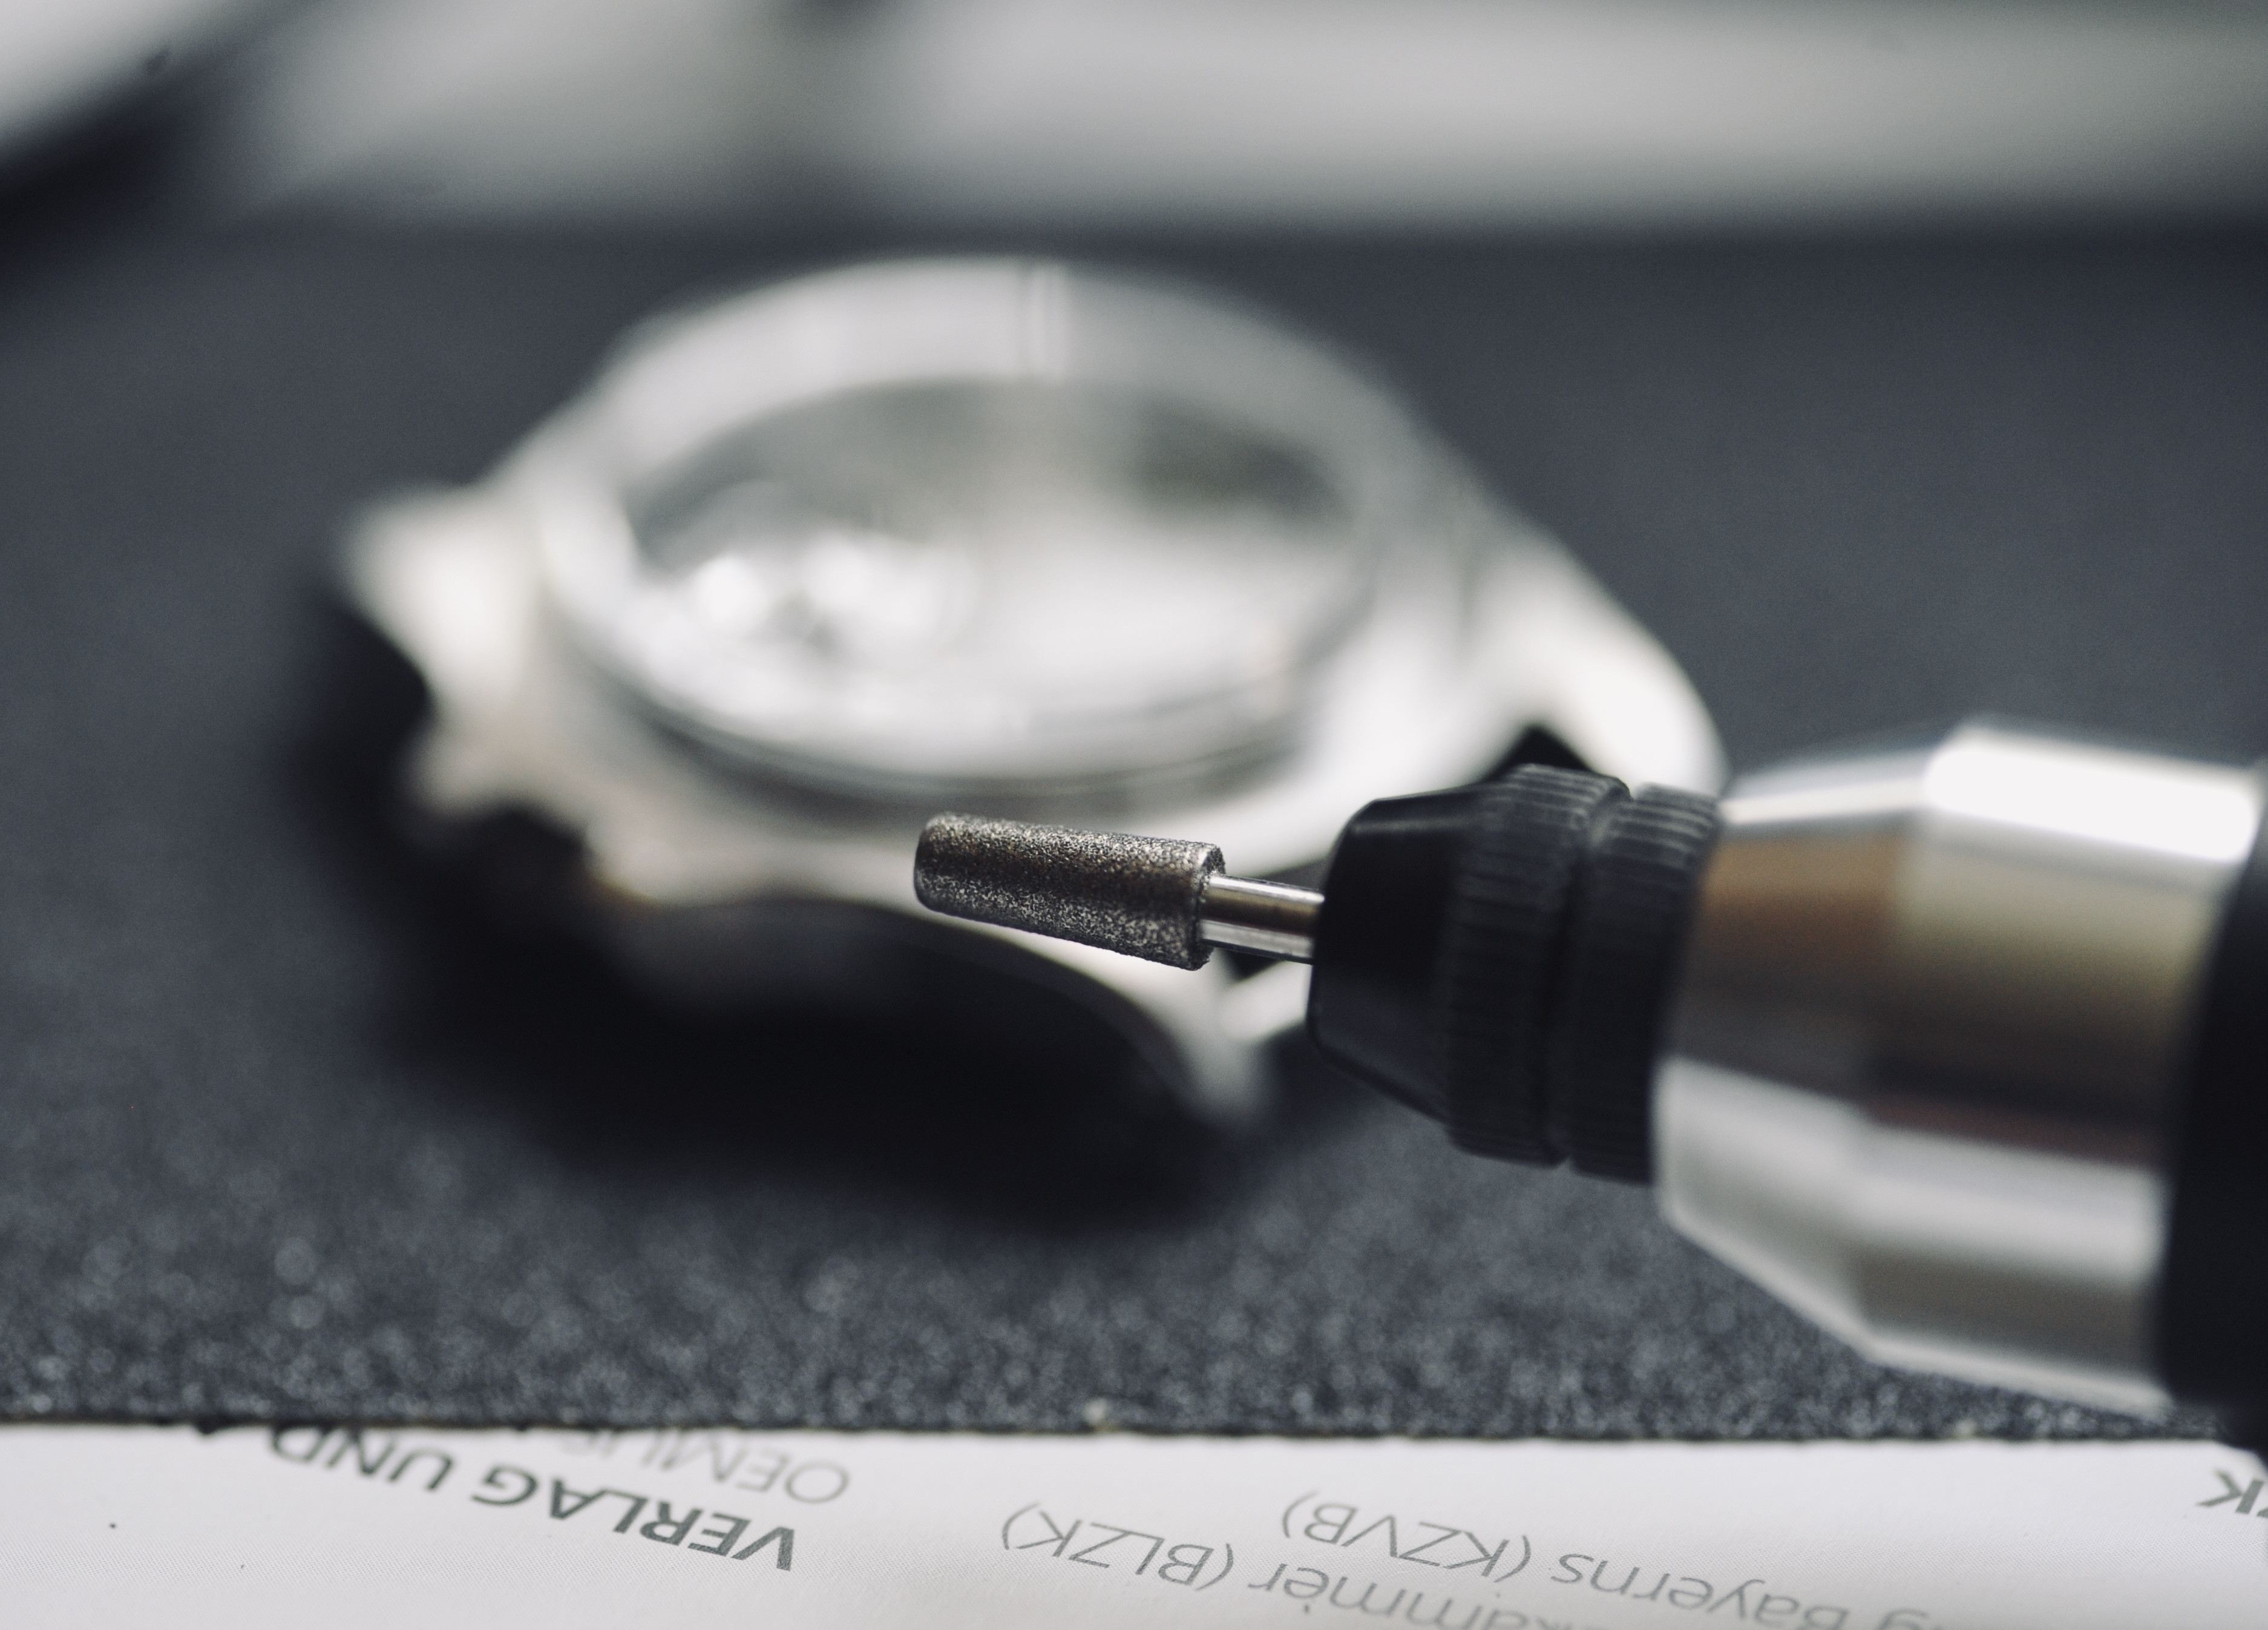
Since I’m a dentist by day I have some nice diamond drills - but I found this one to work best. It’s a fine diamond drill with a very handy form for case reshaping. With this I gave the cg a vage form.
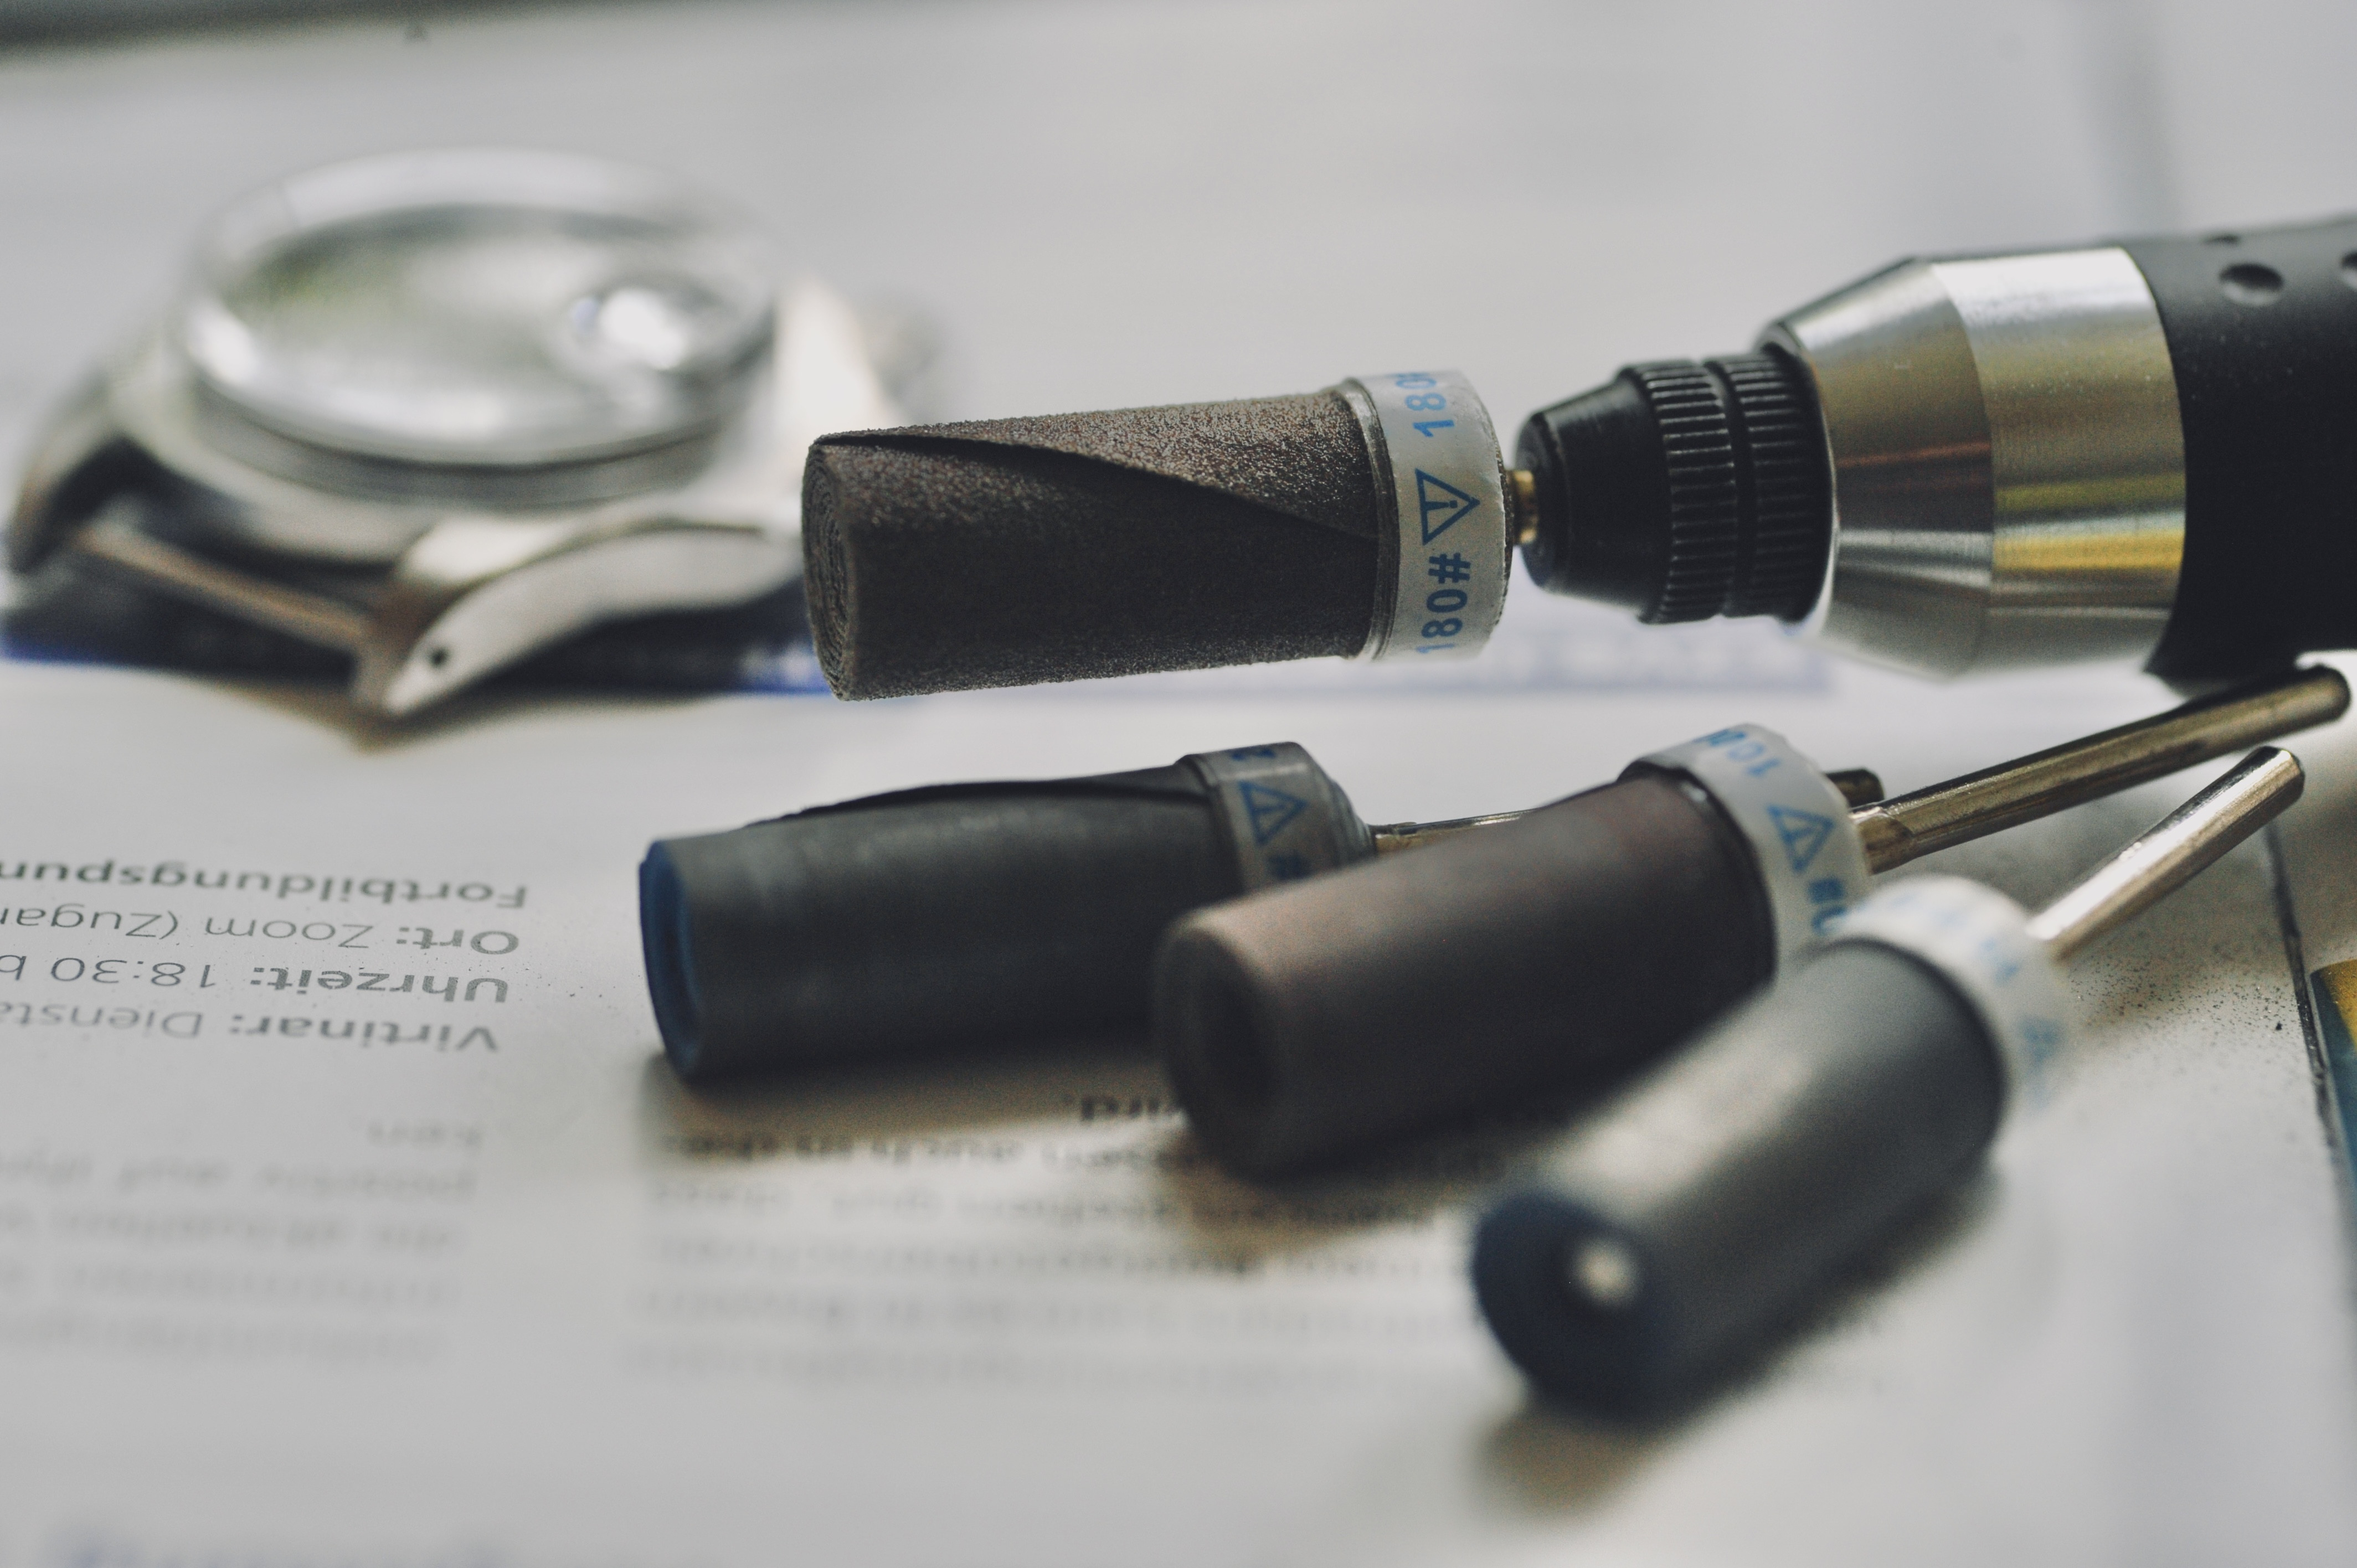
To open up the cg from the inside I used a sanding wheel - but be extra careful not to hit the case - it will leave nasty nasty scars that are hard to polish away
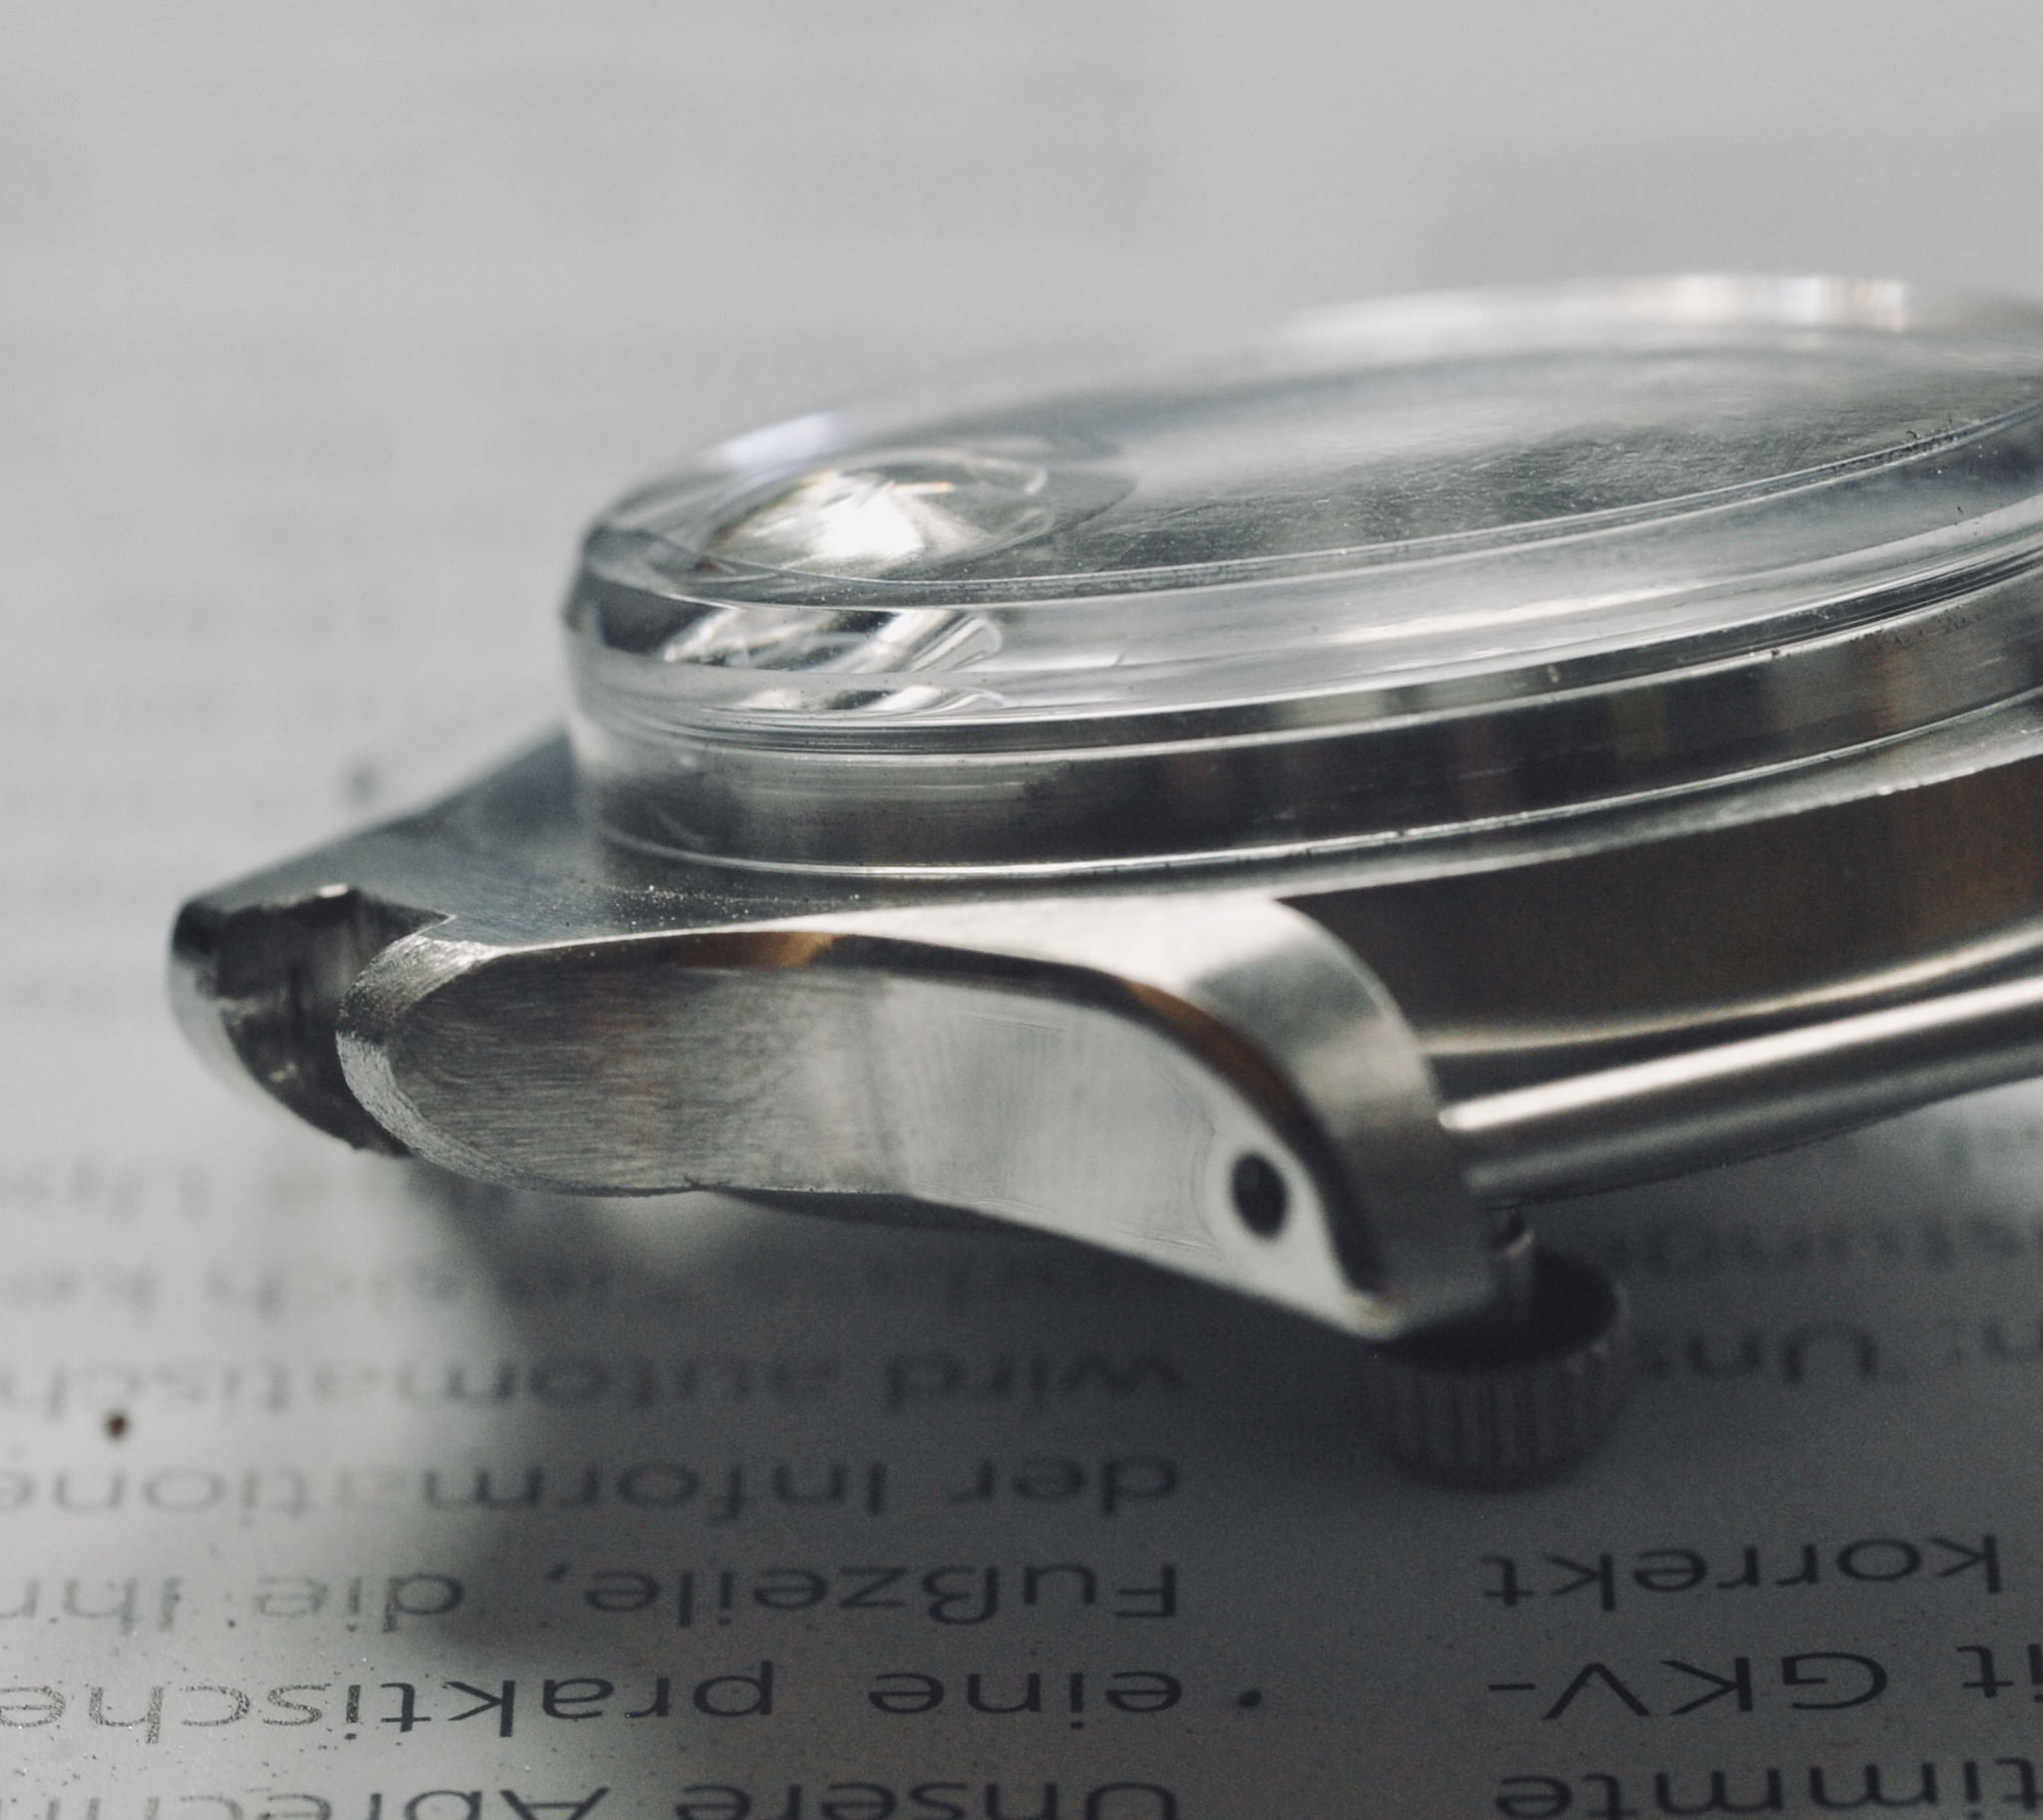
Leave some material for corrections (symmetrical form of upper and lower cg, polishing errors etc). Here you can see the „dirty first reshape“.
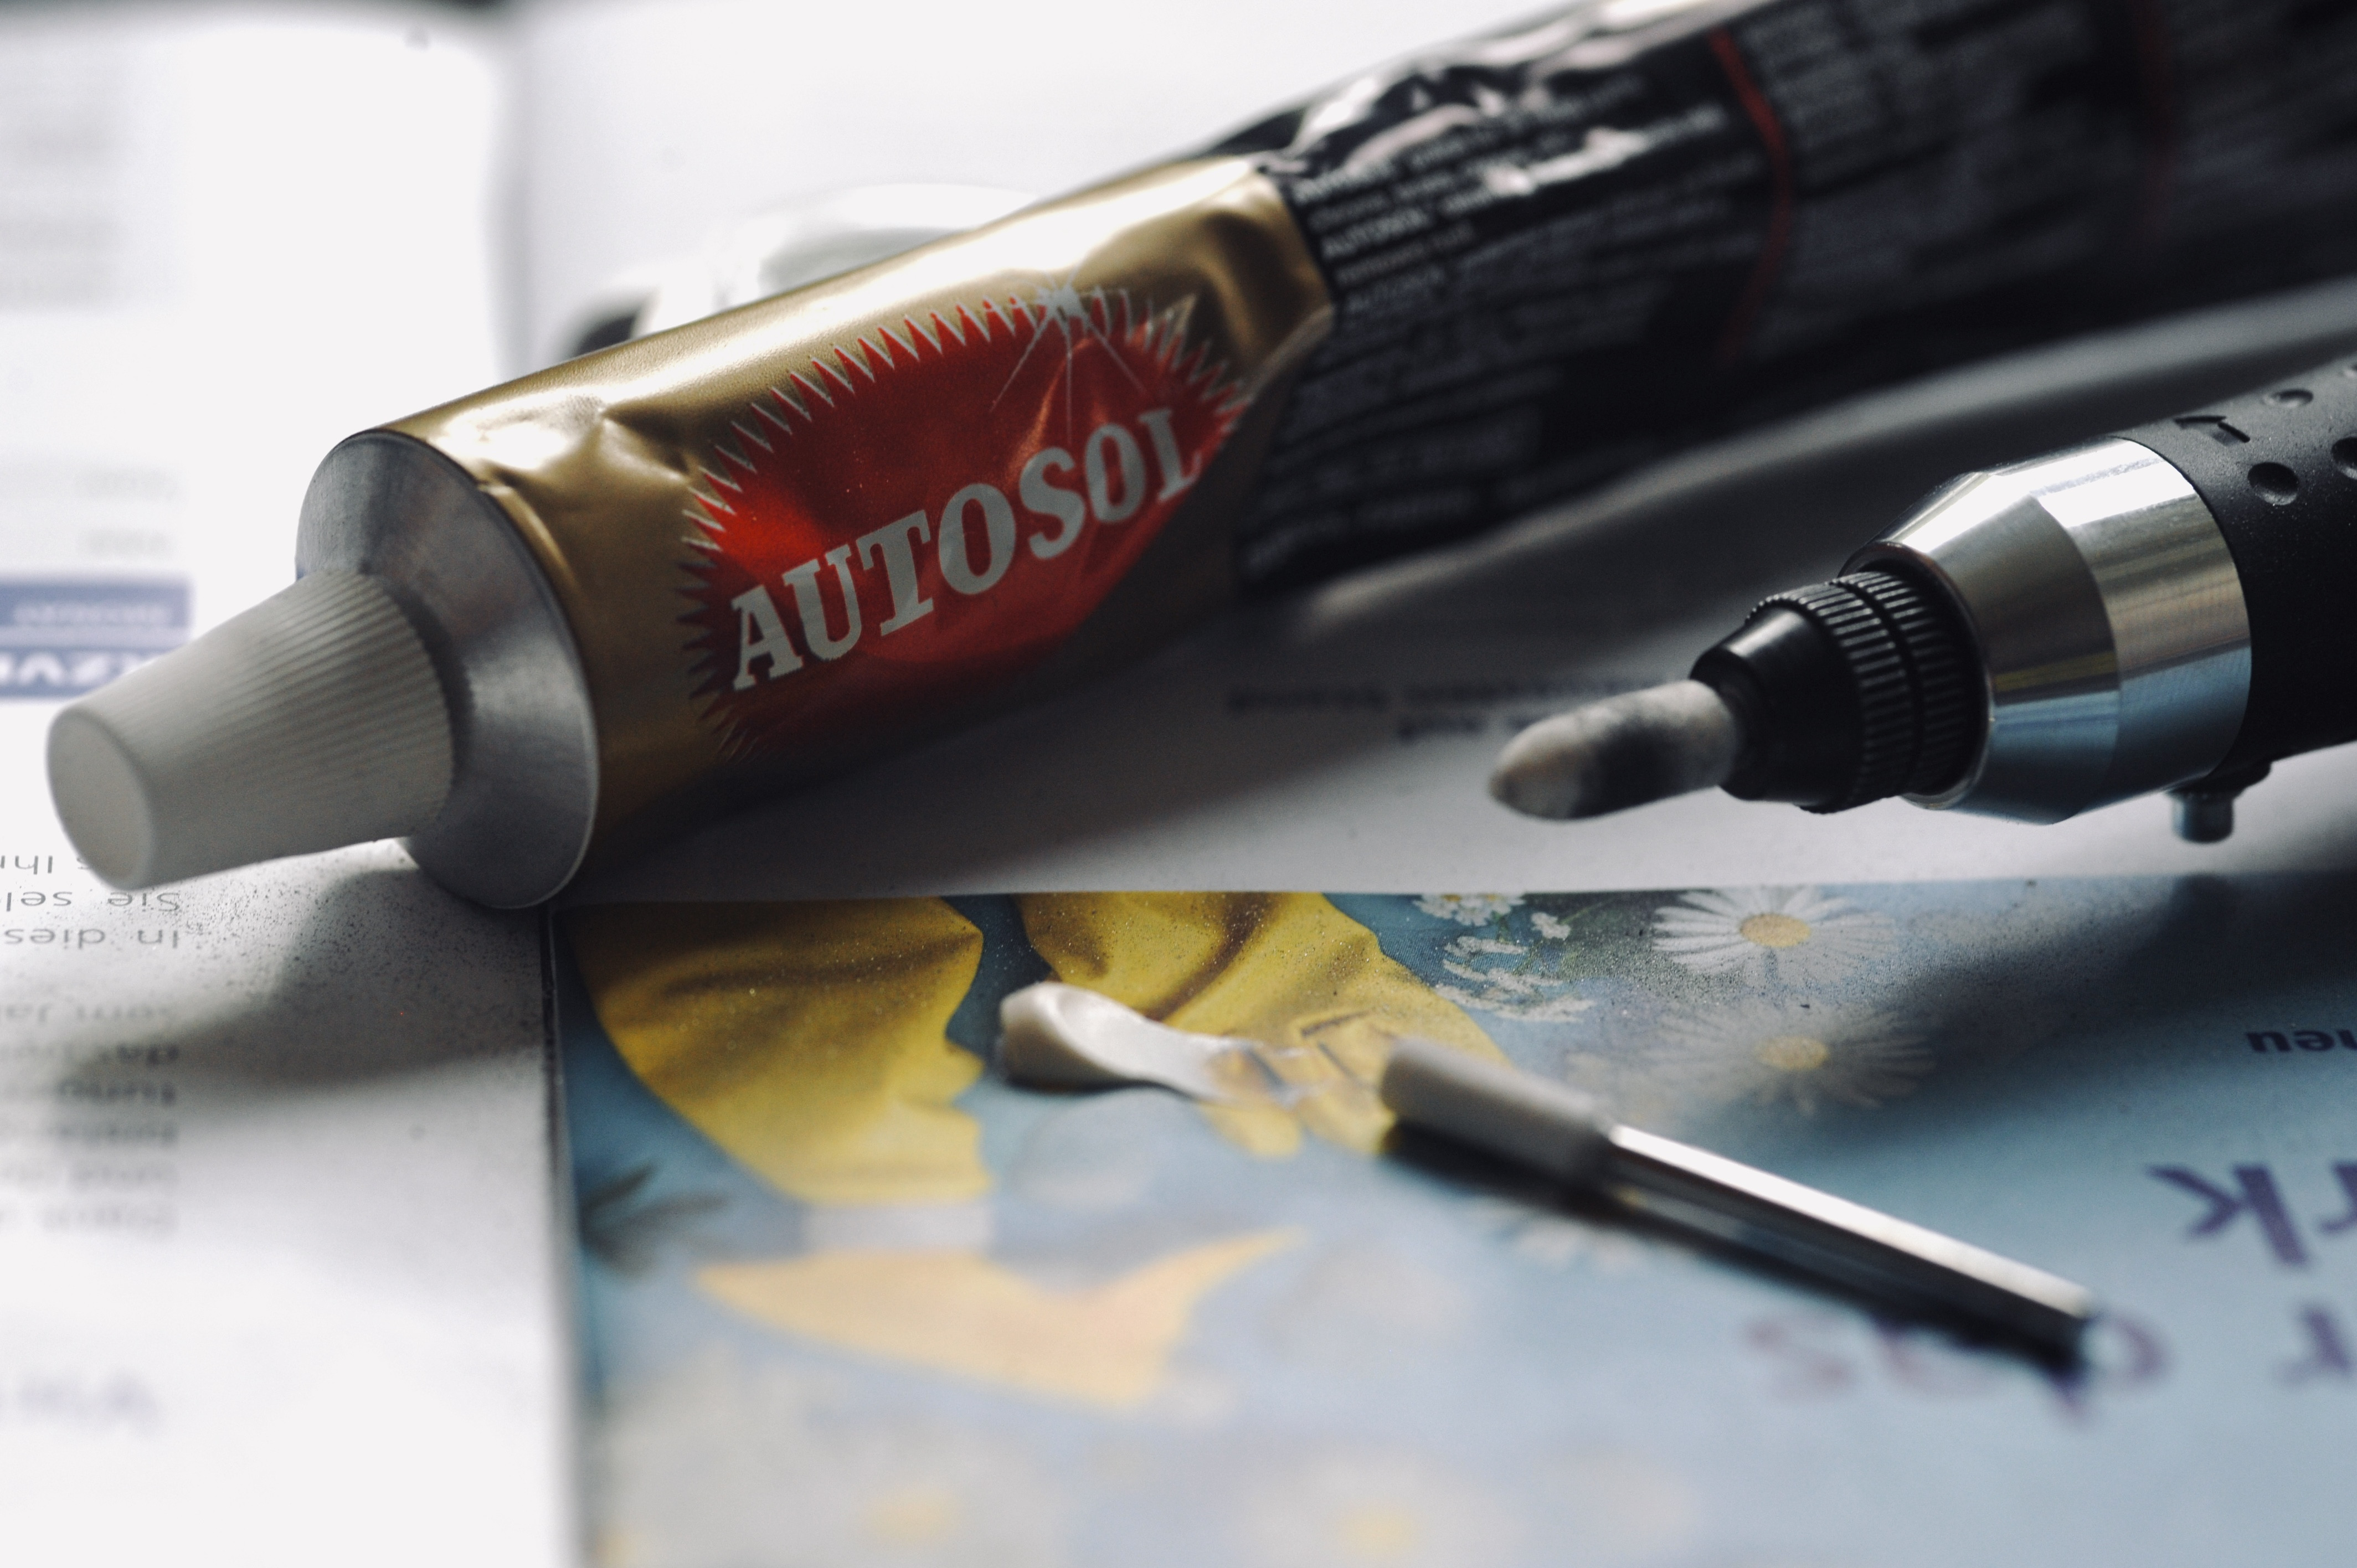
To polish the case I bought sand paper drums starting at 120 grid going up all the way to 2000 grid. If you are careful with your work here and don’t rush it you will have a case that only needs a quick polish with a cotton drum and some metal polish.
By the way - for the dremel work I bought a proxxon 60 series. It has enough power but is small enough for this kind of filigrane work.
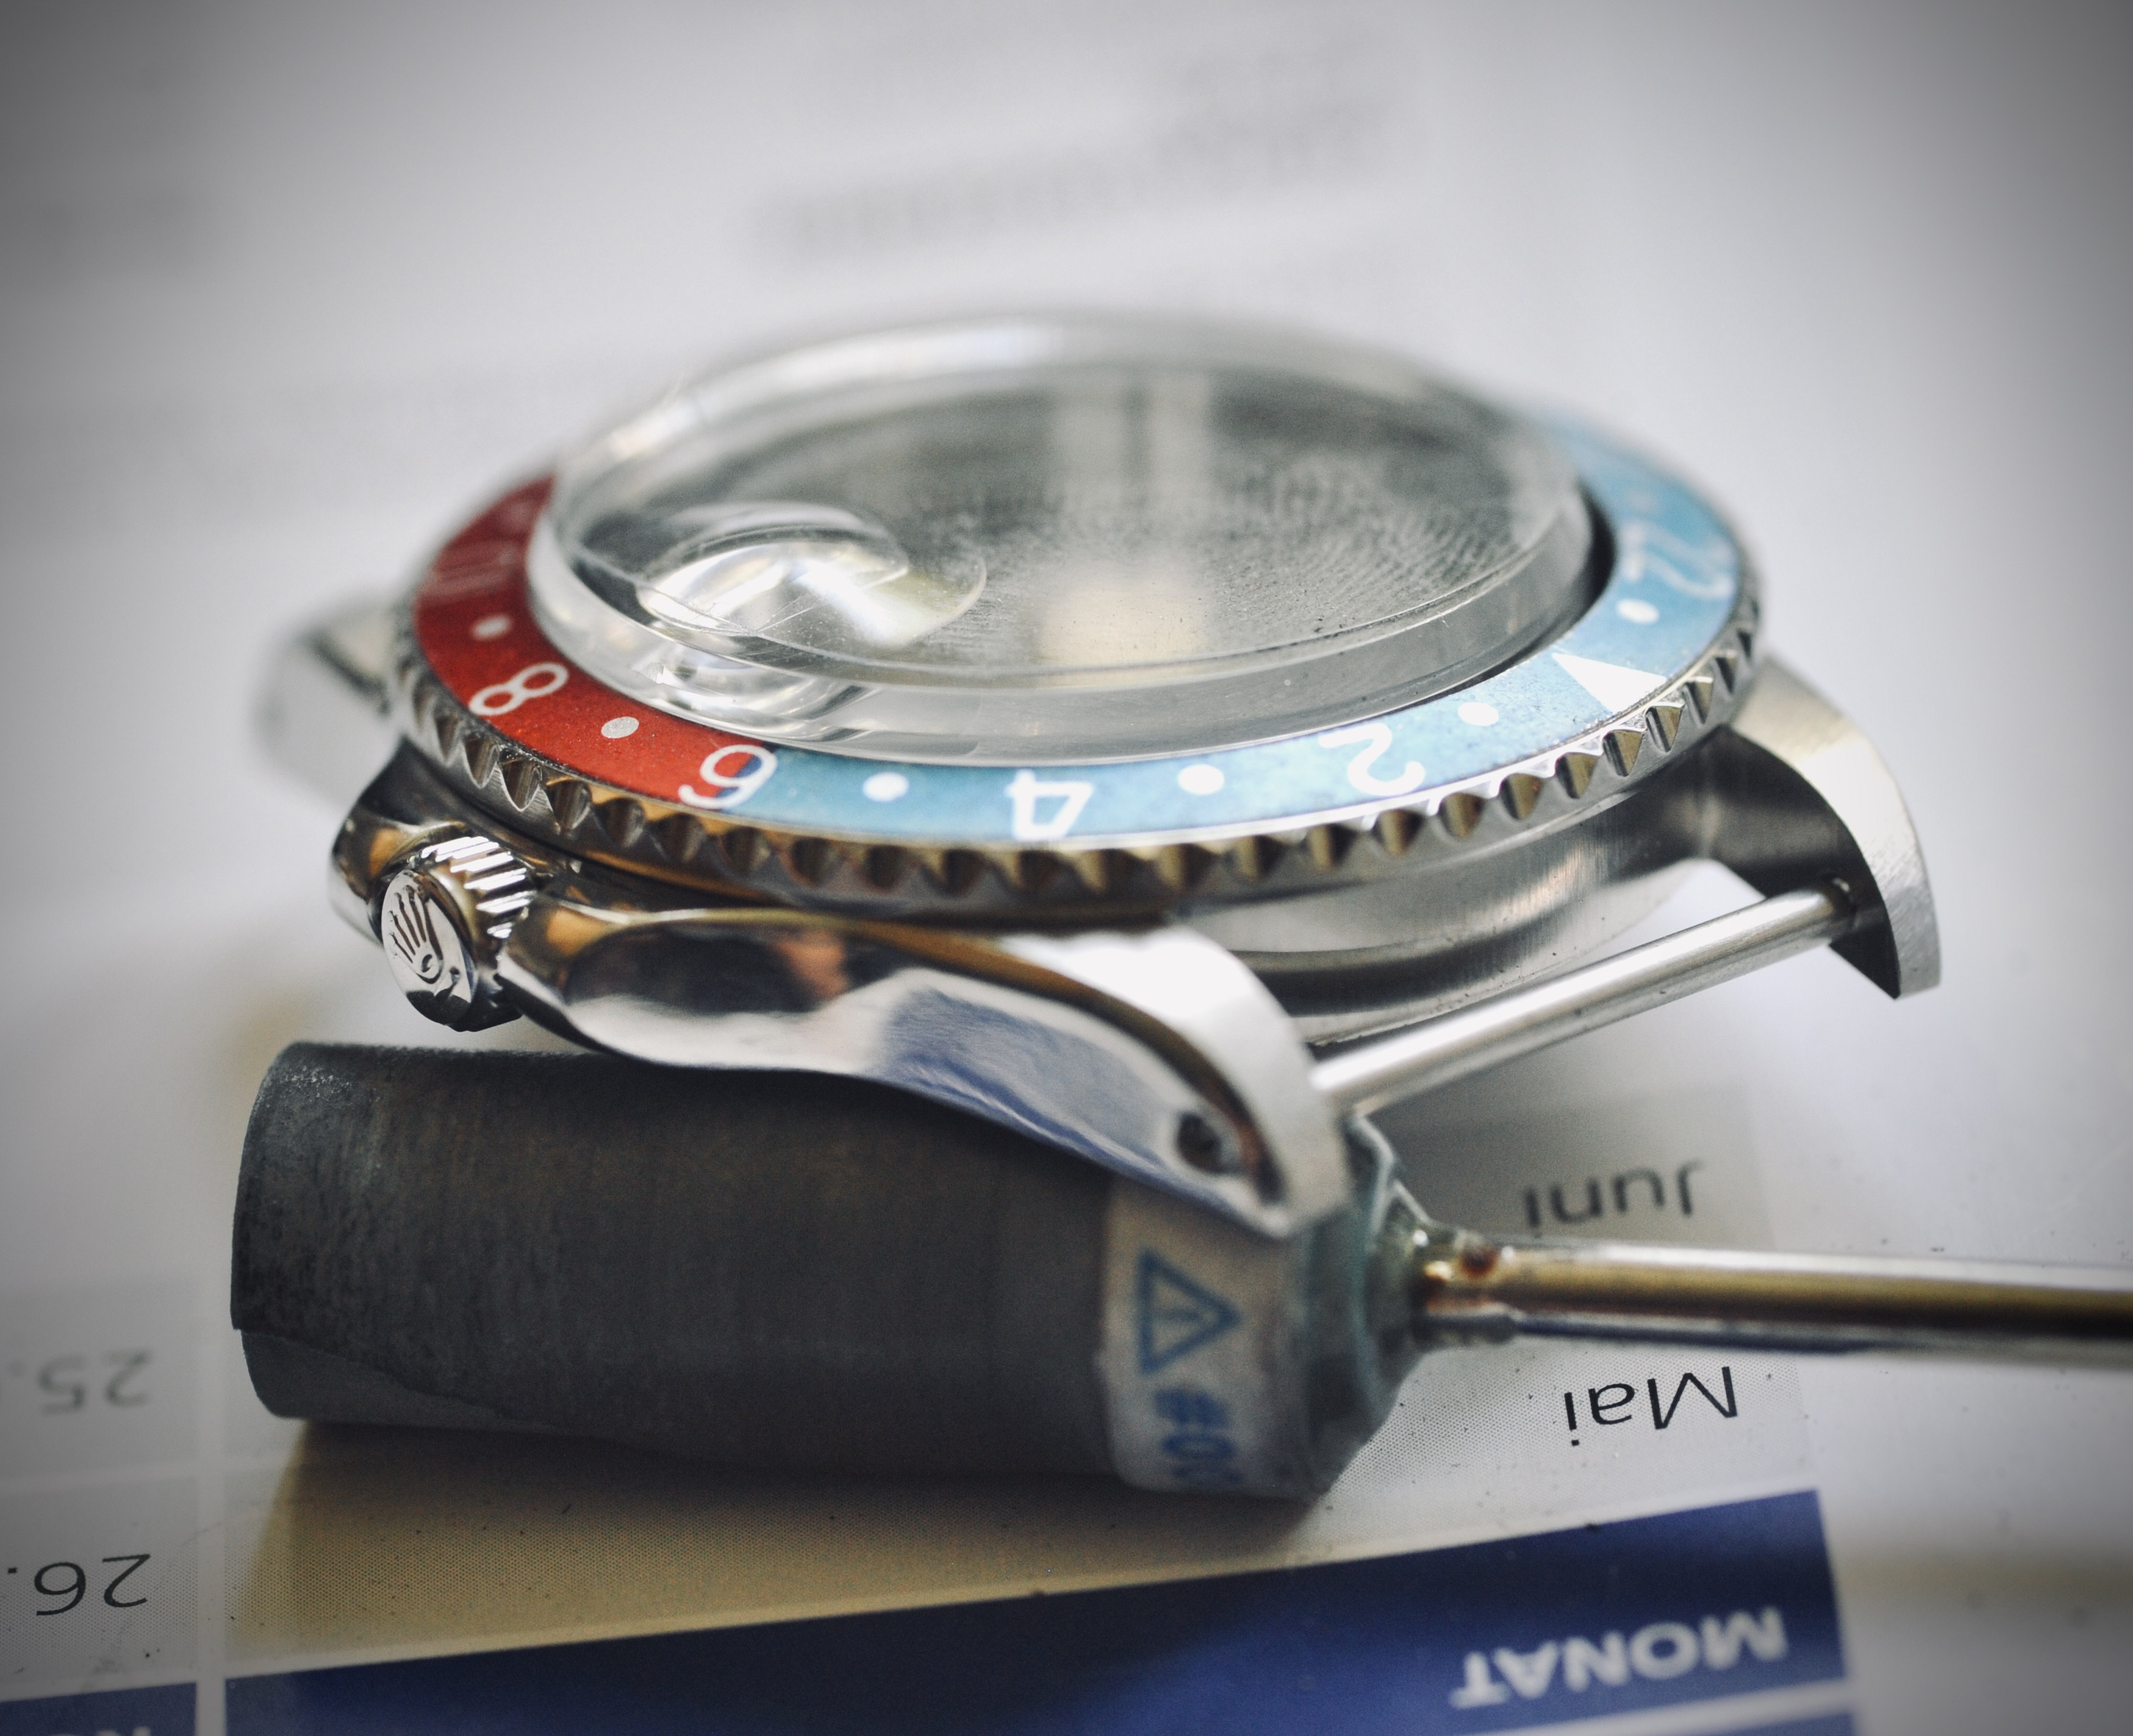
Then I cleaned off all residue and assembled the dial, hands, crown etc. And you’re ready to go:
The only thing that bugs me with the build is the bezel assembly - it’s way to loose ( meaning that the whole assembly is easily removed) - I guess that the little plastic washer that comes with it is too small or something. Did someone find a good solution for this - or did you just glue the bezel retaining ring in place?
Since I love tinkering with all things mechanical and always loved watches- I bought some tools and a raffles 1675 set to get started.
Because I found the knowledge on this site very helpful I wanted to give something back and maybe help others who are at the beginning of this hobby too - I wanted to share my experiences with this build.
So I started with the bezel - there was some kind of protective plastic on top that I had to polish away (you can still see some traces at the 8) because I was afraid that it would give uneven fading once the insert hit the bleach.

I mixed common German bleach with water in a 50/50 ratio- because I found that pure bleach would fade the insert too quickly (I tried this with a JKF 1665 first - which came out too faded).
The other thing I found out with the 1665 was that you should not touch the insert once it’s in the bleach and the first minutes after. With the 1665 I went over it with a brush and it left streaks - I guess it’s a look, but if you want to achieve an even fade: just touch the insert at the sides and check it periodically by placing it in a bowl of water, because it will keep fading some more.
Here’s the 1665 for comparison:
Then I put the insert in a box with nails and gave it a good shake to give it some smaller dings.
For the crownguards I removed the tube and prepared two photos of gen cgs that I liked. I found that if you look at too many pictures you tend to loose the eye for the form.
Since I’m a dentist by day I have some nice diamond drills - but I found this one to work best. It’s a fine diamond drill with a very handy form for case reshaping. With this I gave the cg a vage form.
To open up the cg from the inside I used a sanding wheel - but be extra careful not to hit the case - it will leave nasty nasty scars that are hard to polish away
Leave some material for corrections (symmetrical form of upper and lower cg, polishing errors etc). Here you can see the „dirty first reshape“.
To polish the case I bought sand paper drums starting at 120 grid going up all the way to 2000 grid. If you are careful with your work here and don’t rush it you will have a case that only needs a quick polish with a cotton drum and some metal polish.
By the way - for the dremel work I bought a proxxon 60 series. It has enough power but is small enough for this kind of filigrane work.
Then I cleaned off all residue and assembled the dial, hands, crown etc. And you’re ready to go:
The only thing that bugs me with the build is the bezel assembly - it’s way to loose ( meaning that the whole assembly is easily removed) - I guess that the little plastic washer that comes with it is too small or something. Did someone find a good solution for this - or did you just glue the bezel retaining ring in place?
@Capt. Chaos nice build.
Try dental floss for your loose bezel...reckon you might have some to hand.
Then when you can, upgrade to a gen spec assembly.
Try dental floss for your loose bezel...reckon you might have some to hand.
Then when you can, upgrade to a gen spec assembly.
Capt. Chaos
Do not accept unsolicited offers
Good idea - will try it tomorrow! First time somebody else told me to use dental floss@Capt. Chaos nice build.
Try dental floss for your loose bezel...reckon you might have some to hand.
Then when you can, upgrade to a gen spec assuming
The best but expensive solution is: throw away the bezel and insert and replace it with a Viet and a high quality insert or better a GEN.I came across this forum a couple weeks ago and read through all kinds of threads on how to reshape cases, assemble watches etc.
Since I love tinkering with all things mechanical and always loved watches- I bought some tools and a raffles 1675 set to get started.
Because I found the knowledge on this site very helpful I wanted to give something back and maybe help others who are at the beginning of this hobby too - I wanted to share my experiences with this build.
So I started with the bezel - there was some kind of protective plastic on top that I had to polish away (you can still see some traces at the 8) because I was afraid that it would give uneven fading once the insert hit the bleach.
I mixed common German bleach with water in a 50/50 ratio- because I found that pure bleach would fade the insert too quickly (I tried this with a JKF 1665 first - which came out too faded).
The other thing I found out with the 1665 was that you should not touch the insert once it’s in the bleach and the first minutes after. With the 1665 I went over it with a brush and it left streaks - I guess it’s a look, but if you want to achieve an even fade: just touch the insert at the sides and check it periodically by placing it in a bowl of water, because it will keep fading some more.
Here’s the 1665 for comparison:
Then I put the insert in a box with nails and gave it a good shake to give it some smaller dings.
For the crownguards I removed the tube and prepared two photos of gen cgs that I liked. I found that if you look at too many pictures you tend to loose the eye for the form.
Since I’m a dentist by day I have some nice diamond drills - but I found this one to work best. It’s a fine diamond drill with a very handy form for case reshaping. With this I gave the cg a vage form.
To open up the cg from the inside I used a sanding wheel - but be extra careful not to hit the case - it will leave nasty nasty scars that are hard to polish away
Leave some material for corrections (symmetrical form of upper and lower cg, polishing errors etc). Here you can see the „dirty first reshape“.
To polish the case I bought sand paper drums starting at 120 grid going up all the way to 2000 grid. If you are careful with your work here and don’t rush it you will have a case that only needs a quick polish with a cotton drum and some metal polish.
By the way - for the dremel work I bought a proxxon 60 series. It has enough power but is small enough for this kind of filigrane work.
Then I cleaned off all residue and assembled the dial, hands, crown etc. And you’re ready to go:
The only thing that bugs me with the build is the bezel assembly - it’s way to loose ( meaning that the whole assembly is easily removed) - I guess that the little plastic washer that comes with it is too small or something. Did someone find a good solution for this - or did you just glue the bezel retaining ring in place?
The Raffles bezel is not GEN like so it is no good as well as the poor quality crown.
R.O.Archer
Getting To Know The Place
- 25/12/23
- 50
- 156
- 33
Without cyclop is so sexy!!! Good choice!Latest build, 6460 inside, aged Raffles dial, Cousins insert, and a reduced down cheapy 93150 clasp to make it an GMT style short one.
Capt. Chaos
Do not accept unsolicited offers
So I thought about it and would like to upgrade the bezel and crystal (for a correct cyclop placement) - if someone wants to get rid of his gen spec bezel assembly or could point me into the direction where I could find a good one - please pm me, it would be highly appreciated!