• Tired of adverts on RWI? - Subscribe by clicking HERE and PMing Trailboss for instructions and they will magically go away!

DSN Ultimate PAM 112 - w/ additional CG pin mod

horologie_unitas

Respected Member
3/12/06
5,148
3
38
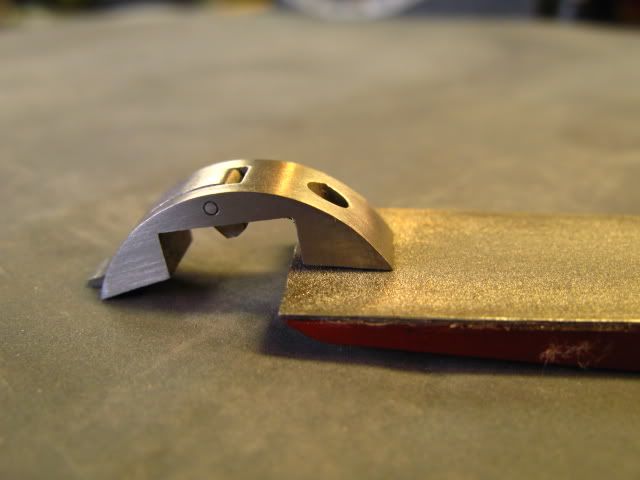
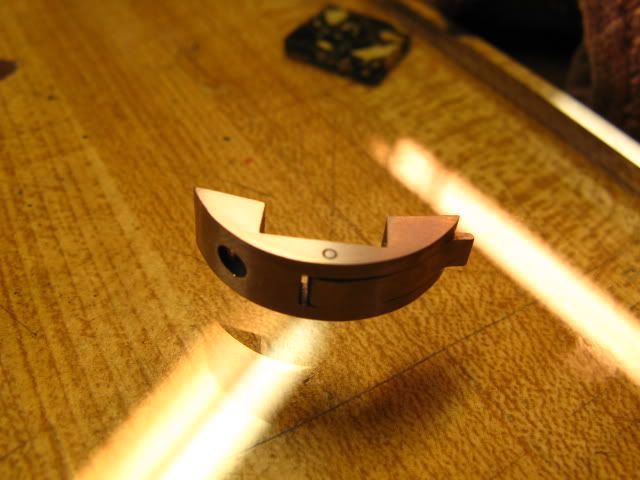
take off the CG...press out the lever pin that it is slightly over the surface of the CG ....use some fine sandpaper on a even surface ( glas, tile etc)
and slide back and forth....so easy. i have to have a flat pin....do it to all my Pams. very easy mod with great result !
 

Aquaracer

Active Member
5/1/07
431
2
0
My DSN 112 next to my Gen Pam 111 is an near exact match for lume intensity and duration- I doubt a relume would accomlish anything- What you have is as good as it gets.
 

crunch

Getting To Know The Place
4/10/07
79
0
0
That's probably one of the first mod I will do when I get my first PAM. Seeing the lever pin out of place just screws up the whole look and feel.

Also gonna get that annoying gap between the CG and the case while I'm at it too~~ :)
 

andyaudi42

Active Member
11/11/07
388
58
28
What i did to flatten the pin was this:

1st, i completely removed the CG from the case. Then i found a piece of wood with a small hole in it, and place the CG over it lining up the pin to fall into the hold in the wood. Then i removed the pin completely.

Using a pair of pliers, i placed the pin where the two arms meet (here the pliers meet the pin holding the pliers at 90 degrees) and let the rounded end of the pin stick out about 2 mm. This ensures that when filing/sanding/grinding the pin remains perpendicular to the surface used to removing the rounded edge. I used a sharpening stone to flatten the top of the pin (sharpening stone for tools, it looks like a little brick, one side is rough and the other is smoother grit*) I used the rough side to remove most of the bulb on the pin. By using the pliers, i was able to gring at 90 degress to the sharpening stone, and i was able to control the strock in 1 direction. Then i used the smooth side to achieve the same fine brushed look as the rest of the CG.

Pop the pin back in (i used the plier where they are pinned together becasue it is flat) and push until the pliers are flush against the CG. Screw your CG back on and your good to go.

I know ppl use a dremel tool or some other mechanical tools to grind, i just think you have more control when you and grind the pin and you are able to get a great result.

Cheers, sory about the length :)
 

alw

Getting To Know The Place
5/12/07
79
0
0
I can see why it pays to go for the ultimate versions...awesome!
 

horologie_unitas

Respected Member
3/12/06
5,148
3
38
i used fine sanding paper on a thick glas plate.....i let the pin stick out for about 1mm ....and slide the whole CG over the sanding paper.

IMG_4542.jpg


IMG_4536.jpg
 

jockl1978

Getting To Know The Place
22/5/07
43
0
0
horologie_unitas said:
i used fine sanding paper on a thick glas plate.....i let the pin stick out for about 1mm ....and slide the whole CG over the sanding paper.

Thank you for the advice, will try this on my next PAM (don´t want to mess my DSN 127 CG with the engraving) - do you know if it works on Ti PAMs also?
I don´t want to become the CG surface different then the case surface.
 

horologie_unitas

Respected Member
3/12/06
5,148
3
38
WHAT YOU SEE IS A TITANIUM CROWN GUARD. YOU JUST NEED TO BE CAREFUL WHEN YOU USE A MACHINE...THAT THE TI DOES NOT GET HOT AND TURN BLUE.
 

bazonkers

Known Member
22/10/07
119
0
0
horologie_unitas said:
WHAT YOU SEE IS A TITANIUM CROWN GUARD. YOU JUST NEED TO BE CAREFUL WHEN YOU USE A MACHINE...THAT THE TI DOES NOT GET HOT AND TURN BLUE.

If it turns blue, you will be blue.