• Tired of adverts on RWI? - Subscribe by clicking HERE and PMing Trailboss for instructions and they will magically go away!

Decal printed dial

chrome72

Renowned Member
7/12/17
639
561
93
Houston TX Baby
Long Life it was just the standard process documented in this thread:
  • Remove print from dial to reveal the brass
  • Polish the brass
  • Make decal, let dry, spray 2 coats of varnish on it
  • Slide decal onto brass dial
  • Dry per your transfer paper's instructions
  • Apply a few more coats of varnish
  • Lume it up
 

Kingk

Getting To Know The Place
26/12/18
34
8
8
Bart cordell posted quite a few in the earlier pages of this thread. If you can’t find them shoot me your email address via PM and I’ll send some.
Can you send the to meet too pls. PMd you.

Sent from my SM-N950F using Tapatalk
 

Long Life

This member is doing hard time, they pissed off the goat.
INMATE
5/3/20
10
0
0
Europa
Long Life it was just the standard process documented in this thread:
  • Remove print from dial to reveal the brass
  • Polish the brass
  • Make decal, let dry, spray 2 coats of varnish on it
  • Slide decal onto brass dial
  • Dry per your transfer paper's instructions
  • Apply a few more coats of varnish
  • Lume it up
I would say an excellent technique and an excellent result
 

p0pperini

patr0n h0arder
Gold Patron
Certified
29/1/19
9,387
33,799
113
UK
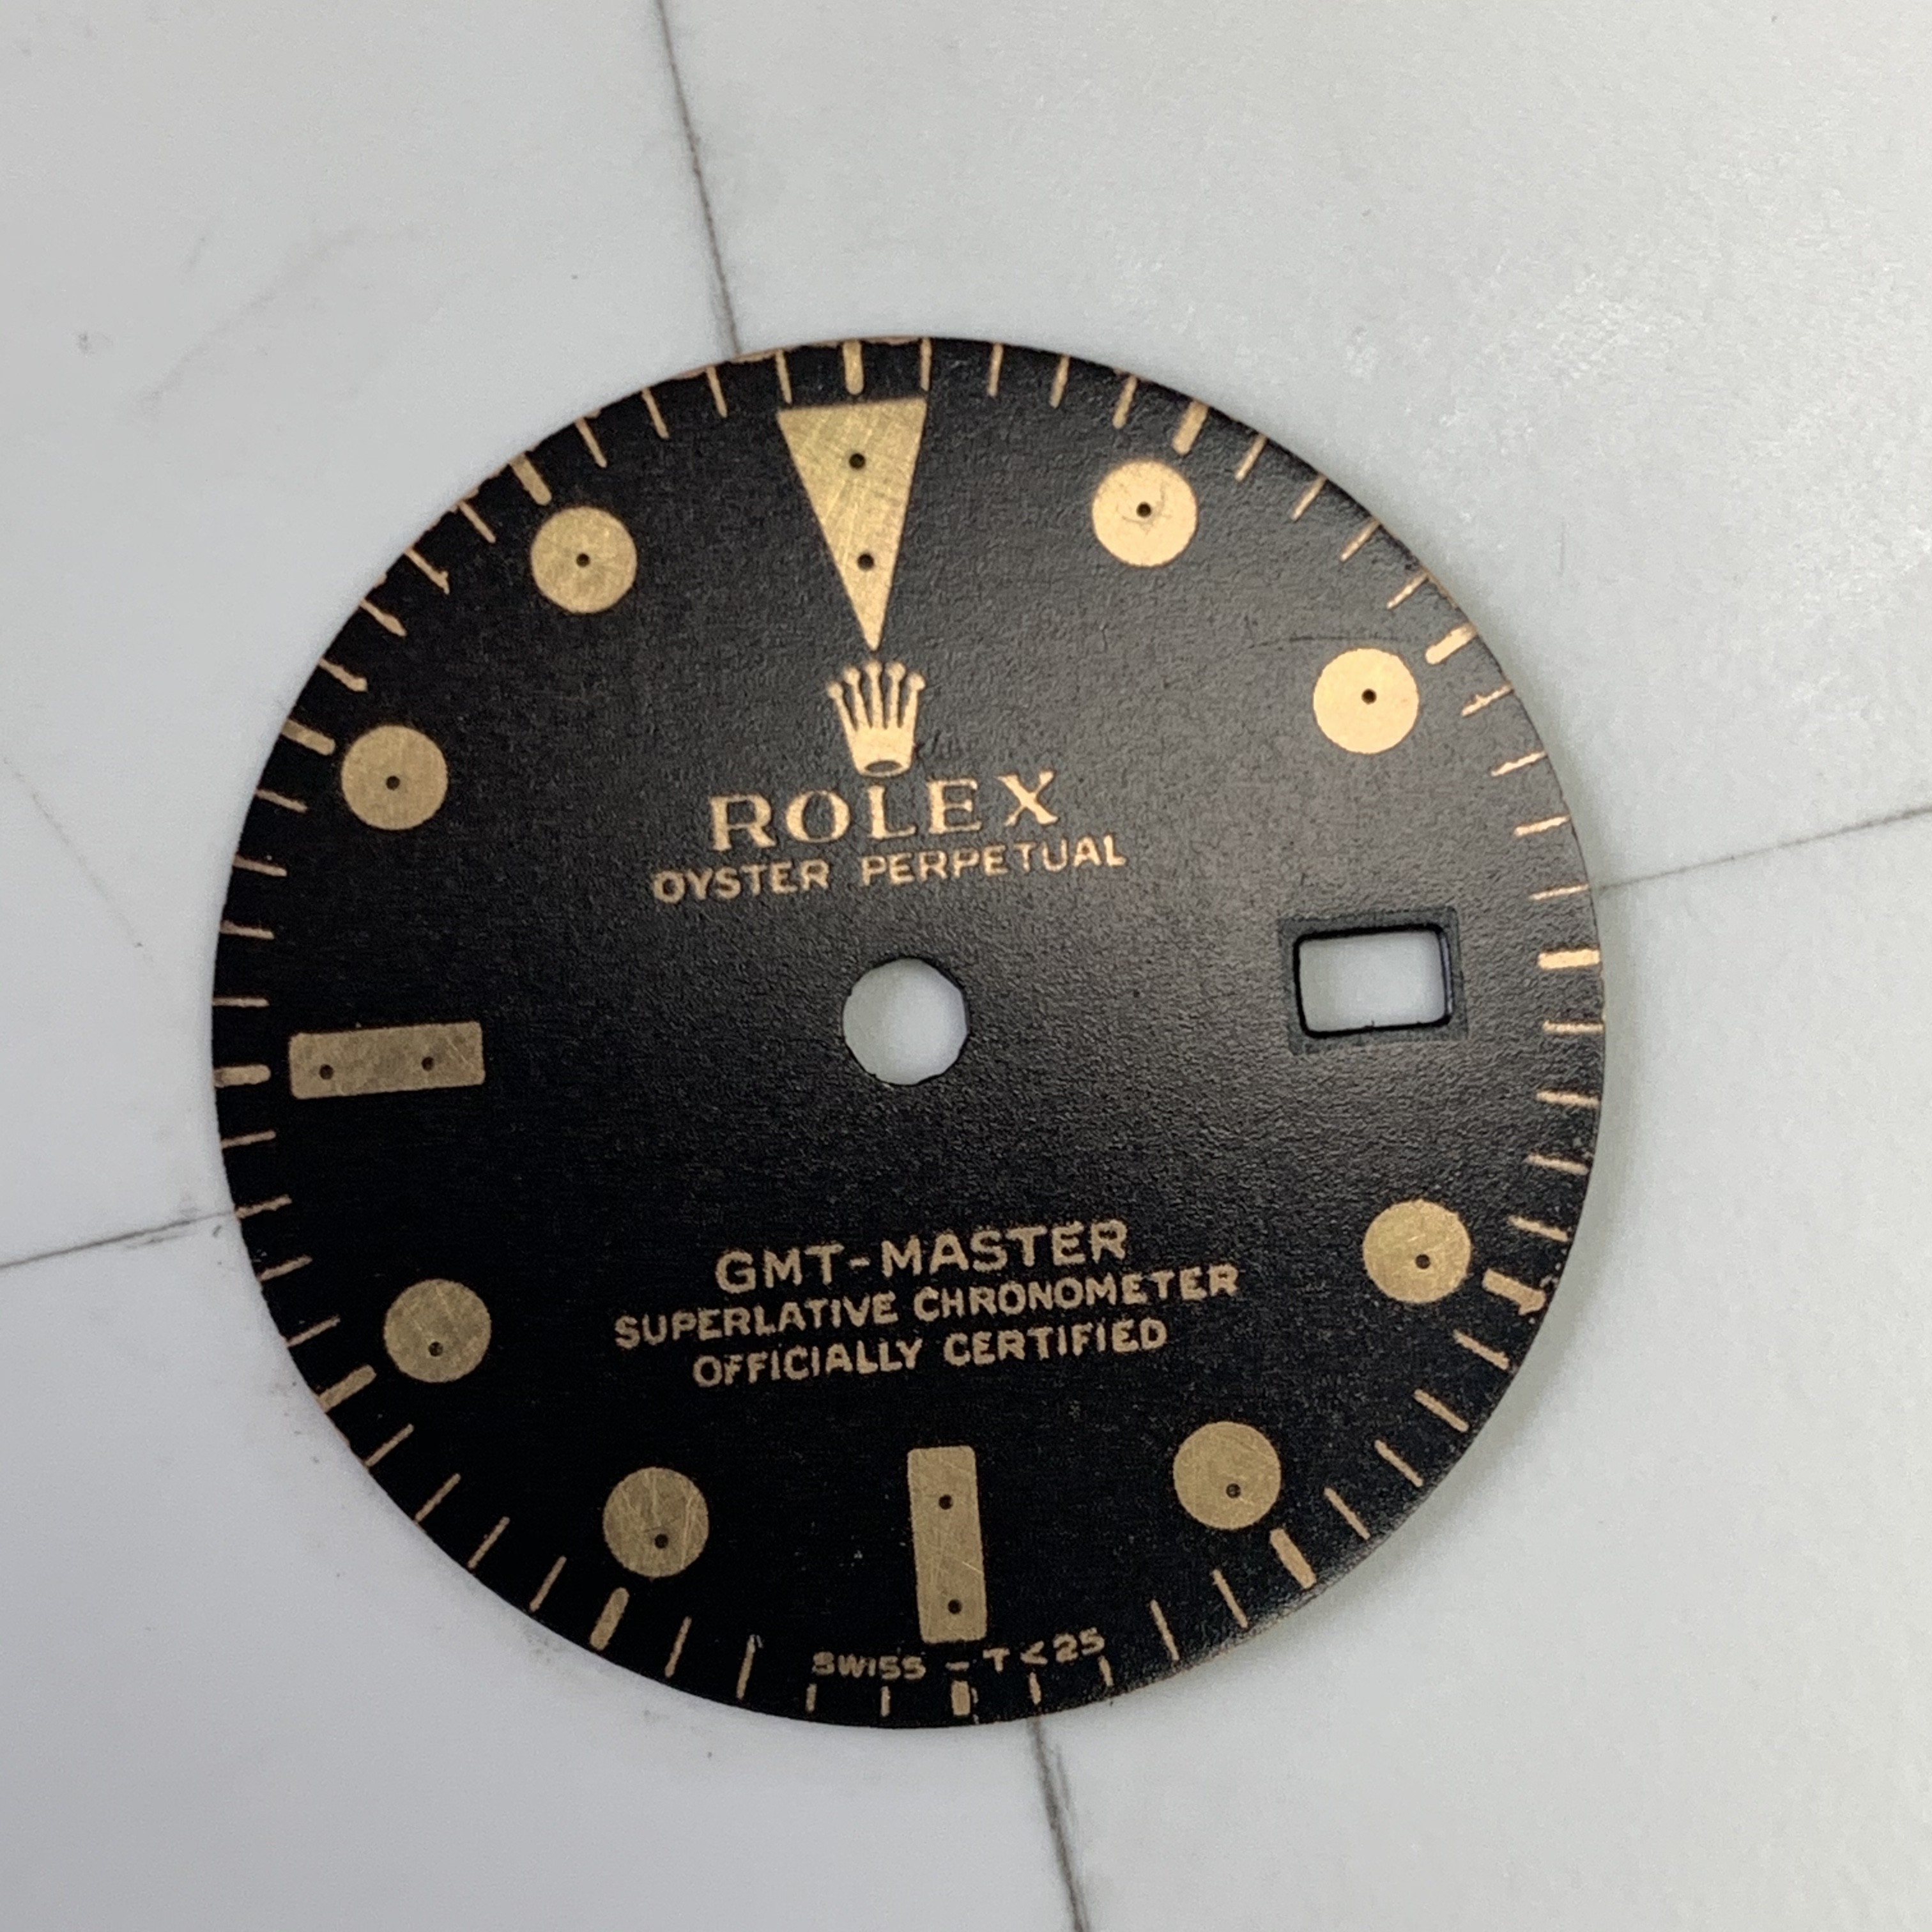
Briteling manodeoro Hey chaps, I've now got my GMT dial film-free print in place on the dial. It got baked at 100 deg for 10 minutes before film removal, then baked for another 10 mins at 200 deg once the film was removed.

What I'm not sure about now is whether I need to seal it with varnish? I have no idea how robust the decal is and whether I can handle it carefully enough to avoid scratching it. Obviously varnishing will add protection, but I guess it will both diminish the relief effect of the film free process - plus probably make luming more tricky as there will be less defined edges round the lume plots.

So, just interested to know what you guys do. And I'm sorry if you already described it - I must have missed it while scanning back through the vastness of this thread! :)

Here's my 1675 dial:

ytHzn.jpg
 

itgoes211

Active Member
10/4/19
373
188
43
Briteling manodeoro Hey chaps, I've now got my GMT dial film-free print in place on the dial. It got baked at 100 deg for 10 minutes before film removal, then baked for another 10 mins at 200 deg once the film was removed.

Here's my 1675 dial:
p0pperini
Well done sir! The texture is great. FWIW, my vote is for no spray. The two that I baked (and ruined) earlier in the thread were pretty hard to clean off once they were baked. After baking, the ink on my ruined dials was almost rock solid. I had to re-do some others before baking, and the ink was significantly les strong and much easier to remove than after the baking. So I assume the baking causes some sort of chemical reaction that hardens/strengthens the ink.
Just my limited experience - I will defer to the elders

Also, I agree with your points regarding the texture and lume application, which would also lean my vote toward a no spray as well. FWIW...

Btw, the bevel around the date window takes the dial up a notch - very nice.
Cant wait to see where this goes next. Cheers :)
 

p0pperini

patr0n h0arder
Gold Patron
Certified
29/1/19
9,387
33,799
113
UK
itgoes211 Thanks for your advice buddy, I really appreciate it - It’s exactly the first-hand experience I was keen to hear. I guessed the point of baking at 200 was to harden the ink, but I didn’t want to assume that and then find half the print drops off when I start attempting the lume. But that’s the next hurdle... I need to practice luming on some test prints, before I attempt it on the dial...

I’m still concerned I may have left out a step though... I now have a brass dial that’s exposed to the air in all the places that don’t have ink on. Won’t these quickly tarnish without being sealed in some way? So, should I have lacquered the dial blank, before applying the print?
 

Alhig72

I'm Pretty Popular
Supporter
Certified
15/11/16
2,752
3,808
113
UK
Print the dial, once its dry spray with ink jet fixative spray, let that dry then you will be good to go

Sent from my LYA-L09 using Tapatalk
 

p0pperini

patr0n h0arder
Gold Patron
Certified
29/1/19
9,387
33,799
113
UK
Alhig72 Thanks for your input, I appreciate it. I know you have extensive experience with building, ageing and modding pieces, so I'm inclined to follow your advice - because as I mentioned, I think the raw dial metal needs some sort of coating to keep it from tarnishing. My only reticence to adding a lacquer/fix layer is that it'll make luming less easy. But that might not be an issue. Ah, what the heck, I'm going with your advice and my own instinct and give it a dusting of clear coat (I don't have any inkjet fixative, but it's all the same sort of thing. I think. Probably.).

EDIT: And... done. A dusting of Rust-oleum Crystal Clear gloss, and now it's safely under a dust cover to dry.
 
Last edited:

Alhig72

I'm Pretty Popular
Supporter
Certified
15/11/16
2,752
3,808
113
UK
The decal itself stops the dial suface from tarnishing, also if you don't apply the fixative spay the ink just comes off of the decal when you put it in the water or touch it, also ive found that leaving the decal to dry naturally for a day or 2 once its on the dial is the best way, drying fast with heat often causes the decal to shrink

Sent from my LYA-L09 using Tapatalk
 

p0pperini

patr0n h0arder
Gold Patron
Certified
29/1/19
9,387
33,799
113
UK
The decal itself stops the dial suface from tarnishing, also if you don't apply the fixative spay the ink just comes off of the decal when you put it in the water or touch it, also ive found that leaving the decal to dry naturally for a day or 2 once its on the dial is the best way, drying fast with heat often causes the decal to shrink
All that advice indicates that you're talking about the regular decal process Alhig. I am doing film-free decal application, which leaves nothing but the ink on the dial. There's no film to protect the exposed parts of the dial.

But no matter - as I said, I think leaving the brass exposed to the air will lead to it tarnishing pretty quickly, so I don't think it was wrong to follow your advice on the additional layer of lacquer, even though it was based on misunderstanding what process I was referring to... :)

EDIT: I just checked the dial as it's drying, and it now looks nothing like as good with the lacquer sprayed on it. Ah well...

Could someone - who is also using this process - maybe Briteling manodeoro confirm whether I should have lacquered the dial surface before applying the film-free decal?
 
Last edited:

Alhig72

I'm Pretty Popular
Supporter
Certified
15/11/16
2,752
3,808
113
UK
How about if you spray the dial with lacquer, once its dry polish with rubbing compound to get it as shiny as possible before applying the decal

Sent from my LYA-L09 using Tapatalk
 

p0pperini

patr0n h0arder
Gold Patron
Certified
29/1/19
9,387
33,799
113
UK
How about if you spray the dial with lacquer, once its dry polish with rubbing compound to get it as shiny as possible before applying the decal
Yes, I think that'll be my next course of action Al. The contrast between the dial surface and the baked on ink is really effective, but spraying clear coat over it ruins that effect. So my next one will be on a pre-lacquered and polished blank.

It's only taken me about three months to get this far. But hey, it's all good fun.

It is really encouraging to see how good this film-free process can look. I'm excited to progress to the next version.
 
Last edited:
  • Like
Reactions: deadpan

Alhig72

I'm Pretty Popular
Supporter
Certified
15/11/16
2,752
3,808
113
UK
Yes, I think that'll be my next course of action Al. The contrast between the dial surface and the baked on ink is really effective, but spraying clear coat over it ruins that effect. So my next one will be on a pre-lacquered and polished blank.

It's only taken me about three months to get this far. But hey, it's all good fun.

It is really encouraging to see how good this film-free process can look. I'm excited to progress to the next version.
Yeah, id like to try that myself but i only have an ink jet printer,. Maybe I'll have to get a laser one for my next batch of dials

Sent from my LYA-L09 using Tapatalk
 

itgoes211

Active Member
10/4/19
373
188
43

Yes, I think that'll be my next course of action Al. The contrast between the dial surface and the baked on ink is really effective, but spraying clear coat over it ruins that effect. So my next one will be on a pre-lacquered and polished blank.

It's only taken me about three months to get this far. But hey, it's all good fun.

It is really encouraging to see how good this film-free process can look. I'm excited to progress to the next version.

Thanks for sharing the experience/test. Would you have/share a post-spray shot of your dial to compare with the pre-spray? I’m curious to see the delta you mentioned.
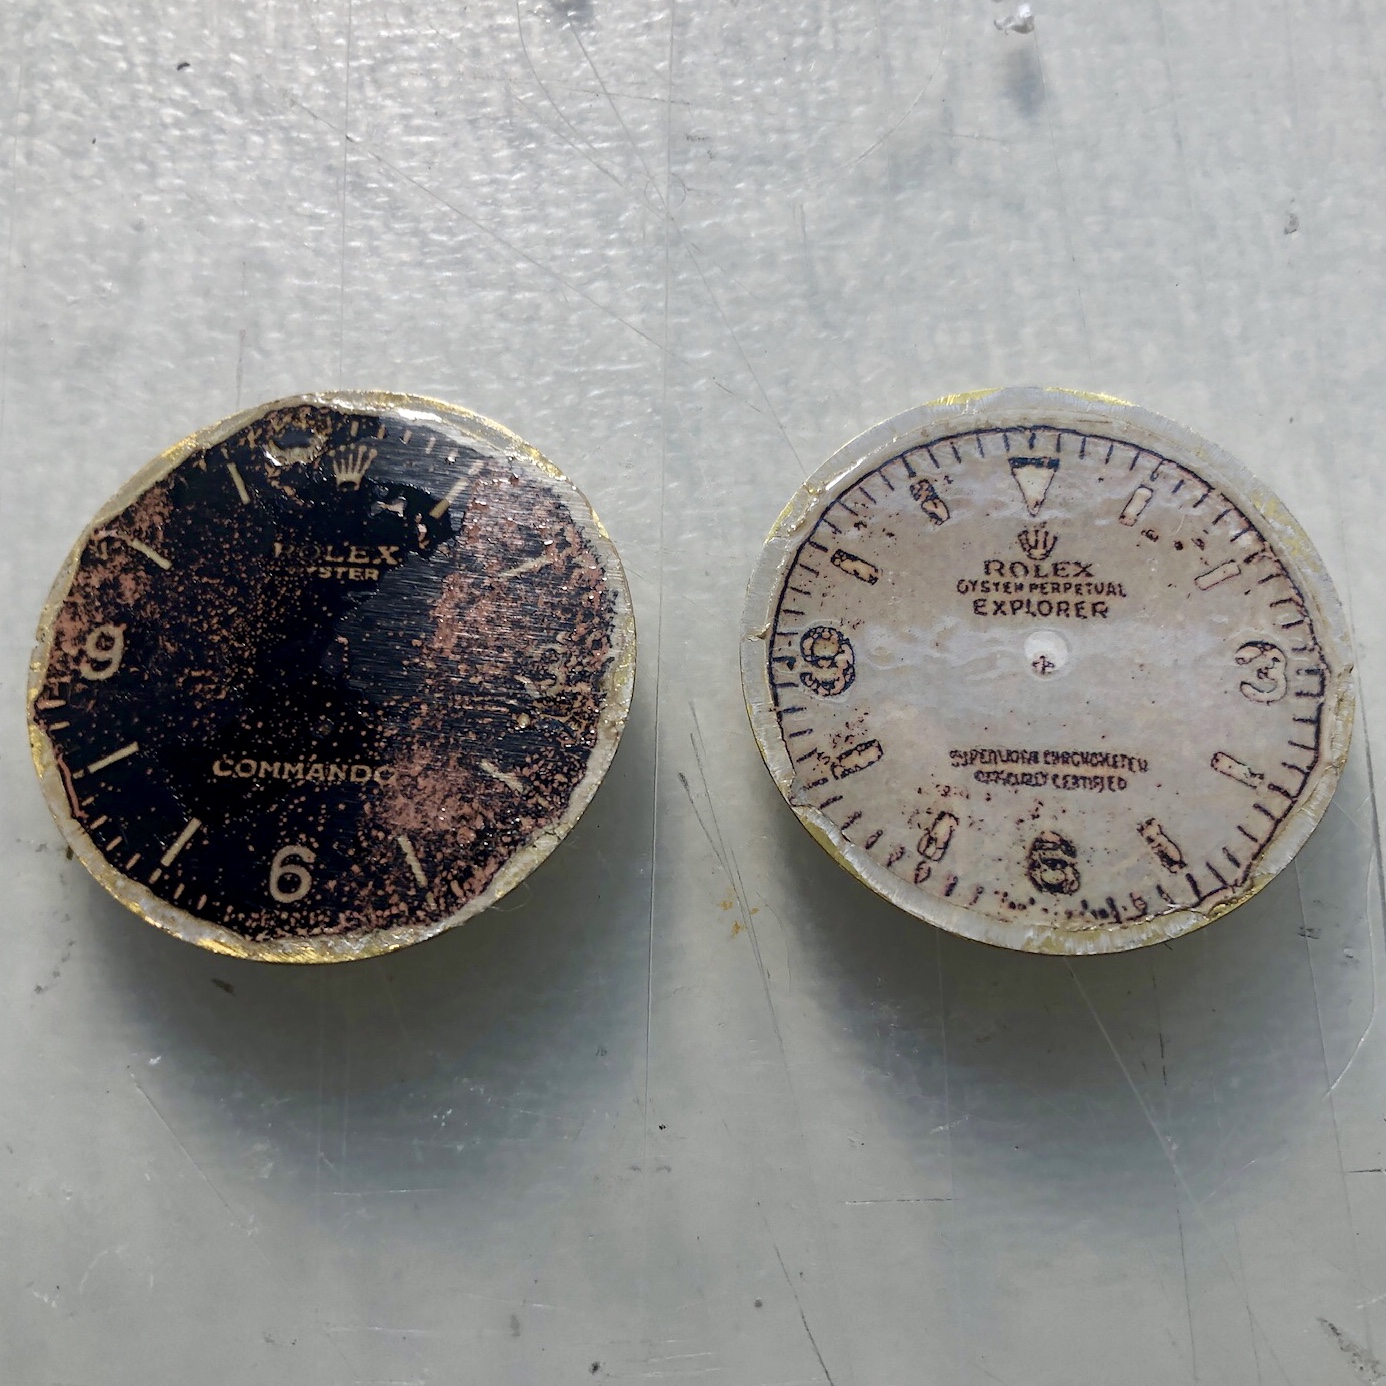
Also, fwiw, maybe test bake a blank with just the lacquer? I think that one of the non-decal dials I baked had lacquer under the non-decal ink, which might have caused the lacquer to melt when baking. And since the non-decal ink was applied to the lacquer and not the brass, the melted lacquer killed the dial. I think it’s the white dial in this failure pic - or both, I didn’t take notes as I was just messing around with the heating process.
I just realized this when reading your post - maybe it wasn’t the heat alone that ruined these baked-dials (I followed the heating directions pretty closely), but rather the lacquer I had under the non-decal ink? Hmm - who knows? Anyway, hope this might help.
 

itgoes211

Active Member
10/4/19
373
188
43
I also just realized that the type of spray might be another variable. I remember reading that some gents use an engine-purposed spray, which I assume handles heat better that the normal krylon art lacquer I’m using. (?)
 

p0pperini

patr0n h0arder
Gold Patron
Certified
29/1/19
9,387
33,799
113
UK
I also just realized that the type of spray might be another variable. I remember reading that some gents use an engine-purposed spray, which I assume handles heat better that the normal krylon art lacquer I’m using. (?)
Ooh... I didn't consider the baking stage causing the lacquer problems. Yeah, in that case I'll have to look into the heat resistant stuff - or just see how the dial looks if left exposed. Dammit, this is such a bloody one step forwards, two steps back process! :)

I'll post a pic or two of the dial with lacquer once it's fully dried - it's still pretty tacky and I know it's bound to pick up dust if I mess with it at all. I might give it a few more coats and try sanding it, as it's mainly the current "I've been sprayed with something" texture that's the issue.