- 20/2/25
- 33
- 16
- 8
Hi all,
I would like to start this thread by saying thank you. Thank you to the RWI community for creating such a wonderful space for people to share, discuss, and communicate all watch related topics. I'm a new member in this forum and this is my first thread and first time ever modifying a watch. I've always loved watches since teenager but oddly enough I never liked wearing them (at least at that age). Now, I have several watches all different brands, I buy watches/collect based on attraction to the dial (personal taste). Well, enough with nonsense and lets get into what we all are here for, sharing the progress of our projects.
I can't begin this without giving a HUGE THANK YOU to both of these two gentlemen @dogwood & @KJ2020 since joining the forum I stumbled on several threads that are extremely informative. They put in the time to share their projects and the progress they make while modifying/servicing their watches, and just like everyone here I would like to share my project with you.
Project detail is a 40mm Submariner: at the time I couldn't decide which one to pick Kermit or Hulk. I had this idea that I would swap the dial (black to green or vice versa) depending on time and occasion to wear the watch. That initial thought escalated quickly and I said what if I can also swap the bezel insert from any color to create different version of the Sub. Well, that simple thought took me to a rabbit hole hahaha.
Case: ARF 40mm with green Ceramic bezel insert
Movement: VS3135
Bracelet: Rubber strap (black or green depending on dial color)
Crystal: Clark's AR
Link to tools I used:
1st Press:
2nd Press:
3rd Press (VISE):
Set of 68 POM dies:
116610 "Specific Dies for Crystal and Gasket pressing" *didn't work for me, i don't see where i can use these dies.
Bezel Remover:
Hytrel Gasket different materials AVBL:
I used UPE - https://www.aliexpress.us/item/3256...t_main.77.85921802RNHS7q&gatewayAdapt=glo2usa
After receiving my perfectly working ARF case, I decided to start the above modifications. Removing the rotating bezel wasn't hard using the tooling was straight forward and easy. Having the bezel assembly off the watch I though it will be easy as pulling things off and pressing them back in (boy was I wrong and the wake up call I was in for). Out of lack of experience, as I mentioned above this was my 1st time ever modifying a watch case I didn't know what to look for when re-assembling back the watch. It took several tries to put that rotating bezel back into the case, it was so tight that I couldn't get it by hand I had to use the press, and while pressing it back the hytrel gasket was damaged. It looked fine to me and I kept attempting to "set it down properly" because the rotating was not smooth and super stiff. In one of my attempts the retaining ring + gasket + crystal came off along with the rotating bezel. At this point things kept getting worse and worse for me given is my 1st time doing all this. I saw the opportunity to do two things 1) Polish the rehaut 2) Install new crystal "Upgrade to Clark's AR" *more on this later.
1) Polishing the rehaut went horribly wrong haha I used the wrong compound to polish and it created deep scratches that later I tried to take off by polishing more with a finer compound. It didn't turn out good at all, the rehaut is shot and done for =/ you can still see the scratches without any magnification hahaha and the polish is "mirror finish". At this point I'm disappointed that everything seems to be going wrong.
2) I ordered the Clark's AR crystal and once received I got busy with installing that. Yet again, another struggle. The retaining ring from ARF was still good up until this point, I cleaned everything assembled the crystal + gasket and manually put it in the case and set everything up to press that retaining ring down. Here is where everything got a lot worse, down bad hahaha. Pressing that retaining ring is not a simple task as i originally thought to be, the dies I had don't really work for this task, at least the plastic ones. I managed to damaged a total of 3 retention rings all were bent while pressing it down. As you can imagine, 40-60$ each I was starting to question if this was worth continuing. I took a break from doing the project and started searching for a die that would do the job. Well, that's when I found the post @KJ2020 had done for swapping crystals and gaskets, he has been a HUGE help I mean tremendous, he guided me through this process and with his help I was able to finally press that retaining ring down Saturday night.
Few things I've learned, tool is essential I'm not saying go and get 400$ piece of tooling, not at all, I'm not a pro nor plan on being one, I just want to be able to swap that bezel and dial to have different variants of the SUB hahahaha. But pay close attention to the tools you use, the press is going to be your best friend here (at least in my case). The 1st press I used was not "perfectly" straight and I didn't even think about it until KJ suggested to make sure everything lined up straight as possible to press the retention ring. I decided to take some measurement and voila! found that the upper base of the traveling shaft where the upper die sits up against was bent It has a difference of 1.5mm on one side. Knowing this i decided to get a different press, one with a relatively flat surface, and that's when i got press #3 (VISE). The pressing was better since both plates were "leveled" I put it in quotes because that 60$ VISE won't have perfectly flat plates but better than 1.5mm difference hahaha. The watch is back to one piece but not 100% complete, there are some flaws that i would like to correct and that's why i made this thread. I would love to hear feedback/suggestions and of course the best part which is to share it brings such joy for me at least.
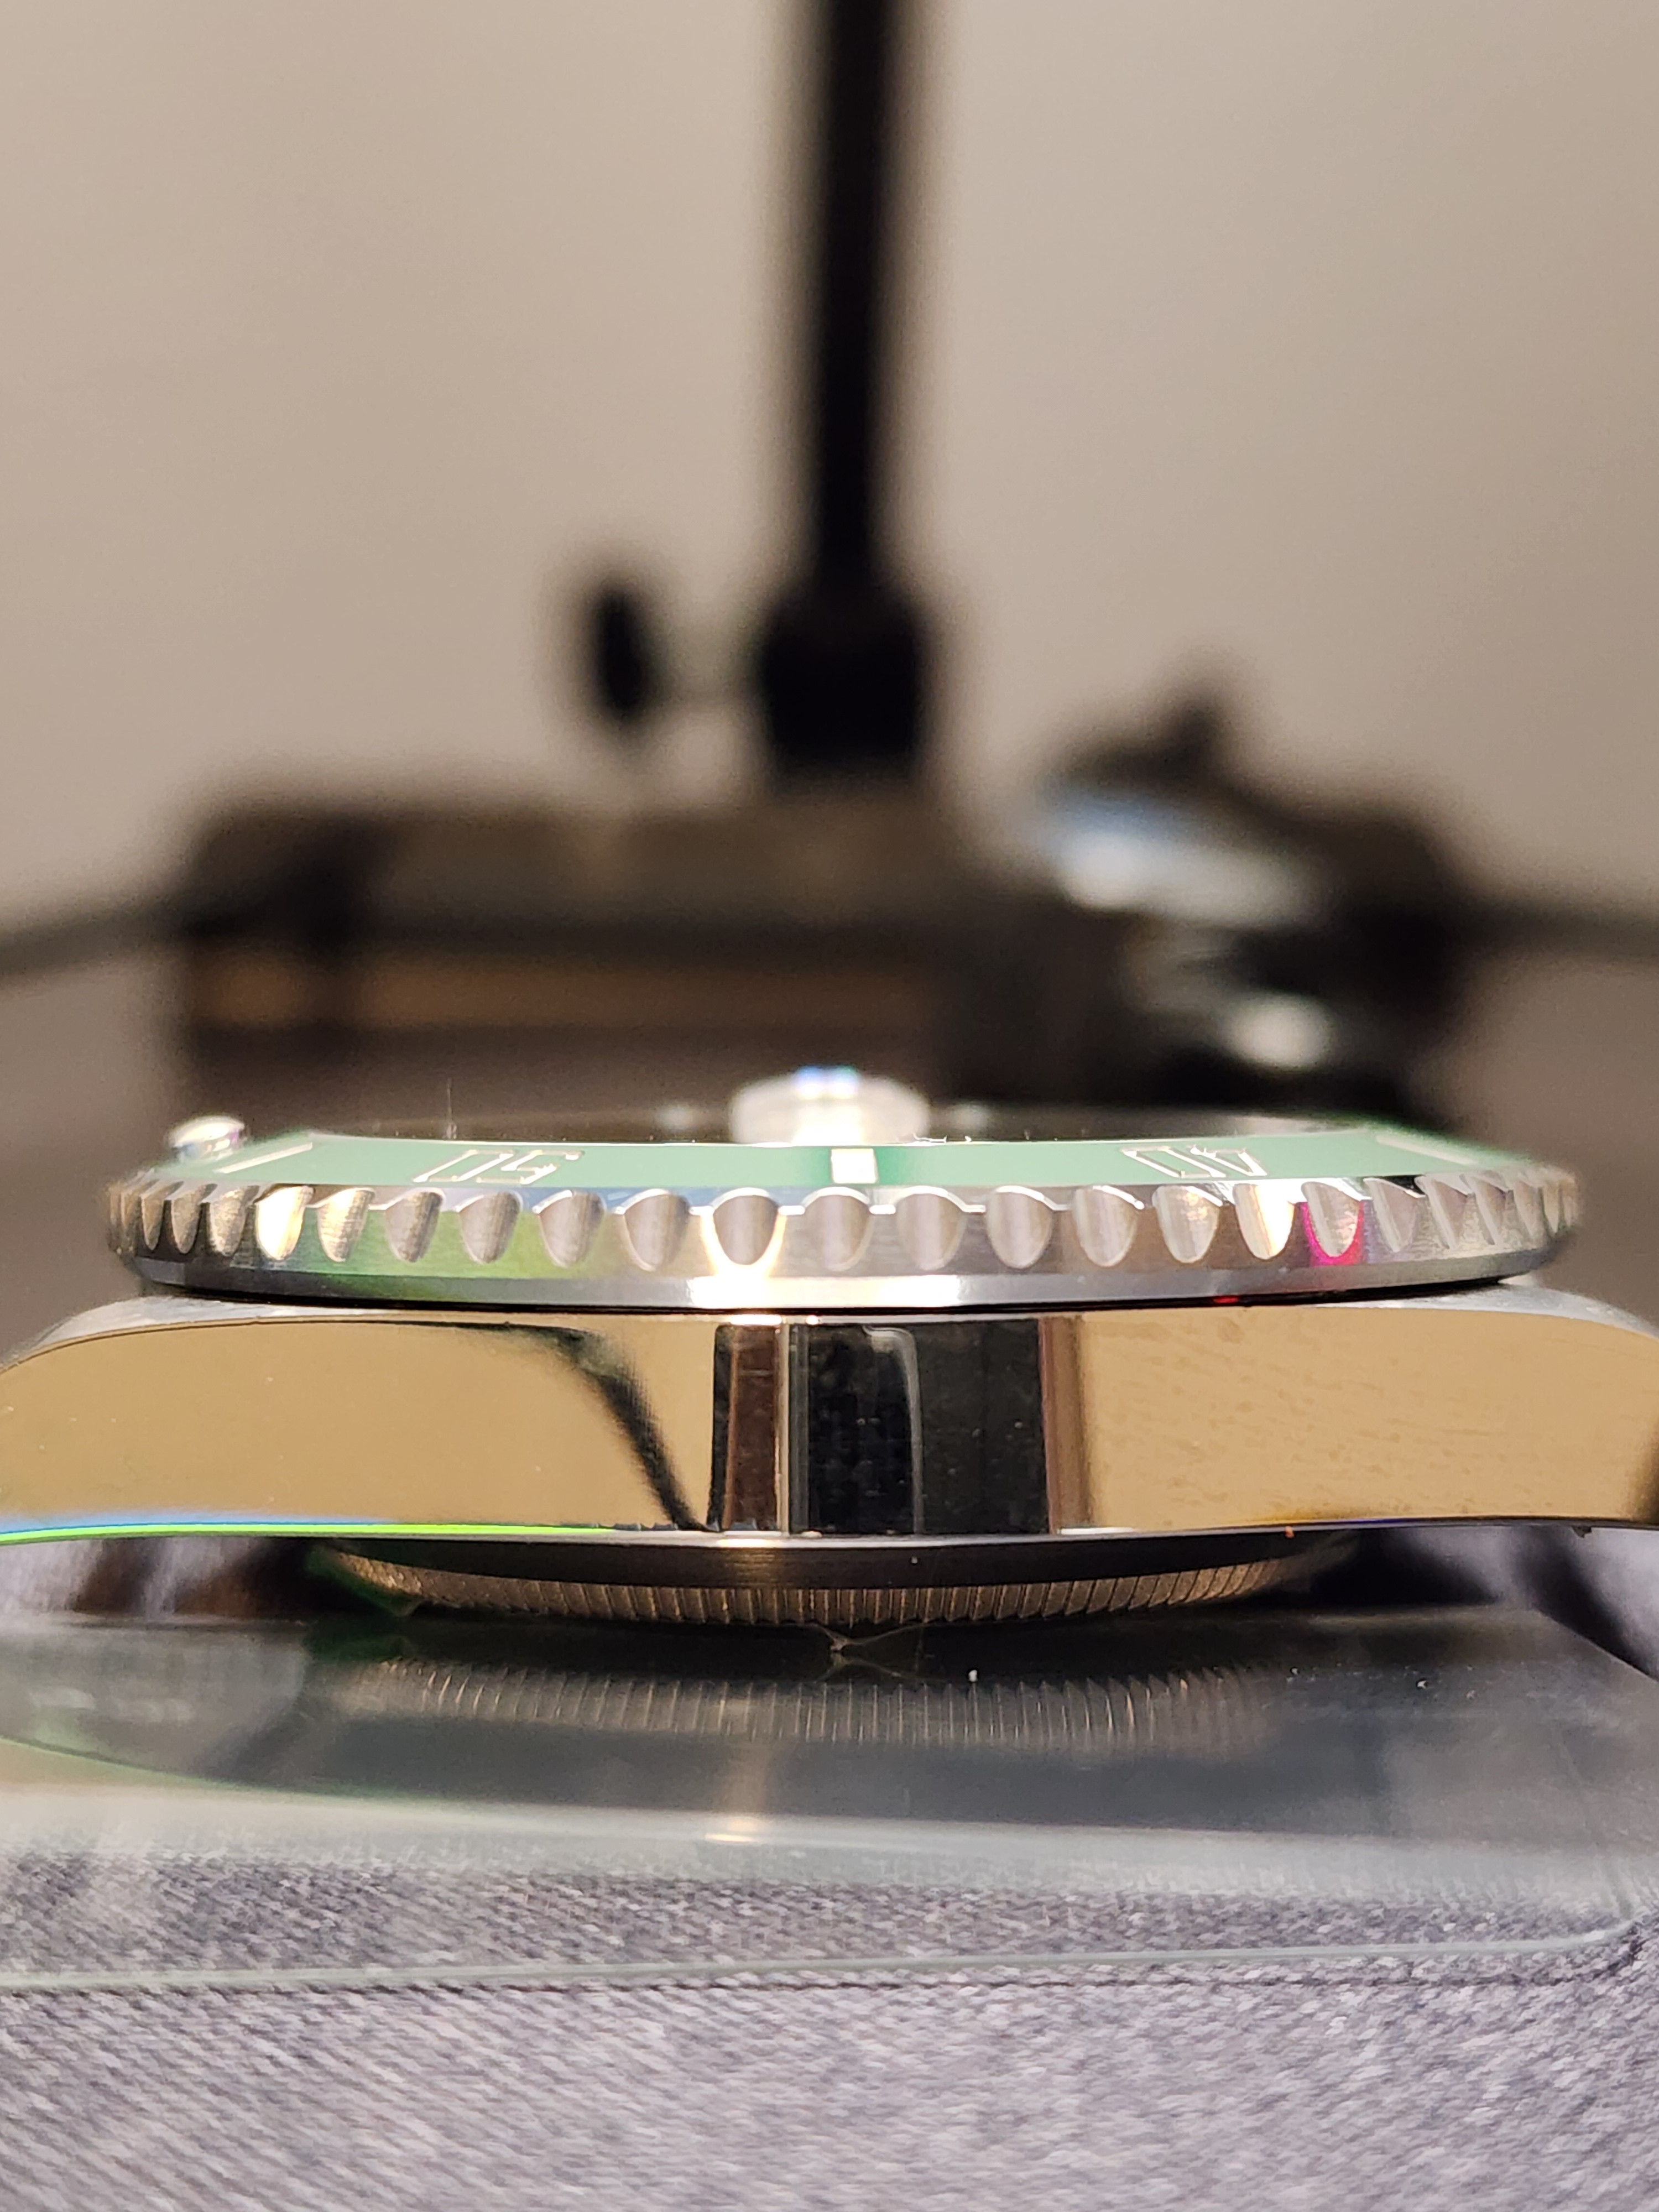
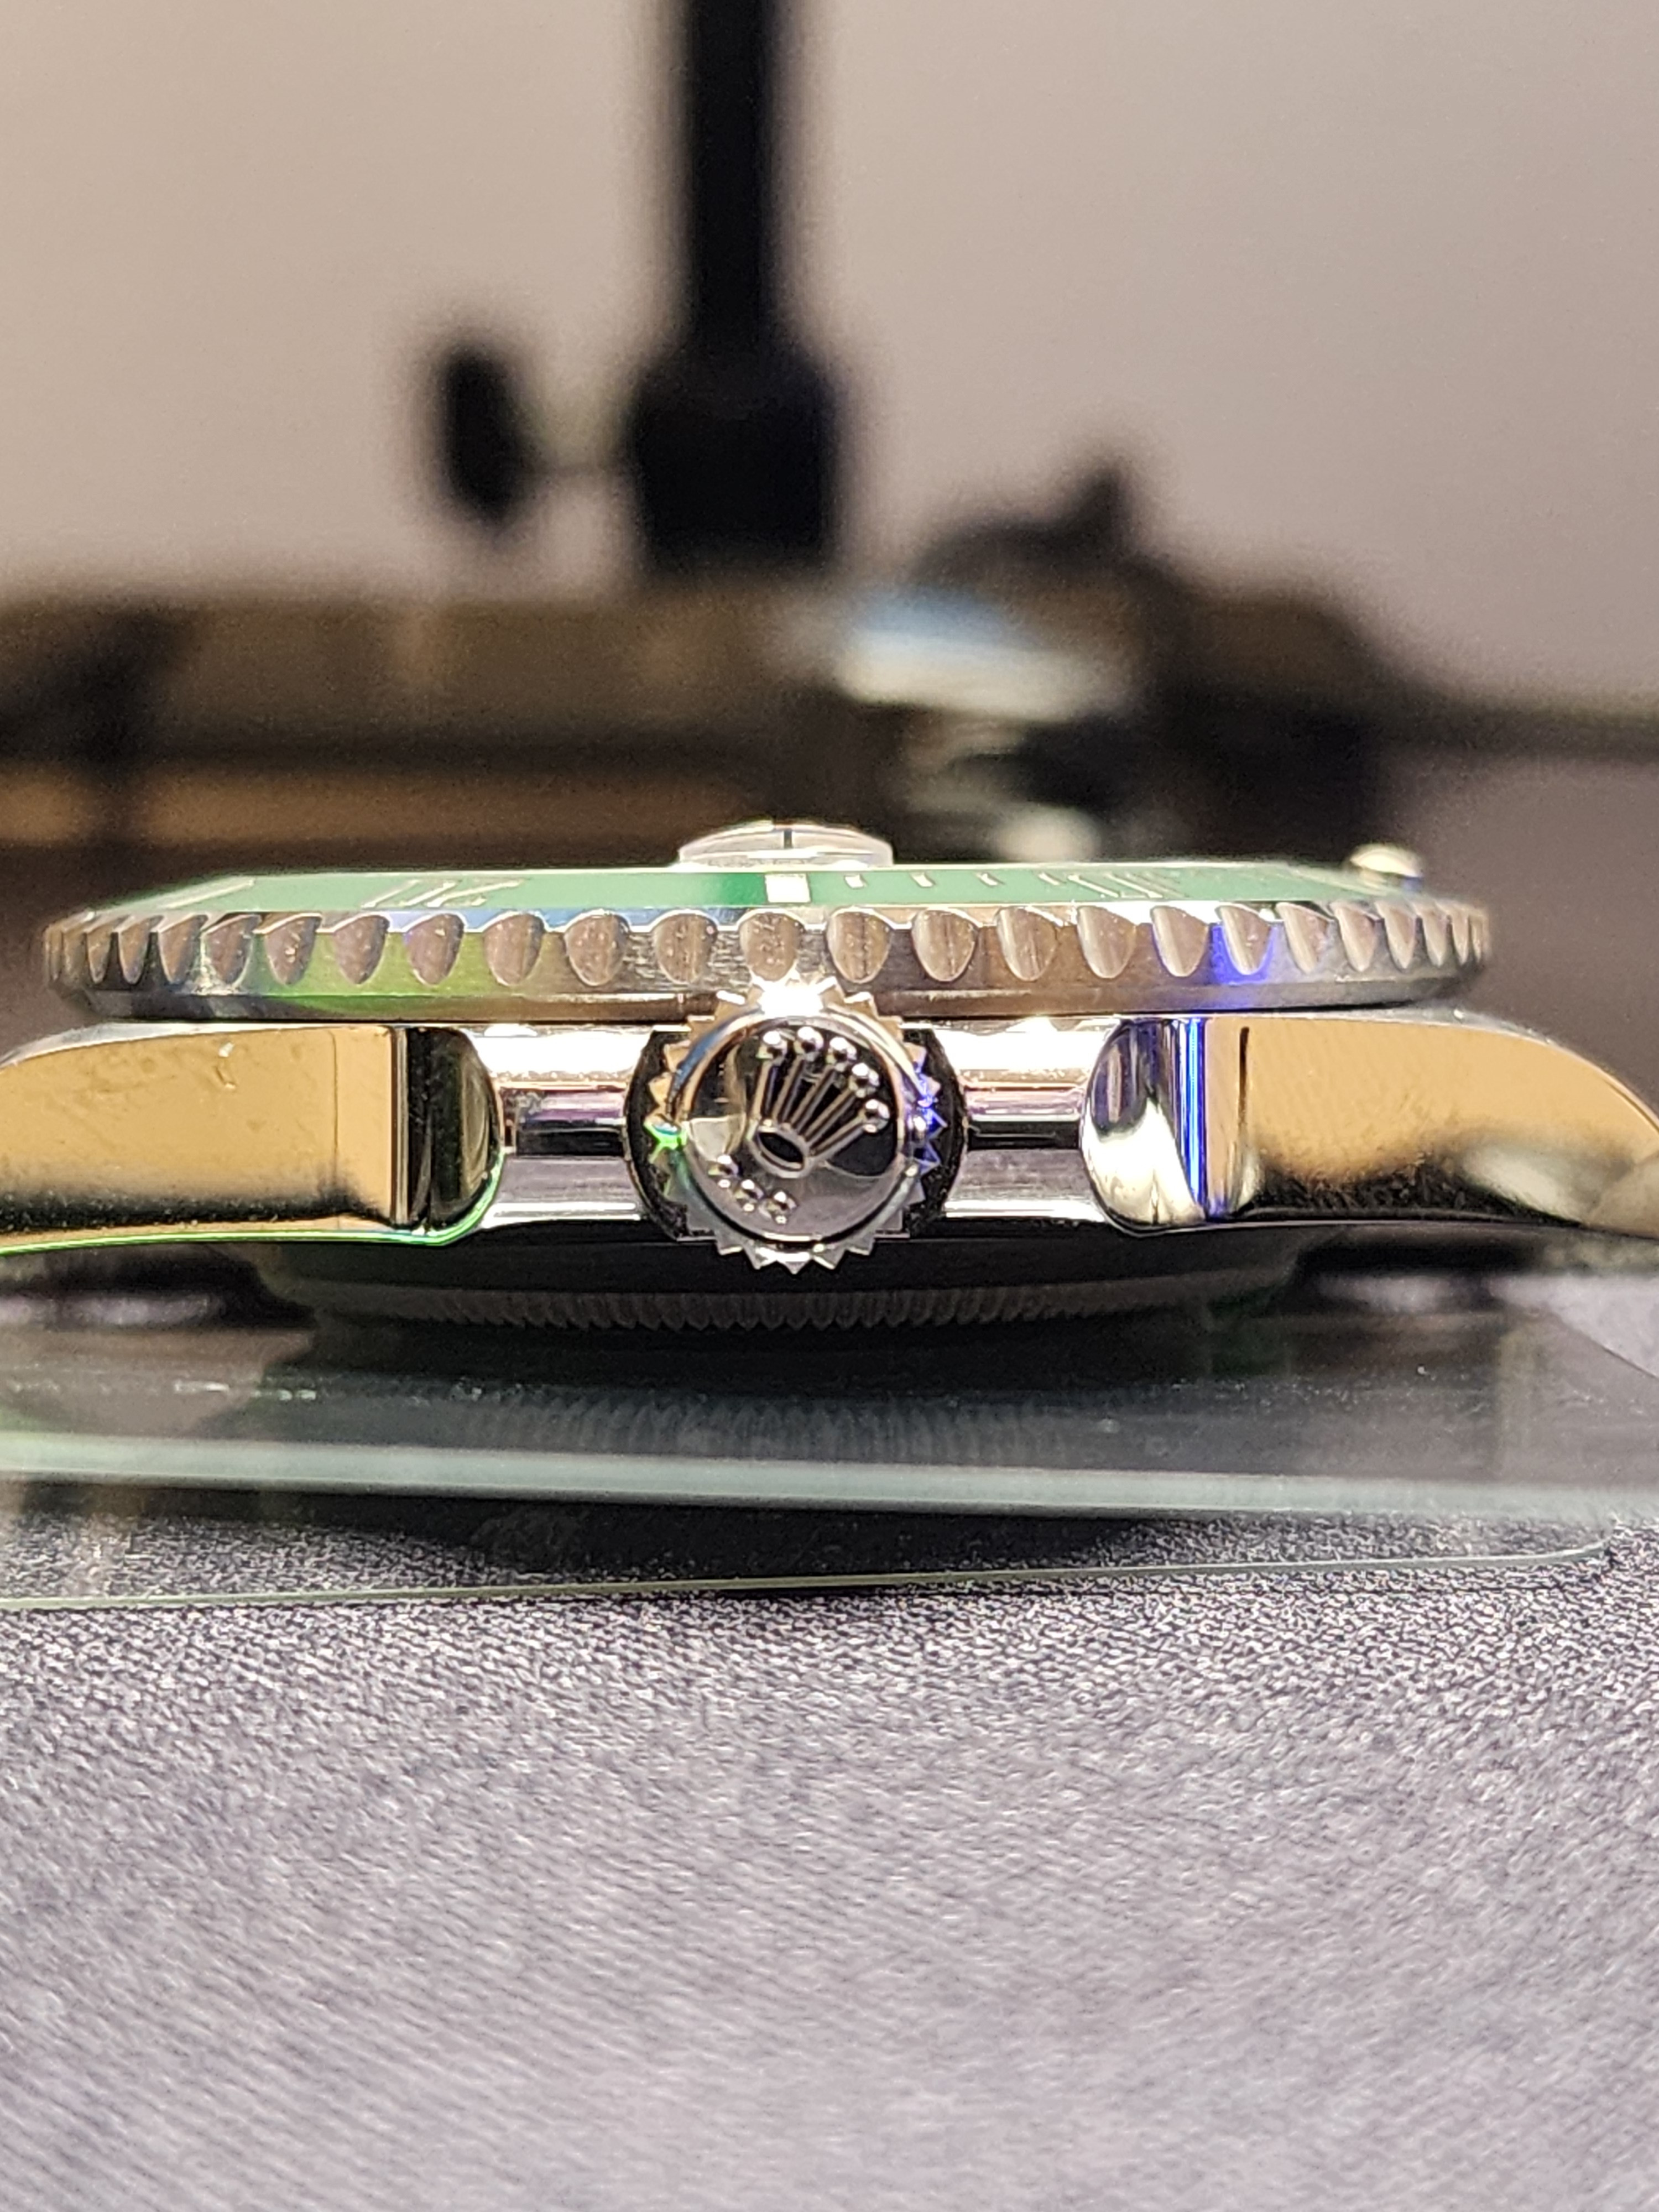
Here is a pic of what I have as of today, is it perfect? NOP it never will be, but I'm becoming emotionally attach to it despite the flaws and problems it has. I can share more details on how i did certain things if you guys want me to, I decided to limit such details on the initial post because it will be very lengthy and might discourage people from reading (not this is any shorter but, you get the point). I'm looking forward to share with you guys, I might be of some help for someone out there just like I was when KJ guided me.

I would like to start this thread by saying thank you. Thank you to the RWI community for creating such a wonderful space for people to share, discuss, and communicate all watch related topics. I'm a new member in this forum and this is my first thread and first time ever modifying a watch. I've always loved watches since teenager but oddly enough I never liked wearing them (at least at that age). Now, I have several watches all different brands, I buy watches/collect based on attraction to the dial (personal taste). Well, enough with nonsense and lets get into what we all are here for, sharing the progress of our projects.
I can't begin this without giving a HUGE THANK YOU to both of these two gentlemen @dogwood & @KJ2020 since joining the forum I stumbled on several threads that are extremely informative. They put in the time to share their projects and the progress they make while modifying/servicing their watches, and just like everyone here I would like to share my project with you.
Project detail is a 40mm Submariner: at the time I couldn't decide which one to pick Kermit or Hulk. I had this idea that I would swap the dial (black to green or vice versa) depending on time and occasion to wear the watch. That initial thought escalated quickly and I said what if I can also swap the bezel insert from any color to create different version of the Sub. Well, that simple thought took me to a rabbit hole hahaha.
Case: ARF 40mm with green Ceramic bezel insert
Movement: VS3135
Bracelet: Rubber strap (black or green depending on dial color)
Crystal: Clark's AR
Link to tools I used:
1st Press:
2nd Press:
3rd Press (VISE):
Set of 68 POM dies:
116610 "Specific Dies for Crystal and Gasket pressing" *didn't work for me, i don't see where i can use these dies.
Bezel Remover:
Hytrel Gasket different materials AVBL:
I used UPE - https://www.aliexpress.us/item/3256...t_main.77.85921802RNHS7q&gatewayAdapt=glo2usa
After receiving my perfectly working ARF case, I decided to start the above modifications. Removing the rotating bezel wasn't hard using the tooling was straight forward and easy. Having the bezel assembly off the watch I though it will be easy as pulling things off and pressing them back in (boy was I wrong and the wake up call I was in for). Out of lack of experience, as I mentioned above this was my 1st time ever modifying a watch case I didn't know what to look for when re-assembling back the watch. It took several tries to put that rotating bezel back into the case, it was so tight that I couldn't get it by hand I had to use the press, and while pressing it back the hytrel gasket was damaged. It looked fine to me and I kept attempting to "set it down properly" because the rotating was not smooth and super stiff. In one of my attempts the retaining ring + gasket + crystal came off along with the rotating bezel. At this point things kept getting worse and worse for me given is my 1st time doing all this. I saw the opportunity to do two things 1) Polish the rehaut 2) Install new crystal "Upgrade to Clark's AR" *more on this later.
1) Polishing the rehaut went horribly wrong haha I used the wrong compound to polish and it created deep scratches that later I tried to take off by polishing more with a finer compound. It didn't turn out good at all, the rehaut is shot and done for =/ you can still see the scratches without any magnification hahaha and the polish is "mirror finish". At this point I'm disappointed that everything seems to be going wrong.
2) I ordered the Clark's AR crystal and once received I got busy with installing that. Yet again, another struggle. The retaining ring from ARF was still good up until this point, I cleaned everything assembled the crystal + gasket and manually put it in the case and set everything up to press that retaining ring down. Here is where everything got a lot worse, down bad hahaha. Pressing that retaining ring is not a simple task as i originally thought to be, the dies I had don't really work for this task, at least the plastic ones. I managed to damaged a total of 3 retention rings all were bent while pressing it down. As you can imagine, 40-60$ each I was starting to question if this was worth continuing. I took a break from doing the project and started searching for a die that would do the job. Well, that's when I found the post @KJ2020 had done for swapping crystals and gaskets, he has been a HUGE help I mean tremendous, he guided me through this process and with his help I was able to finally press that retaining ring down Saturday night.
Few things I've learned, tool is essential I'm not saying go and get 400$ piece of tooling, not at all, I'm not a pro nor plan on being one, I just want to be able to swap that bezel and dial to have different variants of the SUB hahahaha. But pay close attention to the tools you use, the press is going to be your best friend here (at least in my case). The 1st press I used was not "perfectly" straight and I didn't even think about it until KJ suggested to make sure everything lined up straight as possible to press the retention ring. I decided to take some measurement and voila! found that the upper base of the traveling shaft where the upper die sits up against was bent It has a difference of 1.5mm on one side. Knowing this i decided to get a different press, one with a relatively flat surface, and that's when i got press #3 (VISE). The pressing was better since both plates were "leveled" I put it in quotes because that 60$ VISE won't have perfectly flat plates but better than 1.5mm difference hahaha. The watch is back to one piece but not 100% complete, there are some flaws that i would like to correct and that's why i made this thread. I would love to hear feedback/suggestions and of course the best part which is to share it brings such joy for me at least.
Here is a pic of what I have as of today, is it perfect? NOP it never will be, but I'm becoming emotionally attach to it despite the flaws and problems it has. I can share more details on how i did certain things if you guys want me to, I decided to limit such details on the initial post because it will be very lengthy and might discourage people from reading (not this is any shorter but, you get the point). I'm looking forward to share with you guys, I might be of some help for someone out there just like I was when KJ guided me.