- 26/11/18
- 841
- 177
- 43
GS hypocement is king, I put it in my cereal every morning too!
Lol I liked this!
GS hypocement is king, I put it in my cereal every morning too!
I can never get a clean application of the stuff because of the hair-fine strand that is whisped across my work as I move the needle-point applicator off the target surface. Did I just get a bad tube or is it always like that?
I have not had that problem. I do keep a ! QueTip and or toothpick dipped in acetone handy to remove any excess glue.
These products really aren’t expensive, my advice would be to buy it ALL and try it out, see what works for you!as I see Cmaster there are conflicting opinions, you feel better with gs hypo ?
as I see Cmaster there are conflicting opinions, you feel better with gs hypo ?
The decal itself is matte, but there will be gloss lacquer over the dial - the early gilt dials had gloss black printing of the dial face. The decal material is Sunnyscopa “film free” which should result in a look that’s close to how the gens were printed. We’ll see...nobby you're going to use a decal to create your dial? I guess they are matte so it would be perfectly fine. I'll be interested in the final product.
")
I hope everyone stays glued to this thread...
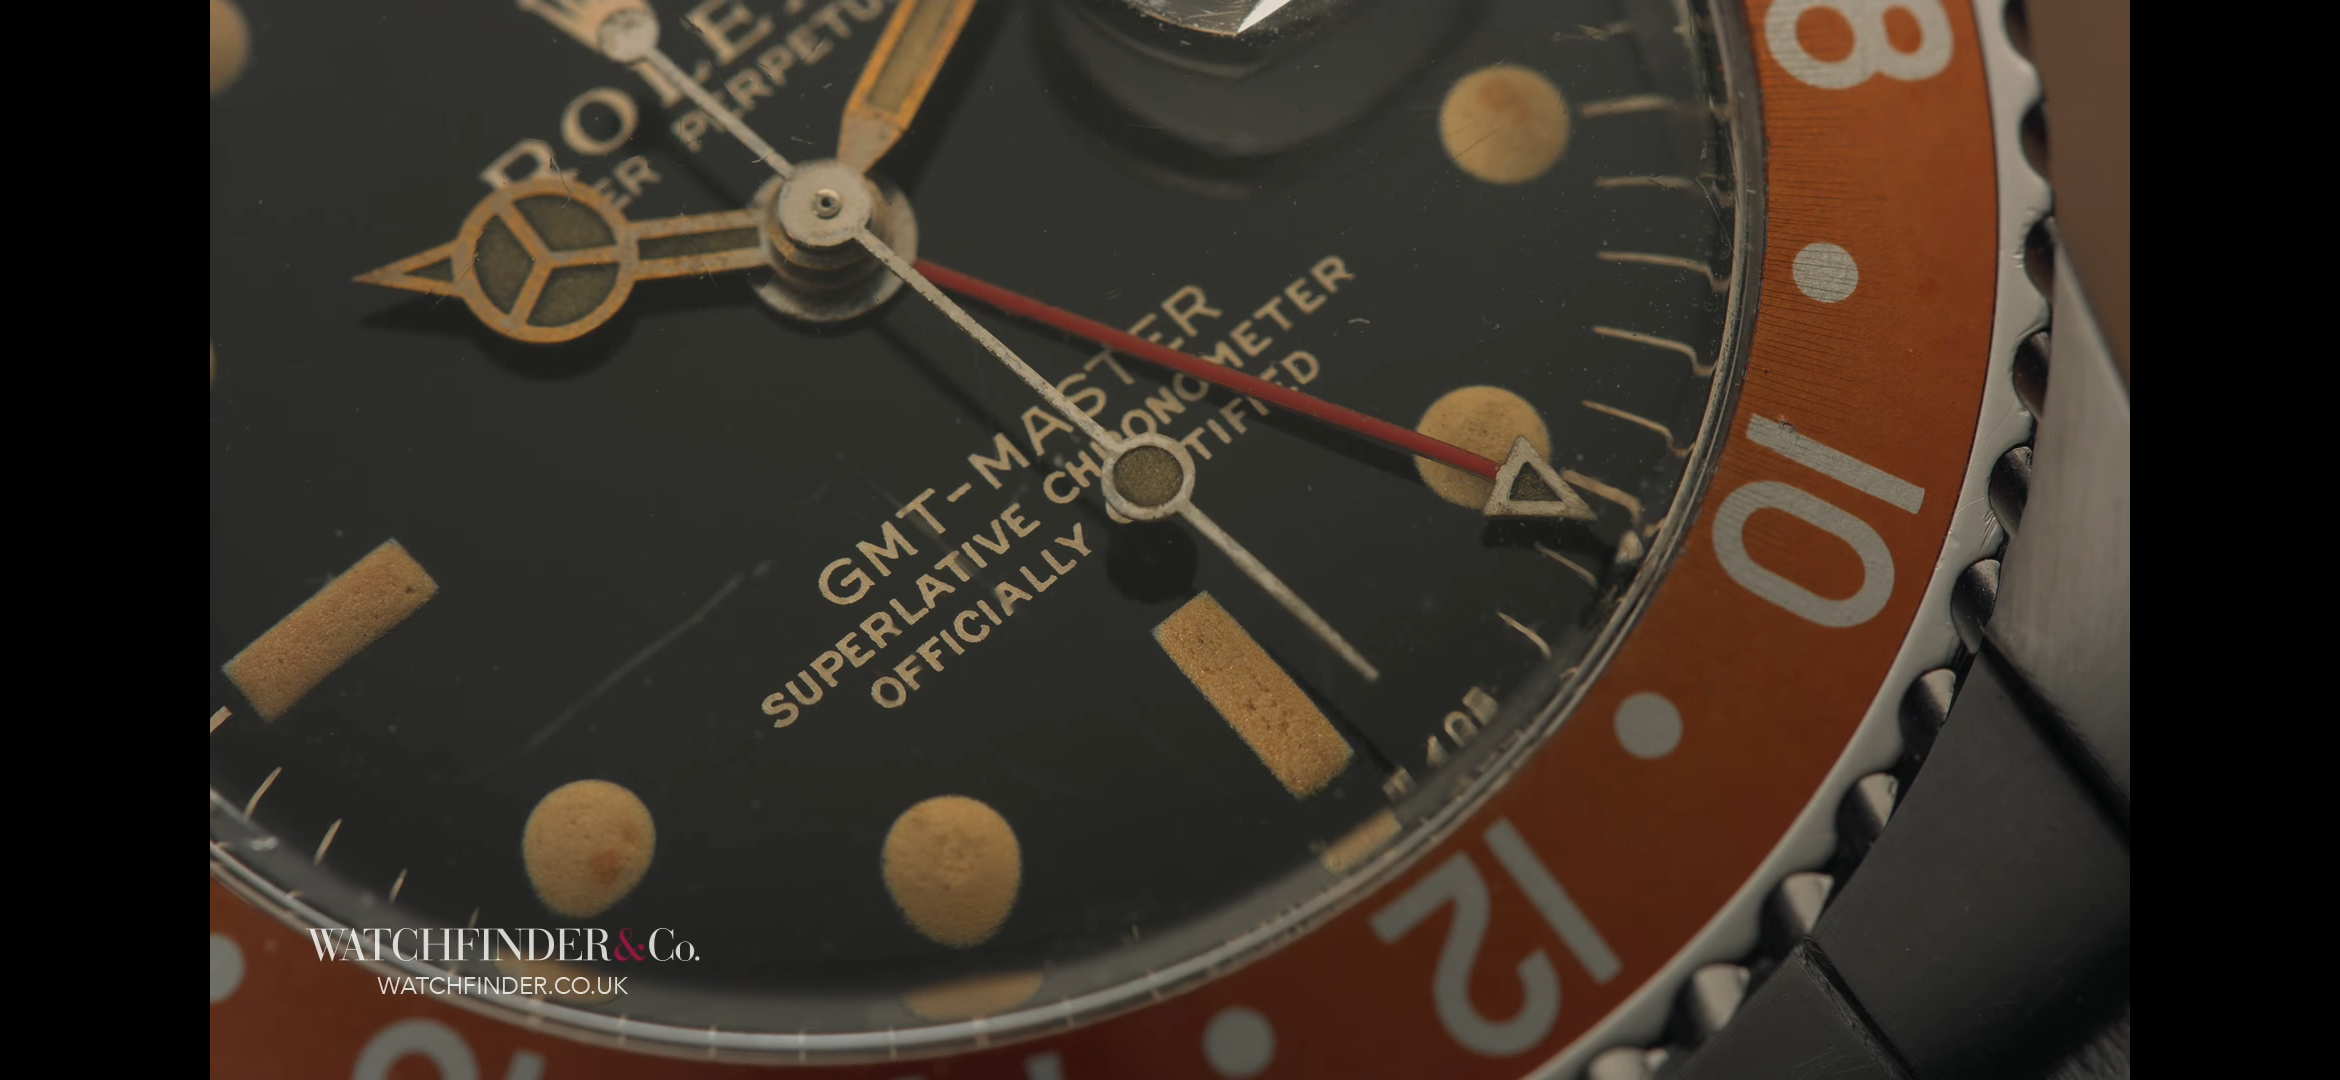
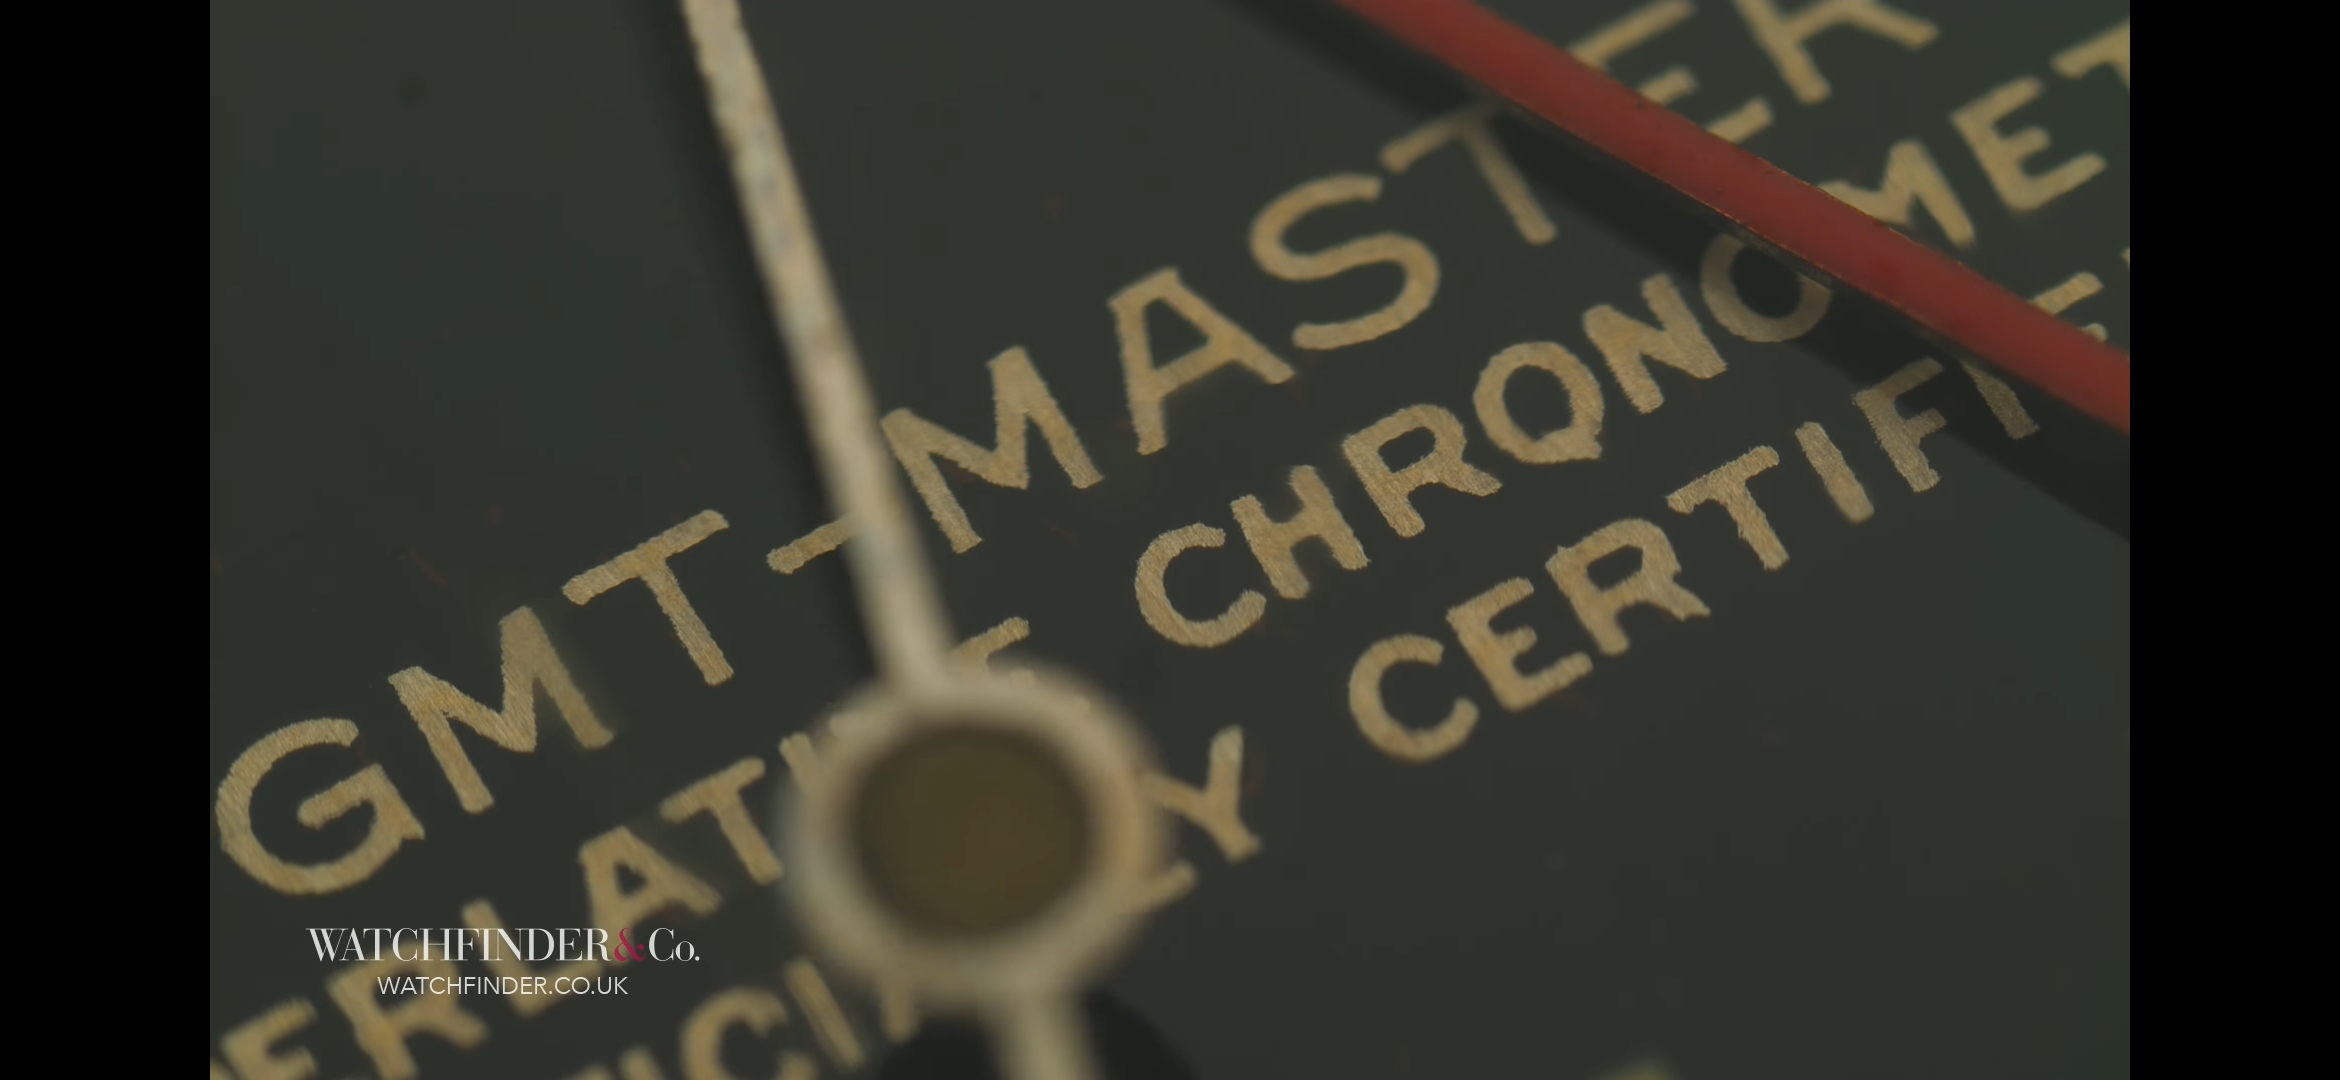
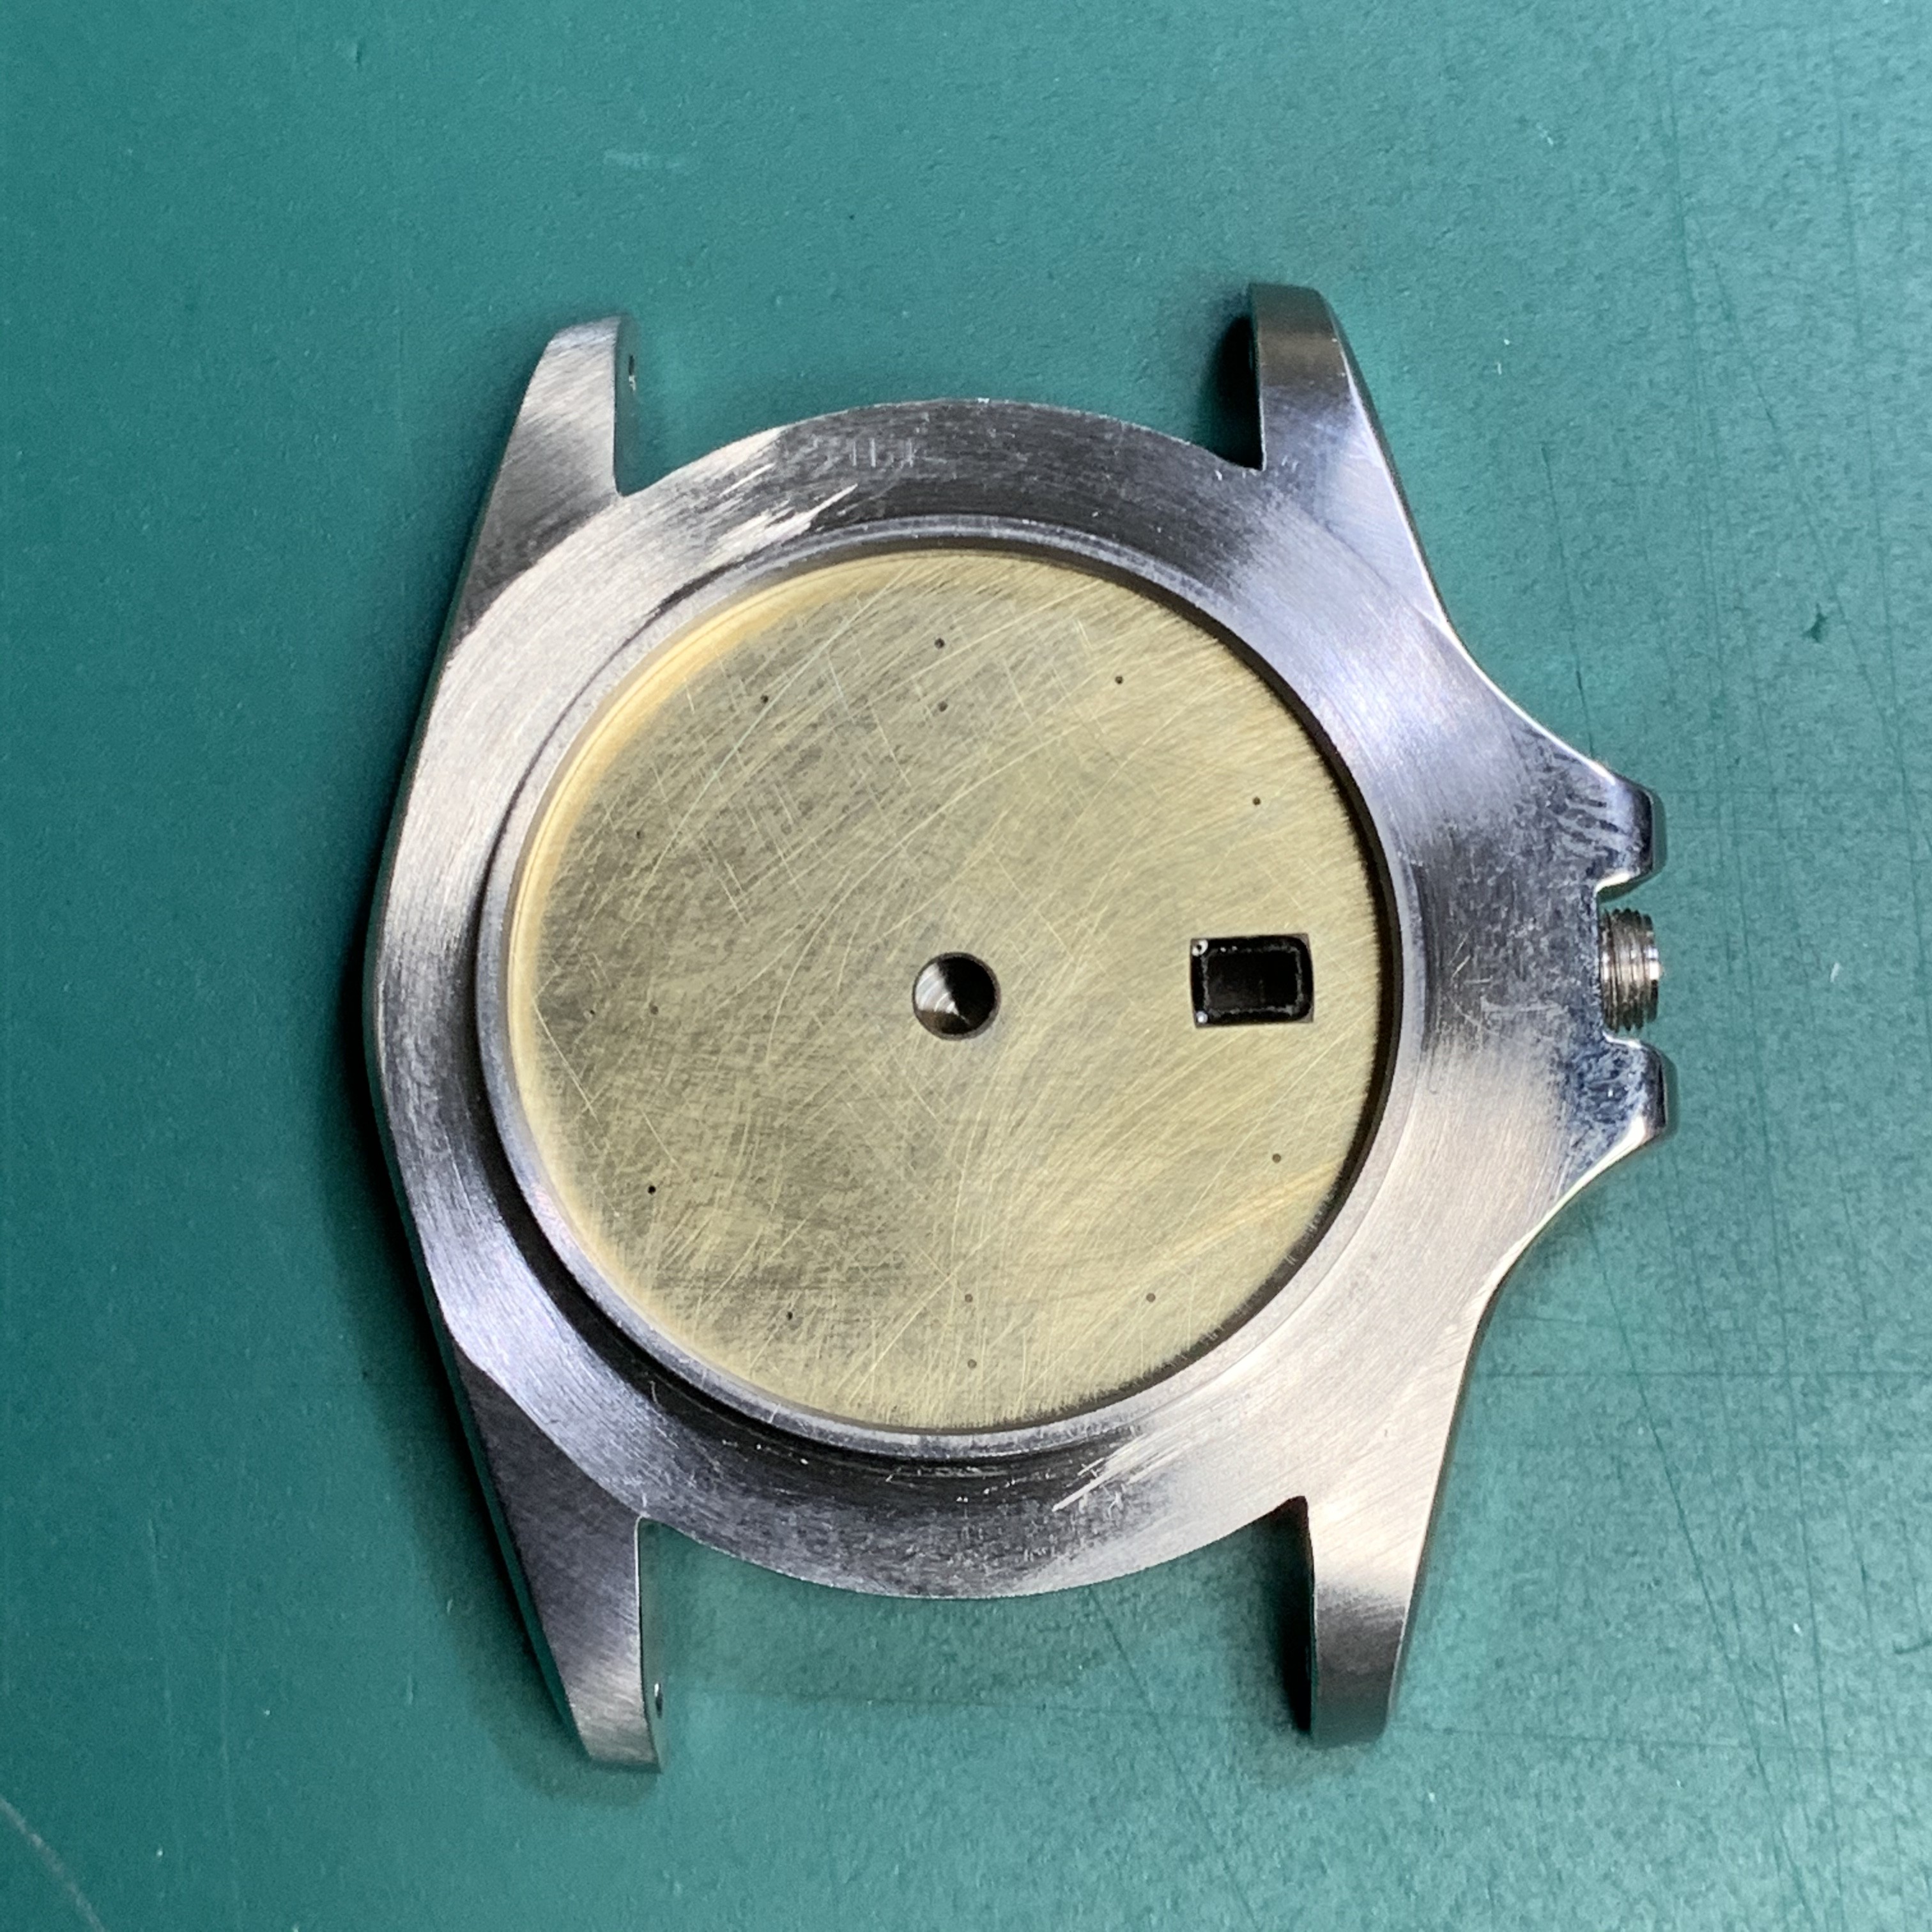
a short update - progress on the dial. I really only needed to sand the paint off the rim of the donor GMT II dial in order for it to fit nice and snug. I then sanded the paint off it’s face with 1500 then 8000 grit sandpaper. I’ll polish it on the buffer to get a nice mirror finish before applying the dial transfer. Here it is after the basic sanding, loosely test-fitted.
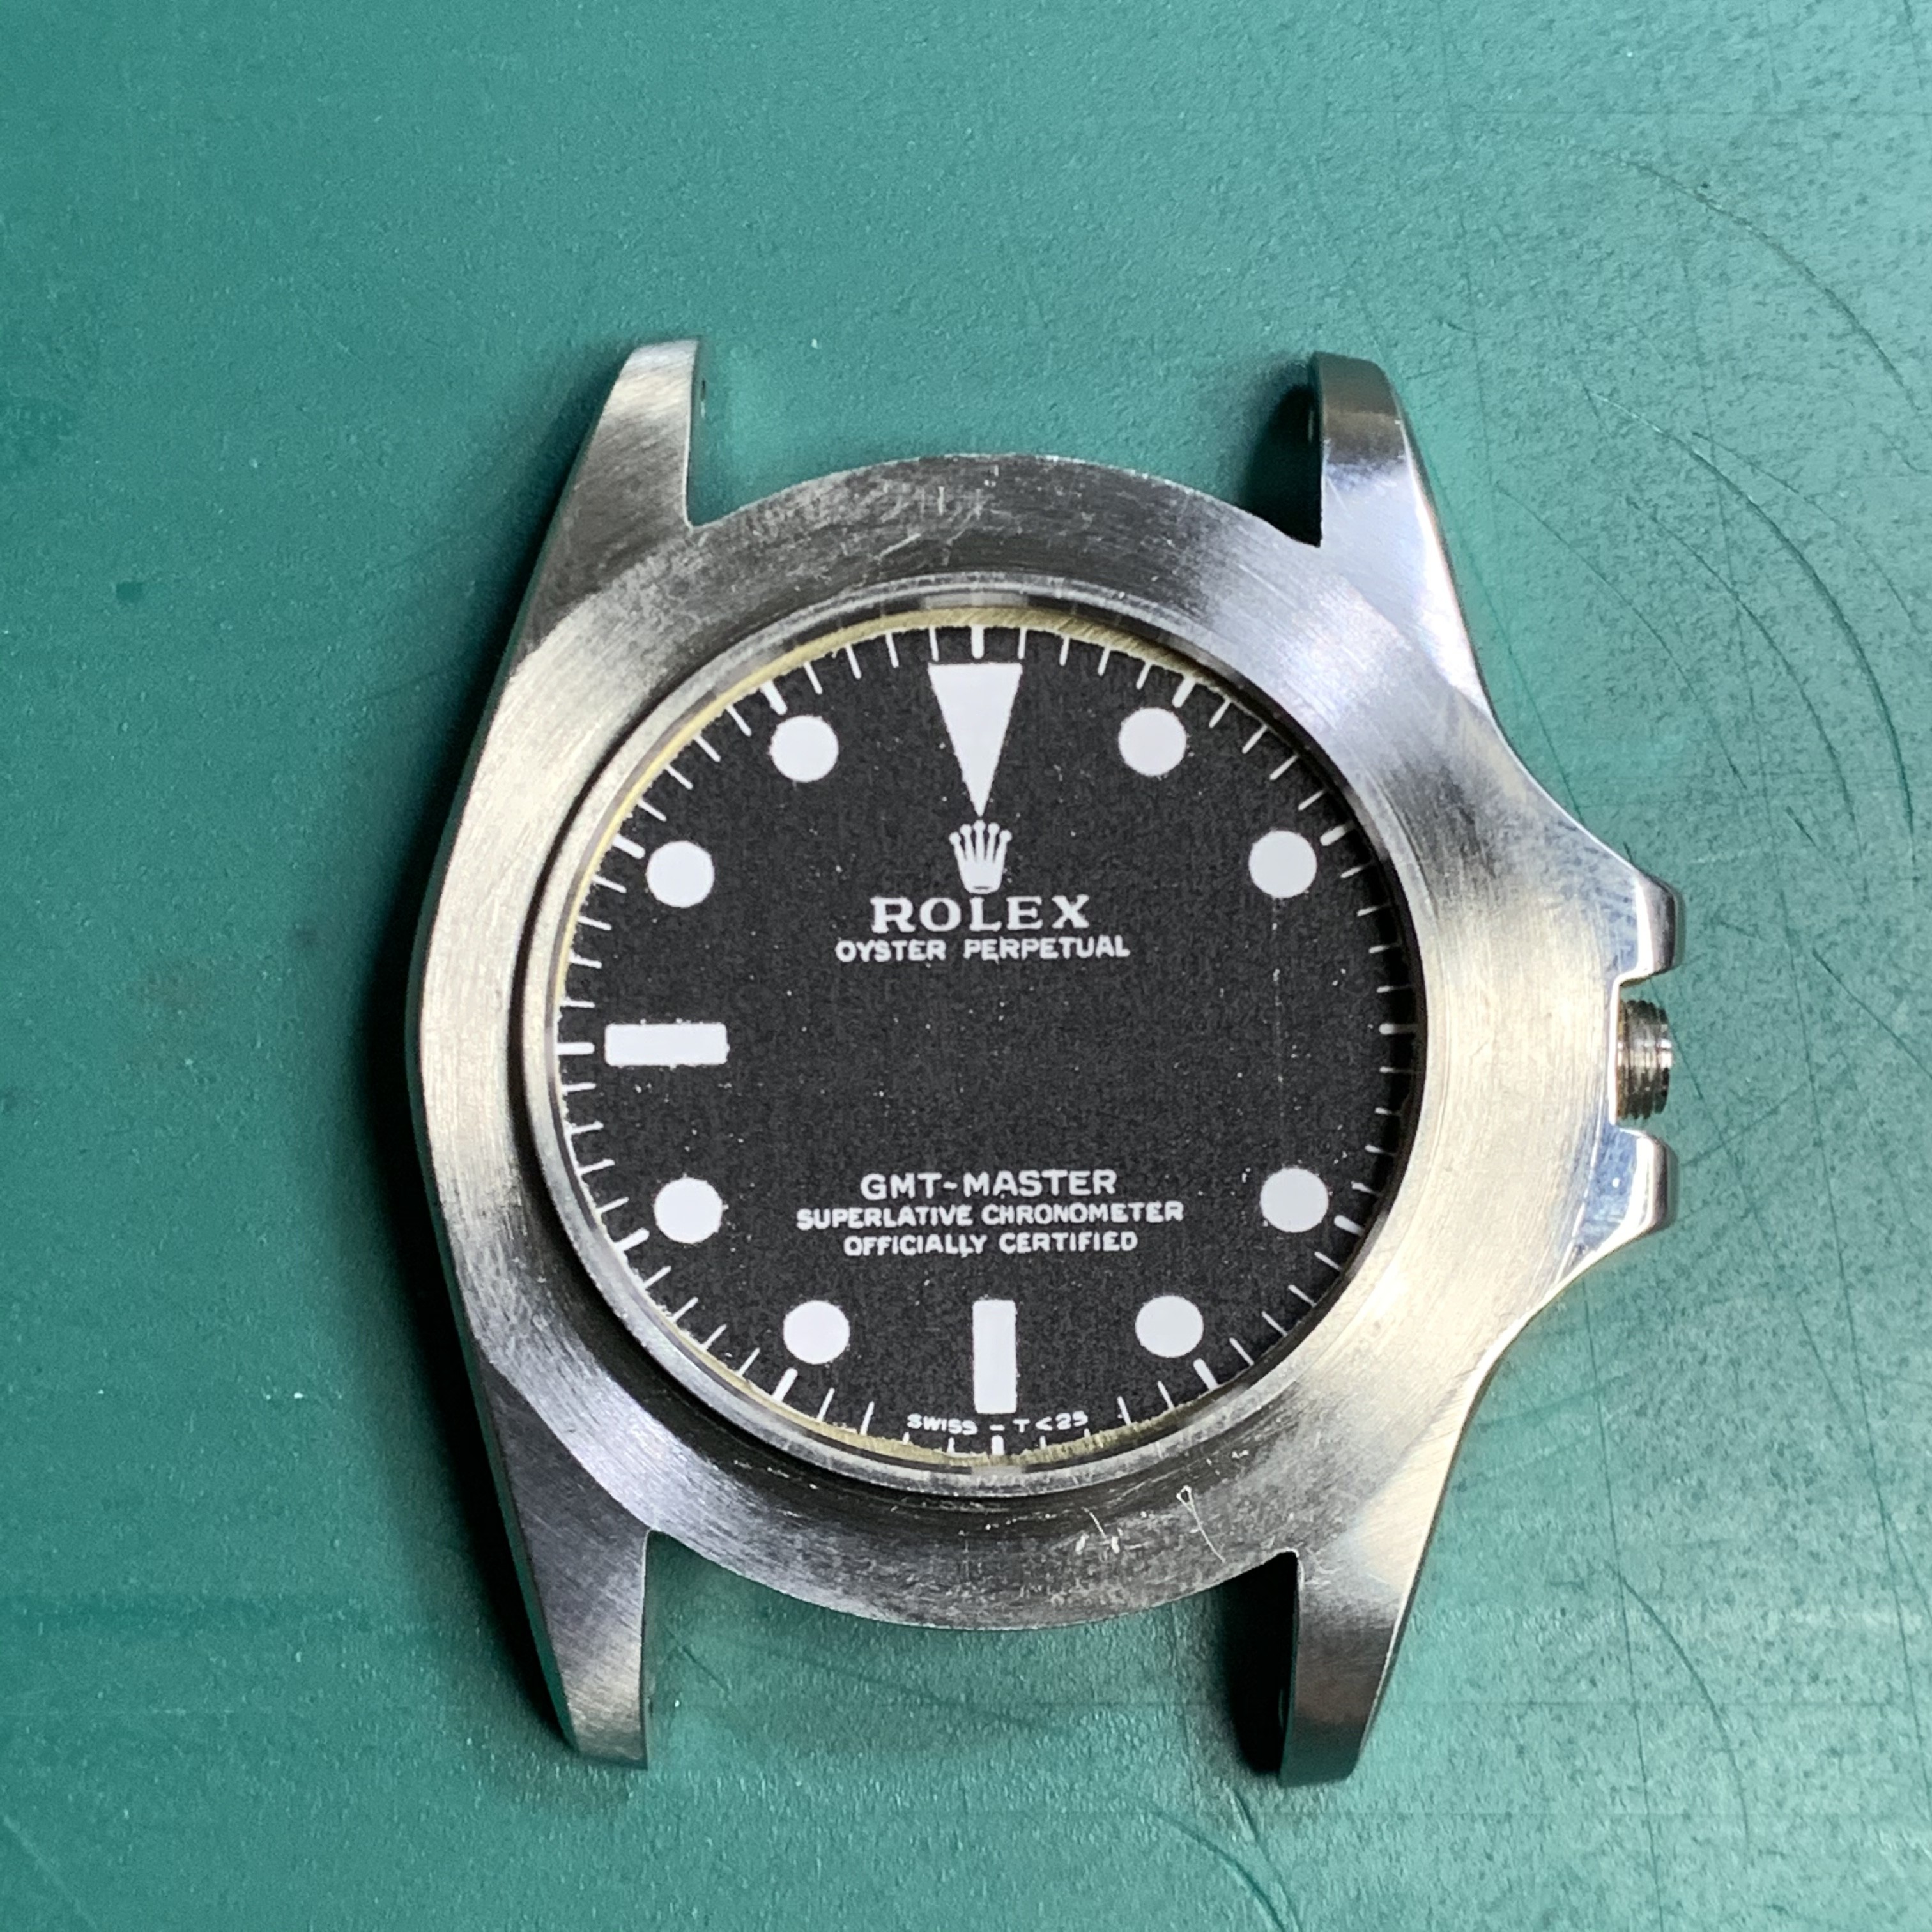
I also printed and cut out a paper version of the dial design to check the fit. Since posting my last version of the artwork I’ve completely revised it, and it's now a copy of the refinished gen dial MQ was selling for 6000 euros (which was a true gilt dial from the 1960s, whereas my previous design was copied from a later, 1970s white printed dial).
They've filled up with the paint that was being sanded from the dial face. The film free decal is glued on, so the glue should bind the dust, and then there's lume to be applied over the top of that, so all in all they're not something to worry about.what did you fill the applied marker holes with on the blank?
Haha, thanks Redheart, I love your cheery optimism and "can do" approach..! Unfortunately I don't have any spare stock of movement rings, let alone any easy way to customise one... I guess I could cannibalise a watch I already have... Nah, I think I'll wait for the one I ordered from Raffles to arrive.you can make any kind of custom movement ring and it will stay secure!
So, I tried using the polishing machine, very, very gently... but it did absolutely nothing. And again, I got distracted and veered off to look at something else, then cleaned the swim spa, and then made a cake. And dinner. I'm so Renaissance man.So, a "non-progress" update... The movement ring and hands arrived from Raffles - I ordered the wrong size movement ring.
I then got distracted by my new Franken 16610, and spent probably 2 hours messing about with bracelet options on my other two 16610s for a planned group photo shoot, but in the end I'd spent so long fannying around that I lost interest in doing the photography bit... I'd found myself in need of another set of 501B end links and ordered those (and the right size movement ring).
Then I tried to get creative with my insert ageing - I've already done a bleaching session but I want to get the lovely graduated fade that is so characteristic of aged 1675 inserts, and I don't know how best to achieve it (other than sending them to Redheart...)
I heard wet sanding with a high grit sandpaper works right after a 50/50 bleach dip talking like 1500-2000 grit paper