- 12/3/18
- 37,352
- 79,253
- 113
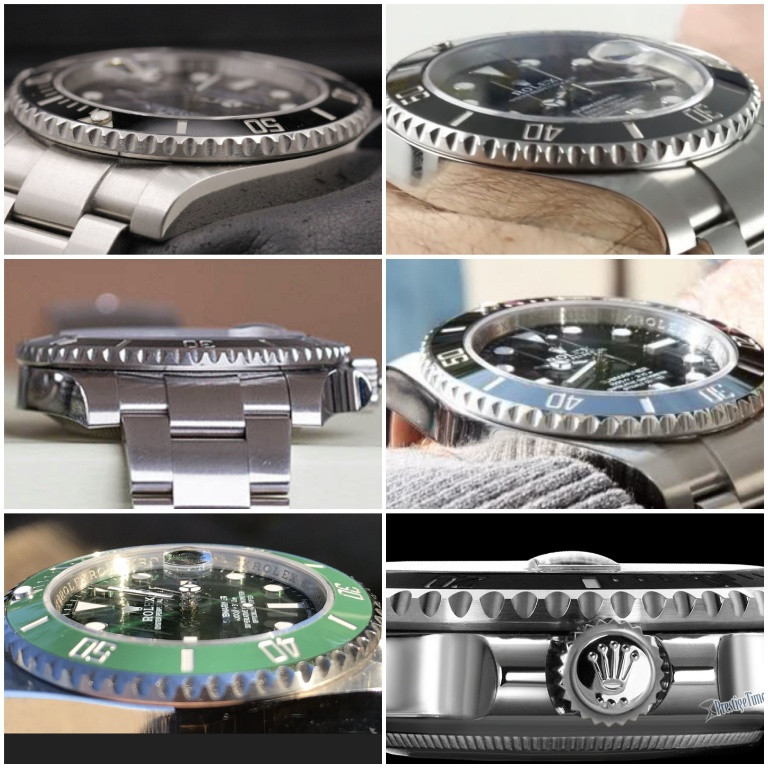
ROLEX 6-Digit Sub Bezel and Crystal Swap - DIY
Most rep 6-digit Sub bezels and crystals can be swapped around or replaced successfully. This post will describe and depict a lot of the steps along the way. There are some basic tools you should have before attempting these tasks, though some improvising can be done.
Tools recommended
Bezel Removal Tool
Strong case knife with a smooth thin blade
Razor blades
Jeweler’s Hammer
Masking tape
Lens cleaner and cloth
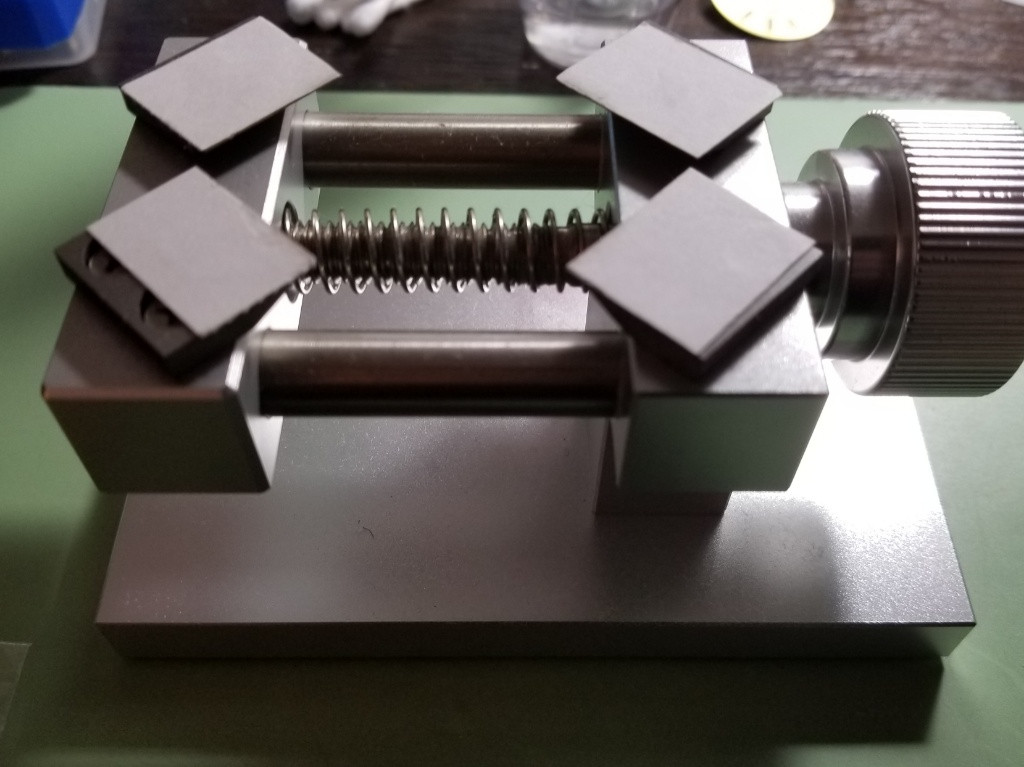
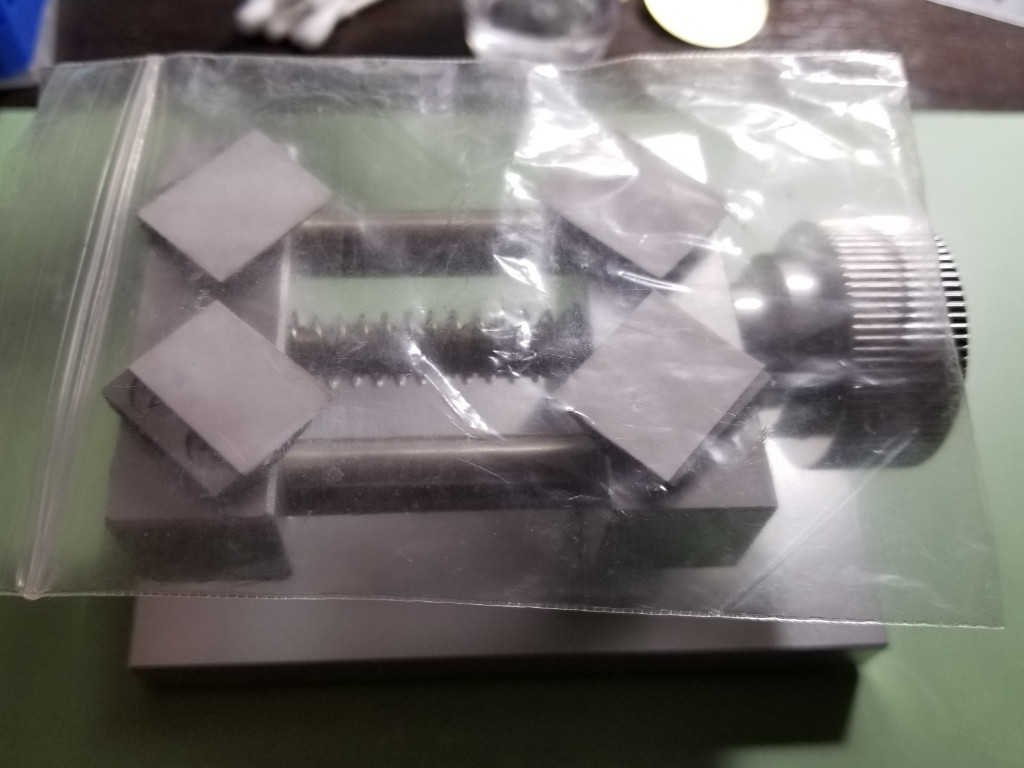
Crystal press with crystal dies
A couple of easily modded bezel dies
A retaining ring die - a really important tool, can be made or improvised
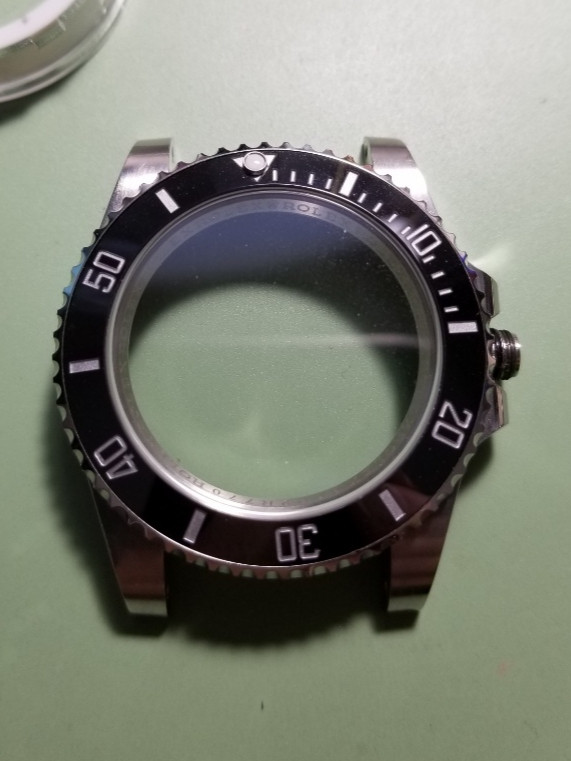
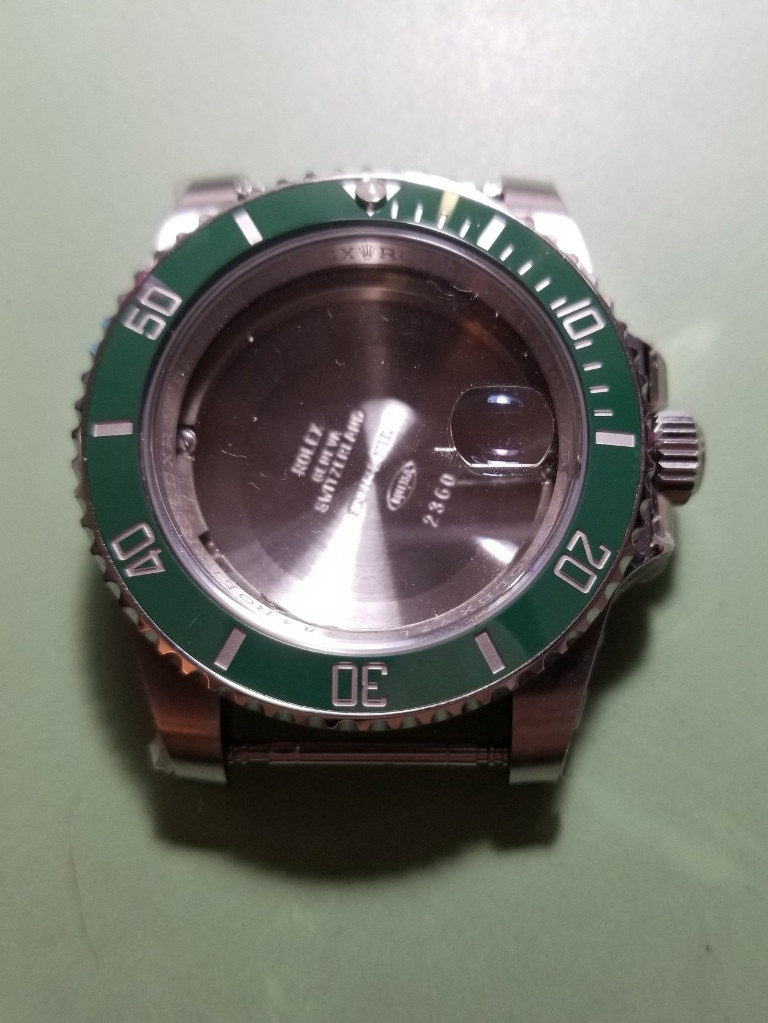
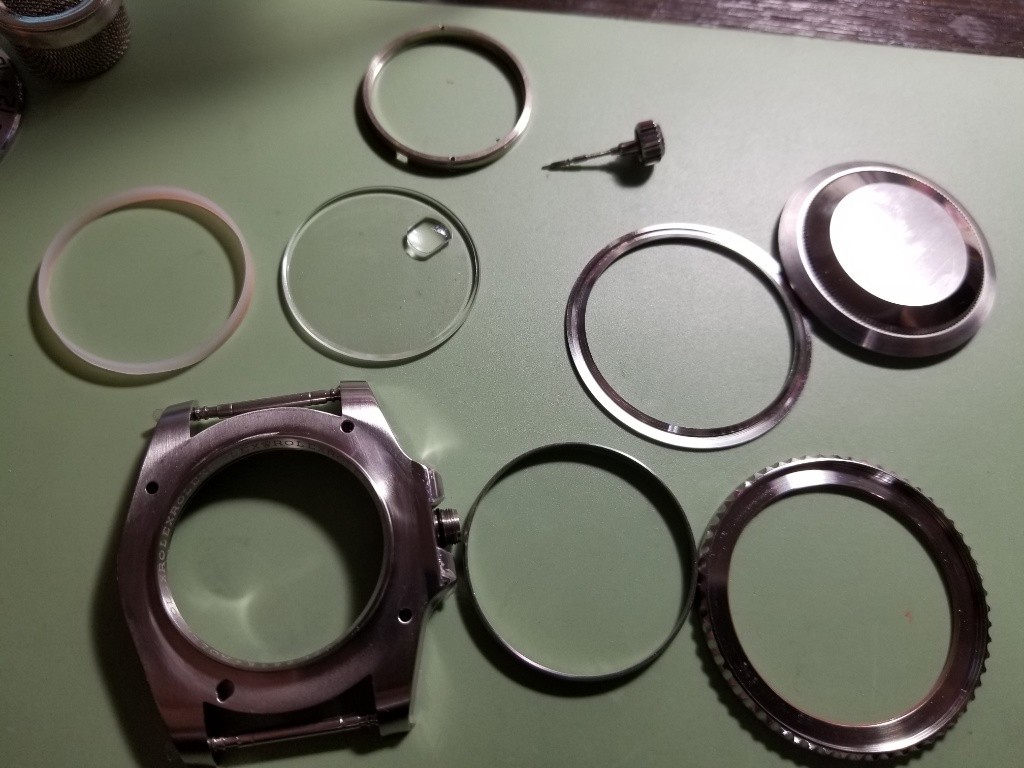
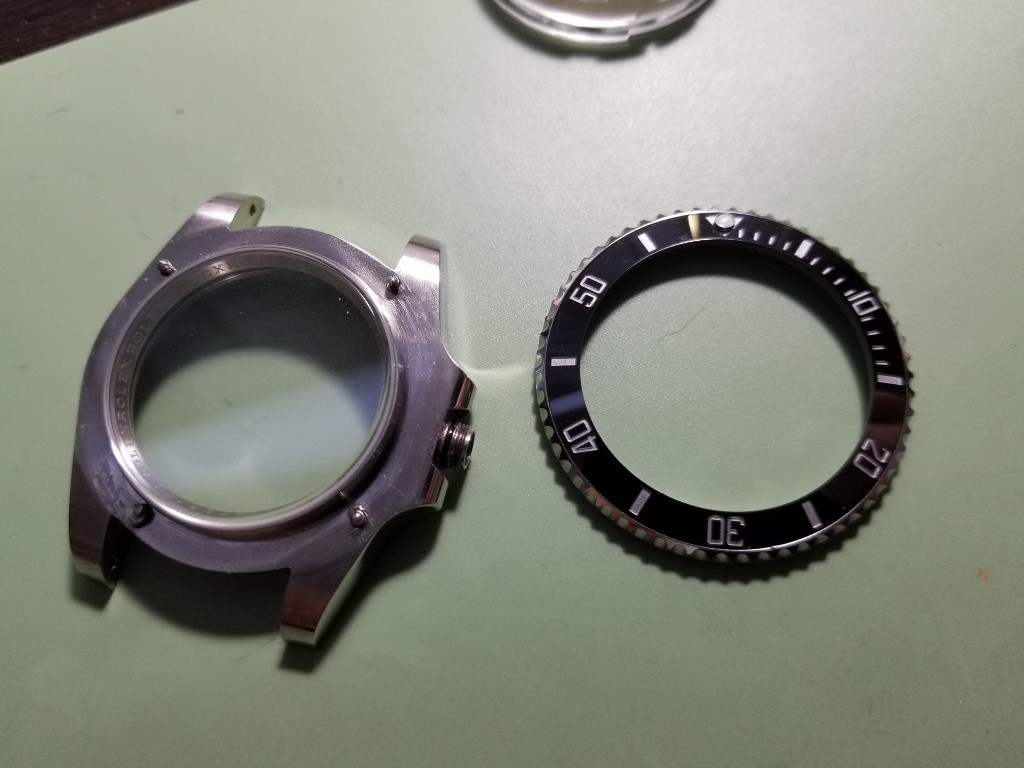
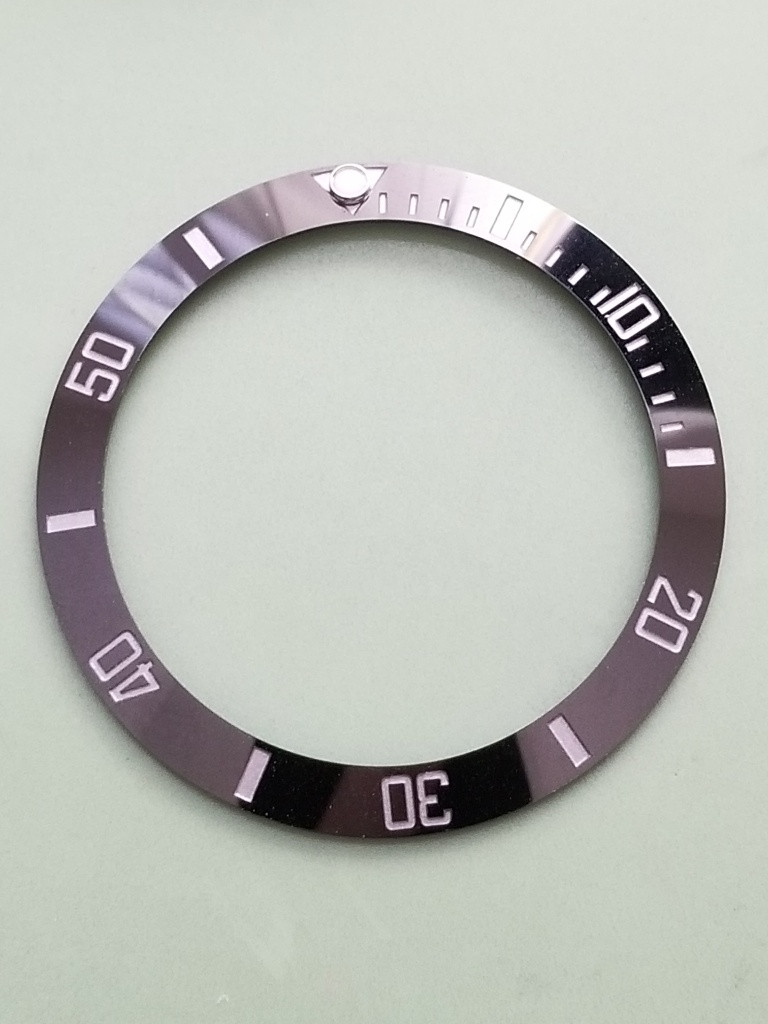
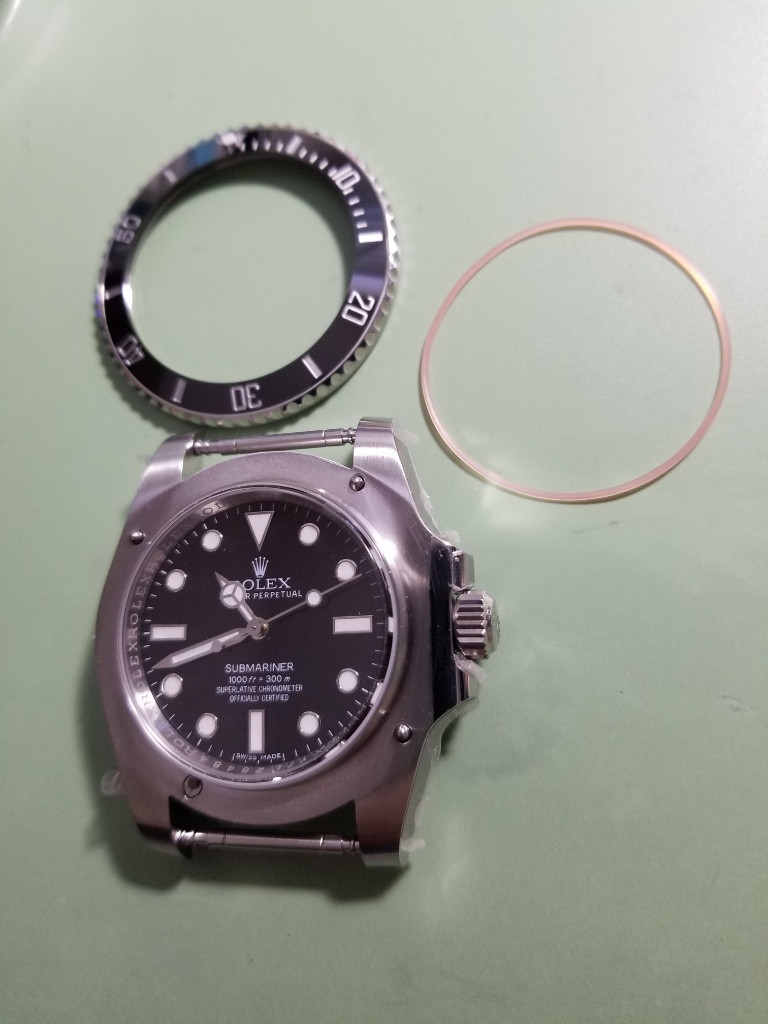
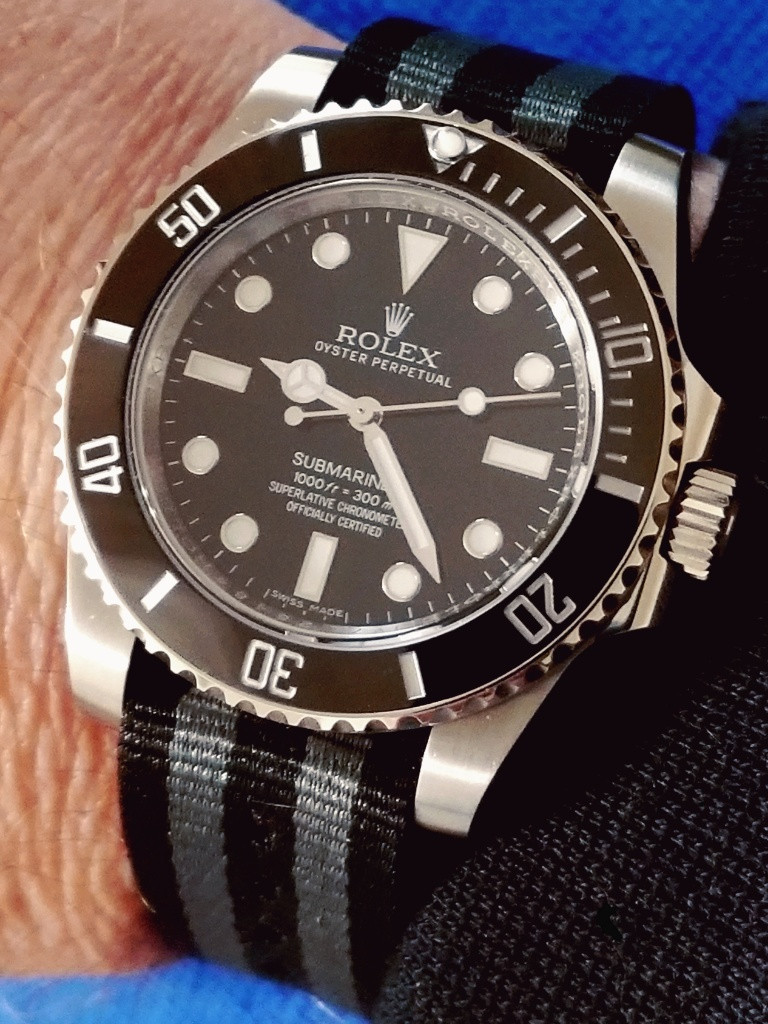
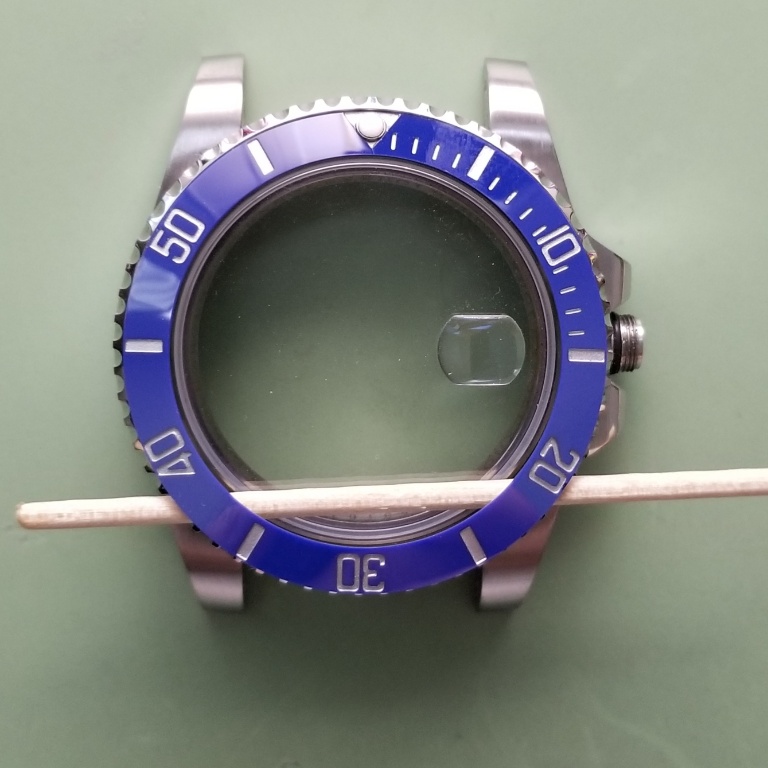
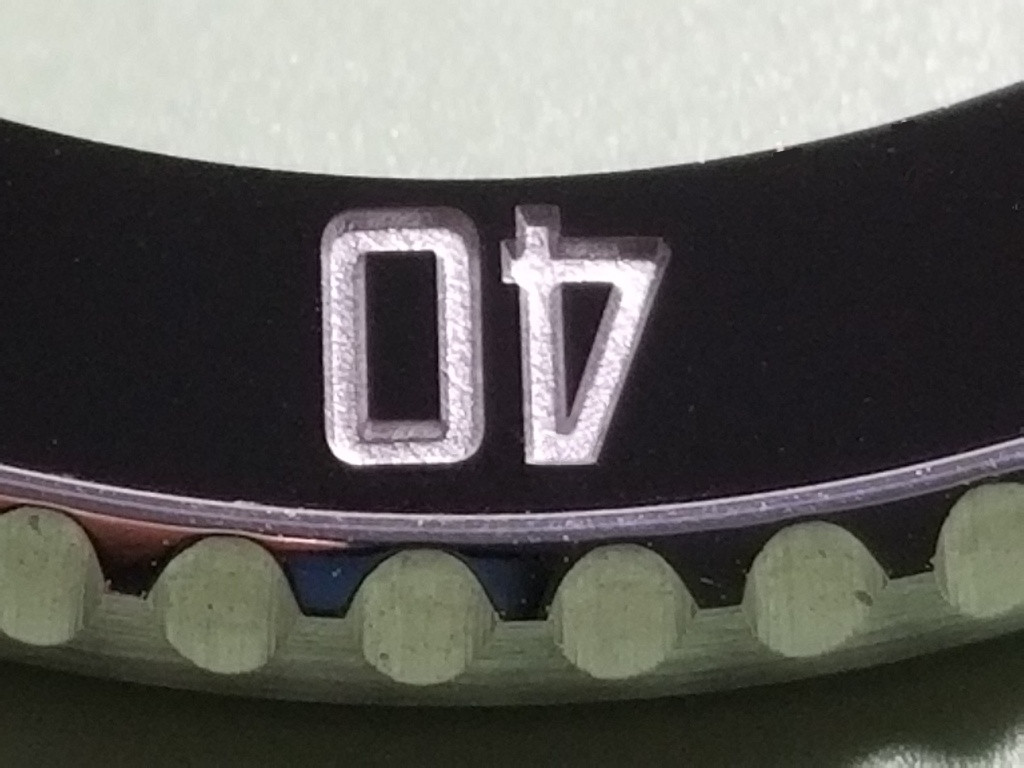
So in this tutorial the project goal is to swap the Noob 114060 no date crystal and the LN insert into the ZZF 116610 LV case. The Noob case is engraved 116610 anyway, so no loss there. The Noob insert is taped in and the ZZF insert is press fit, so both types of removals and installs will be covered.
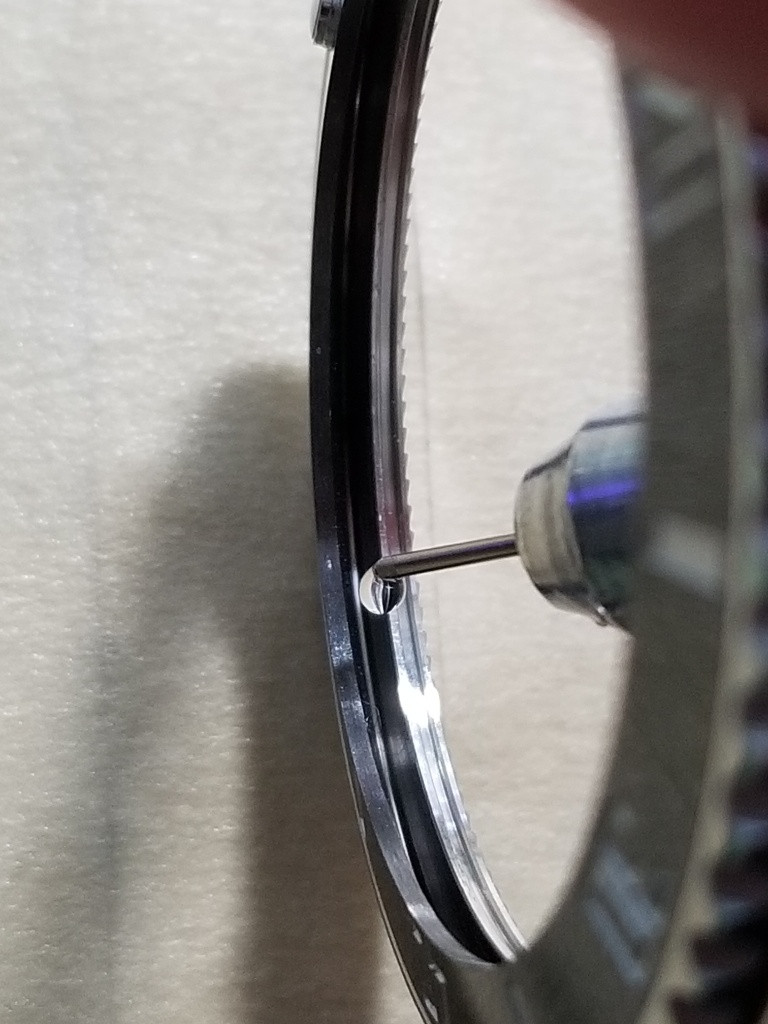
First up is the ZZF bezel, insert, and crystal removal.
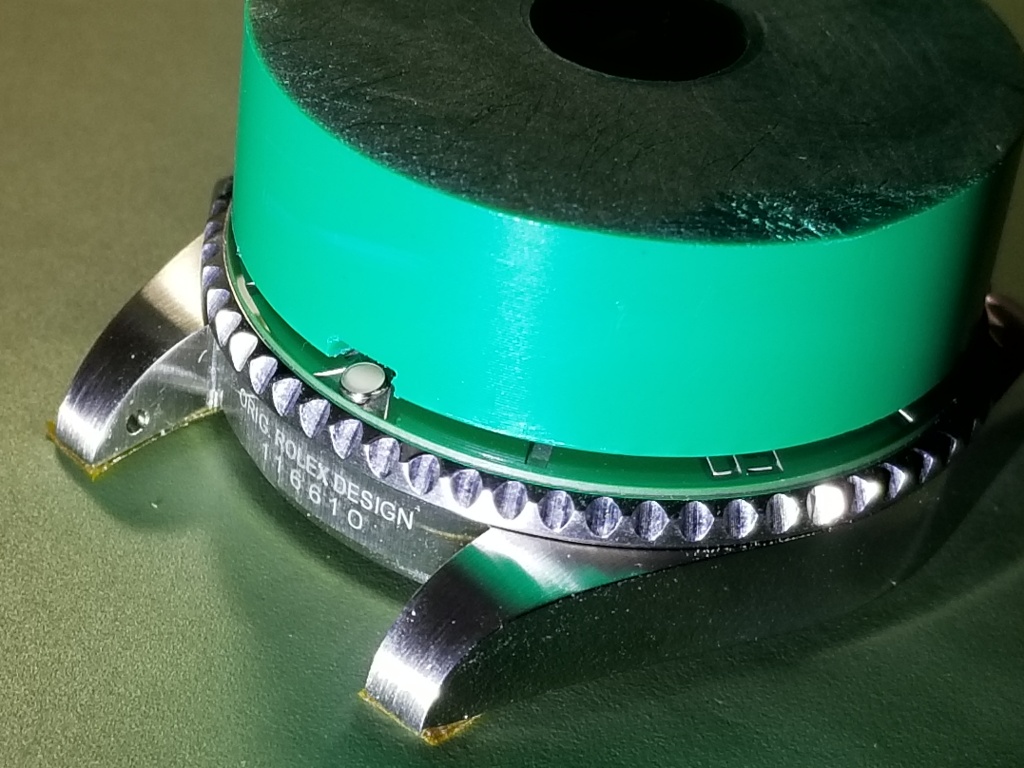
I always use a bezel removal tool to start getting a bezel lifted away from the case. Sometimes you can just use a case knife but I like the precision and the equal lifting force of the removal tool. I have put dial protector squares on the tool’s jaws, and use a plastic bag too.
Place the case upside down on the tool and make sure the jaws go UNDER the bezel and don’t bite into the sides of it. Turn the screw until a gap is created.
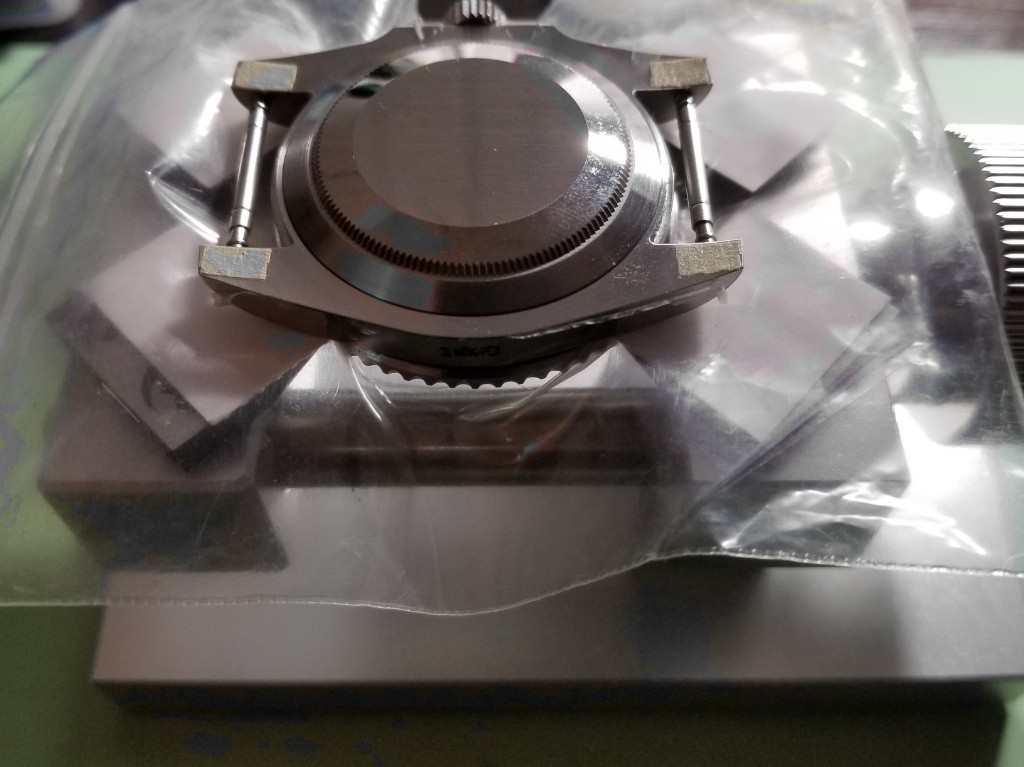
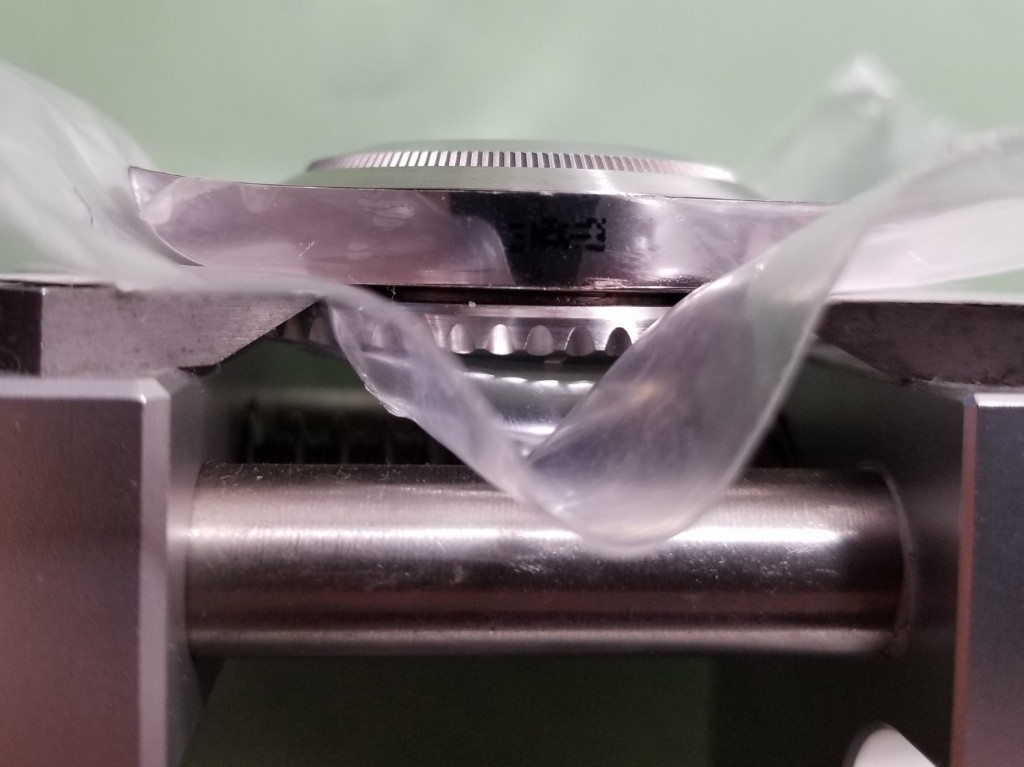
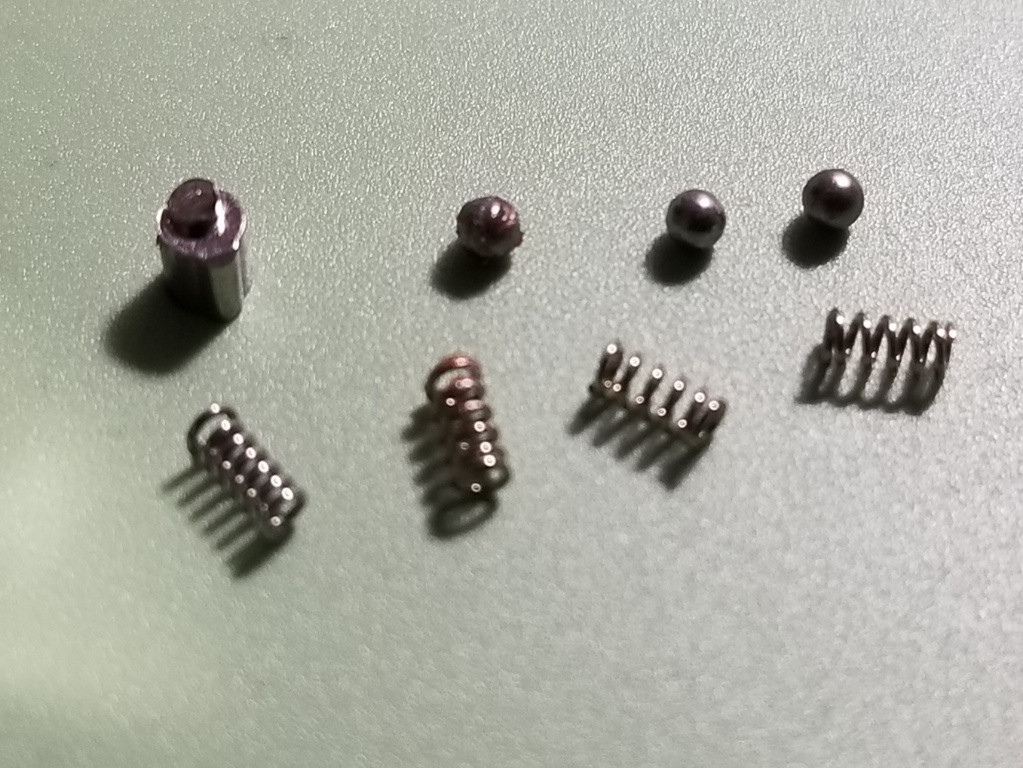
Now you can easily get your case knife under the bezel and pry it up. BE CAREFUL not to lose any springs, balls, or the click. You can put the case inside a zip lock bag to do this step if you feel the need. Also tape up the case beneath the blade so you don’t scar it up.
Store the springs and balls in a safe place.
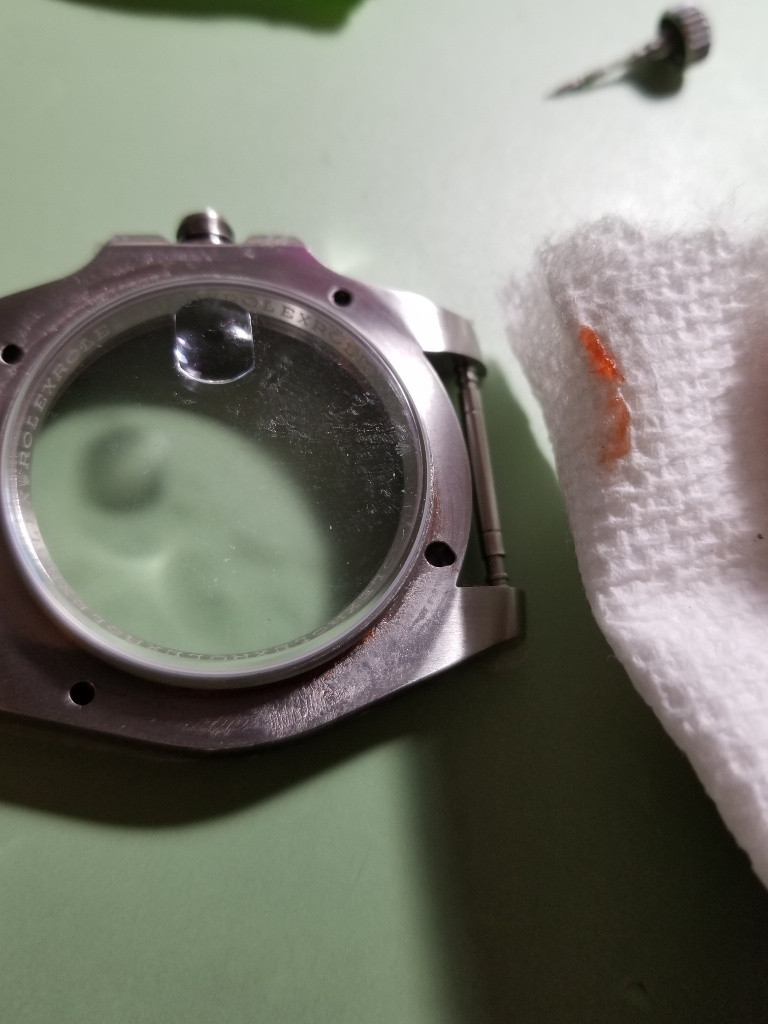
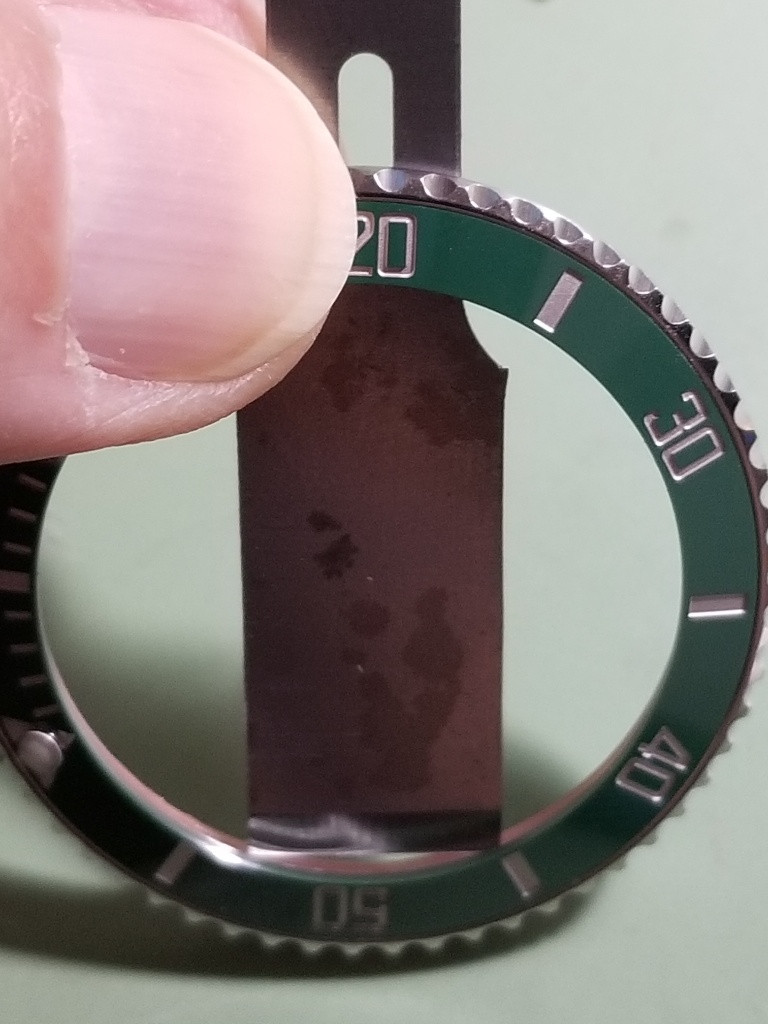
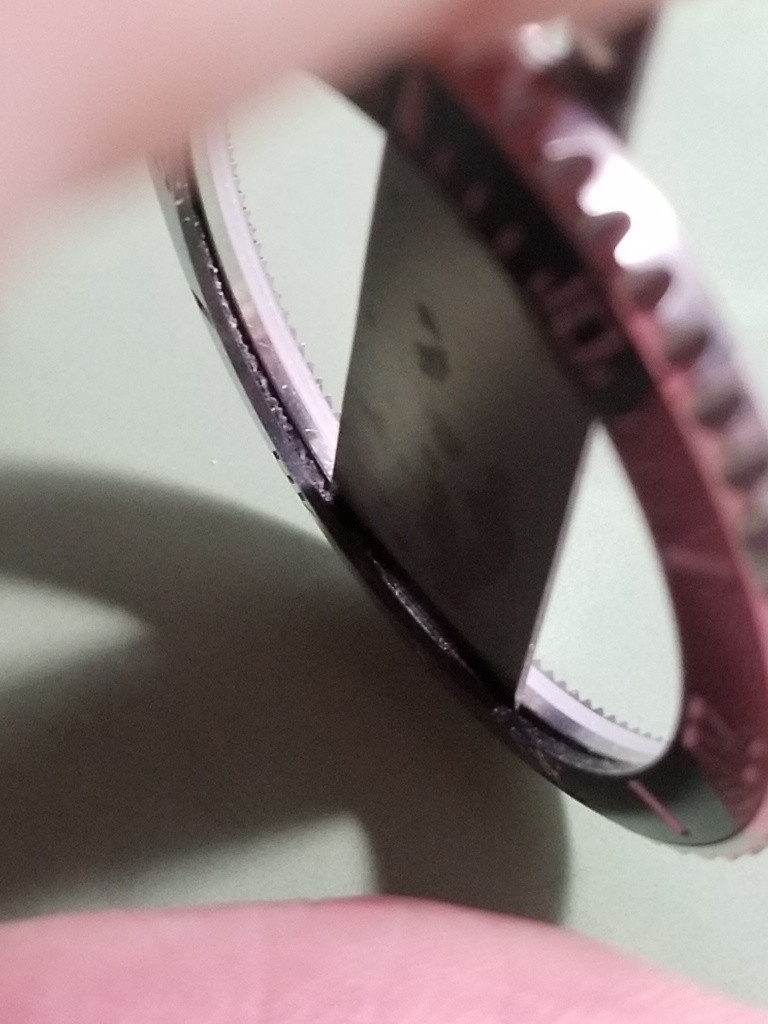
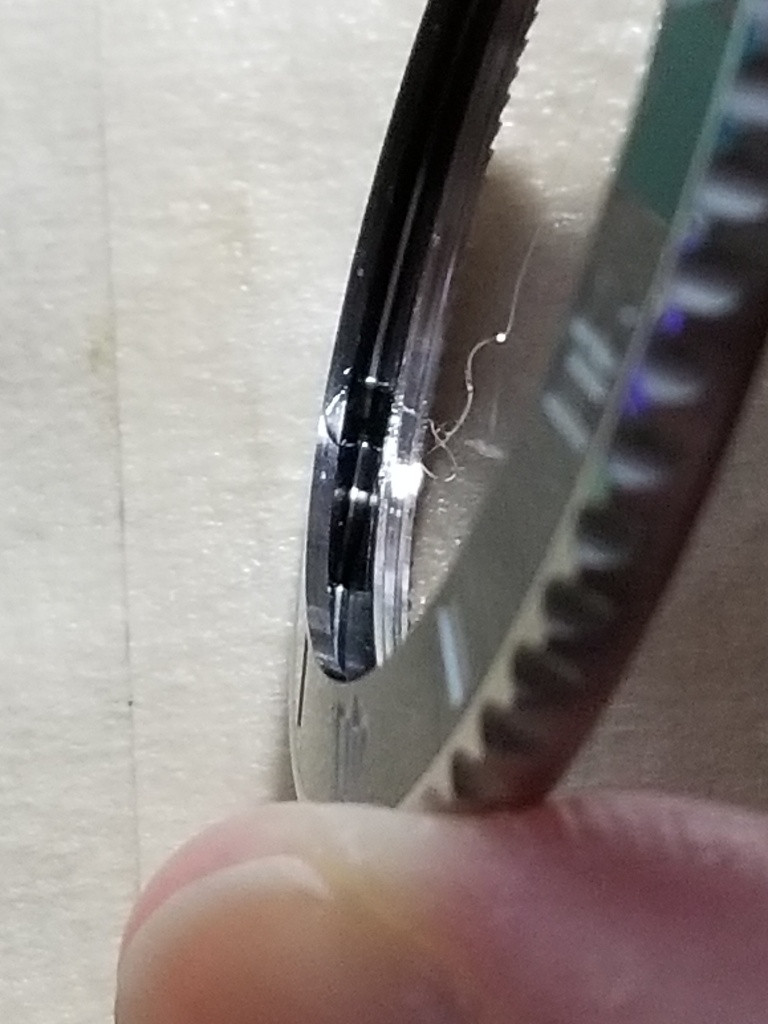
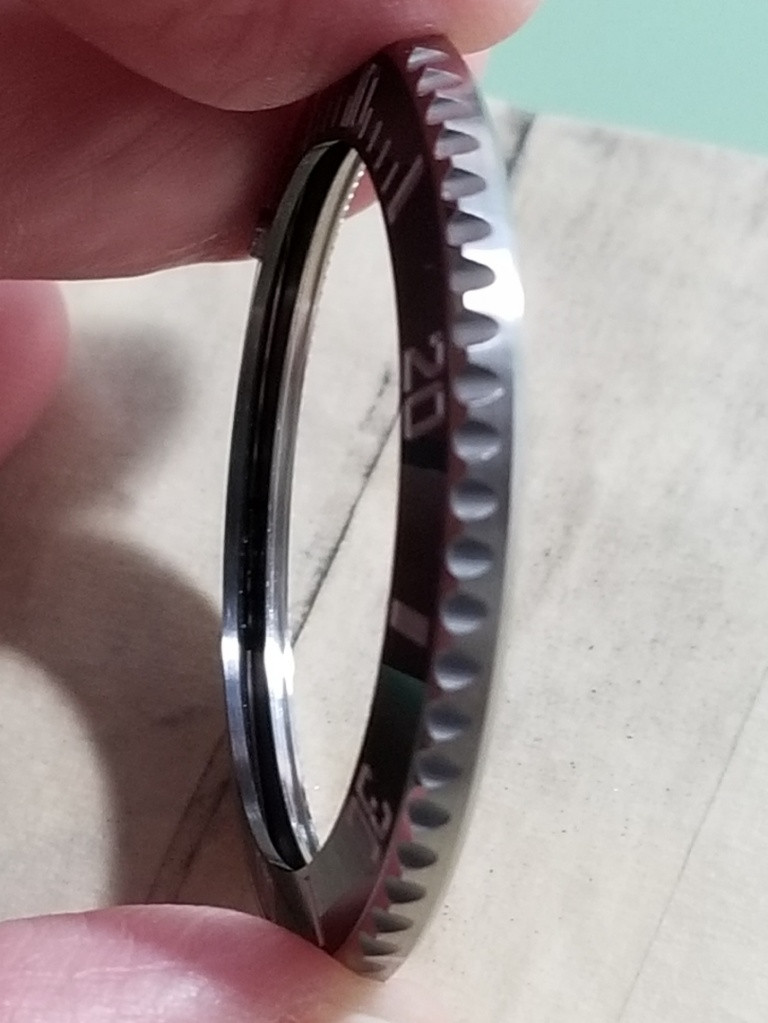
This case had some reddish lube beneath the bezel which bled onto the crystal gasket and the bezel gasket (the hytrel ring). Go figure. No need to take the hytrel ring out yet, but if it comes out make certain you observe its vertical orientation. The ZZF hytrel ring has an outside stairstep with the greater diameter step on top, away from the case. Not all hytrel rings are alike - some have an inside stairstep for example. If the hytrel ring is put back in upside down the bezel will seat into position and usually won’t rotate. Then you have to remove it again, risking damage to parts all over again.
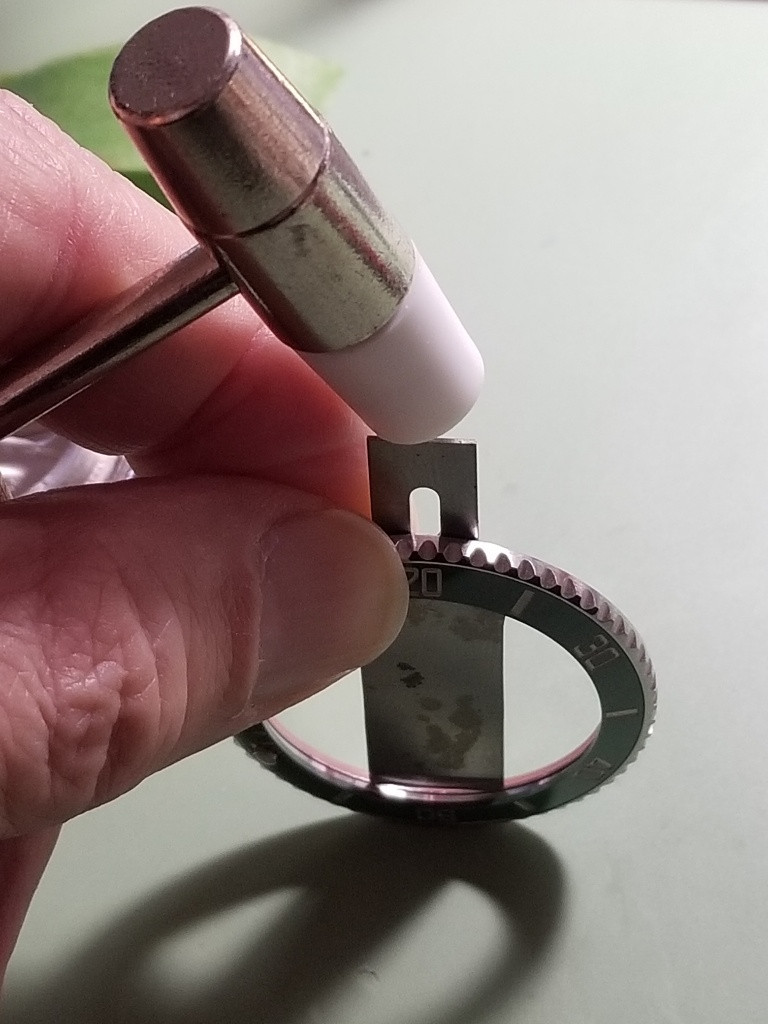
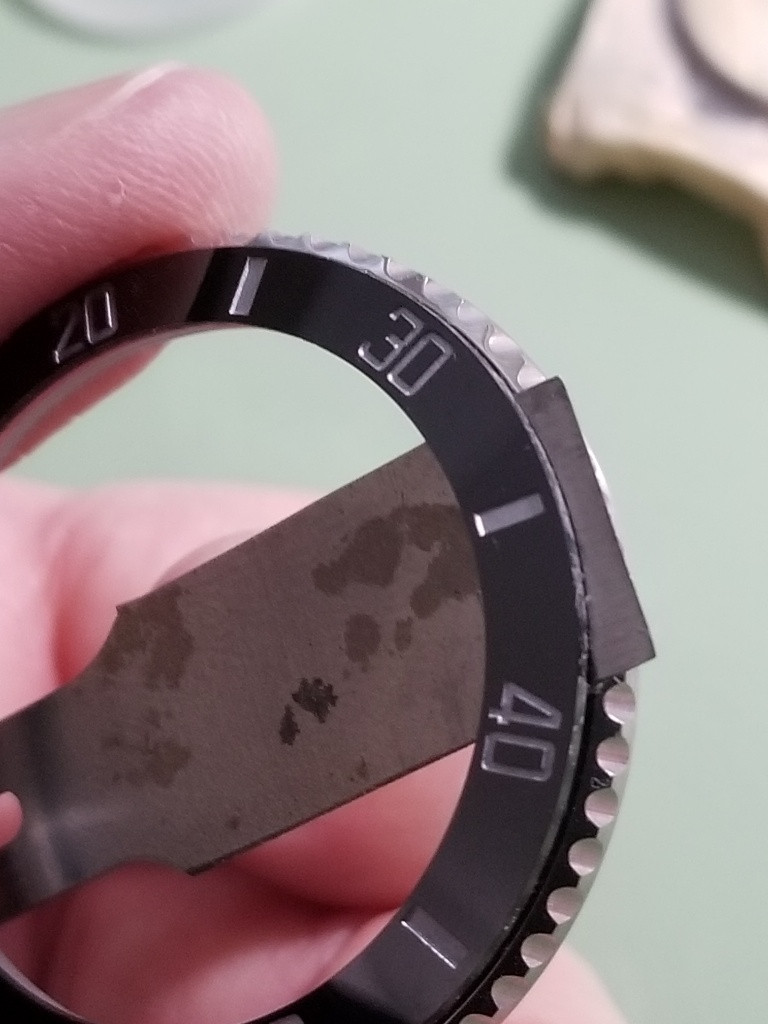
Now we need to get the insert out of the bezel. The ZZF is press fit, so there is no adhesive and there is an extra part under the insert - the insert support ring.
I separate these parts by using using a hobby razor blade. I like these because it distributes pressure over a larger arc of the insert circle with two points of contact instead of one.
https://www.razorbladeco.com/number-17-hobby-blade
I insert the blade underneath the insert support ring, not the insert
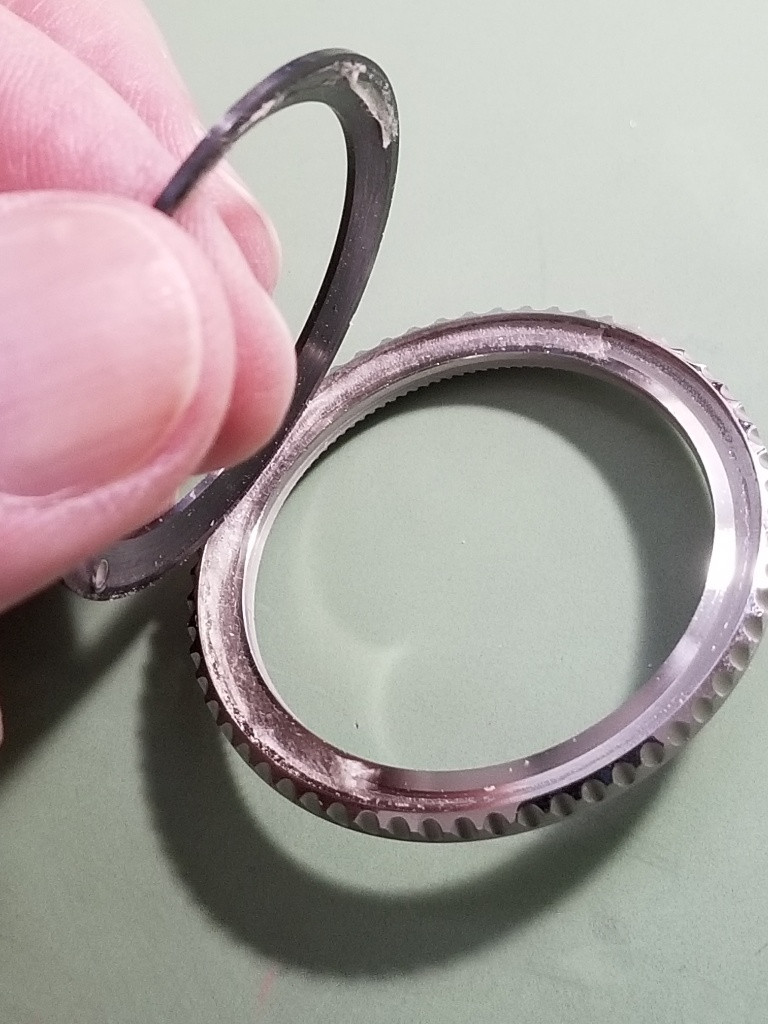
Tap it VERY gently with a jeweler’s hammer and the edge will start to pop up.
Keep tapping carefully and it will give way completely. Then separate the support ring.
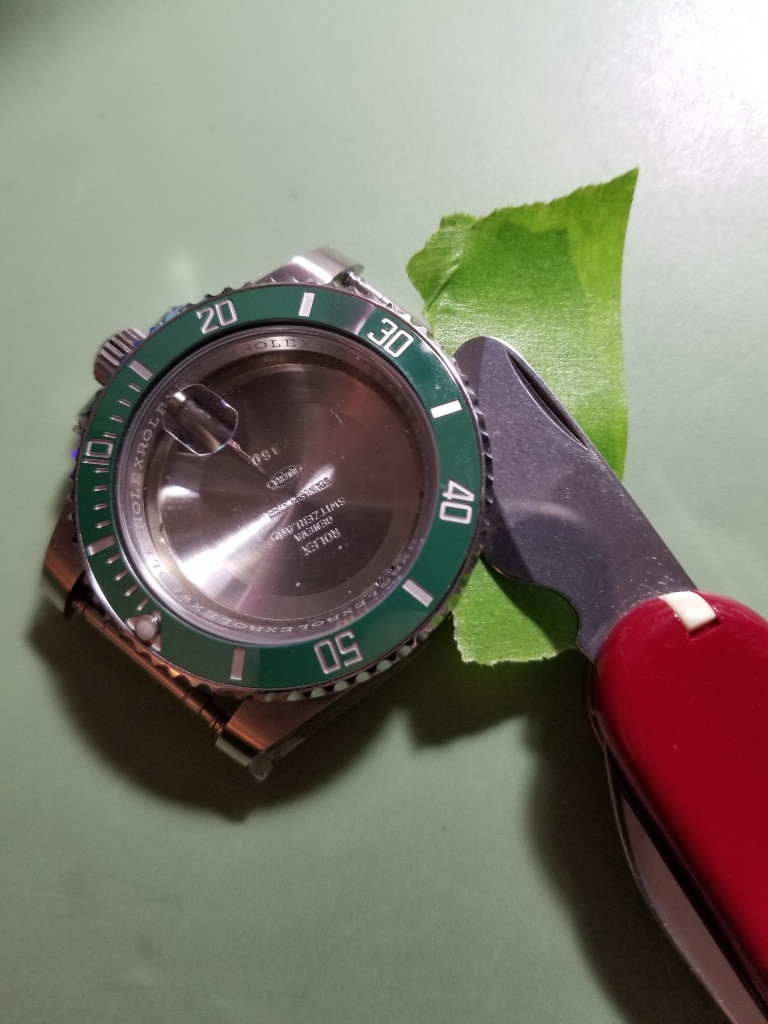
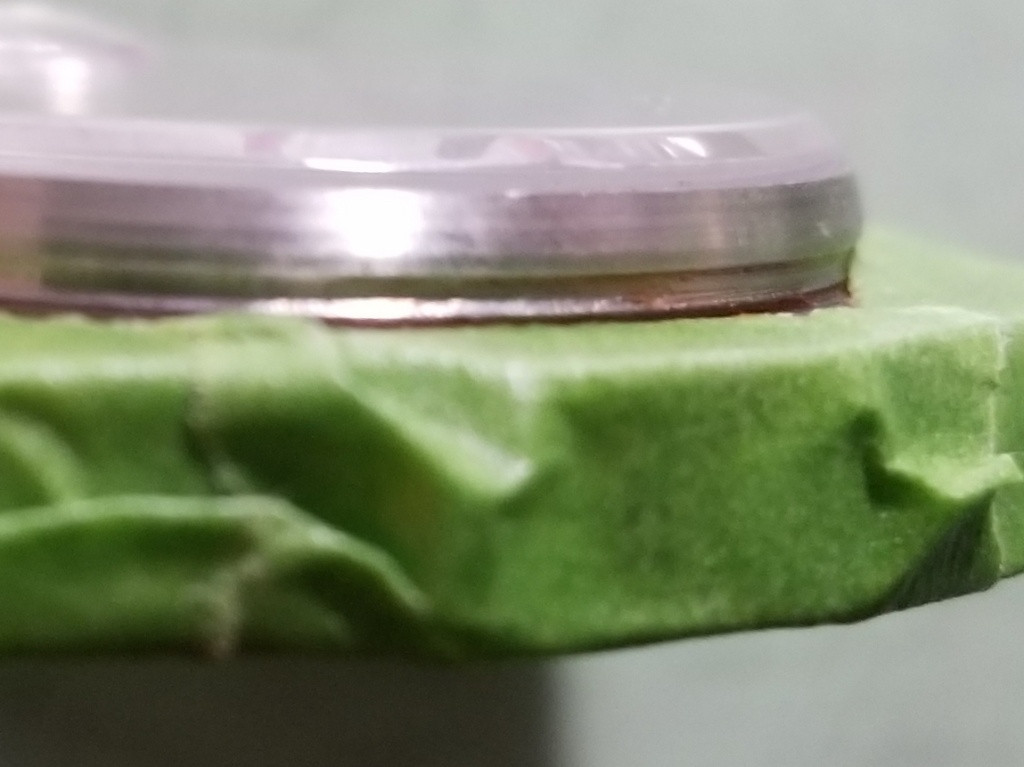
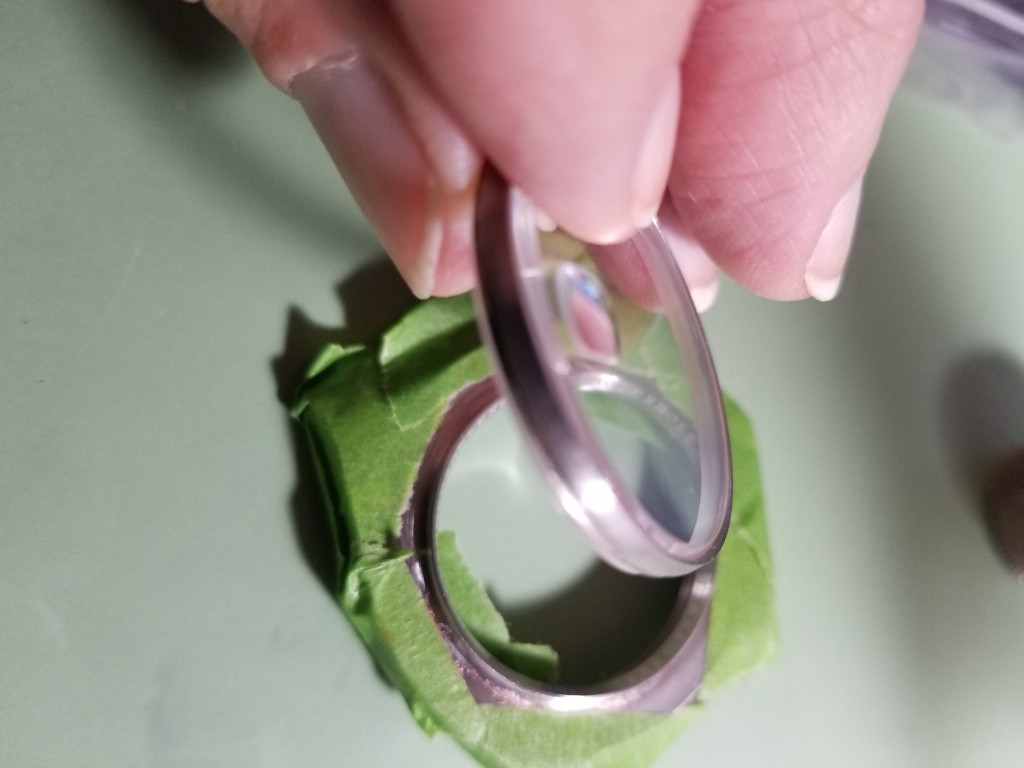
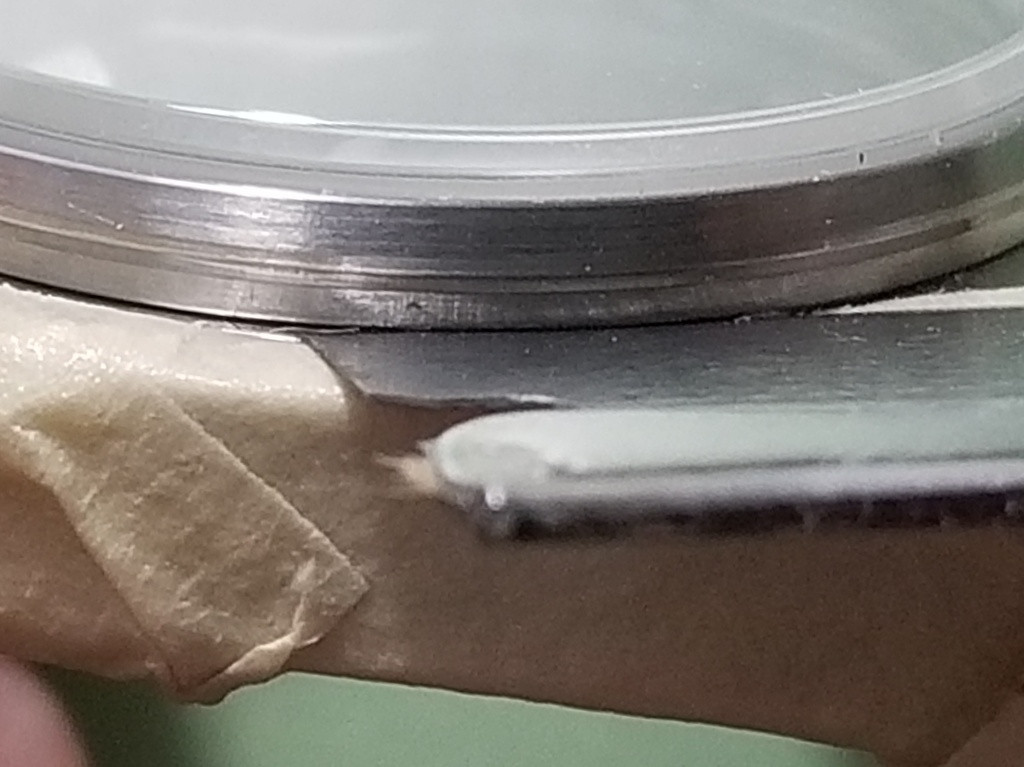
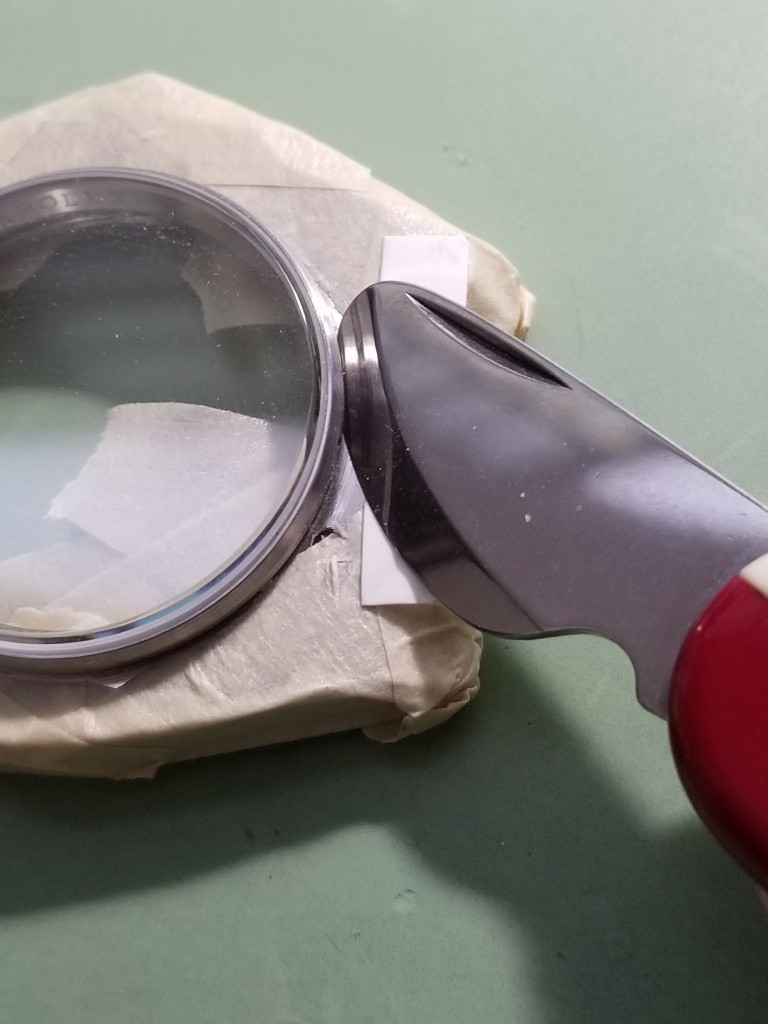
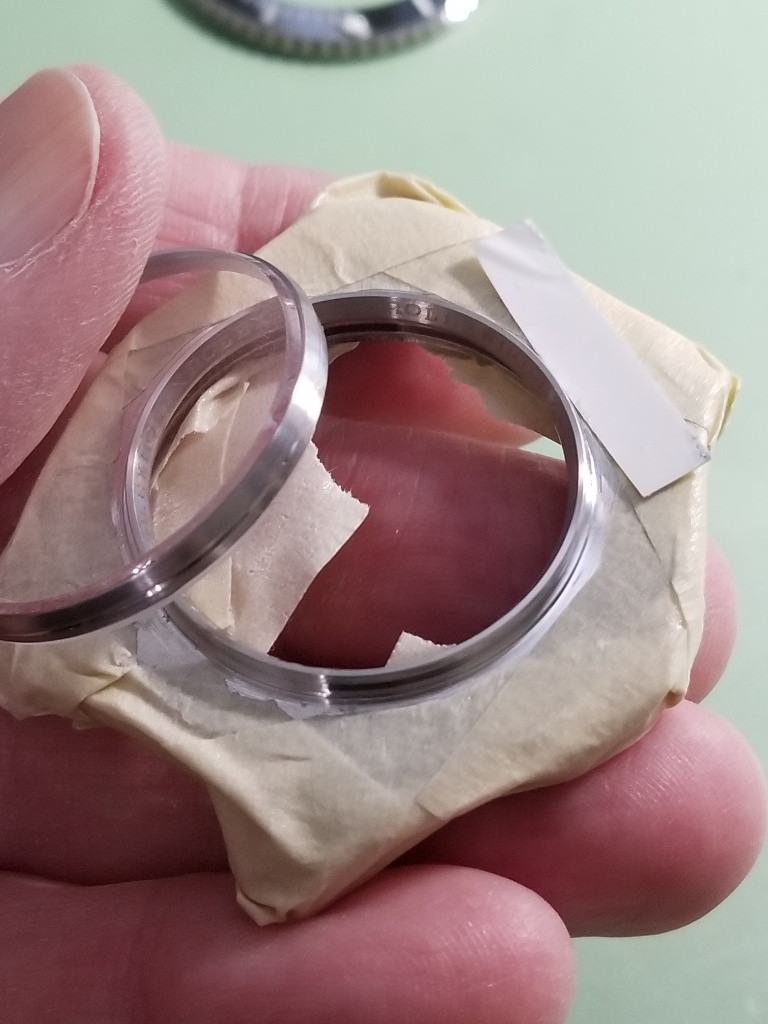
The last disassembly step is to remove the crystal. This requires removing the crystal retaining ring.
Some retaining rings are not on super tight and can be lifted up with just a case knife. More often, they are so tight that creating a gap for the case knife requires using a standard utility razor blade with a protective back on it. So we’ll make a gap with the blade and a hammer, then finish lifting with the case knife. Tape up your case fully for maximum protection.

Often the retaining ring and the crystal will come off together, that’s fine. In fact sometimes they both come off when you remove the bezel, that’s OK too.
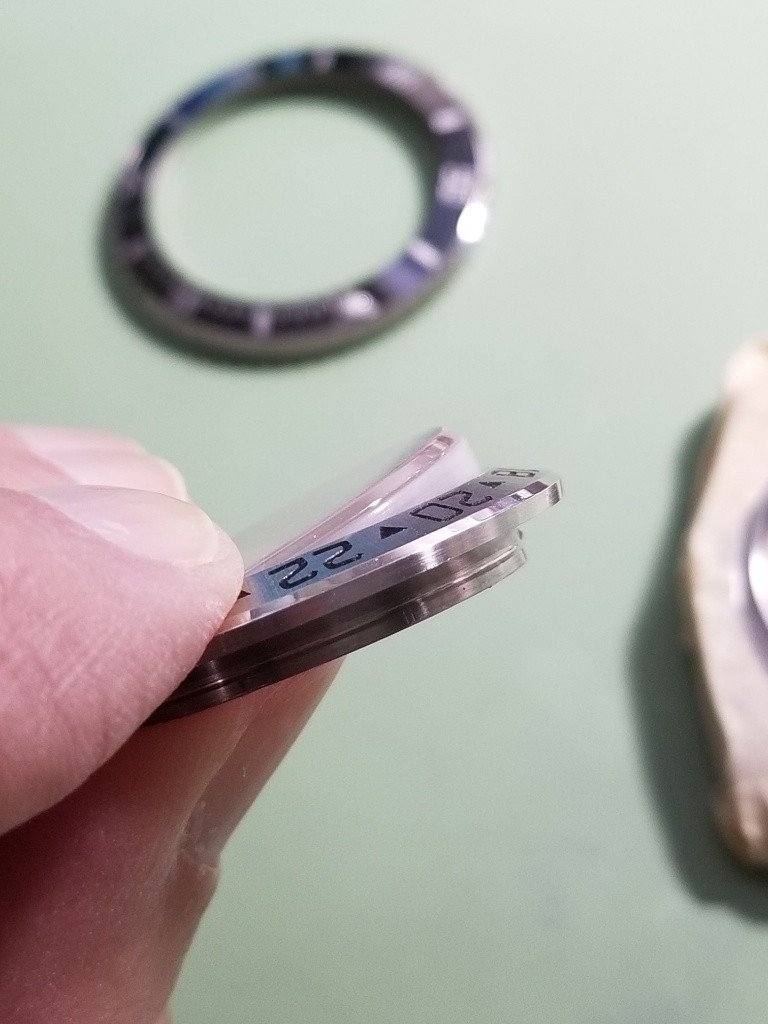
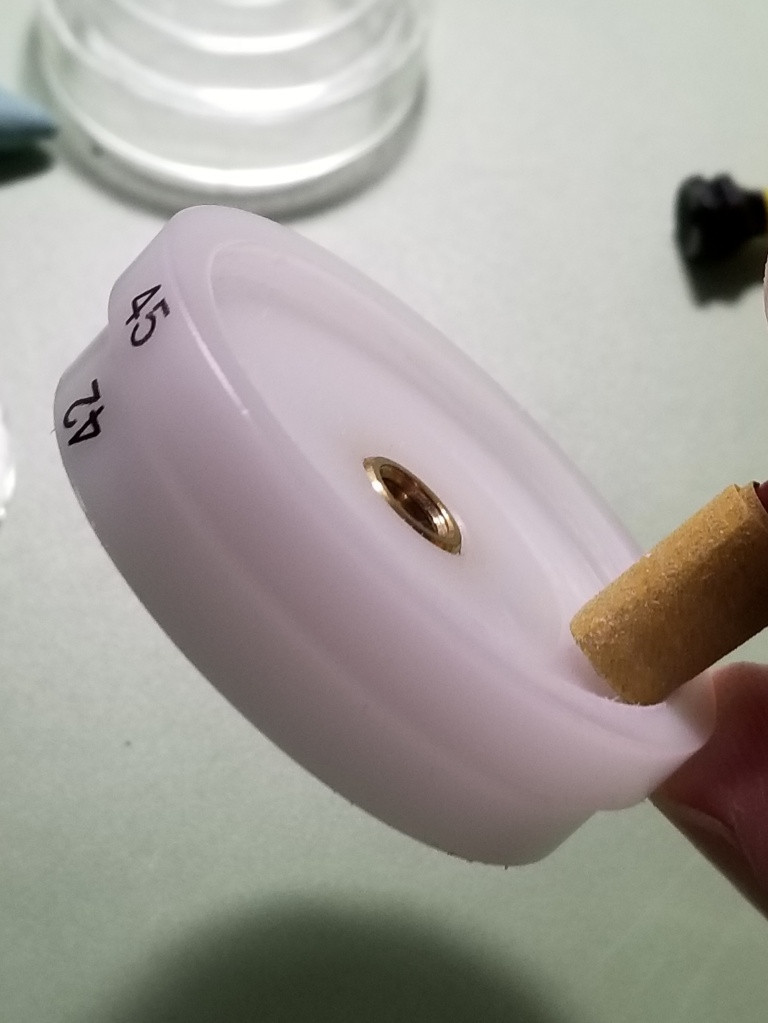
Now is when one of the most important tools comes into play - the retaining ring die. Ideally it would be made of metal and needs to have an inside diameter slightly larger than the crystal but small enough to catch the top ledge of the crystal retaining ring. One can be custom made on a lathe, or a crystal die can be trimmed down to the correct size. One of the best readymade ones is a bezel from an old Explorer II rep.
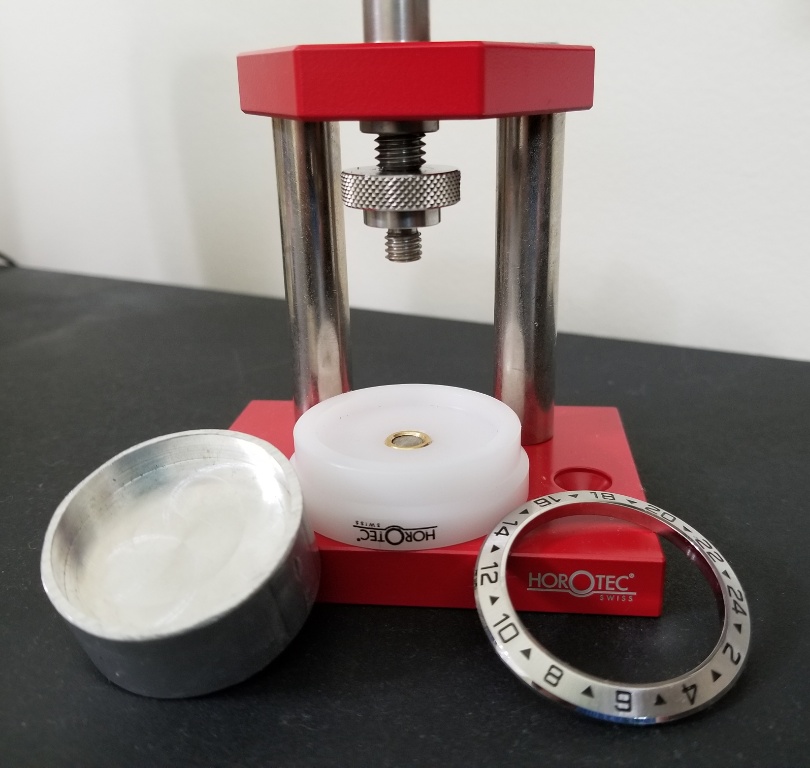
So if the crystal retaining ring and the crystal come off together (or all come off with the bezel), these parts need to be separated. You need to use the crystal press and dies to separate the bezel away, and then use the retaining ring die to separate the retaining ring from the crystal. Usually that can just be done by hand, but use the press if needed.
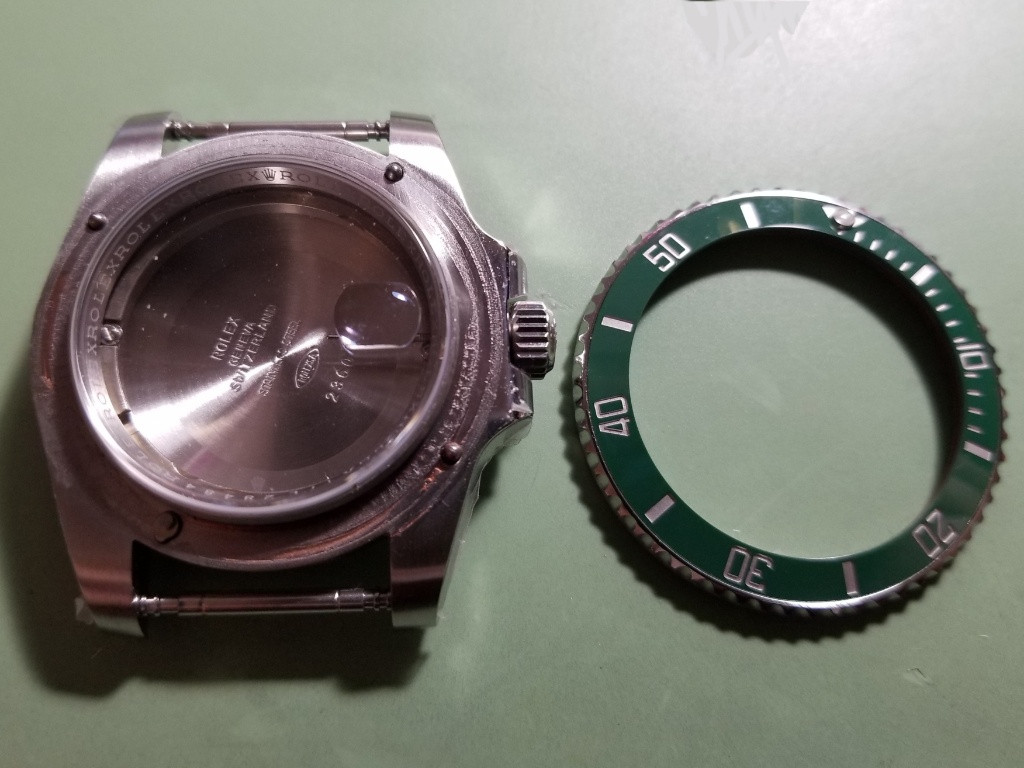
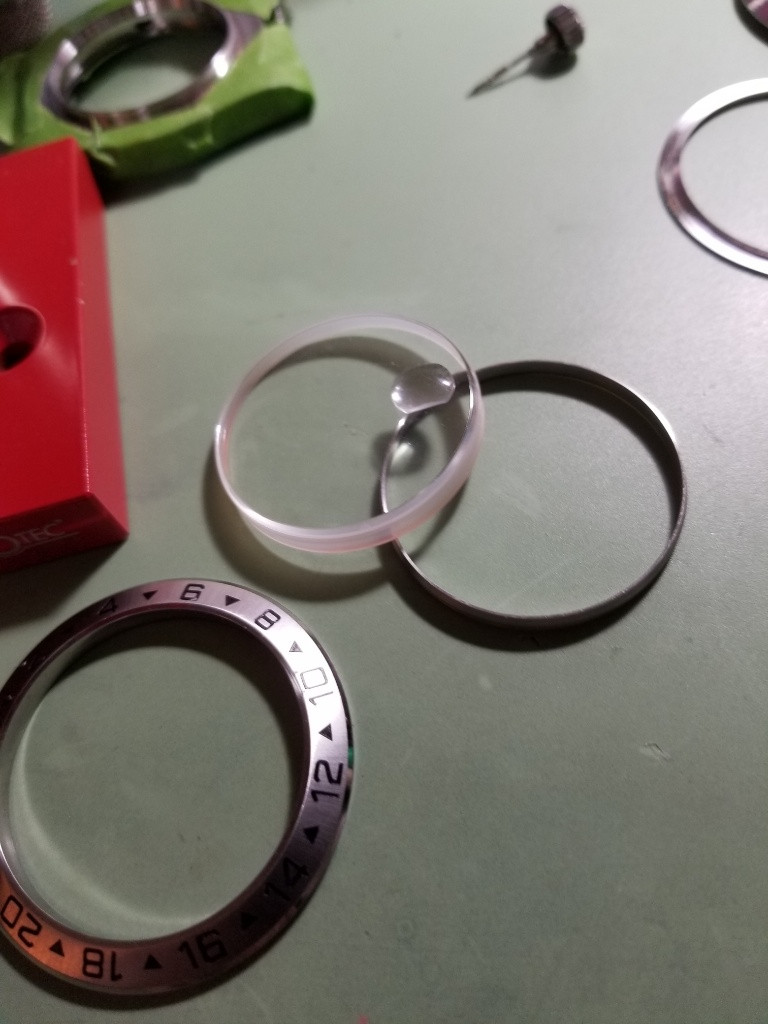
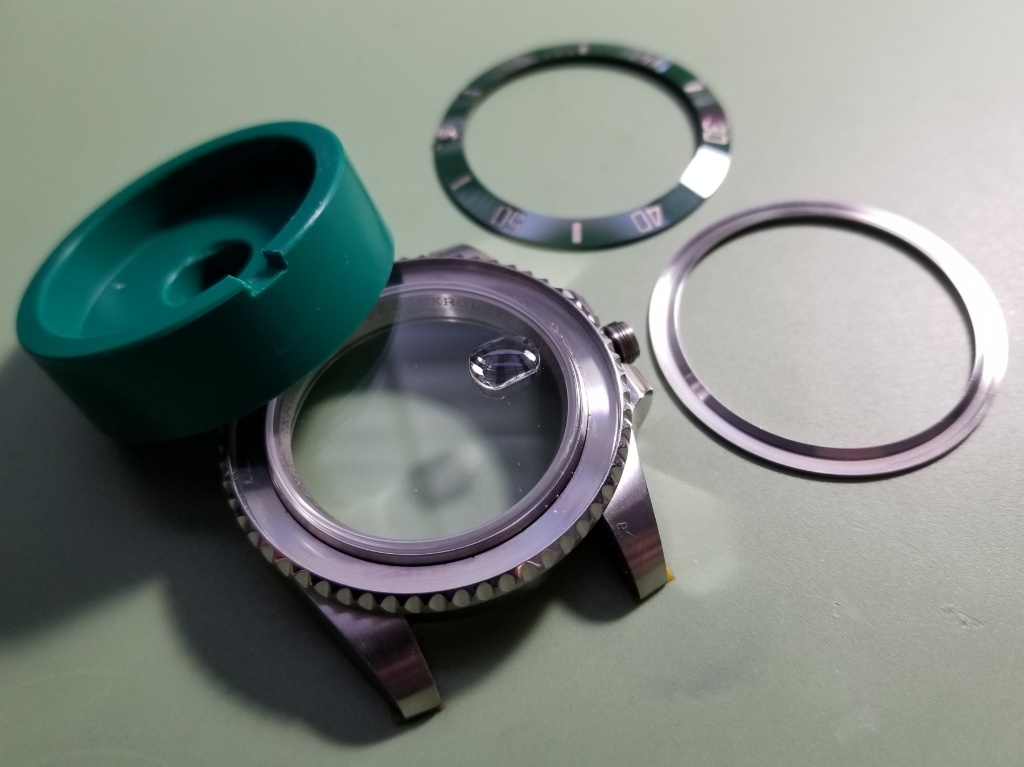
So now all the ZZF pieces should be separated.
The Noob gets disassembled in much the same way, the only difference is this Noob insert is double stick taped in and not press fit. First the bezel comes off.

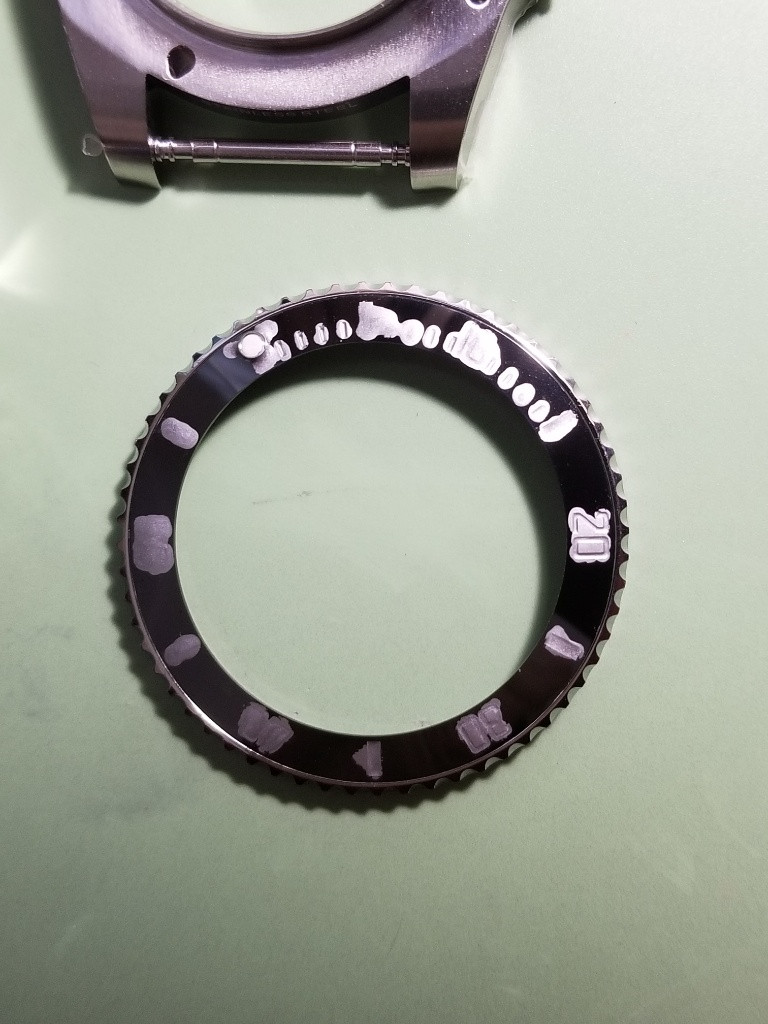
Taped or glued inserts can be removed a few different ways - soaking in soapy water or using a heat gun, etc. I just use a similar technique with the hobby razor blade. This Noob insert doesn’t have an insert support ring so the blade goes directly under the insert.
Apply pressure until it starts to pop out

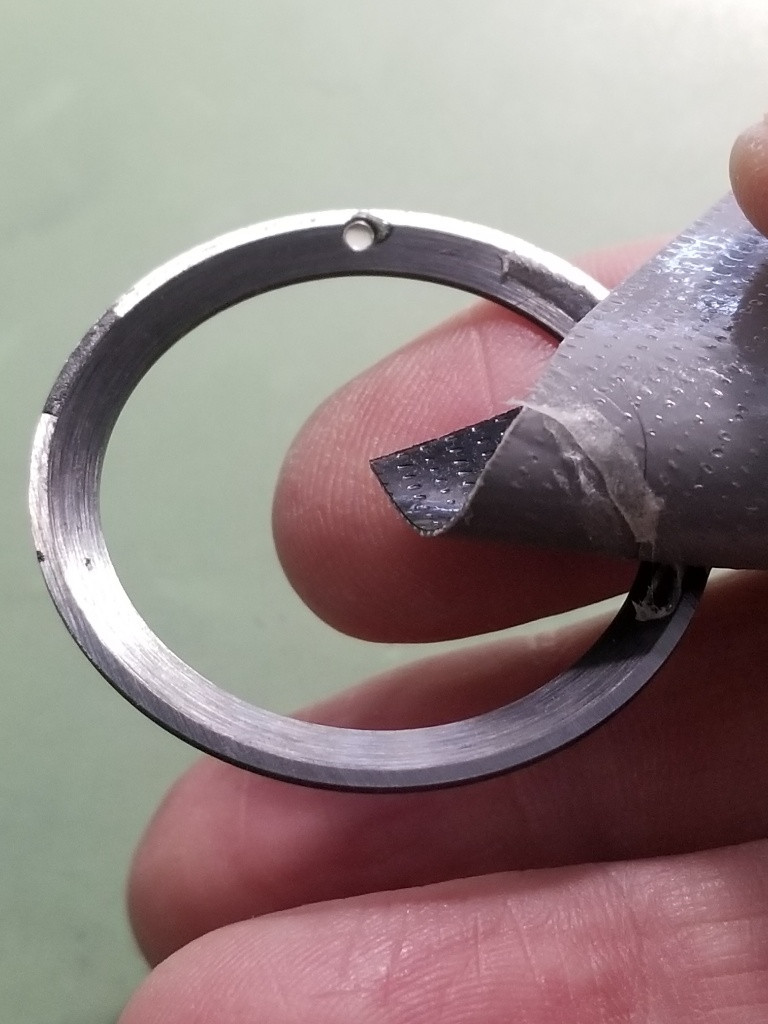
Then you can get a blade in underneath and slice through the tape or glue. Be careful not to scratch up the bezel rim.
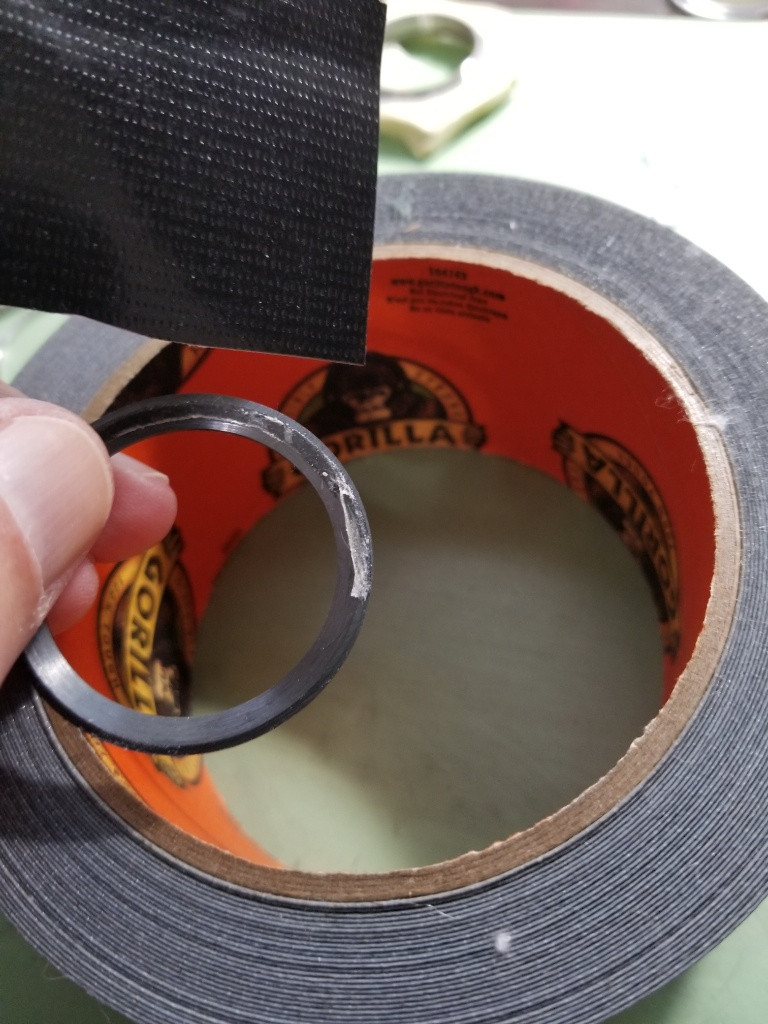
Gorilla tape is great for getting the sticky mess off the insert and out of the bezel well. WD-40 works also but is messy.
Remove the retaining ring and crystal and separate them
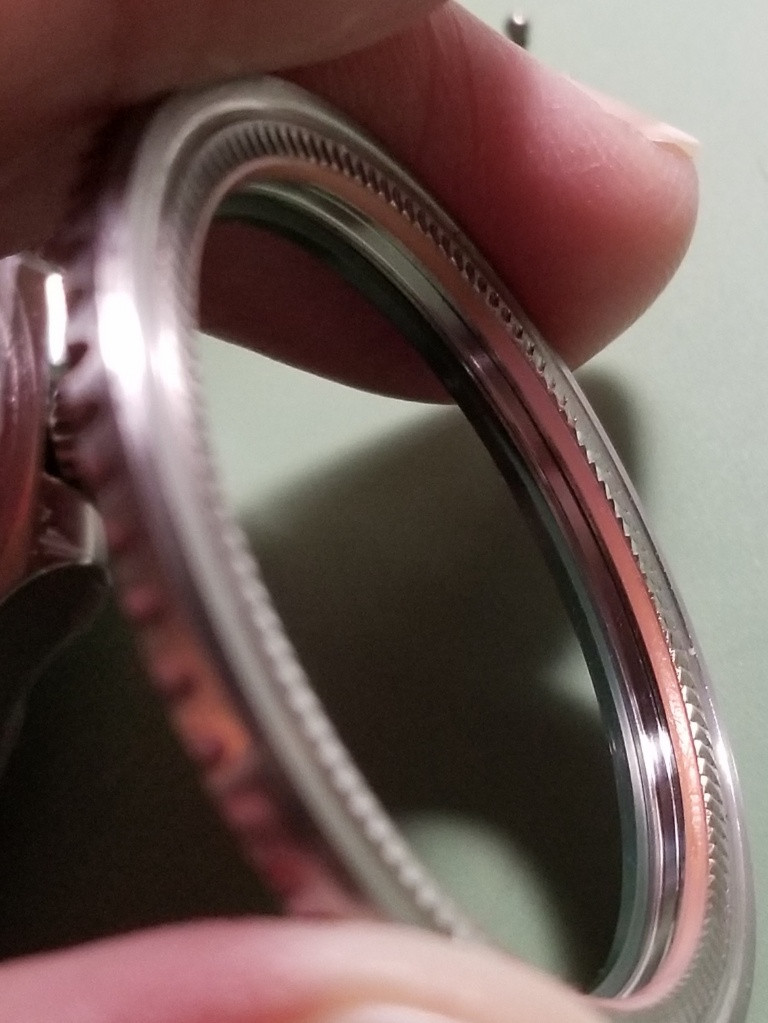
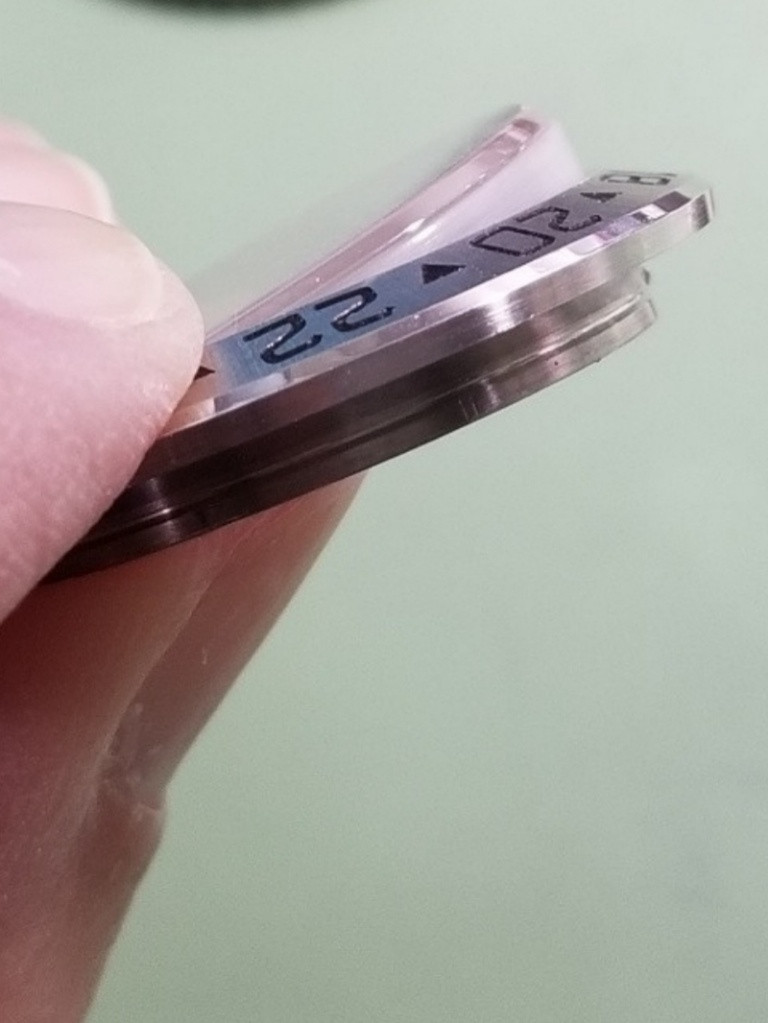
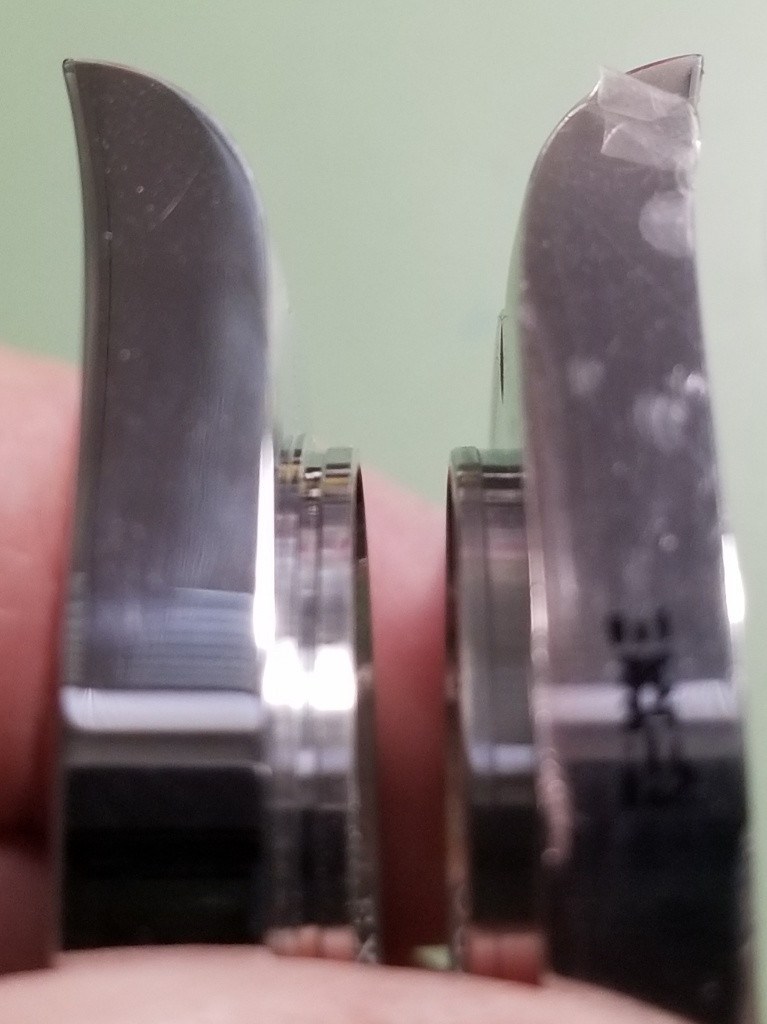
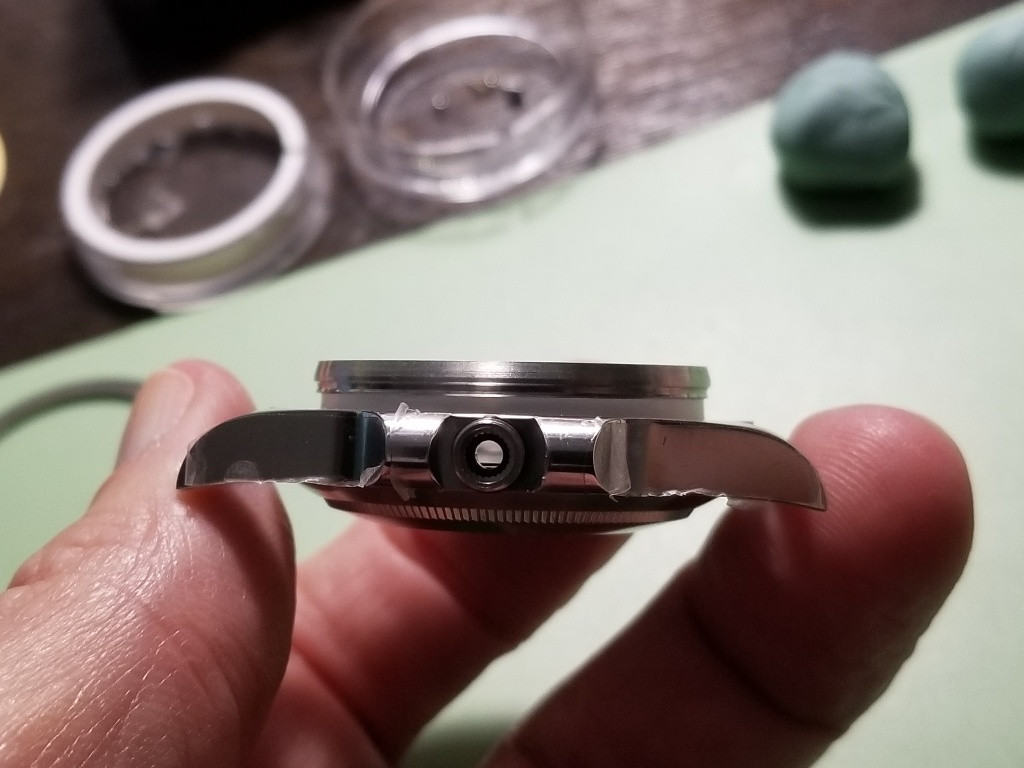
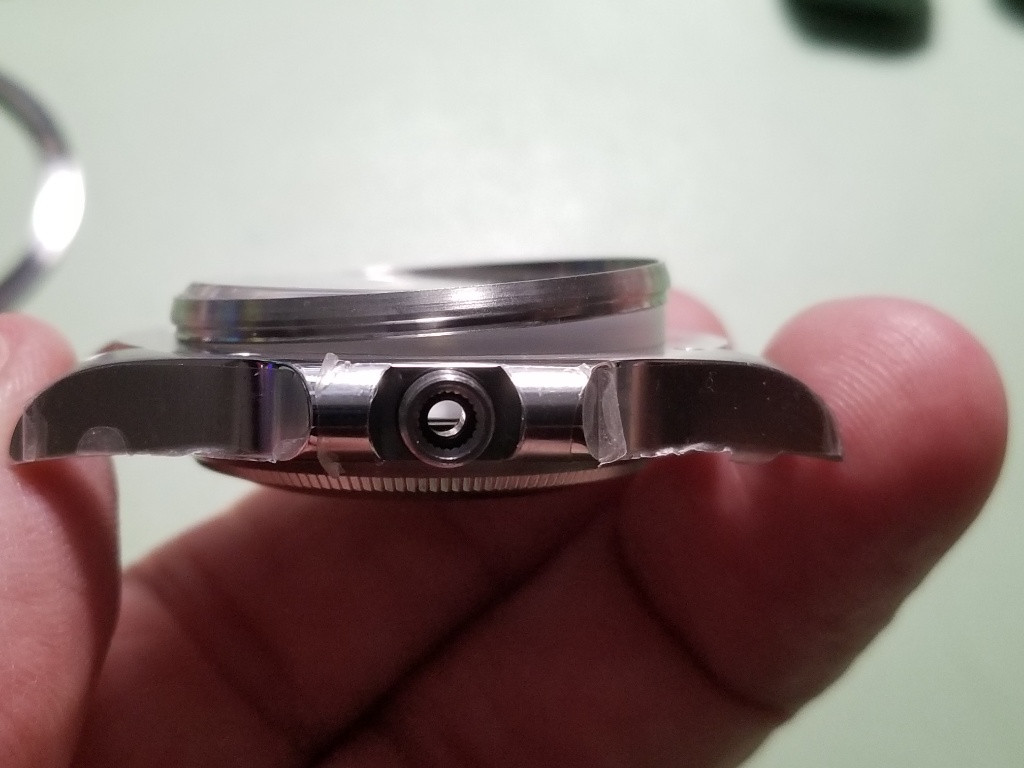
Now that everything is apart we can decide how to reassemble the pieces. I had thought about just swapping the bezels but after examining the retaining rings and the rehauts, they are too different to mix and match them. You can see the Noob retaining ring lip (on the left) is set a lot higher than the ZZF so the bezels are going to have to stay with their paired retaining rings.
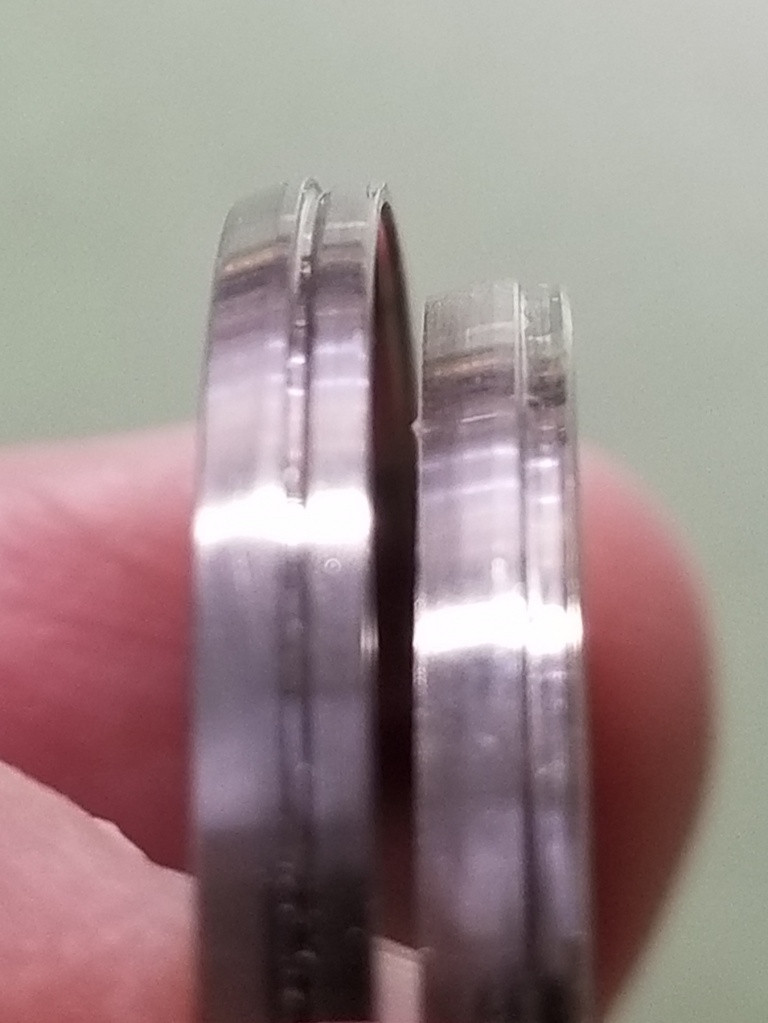
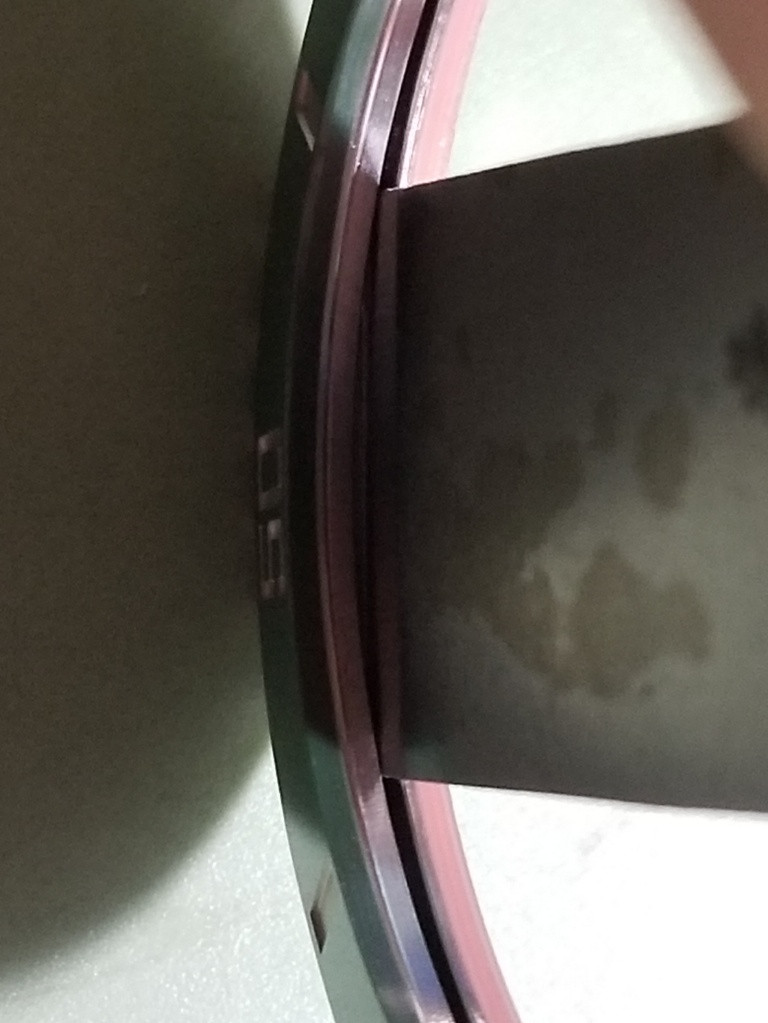
And the outsides of the rehauts are shaped differently too so the retaining rings should stay with their original cases.
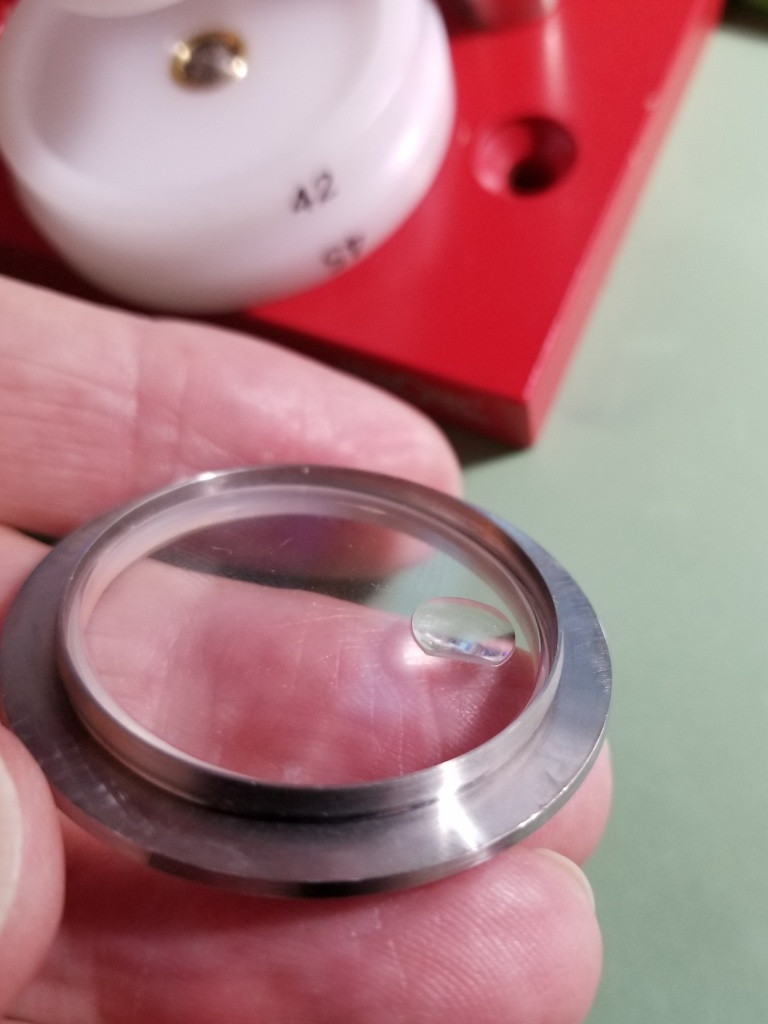
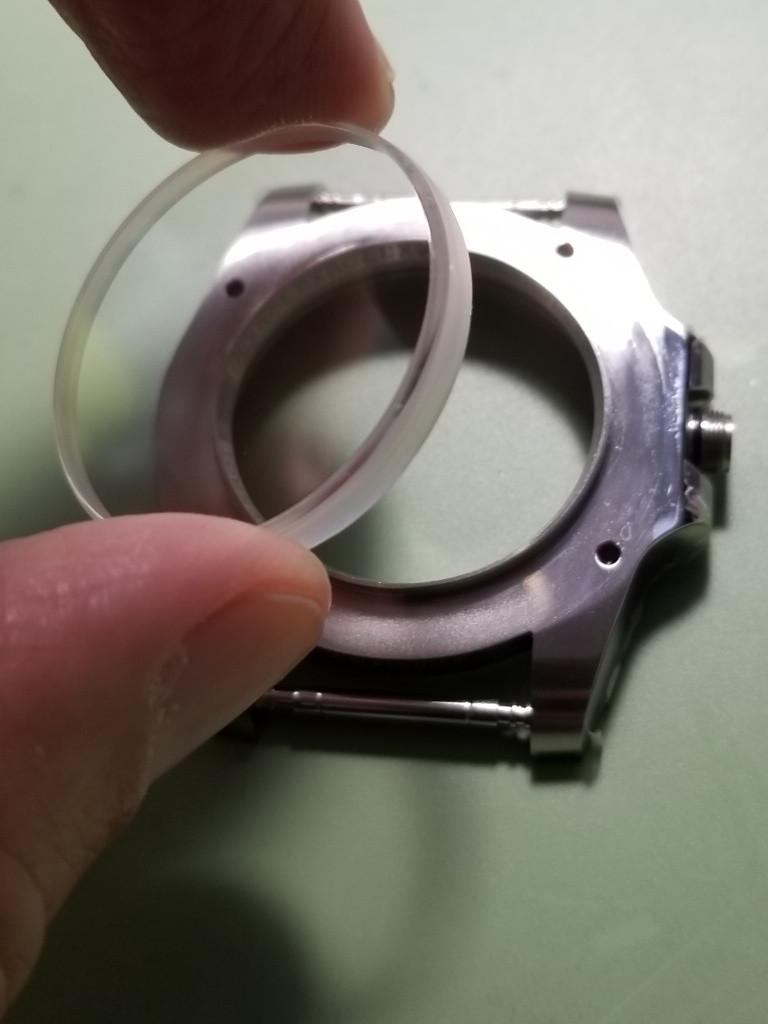
So now we can put the no date crystal and gasket on the ZZF case.
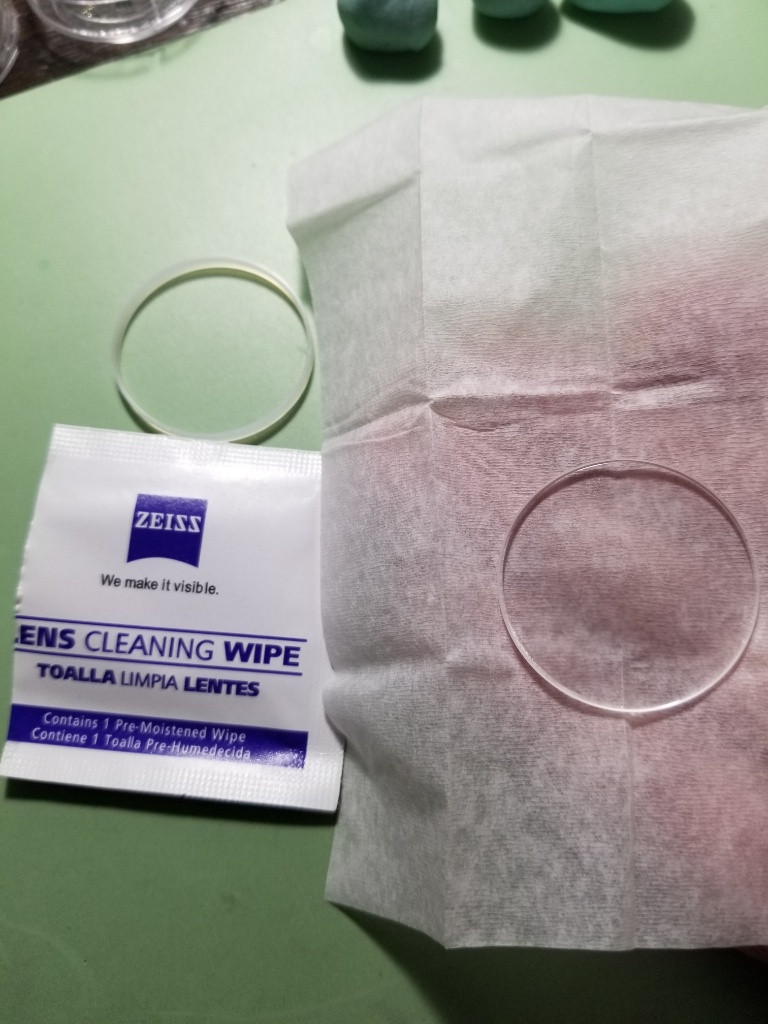
I use Zeiss clens cleaning wipes to clean crystals.
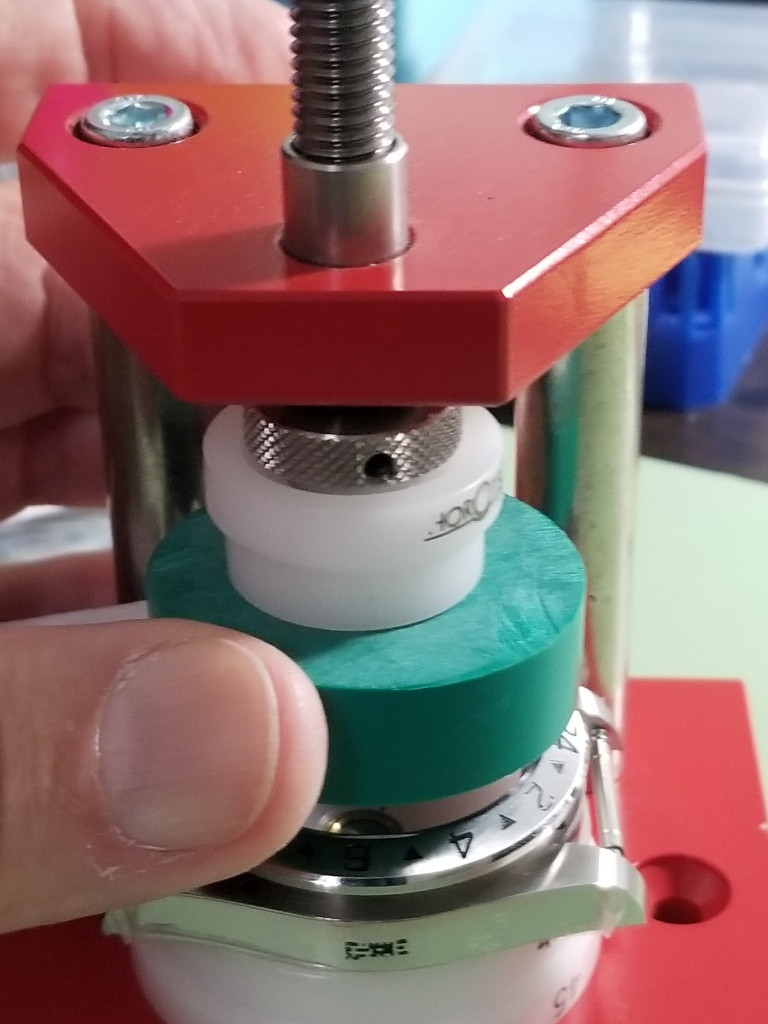
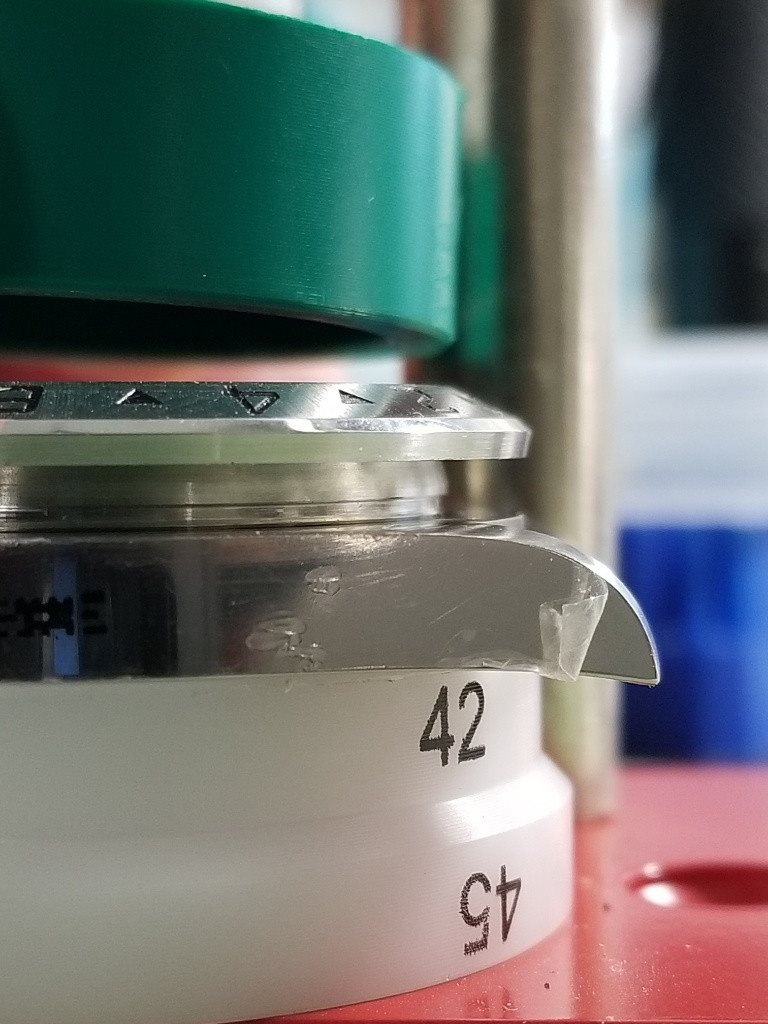
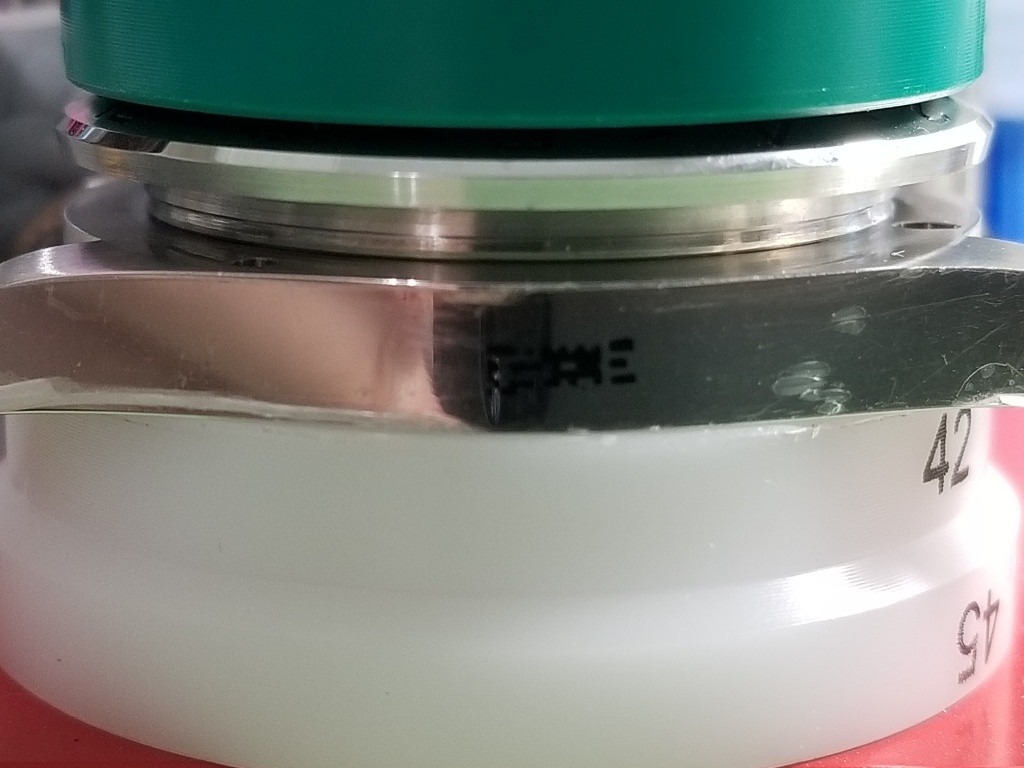
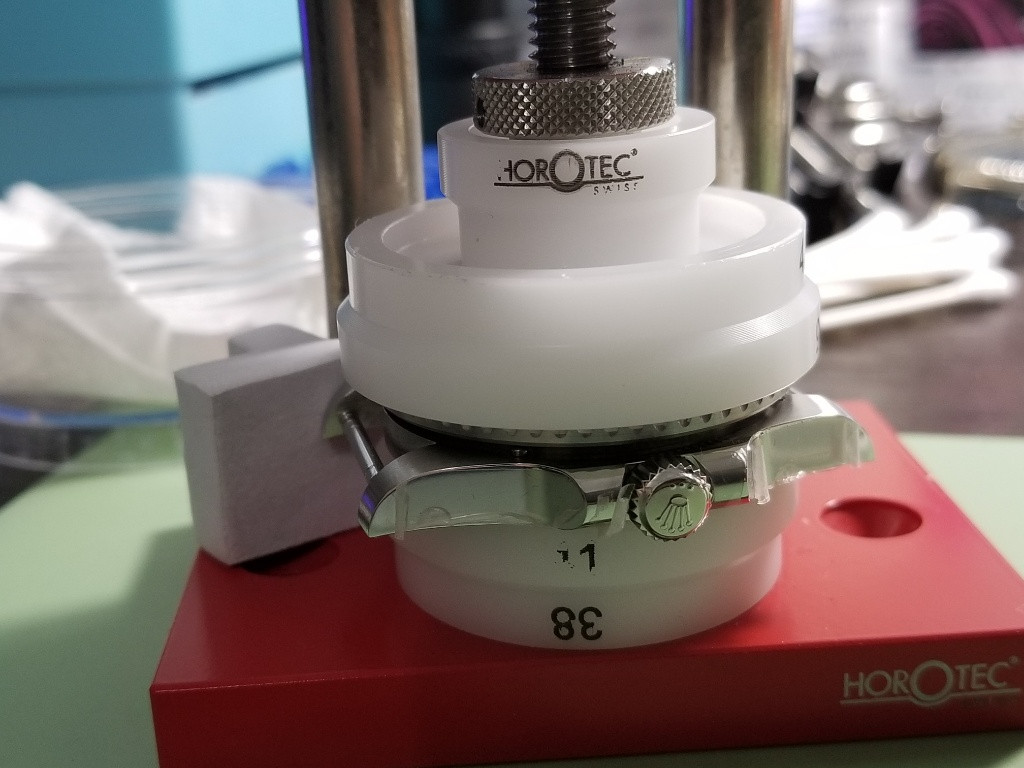
Next we can press the ZZF retaining ring back onto its original case. Start by setting it level onto the crystal gasket, not lopsided or it will be hard to press on and it can crush the top edge of the gasket.
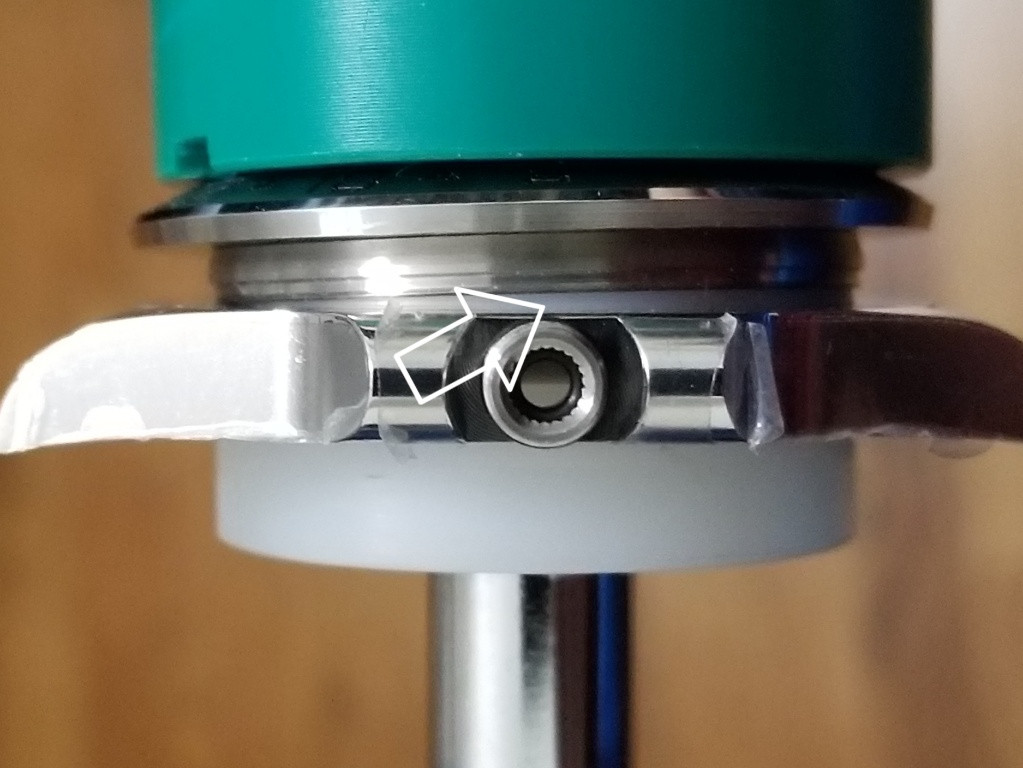
Put everything into your crystal press, set it all straight and press the retaining ring home.
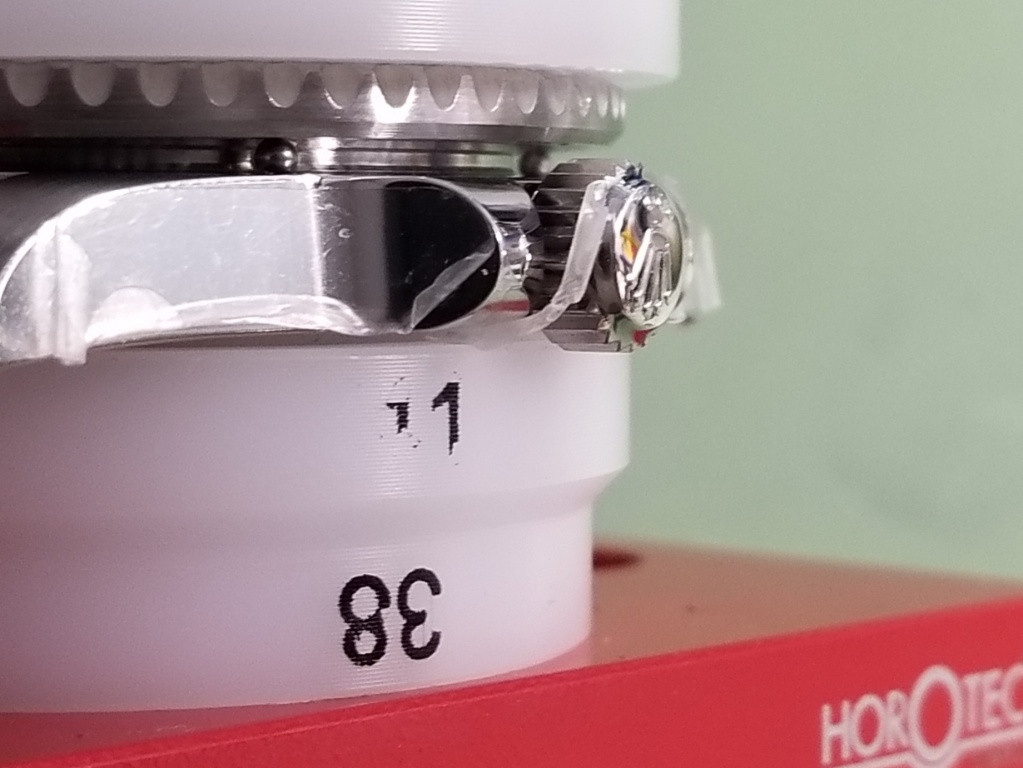
Alternate retaining ring die setup
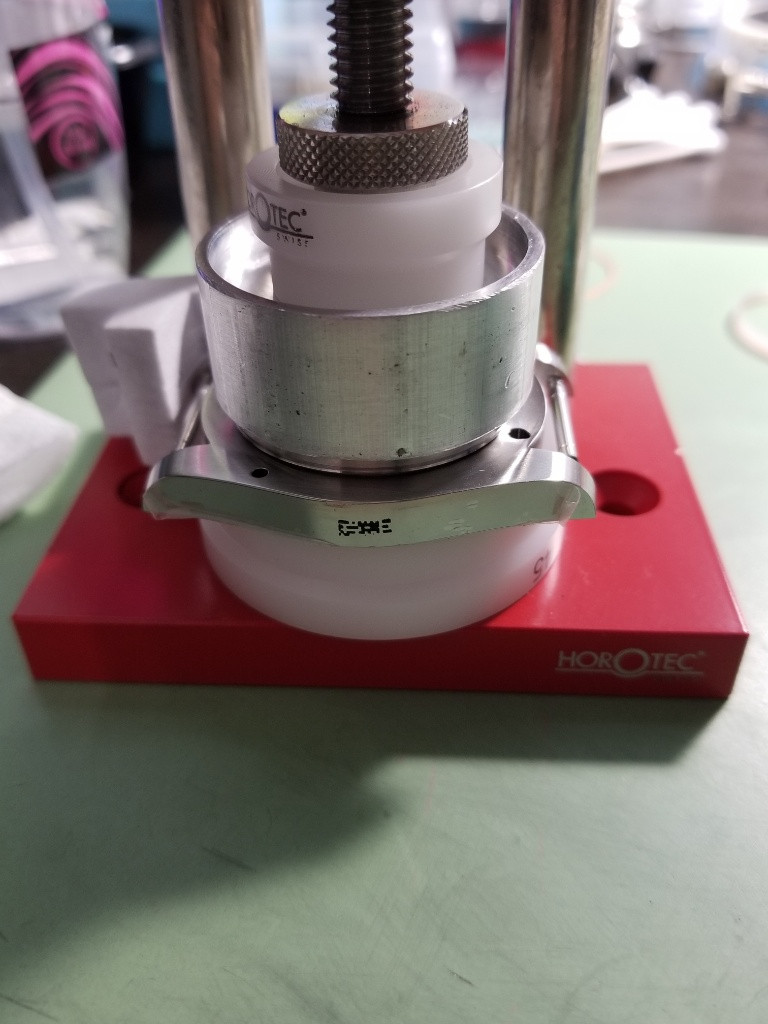
Using the Explorer II “die”
Now is a good time to do a WP test since bezels can trap air and confuse the issue.
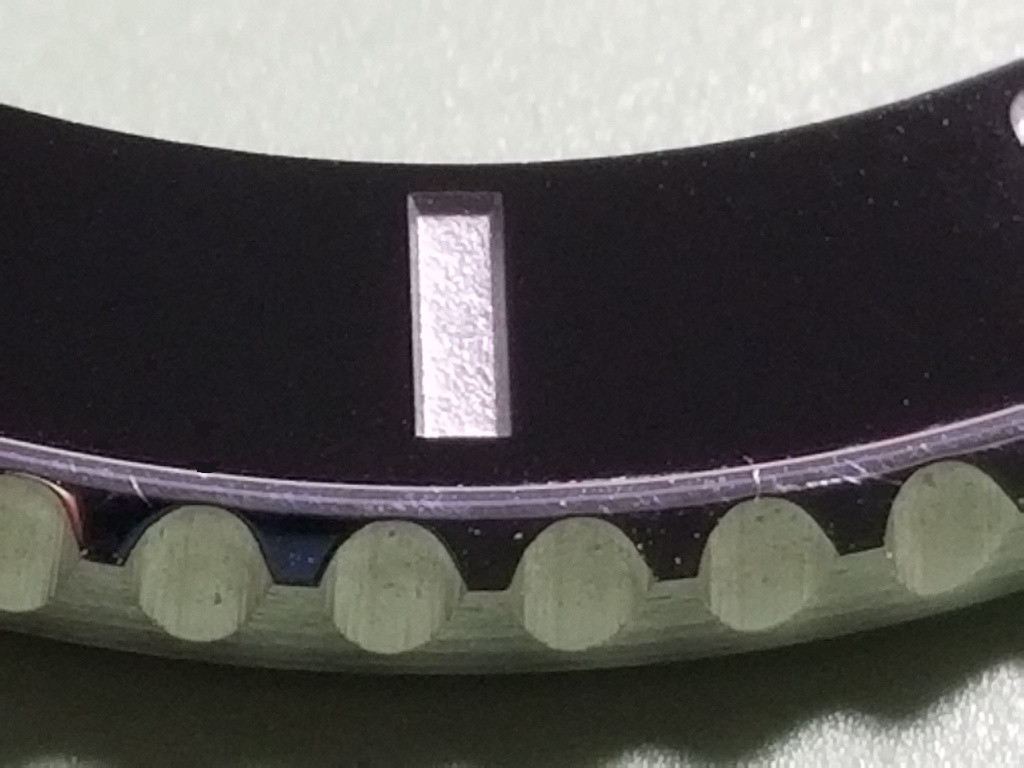
Before we move on to the insert, I need to mention a few things about crystal gaskets, and dealing with a cyclops if your crystal has one. If you look at a lot of gen 6-digit Subs, you'll see some minor variation in where the crystal sits relative to the insert. In general, it's noticeably lower than on 5-digit Subs though, and appears to be about 1.0mm above the insert.
If there is a cyclops, you need to assess how the date magnification looks. Again, you can find some variation in gens. Look at a bunch and get a feel for what looks right to you. Increasing the gasket height will increase the date mag.
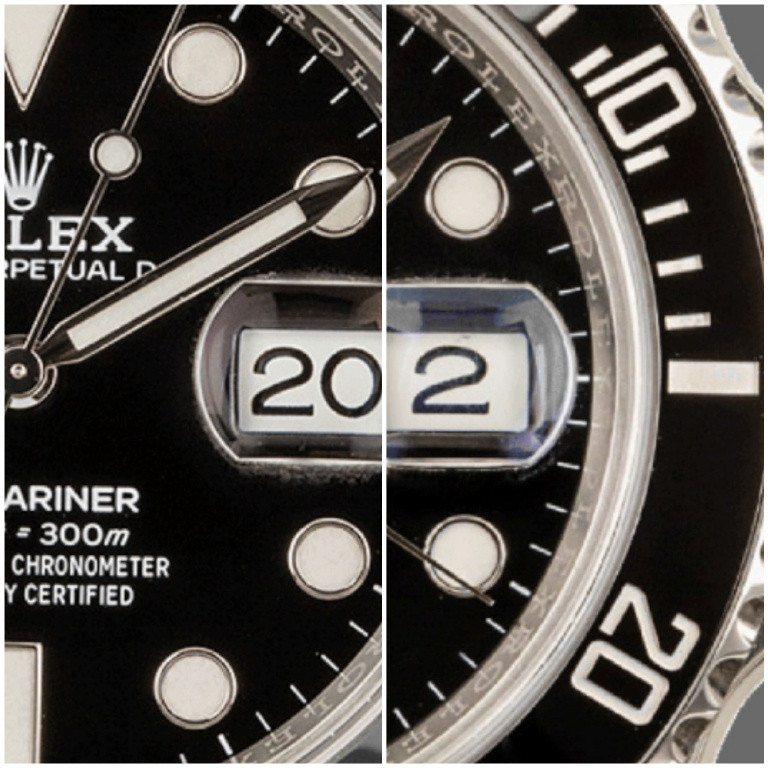
Sometimes on a rep you will have to compromise between getting the correct date mag or the correct crystal height. I place more importance on getting the correct date mag if you can't manage to get both.
So when replacing a crystal on a rep, you need to pay attention to which height gasket you choose. I like to keep about 3 or 4 sizes of gaskets on hand - 2.5, 2.7, 2.85, even 3.0mm. And if there's a cyclops you'll have to put the movement back in the case at least temporarily to check the date mag. The retaining ring can then be pressed on with the movement in or out, as long as you keep the cyclops and the LEC stationary.
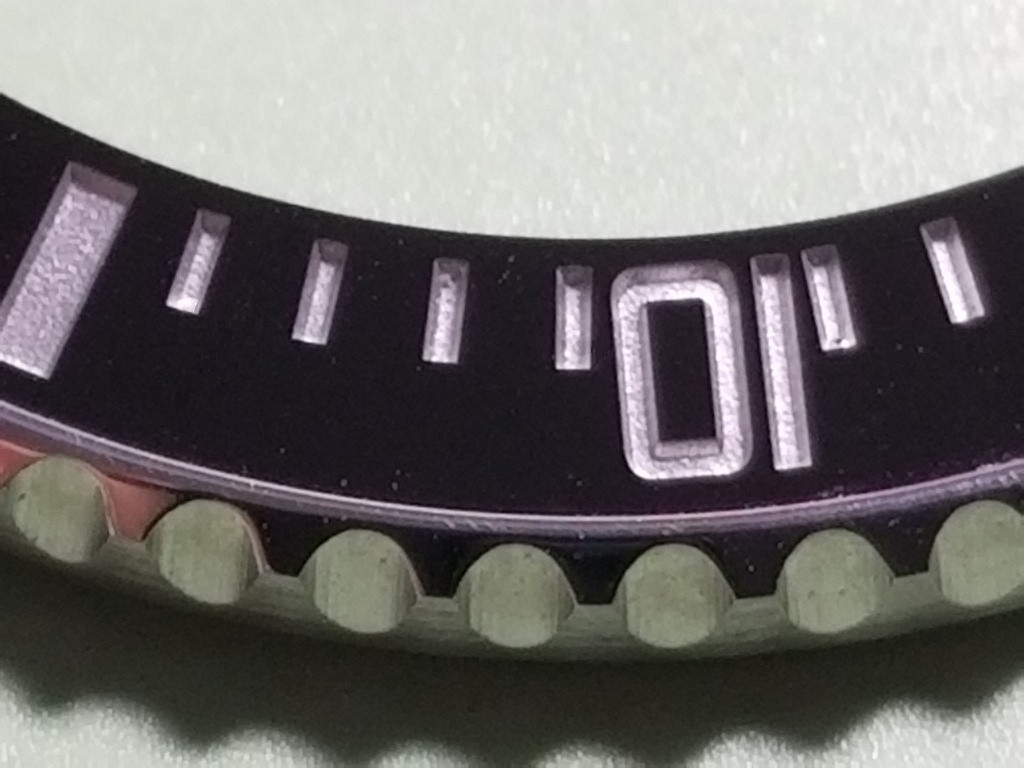
After your crystal is installed, we can move on to the insert. For this project the best choice was just to swap the inserts since the bezels are so different. Rolex ceramic inserts (gen and rep) are nearly always the same outer diameter (38.0mm) so it’s usually possible to swap taped in or press fit inserts to non-matching bezels.
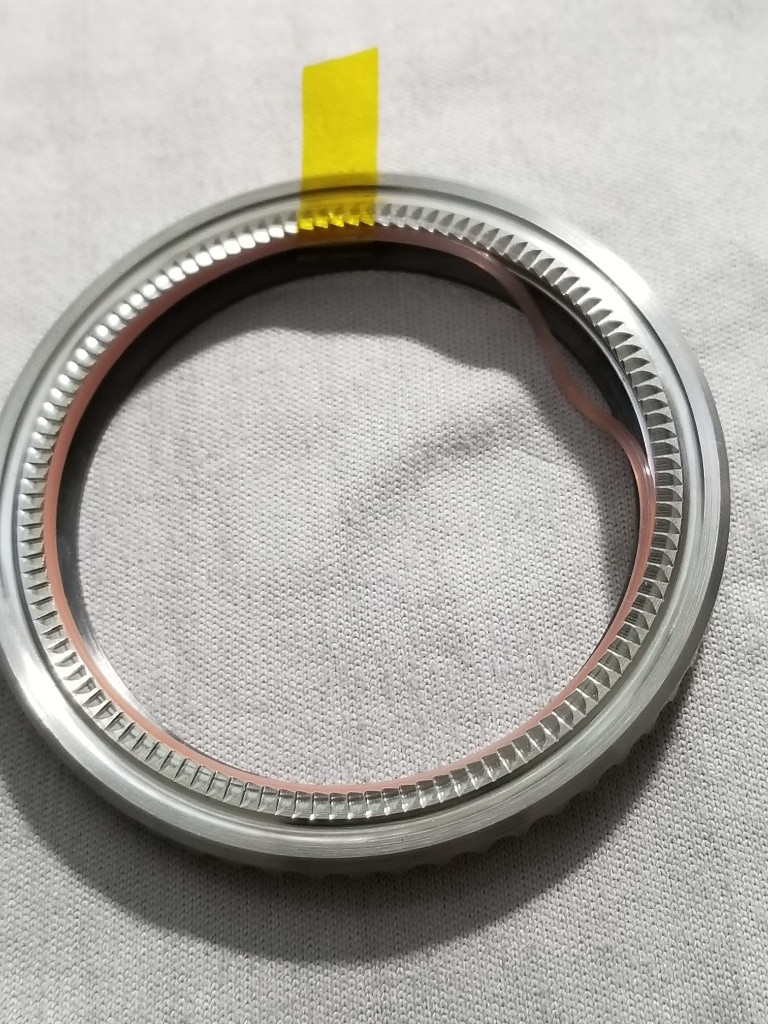
Here I test fitted the Noob insert to the ZZF bezel, both with and without the insert support ring. With the support ring, the insert sat too high and stuck up above the bezel rim. It is possible to just shave the bottom of the support ring by that amount, but let's see if there is another way.
With the support ring removed, the height is perfect.
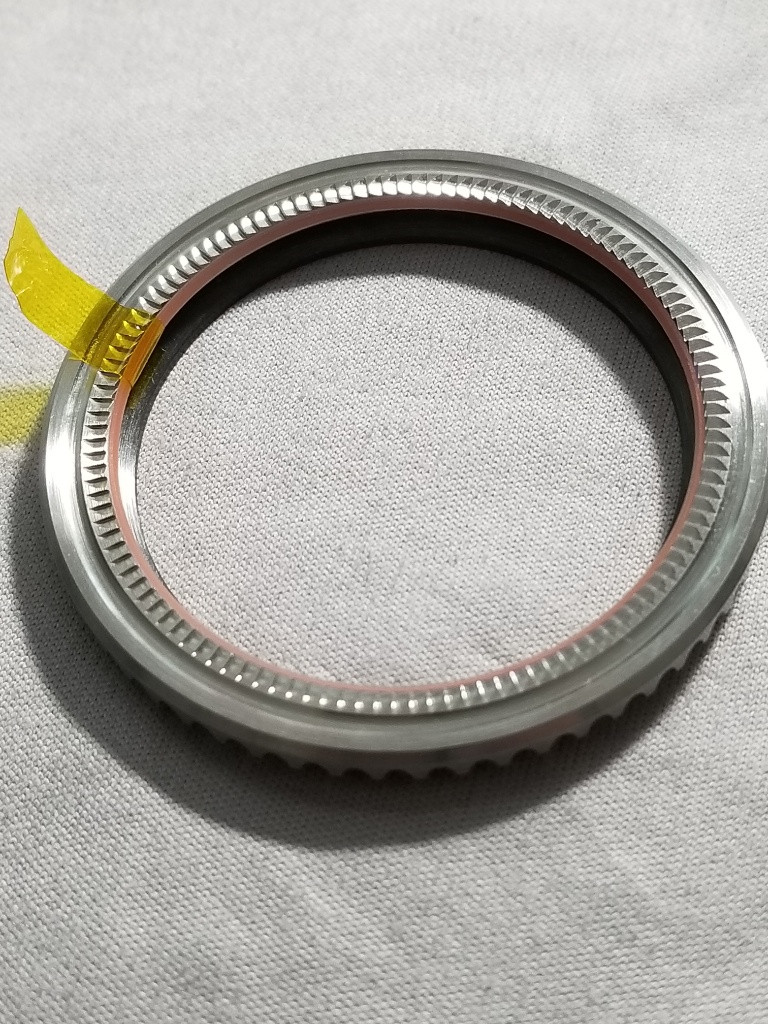
The fit was very snug, almost good enough as is but I always like to add some extra measure of security. You can use tape or various glues. I put several generous blobs of GS Hypo Cement in 4 places at 10, 20, 40 and 50. The hytrel ring was removed so it wouldn't get glue on it. Before gluing, I tested the insert alignment in the bezel by putting it on the case without the hytrel ring installed but with the springs and balls and click in place. That way I could tell it would line up with 12 o’clock and not be off half a click.
GS Hypo Cement is messy and leaves stringers but the good thing is that it cleans up easily and completely after drying quickly. And it is very strong so I’m not worried about the insert coming out.
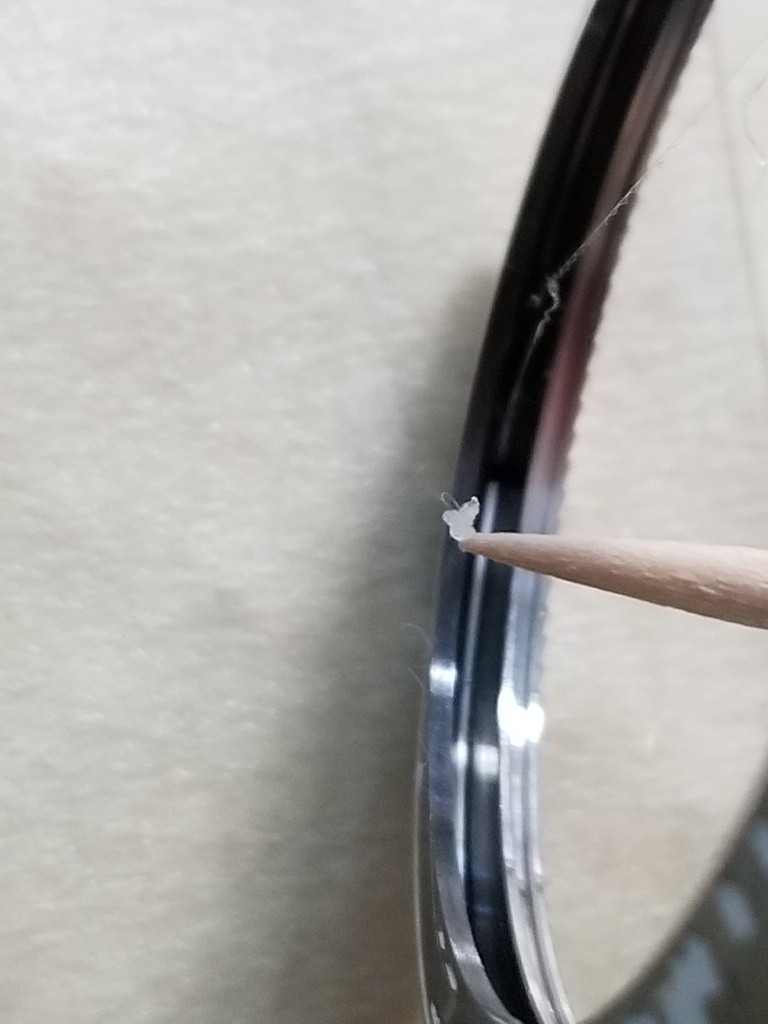
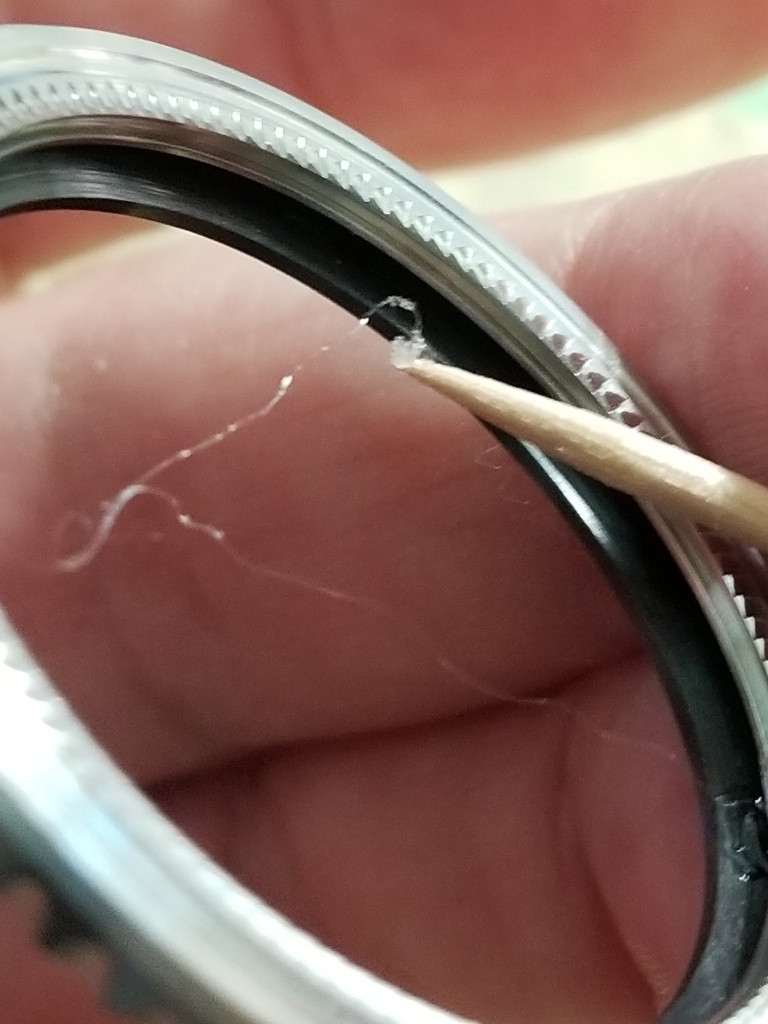
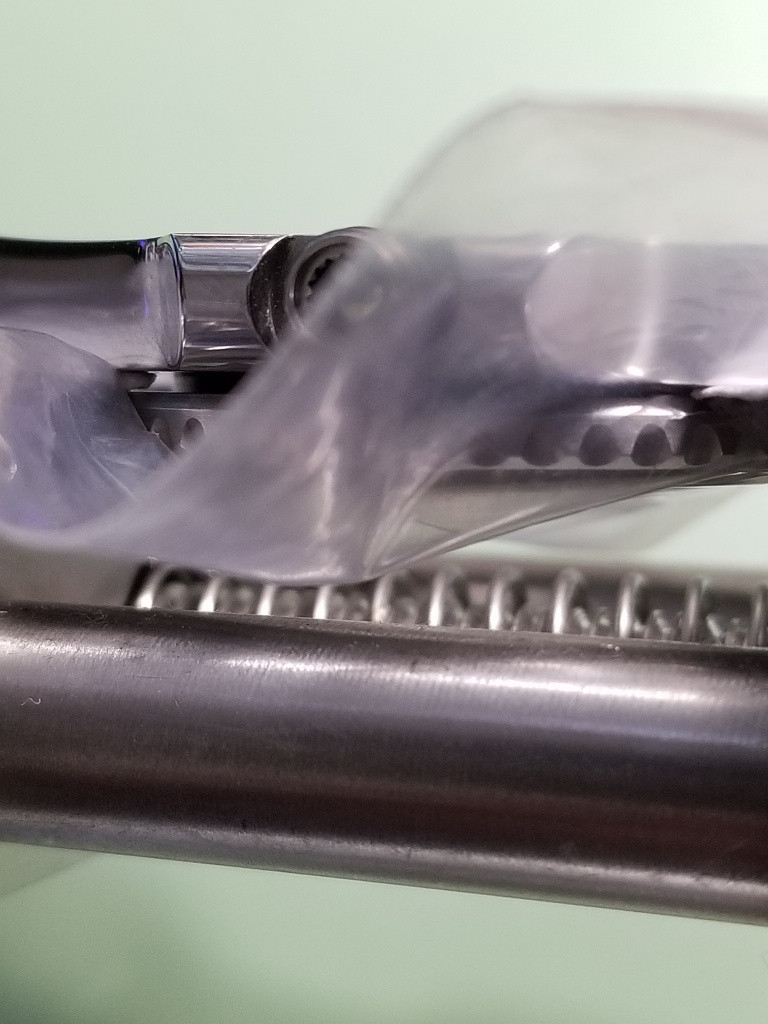
When putting the pretty pink (wtf) hytrel ring back, often they can kink up and seem to be too big. Taping a section down helps, then just massage it into the groove with a toothpick or peg wood. If you absolutely can’t get it to fit, a tiny section of it can be cut away without compromising functionality. Make sure you get the vertical orientation right, the same way it came out!
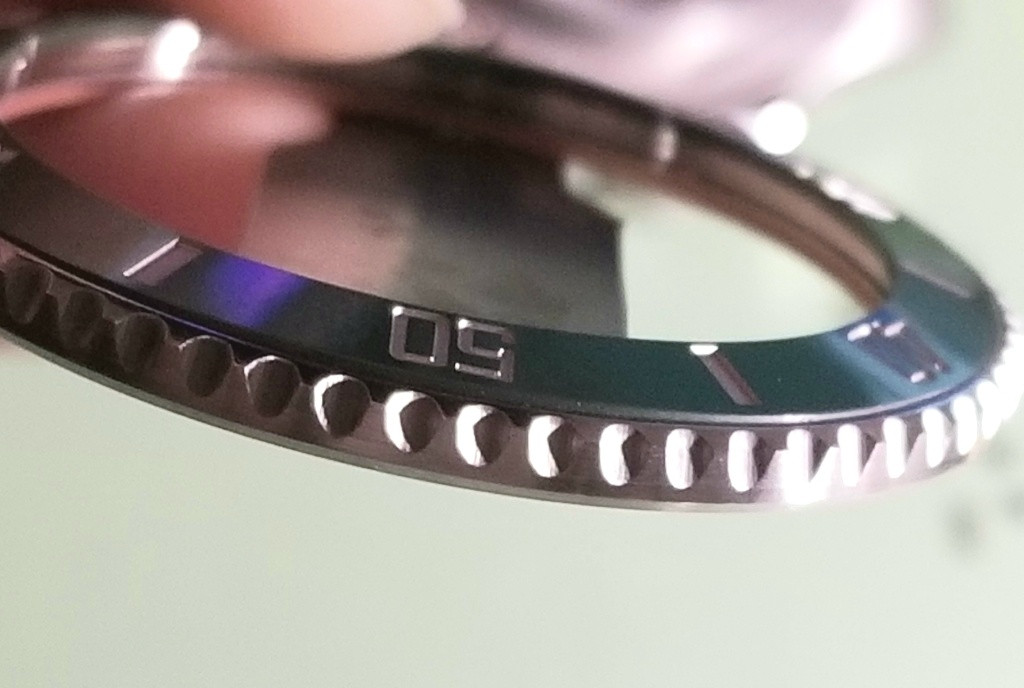
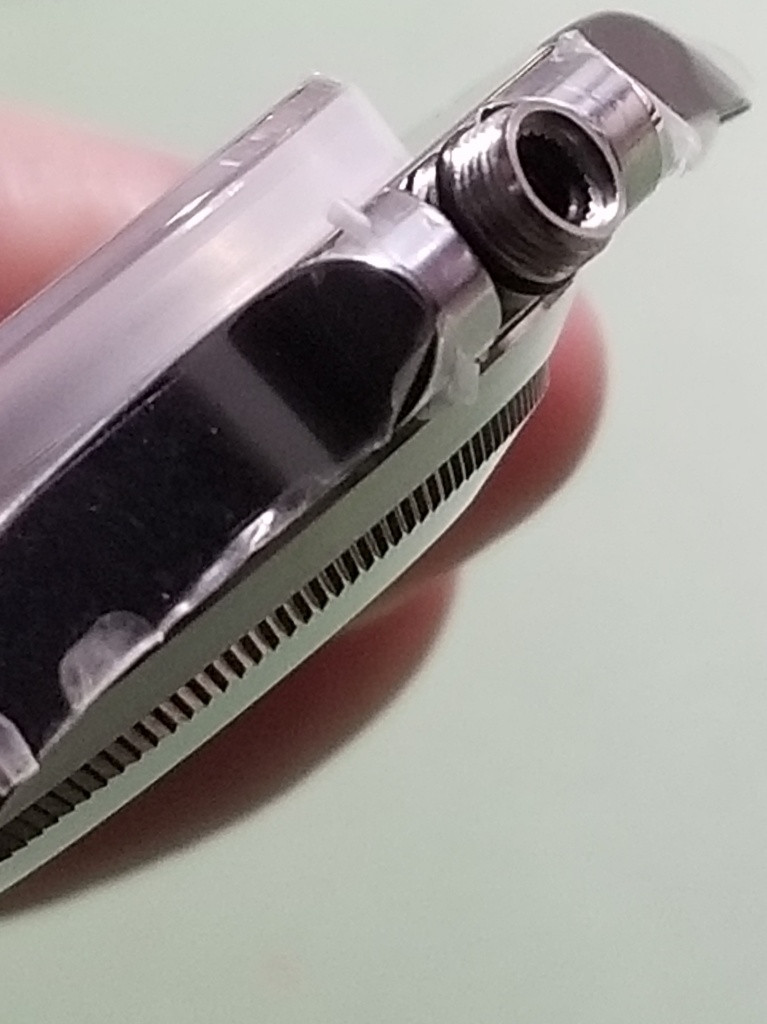
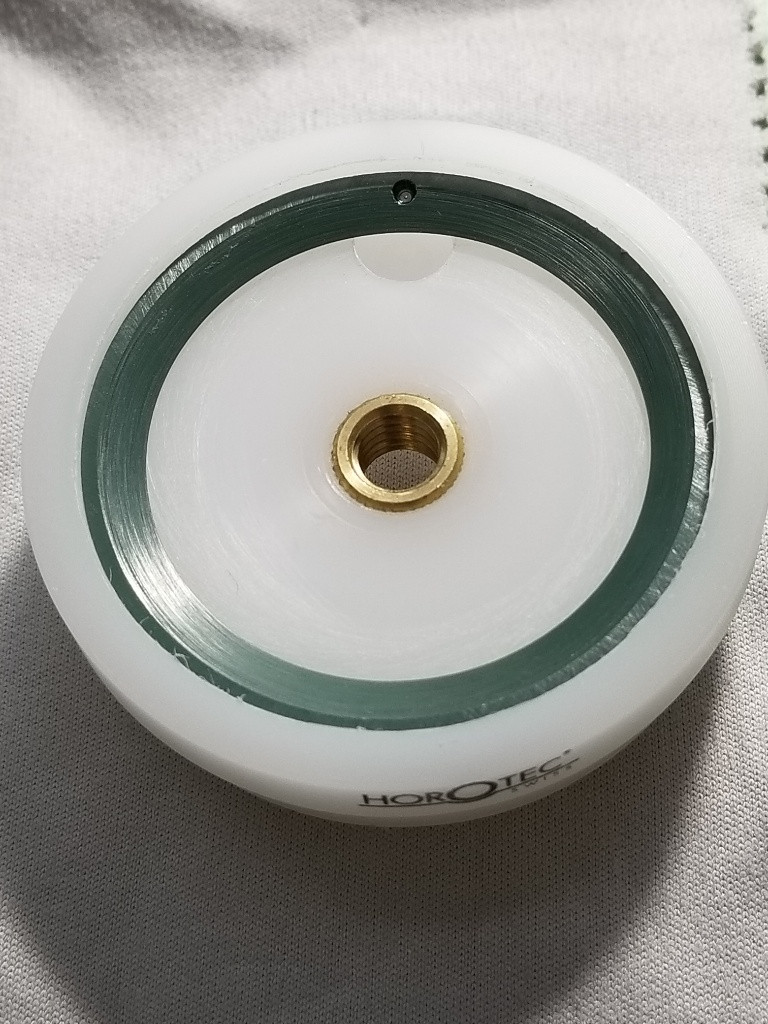
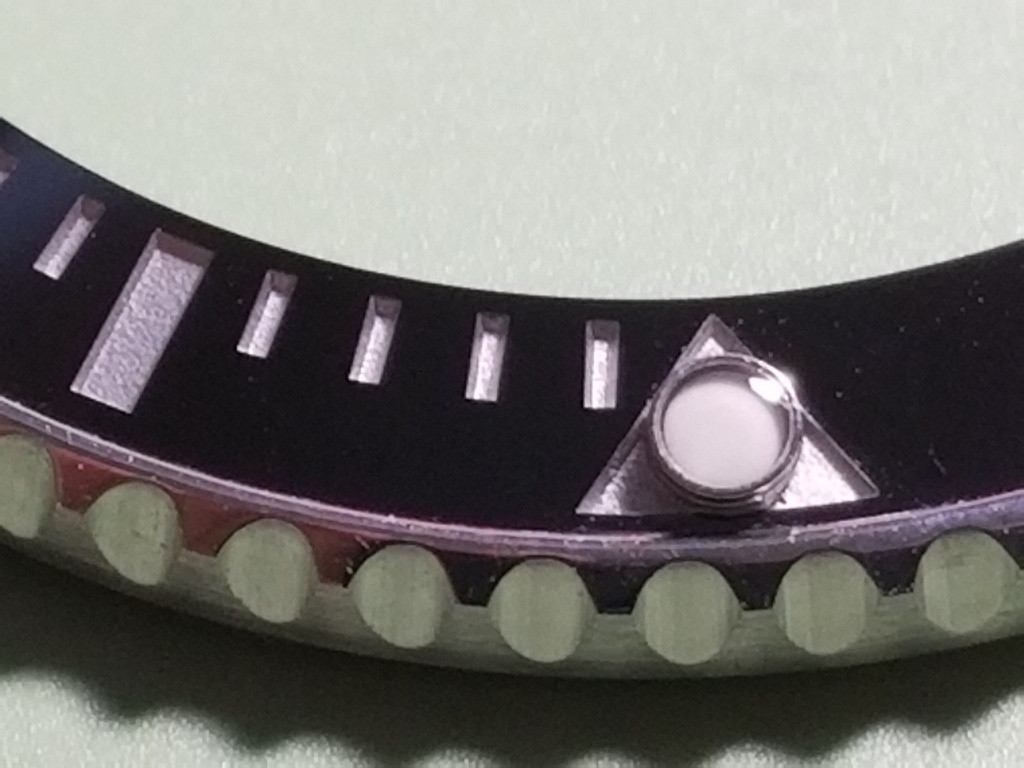
The final step is pressing the bezel home. Since the insert is already installed, we need to use a die that doesn’t press the insert but catches the bezel rim. This is just like the retaining ring die pressing the retaining ring but missing the crystal. You can make one of these from a crystal die by shaving the inner perimeter down with some 220 or 320 grit on a round tool handle. It only takes a couple minutes. Then drill a hole into it for the pearl. It doesn’t even damage the die from its original purpose.
Now comes the money shot. Install the springs and balls and the click. I put a thin coat of silicone grease on the hytrel ring (no CF you don’t need HALF A TUB OF GREASE) then stack your bezel over the retaining ring.
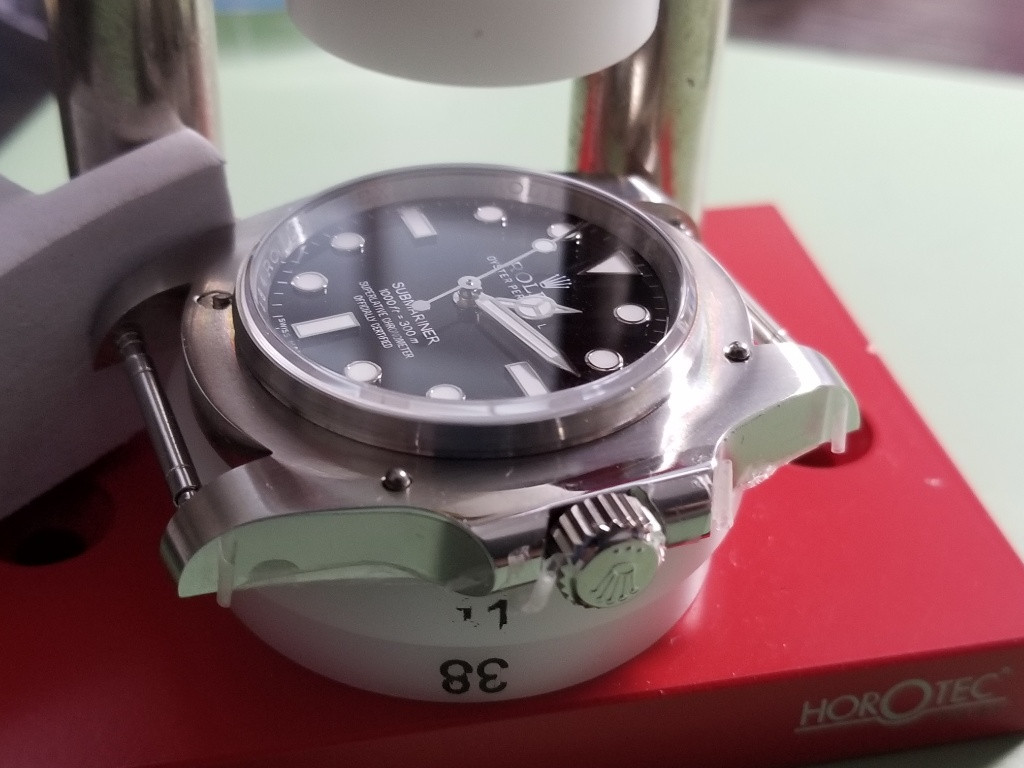
Press it home and Voila! You’re done.
A couple of other scenarios
If you have to reinstall a press fit insert, I usually press the bezel onto the case first. Then align the insert. I use a different die to press the insert back onto the support ring and into the bezel. I also use a different press for this - the lever handle type because it allows more control over the amount of pressure applied. This is a delicate operation that has to done carefully. Heavy handedness can be instantly fatal to your insert.
If you are taping an insert in after pressing a bezel home, first test fit a small section of tape to see if the height is OK, If not add another layer to the section and test again. If I have to use more than 3 layers, I use a different tape or place a glue bed in the well, then use tape on top after it dries. You can put an obstacle across the bottom half of the insert while aligning so the insert doesn’t fall in and stick crooked. That would mean starting over - D’oh!
Oh I almost forgot - I had paint modded the LN insert a couple years ago and though it didn't abolutely have to be re-done I figured what the hell since it only takes a few minutes to Wax ON, Wax OFF.
Before
Fast flooding
After
Thanks for looking and happy modding!

Most rep 6-digit Sub bezels and crystals can be swapped around or replaced successfully. This post will describe and depict a lot of the steps along the way. There are some basic tools you should have before attempting these tasks, though some improvising can be done.
Tools recommended
Bezel Removal Tool
Strong case knife with a smooth thin blade
Razor blades
Jeweler’s Hammer
Masking tape
Lens cleaner and cloth
Crystal press with crystal dies
A couple of easily modded bezel dies
A retaining ring die - a really important tool, can be made or improvised
So in this tutorial the project goal is to swap the Noob 114060 no date crystal and the LN insert into the ZZF 116610 LV case. The Noob case is engraved 116610 anyway, so no loss there. The Noob insert is taped in and the ZZF insert is press fit, so both types of removals and installs will be covered.
First up is the ZZF bezel, insert, and crystal removal.
I always use a bezel removal tool to start getting a bezel lifted away from the case. Sometimes you can just use a case knife but I like the precision and the equal lifting force of the removal tool. I have put dial protector squares on the tool’s jaws, and use a plastic bag too.
Place the case upside down on the tool and make sure the jaws go UNDER the bezel and don’t bite into the sides of it. Turn the screw until a gap is created.
Now you can easily get your case knife under the bezel and pry it up. BE CAREFUL not to lose any springs, balls, or the click. You can put the case inside a zip lock bag to do this step if you feel the need. Also tape up the case beneath the blade so you don’t scar it up.
Store the springs and balls in a safe place.
This case had some reddish lube beneath the bezel which bled onto the crystal gasket and the bezel gasket (the hytrel ring). Go figure. No need to take the hytrel ring out yet, but if it comes out make certain you observe its vertical orientation. The ZZF hytrel ring has an outside stairstep with the greater diameter step on top, away from the case. Not all hytrel rings are alike - some have an inside stairstep for example. If the hytrel ring is put back in upside down the bezel will seat into position and usually won’t rotate. Then you have to remove it again, risking damage to parts all over again.
Now we need to get the insert out of the bezel. The ZZF is press fit, so there is no adhesive and there is an extra part under the insert - the insert support ring.
I separate these parts by using using a hobby razor blade. I like these because it distributes pressure over a larger arc of the insert circle with two points of contact instead of one.
https://www.razorbladeco.com/number-17-hobby-blade
I insert the blade underneath the insert support ring, not the insert
Tap it VERY gently with a jeweler’s hammer and the edge will start to pop up.
Keep tapping carefully and it will give way completely. Then separate the support ring.
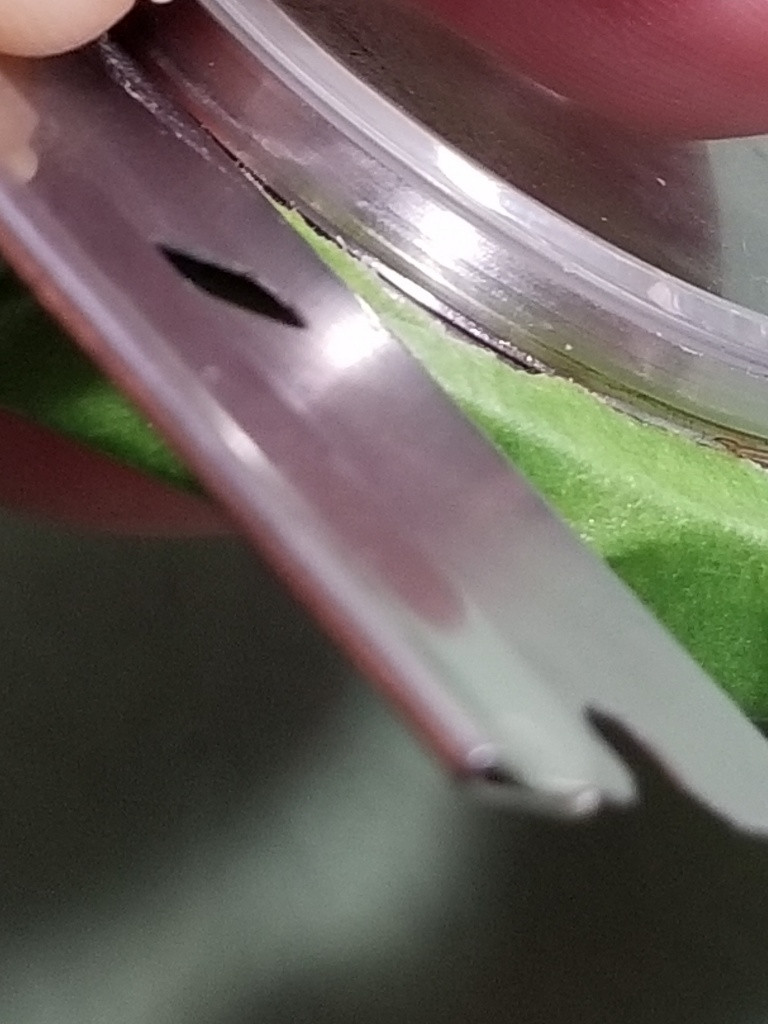
The last disassembly step is to remove the crystal. This requires removing the crystal retaining ring.
Some retaining rings are not on super tight and can be lifted up with just a case knife. More often, they are so tight that creating a gap for the case knife requires using a standard utility razor blade with a protective back on it. So we’ll make a gap with the blade and a hammer, then finish lifting with the case knife. Tape up your case fully for maximum protection.
Often the retaining ring and the crystal will come off together, that’s fine. In fact sometimes they both come off when you remove the bezel, that’s OK too.
Now is when one of the most important tools comes into play - the retaining ring die. Ideally it would be made of metal and needs to have an inside diameter slightly larger than the crystal but small enough to catch the top ledge of the crystal retaining ring. One can be custom made on a lathe, or a crystal die can be trimmed down to the correct size. One of the best readymade ones is a bezel from an old Explorer II rep.
So if the crystal retaining ring and the crystal come off together (or all come off with the bezel), these parts need to be separated. You need to use the crystal press and dies to separate the bezel away, and then use the retaining ring die to separate the retaining ring from the crystal. Usually that can just be done by hand, but use the press if needed.
So now all the ZZF pieces should be separated.
The Noob gets disassembled in much the same way, the only difference is this Noob insert is double stick taped in and not press fit. First the bezel comes off.
Taped or glued inserts can be removed a few different ways - soaking in soapy water or using a heat gun, etc. I just use a similar technique with the hobby razor blade. This Noob insert doesn’t have an insert support ring so the blade goes directly under the insert.
Apply pressure until it starts to pop out
Then you can get a blade in underneath and slice through the tape or glue. Be careful not to scratch up the bezel rim.
Gorilla tape is great for getting the sticky mess off the insert and out of the bezel well. WD-40 works also but is messy.
Remove the retaining ring and crystal and separate them
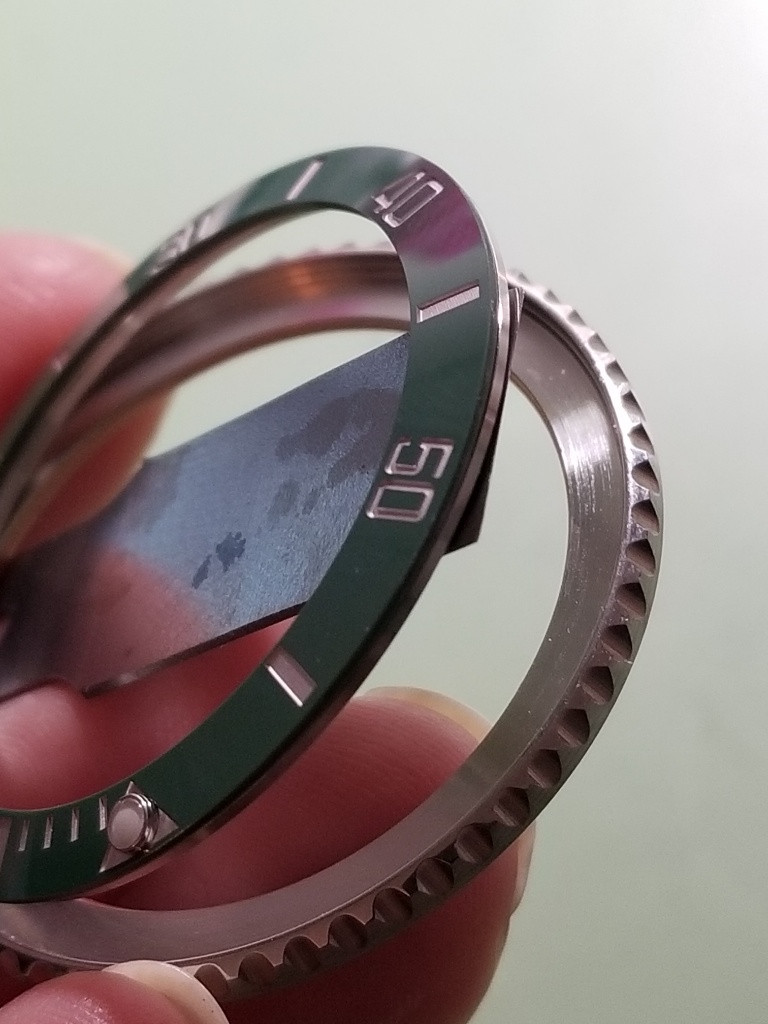
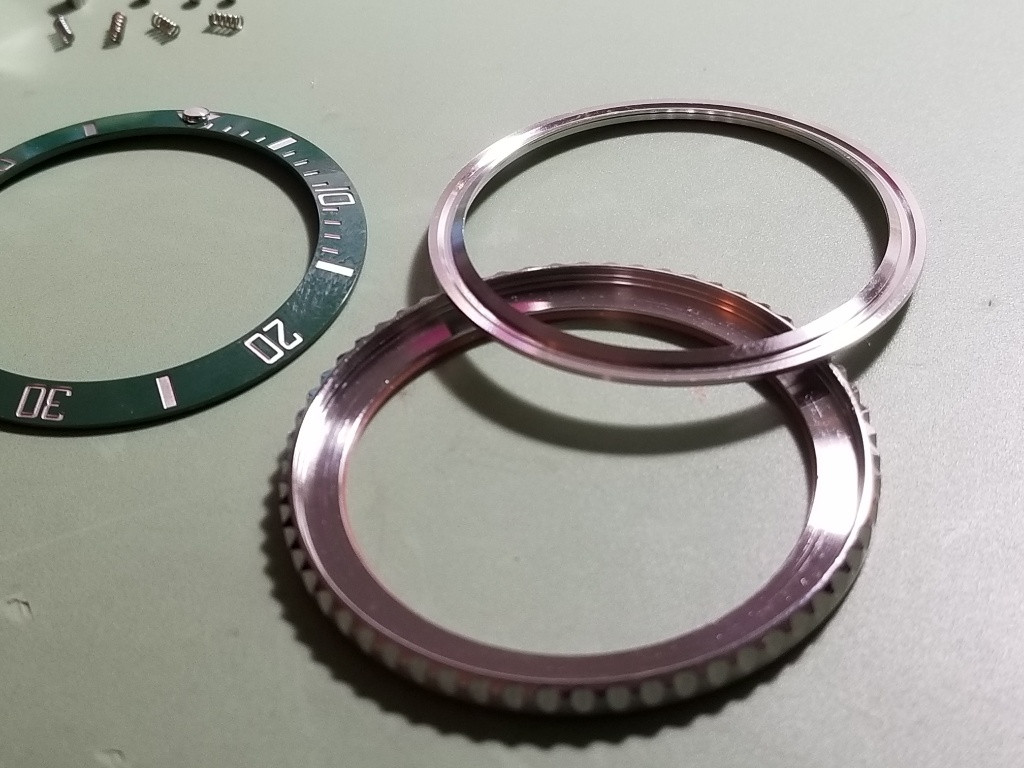
Now that everything is apart we can decide how to reassemble the pieces. I had thought about just swapping the bezels but after examining the retaining rings and the rehauts, they are too different to mix and match them. You can see the Noob retaining ring lip (on the left) is set a lot higher than the ZZF so the bezels are going to have to stay with their paired retaining rings.
And the outsides of the rehauts are shaped differently too so the retaining rings should stay with their original cases.
So now we can put the no date crystal and gasket on the ZZF case.
I use Zeiss clens cleaning wipes to clean crystals.
Next we can press the ZZF retaining ring back onto its original case. Start by setting it level onto the crystal gasket, not lopsided or it will be hard to press on and it can crush the top edge of the gasket.
Put everything into your crystal press, set it all straight and press the retaining ring home.
Alternate retaining ring die setup
Using the Explorer II “die”
Now is a good time to do a WP test since bezels can trap air and confuse the issue.
Before we move on to the insert, I need to mention a few things about crystal gaskets, and dealing with a cyclops if your crystal has one. If you look at a lot of gen 6-digit Subs, you'll see some minor variation in where the crystal sits relative to the insert. In general, it's noticeably lower than on 5-digit Subs though, and appears to be about 1.0mm above the insert.
If there is a cyclops, you need to assess how the date magnification looks. Again, you can find some variation in gens. Look at a bunch and get a feel for what looks right to you. Increasing the gasket height will increase the date mag.
Sometimes on a rep you will have to compromise between getting the correct date mag or the correct crystal height. I place more importance on getting the correct date mag if you can't manage to get both.
So when replacing a crystal on a rep, you need to pay attention to which height gasket you choose. I like to keep about 3 or 4 sizes of gaskets on hand - 2.5, 2.7, 2.85, even 3.0mm. And if there's a cyclops you'll have to put the movement back in the case at least temporarily to check the date mag. The retaining ring can then be pressed on with the movement in or out, as long as you keep the cyclops and the LEC stationary.
After your crystal is installed, we can move on to the insert. For this project the best choice was just to swap the inserts since the bezels are so different. Rolex ceramic inserts (gen and rep) are nearly always the same outer diameter (38.0mm) so it’s usually possible to swap taped in or press fit inserts to non-matching bezels.
Here I test fitted the Noob insert to the ZZF bezel, both with and without the insert support ring. With the support ring, the insert sat too high and stuck up above the bezel rim. It is possible to just shave the bottom of the support ring by that amount, but let's see if there is another way.
With the support ring removed, the height is perfect.
The fit was very snug, almost good enough as is but I always like to add some extra measure of security. You can use tape or various glues. I put several generous blobs of GS Hypo Cement in 4 places at 10, 20, 40 and 50. The hytrel ring was removed so it wouldn't get glue on it. Before gluing, I tested the insert alignment in the bezel by putting it on the case without the hytrel ring installed but with the springs and balls and click in place. That way I could tell it would line up with 12 o’clock and not be off half a click.
GS Hypo Cement is messy and leaves stringers but the good thing is that it cleans up easily and completely after drying quickly. And it is very strong so I’m not worried about the insert coming out.
When putting the pretty pink (wtf) hytrel ring back, often they can kink up and seem to be too big. Taping a section down helps, then just massage it into the groove with a toothpick or peg wood. If you absolutely can’t get it to fit, a tiny section of it can be cut away without compromising functionality. Make sure you get the vertical orientation right, the same way it came out!
The final step is pressing the bezel home. Since the insert is already installed, we need to use a die that doesn’t press the insert but catches the bezel rim. This is just like the retaining ring die pressing the retaining ring but missing the crystal. You can make one of these from a crystal die by shaving the inner perimeter down with some 220 or 320 grit on a round tool handle. It only takes a couple minutes. Then drill a hole into it for the pearl. It doesn’t even damage the die from its original purpose.
Now comes the money shot. Install the springs and balls and the click. I put a thin coat of silicone grease on the hytrel ring (no CF you don’t need HALF A TUB OF GREASE) then stack your bezel over the retaining ring.
Press it home and Voila! You’re done.
A couple of other scenarios
If you have to reinstall a press fit insert, I usually press the bezel onto the case first. Then align the insert. I use a different die to press the insert back onto the support ring and into the bezel. I also use a different press for this - the lever handle type because it allows more control over the amount of pressure applied. This is a delicate operation that has to done carefully. Heavy handedness can be instantly fatal to your insert.
If you are taping an insert in after pressing a bezel home, first test fit a small section of tape to see if the height is OK, If not add another layer to the section and test again. If I have to use more than 3 layers, I use a different tape or place a glue bed in the well, then use tape on top after it dries. You can put an obstacle across the bottom half of the insert while aligning so the insert doesn’t fall in and stick crooked. That would mean starting over - D’oh!
Oh I almost forgot - I had paint modded the LN insert a couple years ago and though it didn't abolutely have to be re-done I figured what the hell since it only takes a few minutes to Wax ON, Wax OFF.
Before
Fast flooding
After
Thanks for looking and happy modding!
Last edited:
