- 24/4/13
- 4,115
- 130
- 63
Hi guys ,
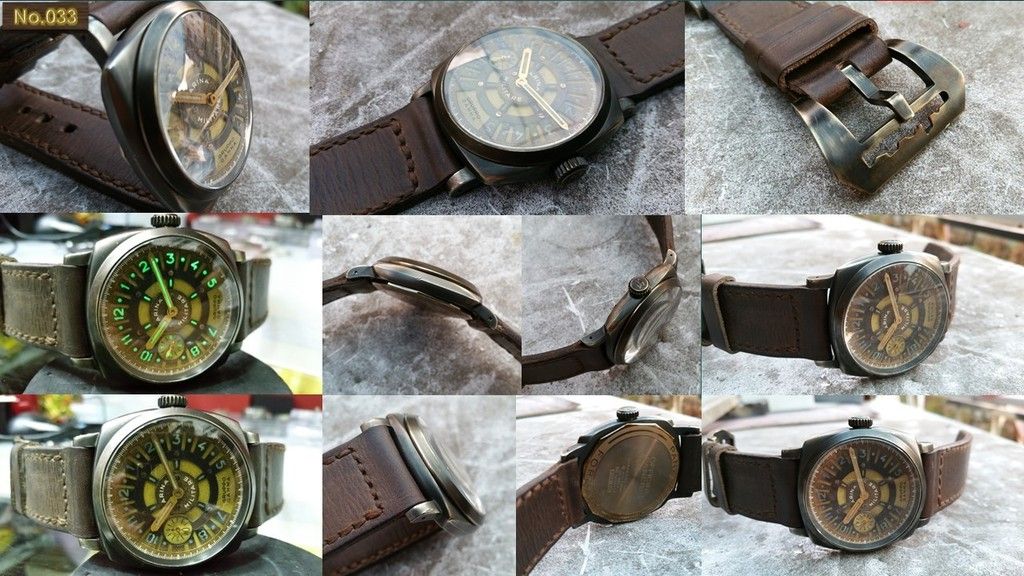
I'm working on a depth gauge 2 piece dial. This is the preparation log of how to make one.
I prepared the layering paints of both face dial and back plate first. ( this could come later, its up to u.. for starters u can do this later as u might scratch the paintwork)
There's total of 14 layers of paintwork, some oven baking dry , stenciling effect and stuffs..
The intriguing part is the screws. I have selected some loose screws from a scrap quartz movement , they are of the right sizes and dimensions.
Back plate screws positioning. I mark down the position , gave it some light tapping and hand drill.

This is just to get the right position after the 2 dials are placed together.
I wanted a slight "floating effect" so the screws got to be slightly longer.
Two dials are placed together, the thickness is definitely different from a single dial.
I use a unwanted 2533 dial to sand off the excess length in these screws.


Look at how the double sided tapes are used to hold them in position


Its not done yet , the screws need to be aged a little, they are too " silver "

All screws prepared , now we need to position them back to the gauge dial.

Go slow on this. I hypo-cement them on first face plate , before the glue dries up , flip it over to get the positioning of the screws.


Leave dry for 3 hours.

To be continue.... unk:
unk:
I'm working on a depth gauge 2 piece dial. This is the preparation log of how to make one.
I prepared the layering paints of both face dial and back plate first. ( this could come later, its up to u.. for starters u can do this later as u might scratch the paintwork)
There's total of 14 layers of paintwork, some oven baking dry , stenciling effect and stuffs..
The intriguing part is the screws. I have selected some loose screws from a scrap quartz movement , they are of the right sizes and dimensions.
Back plate screws positioning. I mark down the position , gave it some light tapping and hand drill.

This is just to get the right position after the 2 dials are placed together.
I wanted a slight "floating effect" so the screws got to be slightly longer.
Two dials are placed together, the thickness is definitely different from a single dial.
I use a unwanted 2533 dial to sand off the excess length in these screws.


Look at how the double sided tapes are used to hold them in position


Its not done yet , the screws need to be aged a little, they are too " silver "

All screws prepared , now we need to position them back to the gauge dial.

Go slow on this. I hypo-cement them on first face plate , before the glue dries up , flip it over to get the positioning of the screws.


Leave dry for 3 hours.

To be continue....


