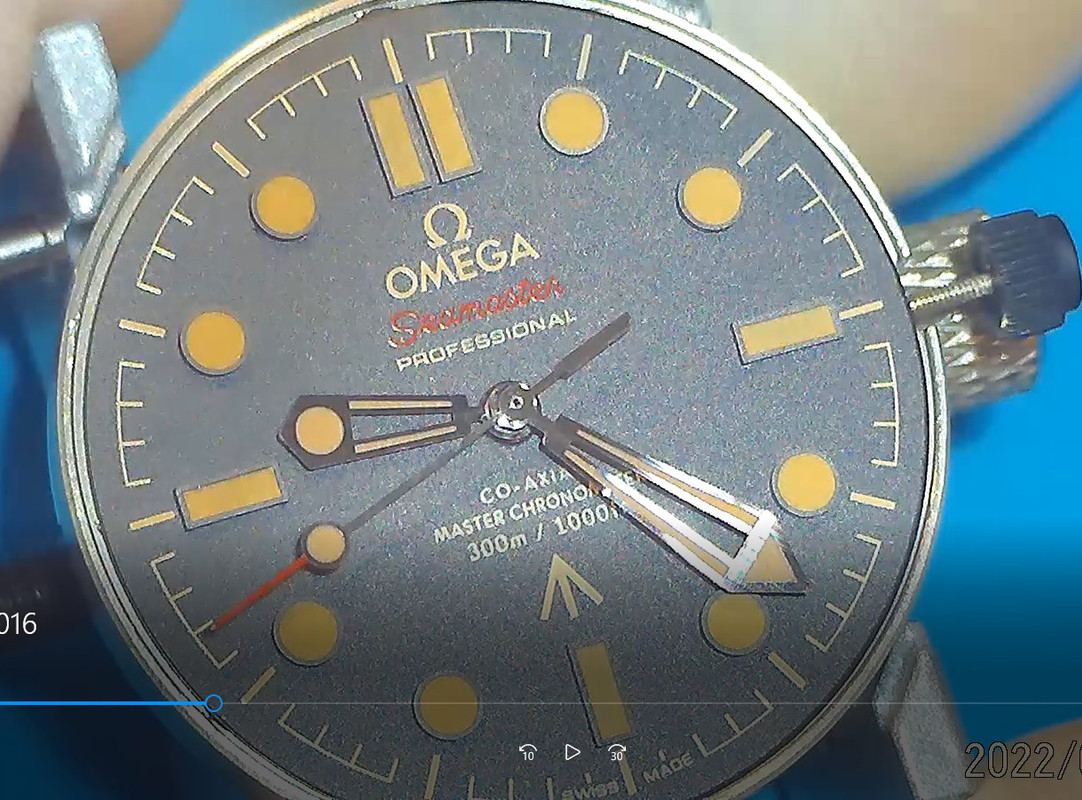
So to recap, I have a VSF NTTD that I recently purchased that started losing time, and I couldn’t regulate it at all. When I pulled it apart it was a pretty bad eta 2824 skeletonized replica. Instead of trying to play with it any more, I decided to order a new movement all together that would be a better movement long term. I ordered the Seagull ST2130 directly from seagull (the ones on ebay are mostly fake) I decided to use Seagull instead of Sellita or ETA mainly due to price… the Seagull ST2130 is almost up to par with the “Top” ETA 2824-2 in finish and function. The Movement dropped right in… with some fuss which I will point out, but took less than 30 min to complete.
There are a few posts about the teardown on the VSF Omegas, so I won’t repeat that here, they are all very close to the same.
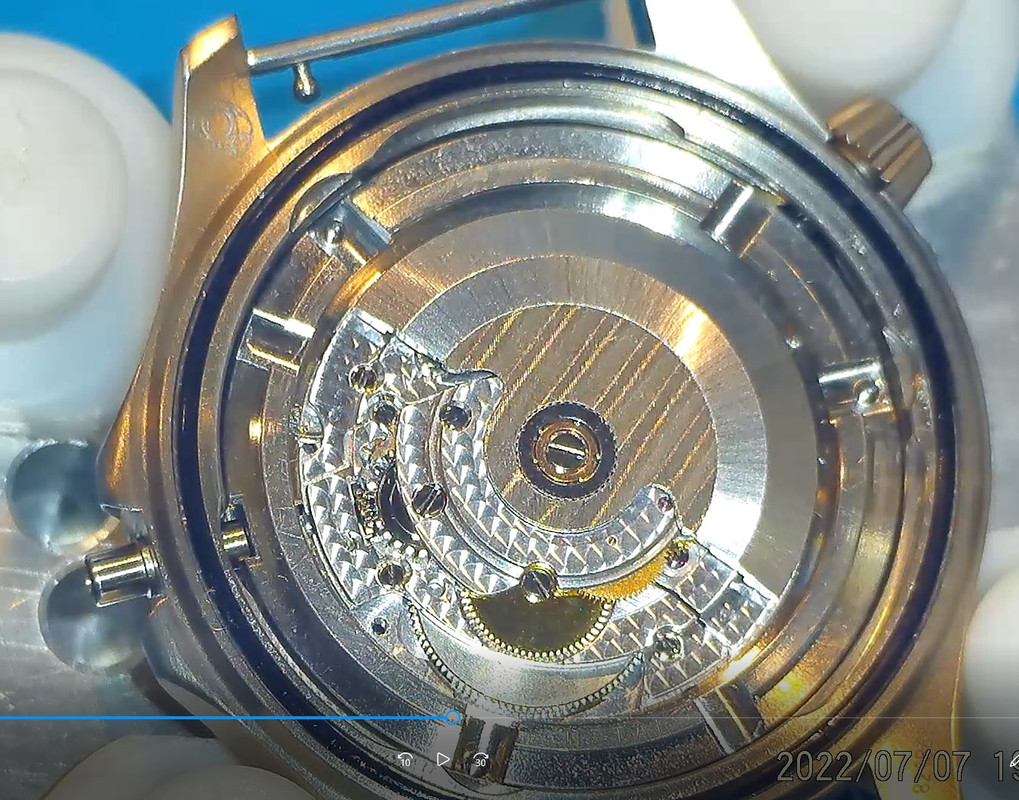
I forgot to turn on the camera so I will start here – This is what the movement ring looks like when the main plate of the old movement is removed. You can see the dial adhesive (this is mainly how the dial holds on, the dial feet aren’t as tight as traditional dial feet). There is also the three holes for the screws that hold the movement into the case ring.

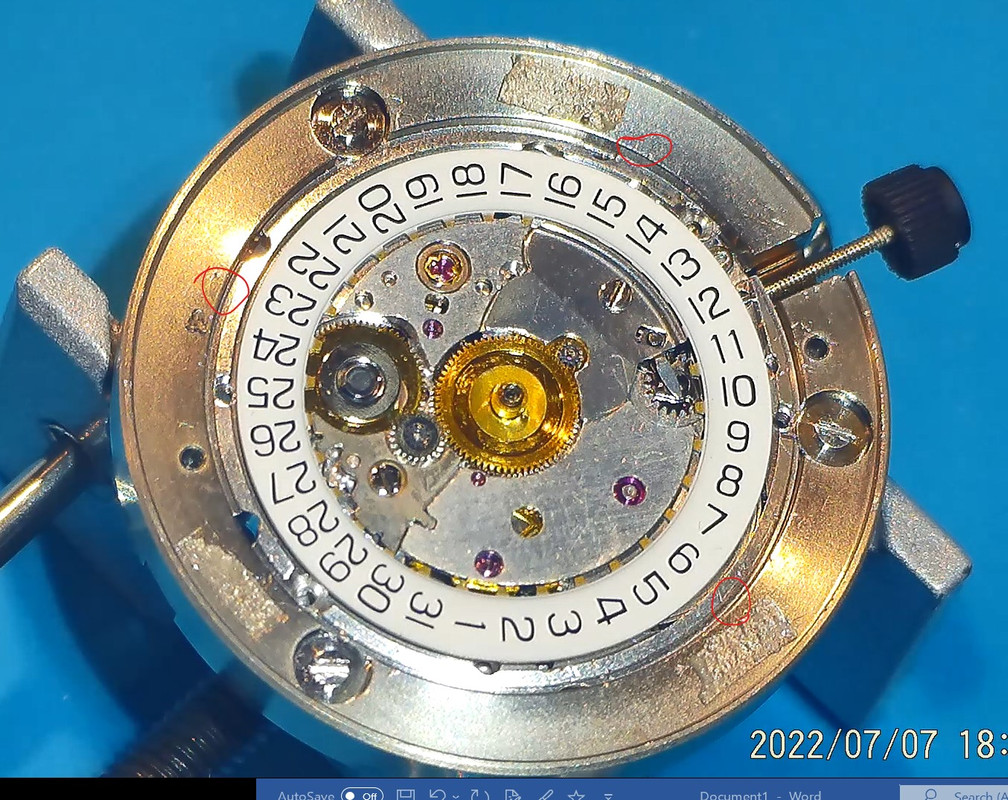
Once the new movement is obtained, you can begin immediately to drop it in. Place the movement into the ring, being sure to apply even pressure in the areas I marked with red circles to level out the movement in the ring. It is pretty tight, so starting as close to level as possible is best. Once fully depressed, THEN use the flat screws to hold the movement in… don’t try to do the leveling with the screws as they will strip the aluminum case ring. Notice I did not remove the calendar works… the case ring is set up for this specifically so it is not needed and since I wasn’t planning on removing the extra click in the keyless works, I decided to keep it all in tact.
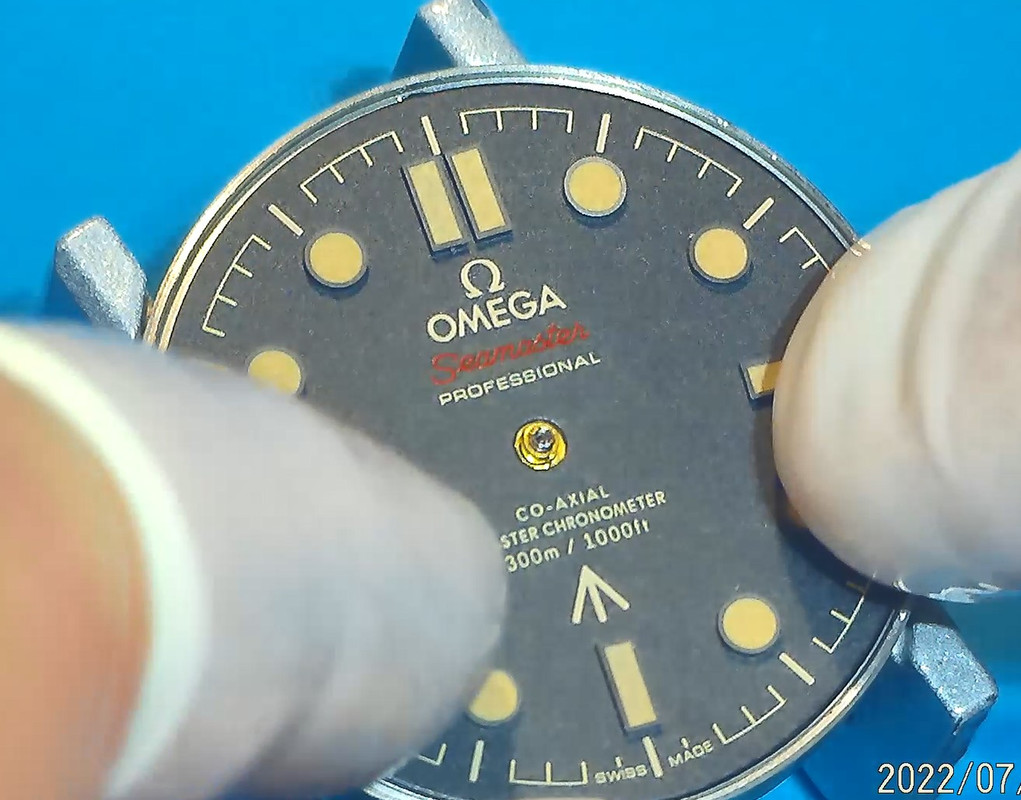
Placing the Dial is very straight forward. Be sure the adhesive is still there – that will help you keep it in place as the dial feet holders in the movement don’t hold it in as well as in traditional watches.
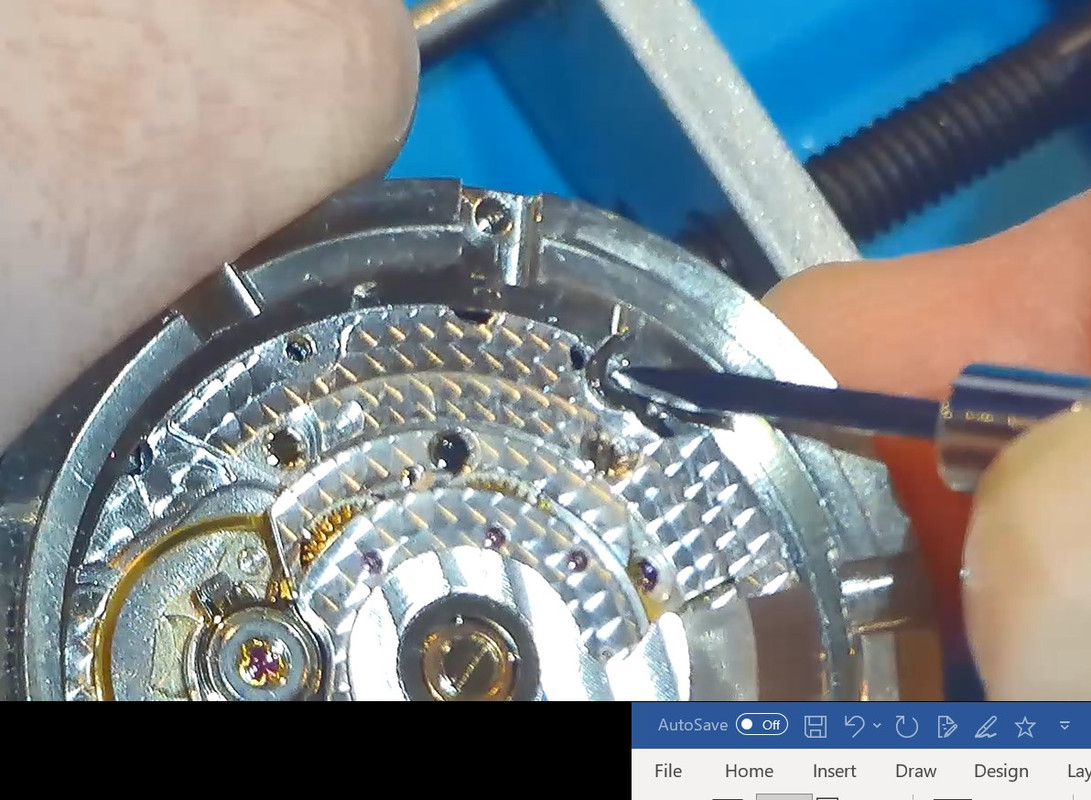
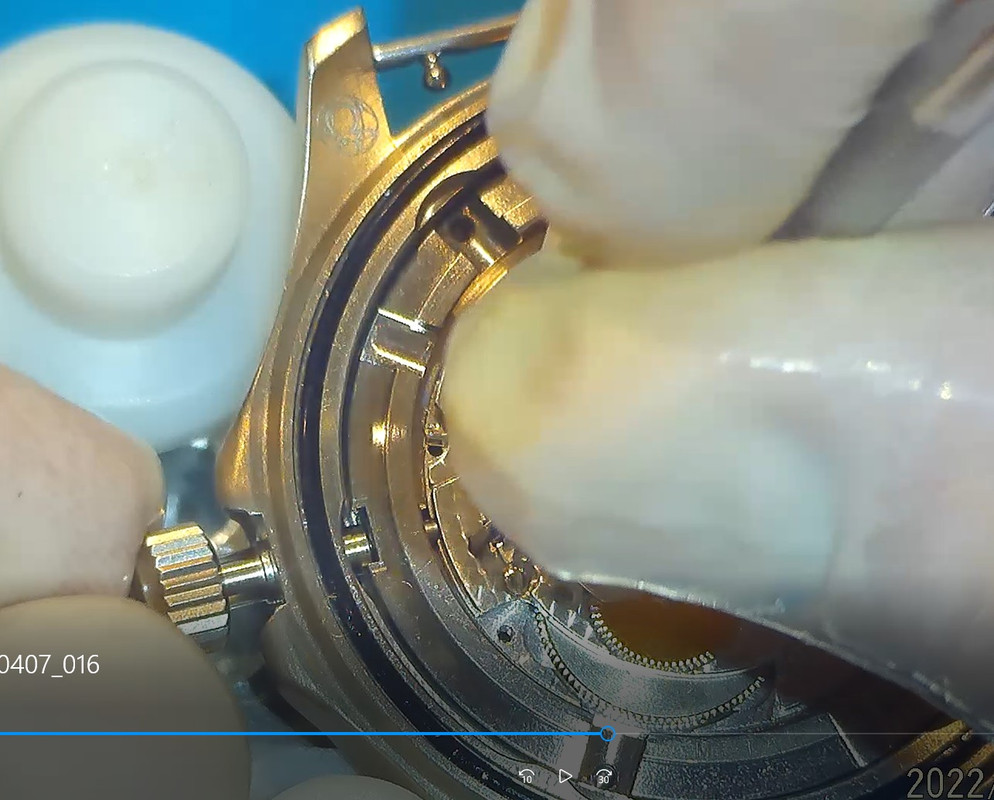
I opened the dial feet holders once I had the movement case ring completely seated, just in case they needed to be open to put the dial on – I don’t think they do… but It’s good practice. Here I am closing them.
 screenshot studio
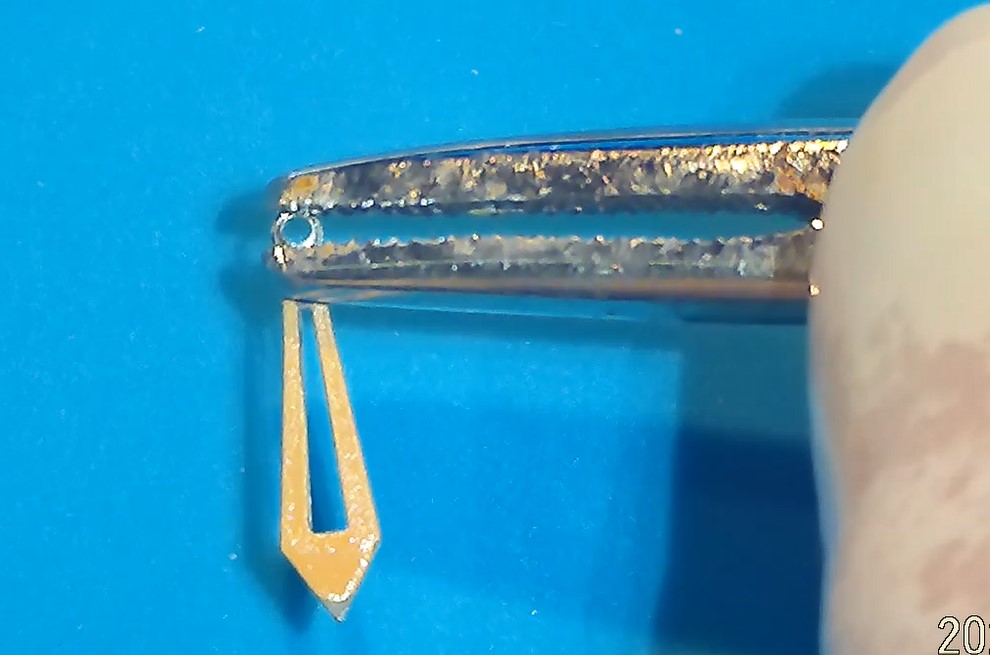
The one different thing about this movement is the minute wheel. The minute hand on the VSF was slightly larger than the barrel on the minute wheel which will look to work initially, but will loosen and fall off after just a few turns. That left me two options – change the minute wheel on the ST2130 with the one from the Asian movement… and risk some slight error in timing of the gears, or crimp the minute hand… which is what I chose to do. Works perfectly – just do so with the utmost care – it only needed a miniscule amount of crimping. I used a surgical needle holder to do this.
 screenshot captor
Once That was done, placing the hands was easy using conventional methods.
Now the movement just drops into the case.
I decided to use the crown and stem from the original Asian movement as it was exactly like the one that came with the ST2130 so I didn’t have to change the crown/oring combo out. This worked perfectly and was a direct swap.
Now, if you don’t care about the fancy stuff that make the movement *look* like the Omega movement, you can skip to placing the movement holders in and call it a day. I almost did this considering that any time you try to put a vanity plate over a movement with an automatic movement, you then need another rotor that will extend through the vanity plate which never works as well as the original. The original rotors always seem to float effortlessly back and forth like a pendulum should, whereas the dressed up rotors tend to be jerky. This is due to the extra strain on the system… but it works nonetheless.
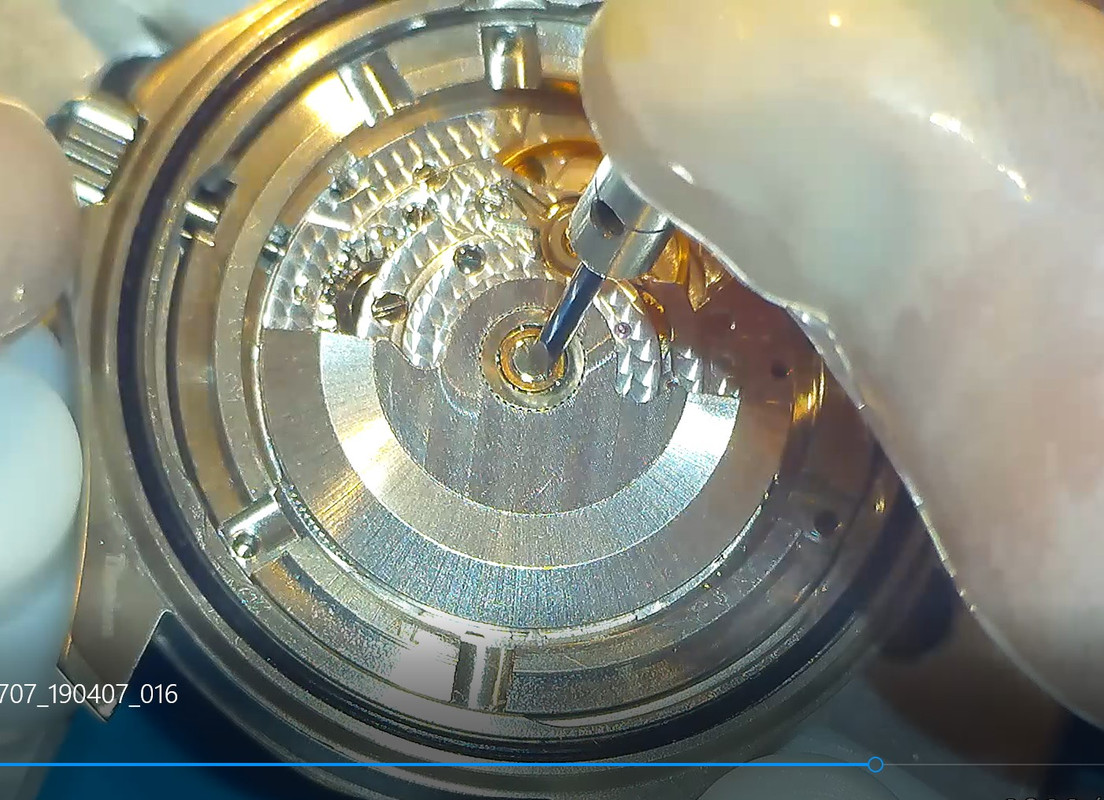
To put the vanity plates on, you have to remove the rotor by unscrewing the center screw.
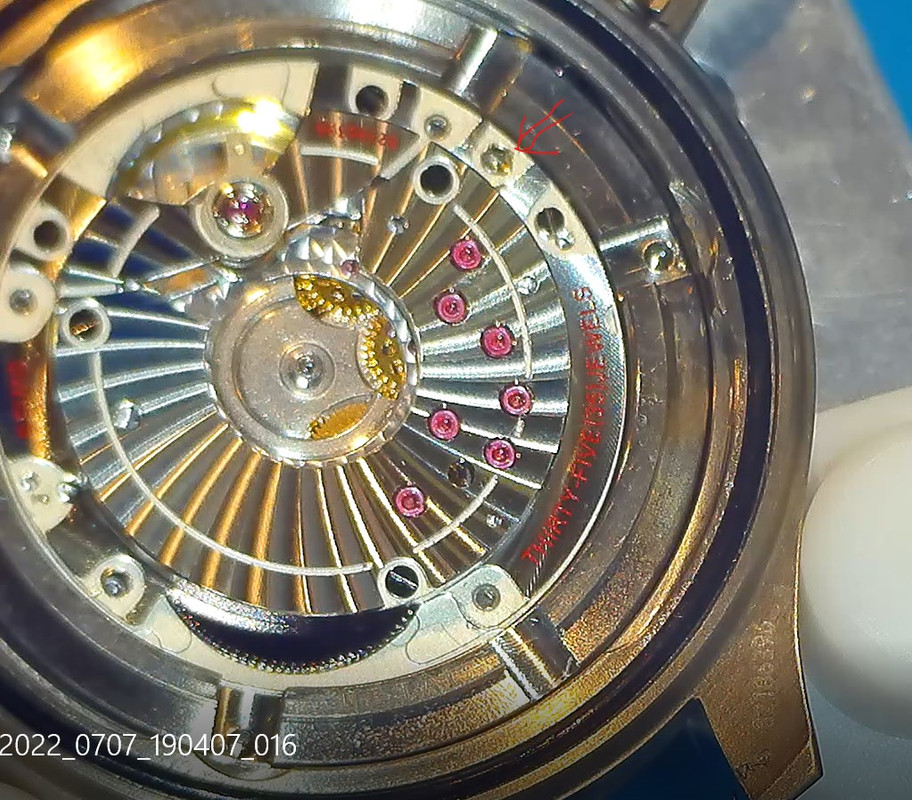
Place the main vanity plate over the movement. Use the Balance wheel ad shock jewel to line things up.
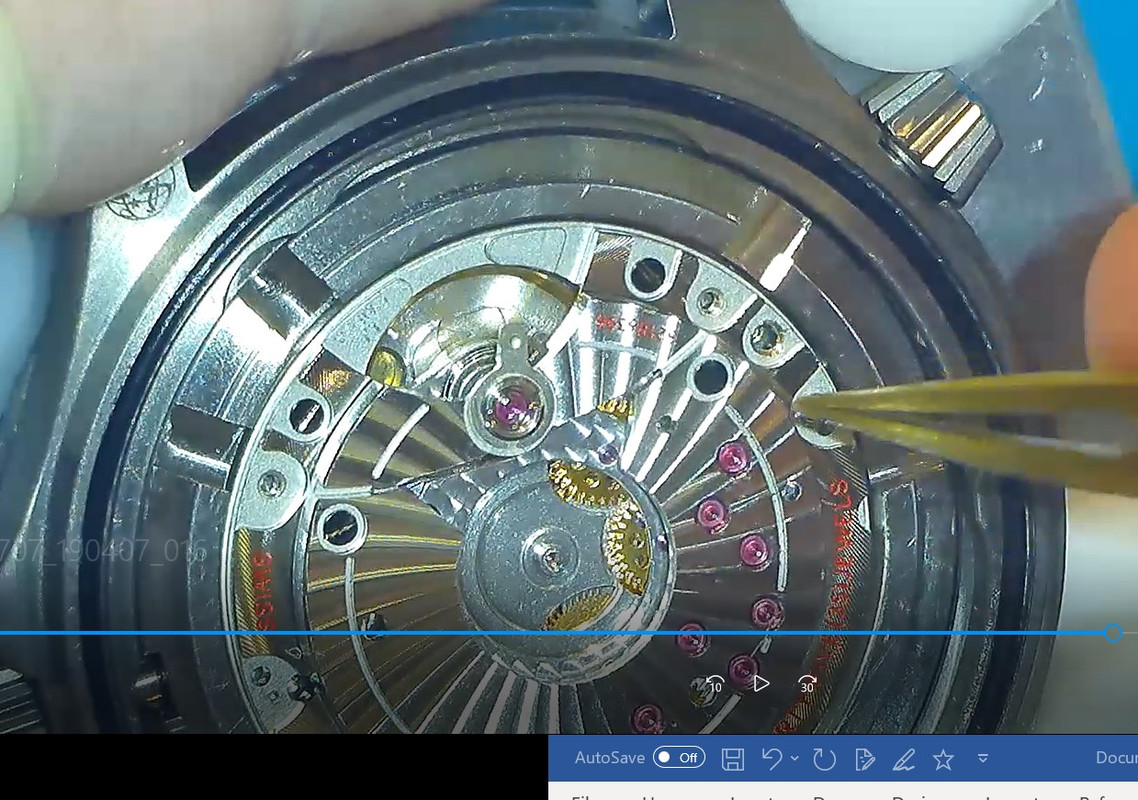
Be sure the screw holes are lined up. You can replace these screws to fasten the vanity plate directly to the movement, although this is unnecessary. Once lined up press firmly and you might hear the vanity plate click in place. This is an important step because if it isn’t fully seated it will bind on the rotor.
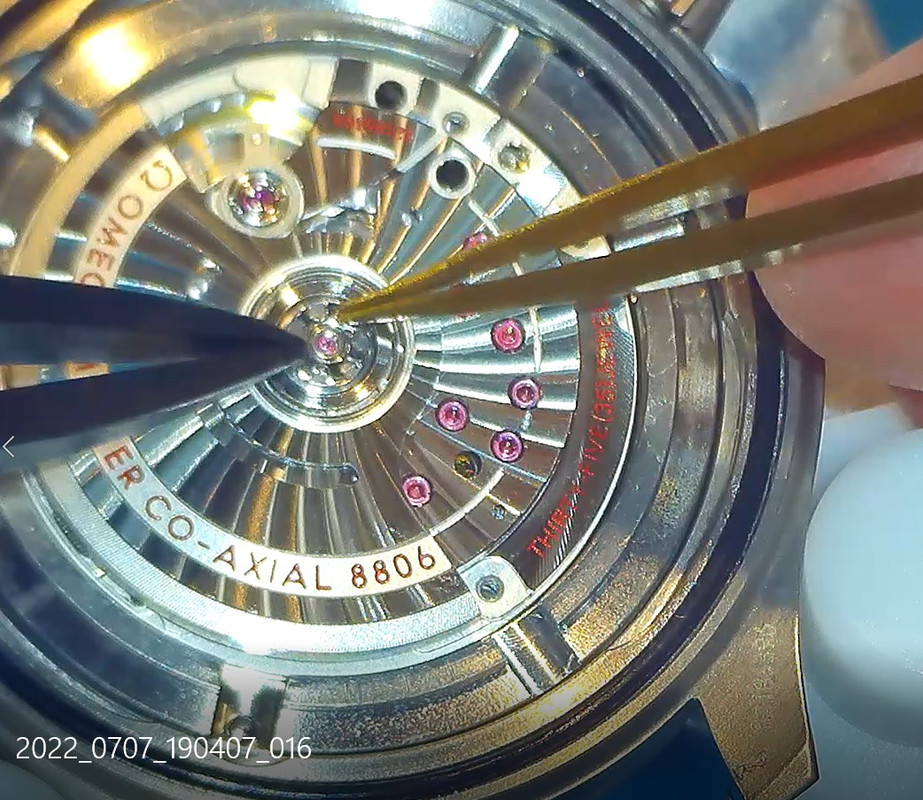
Next place the vanity rotor, bushing and screw and tighten into place. Most of these movements have the screw that has the star pattern glued into place – mine did too but the notches in the star lined up with the notches to tighten the screw, which was perfect. I don’t recommend putting the case holders in yet – test the rotor in place first to be sure it doesn’t bind then put the case clamps on.
 screen cap
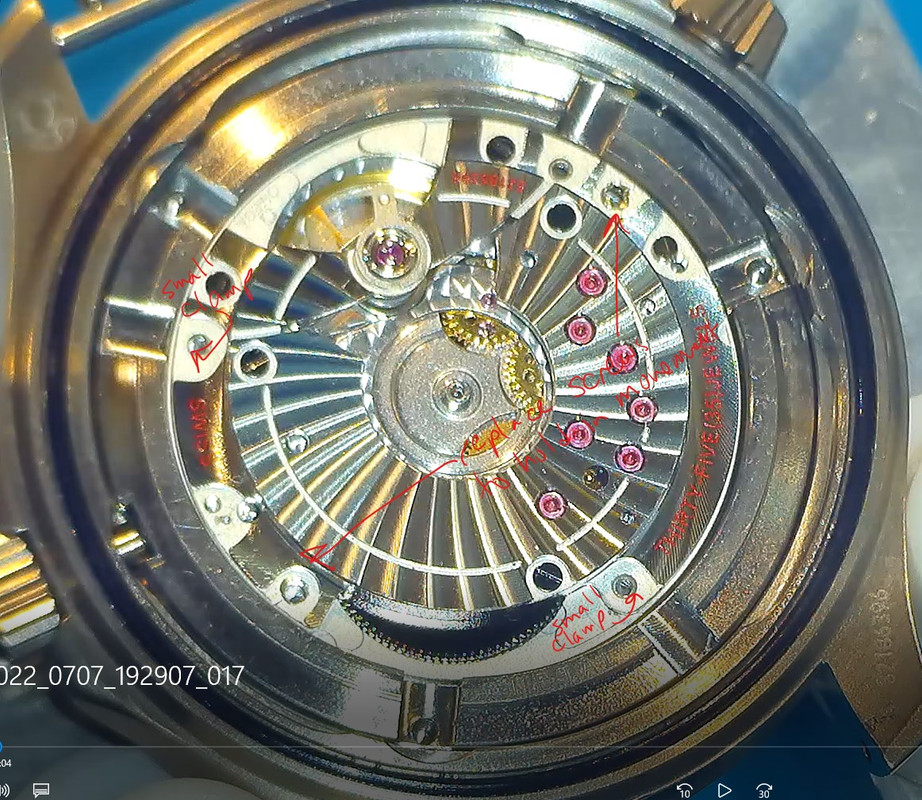
Place the 2 small clamps and 2 screws to fasten vanity plate to movement
 greenshot screen capture
Replace the three case clamps that hold the case ring/movement into the case.

Put the case back on and you are done!

Hope this helps someone. We all love these watches because they look awesome, but sometimes don’t work all that great. Changing the movement is sometimes the easiest and best option.
There are a few posts about the teardown on the VSF Omegas, so I won’t repeat that here, they are all very close to the same.
I forgot to turn on the camera so I will start here – This is what the movement ring looks like when the main plate of the old movement is removed. You can see the dial adhesive (this is mainly how the dial holds on, the dial feet aren’t as tight as traditional dial feet). There is also the three holes for the screws that hold the movement into the case ring.
Once the new movement is obtained, you can begin immediately to drop it in. Place the movement into the ring, being sure to apply even pressure in the areas I marked with red circles to level out the movement in the ring. It is pretty tight, so starting as close to level as possible is best. Once fully depressed, THEN use the flat screws to hold the movement in… don’t try to do the leveling with the screws as they will strip the aluminum case ring. Notice I did not remove the calendar works… the case ring is set up for this specifically so it is not needed and since I wasn’t planning on removing the extra click in the keyless works, I decided to keep it all in tact.
Placing the Dial is very straight forward. Be sure the adhesive is still there – that will help you keep it in place as the dial feet holders in the movement don’t hold it in as well as in traditional watches.
I opened the dial feet holders once I had the movement case ring completely seated, just in case they needed to be open to put the dial on – I don’t think they do… but It’s good practice. Here I am closing them.
screenshot studioThe one different thing about this movement is the minute wheel. The minute hand on the VSF was slightly larger than the barrel on the minute wheel which will look to work initially, but will loosen and fall off after just a few turns. That left me two options – change the minute wheel on the ST2130 with the one from the Asian movement… and risk some slight error in timing of the gears, or crimp the minute hand… which is what I chose to do. Works perfectly – just do so with the utmost care – it only needed a miniscule amount of crimping. I used a surgical needle holder to do this.
screenshot captorOnce That was done, placing the hands was easy using conventional methods.
Now the movement just drops into the case.
I decided to use the crown and stem from the original Asian movement as it was exactly like the one that came with the ST2130 so I didn’t have to change the crown/oring combo out. This worked perfectly and was a direct swap.
Now, if you don’t care about the fancy stuff that make the movement *look* like the Omega movement, you can skip to placing the movement holders in and call it a day. I almost did this considering that any time you try to put a vanity plate over a movement with an automatic movement, you then need another rotor that will extend through the vanity plate which never works as well as the original. The original rotors always seem to float effortlessly back and forth like a pendulum should, whereas the dressed up rotors tend to be jerky. This is due to the extra strain on the system… but it works nonetheless.
To put the vanity plates on, you have to remove the rotor by unscrewing the center screw.
Place the main vanity plate over the movement. Use the Balance wheel ad shock jewel to line things up.
Be sure the screw holes are lined up. You can replace these screws to fasten the vanity plate directly to the movement, although this is unnecessary. Once lined up press firmly and you might hear the vanity plate click in place. This is an important step because if it isn’t fully seated it will bind on the rotor.
Next place the vanity rotor, bushing and screw and tighten into place. Most of these movements have the screw that has the star pattern glued into place – mine did too but the notches in the star lined up with the notches to tighten the screw, which was perfect. I don’t recommend putting the case holders in yet – test the rotor in place first to be sure it doesn’t bind then put the case clamps on.
screen capPlace the 2 small clamps and 2 screws to fasten vanity plate to movement
greenshot screen captureReplace the three case clamps that hold the case ring/movement into the case.
Put the case back on and you are done!
Hope this helps someone. We all love these watches because they look awesome, but sometimes don’t work all that great. Changing the movement is sometimes the easiest and best option.


