-
Tired of adverts on RWI? - Subscribe by clicking HERE and PMing Trailboss for instructions and they will magically go away!
You are using an out of date browser. It may not display this or other websites correctly.
You should upgrade or use an alternative browser.
You should upgrade or use an alternative browser.
Question on mating a 2824 dial to a 3135 movement
- Thread starter Timmer
- Start date
Yes, I read KJs posting (albeit attaching a 3135 dial to a 2824 movement) - just wanted to confirm it is still best practice. On the 3135, it looks to me that the DW is slightly recessed from the surface of rest of the movement, such that the dial can sit directly on the top of the movement without impeding the function of the DW. Thanks.
- 12/3/18
- 37,543
- 80,259
- 113
Some people use dial dots successfully - they are made for the purpose after all. I don't like them because they can get sticky and messy, they can introduce extra space between a dial and a movement (sunken DW and reduced hand pinion height), but most of all because they can allow dial shifting. This has several potential negative repercussions - dial edges can get scraped up, dial can become un-centered, or rotated which throws everything off - DW in date window, LEC, rehaut crown, hands alignment to markers and indices.
Gluing new feet on can be a little time consuming. Another option with a 2824 dial on a 3135 is to use GS Hypo cement and just glue the dial to the date indicator seating. You have to be careful because GS leaves stringers but it scrapes away cleanly and easily after drying quickly. It's very strong and can be sliced through and cleaned away without issue if the dial needs to come off. I've used this method a few times, it's the same as gluing a dial to a dial spacer on an ETA clone or a DG. You only need about 4 narrow short lines of glue around the date seating plate, about 2mm long and 1mm wide. Stay clear of screw heads, holes, etc and favor the outer edge so glue doesn't spread to the DW when the dial is set on.
Practicing with a junk dial and junk movement will help avoid mistakes on parts you don't want to mess up. GS Hypo doesn't give much time for adjustment so you have to be quick. You can remove the dial screws completely or screw them all the way in for future use.
You can also use slow cure epoxy to accomplish this task, I have resorted to this technique exclusively. I use BSI 30 min clear epoxy and love the stuff. However to glue new dial feet on as shown in my post below, I prefer to use JB Weld epoxy as it holds up better against side shear forces with such a small footprint.
Last edited:
Thanks KJ, following your earlier advice I went out and got some JB Weld. Opted to go with their "ClearWeld" as it sets in 5 minutes and cures in 1 hour.
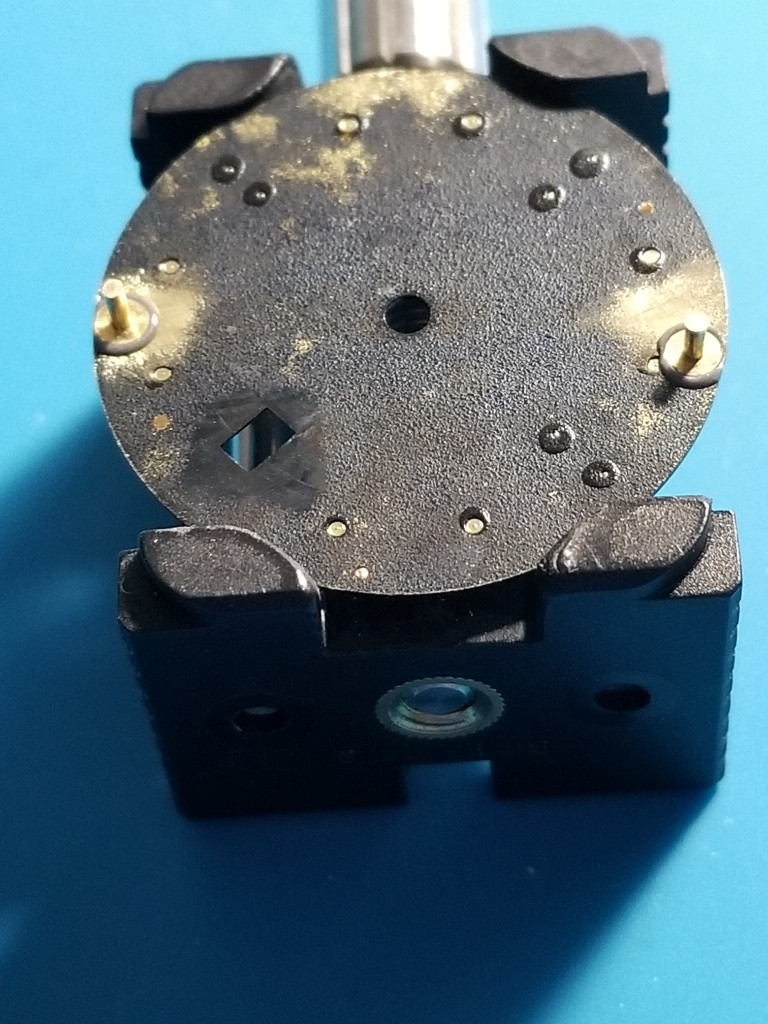
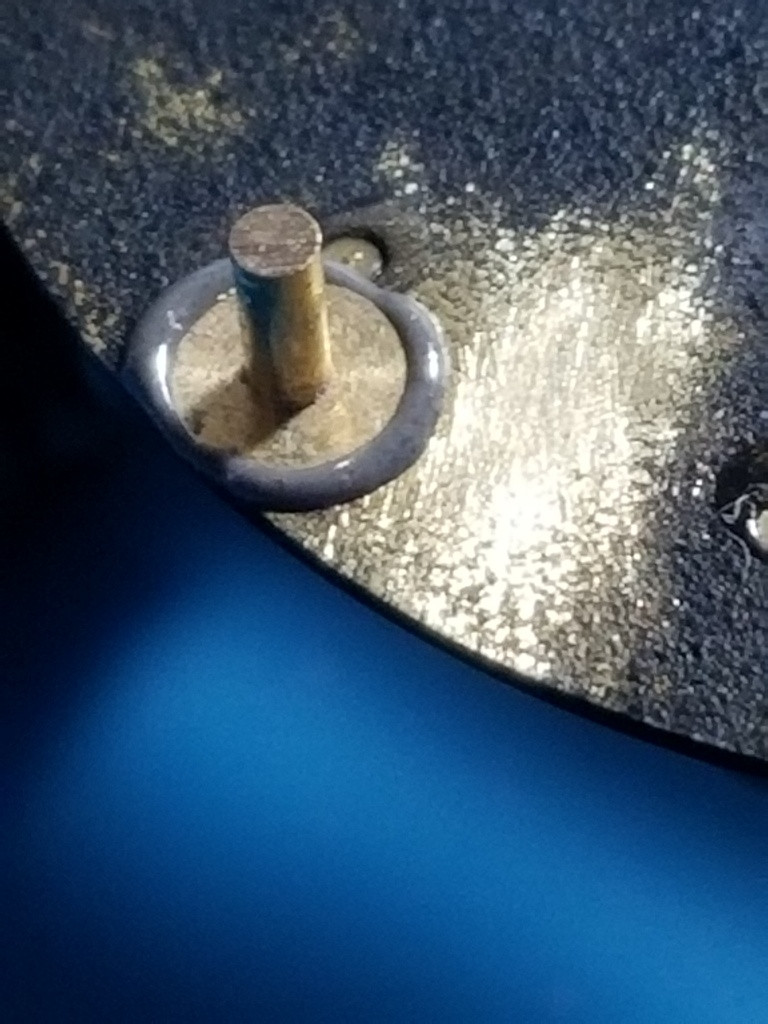
In test fitting the new feet, it looks like they are a little to tall, and I might need to trim a mm or so....or should there be a small gap between the dial and movement?
In test fitting the new feet, it looks like they are a little to tall, and I might need to trim a mm or so....or should there be a small gap between the dial and movement?
- 12/3/18
- 37,543
- 80,259
- 113
Thanks KJ, following your earlier advice I went out and got some JB Weld. Opted to go with their "ClearWeld" as it sets in 5 minutes and cures in 1 hour.
In test fitting the new feet, it looks like they are a little to tall, and I might need to trim a mm or so....or should there be a small gap between the dial and movement?
There should not be a gap to the movement, it will make the DW sunken and decrease the available hands pinion height to mount hands. Clip the feet posts before gluing them so as not to stress the glue joint. I also put the feet in a pin vise and thin the round base by half or more. After the glue has dried I sand down the surrounding glue bead to make it level with the foot base. The goal is to have the dial as flush to the movement as possible.
If you really want to go the extra mile, drilling a small pit in the top of the foot base is useful to act as a glue reservoir. Two pin vices, hand drilled, very easy as brass is soft.


Last edited:

- 12/3/18
- 37,543
- 80,259
- 113
Thanks KJ, following your earlier advice I went out and got some JB Weld. Opted to go with their "ClearWeld" as it sets in 5 minutes and cures in 1 hour.
In test fitting the new feet, it looks like they are a little to tall, and I might need to trim a mm or so....or should there be a small gap between the dial and movement?
Screw the dial screws into the feet so that the feet are held up off the movement just like in your pic for gluing. This prevents the dial from getting glued to the movement. It's a little fiddly to do, but easier if you temporarily place a spacer in between (toothpick, dial protector, etc). Anchor the foot and remove the spacer, then glue.
Last edited:
There should not be a gap to the movement, it will make the DW sunken and decrease the available hands pinion height to mount hands. Clip the feet posts before gluing them so as not to stress the glue joint. I also put the feet in a pin vise and thin the round base by half or more. After the glue has dried I sand down the surrounding glue bead to make it level with the foot base. The goal is to have the dial as flush to the movement as possible.
If you really want to go the extra mile, drilling a small pit in the top of the foot base is useful to act as a glue reservoir. Two pin vices, hand drilled, very easy as brass is soft.
What’s that vice you’ve got the dial held in? I tried searching for it and couldn’t find anything.
- 12/3/18
- 37,543
- 80,259
- 113
It's an ETA movement holder, they are useful for other tasks too.What’s that vice you’ve got the dial held in? I tried searching for it and couldn’t find anything.