Tutorial:
How to completely disassemble your watch.
First off, this is not a patronisation excercise this is to try and help educate the plethora of begginers that we have. Lots of people ask how to do tit bits and that's great that is why we are here to help.
But I think that the really basic stuff is covered here, so if you want to open the case and check out the movement or anything like that just check this thread out and it'll be all good. This is a step by step tutorial on how to completely take your watch apart. The test subject watch was the POS SD that you saw in one of my earlier threads, which was bought for this exact purpose, testing and practicing.
Howeve I will not be held responsible for anyone screwing up their watch lol, but if you do follow this it's REALLY EASY.
I have done this with almost no tools, a very small amount are required.
HERE WE GO:
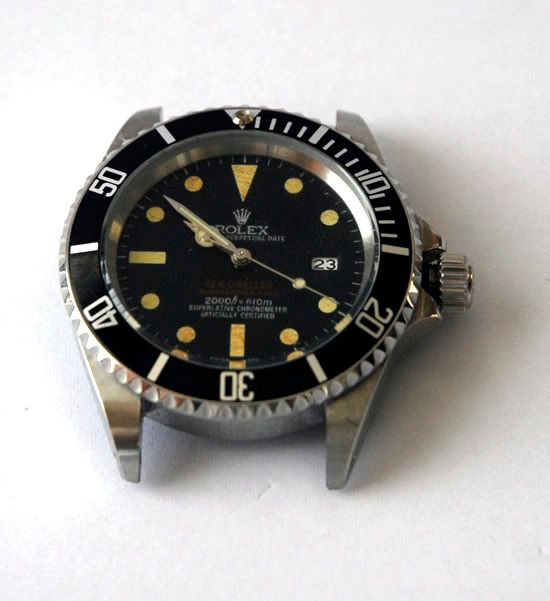
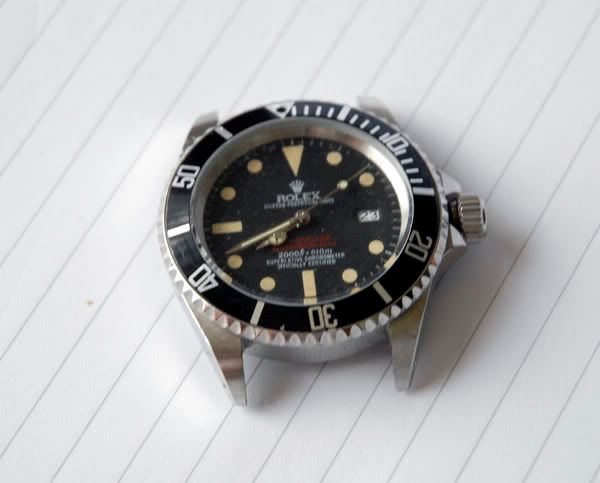
First off a quick shot of the case of the watch, with the bracelet already removed, please note that some vintagising was attempted on the dial prior to this hence some smal scratches and also the tea colour:
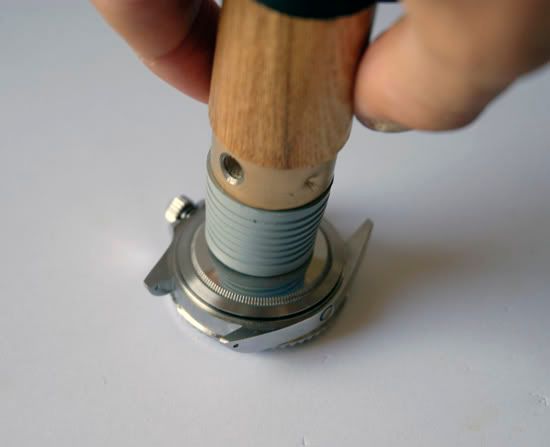
Then in order to remove the caseback, take your caseback remover, or rubber gloves/duck tape, whatever you use and twist, COUNTER clockwise:
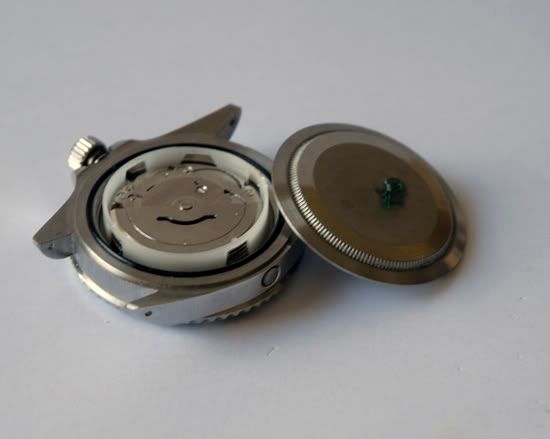
Hey Presto one removed caseback:
Next it's time to remove the crown/stem, this is done by pressing gently on the release, and then again GENTLY pulling out the crown. The release for this asian POS is very small and the release is a different shape from ETA models but general idea is the same.
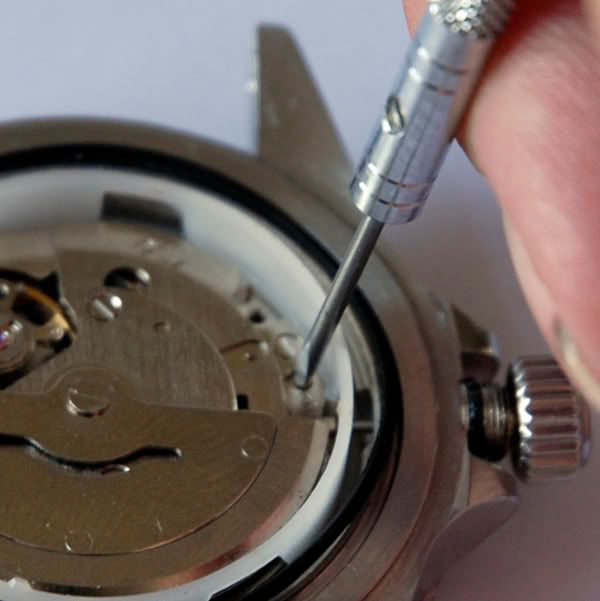
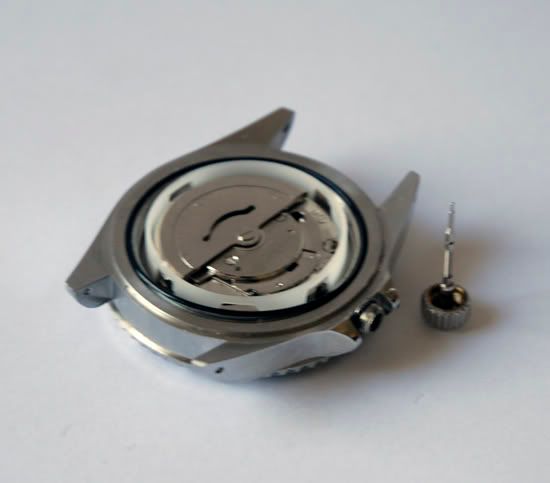
Please take time to notice that this is a POS movement and an ETA would have movement clamp screws instead of this plastic thing. The ETA is easily removed by unscrewing the clamps with a 1.2mm screwdriver, whereas this POS just pops out lol.
Next we have to remove the hands. Take a hand remover or a set of tweezers, set the time to 12 so as to keep the date chage in the correct position, and gently pull, they come off reasonably easily.
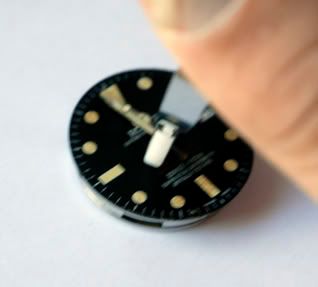
The Dial can be removed from the movement by gently prying the razor blade between the parts, as there is a little glue on it. On ETA models there are no feet so the dial is glued on, a little prying with a blade and it comes off easily. On the Asian efforts there are dial feet that need to be loosened out of place, but that is OVER SIMPLE, it's just a screwdriver and unscrewing the small screws that clamp them in place.
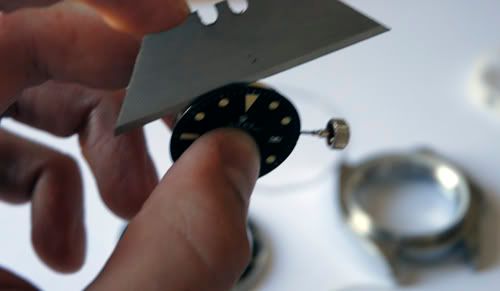
Next it is the turn of the bezel assembley. This can be done at any point but I chose now lol. Slip a razor blade between the case and assembley and simply push down. Off it pops.
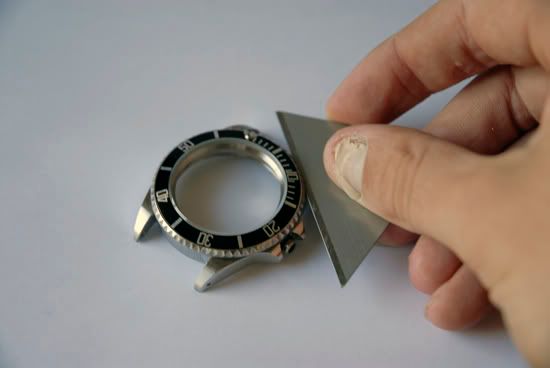
I have taken out the bezel spring and also the O ring but that's immaterial.
Next a VERY techincal point, please note this is not for the handless........remove the crystal, on all non MBW vintage models the trick is to...........
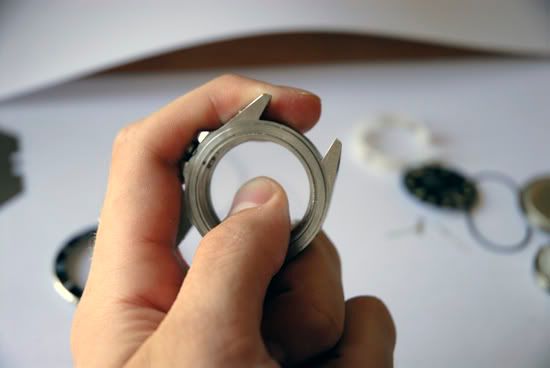
push it with your thumb lol, told you it was technical.
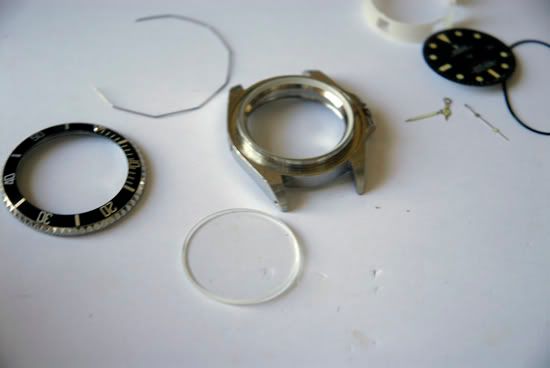
And there you have it a completely dissassembled watch. I have added a couple of pics of all of the parts and also all of the parts and ALL of the tools used.
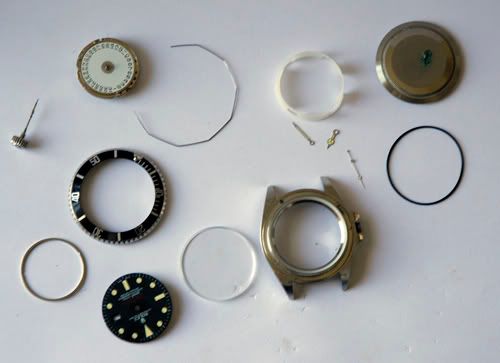
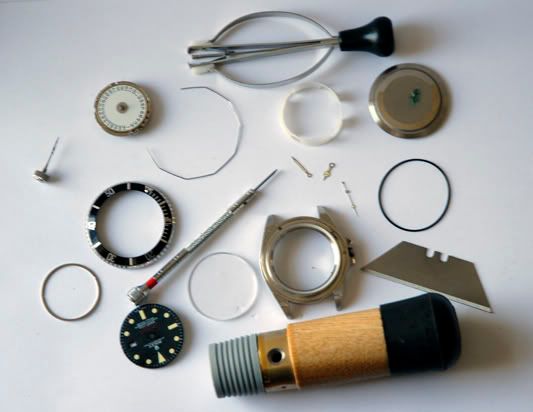
I hope you found this helpfull if not then F*** Y**. It's dead easy just try it honest, if I can do it anyone can. It's a stepping stone in growing the confidence you need to mod your own watch, which believe me is SOOO satisfying, it's a great feeling to know that you have successfully fixe your own watch and not had to send it off to be done.
At the end of the day, it's nice to experiment but please be carefull these things are delicate, and PATIENCE is KEY. Don't rush things or you will ruin what was a nice piece lol.
Enjoy!
Chris
Edge's Guide To Watches - Part II
What The Hell To Do With The Parts!!
The Eagerly Awaited Part II
I recently wrote a tutuorial on how to take apart a rolex. This is the follow up to that now that you guys have a lovely little collection of parts sitting on your desks lol.
You have fair warning this is a PROPER Modem Burner lol.
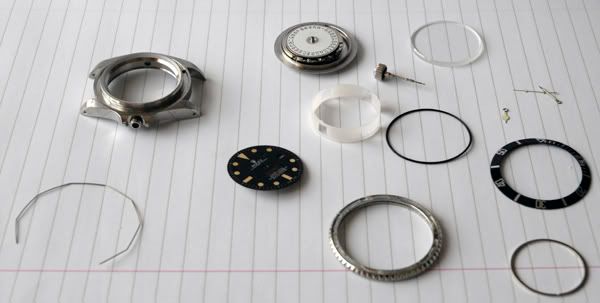
First off a quick shot of the watch parts disassembled from last time.
First things first it's time to put the rystal back on. This one is simple just push it in place, yours may not be as simple but you might have to add a little crystal cement and press it into place.

For me the next step was to reattach the dial, this can be done by alligning the feet with the screws, on the side of the movement, the feet only fit one way so allignment isn't really an issue.
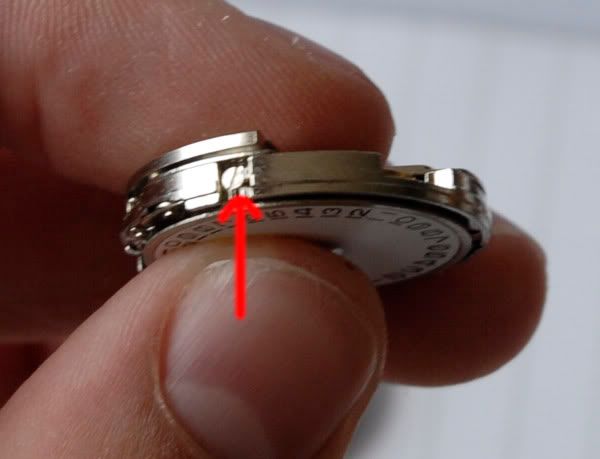
ETA movements don't have feet so allignment is more difficult and the dial will need to be glued back onto the ring and attached back onto the movement.
Next the movement and dial were popped back into the plastic holder, which again differs in ETA models. In the ETa models there is no plastic holder the movement is held in place by movement clamps.
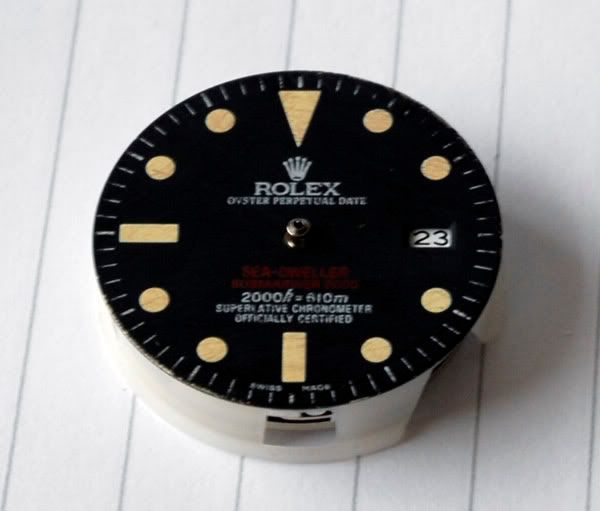
The nest step is the tricky part, well it WAS it's not now. Many of you struggle as I did with hand putting. I have been asked about tips and tricks, and to be honest I had NONE. Until now, I have solved the issue.
I spent an HOUR putting the seconds hand back on my 1680 which was VERY frustrating and time consuming. However the hand putting this tiem took me 10 seconds, "HOW??" I hear you say.......
The Hour and Minute hands are relatively simple to put, they can be reattached with tweezers and patience very simple. They can be pressed GENTLY into place by using the Hand Removal Tool.
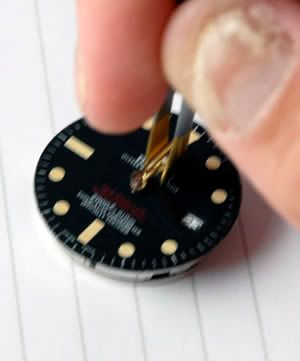
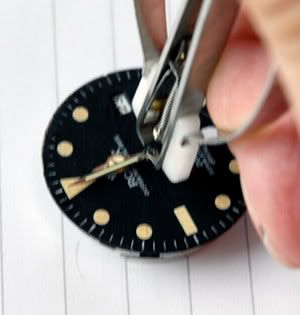
Now to the tricky part.....
- Take a piece of sellotape, fold it twice so that the sticky bit is no longer sticky
- Leave a sticky portion of enough length to get to the round mount in the middle
- Stick the seconds hand to the tape
- Position the seconds hand in the correct place
- Push gently on the round mount
- The tape then comes easily away without damaging the hand and leaves the hand in place.
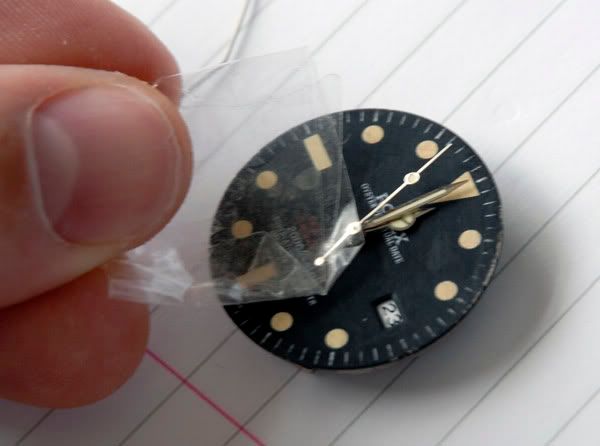
I suggest using sellotape as it is not that sticky so will come away easily and is transparent so one can see the mounting clearly.
EASY as that 10 seconds and it's all back together...WOOHOO!!!!
Thanks Chris you are my HERO!!!!.........I know thank you vey much guys........
Next the reassembled movement/dial can be reentered into the case.
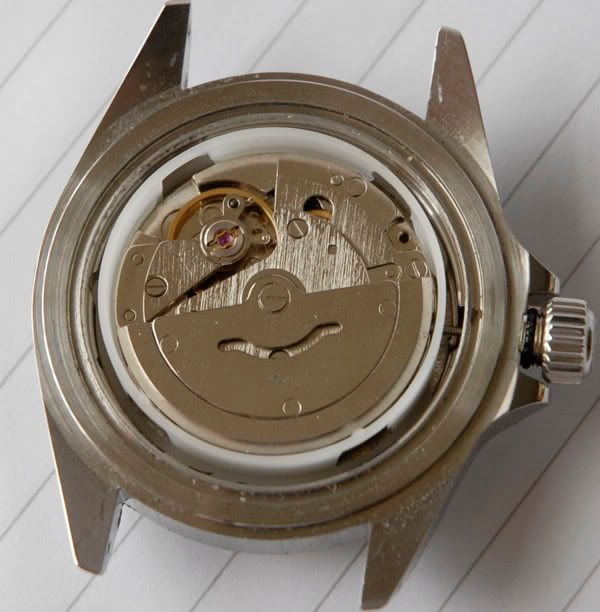
Next comes the O-Ring....DON@T FORGET THE O-RING!!!!.
Take some Silicon Grease....
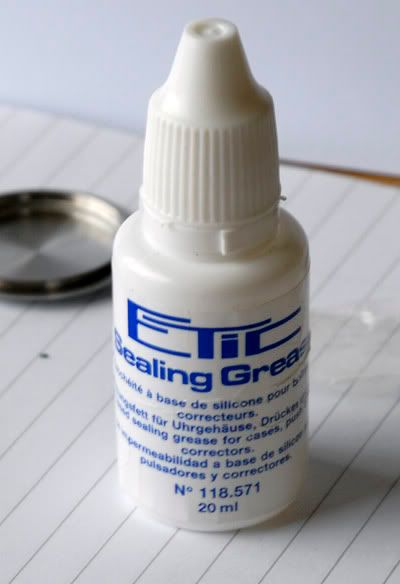
Put some on your fingers and apply to the O-Ring....
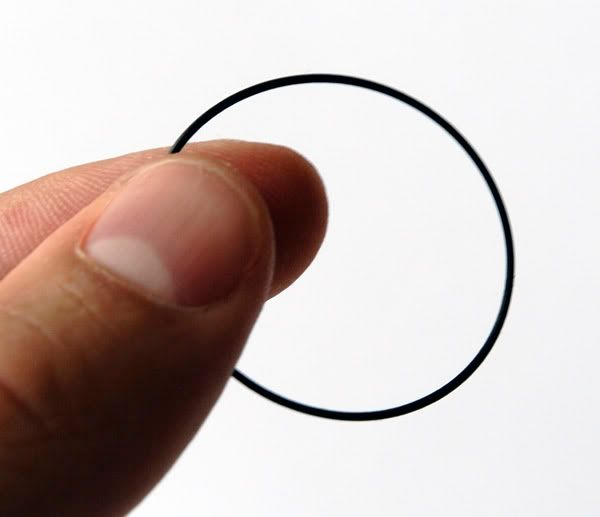
Then it's time to put the O-Ring back into the case......
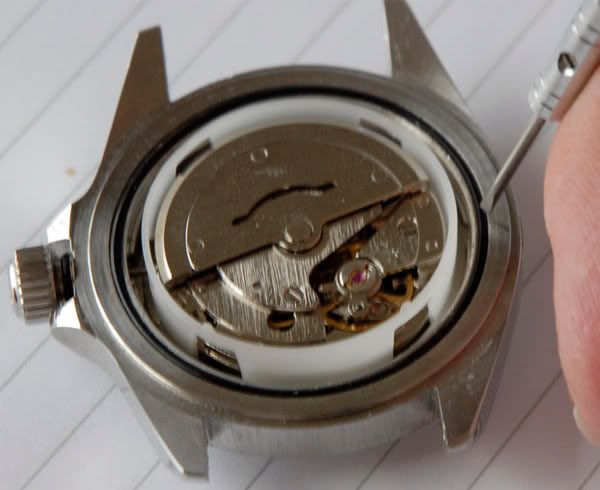
Pop it into the groove and gently press around witht a screwdriver or suchlike to get in into place.
Then it's time for the case back. Put it on and screw it round, then take the caseback removal toll and tighten it up nice and secure....
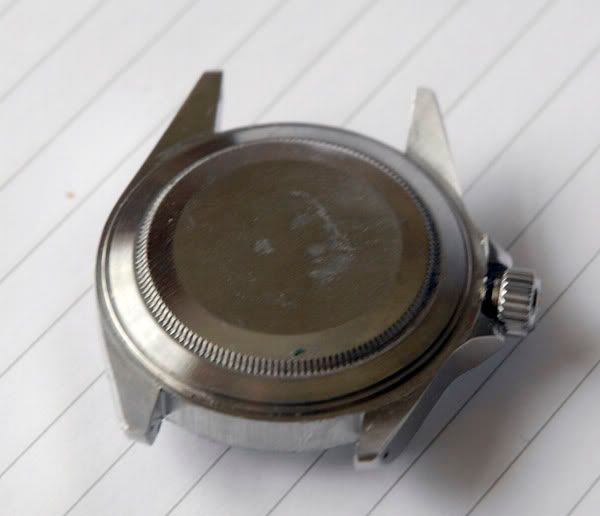
Next it's the turn of the bezel assembly.
Put some glue on the bezel, just a little, then press the insert back into position....
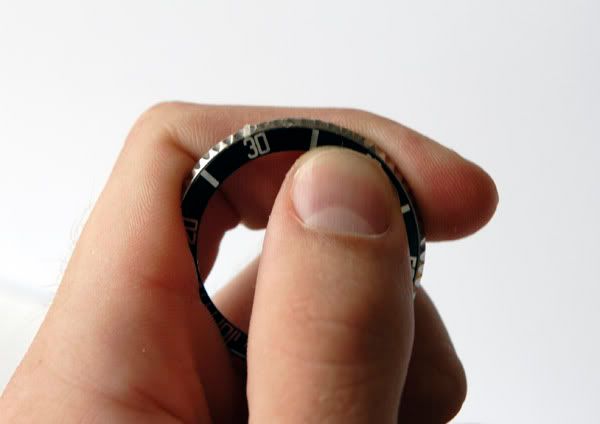
TAH DAH!!
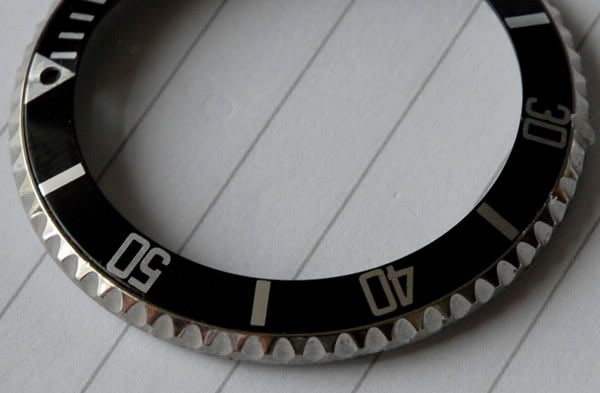
Then it's time for the washer, put the start of the washer into the groove and then gently work it round with your finger.
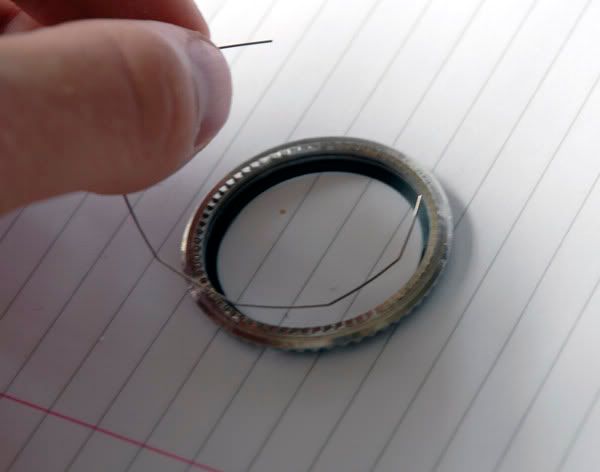
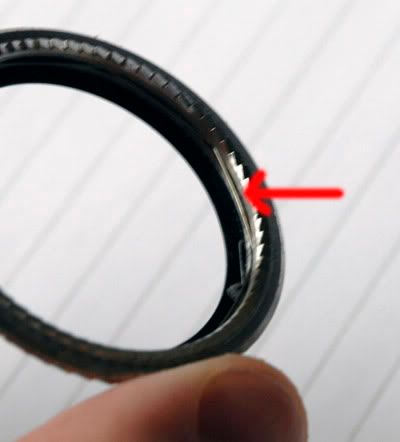
It will sit quite happily in it's groove......
Then comes the bezel assembly's turn to go onto the case....simple....align it and push lol.....
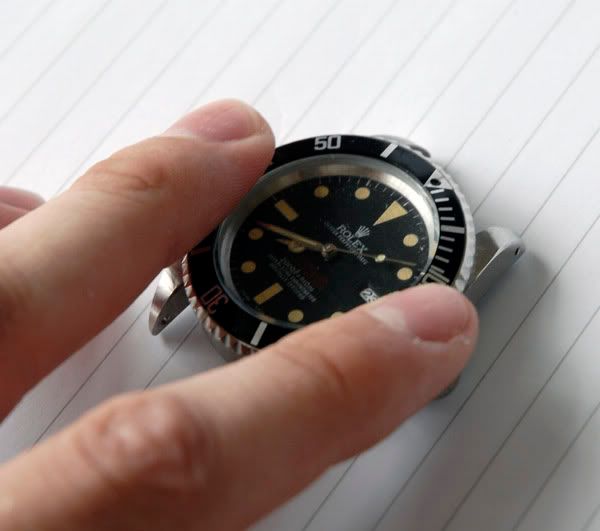
Simple as that and then you are all done......
There are some small variances in procedure between ETA and Asian that I hope I have covered, it's all pretty simple stuff just need to get the finger out and try it guys.....
NOW NOTE!!
It is a good idea to use Greaseproof paper to protect the dial, I didn't have any on han and seeing as it's a POS watch I didn't bother going to get any. I higly recommend this as it prevents any damage to the dial.
The crown is pushed into place when the movement is in the case and doesn't really merit a mention but it's just get pushed into position really really simple.
Well guys that's us I really hope you hve enjoyed Part II and that you will try and do some of this stuff for yourself.
I hope that you hav learned some stuff and that you have got the gumption to give using my tutorials a go.
I have to give a massive Thanks to the people who helped me have the balls to give it a go....
Randy, Joe, Rob, Dave, Bob and the others thanks so much for all of your time and help it has been irreplaceable.
Well Peace Out!!
Enjoy!
Chris
How to completely disassemble your watch.
First off, this is not a patronisation excercise this is to try and help educate the plethora of begginers that we have. Lots of people ask how to do tit bits and that's great that is why we are here to help.
But I think that the really basic stuff is covered here, so if you want to open the case and check out the movement or anything like that just check this thread out and it'll be all good. This is a step by step tutorial on how to completely take your watch apart. The test subject watch was the POS SD that you saw in one of my earlier threads, which was bought for this exact purpose, testing and practicing.
Howeve I will not be held responsible for anyone screwing up their watch lol, but if you do follow this it's REALLY EASY.
I have done this with almost no tools, a very small amount are required.
HERE WE GO:
First off a quick shot of the case of the watch, with the bracelet already removed, please note that some vintagising was attempted on the dial prior to this hence some smal scratches and also the tea colour:

Then in order to remove the caseback, take your caseback remover, or rubber gloves/duck tape, whatever you use and twist, COUNTER clockwise:

Hey Presto one removed caseback:

Next it's time to remove the crown/stem, this is done by pressing gently on the release, and then again GENTLY pulling out the crown. The release for this asian POS is very small and the release is a different shape from ETA models but general idea is the same.


Please take time to notice that this is a POS movement and an ETA would have movement clamp screws instead of this plastic thing. The ETA is easily removed by unscrewing the clamps with a 1.2mm screwdriver, whereas this POS just pops out lol.
Next we have to remove the hands. Take a hand remover or a set of tweezers, set the time to 12 so as to keep the date chage in the correct position, and gently pull, they come off reasonably easily.

The Dial can be removed from the movement by gently prying the razor blade between the parts, as there is a little glue on it. On ETA models there are no feet so the dial is glued on, a little prying with a blade and it comes off easily. On the Asian efforts there are dial feet that need to be loosened out of place, but that is OVER SIMPLE, it's just a screwdriver and unscrewing the small screws that clamp them in place.

Next it is the turn of the bezel assembley. This can be done at any point but I chose now lol. Slip a razor blade between the case and assembley and simply push down. Off it pops.

I have taken out the bezel spring and also the O ring but that's immaterial.
Next a VERY techincal point, please note this is not for the handless........remove the crystal, on all non MBW vintage models the trick is to...........

push it with your thumb lol, told you it was technical.

And there you have it a completely dissassembled watch. I have added a couple of pics of all of the parts and also all of the parts and ALL of the tools used.


I hope you found this helpfull if not then F*** Y**. It's dead easy just try it honest, if I can do it anyone can. It's a stepping stone in growing the confidence you need to mod your own watch, which believe me is SOOO satisfying, it's a great feeling to know that you have successfully fixe your own watch and not had to send it off to be done.
At the end of the day, it's nice to experiment but please be carefull these things are delicate, and PATIENCE is KEY. Don't rush things or you will ruin what was a nice piece lol.
Enjoy!
Chris
Edge's Guide To Watches - Part II
What The Hell To Do With The Parts!!
The Eagerly Awaited Part II
I recently wrote a tutuorial on how to take apart a rolex. This is the follow up to that now that you guys have a lovely little collection of parts sitting on your desks lol.
You have fair warning this is a PROPER Modem Burner lol.
First off a quick shot of the watch parts disassembled from last time.

First things first it's time to put the rystal back on. This one is simple just push it in place, yours may not be as simple but you might have to add a little crystal cement and press it into place.

For me the next step was to reattach the dial, this can be done by alligning the feet with the screws, on the side of the movement, the feet only fit one way so allignment isn't really an issue.

ETA movements don't have feet so allignment is more difficult and the dial will need to be glued back onto the ring and attached back onto the movement.
Next the movement and dial were popped back into the plastic holder, which again differs in ETA models. In the ETa models there is no plastic holder the movement is held in place by movement clamps.

The nest step is the tricky part, well it WAS it's not now. Many of you struggle as I did with hand putting. I have been asked about tips and tricks, and to be honest I had NONE. Until now, I have solved the issue.
I spent an HOUR putting the seconds hand back on my 1680 which was VERY frustrating and time consuming. However the hand putting this tiem took me 10 seconds, "HOW??" I hear you say.......
The Hour and Minute hands are relatively simple to put, they can be reattached with tweezers and patience very simple. They can be pressed GENTLY into place by using the Hand Removal Tool.


Now to the tricky part.....
- Take a piece of sellotape, fold it twice so that the sticky bit is no longer sticky
- Leave a sticky portion of enough length to get to the round mount in the middle
- Stick the seconds hand to the tape
- Position the seconds hand in the correct place
- Push gently on the round mount
- The tape then comes easily away without damaging the hand and leaves the hand in place.

I suggest using sellotape as it is not that sticky so will come away easily and is transparent so one can see the mounting clearly.
EASY as that 10 seconds and it's all back together...WOOHOO!!!!
Thanks Chris you are my HERO!!!!.........I know thank you vey much guys........
Next the reassembled movement/dial can be reentered into the case.

Next comes the O-Ring....DON@T FORGET THE O-RING!!!!.
Take some Silicon Grease....

Put some on your fingers and apply to the O-Ring....

Then it's time to put the O-Ring back into the case......

Pop it into the groove and gently press around witht a screwdriver or suchlike to get in into place.
Then it's time for the case back. Put it on and screw it round, then take the caseback removal toll and tighten it up nice and secure....

Next it's the turn of the bezel assembly.
Put some glue on the bezel, just a little, then press the insert back into position....

TAH DAH!!

Then it's time for the washer, put the start of the washer into the groove and then gently work it round with your finger.

It will sit quite happily in it's groove......

Then comes the bezel assembly's turn to go onto the case....simple....align it and push lol.....

Simple as that and then you are all done......

There are some small variances in procedure between ETA and Asian that I hope I have covered, it's all pretty simple stuff just need to get the finger out and try it guys.....
NOW NOTE!!
It is a good idea to use Greaseproof paper to protect the dial, I didn't have any on han and seeing as it's a POS watch I didn't bother going to get any. I higly recommend this as it prevents any damage to the dial.
The crown is pushed into place when the movement is in the case and doesn't really merit a mention but it's just get pushed into position really really simple.
Well guys that's us I really hope you hve enjoyed Part II and that you will try and do some of this stuff for yourself.
I hope that you hav learned some stuff and that you have got the gumption to give using my tutorials a go.
I have to give a massive Thanks to the people who helped me have the balls to give it a go....
Randy, Joe, Rob, Dave, Bob and the others thanks so much for all of your time and help it has been irreplaceable.
Well Peace Out!!
Enjoy!
Chris
