- 12/3/18
- 36,817
- 76,593
- 113
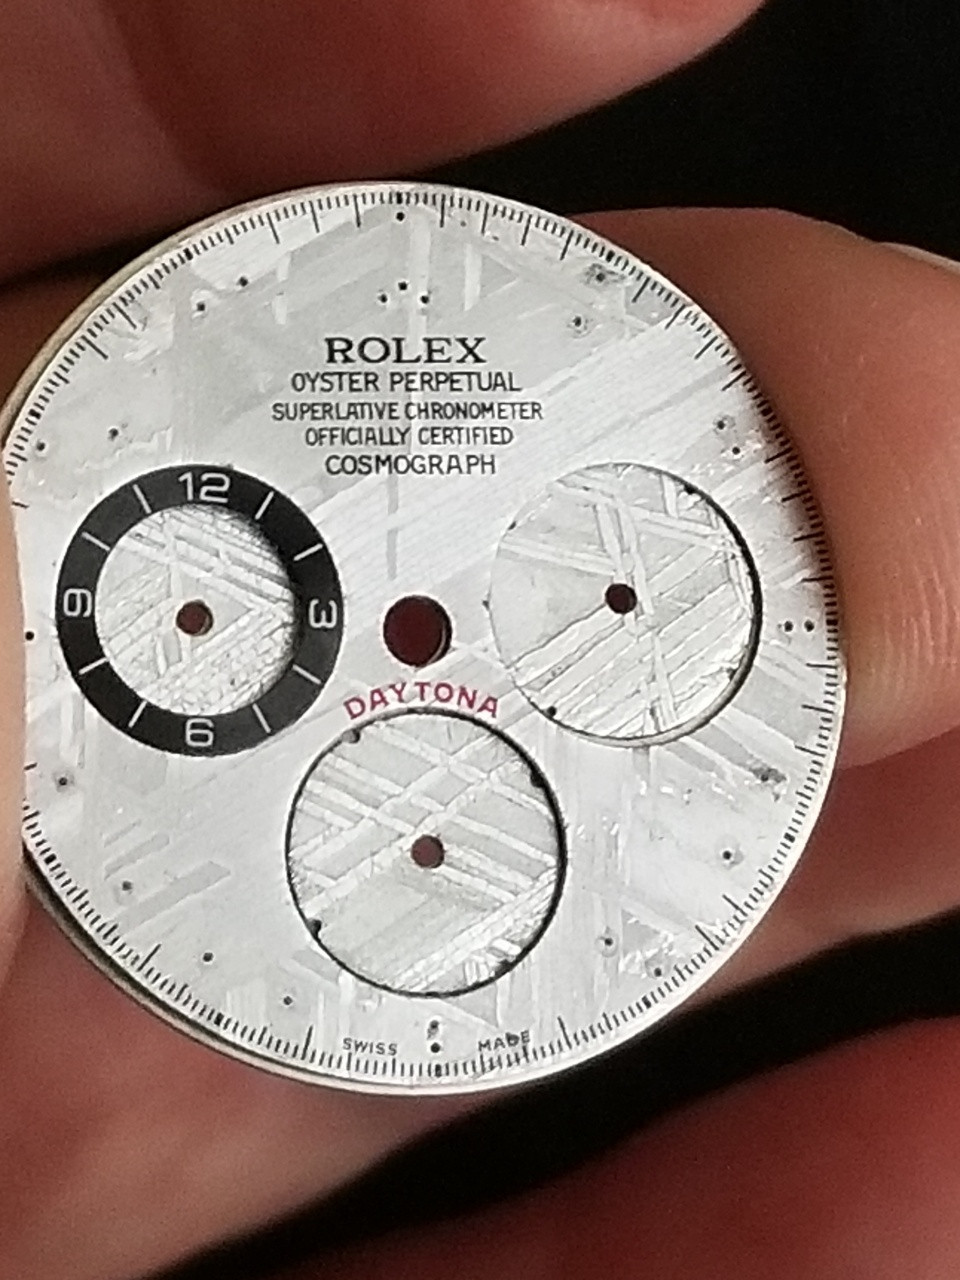
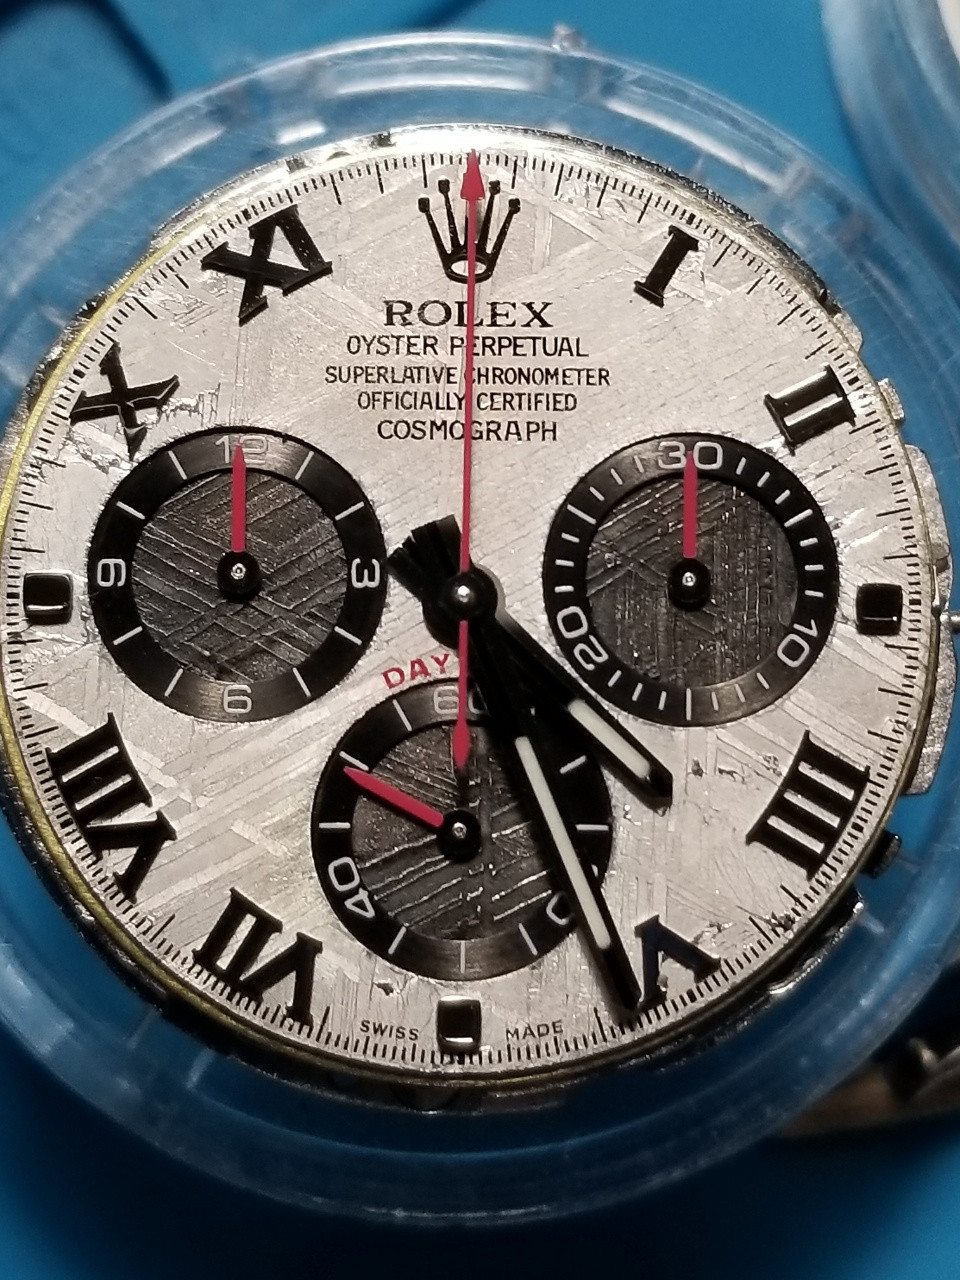
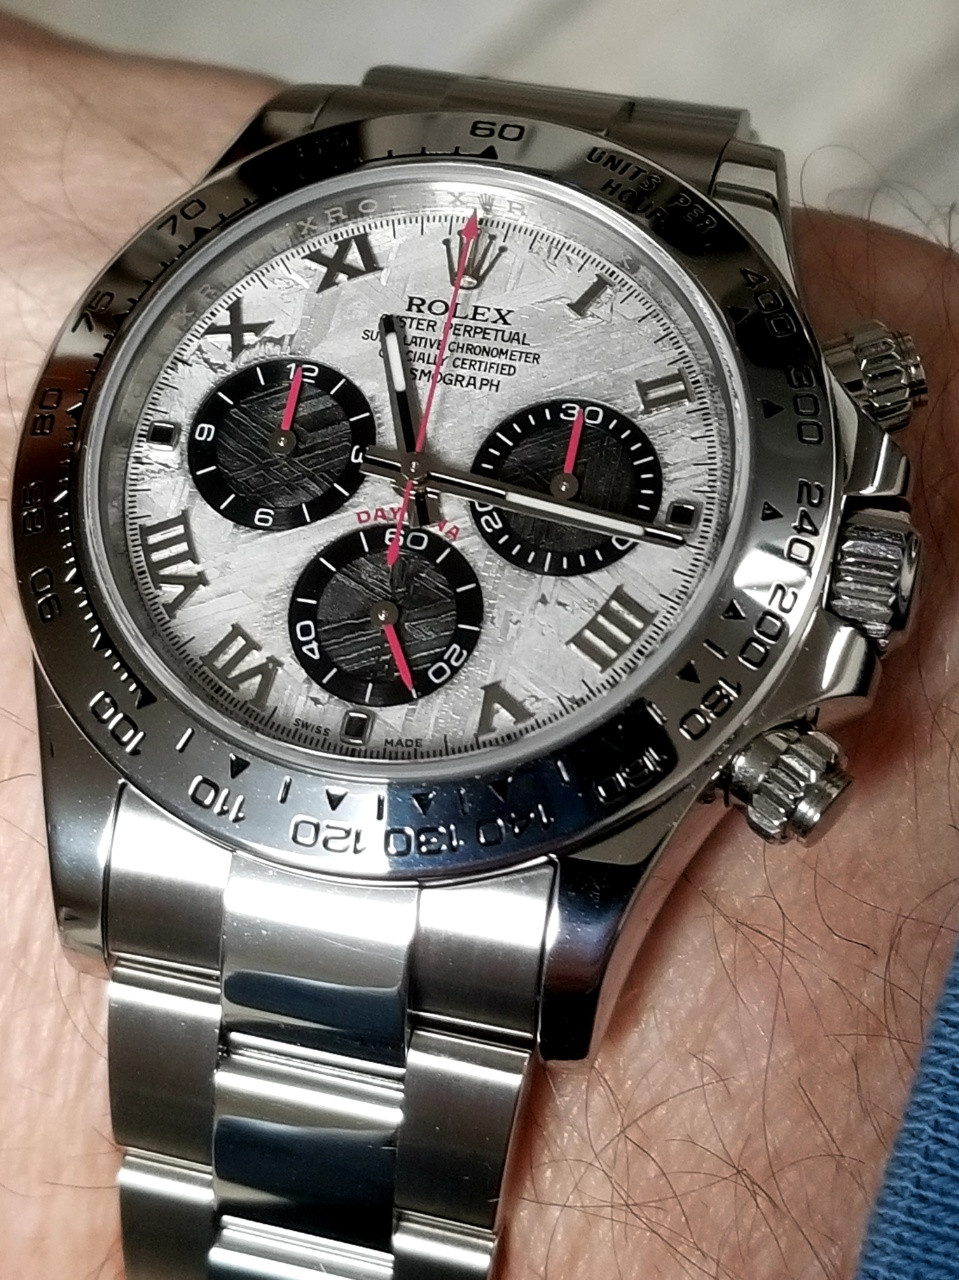
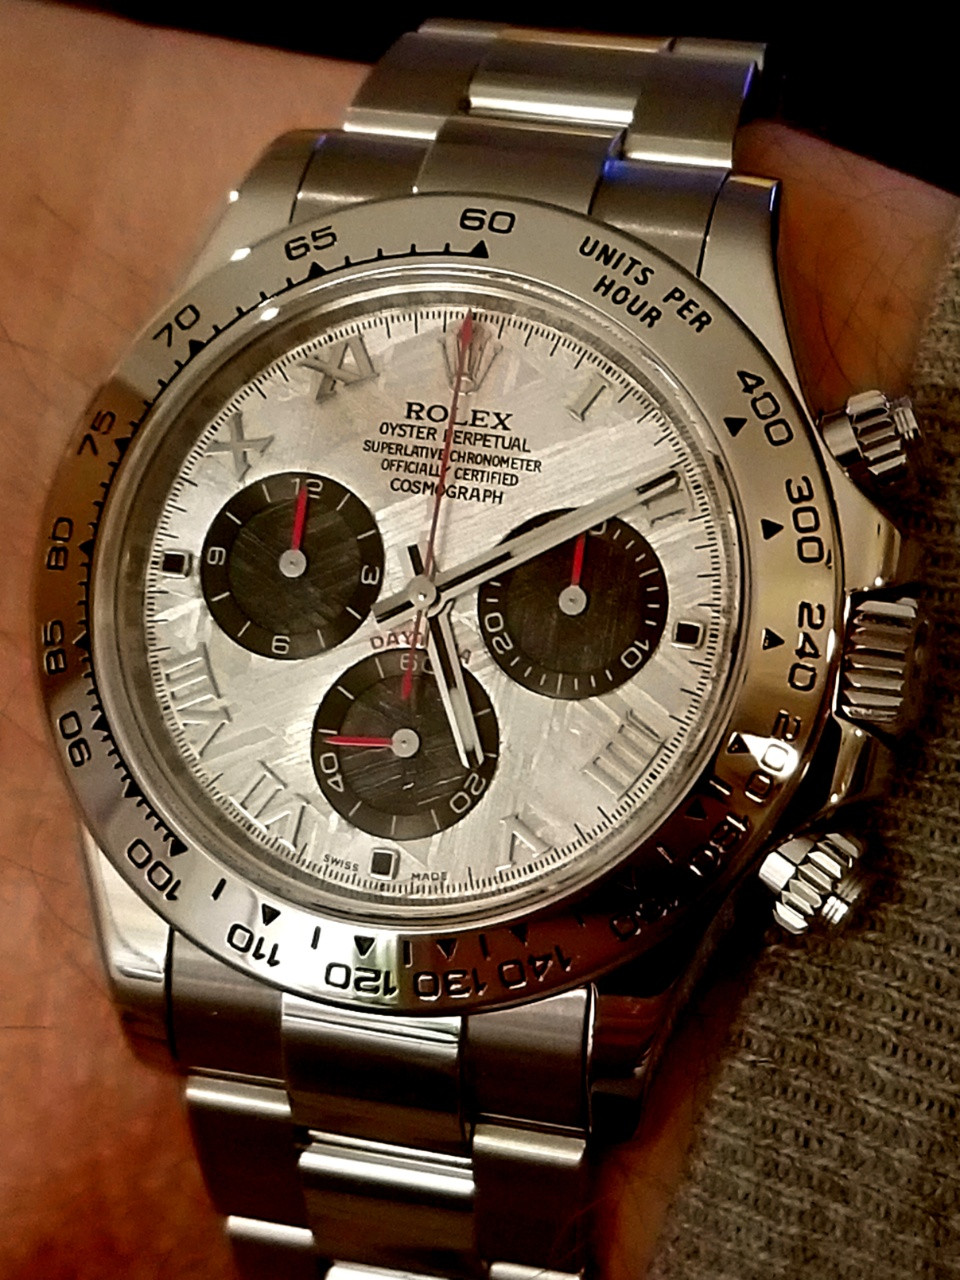
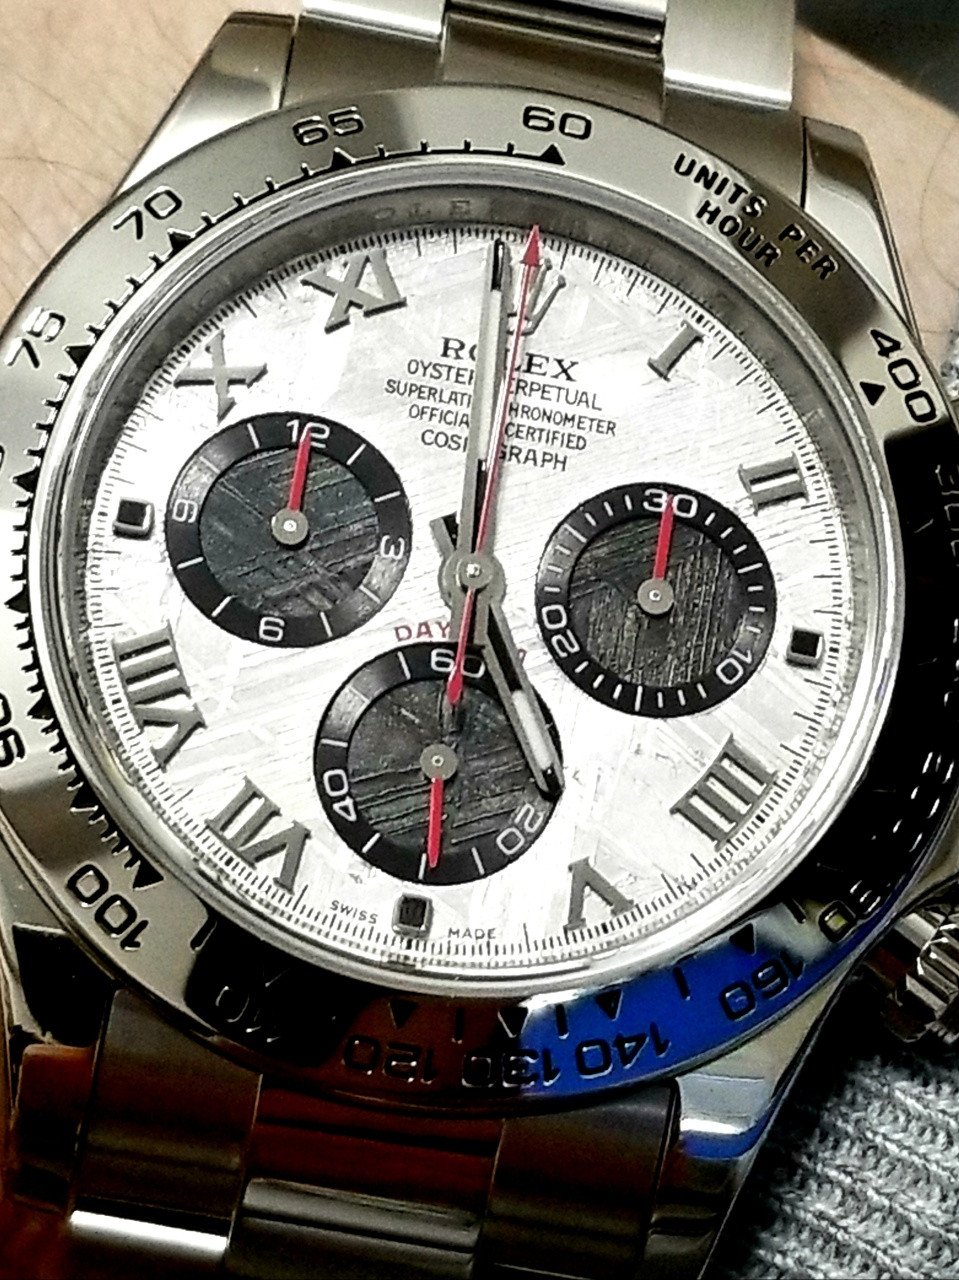
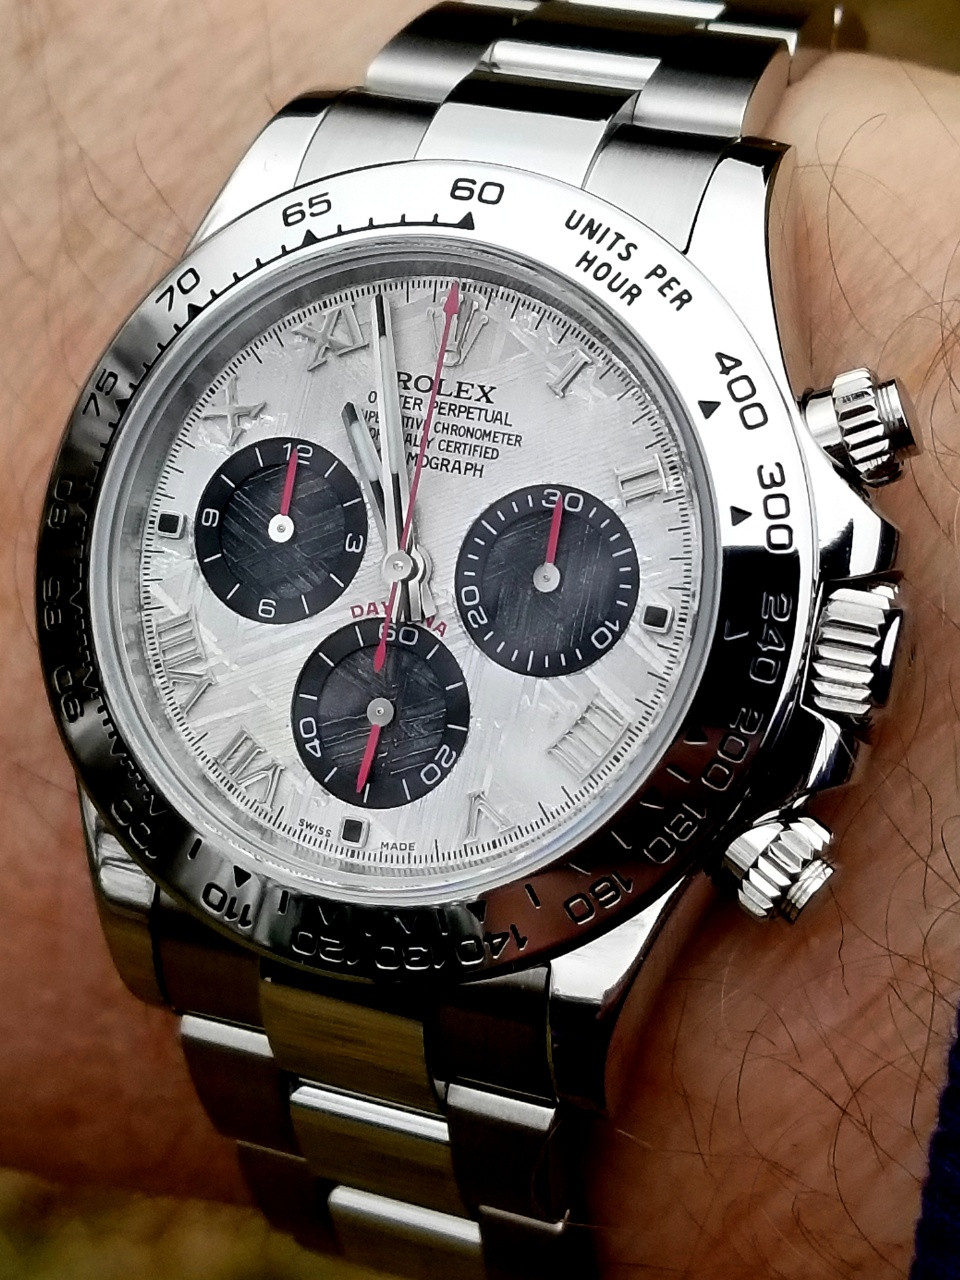
Daytona Meteorite - White and Black
Howdy fellow watch bros!
I want to share a build here that I never had any plans to do and one that took a lot of twists and turns that nearly landed it in the bin more than once.
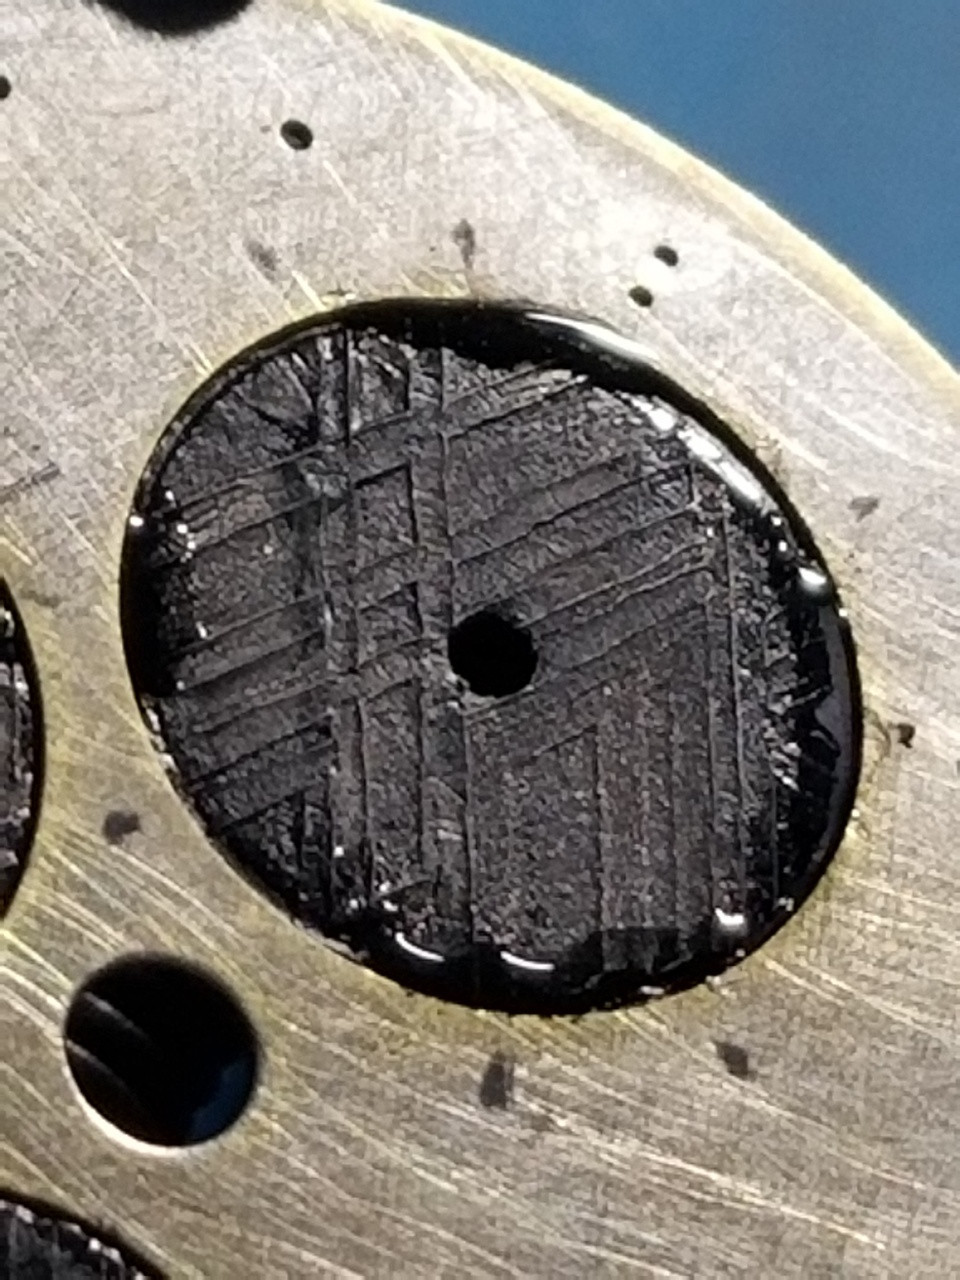
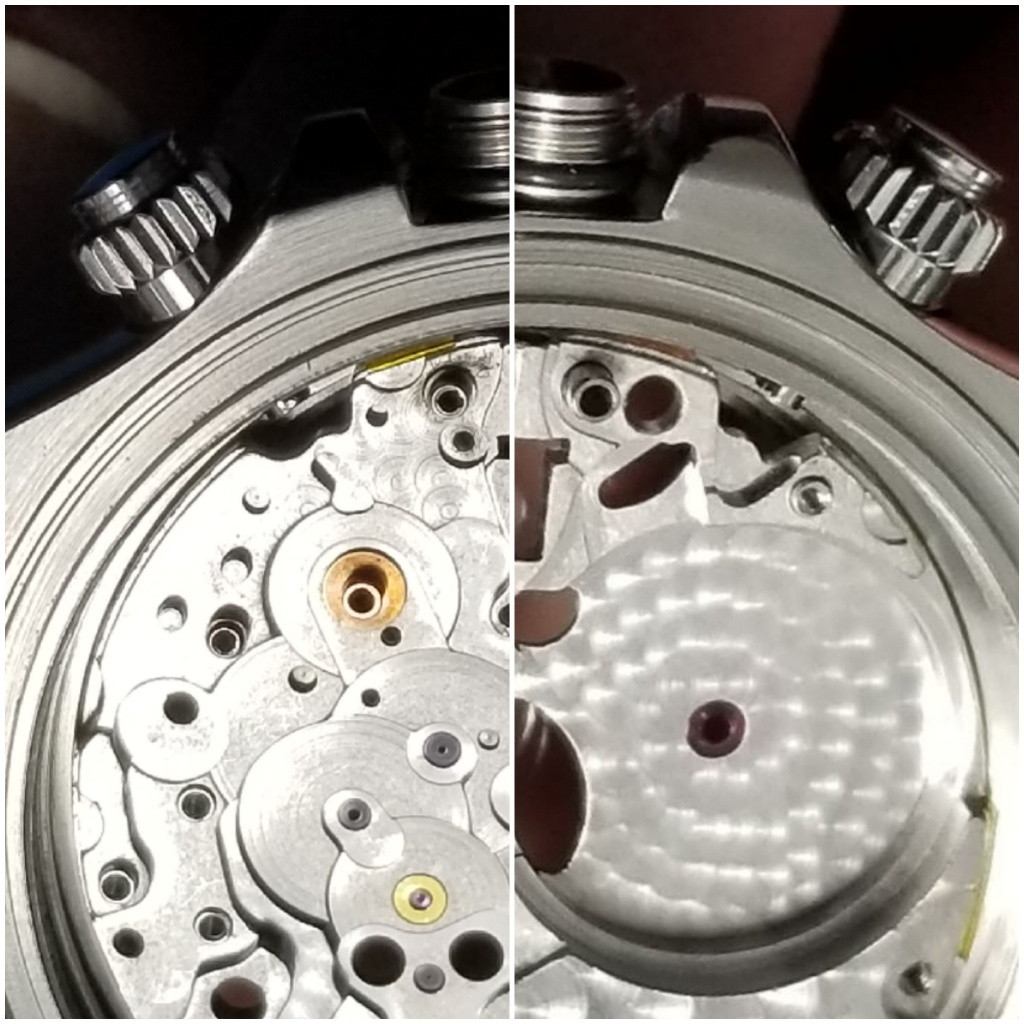
The base watch is a late batch Noob Roman numeral Meteorite. I grew to dislike one of the subdials because it was markedly darker in some lighting and at certain angles. Ironically, the flip side of that subdial was much brighter and would have been just fine but I couldn't flip it because the subdial numerals were printed right on them.

6 o'clock subdial flip side
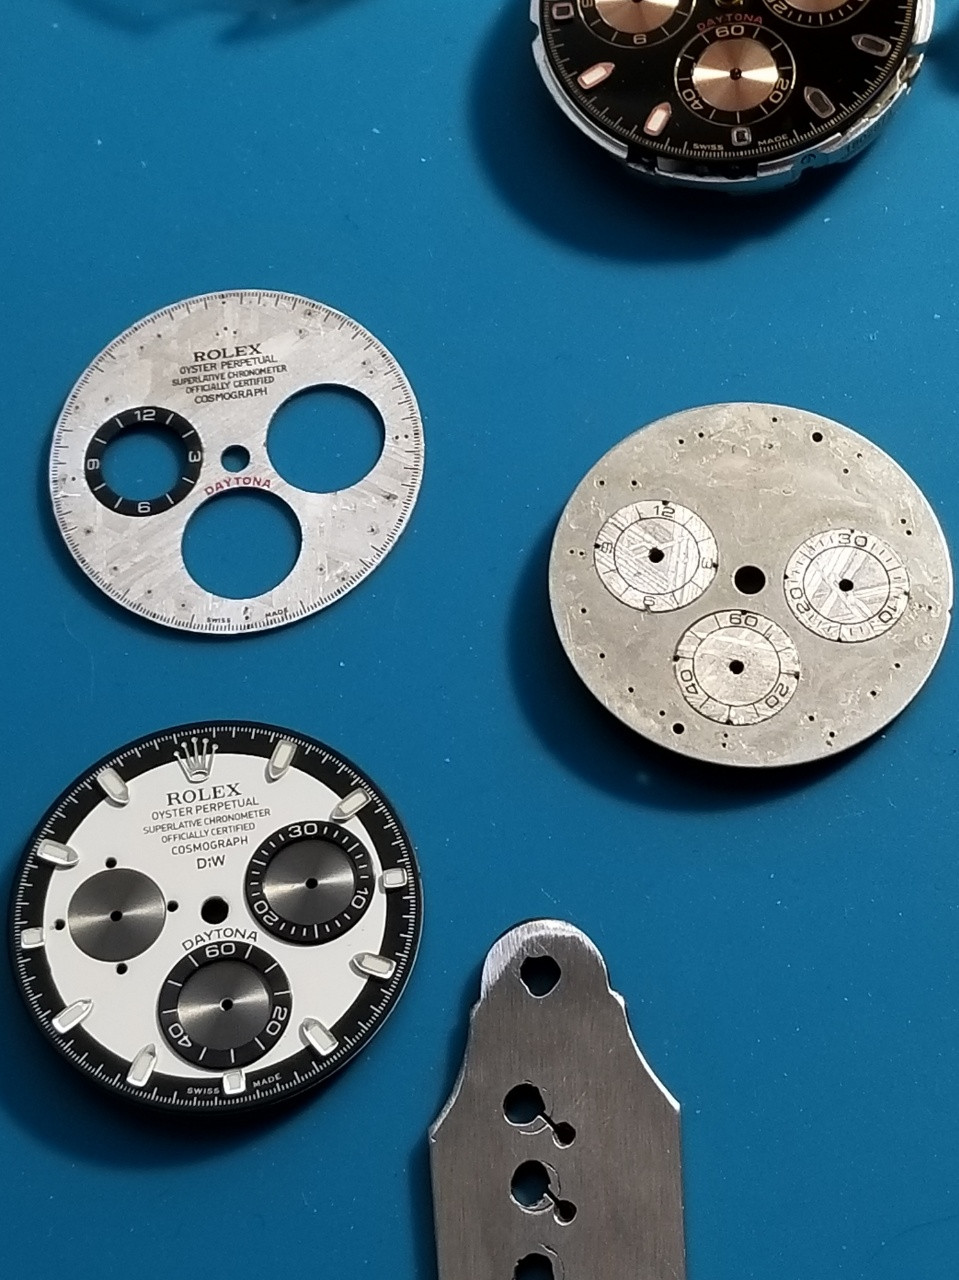
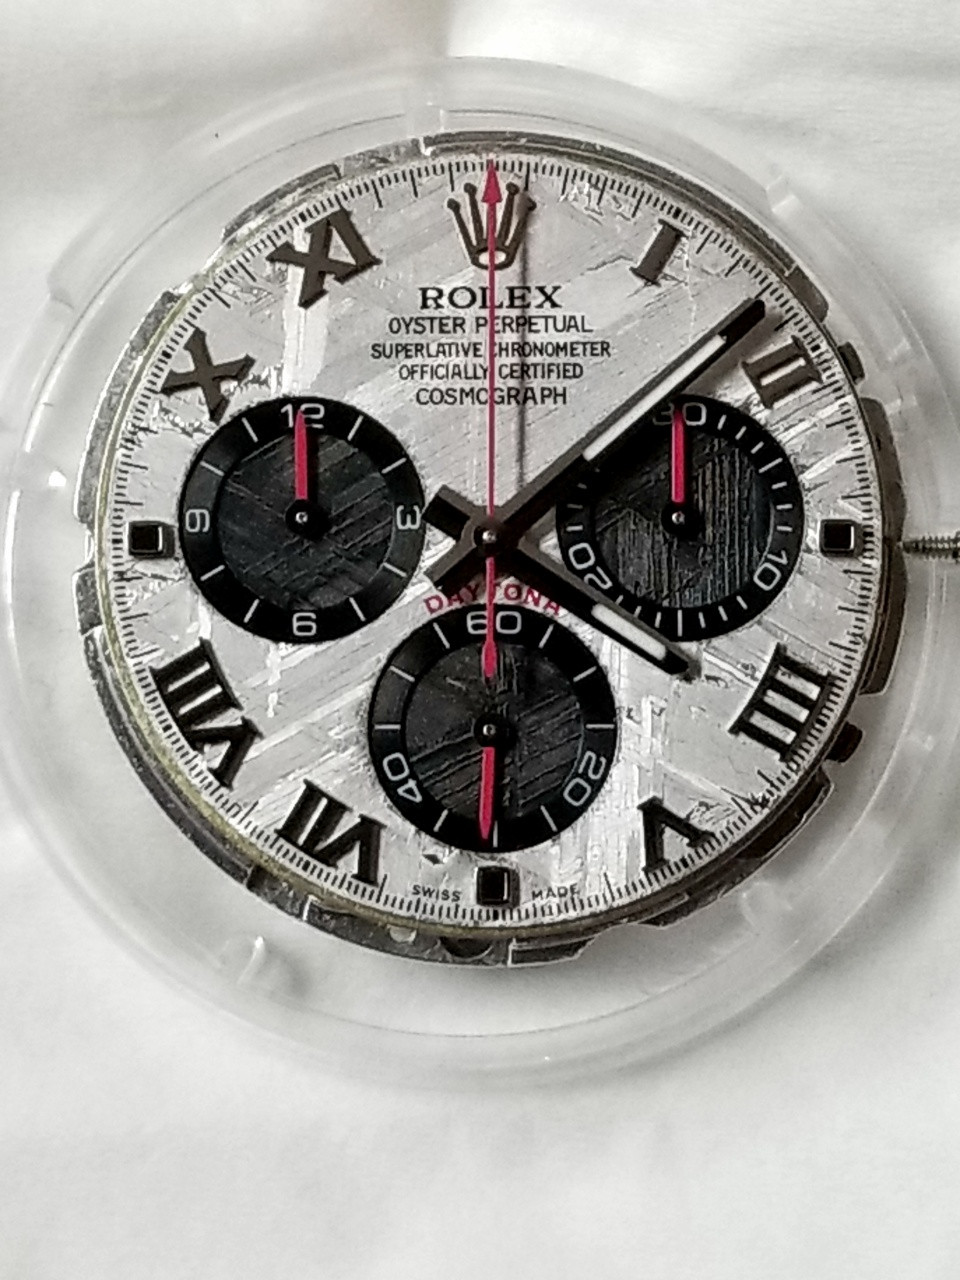
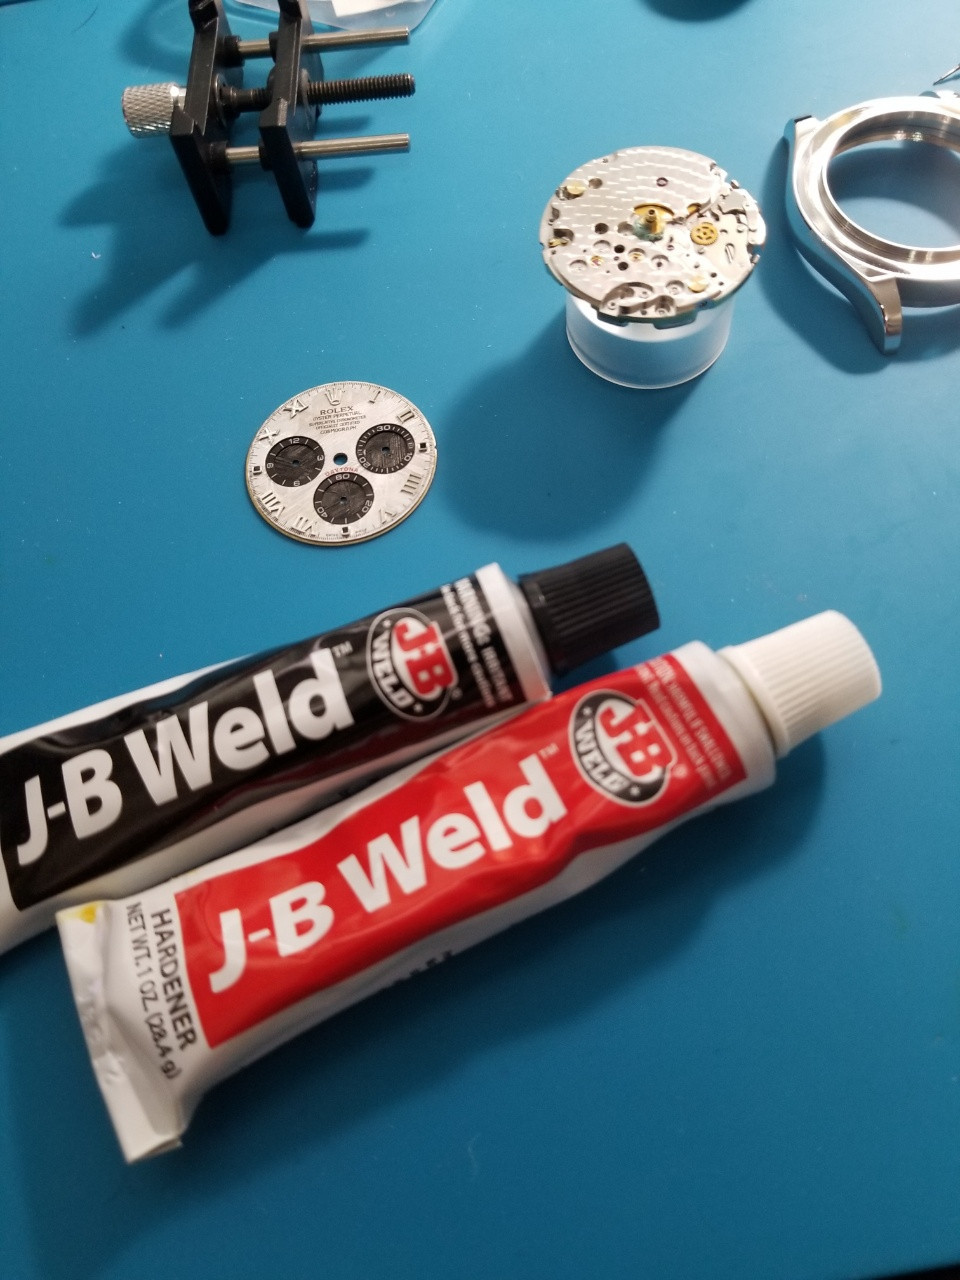
I was just going to replace the dial with this beautiful ARF that I shaved and epoxied new feet on.
But after fitting the hands and attempting to install the movement I discovered that at least with Noob meteorites, the case interiors have slightly different ridges and seats to accommodate the thicker meteorite dials. The ARF dial wouldn't seat to the bottom of the rehaut after it was mounted on the movement. D'oh.
This issue could have been remedied with some thin spacers (even dial dots) but it got me thinking about a mod since I had some subdial rings from a DIW dial I knew I would never use. So the saga began. The dial mod was a lot more work than I anticipated but as every step completed acceptably well I grew more convinced it might leave me with something I didn't dislike. I didn’t really care if this project exploded somewhere along the way, the meteorite sample isn’t the best for sure and I enjoy tearing things apart so plenty of exploring fun to be had along the way. I was curious just how far I could take this notion.
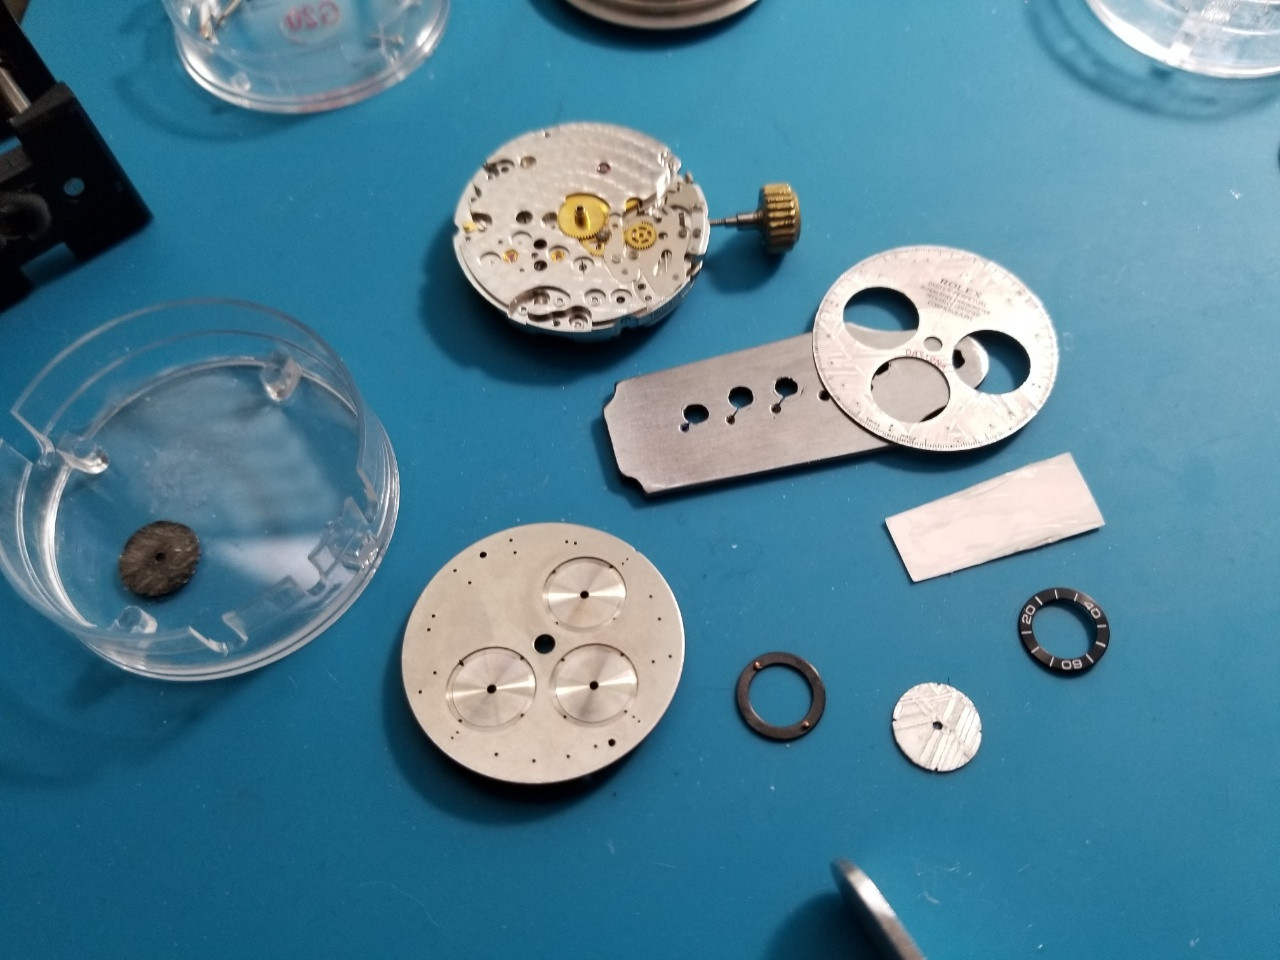
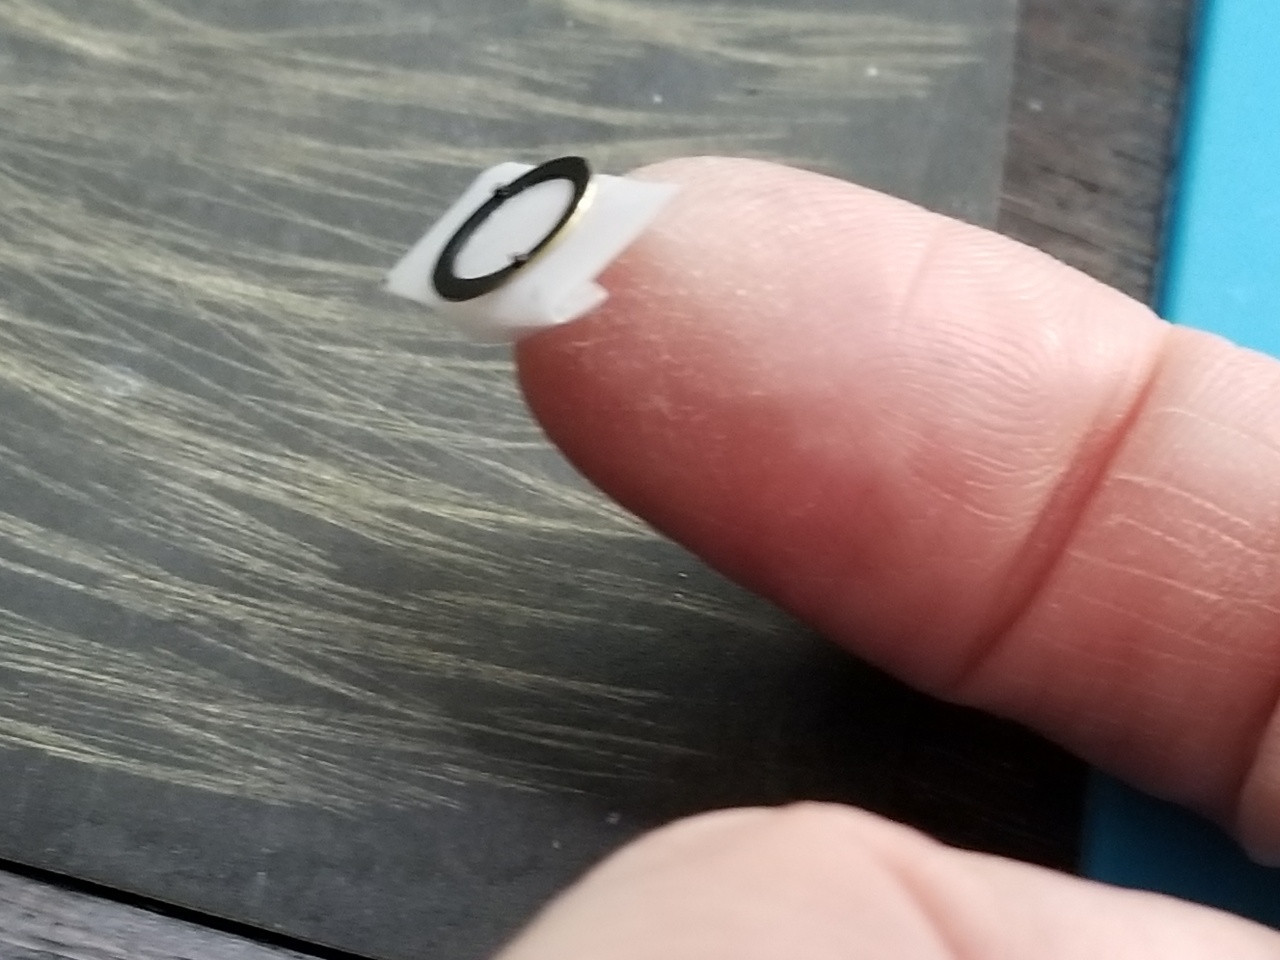
The DIW subdial rings popped off easily enough. There were a few issues with them though - they sat ABOVE the subdial which would create a subdial pinion height issue, and they were bigger in diameter than the dial holes.
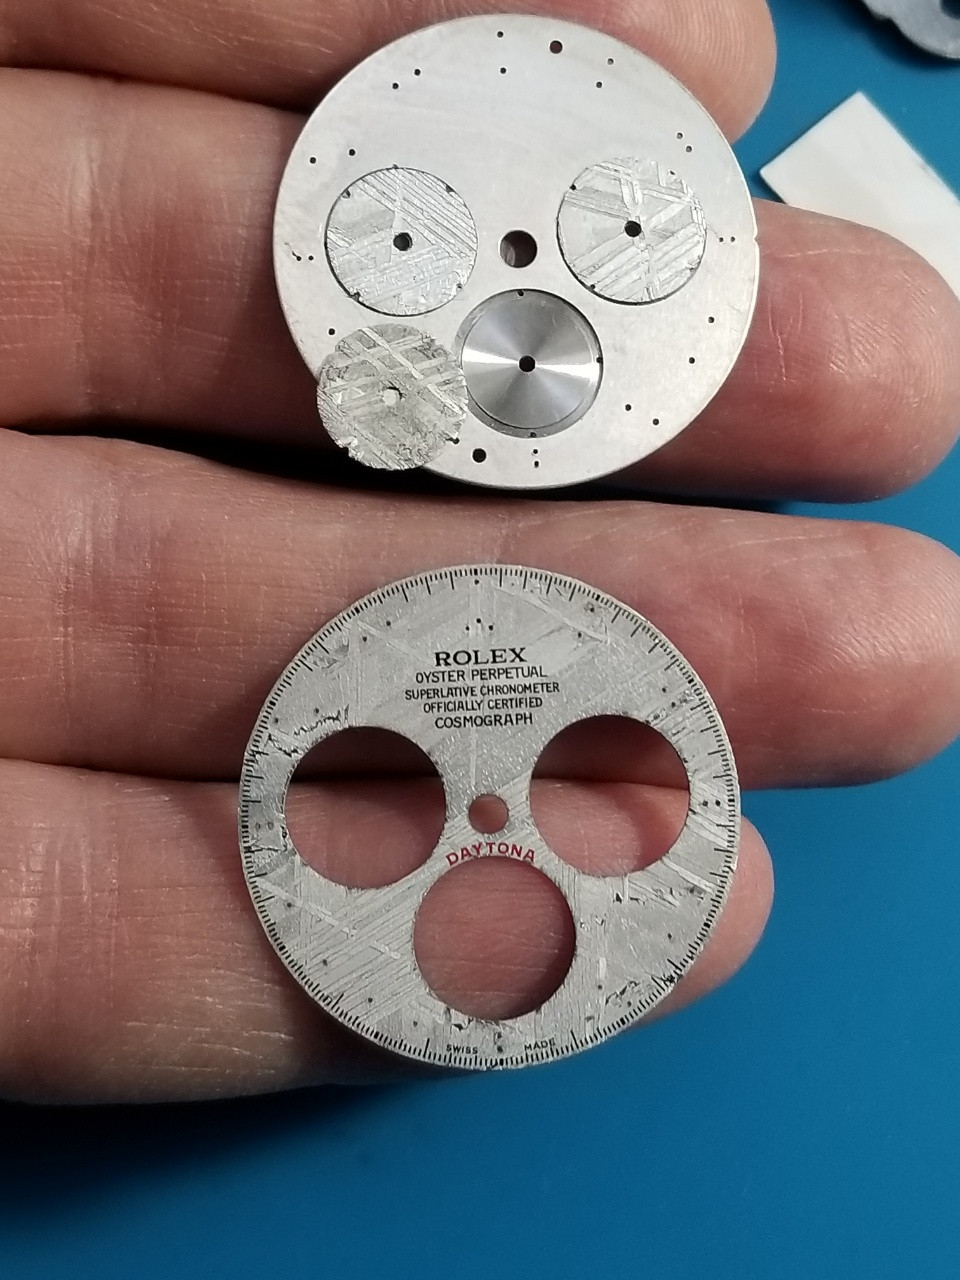
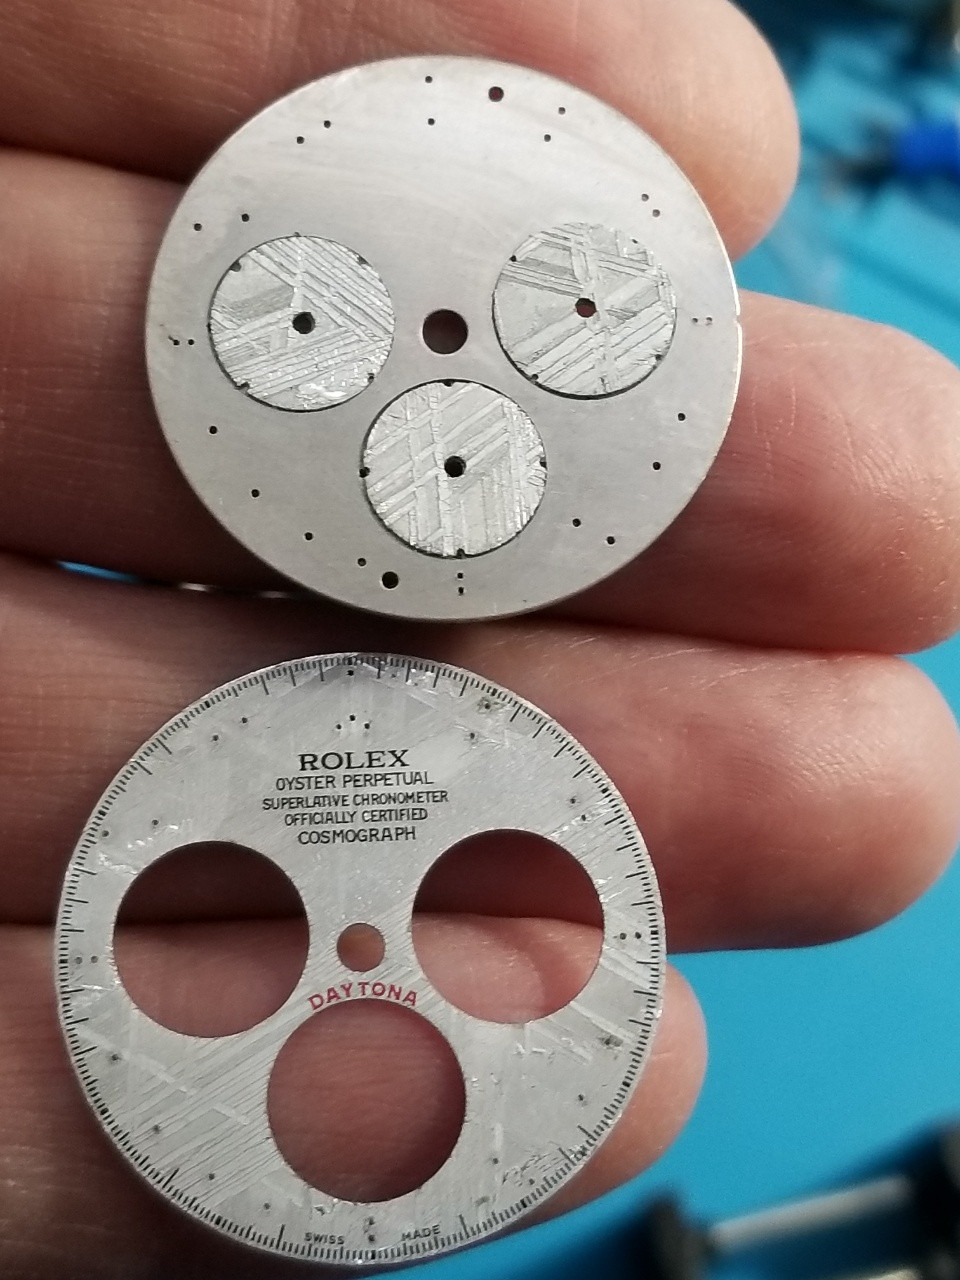
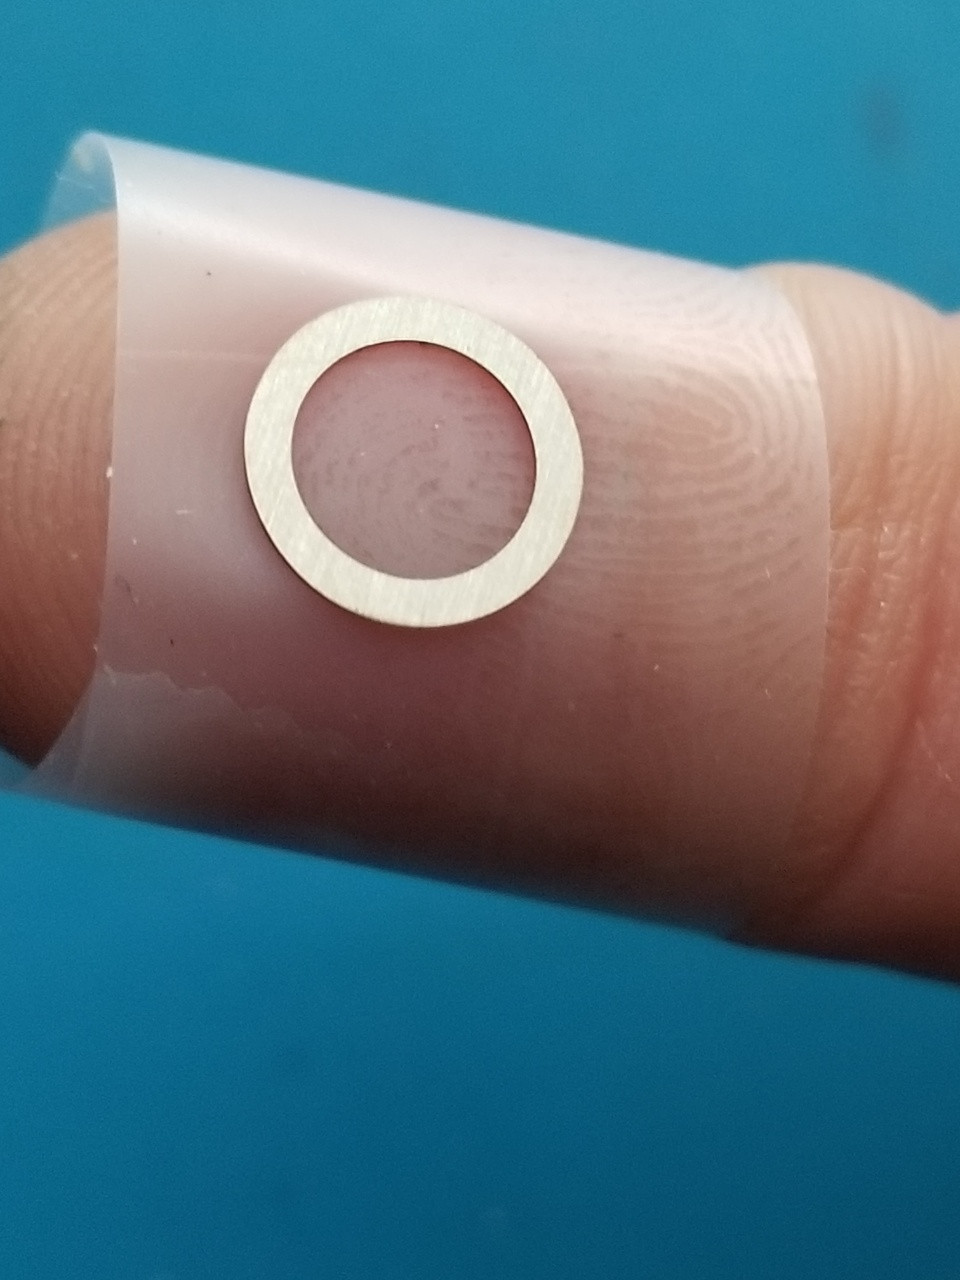
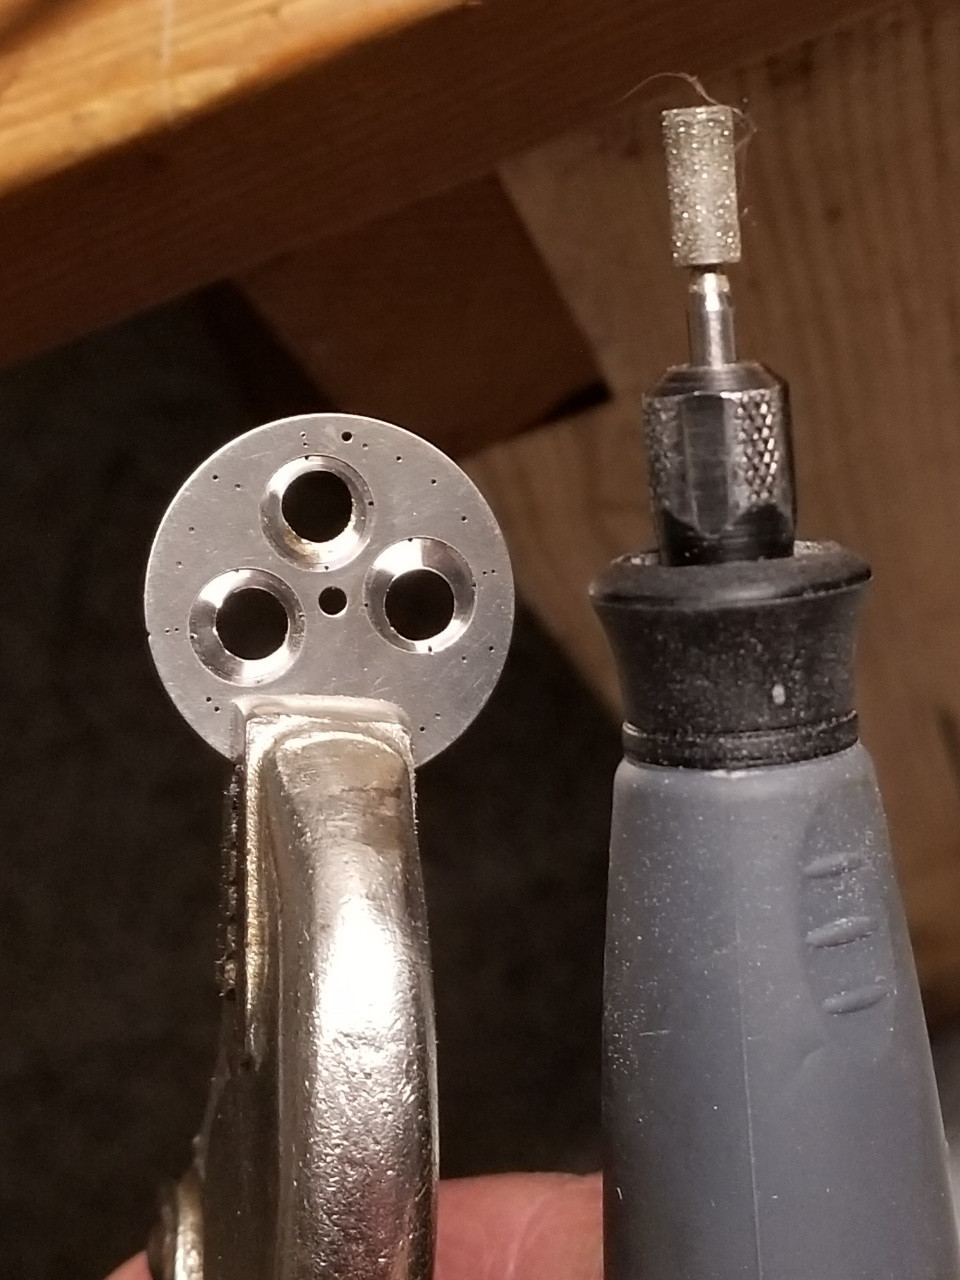
So I shaved both the outer diameter and the thickness of them. For those who haven’t tinkered around with a stone dial, it is mounted (adhered) onto a metal plate to provide stability against cracking or breaking. This added plate thickness already decreases the available hands pinion height so I knew I was working with like tenths of a mm margins here.
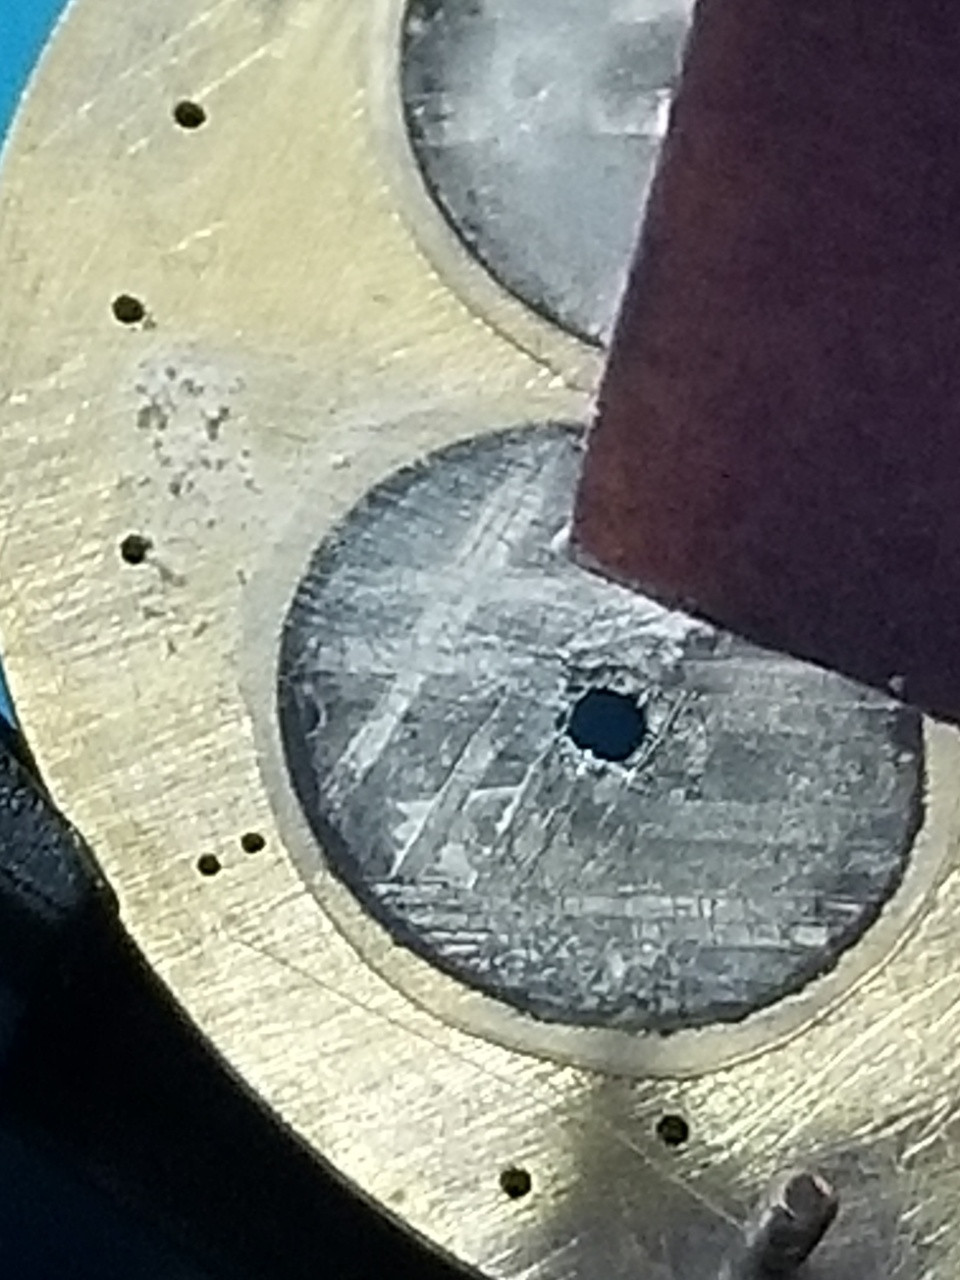
I sanded the subdial ring edges like you would sand down a dial or an aluminum insert - swipe/roll it across a piece of taped flat sandpaper. Tedious, but not difficult. I also sanded the prongs off and decreased the thickness as much as I dared.
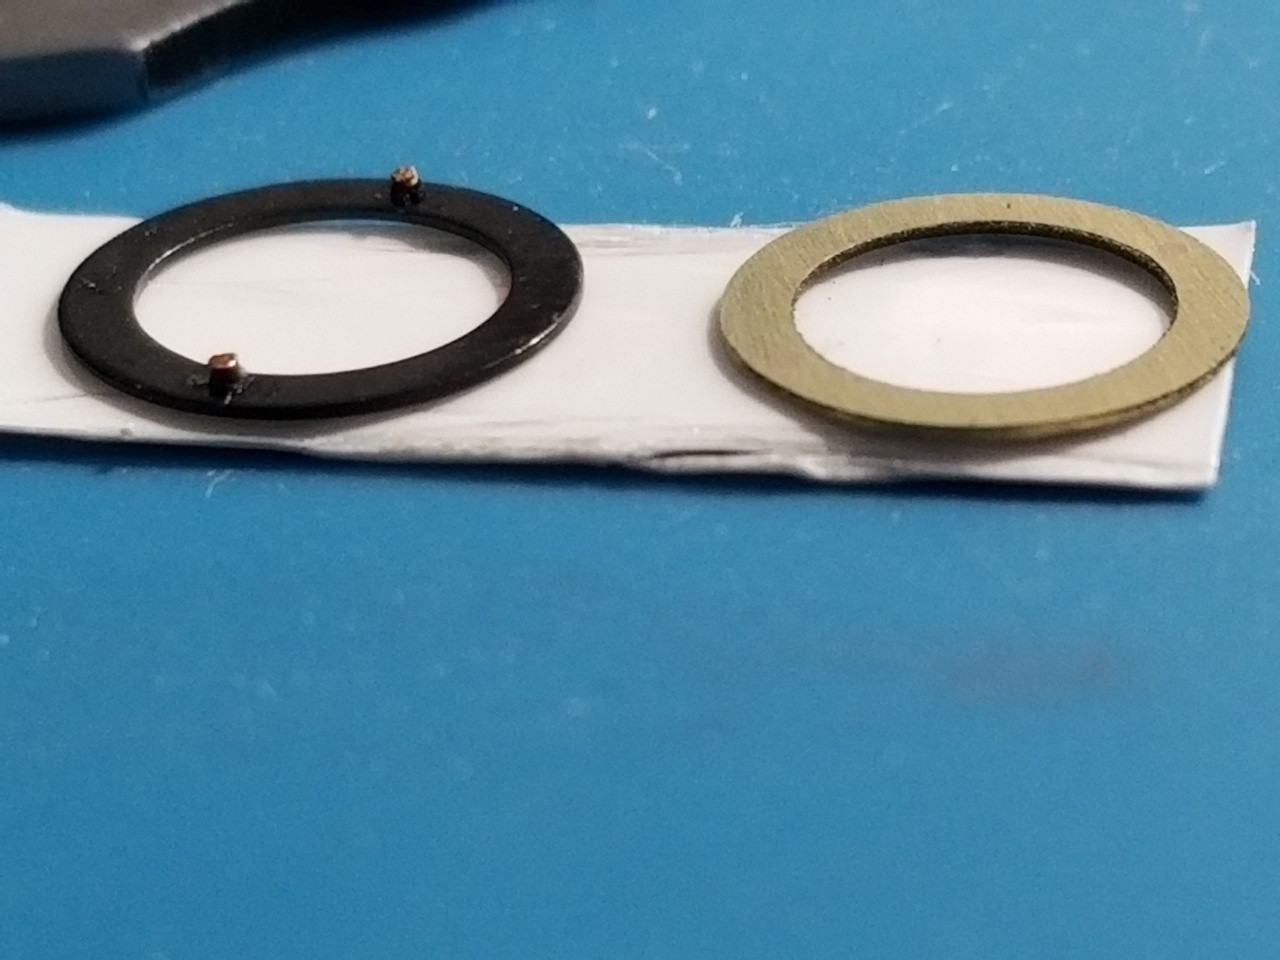
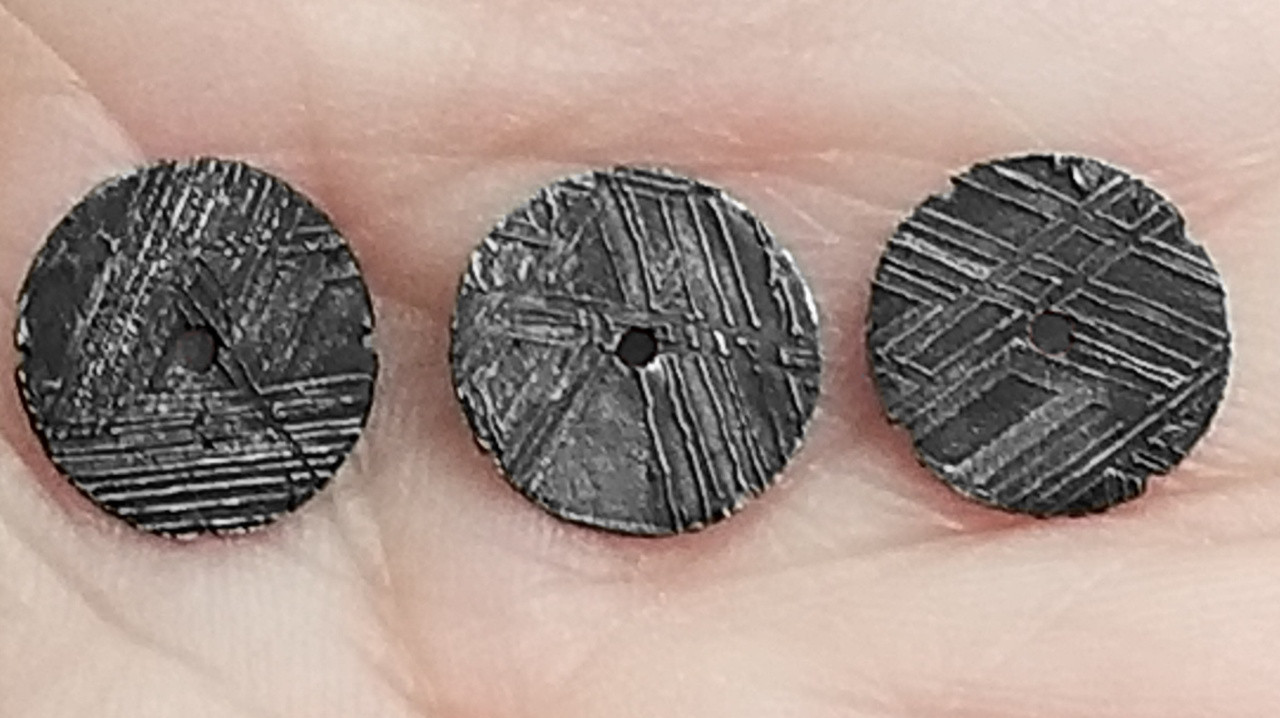
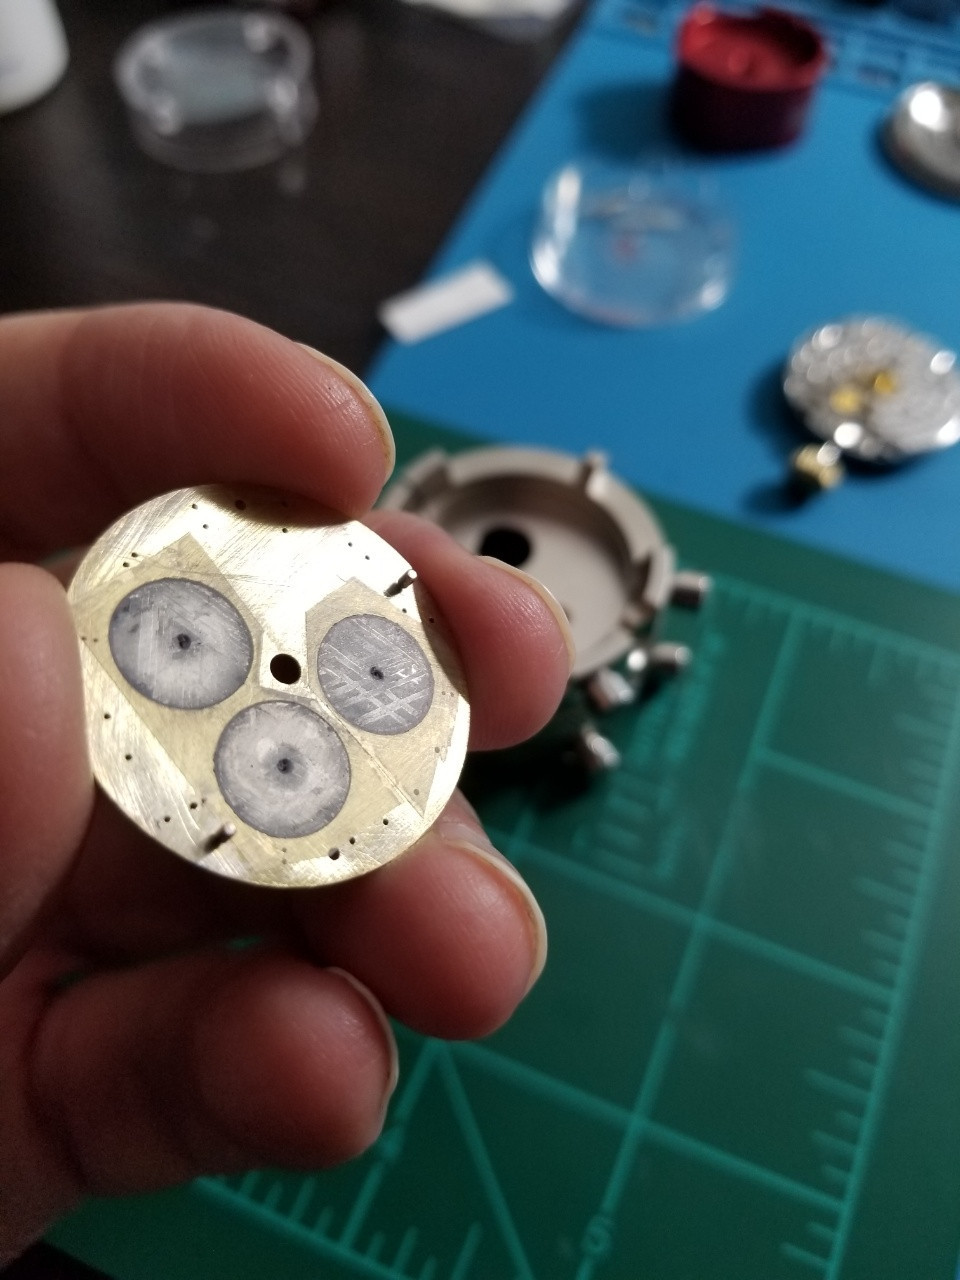
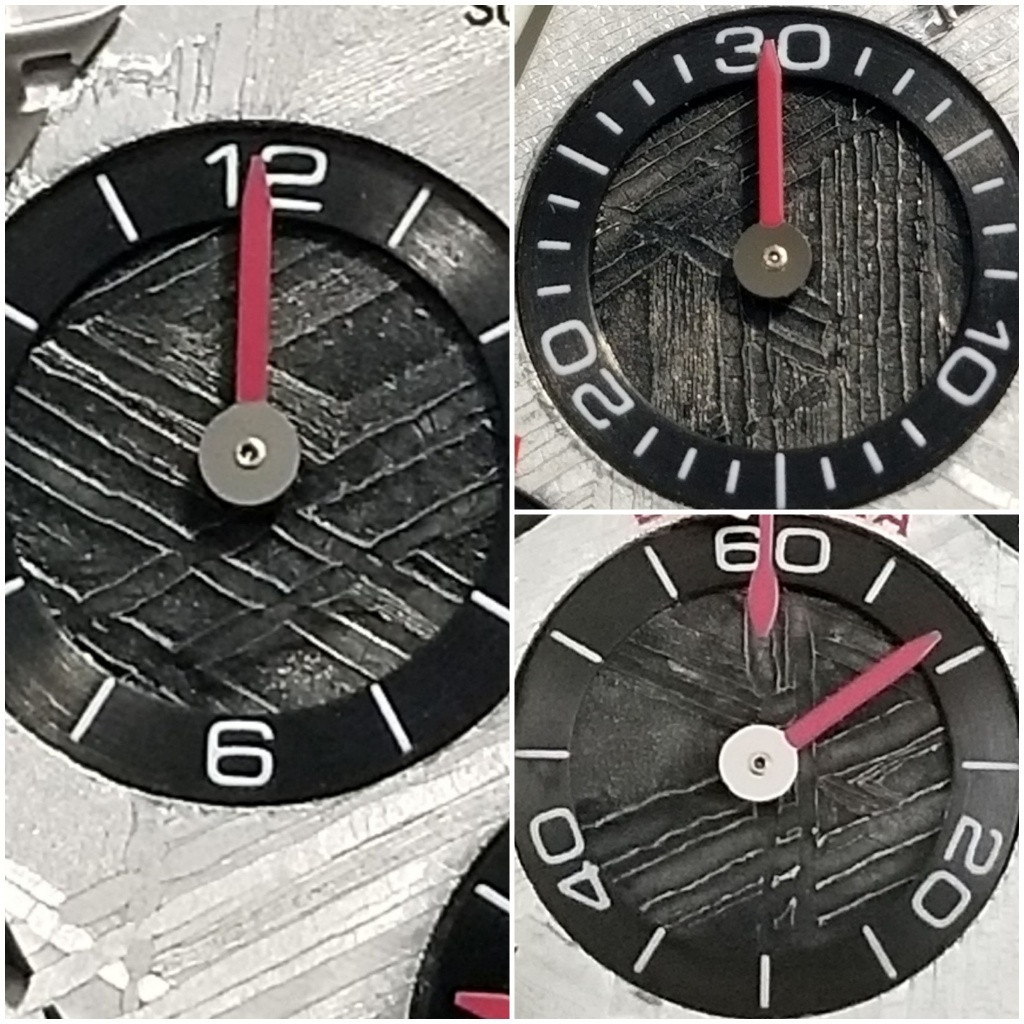
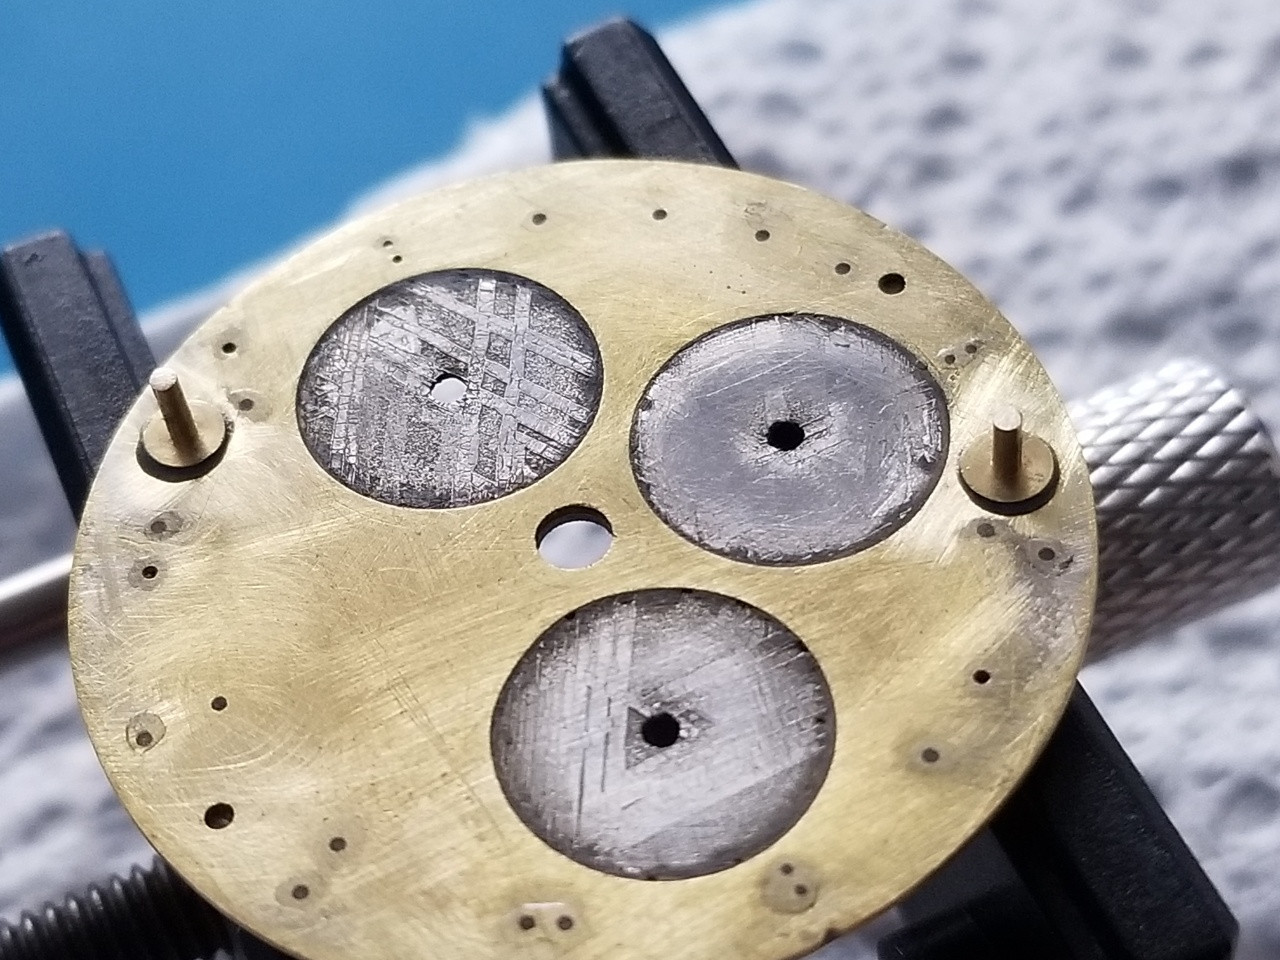
I toyed with the notion of using the white subdials but then I thought that a blackened meteorite subdial might look cool.

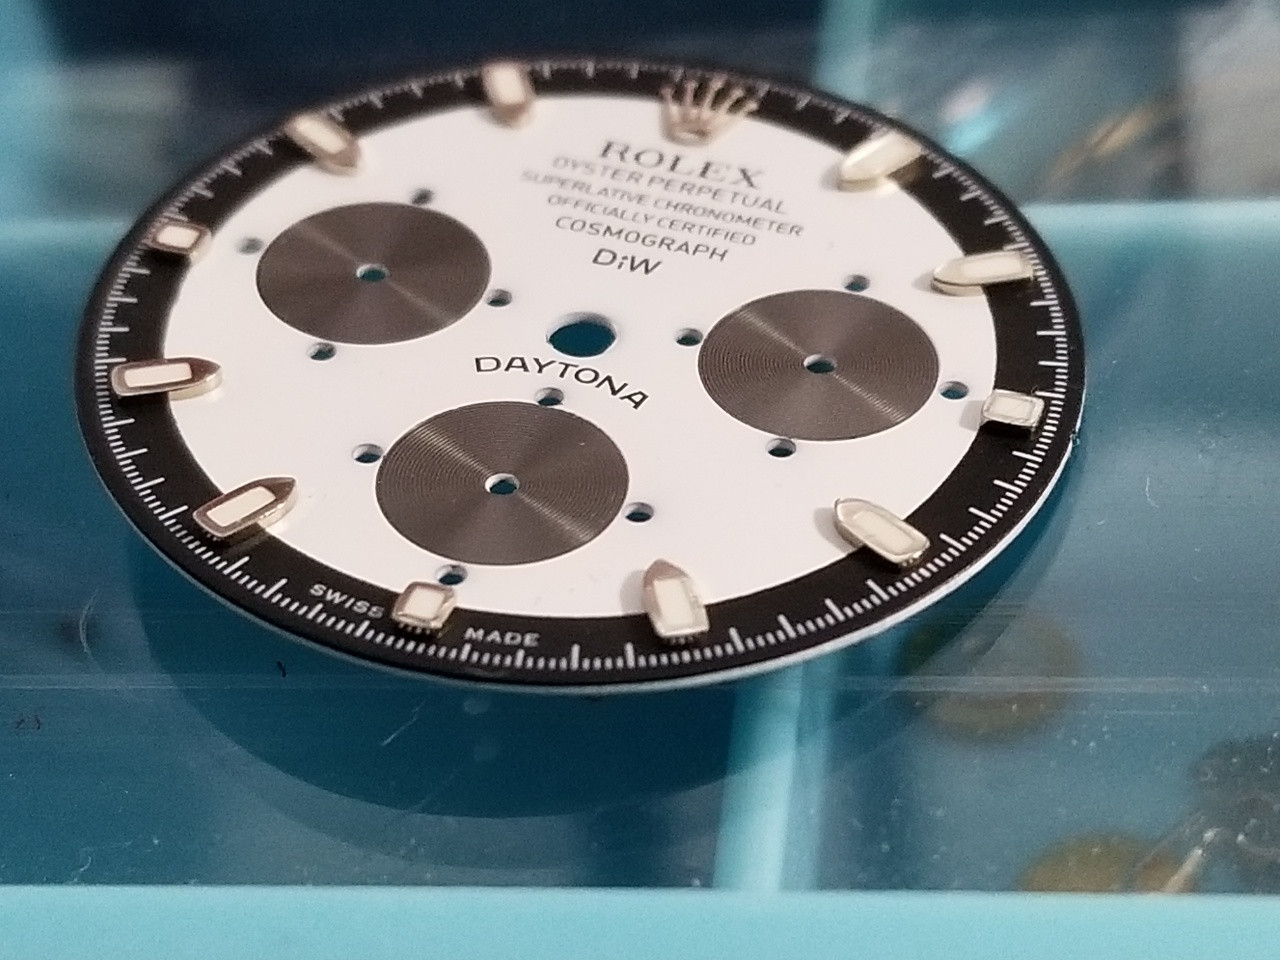
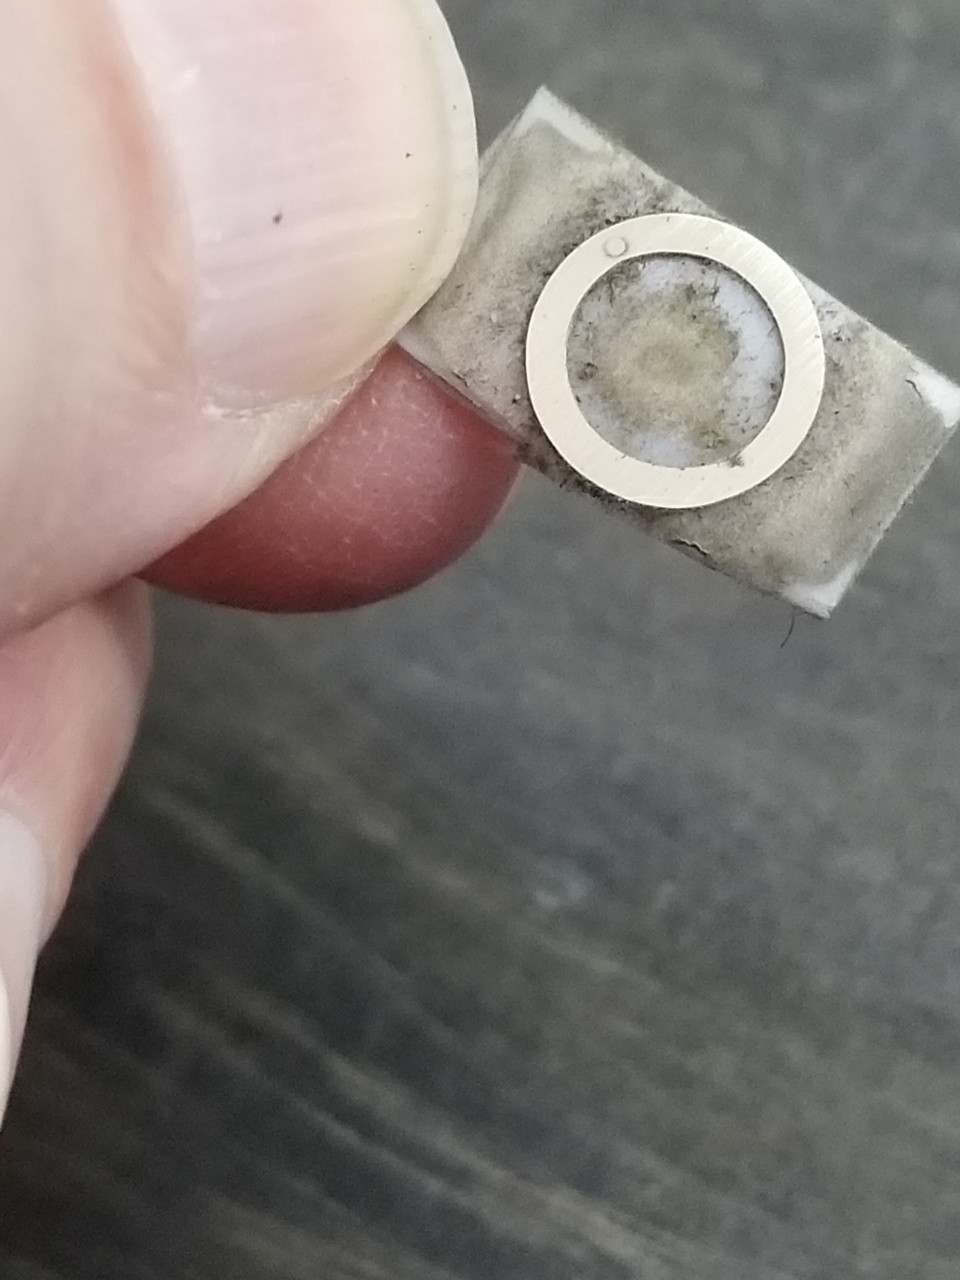
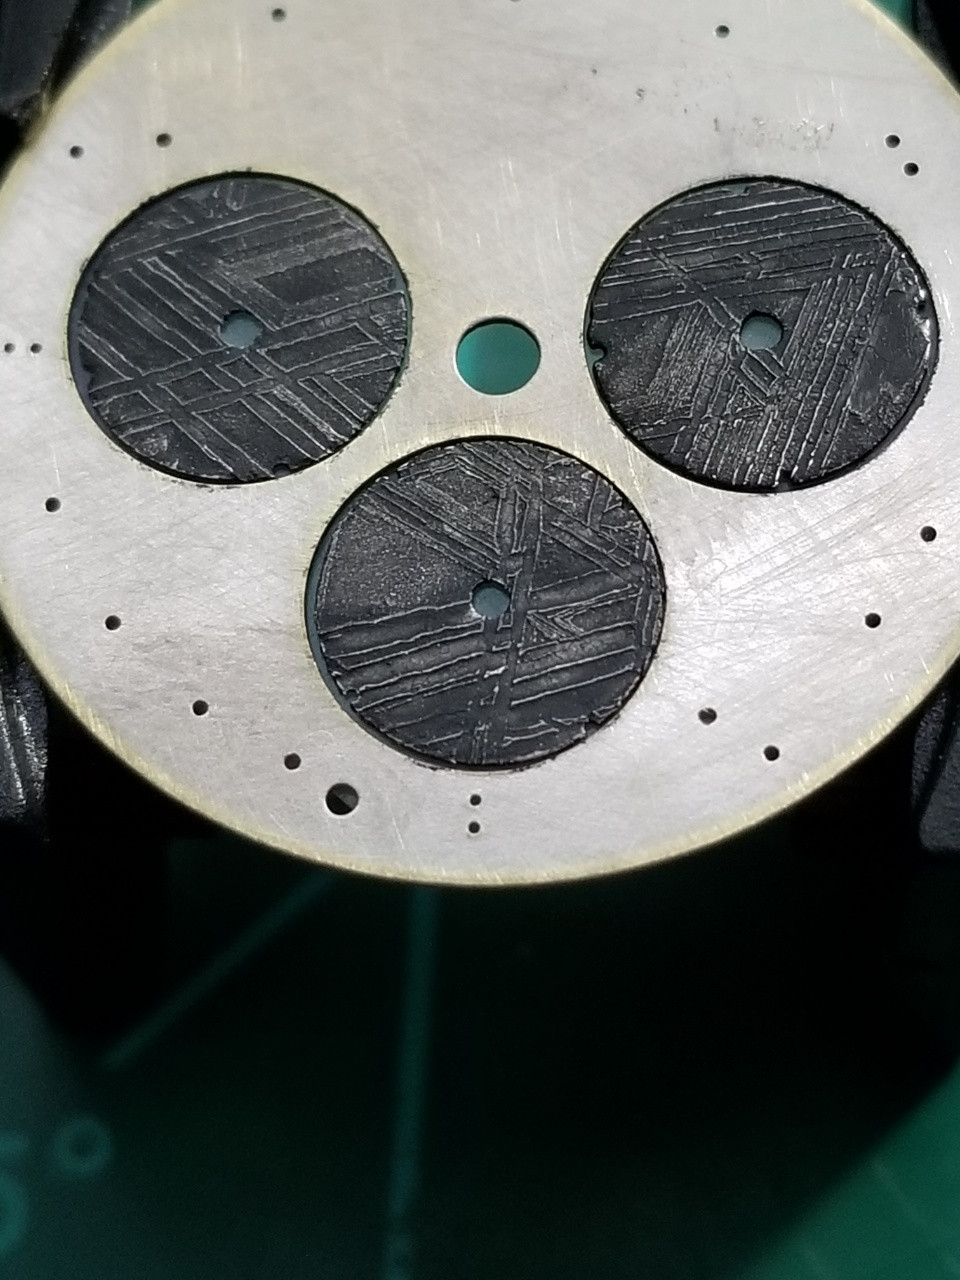
So next step was to make the subdials look realistically blackened. I simply stripped the print off these with acetone then hand painted them with Testor's enamel. Gloss and flat black, some pewter, and then some brushed thinner to mix and randomly lighten. Finally some sparse light sanding on a few high ridges to create a worn look.
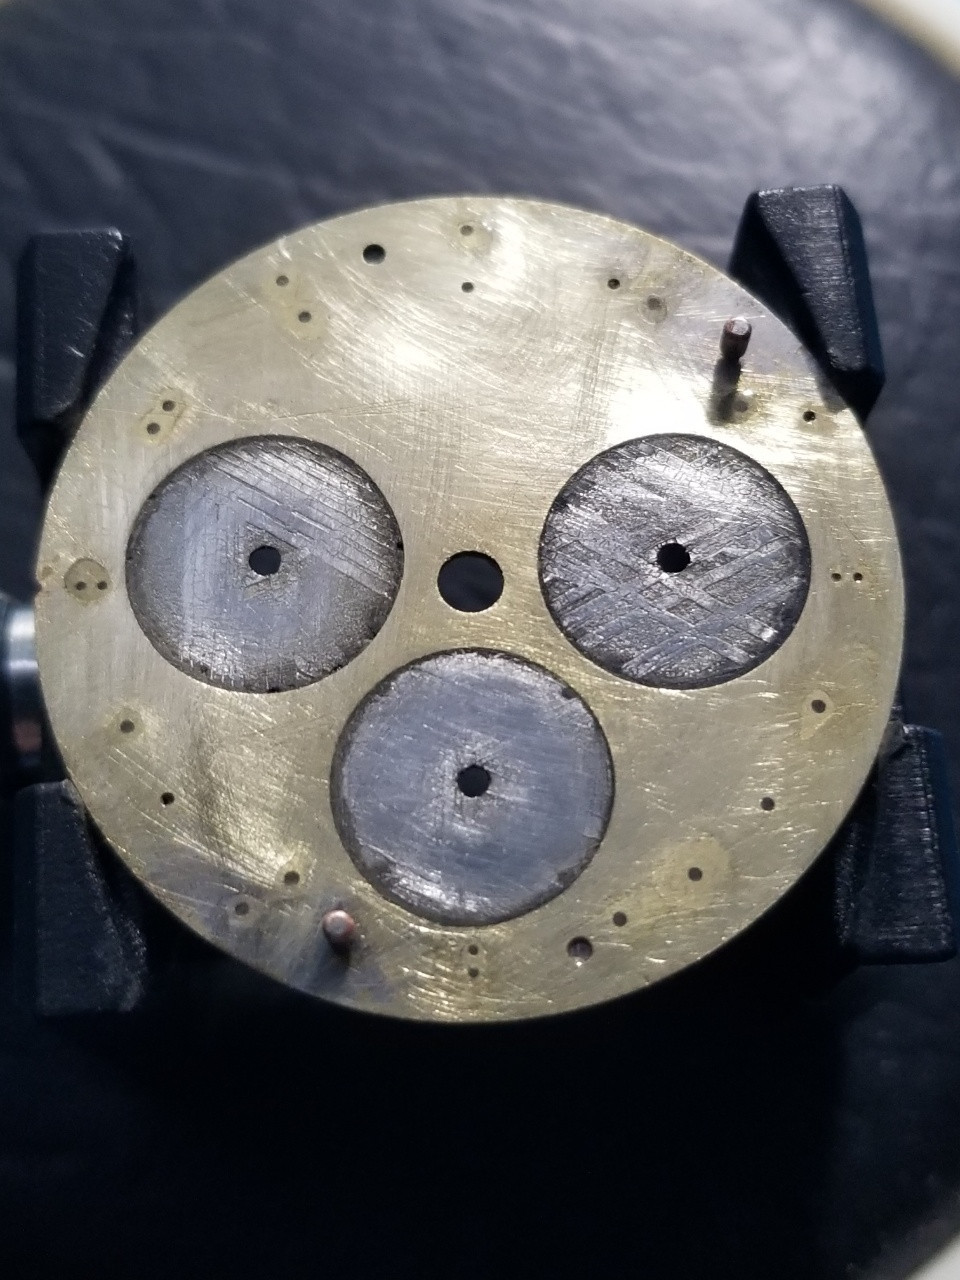
Once the subdials were ready, I decided to cut away their support backing in the dial plate to lower them. It wasn’t much but remember the subdial rings have to sit above them so every little bit helps.
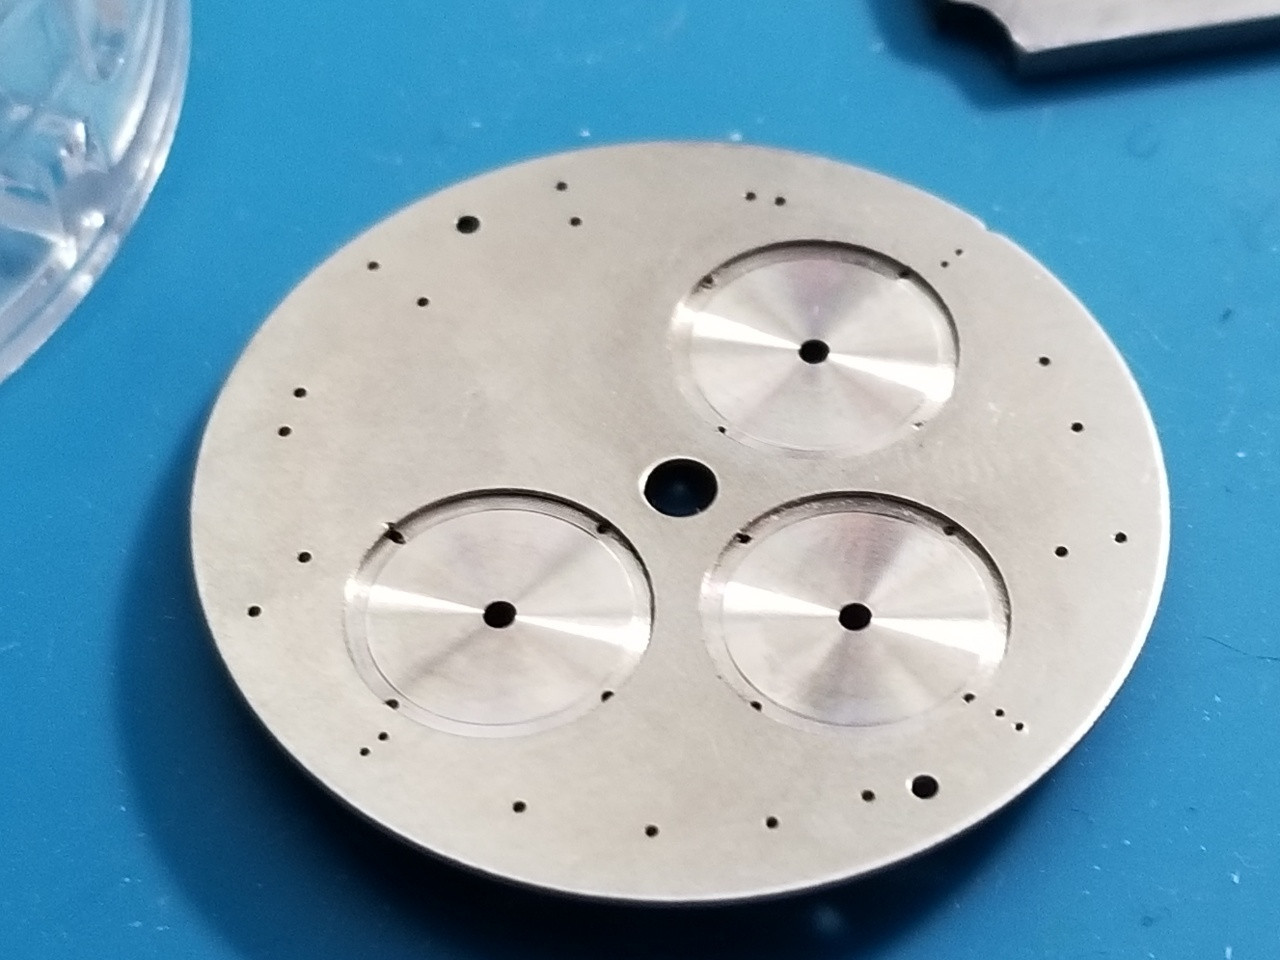
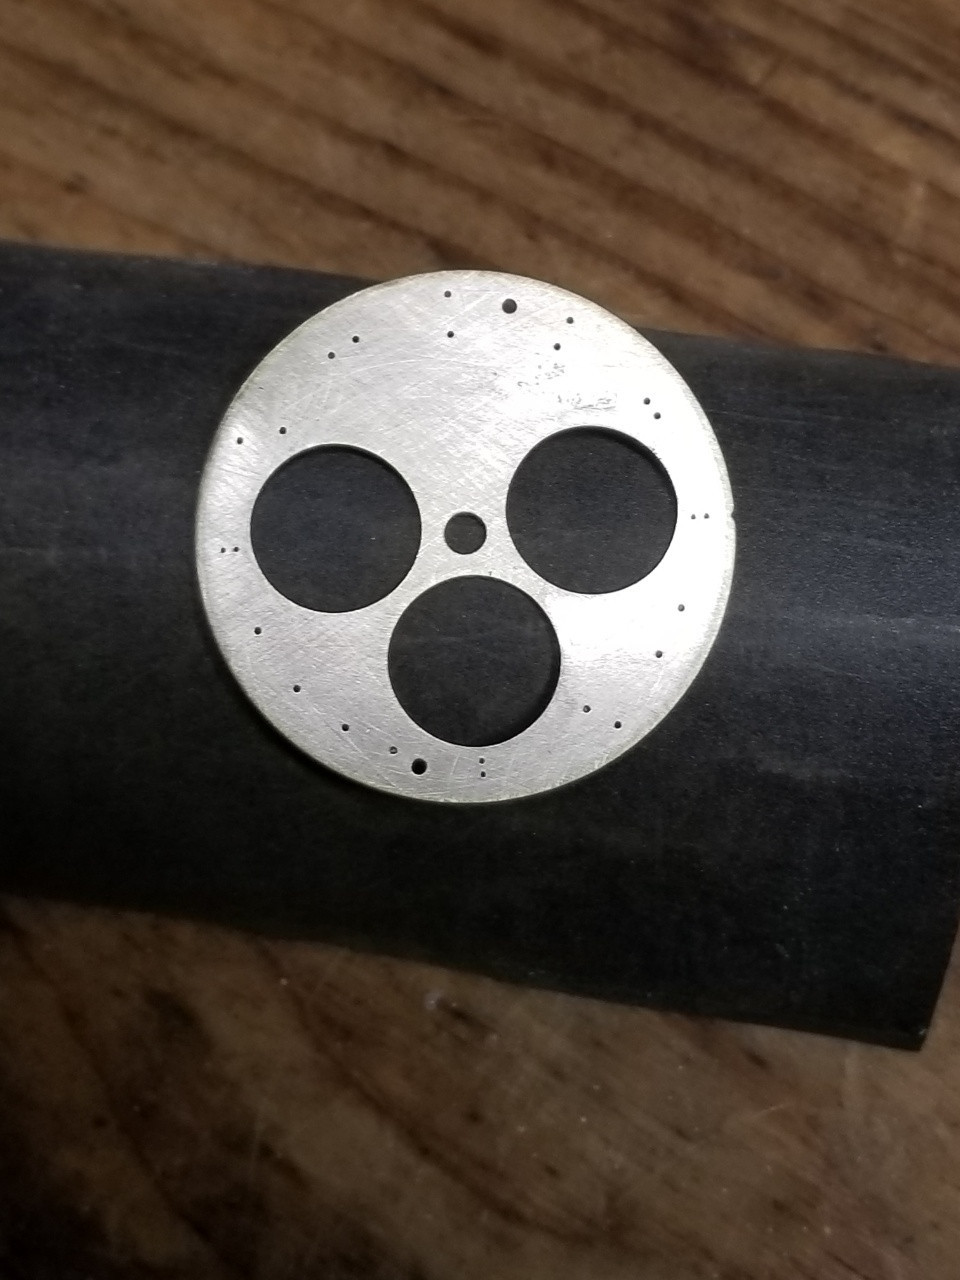
I put some scotch tape over the holes, set the subdials in the orientations I wanted and drizzled some epoxy around their edges.
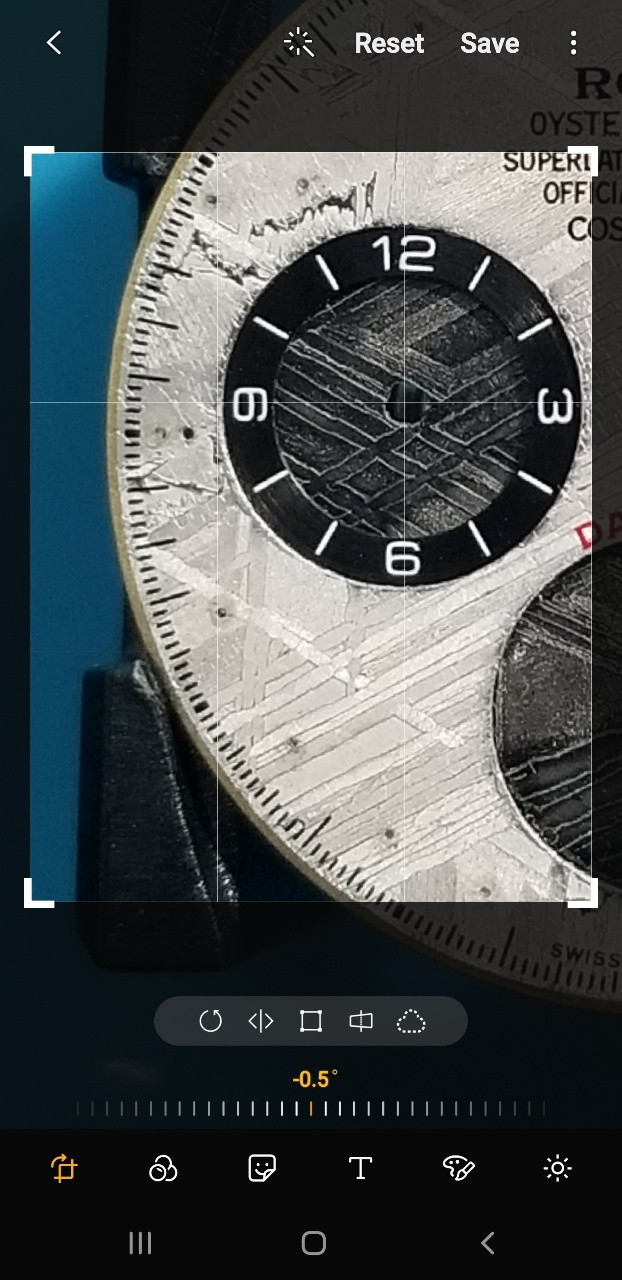
Next I had to figure out how to orient the subdial rings correctly. I used some broaching files to align the dial with its backing plate. Then slide the rings into their holes. I took pics and used the photo editor to align the rings with the dial text and the minute tics, using a gen dial for reference. Then I removed the dial, leaving the rings resting on the backing plate and made some pencil marks on it to aid in the positioning.
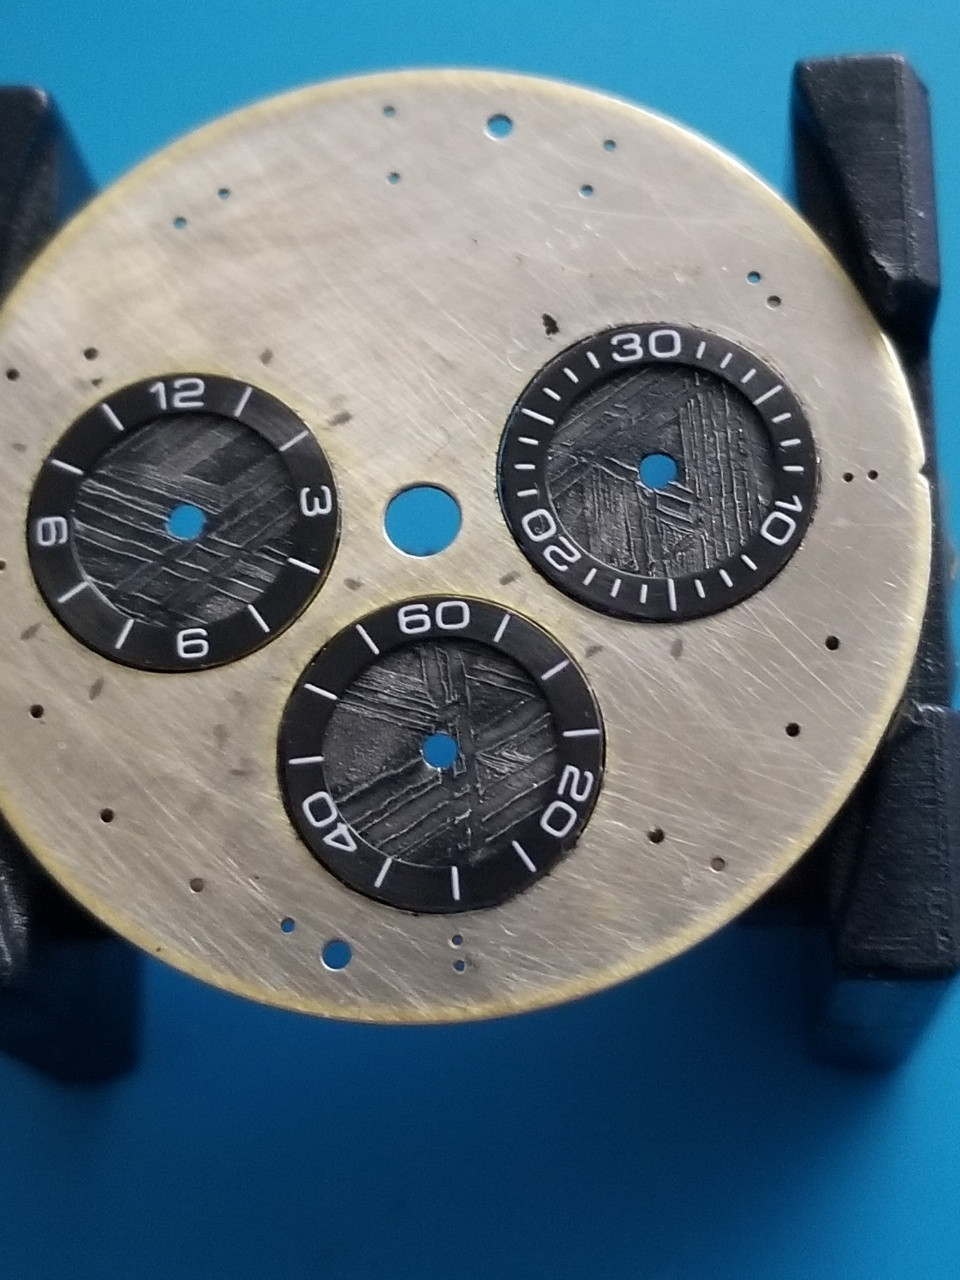
Then a slightly wider bead of epoxy than before on the perimeter, and a few drops on the rings.
Then place the rings onto the backer plate, lined up with the pencil marks.
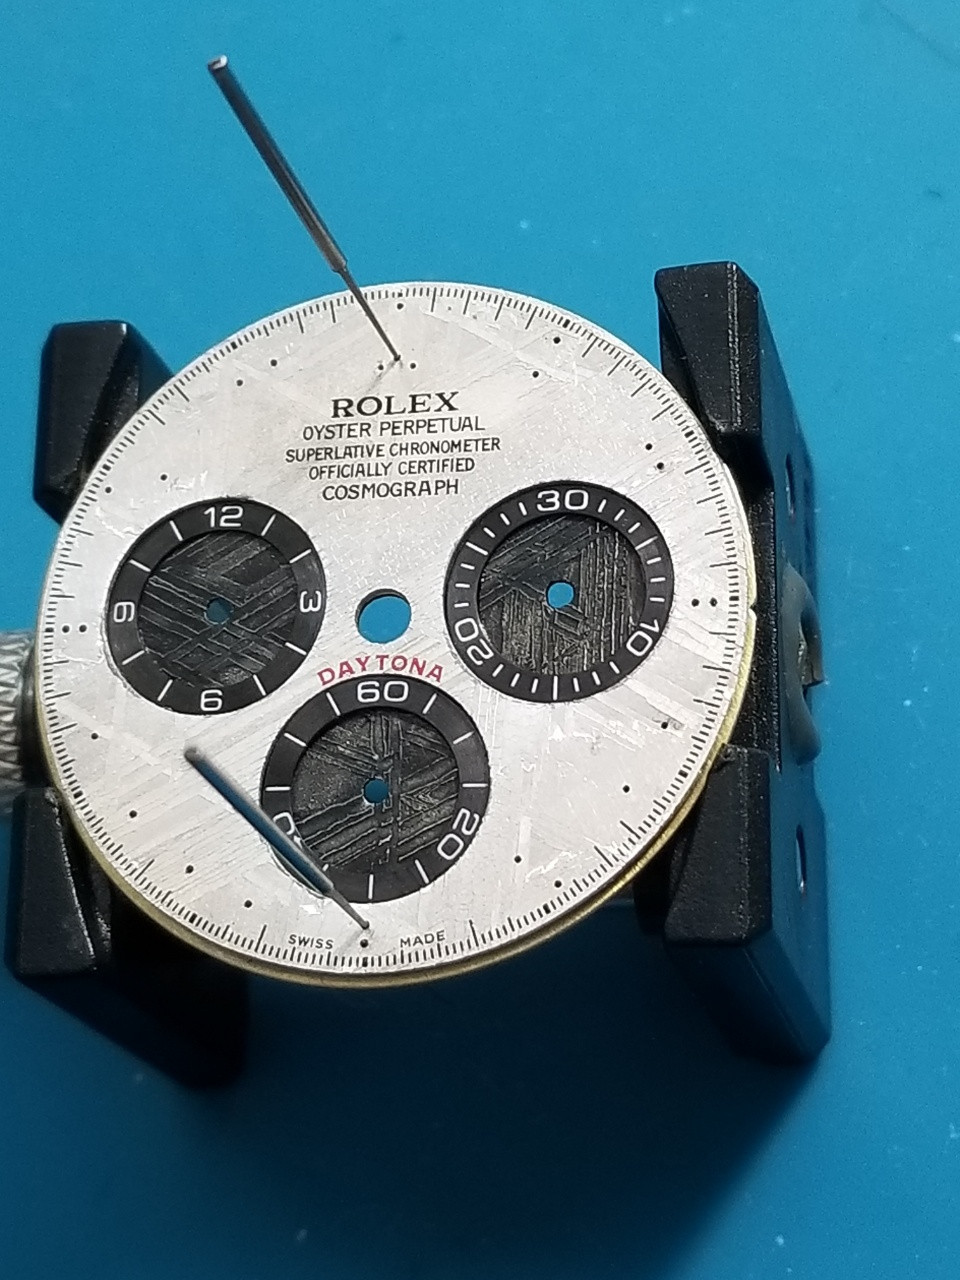
After each ring was glued into place, I put the dial over it and could make fine adjustments.
After all the epoxy cured, I went back and sanded off the scotch tape so the dial would sit as flat as possible to the movement.
Now we can glue the dial back onto its backer plate. Just some gentle pressure with the clamps.
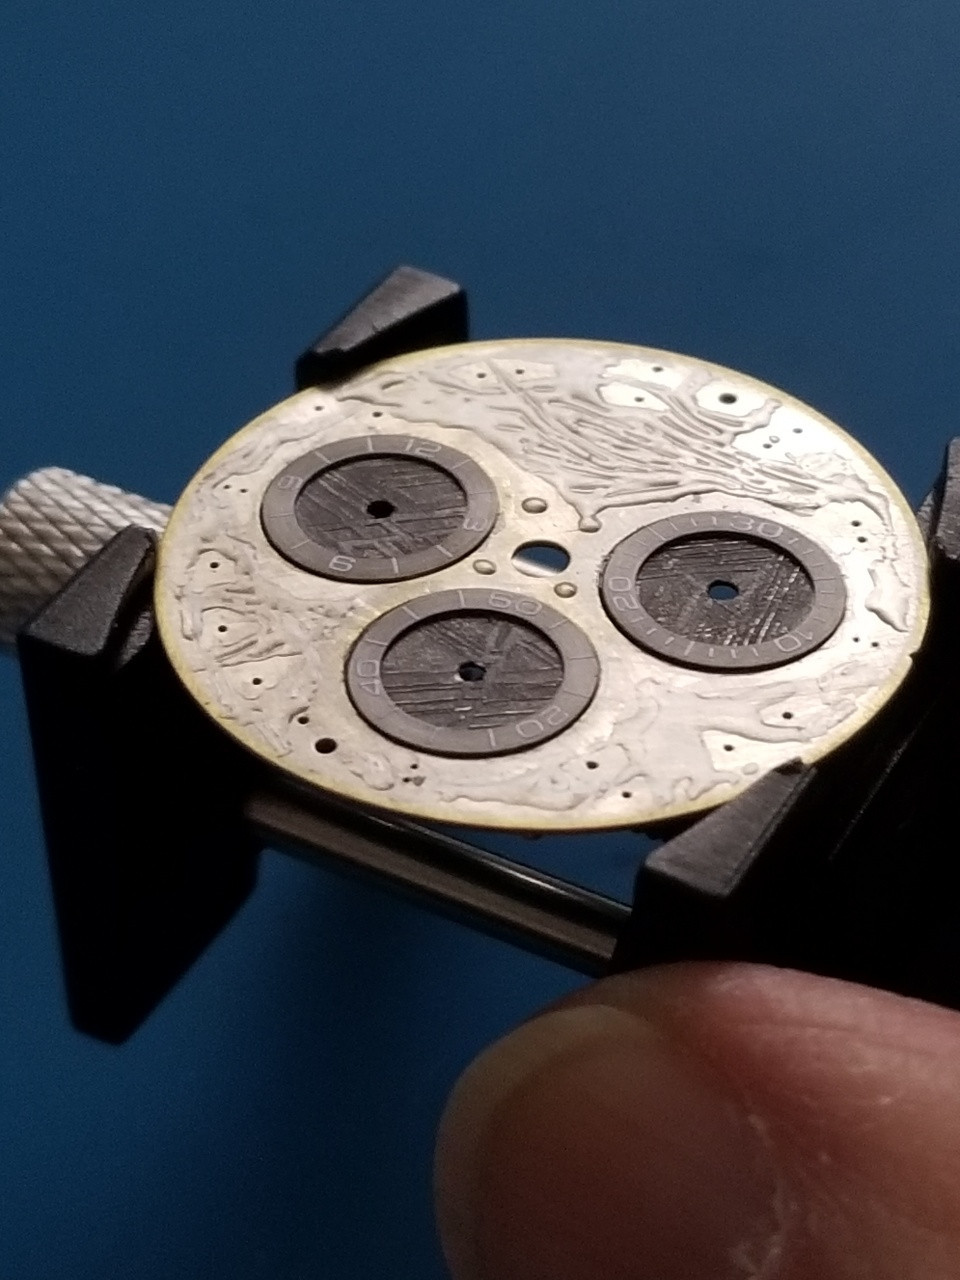
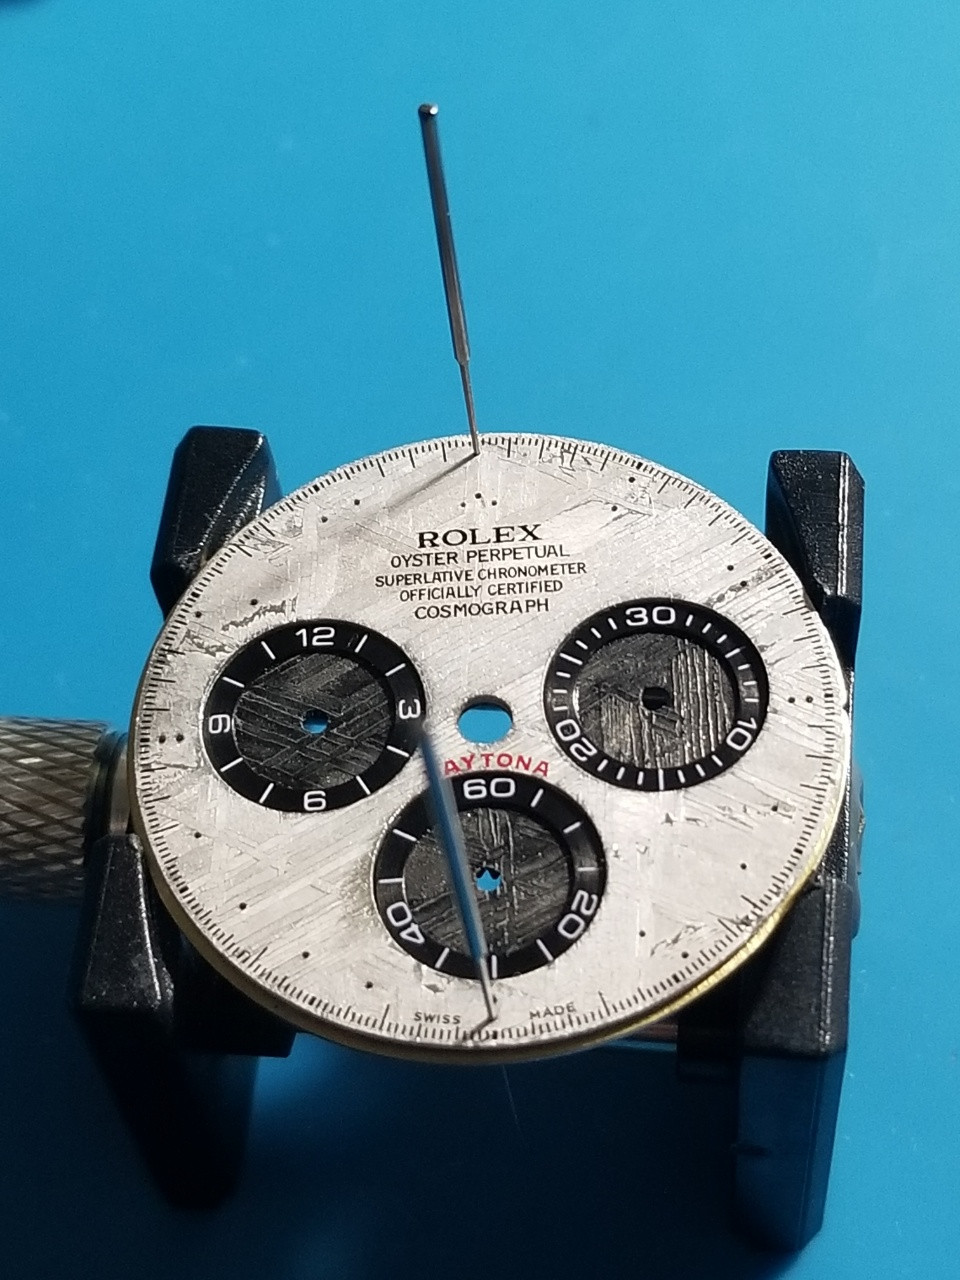

Good so far. Now we can add the markers back on, set the hands and mount the movement back into the case!
But wait, wtf is this!?
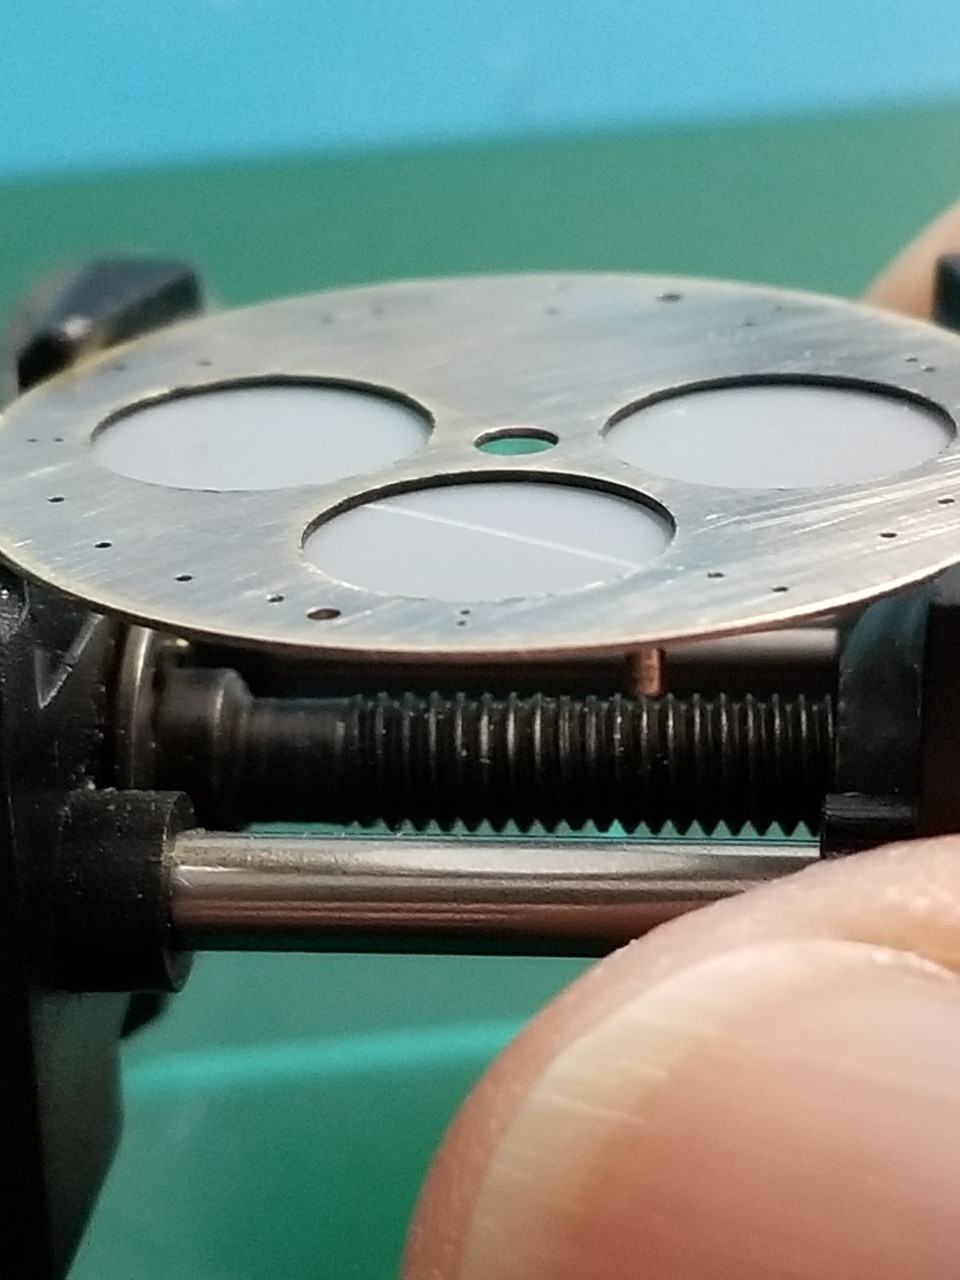
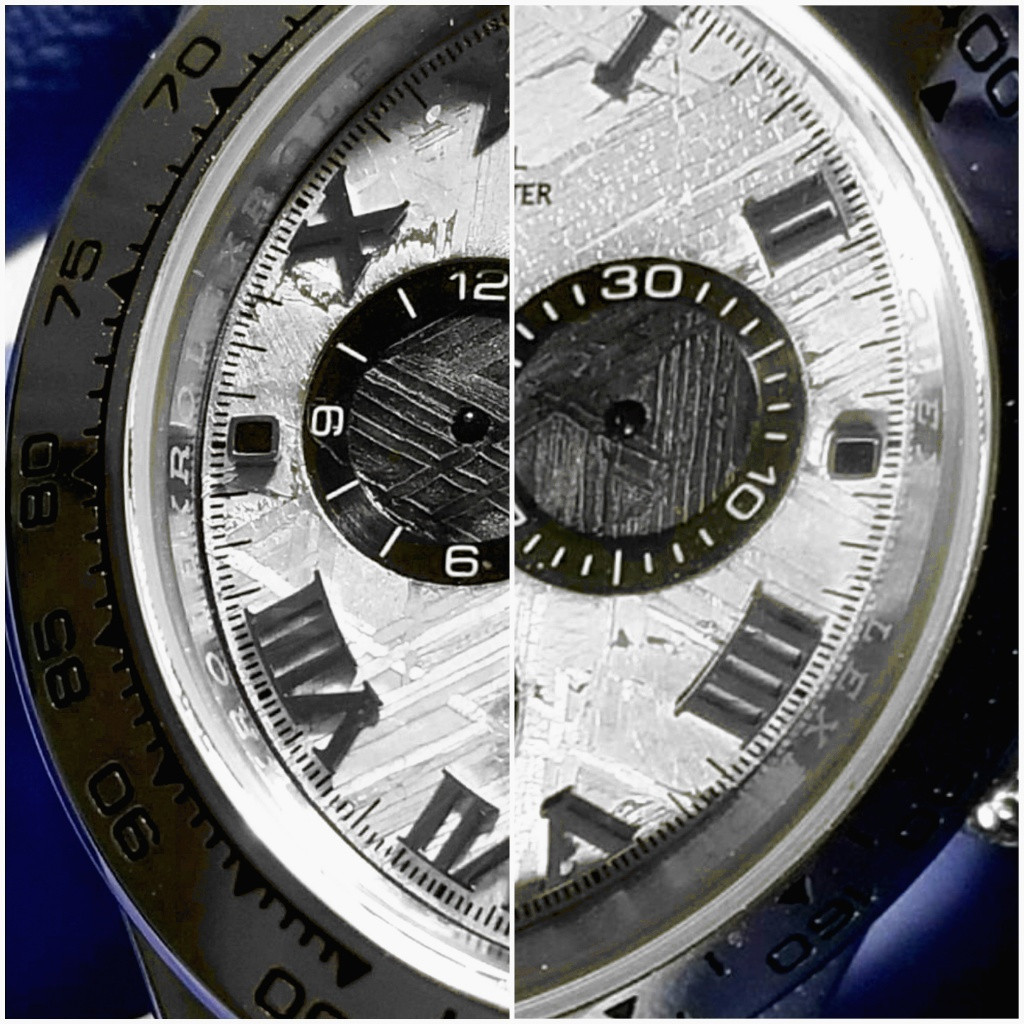
The dial isn’t centered in the rehaut! Huh?
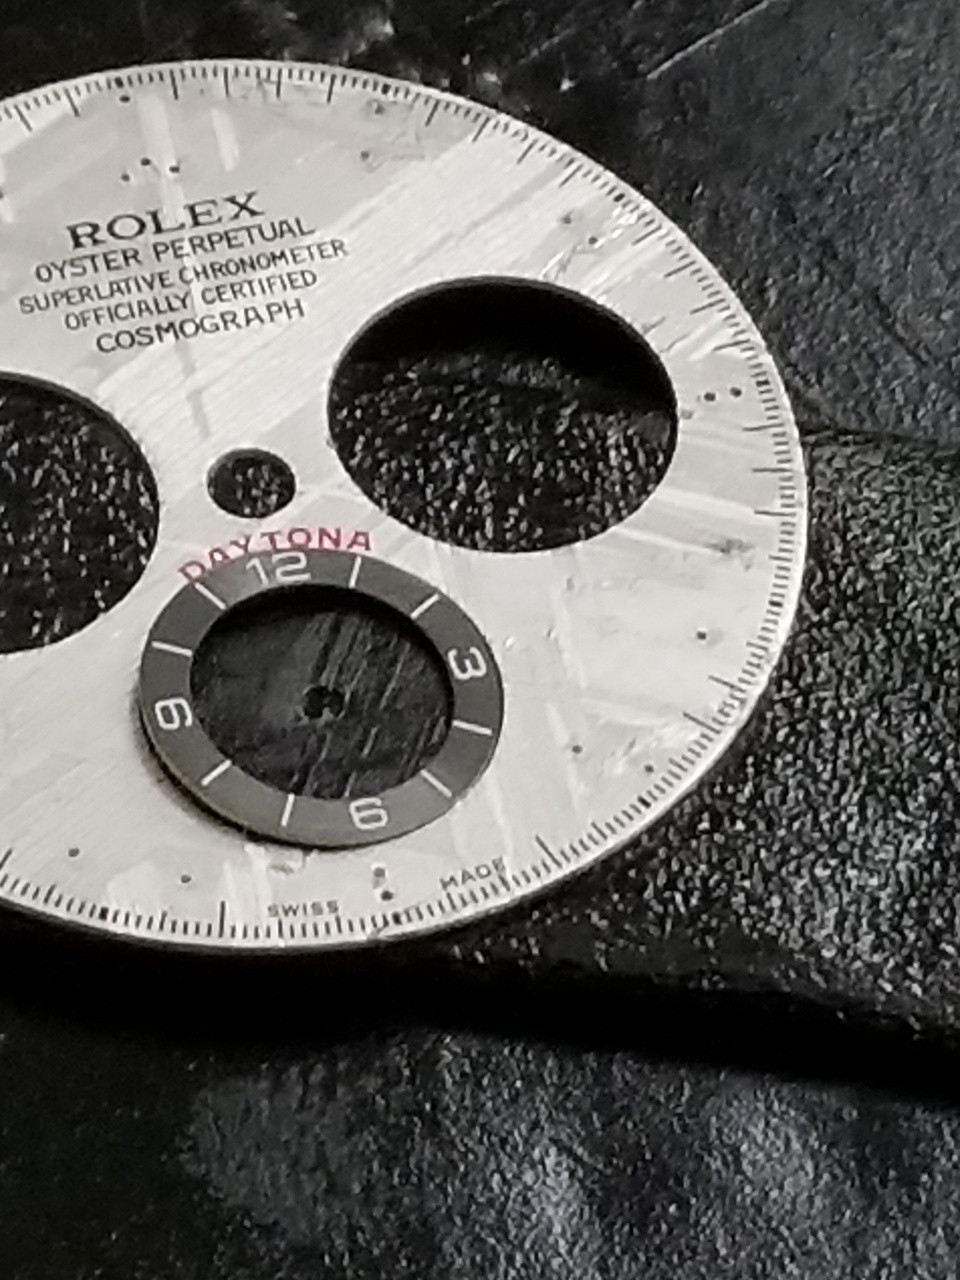
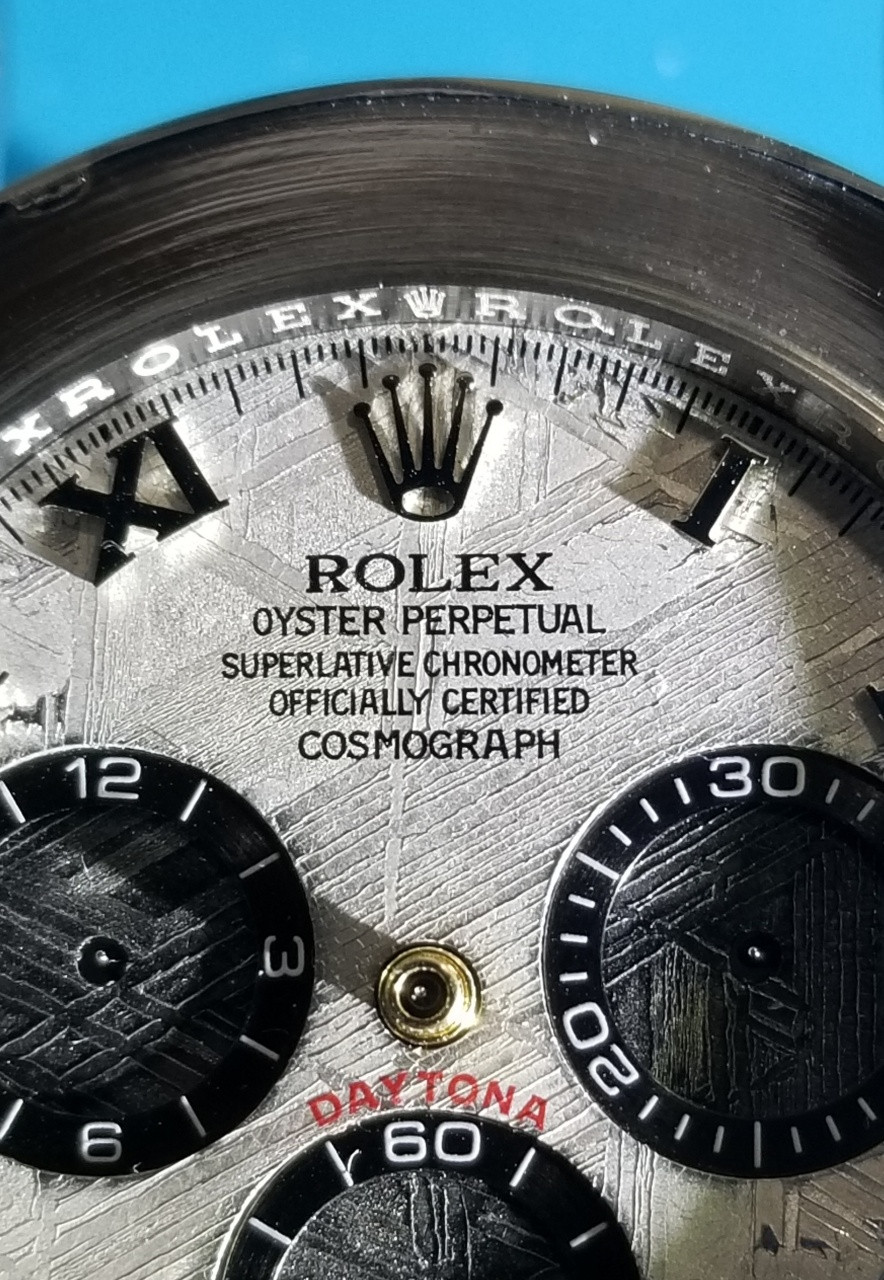
Sad to admit it but this is the first I noticed that the dial had been factory mounted offset to the right on its backer plate. Wow. Stone dials are made to fit up inside the rehaut so that they are not contacted by the underside of the rehaut. Pressure on the dial edge from the rehaut can chip away at it or crack it. You can see a tiny bit of chipping from 14 - 19 minutes.

This wasn’t my mistake, all the holes in the plate were perfectly aligned with the holes in the dial. But it certainly was mine to catch and I failed to do so in time. This is how the dial fit into the case. A gap on the left and it was under the rehaut on the right. You should see a tiny even gap to the rehaut all the way around with a stone dial and certainly no part of the dial underneath it.
So, as you can imagine I wasn’t too keen on the notion of taking everything apart again after all the epoxy cured so the project was set aside for a bit while I tried to come up with a solution.
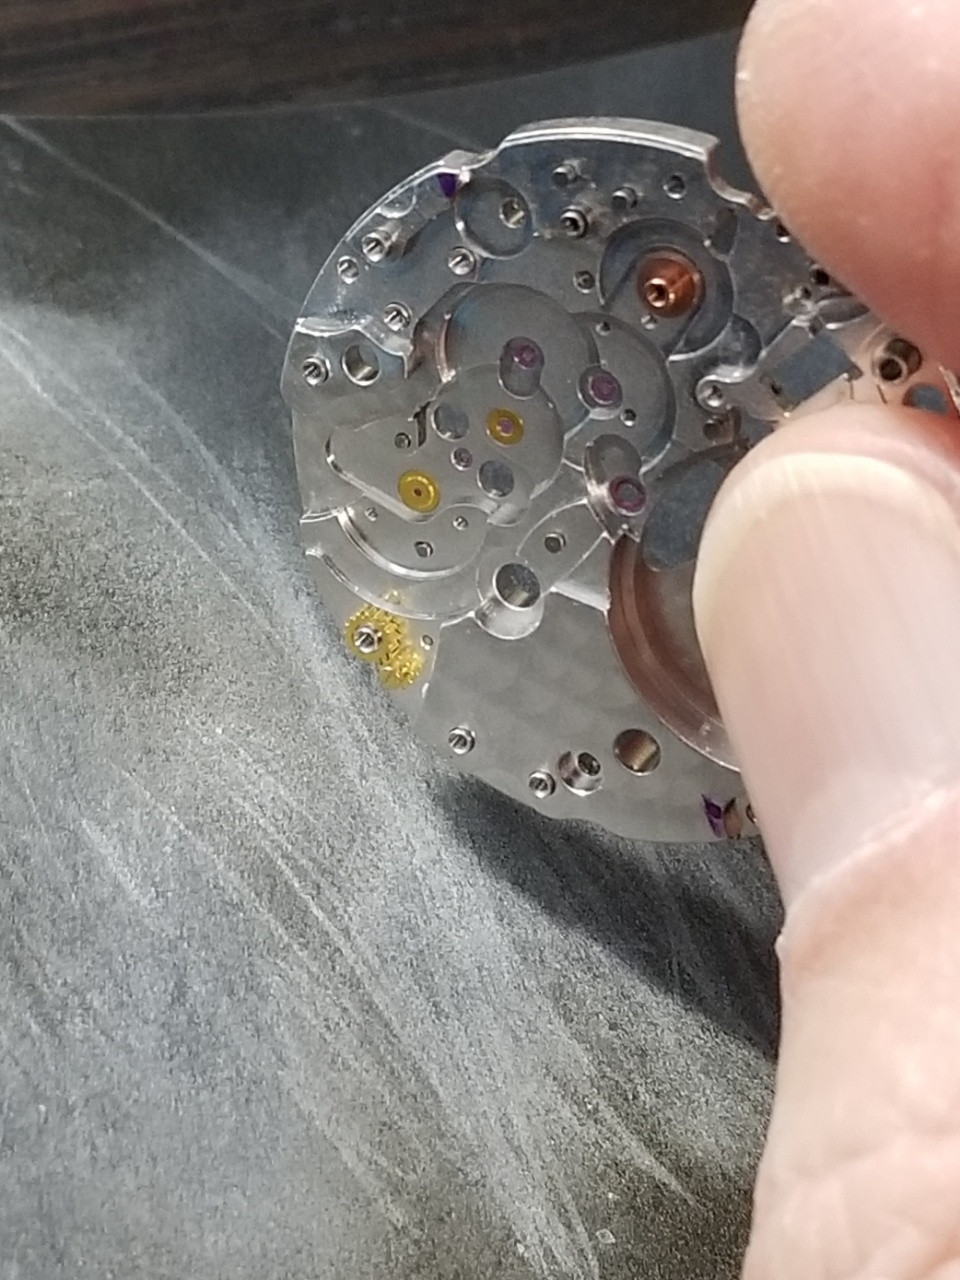
And then it hit me. If I shaved a little off the left side of the movement plate I could move the whole assembly left in the case and the dial would fit correctly. I would need a few shims on the right side to keep the movement in place and maybe a longer stem but hey, it might work!
Of course to do that meant tearing the movement down completely so I went ahead and serviced it while it was apart, hell the disassembly and reassembly is 90% of a servicing anyway.
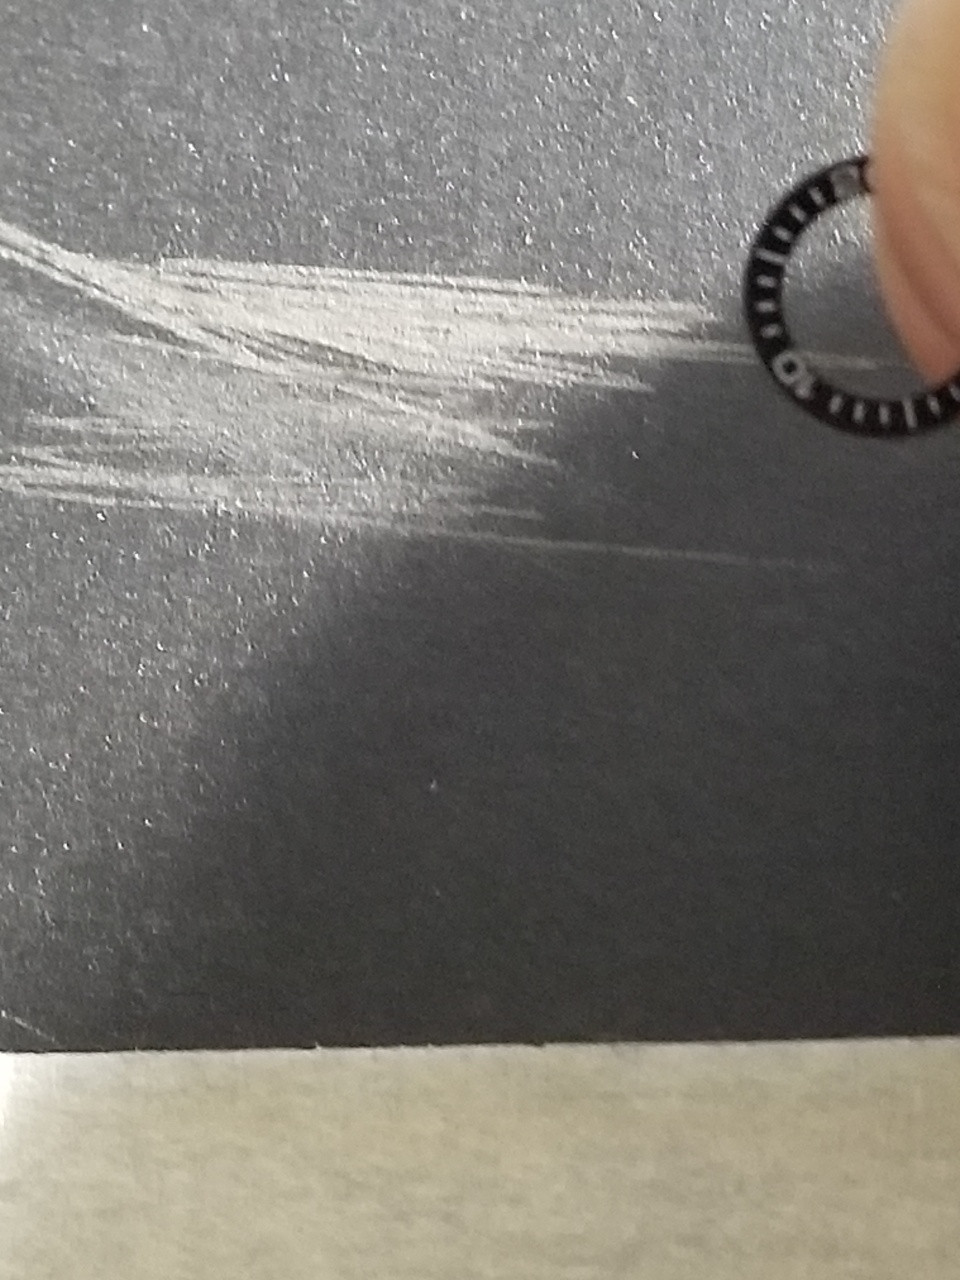
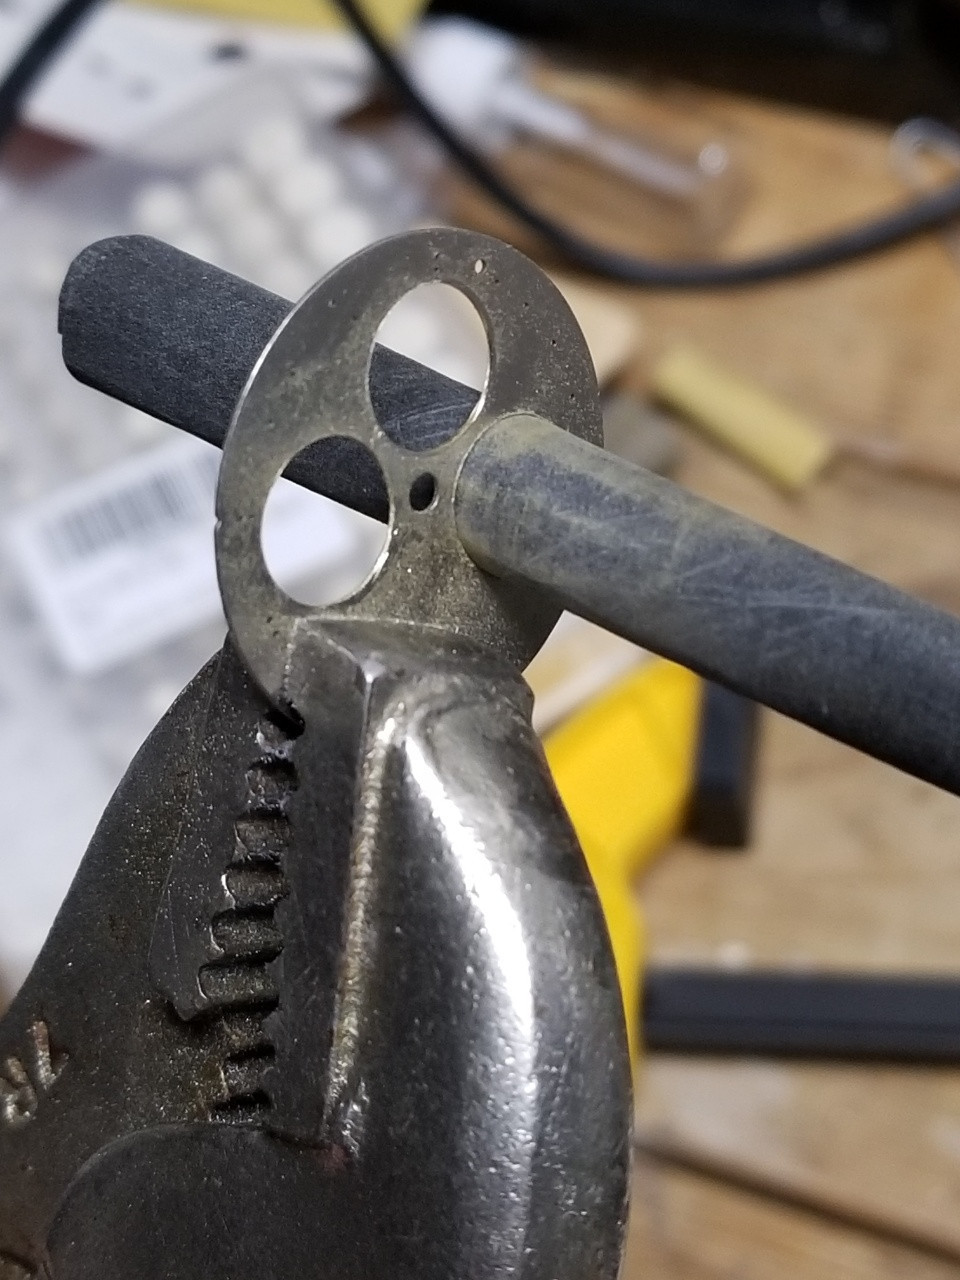
Shaving the main plate was a cinch, just like shaving a dial or an aluminum insert - swipe/roll, rinse and repeat. I used progressively finer grit paper then polished it on a buffing wheel. For the shims I stacked bracelet tape then cut rectangles in the right size to fit. I experimented with varying amounts of shaving plus various layers and positions of shims to come up with an ideal combination.
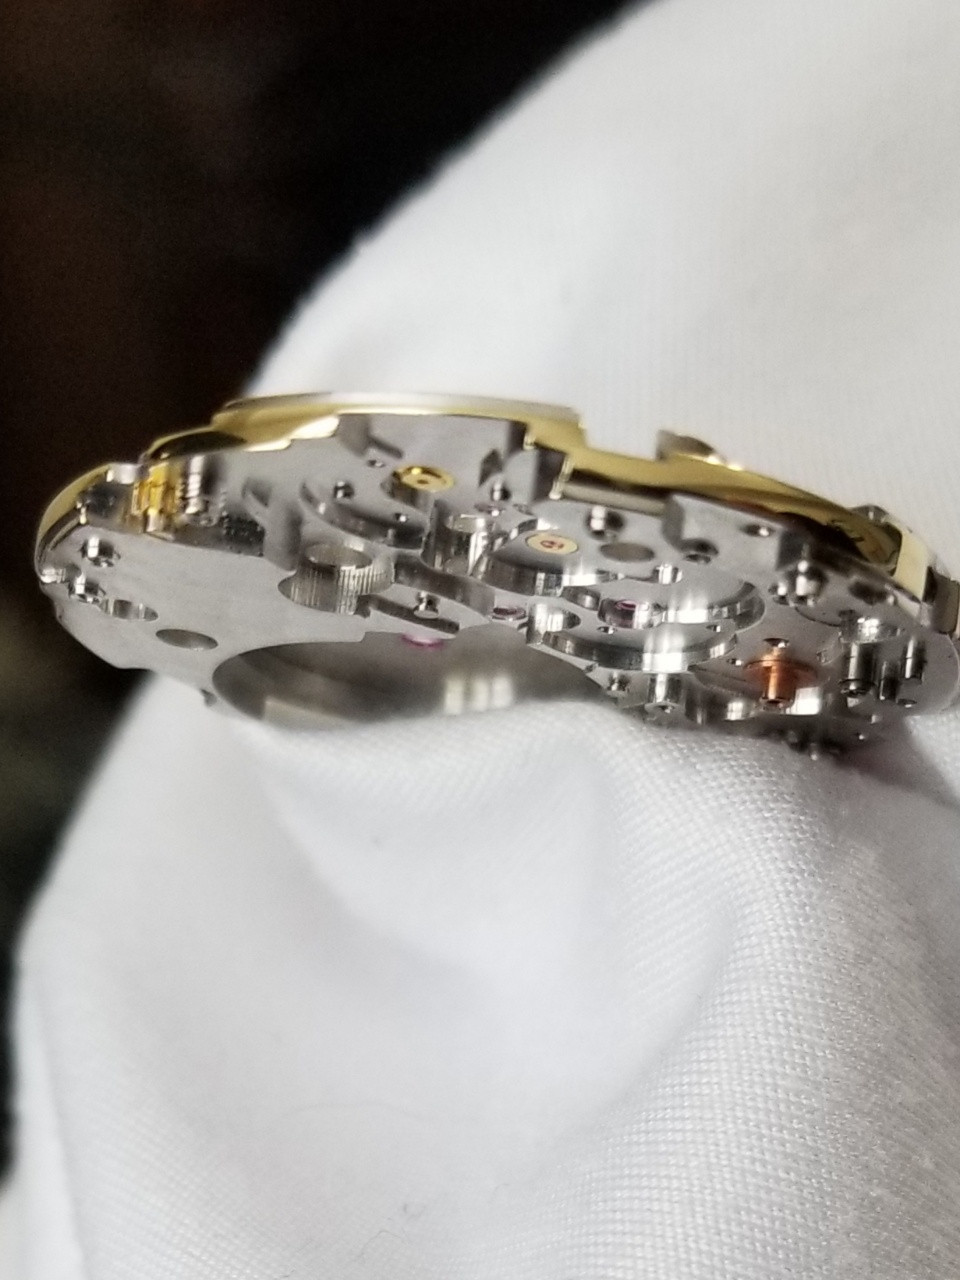

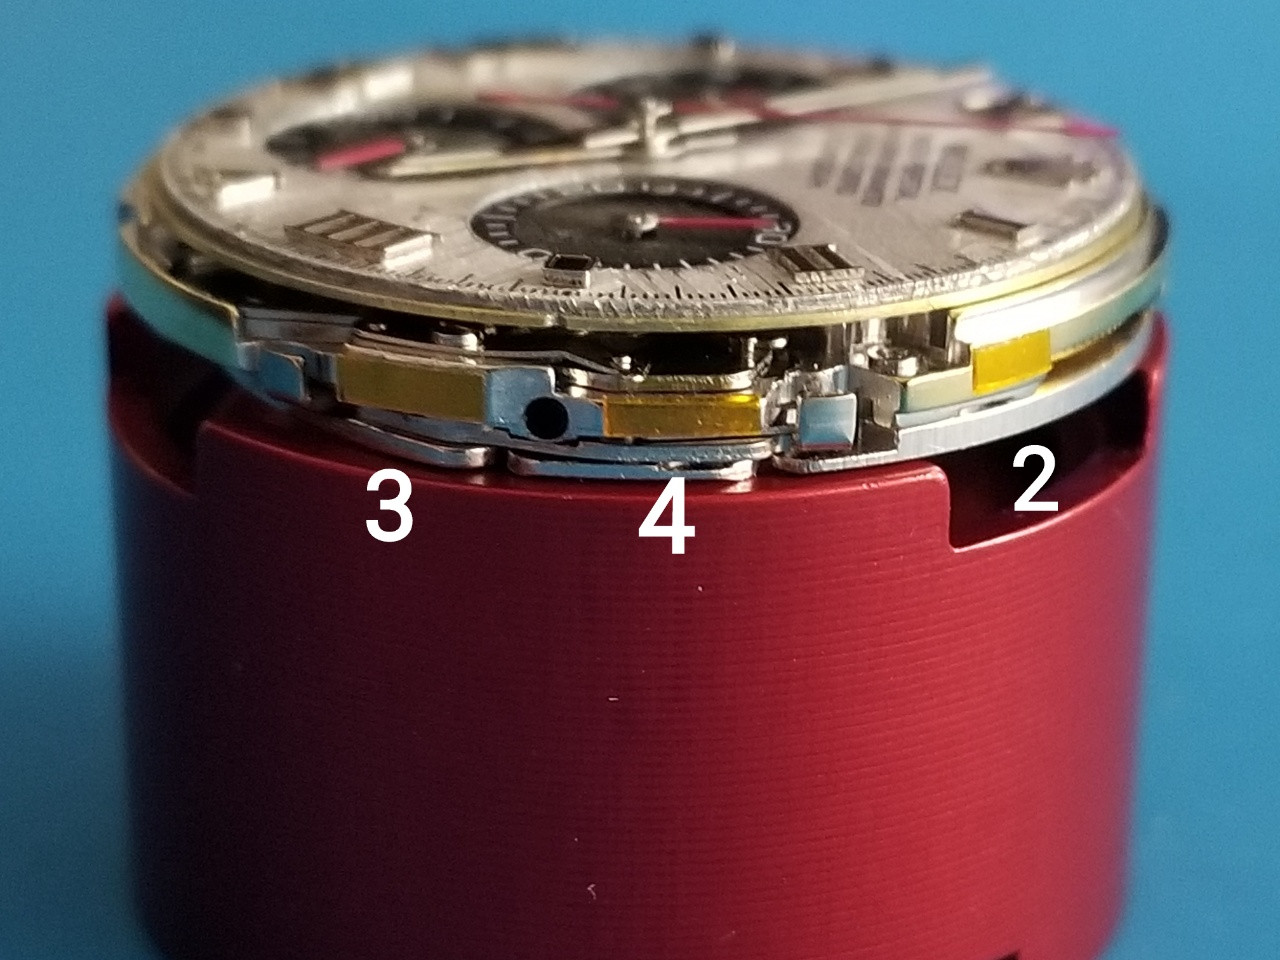
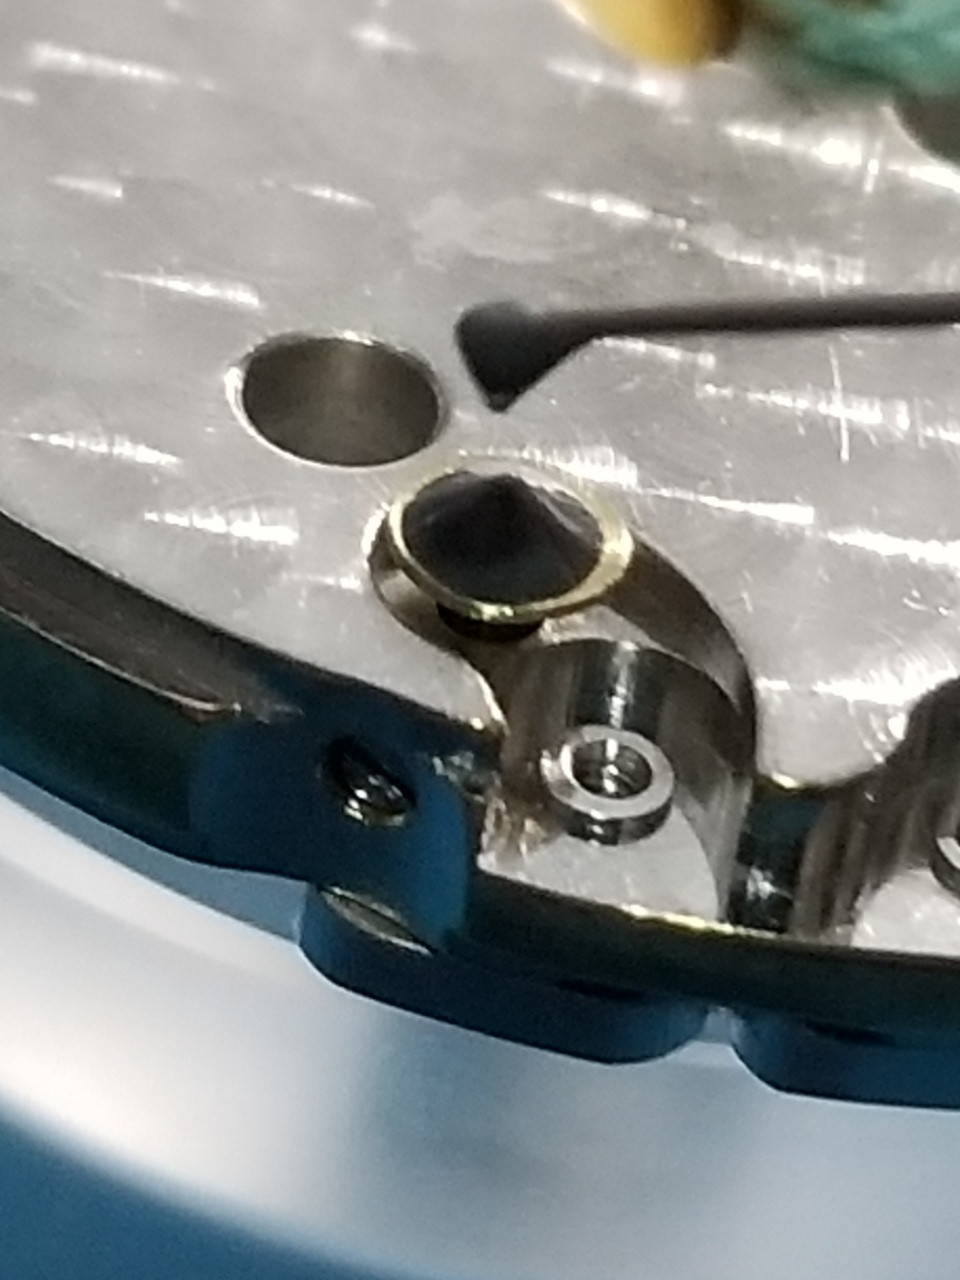
Here you can see the shims in place, it’s righty tighty, nothing’s going anywhere.
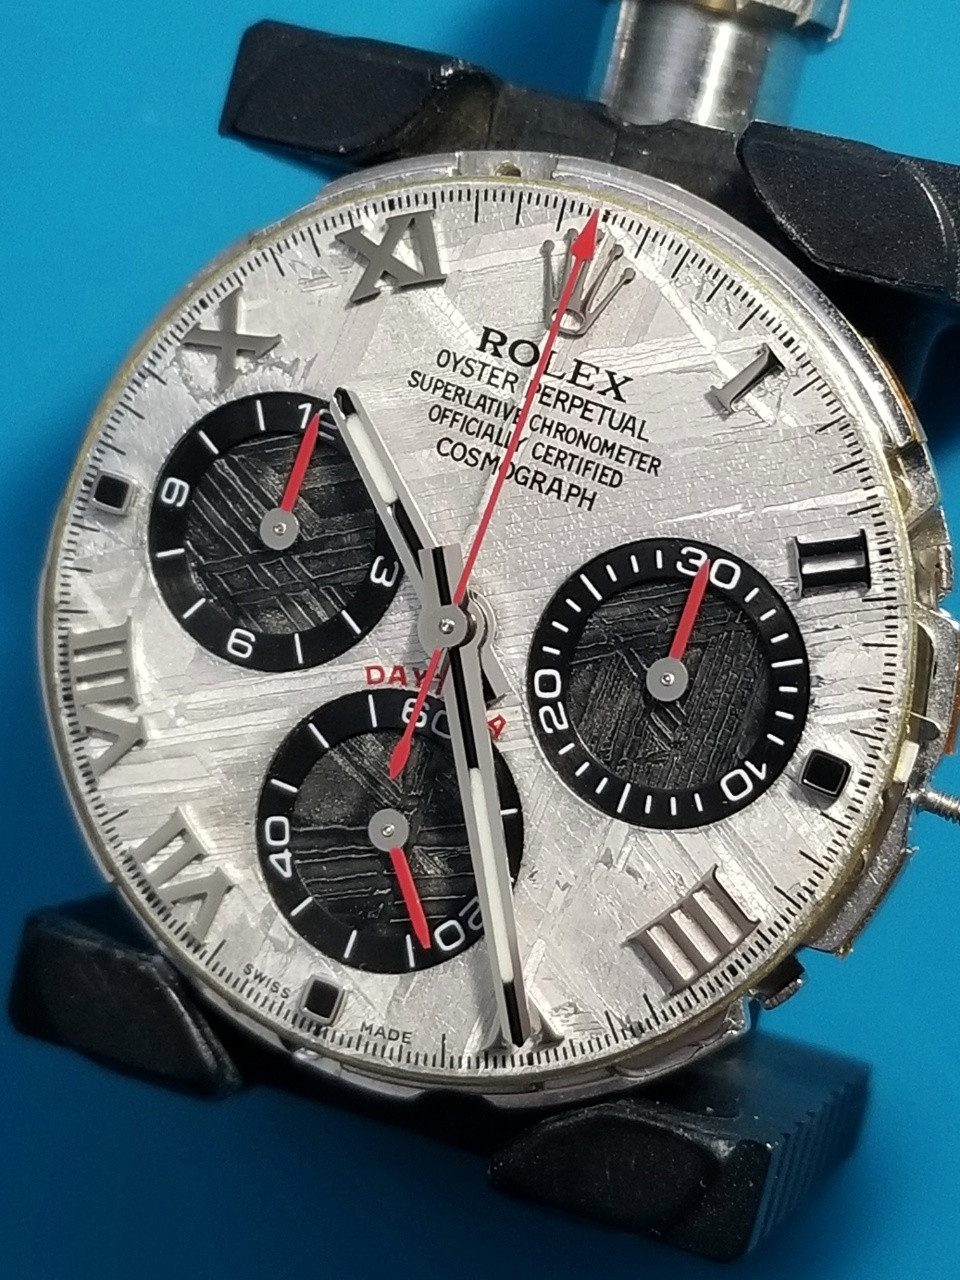
So let’s try this again, hands reset ,back in the case and YES we have a good dial fit.
Hmm the rehaut crown is off a little to the right, what’s up with that? I know these can be off sometimes and I can tolerate it to some extent but when I put the bezel and bracelet back on the 60 was aligned with the dial but way off with the bracelet center link. OMG, now what? At first I wondered if I had caused this by moving everything left but I didn’t move the dial left of where it should be, I moved it exactly to where it should be.
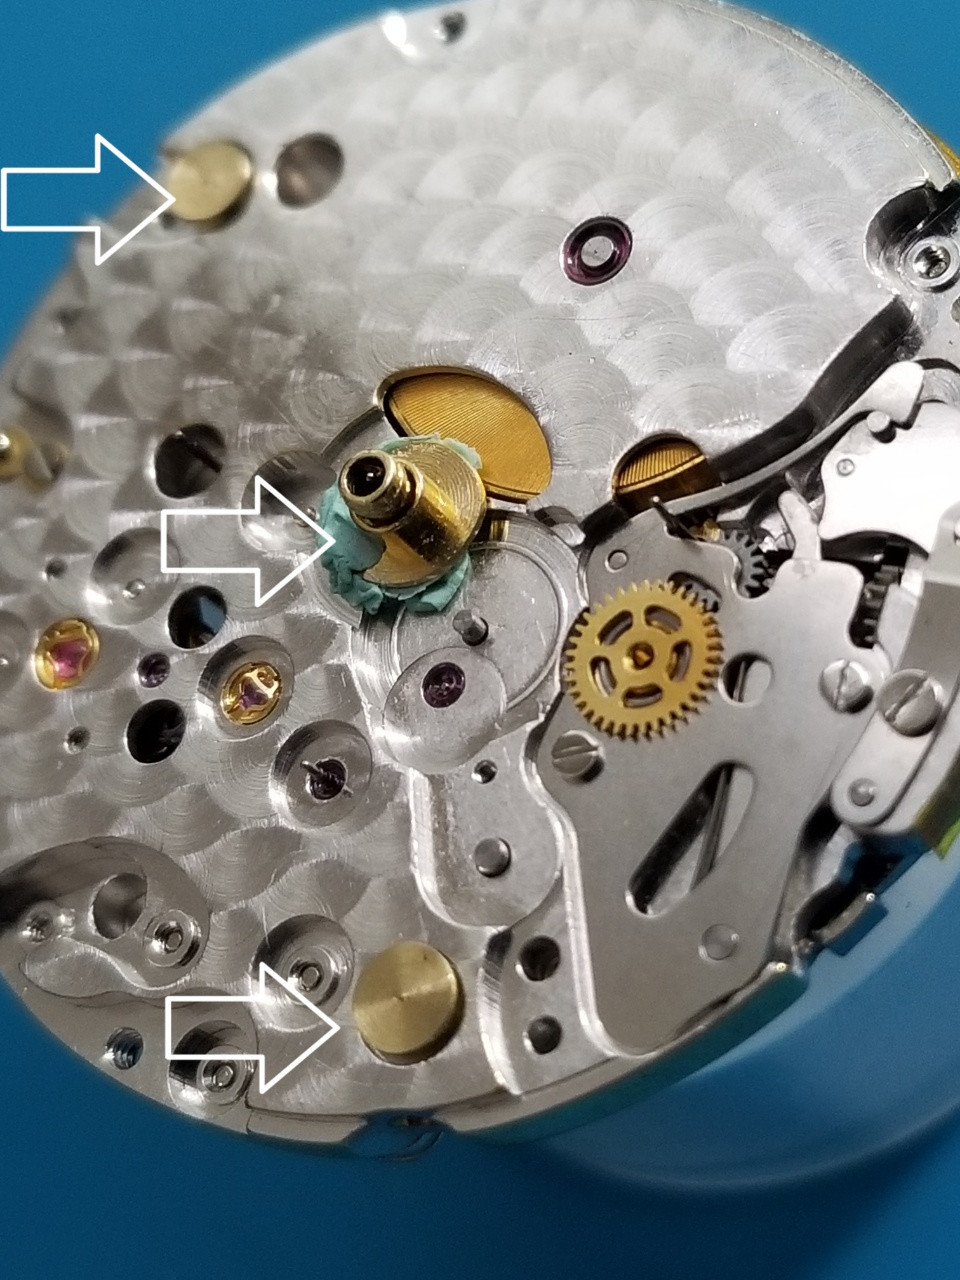
So it turned out that the dial feet that are on the backer plate were actually off about 2 degrees. Thanks a lot Noob!
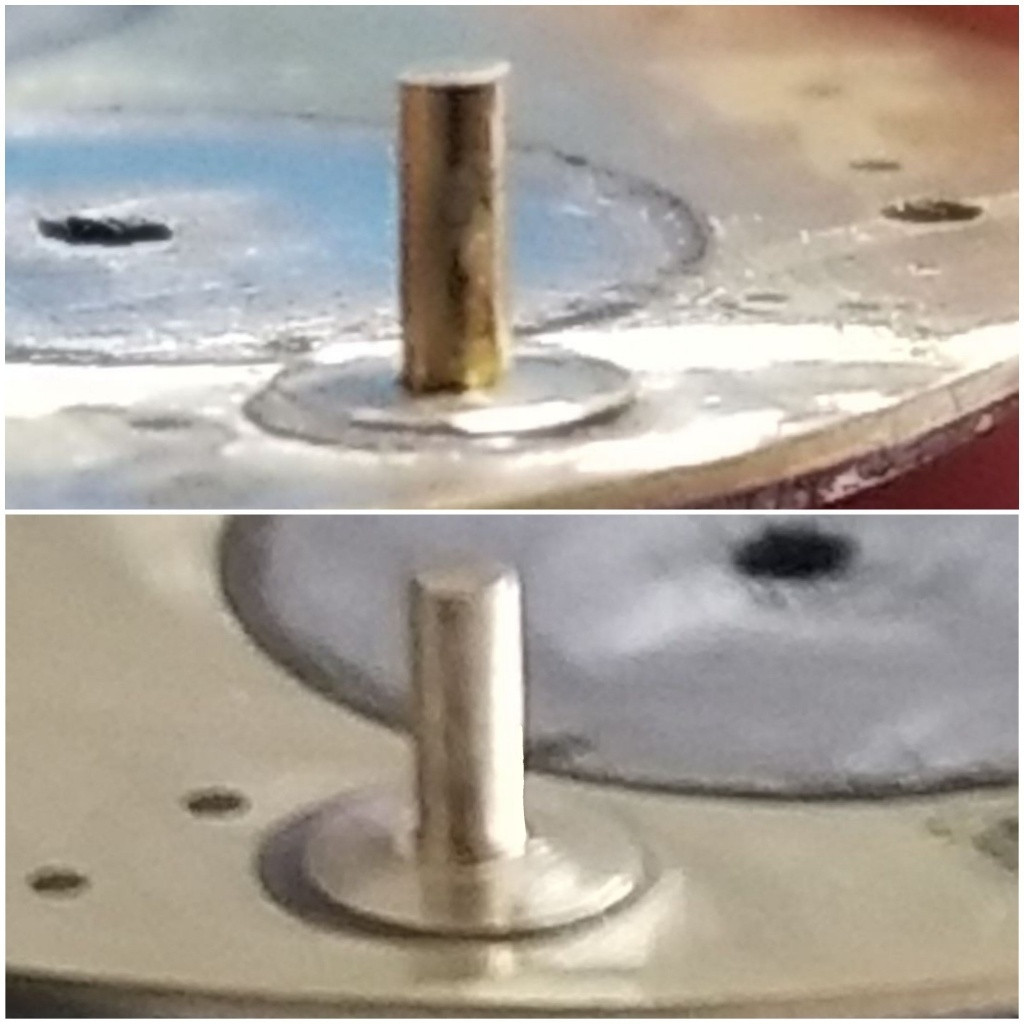
So everything had to come off again - hands, dial, bezel, bracelet - whew. Dial feet were grinded off and new feet were epoxied on.
I used an old hour and minute wheel with shaved perimeters and some Rodico to act as a dial centering and immobilizing tool. I elevated and anchored the new feet in the feet holes then added the epoxy. This keeps the glue from oozing onto the movement. I used the case to weight the dial plate down onto the new feet, which gave me the perfect way to center the rehaut.
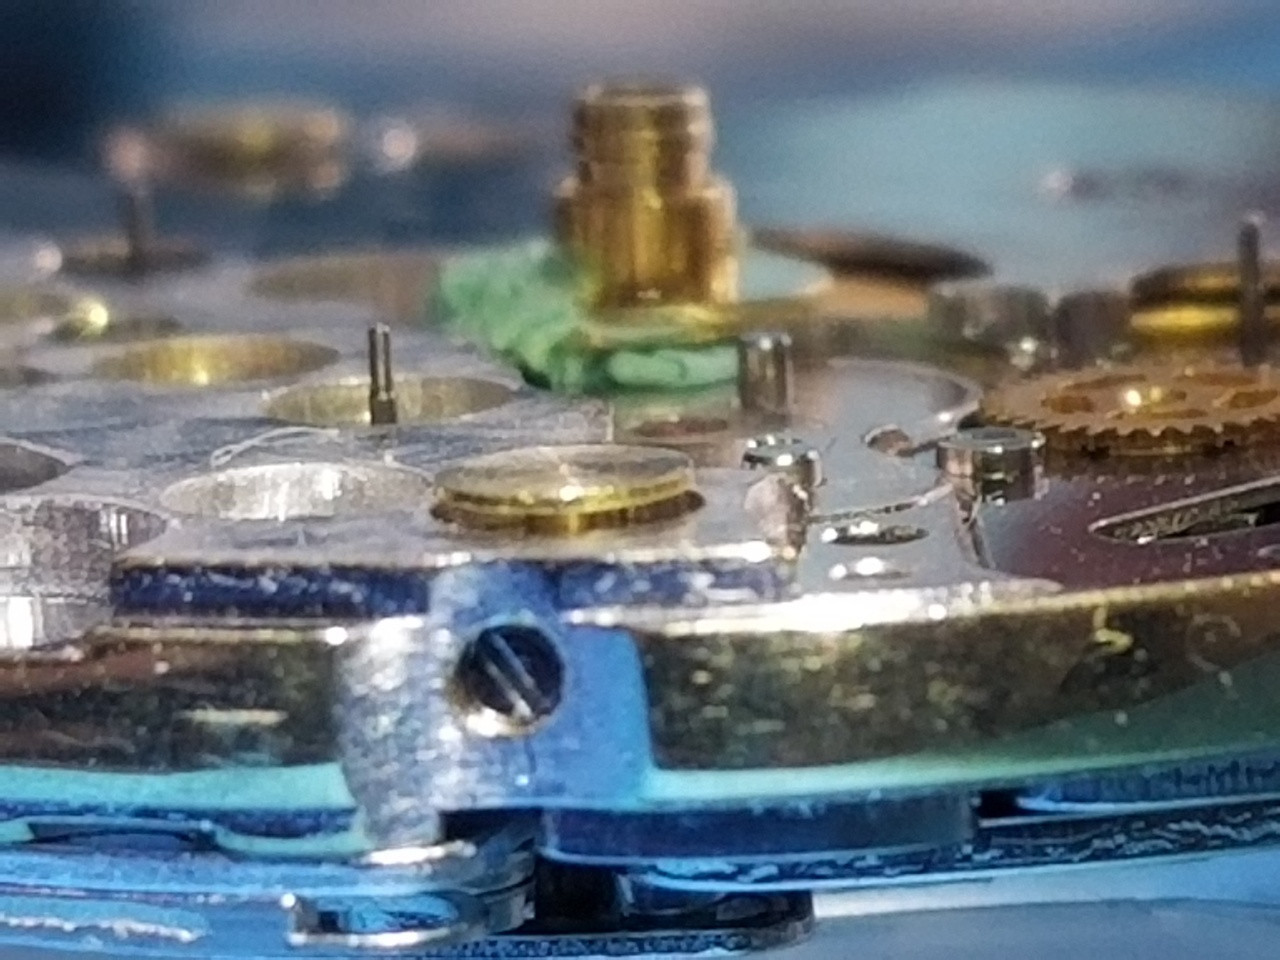
I sanded down the glue bumps around the new feet bases so the dial would sit flush.
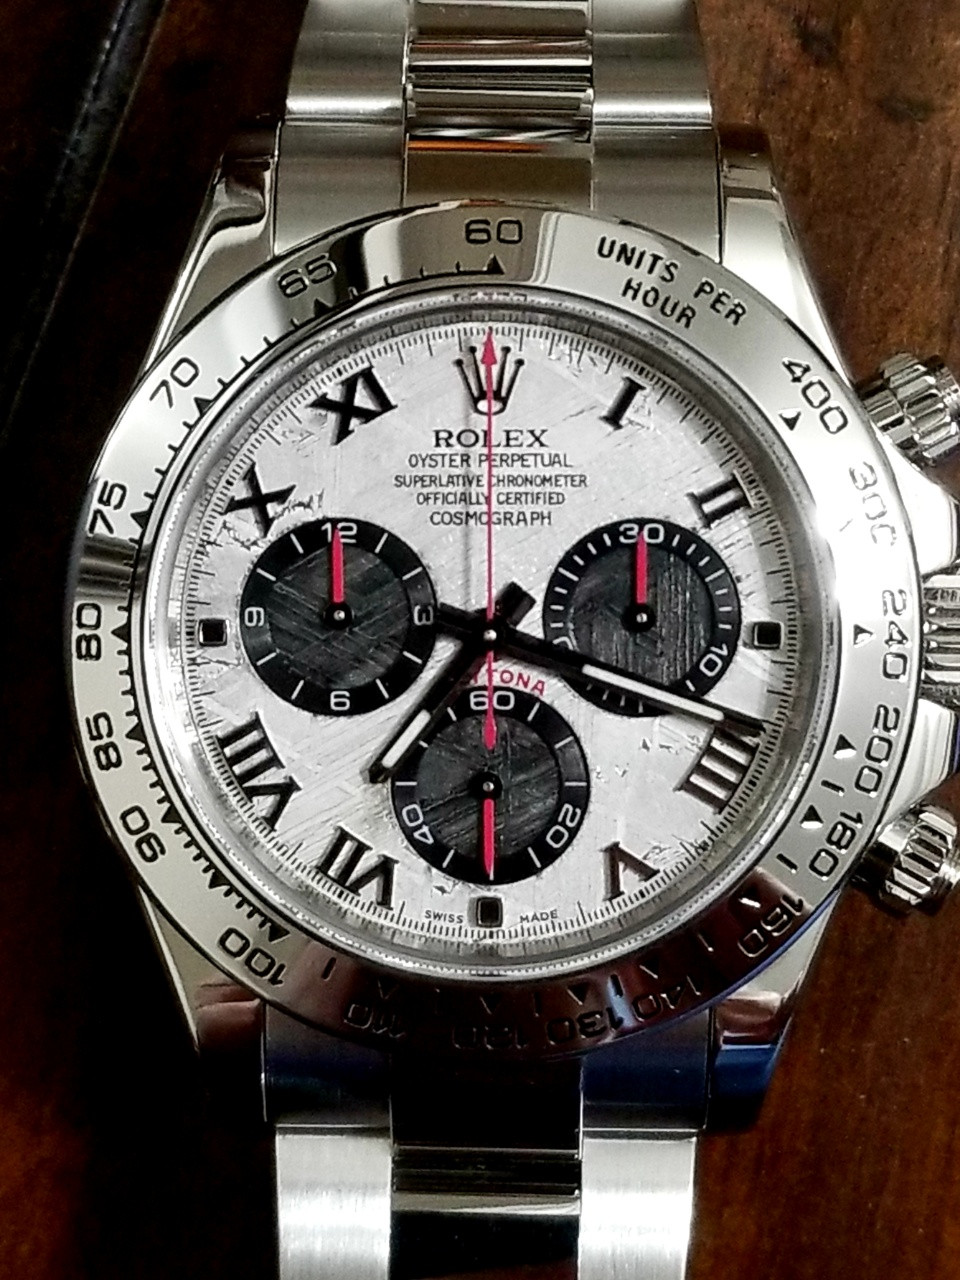
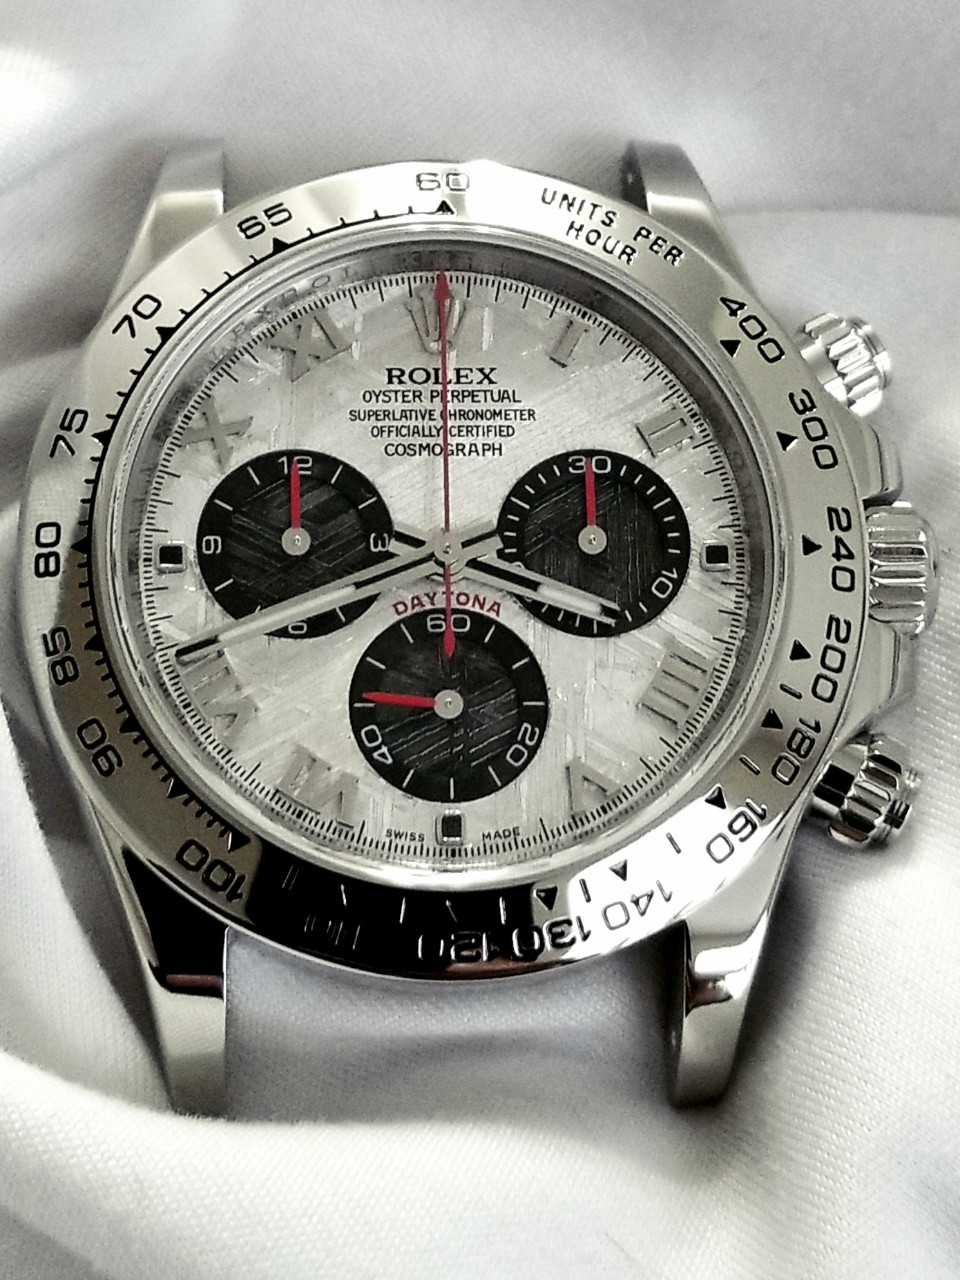
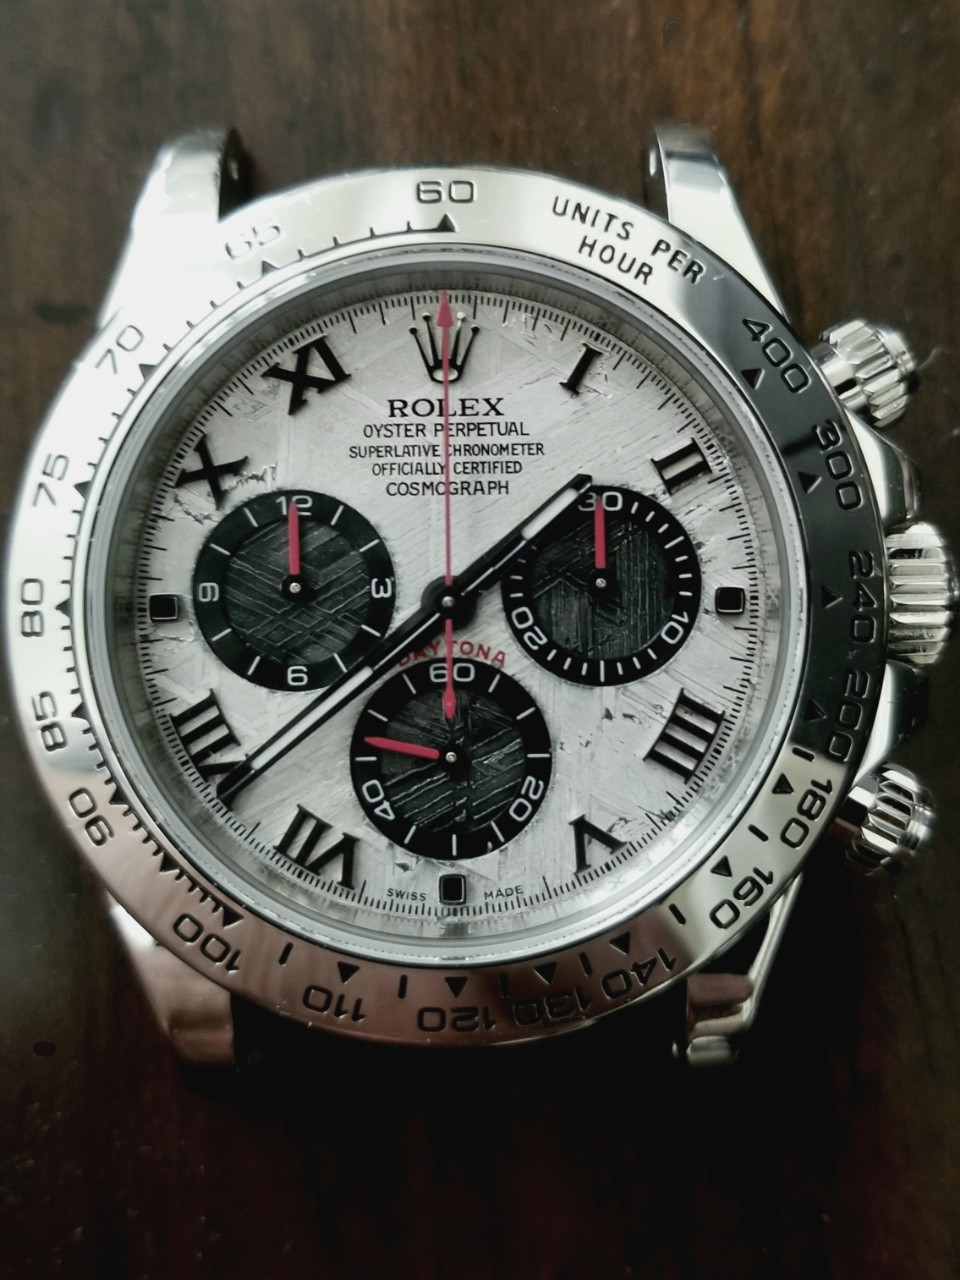
And now finally, it’s as good as it gets, YAY! Not perfect for sure but it reminds me to live up to my motto concerning reps "Love them for what they are and don't hate them for what they're not". Maybe this will inspire some more similar builds with an awesome base dial and a lot fewer roadblocks.
Thanks for looking!
Howdy fellow watch bros!
I want to share a build here that I never had any plans to do and one that took a lot of twists and turns that nearly landed it in the bin more than once.
The base watch is a late batch Noob Roman numeral Meteorite. I grew to dislike one of the subdials because it was markedly darker in some lighting and at certain angles. Ironically, the flip side of that subdial was much brighter and would have been just fine but I couldn't flip it because the subdial numerals were printed right on them.
6 o'clock subdial flip side
I was just going to replace the dial with this beautiful ARF that I shaved and epoxied new feet on.
But after fitting the hands and attempting to install the movement I discovered that at least with Noob meteorites, the case interiors have slightly different ridges and seats to accommodate the thicker meteorite dials. The ARF dial wouldn't seat to the bottom of the rehaut after it was mounted on the movement. D'oh.
This issue could have been remedied with some thin spacers (even dial dots) but it got me thinking about a mod since I had some subdial rings from a DIW dial I knew I would never use. So the saga began. The dial mod was a lot more work than I anticipated but as every step completed acceptably well I grew more convinced it might leave me with something I didn't dislike. I didn’t really care if this project exploded somewhere along the way, the meteorite sample isn’t the best for sure and I enjoy tearing things apart so plenty of exploring fun to be had along the way. I was curious just how far I could take this notion.
The DIW subdial rings popped off easily enough. There were a few issues with them though - they sat ABOVE the subdial which would create a subdial pinion height issue, and they were bigger in diameter than the dial holes.
So I shaved both the outer diameter and the thickness of them. For those who haven’t tinkered around with a stone dial, it is mounted (adhered) onto a metal plate to provide stability against cracking or breaking. This added plate thickness already decreases the available hands pinion height so I knew I was working with like tenths of a mm margins here.
I sanded the subdial ring edges like you would sand down a dial or an aluminum insert - swipe/roll it across a piece of taped flat sandpaper. Tedious, but not difficult. I also sanded the prongs off and decreased the thickness as much as I dared.
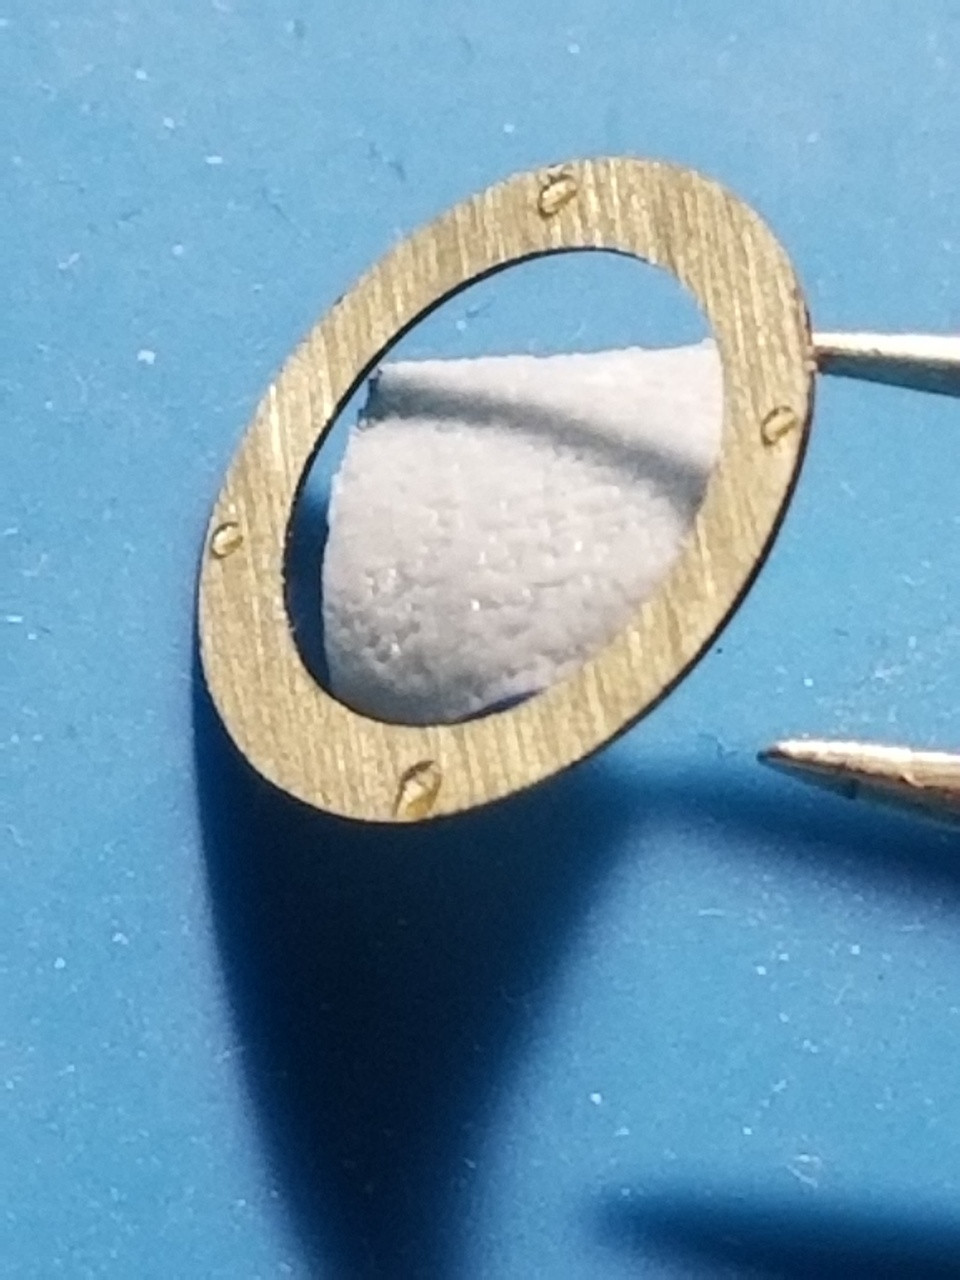
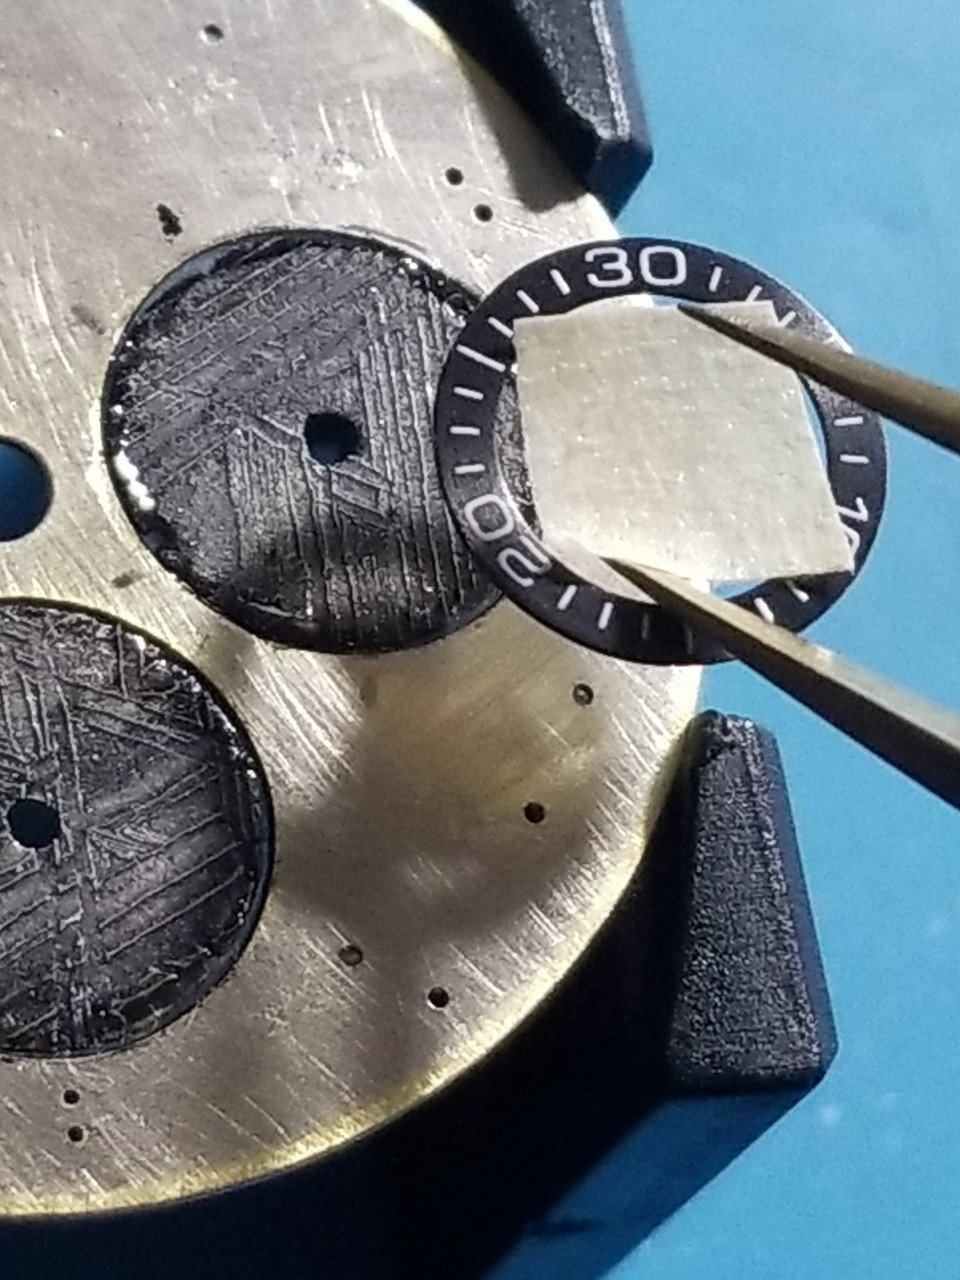
I toyed with the notion of using the white subdials but then I thought that a blackened meteorite subdial might look cool.
So next step was to make the subdials look realistically blackened. I simply stripped the print off these with acetone then hand painted them with Testor's enamel. Gloss and flat black, some pewter, and then some brushed thinner to mix and randomly lighten. Finally some sparse light sanding on a few high ridges to create a worn look.
Once the subdials were ready, I decided to cut away their support backing in the dial plate to lower them. It wasn’t much but remember the subdial rings have to sit above them so every little bit helps.
I put some scotch tape over the holes, set the subdials in the orientations I wanted and drizzled some epoxy around their edges.
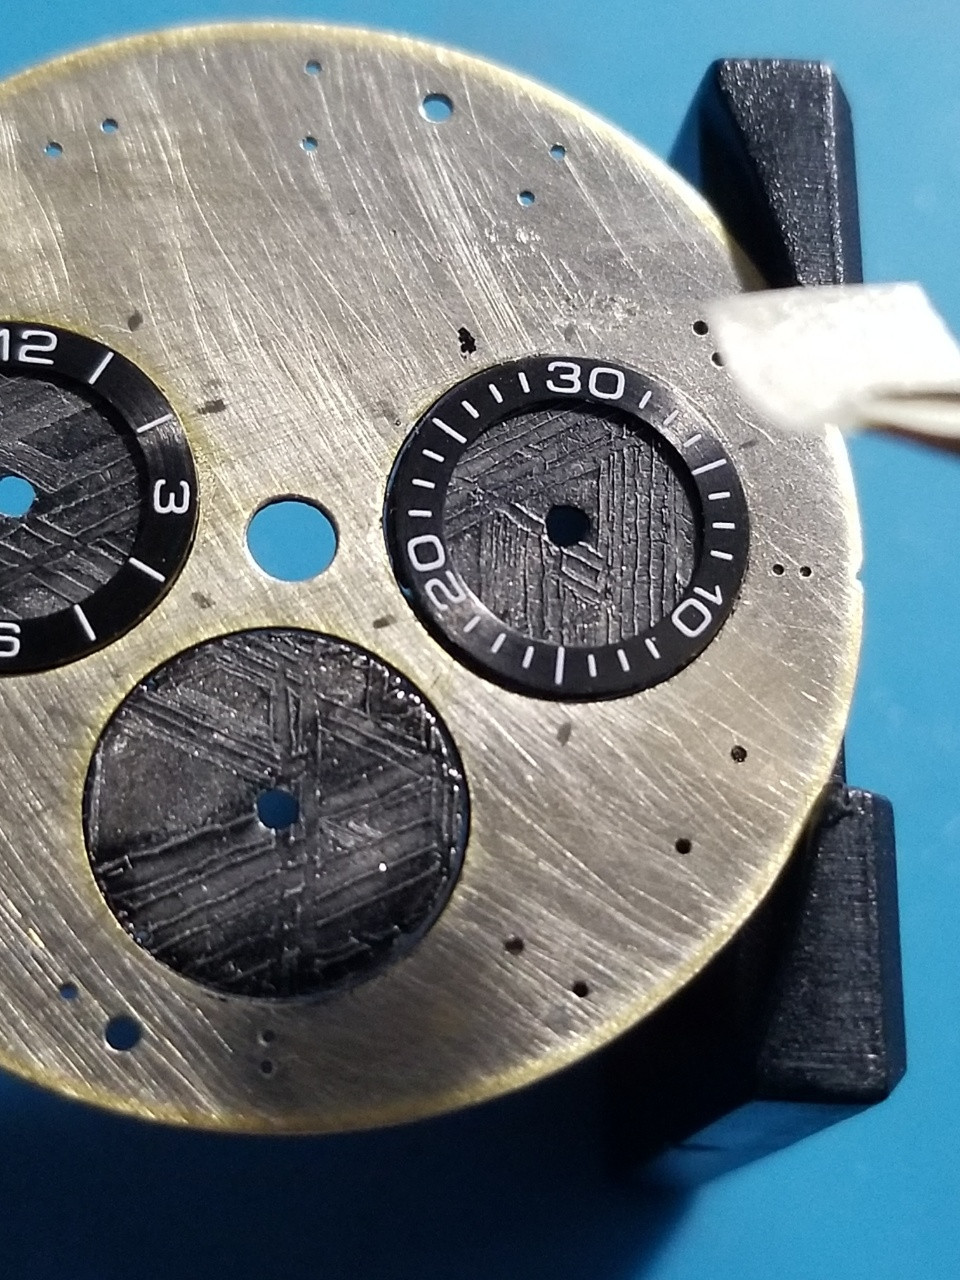
Next I had to figure out how to orient the subdial rings correctly. I used some broaching files to align the dial with its backing plate. Then slide the rings into their holes. I took pics and used the photo editor to align the rings with the dial text and the minute tics, using a gen dial for reference. Then I removed the dial, leaving the rings resting on the backing plate and made some pencil marks on it to aid in the positioning.
Then a slightly wider bead of epoxy than before on the perimeter, and a few drops on the rings.
Then place the rings onto the backer plate, lined up with the pencil marks.
After each ring was glued into place, I put the dial over it and could make fine adjustments.
After all the epoxy cured, I went back and sanded off the scotch tape so the dial would sit as flat as possible to the movement.
Now we can glue the dial back onto its backer plate. Just some gentle pressure with the clamps.
Good so far. Now we can add the markers back on, set the hands and mount the movement back into the case!
But wait, wtf is this!?
The dial isn’t centered in the rehaut! Huh?
Sad to admit it but this is the first I noticed that the dial had been factory mounted offset to the right on its backer plate. Wow. Stone dials are made to fit up inside the rehaut so that they are not contacted by the underside of the rehaut. Pressure on the dial edge from the rehaut can chip away at it or crack it. You can see a tiny bit of chipping from 14 - 19 minutes.
This wasn’t my mistake, all the holes in the plate were perfectly aligned with the holes in the dial. But it certainly was mine to catch and I failed to do so in time. This is how the dial fit into the case. A gap on the left and it was under the rehaut on the right. You should see a tiny even gap to the rehaut all the way around with a stone dial and certainly no part of the dial underneath it.
So, as you can imagine I wasn’t too keen on the notion of taking everything apart again after all the epoxy cured so the project was set aside for a bit while I tried to come up with a solution.
And then it hit me. If I shaved a little off the left side of the movement plate I could move the whole assembly left in the case and the dial would fit correctly. I would need a few shims on the right side to keep the movement in place and maybe a longer stem but hey, it might work!
Of course to do that meant tearing the movement down completely so I went ahead and serviced it while it was apart, hell the disassembly and reassembly is 90% of a servicing anyway.
Shaving the main plate was a cinch, just like shaving a dial or an aluminum insert - swipe/roll, rinse and repeat. I used progressively finer grit paper then polished it on a buffing wheel. For the shims I stacked bracelet tape then cut rectangles in the right size to fit. I experimented with varying amounts of shaving plus various layers and positions of shims to come up with an ideal combination.
Here you can see the shims in place, it’s righty tighty, nothing’s going anywhere.
So let’s try this again, hands reset ,back in the case and YES we have a good dial fit.
Hmm the rehaut crown is off a little to the right, what’s up with that? I know these can be off sometimes and I can tolerate it to some extent but when I put the bezel and bracelet back on the 60 was aligned with the dial but way off with the bracelet center link. OMG, now what? At first I wondered if I had caused this by moving everything left but I didn’t move the dial left of where it should be, I moved it exactly to where it should be.
So it turned out that the dial feet that are on the backer plate were actually off about 2 degrees. Thanks a lot Noob!
So everything had to come off again - hands, dial, bezel, bracelet - whew. Dial feet were grinded off and new feet were epoxied on.
I used an old hour and minute wheel with shaved perimeters and some Rodico to act as a dial centering and immobilizing tool. I elevated and anchored the new feet in the feet holes then added the epoxy. This keeps the glue from oozing onto the movement. I used the case to weight the dial plate down onto the new feet, which gave me the perfect way to center the rehaut.
I sanded down the glue bumps around the new feet bases so the dial would sit flush.
And now finally, it’s as good as it gets, YAY! Not perfect for sure but it reminds me to live up to my motto concerning reps "Love them for what they are and don't hate them for what they're not". Maybe this will inspire some more similar builds with an awesome base dial and a lot fewer roadblocks.
Thanks for looking!
Last edited:


 . Love the final result. Thank you for sharing.

