- 12/3/18
- 37,543
- 80,255
- 113
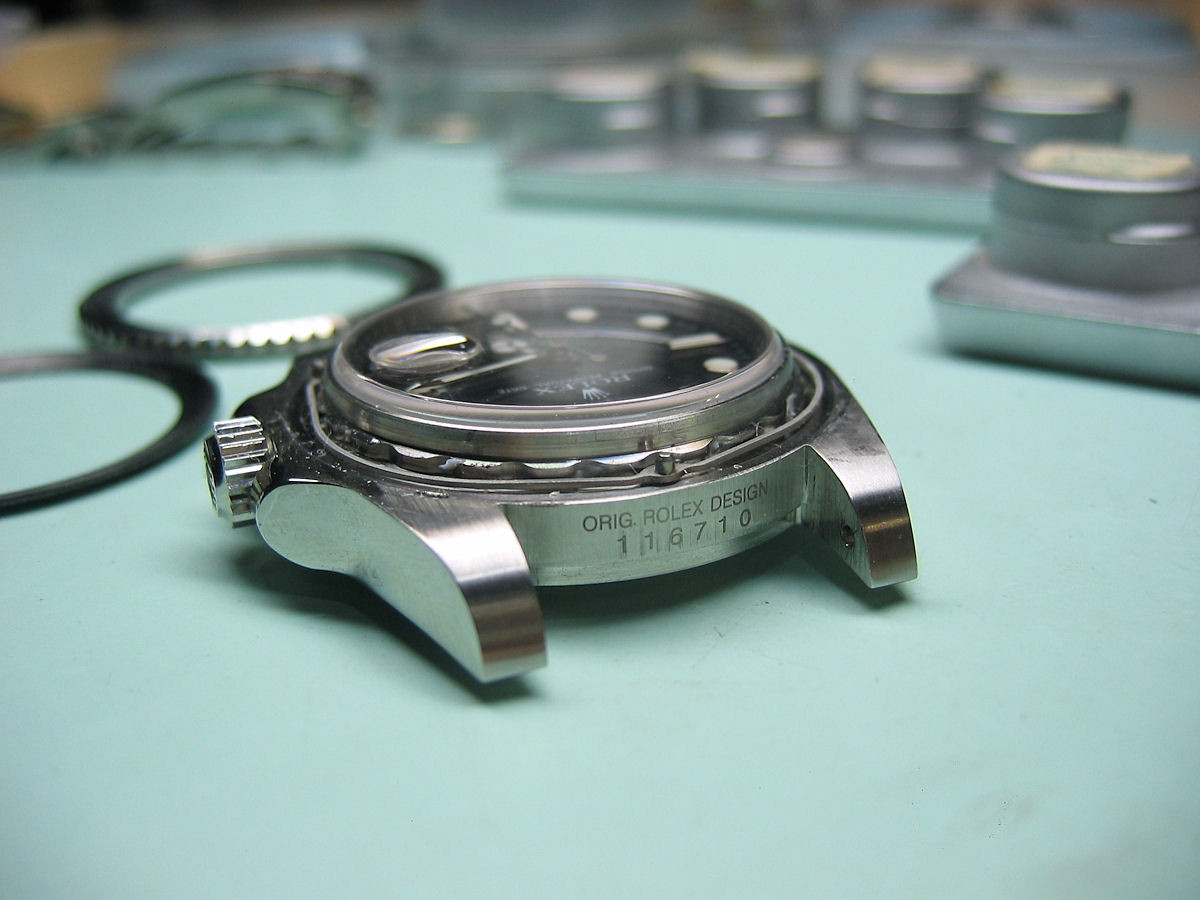
Sometimes your datewheel can look too big or too small. This can usually be quickly corrected by changing the gasket height. However gaskets come in fixed heights so it can happen that no standard size looks right.
I like to start by finding a sample that looks right and take a pic of it. Then make a collage showing it next to the one I'm working on. Match the two images in scale using the cyclops edges, then you can slide one image around comparing the date window height and numeral sizes.

To make a custom height gasket, start with a taller size gasket. Fold some tape over onto itself and place it on the crystal as a handle. You can use a junk crystal if you feel the need, and swap it back to the real one for the next evaluation pic.

Then just rub a dub dub for a bit, changing your grip on the handle to distribute your pressure points. Use varying strokes, sometimes circular, etc. I use 400 grit paper. Don't use black sandpaper, it can stain the gasket.


When you are happy with the crystal height, you can clean up the gasket bottom edge by sanding lightly on an angle so as not to abrade the top edge of the gasket.

Once you have a satisfactory date mag level, make sure your crystal sitting height is OK visually, and that there is still adequate clearance for your hands.

Note that you can use this same technique to narrow the width of a gasket if you can't get a bezel or retaining ring back on with a new gasket. This is especially useful with a Clark's gasket or even a Gen as those are both thicker than many rep gaskets. Just turn the gasket on edge and swipe/roll it toward you 4-5 times in a 30 degree arc or so, overlapping as you go around the outer perimeter. Use a crystal as above for a backbone and be ultra careful if not using a junk one!
Shave off only a little width at a time. You can put a Sharpie mark on the crystal for a reference point to keep track of start/end point of sanding if you don't have a cyclops. Clean up the gasket of stray fibers with finer grit paper like 800 or 1000, then use ultrasound or alcohol for final clean. Add a thin coat of silicone grease to the inside perimeter of the retaining ring (or bezel for Daytona, Explorer, etc.) for extra ease of pressing.
Thanks for looking!
I like to start by finding a sample that looks right and take a pic of it. Then make a collage showing it next to the one I'm working on. Match the two images in scale using the cyclops edges, then you can slide one image around comparing the date window height and numeral sizes.
To make a custom height gasket, start with a taller size gasket. Fold some tape over onto itself and place it on the crystal as a handle. You can use a junk crystal if you feel the need, and swap it back to the real one for the next evaluation pic.
Then just rub a dub dub for a bit, changing your grip on the handle to distribute your pressure points. Use varying strokes, sometimes circular, etc. I use 400 grit paper. Don't use black sandpaper, it can stain the gasket.
When you are happy with the crystal height, you can clean up the gasket bottom edge by sanding lightly on an angle so as not to abrade the top edge of the gasket.
Once you have a satisfactory date mag level, make sure your crystal sitting height is OK visually, and that there is still adequate clearance for your hands.
Note that you can use this same technique to narrow the width of a gasket if you can't get a bezel or retaining ring back on with a new gasket. This is especially useful with a Clark's gasket or even a Gen as those are both thicker than many rep gaskets. Just turn the gasket on edge and swipe/roll it toward you 4-5 times in a 30 degree arc or so, overlapping as you go around the outer perimeter. Use a crystal as above for a backbone and be ultra careful if not using a junk one!
Shave off only a little width at a time. You can put a Sharpie mark on the crystal for a reference point to keep track of start/end point of sanding if you don't have a cyclops. Clean up the gasket of stray fibers with finer grit paper like 800 or 1000, then use ultrasound or alcohol for final clean. Add a thin coat of silicone grease to the inside perimeter of the retaining ring (or bezel for Daytona, Explorer, etc.) for extra ease of pressing.
Thanks for looking!
Last edited: