I had to find a solution for missing cg pin, and I am very happy with final result.
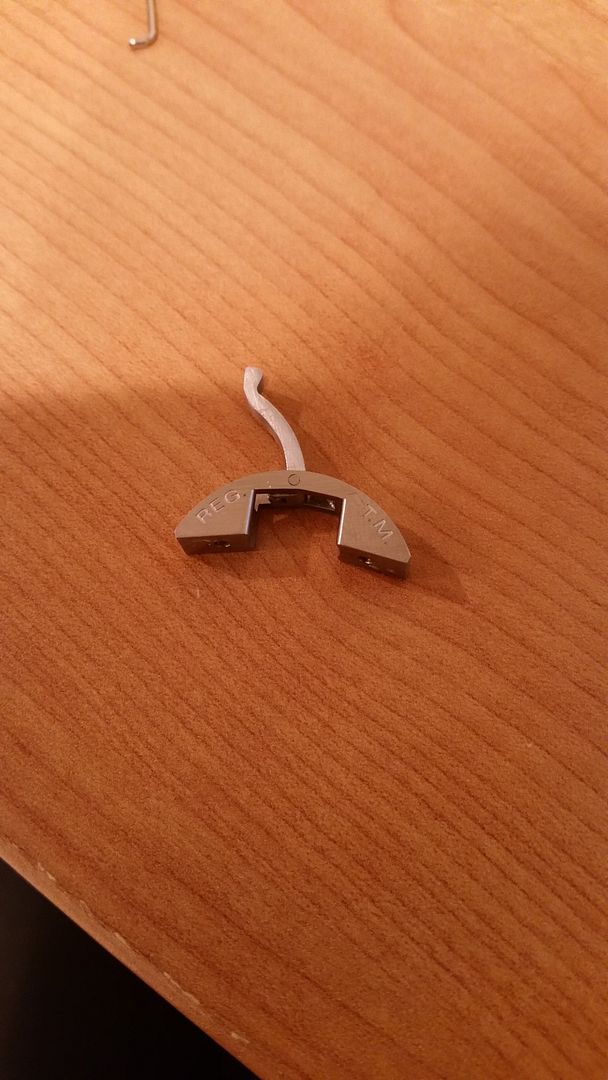
I tried to sand down original pin to make it flush and was a bit careless handling it. Pin ended catapulting from my tweezers across the room and I was never able to find it even after few days moving furniture in the room, so I had to come up with a solution.
Thanks to DIY section here, I used paper clip which didn't quiet fit so I had to grind down the diameter and sand it until it fitted nicely took me about 2 hours.
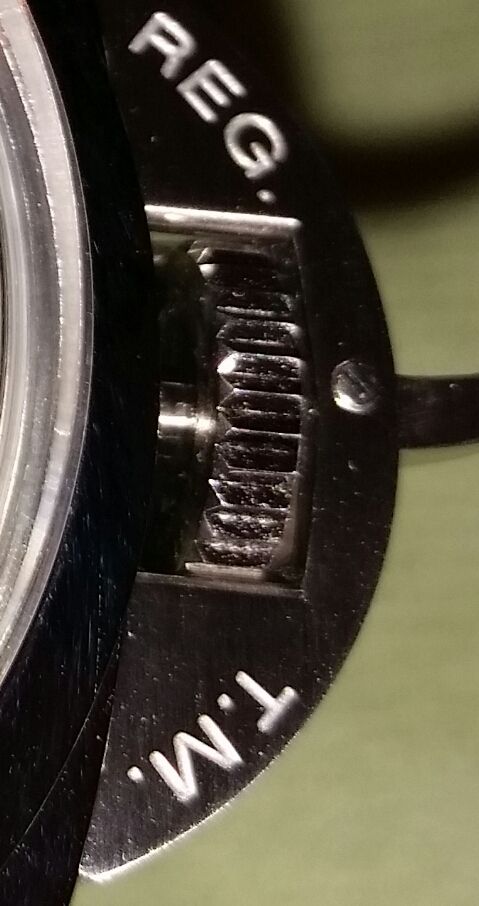
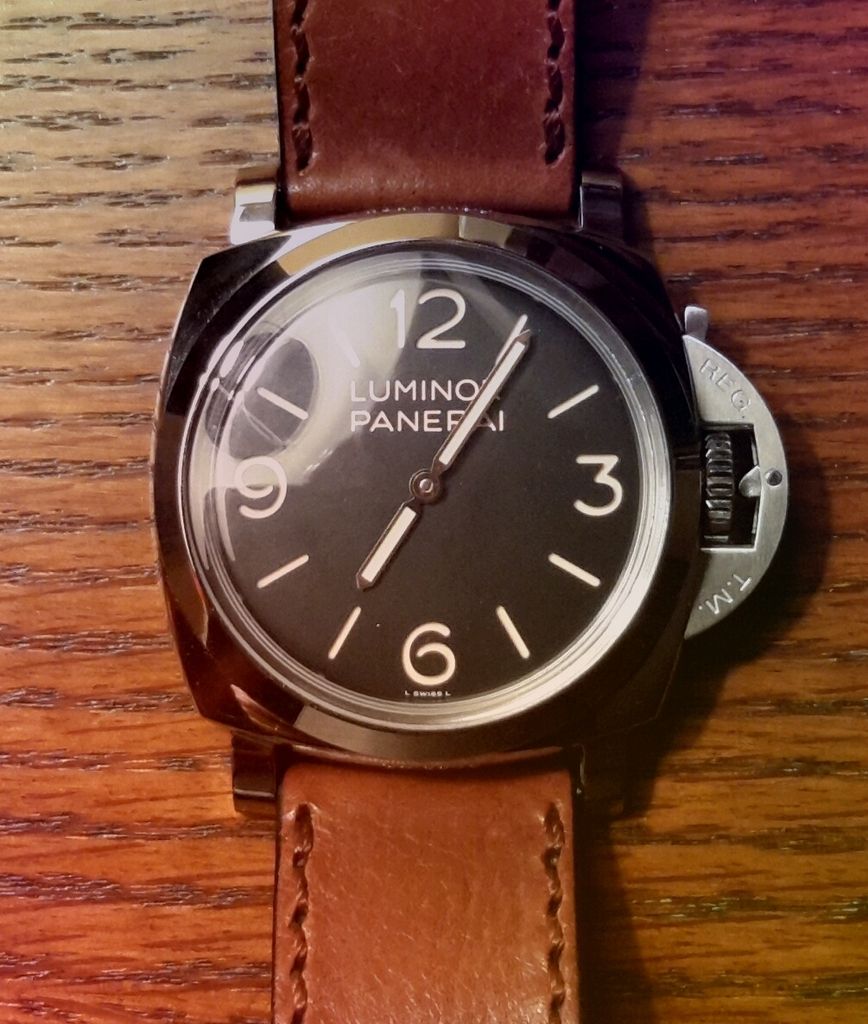
After mounting the pin I used 320 then 400 grid sand paper and refinished top and bottom of cg to make pin nice and flush with the surface, and give crown guard fresh brushed look, it was easy enough but I was a bit frightened. I think result looks great. I can still pop it out and touch it with polishing paste to make it shine, but I kind of like the way it looks now. This is for 47mm 1950 Luminor 372.
Tell me what you think, and if I should polish it to be more accurate.
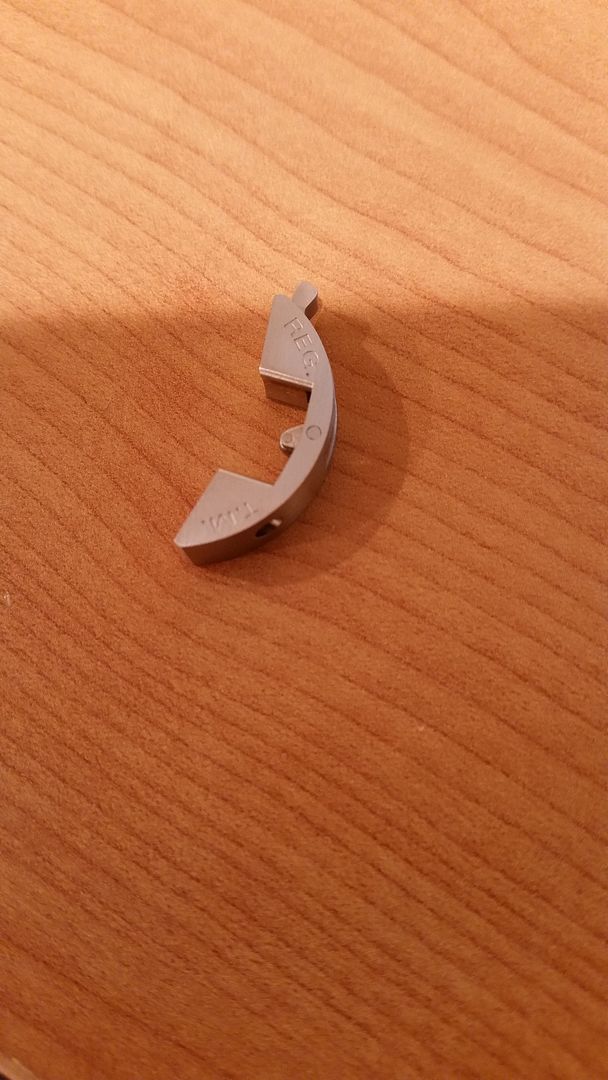
THIS WAS ORIGINAL PIN. I think it looks better now. unk:
unk:
I tried to sand down original pin to make it flush and was a bit careless handling it. Pin ended catapulting from my tweezers across the room and I was never able to find it even after few days moving furniture in the room, so I had to come up with a solution.
Thanks to DIY section here, I used paper clip which didn't quiet fit so I had to grind down the diameter and sand it until it fitted nicely took me about 2 hours.
After mounting the pin I used 320 then 400 grid sand paper and refinished top and bottom of cg to make pin nice and flush with the surface, and give crown guard fresh brushed look, it was easy enough but I was a bit frightened. I think result looks great. I can still pop it out and touch it with polishing paste to make it shine, but I kind of like the way it looks now. This is for 47mm 1950 Luminor 372.
Tell me what you think, and if I should polish it to be more accurate.


THIS WAS ORIGINAL PIN. I think it looks better now.
unk:


