• Tired of adverts on RWI? - Subscribe by clicking HERE and PMing Trailboss for instructions and they will magically go away!

Chinese 2813 - A novice's guide for dismantling, cleaning, servicing, assembling and adjusting

Dino2018

Active Member
Patron
Certified
14/3/18
417
173
43
I started into this hobby less than two years ago, driven for my passion for old Rolexes, Omegas and Heuers. I registered first time to RWI around November 2017, before the site crash, and all the passion shared by its members encouraged me to learn about watches and movements and since has become a passion for life. I found plenty of information around here, and asked frequently to the experienced members, bought a couple of books and tried by myself. I love challenges and I tackled this one with enthusiasm, but sometimes lack of experience and specific information made me break parts or miss some others into the outer space. However its been a wonderful experience and now that I'm learned a bit about this amazing world, I would like to share some of this knowledge, in the way I would had loved to find when I first started.

My aim with this thread is to guide someone that has never dissasembled a movement to dismantle, clean, service, assemble and adjust his 2813 movement. Please forgive me if I miss something of explain it in a very simple way, or you consider my workmanship not of profesional quality, even if I try my best doing this tutorial, because I'm not in any way a watchmaker but an amateur enthusiast. Please feel free to ask, comment, correct me when I'm wrong, or add any tip or information you consider. I would love this could be a very open thread.

So let's start the work. I hope you'll enjoy!
 
  • Like
Reactions: Gah73

mydnytrydr

Mythical Poster
25/9/09
7,800
222
63
Do you have a work bench or designated area? Tools? Sonic cleaner and cleanser? Oils with applicators and recommended amounts?
partnames.jpg
 
  • Like
Reactions: Dino2018

Dino2018

Active Member
Patron
Certified
14/3/18
417
173
43
Working space and tools for dismatling

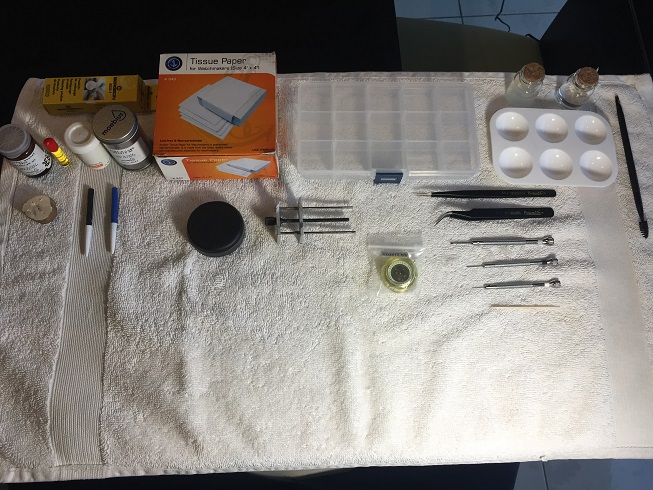
This is the set up I made for working with this movement:

2270-reducida.jpg


Working Surface:
I use a towel as working surface - yes, you read well, a towel! - because is the only surface I tried where the falling parts do not bounce and dissapear into outer space (or anywhere down the floor, I mean). After started using it, saved me from hours of looking at the floor trying to find missing micro parts, you really want to cry when it happens.

Light: I use a led lamp (US $30) that gives good white light and it does not get hot, that is handy when you work very close to it.

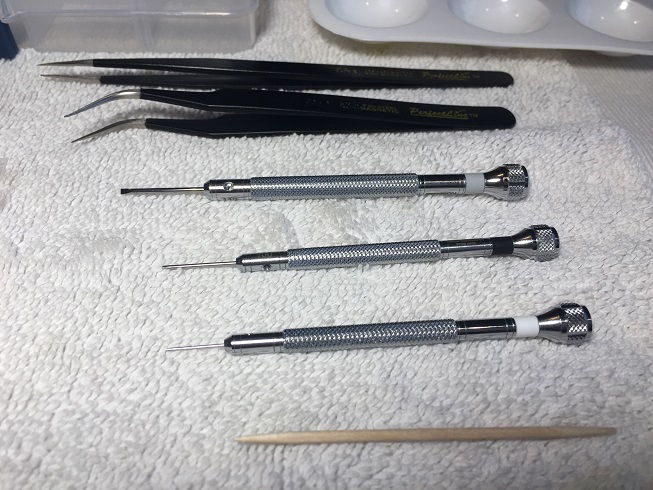
Tools for dismantling: In a very basic level, you can barely use a cheap universal movement holder (US $6.95), 1mm Bergeon screwdriver (US $16.95), wooden toothpick (free!) and economy twizers (US $9.95 a set). I would recommend invest in Bergeon or similar high quality screwdrivers, it really makes all the difference. I use three of them, 0.60mm, 1.00mm and 1.40mm. While you can do it with the 1.00mm that is a good general purpose one, I find myself most of the time using the 1.40, sometimes the 0.60 and barely the 1.00.

Also: I used a cheap plastic container with plenty of compartments, so each group of parts are placed separately and in order, for ease of posterior assembling. I also use a Bergeon casing cushion (US $25.95) but this is in no way compulsory. It serves to care the movement when you work over it (for example when you install the dial or hands).


2272-reducida.jpg
 
Last edited:

Dino2018

Active Member
Patron
Certified
14/3/18
417
173
43
Do you have a work bench or designated area? Tools? Sonic cleaner and cleanser? Oils with applicators and recommended amounts?
Hello! thanks for writing! I work over the dinning room table, because at nights all the family is in front of TV and leaves me alone! The tools I use I will describe it before each group of operations and I will indicate how much it costed me each as a guide. I have used both sonic cleaner and the amonnia/benzina hand traditional method, I will describe both in this thread. Oils I use 4 of them, Moebious 9010, 9020, 8000 and 8300. I will indicate which one to use where and the quantities used. Please stay tuned and thank you for watching!
 

Dino2018

Active Member
Patron
Certified
14/3/18
417
173
43
Dissasembling

Some advice: Let's start stating that everything in a movement has to be assembled or dissasembled with extrem care and a very easy hand, no effort at all, because it would probably break if forced. In the full scale world we're accustomed to use force, but not here. Micro parts mean micro force!
Second, please make pictures of everything before and after dissasembling any part. It will be priceless when you try to assemble it back! I use my mobile phone just over a box, and for the very detailed pics I use a macro lens that goes over the phone lens with a clamp, that I bought for some US $5.00 in Miniso. :)

The movement:

2274-reducida.jpg


This is a 2813 Chinese movement I bought at Startime Supply for US $29.95. I believe it is the most popular movement inside the Replica watches and a very simple, cheap and reliable automatic movement.

2299-reducida.jpg


First I put with the automatic module and the balance face to me over the movement holder and apply a light pressure to the holder nut to to clamp it in place.

2301-reducida.jpg


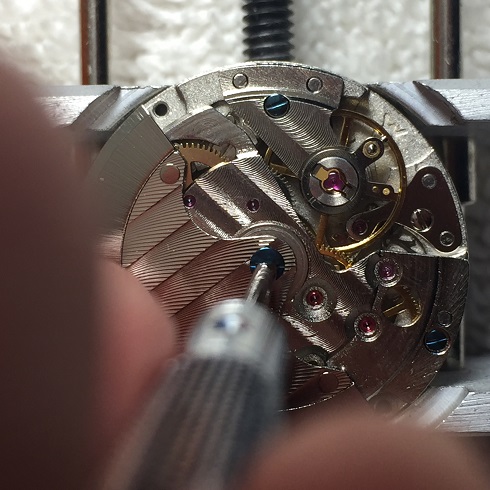
With the 1.40mm screwdriver, I unlock the automatic oscilating plate screw.

2302-reducida.jpg


Once fully unlocked, I use a pair of twizers to remove it form the movemet and put in the plastic container first compartment.

2303-reducida.jpg


With the same pair of twizers, I remove the oscilating weight from the movement and put it in the first compartment too.

2304-reducida.jpg


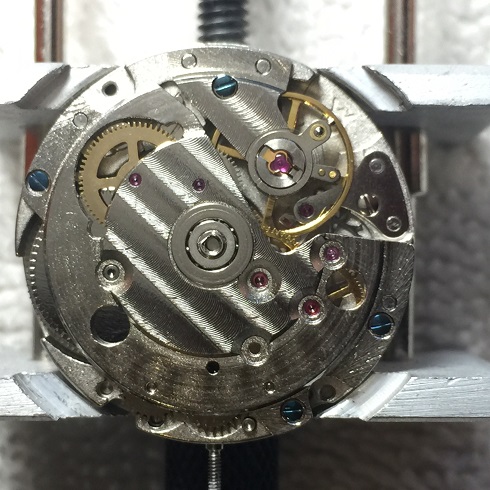
This is the look of the movement without the oscilating weight.
 
Last edited:

Dino2018

Active Member
Patron
Certified
14/3/18
417
173
43
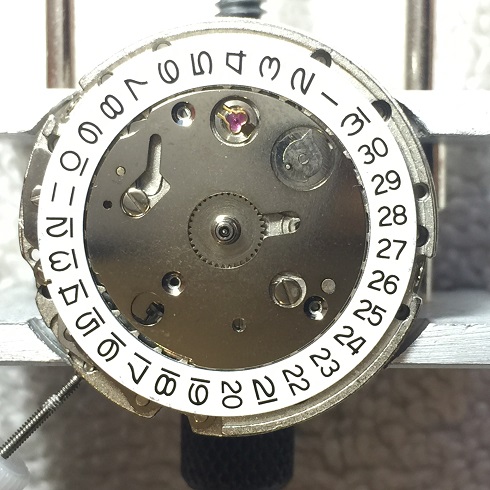
Now we turn over the movement to face up the date wheel. WARNING! When we clamp back the movement onto the holder, please align it carefully so the clamps do not touch the balance wheel. It is by far the most delicate part of the movement and sadly goes easily damaged.

2305-reducida.jpg


The date plate is affixed by three screws. I use the 1.40 screwdriver to unlock them.

2306-reducida.jpg


Once the screws removed and put into the second compartment, is quite easy to unistall the date plate.

2307-reducida.jpg
I push lightly with the 0.60 screwdriver under it and then I remove it with the pair of twizers.
WARNING!
Please be gentle with the twizers not to mark the date wheel as it is scratched easily.
 
Last edited:

Dino2018

Active Member
Patron
Certified
14/3/18
417
173
43
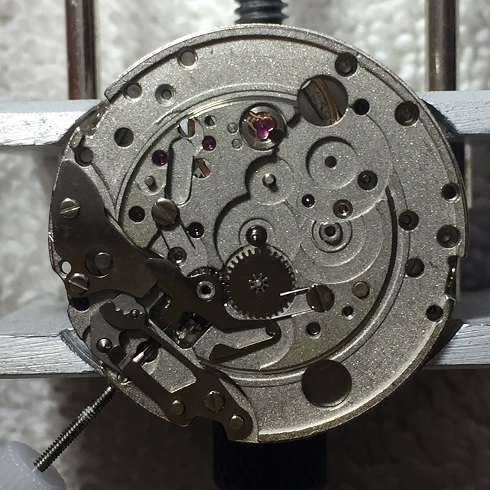
Once the date plate and date Wheel have been disassembled, we can extract the hour Wheel (Golden color in the pic).


It goes away simply by pulling with the twizers. I'll put it in the compartment number three.


Next is the turn of the cannon pinion. For extracting it, place the twizers at 90 degree to the cannon, press lightly against it, and then pull it gently. Put it into the compartment number three.


Then it comes the date finger. Just lever it slightly underneath with the 0.60 screwdriver and pick it with the twizers. Goes also to the c
ompartment number three.
 

Dino2018

Active Member
Patron
Certified
14/3/18
417
173
43
The following picture was taken when the date jumper (highlighted in red in the pic) "jumped" and moved from its original position (highlighted in green). I did not notice when toke the picture, I remark it here so hopefully no one gets confused.

2311-copia.jpg


I pick it with the twizers and put it in the same container three.

2312-copia.jpg


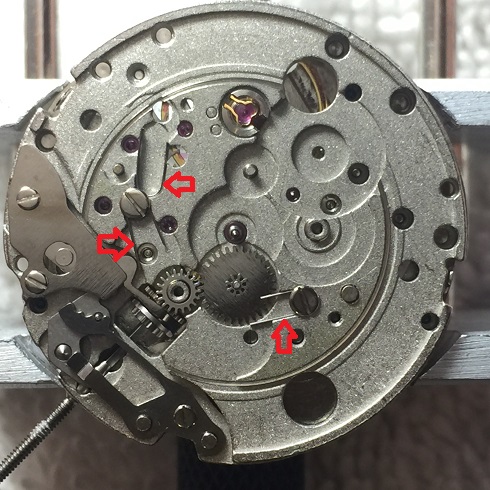
Next we have to remove the three identical springs that are placed in the main plate on the calendar side. In the next pic they are marked with an arrow in red.

2321-copia.jpg


I start removing one of the screws that hold them in position with the 1.40 screwdriver. WARNING they jump extremelly easy and tends to dissapear into the environment. Take extreme care while unlocking the screws.

2322-copia.jpg


Once the screw is removed, I start extracting the spring with the 0.60 screwdriver and the help of a toothpick. The toothpick is used to held the spring in position on its bottom and prevent it to jump.

2332-copia.jpg


2333-copia.jpg
 
Last edited:

johnnythefox

Renowned Member
16/10/17
858
25
28
This is great Bro, just the info that I need for working on an old 2813 movement.....Thanks Dude
 
  • Like
Reactions: Dino2018

Automotiveromance

Known Member
8/3/18
106
54
28
Some tips. Don’t use a towel, go buy yourself a watchmaker’s workmat. The towel will get lint and dust all over the parts. Also, don’t use toothpicks but buy pegwood. Toothpicks contain traces of resin, which is bad for watchparts. A dust blower is invaluable as well. Now, this isn’t such a problem on disassembly, but I wouldn’t reassemble clean parts over a towel using toothpicks.

On oils, I have found that I use D5 on almost all slow moving parts and their respective posts/springs/contact surfaces. Also, you’ll need to oil the pallet jewels on reassembly. This requires the very specific 9415 which has a grease like consistency that changes viscosity when the stone impacts the escape wheel tooth. You could use a microscopic amount of 9010 there (this is what was commonly used before 9415 was introduced), but this is extremely hard to do and even harder if you don’t treat the stones and escape wheel with epilame first.
When you wish to also service the mainspring and barrel, you’ll need braking grease (I use Glissalube 20 mostly) and the other appropriate lubes.
If the hand oilers start to frustrate, an automatic oiler is a really nice thing to have. Especially on end stones which require a very specific amount of oil.

This is not to rain on your parade, as I think you’re off to a very good start!

Just my 2 cents.
 

Dino2018

Active Member
Patron
Certified
14/3/18
417
173
43
Automotiveromance thank you very much my friend! I’m here to share and to learn! Do the parts over the watchmaker bounce or do they get “trapped”?
About oils, I use 9020 instead D5 in slow parts, 9010 in fast moving ones, 8000 in pallet stones and 8300 grease in friction points, what do you think?
 

Automotiveromance

Known Member
8/3/18
106
54
28
Automotiveromance thank you very much my friend! I’m here to share and to learn! Do the parts over the watchmaker bounce or do they get “trapped”?
About oils, I use 9020 instead D5 in slow parts, 9010 in fast moving ones, 8000 in pallet stones and 8300 grease in friction points, what do you think?

A watchmaker’s mat absorbs the energy so parts don’t bounce.

For lubricants, everyone has a preference. 8000 on pallet stones wouldn’t be my choice because it wears out and spreads to places it doesn’t belong. It works and it isn’t ‘bad’ for the movement, but you should try 9415 (it’s expensive though) and I think you won’t go back because it’s so easy to use.
 
  • Like
Reactions: Dino2018

Dino2018

Active Member
Patron
Certified
14/3/18
417
173
43
A watchmaker’s mat absorbs the energy so parts don’t bounce.

For lubricants, everyone has a preference. 8000 on pallet stones wouldn’t be my choice because it wears out and spreads to places it doesn’t belong. It works and it isn’t ‘bad’ for the movement, but you should try 9415 (it’s expensive though) and I think you won’t go back because it’s so easy to use.

Superb! I will buy a watchmaker mat for the assembling! Thanks for the tip! The pegwood I got already, but I felt handier the toothpick. I will use it for assembling also. :)
 

Dynaduck

Sales moderator
Advisor
6/4/11
2,881
575
0
Looking forward to your thoughts on the re-assembling. I hate the 2813 trying to fit the bridge on to four pinions... :D
 
  • Like
Reactions: Dino2018

Dino2018

Active Member
Patron
Certified
14/3/18
417
173
43
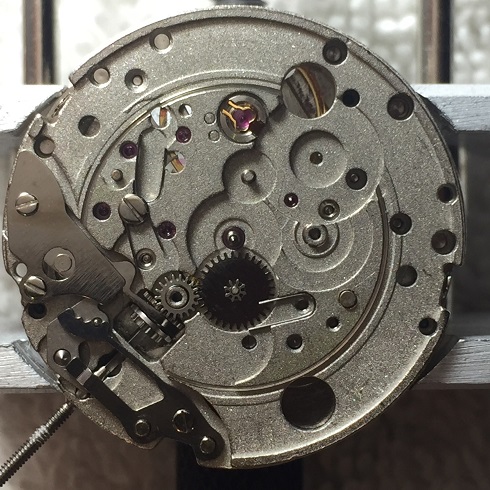
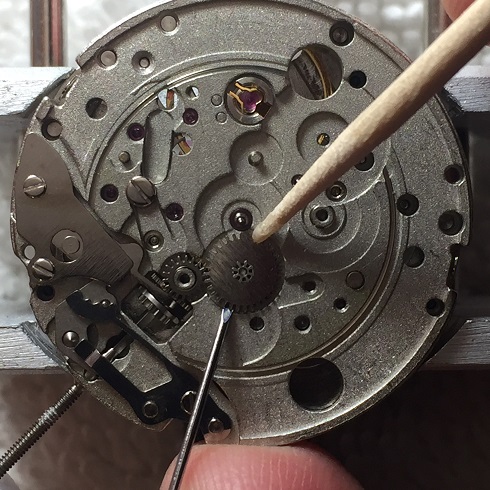
Before removing the two remaining springs, I'll go from right to left removing some other parts. First is the minute Wheel. I push one side lightly with the toothpick and lever the other side with the 0.60 screwdriver. All this section parts go also to compartement number three.


Next to the left is the setting Wheel. Just lever with the 0.60 screwdriver.


Now we'll focus in the two remaining springs. The one in the upper left side does not have a screw, so we will remove it with th 0.60mm screwdriver and the toothpick. WARNING!


And the last spring, we first unlock the screw with the 1.40mm screwdriver and release the spring with the 0.60mm screwdriver and the toothpick.
WARNING!


Now the upper side of the main plate looks cleaner!

 
  • Like
Reactions: Mav2000

Dino2018

Active Member
Patron
Certified
14/3/18
417
173
43
Looking forward to your thoughts on the re-assembling. I hate the 2813 trying to fit the bridge on to four pinions... :D

Thank you very much! This phase of the assembling is one of the trickiest!
 
  • Like
Reactions: Dynaduck

Mav2000

Active Member
10/1/19
388
59
0
Very interested to see the rest. Please do update when you have the time.
 

Dr Fun Socks

I'm Pretty Popular
Supporter
Certified
28/2/17
2,387
1,952
113
Great write up man really thorough! Much respect!
 

Tr0cadero

Getting To Know The Place
29/11/16
19
1
3
Really good pics and well written guide. I want to start servicing movements and this guide makes it less frightening. Looking forward to the updates!