- 26/9/08
- 4,398
- 3
- 38
It's been quite while since I wanted to built myself a very personal watch!
I'm a big fan of Francisco's tutos and that pushed me further in my idea.
I wanted it to be Ti Pam based! (that's what I like)
A while back I ordered a Seagull ST-36 from a guy in Germany (to replace an asian 6497 in on of my Pam), anyway the guy screw up in is order and sent me a nice PVD 6498.
I kept the movement and he sent me the one I wanted for less than 25$.
The idea then came to build a Pam dial with second at 6!
I copied Pam blueprint and using Paint (that's the only thing I know how to use) obtained this:

I then make a basic drawing of my vessel (I'm a master in the merchant marine), still using Paint and put the 2 drawings together using Word.

I tried 2 different ship as I hadn't made my choice about having color or not!
At that point you can pick up whatever image you want to personalize your watch and have a very unique model.
Now I followed one of Francisco's tuto about placing decals on watches:

Bought myself some LIQUID DECAL FILM and some DECAL PAPER.
I printed my 2 drawing an the decal paper and applied a coating of liquid decal film and let the whole thing dry.
If you've ever been on a cruise ship or just a ferry, you must have seen Safety signs eveerywhere to show you direction to lifeboat, etc... Anyway those sign are called IMO sign and are made of self-adhesive photoluminescent vinyl so that if you have a total power failure you can find what you're looking for in the dark!
I had quite a few spare sign on board my vessel and took a piece of one to serve as support for my dial! I also bought some MICROSET and cut my decal to its dial shape:

Now I'm ready to go:

About 30 seconds in distilled water!
Time to put some Microset on the support and to slide the deal onto it.

I also had so MICROSOL so I applied a coating:

This step is not mandatory as our support is flat. But, be careful if you decide to do it, the ink almost washed away (I use an Inkjet printer on Inkjet decal paper, don't know if the same thing would happen using the Laser stuff).
Now I had in my spare part and old sandwich dial, I removed the upper part and sanded the lower one.
I cut my newly done dial and placed it on my dial base:

I then used my dremmel to make the dial holes:

The following steps don't need any comment as I just put the watch together.
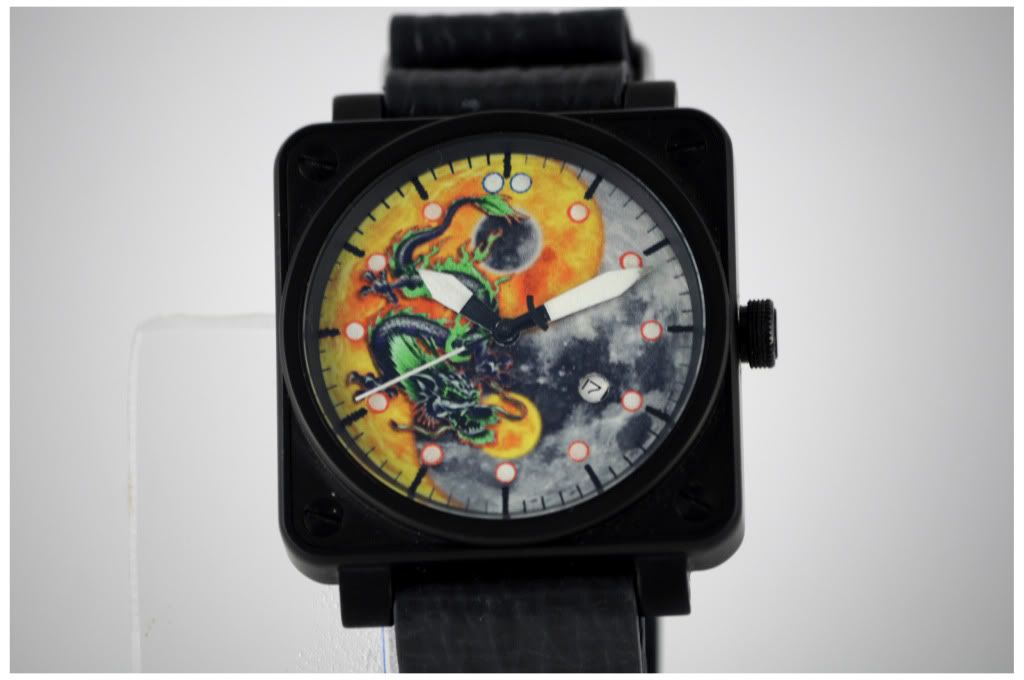
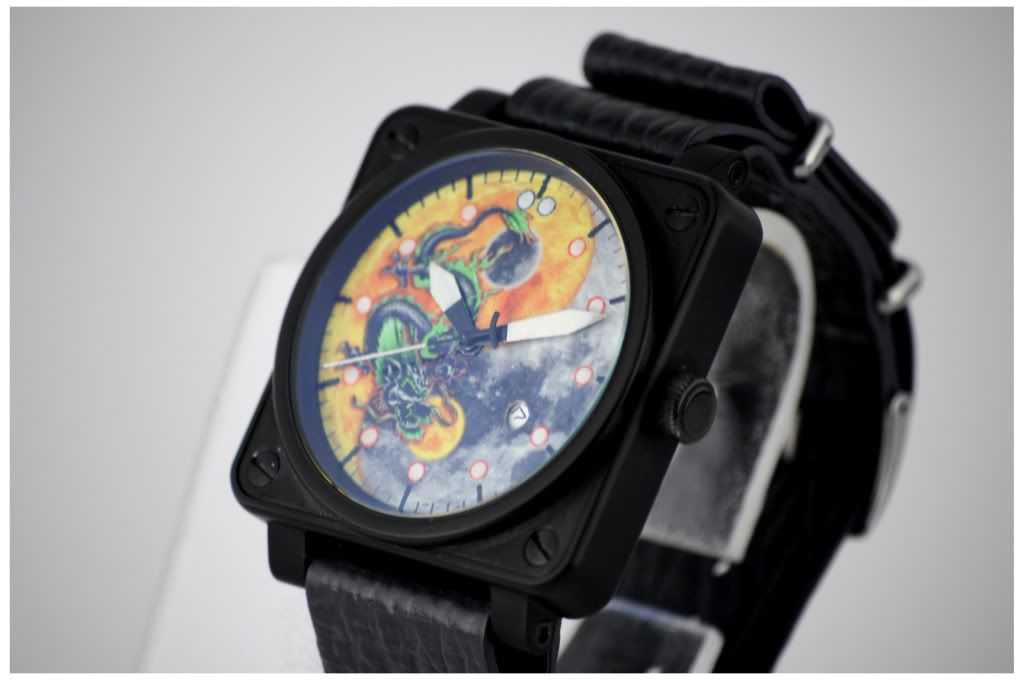
Here's the final result:


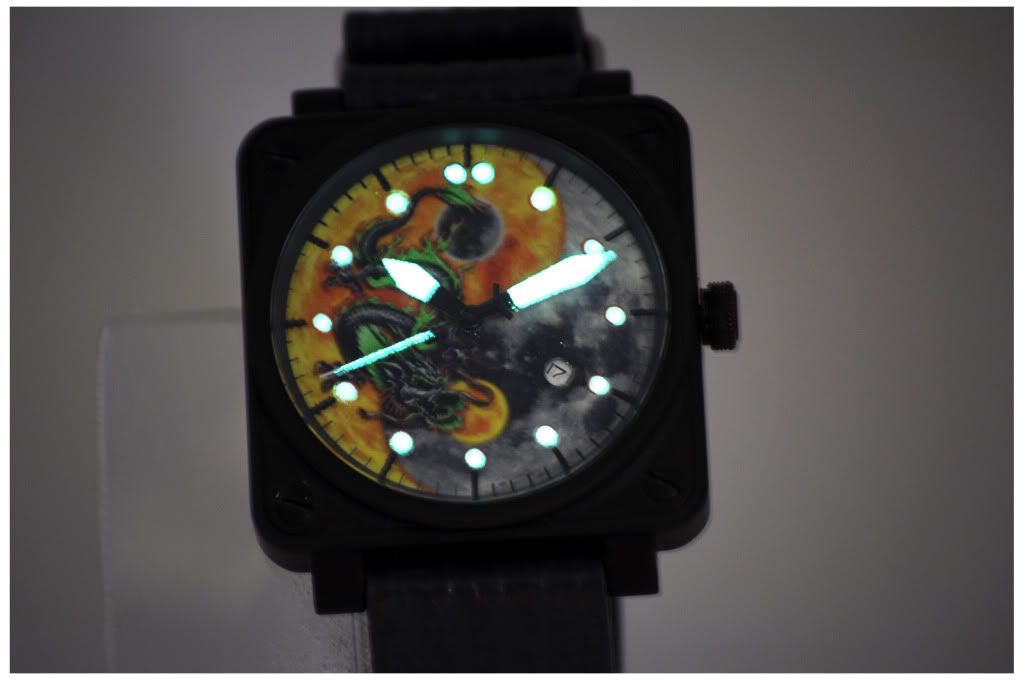
I didn't take a lume shot but will post one later one, but no need to say that it's very luminous.
I'm a big fan of Francisco's tutos and that pushed me further in my idea.
I wanted it to be Ti Pam based! (that's what I like)
A while back I ordered a Seagull ST-36 from a guy in Germany (to replace an asian 6497 in on of my Pam), anyway the guy screw up in is order and sent me a nice PVD 6498.
I kept the movement and he sent me the one I wanted for less than 25$.
The idea then came to build a Pam dial with second at 6!
I copied Pam blueprint and using Paint (that's the only thing I know how to use) obtained this:

I then make a basic drawing of my vessel (I'm a master in the merchant marine), still using Paint and put the 2 drawings together using Word.

I tried 2 different ship as I hadn't made my choice about having color or not!
At that point you can pick up whatever image you want to personalize your watch and have a very unique model.
Now I followed one of Francisco's tuto about placing decals on watches:

Bought myself some LIQUID DECAL FILM and some DECAL PAPER.
I printed my 2 drawing an the decal paper and applied a coating of liquid decal film and let the whole thing dry.
If you've ever been on a cruise ship or just a ferry, you must have seen Safety signs eveerywhere to show you direction to lifeboat, etc... Anyway those sign are called IMO sign and are made of self-adhesive photoluminescent vinyl so that if you have a total power failure you can find what you're looking for in the dark!
I had quite a few spare sign on board my vessel and took a piece of one to serve as support for my dial! I also bought some MICROSET and cut my decal to its dial shape:

Now I'm ready to go:

About 30 seconds in distilled water!
Time to put some Microset on the support and to slide the deal onto it.

I also had so MICROSOL so I applied a coating:

This step is not mandatory as our support is flat. But, be careful if you decide to do it, the ink almost washed away (I use an Inkjet printer on Inkjet decal paper, don't know if the same thing would happen using the Laser stuff).
Now I had in my spare part and old sandwich dial, I removed the upper part and sanded the lower one.
I cut my newly done dial and placed it on my dial base:

I then used my dremmel to make the dial holes:

The following steps don't need any comment as I just put the watch together.
Here's the final result:


I didn't take a lume shot but will post one later one, but no need to say that it's very luminous.


