- 12/9/08
- 691
- 1
- 0
A friend asked me how I shot my watch pictures without getting the flash bouncing back and I put together a short tutorial on building an inexpensive lightbox.
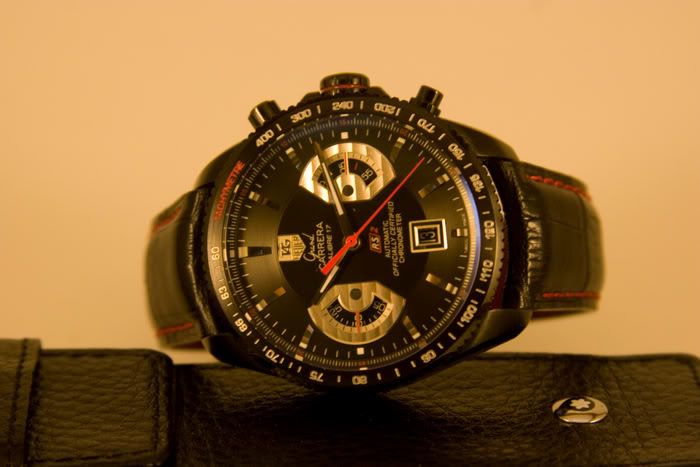
Here is a picture of a watch that I shot a few months ago:
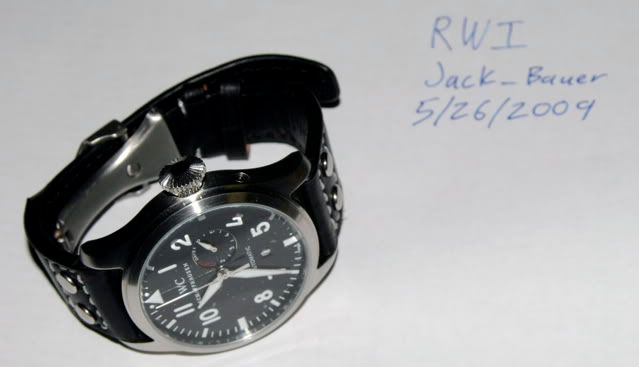
A few things wrong:
You can't see the dial straight on, when I shot it straight on, the flash reflection washed out the dial so I had to take it at an extreme angle
Overexposed at the dial, underexposed on the strap
All credit goes to http://digital-photography-school.com/how-to-make-a-inexpensive-light-tent
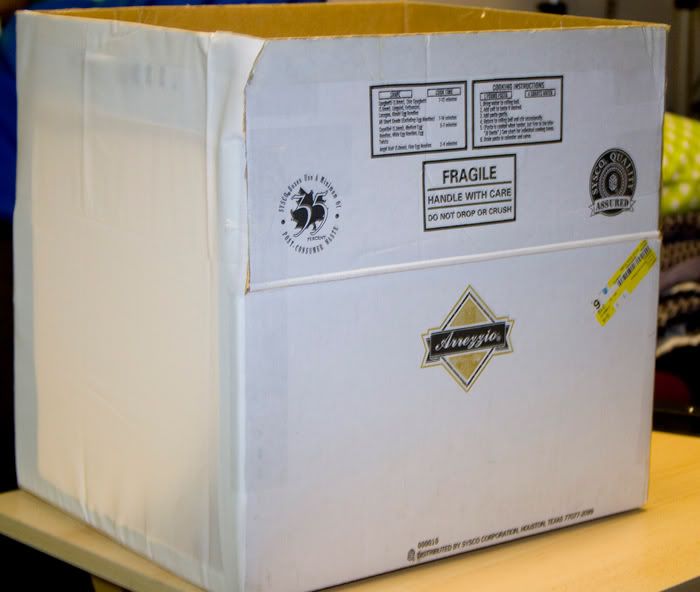
Start with a decent size box. I used a short box and taped the lid flaps together to extend it.
Step 1: Cut a hole in the box (I really hope someone gets this reference) Cut three holes, one on the top and one on each side. You'll be cutting away the white part in this picture.
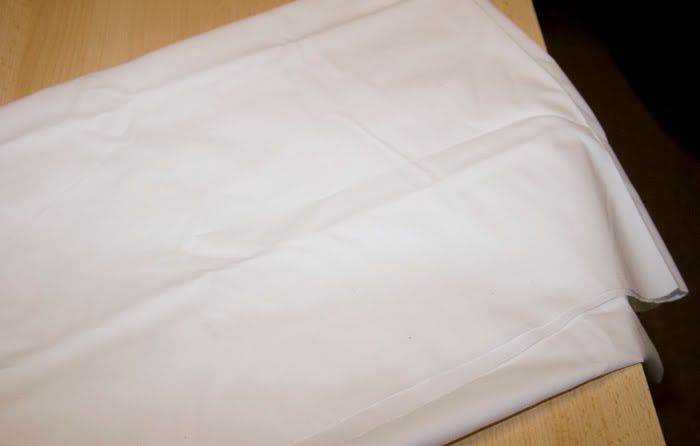
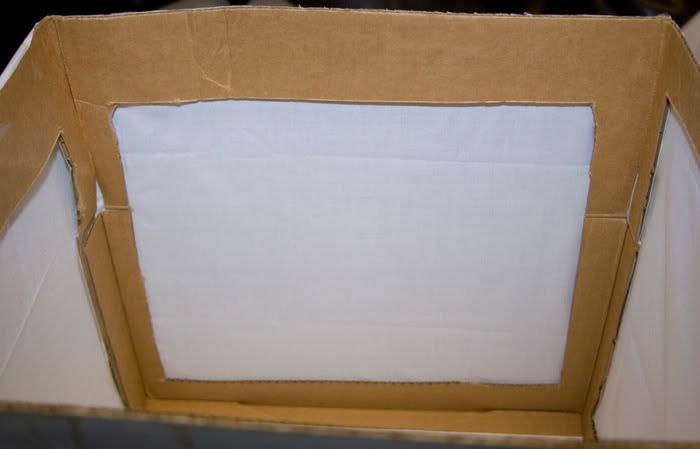
Get some white cloth from a fabric store. I bought 2 yards in case I needed more or messed up but I only ended up using about a half of a yard. Different hues of white will yield a different result. I got an off-white.
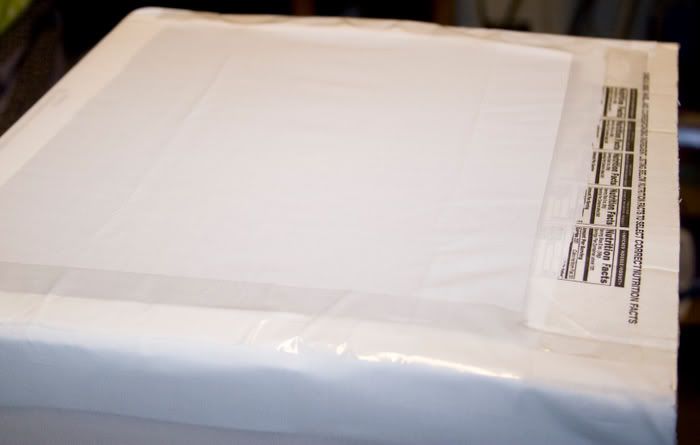
Cut pieces of the white cloth larger than the holes you cut in step 1 and tape them over the holes. I only used one layer, but you can experiment with different numbers of layers and different thicknesses. A glue stick would also work here.
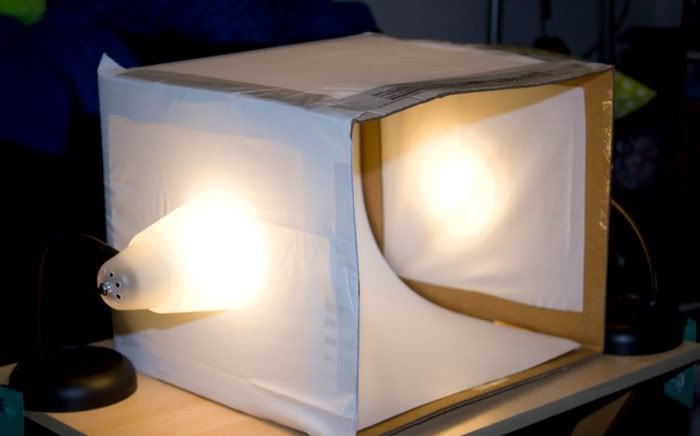
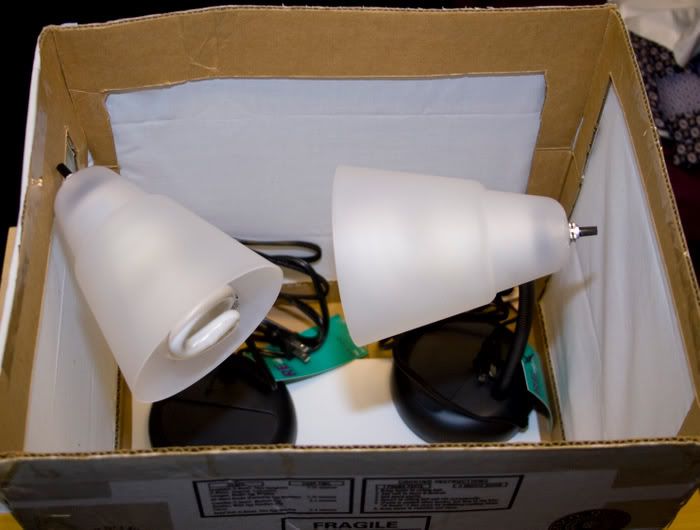
Set up two desk lamps on either side of the lightbox. This can be done with one lamp if you get a bright enough lamp and put it on top pointing down. The more light sources you use, the less of a shadow you'll get. You can even use three lamps but I found through experience and research that two lamps on the sides will give you the best result.
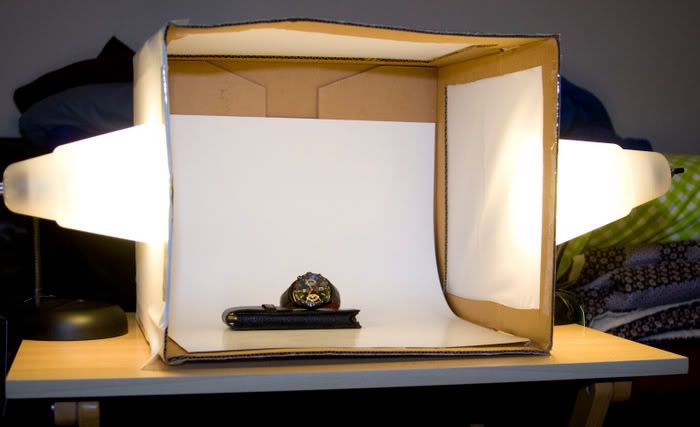
Get a piece of white butcher paper or poster board and lay it on the back and bottom of the lightbox. This will serve as a backdrop so make sure it is a good white color, clean, and seamless (Don't tape two pieces of paper together or the seam will show) Put whatever you want to photograph in the box and move the lamps accordingly to get the best light. If your item is reflective, you might get yourself in the shot or part of the brown box so just be aware of shooting reflective objects.
You'll end up with a picture like this when you take it. Don't use a flash or you'll get harsh light reflecting back at you and it will make your picture look like crap. Here is where you will want to shoot your pictures in raw so you can edit it on the computer. The reason the picture came out with a brown color is because 1) The light bulbs I used were off the shelf CFLs 2) The white balance wasn't set on my camera and 3) The white fabric I chose is off-white.
To fix #1, you can buy light bulbs that give off "natural" light and install them in your lamps. To fix #2, you can set the white balance before your shoot but it's so easy to change on the computer, I don't even bother. To fix #3, you'll have to experiment with different tints and thicknesses of white fabric. Again, it's so easy to fix on the computer I don't bother with this.

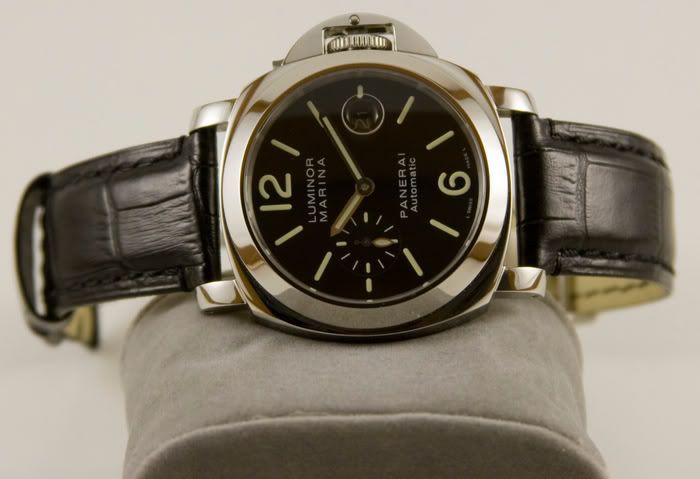
Less than a minute of editing and here is the final result.
Changes made were:
Fix white balance
Increase brightness
Rotate and crop
This part is subjective and you can edit it to your heart's content.
When you're done, you can put everything back in the lightbox for easy storage. Some people have used clear Tupperware boxes with locking lids instead of cutting up a cardboard box that that works too. I just worked with what I had around the house.
Total Cost:
Box - had around the house
2 lamps - $3.99 each at target
Lightblulbs - I had them but if you need them they're 3 for $1 at ranch 99
Fabric - $2.99 but i could have done it with about $1 worth
Posterboard backdrop - Had this, but it's cheap if you need to buy
Packing tape - Who doesn't have this?
This is an example of shooting something reflective. You'll notice at 1:30, 4:30, 7:00, and 11:00, you can see the brown part of the box that wasn't covered by the backdrop.
There are infinite ways of making a lightbox and shooting your watches, but this project was quick, cheap, and has lasted me a few months. I hope this helps.
Here is a picture of a watch that I shot a few months ago:
A few things wrong:
You can't see the dial straight on, when I shot it straight on, the flash reflection washed out the dial so I had to take it at an extreme angle
Overexposed at the dial, underexposed on the strap
All credit goes to http://digital-photography-school.com/how-to-make-a-inexpensive-light-tent
Start with a decent size box. I used a short box and taped the lid flaps together to extend it.
Step 1: Cut a hole in the box (I really hope someone gets this reference) Cut three holes, one on the top and one on each side. You'll be cutting away the white part in this picture.
Get some white cloth from a fabric store. I bought 2 yards in case I needed more or messed up but I only ended up using about a half of a yard. Different hues of white will yield a different result. I got an off-white.
Cut pieces of the white cloth larger than the holes you cut in step 1 and tape them over the holes. I only used one layer, but you can experiment with different numbers of layers and different thicknesses. A glue stick would also work here.
Set up two desk lamps on either side of the lightbox. This can be done with one lamp if you get a bright enough lamp and put it on top pointing down. The more light sources you use, the less of a shadow you'll get. You can even use three lamps but I found through experience and research that two lamps on the sides will give you the best result.
Get a piece of white butcher paper or poster board and lay it on the back and bottom of the lightbox. This will serve as a backdrop so make sure it is a good white color, clean, and seamless (Don't tape two pieces of paper together or the seam will show) Put whatever you want to photograph in the box and move the lamps accordingly to get the best light. If your item is reflective, you might get yourself in the shot or part of the brown box so just be aware of shooting reflective objects.
You'll end up with a picture like this when you take it. Don't use a flash or you'll get harsh light reflecting back at you and it will make your picture look like crap. Here is where you will want to shoot your pictures in raw so you can edit it on the computer. The reason the picture came out with a brown color is because 1) The light bulbs I used were off the shelf CFLs 2) The white balance wasn't set on my camera and 3) The white fabric I chose is off-white.
To fix #1, you can buy light bulbs that give off "natural" light and install them in your lamps. To fix #2, you can set the white balance before your shoot but it's so easy to change on the computer, I don't even bother. To fix #3, you'll have to experiment with different tints and thicknesses of white fabric. Again, it's so easy to fix on the computer I don't bother with this.
Less than a minute of editing and here is the final result.
Changes made were:
Fix white balance
Increase brightness
Rotate and crop
This part is subjective and you can edit it to your heart's content.
When you're done, you can put everything back in the lightbox for easy storage. Some people have used clear Tupperware boxes with locking lids instead of cutting up a cardboard box that that works too. I just worked with what I had around the house.
Total Cost:
Box - had around the house
2 lamps - $3.99 each at target
Lightblulbs - I had them but if you need them they're 3 for $1 at ranch 99
Fabric - $2.99 but i could have done it with about $1 worth
Posterboard backdrop - Had this, but it's cheap if you need to buy
Packing tape - Who doesn't have this?
This is an example of shooting something reflective. You'll notice at 1:30, 4:30, 7:00, and 11:00, you can see the brown part of the box that wasn't covered by the backdrop.
There are infinite ways of making a lightbox and shooting your watches, but this project was quick, cheap, and has lasted me a few months. I hope this helps.
") I remember building one of those a couple years ago
I remember building one of those a couple years ago