Hi all,
Quick disclaimer, Im still fairly new to the hobby and I believe in learning by doing, so if you see any glaring mistakes (and I'm sure you will!) it would be much appreciated if you give me a nudge in the right direction!
Parts List-
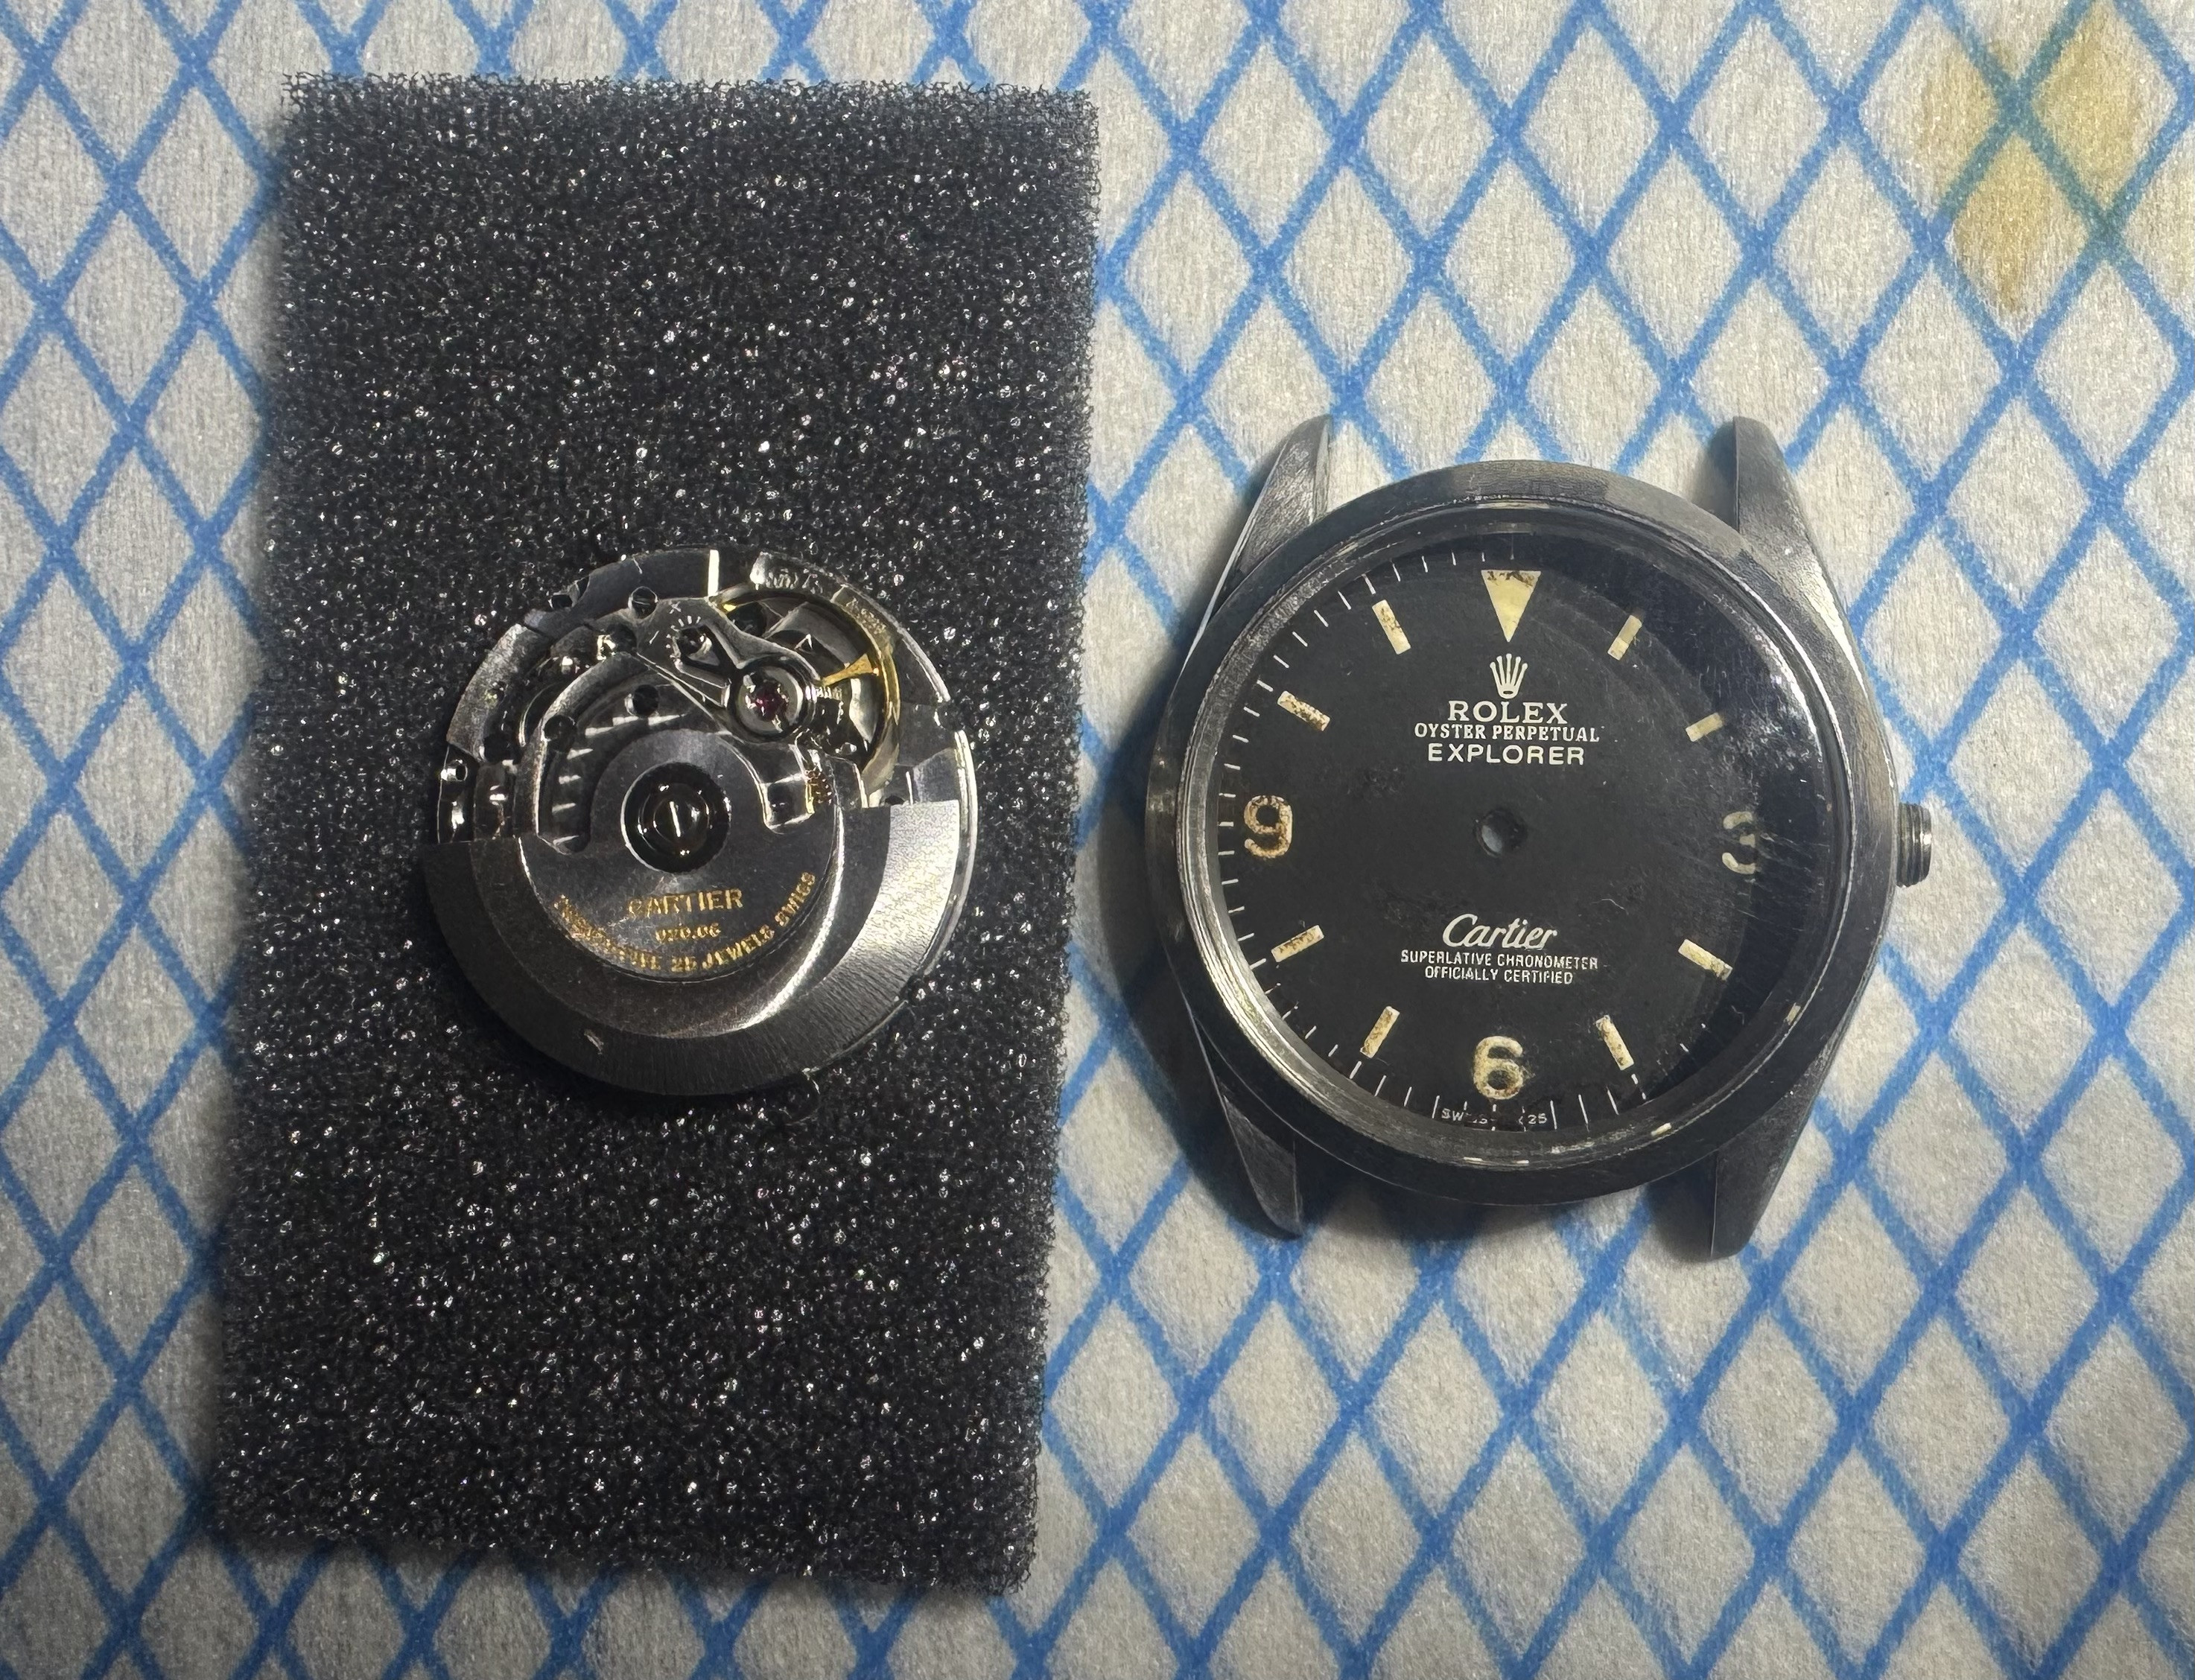
Movement: Cartier 020-06 (ETA 2824-2)
This is what started this build, I found a Cartier ETA 2824 and a Tiffany ETA 2824 on Ebay and I knew they would make a good pair of watches when complete. (Im thinking a 5513 Tiffany Dial for the remaining movement but that's a discussion for another day). Ive already removed the date complication and I've just received a couple of ETA 2801 setting lever jumpers to remove the ghost date position in the crown. When test fitting the dial I found the clearance between the hands and the dial was nearly non-existent, so I've also sourced the H4 pinons to raise the hand height. Pics will follow when I get around the fitting the parts.
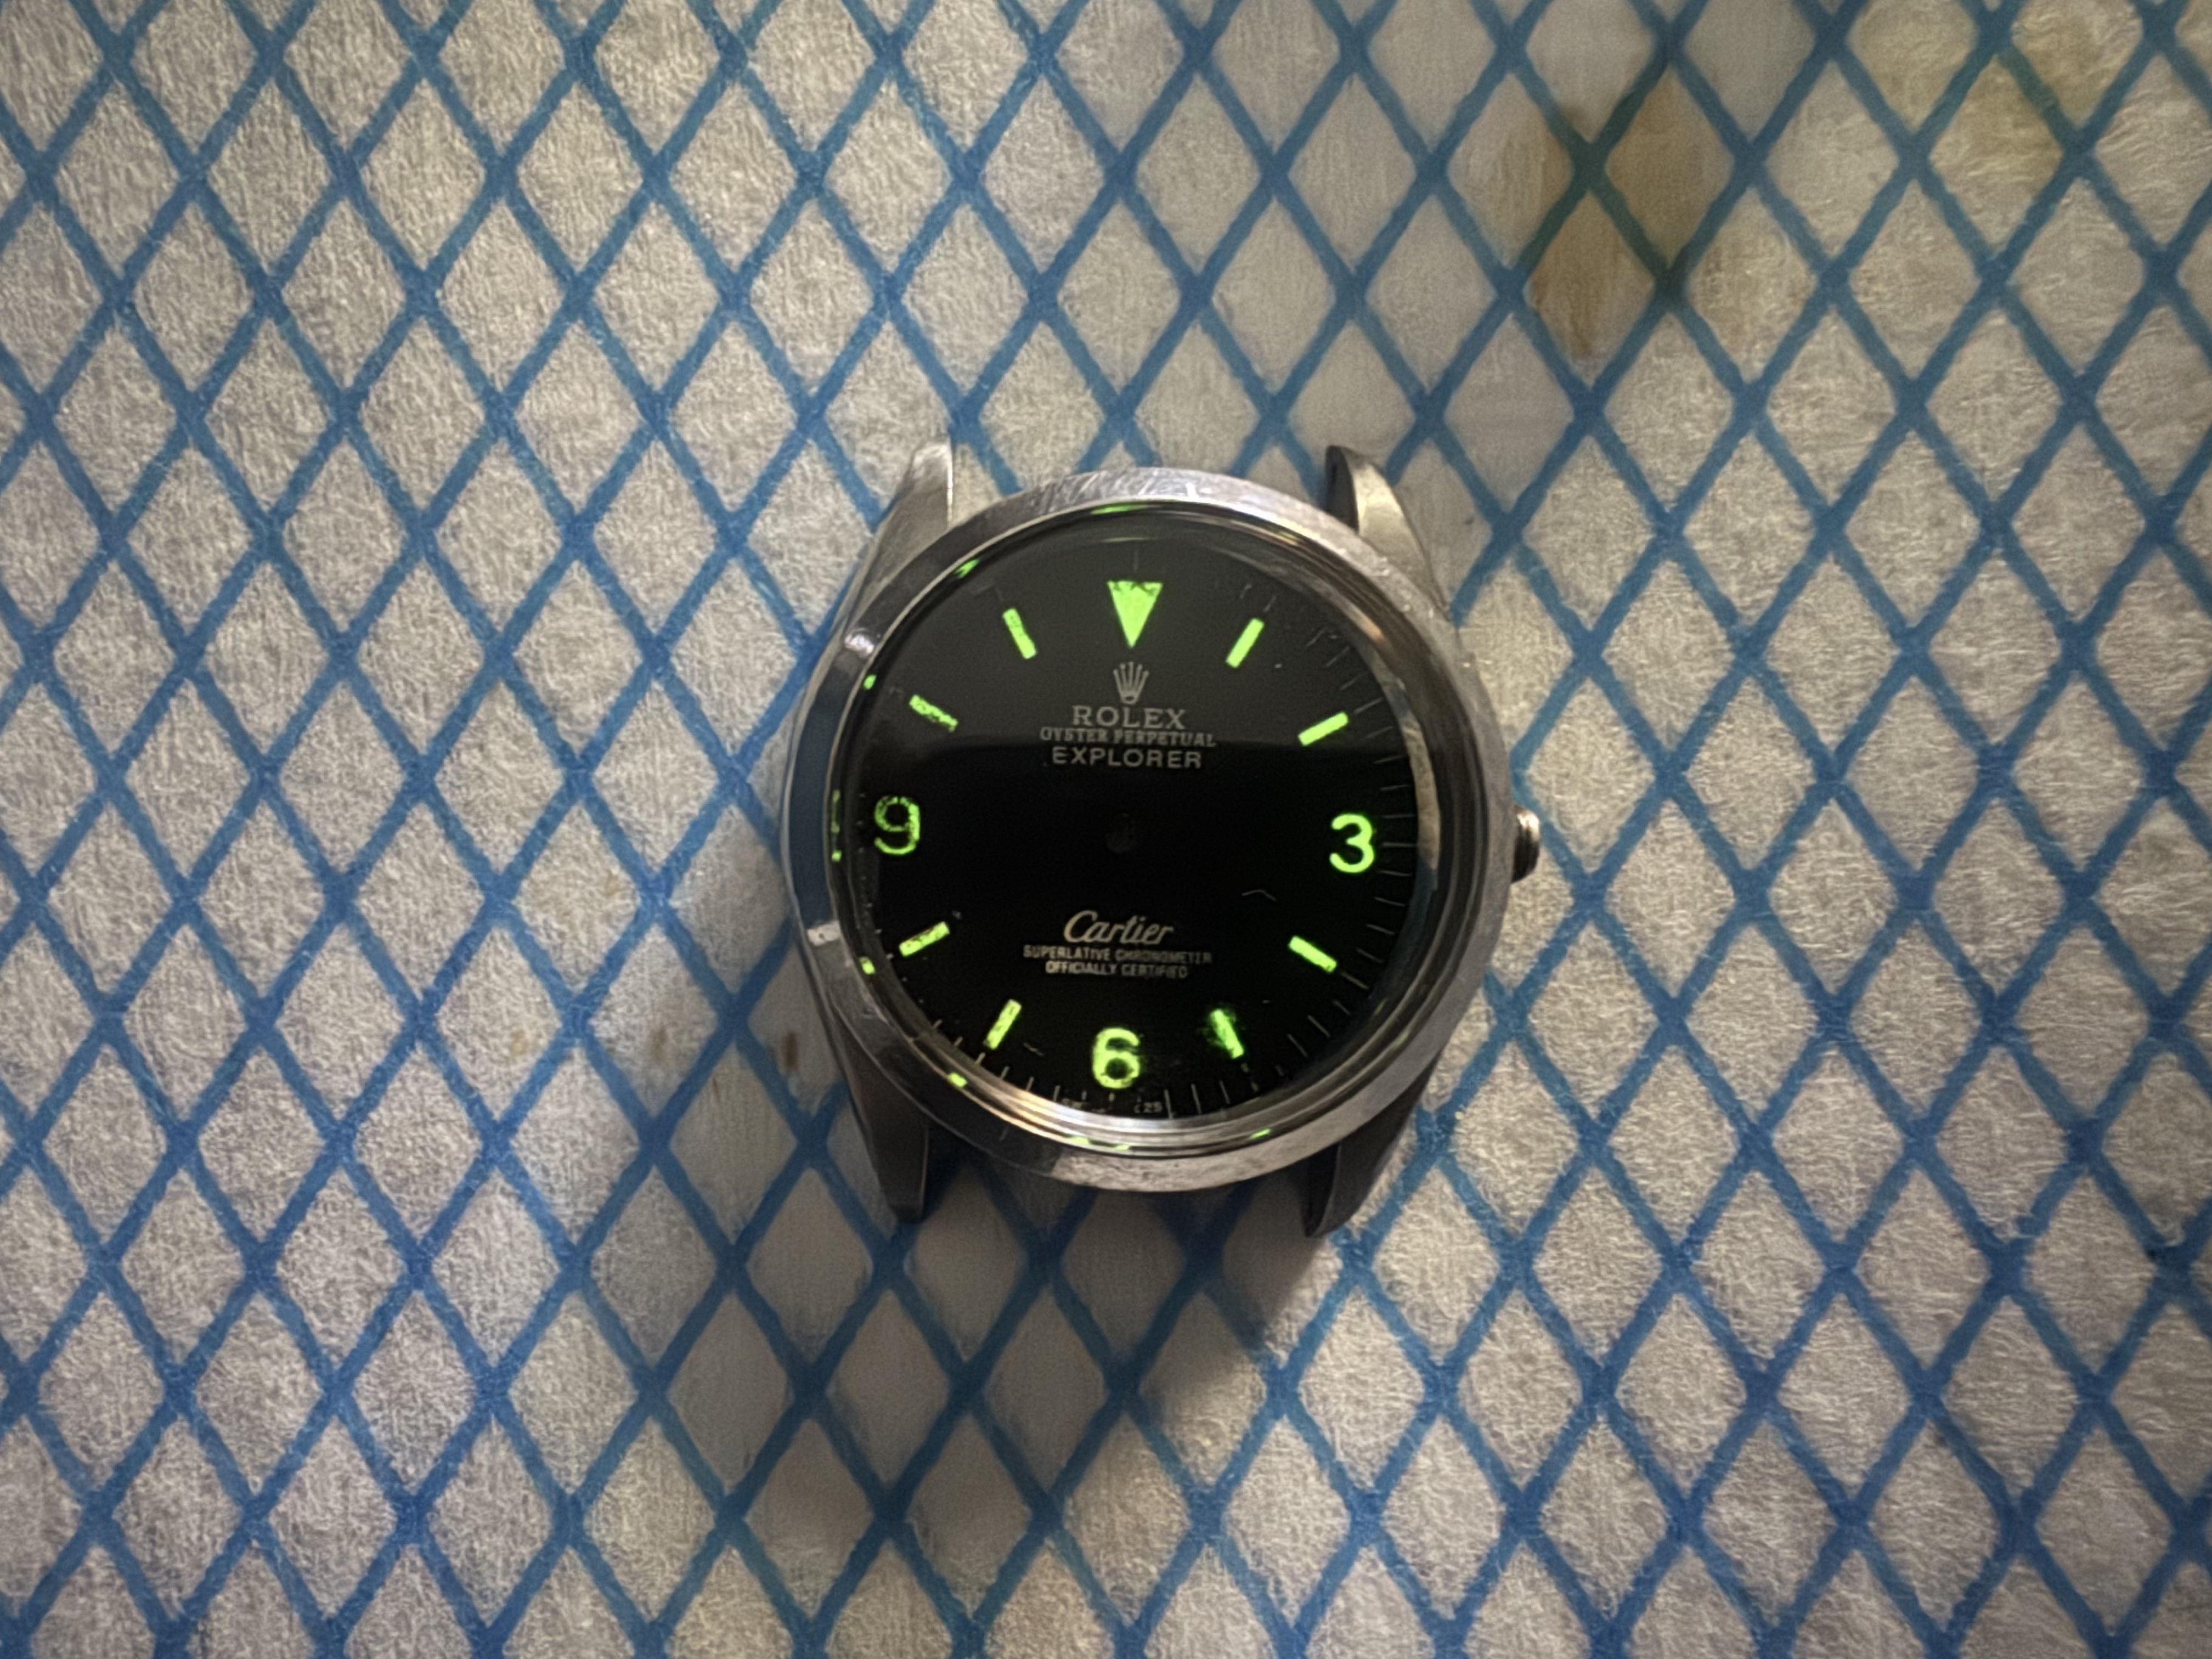
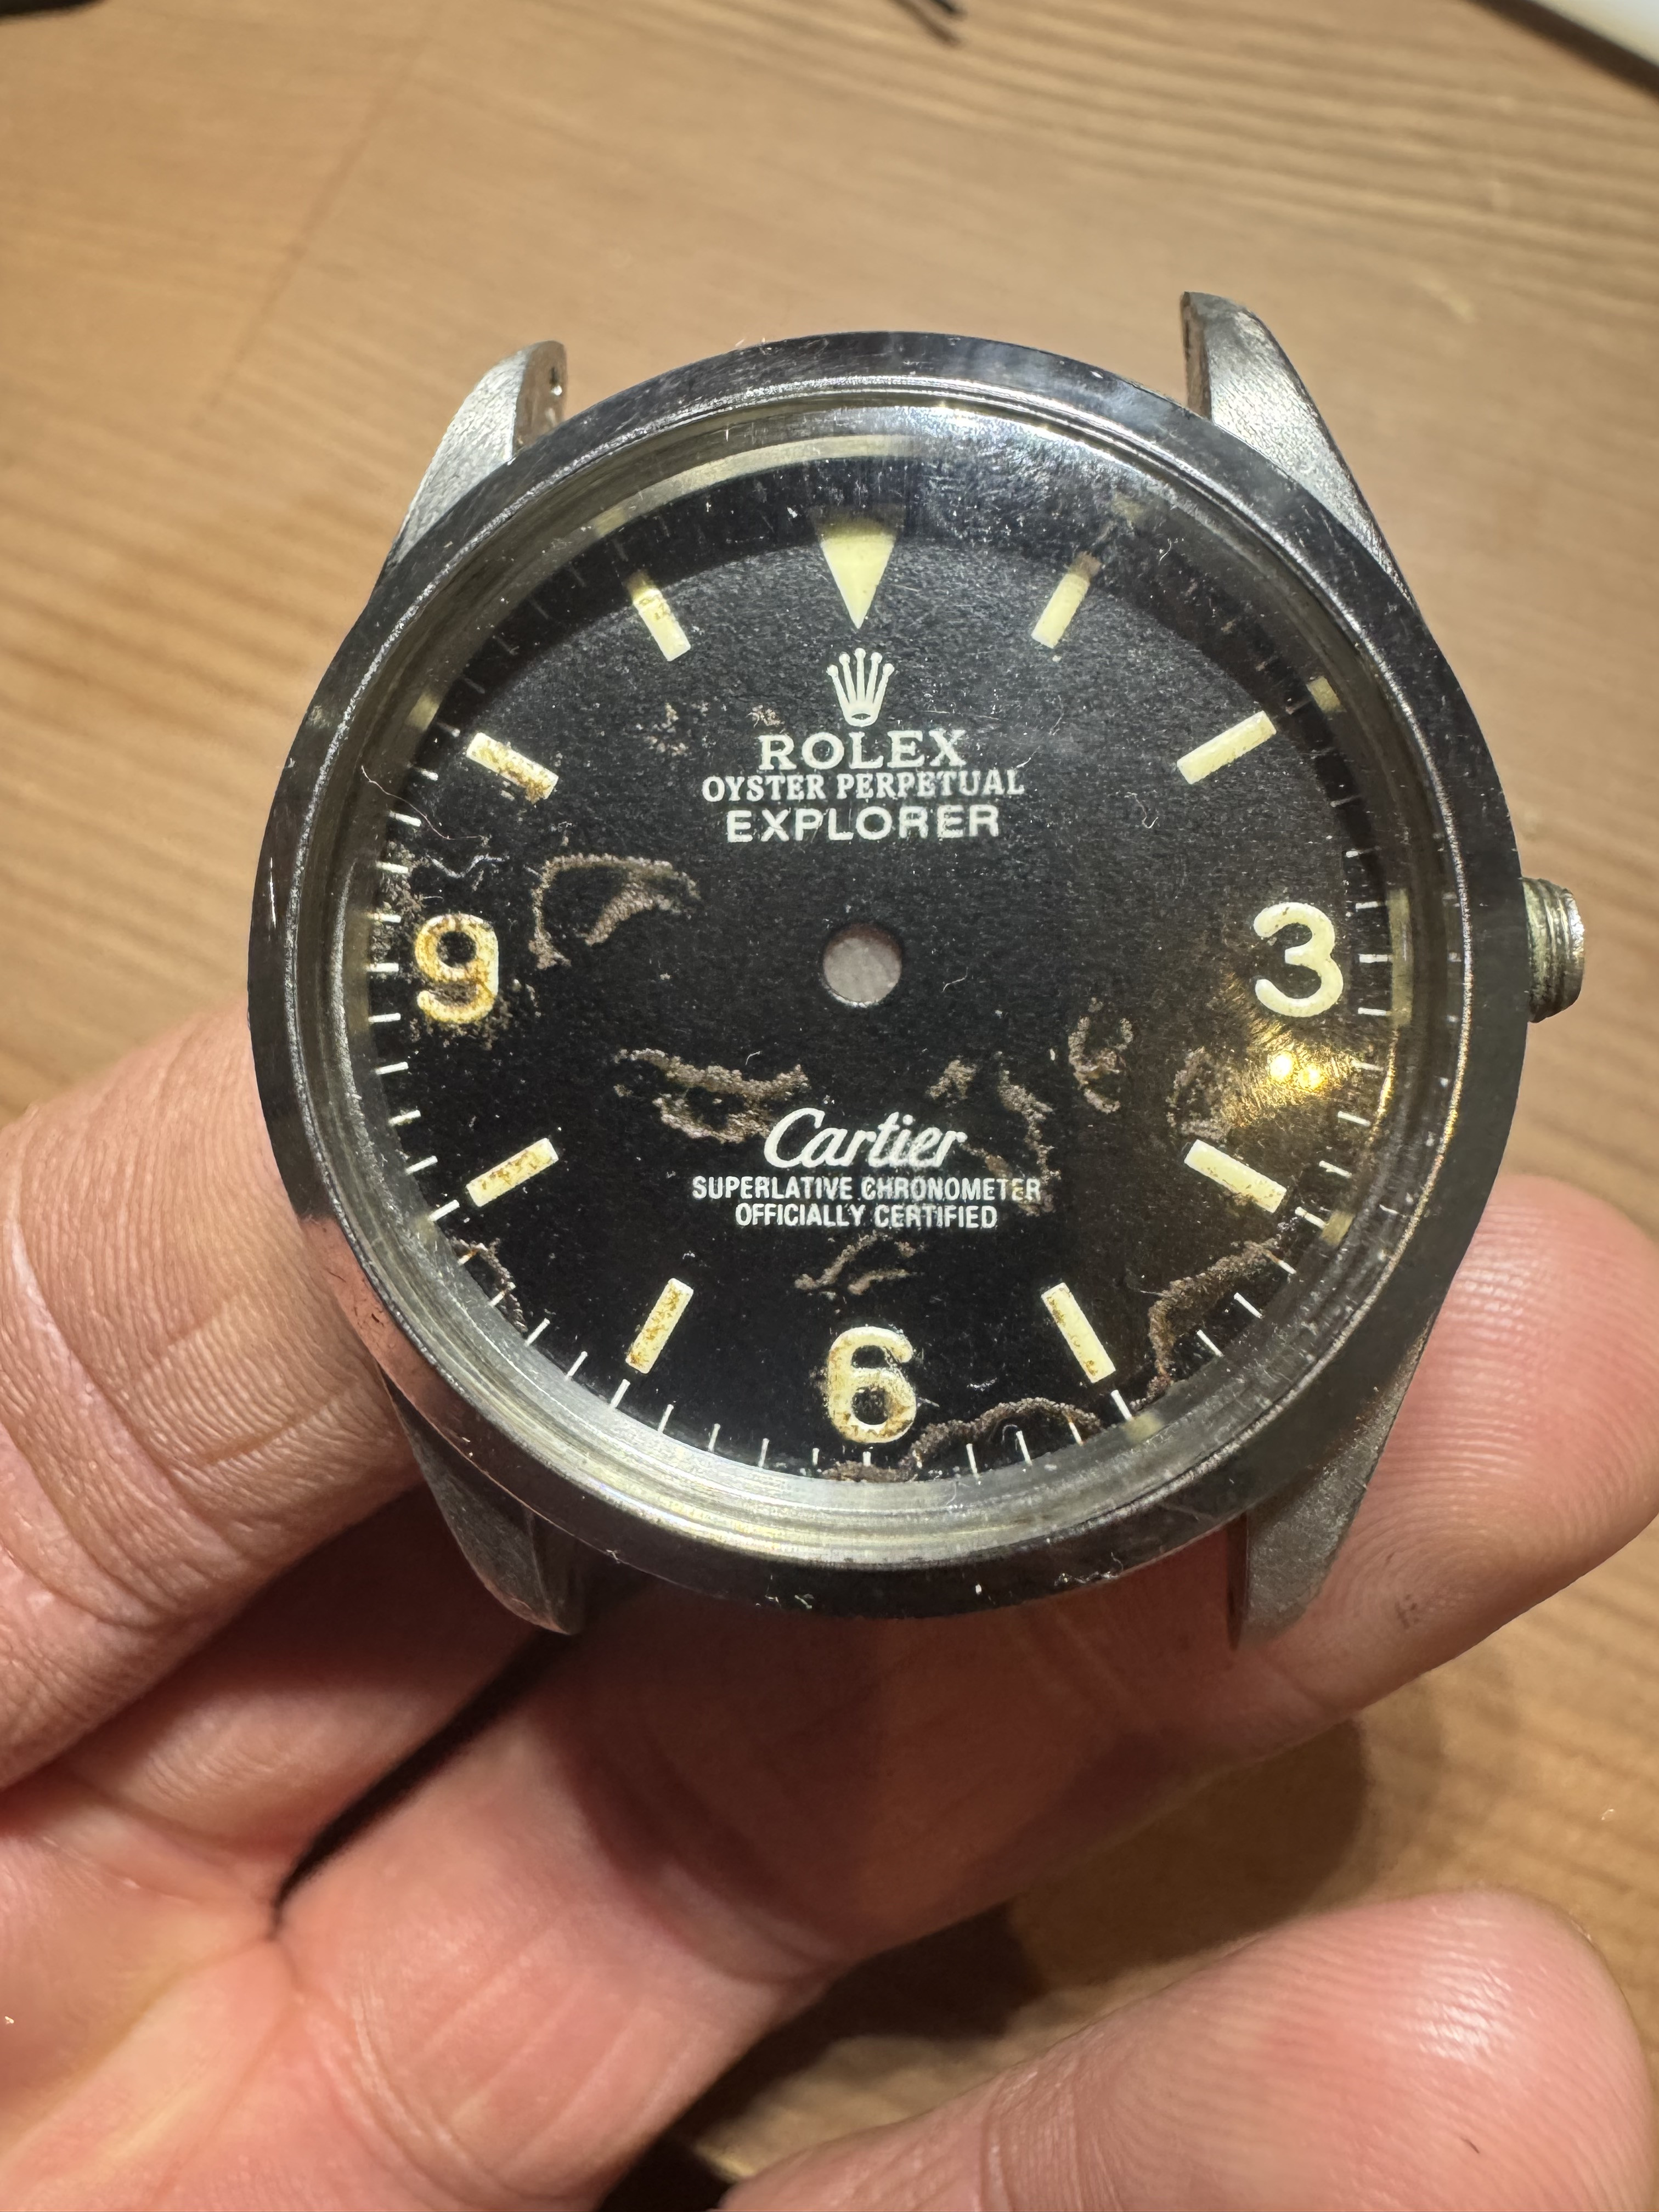
Case: Rolex 1002 Case Set
Does what it says on the tin really, the case didn't come with a crown so I have one on the way, it should be here in the next week or two. Id like clear casebacks on both of these watches so I went ahead and bought a CustomWatchConcepts caseback, it was pricey but I think it will really bring the build together.
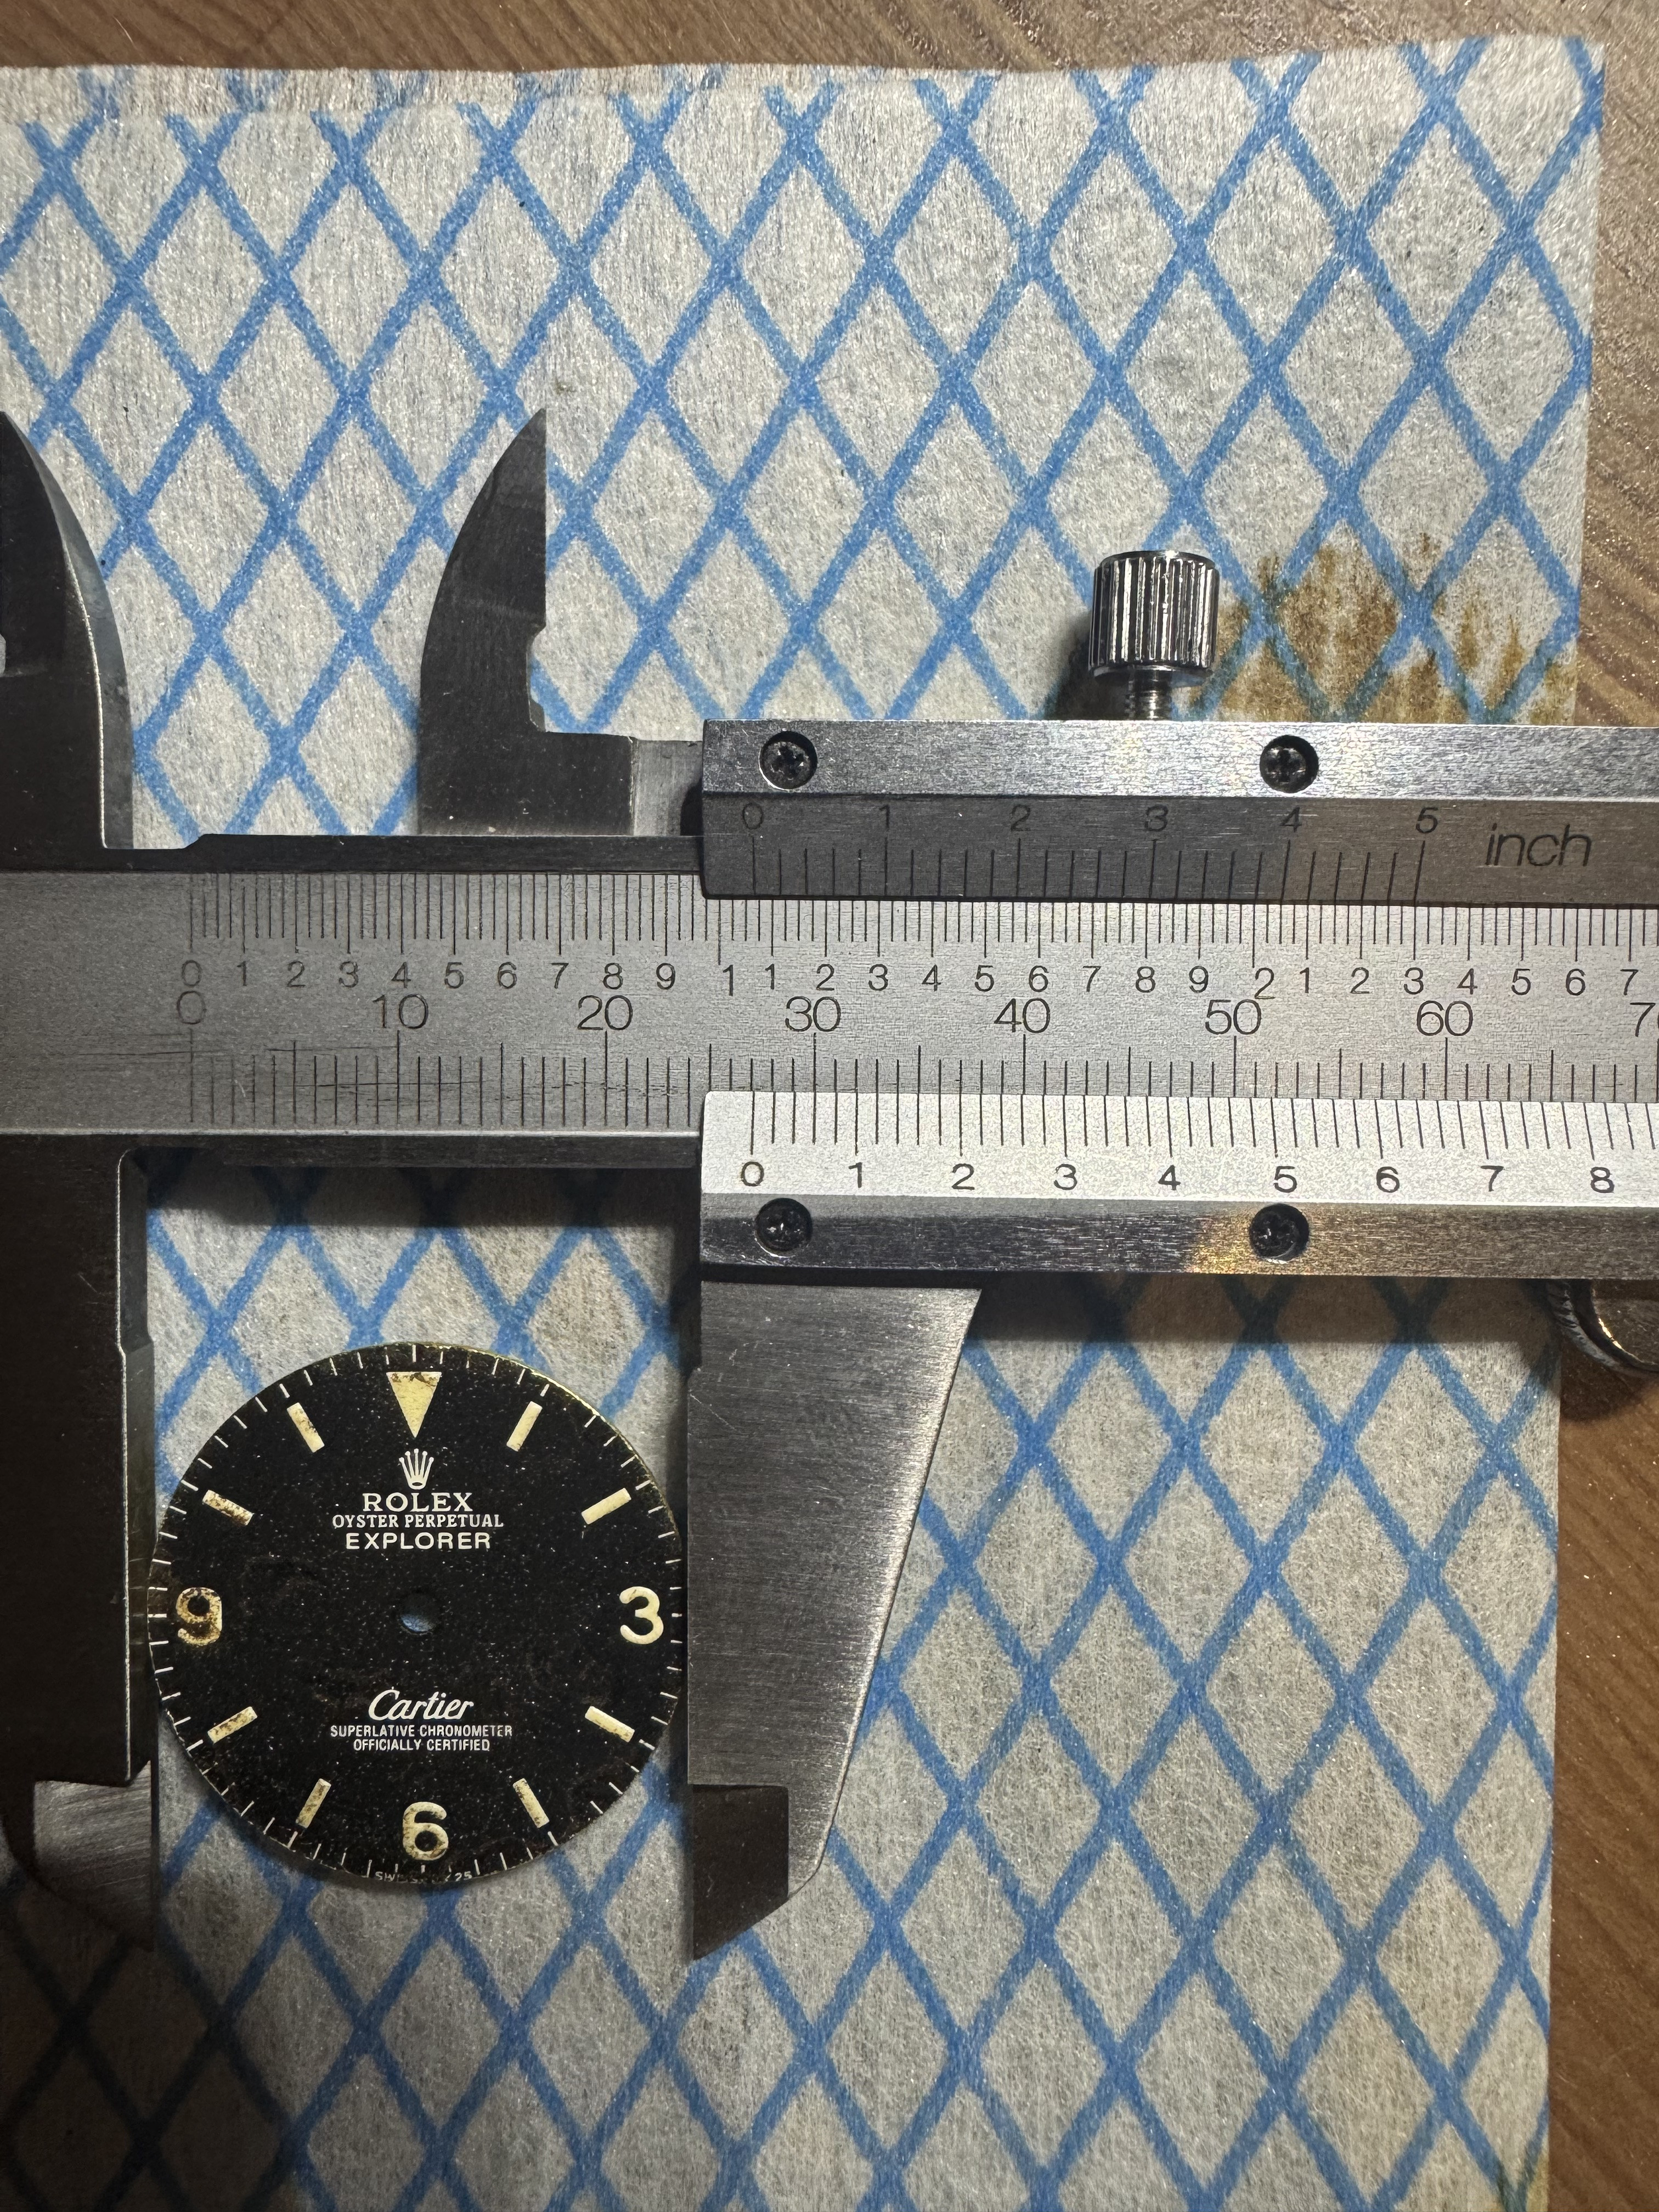
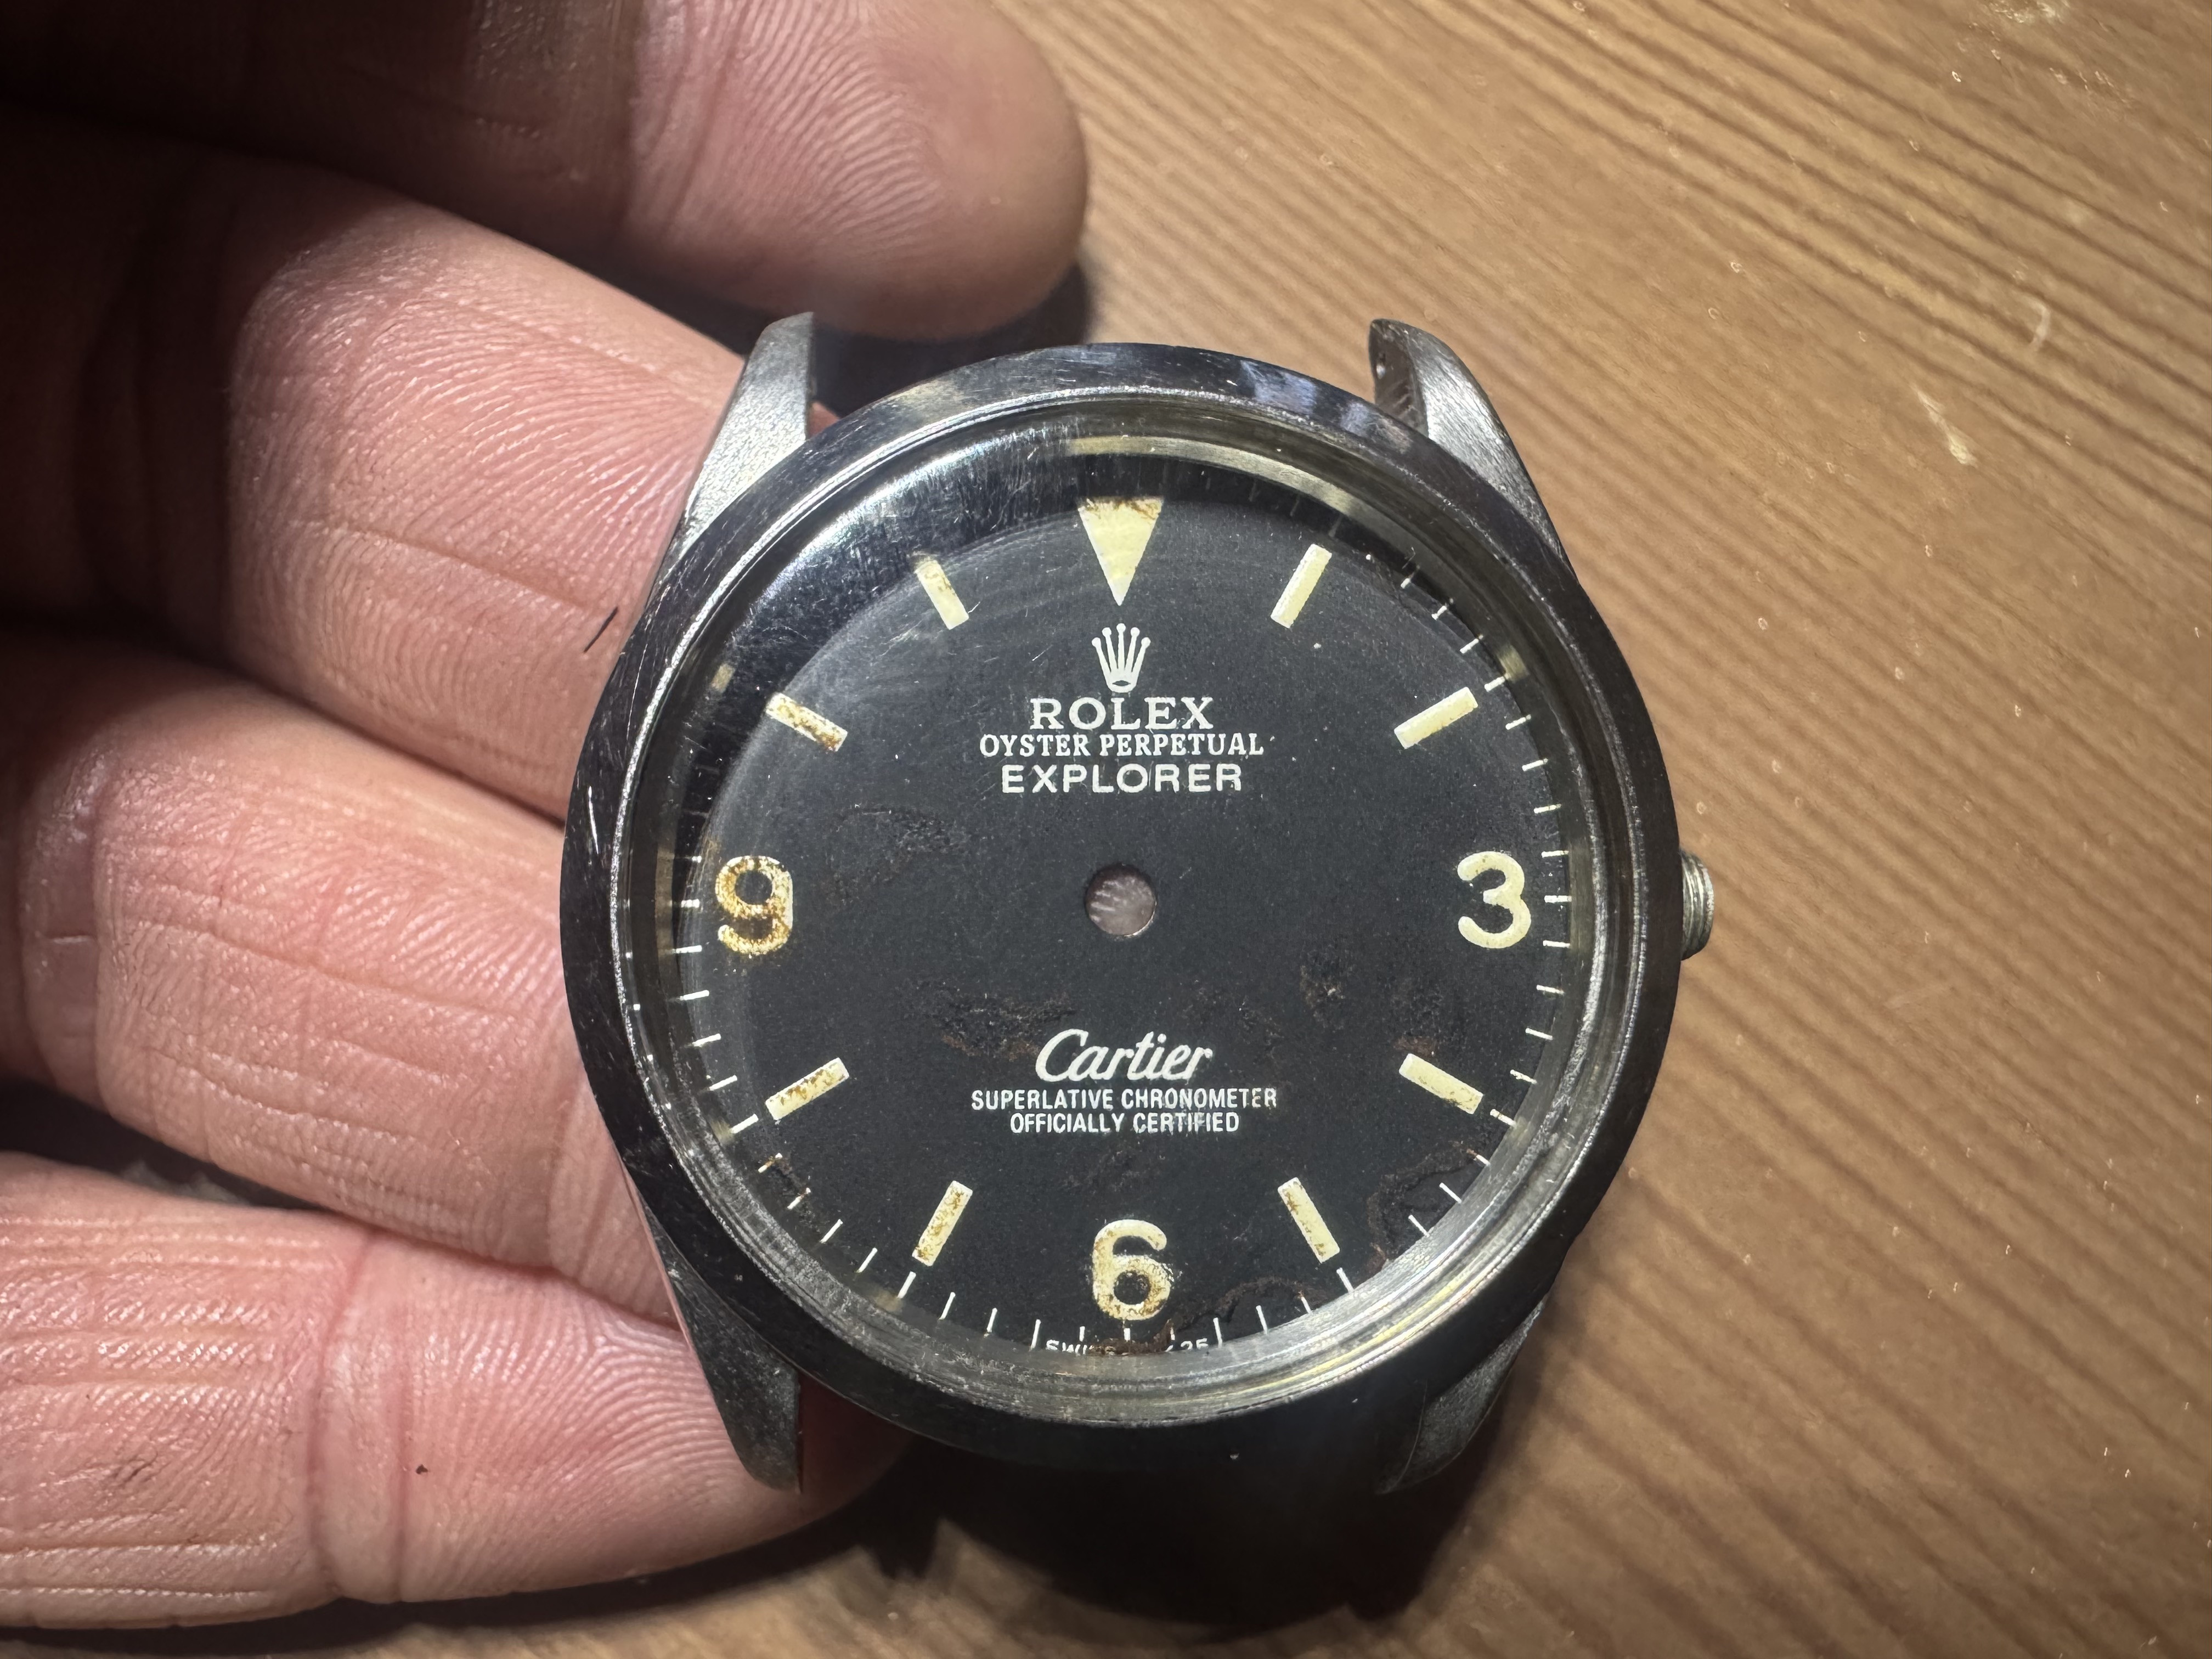
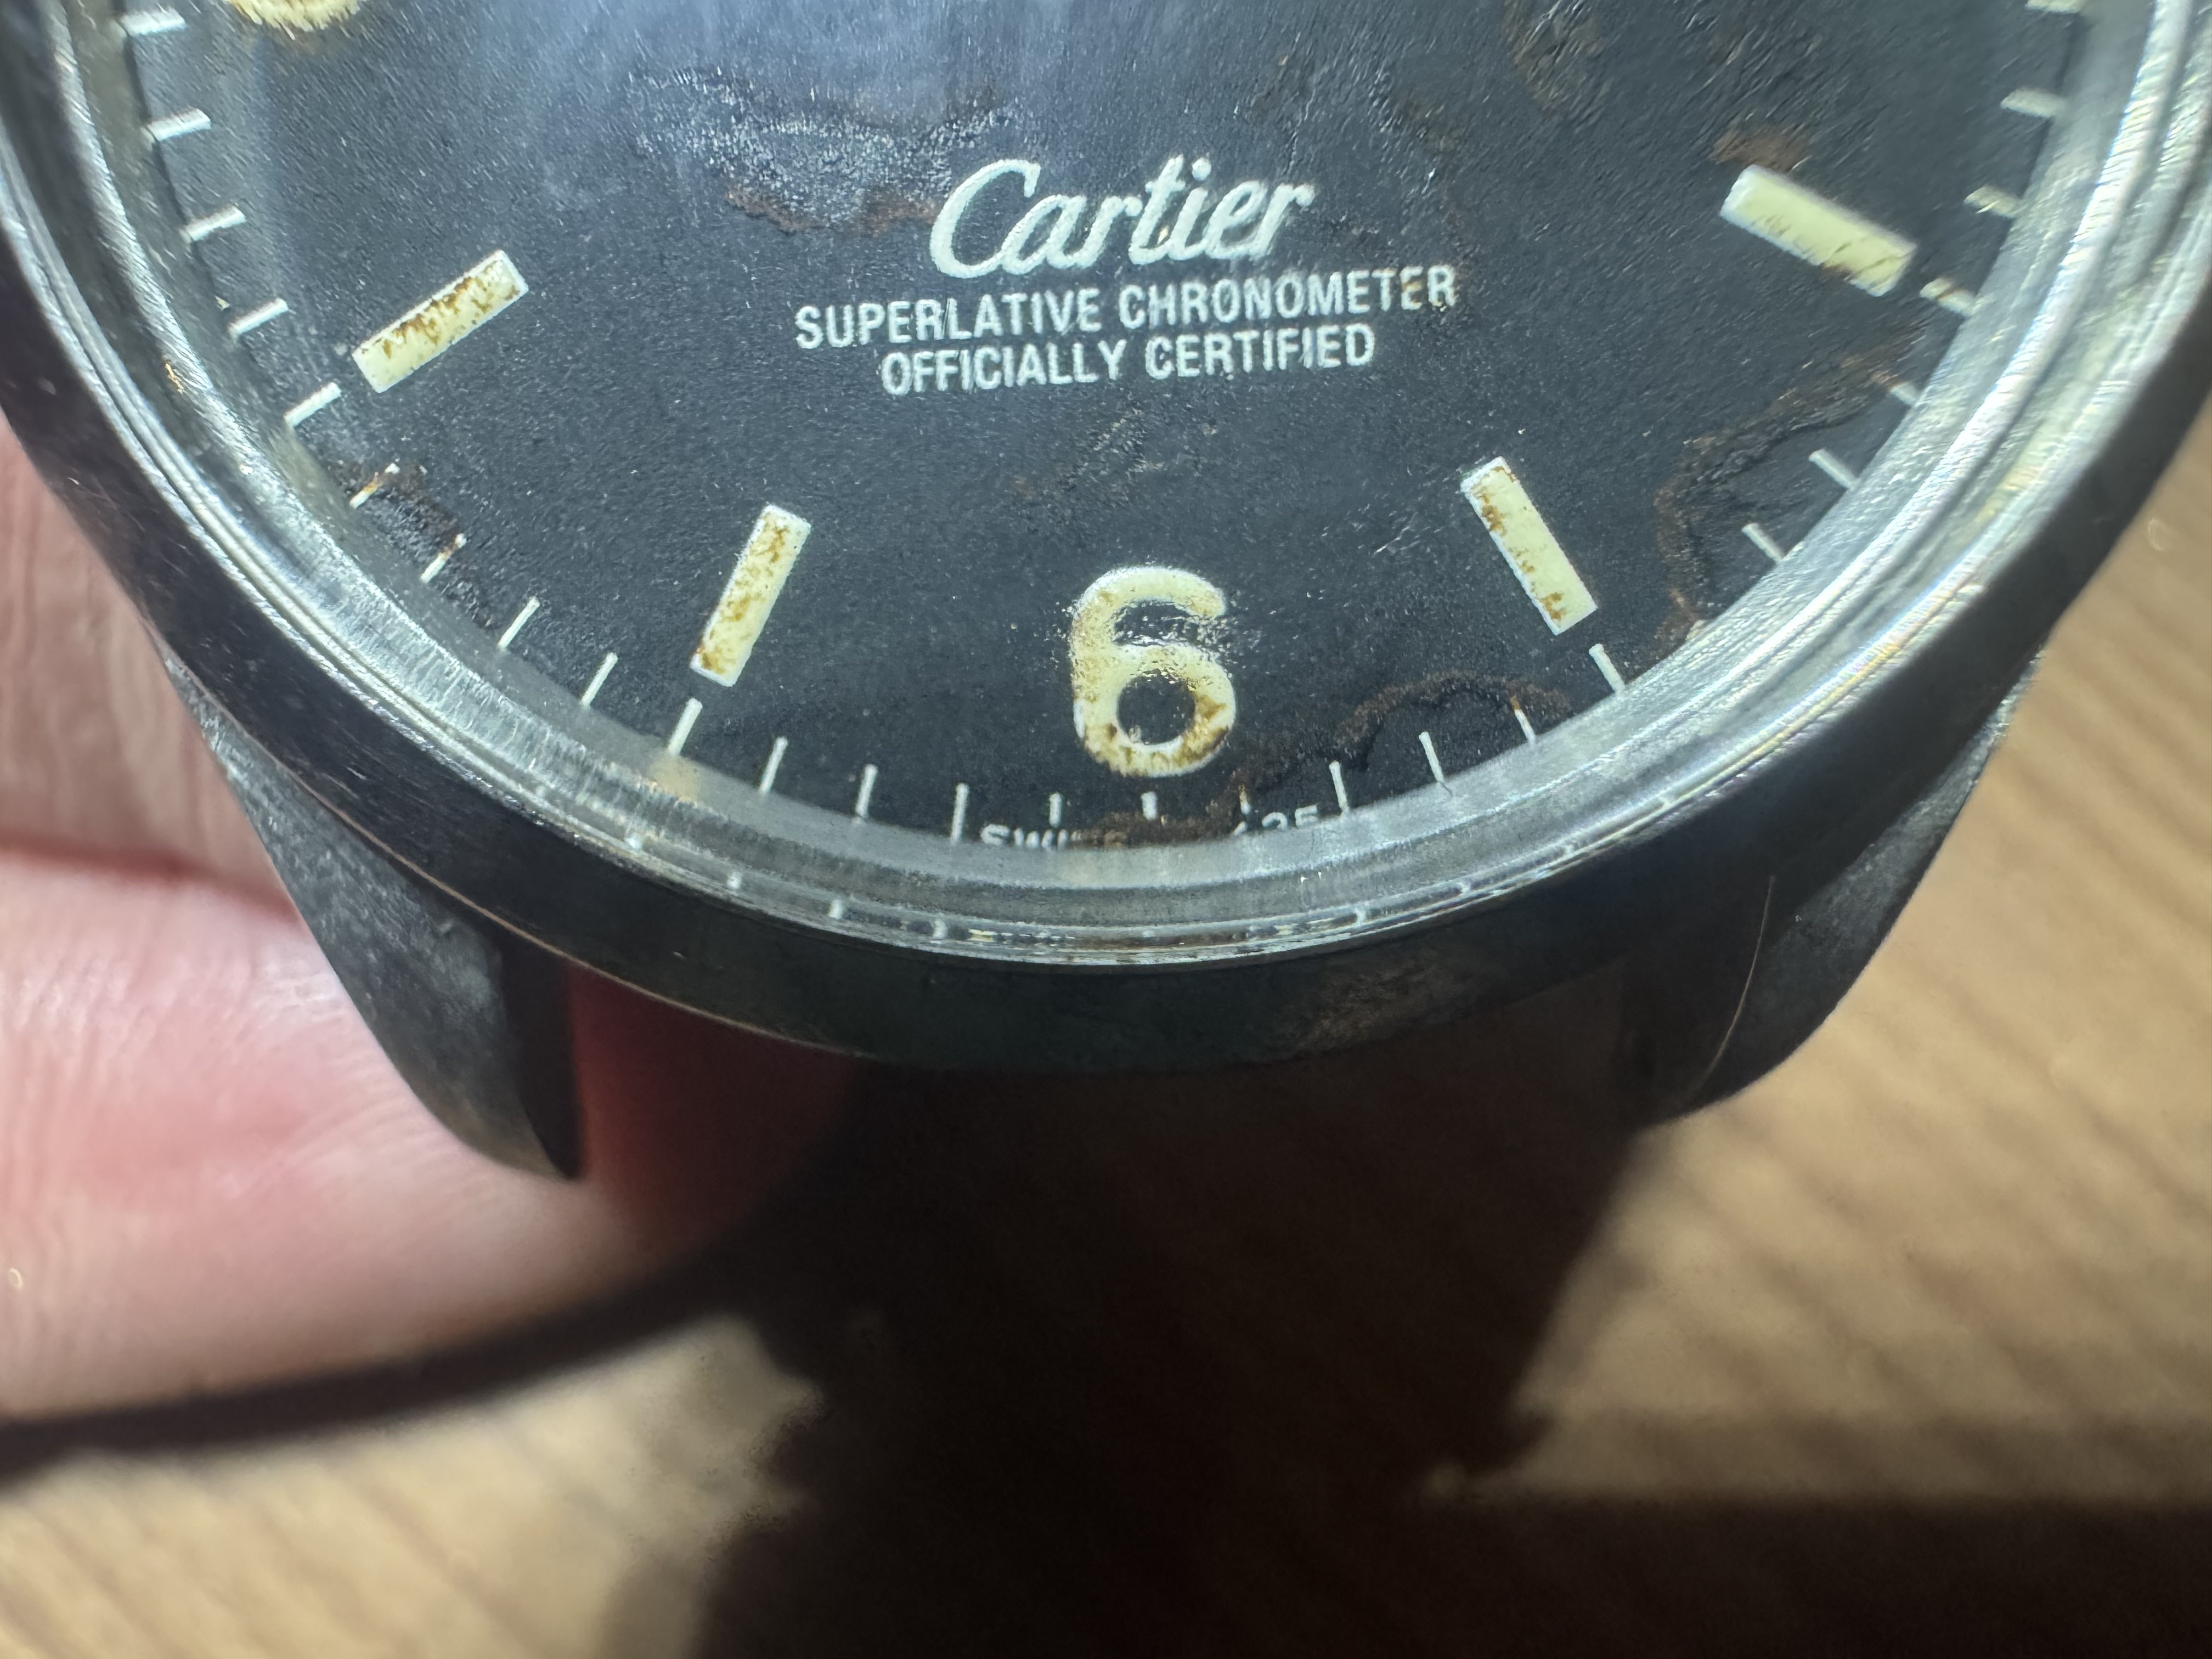
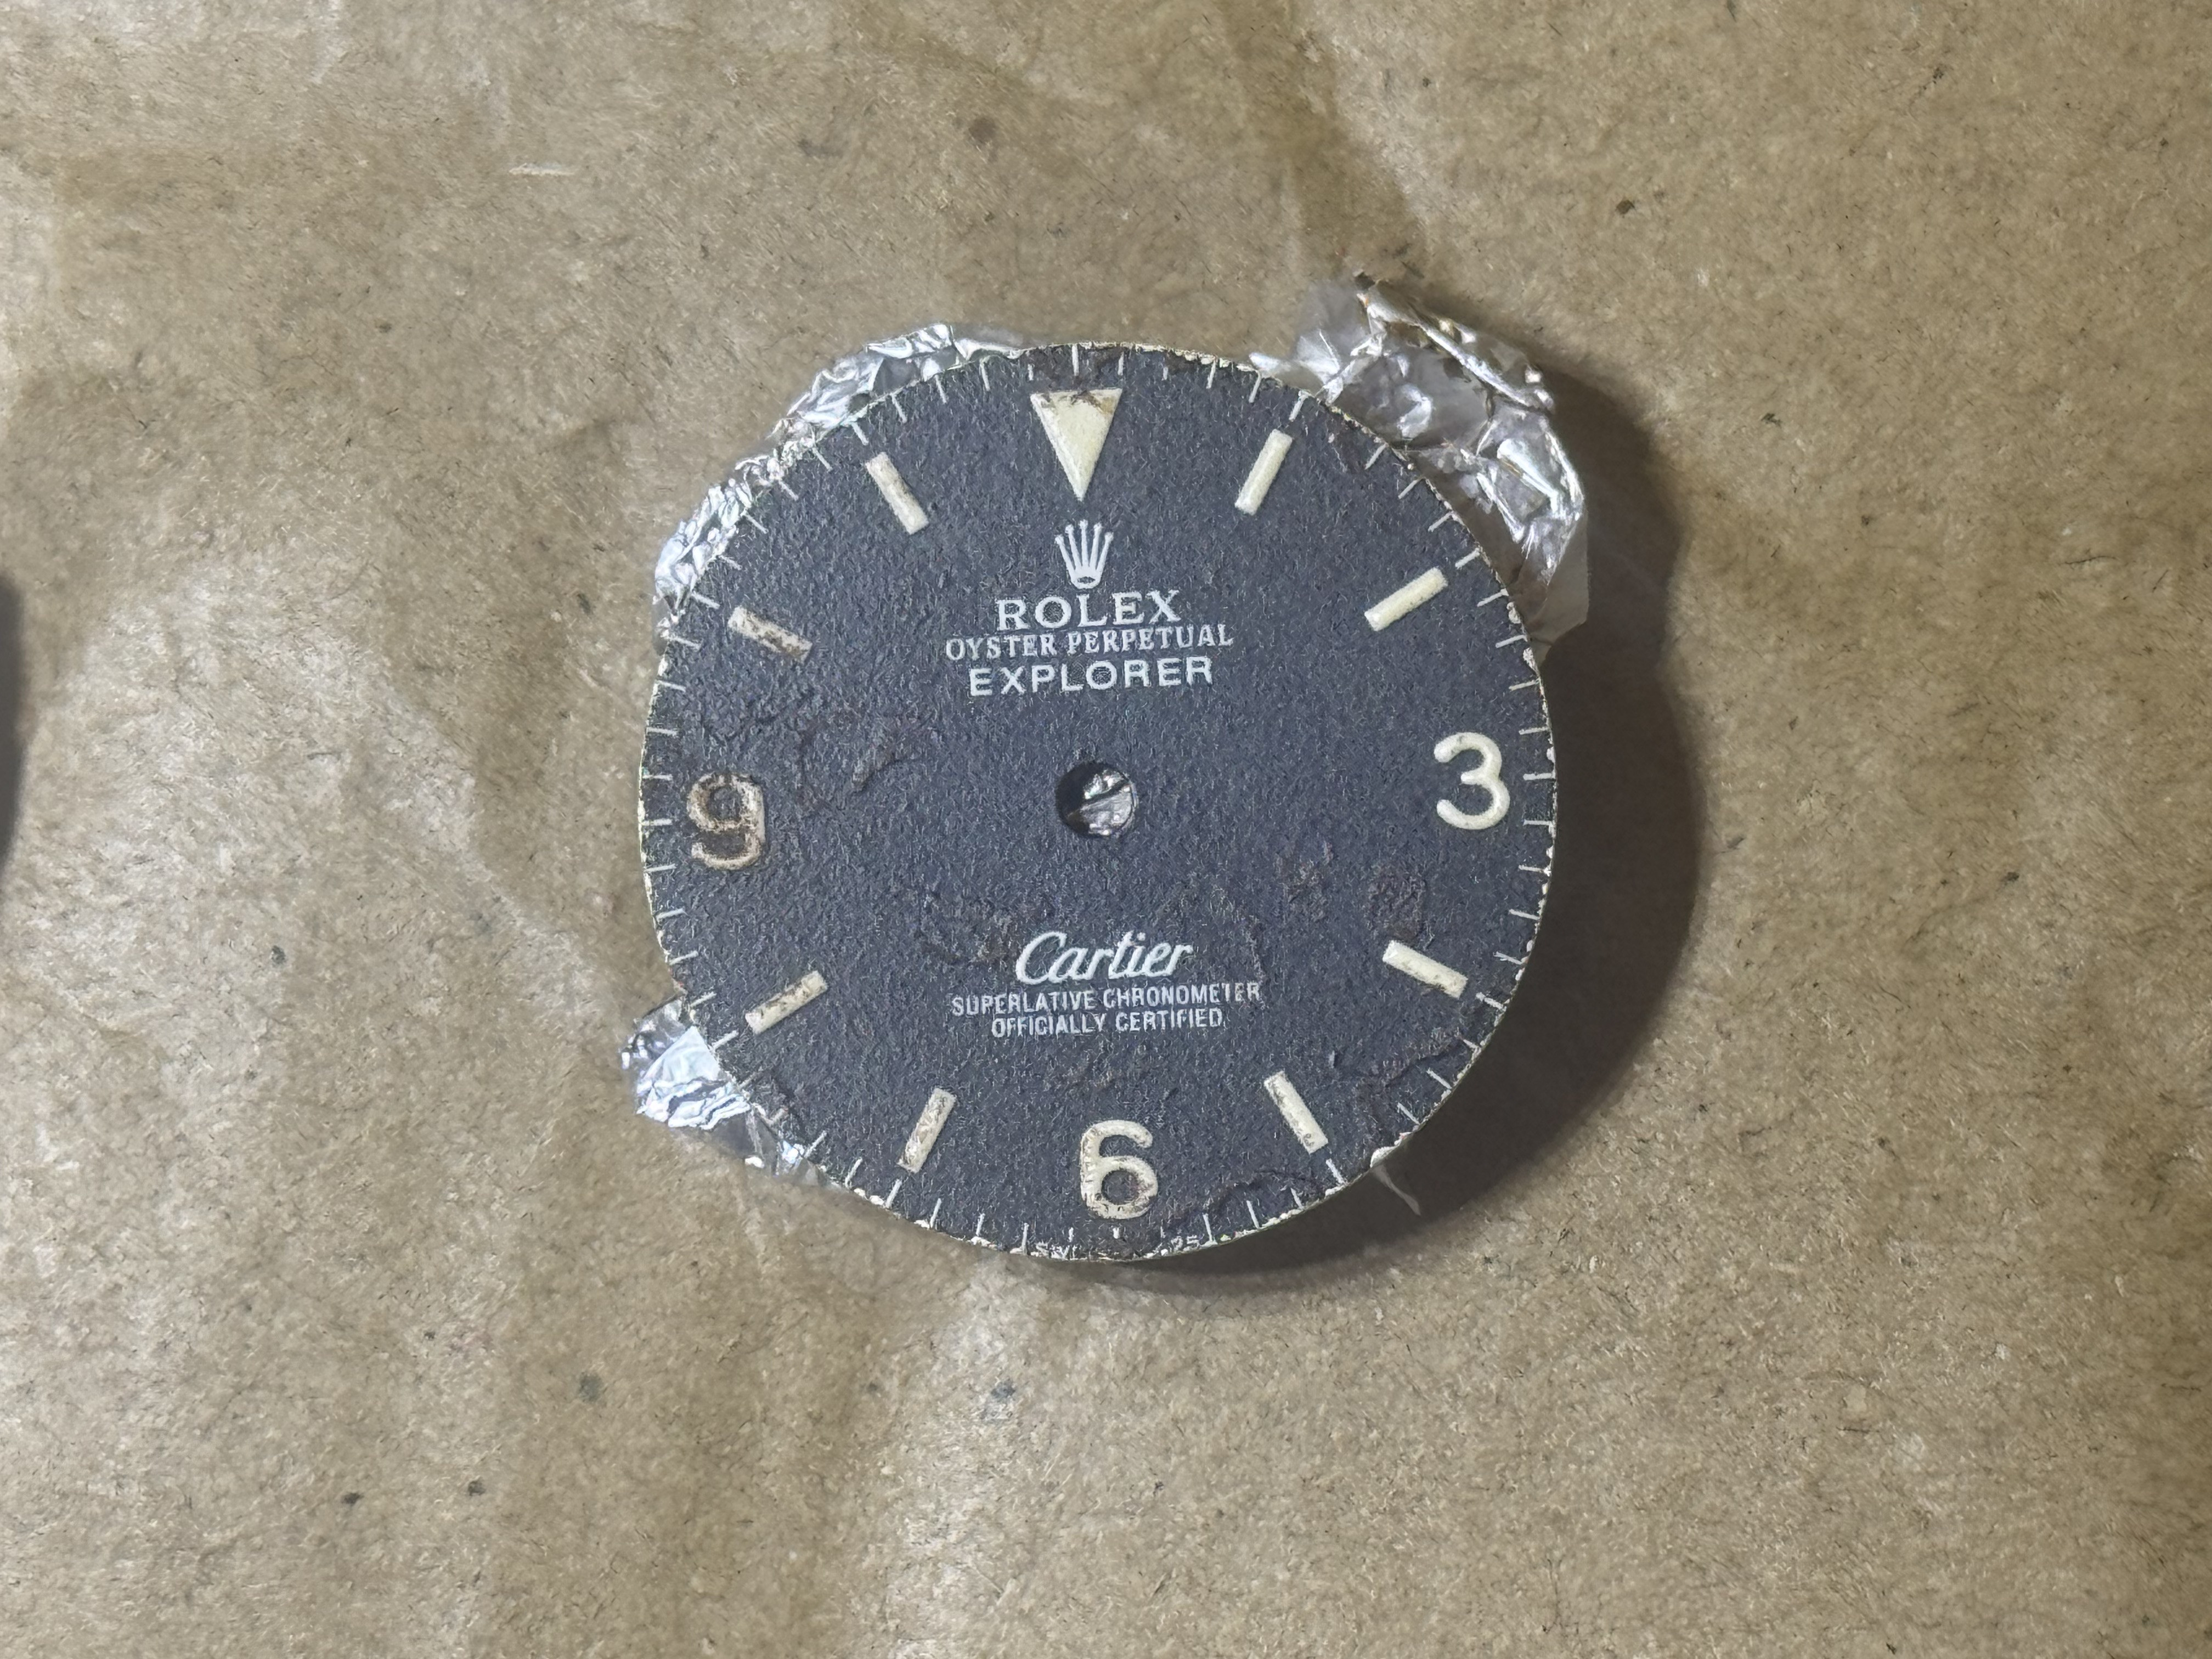
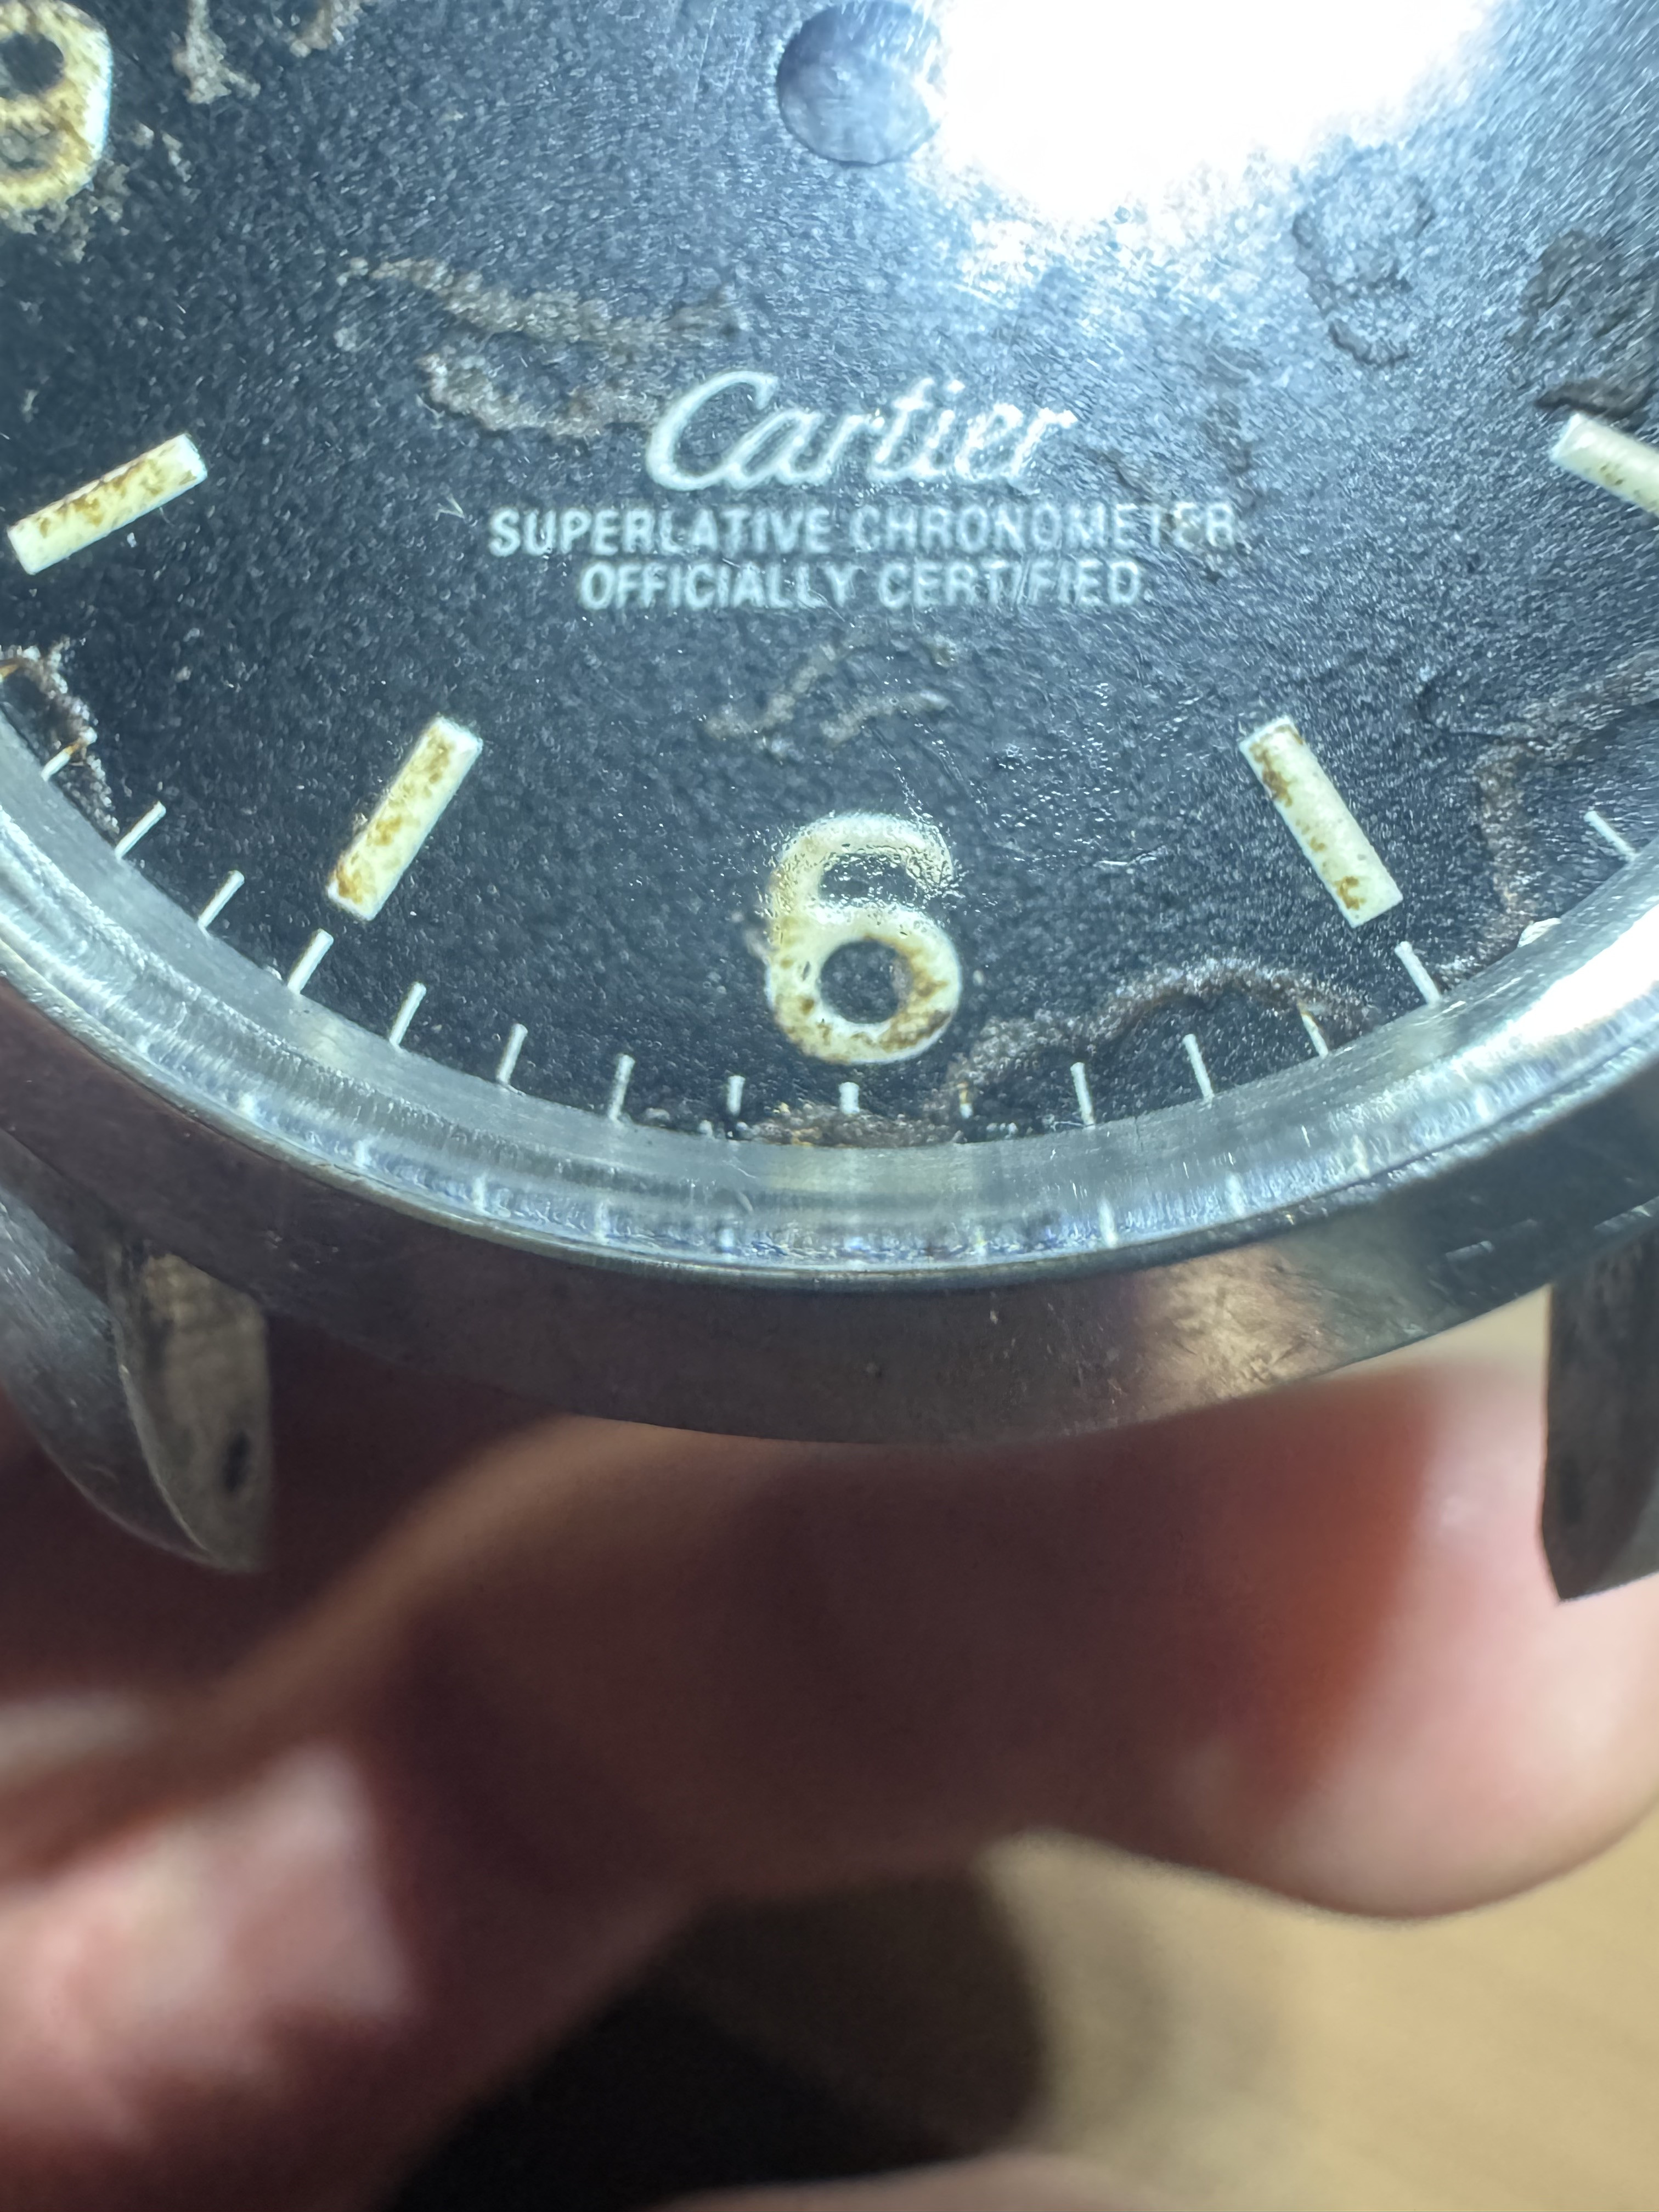
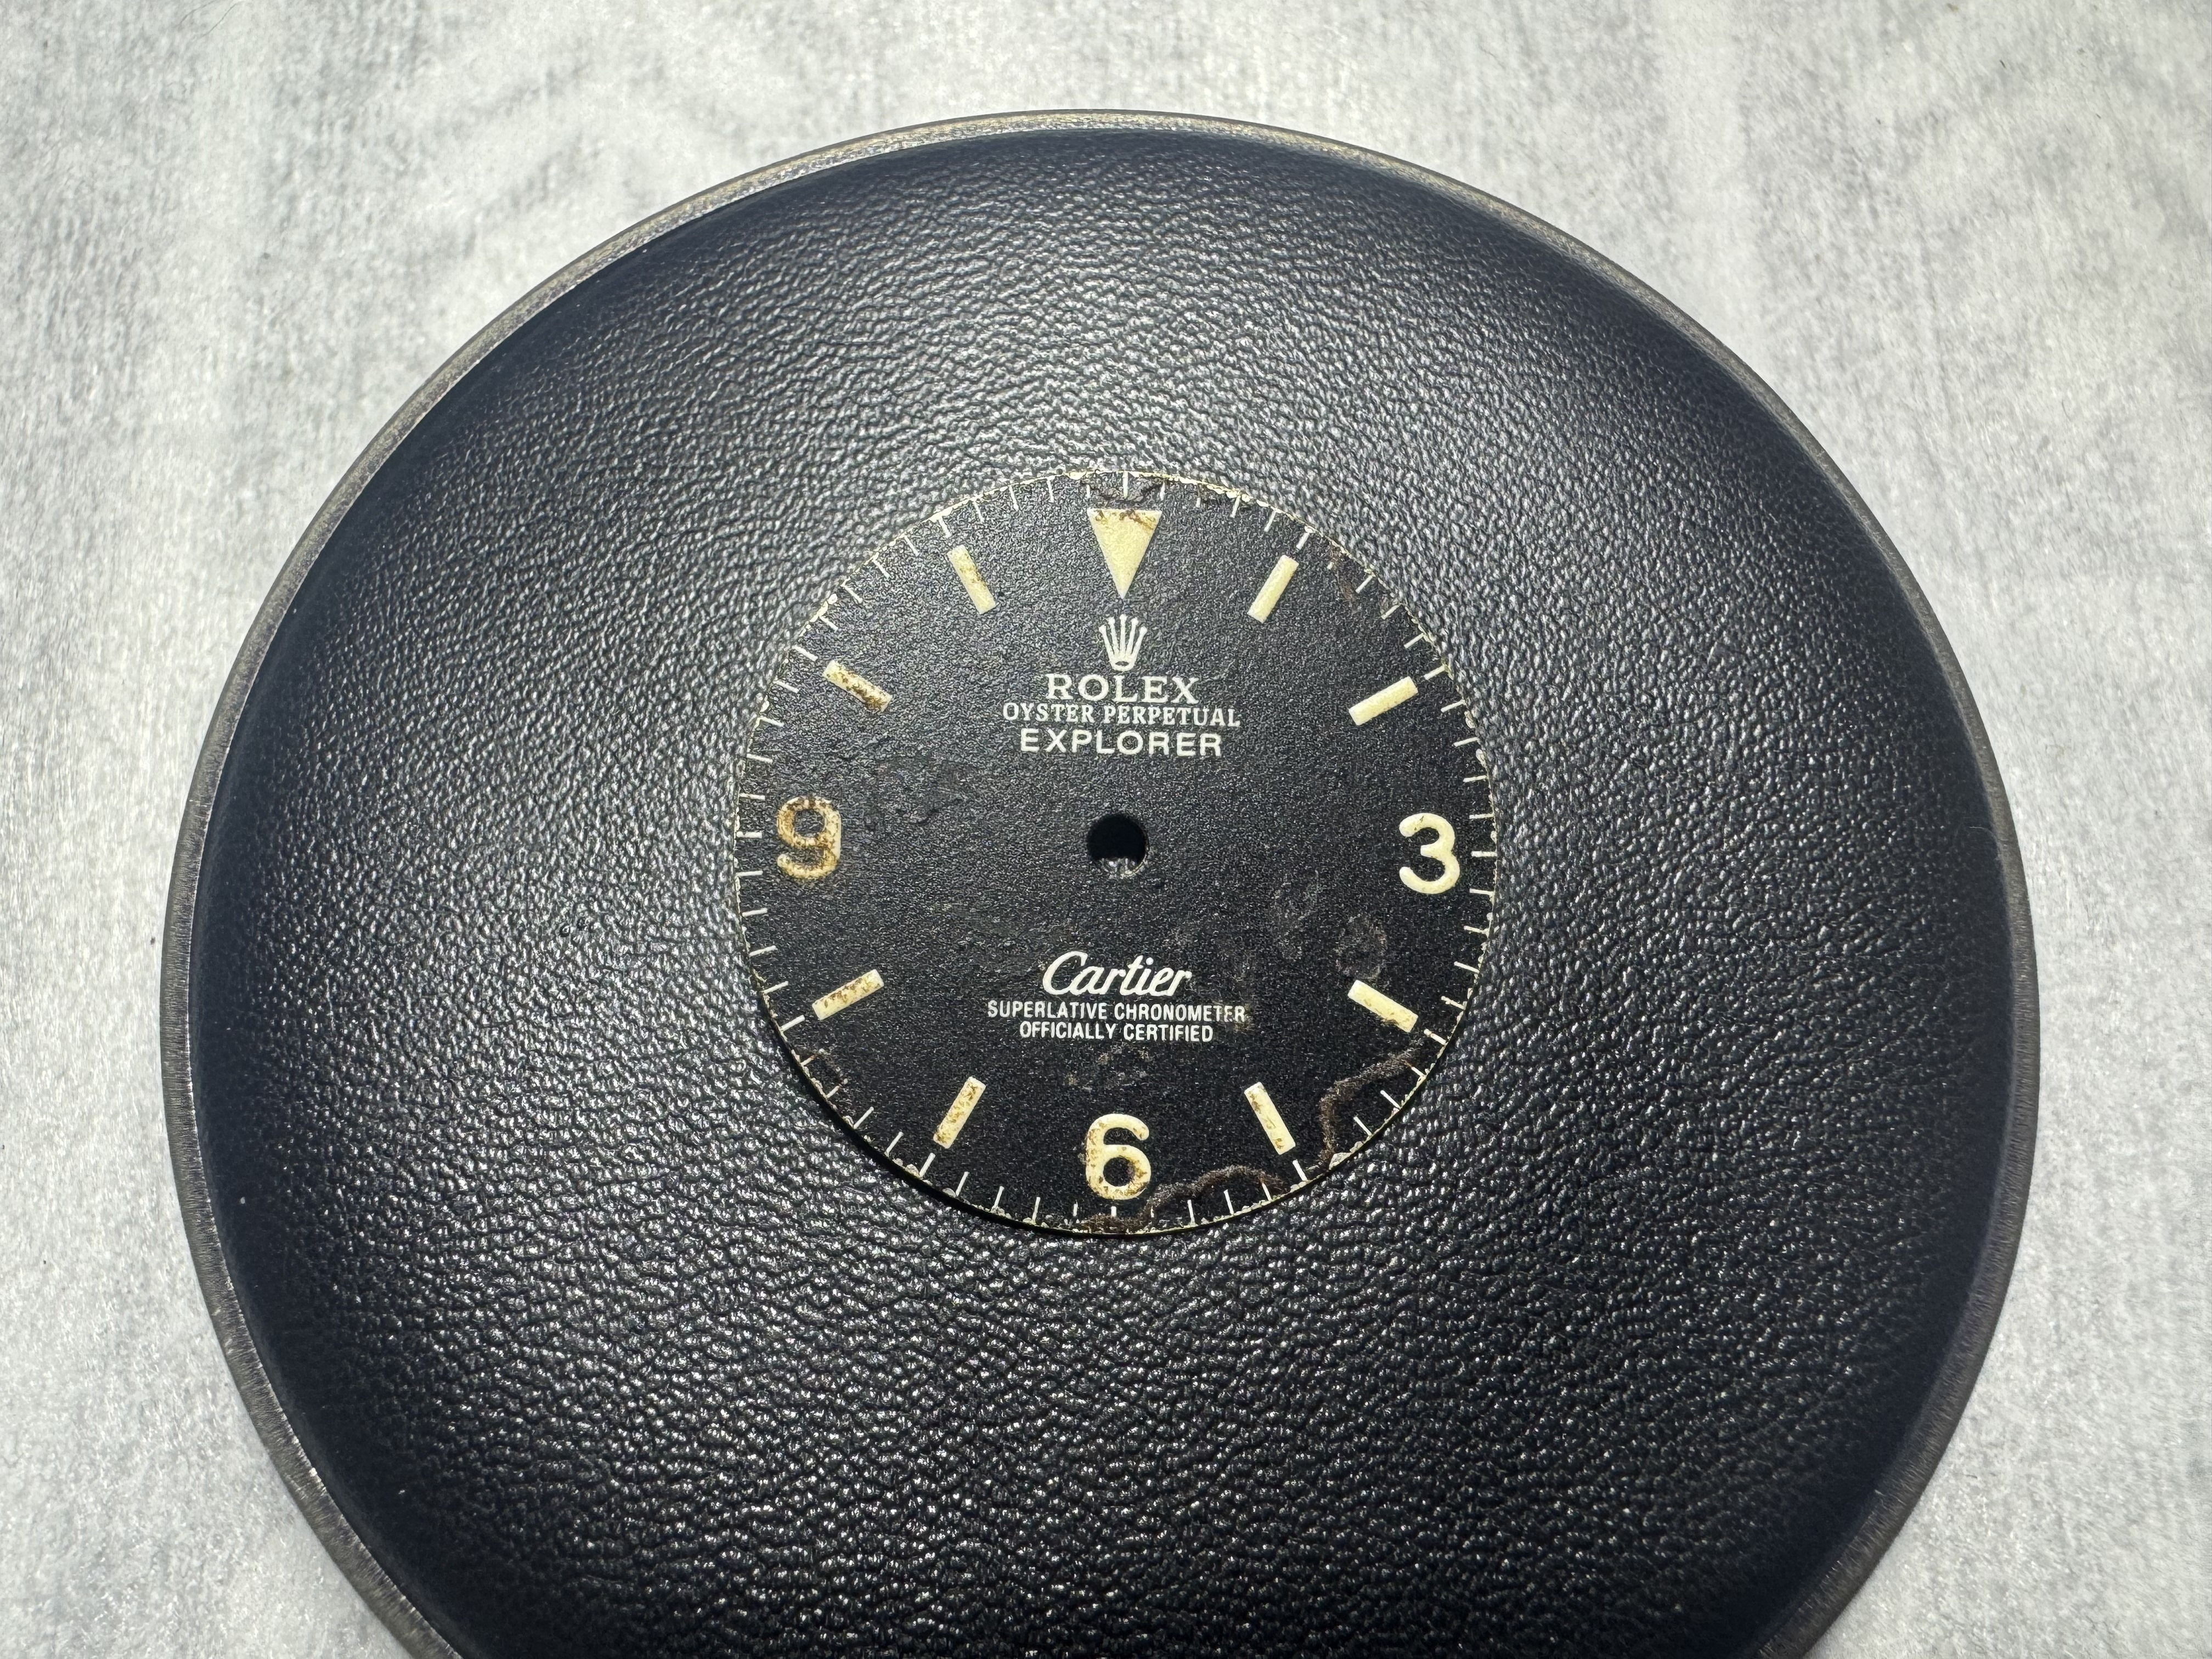
Dial: RafflesDial 1016 Cartier Explorer Dial
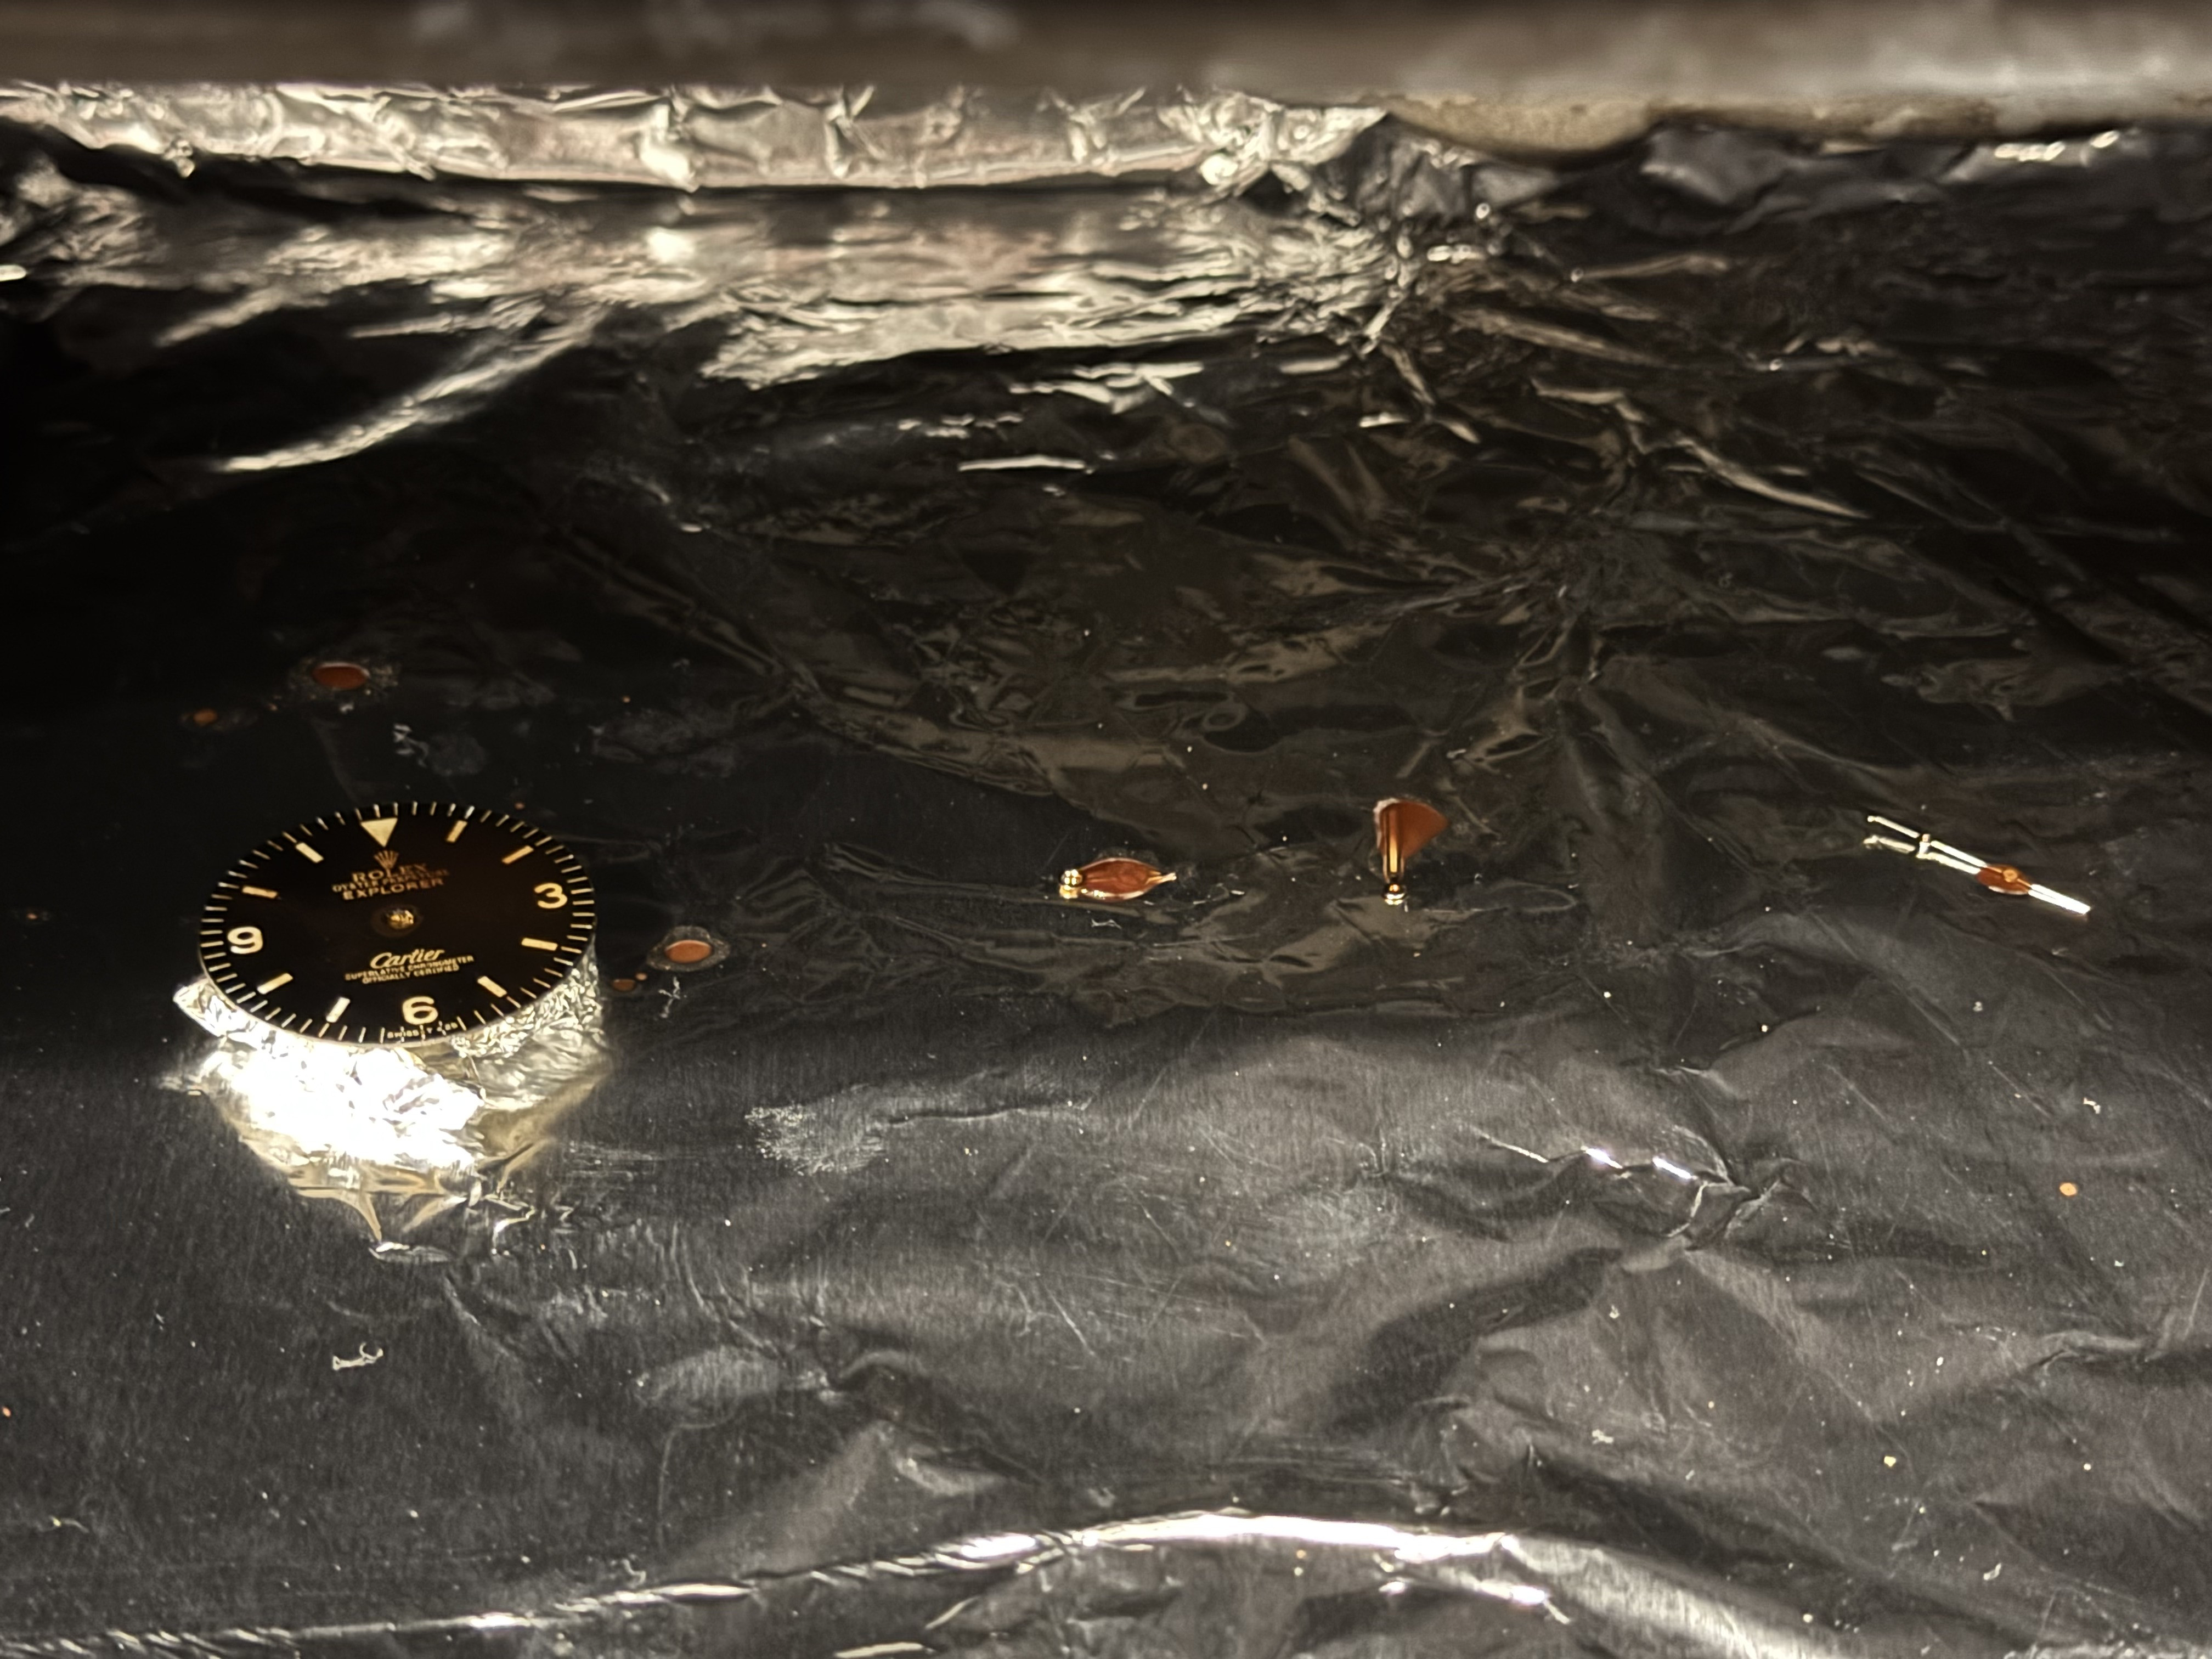
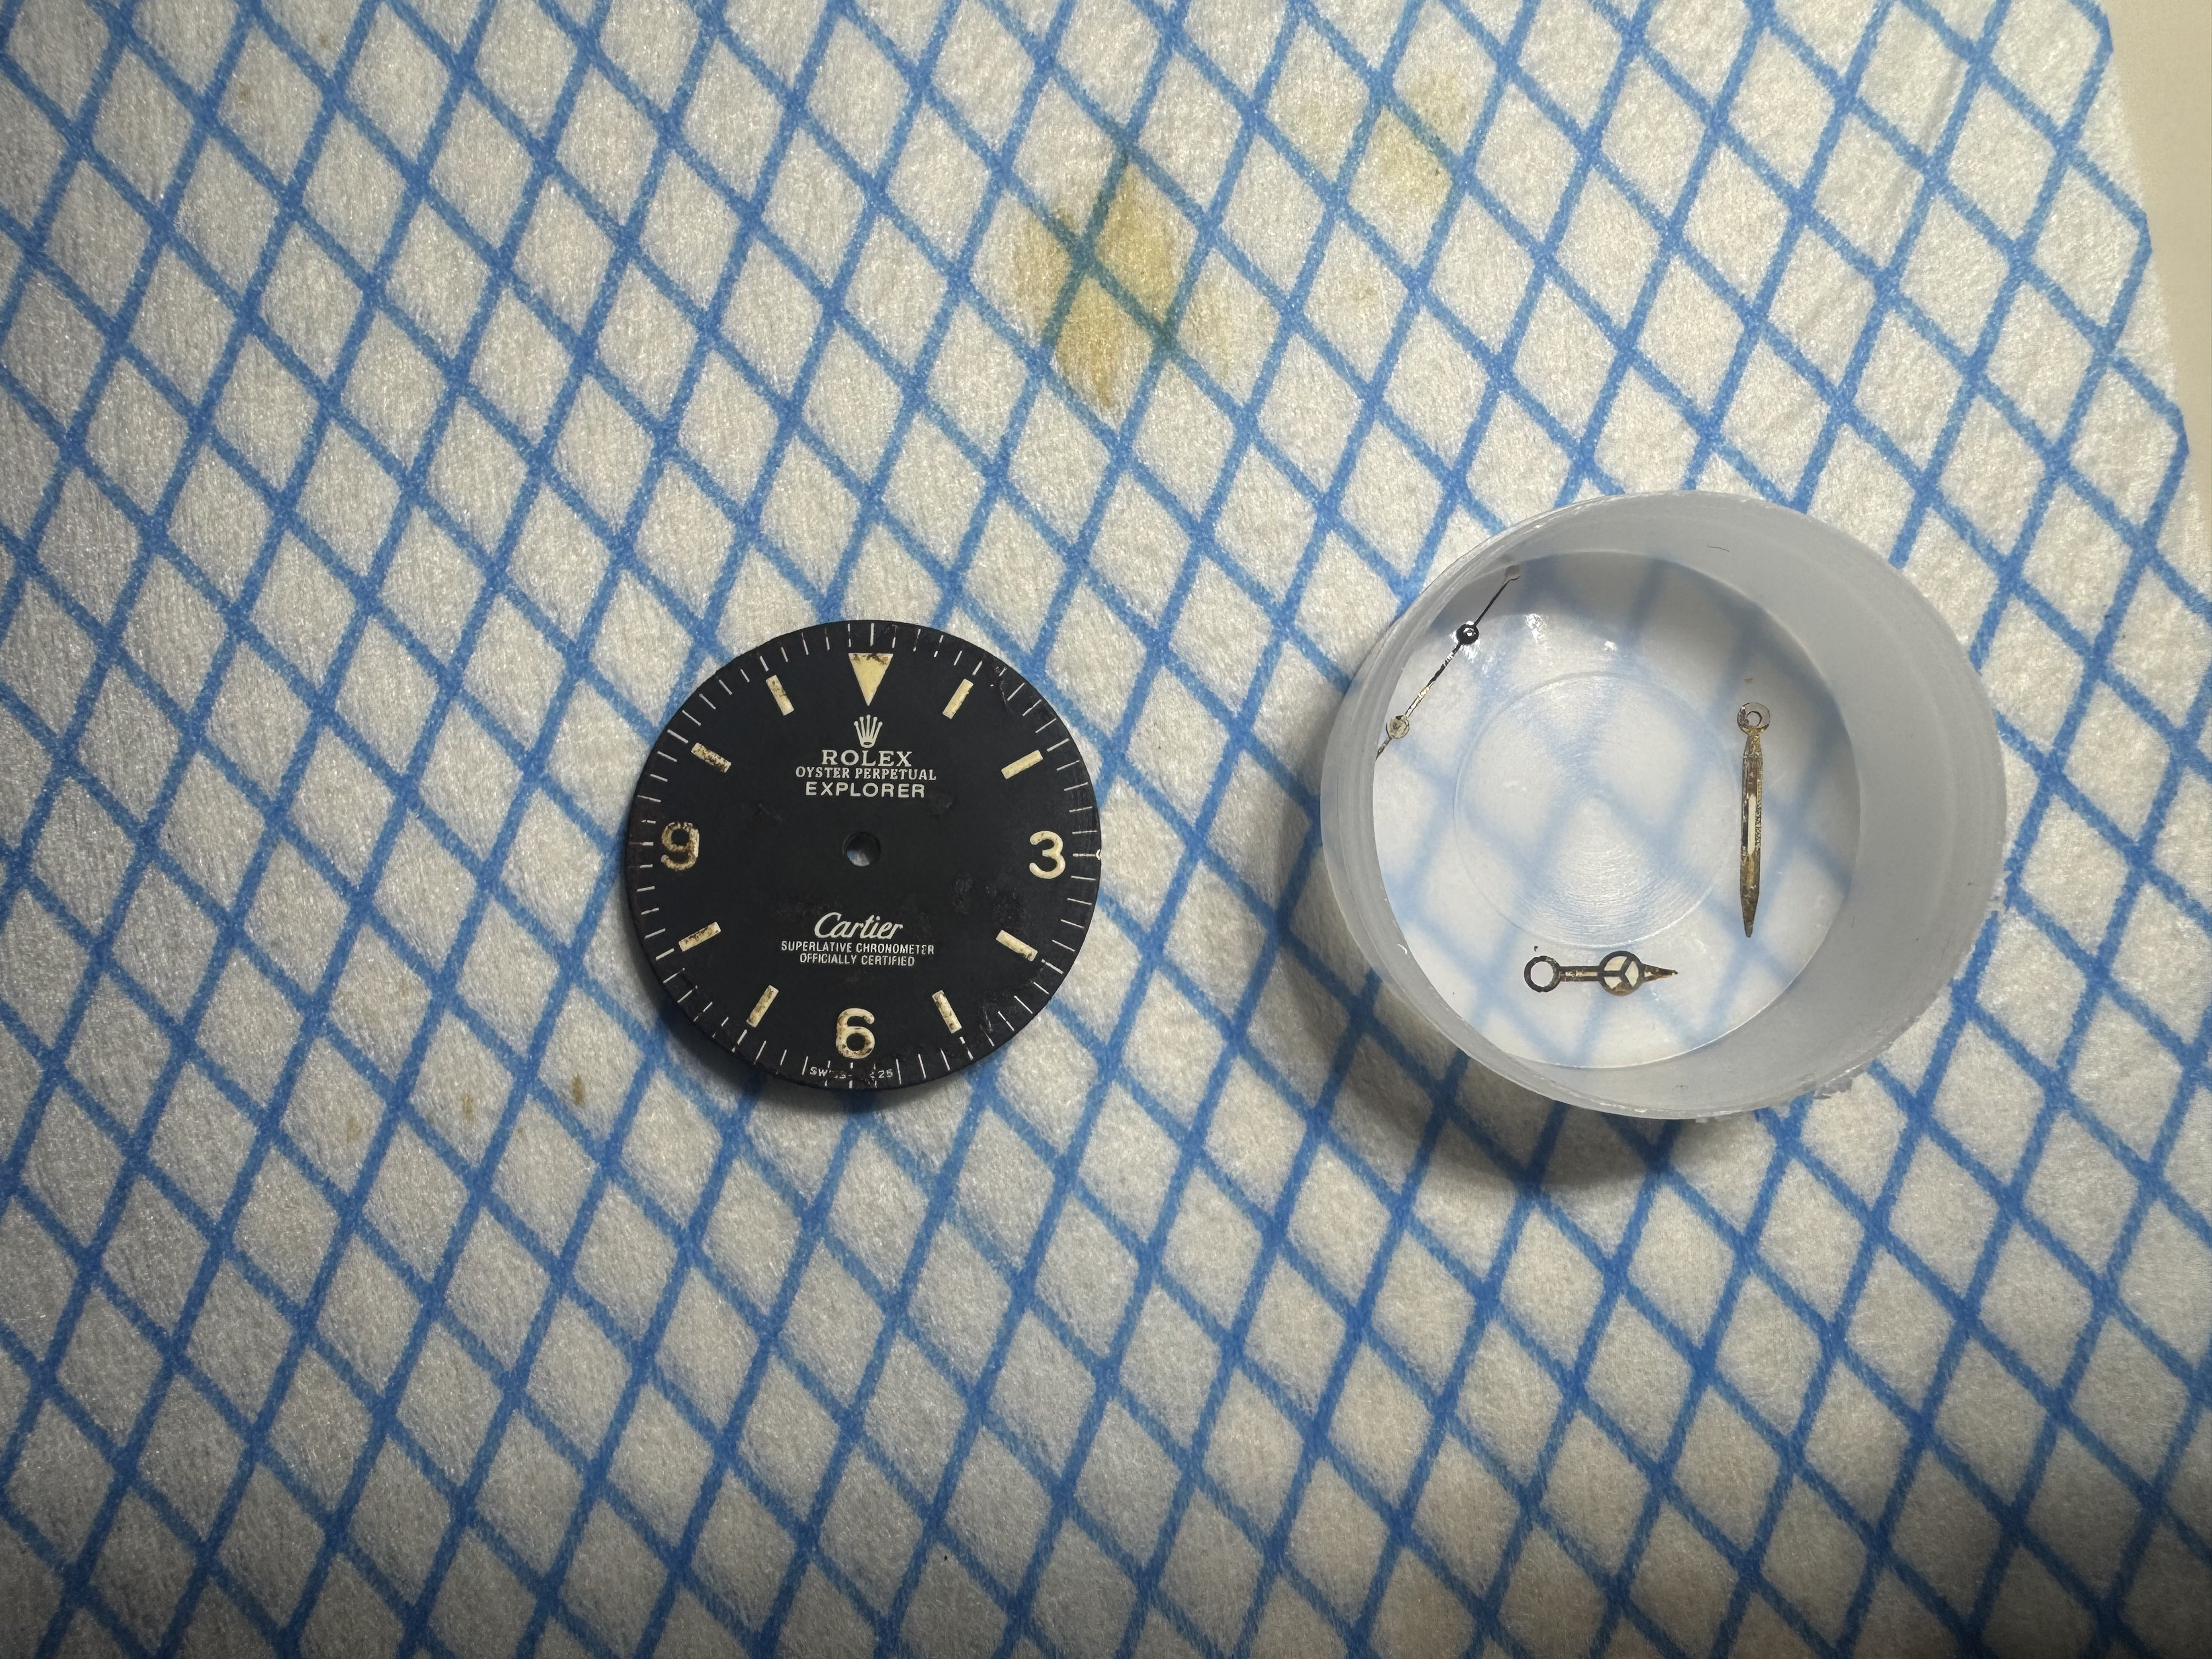
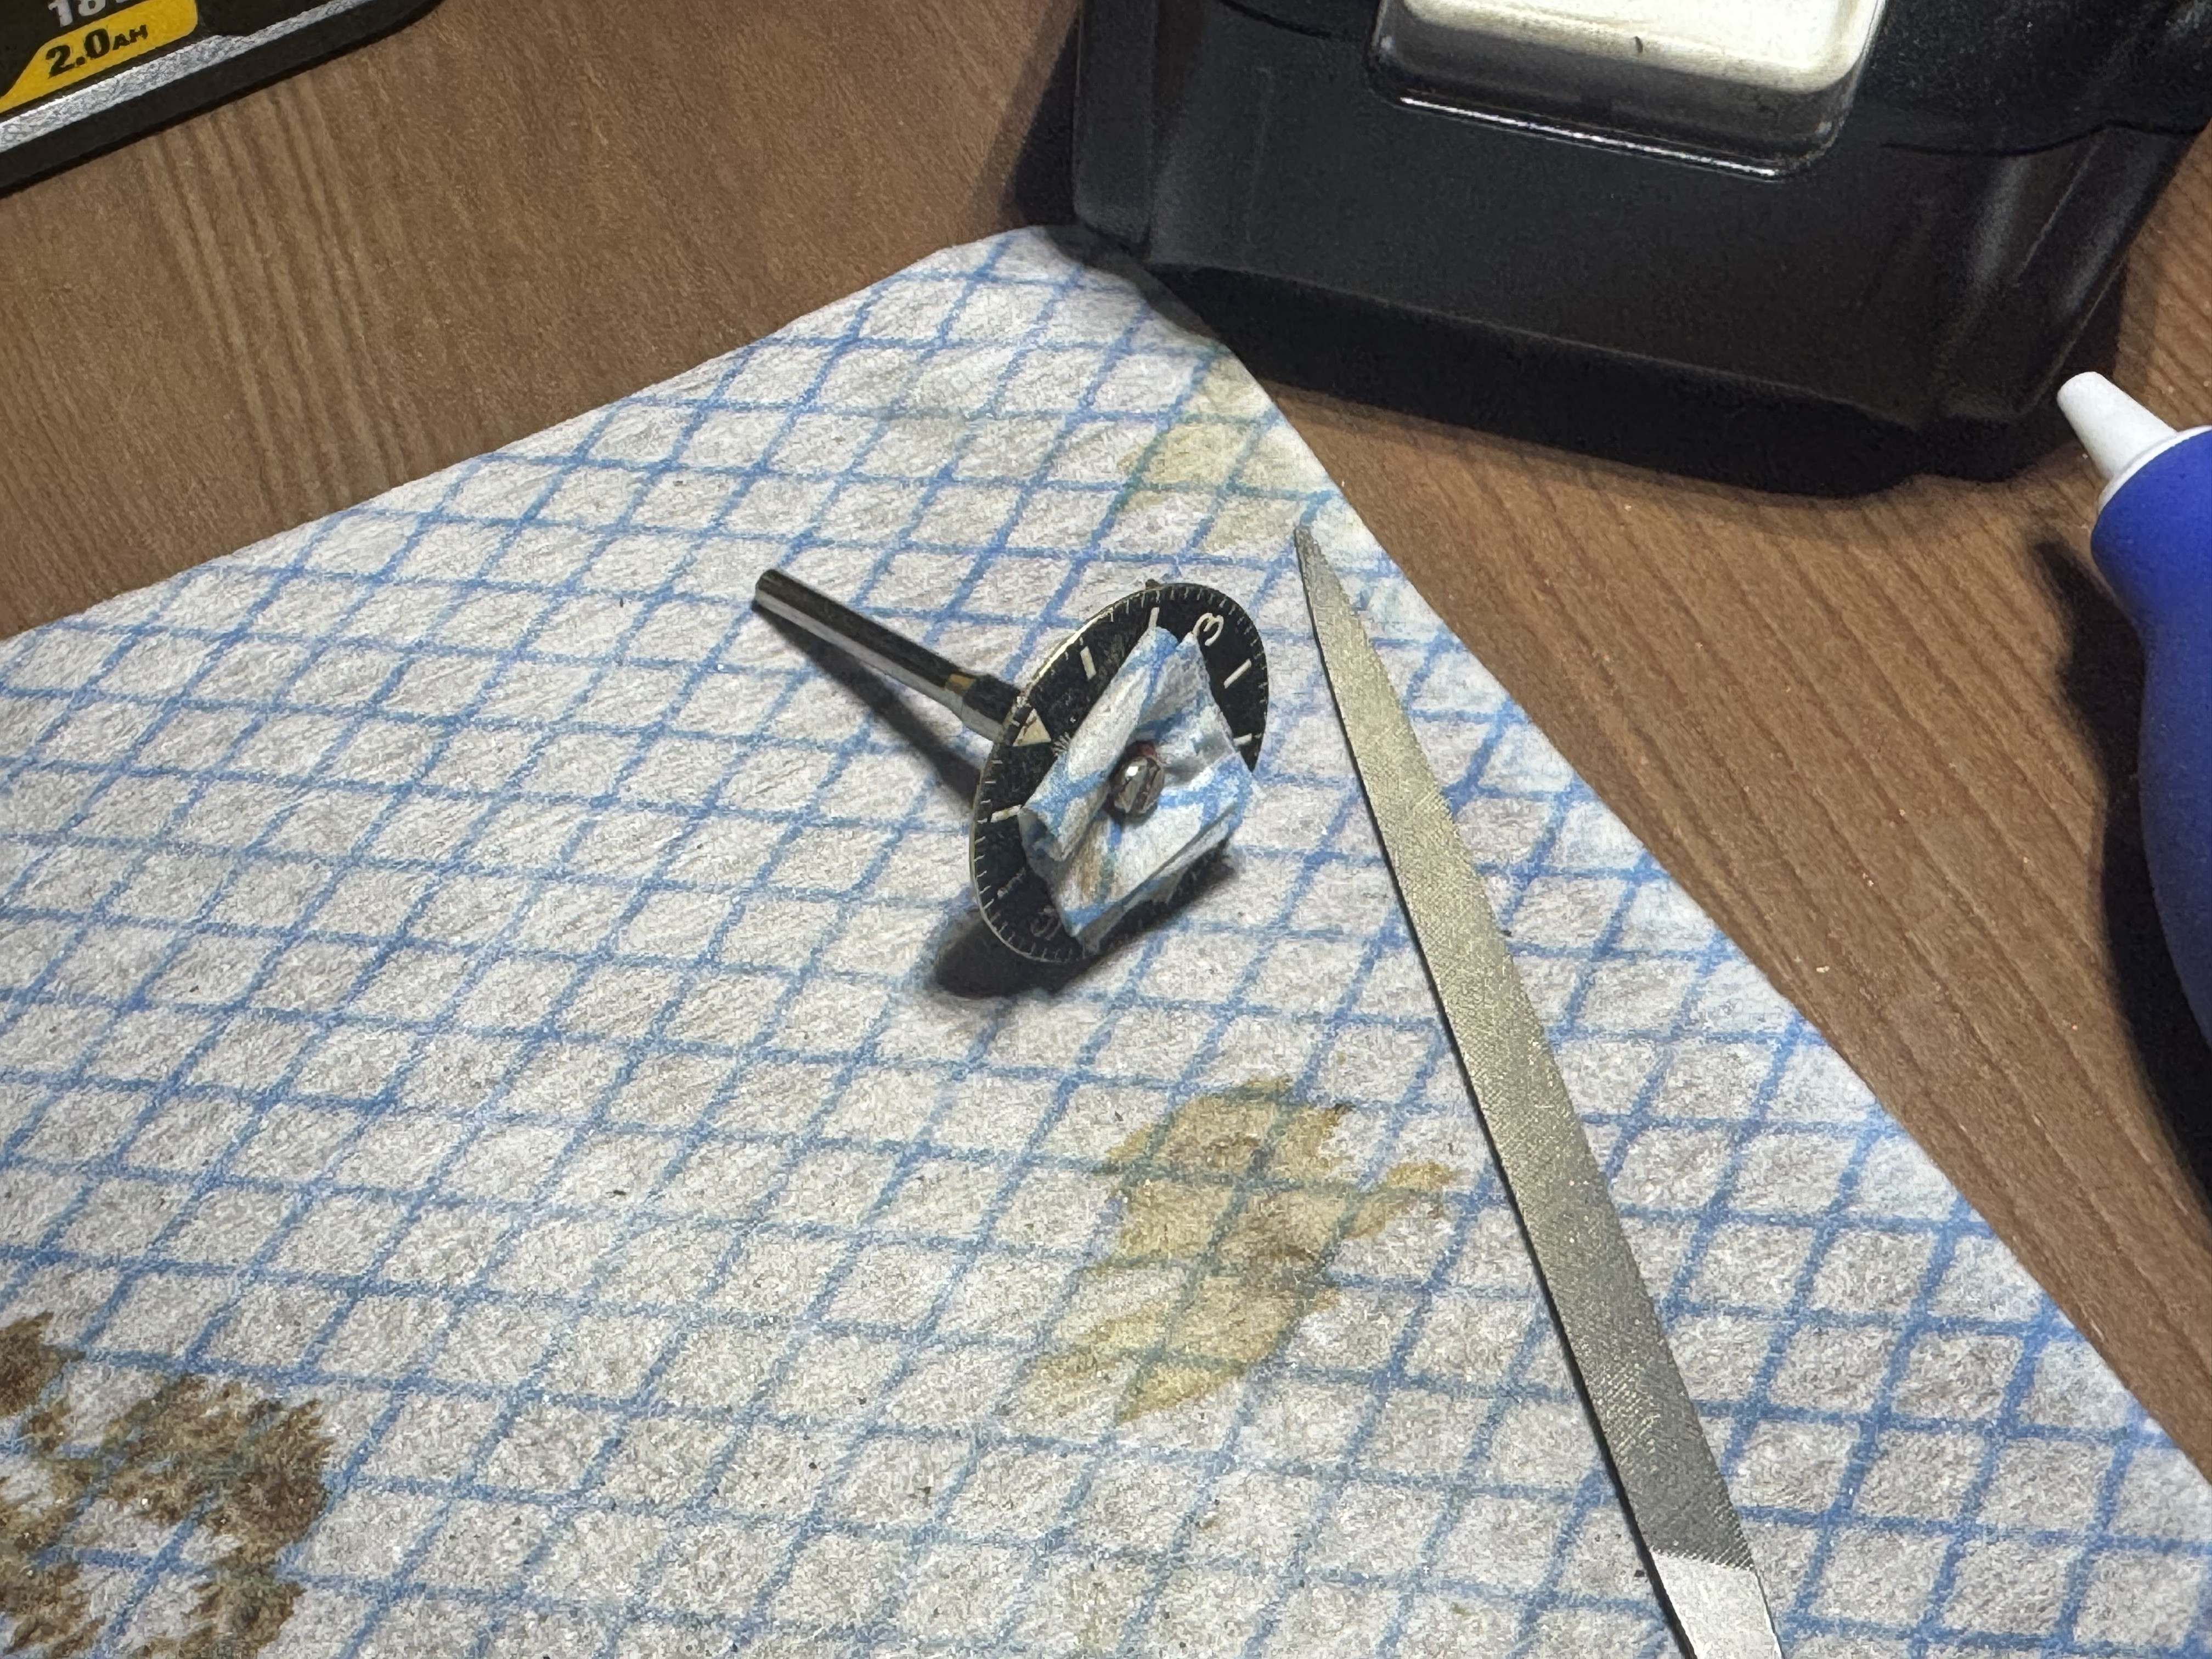
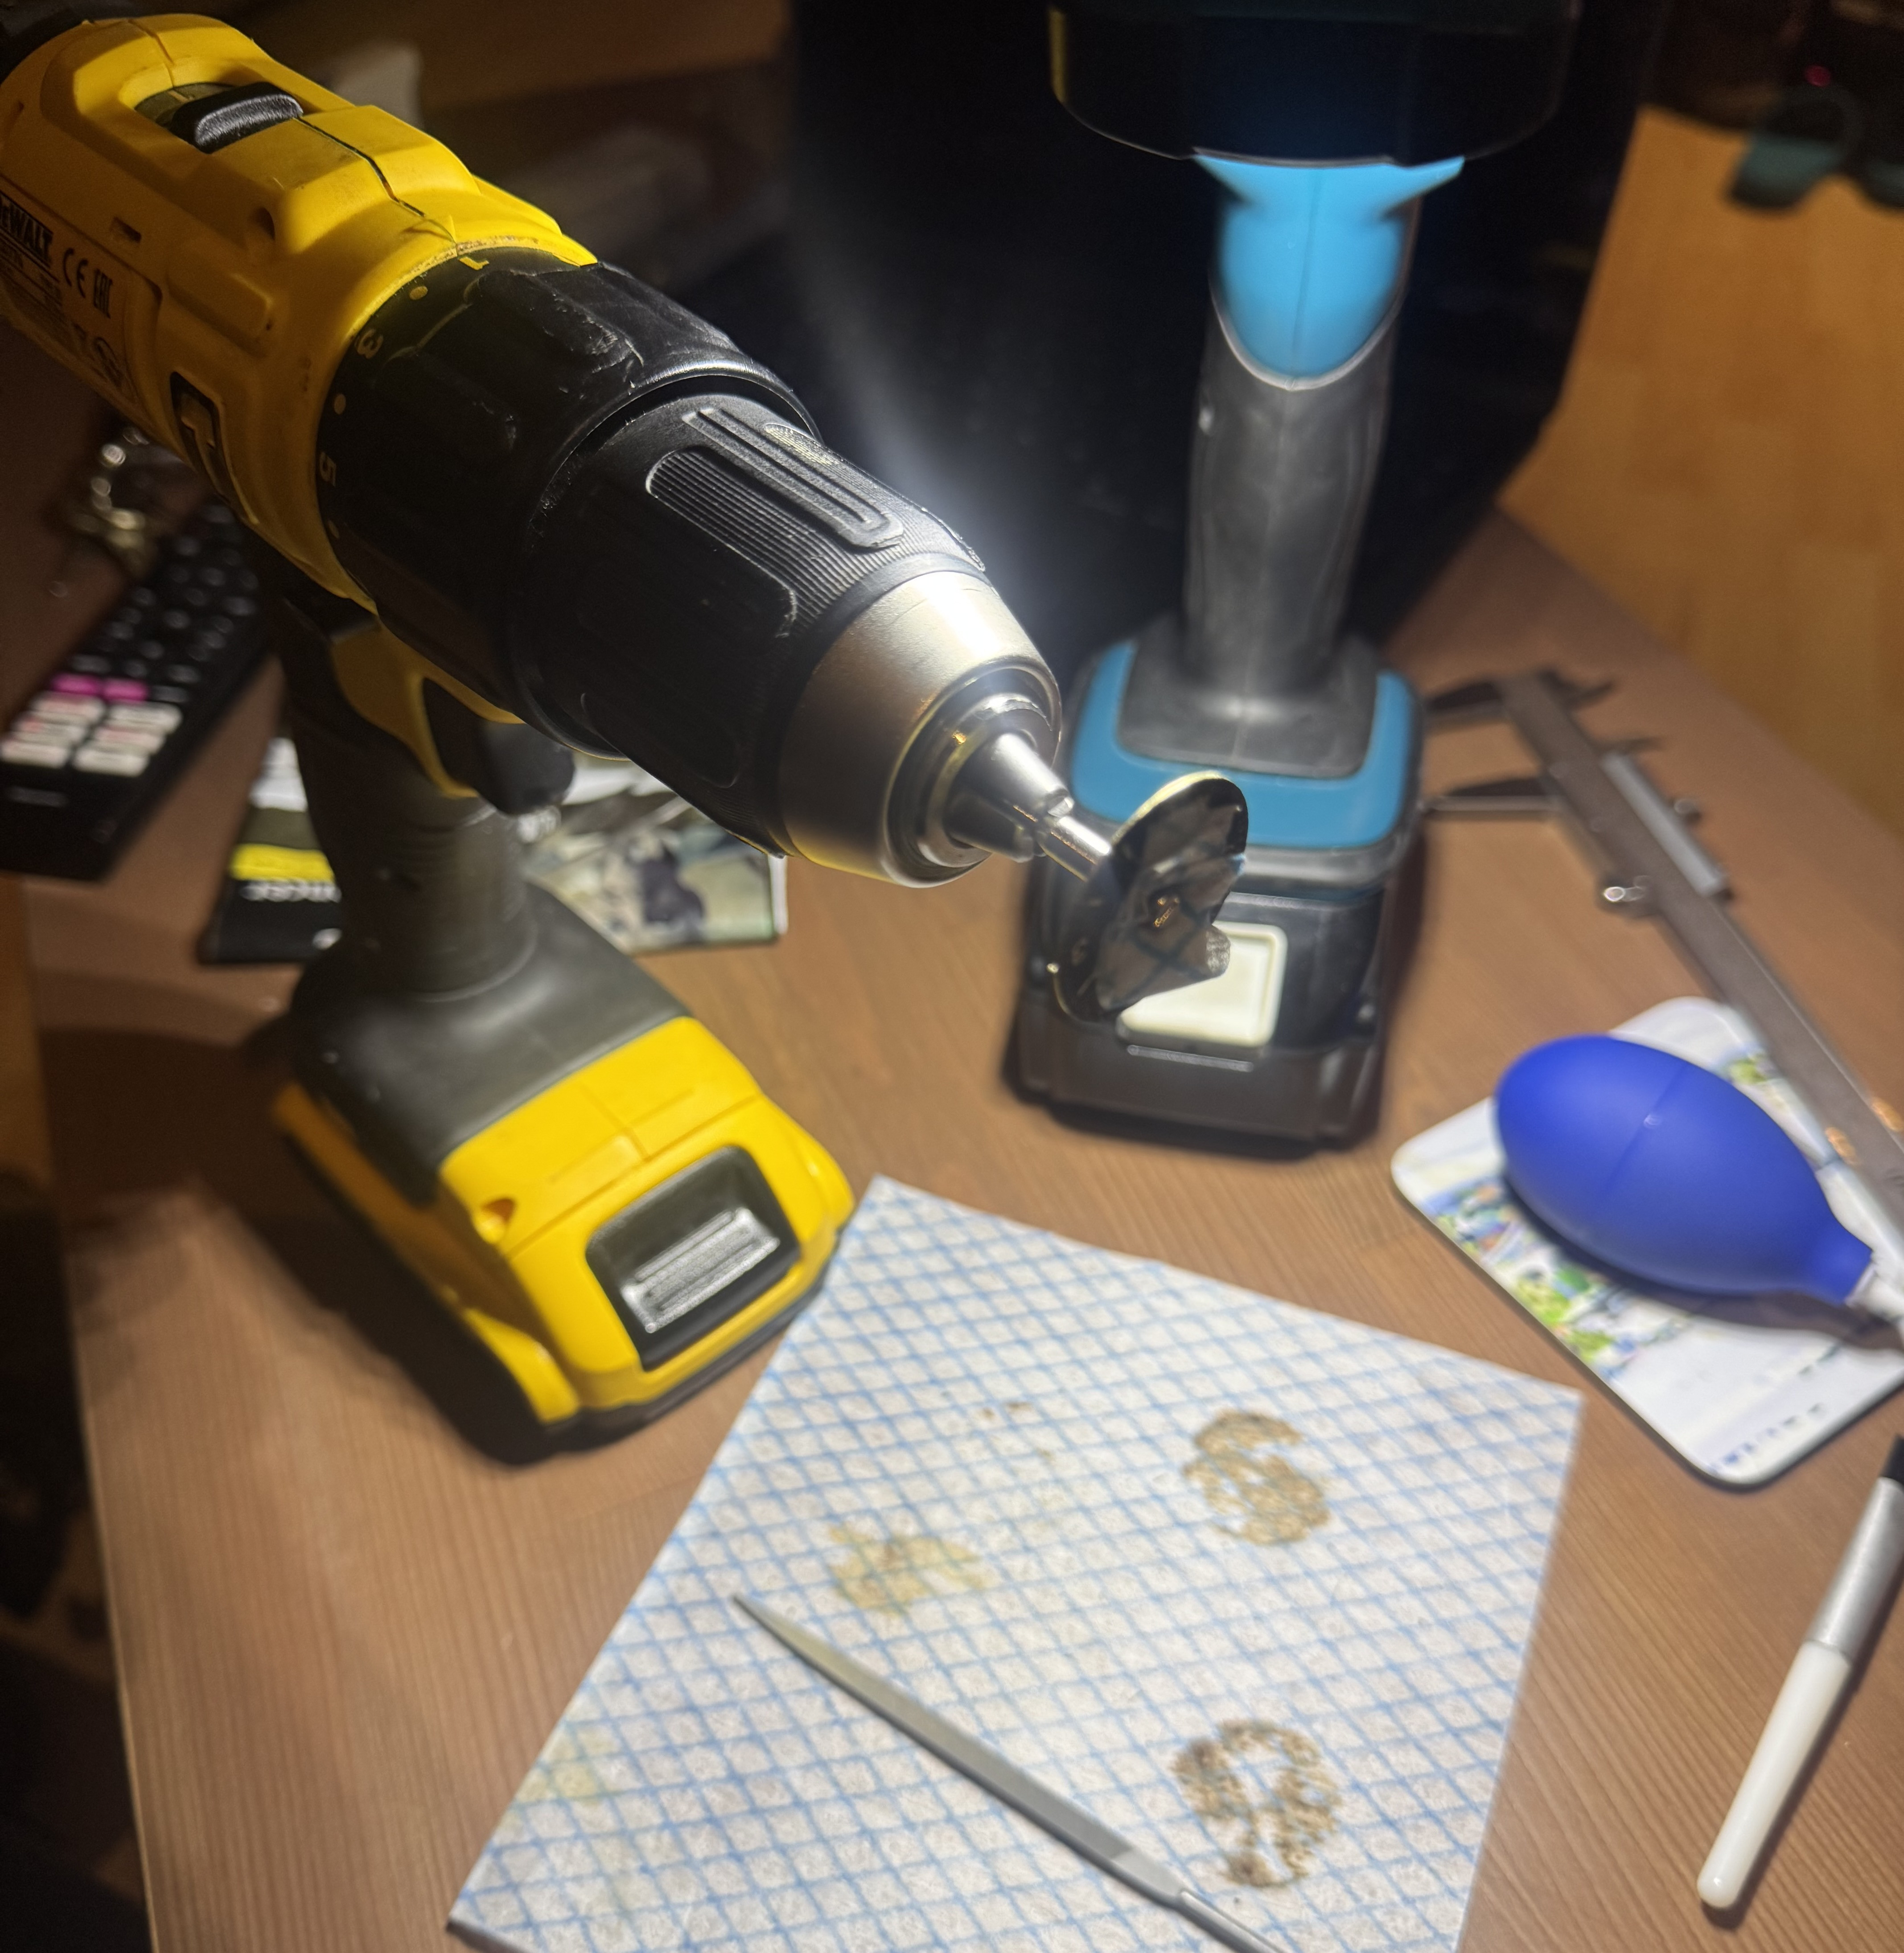
This is the weak point to the build, but it was the only Cartier stamped dial I could find with ETA 2824 feet. I was originally going to use a mochacha dial and have a go gluing new feet on with a jig, however I already had the raffles dial so I've done some tinkering and im happy with the results. Ive got photos of the ageing and trimming process which il add in later on tonight.
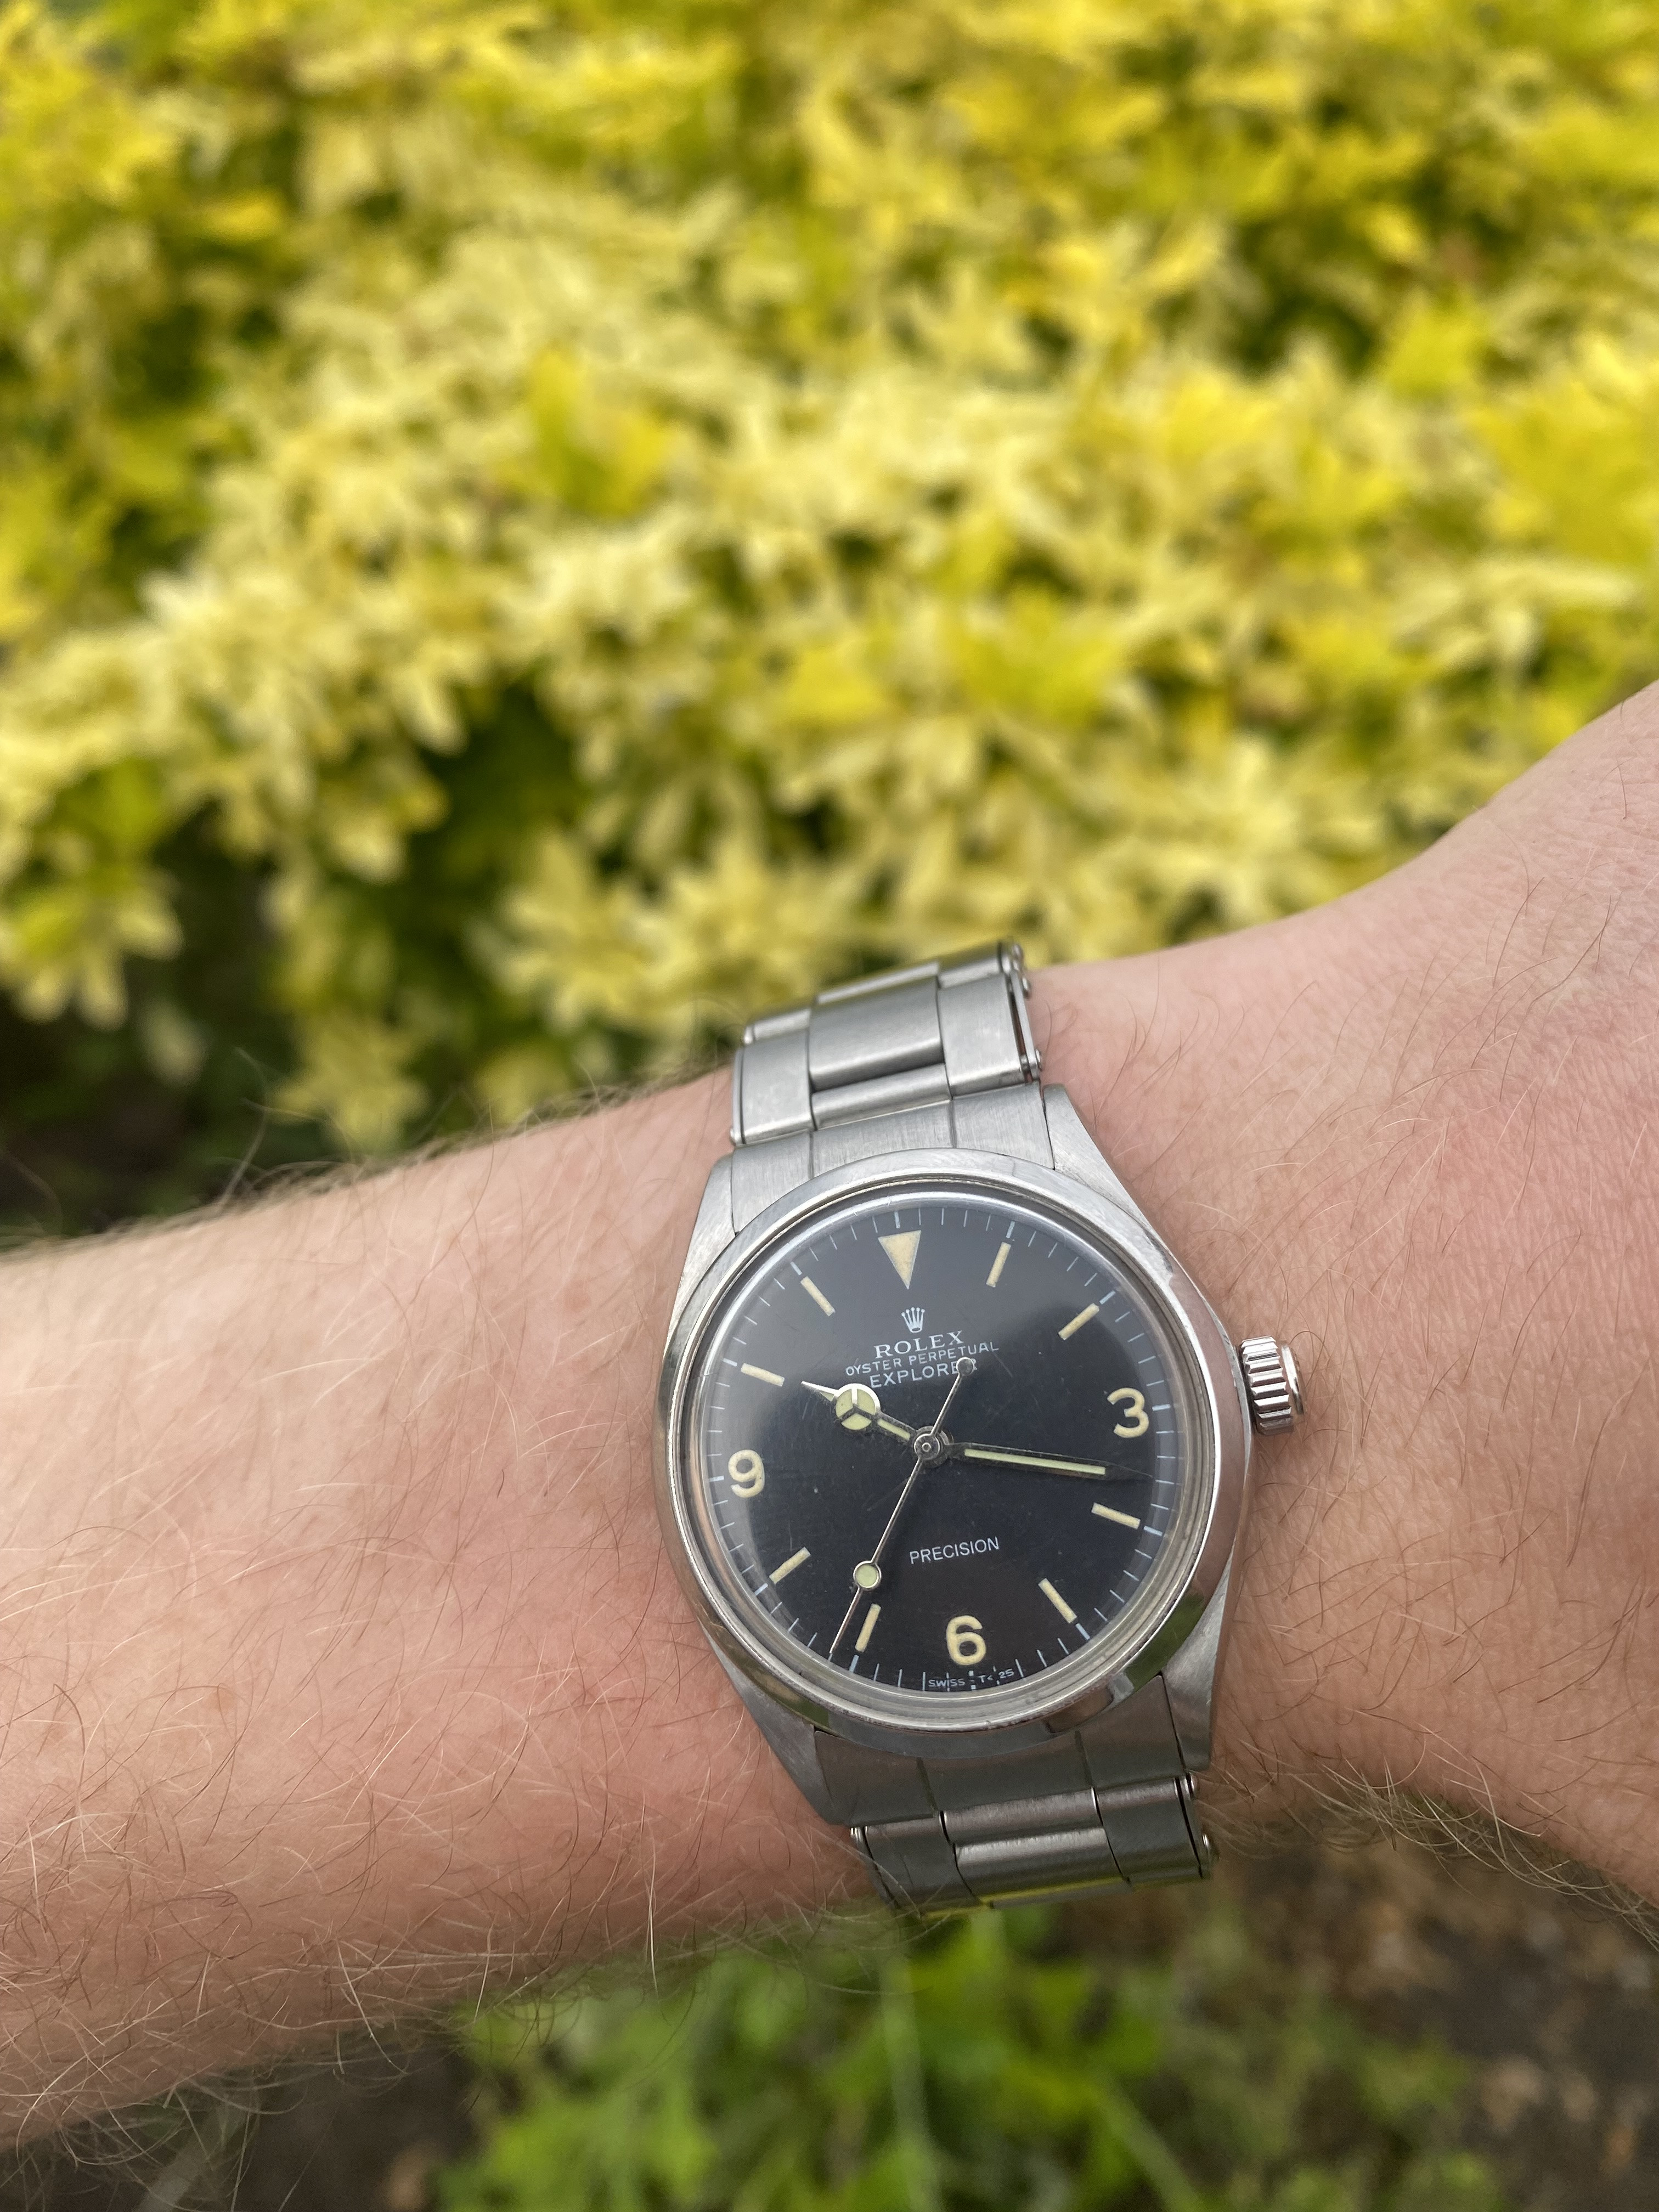
Hands: RafflesDial ETA 2824 Mercedes Hands
Nothing fancy here but cheap and good enough. Ive also done some ageing here which you'll see later.
Movement Ring: Helenarou
Couldn't find the Yuki movement rings, which I've heard are copy's of the infamous Stilty spacer, so I settled for this helenarou ring instead.
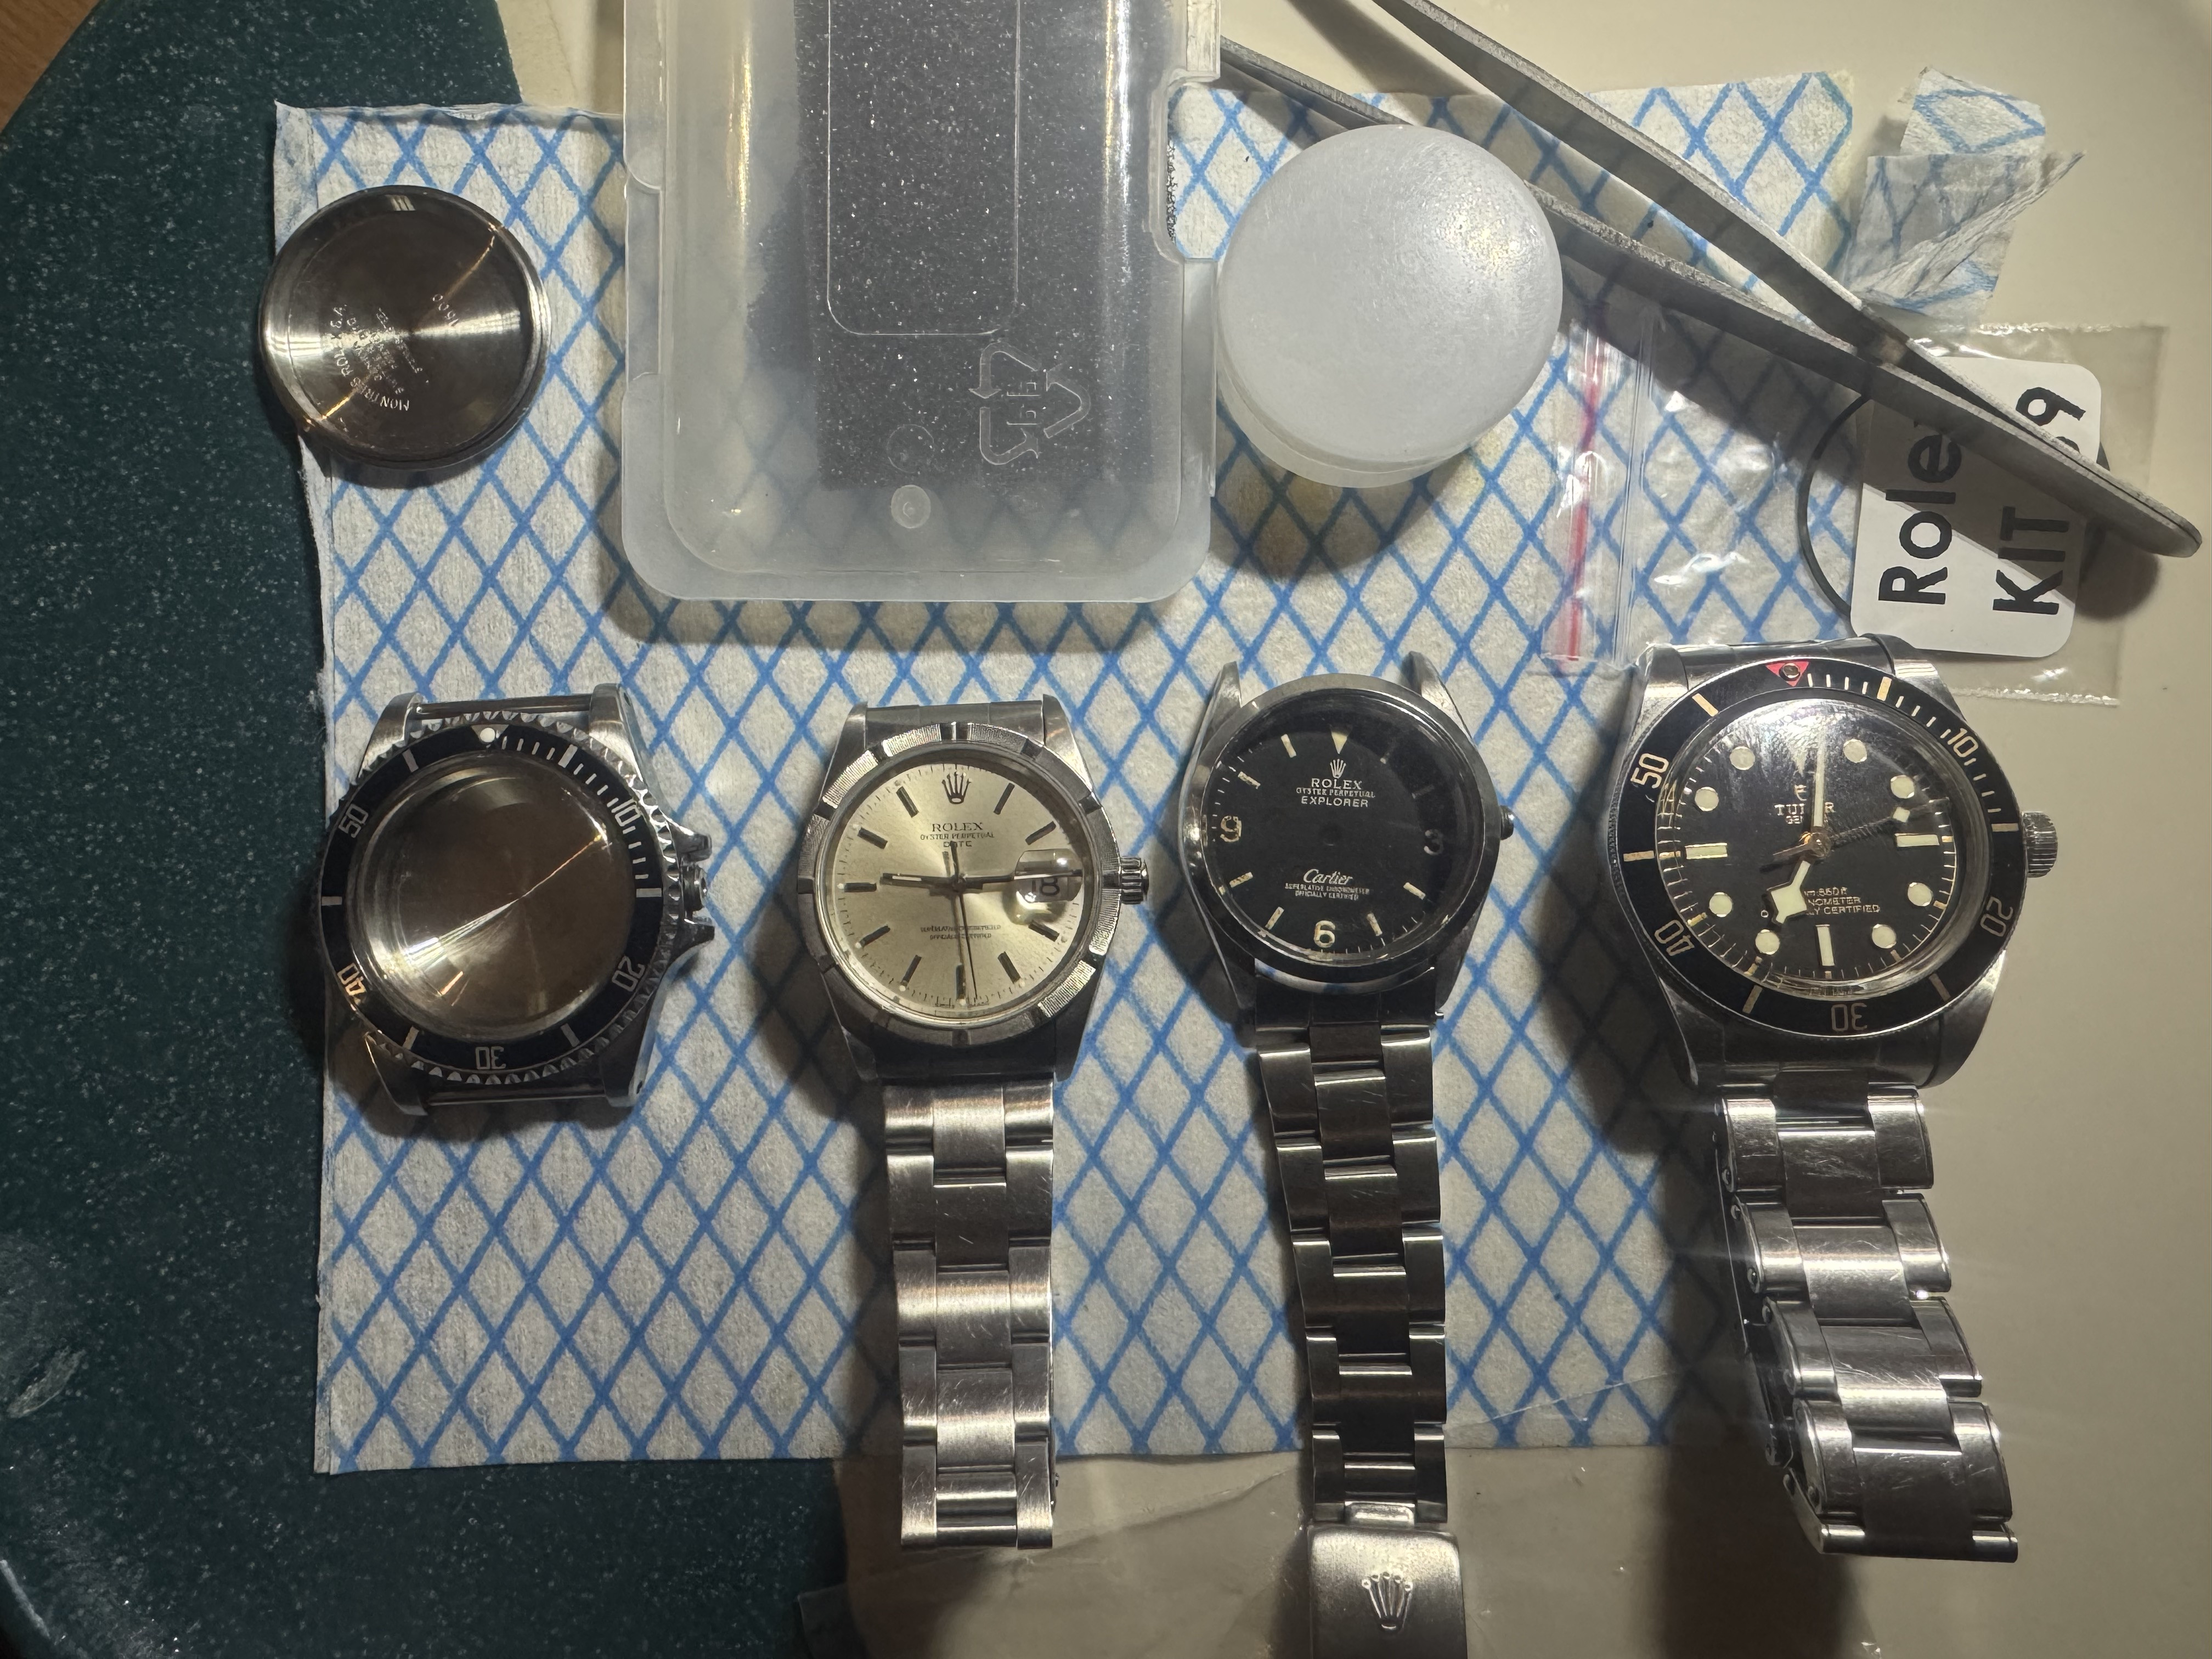
Im close to finishing the dial so the pictures will follow shortly, but for now here's a little look at my little rep collection and projects.
Thanks for attending my TED talk")
Quick disclaimer, Im still fairly new to the hobby and I believe in learning by doing, so if you see any glaring mistakes (and I'm sure you will!) it would be much appreciated if you give me a nudge in the right direction!
Parts List-
Movement: Cartier 020-06 (ETA 2824-2)
This is what started this build, I found a Cartier ETA 2824 and a Tiffany ETA 2824 on Ebay and I knew they would make a good pair of watches when complete. (Im thinking a 5513 Tiffany Dial for the remaining movement but that's a discussion for another day). Ive already removed the date complication and I've just received a couple of ETA 2801 setting lever jumpers to remove the ghost date position in the crown. When test fitting the dial I found the clearance between the hands and the dial was nearly non-existent, so I've also sourced the H4 pinons to raise the hand height. Pics will follow when I get around the fitting the parts.
Case: Rolex 1002 Case Set
Does what it says on the tin really, the case didn't come with a crown so I have one on the way, it should be here in the next week or two. Id like clear casebacks on both of these watches so I went ahead and bought a CustomWatchConcepts caseback, it was pricey but I think it will really bring the build together.
Dial: RafflesDial 1016 Cartier Explorer Dial
This is the weak point to the build, but it was the only Cartier stamped dial I could find with ETA 2824 feet. I was originally going to use a mochacha dial and have a go gluing new feet on with a jig, however I already had the raffles dial so I've done some tinkering and im happy with the results. Ive got photos of the ageing and trimming process which il add in later on tonight.
Hands: RafflesDial ETA 2824 Mercedes Hands
Nothing fancy here but cheap and good enough. Ive also done some ageing here which you'll see later.
Movement Ring: Helenarou
Couldn't find the Yuki movement rings, which I've heard are copy's of the infamous Stilty spacer, so I settled for this helenarou ring instead.
Im close to finishing the dial so the pictures will follow shortly, but for now here's a little look at my little rep collection and projects.
Thanks for attending my TED talk