This time round is a successful transplant. I will write a step by step guide on how to do so. I would assume that this mod is very risky, especially for first timer. Otherwise, I have some tips to clear up mess if it happens.
Common knowledge required such as opening caseback, decasing movement and hand/dial removal. You are also required to put things back in order just by doing reverse process.
Stay tune!
... So the subject for this moment is IWC Cousteau Diver's 2006. Why this watch? This is a good candidate for a daily beater watch. Very comfortable on the wrist and has Chronograph function. Trust me, I use the chrono function pretty frequently during cooking, washing, etc.
Let's start!
1. Opening the Caseback
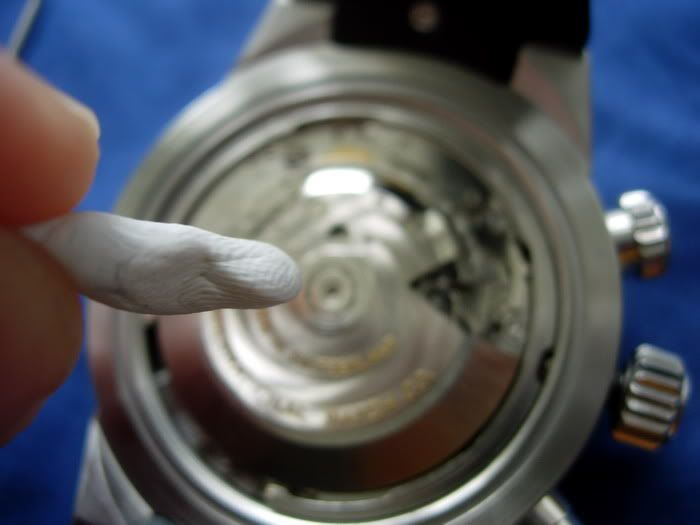
As usual, untightened it using proper caseback tool. Afterwards, sticks some BlueTack/Patafix/Rodico on the caseback to open it up.
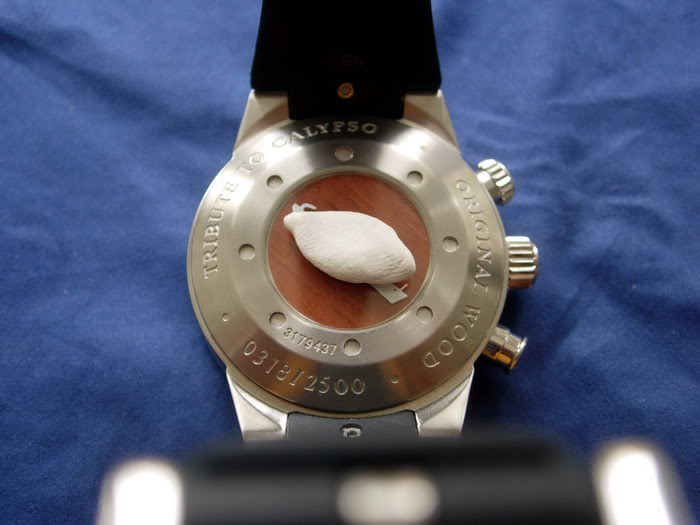
Caseback opened:
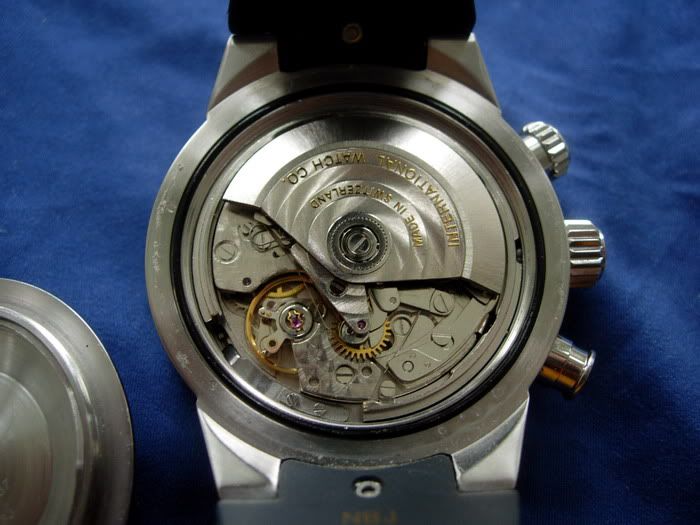
2. Decasing the Movement
First of all, the movement on this piece is held by a retainer ring. In order to decase the movement you only need to release the crown+stem. Unscrew the crown, press the stem release button on the movement and pull out the crown. Please take note that the crown position is winding position (or so called position 1).
Stem release button:
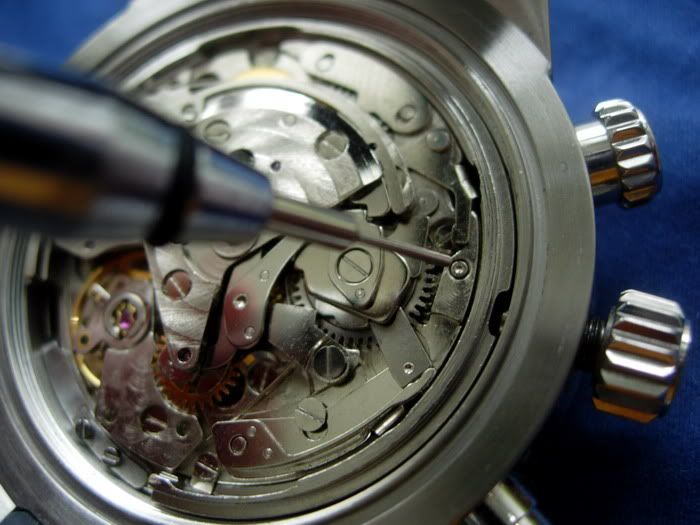
You need a pin in order to push this button. Diameter is ~1mm.
Crown removed:
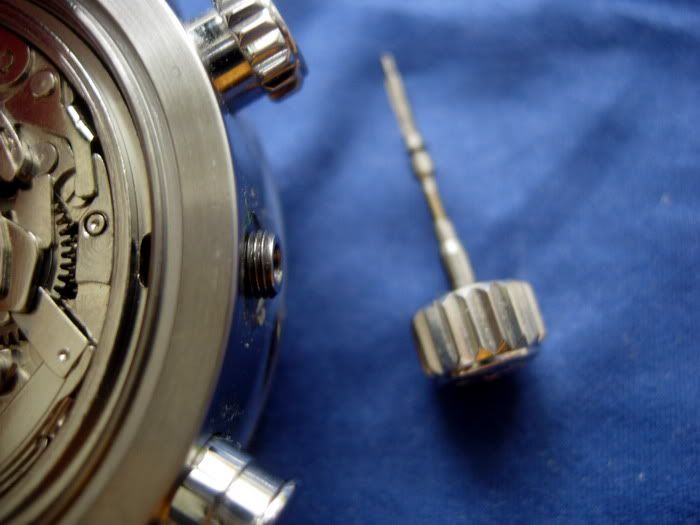
At this stage, we will need to remove 2 movement retainer screws which connects the movement with the retainer ring. Removing the rotor is an optional step because my movement holder allows only the movement without rotor.
Removing rotor. Screwdriver size 1.5mm
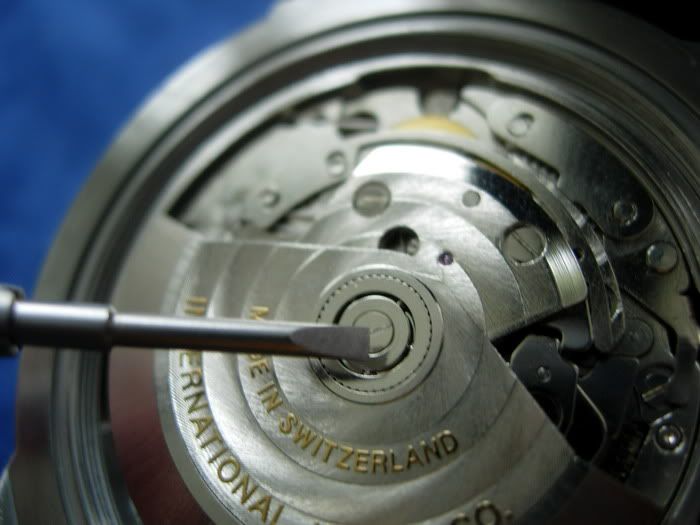
Unscrewed rotor screw:
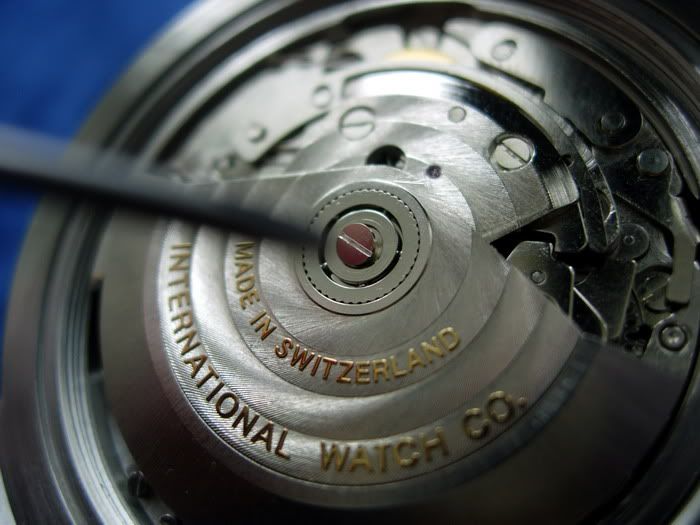
2 Choices to take out the screw... Tweezer or Rodico
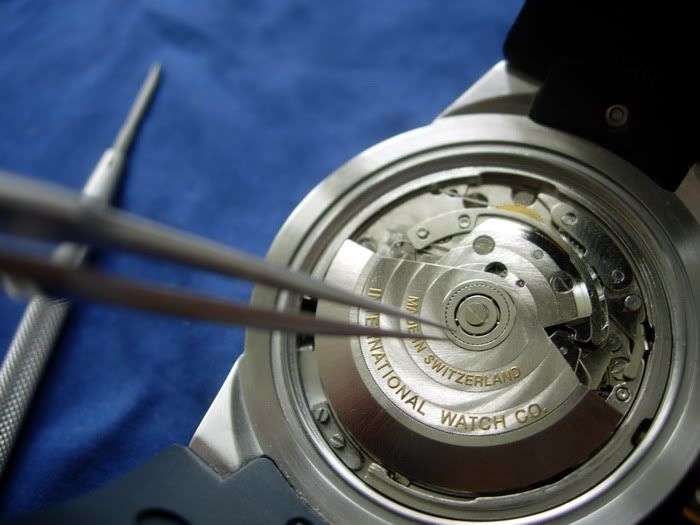
Now remove the movement retainer screws (2 of them):
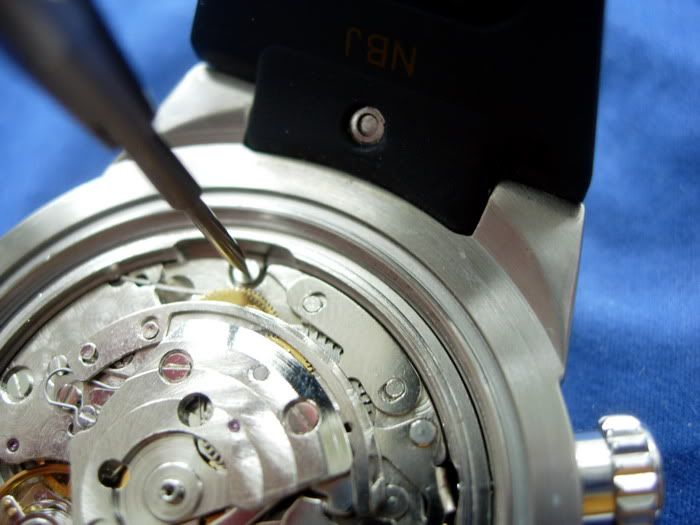
and
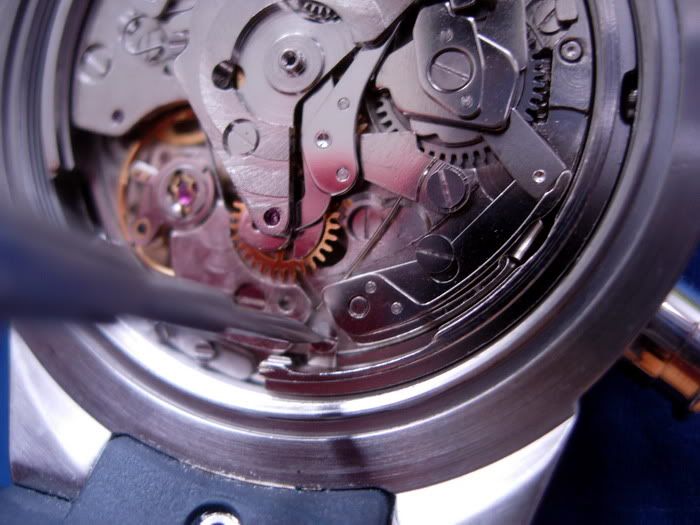
Flip over the watch carefully use a piece of paper to hold it firmly, don't let that movement drop. You will get a decased Asian 7750 complete with movement retainer ring, dial and hands.
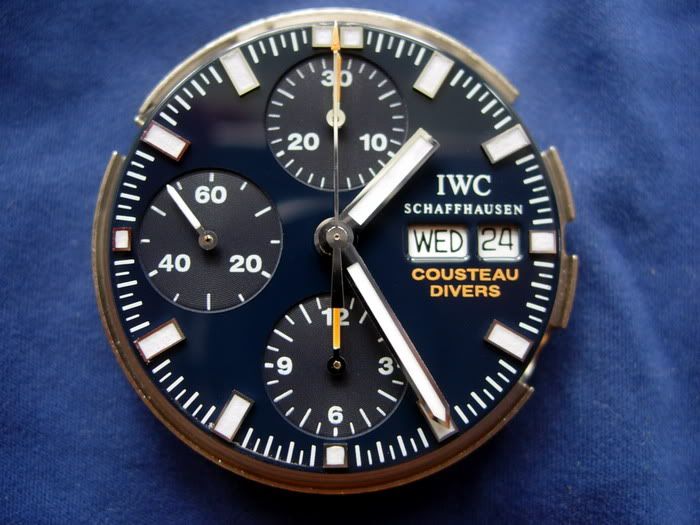
3. Removing Hands and Dial from Asian 7750
3.1 Removing hands
First step, install a compatible ETA7750/Asian 7750 stem+crown. You can insert it carefully, press the stem release button and insert the crown. It will be still in winding position. Check everything and hack it. Make sure it works.
This is the state after crown is installed, on a movement holder:
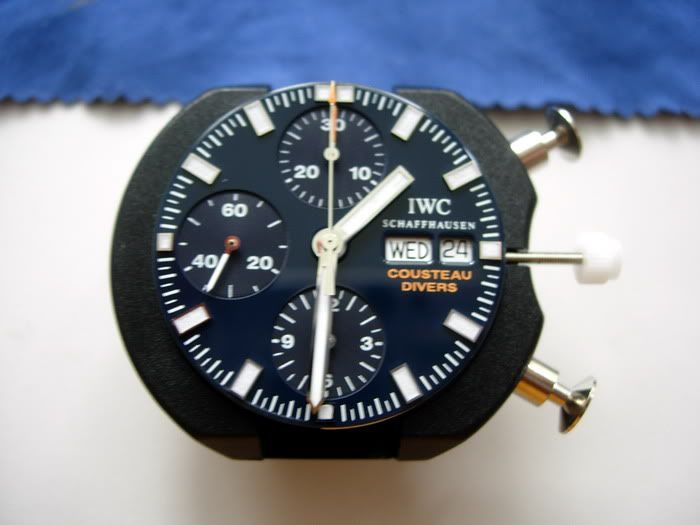
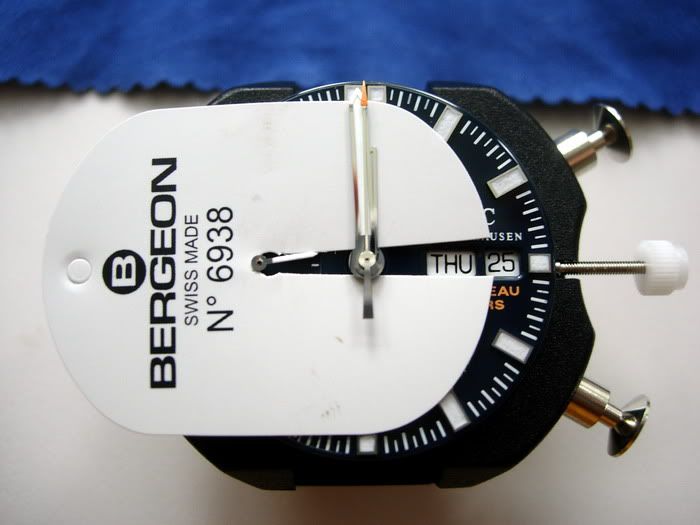
Prepare the dial protector and hand removal tool. Bergeon for me We will start with removing 2 visible subdials hands. Movement is set to hacking position, 12 midnight.
First subdial:
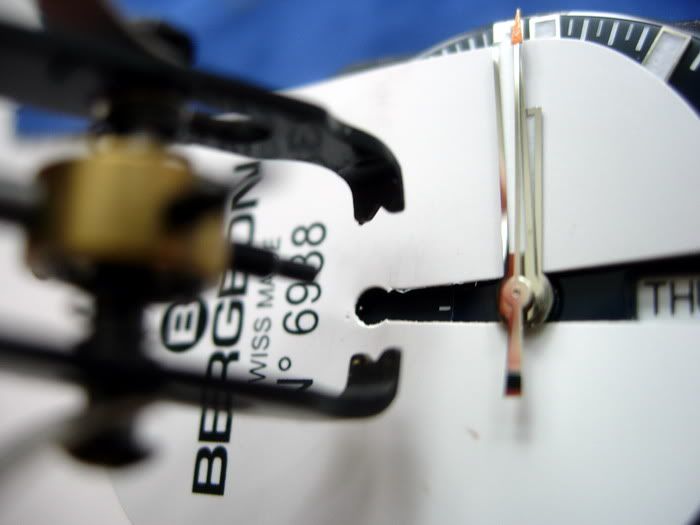
Picture of the tip of the hand removal tool after subdial hand is removed:
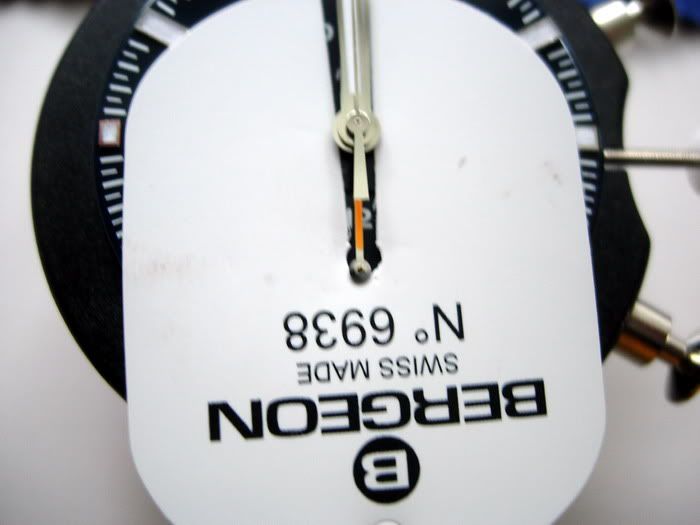
Move on to the second subdial, move that dial protector:
Hand removal tool in use:
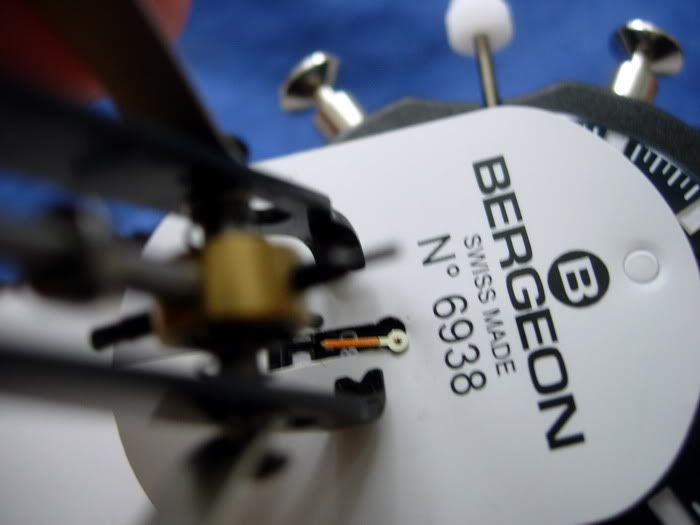
Now, let move on to remove chrono second counter, hour and minute hands. Use the hand removal tool to remove the chrono second counter hand. Remember... Grab it firm and pull up perpendicular to the dial. This is the reason I use only good tool. Imitation Presto tools can't really grab the hand properly. Alternatively you can make use of Bergeon Balance spring tool. This is more suited to remove hand with small pole diameter such as chrono second hand counter.
Move the dial protector:
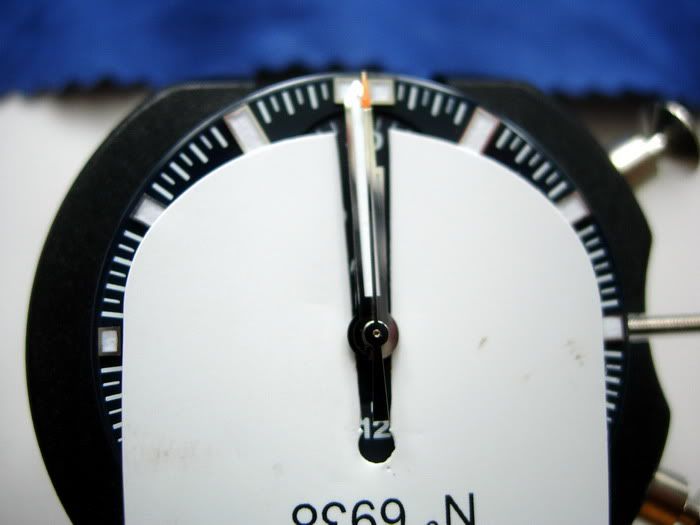
Remember... Use the hand removal tool perpendicular. Grab it, pull it up. It should come off easily without excessive force. Do the same for hour and minute hand. Now, don't forget to remove that last chrono minute counter hand.
All hands removed:
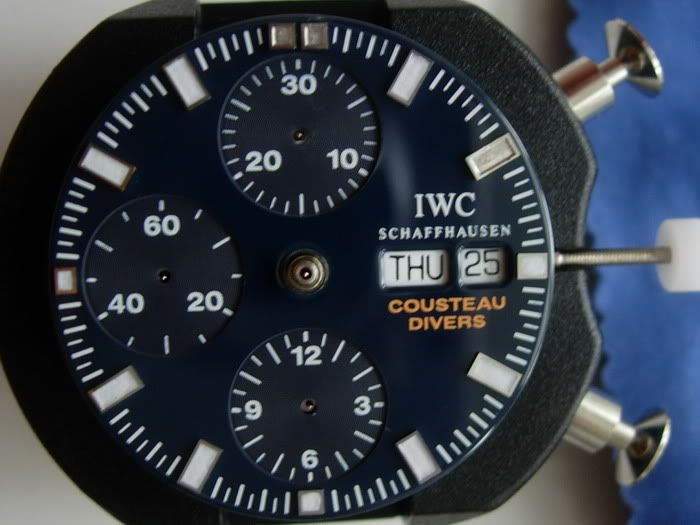
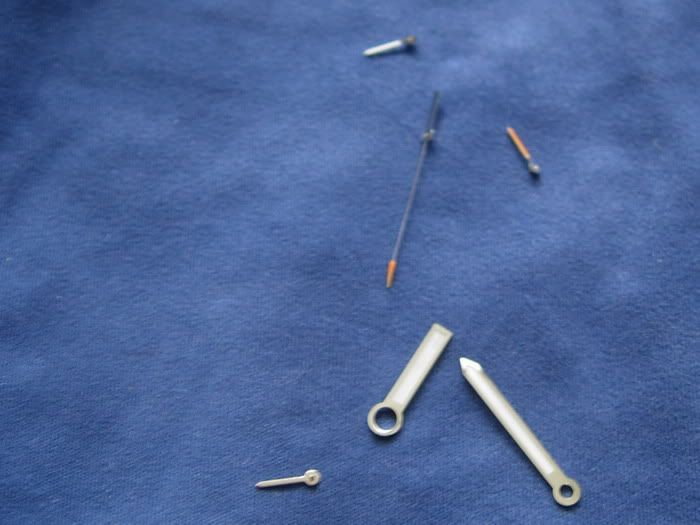
3.2 Removing dial
This is probably won't be very difficult. 2 dial feet clamps are located at the side of the movement:
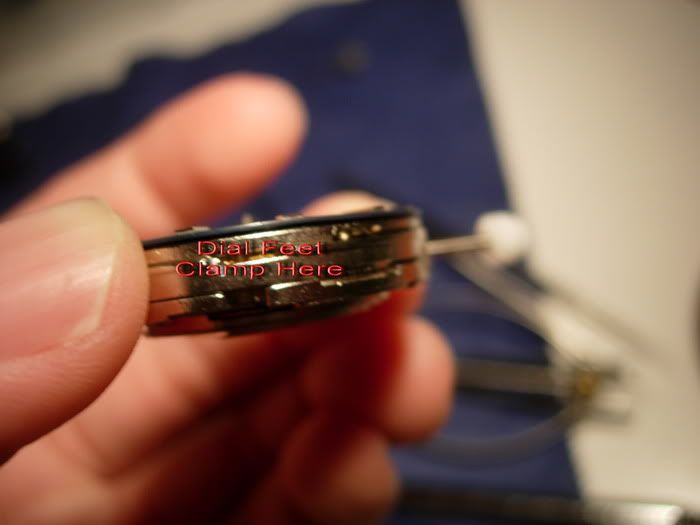
You can remove it using 0.8mm screwdriver, the shape looks like a hook, hook it from the side and pull it out.
This is the picture after the 2 clamps are opened.
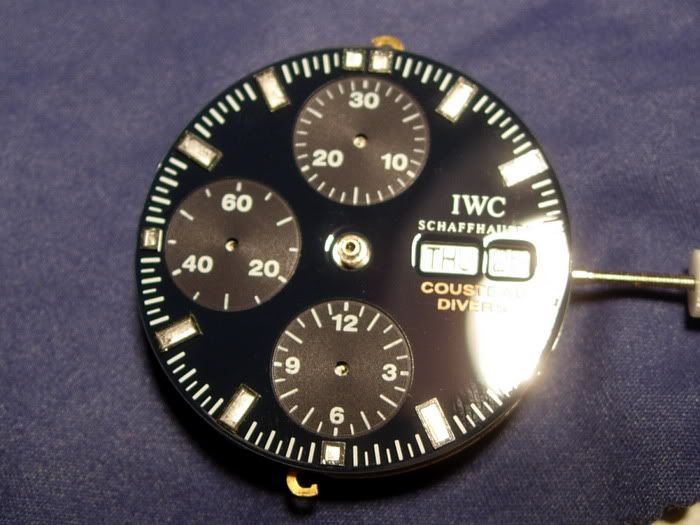
Be careful that these 2 clamps are very fragile, especially in Asian 7750.
Now remove the dial... Dial removed:
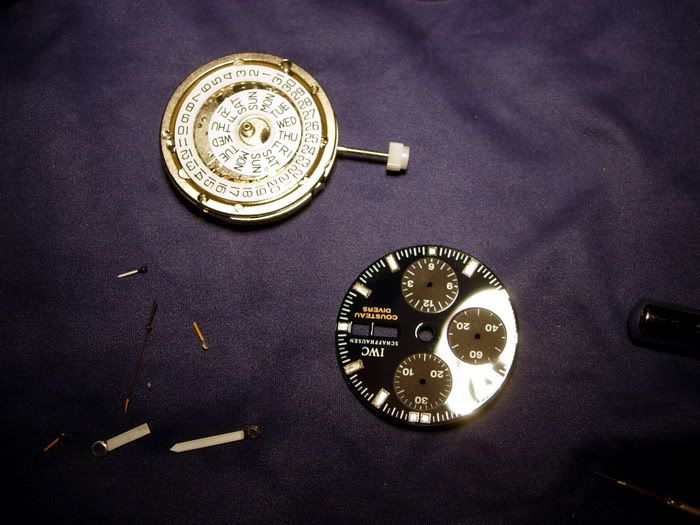
4. Installing dial and hands on ETA7750
4.1 Installing dial
Prepare the new movement. ETA 7750. By default, daywheel is not installed so you have to install it yourself. It's a simple process of placing it on the movement. It should fit flat on the movement. If not, fitting it by turning it anticlockwise to engage the day click mechanism.
Picture of the movement:
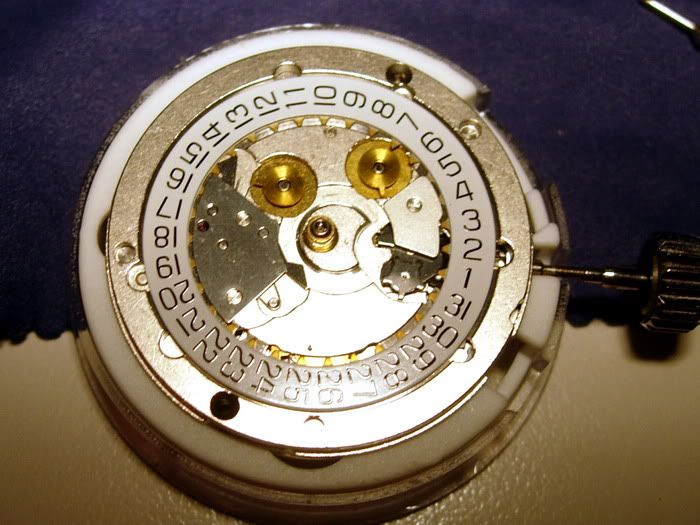
Install the day wheel and don't forget to open 2 clamps for dial feet.
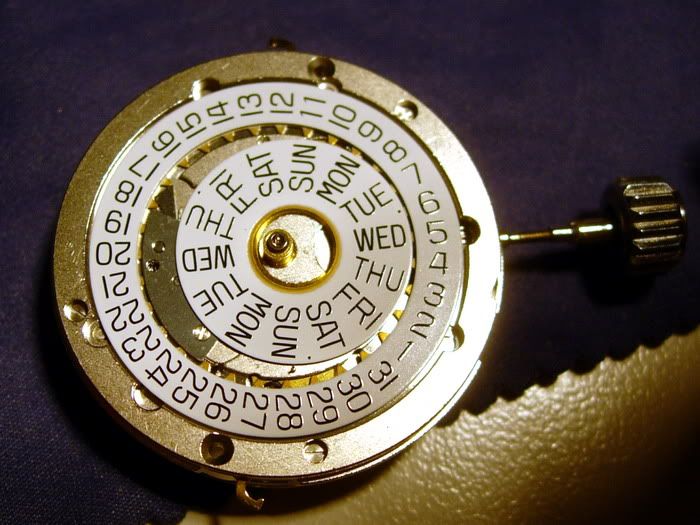
Place the dial on the movement and don't forget to close the 2 clamps:
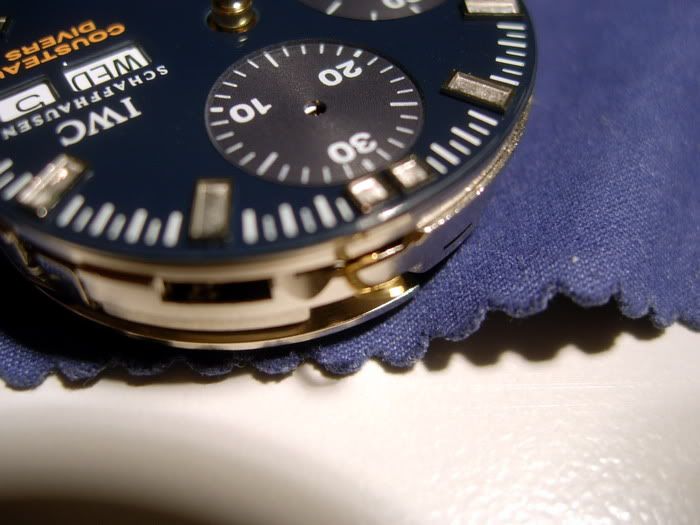
As you will notice from the pictures, lume on the dial is missing! I did reluming at the same time but I won't go into details this time.
4.2 Installing the hands
Let's start with putting all the subdial hands. It's good (and sort of a must) if you make sure that chrono is in ZERO position. Go by pressing chrono stop button and reset button.
Install the hands by using hand presser tool. All subdial hands should fit nicely. Sometimes a bit loose, you need to apply a little bit of GS Cement Glue and use the hand presser tool gently.
2 Hands installed successfully:
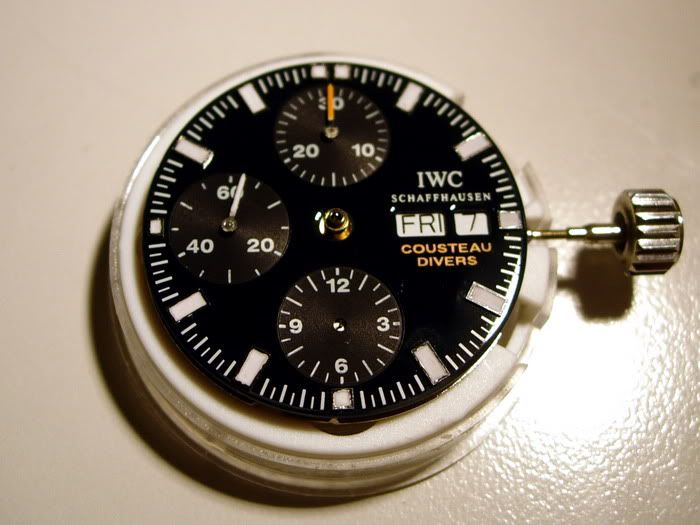
However, not the case for the last hand. I am not careful enough and pressed on the hand too hard. Tube and hand is separated. Ooopppsss... It should not happen. What should we do if we encounter similar problem? There are many ways to go by this problem. This is a method which I choose. Use a stock ETA7750 subdial hands. Modify it to suit the original chrono subdial hand.
First, remove the broken tube carefully. The hand will have no pole by now. Use epoxy glue to join together this broken hand and stock ETA7750 subdial hand. More like a sandwich...
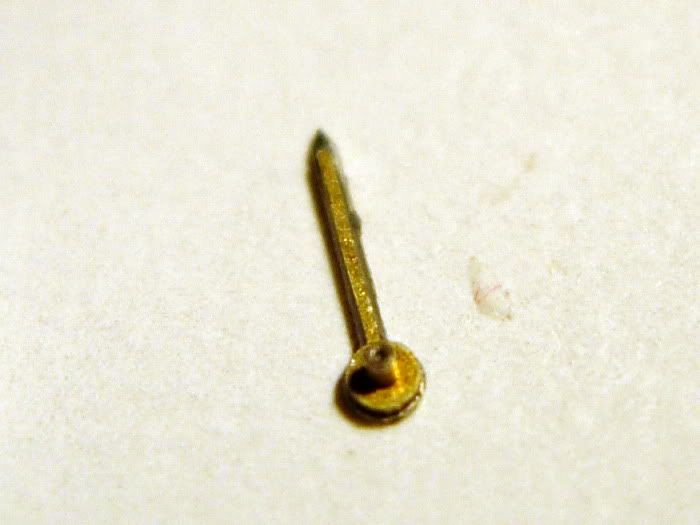
All subdial hands installed:
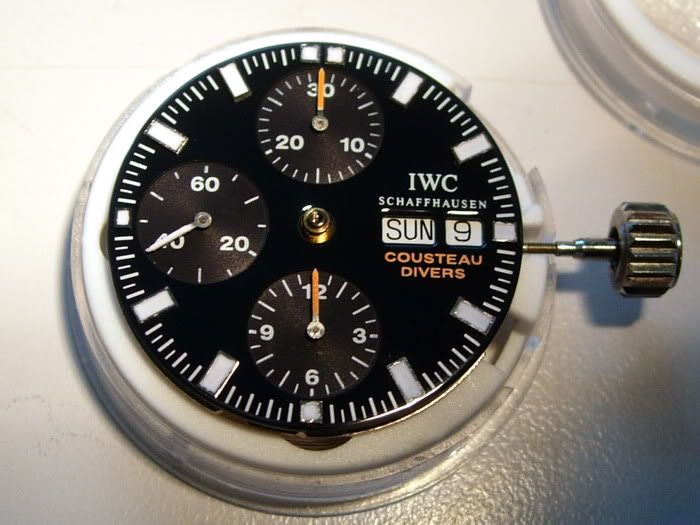
Well, to illustrate that zeroing chrono before installing hand is important, try running the chrono. The 2 subdials hands should reset properly to their intended positions. Imagine installing hands without doing so. The hands are going to reset to unintended position (i.e.: non zero).
Now proceed with installing hour and minute hand. Before doing so, hack the movement. Set it to almost midnight. In this movement date and day will advance almost simultaneously unlike in Asian 7750. In my case, date advance first then day. I would prefer to be as near to midnight as possible. Advance the time by rotating the crown anticlockwise on hacking position. You may do several rotation to get yourself a feeling of "almost" midnight. It's good if you set it just, I repeat, just before the date advance to a new date. In this case, you will have date change just right after midnight. In my piece it's just (less than 1 minute) before midnight. This is considered good. The only watch advances almost exactly midnight is my Omega SMP (+15 secs). This needs a little bit of luck.
Install the hands using another side of the hand pusher (bigger hole). Hold the hand using Rodico at the tip of it and get ready the hand pusher on your another side of your hand:
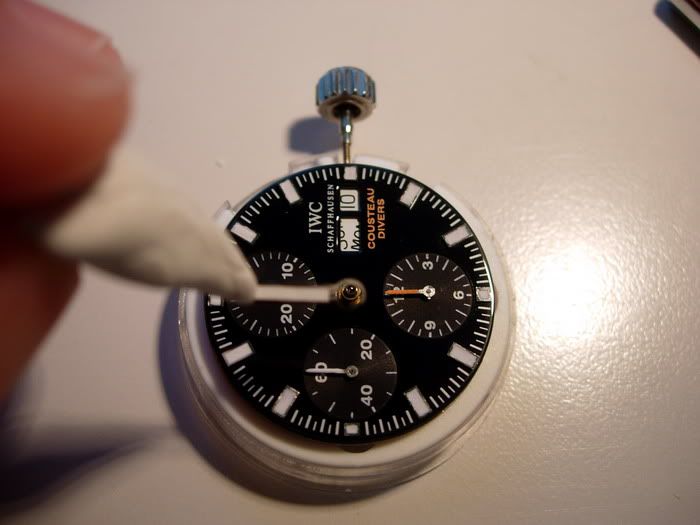
This is the sandwich that I am talking about. Look at chrono hour counter hand.
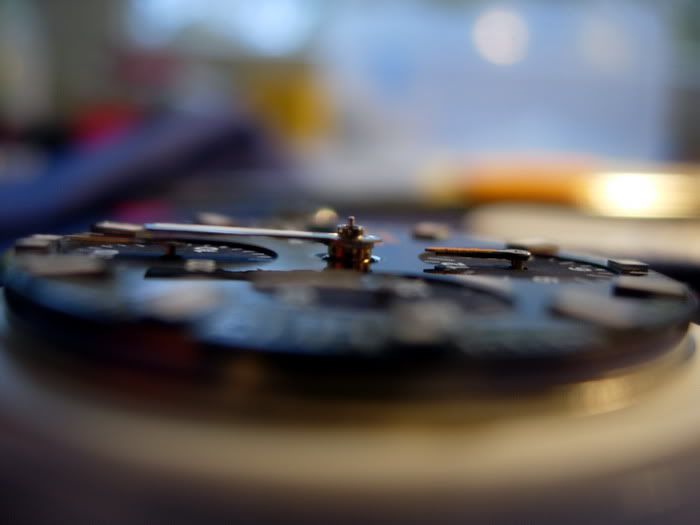
Make sure that hour hand doesn't touch any of the hands on the subdial.
Do the same for minute hand. Again, make sure that minute hand doesn't touch hour hand -> it should not touch any subdial hands too.
Hour and minute hands installed:
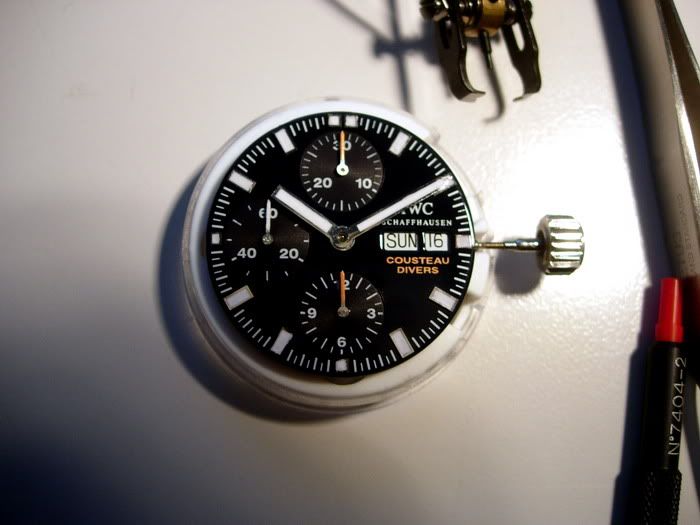
Now... The trickiest part and pretty dangerous part. Installing chrono second hand counter. As we are all aware of, Asian 7750 has different pole size (smaller) than ETA7750. You need to sort of "force" this hand in order to fit into ETA7750. Create a line of Rodico on the dial protector as you see on the picture below:
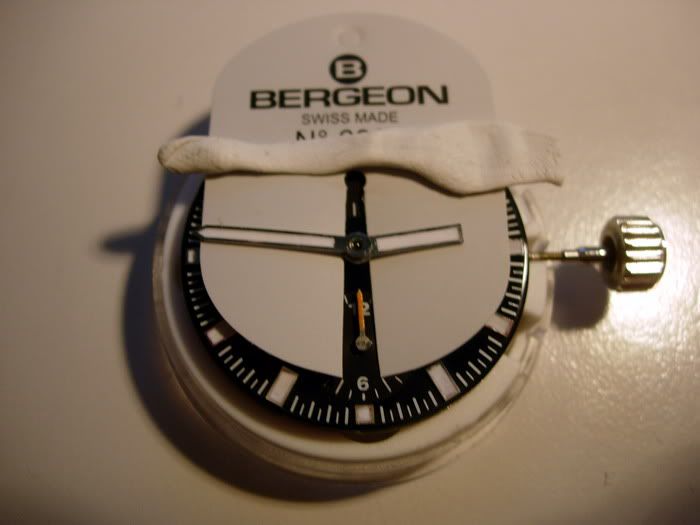
This Rodico serves as "pillow" for chrono second hand counter.
Now align the hand with the pole exactly on top of each other. Don't forget to align it with intended position (12 o clock).
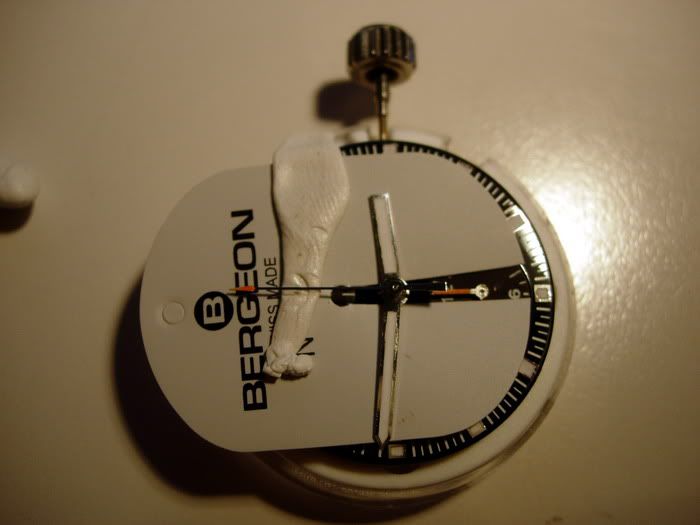
Now you see how the pillow is working. Tap on the hand gently using hand pushers tool. After it's slightly inserted, make sure that it's perpendicular with the dial. Use a small pin to further tapping it. Not too hard... This is very fragile. You can either break the pole or worst... part of the movement.
Remove the dial protector. Be careful not to leave residue on the back of the hand.
All hands installed:
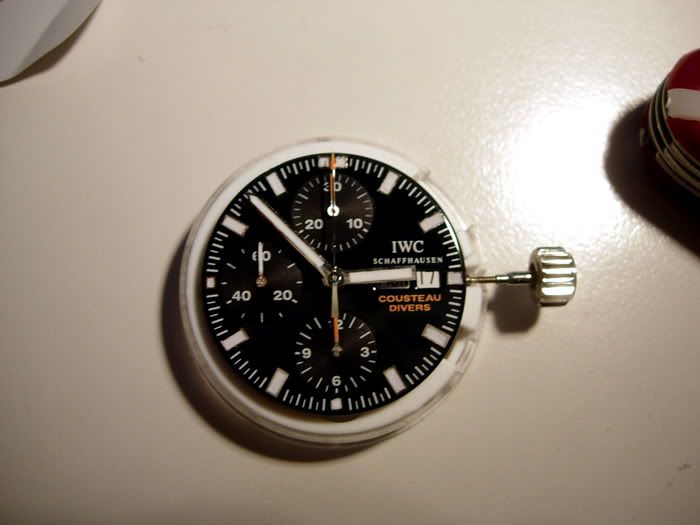
Again... Make sure that all functions correctly... No touching hands, chrono work and resets properly.
After that, you are almost done... Do the reserve process. Put the movement back into the case!
The final result is just rewarding:
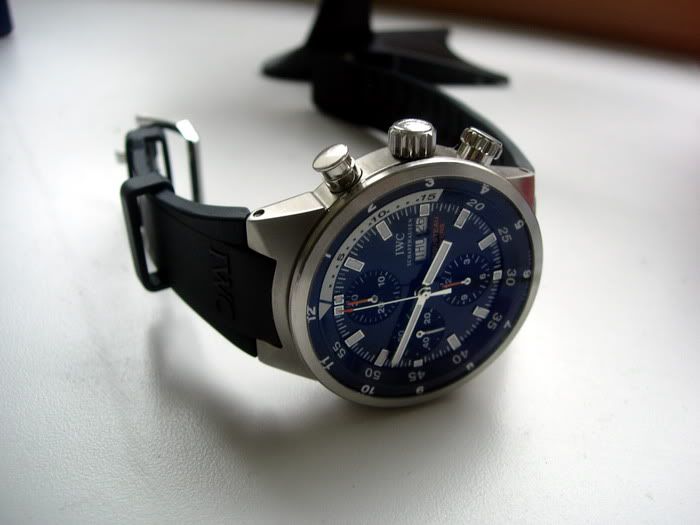
You may want at the same time time the movement. Make it as precise as possible. I am in the process of fine tuning mine. So far it's running +1 with chrono up, watch vertical.
Ah... yes, reluming result too:
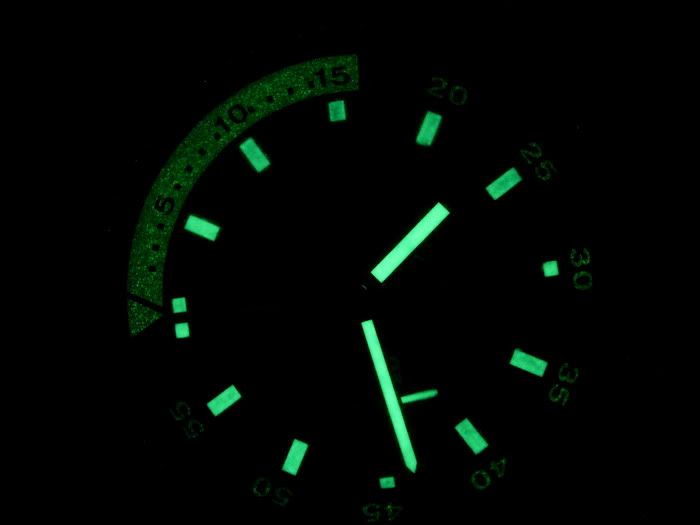
Please feel free to add/comment if you have an alternative or a better way doing things. I am very much interested to know (I am sure the community too). Thank you for your time reading my post. I won't be held responsible for any screwed up movement/watches/parts as a result of doing this swap.
Common knowledge required such as opening caseback, decasing movement and hand/dial removal. You are also required to put things back in order just by doing reverse process.
Stay tune!
... So the subject for this moment is IWC Cousteau Diver's 2006. Why this watch? This is a good candidate for a daily beater watch. Very comfortable on the wrist and has Chronograph function. Trust me, I use the chrono function pretty frequently during cooking, washing, etc.
Let's start!
1. Opening the Caseback
As usual, untightened it using proper caseback tool. Afterwards, sticks some BlueTack/Patafix/Rodico on the caseback to open it up.

Caseback opened:

2. Decasing the Movement
First of all, the movement on this piece is held by a retainer ring. In order to decase the movement you only need to release the crown+stem. Unscrew the crown, press the stem release button on the movement and pull out the crown. Please take note that the crown position is winding position (or so called position 1).
Stem release button:

You need a pin in order to push this button. Diameter is ~1mm.
Crown removed:

At this stage, we will need to remove 2 movement retainer screws which connects the movement with the retainer ring. Removing the rotor is an optional step because my movement holder allows only the movement without rotor.
Removing rotor. Screwdriver size 1.5mm

Unscrewed rotor screw:

2 Choices to take out the screw... Tweezer or Rodico


Now remove the movement retainer screws (2 of them):

and

Flip over the watch carefully use a piece of paper to hold it firmly, don't let that movement drop. You will get a decased Asian 7750 complete with movement retainer ring, dial and hands.

3. Removing Hands and Dial from Asian 7750
3.1 Removing hands
First step, install a compatible ETA7750/Asian 7750 stem+crown. You can insert it carefully, press the stem release button and insert the crown. It will be still in winding position. Check everything and hack it. Make sure it works.
This is the state after crown is installed, on a movement holder:

Prepare the dial protector and hand removal tool. Bergeon for me
First subdial:

Picture of the tip of the hand removal tool after subdial hand is removed:

Move on to the second subdial, move that dial protector:

Hand removal tool in use:

Now, let move on to remove chrono second counter, hour and minute hands. Use the hand removal tool to remove the chrono second counter hand. Remember... Grab it firm and pull up perpendicular to the dial. This is the reason I use only good tool. Imitation Presto tools can't really grab the hand properly. Alternatively you can make use of Bergeon Balance spring tool. This is more suited to remove hand with small pole diameter such as chrono second hand counter.
Move the dial protector:

Remember... Use the hand removal tool perpendicular. Grab it, pull it up. It should come off easily without excessive force. Do the same for hour and minute hand. Now, don't forget to remove that last chrono minute counter hand.
All hands removed:


3.2 Removing dial
This is probably won't be very difficult. 2 dial feet clamps are located at the side of the movement:

You can remove it using 0.8mm screwdriver, the shape looks like a hook, hook it from the side and pull it out.
This is the picture after the 2 clamps are opened.

Be careful that these 2 clamps are very fragile, especially in Asian 7750.
Now remove the dial... Dial removed:

4. Installing dial and hands on ETA7750
4.1 Installing dial
Prepare the new movement. ETA 7750. By default, daywheel is not installed so you have to install it yourself. It's a simple process of placing it on the movement. It should fit flat on the movement. If not, fitting it by turning it anticlockwise to engage the day click mechanism.
Picture of the movement:

Install the day wheel and don't forget to open 2 clamps for dial feet.

Place the dial on the movement and don't forget to close the 2 clamps:

As you will notice from the pictures, lume on the dial is missing! I did reluming at the same time but I won't go into details this time.
4.2 Installing the hands
Let's start with putting all the subdial hands. It's good (and sort of a must) if you make sure that chrono is in ZERO position. Go by pressing chrono stop button and reset button.
Install the hands by using hand presser tool. All subdial hands should fit nicely. Sometimes a bit loose, you need to apply a little bit of GS Cement Glue and use the hand presser tool gently.
2 Hands installed successfully:

However, not the case for the last hand. I am not careful enough and pressed on the hand too hard. Tube and hand is separated. Ooopppsss... It should not happen. What should we do if we encounter similar problem? There are many ways to go by this problem. This is a method which I choose. Use a stock ETA7750 subdial hands. Modify it to suit the original chrono subdial hand.
First, remove the broken tube carefully. The hand will have no pole by now. Use epoxy glue to join together this broken hand and stock ETA7750 subdial hand. More like a sandwich...

All subdial hands installed:

Well, to illustrate that zeroing chrono before installing hand is important, try running the chrono. The 2 subdials hands should reset properly to their intended positions. Imagine installing hands without doing so. The hands are going to reset to unintended position (i.e.: non zero).
Now proceed with installing hour and minute hand. Before doing so, hack the movement. Set it to almost midnight. In this movement date and day will advance almost simultaneously unlike in Asian 7750. In my case, date advance first then day. I would prefer to be as near to midnight as possible. Advance the time by rotating the crown anticlockwise on hacking position. You may do several rotation to get yourself a feeling of "almost" midnight. It's good if you set it just, I repeat, just before the date advance to a new date. In this case, you will have date change just right after midnight. In my piece it's just (less than 1 minute) before midnight. This is considered good. The only watch advances almost exactly midnight is my Omega SMP (+15 secs). This needs a little bit of luck.
Install the hands using another side of the hand pusher (bigger hole). Hold the hand using Rodico at the tip of it and get ready the hand pusher on your another side of your hand:

This is the sandwich that I am talking about. Look at chrono hour counter hand.

Make sure that hour hand doesn't touch any of the hands on the subdial.
Do the same for minute hand. Again, make sure that minute hand doesn't touch hour hand -> it should not touch any subdial hands too.
Hour and minute hands installed:

Now... The trickiest part and pretty dangerous part. Installing chrono second hand counter. As we are all aware of, Asian 7750 has different pole size (smaller) than ETA7750. You need to sort of "force" this hand in order to fit into ETA7750. Create a line of Rodico on the dial protector as you see on the picture below:

This Rodico serves as "pillow" for chrono second hand counter.
Now align the hand with the pole exactly on top of each other. Don't forget to align it with intended position (12 o clock).

Now you see how the pillow is working. Tap on the hand gently using hand pushers tool. After it's slightly inserted, make sure that it's perpendicular with the dial. Use a small pin to further tapping it. Not too hard... This is very fragile. You can either break the pole or worst... part of the movement.
Remove the dial protector. Be careful not to leave residue on the back of the hand.
All hands installed:

Again... Make sure that all functions correctly... No touching hands, chrono work and resets properly.
After that, you are almost done... Do the reserve process. Put the movement back into the case!
The final result is just rewarding:

You may want at the same time time the movement. Make it as precise as possible. I am in the process of fine tuning mine. So far it's running +1 with chrono up, watch vertical.
Ah... yes, reluming result too:

Please feel free to add/comment if you have an alternative or a better way doing things. I am very much interested to know (I am sure the community too). Thank you for your time reading my post. I won't be held responsible for any screwed up movement/watches/parts as a result of doing this swap.
