This is my attempt using both the Ranger platinum embossing powder, as well as Wow platinum embossing powder. I had previously understood that Davidmac and Janstood have had issues with getting the embossing ink where they wanted it to only, as well as getting the powder to stick.
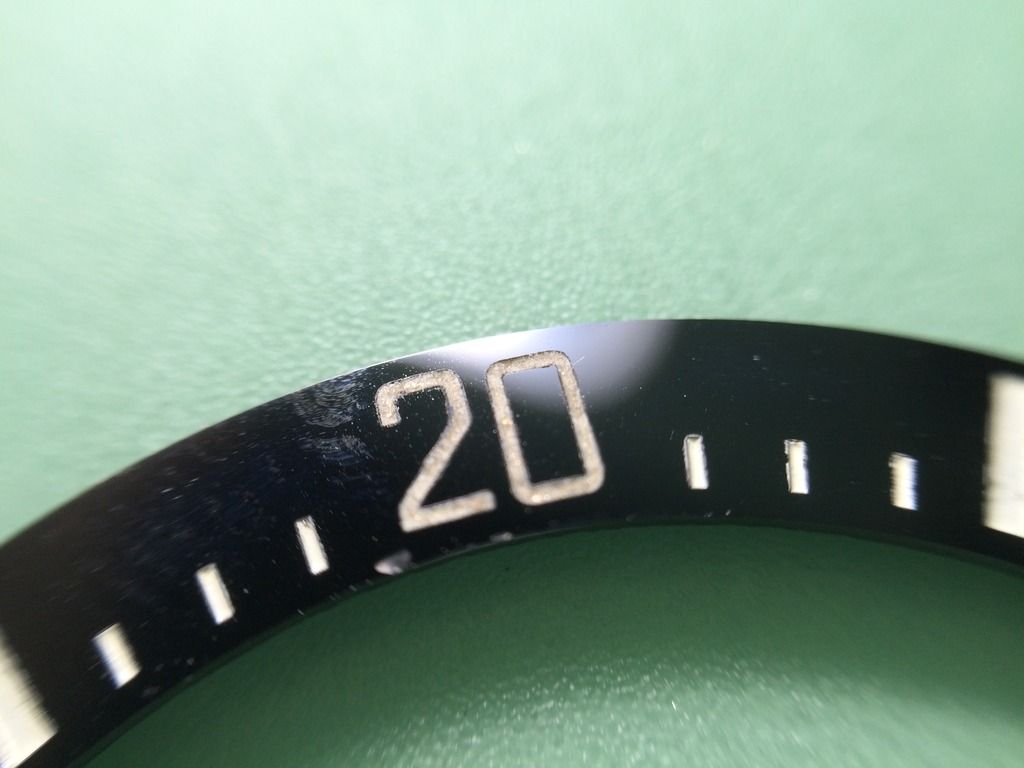
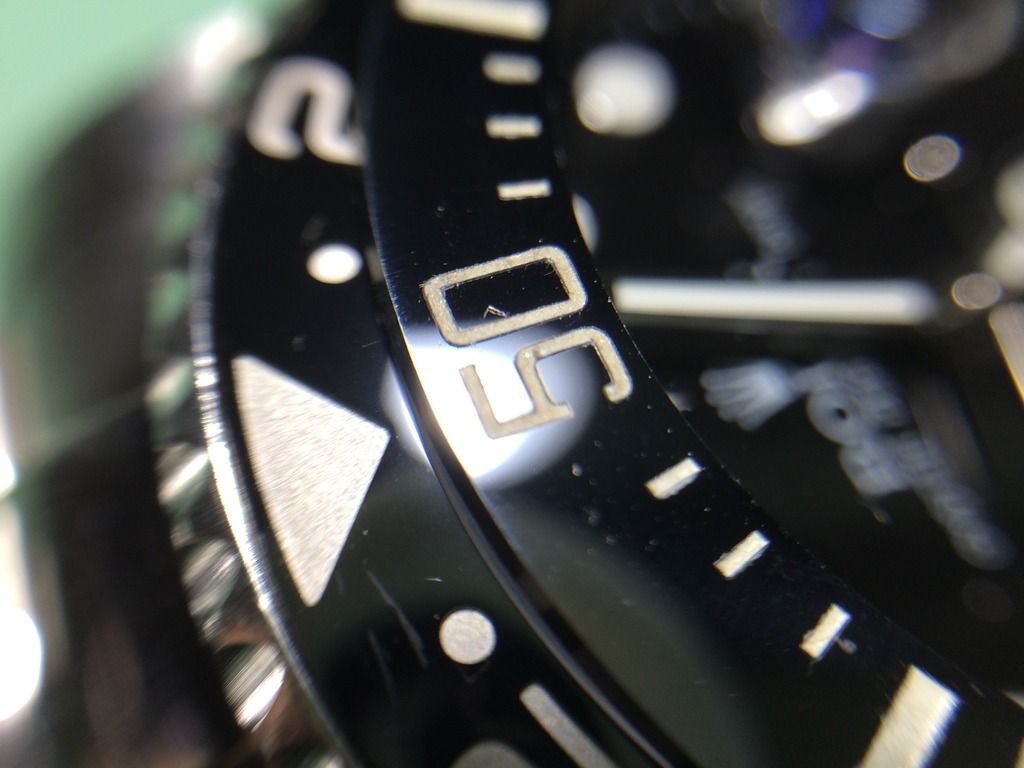
So I decided to give it a try, and I am satisfied to say the least. Although the end result is still slightly too peachy as compared to my GMT II gen insert.
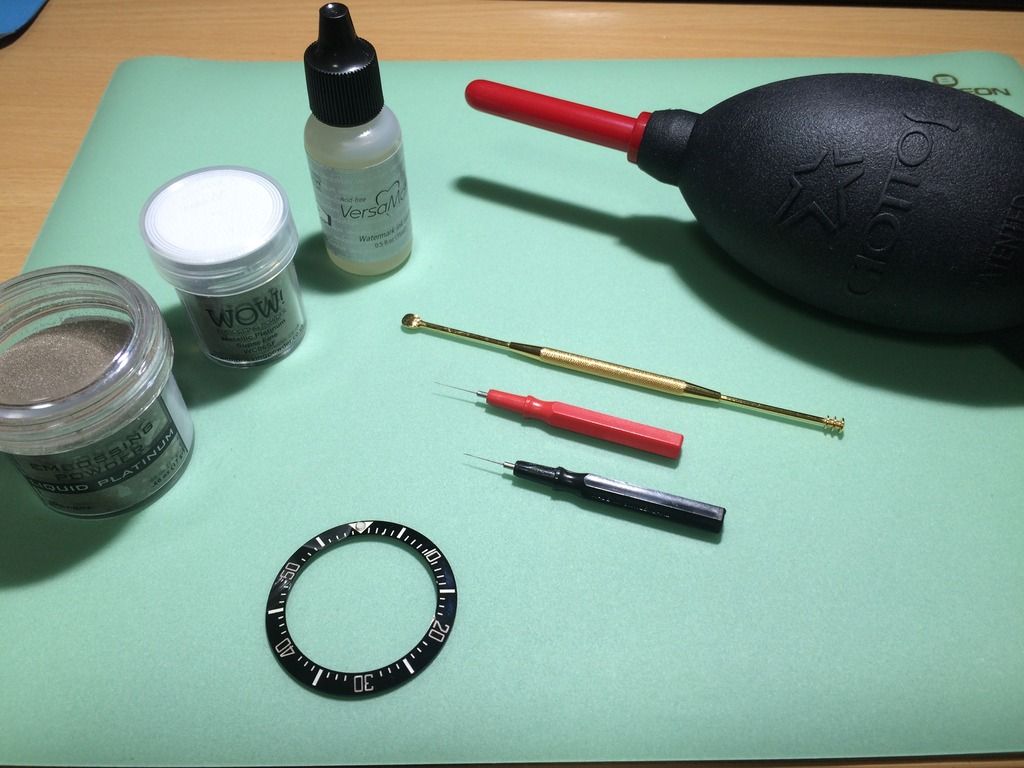
Tools/items used:
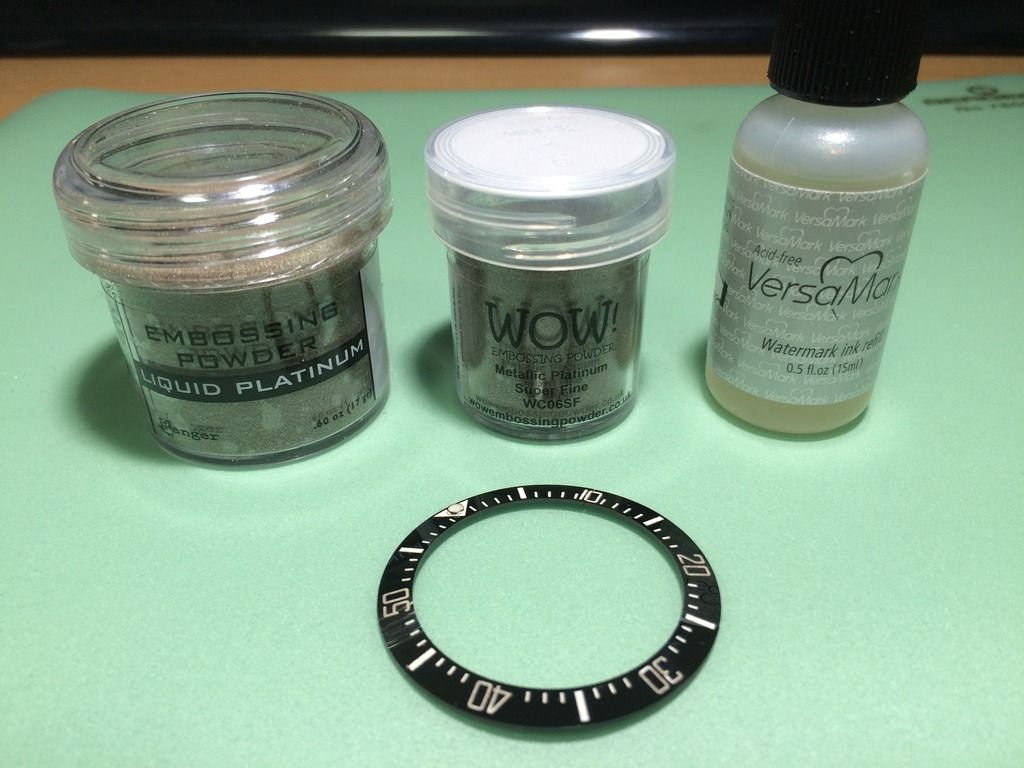
Ranger platinum embossing powder
Wow platinum embossing powder (super fine)
Versamark embossing ink
Oiler, very fine tip
Oiler, grinded off needle tip only
Small lil scoop for handling the powder
Dust blower
Loupe (not shown in pic)
Heater gun (not shown in pic)
Steps I took to do this:
1. Apply embossing ink using the very fine tip oiler to the numbers. This can be applied very nice and evenly. The entire process of my attempts took nearly 2 hours, and by then, the embossing ink had not even dried. Very interesting to note.
2. Scatter the platinum powder onto the inked numbers. Shake the excess off, followed by using the dust blower to remove even more excess. What is required on the numbers is only a minuscule amount of powder, like a couple of grains enough to cover the number.
3. Apply heat using the heater gun. It only requires about 10 seconds for the platinum powder to melt. Once melted, let it cool for a couple of minutes. DO NOT touch the insert once the powder has melted, as it is very very hot. Burnt my index finger slightly doing that.
4. Once cooled, I used the needle tip oiler to scrap clean the edges of the numbers only.
5. After the edges are clearly defined, rub the number with your finger to thin it out. The insert will become very sticky at this point of time.
6. Wash the insert with detergent and wipe clean. Result will be as per my photos if you got this right.
The platinum seems to be rather durable for now, although that remains to be seen.
I did not capture the process of doing it, as I was still skeptical about the results that I would get.
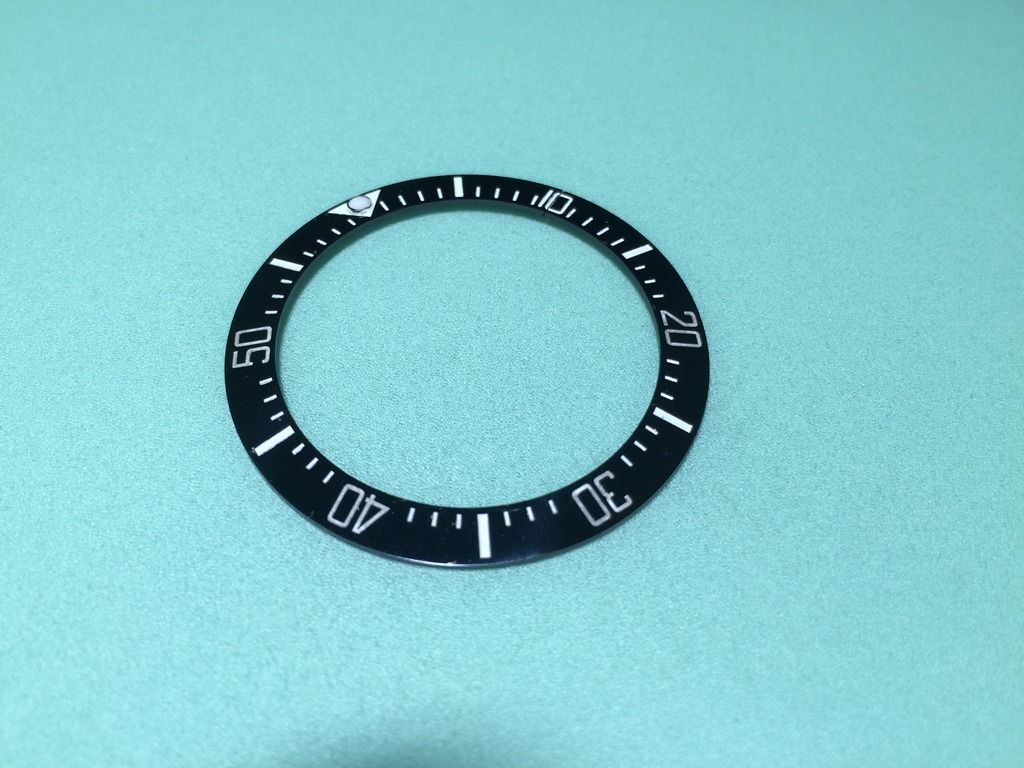
I did the mod on the 20, 30, 40 and 50 numbers on the insert. As you can see, there is already a noticeable color difference when seen from a distance.
First attempt using Wow platinum embossing powder
Second attempt using Ranger platinum embossing powder. I think Wow does a better job, although both seem to have identical colours.
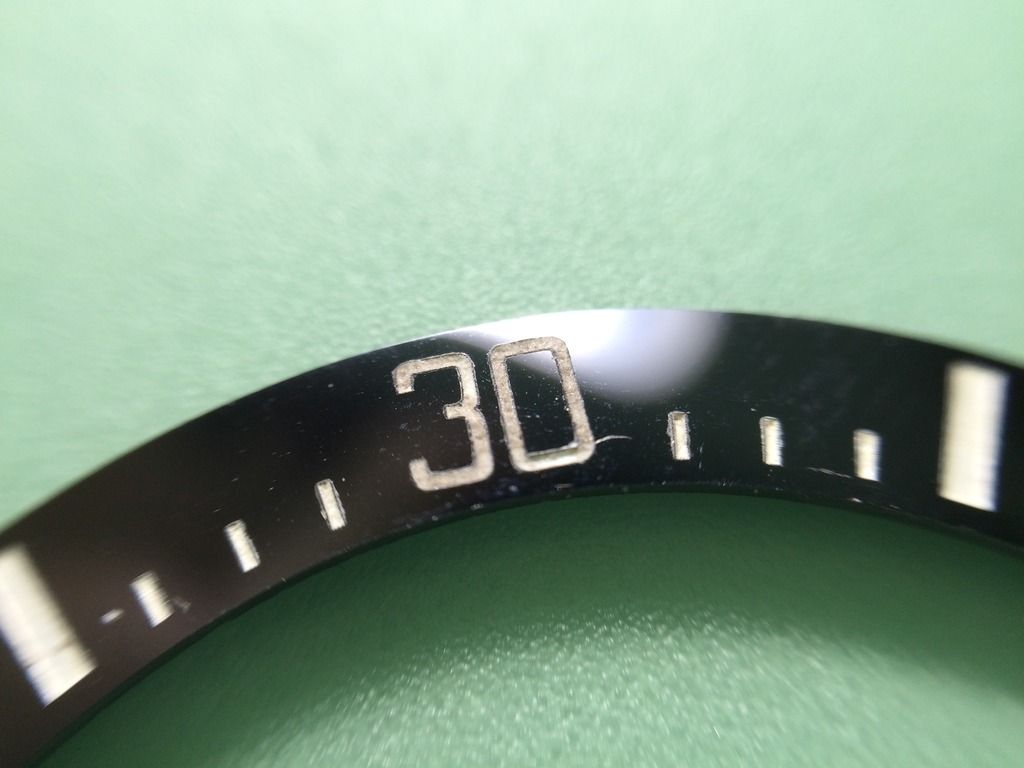
Third attempt using Wow. At this point of time, I was focusing on regulating the amount of granules getting onto the inked numbers.
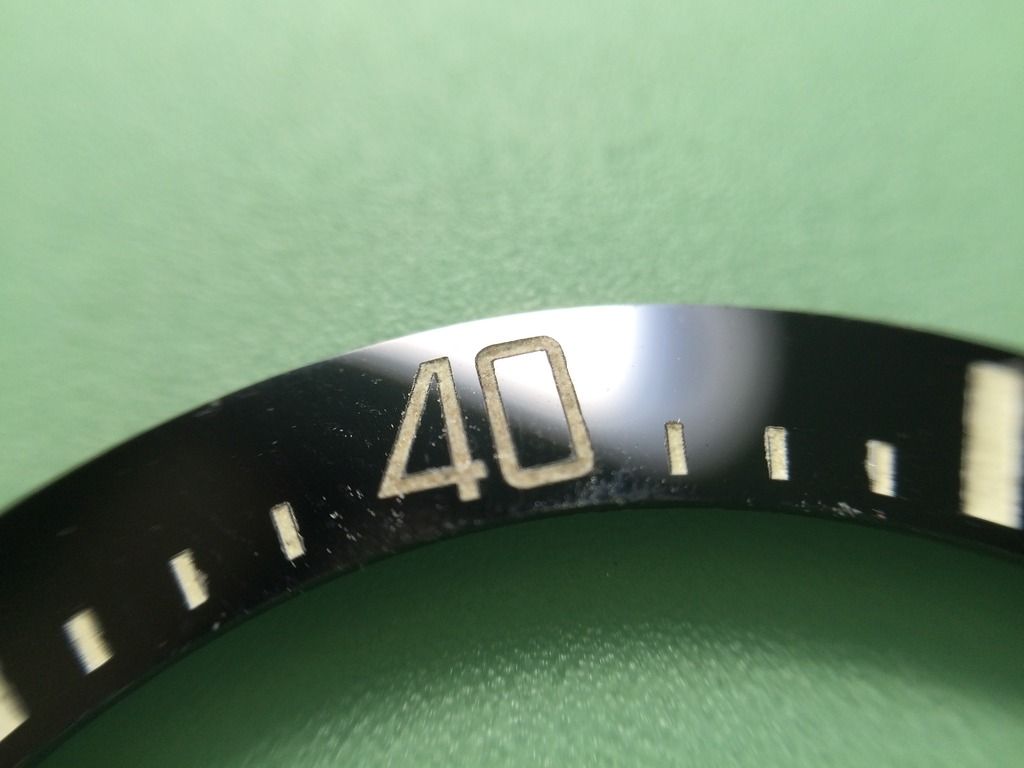
Last attempt using Wow. My best attempt so far, and I am satisfied with the result.
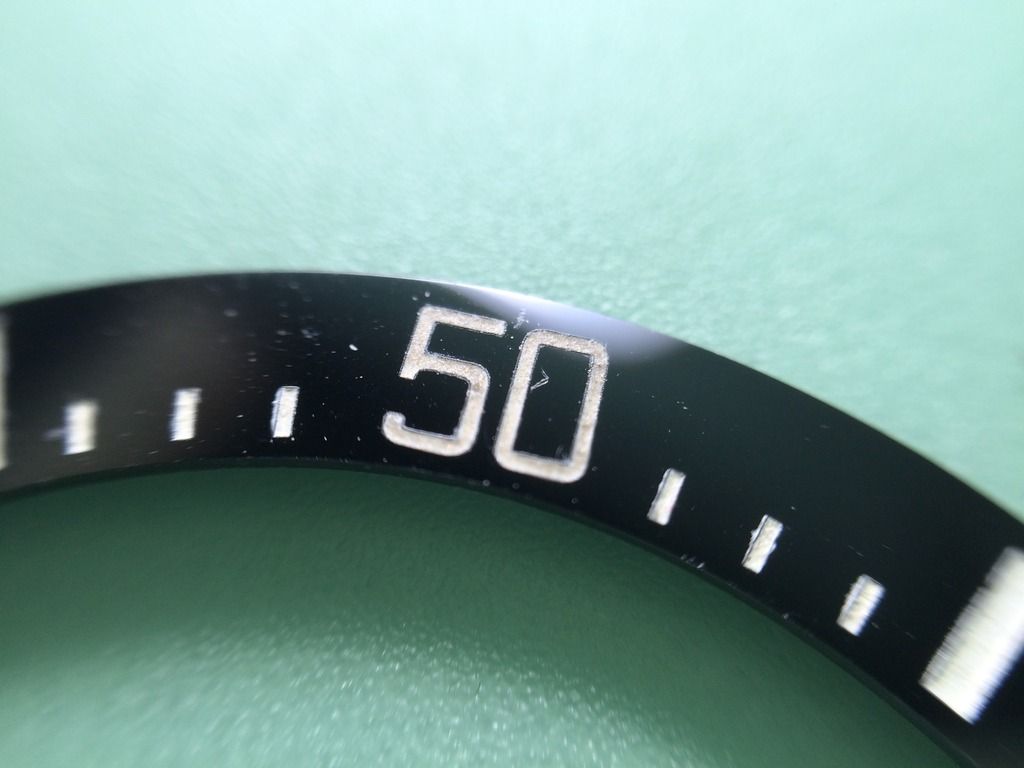
Comparison shot of best attempt, number 50, against gen GMT II insert triangle.
I will make a pictorial if there is interest in getting a real platinum mod done on your ceramic inserts!
Credits to Davidmac and Janstood for discovering this method and giving their best shot at this!


") not the crappy silver i see people doing with there paint mods
not the crappy silver i see people doing with there paint mods