About 2 months ago, i ordered a Noob V3 111 from toro with the incabloc already installed. Since then I've been doing a few mods here and there to make it look better. Those mods include:
-Sourcing a Noob Pam 390 CG (Better than Noob V3). I champfered the edge of the cg body and the lever (as per gen), flattened and polished the pin and recessed it, and rebrushed the body and lever with 600 grit
-Sourced a Gen crown, adjusted and loctited the crown tube to provide a better snap when closing the cg lever
-Sourced Gen ratchet and crown wheels for the movement. These make the winding feel a lot more like a swiss 6497.
-Brushed the pallet bridge on the movement
I bought the gen gear train for the movement from ofrei, but i'm having a hard time getting the center wheel in to the movement. This is where I need an expert's advice. The diameter of the pinion on the asian center wheel is .99mm while the swiss is 1.01mm. Is there a way to bore out the jewel by .02mm? or can i replace the jewel in the base plate with a swiss one?
I also have a H-fac swan neck with the longer screw that i plan to use. The surface of these swan necks are brushed, so i decided to try to polish it with diamond paste. That resulted in a brass swan neck, but hey, it shined like a mofo. So now i need to find someone who can platinum/rhodium plate it.
Going forward, parts that I'm looking for are:
-A new base plate for the movement with better perlage. The perlage on mine is kind of dull
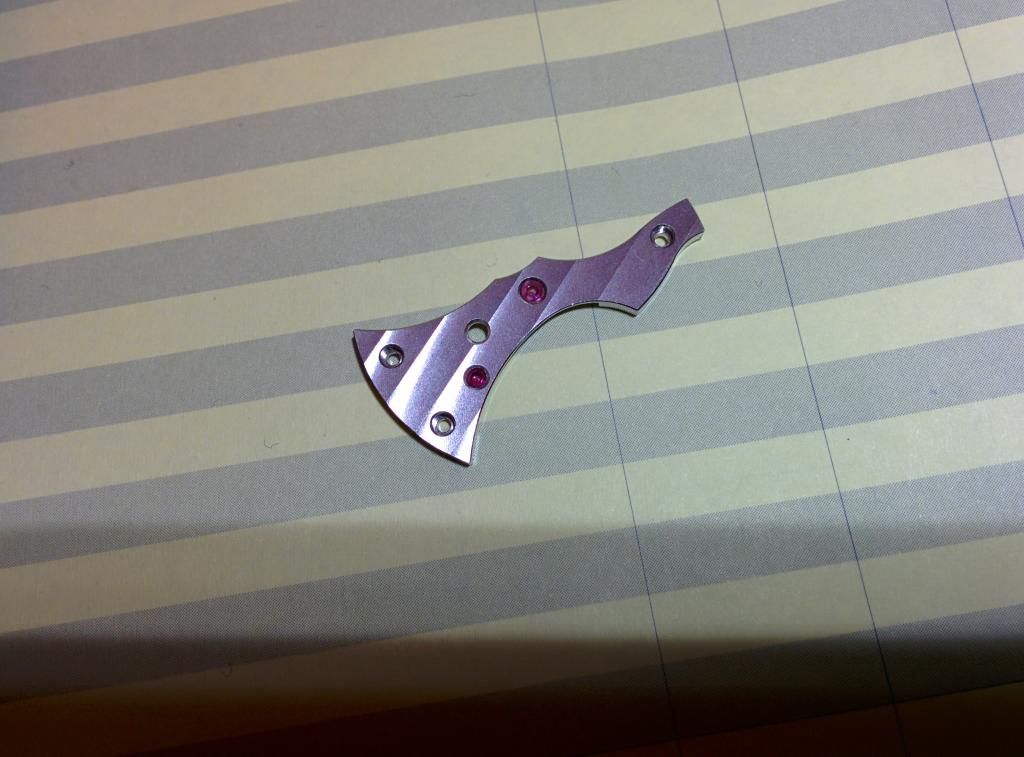
-New bridge plates that are scratch free. Looks like toro's watchsmith left a few very light scratches on the plates while swapping the incabloc. They are very hard to get a picture of, but they are noticable.
-A new dial. Mine has a QC issue on the 6. The left side of it doesn't have enough lume and you can see part of the white back plate.
If you have any of the above, please let me know
Here are the pics of it so far:
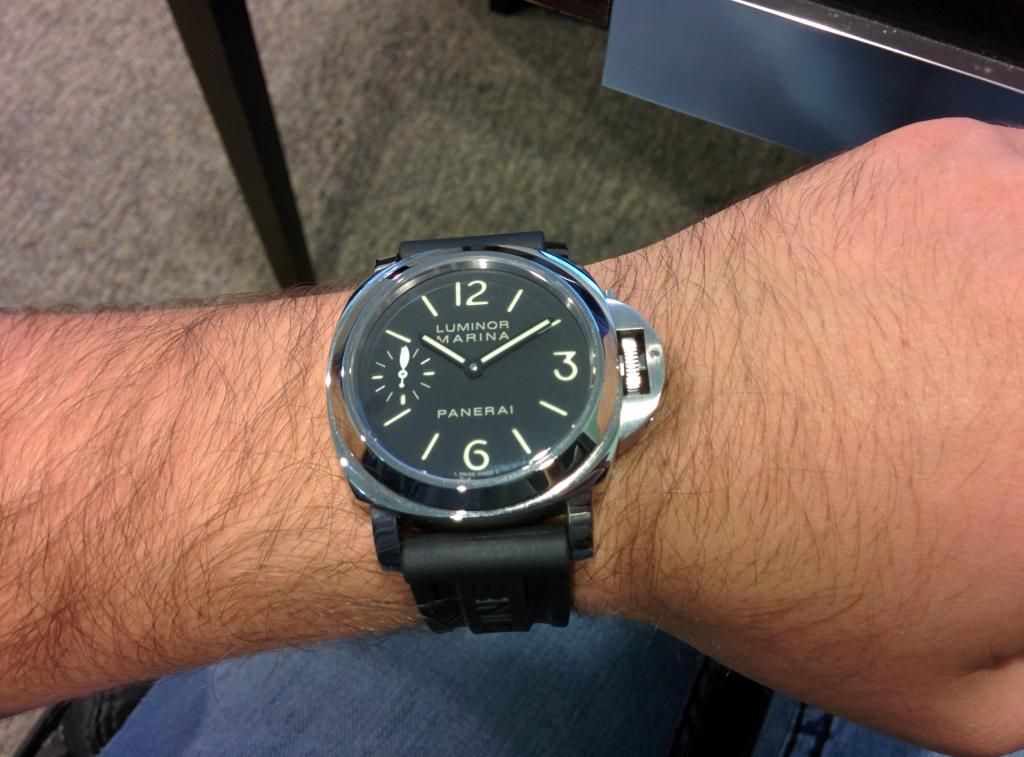
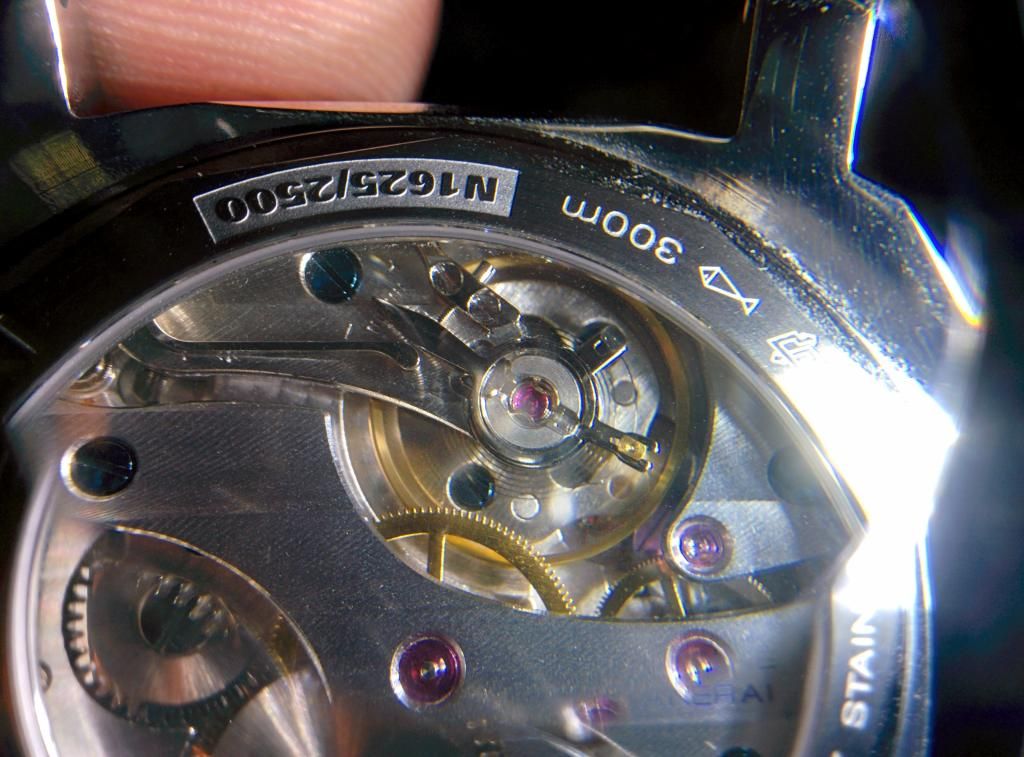
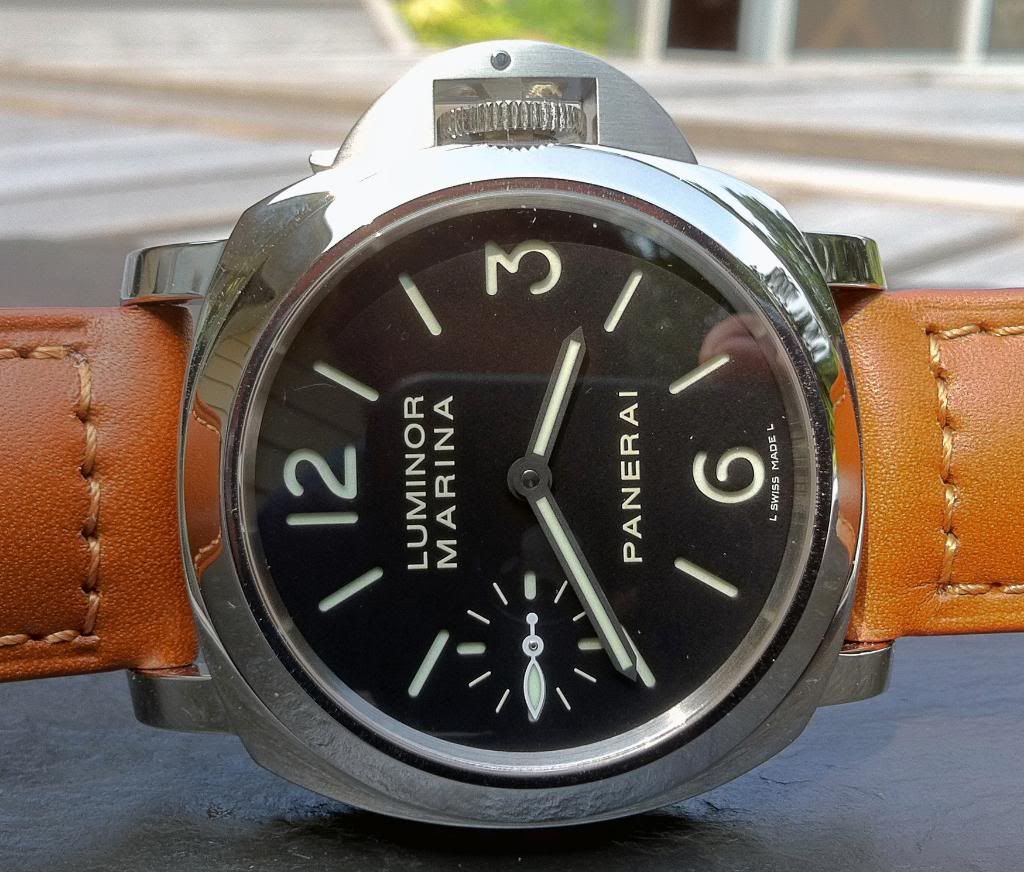
This was a wrist shot before the mods. It did, however, have the 390 cg. This was also before the gen crown was put on. I had sourced a crown from a 390 as well, which has a better thin crown wall like the gen, but it was too wobbly when winding and when closing the lever.
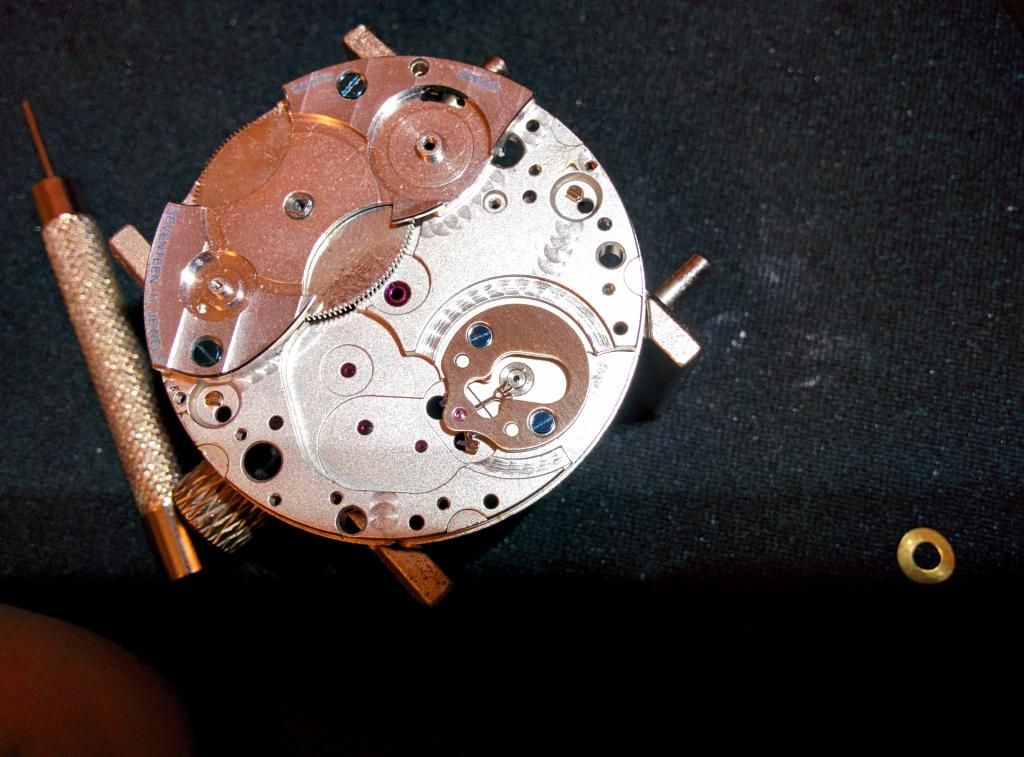
The unmodded (except for the preinstalled Y incabloc) movement:
The movement after applying the gen ratchet and crown gears. These make a world of difference guys. So if you can source these, do not hesitate!
Here it is aside an unmodded 111 movement:

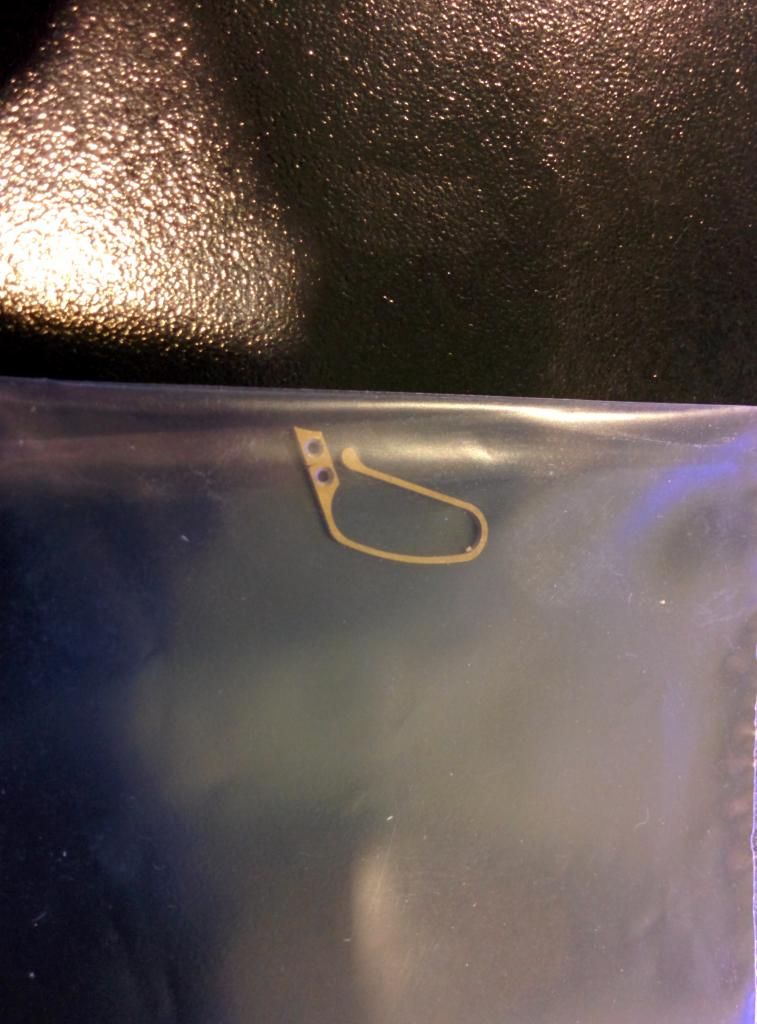
My attempt and polishing the swan neck. Jerryrigged "Black Polishing" with .25 micron diamond paste
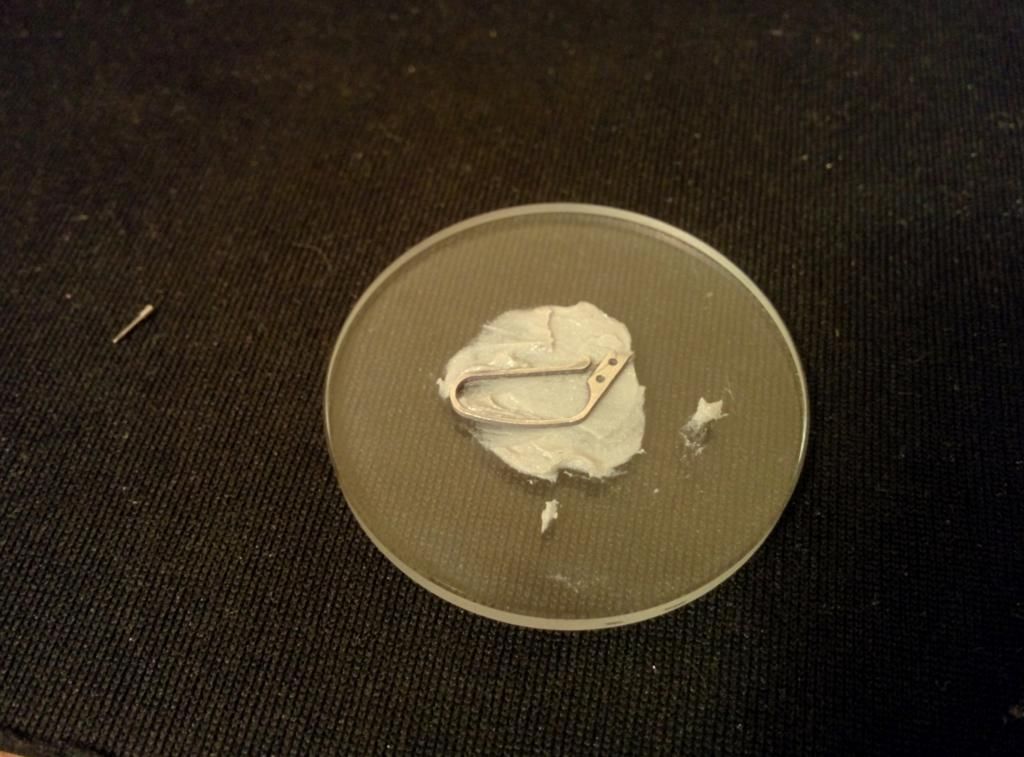
...And the result:
Heres a comparison between the Noob V3 lll CG and the Noob 390 CG (V3 on the left, 390 on the right):
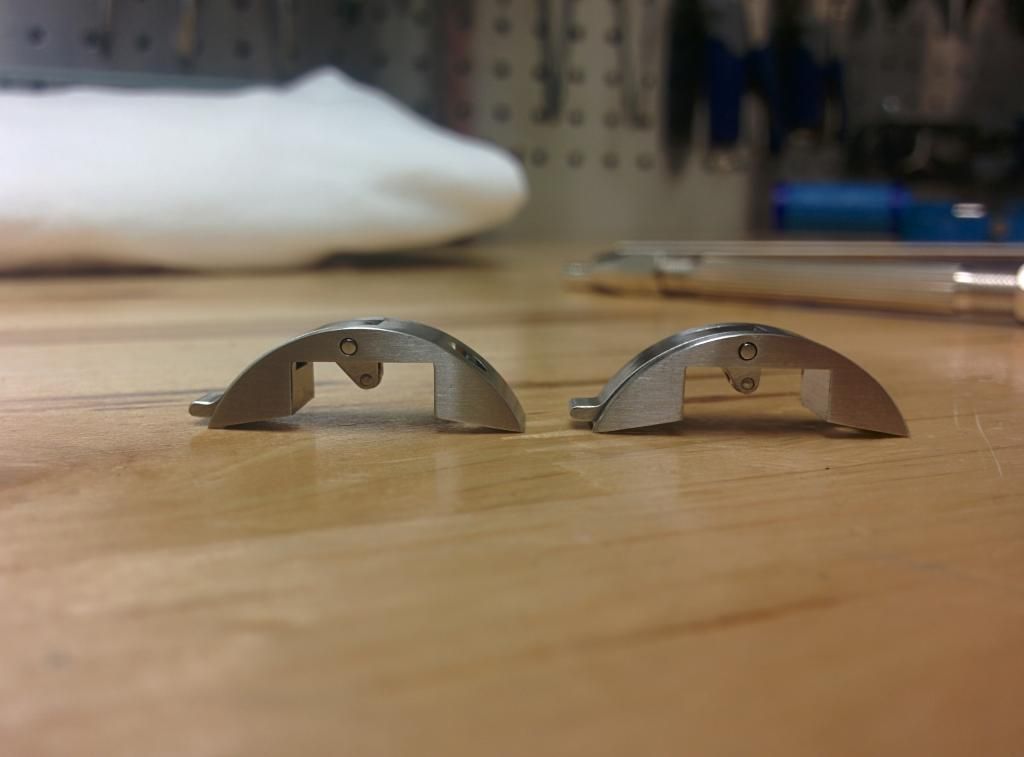
As you can see, the lever support area isn't as angled as on the V3, which is more like the gen.
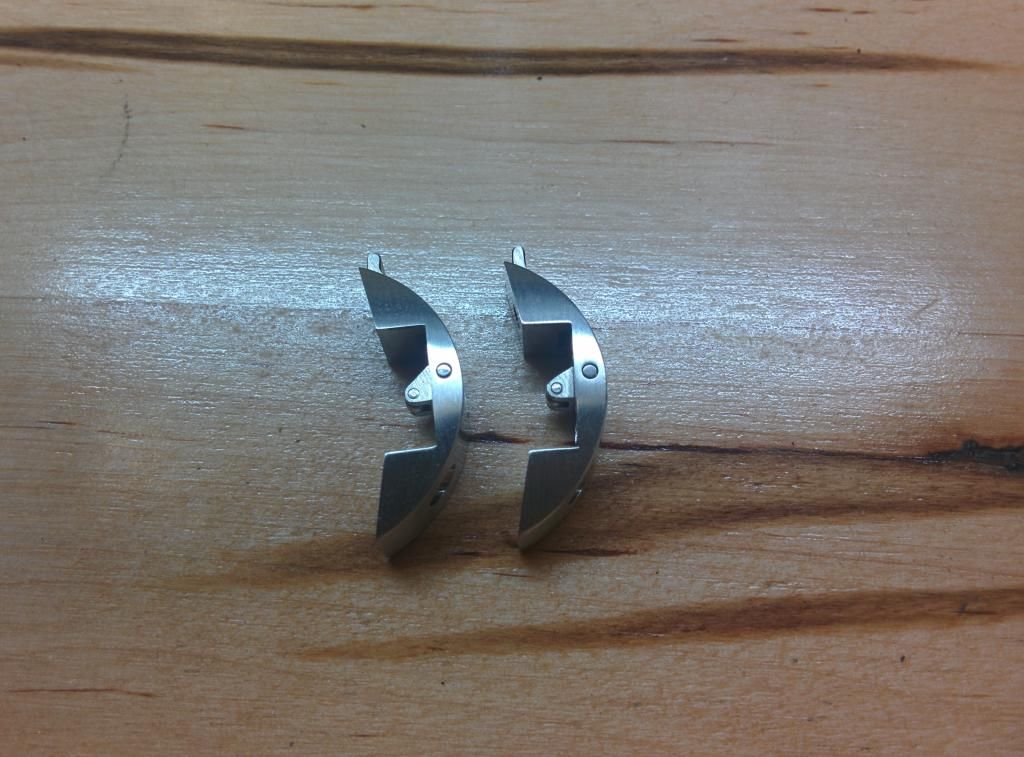
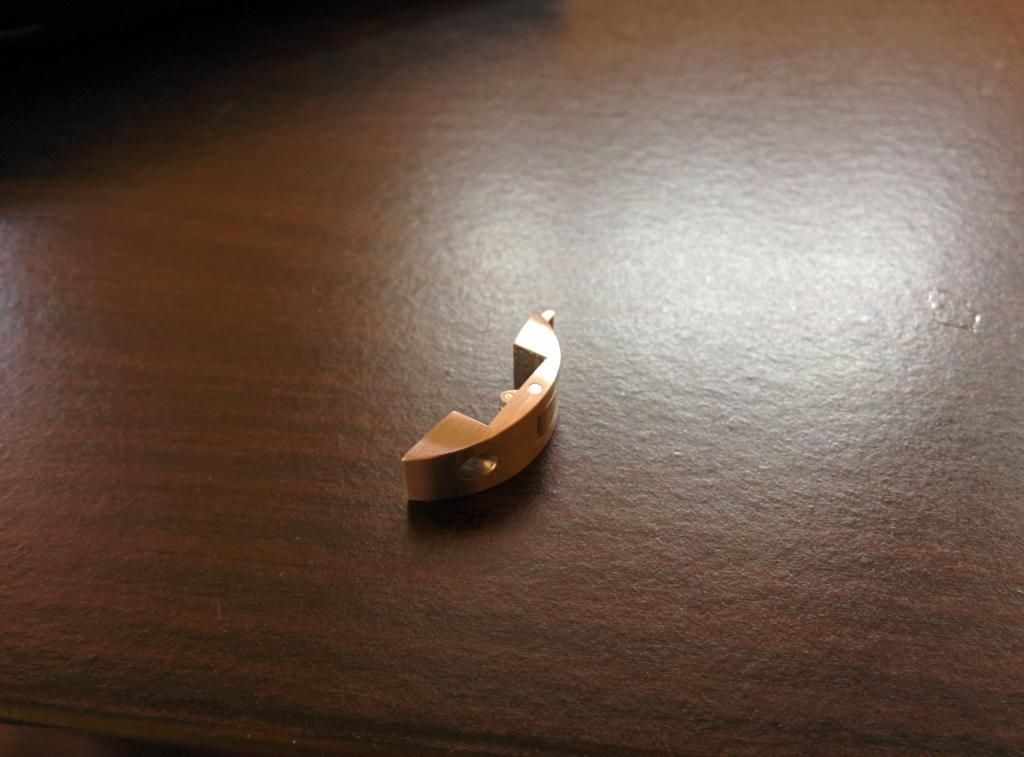
Champfered the edge and polished it slightly. Looks way better now:
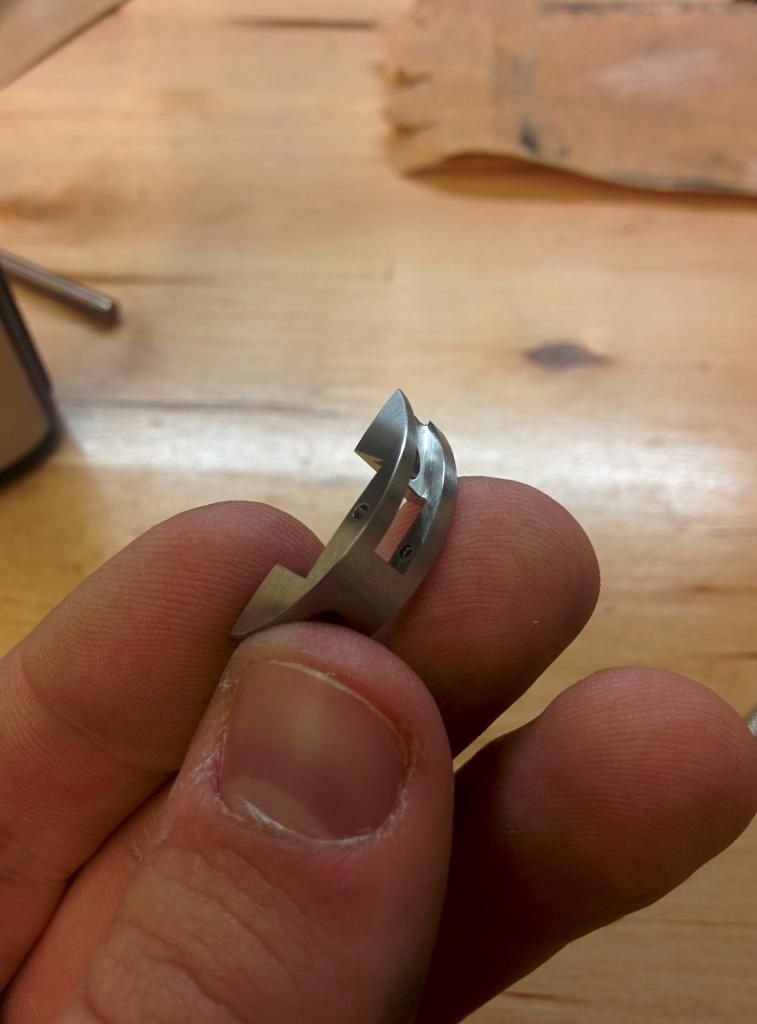
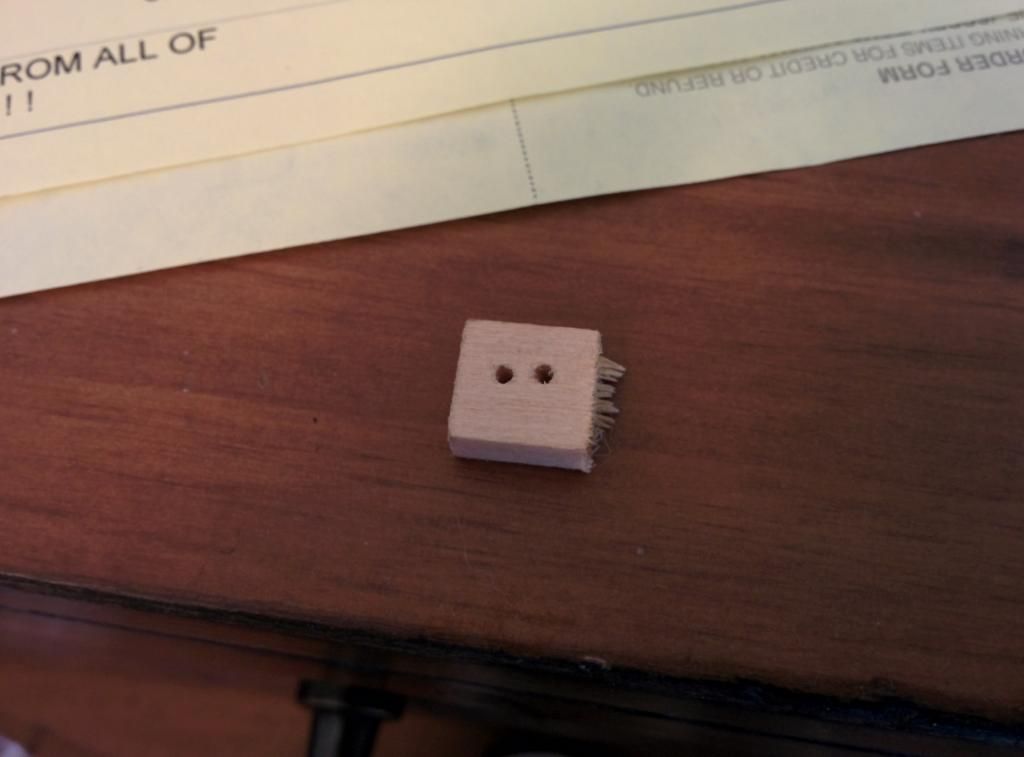
I first flattened and polished the pin using a technique i learned from a thread Projectologist made on RG where he used a pin vice and sandpaper to flatten and polish it, but i wasn't pleased with the result. Even though the pin was completely flush with the mouth of the pin vice, the edges of the pin still seemed to be rounded after polishing. So, I grabbed a small piece of bulsa wood and i drilled a hole just big enough for the pin to fit snuggly inside of it (if you try this, make sure the hole is 100% perfectly verticle or else the pin will have a slanted surface when finished). I put a small piece of rodico on the back to keep the pin from sliding around inside the hole. I the then used 600 grit to flatted the pin. The purpose of the bulsa wood is to keep the pin perfectly verticle and to prevent the edges from rounding while polishing. Once it was perfecly flat from sanding, I put the jig (wood, rodico, and pin) into a vice grip and polished it on a wheel. If you try this, make sure the pin stays perfectly flush with the piece of wood. If it protrudes, the edges will round. if it is recessed, then it won't polish all the way. Once I was finished, I used a wood chopstick with a domed end to press the pin back into the cg. The wood chopstick prevented the freshly polished pin from getting scratched under pressure and the domed end allowed it to be easily recessed into the cg body.
Here are some pics of the setup:
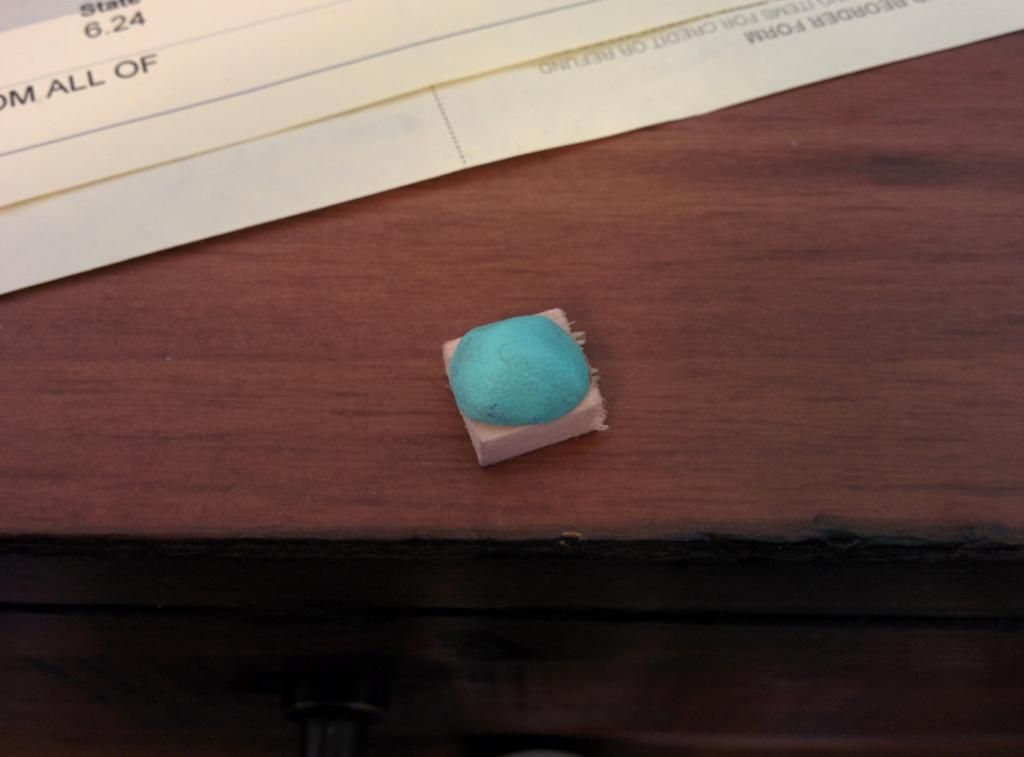
...And the result:

Sunlight Shot with Gen Crown:

Speaking of crown, here's a comparison between 3 crowns; a V3 111 crown, a Noob 390 crown, and a gen crown (in that order). Both of the rep crowns were polished on a wheel so this picture is only meant to compare the wall thickness of the 3.
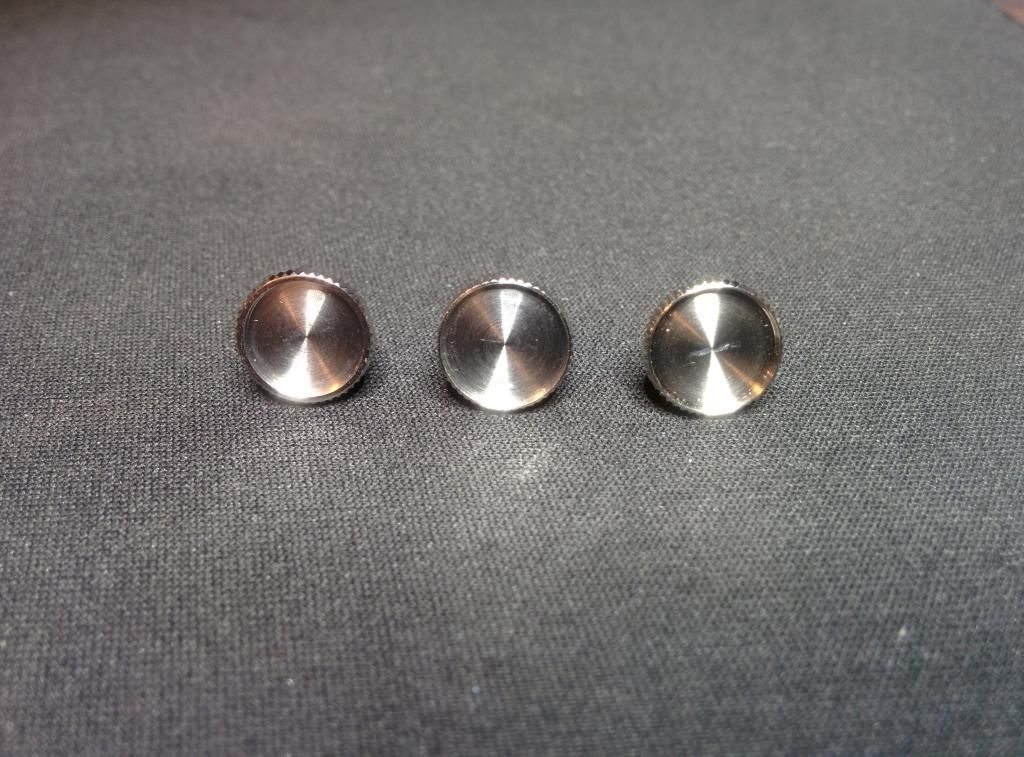
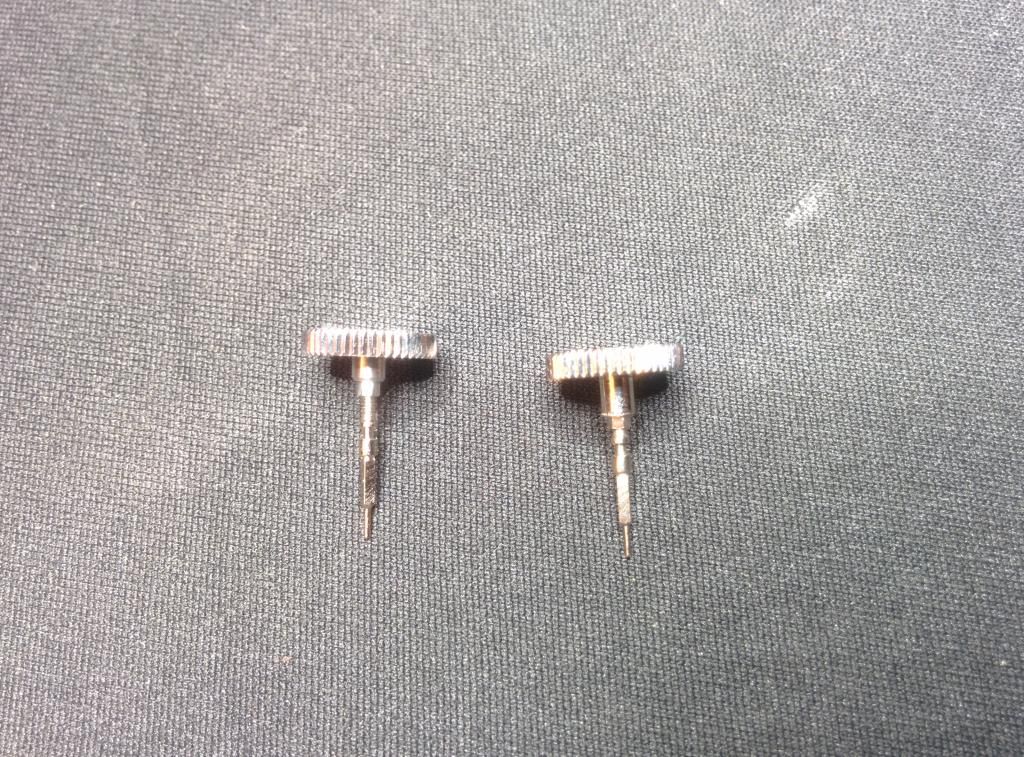
Here is just the Noob 390 crown an the gen (the gen is the one with the longer tube). Notice how even though the 390 crown was polished to as bright as it will go without rounding the teeth, the gen still shines brighter.


Back to the movement. I tested the brushing of the pallet bridge on 600 grit sandpaper, but unfortunatley the surface of the asian pallet bridge isn't 100% flat. So this left it with uneven brushing and brass showing through in a few spots:
Good thing that was a test. I took final one and put it on a junk 6498 base plate to hold it in place and brushed it with a scouring pad. Much better:


Assembled:
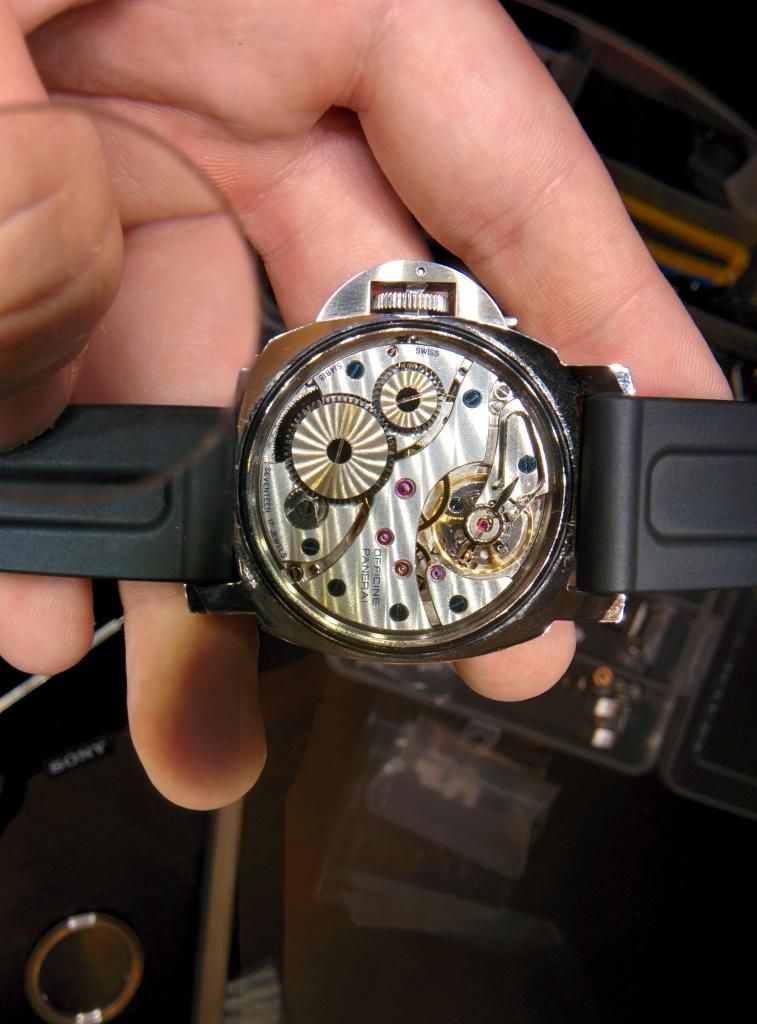
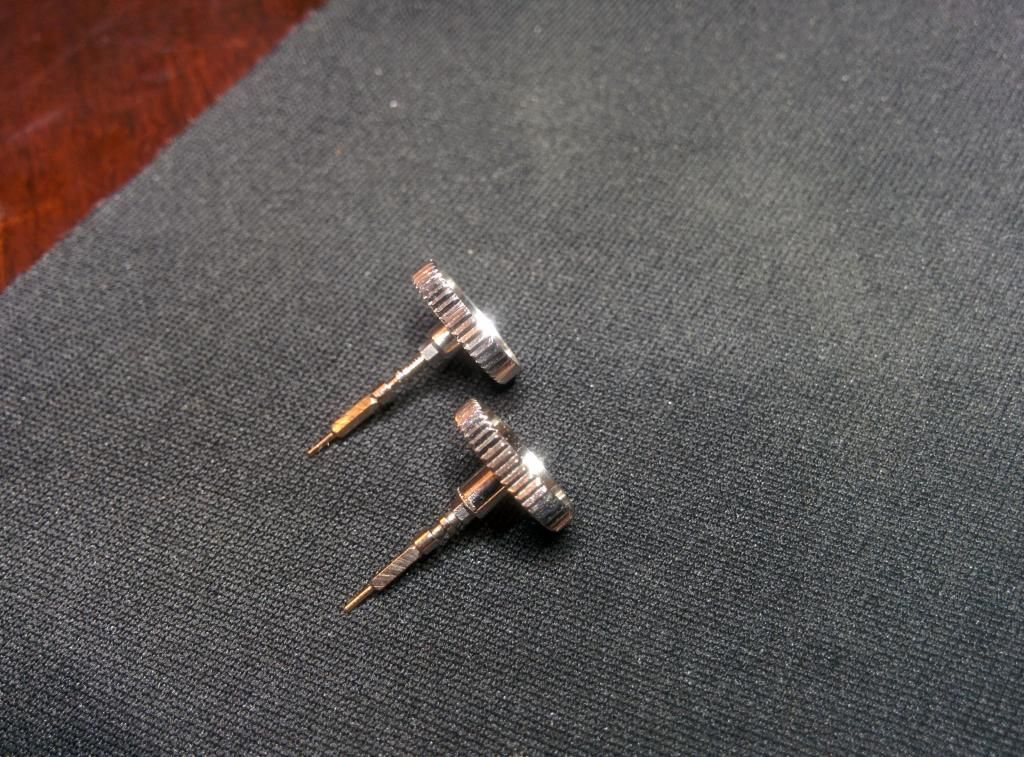
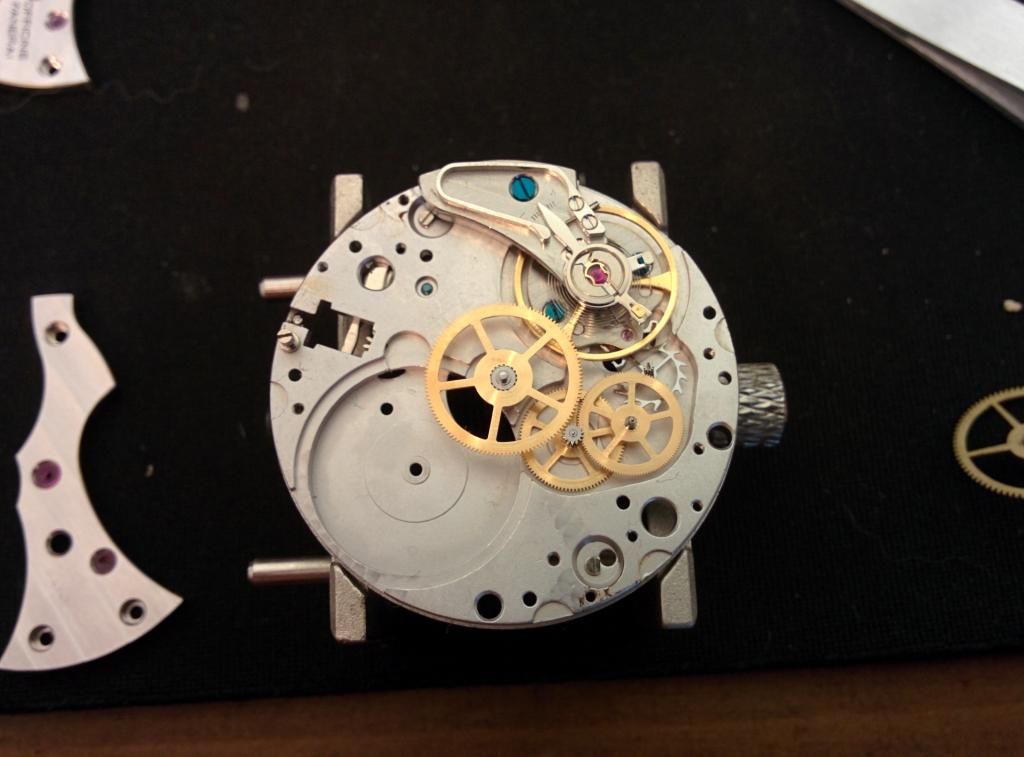
Here is a pic of the current stage of the movement with gen gear train. Notice how the center wheel won't go down all the way (as mentioned earlier).
I recently (more like a few hours ago) purchased a swiss 6498-1 to see if i can swap the center wheel jewel to make the gen center wheel fit. We'll see how it goes. I already successfully swapped some of the jewels on my test movement with ones from a junk eta 6431 movement i had lying around.
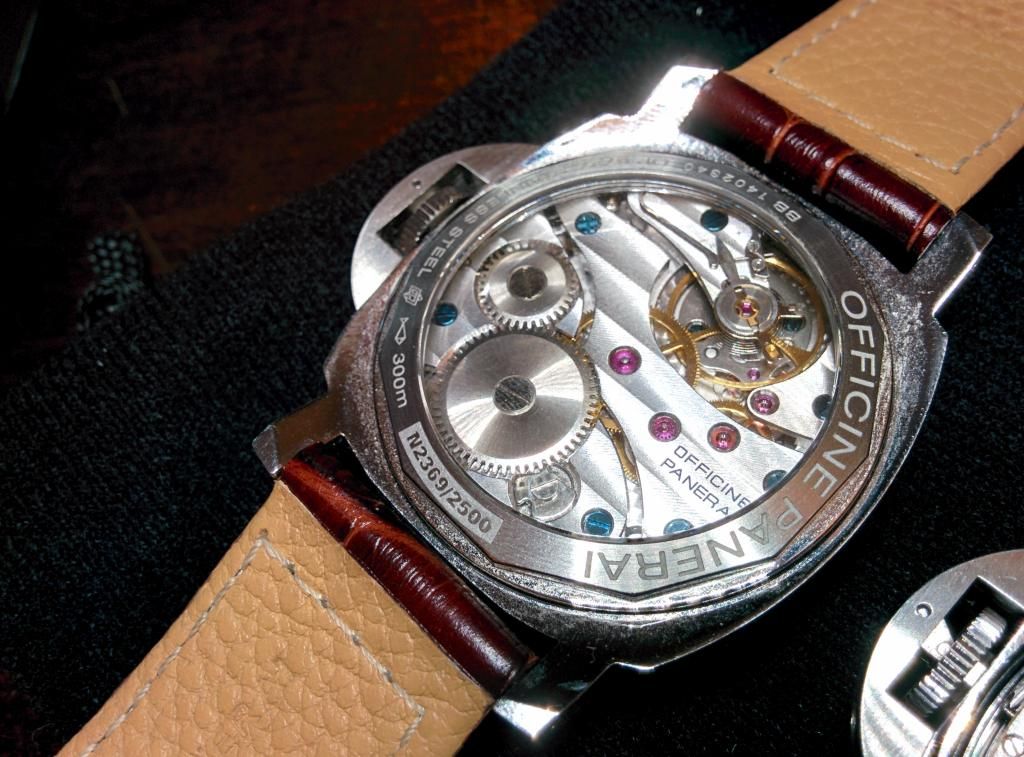
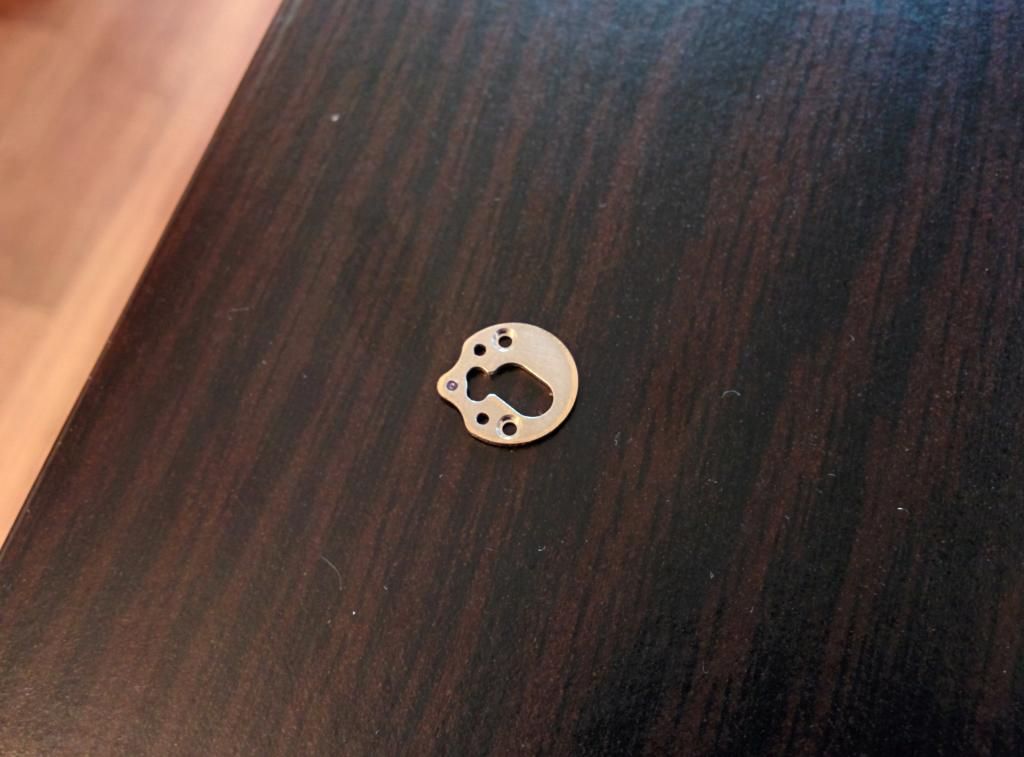
One thing that i have noticed about the asian movements, and I'm sure many others have seen this too, is that the jewels are too pale. they a a more magenta color while the swiss ones are a deeper red. You can even see this in the picture above (the center jewel is asian and the other is swiss). Once i get the swiss 6498 and some better bridge plates that aren't scratched, i plan to swap the jewels so that mine are that deeper red color
I will update this thread as i progress further in this build.
Thanks for reading.
-Sourcing a Noob Pam 390 CG (Better than Noob V3). I champfered the edge of the cg body and the lever (as per gen), flattened and polished the pin and recessed it, and rebrushed the body and lever with 600 grit
-Sourced a Gen crown, adjusted and loctited the crown tube to provide a better snap when closing the cg lever
-Sourced Gen ratchet and crown wheels for the movement. These make the winding feel a lot more like a swiss 6497.
-Brushed the pallet bridge on the movement
I bought the gen gear train for the movement from ofrei, but i'm having a hard time getting the center wheel in to the movement. This is where I need an expert's advice. The diameter of the pinion on the asian center wheel is .99mm while the swiss is 1.01mm. Is there a way to bore out the jewel by .02mm? or can i replace the jewel in the base plate with a swiss one?
I also have a H-fac swan neck with the longer screw that i plan to use. The surface of these swan necks are brushed, so i decided to try to polish it with diamond paste. That resulted in a brass swan neck, but hey, it shined like a mofo. So now i need to find someone who can platinum/rhodium plate it.
Going forward, parts that I'm looking for are:
-A new base plate for the movement with better perlage. The perlage on mine is kind of dull
-New bridge plates that are scratch free. Looks like toro's watchsmith left a few very light scratches on the plates while swapping the incabloc. They are very hard to get a picture of, but they are noticable.
-A new dial. Mine has a QC issue on the 6. The left side of it doesn't have enough lume and you can see part of the white back plate.
If you have any of the above, please let me know
Here are the pics of it so far:
This was a wrist shot before the mods. It did, however, have the 390 cg. This was also before the gen crown was put on. I had sourced a crown from a 390 as well, which has a better thin crown wall like the gen, but it was too wobbly when winding and when closing the lever.

The unmodded (except for the preinstalled Y incabloc) movement:

The movement after applying the gen ratchet and crown gears. These make a world of difference guys. So if you can source these, do not hesitate!

Here it is aside an unmodded 111 movement:


My attempt and polishing the swan neck. Jerryrigged "Black Polishing" with .25 micron diamond paste

...And the result:

Heres a comparison between the Noob V3 lll CG and the Noob 390 CG (V3 on the left, 390 on the right):

As you can see, the lever support area isn't as angled as on the V3, which is more like the gen.

Champfered the edge and polished it slightly. Looks way better now:

I first flattened and polished the pin using a technique i learned from a thread Projectologist made on RG where he used a pin vice and sandpaper to flatten and polish it, but i wasn't pleased with the result. Even though the pin was completely flush with the mouth of the pin vice, the edges of the pin still seemed to be rounded after polishing. So, I grabbed a small piece of bulsa wood and i drilled a hole just big enough for the pin to fit snuggly inside of it (if you try this, make sure the hole is 100% perfectly verticle or else the pin will have a slanted surface when finished). I put a small piece of rodico on the back to keep the pin from sliding around inside the hole. I the then used 600 grit to flatted the pin. The purpose of the bulsa wood is to keep the pin perfectly verticle and to prevent the edges from rounding while polishing. Once it was perfecly flat from sanding, I put the jig (wood, rodico, and pin) into a vice grip and polished it on a wheel. If you try this, make sure the pin stays perfectly flush with the piece of wood. If it protrudes, the edges will round. if it is recessed, then it won't polish all the way. Once I was finished, I used a wood chopstick with a domed end to press the pin back into the cg. The wood chopstick prevented the freshly polished pin from getting scratched under pressure and the domed end allowed it to be easily recessed into the cg body.
Here are some pics of the setup:


...And the result:


Sunlight Shot with Gen Crown:

Speaking of crown, here's a comparison between 3 crowns; a V3 111 crown, a Noob 390 crown, and a gen crown (in that order). Both of the rep crowns were polished on a wheel so this picture is only meant to compare the wall thickness of the 3.

Here is just the Noob 390 crown an the gen (the gen is the one with the longer tube). Notice how even though the 390 crown was polished to as bright as it will go without rounding the teeth, the gen still shines brighter.


Back to the movement. I tested the brushing of the pallet bridge on 600 grit sandpaper, but unfortunatley the surface of the asian pallet bridge isn't 100% flat. So this left it with uneven brushing and brass showing through in a few spots:

Good thing that was a test. I took final one and put it on a junk 6498 base plate to hold it in place and brushed it with a scouring pad. Much better:


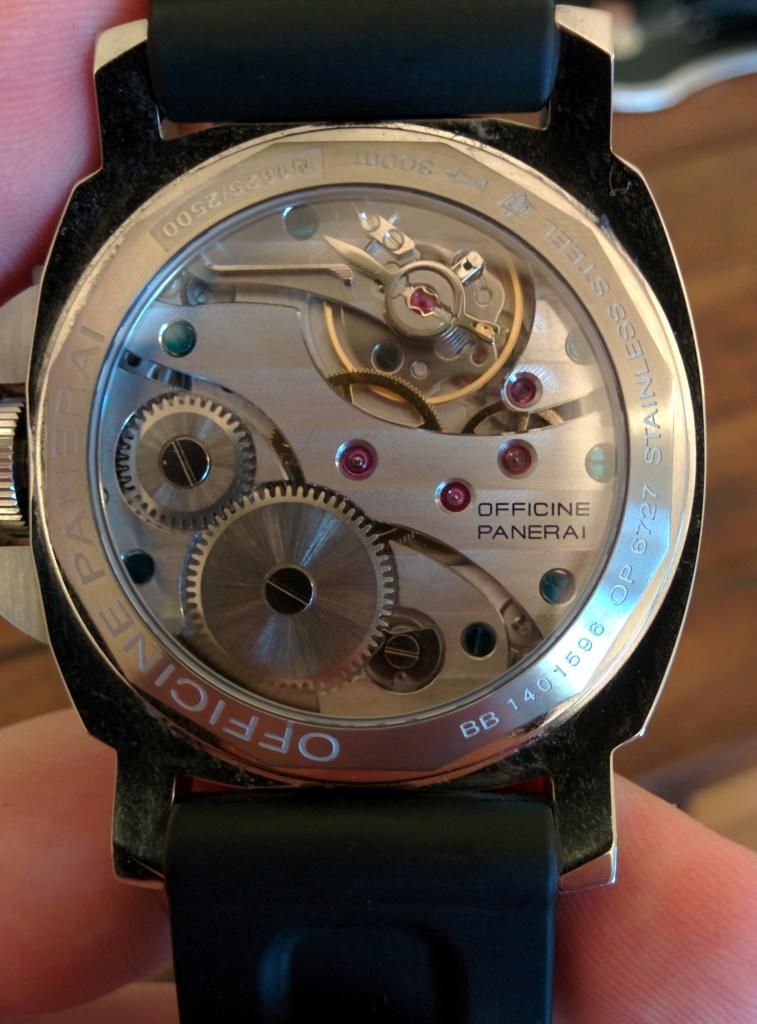
Assembled:

Here is a pic of the current stage of the movement with gen gear train. Notice how the center wheel won't go down all the way (as mentioned earlier).

I recently (more like a few hours ago) purchased a swiss 6498-1 to see if i can swap the center wheel jewel to make the gen center wheel fit. We'll see how it goes. I already successfully swapped some of the jewels on my test movement with ones from a junk eta 6431 movement i had lying around.

One thing that i have noticed about the asian movements, and I'm sure many others have seen this too, is that the jewels are too pale. they a a more magenta color while the swiss ones are a deeper red. You can even see this in the picture above (the center jewel is asian and the other is swiss). Once i get the swiss 6498 and some better bridge plates that aren't scratched, i plan to swap the jewels so that mine are that deeper red color
I will update this thread as i progress further in this build.
Thanks for reading.


")

