- 27/1/13
- 9,280
- 1,892
- 113
Like most of you, I like the Rubens Barrichello models. However, because of the semi-skeletal structure of the gen dial, and the decoration of the gen movement, the reps need modification to fully emulate the gen. Domi's masterly and thorough modification of the RB has been documented, and his latest breakthrough with the CdG decoration has also been updated by Guru. What I want to show you here is a simpler DIY approach to this modification, with the help of my latest purveyor of DIY modification supplies: Mikey2008 over at RG. This mod is not meant to be perfect, so it will not please perfectionists, but it is an ingenious approach that might please night-time or weekend "guerrilla" modders, and it uses a technique that was already suggested by the legendary and now retired modder Sander over at RWG.
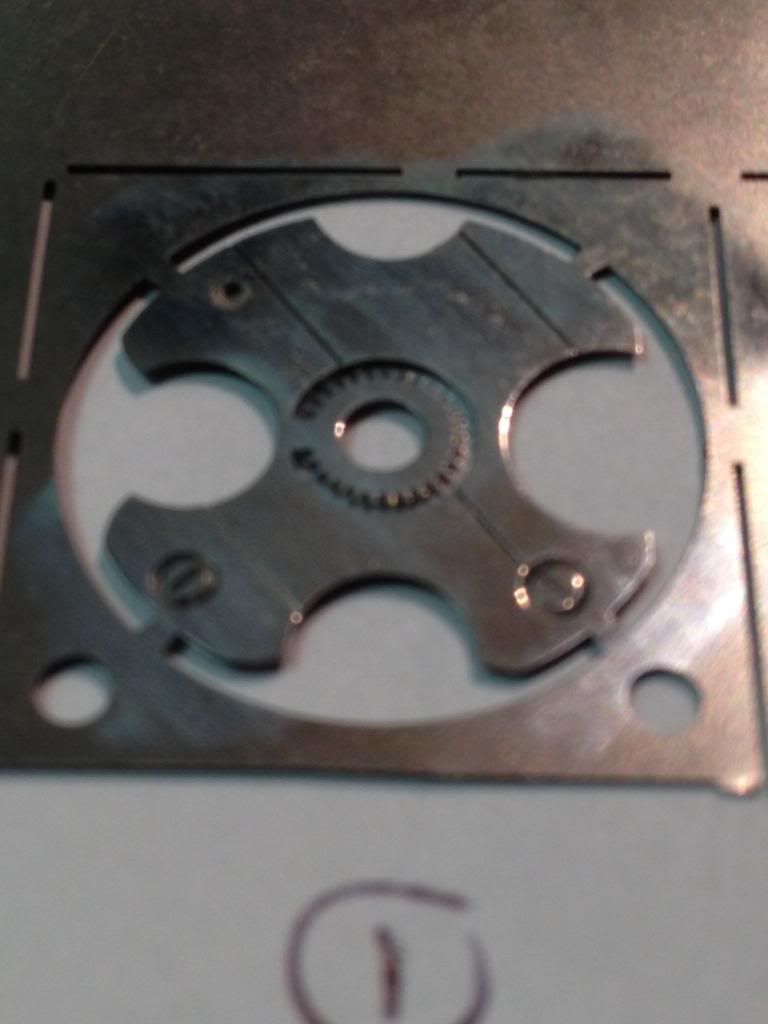
First, about two weeks I received a small envelope containing some plates that Mikey2008 had printed and finished. Here they are:

Notice the warning message: these plates really do have very sharp edges, and must be handled with extreme caution to avoid slicing your fingers: I covered my fingers with finger cots throughout when handing them. You will notice some of the plates have screws already formed into them, and some of them have holes where one might add very thin screw heads of your own. Even though I had perfectly suitable screws to add to these plates, I decided to make things easy for myself and use one of the plates with preformed screw heads. Now the finish of all of these plates is not perfect CdG by any means, and even though I had some tools to simulate a CdG at hand, I decided to forego that perfectionist detour, thinking that the patterning of the CdG is not continuous enough in its presentation through the grill of the front dial to really be noticeable. So, I chose to install Plate 1:
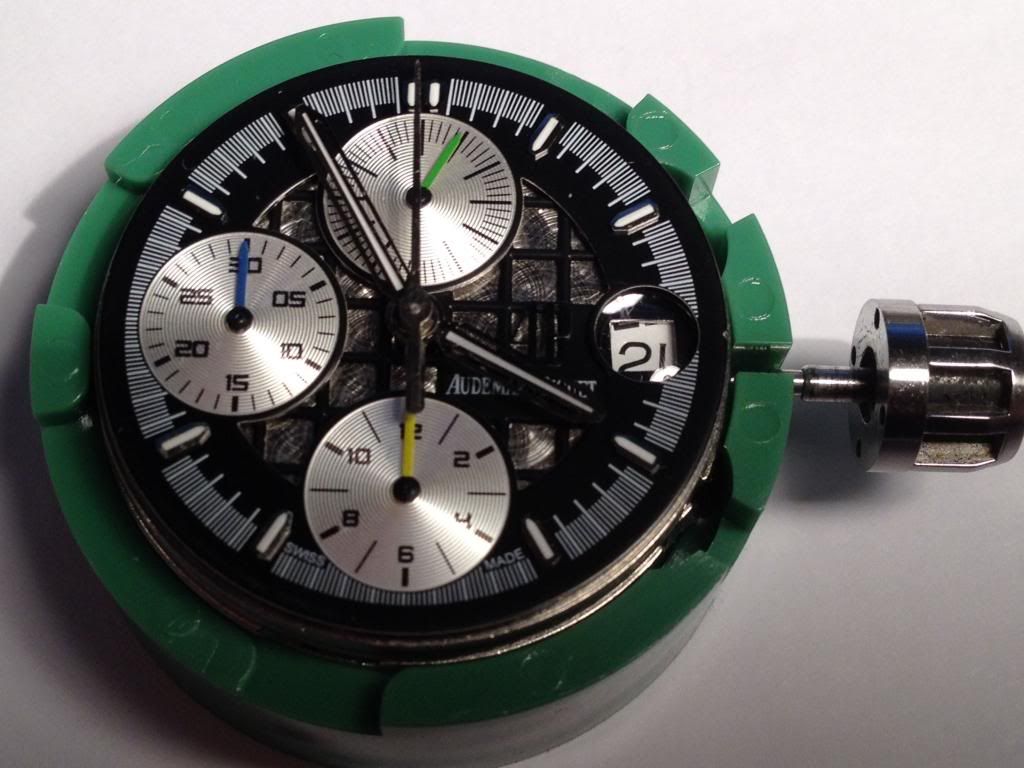
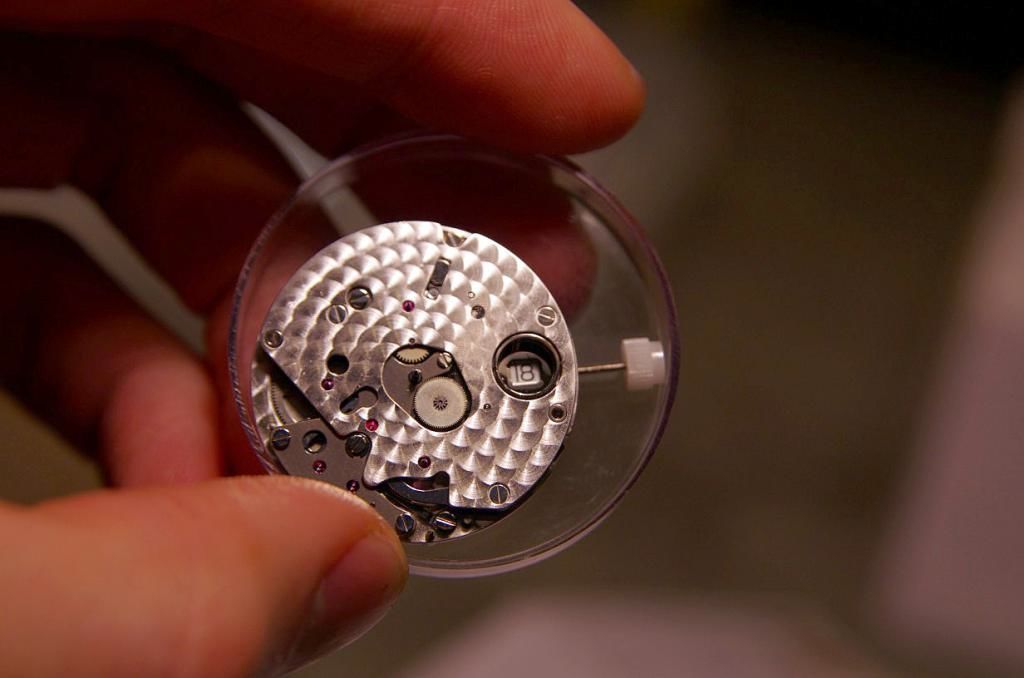
Next came removal of a RB movement with dial:
Using a Bergeon #6 presto tool and some self-made dial protectors I removed the hands of the movement:
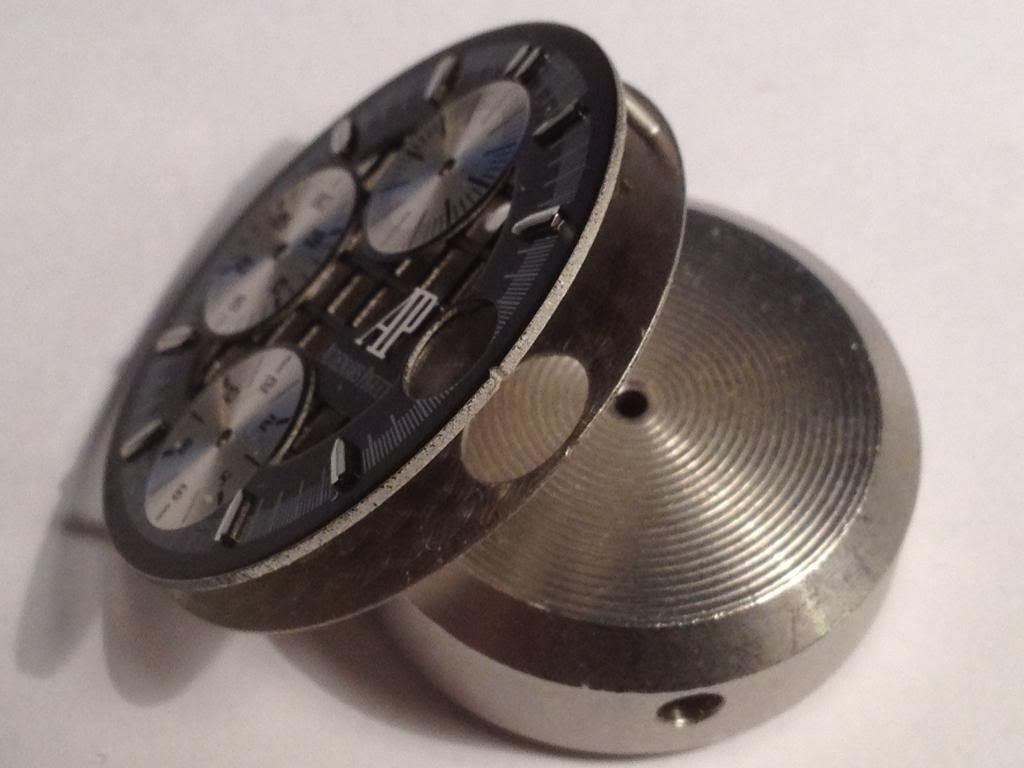
I then removed the dial from the rep movement:
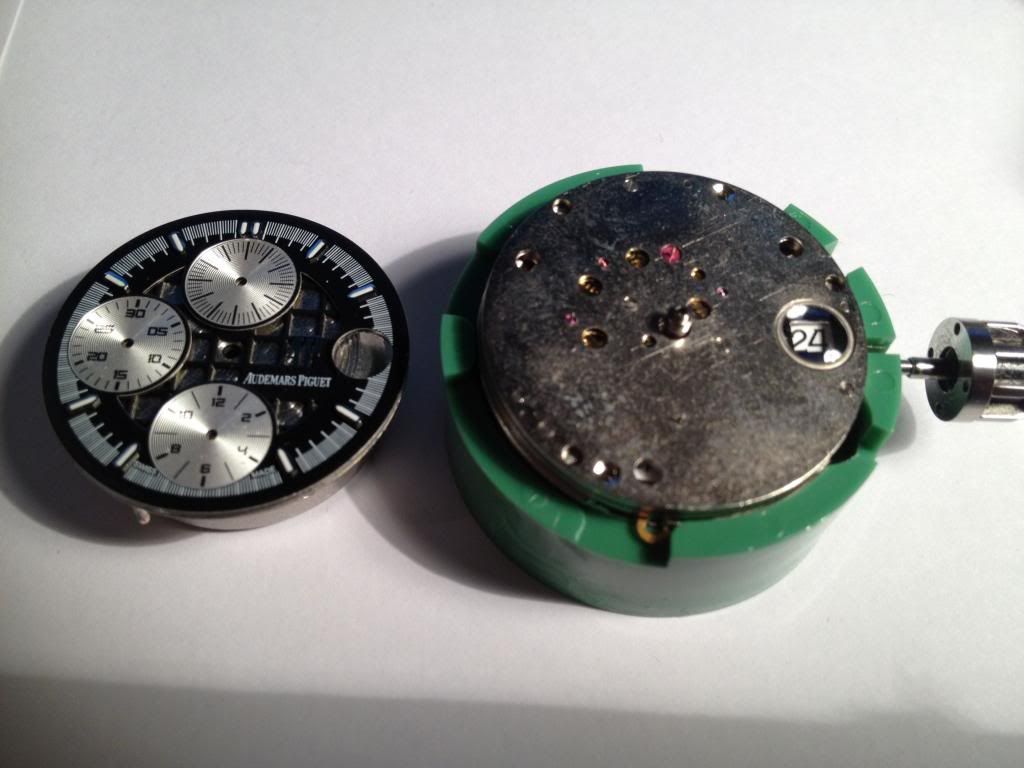
It may not be noticeable at first, but the RB dial is made out of two layers: the front lattice grill, and a decorated backing plate. These were carefully separated from one another so as not to damage the dial feet:
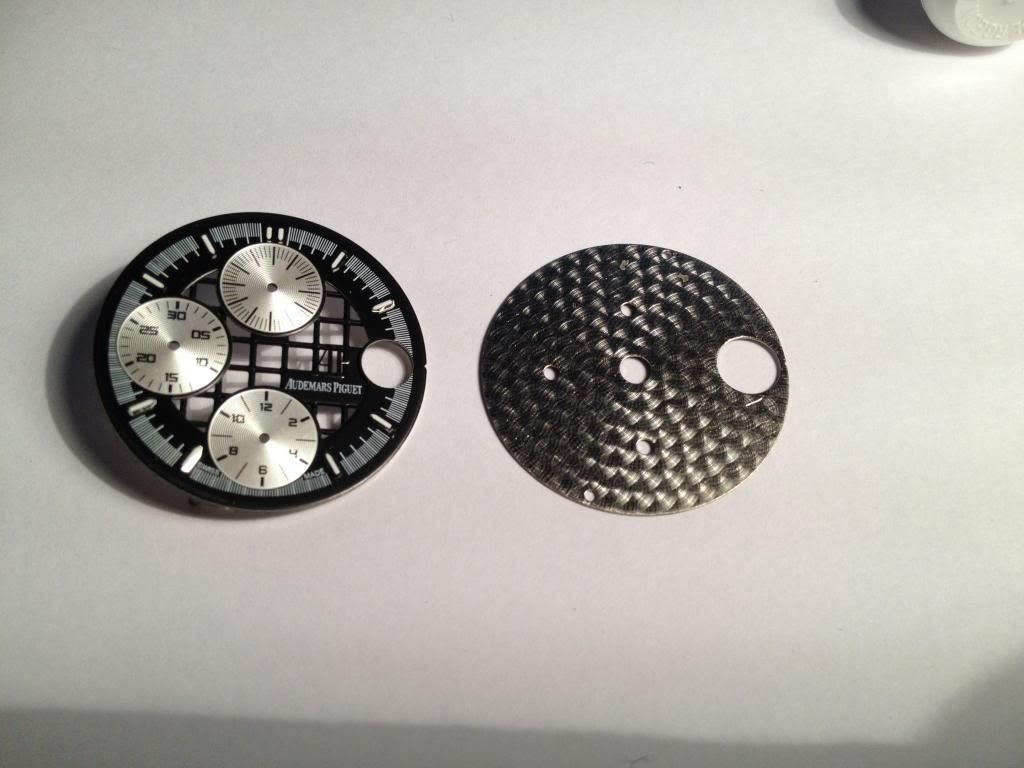
Here are the two separated from one another. The back plate has a decoration much like some LWO 283, but not a CdG pattern like the AP RB.
Here is a picture of an LWO 283 for comparison:
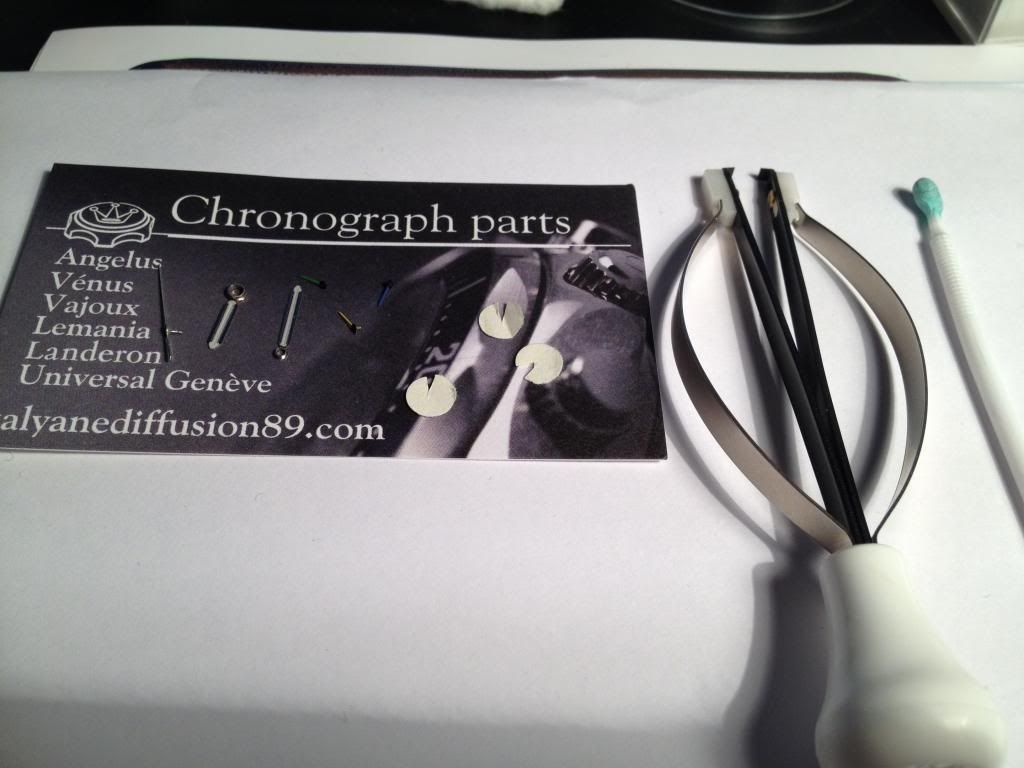
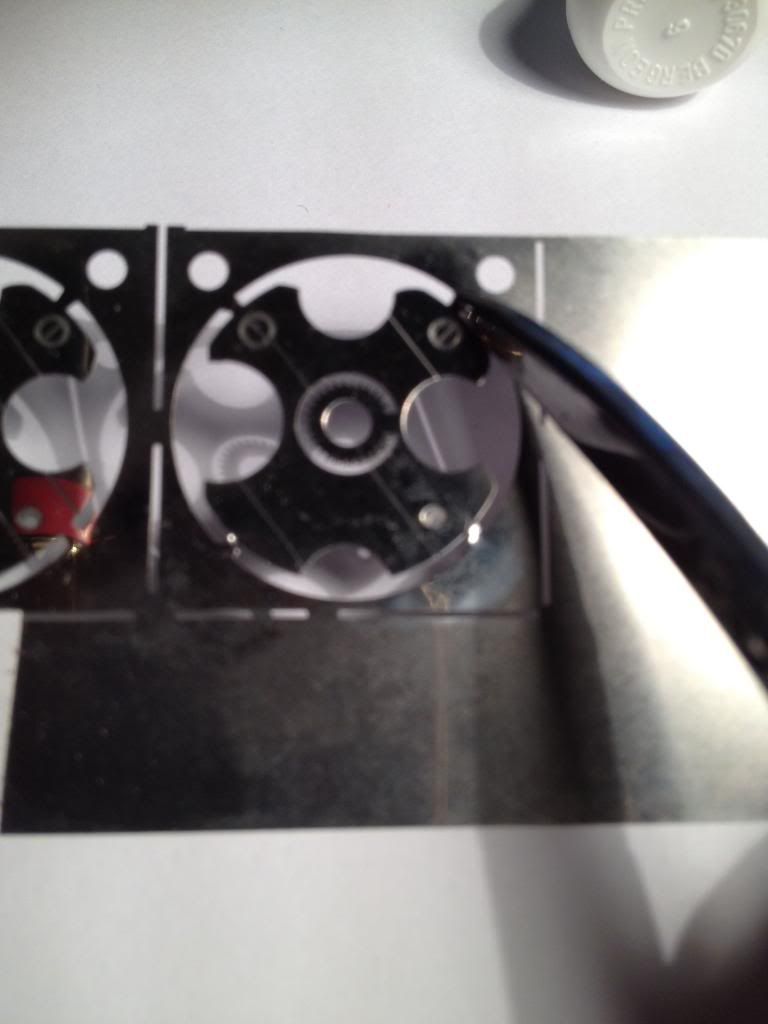
Now came the dangerous part: the cutting out of the sharp back plate #1 from the form: I used a sharp curved cuticle scissor and finger cots to avoid cutting myself:
Once removed, the backplate was further finished and cleaned to remove dust and dirt. Then it was placed in the correct position on the movement front:
Finally the insert was further cleaned with spirits (very important here) and the dial was placed on top of the insert, and a photo taken to document the appearance:
Hands have not yet been reinstalled as I certainly want to play with some other variations with this modification. What you see above are the results of the simplest, quickest, easiest approach possible, made even easier by Mike's design and production work. Notice how the attachment of the centre gear is hidden by the subdial at 12 o'clock very conveniently. Of course, the prospect of making my own CdG pattern on these plates, and adding my own gen-spec screw heads to the plates was too tempting for me to call this finished. And those possibilities will be explored in due time. But this should give you a feel for how the CdG modification can be approached in a simple, yet elegant fashion, accessible to the most impatient of DIY modification hobbyists. Who knows? As time goes by, I might even leave things this way and call it a day.
First, about two weeks I received a small envelope containing some plates that Mikey2008 had printed and finished. Here they are:
Notice the warning message: these plates really do have very sharp edges, and must be handled with extreme caution to avoid slicing your fingers: I covered my fingers with finger cots throughout when handing them. You will notice some of the plates have screws already formed into them, and some of them have holes where one might add very thin screw heads of your own. Even though I had perfectly suitable screws to add to these plates, I decided to make things easy for myself and use one of the plates with preformed screw heads. Now the finish of all of these plates is not perfect CdG by any means, and even though I had some tools to simulate a CdG at hand, I decided to forego that perfectionist detour, thinking that the patterning of the CdG is not continuous enough in its presentation through the grill of the front dial to really be noticeable. So, I chose to install Plate 1:
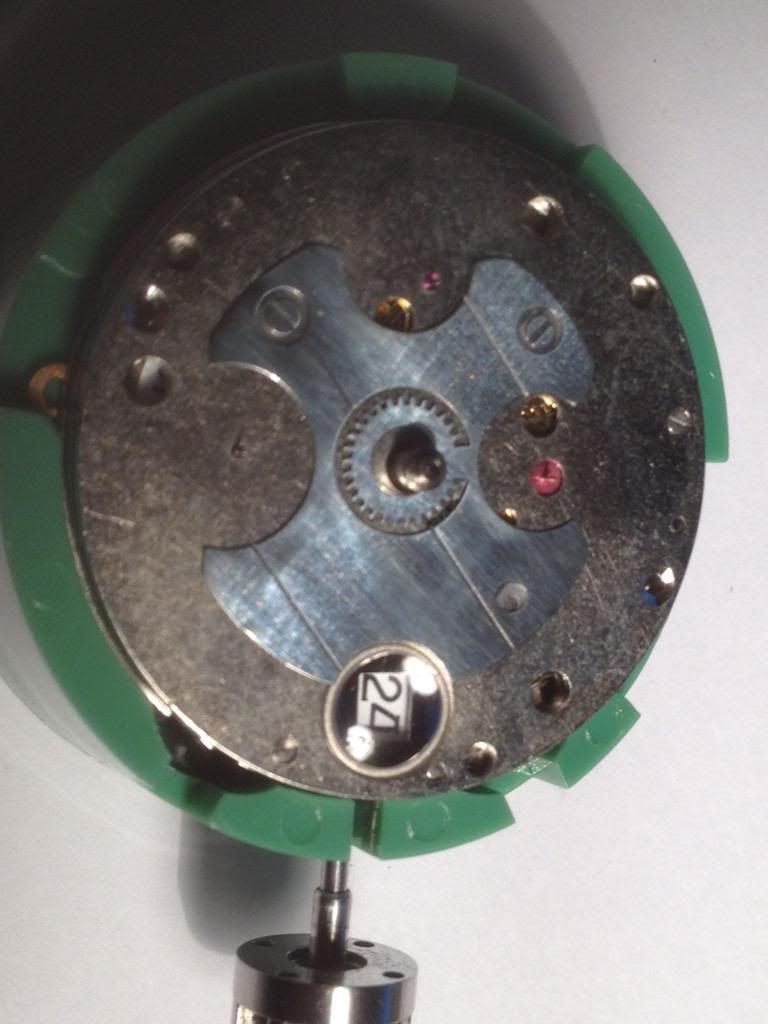
Next came removal of a RB movement with dial:
Using a Bergeon #6 presto tool and some self-made dial protectors I removed the hands of the movement:
I then removed the dial from the rep movement:
It may not be noticeable at first, but the RB dial is made out of two layers: the front lattice grill, and a decorated backing plate. These were carefully separated from one another so as not to damage the dial feet:
Here are the two separated from one another. The back plate has a decoration much like some LWO 283, but not a CdG pattern like the AP RB.
Here is a picture of an LWO 283 for comparison:
Now came the dangerous part: the cutting out of the sharp back plate #1 from the form: I used a sharp curved cuticle scissor and finger cots to avoid cutting myself:
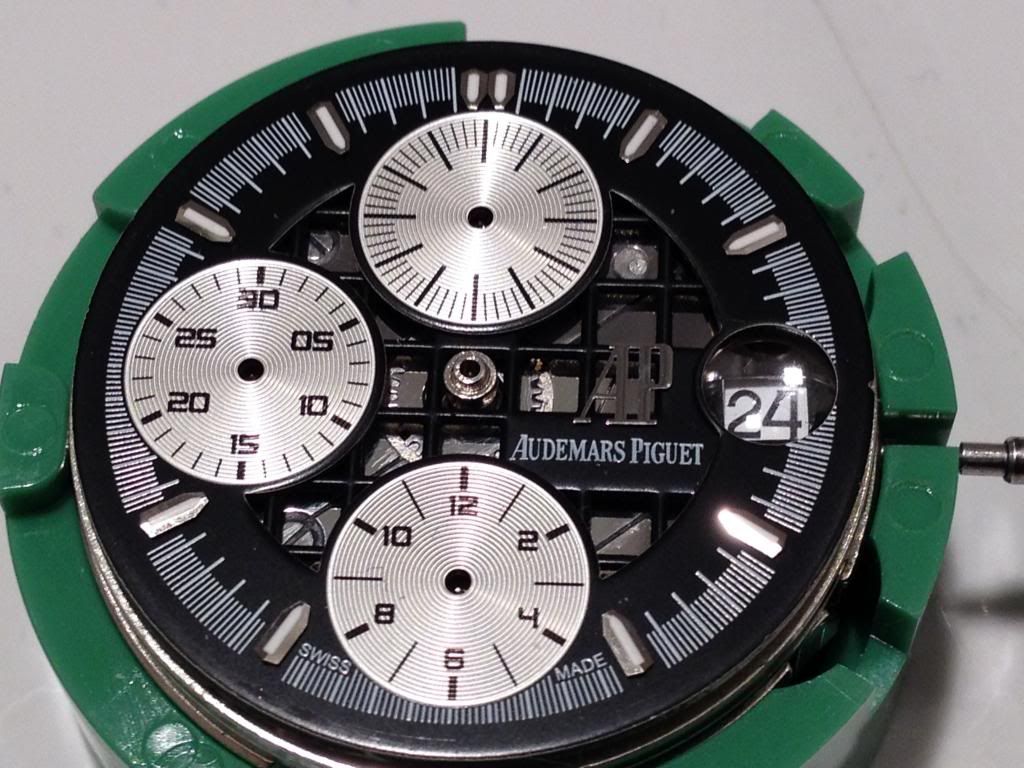
Once removed, the backplate was further finished and cleaned to remove dust and dirt. Then it was placed in the correct position on the movement front:
Finally the insert was further cleaned with spirits (very important here) and the dial was placed on top of the insert, and a photo taken to document the appearance:
Hands have not yet been reinstalled as I certainly want to play with some other variations with this modification. What you see above are the results of the simplest, quickest, easiest approach possible, made even easier by Mike's design and production work. Notice how the attachment of the centre gear is hidden by the subdial at 12 o'clock very conveniently. Of course, the prospect of making my own CdG pattern on these plates, and adding my own gen-spec screw heads to the plates was too tempting for me to call this finished. And those possibilities will be explored in due time. But this should give you a feel for how the CdG modification can be approached in a simple, yet elegant fashion, accessible to the most impatient of DIY modification hobbyists. Who knows? As time goes by, I might even leave things this way and call it a day.
")