I know there is one posted here already but thought I would share with you guys an alternative option
The biggest question that we all run into and or wonder... Is my watch waterproof?
Well the answer is no! There is really no such thing as waterproof, only various degrees of water resistance. With that being said... for most of us we really only concerned with can I get my watch wet and or can I swim with it. I provided the technical answers below but it comes down to two numbers 3ATM and 5ATM. If you are like me with 20 plus watches and the simple thought of being with out a watch for even a week to send it out for testing in which the cost will keep adding up per watch you send out, I needed a viable solution. I need my own tester. Well after researching for the real deal... they are not cheap...lol and I could not justify the expense (ok the wife would not let me justify the expense") ). So it is time to build one. Now the research begins. I found a great tutorial on RG and RWI by mucrewbtp http://www.repgeek.com/showthread.php?t=16317&highlight=water that uses $30 in supplies. My fear is that it leverages a water bottle and putting a lot of pressure inside of it just seems a little bit to risky for me...lol. Do not get me wrong I like things that go boom... but not in front of my face and or in my garage/house . So the search continues.... I stumbled on a DIY over at the Christopher Ward forum http://www.christopherwardforum.com/viewtopic.php?f=33&t=10816 . Bingo!!! this is brilliant. What makes this setup so good is he chose to use a water filter housing rated at 125psi. This will allow you to test up to 5atm with out the fear of it exploding. I pretty much followed his instructions with a couple small modifications. First I wanted to have a gauge on mine also I changed the safety valve to 100psi as I wanted to ensure that I could test to 5atm with out issue since I have a pool and want to be able to know if I can swim with a watch or not. Before I started gathering parts I consulted with several plumbers and engineers in regards to the 125psi rating on the water filter housing and they all confirmed as long as it does not remain under that pressure for an extended period time and with the 100psi safety valve I should not have anything to worry about. Woo hoo time to gather the parts...
). So it is time to build one. Now the research begins. I found a great tutorial on RG and RWI by mucrewbtp http://www.repgeek.com/showthread.php?t=16317&highlight=water that uses $30 in supplies. My fear is that it leverages a water bottle and putting a lot of pressure inside of it just seems a little bit to risky for me...lol. Do not get me wrong I like things that go boom... but not in front of my face and or in my garage/house . So the search continues.... I stumbled on a DIY over at the Christopher Ward forum http://www.christopherwardforum.com/viewtopic.php?f=33&t=10816 . Bingo!!! this is brilliant. What makes this setup so good is he chose to use a water filter housing rated at 125psi. This will allow you to test up to 5atm with out the fear of it exploding. I pretty much followed his instructions with a couple small modifications. First I wanted to have a gauge on mine also I changed the safety valve to 100psi as I wanted to ensure that I could test to 5atm with out issue since I have a pool and want to be able to know if I can swim with a watch or not. Before I started gathering parts I consulted with several plumbers and engineers in regards to the 125psi rating on the water filter housing and they all confirmed as long as it does not remain under that pressure for an extended period time and with the 100psi safety valve I should not have anything to worry about. Woo hoo time to gather the parts...
Like I said above I pretty much followed the tutorial that I posted above and for those that do not want to make the jump I have documented my build. (I feel I need to give credit were credit is deserved)
Parts List
Pentek 158599 1/4" 3G Slim Line 10" Clear Housing $25.63
http://www.filtersfast.com/Pentek-158599-Filter-Housing.asp
2-1/2" Dry Utility Pressure Gauge - Blk.Steel 1/4" Lower Mount, 0-160psi $7.21
[ame="http://www.amazon.com/dp/B006K2RNN4/ref=pe_175190_21431760_M3T1_ST1_dp_1"]2-1/2" Dry Utility Pressure Gauge - Blk.Steel 1/4" Lower Mount, 0-160psi: Amazon.com: Industrial & Scientific@@AMEPARAM@@http://ecx.images-amazon.com/images/I/51H%2BFJYGAML.@@AMEPARAM@@51H%2BFJYGAML[/ame]
9545K27 - Push-in Tapered Round Rubber Plug, Through Hole, Size 2, 13/64" Hole Size, Packs of 25 $6.25
http://www.mcmaster.com/#catalog/119/3753/=le109q
9545K63 - Push-in Tapered Round Rubber Plug, Through Hole, Size 13-1/2, 13/64" Hole Size, Packs of 3 $11.05
http://www.mcmaster.com/#catalog/119/3753/=le10vo
85765K82 - Oil-Resistant High-Temperature ECH Rubber, 1/16" Thick, 2" Width, 36" Length, Black $7.91
http://www.mcmaster.com/#catalog/119/3523/=le11fl
48435K72 - Extend-Life ASME Pop-Safety Valve with Test Ring, Brass, Medium Flow, 1/4 NPT Male, 100 PSI (note: make sure you pick the proper pressure) $5.26
http://www.mcmaster.com/#catalog/119/485/=le11qo
4912K72 - Miniature Chrome-Plated Brass Ball Valve, Wedge Handle, 1/4" NPT Female X Male Connections $6.00
http://www.mcmaster.com/#catalog/119/433/=le12fi
89895K227 - Type 304 Smooth-Bore Seamless Stainless Steel Tubing, 1/4" OD, .12" ID, .065 Wall, 1' Length $7.27
http://www.mcmaster.com/#catalog/119/149/=le12wz
8063K38 - Brass Air Fill Valve, Straight, 1/4 NPT, 1-3/8" Overall Length $4.43
http://www.mcmaster.com/#catalog/119/467/=le139z
9151K52 - (2ea) Nickel-Plated Brass Threaded Pipe Fitting, 1/4" Pipe Size, Tee, Female X Female X Male $5.76ea
http://www.mcmaster.com/#catalog/119/35/=le13z6
Teflon tape (found at any hardware store) $2.00
Technical information:
* There is all sorts of information in regards to water resistance for watches on the internet. After doing much research the above was taken from wikipedia. If you want to learn more about the basics start here
[ame="http://en.wikipedia.org/wiki/Water_Resistant_mark"]Water Resistant mark - Wikipedia, the free encyclopedia[/ame]
Water Resistant 3 ATM or 30*m
Suitable for everyday use. Splash/rain resistant. NOT suitable for showering, bathing, swimming, snorkelling, water related work and fishing.
Water Resistant 5 ATM or 50*m
Suitable for swimming, white water rafting, non-snorkeling water related work, and fishing.
* As you can see below I provided some conversions based on various gauges. I could not find an ATM guage but I did find a gauge that measures in bars and PSI. Being that Bars are almost 1:1 for ATM measuring in Bars will be good enough for me
1 Atm = 1.01325 Bars
3 Atm = 3.039749999999999730 Bars
5 Atm = 5.06625 Bars
1 Atm = 14.6959488 Psi
3 Atm = 44.08784640000000365 Psi
5 Atm = 73.479744 Psi
1 Bar = 14.5037738 Psi
3 Bars = 43.5113214 Psi
5 Bars = 72.518869 Psi
The Build:
Here is pics of the parts before we put it all together

Notice how thick this is


The build
The plumbing setup (note the direction of the flow)

Bending the steel tube (optional)
First have to mark the depth of the hole then mark after the thickness of the two rubber stops that the watch sits in. Once you have that you know where to start your bend


now slide on the two big stoppers and then the two little stoppers. (you will need to trim one of the small stoppers so everything sits flush) (Also you may need to lube the steel rod a bit to slide the stoppers on. It is very tight and thats how you want it to stay)
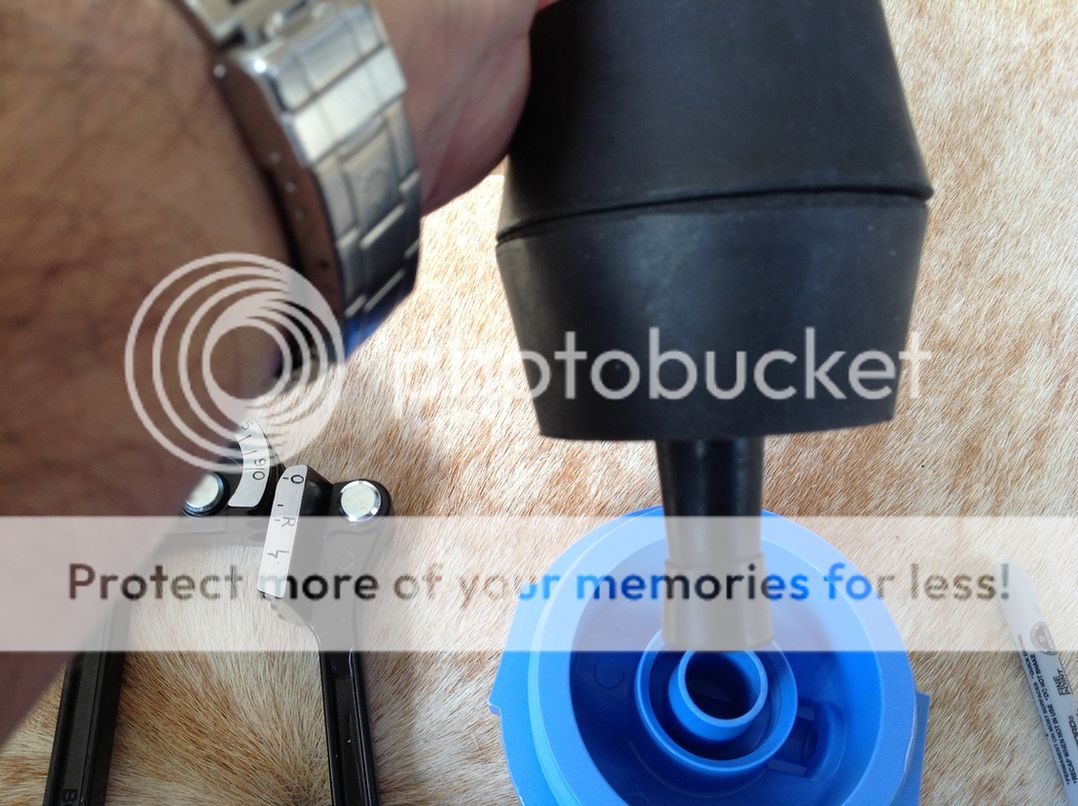
This is how it should look once you have them stacked. You need to know stick tube assembly into the filter lid
Final lid assembly


Almost done....
Need to make a rubber strap to hold the watch.... pretty self explanatory. Cut the desired width, make holes with hole punch

Put watch on rubber strap nato style and place on steel tube so the watch rests on the stopper base

After it is built

Test run at 3 ATM (i know it is not exact.. I had a leak that I needed to fix)

Test run at 5 ATM (i know it is not exact.. I had a leak that I needed to fix)

5 ATM Real Deal
Put watch and water in container screw down lid. hand tight is sufficient. Pump up to either 3 or 5 ATM allow tester to sit for 3 minutes to allow pressurization of the watch to adjust


After 3 min flip vessel over so the watch is submerged in water. Once watch is under water turn the handle to release the air out of the vessel. If the watch has a leak you will see a stream of bubbles coming from the watch. It will be much different than the little bubbles you see around the watch and or bezel. (if you see a stream of bubbles flip the container over immediately to get it of the water. Note where it came from... fix and try again).


My gen seamaster passed the test
I hope you enjoyed and this helps.
The biggest question that we all run into and or wonder... Is my watch waterproof?
Well the answer is no! There is really no such thing as waterproof, only various degrees of water resistance. With that being said... for most of us we really only concerned with can I get my watch wet and or can I swim with it. I provided the technical answers below but it comes down to two numbers 3ATM and 5ATM. If you are like me with 20 plus watches and the simple thought of being with out a watch for even a week to send it out for testing in which the cost will keep adding up per watch you send out, I needed a viable solution. I need my own tester. Well after researching for the real deal... they are not cheap...lol and I could not justify the expense (ok the wife would not let me justify the expense
). So it is time to build one. Now the research begins. I found a great tutorial on RG and RWI by mucrewbtp http://www.repgeek.com/showthread.php?t=16317&highlight=water that uses $30 in supplies. My fear is that it leverages a water bottle and putting a lot of pressure inside of it just seems a little bit to risky for me...lol. Do not get me wrong I like things that go boom... but not in front of my face and or in my garage/house . So the search continues.... I stumbled on a DIY over at the Christopher Ward forum http://www.christopherwardforum.com/viewtopic.php?f=33&t=10816 . Bingo!!! this is brilliant. What makes this setup so good is he chose to use a water filter housing rated at 125psi. This will allow you to test up to 5atm with out the fear of it exploding. I pretty much followed his instructions with a couple small modifications. First I wanted to have a gauge on mine also I changed the safety valve to 100psi as I wanted to ensure that I could test to 5atm with out issue since I have a pool and want to be able to know if I can swim with a watch or not. Before I started gathering parts I consulted with several plumbers and engineers in regards to the 125psi rating on the water filter housing and they all confirmed as long as it does not remain under that pressure for an extended period time and with the 100psi safety valve I should not have anything to worry about. Woo hoo time to gather the parts...Like I said above I pretty much followed the tutorial that I posted above and for those that do not want to make the jump I have documented my build. (I feel I need to give credit were credit is deserved)
Parts List
Pentek 158599 1/4" 3G Slim Line 10" Clear Housing $25.63
http://www.filtersfast.com/Pentek-158599-Filter-Housing.asp
2-1/2" Dry Utility Pressure Gauge - Blk.Steel 1/4" Lower Mount, 0-160psi $7.21
[ame="http://www.amazon.com/dp/B006K2RNN4/ref=pe_175190_21431760_M3T1_ST1_dp_1"]2-1/2" Dry Utility Pressure Gauge - Blk.Steel 1/4" Lower Mount, 0-160psi: Amazon.com: Industrial & Scientific@@AMEPARAM@@http://ecx.images-amazon.com/images/I/51H%2BFJYGAML.@@AMEPARAM@@51H%2BFJYGAML[/ame]
9545K27 - Push-in Tapered Round Rubber Plug, Through Hole, Size 2, 13/64" Hole Size, Packs of 25 $6.25
http://www.mcmaster.com/#catalog/119/3753/=le109q
9545K63 - Push-in Tapered Round Rubber Plug, Through Hole, Size 13-1/2, 13/64" Hole Size, Packs of 3 $11.05
http://www.mcmaster.com/#catalog/119/3753/=le10vo
85765K82 - Oil-Resistant High-Temperature ECH Rubber, 1/16" Thick, 2" Width, 36" Length, Black $7.91
http://www.mcmaster.com/#catalog/119/3523/=le11fl
48435K72 - Extend-Life ASME Pop-Safety Valve with Test Ring, Brass, Medium Flow, 1/4 NPT Male, 100 PSI (note: make sure you pick the proper pressure) $5.26
http://www.mcmaster.com/#catalog/119/485/=le11qo
4912K72 - Miniature Chrome-Plated Brass Ball Valve, Wedge Handle, 1/4" NPT Female X Male Connections $6.00
http://www.mcmaster.com/#catalog/119/433/=le12fi
89895K227 - Type 304 Smooth-Bore Seamless Stainless Steel Tubing, 1/4" OD, .12" ID, .065 Wall, 1' Length $7.27
http://www.mcmaster.com/#catalog/119/149/=le12wz
8063K38 - Brass Air Fill Valve, Straight, 1/4 NPT, 1-3/8" Overall Length $4.43
http://www.mcmaster.com/#catalog/119/467/=le139z
9151K52 - (2ea) Nickel-Plated Brass Threaded Pipe Fitting, 1/4" Pipe Size, Tee, Female X Female X Male $5.76ea
http://www.mcmaster.com/#catalog/119/35/=le13z6
Teflon tape (found at any hardware store) $2.00
Technical information:
* There is all sorts of information in regards to water resistance for watches on the internet. After doing much research the above was taken from wikipedia. If you want to learn more about the basics start here
[ame="http://en.wikipedia.org/wiki/Water_Resistant_mark"]Water Resistant mark - Wikipedia, the free encyclopedia[/ame]
Water Resistant 3 ATM or 30*m
Suitable for everyday use. Splash/rain resistant. NOT suitable for showering, bathing, swimming, snorkelling, water related work and fishing.
Water Resistant 5 ATM or 50*m
Suitable for swimming, white water rafting, non-snorkeling water related work, and fishing.
* As you can see below I provided some conversions based on various gauges. I could not find an ATM guage but I did find a gauge that measures in bars and PSI. Being that Bars are almost 1:1 for ATM measuring in Bars will be good enough for me
1 Atm = 1.01325 Bars
3 Atm = 3.039749999999999730 Bars
5 Atm = 5.06625 Bars
1 Atm = 14.6959488 Psi
3 Atm = 44.08784640000000365 Psi
5 Atm = 73.479744 Psi
1 Bar = 14.5037738 Psi
3 Bars = 43.5113214 Psi
5 Bars = 72.518869 Psi
The Build:
Here is pics of the parts before we put it all together
Notice how thick this is
The build
The plumbing setup (note the direction of the flow)
Bending the steel tube (optional)
First have to mark the depth of the hole then mark after the thickness of the two rubber stops that the watch sits in. Once you have that you know where to start your bend
now slide on the two big stoppers and then the two little stoppers. (you will need to trim one of the small stoppers so everything sits flush) (Also you may need to lube the steel rod a bit to slide the stoppers on. It is very tight and thats how you want it to stay)
This is how it should look once you have them stacked. You need to know stick tube assembly into the filter lid
Final lid assembly
Almost done....
Need to make a rubber strap to hold the watch.... pretty self explanatory. Cut the desired width, make holes with hole punch
Put watch on rubber strap nato style and place on steel tube so the watch rests on the stopper base
After it is built
Test run at 3 ATM (i know it is not exact.. I had a leak that I needed to fix)
Test run at 5 ATM (i know it is not exact.. I had a leak that I needed to fix)
5 ATM Real Deal
Put watch and water in container screw down lid. hand tight is sufficient. Pump up to either 3 or 5 ATM allow tester to sit for 3 minutes to allow pressurization of the watch to adjust
After 3 min flip vessel over so the watch is submerged in water. Once watch is under water turn the handle to release the air out of the vessel. If the watch has a leak you will see a stream of bubbles coming from the watch. It will be much different than the little bubbles you see around the watch and or bezel. (if you see a stream of bubbles flip the container over immediately to get it of the water. Note where it came from... fix and try again).
My gen seamaster passed the test
I hope you enjoyed and this helps.
