- 30/3/08
- 43,954
- 20,394
- 113
Arkie the Arktos is going on a trip. If you didn't know that you can read more here: http://forum.replica-watch.info/vb/showthread.php/wat-in-worldi-90684
She has been with me for a few days now and has been on the cyclo tester running in while we wait for a buckle for her Ach's Straps XMAS special. I had the time today to do her pre trip prep work. This involved cementing the little blips on her bezel as they have a habit of coming off since they are only super glued into pace (and not very well at that), lubeing her rotor, timing her and giving her the water proof treatment and test.
All of this makes sure she is in tiptop shape to begin her travels.
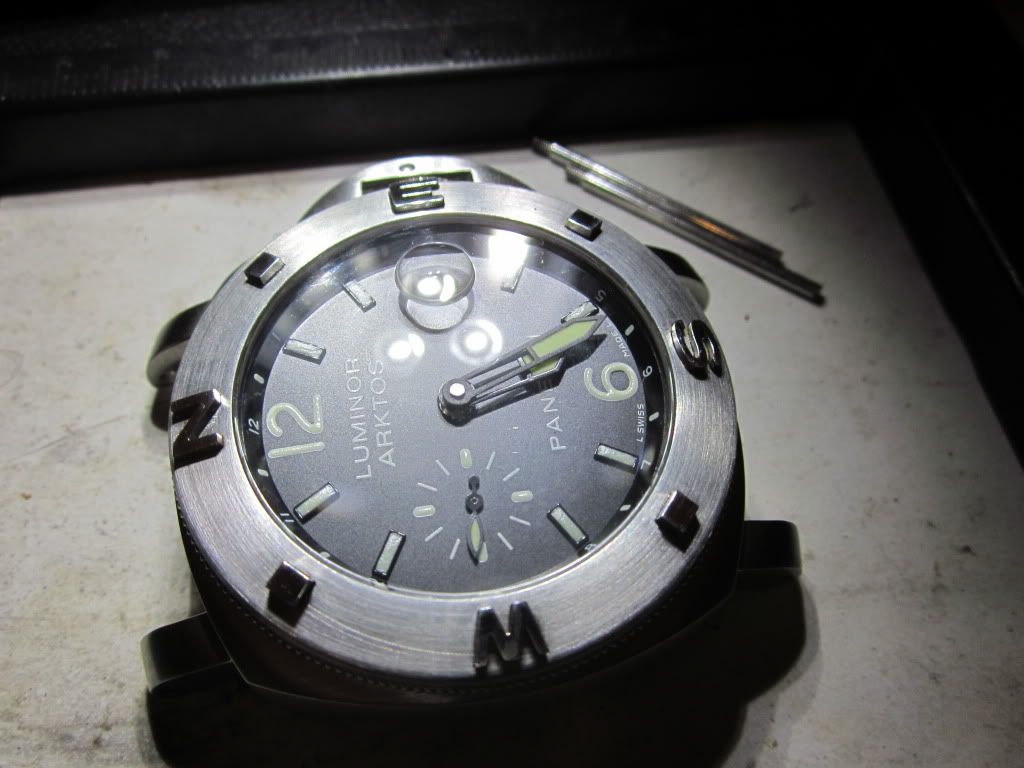
Step one was to remove the strap and clean the bezel to remove any oil or grease that may prevent the UV cement from sticking. This was done with Isopropyl alcohol and a micro fibre cloth. After that she was nice and clean and ready to go.
We then get a small amount of UV cement out of the bottle and onto a suitable surface. Always do this so the bottle is not left open as even inside some UV light will enter and part cure your adhesive.
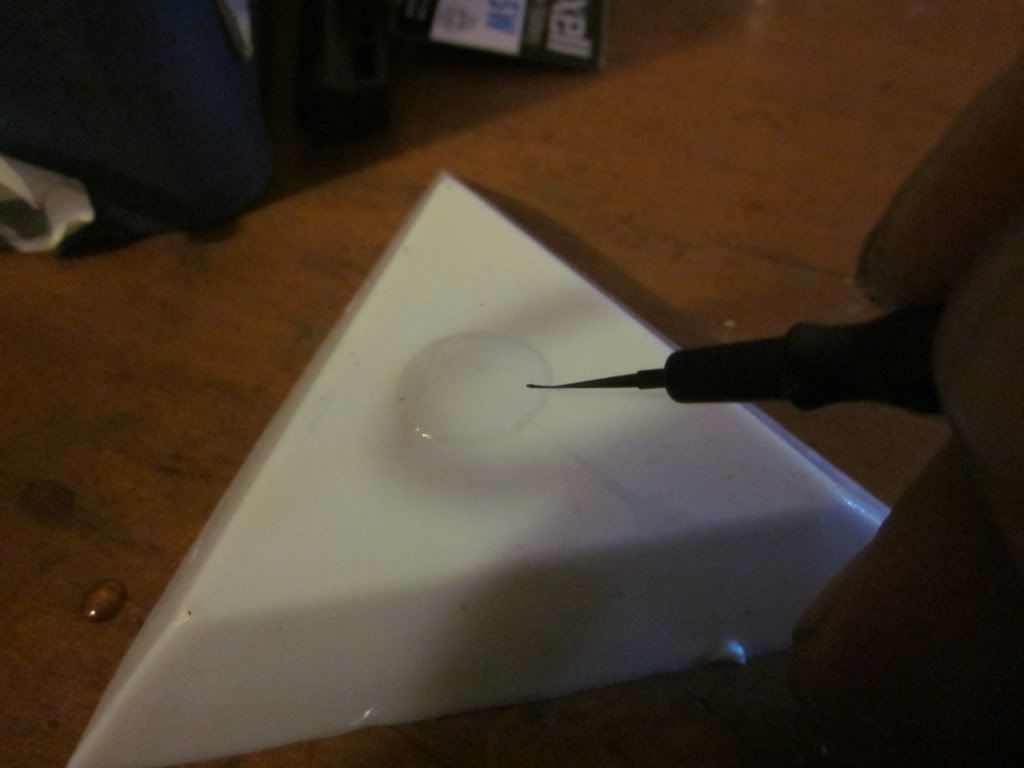
We then use a small oiler pick up a tiny drop of the cement, Even that will be too much so dot it down somewhere clean and reduce the amount before carefully applying it to the cardinal markers on the bezel.
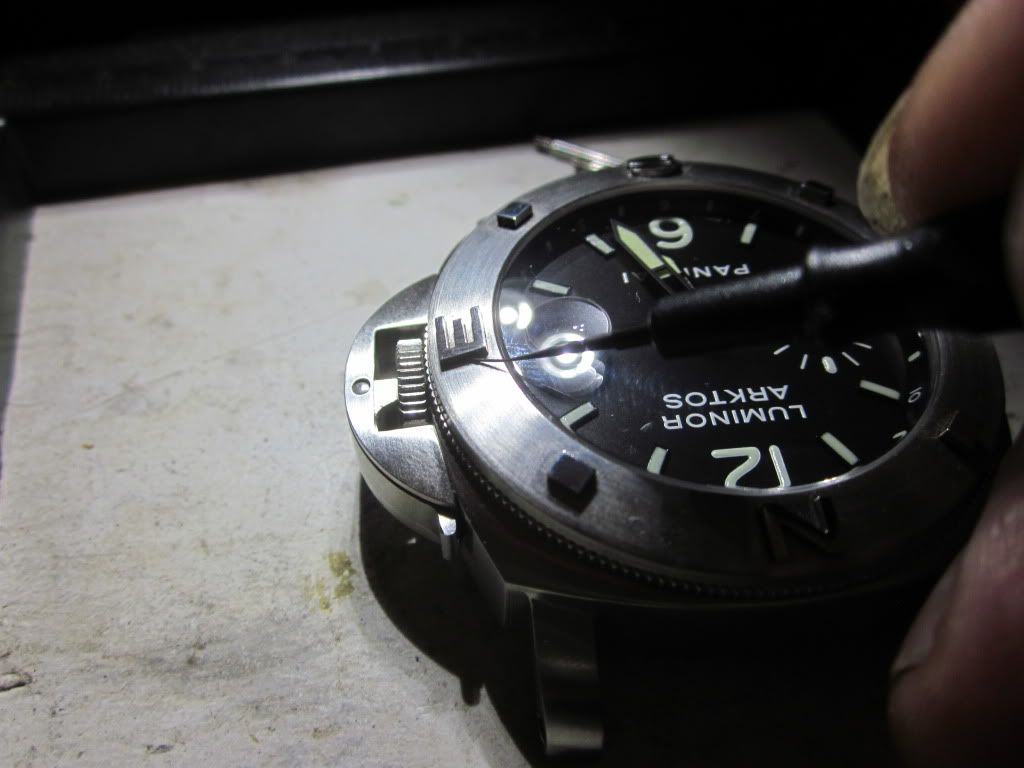
The cement should flow under the edge of the marker and almost disappear. Don't worry if it doesn't, you can always wipe of the excess later. This is the great thing about UV adhesives, they don't set until you want them to. When done you can now wipe off the excess adhesive with a clean dry lint free cloth. Don't forget to clean your oiler as well. Give it a wipe with the Isopropyl to remove all the cement.
After doing all the markers and cleaning up it's time for some UV exposure. This is a UV light but you can always just set it outside if you don't have one.
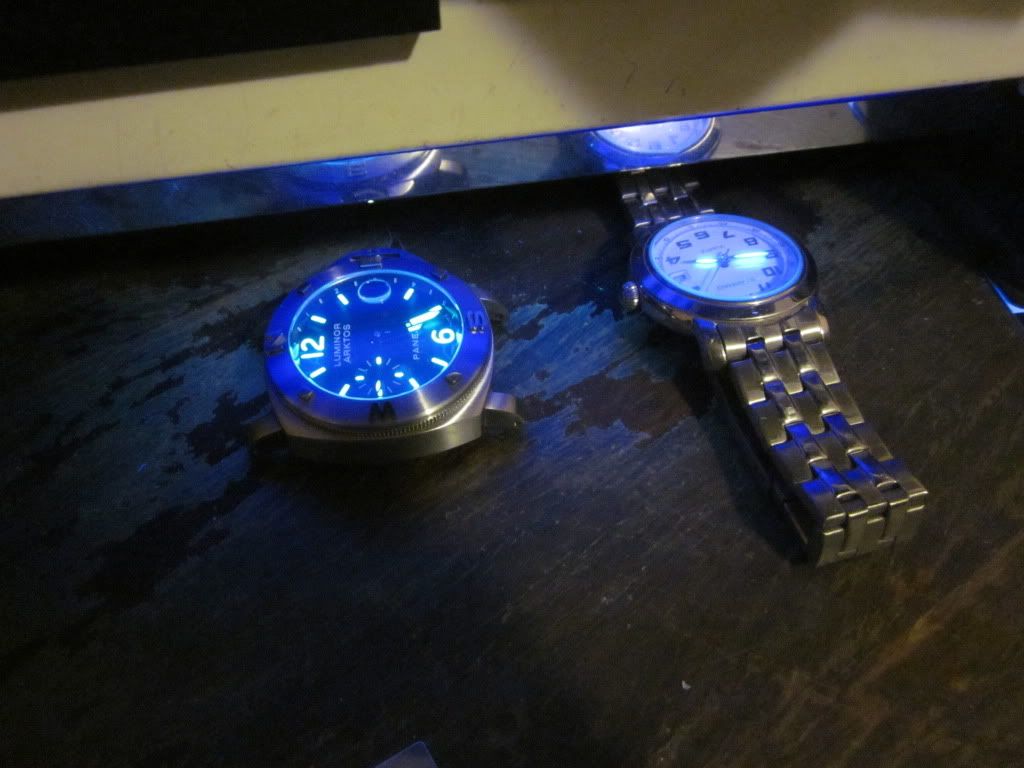
You will need to rotate the watch so the light gets under every edge of the marks, the cement is right in under there remember? So, spin it around in 45 degree steps and leave it about three or four minutes in between.
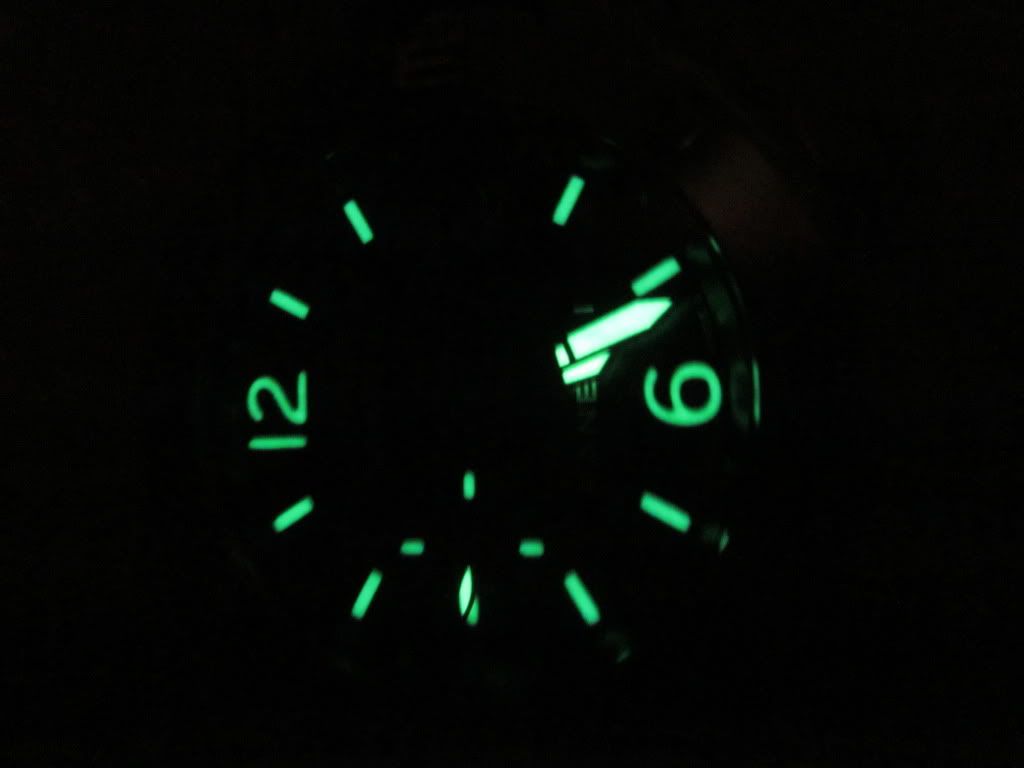
After a trip thru the UV light box she has a nice healthy glow about her don't you think?
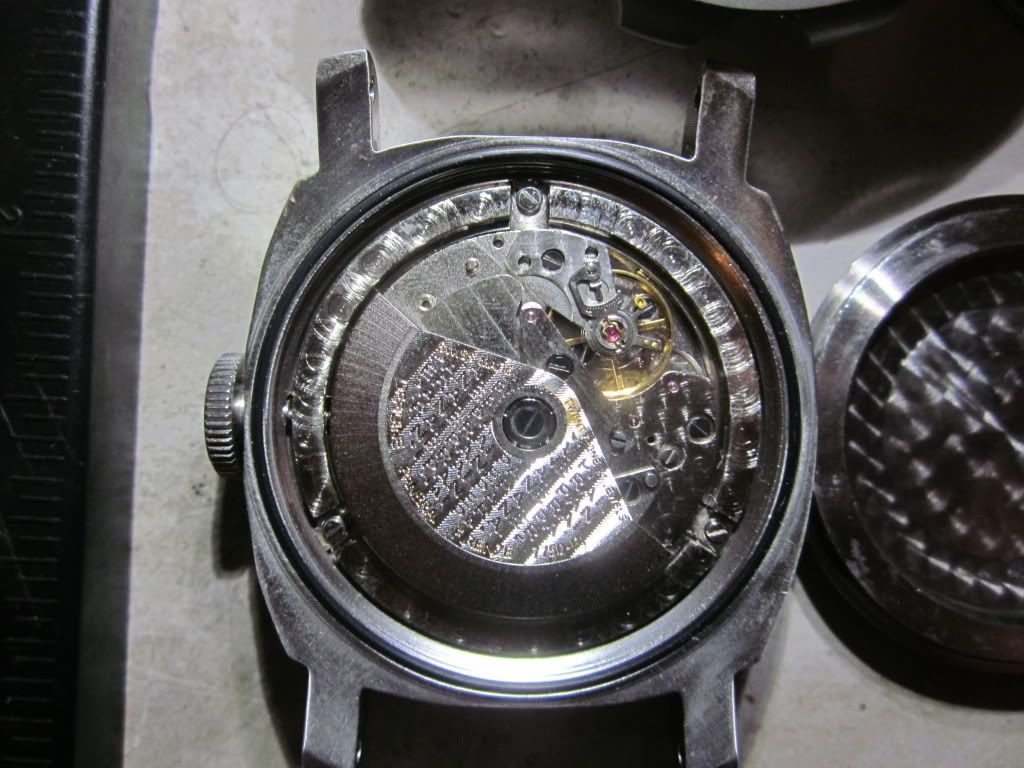
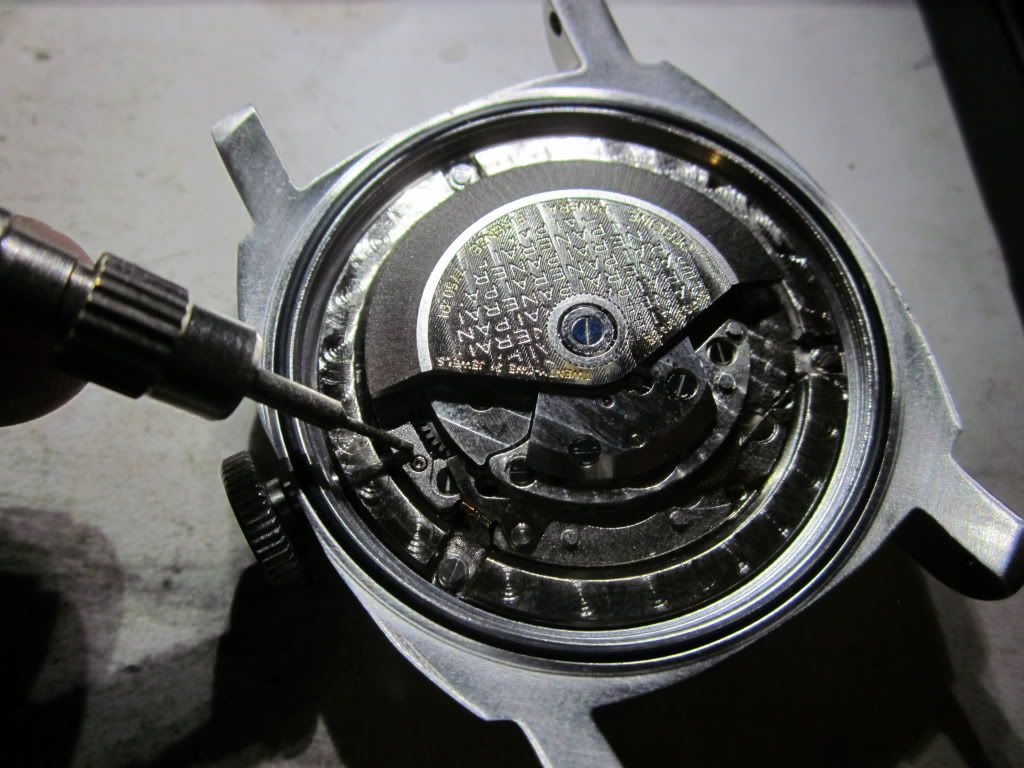
Now we need to remove her back so we can oil the rotor bearing and grease the stem seal and case back seal as well as time her.

A nicely decorated MVT for a closed back watch.
A bit of oil on the rotor bearing will quieten her down a bit, as usual this was dry.
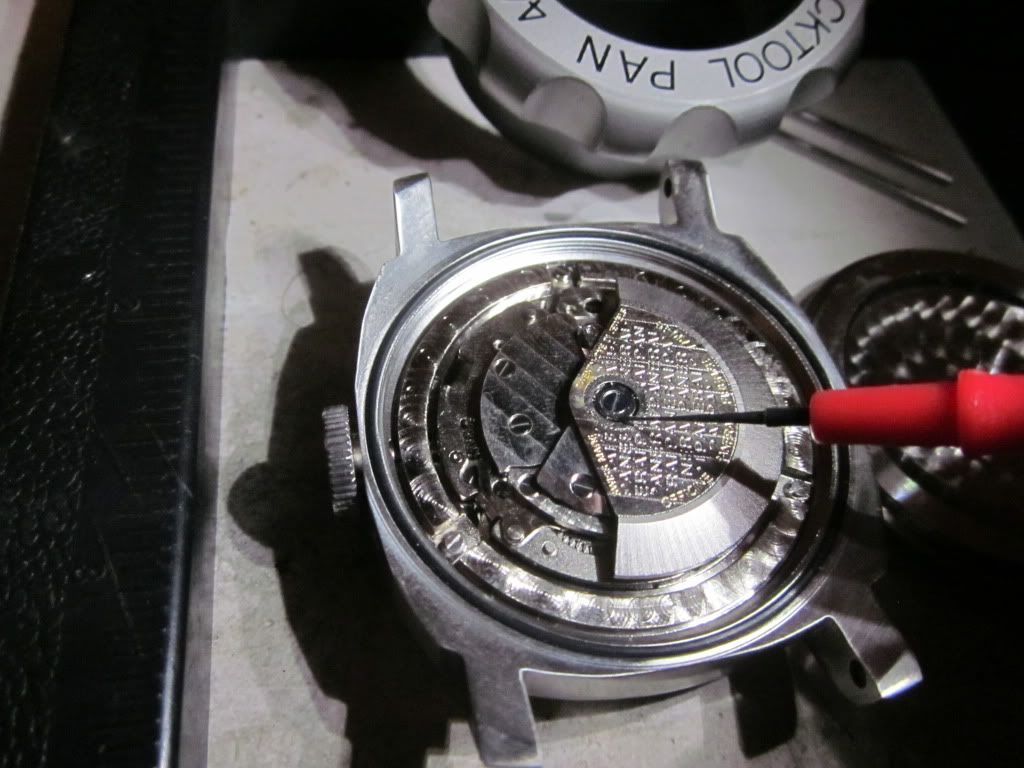
I use clock oil for this, most watch oils are too thin and tend to creep away from the bearing. Some use mainspring grease but I fail to see how you can distribute a suitably small amount evenly over the bearing. I will bet if grease is used too much will go on there.
Now we can time her. This is always done with the caseback off so as to prevent echoes spoiling the reading. I averaged her over two positions, crown down and face up. I got her to within one or two seconds a day in both positions. These two positions cover standing (crown down) and both working at a desk and sitting by your bedside at night (face up). Please note if you get this watch in it's travels and wear it left handed (crown up) it will be more like -12 sec a day out.

The amplitude is a tad high but nothing we can't live with. There is also some roughness on several teeth on the escape wheel as can be seen by the blippy sections of the trace. This is more or less typical of a lower grade a7750 MVT. At least the balance shaft isn't bent like some!
Now we can peel of the case back o ring from it's slot.
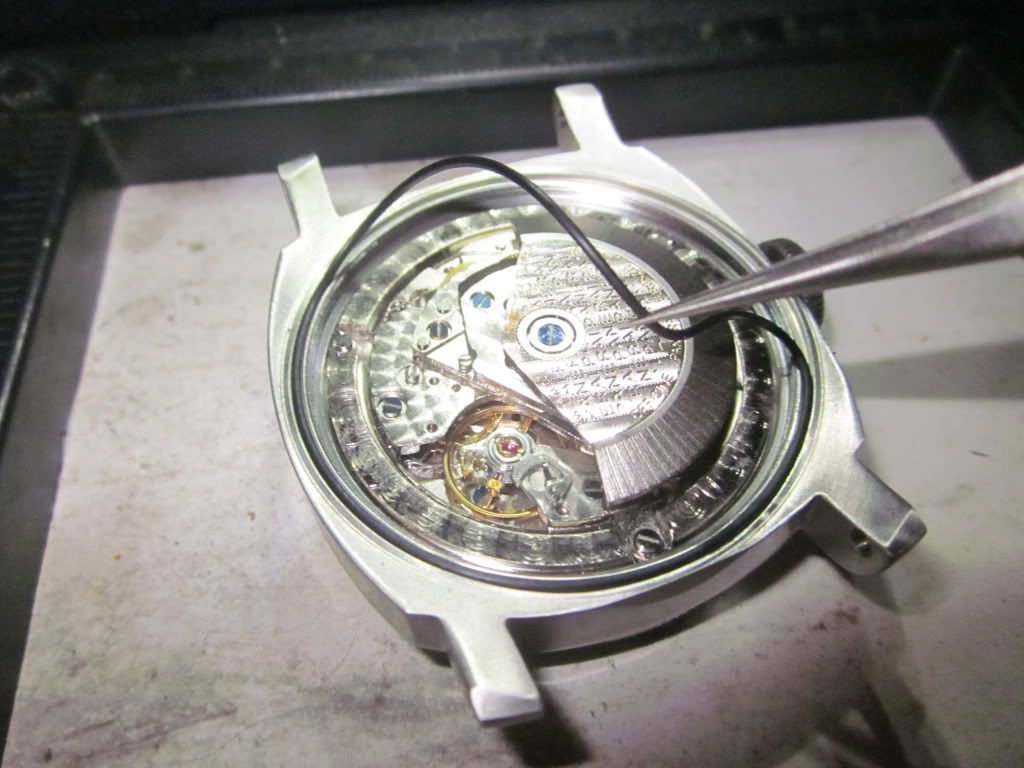
And remove the stem. The point of the springbar tool is pointing at the release button for the stem. Press this only just hard enough to remove the stem! Pressing to hard will muck up the keyless works and result in the need for a partial tear down of the MVT to fix it.
We can then grease the crown seal and the o ring. Here we are placing a tiny amount of silicon grease on the stem seal.
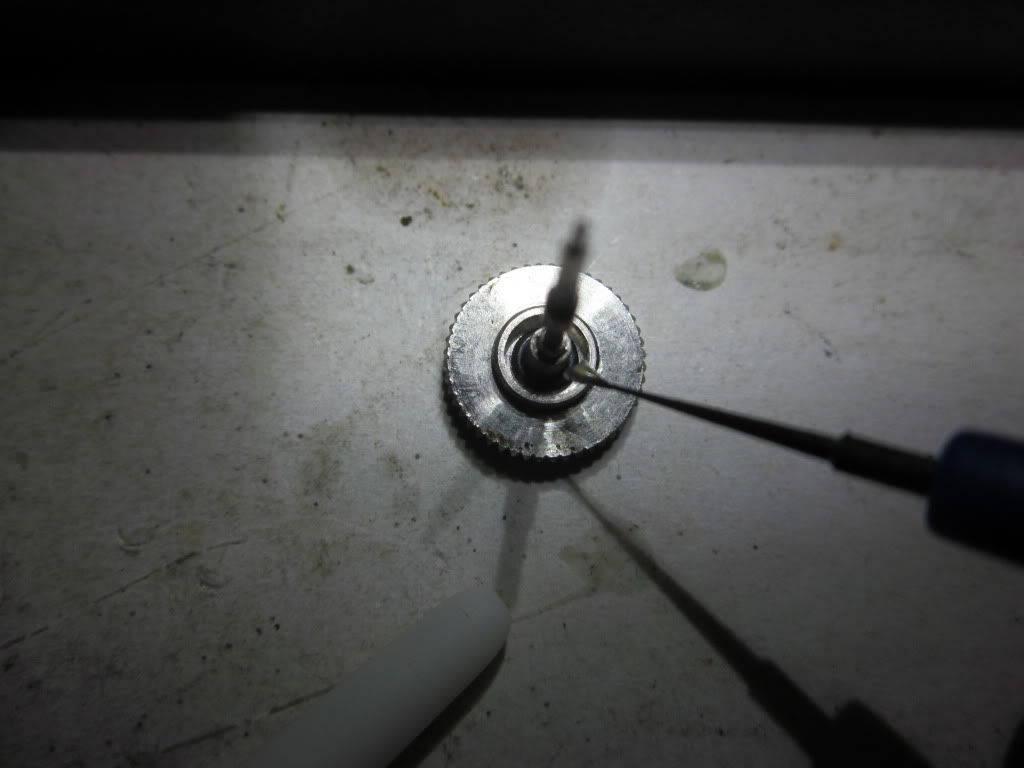
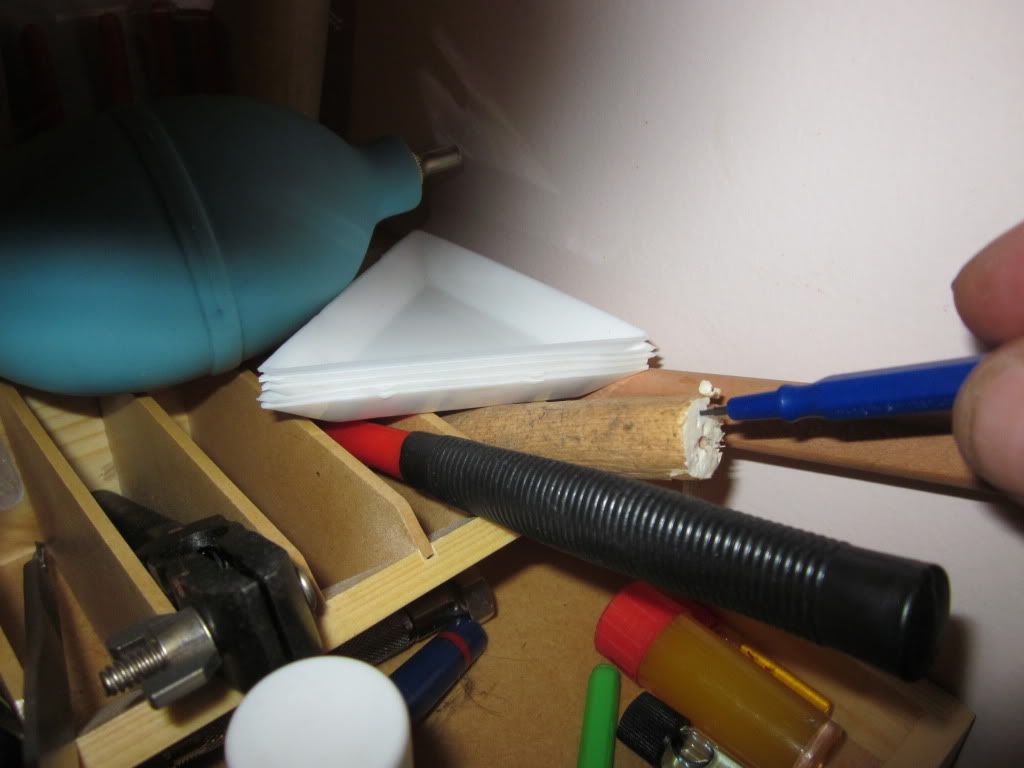
Now, next time we use our oiler to oil a jewel or the like we don't want silicon grease on there to contaminate the oil so don't forget to clean the oiler before replacing it's cap and putting it away. A dip into a piece of pith wood will clean it for it's next use.
Then it's back together time. With a 7750 you usually need to depress the stem release once again to get the stem to seat, not too hard remember!
When that's done and the caseback tightened up it's into the water tester. Arkie passed to 3 bar no worries at all.
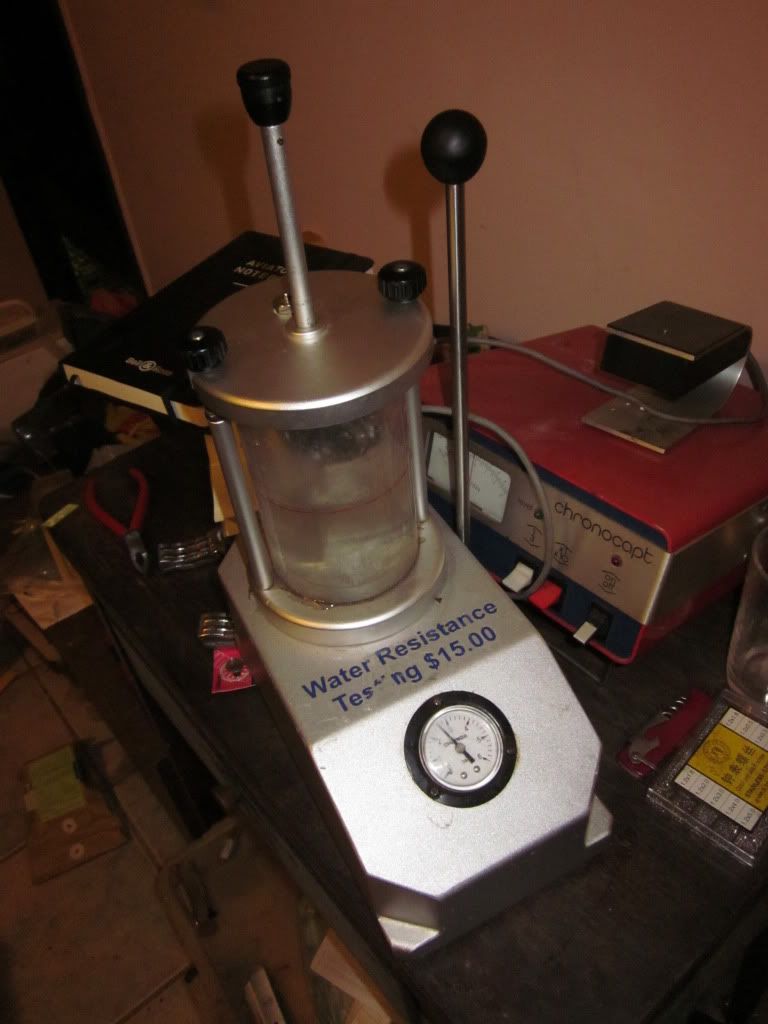
Before anyone asks the device behind the tester is a quartz watch timer.
And that is that, Arkie is now ready for the big wide world just as soon as the new buckle arrives. I hope you enjoyed this little look at a watch a lot of you will get to know a lot better in the coming months and years.
BTW, every tool used here is available from our trusted dealer, Watchbitz and nothing here is so hard you can not do it yourself on your own watches, thanks for viewing.
She has been with me for a few days now and has been on the cyclo tester running in while we wait for a buckle for her Ach's Straps XMAS special. I had the time today to do her pre trip prep work. This involved cementing the little blips on her bezel as they have a habit of coming off since they are only super glued into pace (and not very well at that), lubeing her rotor, timing her and giving her the water proof treatment and test.
All of this makes sure she is in tiptop shape to begin her travels.
Step one was to remove the strap and clean the bezel to remove any oil or grease that may prevent the UV cement from sticking. This was done with Isopropyl alcohol and a micro fibre cloth. After that she was nice and clean and ready to go.
We then get a small amount of UV cement out of the bottle and onto a suitable surface. Always do this so the bottle is not left open as even inside some UV light will enter and part cure your adhesive.
We then use a small oiler pick up a tiny drop of the cement, Even that will be too much so dot it down somewhere clean and reduce the amount before carefully applying it to the cardinal markers on the bezel.
The cement should flow under the edge of the marker and almost disappear. Don't worry if it doesn't, you can always wipe of the excess later. This is the great thing about UV adhesives, they don't set until you want them to. When done you can now wipe off the excess adhesive with a clean dry lint free cloth. Don't forget to clean your oiler as well. Give it a wipe with the Isopropyl to remove all the cement.
After doing all the markers and cleaning up it's time for some UV exposure. This is a UV light but you can always just set it outside if you don't have one.
You will need to rotate the watch so the light gets under every edge of the marks, the cement is right in under there remember? So, spin it around in 45 degree steps and leave it about three or four minutes in between.
After a trip thru the UV light box she has a nice healthy glow about her don't you think?
Now we need to remove her back so we can oil the rotor bearing and grease the stem seal and case back seal as well as time her.
A nicely decorated MVT for a closed back watch.
A bit of oil on the rotor bearing will quieten her down a bit, as usual this was dry.
I use clock oil for this, most watch oils are too thin and tend to creep away from the bearing. Some use mainspring grease but I fail to see how you can distribute a suitably small amount evenly over the bearing. I will bet if grease is used too much will go on there.
Now we can time her. This is always done with the caseback off so as to prevent echoes spoiling the reading. I averaged her over two positions, crown down and face up. I got her to within one or two seconds a day in both positions. These two positions cover standing (crown down) and both working at a desk and sitting by your bedside at night (face up). Please note if you get this watch in it's travels and wear it left handed (crown up) it will be more like -12 sec a day out.
The amplitude is a tad high but nothing we can't live with. There is also some roughness on several teeth on the escape wheel as can be seen by the blippy sections of the trace. This is more or less typical of a lower grade a7750 MVT. At least the balance shaft isn't bent like some!
Now we can peel of the case back o ring from it's slot.
And remove the stem. The point of the springbar tool is pointing at the release button for the stem. Press this only just hard enough to remove the stem! Pressing to hard will muck up the keyless works and result in the need for a partial tear down of the MVT to fix it.
We can then grease the crown seal and the o ring. Here we are placing a tiny amount of silicon grease on the stem seal.
Now, next time we use our oiler to oil a jewel or the like we don't want silicon grease on there to contaminate the oil so don't forget to clean the oiler before replacing it's cap and putting it away. A dip into a piece of pith wood will clean it for it's next use.
Then it's back together time. With a 7750 you usually need to depress the stem release once again to get the stem to seat, not too hard remember!
When that's done and the caseback tightened up it's into the water tester. Arkie passed to 3 bar no worries at all.
Before anyone asks the device behind the tester is a quartz watch timer.
And that is that, Arkie is now ready for the big wide world just as soon as the new buckle arrives. I hope you enjoyed this little look at a watch a lot of you will get to know a lot better in the coming months and years.
BTW, every tool used here is available from our trusted dealer, Watchbitz and nothing here is so hard you can not do it yourself on your own watches, thanks for viewing.

