- 14/6/19
- 237
- 34
- 28
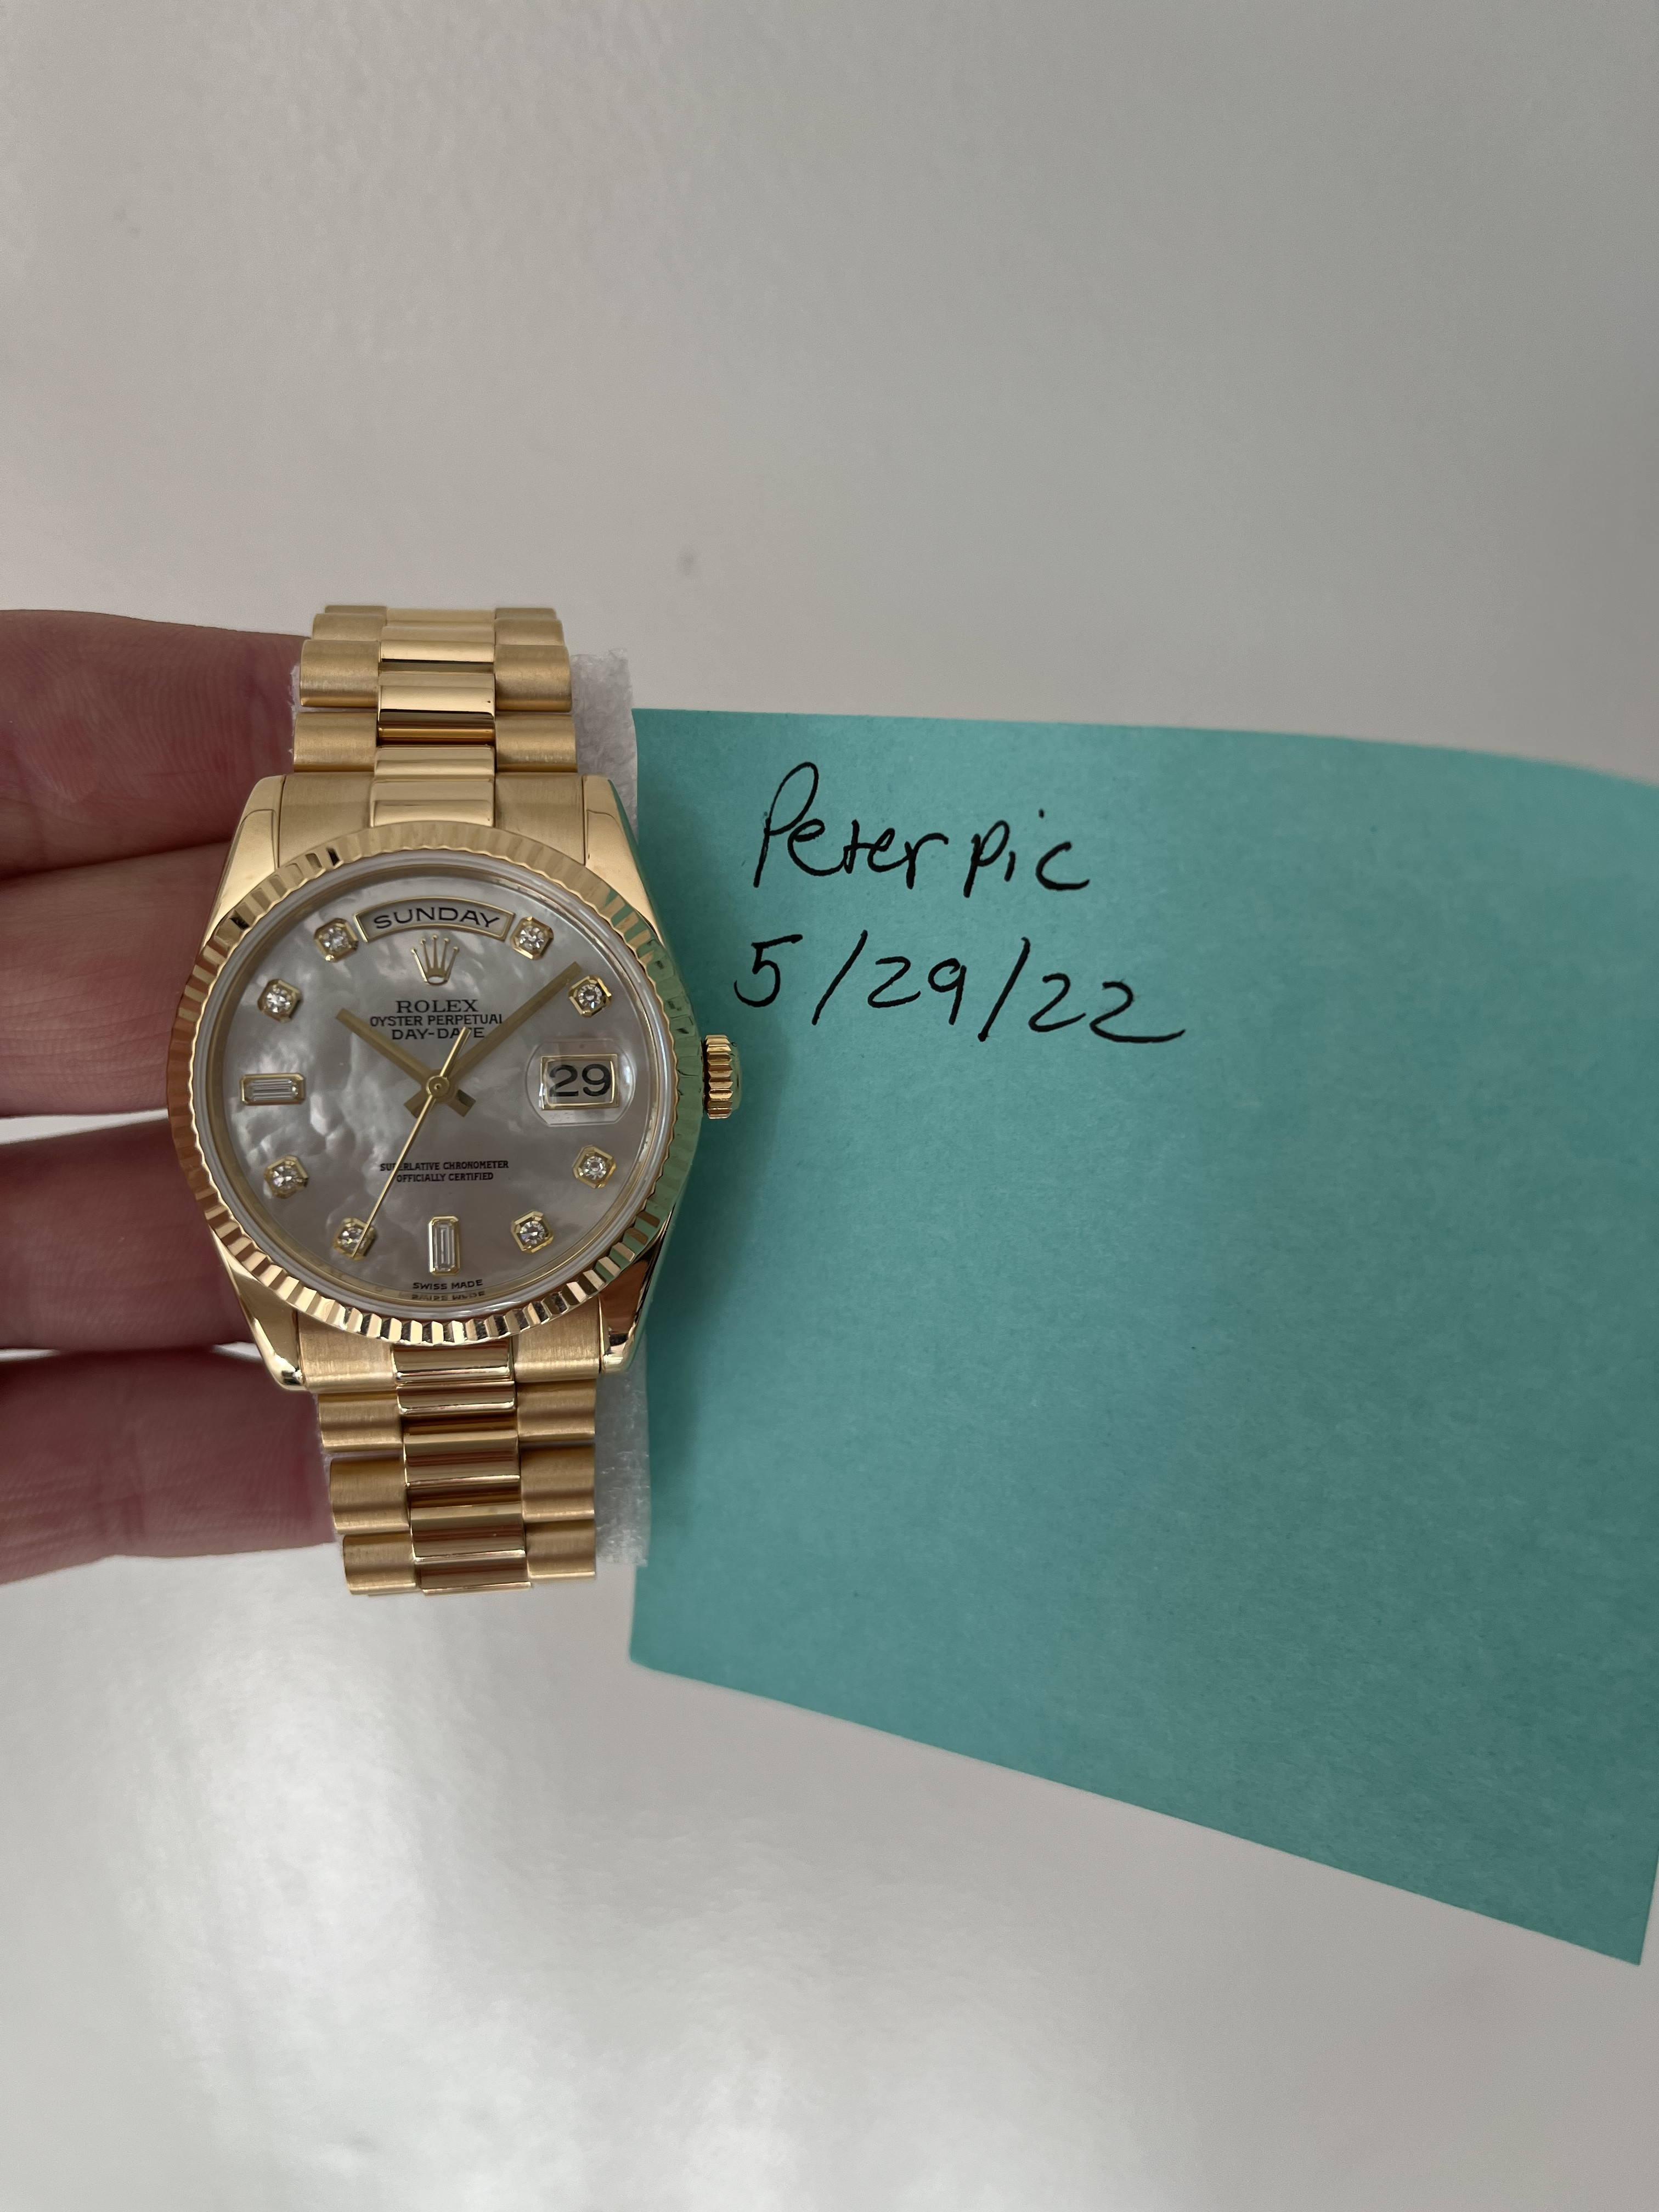
Hello RWI members! So recently I’ve been trying to expand a little more and showcase some of the work I offer / services I provide on a daily basis.. so here’s a quick one fixing a very expensive dial making sure its back to factory spec and the print is identical.. this is in my personal watch and I couldn’t be happier with the outcome! If you have any questions, or need something like this done shoot me a PM I am USA based and all of the work is done in house no outsourcing and best of all NO WEEKS - MONTHS LEAD TIME!!
I like to think made my bones off of working with reps first as this was what I could afford at the time, now I’m able to stock over 110 genuine dials, gen cases, bracelets, bezels insert etc as I supply parts to a variety of people. what was once a small hobby has now turned into something I love more than my actual day job and has consumed me, this is what I love to do so I’m attempting to get better at these write ups to hopefully help out some of you along the way enjoy!
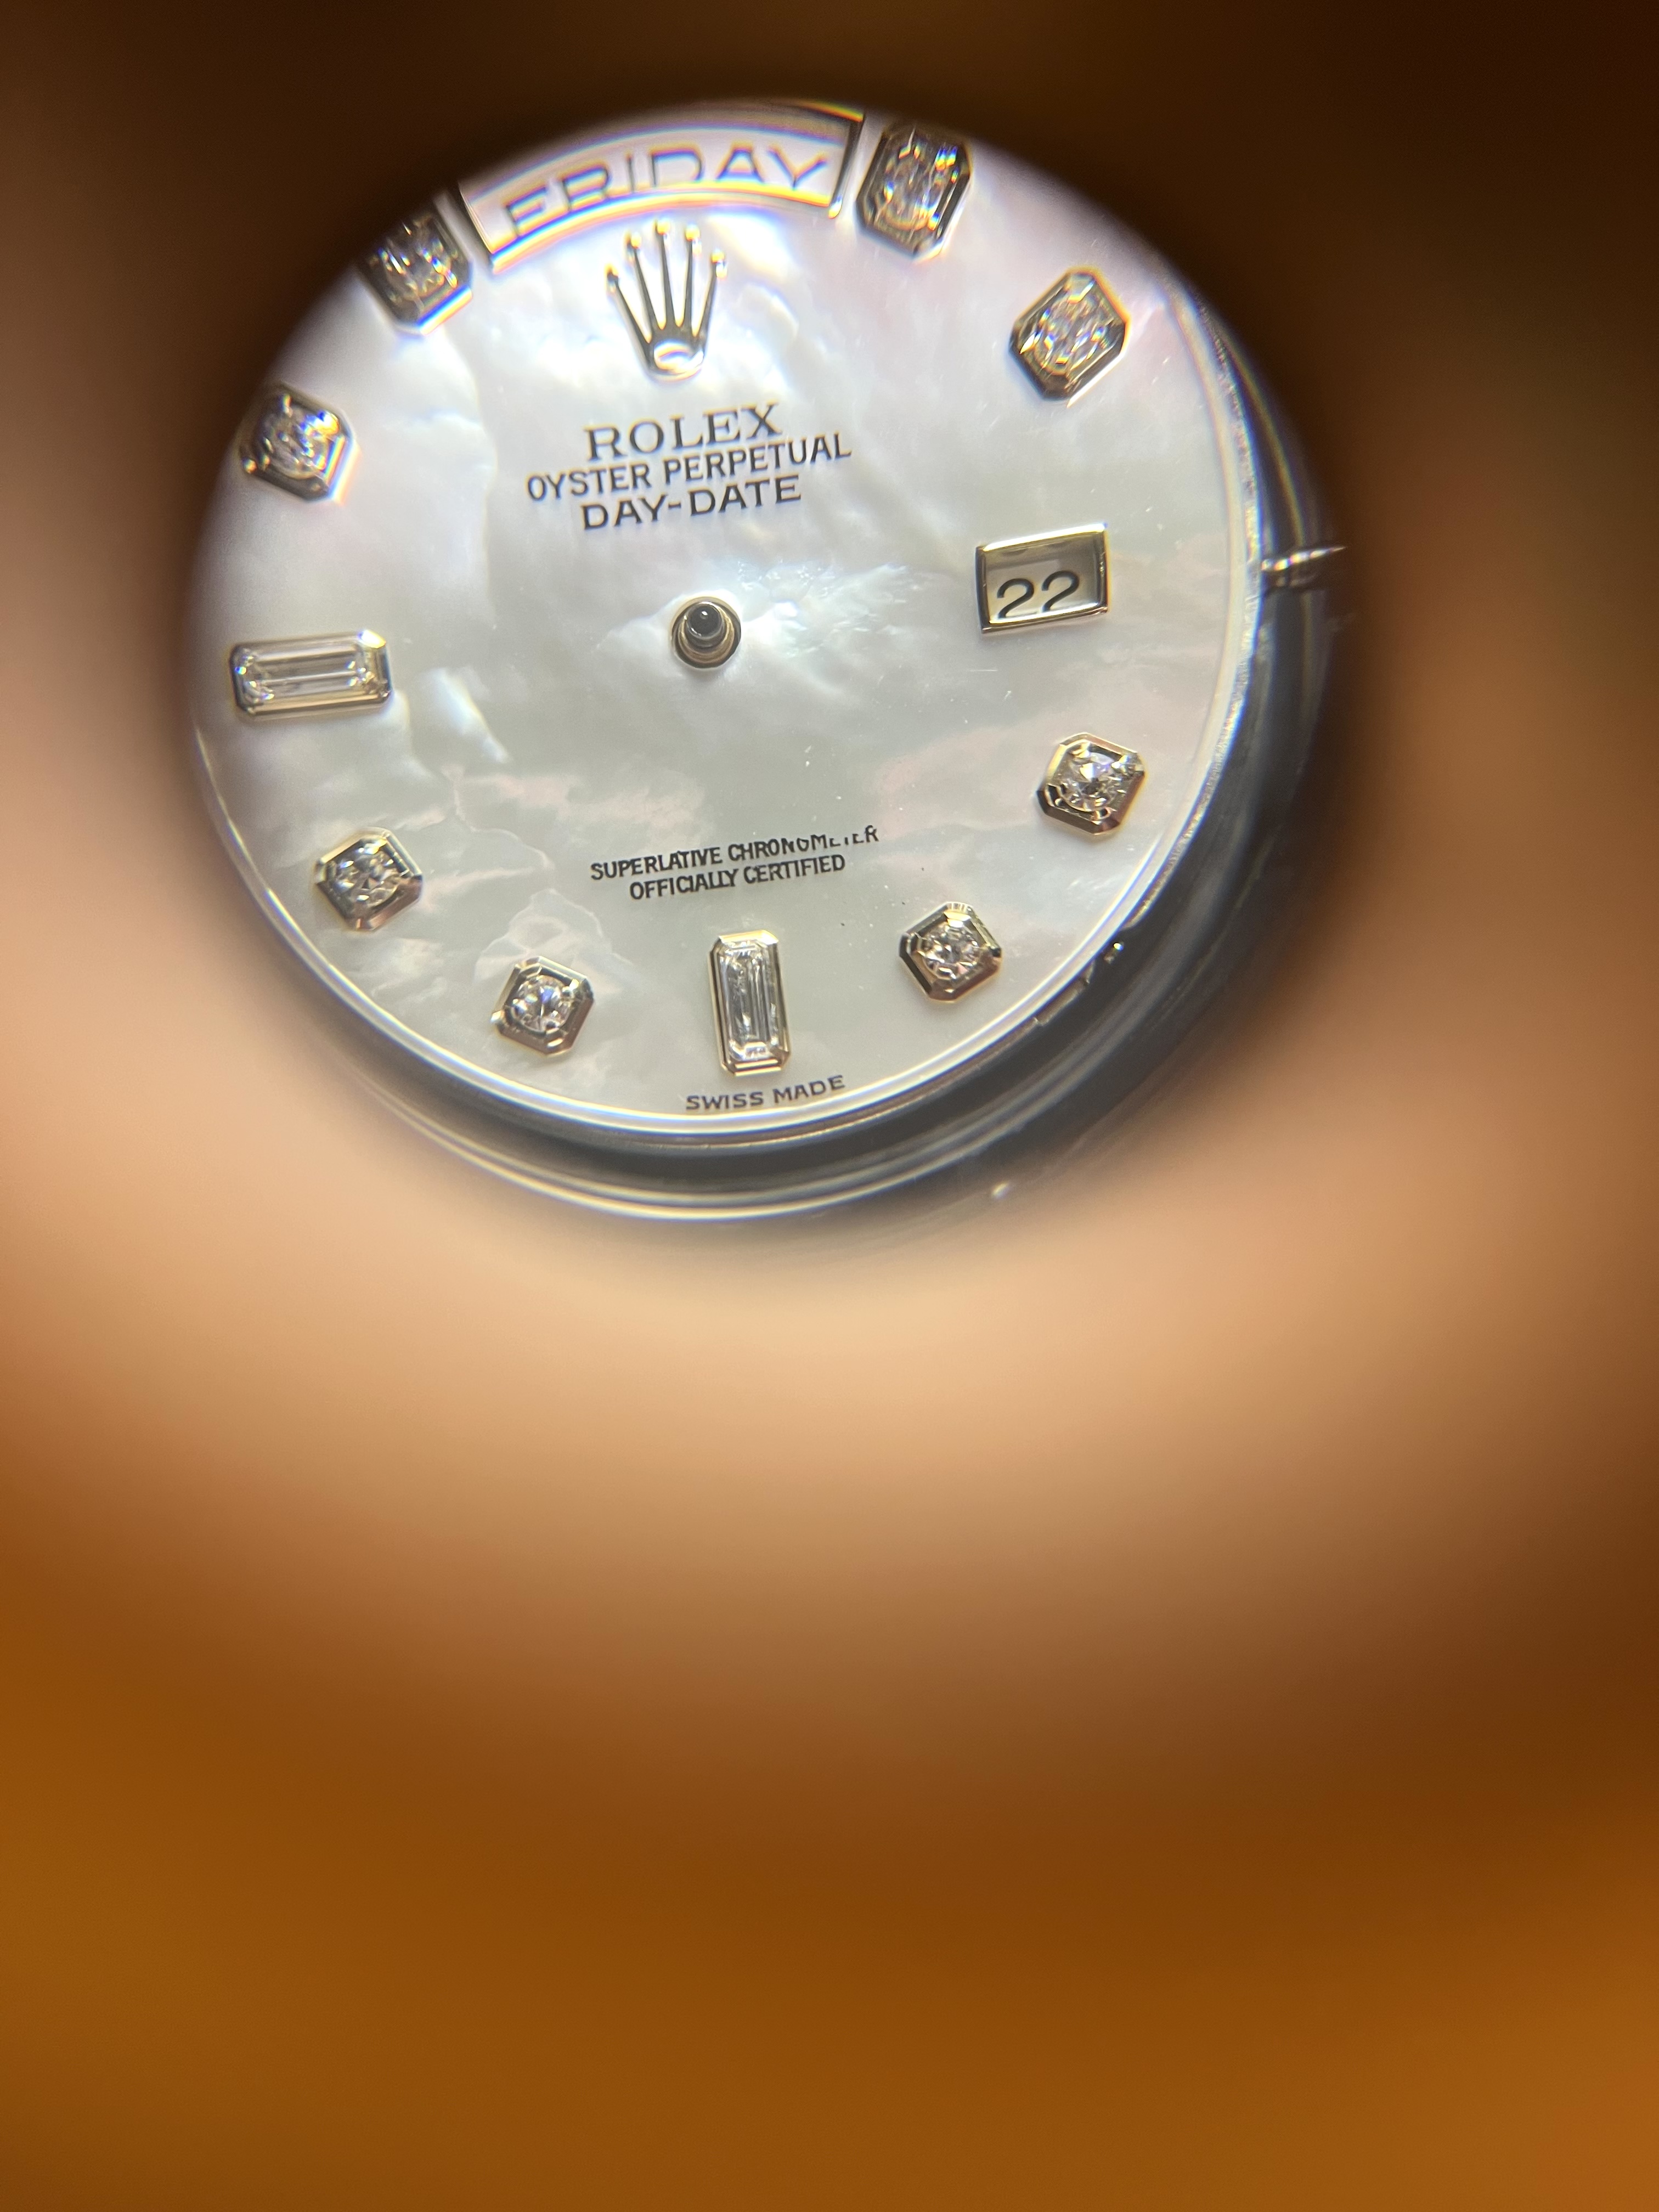
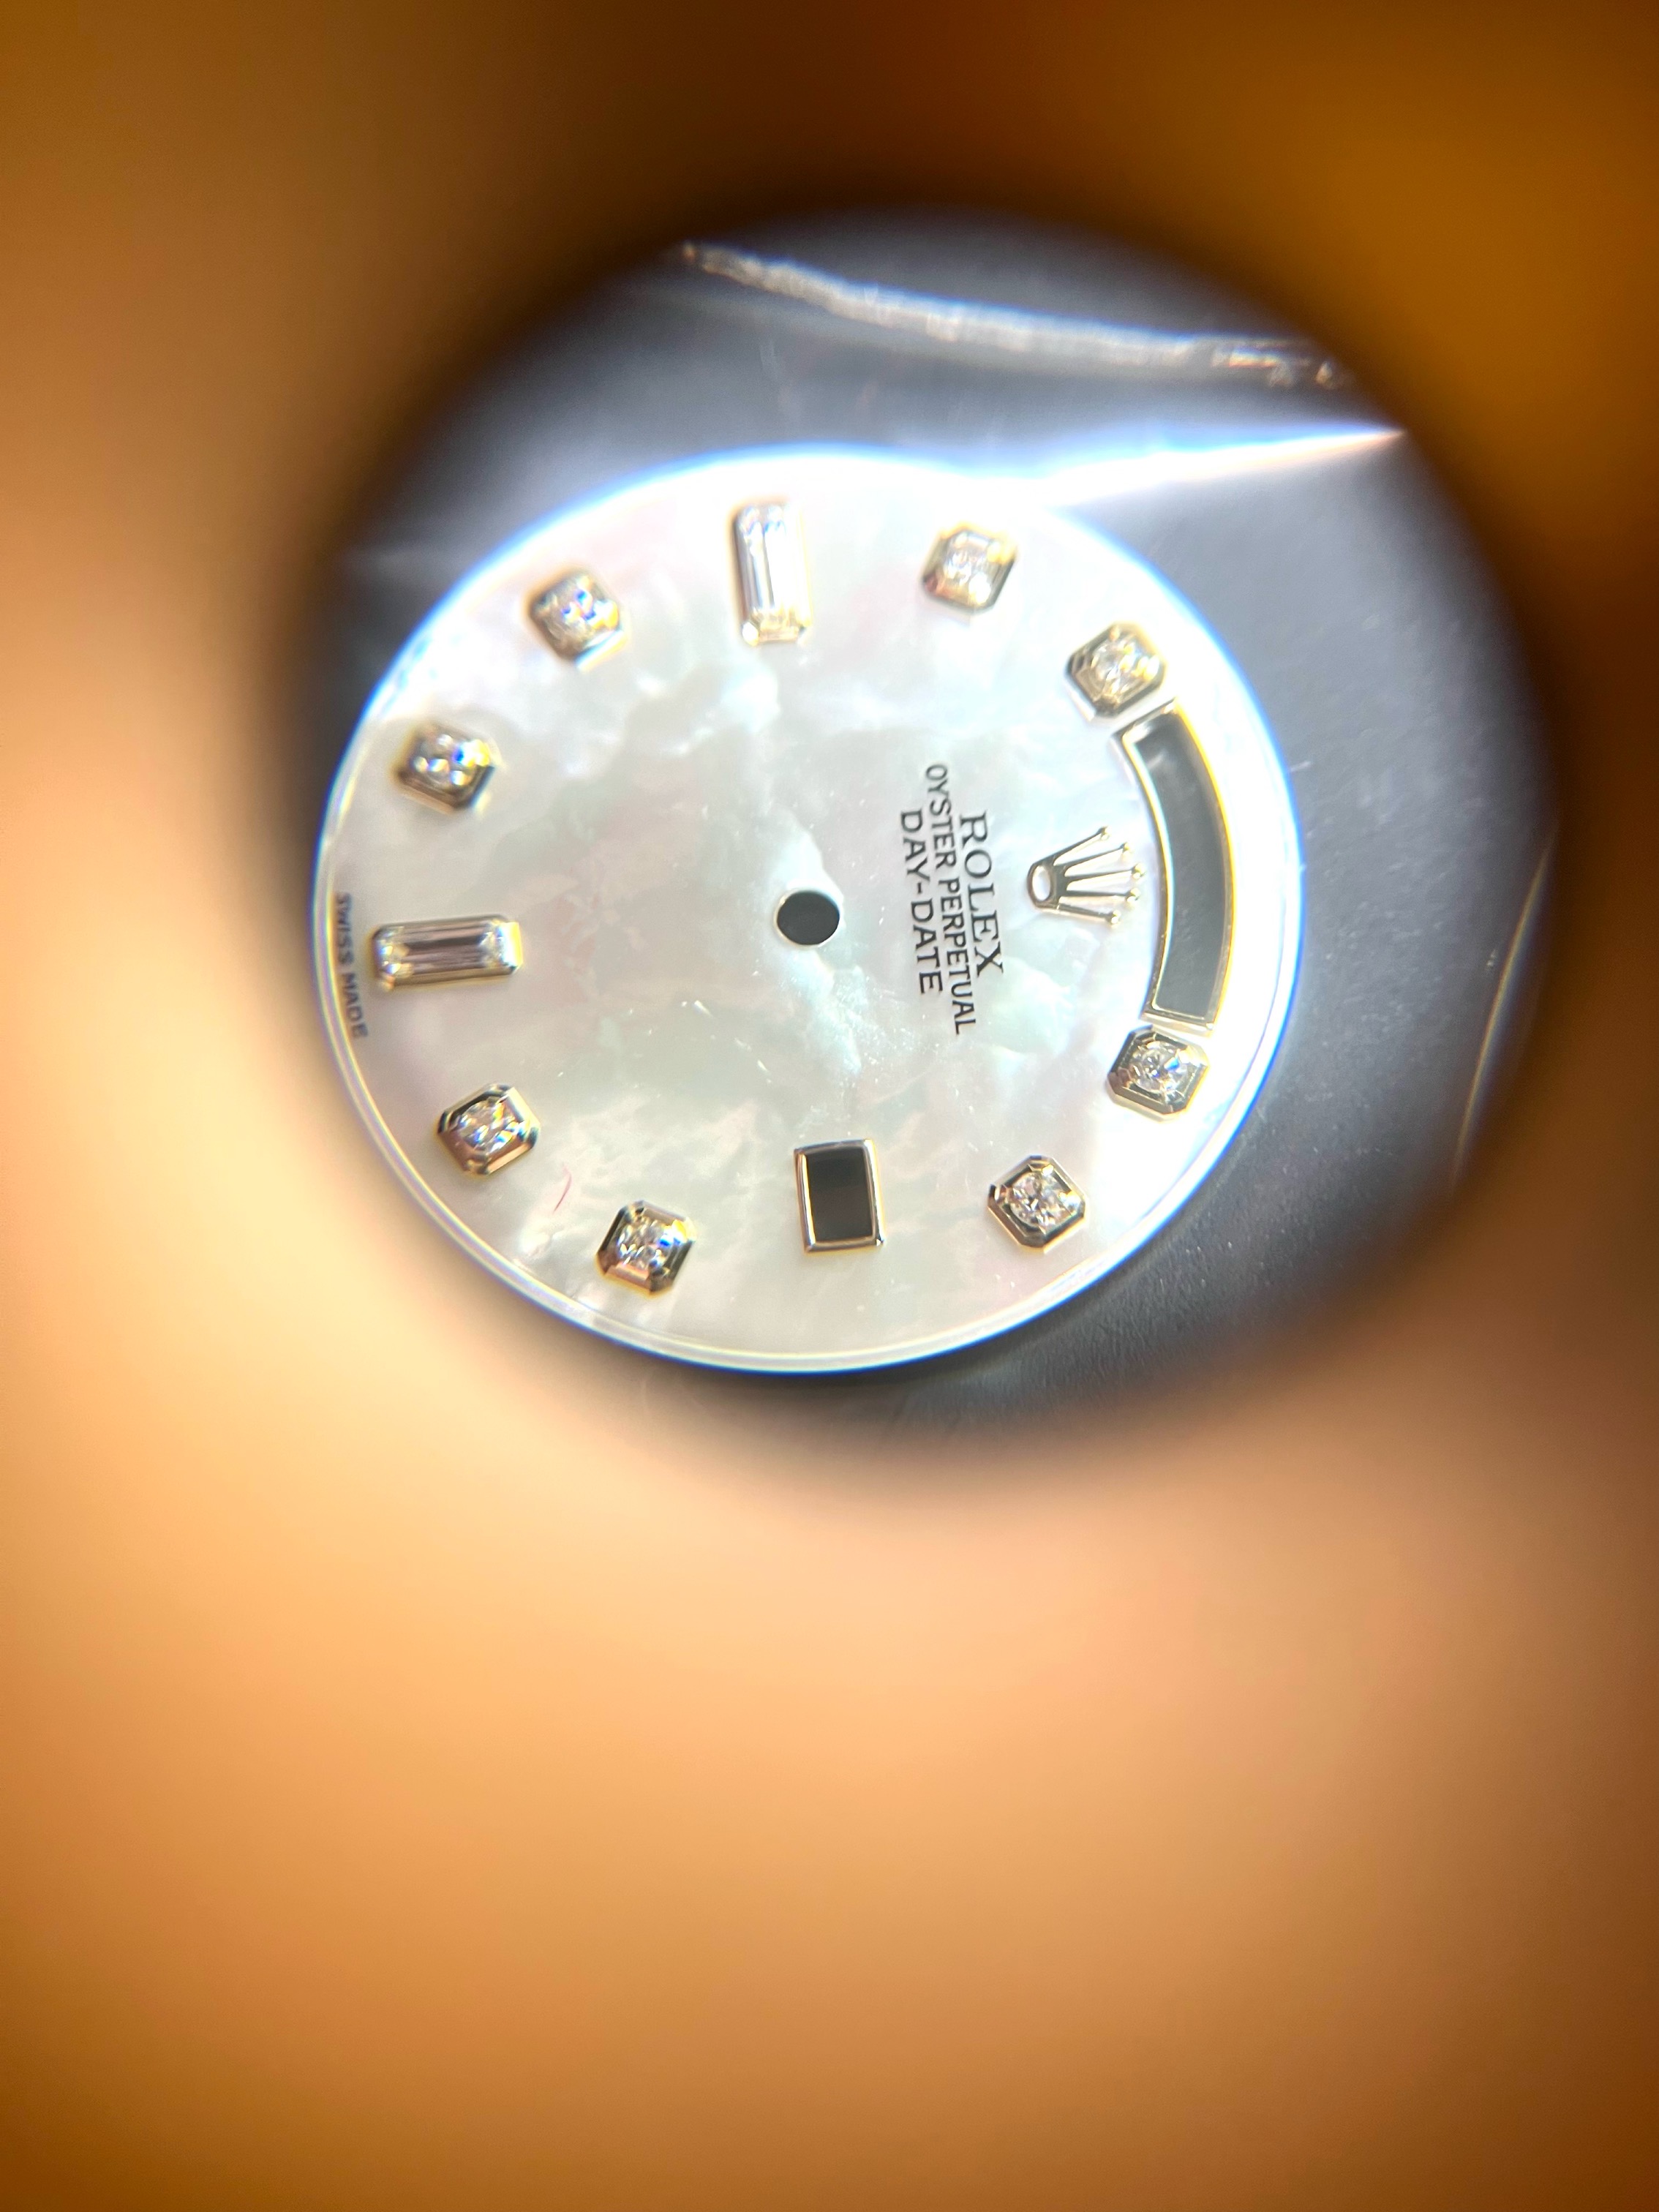
So here we have a genuine 118238 Z serial 36MM day date, after going to service its clear the monkey of a watchmaker carelessly heavily scratched and dropped something on the dial, or used a cleaning solvent in which removed some print on a $2500+ dial… so lets break it down on how to fix these issues. (WARNING: IF YOU HAVE THE SHAKES PLEASE DO NOT TRY THIS I AM NOT RESPONSIBLE FOR ANYTHING YOU TRY AT HOME)
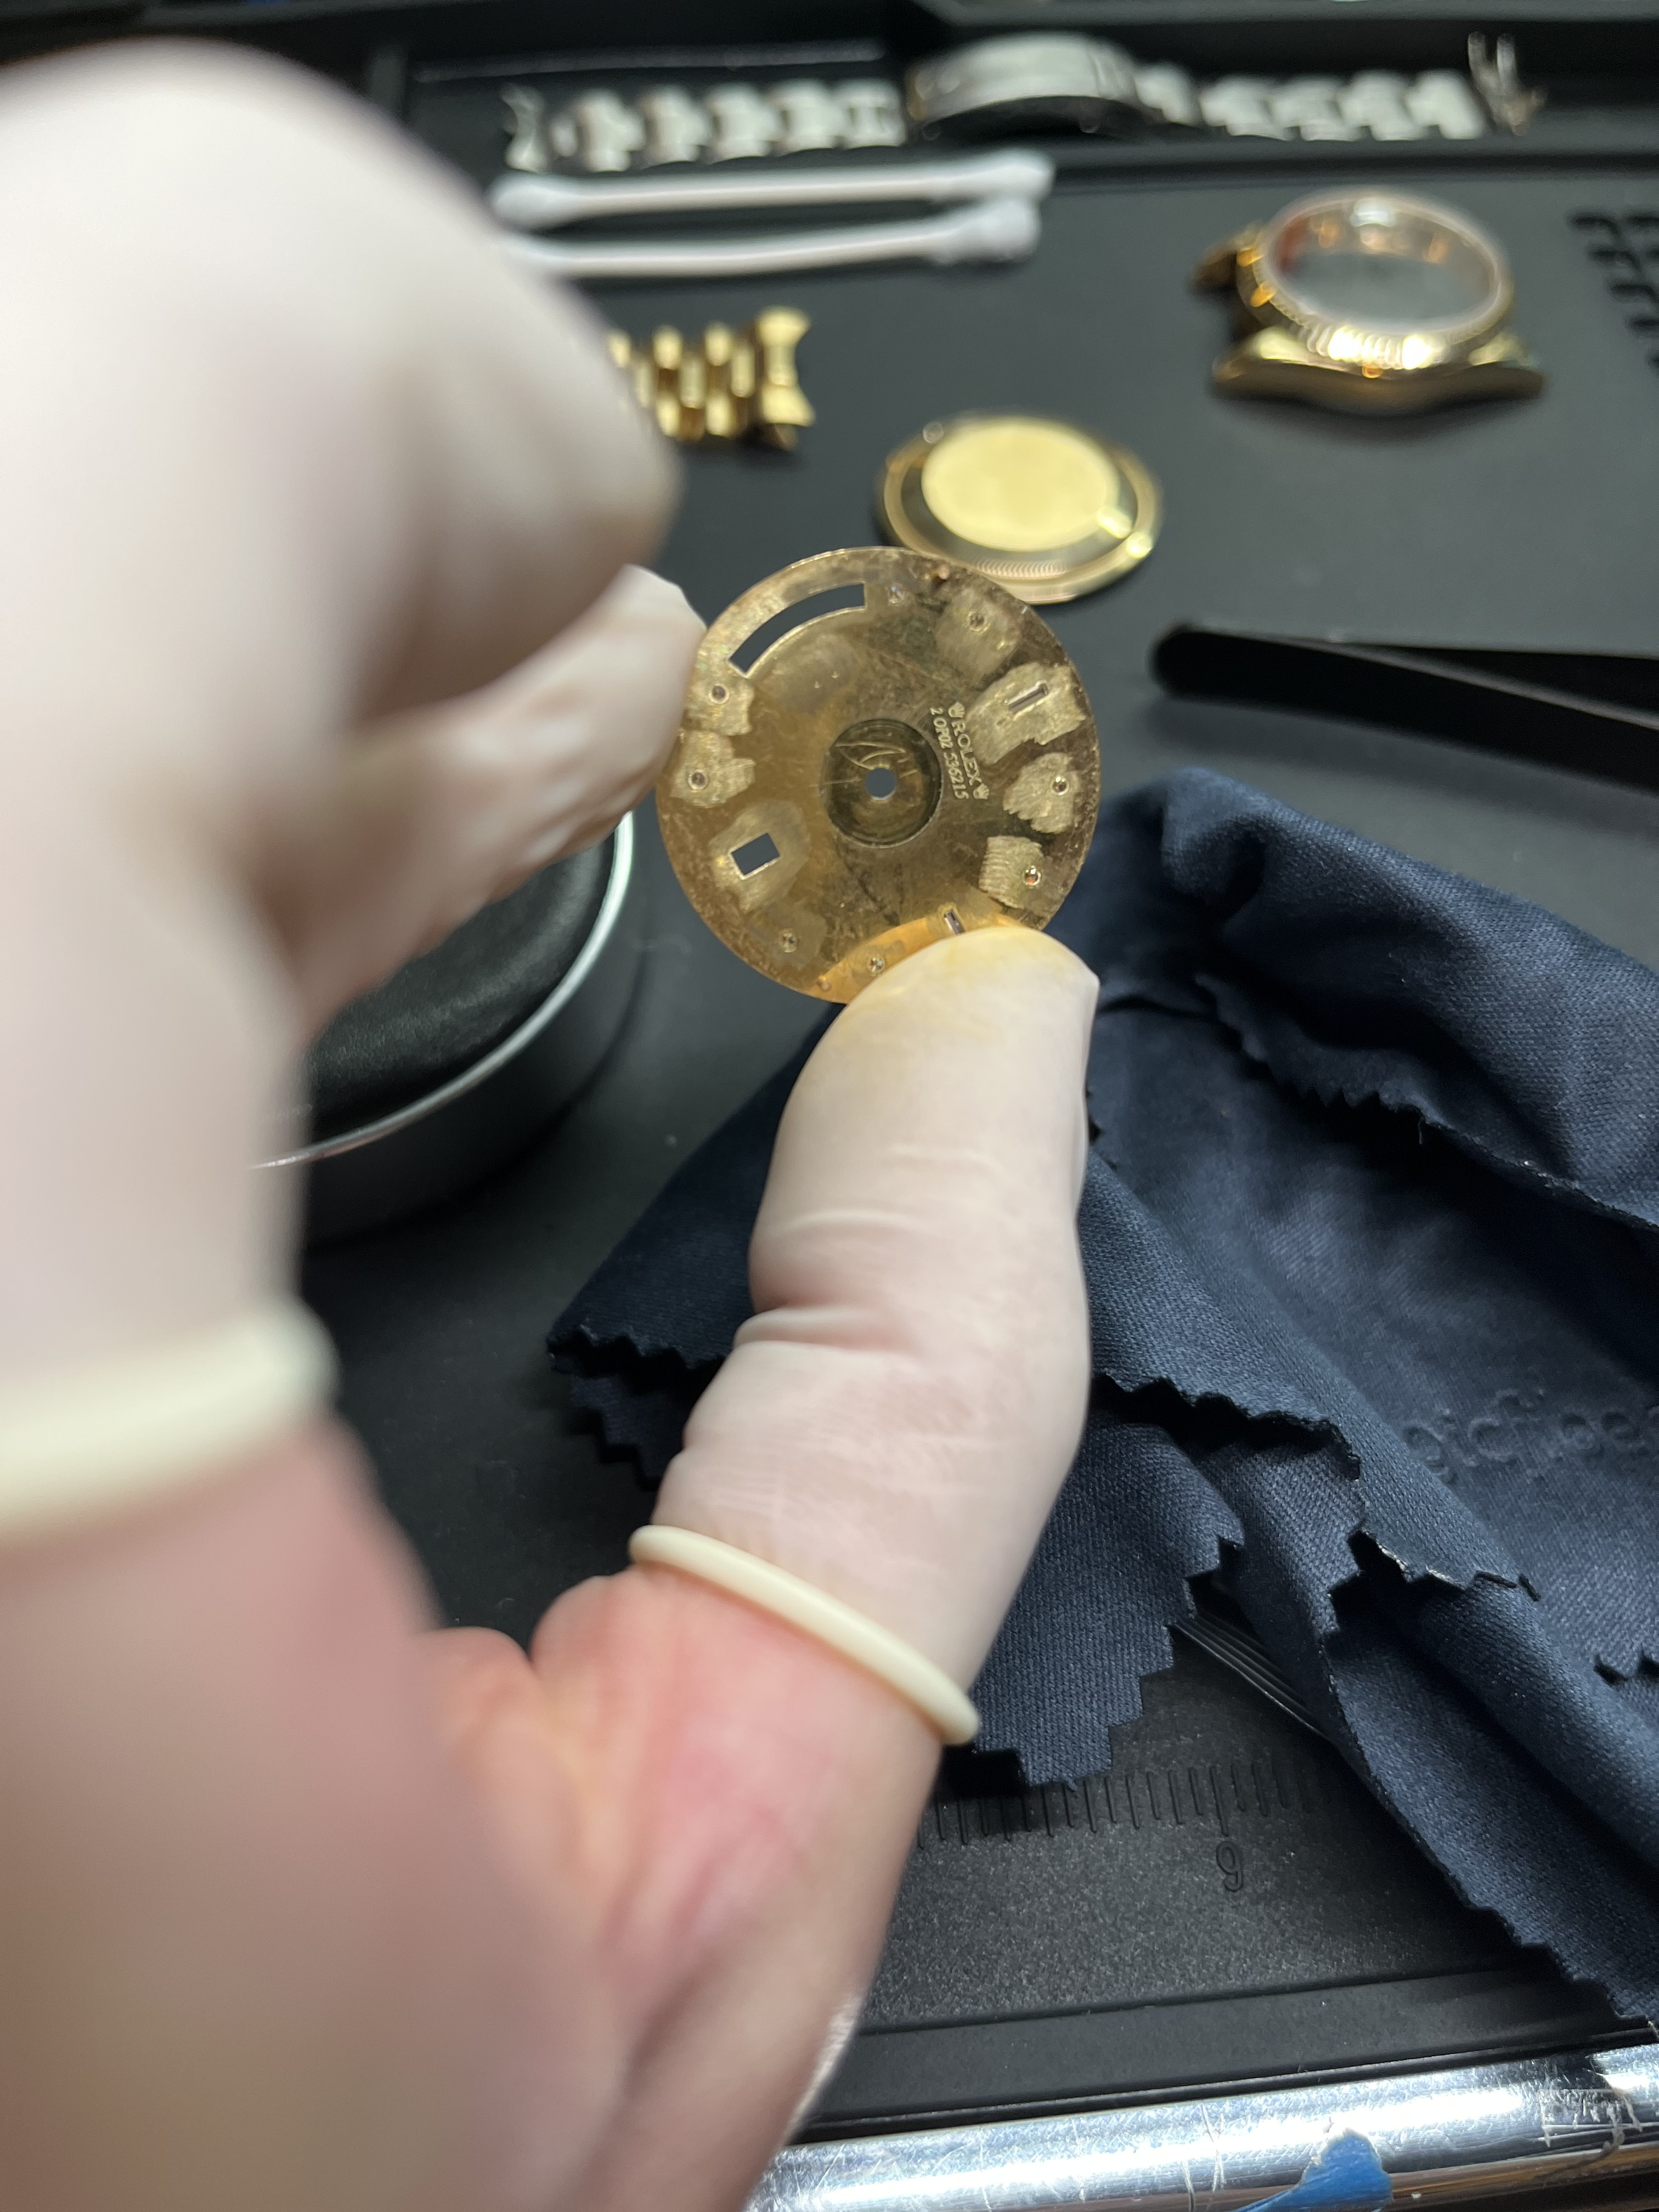
STEP ONE: remove dial from movement, don’t think because its already messed up you can just do whatever you like always cover the dial when removing hands, and remove hands without grazing the dial.. this dial has high polished date and day windows that are real 18k yellow gold so even the slightest touch will scratch them, and require a repolish.
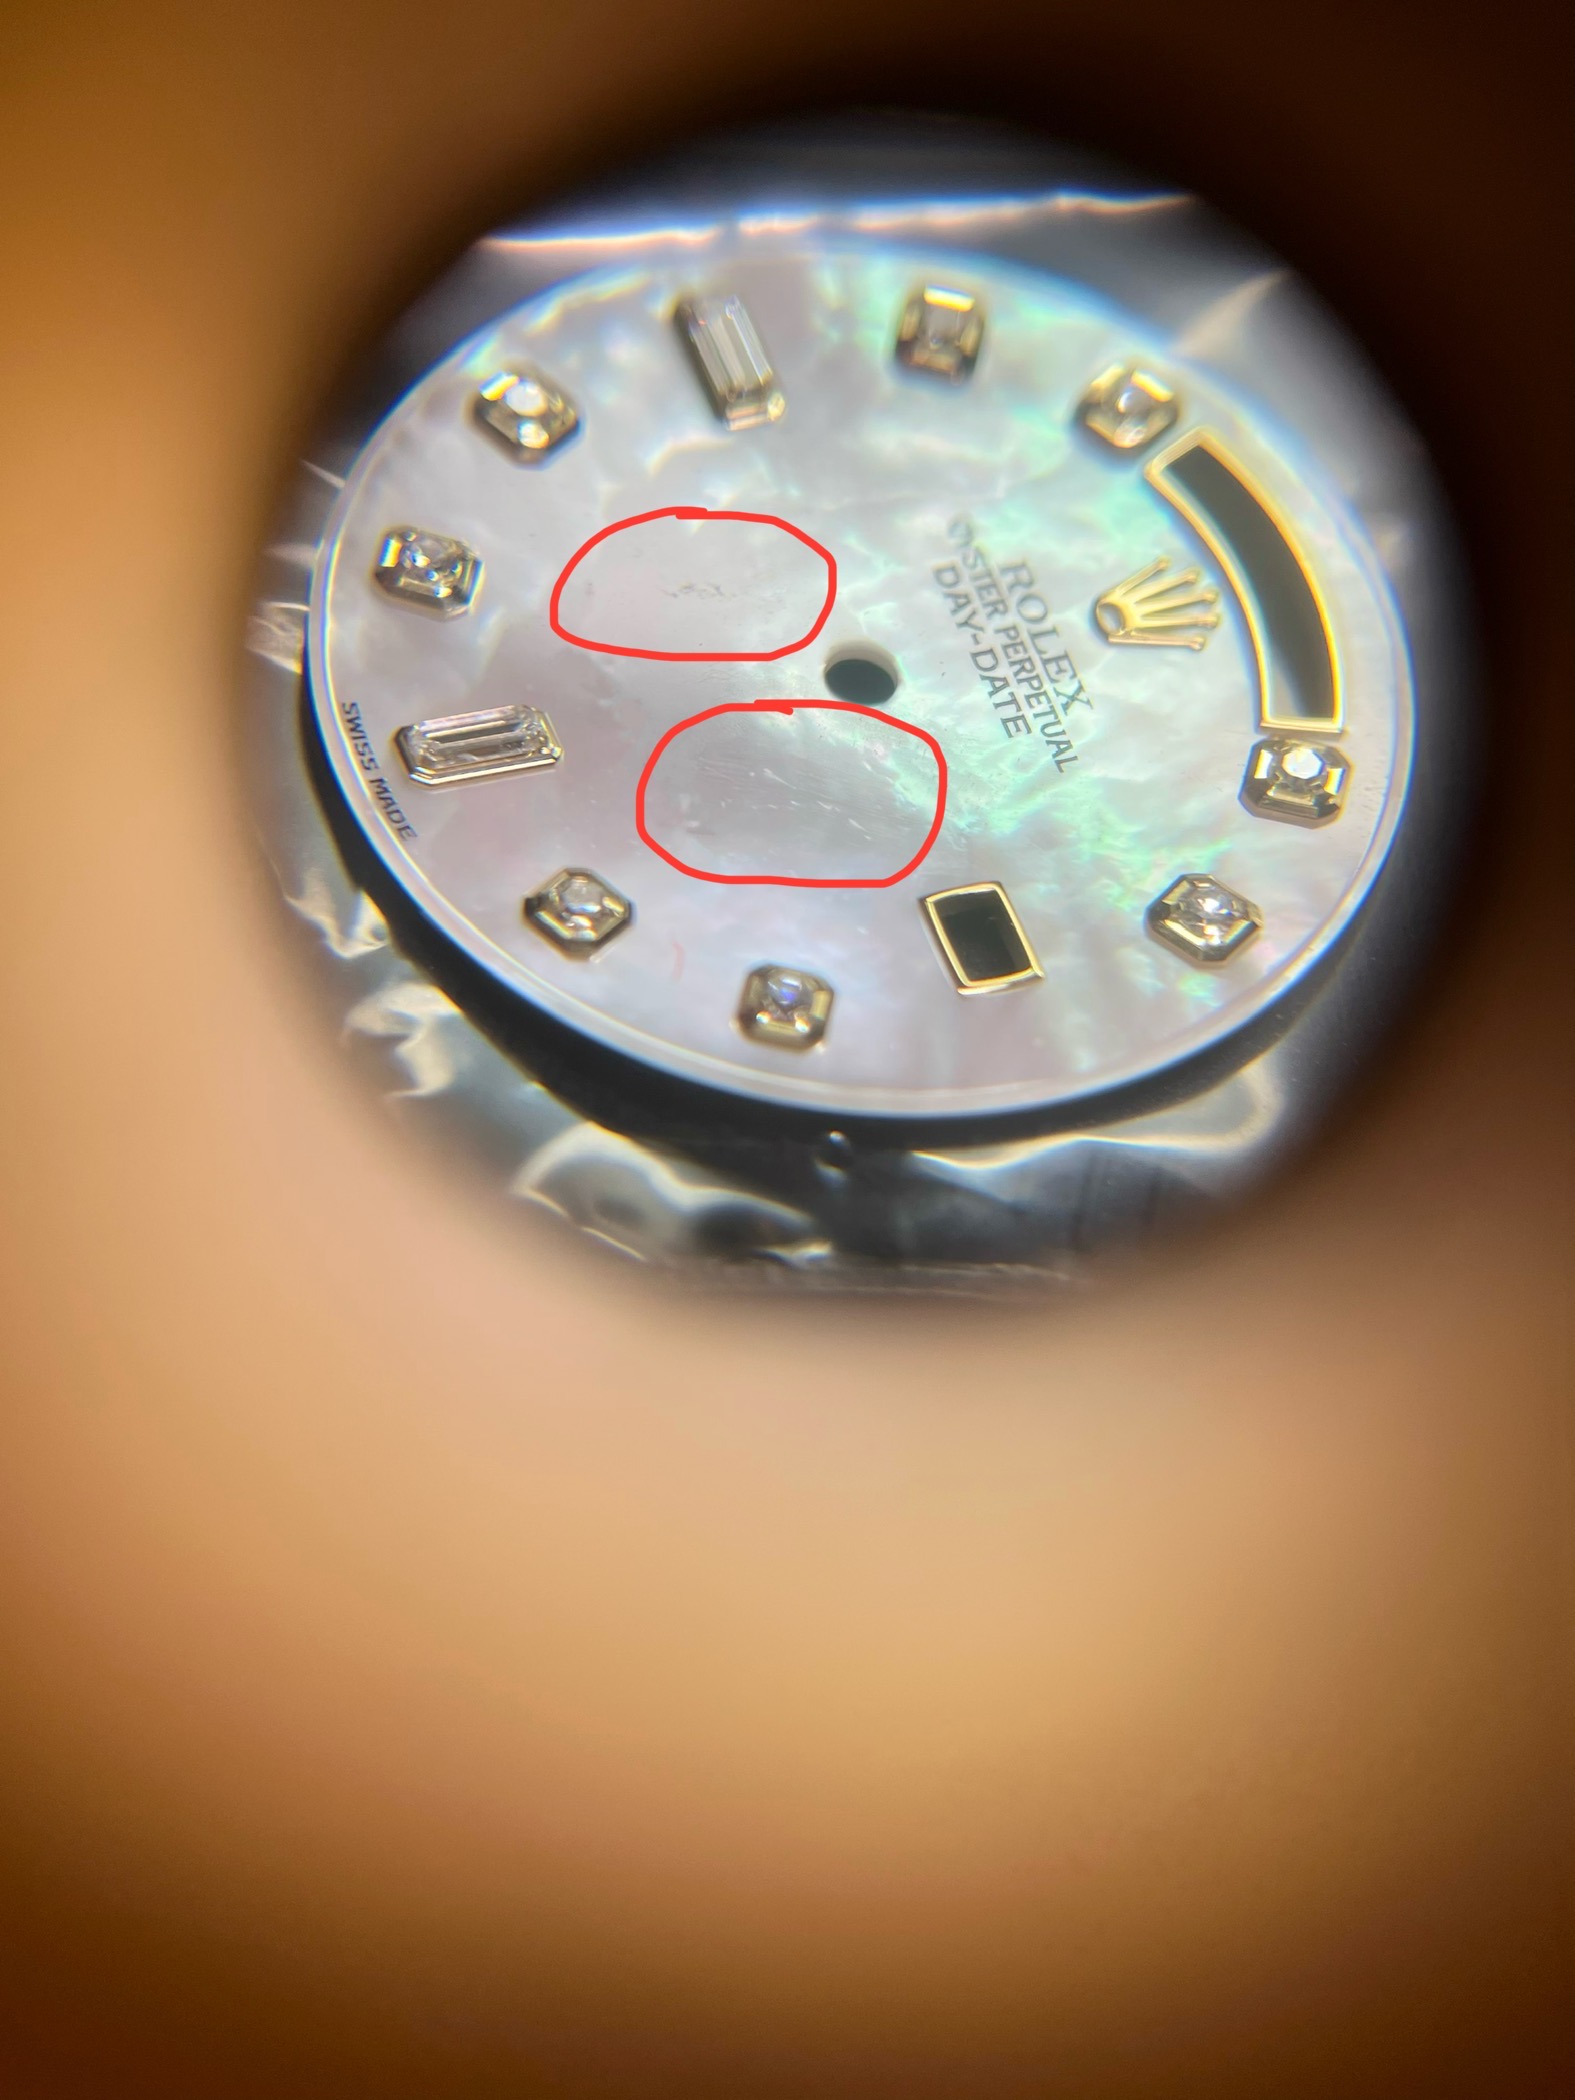
STEP TWO: Assessing the damage.. it sucks, but after you’ve thrown up once or twice lets figure out how to fix this, so we are dealing with a heavily scratched resin or lacquer top coat, and bottom 2 line damage. First remove the rest of the printing, there’s no saving it so removal & reprint is the only option here. Ive found rubbing alcohol & a que tip will remove the print and not distort or eat through this top coat (ALL DIALS ARE DIFFERENT SOME ARE ANODIZED THIS METHOD WILL TAKE OFF COLOR)
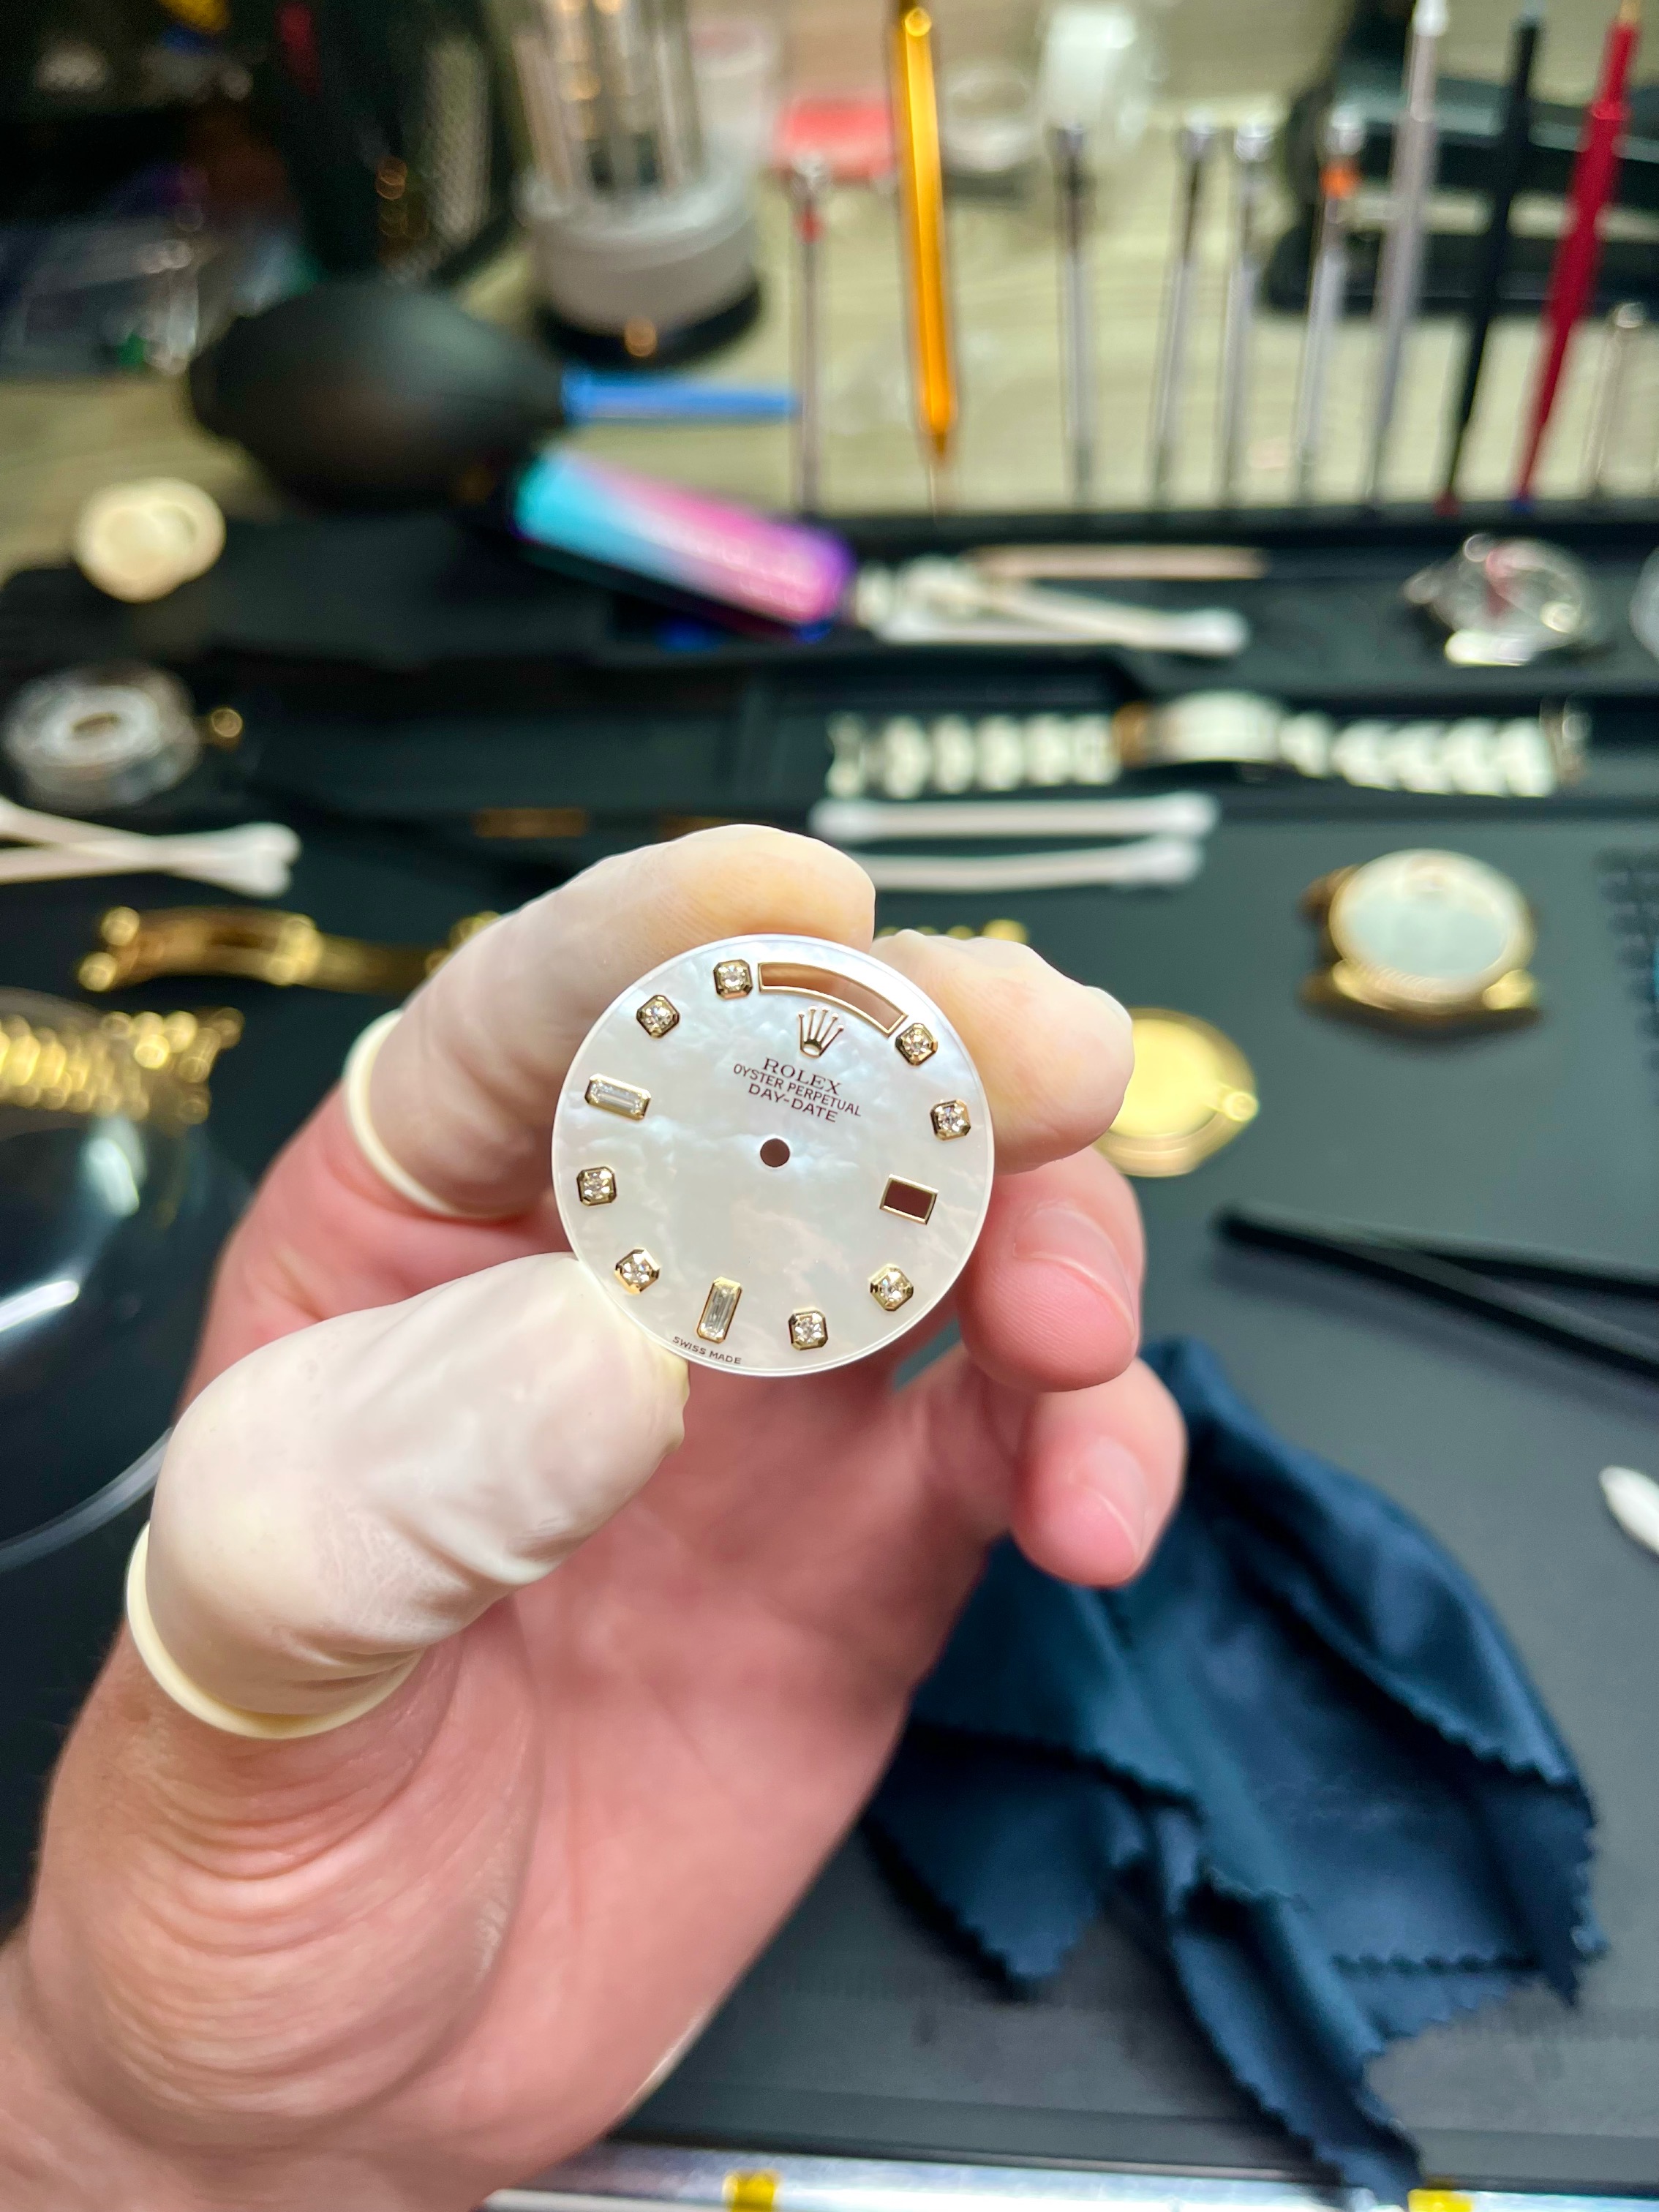
STEP THREE: removing the scratches.. this is a very tedious process that I honestly can’t take enough pictures on, its all about the feel and having a sharp eye, have something like a microscope or at least a 10x loupe. I was once heavily involved in the automotive industry and car paint repairs were my specialty so its similar but no where near the same. Start by saying off the dial markers use watch wrap and tape to secure it (DO NOT USE TAPE ON THE DIAL YOU MIGHT LEAVE RESIDUE WHICH MAKES MORE WORK) now depending on how deep the scratch is you will need to sand and repolish the finish.
For this dial specifically: secure dial on foam block do not try and sand it on bench top you can bend the dial feet..
Scratches were decently deep, but there were a lot of affected areas.
1 - Start with least aggressive and check results (3000 grit foam backed pad secured to a q tip) usually I use a sanding pen (but just to show users it can be done with minimal tools)
2 - Started with 2500 grit in small circular motions (this will haze the dial don’t get scared) check work / progress)
3- 2500 grit - 3000 - 3500 - 4000 - 4500 - 5000 ALL OF THESE GRITS ARE FOAM BACKED Light finish pads made for bowling balls specifically.
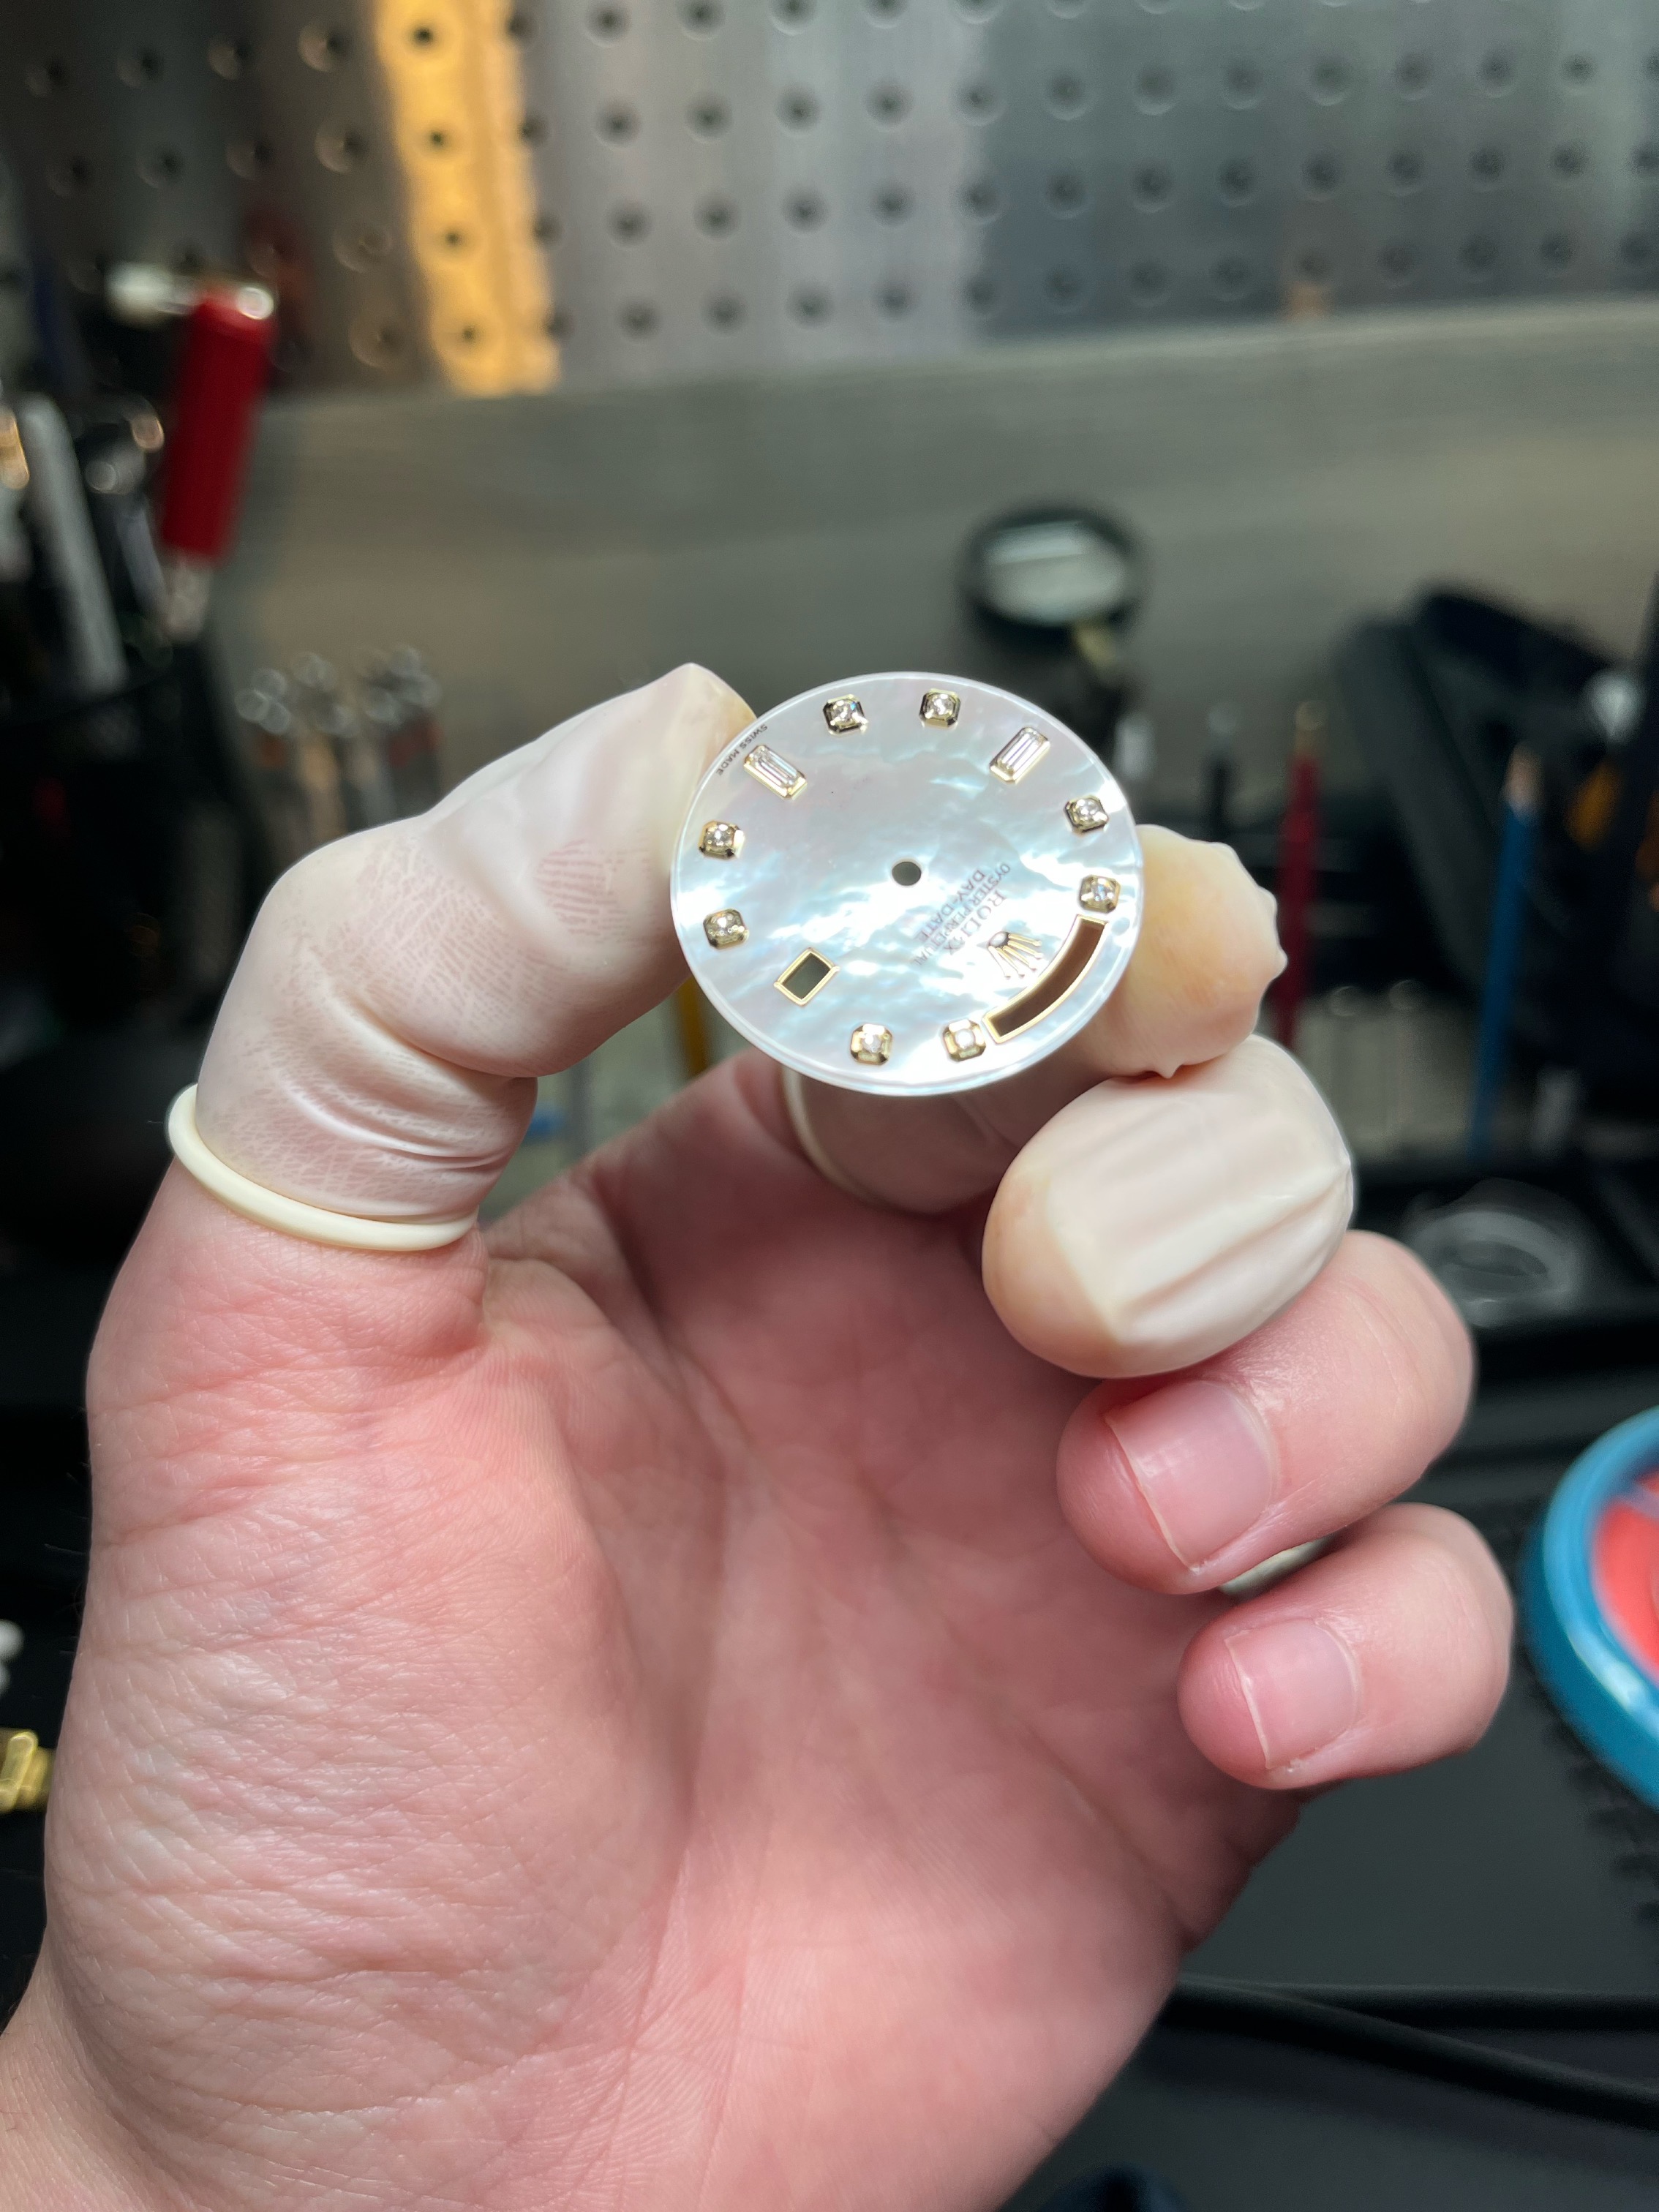
STEP FOUR: re-polishing.. this can be a very messy step but you need to take precautions to keep the polish contained.
using micro foam pads varying stiffness, figure out which one will suite the dial finish best without Marring the surface..
use liquid polish only - I used multiple (grit) based polishes to make sure the finish is glassy & all sanding marks are removed
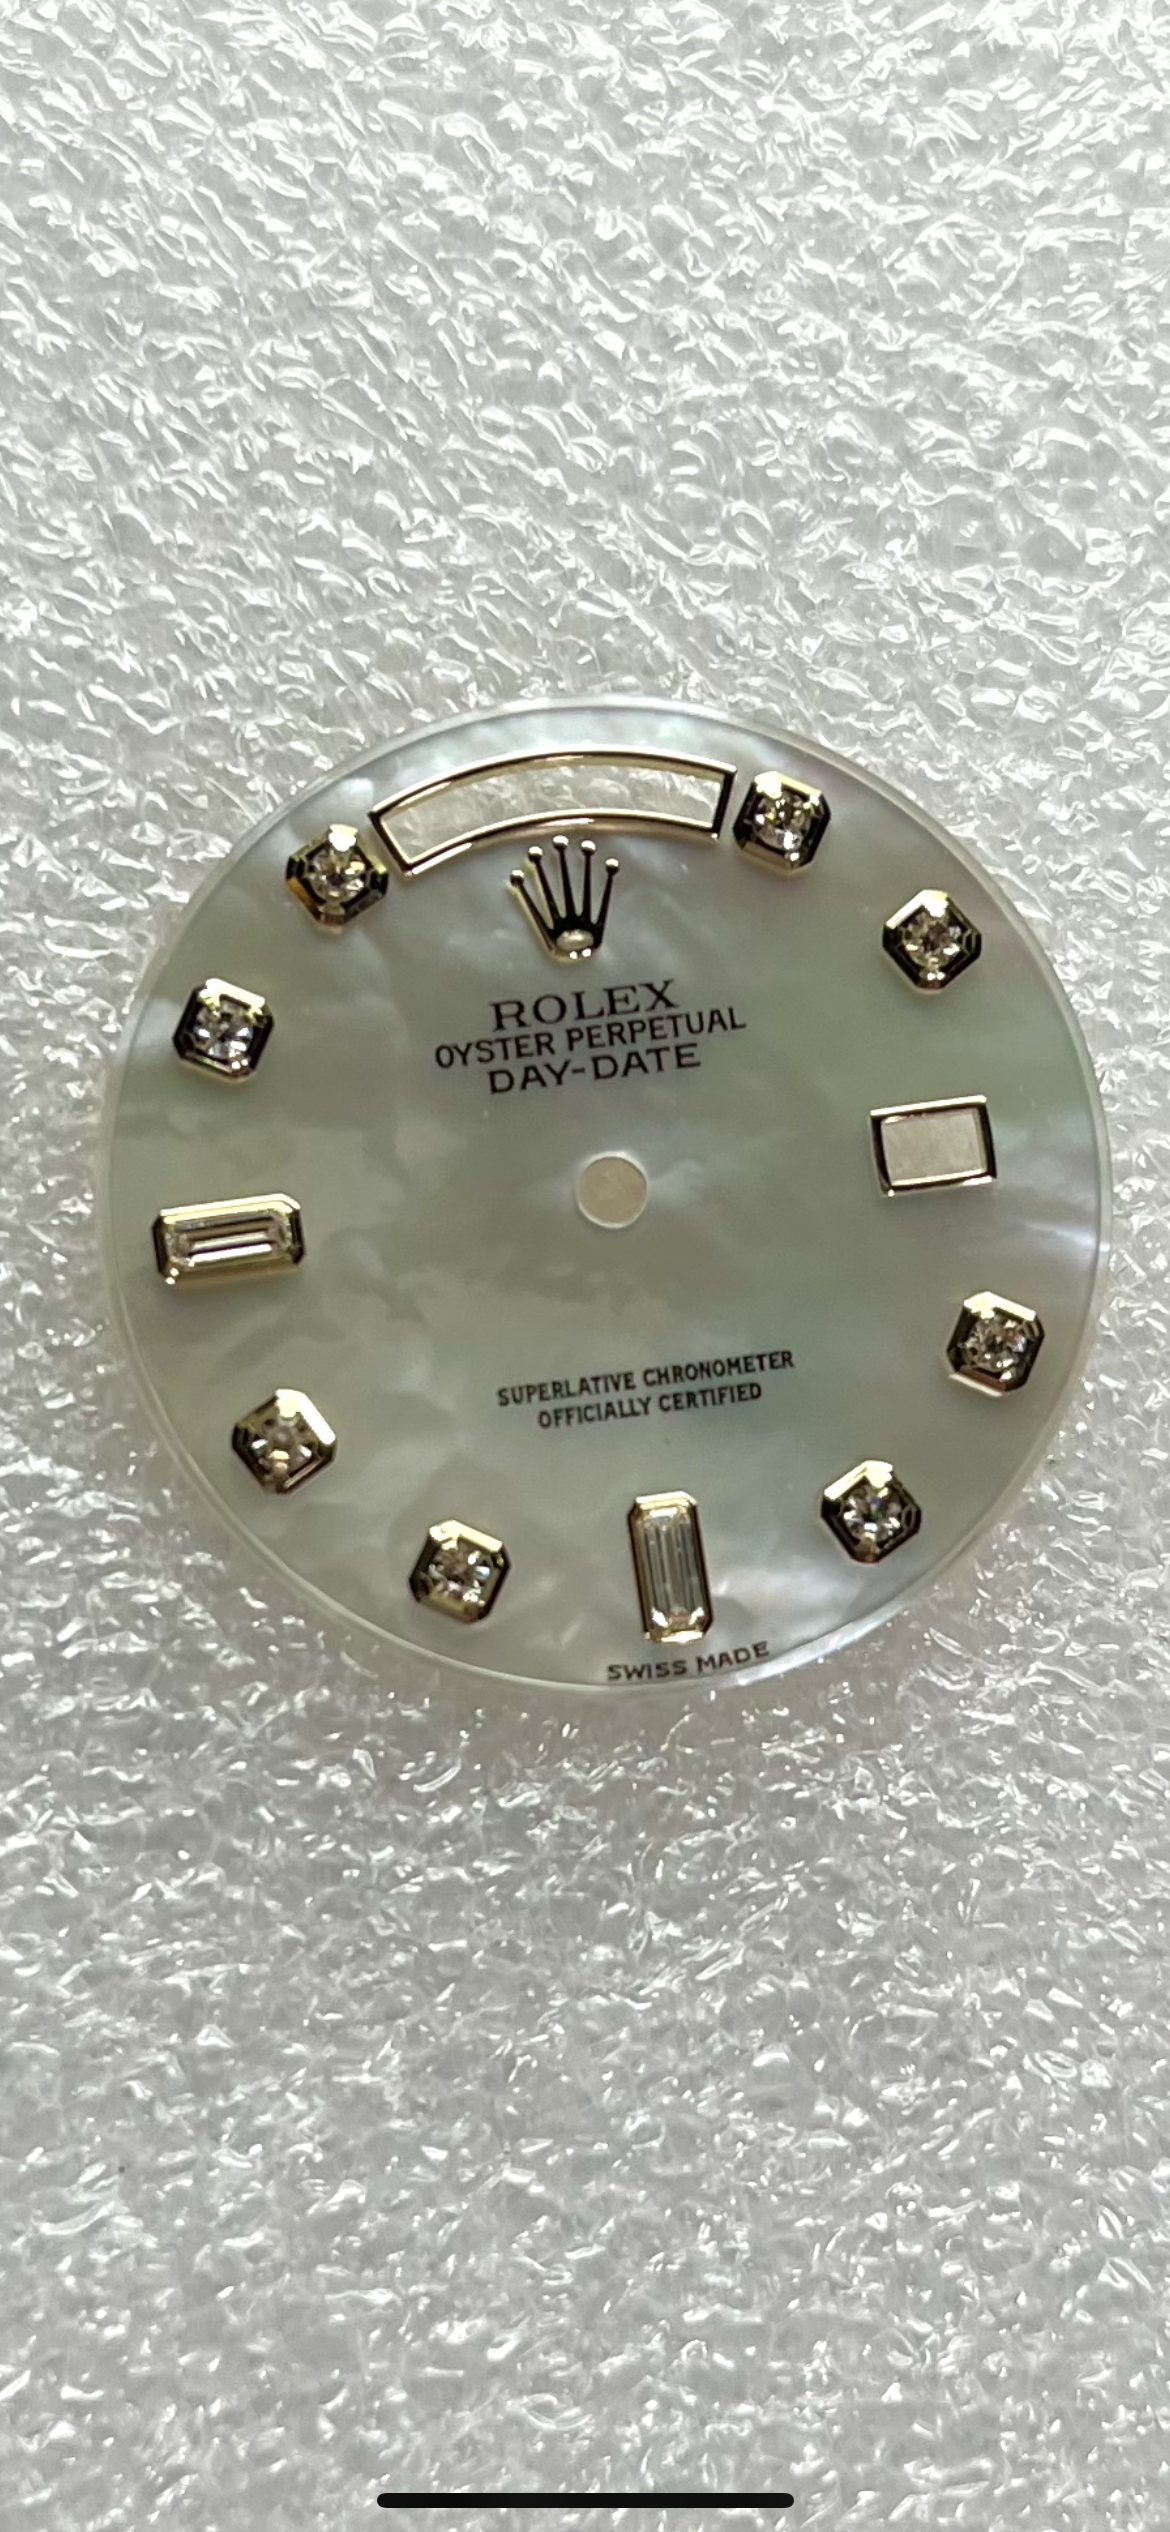
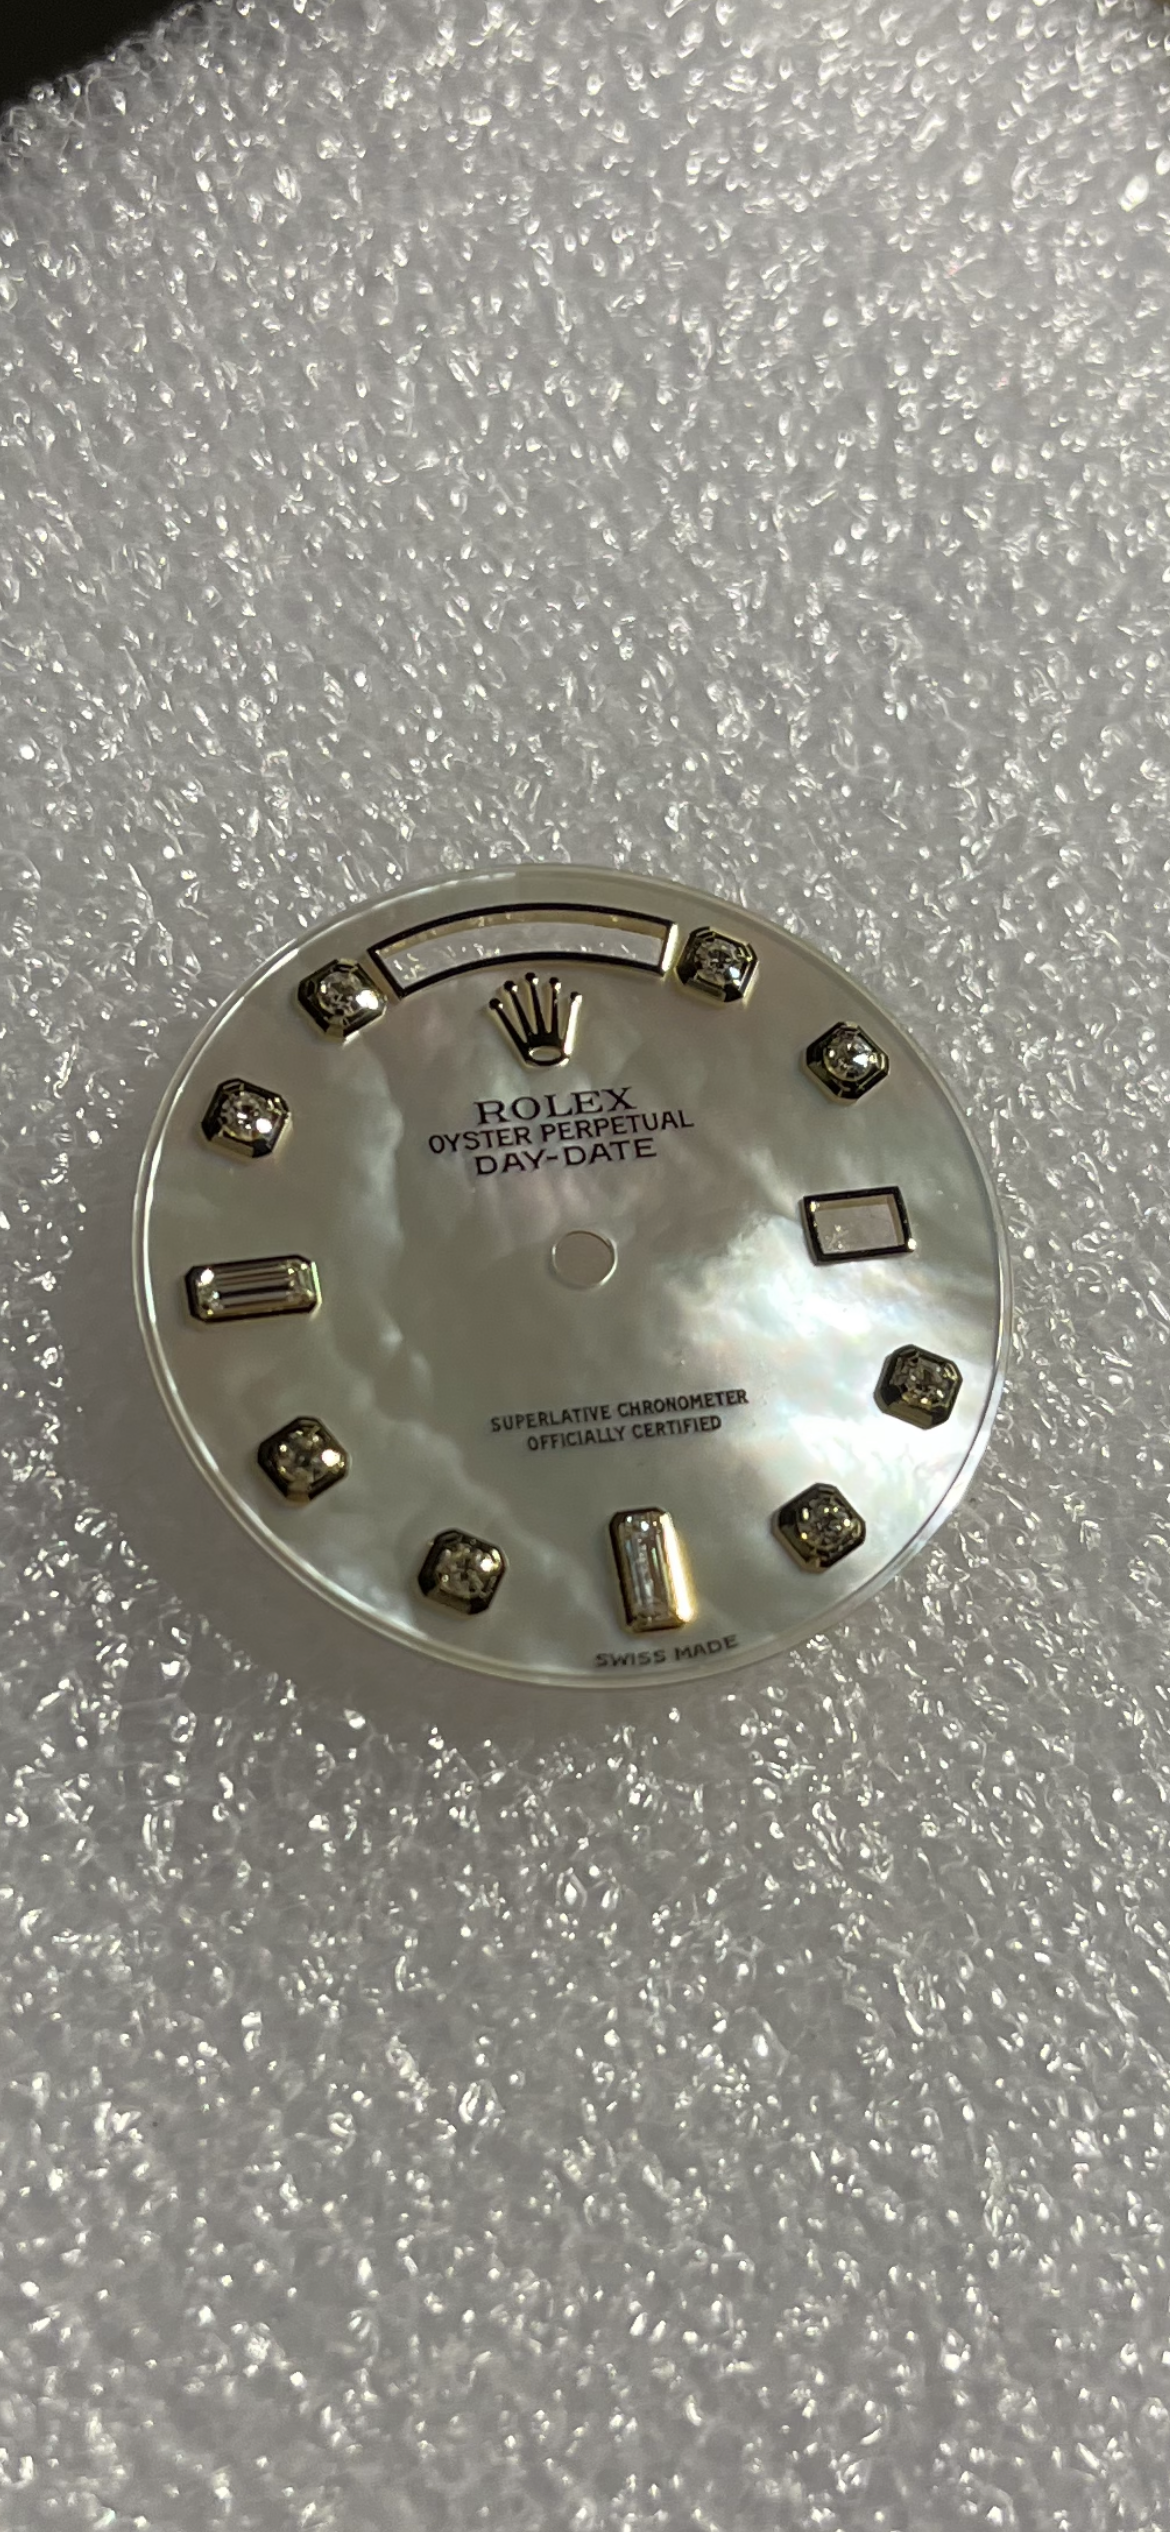
DIAL AFTER POLISH:
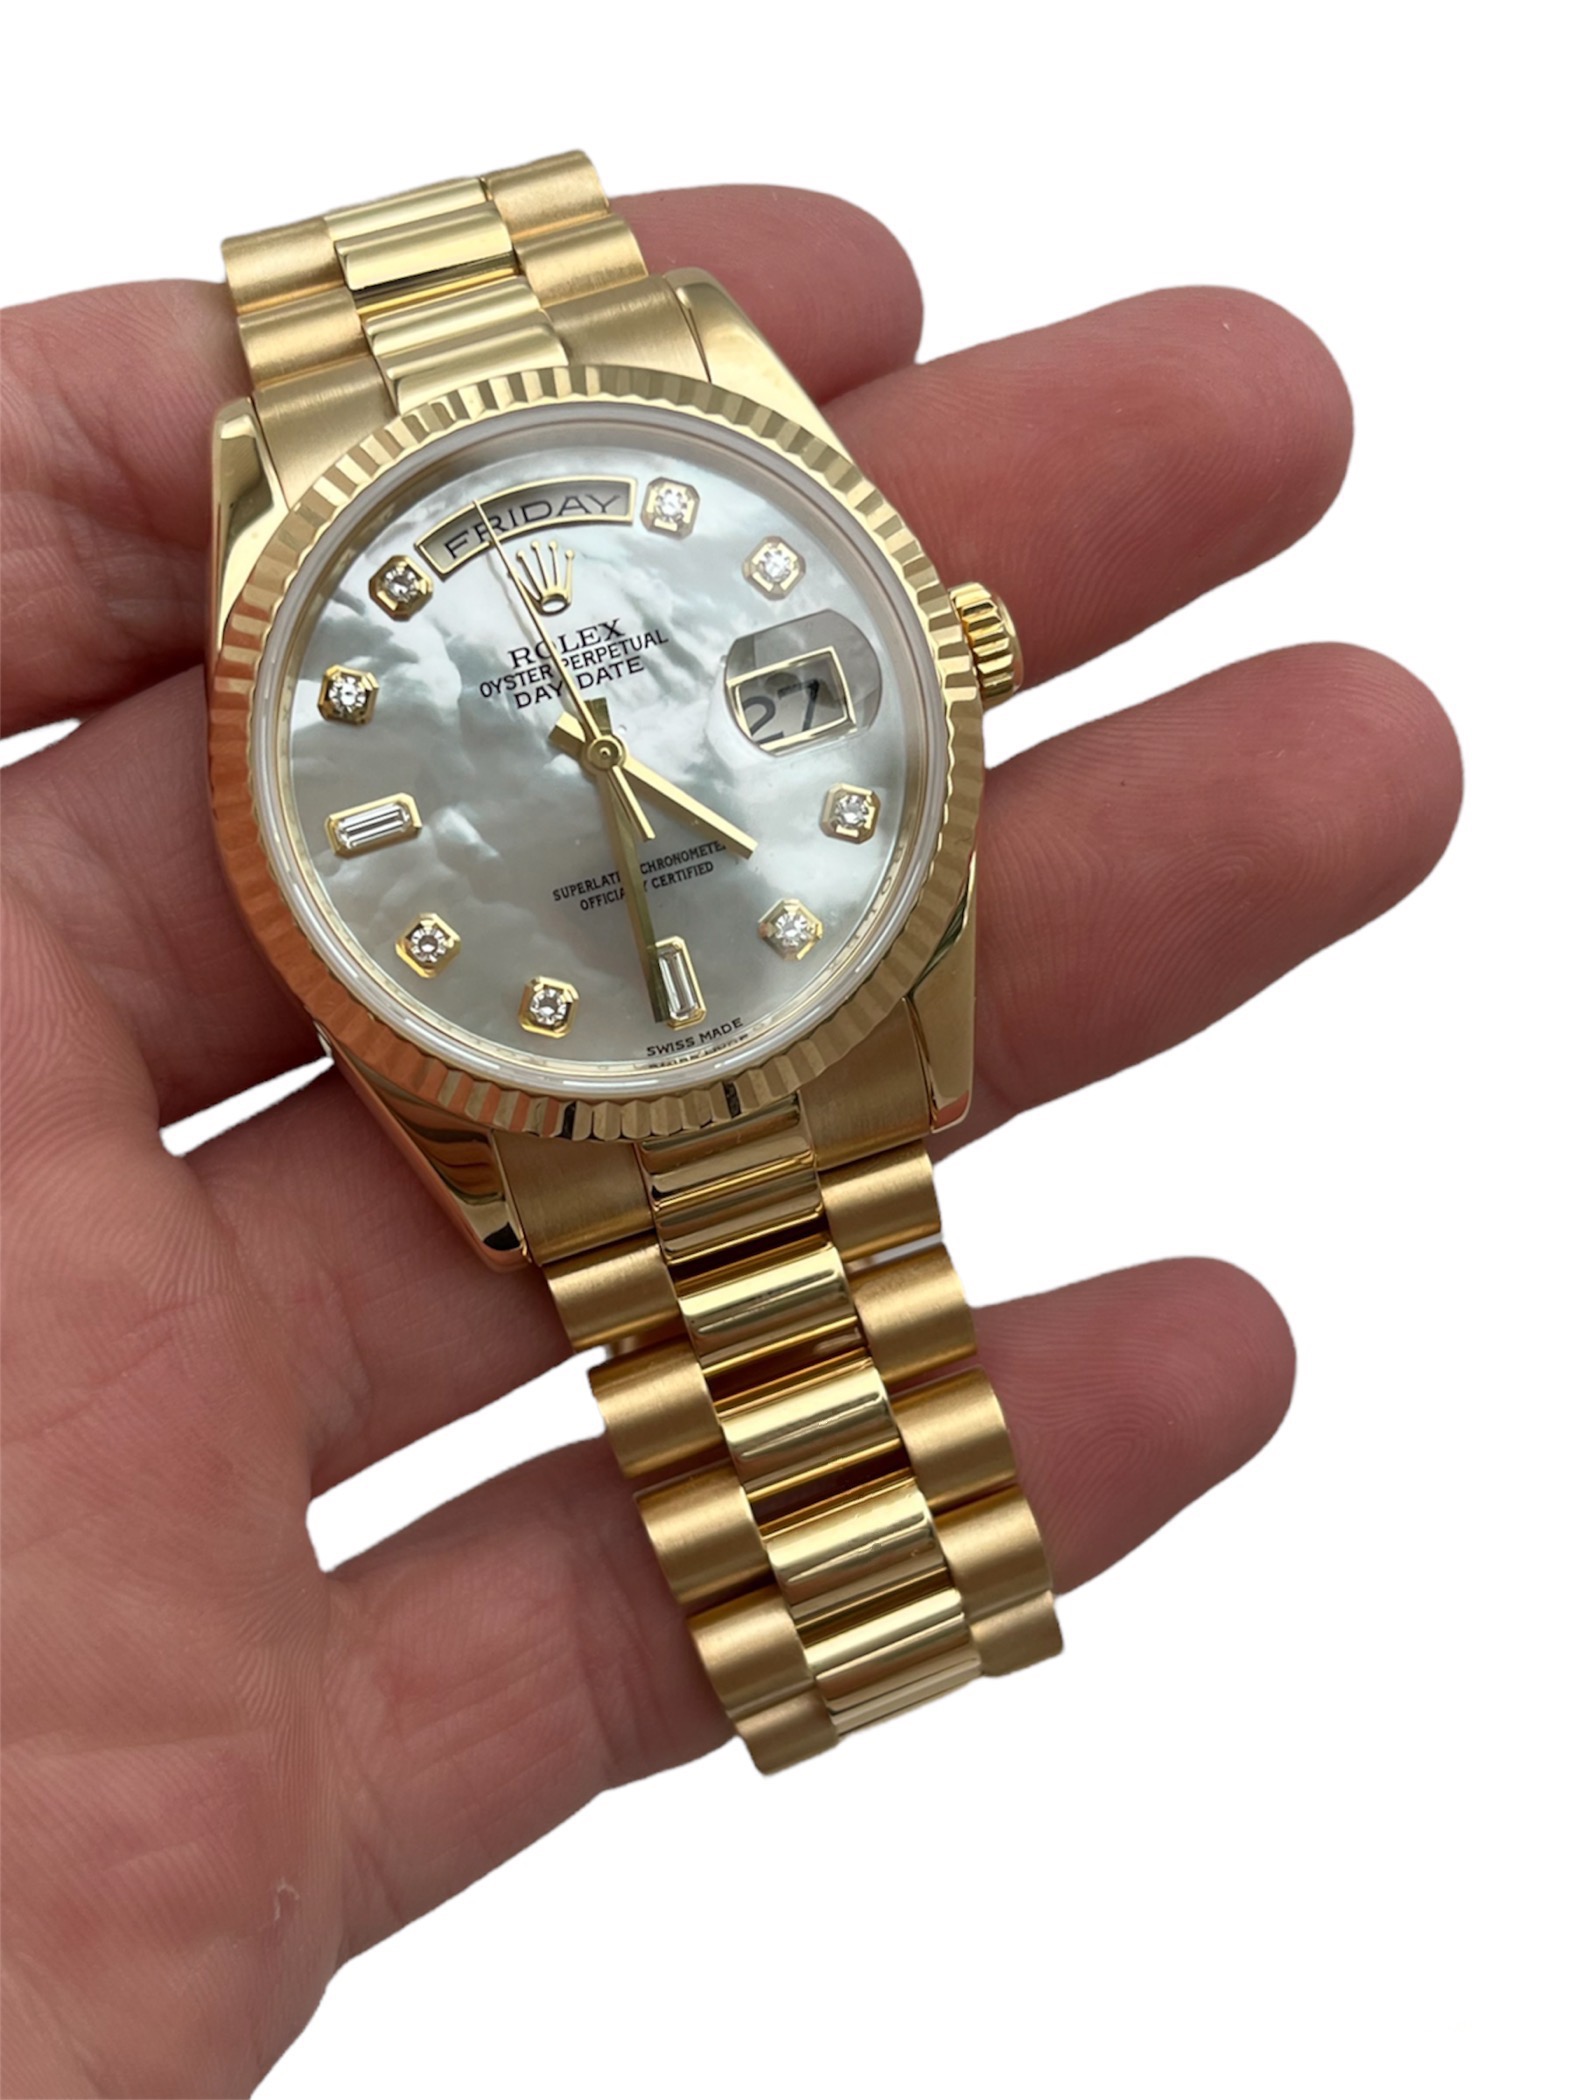
STEP FIVE: now this process I cannot show for a variety of reasons.. having access to the tooling specific dies etc are the only way you can do this part.. from Rolex - Patek - AP I can customize any dial with any wording etc.
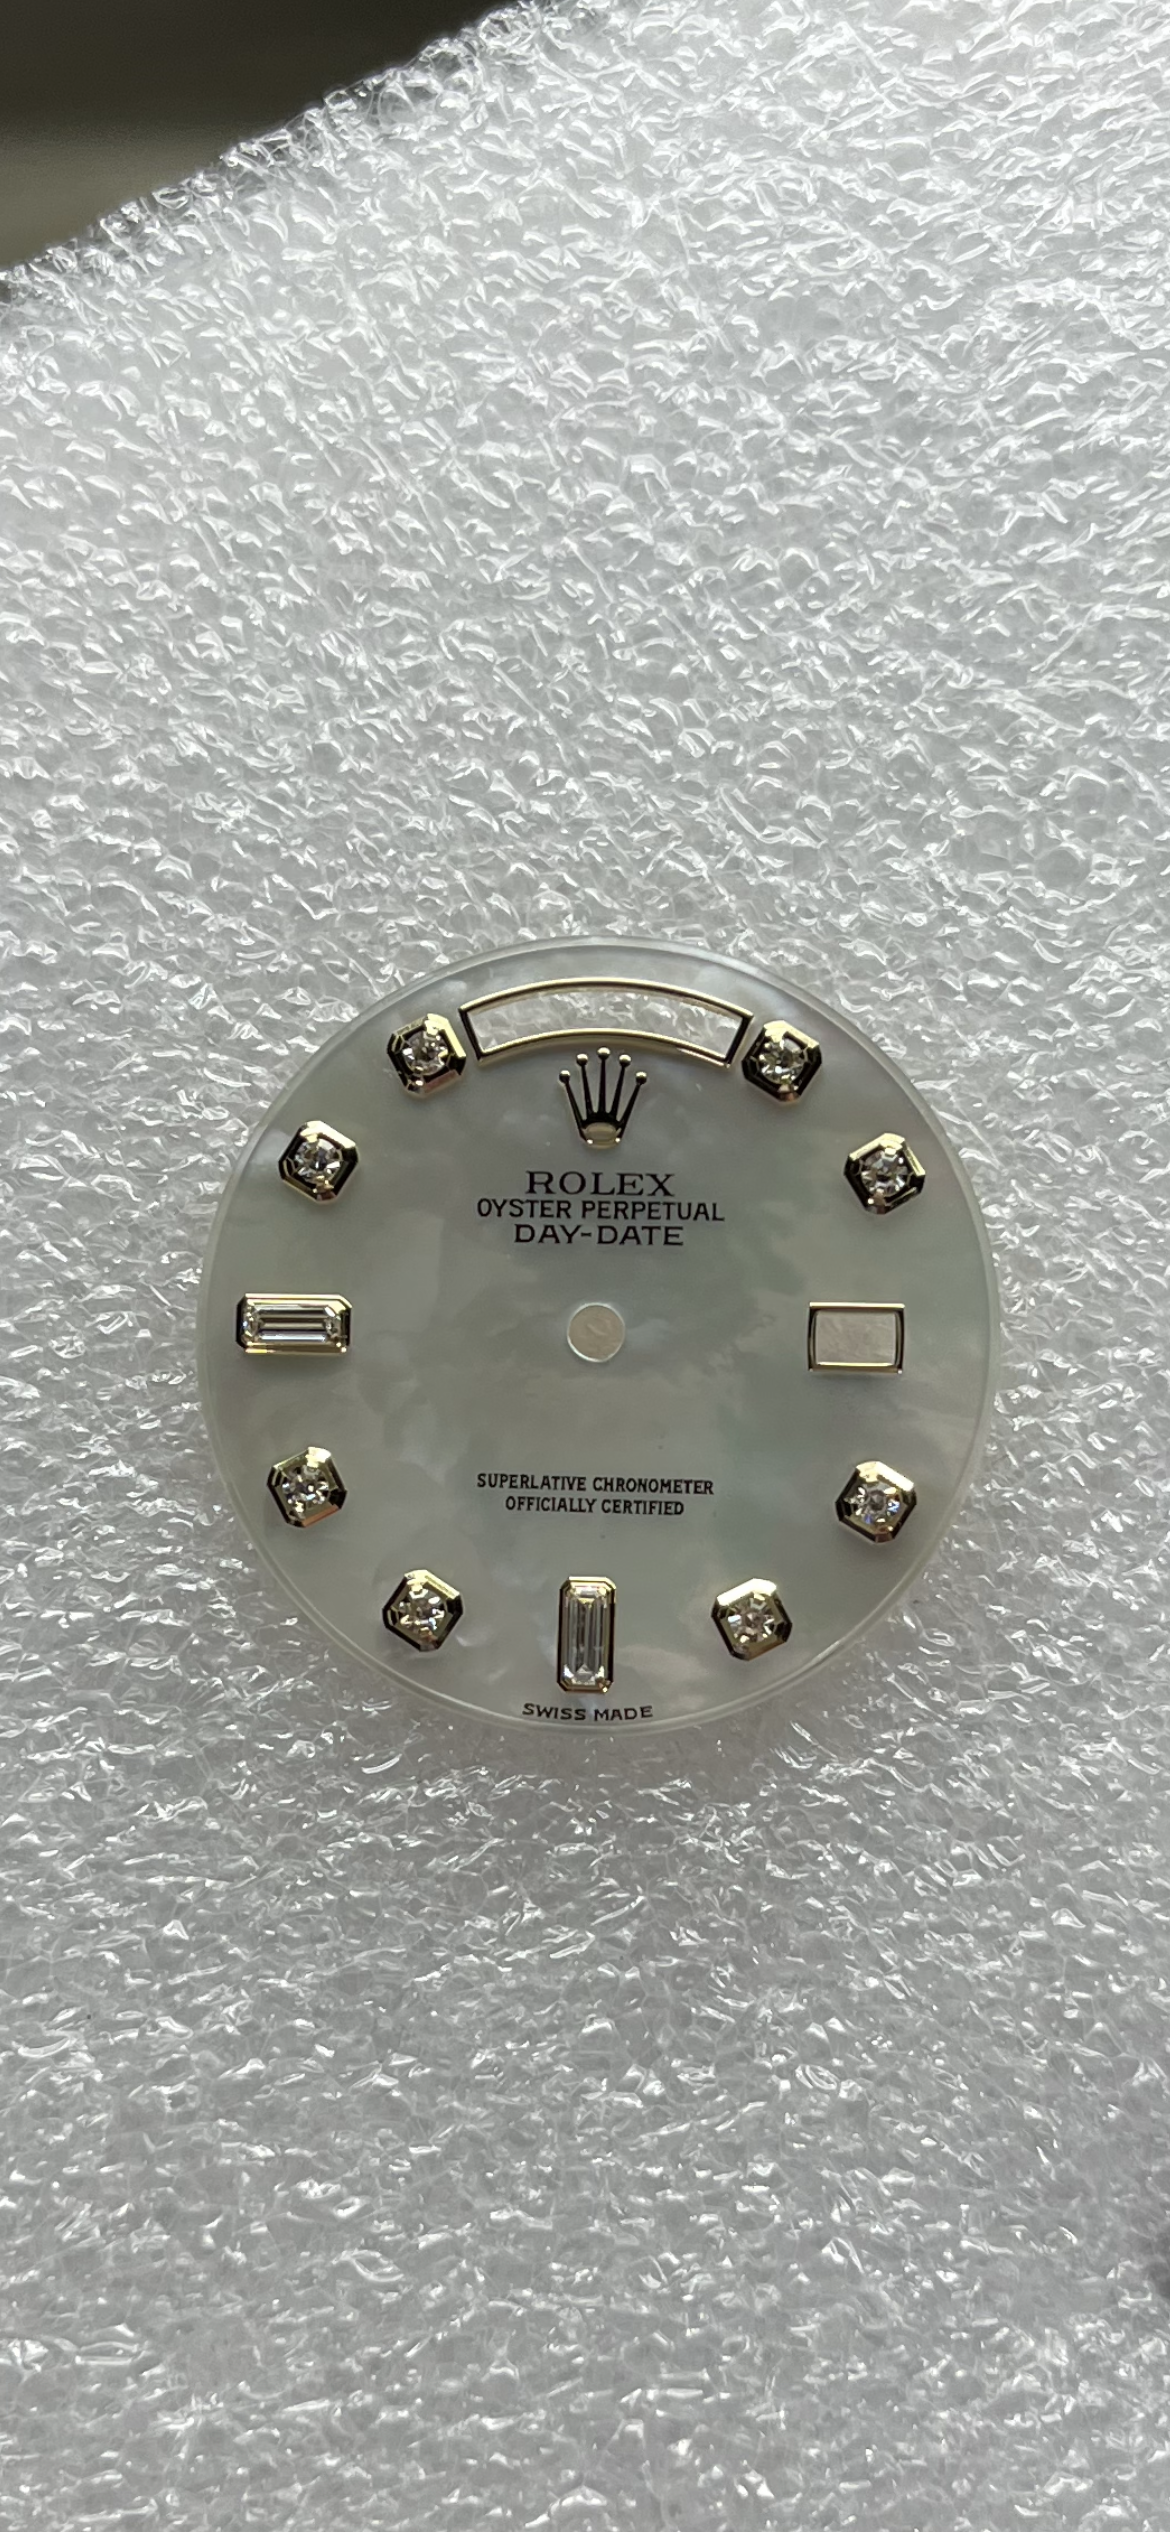
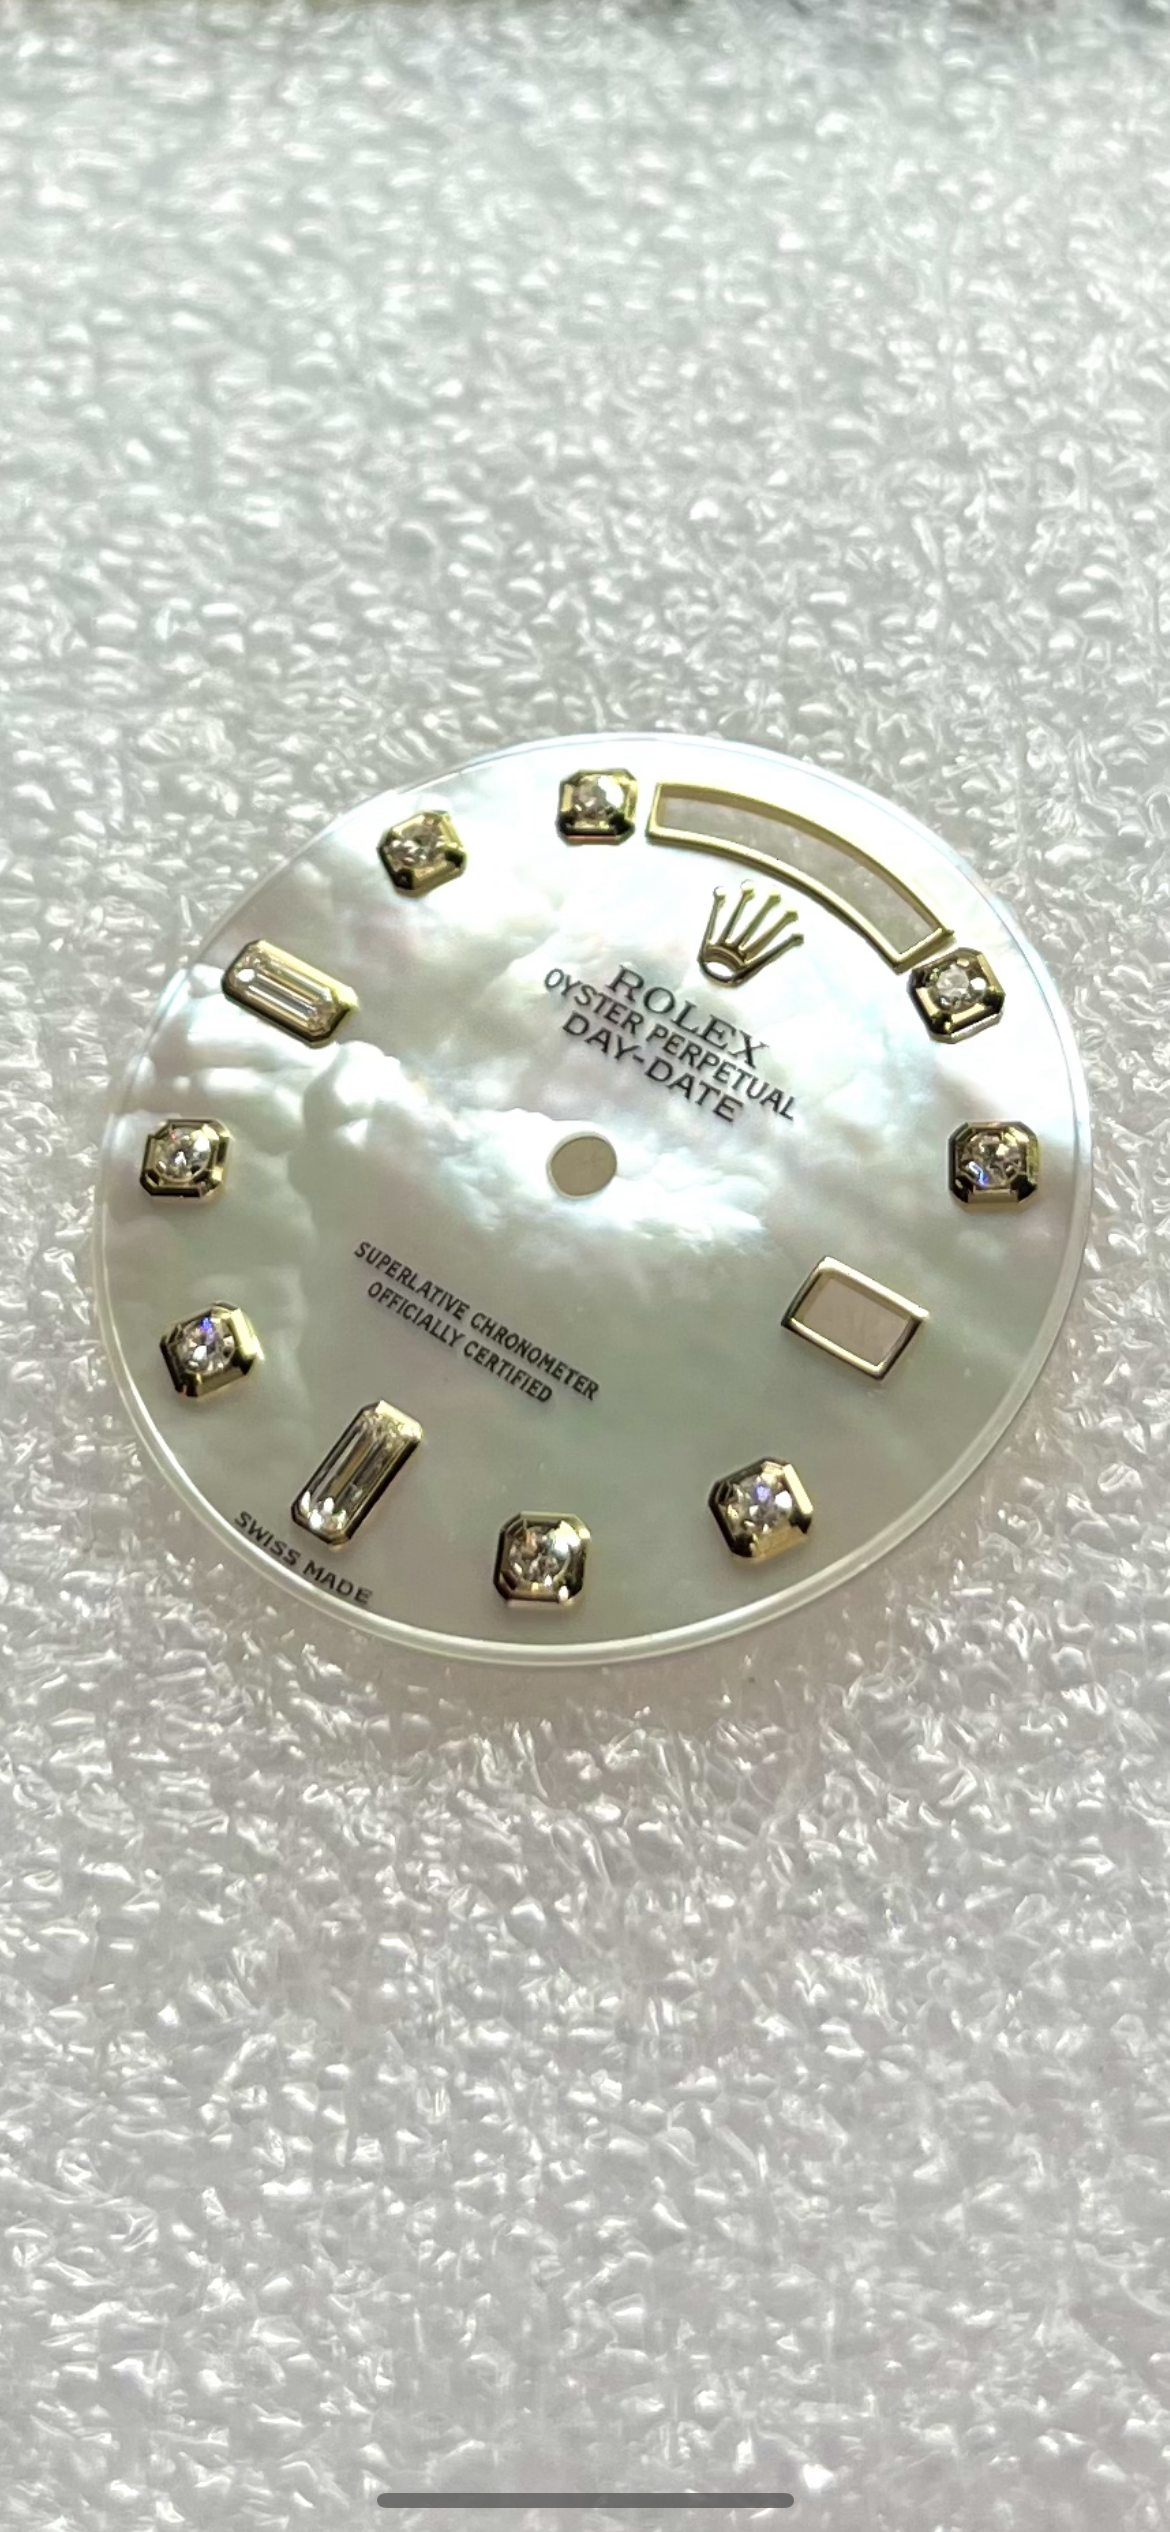
Dial restamped / back in watch!! This is my personal piece
I like to think made my bones off of working with reps first as this was what I could afford at the time, now I’m able to stock over 110 genuine dials, gen cases, bracelets, bezels insert etc as I supply parts to a variety of people. what was once a small hobby has now turned into something I love more than my actual day job and has consumed me, this is what I love to do so I’m attempting to get better at these write ups to hopefully help out some of you along the way enjoy!
So here we have a genuine 118238 Z serial 36MM day date, after going to service its clear the monkey of a watchmaker carelessly heavily scratched and dropped something on the dial, or used a cleaning solvent in which removed some print on a $2500+ dial… so lets break it down on how to fix these issues. (WARNING: IF YOU HAVE THE SHAKES PLEASE DO NOT TRY THIS I AM NOT RESPONSIBLE FOR ANYTHING YOU TRY AT HOME)
STEP ONE: remove dial from movement, don’t think because its already messed up you can just do whatever you like always cover the dial when removing hands, and remove hands without grazing the dial.. this dial has high polished date and day windows that are real 18k yellow gold so even the slightest touch will scratch them, and require a repolish.
STEP TWO: Assessing the damage.. it sucks, but after you’ve thrown up once or twice lets figure out how to fix this, so we are dealing with a heavily scratched resin or lacquer top coat, and bottom 2 line damage. First remove the rest of the printing, there’s no saving it so removal & reprint is the only option here. Ive found rubbing alcohol & a que tip will remove the print and not distort or eat through this top coat (ALL DIALS ARE DIFFERENT SOME ARE ANODIZED THIS METHOD WILL TAKE OFF COLOR)
STEP THREE: removing the scratches.. this is a very tedious process that I honestly can’t take enough pictures on, its all about the feel and having a sharp eye, have something like a microscope or at least a 10x loupe. I was once heavily involved in the automotive industry and car paint repairs were my specialty so its similar but no where near the same. Start by saying off the dial markers use watch wrap and tape to secure it (DO NOT USE TAPE ON THE DIAL YOU MIGHT LEAVE RESIDUE WHICH MAKES MORE WORK) now depending on how deep the scratch is you will need to sand and repolish the finish.
For this dial specifically: secure dial on foam block do not try and sand it on bench top you can bend the dial feet..
Scratches were decently deep, but there were a lot of affected areas.
1 - Start with least aggressive and check results (3000 grit foam backed pad secured to a q tip) usually I use a sanding pen (but just to show users it can be done with minimal tools)
2 - Started with 2500 grit in small circular motions (this will haze the dial don’t get scared) check work / progress)
3- 2500 grit - 3000 - 3500 - 4000 - 4500 - 5000 ALL OF THESE GRITS ARE FOAM BACKED Light finish pads made for bowling balls specifically.
STEP FOUR: re-polishing.. this can be a very messy step but you need to take precautions to keep the polish contained.
using micro foam pads varying stiffness, figure out which one will suite the dial finish best without Marring the surface..
use liquid polish only - I used multiple (grit) based polishes to make sure the finish is glassy & all sanding marks are removed
DIAL AFTER POLISH:
STEP FIVE: now this process I cannot show for a variety of reasons.. having access to the tooling specific dies etc are the only way you can do this part.. from Rolex - Patek - AP I can customize any dial with any wording etc.
Dial restamped / back in watch!! This is my personal piece
Last edited: