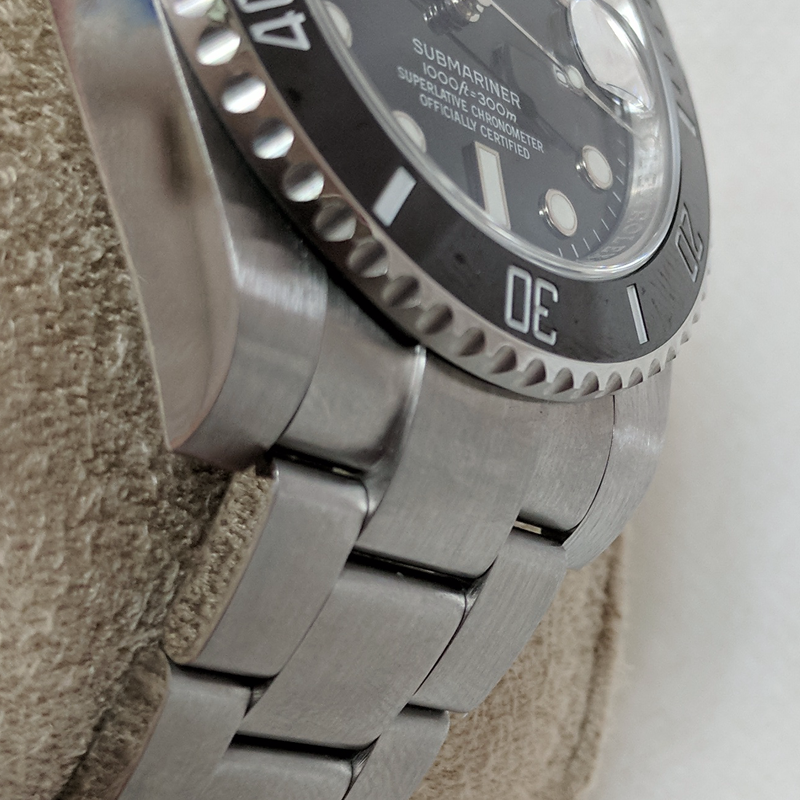
Over in the Noob V9 thread Nikoel posted a great idea for recessing the SELs on a Sub Rep where the SEL sits more flush with the lugs than you might like (which seems to be most of them).
I decided to take my own stab at a modification of his idea but didn't want to post more OT banter in the Noob V9 thread so I started this new thread.
As I understand Nikoel's idea you'd be epoxying smaller diameter spring bars into the SEL - biasing them toward the top of the circumference of the hole in the SEL so the SEL sits lower in the lugs.
Not wanting to commit to the permanence of epoxing the spring bars in (in case I wasn't happy with the result) I took another route.
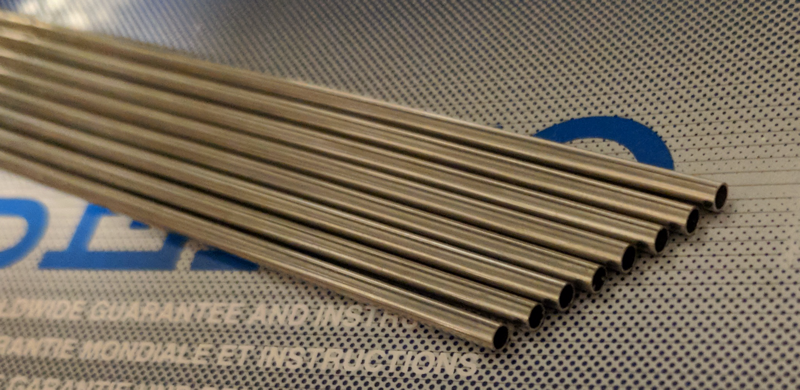
First I experimented to see what size spring bar to use in place of the original 2.0 mm spring bar. A 1.78 mm didn't seem to give as much recess as I was looking for. A 1.5 mm spring bar gave a perfect recess (to my eye anyway).
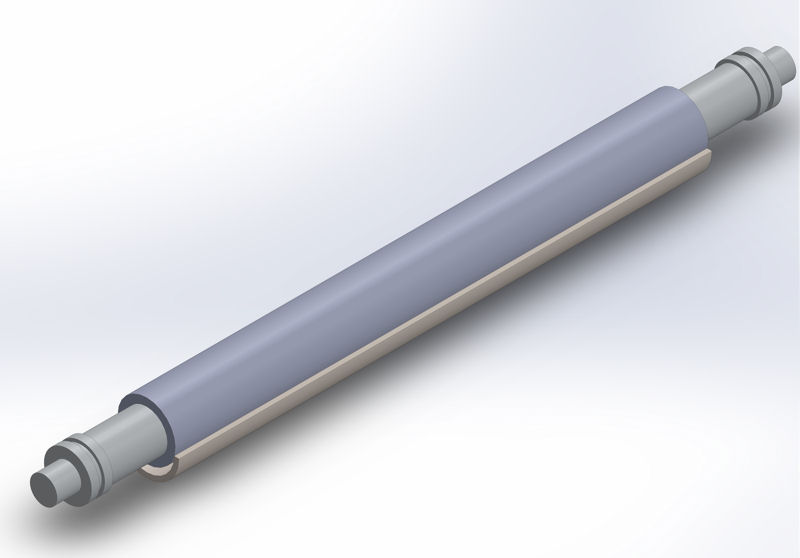
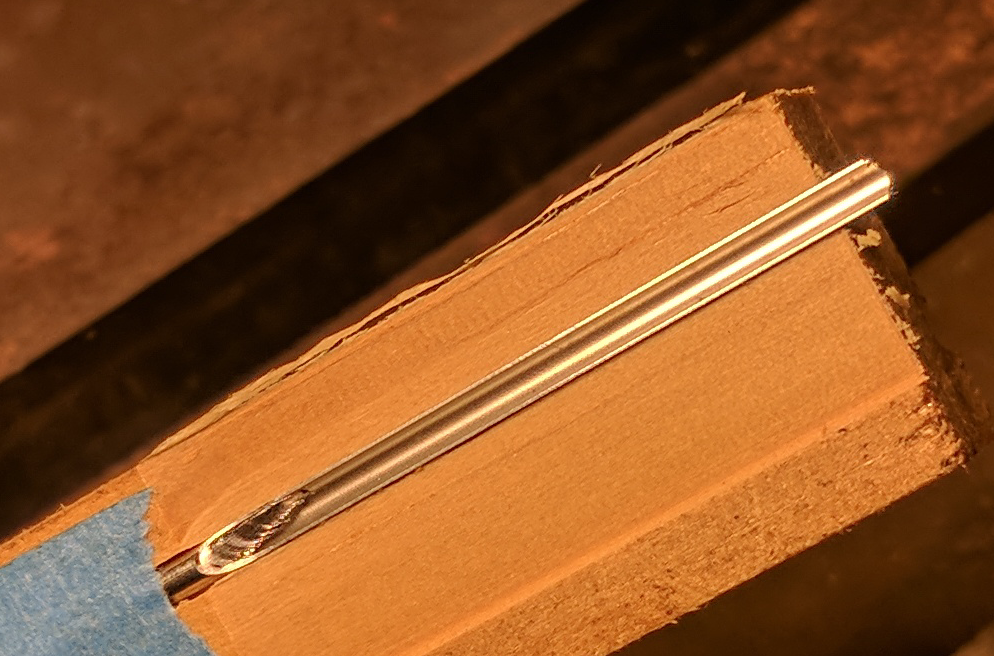
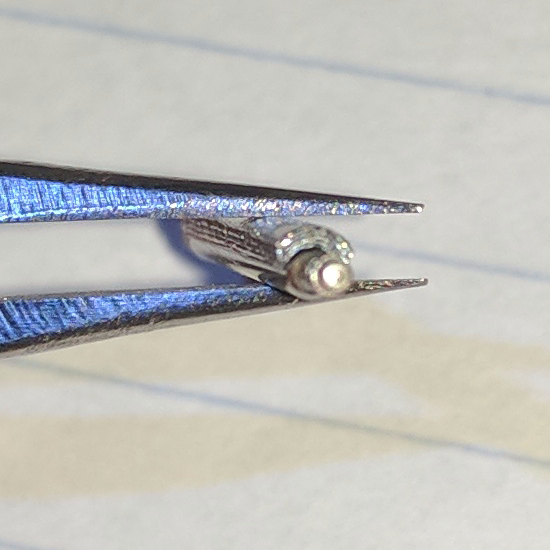
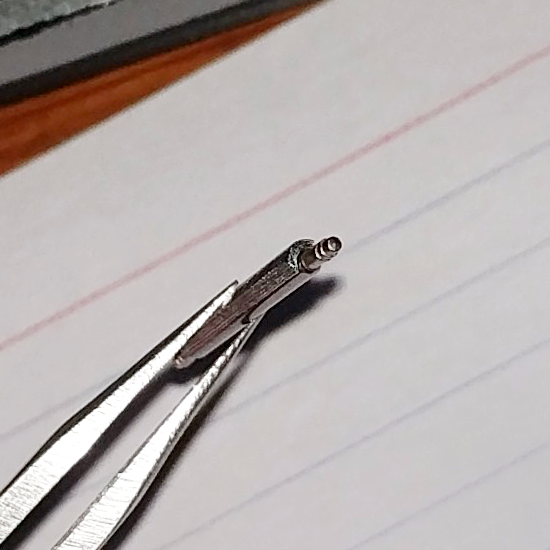
Next what I did was take make a 5-layer thick stack of aluminum adhesive tape, and then cut a small strip about 2.0 mm wide. I then adhered the strip to the spring bar and cut it to length so the adhered aluminum didn't extend past the end of the spring bar body (so the spring loaded ends could move freely).
Here are a couple pictures in case that doesn't make sense.
Next I pressed the modified spring bar into the SEL with the aluminum spacer at the top of the opening. It was a tight fit which is good because the spring bar must be unable to rotate in order to preserve the relationship of everything and maintain the recess.
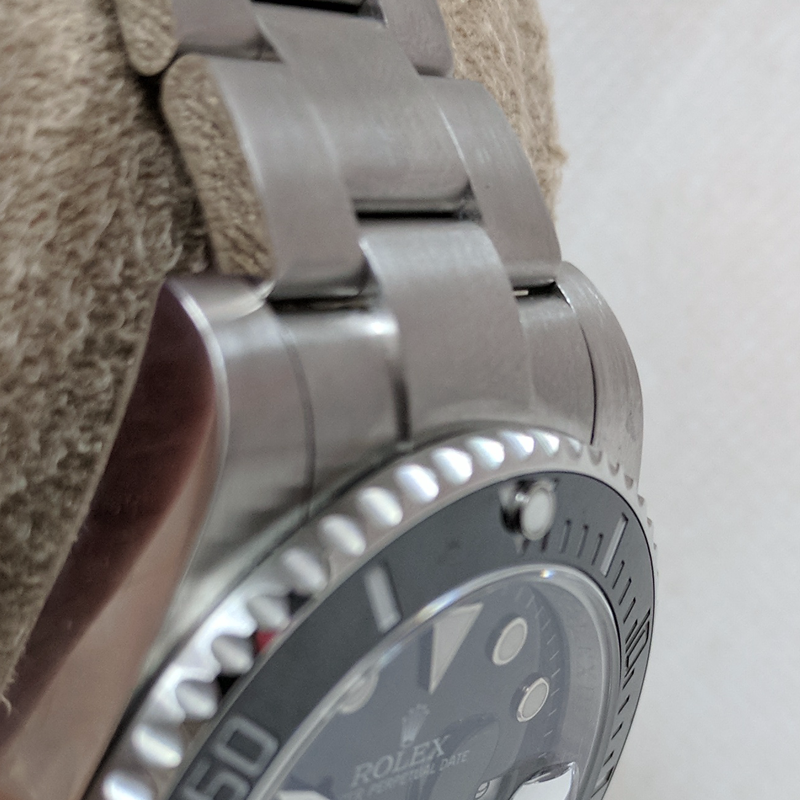
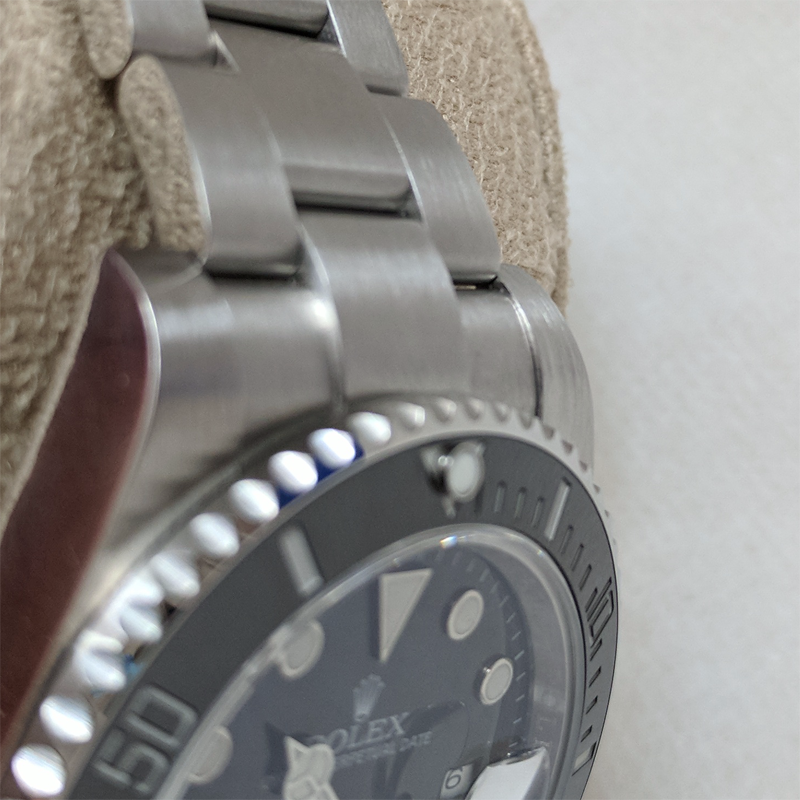
Next I installed the SEL and spring bar back into the watch. The result was a perfectly recessed SEL - to my eye anyway.
Of course on the bottom side of the watch the result is that the SEL is no longer flush with the lugs and sits "high" by the same amount that the SEL sits low on the top side. This isn't really a problem since nobody will see the bottom of the watch - so who cares?
Sadly I did not take a picture of the result - sorry about that. Though I think the cosmetic outcome was fantastic I decided not to stick with the arrangement.
Why?
The flaw in the implementation is the 1.5 mm spring bar. Perhaps it is that the particular 1.5 mm spring bars I had on hand are just cheaply made and have crummy tolerances, or perhaps it is inherent in 1.5 mm spring bars, but the ends (the spring loaded parts that move) don't fit super tight in the sleeve and they can wiggle more than the ends in the original 2.0 mm spring bars. The result is that even though the spring bar body is very tight in the SEL (it doesn't wiggle at all), the ends can wiggle and this translates into the SELs being able to move around more than I'd like.
Perhaps a higher quality 1.5 mm spring bar can be had, or perhaps there is a way to crimp the ends of the tube a little so the spring loaded ends don't wiggle so much.
I think the right answer is just for Noob/ARF et al to get their act together and fix the SELs. I would imagine that they have them drawn up in SolidWorks or AutoCAD or some other CAD software and taking 0.5 mm off the top side would be a trivial matter. If they ever do that it would be nice if they would let us buy the updated bracelet separately so we can "fix" their prior less-than-stellar work.
Thanks to Nikoel for his great idea. I'd be interested to hear if he has the same problem with wiggly ends on his 1.5 mm spring bars or not. Like I said, maybe I just need a better quality 1.5 mm spring bar and this would work perfectly. It would still bug me a little that the bottom side of the watch looks odd with the SELs sitting high, but I'd rather have that than have the top side of the watch (that everyone sees) looking "wrong" with nearly flush SELs.
Anybody else try this approach or any other approach that worked well?
Honestly I like the way the nearly-flush SELs look, but it's not "right" compared to gen, so it bugs me.
Should I quit being so damn picky and just live with it?
This is is what you do. Balls to the wall approach I was meaning to publish in the guide but never got around to it
you get 1.7/8[whatever#] spring bars
then you get Aroldite. Yeah you can see where it’s all going... this ain’t for the weak heartwd
so, next up you take the old spring bars out and put the new ones in. Play around the different sizes. Once you know which give you the best SEL, you keep those and discard the rest. Next you’ll notice that SEL wiggles. That’s to be expected since they are not 2mm springbars. What you want to do next is using a very thin tube of premixed A and B Aroldote and insert it into four of the SEL spring bar openings. Keep the SEL in perfect position manually whilst this is all happening. Don’t worry too much about the mess as Acetone will make quick work of the glue that got places you didn’t want it to. Do not underestimate how long that shit takes to harden. Take good amount of time to do this once. And do it right
repeart for the other end
I decided to take my own stab at a modification of his idea but didn't want to post more OT banter in the Noob V9 thread so I started this new thread.
As I understand Nikoel's idea you'd be epoxying smaller diameter spring bars into the SEL - biasing them toward the top of the circumference of the hole in the SEL so the SEL sits lower in the lugs.
Not wanting to commit to the permanence of epoxing the spring bars in (in case I wasn't happy with the result) I took another route.
First I experimented to see what size spring bar to use in place of the original 2.0 mm spring bar. A 1.78 mm didn't seem to give as much recess as I was looking for. A 1.5 mm spring bar gave a perfect recess (to my eye anyway).
Next what I did was take make a 5-layer thick stack of aluminum adhesive tape, and then cut a small strip about 2.0 mm wide. I then adhered the strip to the spring bar and cut it to length so the adhered aluminum didn't extend past the end of the spring bar body (so the spring loaded ends could move freely).
Here are a couple pictures in case that doesn't make sense.
Next I pressed the modified spring bar into the SEL with the aluminum spacer at the top of the opening. It was a tight fit which is good because the spring bar must be unable to rotate in order to preserve the relationship of everything and maintain the recess.
Next I installed the SEL and spring bar back into the watch. The result was a perfectly recessed SEL - to my eye anyway.
Of course on the bottom side of the watch the result is that the SEL is no longer flush with the lugs and sits "high" by the same amount that the SEL sits low on the top side. This isn't really a problem since nobody will see the bottom of the watch - so who cares?
Sadly I did not take a picture of the result - sorry about that. Though I think the cosmetic outcome was fantastic I decided not to stick with the arrangement.
Why?
The flaw in the implementation is the 1.5 mm spring bar. Perhaps it is that the particular 1.5 mm spring bars I had on hand are just cheaply made and have crummy tolerances, or perhaps it is inherent in 1.5 mm spring bars, but the ends (the spring loaded parts that move) don't fit super tight in the sleeve and they can wiggle more than the ends in the original 2.0 mm spring bars. The result is that even though the spring bar body is very tight in the SEL (it doesn't wiggle at all), the ends can wiggle and this translates into the SELs being able to move around more than I'd like.
Perhaps a higher quality 1.5 mm spring bar can be had, or perhaps there is a way to crimp the ends of the tube a little so the spring loaded ends don't wiggle so much.
I think the right answer is just for Noob/ARF et al to get their act together and fix the SELs. I would imagine that they have them drawn up in SolidWorks or AutoCAD or some other CAD software and taking 0.5 mm off the top side would be a trivial matter. If they ever do that it would be nice if they would let us buy the updated bracelet separately so we can "fix" their prior less-than-stellar work.
Thanks to Nikoel for his great idea. I'd be interested to hear if he has the same problem with wiggly ends on his 1.5 mm spring bars or not. Like I said, maybe I just need a better quality 1.5 mm spring bar and this would work perfectly. It would still bug me a little that the bottom side of the watch looks odd with the SELs sitting high, but I'd rather have that than have the top side of the watch (that everyone sees) looking "wrong" with nearly flush SELs.
Anybody else try this approach or any other approach that worked well?
Honestly I like the way the nearly-flush SELs look, but it's not "right" compared to gen, so it bugs me.
Should I quit being so damn picky and just live with it?