- 10/12/06
- 2,835
- 1,094
- 113
Hi,
I have recently been asked by a lot of members from all forums how I take pictures...and what kinda camera I use....etc..
And every time, I tell them...."It's not the camera...it's how you take the picture and what you do with it after you took it."
Since our photo geek member pugwash has already posted many threads about "how to take good pictures"....I'm going to mainly focus on what to do when you want to enhance your picture.
I know...I'm no pugwash or by-tor but I'm doing this for all those people who are struggling with their photo technique.
I'm not going to cover the advanced level technique which i'm not even too good at....
It will be mostly basic technique which will come in very handy for many members.
A lot of members already know how to take good pictures....but at the same time a lot of them don't seem to know how to enhance their pictures when it's needed.
So...here I go~!
If you're a photoshop friendly members like pug or by-tor.....you probably don't wanna read all this crap I'm about to write~")
First of all, you will need a program called "Photoshop"
Latest version is Photoshop CS but I'm using version 7.0 which is slightly older version than CS...but it still does the job.
Already have one? good! Don't have one? Go get it, it's worth every damn penny....or borrow from someone you know if you can.
--------------------------------------------------------------------------
Jiro's "How to enhance your picture" Part 1 -Basic-
Have you ever took a picture and the color came out all off and wrong?
.....yes, we all have...haven't we...
This is probably the most common and most basic enhancement you can do when that happens.
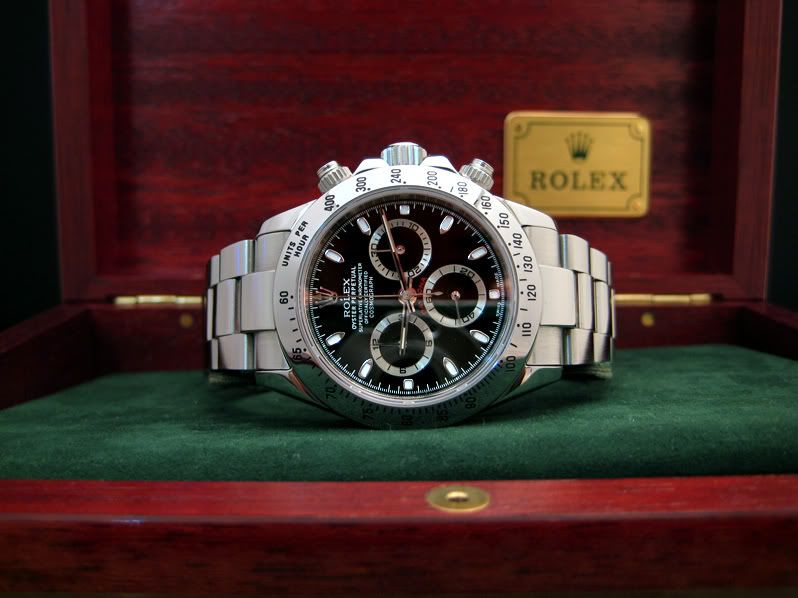
Here we have a picture of beautiful Daytona...
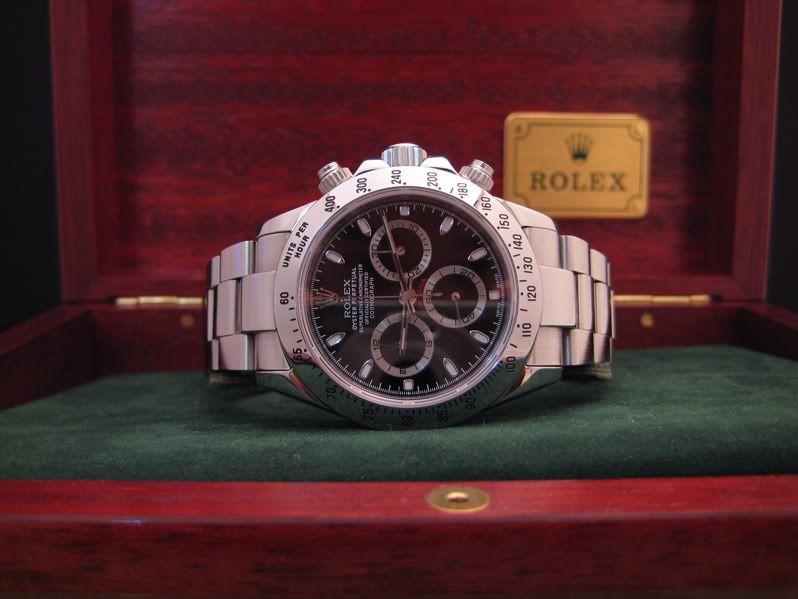
See anything wrong with the picture above?.....yes...color is off.....way off....not even funny....
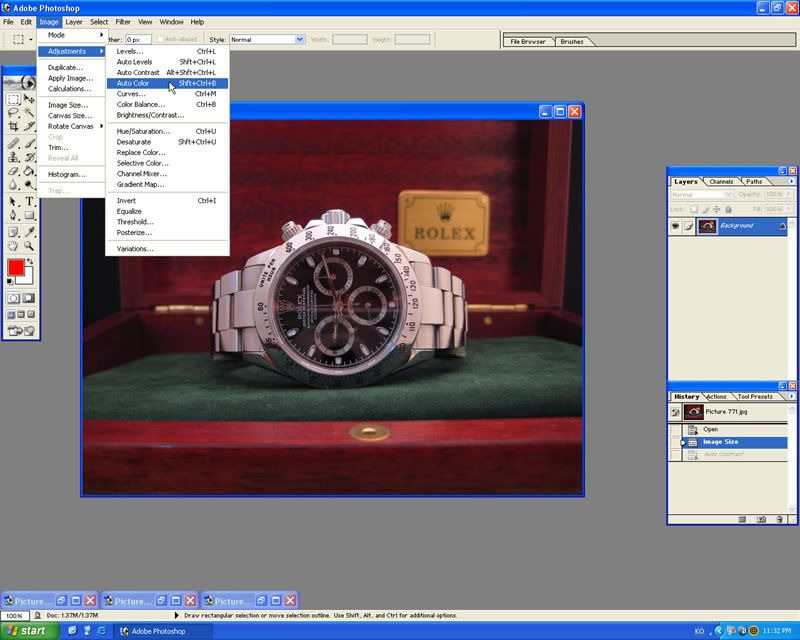
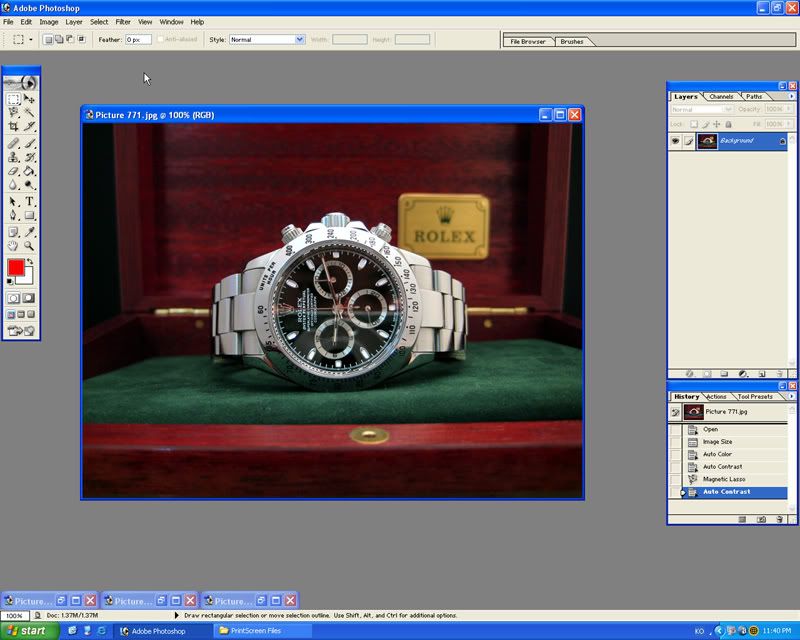
The most simple solution to fix the color in most cases are the "Auto Color" function under the Image Tab.
Image -> Adjustments -> Auto Color
BAM~!
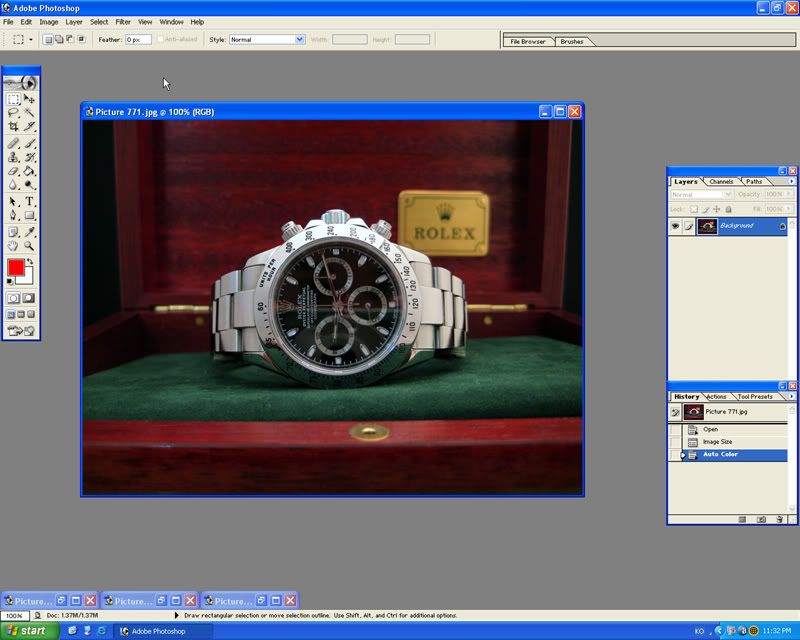
See how much difference that simple button makes???? HUGE~!
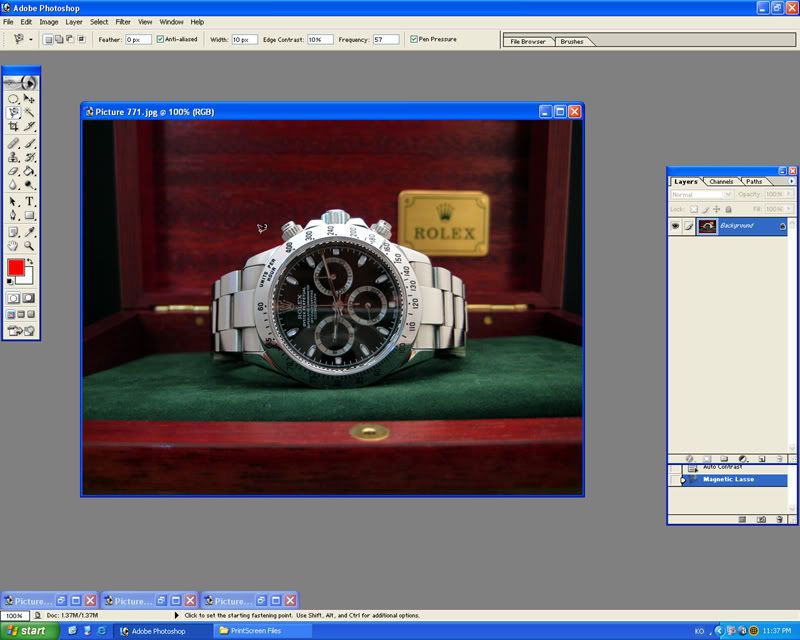
Next, I want that black dial to pop out a little more.
Click and hold on the "Lasso Tool" and change it to "Magnetic Lasso Tool".

And carefully, go around the area that you want to select.....
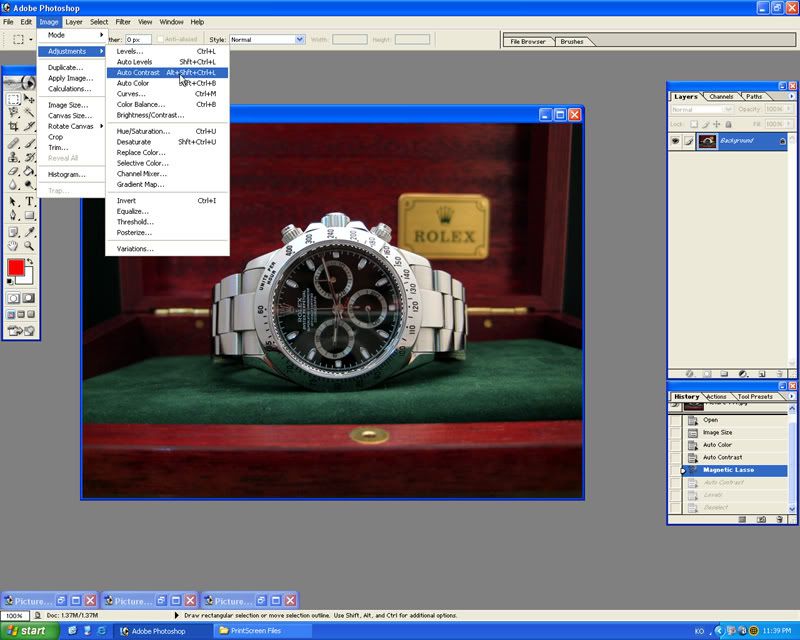
Let's get the right contrast first...
Image -> Adjustments -> Auto Contrast
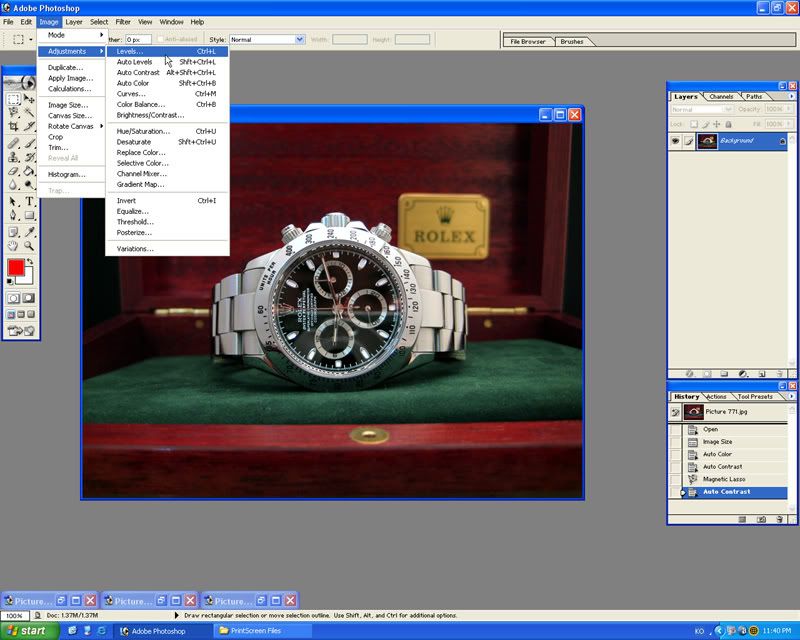
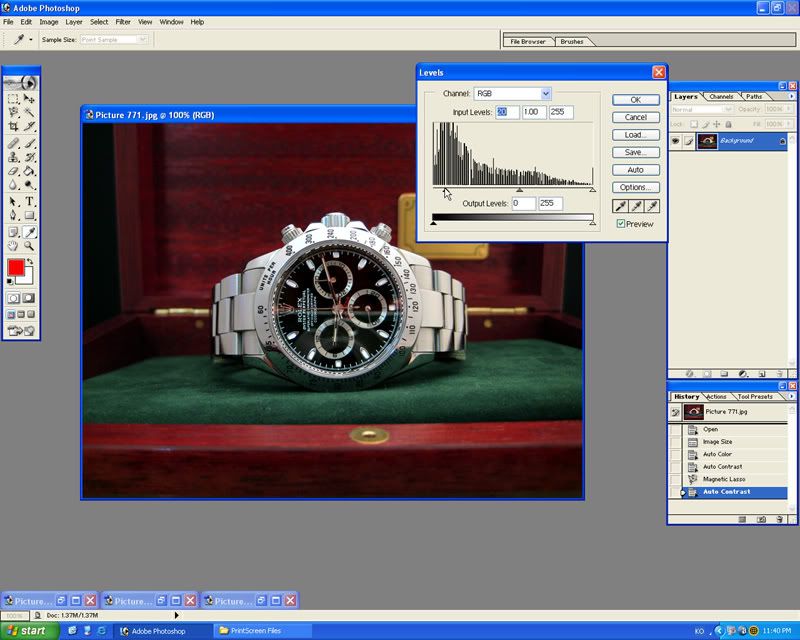
Now, let's get that level adjust to make the black dial pop out a little.
Image -> Adjustments -> Levels...
I will go ahead and change the first input level from 0 to 20.
All done.
Here are the "before" and "after" comparison pictures...
*Before*
*After*
Cheers~!
I have recently been asked by a lot of members from all forums how I take pictures...and what kinda camera I use....etc..
And every time, I tell them...."It's not the camera...it's how you take the picture and what you do with it after you took it."
Since our photo geek member pugwash has already posted many threads about "how to take good pictures"....I'm going to mainly focus on what to do when you want to enhance your picture.
I know...I'm no pugwash or by-tor but I'm doing this for all those people who are struggling with their photo technique.
I'm not going to cover the advanced level technique which i'm not even too good at....
It will be mostly basic technique which will come in very handy for many members.
A lot of members already know how to take good pictures....but at the same time a lot of them don't seem to know how to enhance their pictures when it's needed.
So...here I go~!
If you're a photoshop friendly members like pug or by-tor.....you probably don't wanna read all this crap I'm about to write~
First of all, you will need a program called "Photoshop"
Latest version is Photoshop CS but I'm using version 7.0 which is slightly older version than CS...but it still does the job.
Already have one? good! Don't have one? Go get it, it's worth every damn penny....or borrow from someone you know if you can.
--------------------------------------------------------------------------
Jiro's "How to enhance your picture" Part 1 -Basic-
Have you ever took a picture and the color came out all off and wrong?
.....yes, we all have...haven't we...
This is probably the most common and most basic enhancement you can do when that happens.
Here we have a picture of beautiful Daytona...
See anything wrong with the picture above?.....yes...color is off.....way off....not even funny....
The most simple solution to fix the color in most cases are the "Auto Color" function under the Image Tab.
Image -> Adjustments -> Auto Color
BAM~!
See how much difference that simple button makes???? HUGE~!
Next, I want that black dial to pop out a little more.
Click and hold on the "Lasso Tool" and change it to "Magnetic Lasso Tool".
And carefully, go around the area that you want to select.....
Let's get the right contrast first...
Image -> Adjustments -> Auto Contrast
Now, let's get that level adjust to make the black dial pop out a little.
Image -> Adjustments -> Levels...
I will go ahead and change the first input level from 0 to 20.
All done.
Here are the "before" and "after" comparison pictures...
*Before*
*After*
Cheers~!
