-
Tired of adverts on RWI? - Subscribe by clicking HERE and PMing Trailboss for instructions and they will magically go away!
You are using an out of date browser. It may not display this or other websites correctly.
You should upgrade or use an alternative browser.
You should upgrade or use an alternative browser.
Rolex Explorer Gilt Dial Restoration
- Thread starter hanski
- Start date


- 25/4/18
- 824
- 501
- 0
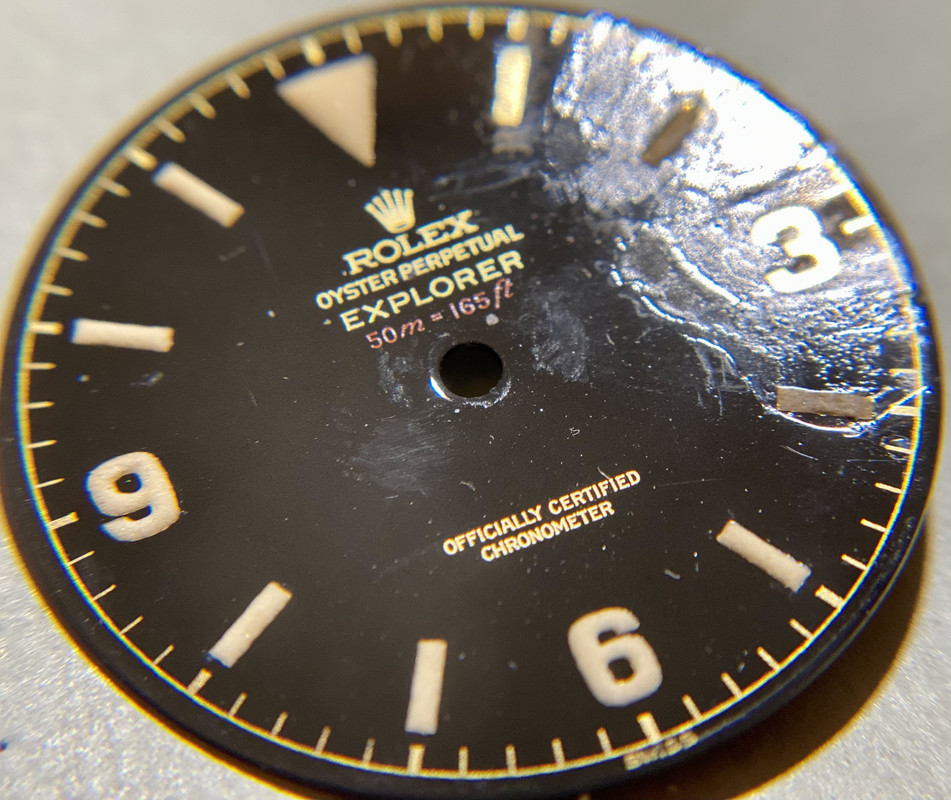
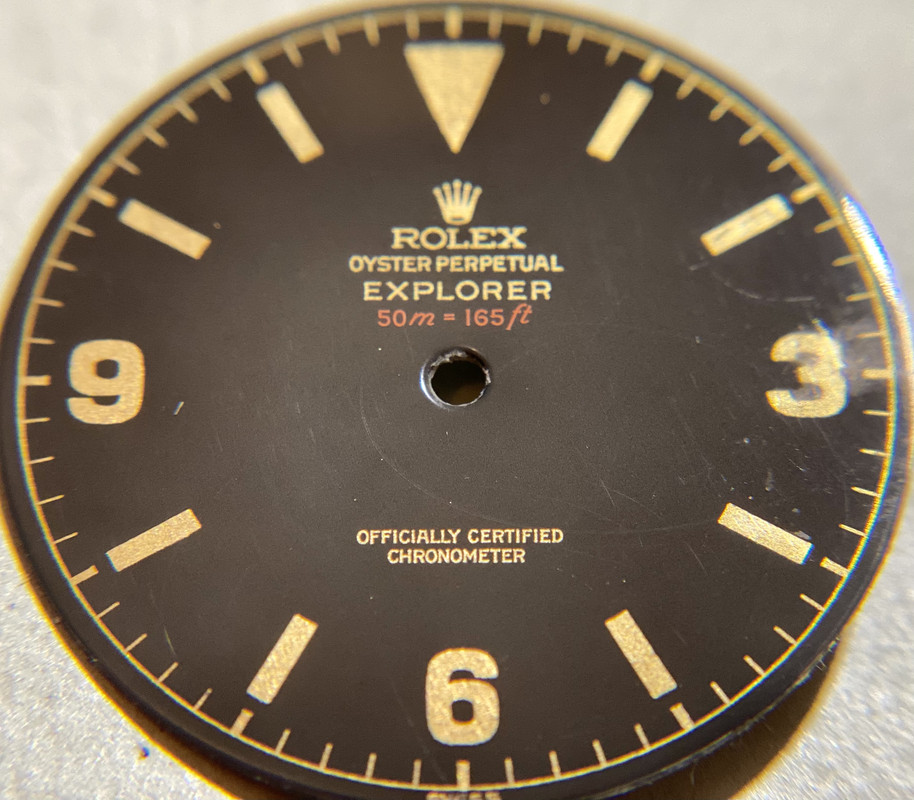
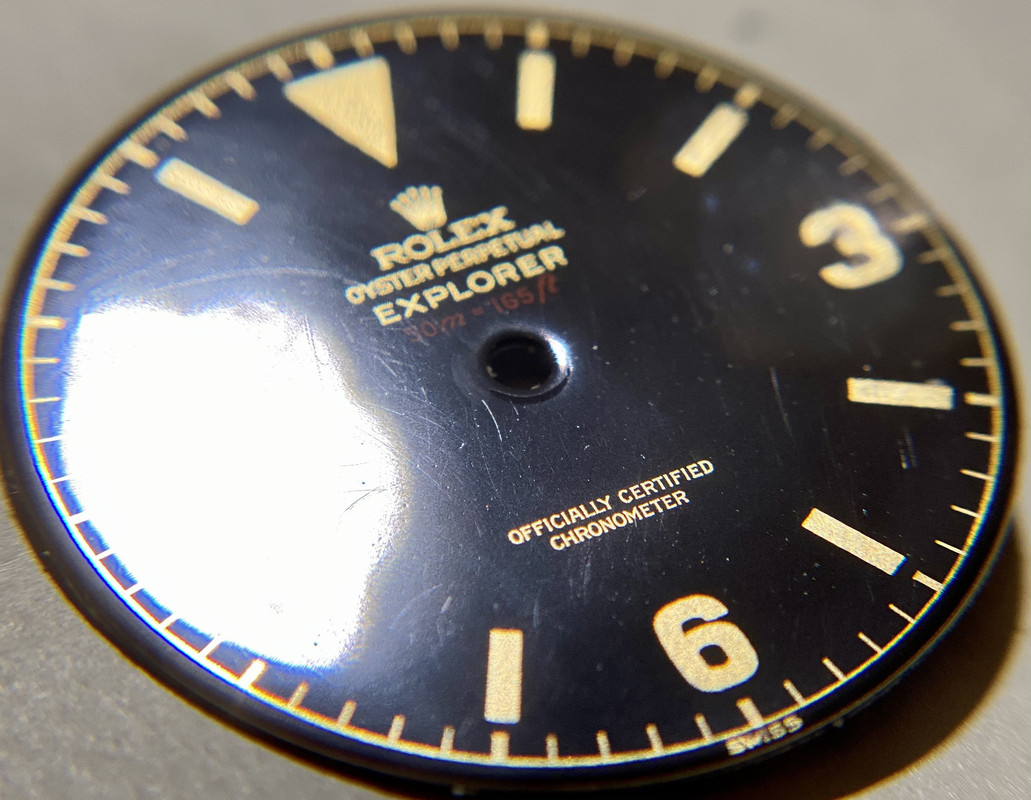
With the dial smoothed out as much as safely possible, let’s apply a new clear coat. For this I use a 1:1 ratio of Model Masters High Gloss Enamel to Lacquer Thinner in my airbrush. Five light coats heat dried followed by a two thick coats on the verge of drips.
Unfortunately you’ll note the damage at 3 effected the black base coat. With the dial having a slight fade there’s no way I am about to match it. Best to let that be.
Time to cure for a few days before the next steps.


Unfortunately you’ll note the damage at 3 effected the black base coat. With the dial having a slight fade there’s no way I am about to match it. Best to let that be.
Time to cure for a few days before the next steps.
kilowattore
Sales Moderator / Section Moderator
Staff member
Moderator Sales
Section Moderator
Certified
- 25/4/18
- 824
- 501
- 0
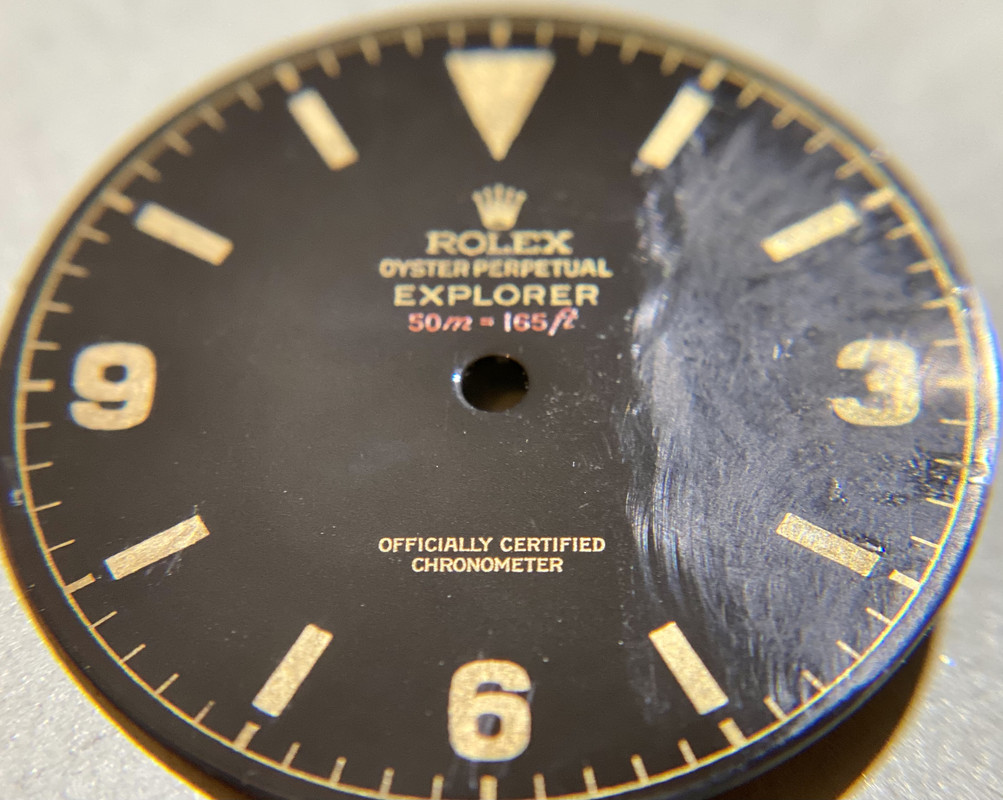
After 48-72 hrs of cure time, let’s move on.
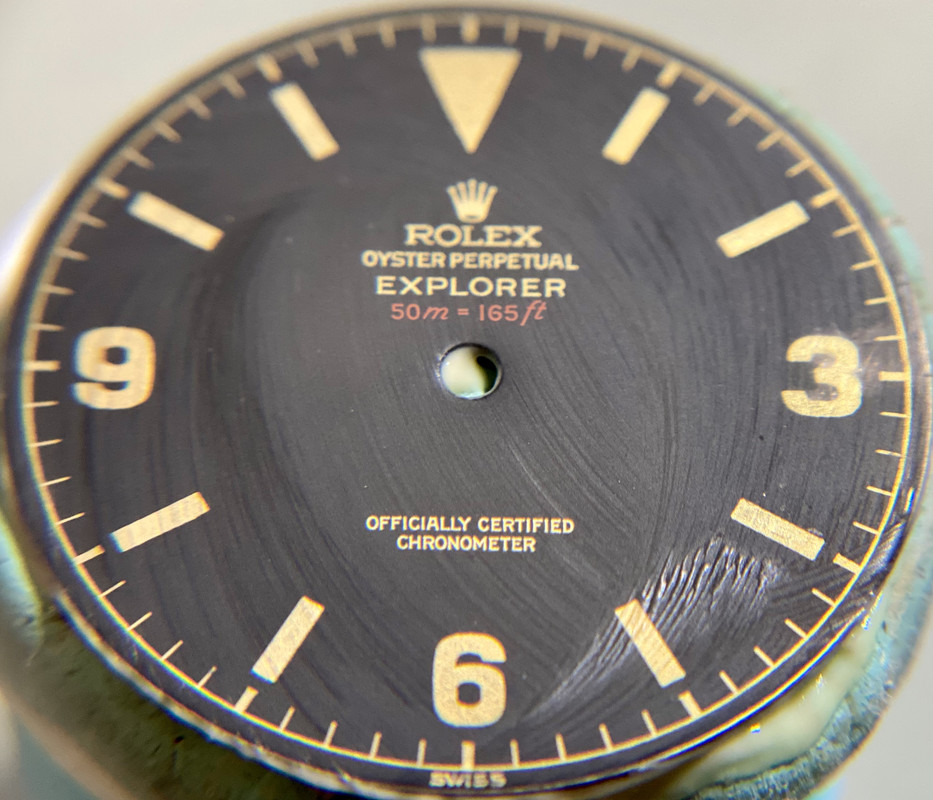
As I’m sure you’ve noticed the dial now has a textured surface, pebbled if you will. Sure, there are examples of textured Explorer dials but a majority of them are flat finishes. To get there the next step is sanding the dial. I use 10,000, 12,000, and 15,000 grit paper to first flatten the surface then smooth out the finish. Delicate, low-pressure, and even sanding is key here. All said and done you want the surface to be an even matte finish.

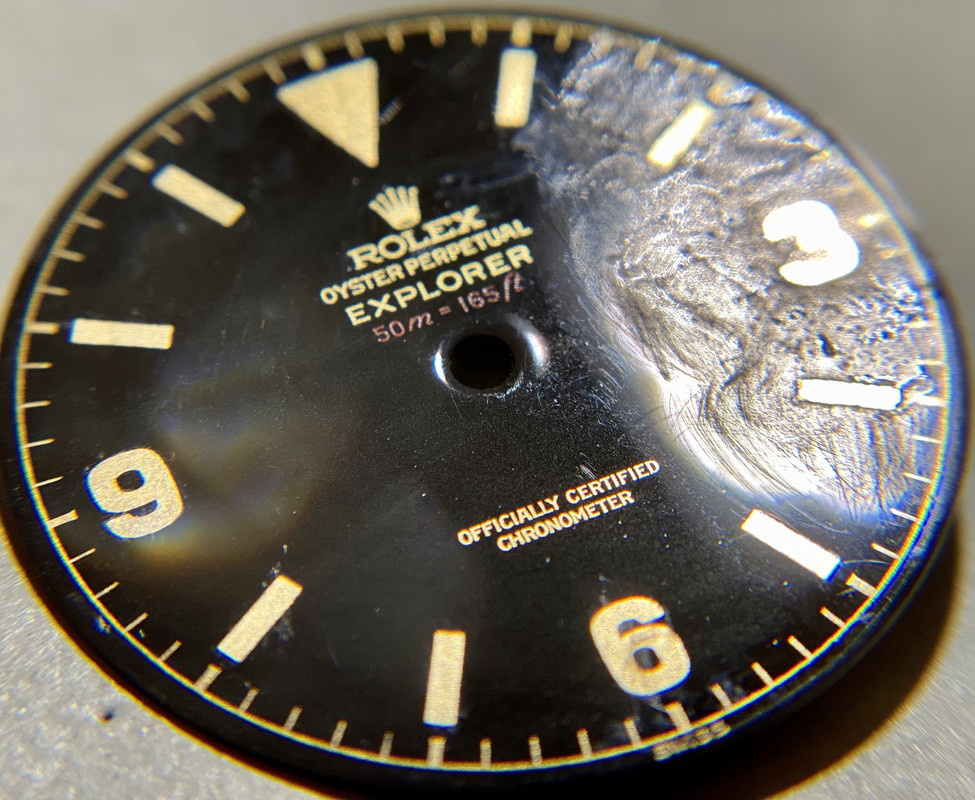
After you’ve flattened the surface the next step is polishing the enamel. For this I start with Novus 2.

As I’m sure you’ve noticed the dial now has a textured surface, pebbled if you will. Sure, there are examples of textured Explorer dials but a majority of them are flat finishes. To get there the next step is sanding the dial. I use 10,000, 12,000, and 15,000 grit paper to first flatten the surface then smooth out the finish. Delicate, low-pressure, and even sanding is key here. All said and done you want the surface to be an even matte finish.
After you’ve flattened the surface the next step is polishing the enamel. For this I start with Novus 2.
- 25/4/18
- 824
- 501
- 0
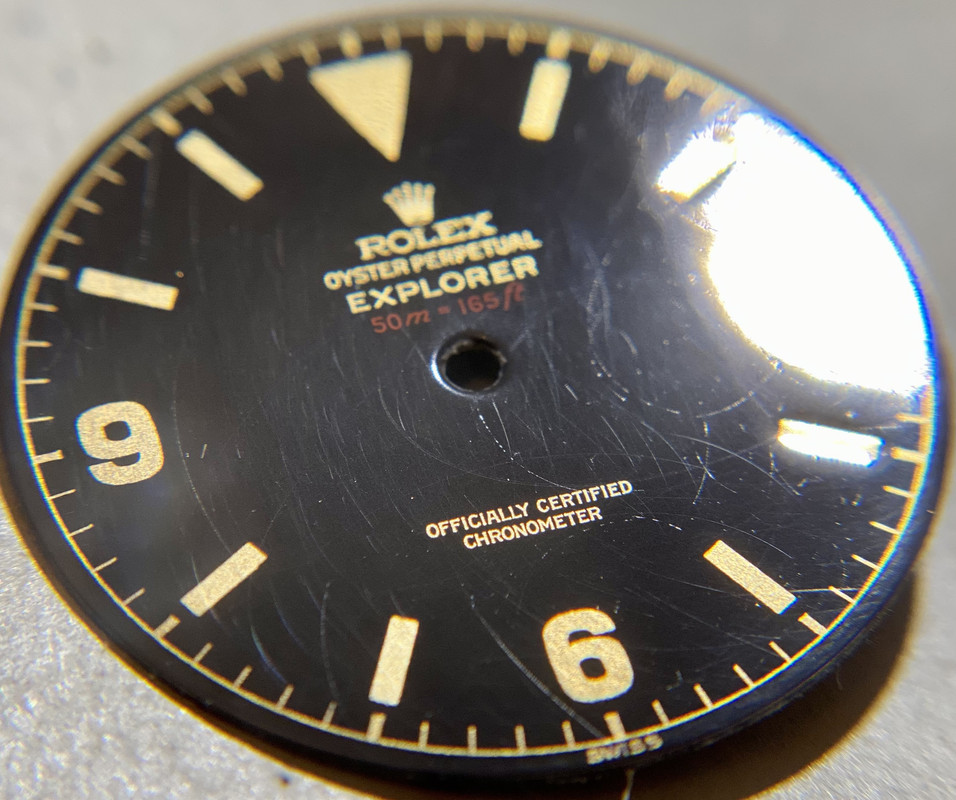
Micro-scratches and swirls - the bane of high gloss polish. Here’s my secret, I take a page from automotive finishing and use Meguiar’s Mirror Glaze Pro Hi-Tech Yellow Wax.
Description says, “Blends the highest quality Carnauba Wax with other costly ingredients...” Obviously top notch stuff.
Apply with light pressure evenly across surface. Allow to haze over and then buff out. Here’s where clean microfiber cloths come in handy. One for each step and a clean one for final wipe.
Now don’t go telling everyone my secret...
Mr Seamaster
Renowned Member
- 27/4/12
- 532
- 314
- 63
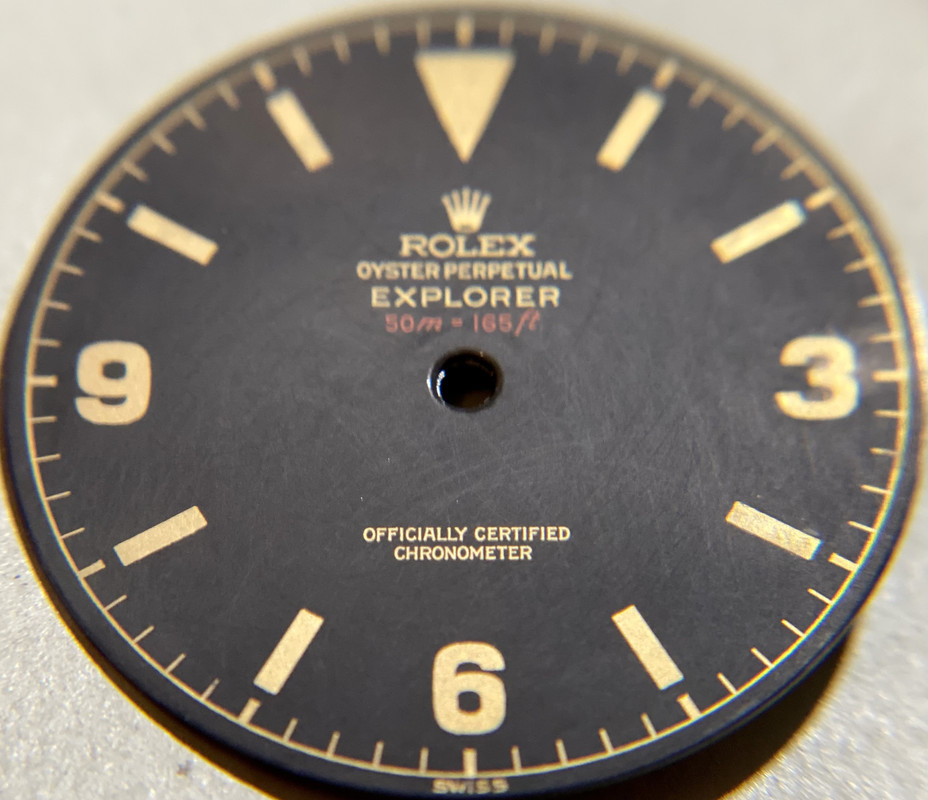
I´m gonna push that thread as that's what i call craftsmanship and I´m astonished how great the outcome is . Well done sir!