OK I figured I'd title a thread here for those looking for a halfway decent vintage looking watch without springing for the big bux VDB masterpieces or doing any mods that are beyond modest talent with a screwdriver.
Here's what I started out with:
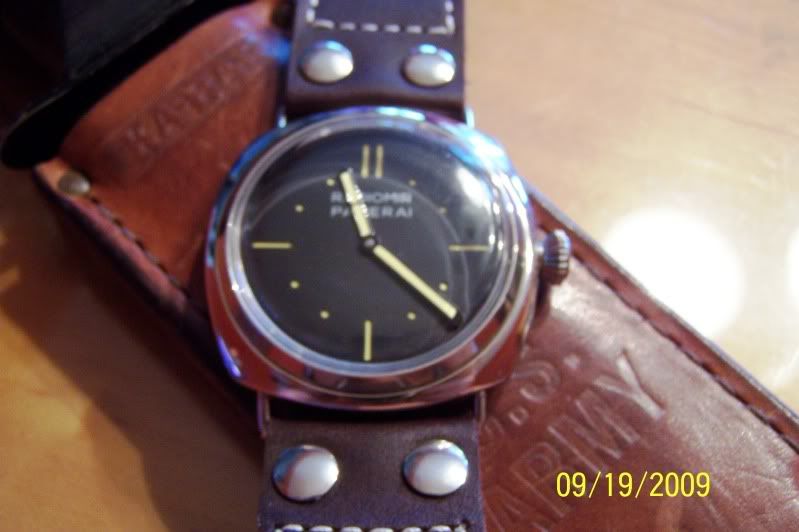
I picked this up from Dante98 on RG after seeing it at Onzenuub's GTG in NYC. He sourced it from Sead for $110.00 Nice and brand new looking. I figured I needed to do something about that.
I started off by unscrewing the caseback and pulling the movement. I should have taken pics as I went along but I'll describe it for those attempting to do it for the first time.
Unscrew your crown until it pops. Look right next to the crown on the movement and there will be a small screw set off in the plate. Turn this screw 3/4 of a turn and your crown and stem will slide right out. The movement screws are easily located around the perimeter of the movement, one on each side. Unscrew these and use an ingrown hair tweezer (can get one at any pharmacists) to remove the screw and tab. Place screws and tabs from each side in separate containers (I found one screw was longer than the other and they would not interchange). Then using a clean sheet of paper, tip the movement out into your hand onto the paper or a movement case if you have one.
Then pop the crystal out forward using your thumbs.
Make sure you take out the O rings and gasket for the crystal prior to the next step.
Now you have a bare case in your hands.
My first step for vintagizing was to put Liquid Electrical Tape (found at Home Depot) on the crown threads as well as the inside of the case itself. This product will pull off but provided protection for delicate areas during the next step.
Once it dried I put a bunch of loose stones and some sand in a 1 liter Gatorade bottle and filled it around with about 250 ml of water. In went the case and I spent around 15-20 minuted shaking it in all different directions.
I then took the case and dropped it into a mixture of white vinegar and rock salt for a couple hours. This allowed some small pitting to form which was enhanced later but this point would be good for those who want an older looking watch without it looking abused (which was what I was going for) to stop and skip the pitting portion of this post. I then drained the water and washed the parts clean. I then took a piece of 440 aluminum oxide sandpaper to the whole thing and wound up with this look.
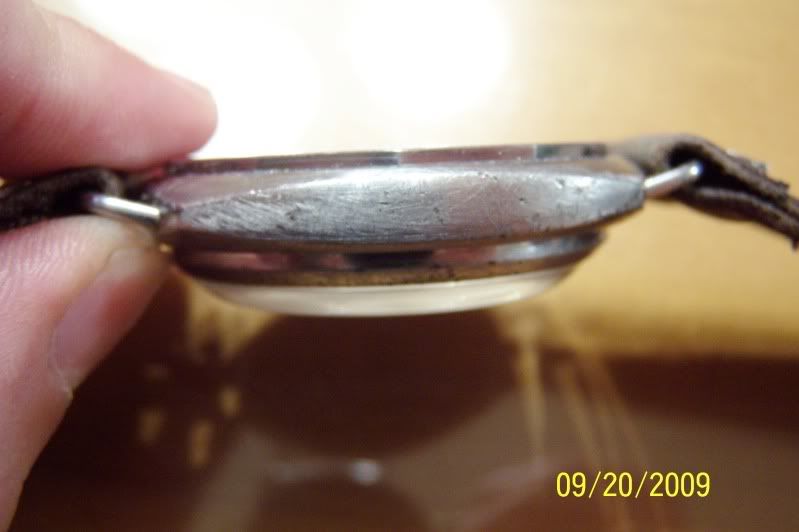
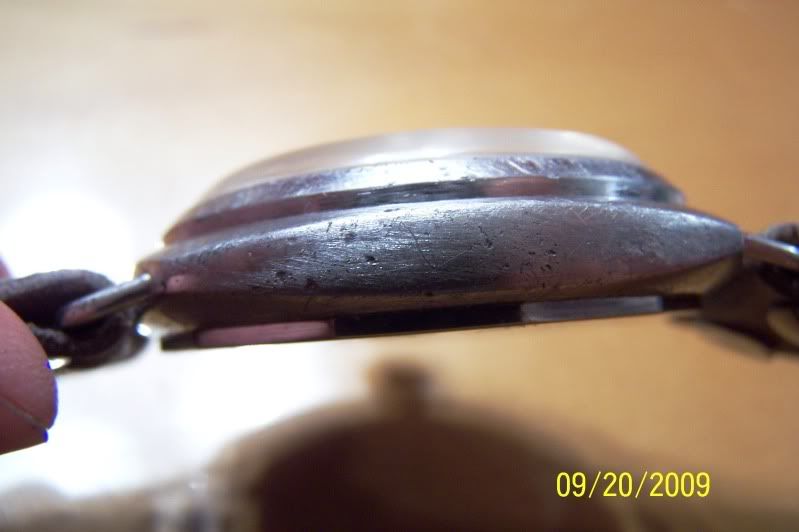
As you can see it looks like it's been sanded with parallel lines showing on the case. I solved this by hitting it with grey ScotchBrite then progessively running finer and finer sandpaper over it winding up with 1500 grit. It gave the case a nice matte aged look and darkened the steel a bit as well, adding to the overall effect.
I wanted a bit more pitting on the case as I was going for a "Look what Grandpa brought back from the war and forgot he had" visual effect, as if the watch was worn by a Kampfschwimmer during WWII and the thing saw combat.
I used this to simulate some deep pits with very good results:
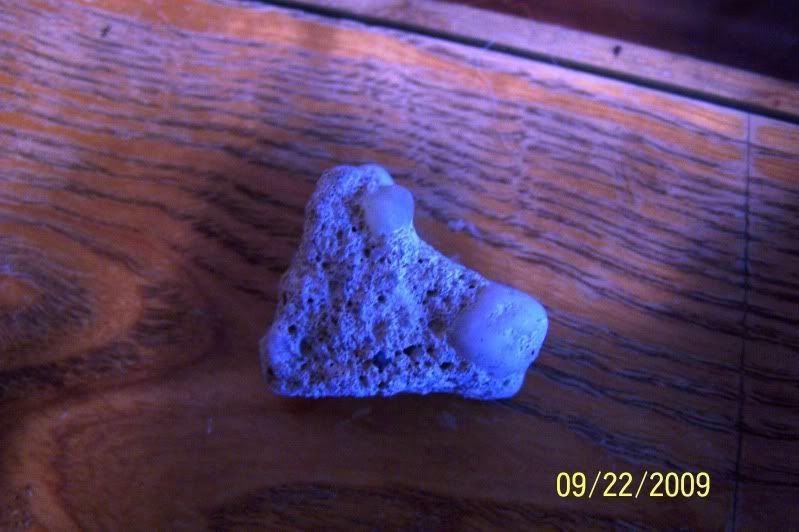
Yes it is a small chunk of concrete. I took a pointed end of it and literally pressed it into the area where I wanted pits and kind of "screwed it into" the case with a twisting motion, keeping the pointed end very localized on the case. I then brushed off the concrete dust and applied white vingear and rock salt mixture to the specifically damaged areas with a Q-Tip and let it sit overnight.
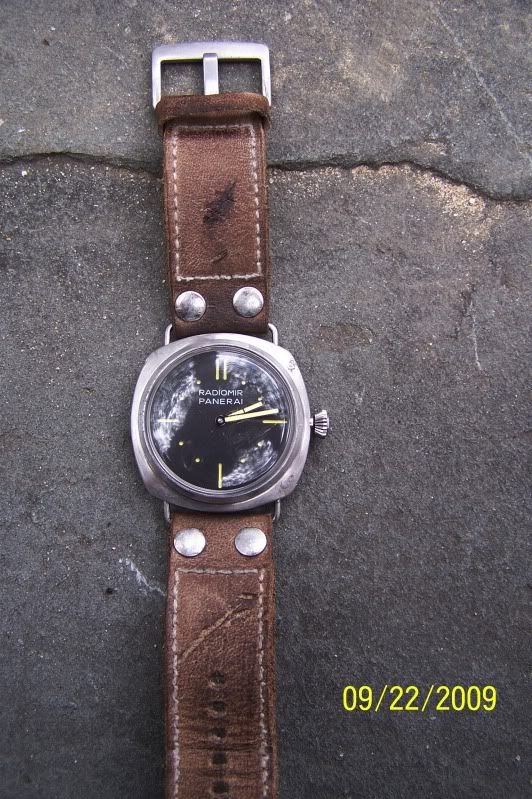
The next day I washed it clean and reassembled it (I did reassemble it prior for pics) and very gently ran 1500 grit A.O. paper over it again. This is the final result:
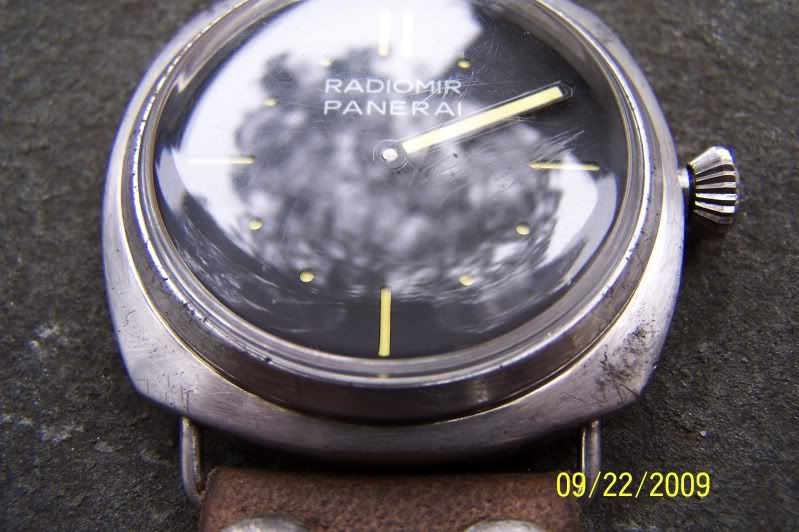
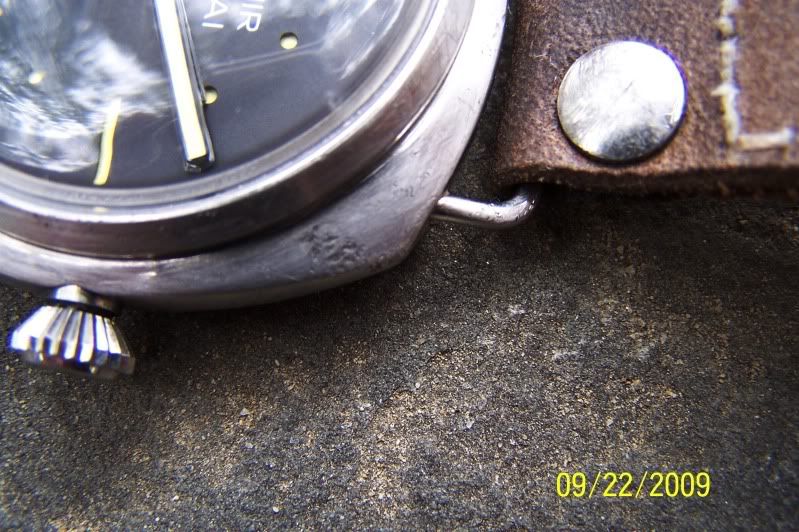
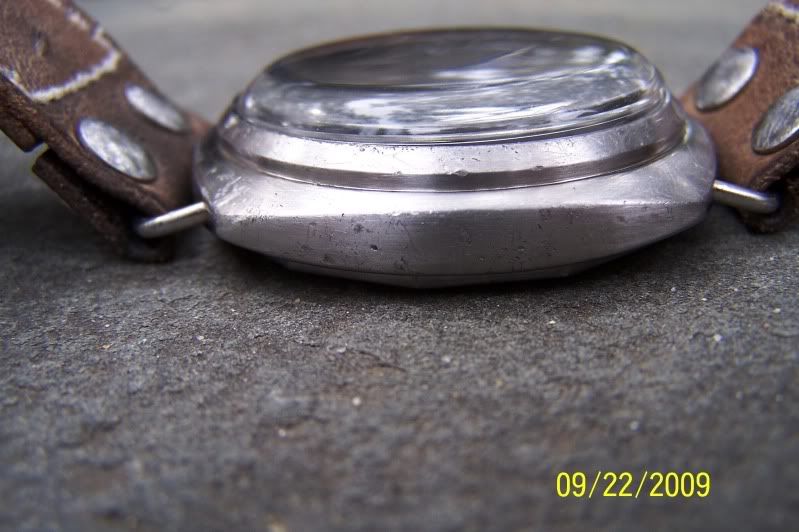
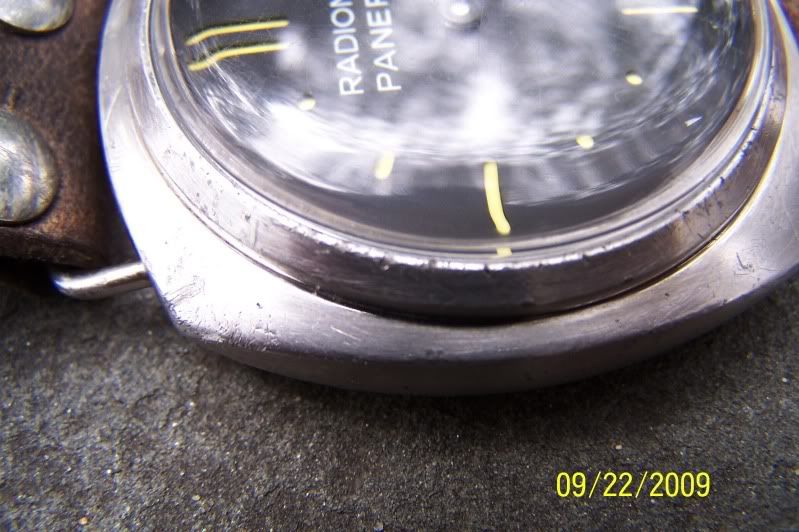
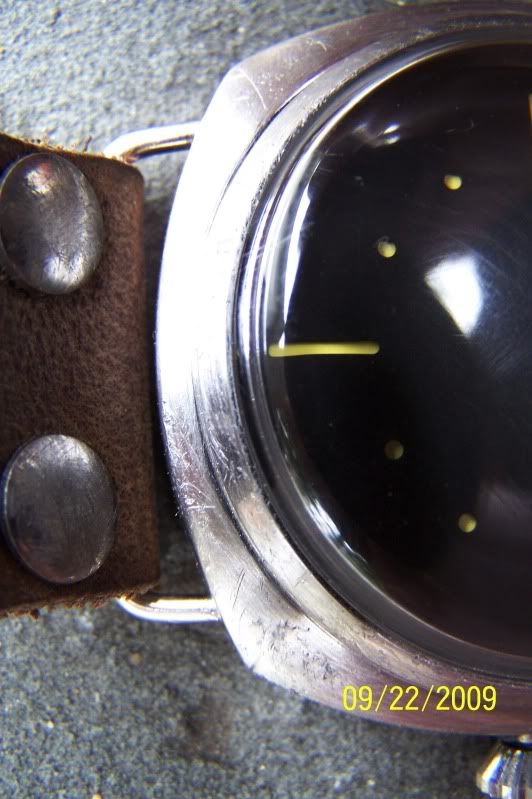
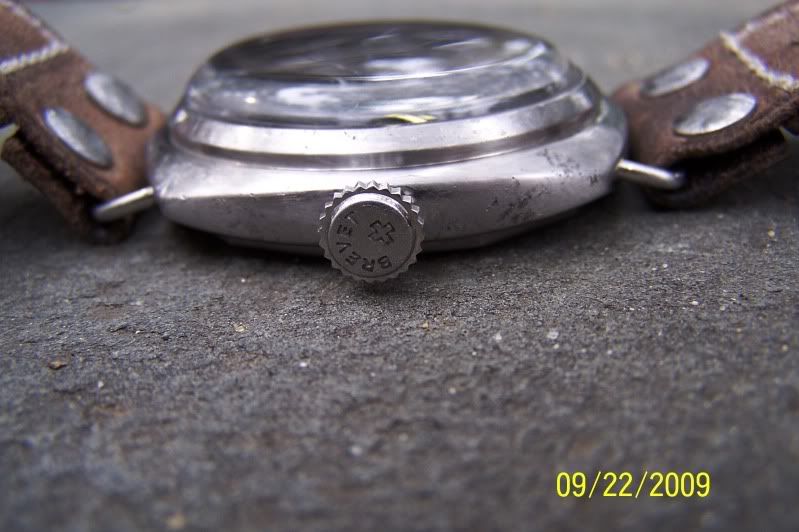
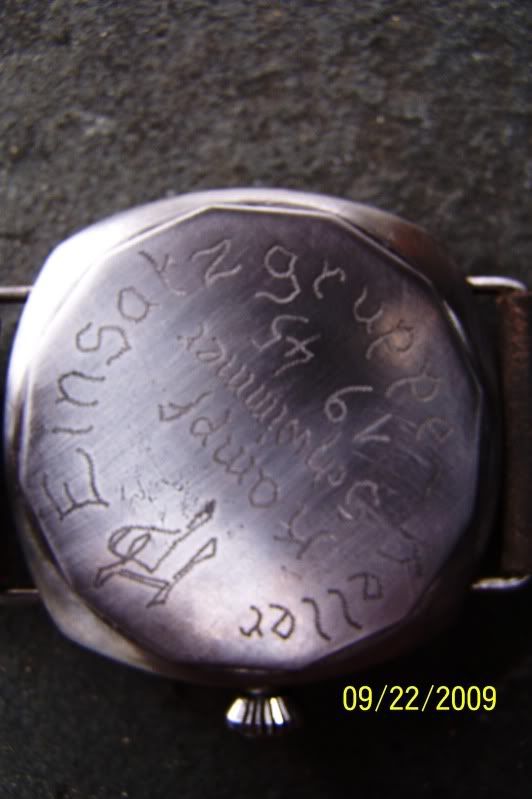
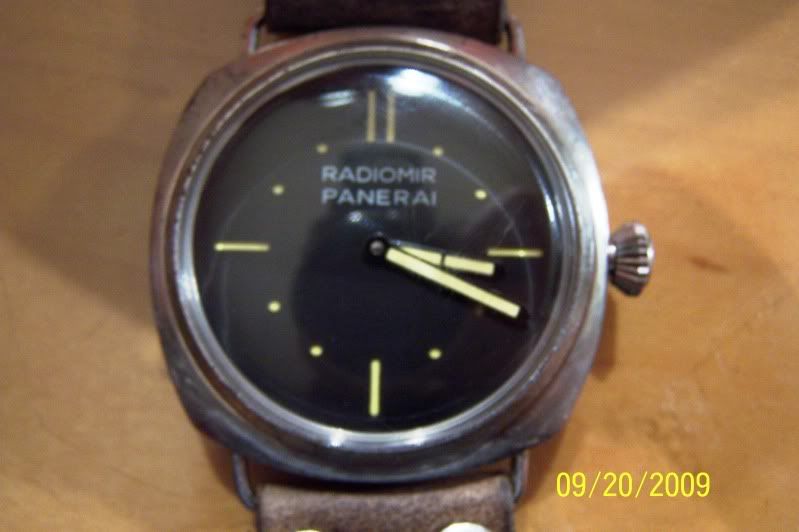
The dial came off and went into a toaster oven (whole sandwich) and baked. I went 350 degrees for around 10 minutes and came up with this:
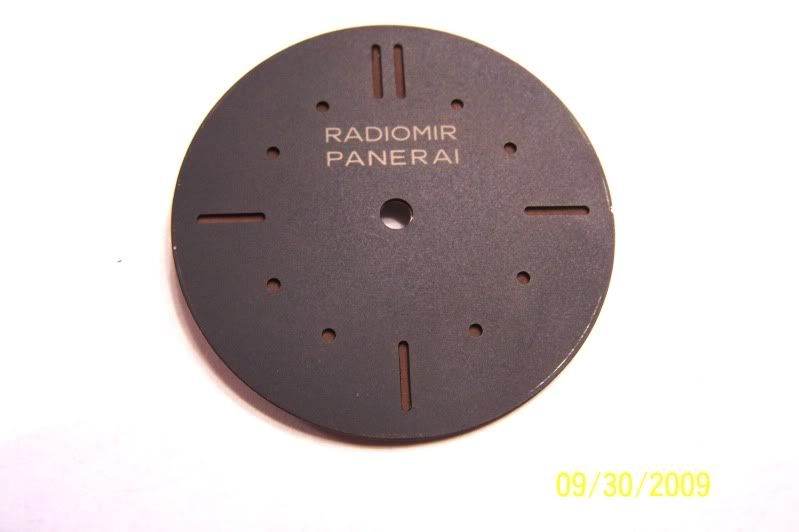
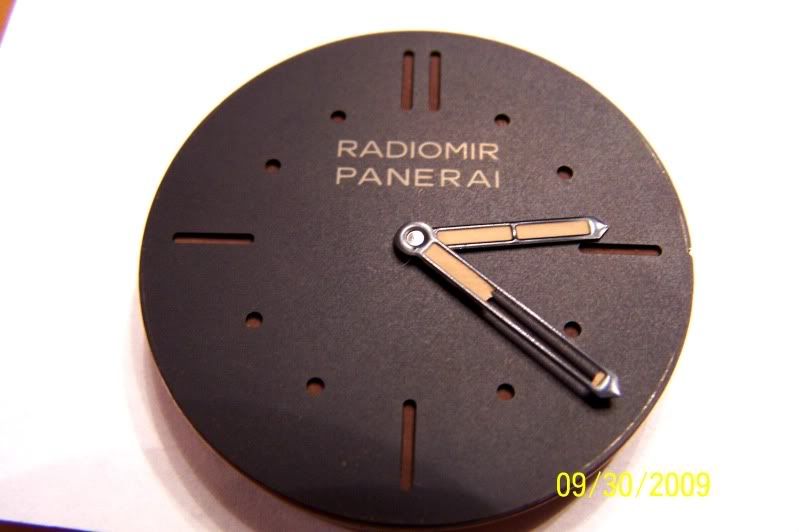
The heat aged the dial nicely, although the lume came out a tad bit darker than I would have liked. Looking at some other gen vintage Panerais the color is quite appropriate- go figure
Milesd pointed out the case was not the right shape so off to the bench again and having at the thing with a Dremel. I used a 5/32" chainsaw sharpening attachment for the Dremel in order to not cut too deep too fast as well as to preserve the plane of the case. I followed it up with 600 and 1500 grit paper.
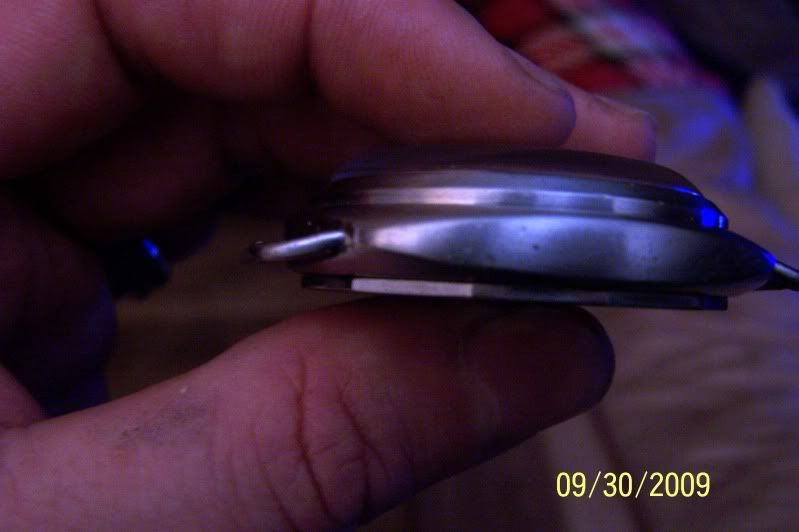
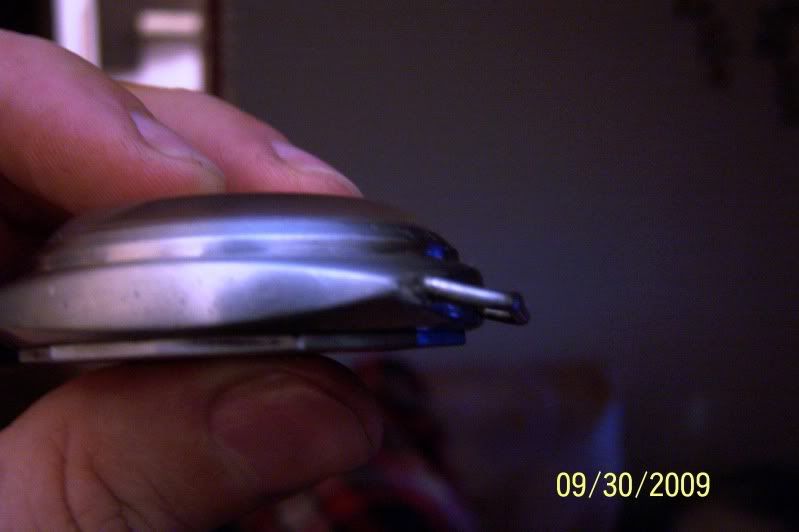
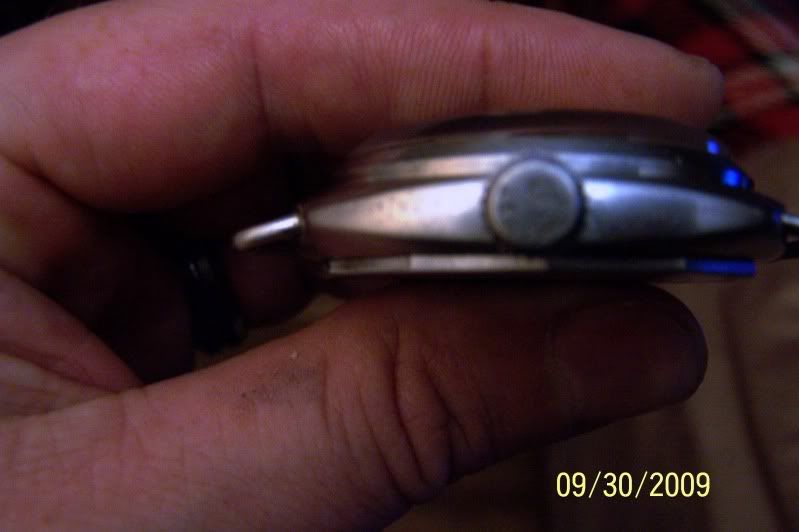
Tried my best to get the right ogive by eyeballing it- not exactly perfect but the edges taper down to a pyramid on each corner approx 1.5mm wide.
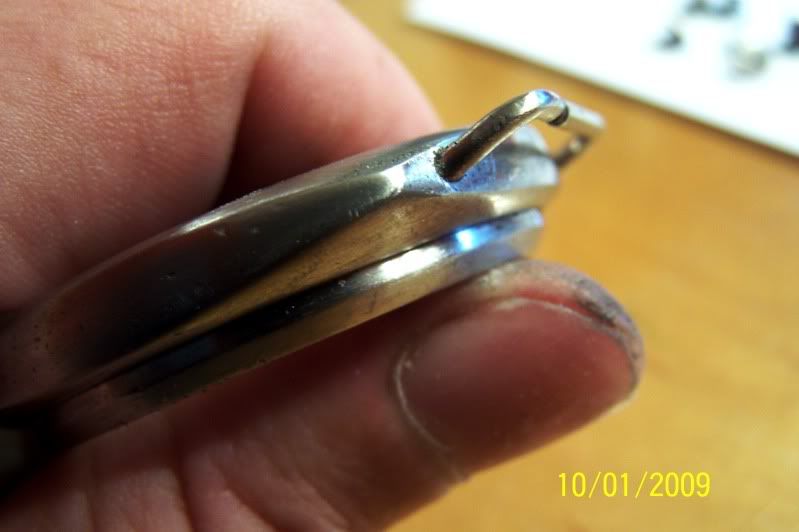
Then Donerix posted a pic showing the case corners have a more rounded tip- so off to the bench again with the wife's emory board to "break" the corners. Best way to do this is to just draw the emory board across the point in a curving motion and eyeball it as you progress.
Remember when reshaping a case go slow- it is VERY easy to remove metal and not so easy to replace it :lol: This is the final case mod prior to polishing:
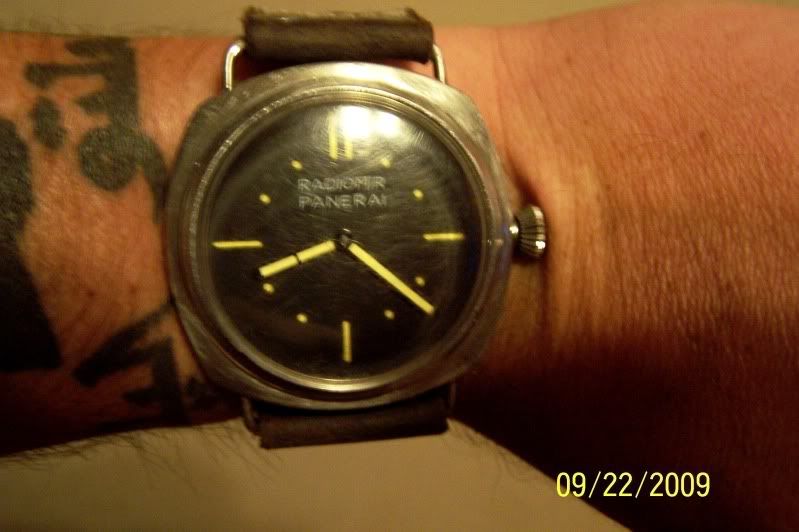
Then I went and aged the plexi.
I slapped the bejeezus out of it with a ScotchBrite pad. Literally held it in my hand and gave it 5-6 whacks.
Then I made a couple small scratches with one of my screwdrivers.
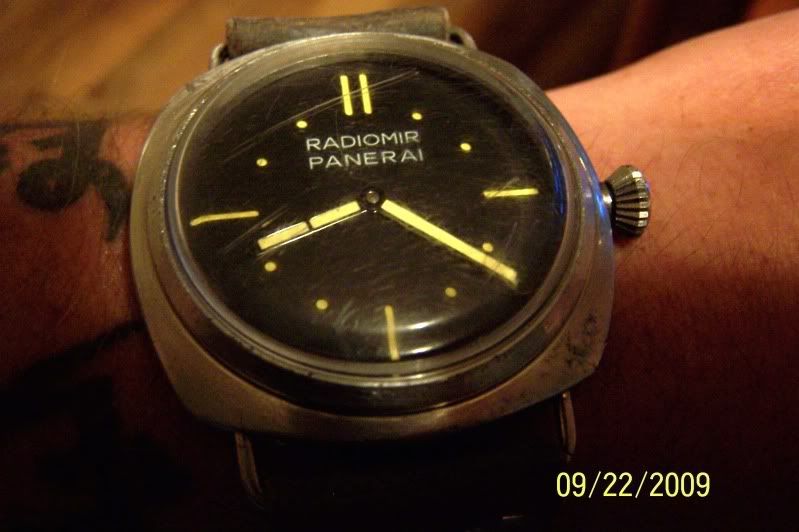
Next up was to get a soldered lug effect without using a torch and solder, which wound up being a mixture of JB Weld, stainless steel and aluminum powders.
I finally got the mixture of aluminum and SS powder right in the JB Weld and I applied it to the lugs.
This only requires a TEENY TINY bit of the compound per lug attachment. Take what you think you need on a pin, then figure you'll use half.
I spread a bead around each lug and pressed it into place. Use a wet finger to do this to avoid the JB sticking to your hand. I then used the shaft of a jewelers screwdriver to get the right curved shape, again wetting it prior to use.
I'm pretty happy with the look although it is a shade off from the case. The macros show the smallest imperfections, even with my questionable photography skills :lol:
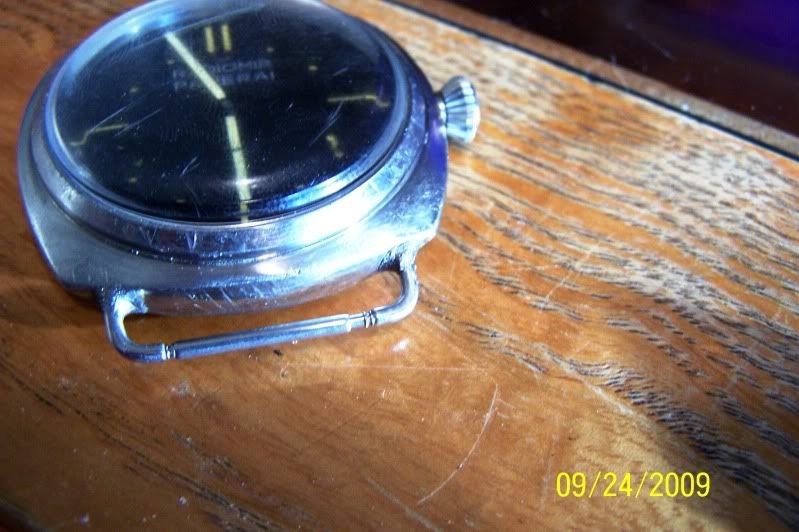
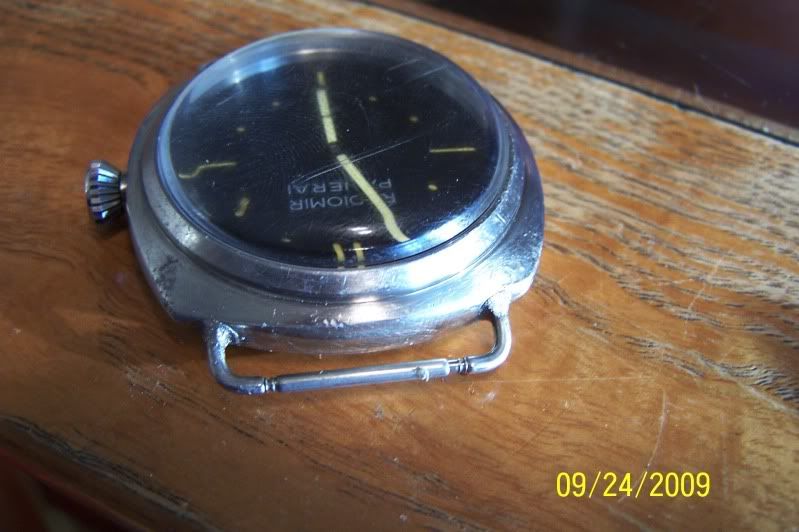
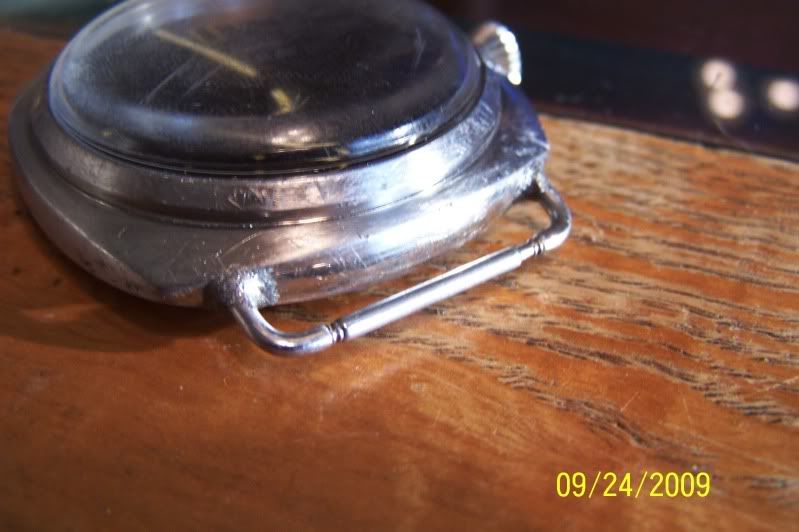
A couple more taken at a distance greater than 3/4"
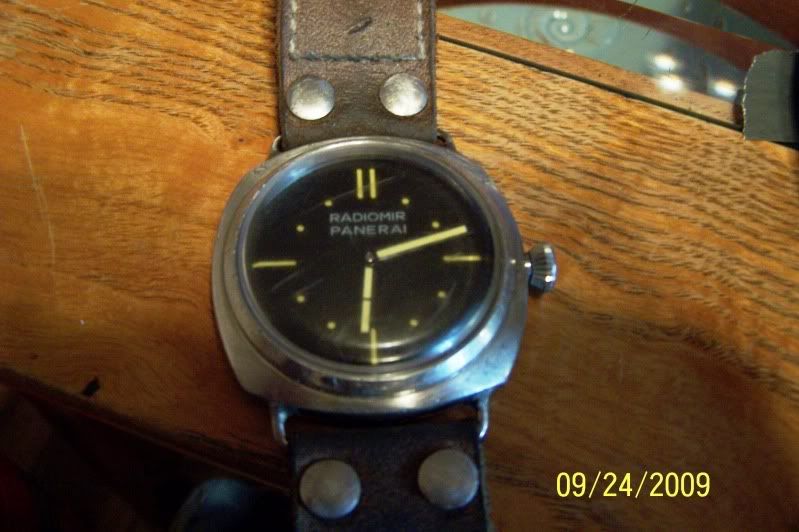
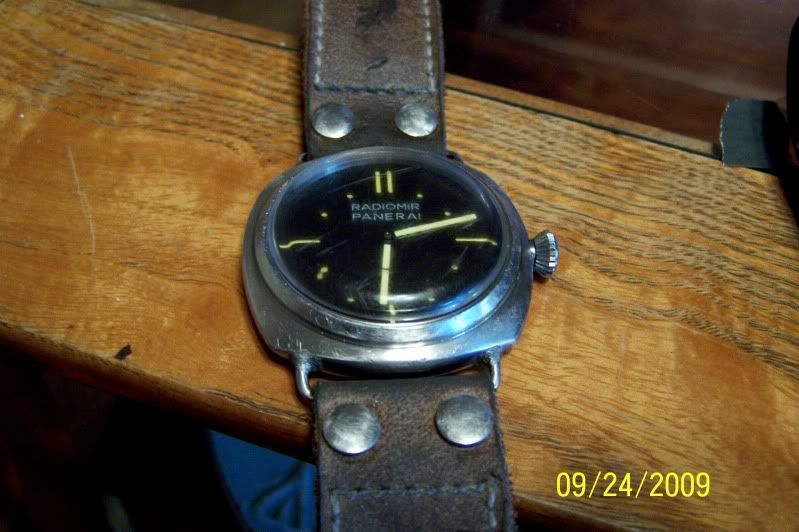
Between case reshaping and final polishing I wound up having to strip off the JB Weld but wanted to put up some pics of the final polished case and assembled watch. It doesn't have a mirror finish but rather looks like what the end result was going for- an older watch. The pitting was retained throughout the burnishing and fits the overall look of the watch quite nicely. The only thing remaining is to redo the JB Weld mixture and apply it to the case lugs and if I am ambitious enough to the crown tube to complete
3/4 Dial shot:
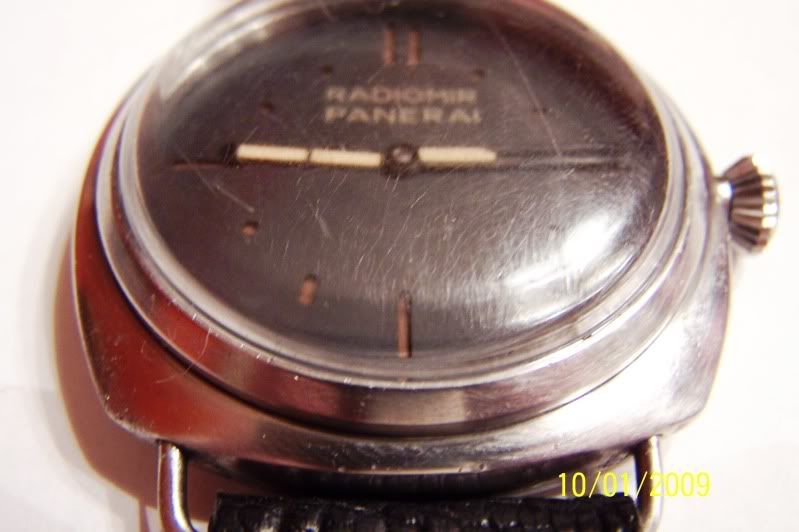
Nice rounded corners, tapered appropriately:
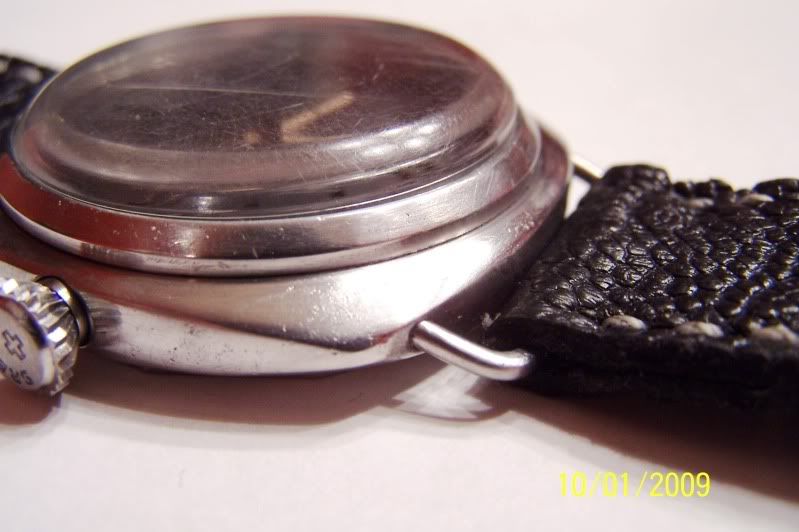
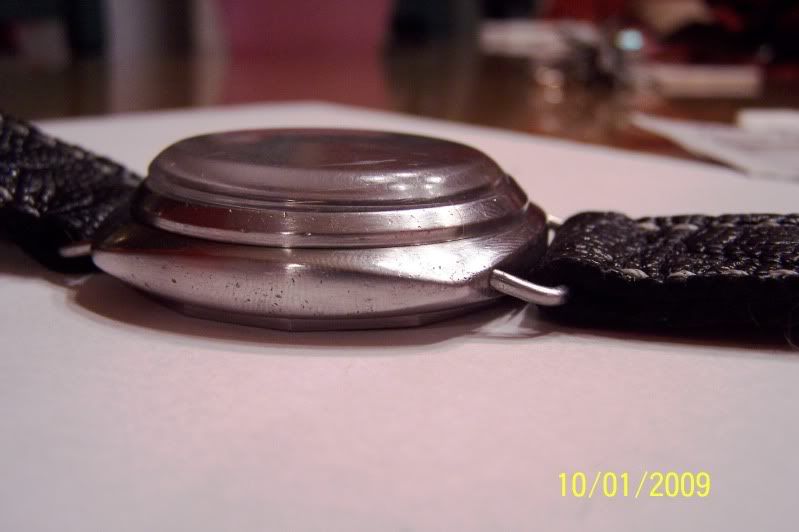
Longside case shot:
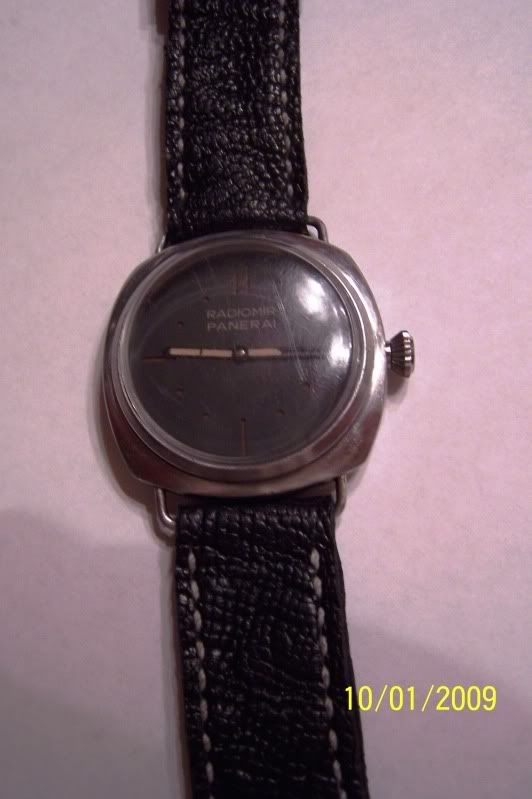
Full frontal:
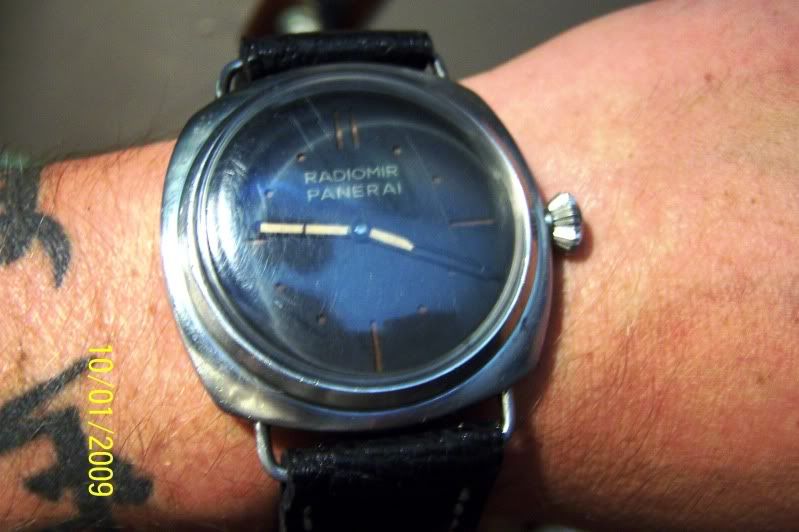
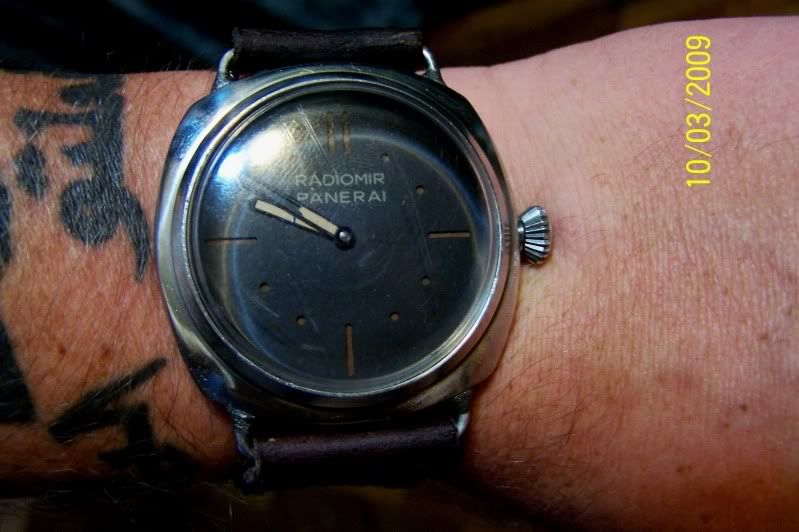
Wristie:
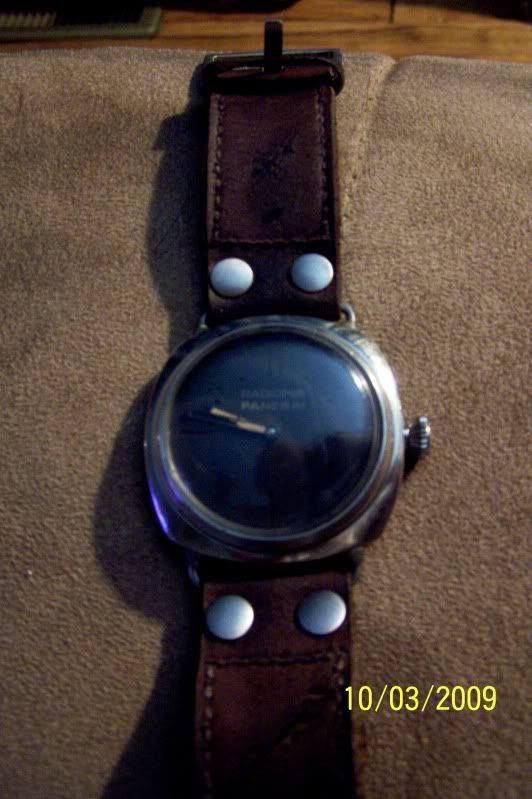
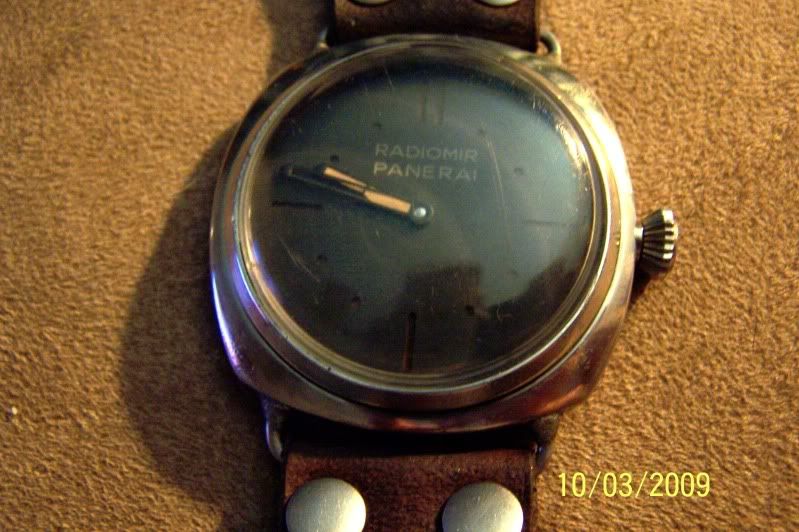
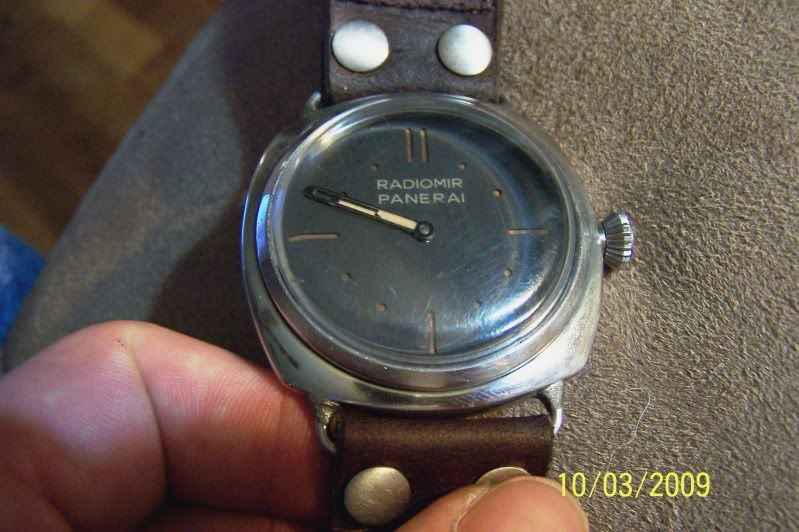
Well here is the final iteration of my 2533 project. Everything polished but with the pits intact, strap colored and conditioned, rivets brushed out nice, corners rounded, all edges broken and smoothed, case with close to correct taper (best I could do with the MK1 Mod 0 eyeball), gently aged plexi....
All in all it's got the effect of a watch that's seen better days but was taken care of throughout the years. I like the way it came about- destroying the watch then "restoring" it vice trying to age it just enough. The process worked well enough and I definitely am going to continue trying to improve on lower end closed caseback reps and possibly try tossing in a Molnija at some point into a display caseback.
Total costs involved in the project not including household items like salt, vinegar and tools:
Base Sead 2533 watch with Asian non-swan neck 6497- 110.00
Grey ScotchBrite pad- 4.00
3 grades of A.O. sandpaper- 15.00
Liquid Electrical Tape- 8.00
JB Weld- 6.00
Dremel Chainsaw Attachment- 7.00
$150.00!
If you add in a set of precision screwdrivers and the ingrown hair tweezers you are still in the neighborhood of 175 bucks.
Keep in mind I am a total hamfist when it comes to DIY projects. I'm more comfortable wrenching on a FAL or M4 than I am messing with screws too small to see but I managed. I mean it when I say if I can do it- ANYONE can. It is definitely not in league with our more accomplished modders work by a longshot but it is a nice representation of the 2533.
Here's what I started out with:

I picked this up from Dante98 on RG after seeing it at Onzenuub's GTG in NYC. He sourced it from Sead for $110.00 Nice and brand new looking. I figured I needed to do something about that.
I started off by unscrewing the caseback and pulling the movement. I should have taken pics as I went along but I'll describe it for those attempting to do it for the first time.
Unscrew your crown until it pops. Look right next to the crown on the movement and there will be a small screw set off in the plate. Turn this screw 3/4 of a turn and your crown and stem will slide right out. The movement screws are easily located around the perimeter of the movement, one on each side. Unscrew these and use an ingrown hair tweezer (can get one at any pharmacists) to remove the screw and tab. Place screws and tabs from each side in separate containers (I found one screw was longer than the other and they would not interchange). Then using a clean sheet of paper, tip the movement out into your hand onto the paper or a movement case if you have one.
Then pop the crystal out forward using your thumbs.
Make sure you take out the O rings and gasket for the crystal prior to the next step.
Now you have a bare case in your hands.
My first step for vintagizing was to put Liquid Electrical Tape (found at Home Depot) on the crown threads as well as the inside of the case itself. This product will pull off but provided protection for delicate areas during the next step.
Once it dried I put a bunch of loose stones and some sand in a 1 liter Gatorade bottle and filled it around with about 250 ml of water. In went the case and I spent around 15-20 minuted shaking it in all different directions.
I then took the case and dropped it into a mixture of white vinegar and rock salt for a couple hours. This allowed some small pitting to form which was enhanced later but this point would be good for those who want an older looking watch without it looking abused (which was what I was going for) to stop and skip the pitting portion of this post. I then drained the water and washed the parts clean. I then took a piece of 440 aluminum oxide sandpaper to the whole thing and wound up with this look.


As you can see it looks like it's been sanded with parallel lines showing on the case. I solved this by hitting it with grey ScotchBrite then progessively running finer and finer sandpaper over it winding up with 1500 grit. It gave the case a nice matte aged look and darkened the steel a bit as well, adding to the overall effect.
I wanted a bit more pitting on the case as I was going for a "Look what Grandpa brought back from the war and forgot he had" visual effect, as if the watch was worn by a Kampfschwimmer during WWII and the thing saw combat.
I used this to simulate some deep pits with very good results:

Yes it is a small chunk of concrete. I took a pointed end of it and literally pressed it into the area where I wanted pits and kind of "screwed it into" the case with a twisting motion, keeping the pointed end very localized on the case. I then brushed off the concrete dust and applied white vingear and rock salt mixture to the specifically damaged areas with a Q-Tip and let it sit overnight.
The next day I washed it clean and reassembled it (I did reassemble it prior for pics) and very gently ran 1500 grit A.O. paper over it again. This is the final result:


The dial came off and went into a toaster oven (whole sandwich) and baked. I went 350 degrees for around 10 minutes and came up with this:


The heat aged the dial nicely, although the lume came out a tad bit darker than I would have liked. Looking at some other gen vintage Panerais the color is quite appropriate- go figure
Milesd pointed out the case was not the right shape so off to the bench again and having at the thing with a Dremel. I used a 5/32" chainsaw sharpening attachment for the Dremel in order to not cut too deep too fast as well as to preserve the plane of the case. I followed it up with 600 and 1500 grit paper.


Tried my best to get the right ogive by eyeballing it- not exactly perfect but the edges taper down to a pyramid on each corner approx 1.5mm wide.
Then Donerix posted a pic showing the case corners have a more rounded tip- so off to the bench again with the wife's emory board to "break" the corners. Best way to do this is to just draw the emory board across the point in a curving motion and eyeball it as you progress.
Remember when reshaping a case go slow- it is VERY easy to remove metal and not so easy to replace it :lol: This is the final case mod prior to polishing:

Then I went and aged the plexi.
I slapped the bejeezus out of it with a ScotchBrite pad. Literally held it in my hand and gave it 5-6 whacks.
Then I made a couple small scratches with one of my screwdrivers.


Next up was to get a soldered lug effect without using a torch and solder, which wound up being a mixture of JB Weld, stainless steel and aluminum powders.
I finally got the mixture of aluminum and SS powder right in the JB Weld and I applied it to the lugs.
This only requires a TEENY TINY bit of the compound per lug attachment. Take what you think you need on a pin, then figure you'll use half.
I spread a bead around each lug and pressed it into place. Use a wet finger to do this to avoid the JB sticking to your hand. I then used the shaft of a jewelers screwdriver to get the right curved shape, again wetting it prior to use.
I'm pretty happy with the look although it is a shade off from the case. The macros show the smallest imperfections, even with my questionable photography skills :lol:


A couple more taken at a distance greater than 3/4"


Between case reshaping and final polishing I wound up having to strip off the JB Weld but wanted to put up some pics of the final polished case and assembled watch. It doesn't have a mirror finish but rather looks like what the end result was going for- an older watch. The pitting was retained throughout the burnishing and fits the overall look of the watch quite nicely. The only thing remaining is to redo the JB Weld mixture and apply it to the case lugs and if I am ambitious enough to the crown tube to complete
3/4 Dial shot:

Nice rounded corners, tapered appropriately:

Longside case shot:

Full frontal:

Wristie:

Well here is the final iteration of my 2533 project. Everything polished but with the pits intact, strap colored and conditioned, rivets brushed out nice, corners rounded, all edges broken and smoothed, case with close to correct taper (best I could do with the MK1 Mod 0 eyeball), gently aged plexi....
All in all it's got the effect of a watch that's seen better days but was taken care of throughout the years. I like the way it came about- destroying the watch then "restoring" it vice trying to age it just enough. The process worked well enough and I definitely am going to continue trying to improve on lower end closed caseback reps and possibly try tossing in a Molnija at some point into a display caseback.


Total costs involved in the project not including household items like salt, vinegar and tools:
Base Sead 2533 watch with Asian non-swan neck 6497- 110.00
Grey ScotchBrite pad- 4.00
3 grades of A.O. sandpaper- 15.00
Liquid Electrical Tape- 8.00
JB Weld- 6.00
Dremel Chainsaw Attachment- 7.00
$150.00!
If you add in a set of precision screwdrivers and the ingrown hair tweezers you are still in the neighborhood of 175 bucks.
Keep in mind I am a total hamfist when it comes to DIY projects. I'm more comfortable wrenching on a FAL or M4 than I am messing with screws too small to see but I managed. I mean it when I say if I can do it- ANYONE can. It is definitely not in league with our more accomplished modders work by a longshot but it is a nice representation of the 2533.
